

Page 1

Video format PAL/CCIR (AU, UK, EU) or NTSC/EIA (US, CA)
Har d disk stora ge IDE type, UDMA, s upports up to 25 0GB HDD
Recor d mode Manual / Alarm / Timer / Motion
Camera Input Signal
Compositevideosignal1Vp-p75OhmBNC,4channels
Main Mo nitor Output
Compo site video signal 1 Vp-p 75 Ohm BNC
Call Monitor Output
Compo site video signal 1 Vp-p 75 Ohm BNC
Motion Detect Are a 16 * 12 targets pe r camera
Motion Detect Se nsitivity
99 Levels
Video Loss Detection
Yes
Refr esh Ra te 240 field/ sec. fo r NTSC / 200 field/ sec. for PAL
Dwell Time
Programmable (1 ~15 Sec)
Picture in Picture Yes (Movable)
Picture Zoom
2*2~4*4(Movable)
Camera Title
8letters
Video Adjustable
Hue/ Co lor/ Contrast/ Brightness Adjustable
Alarm Input TTL input,Hi (5V),Low (GND)
Alarm O utput
COM./N.O/N.C
Remote C ontrol RS-23 2 or RS-48 5
Time D isplay Forma t
YY/MM/D D, DD/MM/ YY, MM/DD/YY, OFF
Power Source
DC 19V
Power Consumption
<32W
Operation Temperature
10° ~40
¢J- 50° ~104°F
RS-232 C / RS-48 5 (bps)
115200
¡B57600¡B19200¡B9600¡B4800¡B3600¡B2400¡
Dimension (mm) - (inche s)
343(W) x 223(L) x59(H) - 13½(W) x 8¾(L) x 2½(H)
Multiplex: Up to 30 field/sec.for NTSC / 25 field/sec. for PAL Quad-fi eld: Up
to 12 0 field/s ec. for NT SC / 1 00 field/ sec. fo r PAL Quad-fr ame: Up to 240
field/ sec. for NT SC / 2 00 field/ sec. fo r PAL
Global Recording Rate
www.swannsecurity.com
Swann Technical Support
All Countries E-mail:
UNITED STATES toll free
USA Exchange & Repairs
AUSTRALIA toll free
International
tech@swann.com.au
877-274-3695
(Sun-Thurs, 2pm-10.30pm PST)
800-627-2799
(Mon0Fri, 9am-1pm PST)
562-777-2551
(Mon-Fri, 9am-5pm PST)
1300 13 8324
(Mon-Fri, 9am-5.30pm Aus EST)
+61 3 8412 4610
(Mon-Fri, 9am-5.30pm Aus EST)
See http://www.worldtimeserver.com for information on different time zones
and the time in Melbourne Australia compare to your local time.
Telephone Helpdesk
Help Desk / Support Details
DVR4 Motion
4 Channel Digital Video Recorder
If this device does not work when you first plug it in,
do not take it back to the store.
Contact the Swann Helpdesk using our fast e-mail service
or call us on one of the Toll-Free
numbers shown on the back cover of this booklet.
tech@swann.com.au
Most problems can be quickly and easily fixed with a simple
e-mail or a quick chat with one of our friendly technical staff.
(Toll-Free available in the US and Australia only)
Installation Guide
with Motion Detection
English
8
Page 2
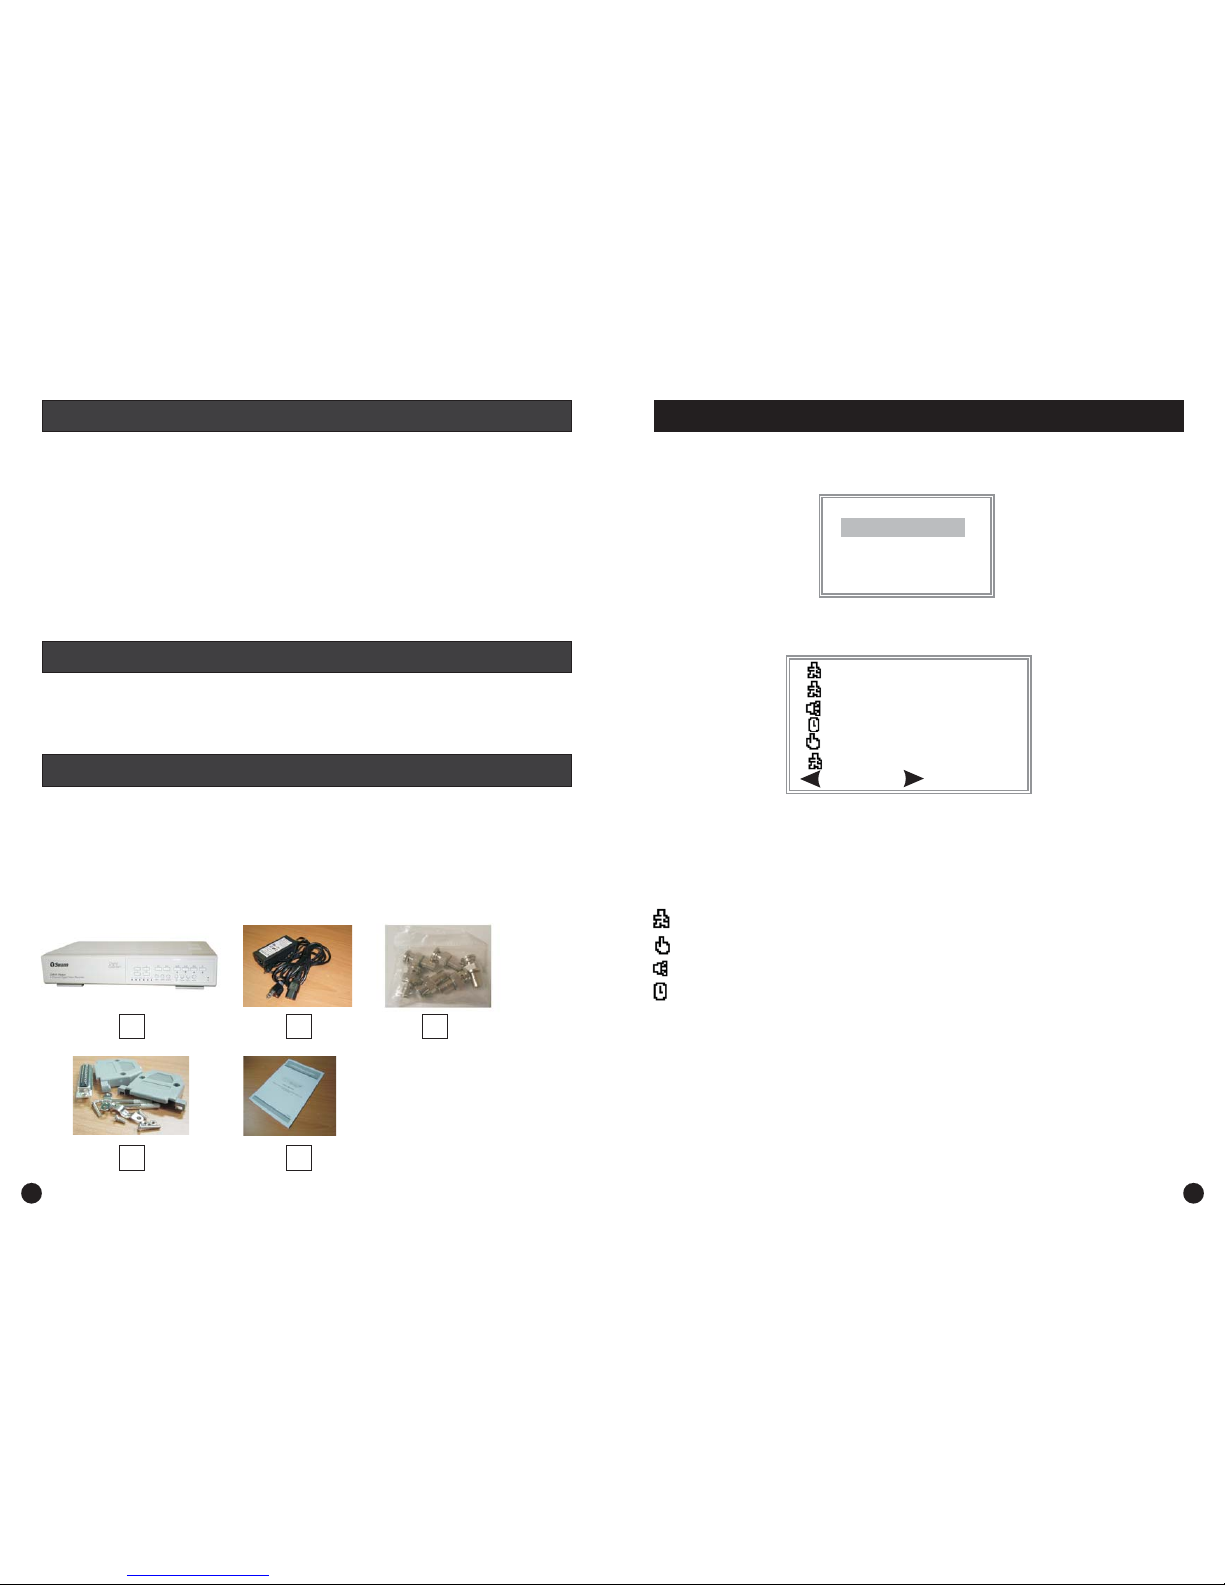
To search the contents of DVR 4 Motion’s HDD, press the button to ensure the DVR
is not recording then press the button to bring up this menu.
Use the or buttons to select the appropriate list, then press Enter. If you select the
FULL LIST option, you will see a menu similar to the one below.
Use the button to PAGE UP through the list and the button to PAGE DOWN through
the list of events. You can also use the and buttons to go up and down one line at a
time on the current page. When you have highlighted the event you wish to view, simply push the
or buttons to play back the video from that event. The icons in the Search page indicate
what type of recording trigger generated the video event.
Stop
Search
Up Down
Left Right
Up Down
Enter Play
4
Motion
1.
2.
3.
4.
5.
6.
Swann DVR 4 Motion Digital Video Recorder
Switching Power Adaptor and Power Cord
6 x BNC male to RCA female adaptors
Pack of serial connection accessories
User instruction Manual
Quickstart guide (this document)
LAST RECORD
FULL LIST
ALARM LIST
MOTION LIST
TIME SEARCH
LAST RECORD
FULL LIST
ALARM LIST
MOTION LIST
TIME SEARCH
2004-FEB- 04 01:02:03 M
2004-AUG-17 05:02:03 M
2004-AUG-22 04:02:03 M
2004-AUG-26 03:02:04 M
2004-OCT-29 05:02:03 M
2004-DEC-25 01:02:01 M
: PAGE UP : PAGE DOWN
: Motion Recording - Blue Text
: Manual Recording - Yellow Text
: Alarm Recording - Orange Text
: Timer Recording - White Text
M : Indicates recording to Master HDD
NOTE: The search page will show a different icon and text colour for each
recording method as detailed above.
What’s in this package? ...............................................................................................................
Introduction ..............................................................................................................................
Hard Disk Drive Installation .......................................................................................................
Hard Disk Drive Installation Steps ..............................................................................................
Setting Time and Date ...............................................................................................................
Configuring Motion Recording ...................................................................................................
Manual Recording ......................................................................................................................
Playing Back Recorded Video .....................................................................................................
Searching for Recorded Video Events .........................................................................................
1
1
2
3
4
4
5
5
6
Technical Specifications .................................................................................................
Helpdesk Details ..........................................................................................................
Back Page
Back Page
This Quickstart guide gives you a brief overview of the main features of the DVR 4 Motion and will
allow you to set the basic functions required for you to monitor, record and play back security
video footage. Please consult the manual for more detailed descriptions of the various functions.
Searching for Recorded Video Events
2 7
Index
Introduction
What’s in this package ...
1 2 3
4 5
Page 3

To start recording at any time press the button. This will give you continuous recording, and
will ignore any motion sensing settings.
When recording different icons will be shown on the screen depending what method of trigger was
used to start recording.
Indicates Alarm triggered recording
Indicates Motion triggered recording
Indicates Timer triggered recording
Indicates Manual triggered recording
REC
Press the “ ” button to play back the last videoPlay•
• Fast Forward FF
FF
• Fast Rewind REW
REW
• Slow Forward FF
FF
• Slow Rewind REW
REW
• Pause
• FF REW
• Stop
recording.
To use while video is playing, press the button to fast forward. Each time you
press the button again the fast forward speed will double until you reach 32x, which is the
fastest speed.
To use while video is playing, press the button to fast rewind. Each time you
press the button again the fast rewind speed will double until you reach 32x, which is the
fastest speed.
To use , press the slow button while video is playing, then the button to change
the slow forward speed. Each time you press the button again the slow forward speed will
halve until you reach 1/32x, which is the slowest speed.
To use , press the slow button while video is playing, then press the button to
slow rewind. Each time you press the button again the slow rewind speed will halve until
you reach 1/32x, which is the slowest speed.
To pause the playback at any time, press the button.
To use the jog mode, while the playback is paused press the or button to move one
frame forward or backward.
To stop recording and return to monitor and record mode, press at any time.
Note: Master
Step 1& 2
Step 3
Step 4
Step 5
Step 6
Step 7
Step 8
Step 9
Please use the step-by-step guide over the page for reference when installing the hard drive into
your Swann DVR 4 Motion.
Remove the 2 screws on either side of the case and the four screws on the back of the
case. ( s )
Lift the case from the back edge and remove it. ( 3)
Remove the screws from either side of the hard disk bracket. ).
Screw the hard disk drive into the hard disk bracket. ( )
Connect the Molex power connector to the HDD. ( )
Firmly push the HDD into the DVR taking care to ensure the data connectors are correctly
aligned. ( )
Replace the two screws to secure the HDD bracket.
Replace the top of the case and replace the eight screws.
Your hard drive must be jumpered for to work correctly while fitted to this
unit (most HDD are jumpered for Cable Select by default and this setting will not work in this
DVR). Please consult with your HDD supplier or manufacturer for more information on how
this is done.
Do not try to view the contents of the HDD on a PC once it is formatted for the DVR 4
Motion, as the HDD will not be recognised correctly and all information on it will be erased.
refer to Picture 1 & 2
refer to Picture
(refer to Picture 4
refer to Picture 5
refer to Picture 6
refer to Picture 7
(refer to Picture 8)
Hard Disk Drive InstallationManual Recording
Playing Back Recorded Video
6
3
Page 4

(MENU)
TIMER
CAMERA
RECORD
ALARM
DWELL
PIP
MOTION
DISPLAY
REMOTE
USER
SYSTEM
EVENT
(SYSTEM)
AUDIO INPUT 1
BUZZER ON
EXT ALARM ON
VLOSS ALARM ON
MOTION ALARM ON
HDD OVERWRITE YES
MESSAGE LATCH YES
DATE DISPLAY D/M/Y
DATE 17-AUG-2004 [SAT]
TIME 20:15:34
CLEAR HDD YES
SYSTEM RESET YES
Before using the DVR 4 Motion, you will need to set the
time and date:
Press the “ ” button, then use the or
arrow until “ ” is highlighted and press the
“ ” button.
Use the or button to highlight
“ ” then use the or button to highlight
the digits.
Use the or button to adjust the digits to the
correct time.
• Menu Up Down
System
Enter
Up Down
Time Left Right
+-
• Up Down Time
Left Right
•+-
•
• Up Down Date
Left Right
•+-
Menu
Use the or button to highlight “ ” then
use the or button to highlight the digits.
Use the or button to adjust the digits to the
correct time.
Use the or button to highlight “ ” then
use the or button to highlight the digits.
Use the or button to adjust the digits to the
correct date then press “ ” until you return to the
main screen to save the settings.
Next you need to set up the Motion
Recording settings:
Press the “ ” button and use the
or button until “ ”
is highlighted then press the “ ”
button.
or
Menu
Up Down Motion
Enter
Up
•
• Down
OFF
MOTION RECORD
+- ON
Use the button to
highlight the “ ” next to
“ ” and press the
or button until “ ” is shown.
(MOTION)
SEN MD-NVM RE DET
CAM1 70 03 64 ON AREA
CAM2 70 03 64 OFF AREA
CAM3 70 03 64 ON AREA
CAM4 70 03 64 ON AREA
MOTION RECORD : ON
DAY START END
DAILY 00 : 00 00 : 00
(MOTION)
SEN MD-NVM RE DET
CAM1 70 03 64 ON AREA
CAM2 70 03 64 OFF AREA
CAM3 70 03 64 ON AREA
CAM4 70 03 64 ON AREA
MOTION RECORD : ON
DAY START END
DAILY 00 : 00 00 : 00
• Up Down Left
Right OFF + -
ON
• Right AREA
Enter
•-
Use the or button to Highlight the Camera you wish to enable, then use the or
button to highlight the “ ” next to that camera and press the and keys to adjust the
setting to “ ”.
key to highlight “ ” next to the camera you wish to enable, and press the
“ ” button.
Press the button to turn on Motion Detection for the whole screen as shown by a green
overlay, then do the same for your other active cameras.
Use the
AREA
Setting Time and Date
Configuring Motion Recording
Hard Disk Drive Installation Steps
1 2
3 4
5 6
7 8
6
3
 Loading...