

Page 1

Security Made Smarter
PRO-SERIES HD
Professional HD
Security System
INSTRUCTION MANUAL
Page 2

2
Important Information
FCC Verification
This equipment has been tested and found to comply with the limits for
Class B digital device, pursuant to part 15 of the FCC Rules. These limits
are designed to provide reasonable protection against harmful interference in a residential installation. This equipment generates, uses and
can radiate radio frequency energy and, if not installed and used in accordance with the instructions, may cause harmful interference to radio
or television reception, which can be determined by turning the equipment off and on, the user is encouraged to try to correct the interference
by one or more of the following measures:
· Reorient or relocate the receiving antenna
· Increase the separation between the equipment and the receiver
· Connect the equipment into an outlet on a circuit different from that
to which the receiver is connected
· Consult the dealer or an experienced radio/TV technician for help
These devices comply with part 15 of the FCC Rules. Operation is subject to the following two conditions:
· These devices may not cause harmful interference
· These devices must accept any interference received, including inter-
ference that may cause undesired operation
Important Notice: All jurisdictions have specific laws and regulations
relating to the use of cameras. Before using any camera for any purpose, it is the buyer’s responsibility to be aware of all applicable laws
and regulations that prohibit or limit the use of cameras and to comply
with the applicable laws and regulations.
FCC Regulation (for USA): Prohibition against eavesdropping
Except for the operations of law enforcement officers conducted under
lawful authority, no person shall use, either directly or indirectly, a device operated pursuant to the provisions of this Part for the purpose
of overhearing or recording the private conversations of others unless
such use is authorized by all of the parties engaging in the conversation.
Warning: Changes or modifications made to this device not approved
expressly by the party responsible for compliance could void the user’s
authority to operate the equipment.
Important Safety Instructions
· Do not operate if wires and terminals are exposed
· Do not cover vents on the side of your device and allow adequate space
for ventilation
· Only use the power adapter supplied with your DVR
About this Instruction Manual
This instruction manual is written for the DVR-1590, DVR-1600 and
DVR-4575 series and was accurate at the time it was completed. However, because of our on-going efforts to constantly improve our products,
additional features and functions may have been added since that time.
Important Password Information
This DVR does not have a default password. A password is created
during the Startup Wizard. If password protection has been enabled
and you have forgotten your password, your DVR’s MAC address can
be used to create a new password (see page 3 - Password Recovery).
Page 3

3
Password Recovery
Forgotten your password? Please do the following:
1. Right-click the mouse on the Live View screen to display the Menu
Bar then click “Main Menu”.
2. At the password login screen click “Forgot Password”.
3. After a short moment, you will receive a password reset request email
containing your DVR’s MAC address (if it’s not in your inbox, check your
junk or spam folder).
4. Input the MAC address including the semicolons (see left example)
then click “OK”.
5. A message will appear on-screen stating that your password has
been reset. Click “OK” to continue.
6. Enter a new password (see bottom left example). The password has to
be a minimum of six characters and can contain a mixture of numbers
and letters. Use a password that you are familiar with, but is not easily
known to others.
7. Write down your password in the space provided below for safe keep-
ing.
8. Complete the Startup Wizard as normal (the settings that you previ-
ously selected in the Startup Wizard will remain unchanged).
Don’t forget to write down your password: ______________________
I haven’t created an email for my DVR, what can I do? Don’t worry,
we’re here to help. Please contact Swann Helpdesk & Technical Support
(phone numbers located on page 72) for assistance.
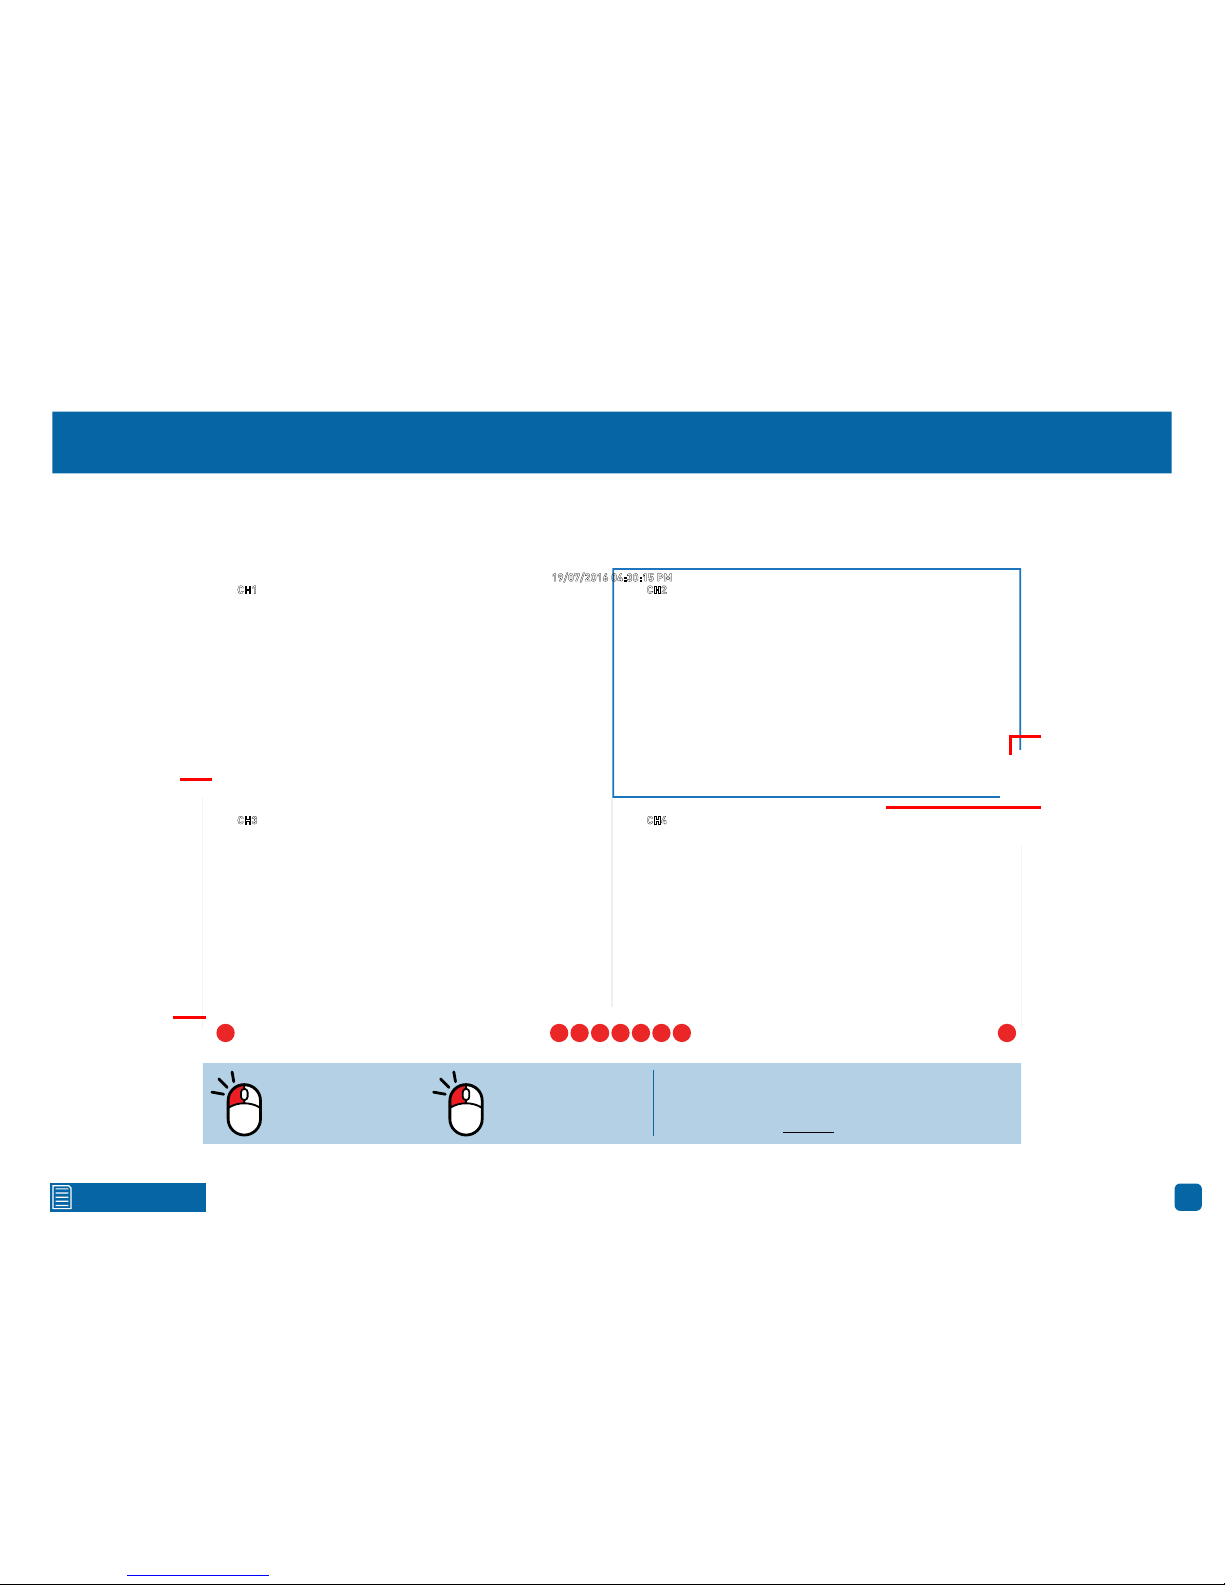
CH1 CH2
19/07/2016 04:30:15 PM
CH3
CH4
CH1 CH2
19/07/2016 04:30:15 PM
CH3
CH4
Page 4

4
Contents
Security Made Smarter
PRO-SERIES HD
Professional HD
Security System
INSTRUCTION MANUAL
Important Information ����������������������������������������������������������������������������� 2
Password Recovery ���������������������������������������������������������������������������������� 3
Live View Mode (4 & 8 channel model) ��������������������������������������������������� 7
Live View Icons & Controls (4 & 8 channel model) ��������������������������������� 8
Live View Mode (16 channel model) �������������������������������������������������������� 9
Live View Icons & Controls (16 channel model) ����������������������������������� 10
Main Menu ���������������������������������������������������������������������������������������������� 11
Main Menu Layout ���������������������������������������������������������������������������������� 12
Camera Configuration ��������������������������������������������������������������������������� 13
Display: Live ������������������������������������������������������������������������������������������� 14
Display: Privacy Zone ����������������������������������������������������������������������������� 16
Creating a Privacy Mask ������������������������������������������������������������������������ 17
Record: Mainstream (720p model) �������������������������������������������������������� 18
Record: Mainstream (1080p model) ������������������������������������������������������ 20
Record: Substream �������������������������������������������������������������������������������� 22
Alarm: Motion ����������������������������������������������������������������������������������������� 23
Motion Detection ������������������������������������������������������������������������������������ 25
Motion Detection Tips ���������������������������������������������������������������������������� 26
Device: PTZ ��������������������������������������������������������������������������������������������� 27
Controlling your PTZ Camera ���������������������������������������������������������������� 28
Creating a Preset ����������������������������������������������������������������������������������� 29
Recording Configuration ����������������������������������������������������������������������� 30
Record: Record ��������������������������������������������������������������������������������������� 31
Record: Schedule ����������������������������������������������������������������������������������� 32
Capture: Capture ������������������������������������������������������������������������������������ 33
Capture: Schedule ���������������������������������������������������������������������������������� 34
Playback & Backup �������������������������������������������������������������������������������� 35
Search: General �������������������������������������������������������������������������������������� 36
The Playback Interface �������������������������������������������������������������������������� 37
Playback: Smart ������������������������������������������������������������������������������������� 39
Search: Events ���������������������������������������������������������������������������������������� 41
Search: Picture ��������������������������������������������������������������������������������������� 42
Playing a Slideshow ������������������������������������������������������������������������������� 43
System Configuration ���������������������������������������������������������������������������� 44
Display: Output ��������������������������������������������������������������������������������������� 45
Network: Network ���������������������������������������������������������������������������������� 46
Network: Email �������������������������������������������������������������������������������������� 48
Network: Email Schedule ���������������������������������������������������������������������� 49
Network: DDNS �������������������������������������������������������������������������������������� 50
Network: RTSP ��������������������������������������������������������������������������������������� 51
System: NTP ������������������������������������������������������������������������������������������� 52
Device: HDD �������������������������������������������������������������������������������������������� 53
Device: S.M.A.R.T. ����������������������������������������������������������������������������������� 54
System: General ������������������������������������������������������������������������������������� 55
System: DST ������������������������������������������������������������������������������������������� 56
System: Users ���������������������������������������������������������������������������������������� 57
Advanced: Maintain �������������������������������������������������������������������������������� 58
Advanced: Events ����������������������������������������������������������������������������������� 59
Advanced: Auto Upgrade ����������������������������������������������������������������������� 60
System Status ���������������������������������������������������������������������������������������� 61
Page 5

5
Contents
System: Info �������������������������������������������������������������������������������������������� 62
System: Channel Info ����������������������������������������������������������������������������� 63
System: Record Info ������������������������������������������������������������������������������� 64
Search: Log ��������������������������������������������������������������������������������������������� 65
Glossary �������������������������������������������������������������������������������������������������� 66
Warranty Information ����������������������������������������������������������������������������� 71
Helpdesk & Technical Support �������������������������������������������������������������� 72
Page 6

6
Click for contents
Live View
Live View is the default display mode
for your DVR. Each camera connected
will be displayed on-screen. You can
check the status or operation of your
DVR and cameras using the icons and
Menu Bar on the Live View screen.
Right-click the mouse to access the
Menu Bar.
CH1 CH2
19/07/2016 04:30:15 PM
CH3
CH4
CH1
19/07/2016 04:30:15 PM
Page 7
7
Click for contents
Live View Mode (4 & 8 channel model)
Live View mode is the default display for your DVR. Each camera connected will be displayed (multiple view modes available). You can check the
operation of your DVR by using the status icons on the Live View screen. The date and time as well as the name for each camera is also displayed.
Double-click a live
video channel to
view full screen.
Click & drag a live
video channel to
reposition it.
To access the Main Menu, right-click the
mouse on the Live View screen to display the
Menu Bar (see page 8 for more information).
CH1 CH2
19/07/2016 04:30:15 PM
CH3
CH4
Camera Toolbar
Status Icons
Menu Bar
1 2 3 4 95 6 7 8
Camera/Group
Page 8
8
Click for contents
Live View Icons & Controls (4 & 8 channel model)
Menu Bar
1. Click this to open the Main Menu.
2. Manually lock your DVR to prevent access
to the Main Menu when “Menu Timeouts” is
turned off.
3. Four camera view.
4. Eight camera view (8 channel model only).
5. Six camera and eight camera view (8
channel model only).
6. Click this to repeatedly cycle through each
video channel full screen. Each video channel will be displayed for 5 seconds.
7. Click this to change the volume or mute
the audio (click the speaker icon to mute).
8. Click this to enter playback mode.
9. Click this to start the Startup Wizard.
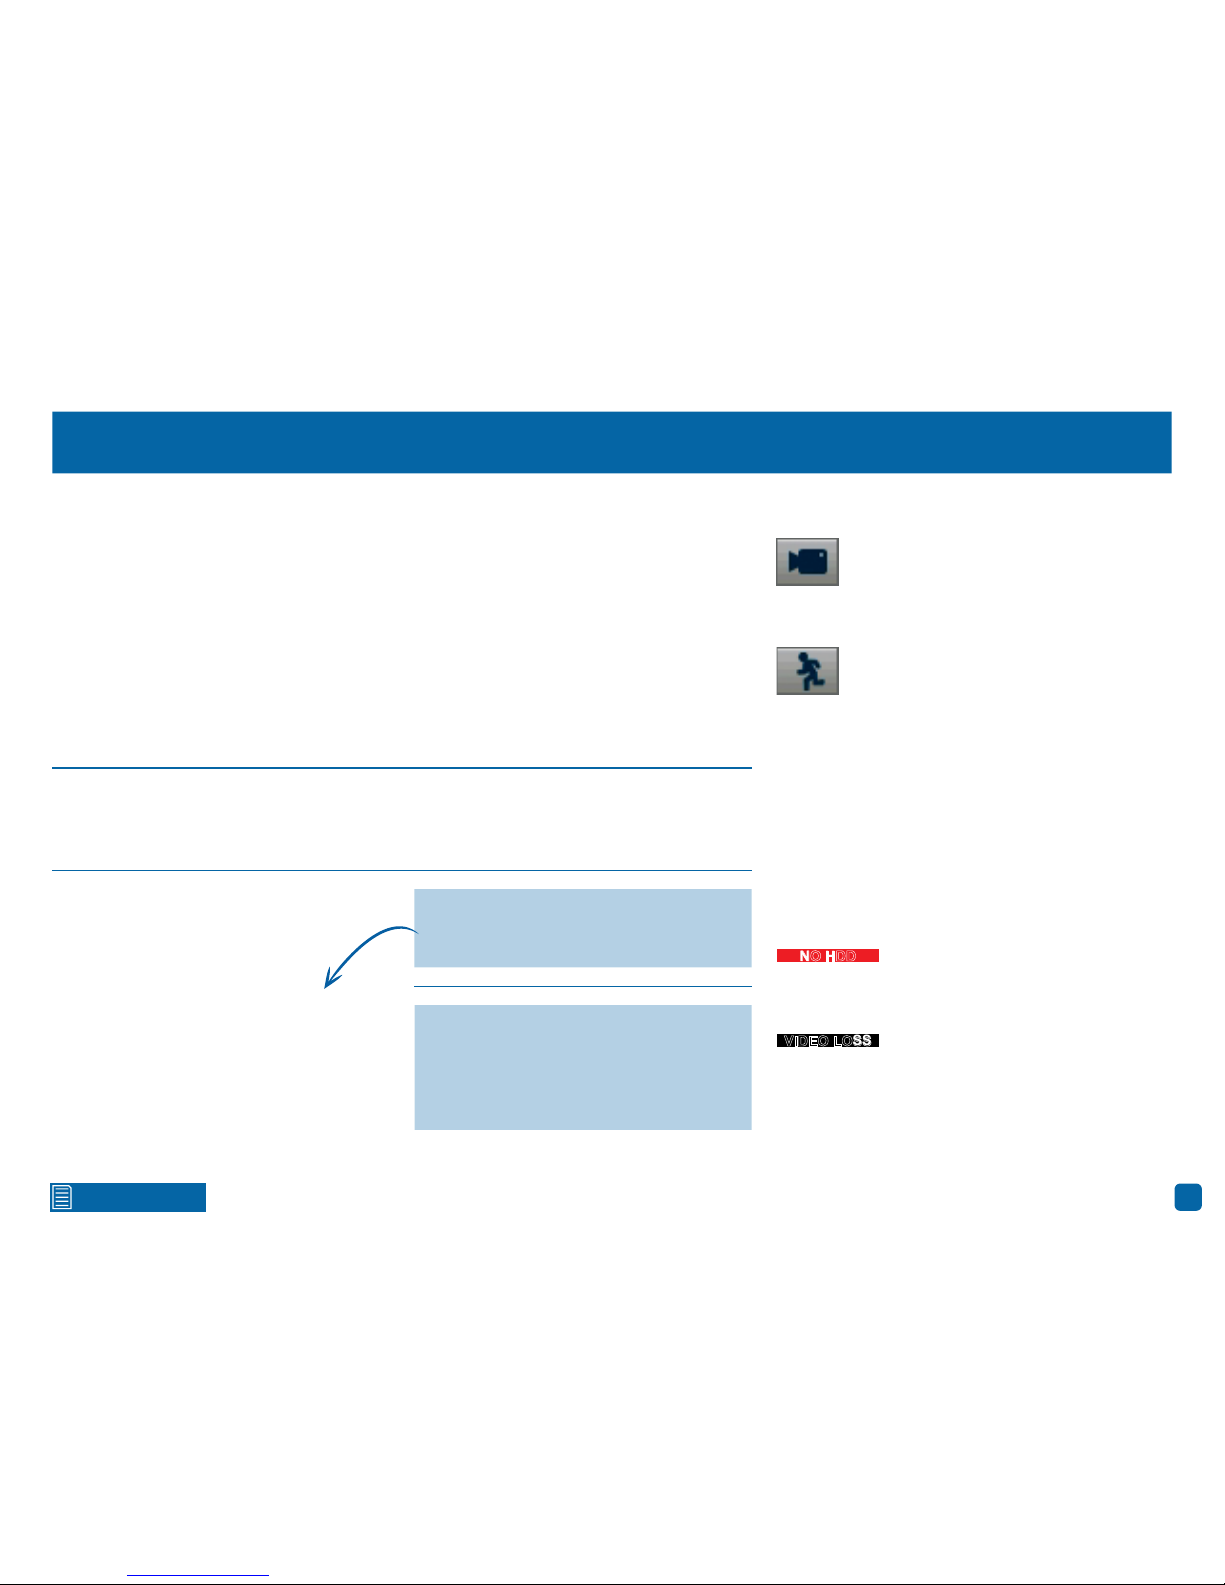
Status Icons
This icon indicates that the camera is
being recorded. Whether it was scheduled, initiated manually or triggered by
motion, the icon will be the same.
This icon indicates that your DVR is detecting motion from the camera.
This icon indicates that your DVR is recording at 720p (1280 x 720) resolution.
This icon indicates that your DVR is recording at 1080l (960 x 1080) resolution.
This icon indicates that the channel
displaying this message has lost
the feed from its camera.
The Camera Toolbar provides quick access
to video playback, manual capture, zoom
and the ability to change image settings.
To ensure the integrity of your recordings,
enter your password and select
“Shutdown” when powering off your DVR.
This icon indicates that your DVR is recording at 1080p (1920 x 1080) resolution.
This icon indicates that your DVR
does not have a hard drive or it fails
to detect the drive that is installed.
VIDEO LOSS
NO HDD
VIDEO LOSS
Camera/Group: In single or four camera
view, move the mouse to the far left or
right to reveal the camera/group button.
You can cycle through each camera or
group of cameras to view.
Page 9

9
Click for contents
Live View Mode (16 channel model)
Live View mode is the default display for your DVR. Each camera connected will be displayed (multiple view modes available). You can check the
operation of your DVR by using the status icons on the Live View screen. The date and time as well as the name for each camera is also displayed.
Double-click a live
video channel to
view full screen.
Click & drag a live
video channel to
reposition it.
To access the Main Menu, right-click the
mouse on the Live View screen to display the
Menu Bar (see page 10 for more information).
CH1 CH2
19/07/2016 04:30:15 PM
CH3
CH4
Camera Toolbar
Status Icons
Menu Bar
1 2 3 4 95 6 7 8 10 11
Camera/Group
Page 10

10
Click for contents
Live View Icons & Controls (16 channel model)
Menu Bar
1. Click this to open the Main Menu.
2. Manually lock your DVR to prevent access
to the Main Menu when “Menu Timeouts” is
turned off.
3. Four camera view.
4. Nine camera view.
5. Twelve camera view.
6. Sixteen camera view.
7. Select from a variety of different camera
layouts available.
8. Click this to repeatedly cycle through each
video channel full screen. Each video channel will be displayed for 5 seconds.
9. Click this to change the volume or mute
the audio (click the speaker icon to mute).
10. Click this to enter playback mode.
11. Click this to start the Startup Wizard.
Status Icons
This icon indicates that the camera is
being recorded. Whether it was scheduled, initiated manually or triggered by
motion, the icon will be the same.
This icon indicates that your DVR is detecting motion from the camera.
This icon indicates that your DVR is recording at 720p (1280 x 720) resolution.
This icon indicates that your DVR is recording at 1080l (960 x 1080) resolution.
This icon indicates that the channel
displaying this message has lost
the feed from its camera.
This icon indicates that your DVR is recording at 1080p (1920 x 1080) resolution.
This icon indicates that your DVR
does not have a hard drive or it fails
to detect the drive that is installed.
VIDEO LOSS
NO HDD
VIDEO LOSS
The Camera Toolbar provides quick access
to video playback, manual capture, zoom
and the ability to change image settings.
To ensure the integrity of your recordings,
enter your password and select
“Shutdown” when powering off your DVR.
Camera/Group: In single or four camera
view, move the mouse to the far left or
right to reveal the camera/group button.
You can cycle through each camera or
group of cameras to view.
Page 11

11
Click for contents
Main Menu
The “Main Menu” is where you control the
various actions and options that are avail-
able on your DVR. You can also access pre-
viously recorded video for playback and to
copy to a storage device such as a USB
flash drive. To maintain system integrity, a
firmware upgrade can be performed when
available and access to the “Shutdown”
menu to restart or safely turn off your DVR.
Page 12

12
Click for contents
Main Menu Layout
The various functions and options
available, are categorised on the
left-hand side of the Menu.
Clicking each category will reveal a
number of tabs or sub-categories
that can be changed from their default value.
To exit or access the
previous menu, rightclick the mouse.
Save changes that have been made
or restore default settings.
Page 13

13
Click for contents
Camera Configuration
The camera configuration options are avail-
able in the “Display”, “Record”, “Alarm”
and “Device” menus that are accessible
from the Main Menu. You can change the
resolution, bitrate, OSD (on-screen dis-
play) position as well as image settings for
hue, brightness, contrast and saturation.
Your DVR has controls for detecting mo-
tion, allowing you to define specific are-
as to alert you to a potential threat in and
around your home. You also have the abil-
ity to create one or more zones for privacy.
Page 14

14
Click for contents
Display: Live
Channel: Select a camera that you would like to edit.
Channel Name: Enter a name for the camera you’ve selected. It can be
up to 8 characters in length.
Show Name: Leave this enabled to display the camera name in Live
View mode, otherwise click the drop down menu to disable.
Record Title: It’s recommended to leave this enabled, as a timestamp
will be embedded on all video recordings. This allows you to easily identify when events have occurred. You can disable this if you wish.
OSD Position: Allows you to change the position of the camera name on
the Live View screen. Click the “Setup” button then use the mouse to
reposition the camera name. Right-click the mouse then click “Save”.
Color: Click the “Setup” button to access the image adjustment tools
available. You will see the following:
Hue: This changes the color mix of the image.
Bright: This changes how light the image appears to be.
Contrast: This increases the difference between the blackest black and
the whitest white in the image.
Saturation: This alters how much color is displayed in the image. The
higher the saturation, the more bright and vivid colors will appear.
Use the slider to adjust each setting. When finished, click the “Save”
button then click “Close” to exit.
Please note: Any changes made to the image settings available will
affect your recordings.
(continued on next page)
· Don’t forget to click “Save”
to apply settings.
· Use the “Copy” function to
apply all settings to the other
cameras.
· Click the “Default” button
to revert back to default settings.
· Click the “Close” button to
exit the Main Menu.
The configuration options available allow
you to name each camera relevant to where it
has been installed as
well as the ability to
adjust image settings
such as brightness and
contrast. You can also
enable covert mode to
hide the camera’s image in Live View mode.
Page 15

15
Click for contents
Display: Live
Covert: When enabled, the camera will detect motion and trigger your
DVR to record, but you will not see an image of the camera in Live View
mode. This may be suitable if your DVR and TV are displayed in a public
area (shop, warehouse, school, etc.), but you don’t want others to see an
image from the camera.
Show Time: By default, the date and time is displayed in Live View mode.
You can disable this if you wish.
· Don’t forget to click “Save”
to apply settings.
· Use the “Copy” function to
apply all settings to the other
cameras.
· Click the “Default” button
to revert back to default settings.
· Click the “Close” button to
exit the Main Menu.
Page 16

16
Click for contents
Display: Privacy Zone
Channel: Select a camera that you would like to edit.
Mask Area: To create a mask, click the drop down menu to enable.
Area Setup: Click the checkbox on the number of privacy masks that
you want to create. Up to four privacy masks can be created per camera.
Mask Area: Click the “Setup” button to create one or more masks (see
page 17 - Creating a Privacy Mask).
· Don’t forget to click “Save”
to apply settings.
· Use the “Copy” function to
apply all settings to the other
cameras.
· Click the “Default” button
to revert back to default settings.
· Click the “Close” button to
exit the Main Menu.
This function can be
used to obscure all
or part of your image
for privacy (up to four
privacy masks can be
created per camera).
You can also use this to
minimize false triggers
when motion is detected. Areas obscured by
a mask won’t be shown
live or recorded.
Page 17
17
Click for contents
Creating a Privacy Mask
1. Depending on the number of masks that you want to create, each
mask will be numbered. To reposition the mask, click and hold the mask
number then move the mask to the desired location.
2. To resize the mask, click and hold the bottom right corner of the mask
then resize to the desired size. You can reposition and resize each mask
to overlap each other.
In the example provided on the left, two masks have been created to
block out cars and pedestrians adjacent to the front yard of the house.
This will minimise false triggers and block movement that is not relevant to entry via the front entrance.
3. When finished, right-click to exit then click “Save” to apply. Areas
obscured by a mask won’t be shown live or recorded (see below left).
To remove a mask, click on the relevant checkbox next to “Area Setup”
then click “Save” to apply.
1
2
CH1
19/07/2016 04:30:15 PM
Click and hold here to
reposition the mask to
the desired location.
Click and hold here to
resize the mask to the
desired size.
Page 18

18
Click for contents
Record: Mainstream (720p model)
Channel: Select a camera that you would like to edit.
Resolution: By default the recording resolution is automatically select-
ed to match the capabilities of the provided cameras. If you have an
older analogue camera connected, lower the resolution to “960 x 480”
for NTSC and “960 x 576” for PAL, to match the camera’s recording capability.
FPS: The number of frames per second (fps) that your DVR will record.
The default is 25fps, however you can change this if needed. In the
HomeSafe View app, you can select “Mainstream” in Live mode to view
your cameras. Lower the frame rate if you’re having issues streaming
to your mobile device (lowering the frame rate to 15fps for example, will
reduce the bandwidth required without sacrificing image quality).
Bitrate Control: CBR (Constant Bitrate) utilises a fixed bitrate and band-
width to record video. This means your DVR will use the same number
of bits throughout the entire recording, regardless of what is happening
on-screen. VBR (Variable Bitrate) utilises a bitrate and bandwidth that
changes when your DVR is recording. The bitrate will increase or decrease depending on how complex the scene is.
Which method should I choose? Scene complexity can vary significantly
over several hours of recorded video, and the bitrate you select for recording will have an effect on image quality, bandwidth consumption,
and hard drive storage. A complex scene with moving action, such as
traffic on a city street, or a scene with a lot of contrasting colors, will
affect image quality and bandwidth consumption more than a less complex scene, such as an interior room with very little action or movement.
(continued on next page)
· Don’t forget to click “Save”
to apply settings.
· Use the “Copy” function to
apply all settings to the other
cameras.
· Click the “Default” button
to revert back to default settings.
· Click the “Close” button to
exit the Main Menu.
The functions available here allow you to
change the resolution,
frame rate and bitrate
for each camera connected. By default the
recording resolution is
automatically selected
to fit in with the capabilities of the provided
cameras.
Page 19

19
Click for contents
Record: Mainstream (720p model)
· Don’t forget to click “Save”
to apply settings.
· Use the “Copy” function to
apply all settings to the other
cameras.
· Click the “Default” button
to revert back to default settings.
· Click the “Close” button to
exit the Main Menu.
CBR: This is the default method of control that your DVR will use to re-
cord video. If you have cameras placed in high traffic areas, CBR is the
recommended control method. As the bitrate is fixed, the image quality
will be consistent throughout the entire recording. This will assist when
identifying people or objects.
VBR: If you have cameras placed in low traffic areas, VBR is the recom-
mended control method. As the bitrate is variable, your DVR can use a
lower bitrate if there is little to no movement detected. This will result in
a lower recording size as well as a lower bandwidth requirement.
When choosing VBR, you can select the recording quality that will define
the variable bitrate used. You can select from worst to best.
Bitrate Mode: You have the choice of selecting a predefined or user-de-
fined bitrate. For most instances, the default selection will be suitable.
Bitrate: The amount of data that your DVR will use to record video. The
higher the bitrate, the more space each recording will consume on the
hard drive. The default bitrate is 2048Kbps. Change the bitrate if you’re
having issues streaming to your mobile device via the HomeSafe View
app (when selecting “Mainstream” in Live mode to view your cameras).
Decreasing this will consume less bandwidth when streaming.
Audio: Click the checkbox if you have an audio source connected to the
DVR’s audio input(s) (for 8 channel models, this option is only available
on camera input 1).
Please note: Selecting the appropriate recording settings is de-
pendent on camera location, lighting conditions and the level of
quality required. A certain level of experimentation is recommended to
select the best settings for your needs.
Page 20

20
Click for contents
Record: Mainstream (1080p model)
Channel: Select a camera that you would like to edit.
Resolution: By default, the recording resolution is automatically select-
ed to match the native capabilities of the provided cameras. If you have
an older analogue camera connected, lower the resolution to “960 x
480” for NTSC and “960 x 576” for PAL, to match the camera’s recording
capability.
FPS: The number of frames per second (fps) that your DVR will record.
The default is 15fps, however you can change this if needed. In the
HomeSafe View app, you can select “Mainstream” in Live mode to view
your cameras. Lower the frame rate if you’re having issues streaming
to your mobile device (lowering the frame rate to 10fps for example, will
reduce the bandwidth required without sacrificing image quality).
Bitrate Control: CBR (Constant Bitrate) utilises a fixed bitrate and band-
width to record video. This means your DVR will use the same number
of bits throughout the entire recording, regardless of what is happening
on-screen. VBR (Variable Bitrate) utilises a bitrate and bandwidth that
changes when your DVR is recording. The bitrate will increase or decrease depending on how complex the scene is.
Which method should I choose? Scene complexity can vary significantly
over several hours of recorded video, and the bitrate you select for recording will have an effect on image quality, bandwidth consumption,
and hard drive storage. A complex scene with moving action, such as
traffic on a city street, or a scene with a lot of contrasting colors, will
affect image quality and bandwidth consumption more than a less complex scene, such as an interior room with very little action or movement.
(continued on next page)
· Don’t forget to click “Save”
to apply settings.
· Use the “Copy” function to
apply all settings to the other
cameras.
· Click the “Default” button
to revert back to default settings.
· Click the “Close” button to
exit the Main Menu.
The functions available here allow you to
change the resolution,
frame rate and bitrate
for each camera connected. By default, the
recording resolution is
automatically selected
to match the native capabilities of the provided cameras.
Page 21

21
Click for contents
Record: Mainstream (1080p model)
CBR: This is the default method of control that your DVR will use to re-
cord video. If you have cameras placed in high traffic areas, CBR is the
recommended control method. As the bitrate is fixed, the image quality
will be consistent throughout the entire recording. This will assist when
identifying people or objects.
VBR: If you have cameras placed in low traffic areas, VBR is the recom-
mended control method. As the bitrate is variable, your DVR can use a
lower bitrate if there is little to no movement detected. This will result in
a lower recording size as well as a lower bandwidth requirement.
When choosing VBR, you can select the recording quality that will define
the variable bitrate used. You can select from worst to best.
Bitrate Mode: You have the choice of selecting a predefined or user-de-
fined bitrate. For most instances, the default selection will be suitable.
Bitrate: The amount of data that your DVR will use to record video. The
higher the bitrate, the more space each recording will consume on the
hard drive. The default bitrate is 4096Kbps. Change the bitrate if you’re
having issues streaming to your mobile device via the HomeSafe View
app (when selecting “Mainstream” in Live mode to view your cameras).
Decreasing this will consume less bandwidth when streaming.
Audio: Click the checkbox if you have an audio source connected to the
DVR’s audio input(s) (for 8 channel models, this option is only available
on camera input 1).
Please note: Selecting the appropriate recording settings is de-
pendent on camera location, lighting conditions and the level of
quality required. A certain level of experimentation is recommended to
select the best settings for your needs.
· Don’t forget to click “Save”
to apply settings.
· Use the “Copy” function to
apply all settings to the other
cameras.
· Click the “Default” button
to revert back to default settings.
· Click the “Close” button to
exit the Main Menu.
Page 22

22
Click for contents
Record: Substream
Channel: Select a camera that you would like to edit.
Resolution: The Substream resolution is always set to 352 x 240 for
NTSC and 352 x 288 for PAL, and cannot be changed.
FPS: The number of frames per second (fps) that your DVR will process
when streaming to your mobile device via the HomeSafe View app. For
most instances, the default frame rate will be suitable. Change this to
10fps or 15fps for cameras that monitor medium to high traffic areas.
This will give you smoother motion, but just be aware this will also increase the bandwidth required.
Bitrate Control: Change this to VBR. This will result in a lower record-
ing size as well as a lower bandwidth requirement. You can select the
recording quality that will define the variable bitrate used, from worst
to best.
Bitrate Mode: You have the choice of selecting a predefined or user-de-
fined bitrate. For most instances, the default selection will be suitable.
Bitrate: The amount of data that your DVR will use to stream video to
your mobile device. For cameras that monitor medium to high traffic
areas, increase the bitrate to add more detail to the camera’s image, but
just be aware this will also increase the bandwidth required. Increase
the bitrate in small doses until you are satisfied with the image quality.
Audio: Click the checkbox if you have an audio source connected to the
DVR’s audio input(s) (for 8 channel models, this option is only available
on camera input 1).
Please note: When streaming live video, the quality is dependent
on your internet connection and the Substream settings utilised.
This is important when streaming multiple cameras at the same time.
· Don’t forget to click “Save”
to apply settings.
· Use the “Copy” function to
apply all settings to the other
cameras.
· Click the “Default” button
to revert back to default settings.
· Click the “Close” button to
exit the Main Menu.
The functions available here allow you to
control how video is
streamed to your mobile device using the
HomeSafe View app.
You can change the
frame rate and bitrate
if you’re having issues
streaming live video
from your DVR.
Page 23

23
Click for contents
Alarm: Motion
Channel: Select a camera that you would like to edit.
Enable: If for some reason motion detection is not required, you have
the option to disable it.
Buzzer: When motion has been detected, you can enable the DVR’s
buzzer to alert you for a predetermined amount of time.
Sensitivity: This option allows you to change the sensitivity level. The
higher the number, the more sensitive your DVR will be when detecting
motion. For most instances, the default selection will be suitable, however it’s recommended to conduct a test to see if the sensitivity level is
correct for the camera’s location (see page 26 - Motion Detection Tips).
Area: Click the “Setup” button to change the default motion detection
area. The entire view of the camera is enabled for motion detection,
however you can select certain areas if you wish (see page 25 - Motion
Detection).
Post Recording: This option instructs your DVR to record for a set period
of time after an event has occurred. For most instances, the default selection will be suitable, however you can change this if you wish.
Show Message: When motion has been detected, the motion icon will
appear on-screen. Click the checkbox if you want to disable this.
Send Email: Click the checkbox to enable your DVR to send an email
alert when motion has been detected.
Full Screen: Click the checkbox if you would like to view the camera full
screen in Live View mode when motion has been detected.
(continued on next page)
· Don’t forget to click “Save”
to apply settings.
· Use the “Copy” function to
apply all settings to the other
cameras.
· Click the “Default” button
to revert back to default settings.
· Click the “Close” button to
exit the Main Menu.
When motion has been
detected by one or
more cameras, your
DVR will alert you to a
potential threat at your
home. It does this by
sending you an email
alert to your mobile
device or computer
with an attached image from the camera
to use as a reference (if
this option is enabled).
Page 24

24
Click for contents
Alarm: Motion
Record Channel: You can instruct your DVR to disable recording when
motion has been detected. Your DVR will still alert you by displaying the
motion icon on-screen and by email if this option has been enabled.
Click the checkbox to disable.
Analog Channels: This option instructs your DVR to trigger additional
cameras to start recording when motion has been detected. Click the
checkbox to select all cameras or click on the individual camera number that you want to trigger for recording.
· Don’t forget to click “Save”
to apply settings.
· Use the “Copy” function to
apply all settings to the other
cameras.
· Click the “Default” button
to revert back to default settings.
· Click the “Close” button to
exit the Main Menu.
Page 25

25
Click for contents
Motion Detection
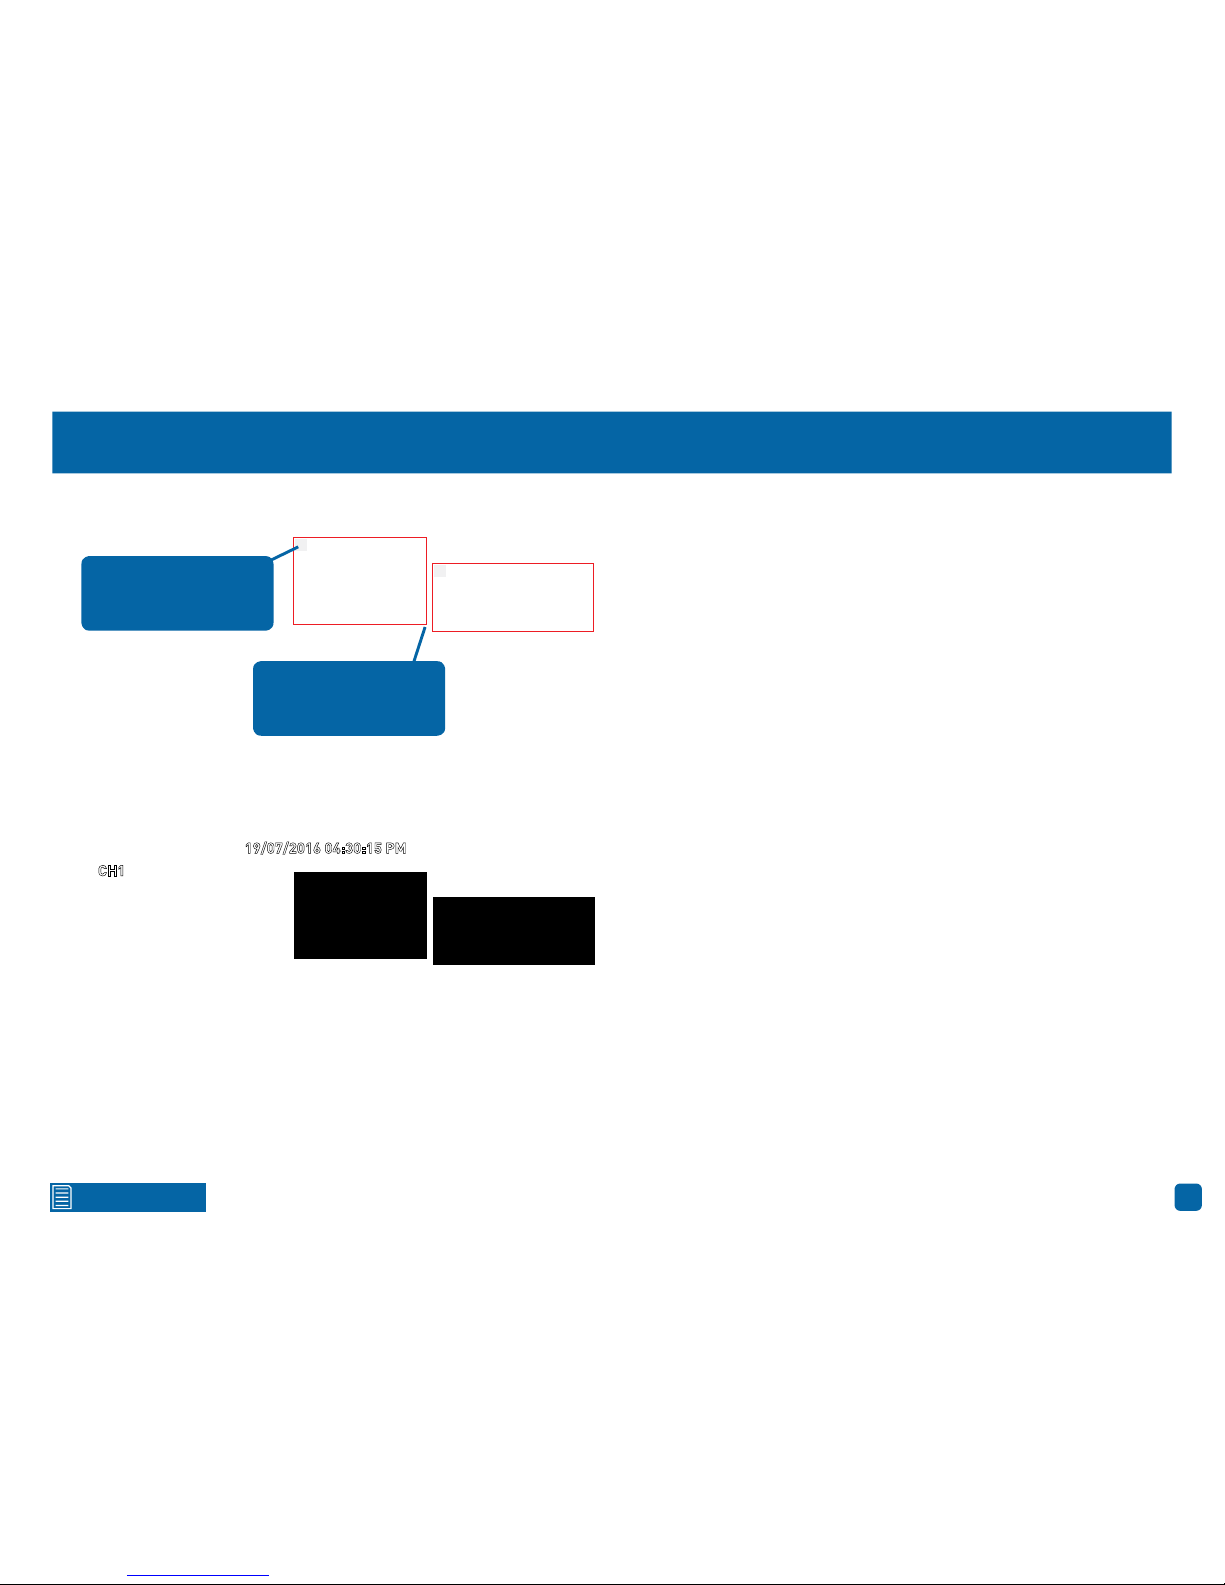
1. Place the mouse inside the cell or square surrounded by a yellow
border (as illustrated on the left). Press and hold the left mouse button,
click and drag to the bottom right-hand corner then release the mouse.
This will delete the default motion detection area.
2. To create a new motion detection area, select the cell or square that
you want to start at. Press and hold the left mouse button, click and
drag to select the area that you want to create then release the mouse.
3. Multiple areas can be created. Each individual cell or square can be
enabled to detect motion. The same action also applies to delete an
area that has been created.
In the example provided, a motion detection area has been created for
the front yard but excludes objects such as trees as well as cars and
pedestrians adjacent to the front yard of the house. Anyone who walks
along the path via the front entrance and approaches the front door will
be detected.
Movement outside of the motion detection areas will not be detected so
will not trigger recordings or event notifications.
4. Right-click the mouse to exit. Adjust the sensitivity if required.
5. Click the “Save” button to save changes made.
To delete the default
motion detection area,
place your mouse here.
Each individual cell or
square can be enabled
to detect motion.
Page 26

26
Click for contents
Motion Detection Tips
Placement of the cameras
1. Place cameras so they are facing areas where people have to walk through to approach your
home regardless of where they are headed. A good idea is to place a camera overlooking your
front door to capture an image of anyone approaching it for later reference. This is great if you
have parcels delivered to your door or if the potential burglar knocks or rings the doorbell to
see if anyone is home.
2. Walk around your house and assess where intruders are most likely to approach to enter,
and what path they would take. Most burglars enter the home through a front or back door, so
it’s advisable to place the cameras near those areas so that you get the best amount of detail
of anyone who approaches.
3. When installing cameras outside, it’s important to keep your front and backyard as well-lit
as possible for ideal night vision and the ability to detect motion. It’s common for intruders to
enter a home through an unlocked garage or by using a garage door opener in an unlocked car
located in the driveway. Positioning your cameras to overlook cars in the driveway and similar
locations can be very useful.
Avoiding False Triggers
1. A tree, shrub or foliage that is blown by the wind - angle the camera so wind-blown objects
are out of the camera’s view or use the camera motion detection area settings to exclude
these areas from detection.
2. People moving along sidewalks or streets that are close to your home, aim your cameras
and use the motion detection area settings to ensure only legitimate threats are triggering
events.
3. Vehicles moving in the background - angle the camera so as to avoid movement in the
background or use the motion detection area settings to stop detection of cars in the street.
4. Movement or light reflected off smooth surfaces such as glass - adjust the sensitivity level
and/or avoid pointing the camera directly at glass surfaces.
The red cameras illustrated (see above) are your
primary locations. Place your cameras close to
the front door, back door, garage entrance and
overlooking the backyard.
The blue cameras illustrated are your secondary
locations. If your DVR includes additional cameras, place these at the front entrance inside the
home, the front of the house (this could overlook
the front garden or driveway), a side gate or if
you have multiple entrances to the backyard.
Page 27

27
Click for contents
Device: PTZ
If you have a compatible PTZ camera connected to your DVR, you can
use the PTZ controls to move the camera as well as the ability to zoom
into an object and to control the level of focus (if available). You can create multiple preset positions, which can be recalled to focus the camera’s view to a different position. Cruise mode can also be used to move
the camera to different preset positions that have been created.
To configure your PTZ camera, consult the instruction manual included
with your device then match those settings here.
Please note: Each channel has a unique address assigned to it,
channel 1 is 001, channel 2 is 002, etc. Most PTZ cameras have
their address or ID set to 001, therefore when connecting to a channel
other than channel 1, the channel address will have to be changed to
match the same address used by the camera. For example, if the cam-
era is connected to channel 3, click the drop down menu, select “CH3”
and change the address to 001. Select “CH1” and change the address to
003. Click the “Save” button to apply settings.
For instructions on how to control your PTZ camera and creating preset
positions (see page 28 - Controlling your PTZ Camera).
· Don’t forget to click “Save”
to apply settings.
· Use the “Copy” function to
apply all settings to the other
cameras.
· Click the “Default” button
to revert back to default settings.
· Click the “Close” button to
exit the Main Menu.
Page 28

28
Click for contents
Controlling your PTZ Camera
To control your PTZ camera, in Live View mode click on the channel the
camera is connected to then click the “PTZ” button located on the camera toolbar. The channel will go full screen and the PTZ controls will be
visible (as shown on the left).
1. If you have multiple PTZ cameras connected, click this to select a
different camera.
2. Click this to start cruise mode (preset positions must be created first).
Cruise mode instructs your DVR to automatically move the camera according to the preset positions that have been created. Click again to
stop cruise mode.
3. Adjust the speed control to alter how fast or slow the camera will pan
or tilt. Move the slider to decrease or increase the speed.
4. Click this to access the Preset panel. This allows you to create multi-
ple preset positions and to access the camera’s on-screen display. Click
again to close.
5. This allows you to zoom into an object and to control the level of focus
(depending on the camera you have, the iris control may not be available).
6. Click the directional buttons to move the camera in the direction se-
lected (the middle button has no function).
For instructions on how to create a preset and to access the camera’s
on-screen display (see page 29 - Creating a Preset).
CH2
19/07/2016 04:30:15 PM
1 2 3
4
56
To move the PTZ controls, click and hold
then reposition it.
A Swann Pro-852 PTZ camera has been used in the example provided.
This model is compatible with the 1590, 1600 and 4575 series of DVRs.
Page 29

29
Click for contents
Creating a Preset
Creating a Preset
→ To create a preset, use the PTZ controls to move the camera to the
desired focal position. The zoom and focus controls can also be used.
Use the speed control to alter how fast or slow the camera will move.
→ Change the length of time the camera will stay at this position.
→ Click the “Set” button to create the preset. You will notice that the
preset position will increase each time a preset is created. The total
number of presets created will also be displayed. Up to 255 different
preset positions can be created.
→ Repeat these steps to create multiple preset positions. When fin-
ished, click the “Save” button to save. Right-click to exit.
→ Click the “Start Cruise” button to continually cycle through each pre-
set created. Click again to stop.
CH2
19/07/2016 04:30:15 PM
56
1
2
3
4
5 6
1. Each preset position will have a different number assigned to it. To
recall a particular position, click the dialogue box, input a number then
click “GO TO”. The camera will then move to that particular position.
When creating a preset position, you may want to make note which position is assigned to each number.
2. Click the dialogue box to change the length of time (in seconds) the
camera will stay at a particular position, before moving to the next position.
3. Click this to go to a particular preset position.
4. Click this to create a preset.
5. Click this to save any changes made.
6. Click this to clear a preset.
Accessing your Camera’s On-screen Display
→ Click the preset position dialogue box (1) then click the backspace
button twice. Enter “95”, click the enter button then click the “GO
TO” button.
→ To navigate the on-screen display, click the up and down directional
buttons. The hyphen indicates which option or setting has been se-
lected.
→ Click the right directional button to confirm selection. Click the left
and right directional buttons to change settings within sub-menus.
→ Consult the camera’s instruction manual for information about the
functions available in the on-screen display.
Page 30

30
Click for contents
Recording Configuration
The recording configuration options are
available in the “Record” and “Capture”
menus that are accessible from the Main
Menu. From here you can access and
change the default recording schedule
(presented as a 24 hour 7 days a week
grid and is color coded) for each camera
connected. You can also enable and set a
schedule for your DVR to take a snapshot
each time an event occurs.
Page 31

31
Click for contents
Record: Record
Channel: Select a camera that you would like to edit.
Record Switch: When disabled, your DVR will detect motion but it will
not record (manual record is also disabled).
Stream Mode: By default, your DVR will record both Mainstream and
Substream video (known as DualStream). This is especially useful when
using Playback mode via the HomeSafe View app, as Substream video
will be used. This requires less bandwidth to stream the video from your
DVR to your mobile device. Mainstream video is used for playback when
using your DVR directly. If remote playback is not required, you can select Mainstream recording only.
PreRecord: Allows your DVR to record for a number of seconds before
an event occurs. It’s recommended to leave this enabled.
· Don’t forget to click “Save”
to apply settings.
· Use the “Copy” function to
apply all settings to the other
cameras.
· Click the “Default” button
to revert back to default settings.
· Click the “Close” button to
exit the Main Menu.
Page 32

32
Click for contents
Record: Schedule
Channel: Select a camera that you would like to edit.
Normal: Your DVR will constantly record for a set period of time.
Motion: Your DVR will only record when motion has been detected from
one or more cameras.
Each square represents 30 minutes. Using the mouse, select the de-
sired recording mode then click on a particular square to change or
click and drag the mouse over the squares corresponding to your desired time period. The same action can also be applied if Normal or
Motion recording is not required (on one or more sections that have recording enabled).
In the above example, a Motion recording schedule has been created for
12:00 a.m. to 06:00 p.m. and a Normal recording schedule for 06:00 p.m.
to 12:00 a.m. Sunday to Saturday.
To search for and play previous Normal and Motion recordings (see page
36 - Search: General).
· Don’t forget to click “Save”
to apply settings.
· Use the “Copy” function to
apply all settings to the other
cameras.
· Click the “Default” button
to revert back to default settings.
· Click the “Close” button to
exit the Main Menu.
By default, a Motion
schedule has been enabled for each camera
connected, however
you can change the
schedule to suit your
needs. The schedule is
presented as a 24-hour
7 days a week grid and
is color coded to represent the event type.
Page 33

33
Click for contents
Capture: Capture
Channel: Select a camera that you would like to edit.
Auto Capture: When enabled, your DVR will take a snapshot each time
an event occurs.
Stream Mode: Leave the default selection. This will save each snapshot
at the camera’s native resolution.
Normal Interval: The length of time that must elapse before a snapshot
is taken. For example, when setting a Normal capture schedule, a snapshot will be taken every 5 seconds using the default selection. Adjust
accordingly.
Alarm Interval: When setting a Motion capture schedule, a snapshot
will be taken each time motion has been detected according to the interval selected. Adjust accordingly.
Manual Capture: Enable this feature if you would like to manually take a
snapshot using the Manual Capture button on the camera toolbar.
As this is an added feature, a capture schedule is not enabled by default.
To enable this (see page 34 – Capture: Schedule).
· Don’t forget to click “Save”
to apply settings.
· Use the “Copy” function to
apply all settings to the other
cameras.
· Click the “Default” button
to revert back to default settings.
· Click the “Close” button to
exit the Main Menu.
As an added feature,
you can enable and
set a schedule for your
DVR to take a snapshot
each time an event occurs. This is particularly useful for finding
motion events quickly
and can also be used
for many different purposes such as time
lapse photography.
Page 34

34
Click for contents
Capture: Schedule
Channel: Select a camera that you would like to edit.
Each square represents 30 minutes. Using the mouse, select the desired capture mode then click on a particular square to change or click
and drag the mouse over the squares corresponding to your desired
time period. The same action can also be applied if Normal or Motion
capture mode is not required (on one or more sections that have been
enabled).
In the above example, a Motion capture schedule has been created for
12:00 a.m. to 06:00 p.m. and a Normal capture schedule for 06:00 p.m.
to 12:00 a.m. Sunday to Saturday.
· Don’t forget to click “Save”
to apply settings.
· Use the “Copy” function to
apply all settings to the other
cameras.
· Click the “Default” button
to revert back to default settings.
· Click the “Close” button to
exit the Main Menu.
Page 35

35
Click for contents
Playback & Backup
The Search function gives you the ability
to search for and play previously record-
ed videos as well as snapshots that are
stored on your DVR’s hard drive. You have
the choice of playing video that matches
your recording schedule, manual record-
ings or motion events only. The Backup
function gives you the ability to save im-
portant events (both video and snapshots)
to a USB a flash drive.
Page 36

36
Click for contents
Search: General
1. Click the drop down menu to select the month that you would like to
search on.
2. Click the drop down menu to select the year that you would like to
search on.
3. Click the drop down menu to select from one or all cameras that you
would like to search on and display for playback.
4. Click the drop down menu to select the video type that you want to
search on. In most circumstances “Motion” would be selected but you
can leave this on “All” if you want to search for all video types. Adjust
accordingly.
5. Click the “Search” button to filter your search criteria.
6. The orange triangles indicate there are recordings on those particu-
lar dates that match your search criteria. Click on a date that you want
to select for playback.
7. When selecting all cameras for playback, this will indicate the chan-
nels that match your search (each channel will be highlighted in blue
with an orange triangle). You can leave the default selection or you can
select specific cameras for playback (click the checkbox then select the
channel required).
8. You can leave the default selection or you can click the dialogue box
to enter a specific start time.
9. You can leave the default selection or you can click the dialogue box
to enter a specific end time.
10. Click the “Play” button to start playing.
You will now see the playback interface (see page 37 - The Playback
Interface).
The orange triangles
indicate there are recordings available on
those particular dates.
1098
7
6
21
3 4 5
Page 37

37
Click for contents
Calendar: You can select a different date with-
out exiting to the previous screen.
Playback Mode: You have the option of select-
ing a different playback mode (a message will
appear on-screen when changing modes).
Camera List: Select from one or more cameras
to display for playback. The blue icon indicates
which cameras match your search criteria.
Time Period: This represents the time period
that is visible. Click on a different time period
to zoom in for precise control.
1. Click this to hide the playback interface so
you can maximise your viewing area. Rightclick to restore.
2. From left to right, these are your reverse,
slow motion, play, pause, stop and fast forward
controls. Subsequent presses of the reverse,
slow motion and fast forward buttons will increase the speed of each action.
3. Select a camera, click this button then click
and drag an area to get a close up view. Use
the picture-in-picture screen to select a different area to view. Right-click to exit.
(continued on next page)
The Playback Interface
CH1 CH2
22/08/2016 08:51:03 AM
CH3 CH4
22/08/2016 08:51:03 AM
22/08/2016 08:51:03 AM22/08/2016 08:51:03 AM
Play
Click and hold the timeline
then drag left or right to
the desired time period (if
the video is playing, press
the stop button first.
Click to close
Smart Mode
Video TypeTime Period
1 2
345
6
Camera List
Calendar
Playback Mode
Timeline
Click on a camera to
select it (a surrounding
blue square is shown).
Page 38

38
Click for contents
4. This button allows you to set mark in and out
points on your video which you can then copy
to a USB flash drive. When you have selected a
video to play, press this button at the mark in
point and press it again at the mark out point.
Press the button again to save (a disk icon will
be shown). For the backup type, leave the default selection or change to this to AVI or MP4
if you need to play this on your computer. Insert a USB flash drive to your DVR then click
“Save”. You have the choice of formatting the
flash drive or creating a new folder if required.
Click “OK” to save then click “Close” when finished.
5. Click this button to mute the audio. Click
again to unmute.
6. Click and hold the slider left or right to
change the volume level.
Video Type: Indicates the video type on the
timeline.
Smart Mode: This mode allows you to define a
specific area of the video which then makes it
easier to find what you are searching for (see
page 39 - Smart Mode).
The Playback Interface
CH1 CH2
22/08/2016 12:57:58 PM22/08/2016 12:57:58 PM
CH4
22/08/2016 12:57:58 PM
CH5
22/08/2016 12:57:58 PM
CH6
22/08/2016 12:57:58 PM
CH7
22/08/2016 12:57:58 PM
CH8
22/08/2016 12:57:58 PM
Play
CH3
22/08/2016 12:57:58 PM
When selecting five or
more cameras for playback, each camera is represented as a single recording on the timeline.
Click to close
Smart Mode
Video TypeTime Period
1 2
345
6
Camera List
Calendar
Playback Mode
Timeline
Page 39

39
Click for contents
Playback: Smart
CH1 CH2
22/08/2016 08:51:03 AM
CH3 CH4
22/08/2016 08:51:03 AM
22/08/2016 08:51:03 AM22/08/2016 08:51:03 AM
Play
1
2
CH1
22/08/2016 08:51:03 AM
34567
Smart mode allows you to define one or more specific areas of the
video which then makes it easier to find what you are searching for. For
example, you may have movement on the left-hand side of the yard, but
you want to see what is happening on the right-hand side. Define one
or more areas where required then search to play video based on those
defined areas.
To commence Smart mode, select a camera that you would like to search
on (if the video is not playing, click play).
1. You can leave the default selection or you can click each dialogue box
to enter a specific start and end time.
2. Click this button to define one or more areas that you want to search
for.
The camera will be shown full screen and the Smart mode controls will
be visible.
3. To move the controls, click and hold here then reposition it.
4. Click this to define a full screen detection area.
5. Click this to delete all areas created.
6. Click this to search and play video based on the areas defined.
7. Click this to return to the playback interface.
(continued on next page)
Page 40

40
Click for contents
Playback: Smart
8. Click and drag to select the area that you want to define. Multiple are-
as can be defined. You can also use the same action to remove sections
of the defined area or to delete it entirely.
9. When finished, click the search button to play video based on the ar-
eas defined.
You’ll be returned back to the playback interface. Segments matching
your search criteria will be shown on the timeline in dark green (as illustrated bottom left).
CH1
22/08/2016 08:51:03 AM
9
8
CH1 CH2
22/08/2016 08:47:19 AM
CH3 CH4
22/08/2016 08:47:19 AM
22/08/2016 08:47:19 AM22/08/2016 08:47:19 AM
Play
Segments matching
your search criteria are
shown in dark green.
Page 41

41
Click for contents
Search: Events
This function can be used to search, play and copy motion events to a
USB flash drive.
Date: Click the calendar icon to select the month, year and date that you
would like to search on.
Time: You can leave the default selection or you can click the dialogue
box to enter a specific start and end time.
Channel: Click the drop down menu to select from one or all cameras
that you would like to search on.
Type: Leave the default selection.
Quick Backup: Click this to copy all motion events that match your
search criteria.
Search: Click this to display a list of motion events that match your
search criteria (as shown above). Double-click an event to play (the event
will play full screen). Click the checkbox next to each event to select it.
Backup: Click this to copy selected motion events. For the backup type,
leave the default selection or change to this to AVI or MP4 if you need
to play this on your computer. Insert a USB flash drive to your DVR then
click “Save”. You have the choice of formatting the flash drive or creating a new folder if required. Click “OK” to save then click “Close” when
finished.
Close: Click this to exit.
Page 42

42
Click for contents
Search: Picture
This function can be used to search, play and copy snapshots to a USB
flash drive.
Date: Click the calendar icon to select the month, year and date that you
would like to search on.
Time: You can leave the default selection or you can click the dialogue
box to enter a specific start and end time.
Channel: Click the drop down menu to select from one or all cameras
that you would like to search on.
Type: You can leave the default selection or you can click the dialogue
box to select the type of snapshot you would like to search on.
Quick Backup: Click this to copy all snapshots that match your search
criteria.
Search: Click this to display a list of snapshots that match your search
criteria (as shown above). Double-click a snapshot to display it full
screen. You can also play a slideshow (see page 43 - Playing a Slideshow). Click the checkbox next to each event to select it (a maximum of
5000 snapshots can be displayed at any one time).
Backup: Click this to copy selected snapshots. Insert a USB flash drive
to your DVR then click “Save”. You have the choice of formatting the
flash drive or creating a new folder if required. Click “OK” to save then
click “Close” when finished.
Close: Click this to exit.
Page 43

43
Click for contents
1. Click this to play the slideshow in reverse.
2. Click this to play the slideshow.
3. Click this to stop the slideshow.
4. Click this to display the previous snapshot or
group of snapshots.
5. Click this to display the next snapshot or
group of snapshots.
6. Click this to view a single snapshot at a time.
7. Click this to view four snapshots at a time.
8. Click this to view eight snapshots at a time.
Right-click to exit.
Playing a Slideshow
CH1 CH2
28/09/2016 10:40:26 PM28/09/2016 10:40:26 PM
CH4
28/09/2016 10:40:27 PM
CH5
28/09/2016 10:40:27 PM
Play
CH3
28/09/2016 10:40:26 PM
CH1
28/09/2016 10:40:31 PM
CH2
28/09/2016 10:40:31 PM
CH3
28/09/2016 10:40:31 PM
1 2 3 4 5 6 7 8
Page 44

44
Click for contents
System Configuration
The options available give you complete
control on how your DVR is configured and
how it operates. Some of the options such
as display resolution, time zone, email
configuration, Daylight Saving and pass-
word creation are configured during the
Startup Wizard. For experienced network
users, your DVR provides options that can
be configured to suit your particular re-
quirements. You can also perform a firm-
ware upgrade when available.
Page 45

45
Click for contents
Display: Output
Video Output: This option cannot be changed.
Seq Mode: Select how many video channels you would like to display
when your DVR is in sequence mode. You can select from one, four or six
cameras to display at a time.
Seq Dwell Time: Enter in seconds the maximum length of time you
would like to display a video channel in sequence mode before displaying the next video channel (300 seconds is the maximum).
VGA/HDMI Resolution: Select a resolution that is suitable for your TV.
1920 x 1080 (1080p) resolution will give you the best quality. Make sure
your TV supports the resolution selected. For audio out via HDMI, select
1280 x 720 (720p) or 1920 x 1080 (1080p).
Transparency: Click and hold the slider left or right to change how
transparent the Menu Bar and Main Menu will appear on-screen. Adjust
accordingly.
Support Overscan: Is mainly used on older television sets to display the
entire viewable area correctly on-screen. It does this by cutting off the
edges of the picture. This is not required for modern Plasma and LCD
TVs as the image is digitally processed to display the correct aspect ratio.
· Don’t forget to click “Save”
to apply settings.
· Click the “Default” button
to revert back to default settings.
· Click the “Close” button to
exit the Main Menu.
Page 46

46
Click for contents
Network: Network
PPPoE: Allows your DVR to be directly connected to a DSL modem.
When selecting this option, you need to input the user name, password
and DNS settings for your internet service provider.
DHCP (Dynamic Host Configuration Protocol): Your router will auto-
matically assign an IP address to each device connected to your network. This is enabled by default.
Static: All devices on your network have their IP address manually de-
fined.
Server Port: This port number is used by your DVR to send information
through. The default number will work in most situations.
HTTP Port: This port number is used to log into your DVR from a remote
location. The default number will work in most situations.
The following five options can be changed when selecting Static:
IP Address: Each device on your network must have a unique IP ad-
dress. A typical address might be “192.168.1.24” or something similar.
Subnet Mask: This allows the flow of network traffic between hosts to be
segregated based on a network configuration. A typical address might
be “255.255.255.0” or something similar.
Gateway: This allows your DVR to connect to the internet. This is typical-
ly the same IP address as your modem or router.
DNS (Domain Name System)1/2: Input the DNS settings for your inter-
net service provider.
(continued on next page)
· Don’t forget to click “Save”
to apply settings.
· Click the “Default” button
to revert back to default settings.
· Click the “Close” button to
exit the Main Menu.
As SwannLink Peerto-Peer technology is
utilised to communicate with your network
and mobile device,
configuration of the
network settings is not
required. If you have
networking expertise
and require specific
settings for your network, your DVR does
have the ability to
change them.
Page 47

47
Click for contents
Network: Network
UPNP: A network protocol designed to allow network connected devices
to automatically configure the router for the purposes of remote access.
This is not required when using UID to access your DVR via the HomeSafe View app. You can enable UPNP if required.
· Don’t forget to click “Save”
to apply settings.
· Click the “Default” button
to revert back to default settings.
· Click the “Close” button to
exit the Main Menu.
Page 48

48
Click for contents
Network: Email
Email: Click “Enable” to input your email details.
Encryption: Leave this on “Auto”. This ensures your DVR will always use
the correct encryption for your email provider.
SMTP Port: Gmail input 00465. Outlook input 00587. Yahoo input 00465.
SMTP Server: Gmail input “smtp.gmail.com”. Outlook input “smtp.live.
com”. Yahoo input “smtp.mail.yahoo.com”.
User Name: Input the email user name for the account you created.
Password: Input the email password for the account you created. Click
the “show” checkbox if you would like to hide your password.
Sender: Input the email address for the account you created.
Recipient: Input the email address that you want to send email alerts to.
Interval: This is the length of time that must elapse after your DVR
sends an email alert before it will send another. Adjust accordingly.
Test Email: Click to verify the information is correct then click “OK”. A
message will appear on-screen stating if the test has been successful.
Click “OK” to continue.
Check the inbox on your device to make sure the test email has been
received. If it’s not in your inbox, check your junk or spam folder.
Email not working? Please try the following:
1. Check that your email and password are correct.
2. Located at the back of your DVR, you should see one or two flashing
LEDs (above the Ethernet port). If you don’t see this, disconnect then
reconnect the Ethernet cable or try a different port on your router.
3. Search “less secure apps” at (support.swann.com).
· Don’t forget to click “Save”
to apply settings.
· Click the “Default” button
to revert back to default settings.
· Click the “Close” button to
exit the Main Menu.
The following email
providers are recommended - Gmail
(gmail.com), Outlook
(outlook.com) and Yahoo (yahoo.com). Select your preferred
provider then on your
computer, go to the
relevant website to
create an account.
When finished, input
those details here.
Why do I need to create an email for
my DVR? If you don’t do this, your
DVR cannot send email alerts or
send you a password reset request
if you have forgotten your password.
Page 49

49
Click for contents
Network: Email Schedule
Motion: If email alerts have been enabled for motion detection, you can
change the schedule on when your DVR can send those alerts. For example, you may only want to receive motion alerts during the day but
not in the evening. A different schedule can be created for each camera.
Exception: There are three event types that your DVR will detect as an
exception - no space left on the hard drive, a hard drive error and if one
or more channels has lost the feed from its camera. It’s recommended
to leave the default schedule in place in case there is an exception that
you need to be alerted to.
Channel: Select a camera that you would like to edit.
Each square represents 30 minutes. Using the mouse, click on a particular square to change or click and drag the mouse over the squares
corresponding to your desired time period.
In the above example, a Motion email alert schedule has been created
for 08:00 a.m. to 07:00 p.m. Motion alerts outside of these times will not
be emailed.
· Don’t forget to click “Save”
to apply settings.
· Use the “Copy” function to
apply all settings to the other
cameras.
· Click the “Default” button
to revert back to default settings.
· Click the “Close” button to
exit the Main Menu.
Page 50

50
Click for contents
Network: DDNS
Go to (www.swanndvr.com) and click the “Registration” button. Follow
the prompts to create your account.
DDNS: Click the drop down menu to enable.
Server: SWANNDVR is automatically selected.
Domain: Enter the domain name that is hosted on your account. For
example, (username.swanndvr.net).
User: Enter the username (host name) for your account.
Password: Enter the password for your account.
Test DDNS: Click this button then click “OK” to confirm your account
details. After a short moment you will see “DDNS test is successful!”.
Click “OK” to close.
· Don’t forget to click “Save”
to apply settings.
· Click the “Default” button
to revert back to default settings.
· Click the “Close” button to
exit the Main Menu.
Prior to developing our
SwannLink Peer-toPeer technology, our
SwannDNS service
was used to connect
to your DVR remotely. This service is still
active and we recommend creating an account as a means of
backup.
Page 51

51
Click for contents
Network: RTSP
The following instructions are for the VLC media player software. You
can download a free copy from (www.videolan.org). After download, double click the file then follow the on-screen instructions for installation.
RTSP Enable: Click the drop down menu to enable.
Verify: Leave the default selection if you would like VLC to verify your us-
ername and password for access, otherwise click the drop down menu
to disable.
RTSP Port: The default port number will work in most circumstances.
RTSP User Name: This is the user name that you enter if verification
has been enabled. You can leave the default name or you can enter a
new name of your choice.
RTSP Password: Enter a new password if verification has been enabled.
1. On your computer, load the VLC media player software. Click “Media”
then “Open Network Stream”.
2. Enter the IP address of your DVR (on your DVR click “Network” in
the Main Menu to display the IP address) into VLC. The following is an
example of what you need to enter - (rtsp://192.168.99.160:554/ch01/0).
rtsp://192.168.99.160: This is the IP address of your DVR.
554: This is the RTSP port of your DVR.
ch01: This represents channel 1. To display channel 2 enter ch02, chan-
nel 3 enter ch03, etc.
0: This represents Mainstream. For Substream enter 1 instead.
3. Click “Play” then enter the user name and password (if required). You
will now see a live view image from your camera.
· Don’t forget to click “Save”
to apply settings.
· Click the “Default” button
to revert back to default settings.
· Click the “Close” button to
exit the Main Menu.
The RTSP function can
be used to stream a
camera’s live view image to your computer,
using software such as
VLC media player. Multiple cameras can be
streamed at the same
time.
Page 52

52
Click for contents
System: NTP
NTP: This is enabled by default.
Server Address: The default time server will work in most circumstanc-
es. If for some reason the DVR’s clock is not syncing, select a different
time server.
Update Now: If for some reason the date and time are not correct, click
this button to update then click “OK” to continue.
· Don’t forget to click “Save”
to apply settings.
· Click the “Default” button
to revert back to default settings.
· Click the “Close” button to
exit the Main Menu.
The NTP (Network
Time Protocol) function allows your DVR
to automatically sync
its clock with a time
server. This gives it
the ability to constantly
have an accurate time
setting (your DVR will
periodically sync time
automatically).
Page 53

53
Click for contents
Device: HDD
This function gives you the option of formatting your DVR’s hard drive,
and it will be listed here for selection.
Overwrite: This instructs your DVR to overwrite the oldest video files as
the hard drive becomes full. You also have the option of disabling this or
selecting the amount of days events are kept before they are overwritten. It’s recommended to leave the default selection as this prevents
your DVR from running out of storage space.
Format HDD: Click the checkbox to select the hard drive then click this
button to format. A message will appear noting that all data will be
erased. Click “OK” to continue.
Please note: From time to time, we recommend that you format the
hard drive. This ensures that your DVR runs efficiently and main-
tains system integrity.
Connect a USB flash drive to copy events that you want to save. Remember, formatting the hard drive erases all your recordings.
*If a new hard drive has been installed inside your DVR, you need to format the drive before it can be used.
· Don’t forget to click “Save”
to apply settings.
· Click the “Default” button
to revert back to default settings.
· Click the “Close” button to
exit the Main Menu.
Page 54

54
Click for contents
Device: S.M.A.R.T.
Whole Evaluation not passed, continue to use the disk: If for some rea-
son the hard drive has developed a fault (such as one or more bad sectors), you can instruct your DVR to continue saving to the drive.
Self-check Type: There are three types available:
Conveyance: This is a very quick test that verifies the mechanical parts
of the hard drive are working.
Short: This test verifies major components of the hard drive such as
read/write heads, electronics and internal memory.
Long: This is a longer test that verifies the above as well as performing
a surface scan to reveal problematic areas (if any) and forces bad sector
relocation.
When performing a test, your DVR will continue to work as normal.
In most circumstances, the information here will not be needed for general use of your DVR, however one of our Swann Helpdesk & Technical
Support staff may ask you to access this if you call for assistance.
· Don’t forget to click “Save”
to apply settings.
· Click the “Close” button to
exit the Main Menu.
This function can be
used to display technical information on
the hard drive installed
inside your DVR. You
can also perform a test
(there are three types
available) to detect potential drive errors.
Page 55

55
Click for contents
System: General
Date: Click the calendar icon to change the date.
Time: Click the dialogue box to change the time. Click the drop down
menu to select AM or PM.
As NTP is enabled by default, the date and time should always remain
accurate.
Date Format: Click the drop down menu to select the preferred date
format.
Time Format: Click the drop down menu to select the preferred time
format (the playback interface will display in 24-hour time only).
Time Zone: Select a time zone relevant to your region or city.
Language: Select a language you would like the system menus to be
displayed in. Multiple languages are available.
Video Format: Select the correct video standard for your country. USA
and Canada are NTSC. UK, Australia and New Zealand are PAL.
Menu Timeouts: Click the drop down menu to select the time your DVR
will exit the Main Menu when idle. You can also disable this by selecting
“OFF” (password protection will be temporarily disabled).
Show Wizard: Click the checkbox if you would like to display the Startup
Wizard each time you turn on or reboot your DVR.
· Don’t forget to click “Save”
to apply settings.
· Click the “Default” button
to revert back to default settings.
· Click the “Close” button to
exit the Main Menu.
Page 56

56
Click for contents
System: DST
DST: If Daylight Saving applies to your time zone, click the drop down
menu to enable.
Time Offset: Select the amount of time that Daylight Saving has in-
creased by in your time zone. This refers to the difference in minutes,
between Coordinated Universal Time (UTC) and the local time.
Daylight Saving Time: You can select how Daylight Saving starts and
ends:
Week: Select the month, a particular day and time when Daylight Saving
starts and ends. For example, 2 a.m. on the first Sunday of a particular
month.
Date: Select the start date (click the calendar icon), end date and time
when Daylight Saving starts and ends.
· Don’t forget to click “Save”
to apply settings.
· Click the “Default” button
to revert back to default settings.
· Click the “Close” button to
exit the Main Menu.
The DST (Daylight Saving Time) function allows you to select the
amount of time that
Daylight Saving has increased by in your time
zone.
Page 57

57
Click for contents
System: Users
To change your DVR’s password, click the “Edit” button. The password
has to be a minimum of six characters and can contain a mixture of
numbers and letters. Enter your new password again to confirm.
Additional user accounts can also be enabled:
1. Click the “Edit” button.
2. Click the drop down menu to enable.
3. Enter a user name and password.
4. Click the “Save” button, enter the admin password then click “OK” to
confirm.
To change permissions, click the “Permission” button then select which
options you would like to enable. Click the “All” button to select all options. Click the “Save” button then click “OK” to close.
· Don’t forget to click “Save”
to apply settings.
· Click the “Default” button
to revert back to default settings.
· Click the “Close” button to
exit the Main Menu.
Page 58

58
Click for contents
Advanced: Maintain
Default User: Admin is the default user account. If multiple user ac-
counts have been created, click the drop down menu to disable.
Auto Reboot: It is recommended to leave this enabled, as it maintains
the operational integrity of your DVR.
Reboot: Choose an appropriate day and time to reboot your DVR.
Update: Click this button to upgrade the firmware from a USB flash
drive. Select the firmware file then “OK” to confirm. When the firmware
upgrade has completed, your DVR will reboot automatically.
Load Settings: Click this button to import a configuration file containing
all the settings that you have customised.
Load Default: Click this button to restore factory default settings.
Save Settings: Click this button to export a configuration file containing
all the settings that you have customised.
· Don’t forget to click “Save”
to apply settings.
· Click the “Default” button
to revert back to default settings.
· Click the “Close” button to
exit the Main Menu.
Page 59

59
Click for contents
Advanced: Events
Event Type: Select the event type that you would like to change.
Enable: Click the checkbox if you would like to disable alerts for the
event selected.
Show Message: Click the checkbox if you like to disable the on-screen
message for the event selected.
Send Email: Click the checkbox if you would like to disable email alerts
for the event selected.
Buzzer: Click the drop down menu and select the time period for the
internal buzzer to activate for the event selected.
· Don’t forget to click “Save”
to apply settings.
· Click the “Default” button
to revert back to default settings.
· Click the “Close” button to
exit the Main Menu.
Whenever there is an
event or if your DVR
displays abnormal behaviour, you can be
alerted to in multiple
ways such as receiving
an email, displaying
a message on-screen
and activating its internal buzzer. There are
three event types that
your DVR will detect as
an exception
Page 60

60
Click for contents
Advanced: Auto Upgrade
Auto Upgrade: By default, your DVR will automatically download and
install new firmware when available. Click the drop down menu if you
would like to disable this feature.
Check for updates: By default, your DVR will automatically check and
alert you if new firmware is available for download. Click the checkbox
if you would like to disable this feature.
Detect: Click this button to check if new firmware is available.
Upgrade: Click this button to upgrade the firmware from a USB flash
drive. Select the firmware file then “OK” to confirm. When the firmware
upgrade has completed, your DVR will reboot automatically.
· Don’t forget to click “Save”
to apply settings.
· Click the “Default” button
to revert back to default settings.
· Click the “Close” button to
exit the Main Menu.
Page 61

61
Click for contents
System Status
The various status tabs give you an over-
view of the various settings and options
that have been selected for your DVR to
function. Each action that your DVR per-
forms as well as events detected are
logged, which you can search and view. If
you call our helpdesk for assistance, our
staff may ask you to access these tabs to
assist them in solving any technical issues
that you may be having.
Page 62

62
Click for contents
System: Info
Device Name: Click the dialogue box to rename your DVR (if required).
MAC Address: You can use this as a recovery password if you have for-
gotten your current password.
If you call our helpdesk for assistance, our staff may ask you to access
this tab to assist them in solving any technical issues that you may be
having.
Displays technical information about your
DVR as well as your
device ID and QR code.
If you call our helpdesk
for assistance, our staff
may ask you to access
this tab to assist them
in solving any technical
issues that you may be
having.
· Don’t forget to click “Save”
to apply settings.
· Click the “Close” button to
exit the Main Menu.
Page 63

63
Click for contents
System: Channel Info
Displays the Mainstream and Substream settings used for each camera
connected.
If you call our helpdesk for assistance, our staff may ask you to access
this tab to assist them in solving any technical issues that you may be
having.
· Click the “Close” button to exit the Main Menu.
Page 64

64
Click for contents
System: Record Info
Displays the recording settings for each camera connected.
If you call our helpdesk for assistance, our staff may ask you to access
this tab to assist them in solving any technical issues that you may be
having.
· Click the “Close” button to exit the Main Menu.
Page 65

65
Click for contents
Search: Log
Start/End Date: Click the calendar icon to select the month, year and
date that you would like to search on.
Start/End Time: You can leave the default selection or you can click the
dialogue box to enter a specific start and end time.
Log Type: Leave the default selection or click the drop down menu to
select a specific action that you would like to search for.
Search: Click this to display a list of log files that match your search
criteria. Double-click a file to display information about that log.
Backup: Click this to copy the log files that match your search criteria.
Insert a USB flash drive to your DVR then click “Save”. You have the
choice of formatting the flash drive or creating a new folder if required.
Click “OK” to save then click “Close” when finished.
Each action that your
DVR performs as well
as events detected
are logged. These log
files can be searched,
viewed and copied to
a USB flash drive for
safe keeping.
Page 66

66
Click for contents
Glossary
3D-Noise Filter: Is an enhanced form of digital noise reduction. The ad-
vancement in technology enables noise to be filtered even more effectively from the image, even in low light conditions.
50Hz: Is the mains frequency used in the UK, Australia and most Euro-
pean countries.
60Hz: Is the mains frequency used in the United States, Canada and
some Latin American countries.
AGC (Automatic Gain Control): In low light conditions, the camera will
automatically boost the gain control so that people and objects can be
seen more clearly. The advantage of this technique is that your camera
will produce images in much lower light conditions. The downside is
that the amplification will increase the video noise visible.
Anti-flicker: As fluorescent lighting operates at the same frequency
as your mains power, this will cause luminance flicker when viewed
through the camera. Enabling the anti-flicker options available can reduce or eliminate the flicker that is visible.
Anti-smearing: A smear effect means that a bright vertical line orig-
inating from a bright light source appears in the image. This happens
especially with back lighting. Enabling this allows people and objects to
be seen correctly against a very bright background.
Auto DNS (Domain Name System): A service that stores domain names
and translates them into internet protocol addresses. For example,
www.google.com will have a DNS server address that is equivalent to
74.125.224.72. For this option, the DNS server is automatically provided
by your internet service provider.
Auto-focus: Will adjust the lens of your camera to focus on an object
being viewed.
Bandwidth: In computer networks, bandwidth is used as a synonym for
data transfer rate, the amount of data that can be carried from one point
to another in a given time period (usually a second). Network bandwidth
is usually expressed in bits per second (bps).
Bitrate: The amount of data that your DVR or NVR will use to record vid-
eo. The higher the bitrate, the more space each recording will consume
on the hard drive. Increasing this will also consume more bandwidth
when streaming. Unit of measurement is either Mbps (megabits per
second) or kbps (kilobits per second).
BLC (Back Light Compensation): Improves exposure of an object that
is in front of a light source. It does this by splitting the whole image into
different regions, and then applying separate exposure levels to those
regions.
Brightness: This changes how light the image appears to be. Its value is
different in darkness to that in daylight. For example, the lights from car
headlights appears to be brighter at night.
CDS: This allows the image to be set by the camera’s light sensor. A CDS
sensor is basically a resistor that changes its resistive value (in ohms)
depending on how much light is shining onto the sensor.
Compound Stream: Indicates that your DVR or NVR is recording video
and audio at the same time.
Contrast: This increases the difference between the blackest black and
the whitest white in the image. Without contrast you wouldn’t have an
image because there wouldn’t be any differentiation between light and
dark.
Covert: The camera will detect motion and trigger your DVR or NVR to
record, but you will not see an image of the camera in Live View mode.
Page 67

67
Click for contents
Glossary
DDNS (Dynamic DNS): Is a service that converts IP addresses into host
names (a host name is a lot easier than trying to remember an IP address). It also supports dynamic IP addresses, such as those assigned
by a DHCP server. This makes DDNS a good fit for home networks,
which normally receives an IP address from the ISP that will change
occasionally.
DHCP (Dynamic Host Configuration Protocol): Uses an appropriate
server or router to enable dynamic assignment of an IP address to a
device connected to the network.
Display Resolution: Is the number of pixels supported by your TV or VGA
monitor or the output signal of a viewing device, e.g. your DVR or NVR.
DNS Server: Is a standard technology for managing public names of
web sites and other internet domains. DNS technology allows you to
type names into your web browser which your computer will automatically find the address on the internet.
DST (Daylight Saving Time): Is the period of the year when clocks are
moved one hour ahead.
DualStream: A process where your DVR or NVR will record both Main-
stream and Substream video at the same time.
Format: Is a command that prepares a storage device such as a USB
flash drive or hard drive to hold data.
Firmware: The software that operates a discrete device (e.g. your
smartphone). It is referred to in this way rather than software as it is
integral to the operation of the device.
Frame Rate: The measurement of the rate that pictures are displayed to
create a video feed. The unit of measurement is frames per second (fps).
Gateway: Is a node or router that routes traffic from a device on your
home network to the outside network that is providing access to the
internet.
H.264+: Mass video data requires increased storage capacity. To resolve
this issue, video compression technologies are used to reduce the data
while maintaining image quality. H.264+ is an innovative encoding technology aimed at surveillance video.
Hardware: A physical device such as your DVR or NVR.
HDD (Hard Disk Drive): Is a storage device located inside your DVR or
NVR. It is where all data is kept, saved and stored.
HTTP Port (Hypertext Transfer Protocol): This port is used to log into
the web browser interface of your DVR or NVR (if available) using a web
client, such as Internet Explorer.
Hue: Is somewhat synonymous to what is usually referred to as colors.
By altering the hue, you can change the color mix of the image.
IP Address: The address of a device attached to the network. Each de-
vice on the network must use a unique address. IP addresses range
from 0.0.0.0 to 255.255.255.255.
Live View: Is the default display mode for your DVR or NVR. Each cam-
era connected will be displayed on-screen.
MAC Address: Is a unique identifier for network hardware. Can also be
used as a super password if you have forgotten your current password.
Mainstream: Is the video stream that your DVR or NVR will display and
record.
Mask: Is used to obscure part of your image for privacy. It can also be
used to minimise false triggers when your DVR or NVR detects motion.
Any area obscured won’t be shown live or recorded.
Page 68

68
Click for contents
Glossary
Menu: Is where you control the various actions and options that are
available on your DVR or NVR.
Motion Detection: Is the main method used by your DVR or NVR to de-
tect motion and is an essential part of your security system. It does this
by comparing one frame of video with the next. A certain amount of difference between these two frames is interpreted as motion.
NAS (Network Attached Storage): A network device with one or more
HDDs that other network devices can use as if the storage was connected directly.
NIC (Network Interface Controller): The hardware component that al-
lows a device to connect to a network. Both wired and wireless NICs
exist for these respective purposes.
NTP (Network Time Protocol): Is used to synchronize your DVR or NVR’s
clock automatically with a network time server. Most time servers are
on the internet.
NTSC: Is the video system used in North America, Canada and some
Latin American countries. In NTSC, 30 frames are transmitted each
second.
Optical Zoom: Is a true zoom feature. It allows you to zoom in (or out) on
an object to get a closer view by using the camera’s lens.
OSD (On-screen Display): Display information from the camera such as
time, date and camera name on-screen.
Overscan: Is mainly used on older television sets to display the entire
viewable area correctly on-screen. It does this by cutting off the edges of
the picture. This is not required for modern Plasma and LCD TVs as the
image is digitally processed to display the correct aspect ratio.
Pack Duration: Instructs your DVR or NVR to split recordings into dis-
crete units. Each unit can be a maximum of 60 minutes in length. Your
DVR or NVR will play these as one continual video.
PAL: Is the video system used in the United Kingdom, Australia and most
European countries. In PAL, 25 frames are transmitted each second.
Post-record: Instructs your DVR or NVR to record for a set period of
time after an event has occurred.
PPPoE (Point-to-Point Protocol over Ethernet): Is the most common
method that your router uses to login to your ISP to enable your internet
connection. This setting also exists on the DVR or NVR, but is only for
advanced users as the configuration required is difficult to complete and
requires a modem-only device (or a modem/router set to modem-only).
Pre-record: Allows your DVR or NVR to record for a number of seconds
before an event occurs.
Privacy Zone: See Mask for information.
Resolution: The measure of detail that can be seen in an image. The
higher the number, the greater the detail available.
RTSP (Real Time Streaming Protocol): A network protocol designed to
transmit video and audio information over networks and the internet in
real time.
Saturation: This alters how much color is displayed in the image. The
higher the saturation, the more bright and vivid colors will appear.
Server Port: Is a logical connection place and specifically, using the in-
ternet protocol TCP/IP, the way a client program specifies a particular
server program on a computer in a network.
SEQ: Puts the DVR or NVR in sequence mode. This will repeatedly cycle
through each video channel for a predetermined time in Live View mode.
Page 69

69
Click for contents
Glossary
S.M.A.R.T. (Self-Monitoring, Analysis & Reporting Technology): This
is an automatic system on modern HDDs and SSDs to detect potential
drive errors before they occur.
SMTP (Simple Mail Transfer Protocol): This is used to send an out-
bound email (e.g. from you DVR or NVR to an email address).
SMTP Port: Is the port number used by a SMTP server to listen for email
send requests. This is specified by your email provider.
SMTP Server: This is the address of the server used for SMTP. Usually
in the form of a web address (e.g. smtp.gmail.com).
Software: A set of instructions that runs on a computing device.
SSID: Is the technical term for a wireless network name. When you set-
up a wireless network, you give it a name to distinguish it from other
networks in your neighbourhood.
SSL (Secure Socket Layer): A secure method for connecting to servers.
In the context of the DVR or NVR, primarily used for email server connections.
Static: When referring to IP addresses, this is where a device’s IP ad-
dress has been manually entered. Sometimes used on older devices
without UIDs to prepare for internet access.
Static DNS: In some circumstances, your internet service provider may
require you to use a static DNS instead of an auto DNS on your router.
Substream: Is the video stream that your DVR or NVR will send to re-
mote devices via the network or internet. Video quality is reduced to
make it easier to send.
Subnet Mask: Used to define which part of the IP address refers to the
network location. If this is incorrect, your DVR or NVR may not be able
to connect to the internet.
Time Server: Is a server that reads the actual time from a reference
clock and distributes the information to its clients on the network.
Time Zone: Is a region that observes a uniform standard time for le-
gal, commercial, and social purposes. It is convenient for areas in close
communication to keep the same time.
Timestamp: Is a sequence of characters or encoded information identi-
fying when a certain event occurred, usually giving date and time of day,
sometimes accurate to a small fraction of a second.
UID (Unique Identifier): Is an alphanumeric string that is associated
with a single entity within a given system. By entering your UID into
the mobile app or computer software, this allows you to communicate
with your DVR or NVR without having to remember IP addresses or port
numbers.
UPnP (Universal Plug and Play): A network protocol designed to allow
network connected devices to automatically configure the router for the
purposes of remote access. Not required to be enabled when using UID.
VCA (Video Content Analysis): Is a new method for triggering recording
and events. This uses the image processing system of the DVR or NVR
& camera to set specific triggers for recording (such as line crossing or
intrusion). This system does use more processing power, therefore it
may not be available on all devices.
Video Loss: Is regarded as a potential alarm event and is considered to
occur any time your DVR or NVR doesn’t receive an active video signal
from any one of its video inputs.
Video Quality Diagnostics: Enables your DVR or NVR to alert you if the
camera has a blurred image, abnormal brightness or unwanted tint in
the image due to the lighting and white balance of the camera (known
as Color Cast).
Page 70

70
Click for contents
Glossary
Video Stream: Indicates that your DVR or NVR is recording a video
stream only.
WDR (Wide Dynamic Range): Is technology to balance out images that
have a large dynamic range. An example of this situation would be if an
indoor camera were pointing towards a window or building entrance.
The image produced by the camera during the day would be extremely
washed out due to the high brightness of the incoming light.
Page 71

71
Warranty Information
USA
Swann Communications USA Inc.
12636 Clark Street
Santa Fe Springs CA 90670
USA
Australia
Swann Communications
Unit 13, 331 Ingles Street
Port Melbourne Vic 3207
Australia
United Kingdom
Swann Communications LTD.
Stag Gates House 63/64 The Avenue
SO171XS
United Kingdom
Warranty Terms & Conditions
Swann Communications warrants this product against defects in workmanship and material for a period of one (1) year from its original purchase
date. You must present your receipt as proof of date of purchase for warranty validation. Any unit which proves defective during the stated period
will be repaired without charge for parts or labour or replaced at the sole discretion of Swann. The end user is responsible for all freight charges
incurred to send the product to Swann’s repair centres. The end user is responsible for all shipping costs incurred when shipping from and to any
country other than the country of origin.
The warranty does not cover any incidental, accidental or consequential damages arising from the use of or the inability to use this product. Any
costs associated with the fitting or removal of this product by a tradesman or other person or any other costs associated with its use are the responsibility of the end user. This warranty applies to the original purchaser of the product only and is not transferable to any third party. Unauthorized
end user or third party modifications to any component or evidence of misuse or abuse of your device will render all warranties void.
By law some countries do not allow limitations on certain exclusions in this warranty. Where applicable by local laws, regulations and legal rights
will take precedence.
For Australia: Our goods come with guarantees which cannot be excluded under Australian Consumer Law. You are entitled to a replacement or
refund for a major failure and for compensation for any other reasonably foreseeable loss or damage. You are also entitled to have the goods repaired or replaced if the goods fail to be of acceptable quality and the failure does not amount to major failure.
Page 72

Helpdesk & Technical Support
Technical Support E-mail: tech@swann.com
Technical Support Website: support.swann.com
Telephone Helpdesk
USA Toll Free 1-800-627-2799
USA Parts & Warranty 1-800-627-2799
(M-F, 9am-5pm US PT)
AUSTRALIA 1800 788 210
NEW ZEALAND Toll Free 0800 479 266
UK 0808 168 9031
M1590_1600_4575VER1E101016 | © Swann 2016
Security Made Smarter
 Loading...