

Page 1
DVR4 1000
USER MANUAL
Page 2
1.CONFIGURATION
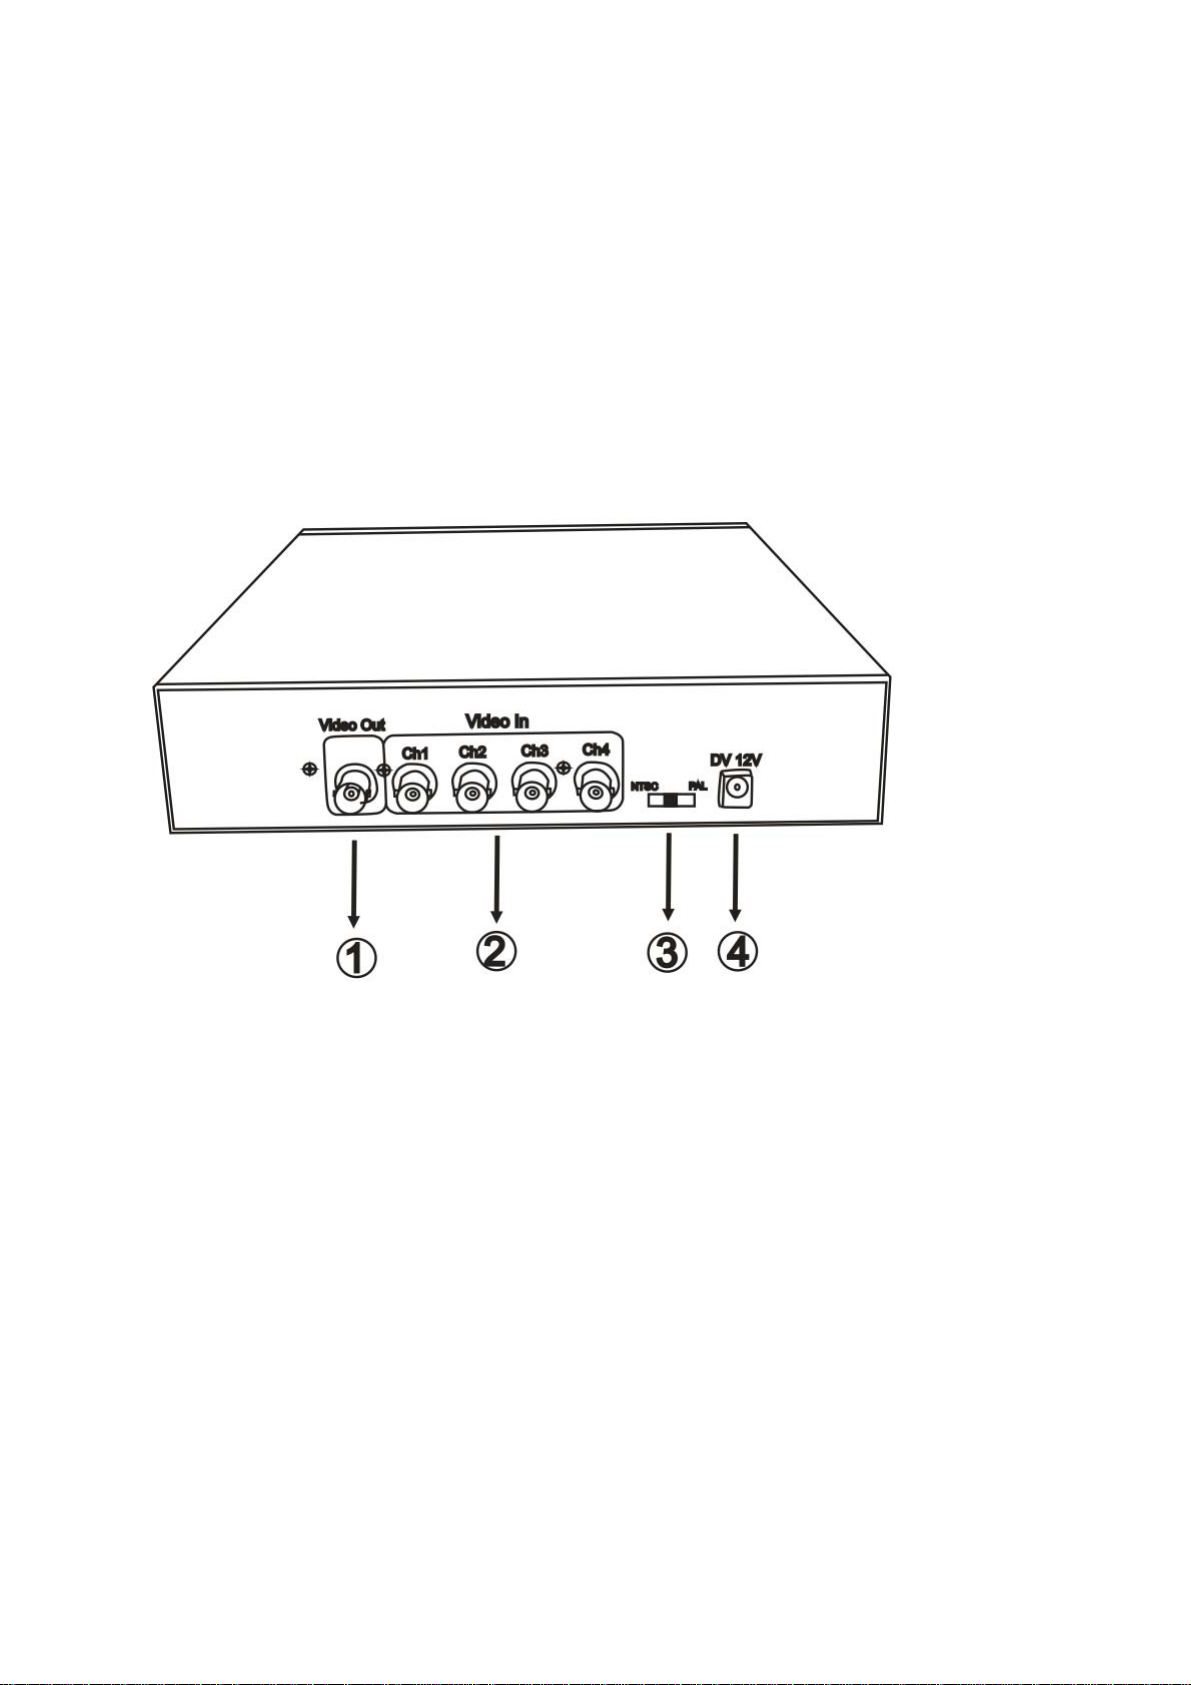
REAR VIEW
(1) Video Output to TV.
(2) Video Input : CH1 -CH4 camera inputs
(3) TV System Switch: PAL / NTSC
(4) Power Input: DC 12V / 4A
Page 3
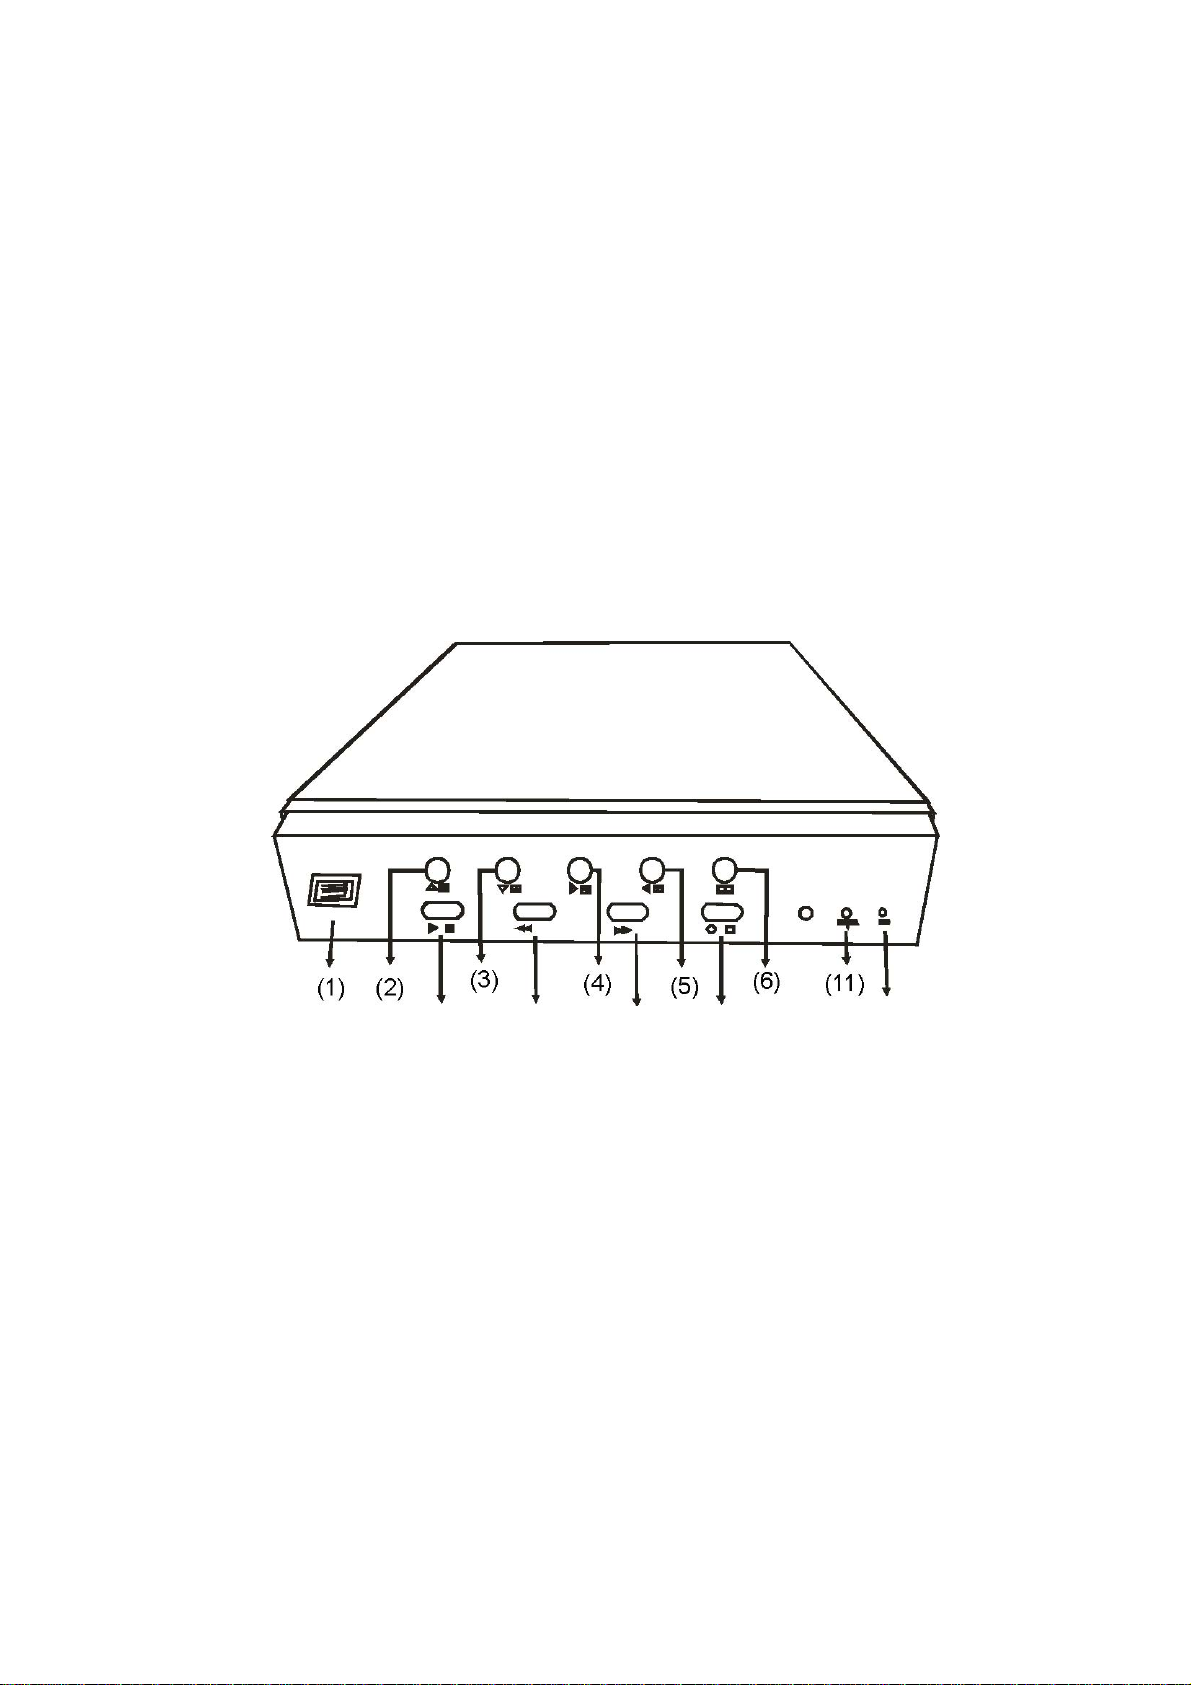
FRONT PANEL
(1) USB PORT
(2) Move Up / camera 1
(3) Move Down / Camera 2
(4) Move Right / Camera 3 / Select
(5) Move Left / Camera 4
(6) Menu
(7) Play / Pause
(8) Rewind
(9) Fast Forward / Sequence Switch / Select
(10) Record / Stop
(11) Power Indicator
(12) HDD activity Indicator
(12)
(7)
(8)
(9) (10)
NOTE:
All jurisdictions have specific laws and regulations relating to the use of cameras. Before using any camera
for any purpose, it is the buyer’s responsibility to be aware of all applicable laws and regulations that
prohibit or limit the use of cameras and to comply with the applicable laws and regulations. The legality of
watching people other than yourself changes from country to country and even state to state. Contact your
local government's privacy information body or your local Police for more information on what if any
restrictions you may face.
Page 4
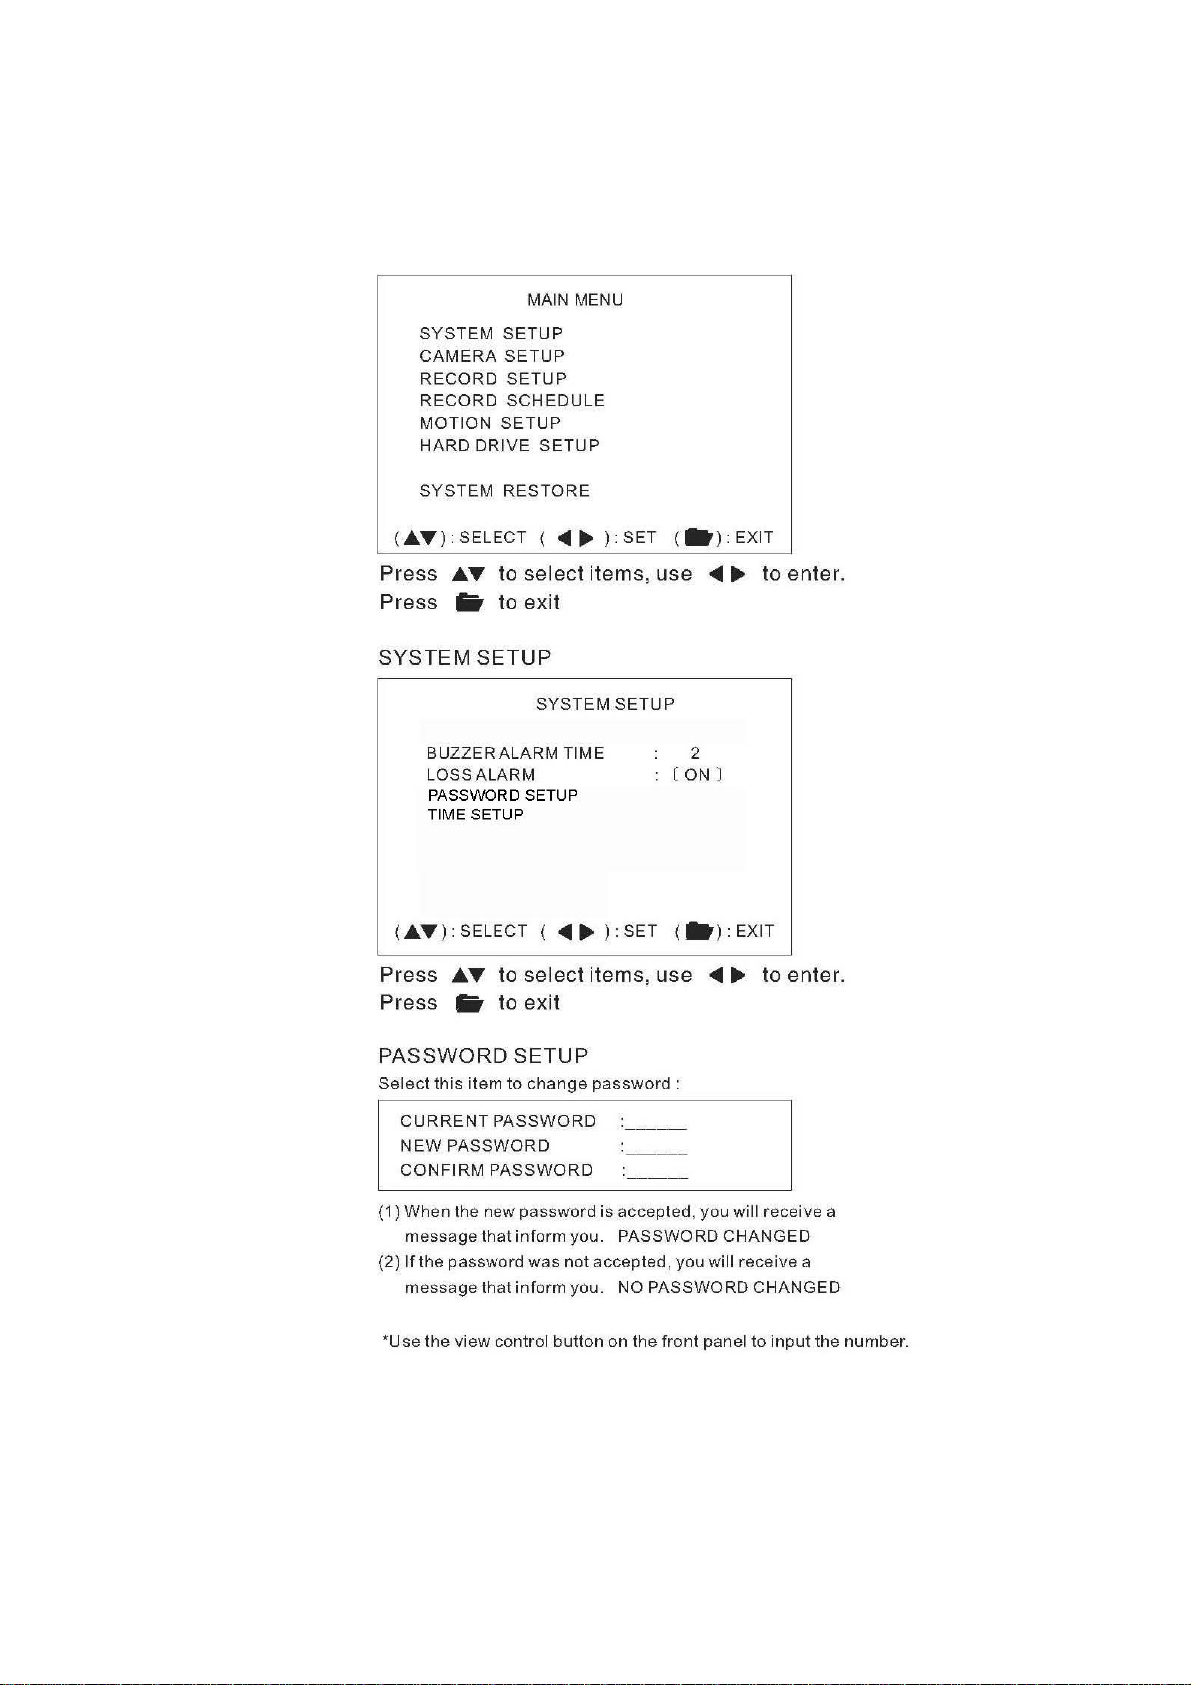
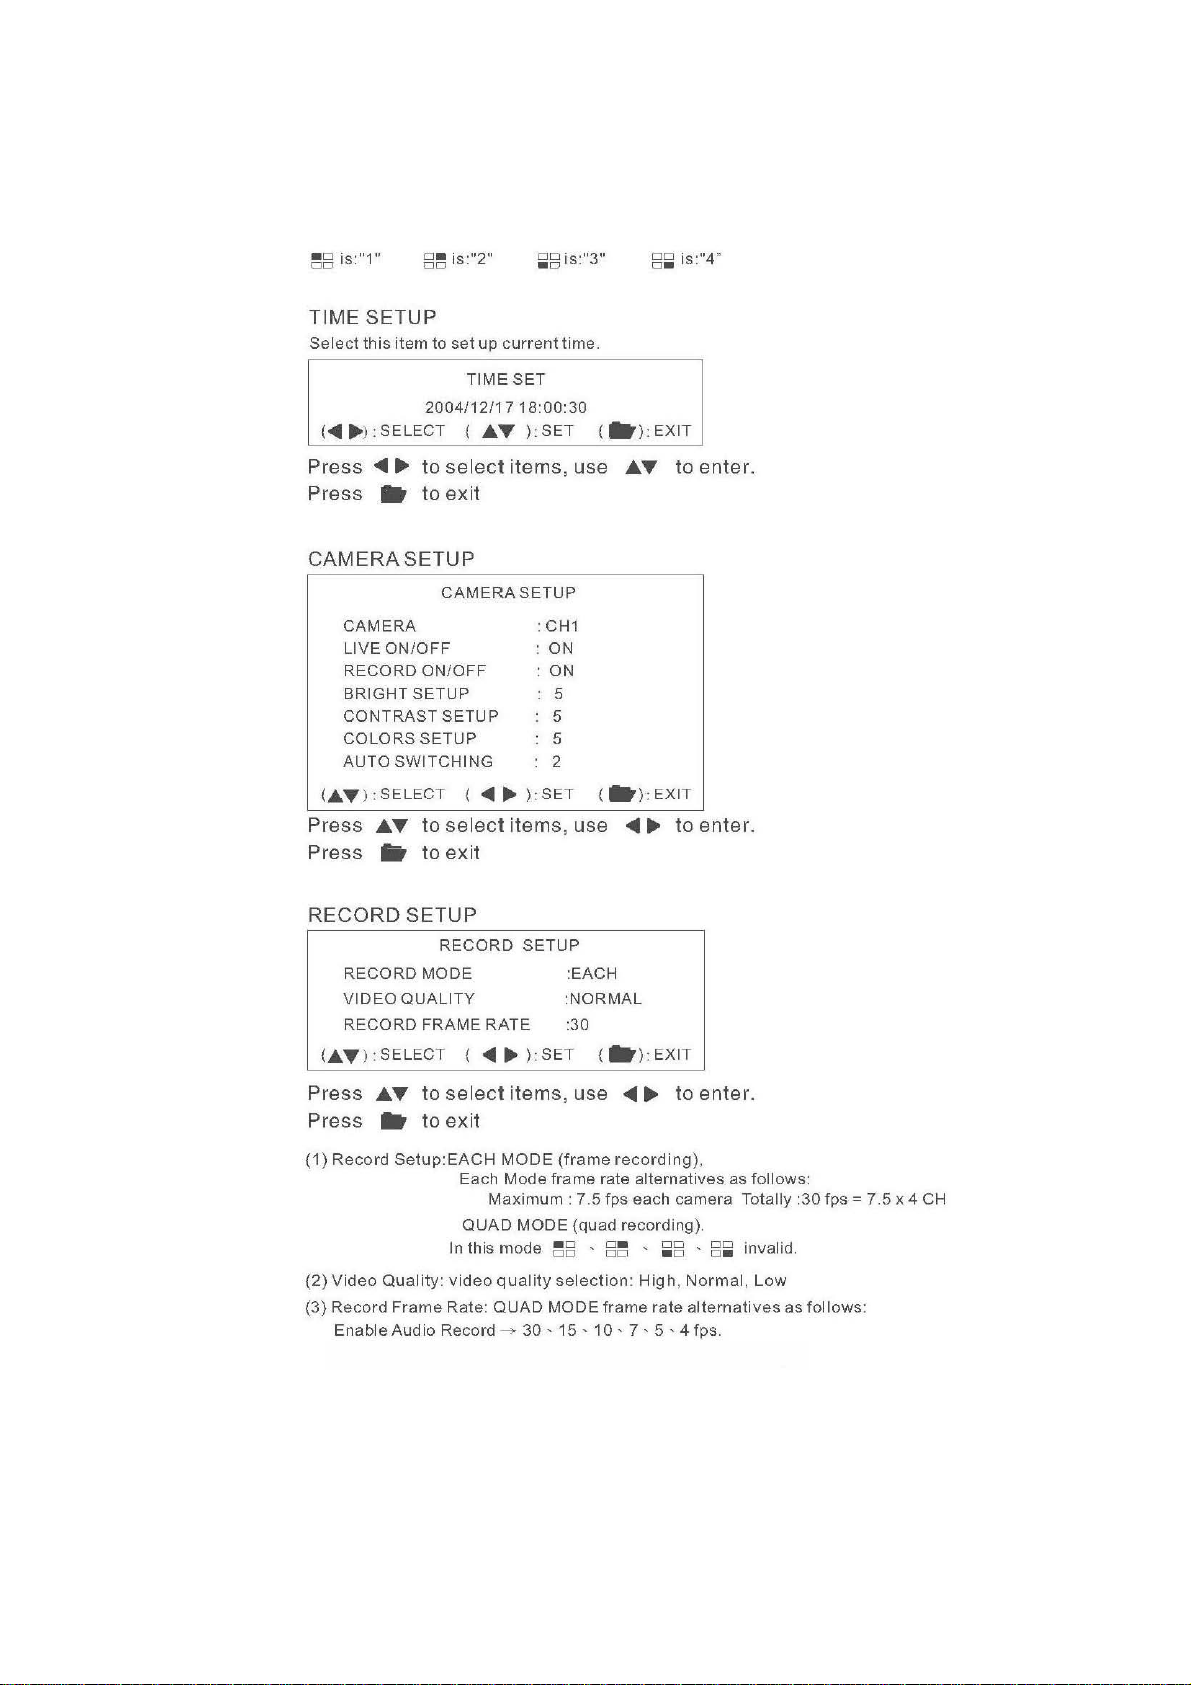
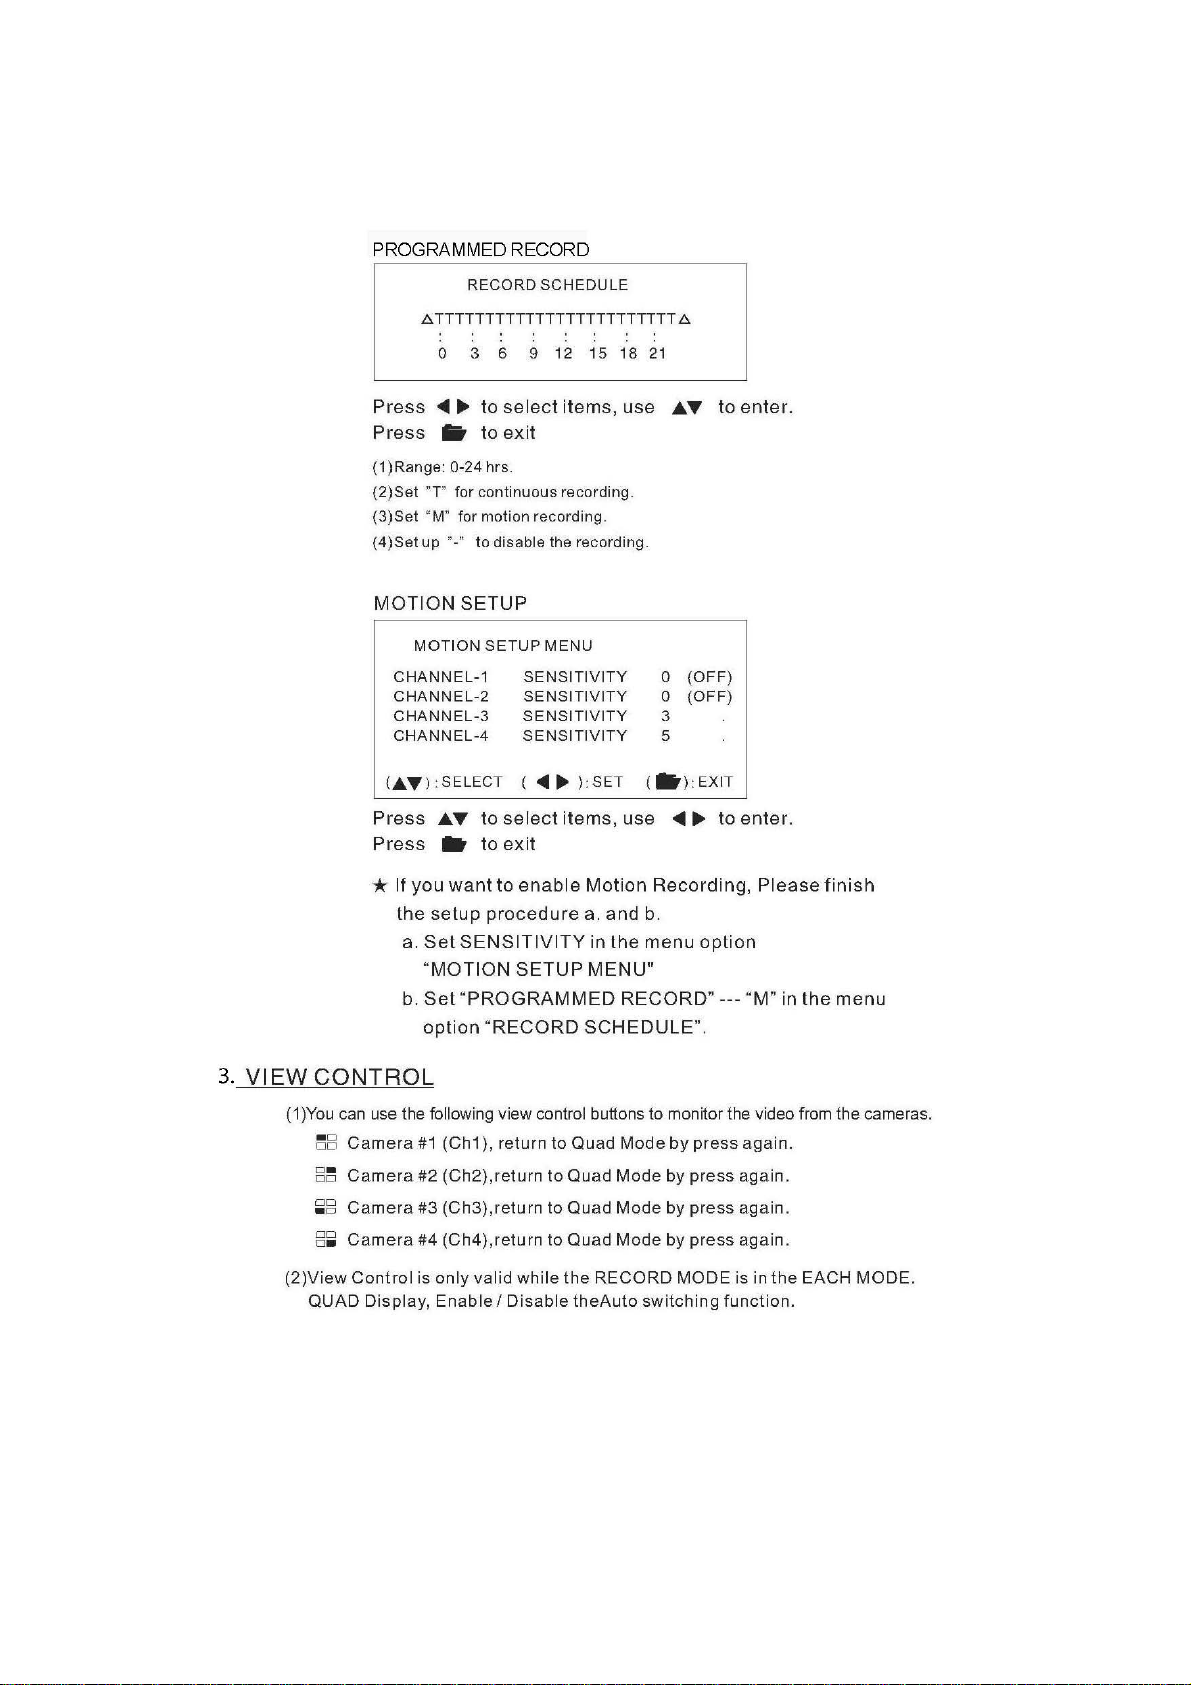
2.SETTINGS
Page 5
Page 6
Page 7

HARD DRIVE SETUP
OVERWRITE ENABLED [YES]
MASTER HDD SIZE 500396 MB
MASTER HDD USED 4405 MB
MASTER HDD FORMAT
PASSWORD INPUT (6): _ _ _ _ _ _
Note: Default password is 111111.
SYSTEM RESTORE
SYSTEM RESTORE [YES]
Page 8

Page 9

NOTE : The table below is an average number of hours you can continually record
for on an 80GB hard drive. This is an approximate time only since the amount of
movement and the complexity of the image can cause the recording times to vary.
Page 10

Page 11

NOTE : To avoid hard disk corruption, Do Not “Stop” the USB Mass
storage device using the icon on the Windows taskbar,
simply unplug the cable from the DVR when finished.
Page 12

Page 13

Page 14

VI. Capture Stream Button
Follow the Capture Instructions below for capturing the stream.
1 Use Position Slider Bar to find the stream position required.
Make sure that the play back is in PAUSE mode, and the Capture Stream Button
is enabled.
2 Press the button, the capturing indicator window will pop up while it’s capturing.
Fig.7 Capturing Indicator Window
• To stop capturing, press the Stop Capturing button on the window. The captured file
(MYS file) will be stored in the Capture Directory. Refer to the Application Setting
section for more details.
VII. Screen Capture Button
1 Use the Position Slider Bar to find the stream position required.
2 Make sure that the play back is in PAUSE mode, and the Capture Stream Button is
enabled.
3 Press the button, JPEG image file will be created and DVR4-1000 will inform you the
file name and the Capture Directory Path.
Page 15

MYS Player
A. User Interface
Page 16

file name and the capture direct path
A. User Interface
Application Setting
Page 17

8. SPECIFICATIONS
OPERATION SYSTEM Embedded RTOS
Video Input NTSC/PAL
Video Input Channel 4CH Composite
Video Output Channel 1CH Composite
Display Frame NTSC 120 fps (4x30 fps)
Recording Frame NTSC Max . 30 fps
Rate(QUAD) PAL Max. 25 fps
Recording Frame NTSC M x. 7.5fps(30 fps/4) a
Rate(EACH) PAL Max. 6.25fps(25 fps/4)
Recording Mode Motion Continuous / / Programmed
Resolution
Compression Format MJPEG Normal 15K Bytes / Frame
Supported HDD 400GB X 1 (Maximum tested size)
Backup Device VCR
Search Mode Time / Date / Event
MOTION DETECT YES
LOSS DETECT YES
BUZZER OUTPUT YES
Brightness adjust YES
Contrast adjust YES
USB Output YES
System monitor Power recover auto restore record mode
Power supply DC 12V / 4A(AC110V-240V 50/60HZ)
Dimension
Weight 4½lbs/2 KG
PAL 100 fps (4x25 fps)
Display NTSC 720 x 480
Recording NTSC 640x224
Advanced Low 12K Bytes / Frame
Full screen YES
PAL 720 x 576
PAL 640x272
High 20K Bytes / Frame
2
/3” x 111/3” x 2” (W x D x H)
8
220mm x 288mm x 48mm (W x D x H)
 Loading...