

Suzuki MDG-100 Assembly Manual

MDG-100
Micro Digital Grand Piano
Easy
Assembly
Guide
STOP!
DO NOT ASSEMBLE YOUR PIANO
BEFORE READING THIS GUIDE!
IF YOU HAVE ANY QUESTIONS OR PROBLEMS,
DO NOT CALL OR RETURN PRODUCT TO THE STORE
Visit www.suzukipianos.com
CALL THIS TOLL FREE HELP LINE
1
•
8OO•854
•
1594
The Name You Know
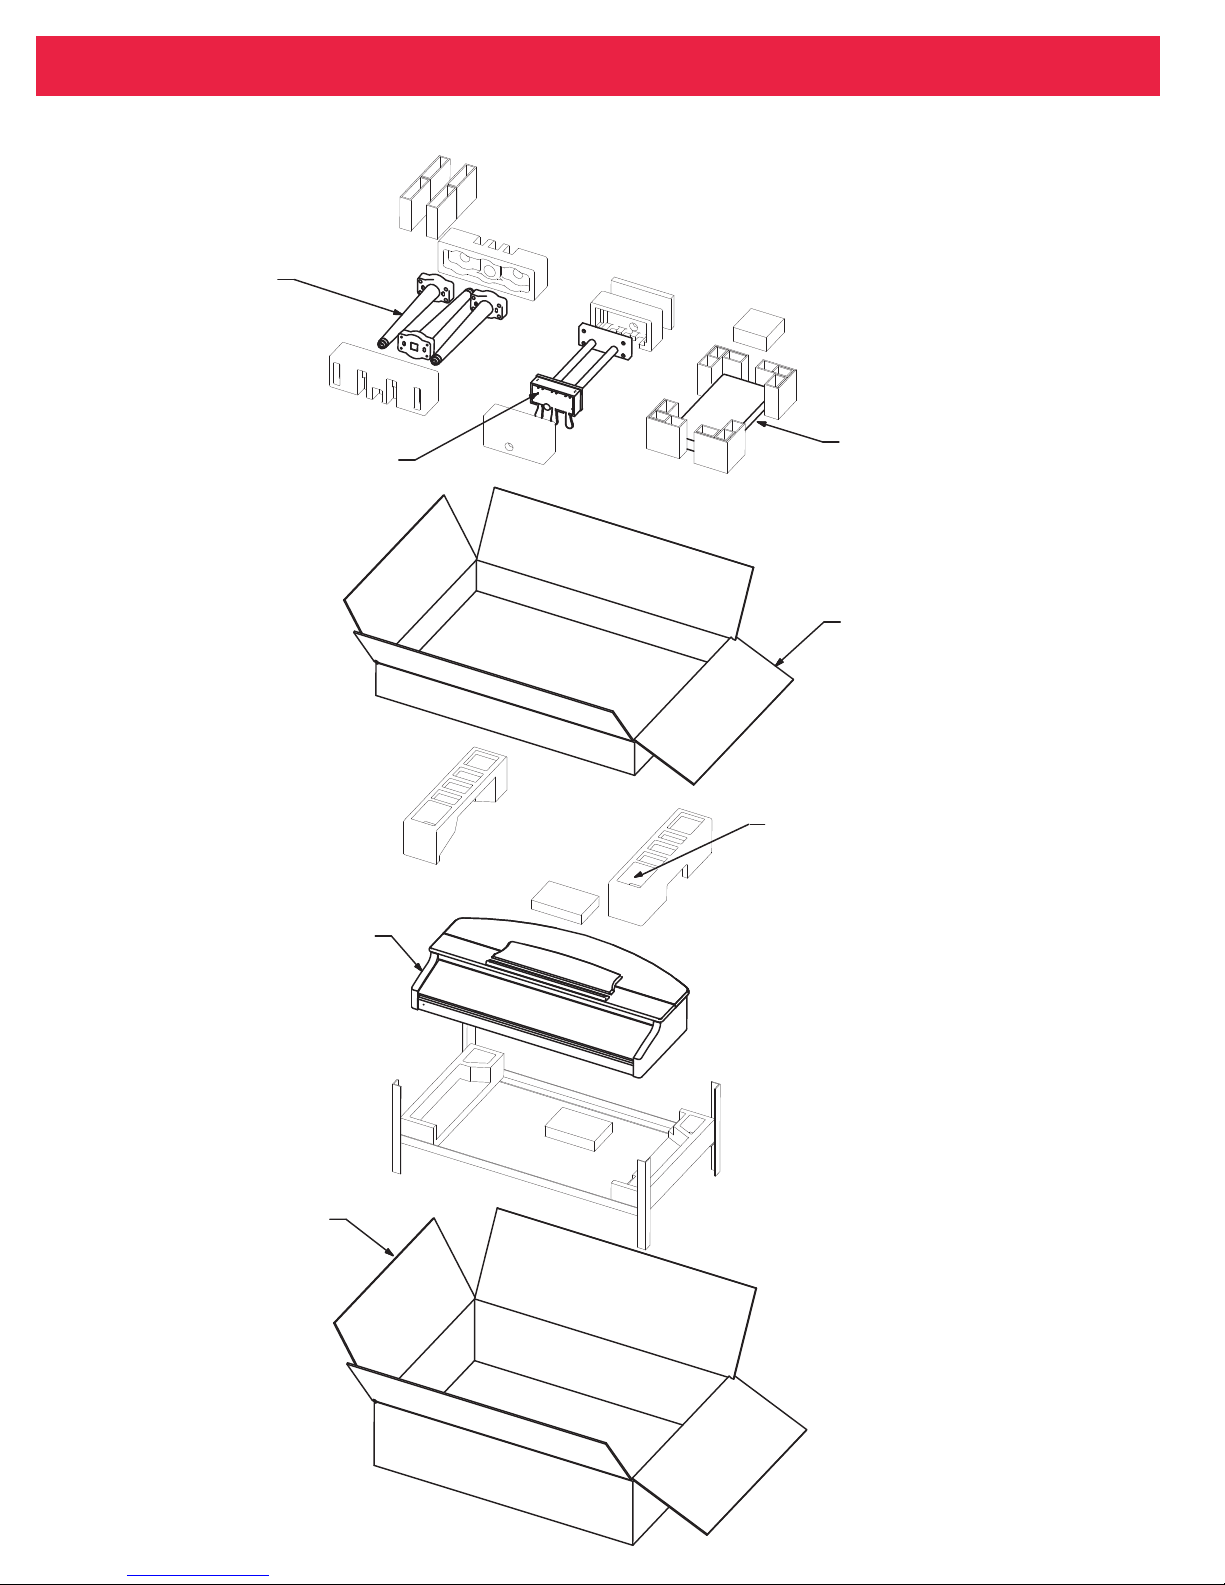
1. Unpacking YoUr new grand piano
The diagram below shows how your piano is packaged:
Legs
Pedal assembly
Piano
Bench
Box for legs, pedal assembly,
pedal support rods and bench
AC Power cord, polish cream and
cloth
Master Box
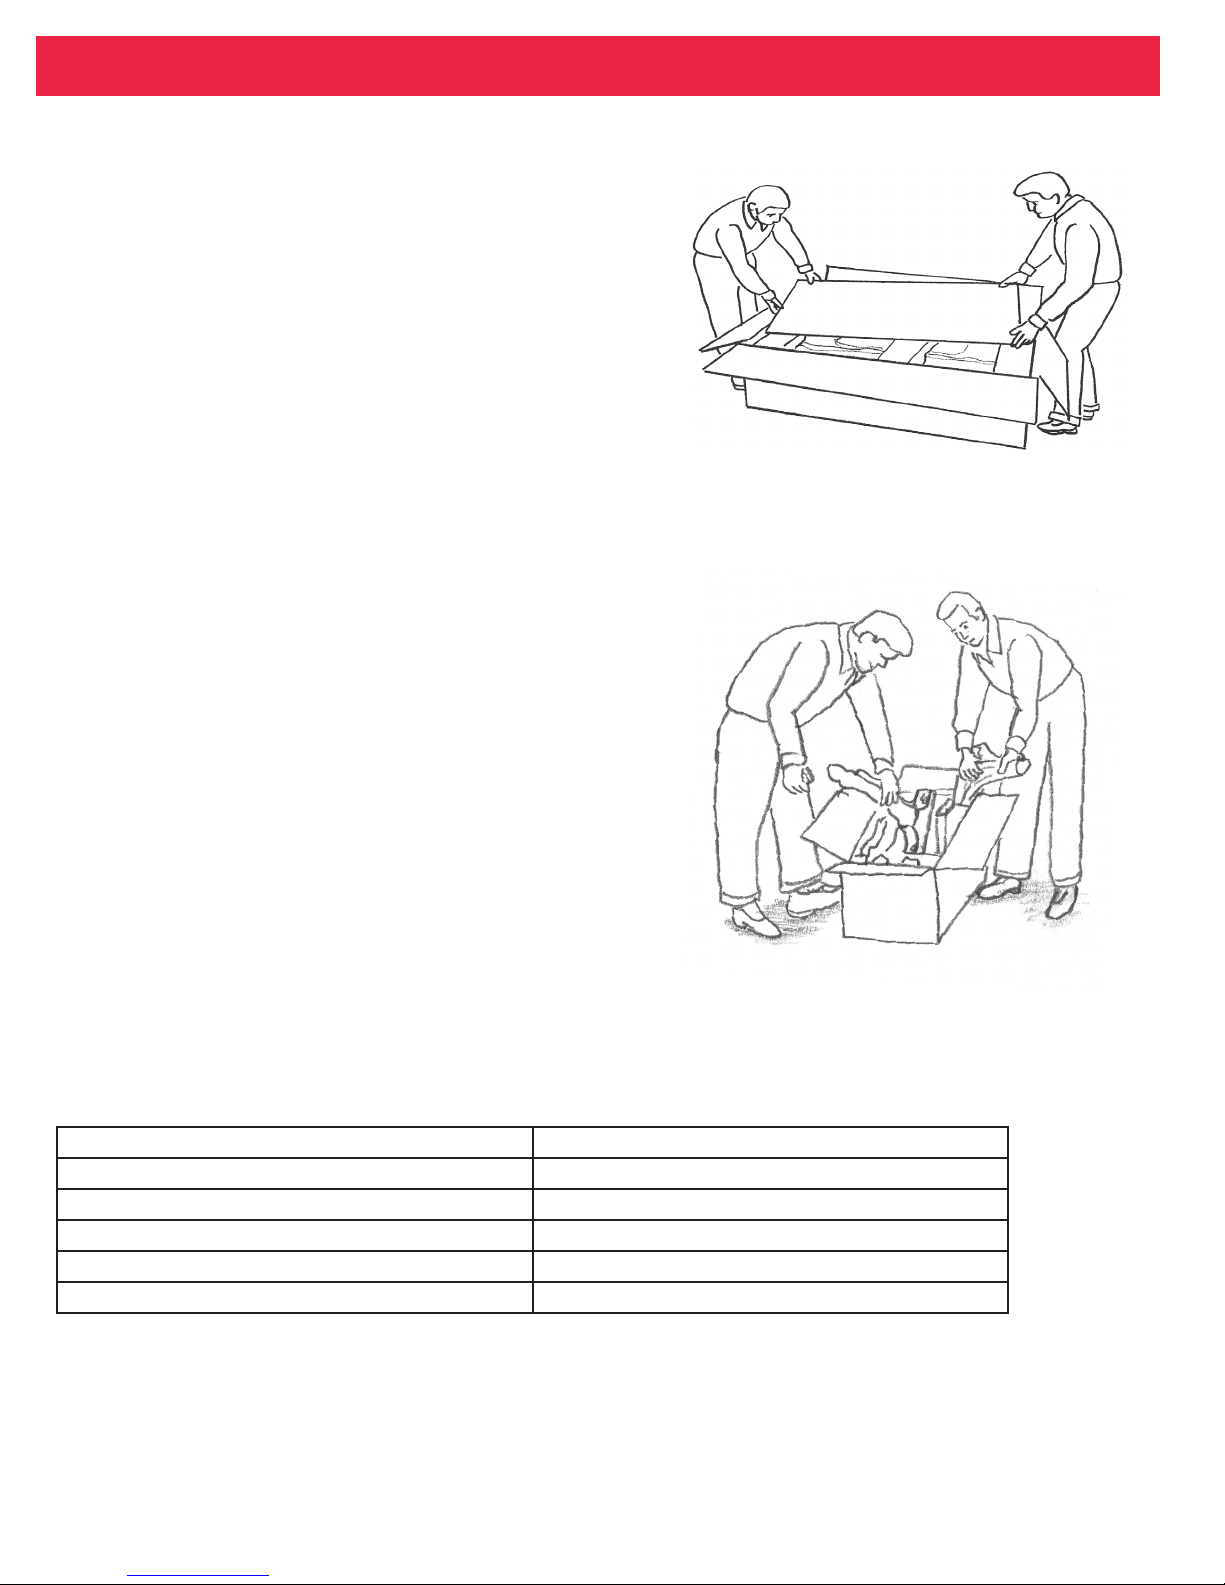
2. Unpacking piano Legs and pedaL assembLY
A. Piano Leg and Lyre Carton:
Remove the Leg and Pedal Assembly Box (the top box) from
the Master Piano Carton.
B. Carefully Handle the Piano Parts
• Carefully slit the tape and open the box as – shown.
• Lift out all the parts inside this box and gently remove the protective
plastic covering. Set aside on a soft surface.
• You are handling the high gloss lacquer finish during this procedure.
Be careful not to scratch or hit these parts against each other or let
them come in contact with any other items.
C. Parts and Pieces:
After you have completed unwrapping everything, here is what you should have:
3 Piano Legs 1 Accessory Cord
1 Pedal Assembly 1 Bag of Hardware:
Piano Bench (includes 4 legs with fastening hardware) 8 - Tapped Screw 4 x 10 (Brass)
2 Brass Support Rods 8 - Bolt M8X45
1 Wrench and Screwdriver 8 - Washers
1 Power Cord
 Loading...