

Suunto SS020396000, SS020393000, SS020365000, SS020395000, SS020392000 User Manual

SUUNTO D4I
USER GUIDE

1 Safety ................................................................................................ 5
2 Getting started ............................................................................... 11
2.1 Display states and views ......................................................... 11
2.2 Set up ...................................................................................... 11
2.3 Icons ........................................................................................ 12
2.4 Software version check .......................................................... 13
3 Features .......................................................................................... 15
3.1 Activation and pre-checks ...................................................... 15
3.1.1 Wireless Transmitter pre-check ..................................... 17
3.1.2 Battery indicators ........................................................... 17
3.2 Air time ................................................................................... 18
3.3 Alarms, warnings and notifications ...................................... 19
3.4 Apnea timer ............................................................................ 23
3.5 Ascent rate .............................................................................. 25
3.6 Backlight ................................................................................. 26
3.7 Bookmarks .............................................................................. 27
3.8 Calendar clock ........................................................................ 27
3.8.1 Time ................................................................................ 27
3.8.2 Date ................................................................................ 27
3.8.3 Units ................................................................................ 28
3.8.4 Dual time ........................................................................ 28
3.8.5 Alarm clock ..................................................................... 29
3.9 Display contrast ...................................................................... 29
3.10 Depth alarm .......................................................................... 30
3.11 Dive history ........................................................................... 30
3.12 Dive modes ........................................................................... 34
3.12.1 Air mode ....................................................................... 35
3.12.2 Nitrox Mode ................................................................. 36
2

3.12.3 Free mode ..................................................................... 37
3.13 Dive planning mode ............................................................. 39
3.14 Dive time alarm .................................................................... 40
3.15 Error state (algorithm lock) ................................................. 40
3.16 Personal and altitude adjustments ...................................... 42
3.17 Safety stops and deepstops ................................................. 44
3.18 Sample rate ........................................................................... 46
3.19 Stopwatch ............................................................................. 47
3.20 Surface and no-fly time ........................................................ 48
3.20.1 Dive numbering ............................................................ 50
3.21 Suunto RGBM ....................................................................... 51
3.21.1 Diver Safety .................................................................. 52
3.21.2 Altitude diving ............................................................. 53
3.21.3 Oxygen exposure .......................................................... 54
3.22 Tank pressure ....................................................................... 55
3.22.1 Wireless transmission ................................................... 56
3.22.2 Installing and pairing transmitter ............................... 57
3.22.3 Transmitted data .......................................................... 58
3.22.4 Tank pressure alarm ..................................................... 60
3.22.5 Air time ......................................................................... 60
3.23 Tones ..................................................................................... 60
3.24 Water contact ....................................................................... 61
4 Care and support ............................................................................ 63
4.1 Handling guidelines ............................................................... 63
4.2 Water resistance ..................................................................... 64
4.3 Battery replacement .............................................................. 65
5 Reference ........................................................................................ 66
5.1 Technical specifications .......................................................... 66
3

5.2 Compliance ............................................................................. 68
5.2.1 CE .................................................................................... 68
5.2.2 EN 13319 ......................................................................... 68
5.2.3 EN 250 and FIOH ............................................................ 68
5.3 Trademark .............................................................................. 69
5.4 Patent notice .......................................................................... 69
5.5 Warranty ................................................................................. 69
5.6 Copyright ................................................................................ 71
5.7 Terms ...................................................................................... 72
Index .................................................................................................. 77
4
1 SAFETY
Types of safety precautions
WARNING: - is used in connection with a procedure or situation
that may result in serious injury or death.
CAUTION: - is used in connection with a procedure or situation
that will result in damage to the product.
NOTE: - is used to emphasize important information.
TIP: - is used for extra tips on how to utilize the features and
functions of the device.
Before you dive
Make sure that you fully understand the use, displays and
limitations of your dive instruments. If you have any questions
about this manual or the dive computer, contact your Suunto dealer
before diving with the dive computer. Always remember that YOU
ARE RESPONSIBLE FOR YOUR OWN SAFETY!
5

Safety precautions
WARNING: ONLY TRAINED DIVERS SHOULD USE A DIVE
COMPUTER! Insufficient training for any kind of diving, including
freediving, may cause a diver to commit errors, such as incorrect use
of gas mixtures or improper decompression, that may lead to
serious injury or death.
WARNING: You must read the printed quick guide and online
user guide for your dive computer. Failure to do so may lead to
improper use, serious injury or death.
WARNING: THERE IS ALWAYS A RISK OF DECOMPRESSION
SICKNESS (DCS) FOR ANY DIVE PROFILE EVEN IF YOU FOLLOW THE
DIVE PLAN PRESCRIBED BY DIVE TABLES OR A DIVE COMPUTER. NO
PROCEDURE, DIVE COMPUTER OR DIVE TABLE WILL PREVENT THE
POSSIBILITY OF DCS OR OXYGEN TOXICITY! An individual’s
physiological make up can vary from day to day. The dive computer
cannot account for these variations. You are strongly advised to
remain well within the exposure limits provided by the instrument
to minimize the risk of DCS. As an added measure of safety, you
should consult a physician regarding your fitness before diving.
WARNING: If you have a pacemaker, we recommend you do not
scuba dive. Scuba diving creates physical stresses on the body which
may not be suitable for pacemakers.
6

WARNING: If you have a pacemaker, consult a doctor before
using this device. The inductive frequency used by the device may
interfere with pacemakers.
WARNING: Allergic reactions or skin irritations may occur when
product is in contact with skin, even though our products comply
with industry standards. In such event, stop use immediately and
consult a doctor.
WARNING: Not for professional use! Suunto dive computers are
intended for recreational use only. The demands of commercial or
professional diving may expose the diver to depths and conditions
that tend to increase the risk of decompression sickness (DCS).
Therefore, Suunto strongly recommends that the device not be used
for any commercial or professional diving activities.
WARNING: USE BACKUP INSTRUMENTS! Ensure that you use
backup instrumentation, including a depth gauge, submersible
pressure gauge, timer or watch, and have access to decompression
tables whenever diving with a dive computer.
WARNING:
For safety reasons, you should never dive alone. Dive
with a designated buddy. You should also stay with others for an
extended time after a dive as the onset of possible DCS may be
delayed or triggered by surface activities.
7

WARNING: PERFORM PRE-CHECKS! Always check that your dive
computer is functioning properly and has the correct settings
before diving. Check that the display is working, the battery level is
OK, tank pressure is correct, and so forth.
WARNING: Check your dive computer regularly during a dive. If
there is any apparent malfunction, abort the dive immediately and
safely return to the surface.
WARNING: THE DIVE COMPUTER SHOULD NEVER BE TRADED OR
SHARED BETWEEN USERS WHILE IT IS IN OPERATION! Its
information will not apply to someone who has not been wearing it
throughout a dive, or sequence of repetitive dives. Its dive profiles
must match that of the user. If it is left on the surface during any
dive, the dive computer will give inaccurate information for
subsequent dives. No dive computer can take into account dives
made without the computer. Thus, any diving activity up to four
days prior to initial use of the computer may cause misleading
information and must be avoided.
WARNING: DO NOT EXPOSE ANY PART OF YOUR DIVE
COMPUTER TO ANY GAS MIX CONTAINING MORE THAN 40%
OXYGEN! Enriched air with greater oxygen content presents a risk
of fire or explosion and serious injury or death.
8
WARNING: DO NOT DIVE WITH A GAS IF YOU HAVE NOT
PERSONALLY VERIFIED ITS CONTENTS AND ENTERED THE
ANALYZED VALUE INTO YOUR DIVE COMPUTER! Failure to verify
tank contents and enter the appropriate gas values where
applicable into your dive computer will result in incorrect dive
planning information.
WARNING: Using a dive planner software such as in Suunto DM5
is not a substitute for proper dive training. Diving with mixed gases
has dangers that are not familiar to divers diving with air. To dive
with Trimix, Triox, Heliox and Nitrox or all of them, divers must
have specialized training for the type of diving they are doing.
WARNING: Do not use Suunto USB Cable in areas where
flammable gases are present. Doing so may cause an explosion.
WARNING:
Do not disassemble or remodel Suunto USB Cable in
any way. Doing so may cause an electric shock or fire.
WARNING: Do not use Suunto USB cable if cable or parts are
damaged.
CAUTION:
DO NOT allow the connector pins of the USB cable to
touch any conductive surface. This may short circuit the cable,
making it unusable.
9

Emergency ascents
In the unlikely event that the dive computer malfunctions during a
dive, follow the emergency procedures provided by your certified
dive training agency to immediately and safely ascend.
10
2 GETTING STARTED
DIVE PLAN MEM
12:00
1.12
TH
12:00
1.12
TH
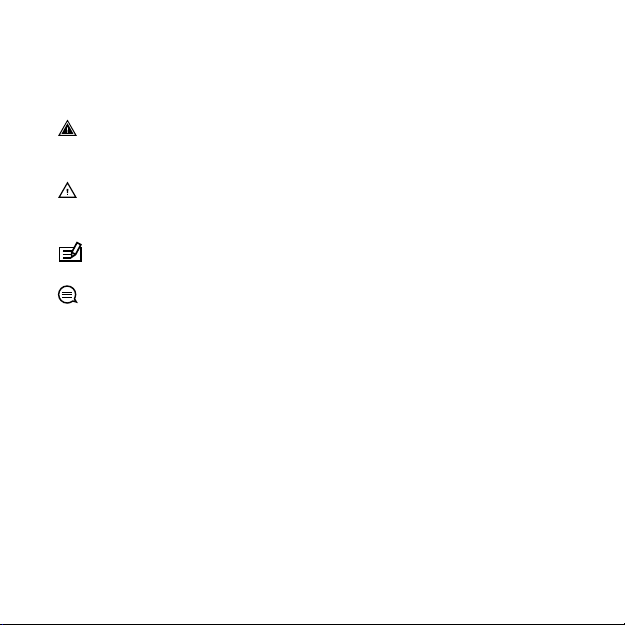
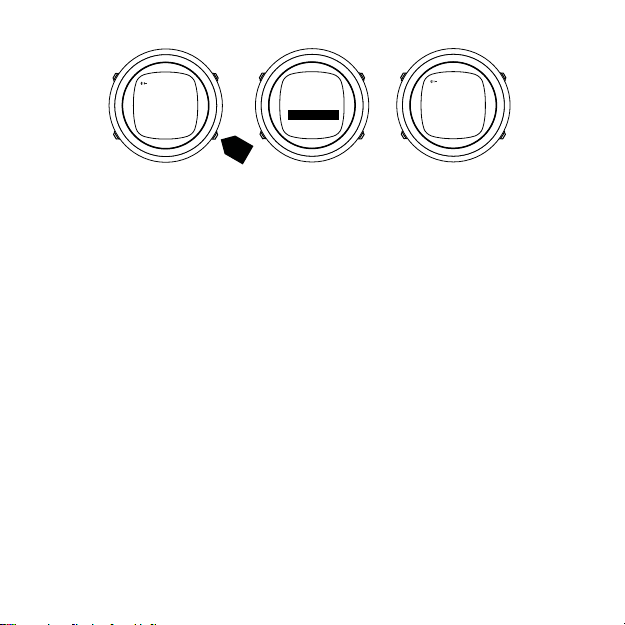
2.1 Display states and views
Suunto D4i has four main modes: TIME, DIVE, PLANNING and
MEMORY. Change modes by pressing [MODE].
Unless DIVE mode is turned off, Suunto D4i automatically switches
to DIVE mode if you are more than 1.2 m (4 ft) under water.
Time and dive modes have different views in the bottom row which
you can scroll through with [DOWN] and [UP].
2.2 Set up
To get the most out of your Suunto D4i, take some time to read this
manual and familiarize yourself with the modes and settings. Make
absolutely sure you have it set up as you want before getting into
the water.
To get started:
1. Wake up the device by keeping any button pressed until the
display turns on.
2.
Keep [DOWN] pressed to enter General Settings.
11

3. Set time. See
4. Set date. See
5. Set units. See
6. Press [MODE] to exit settings.
The default dive mode is Air. For more information on dive modes,
see
3.12 Dive modes
3.8.1 Time
3.8.2 Date
3.8.3 Units
.
.
.
.
2.3 Icons
Suunto D4i uses the following icons:
Icon Description
1 Daily alarm
2 Dive alarm
3 No-fly
4 Safety stop
5 Tank pressure (if available)
6 Wireless transmission (if available)
7 Low battery
8 Active water contact
9 Diver attention symbol
10 Ascent rate
12

2.4 Software version check
Please note that this user guide is for the latest software version of
Suunto D4i. If you have an older version, some features operate
differently.
To check the software version:
1. Keep [DOWN] pressed to enter settings.
2.
Press [DOWN] to scroll to Version and enter with [SELECT].
3. The first line of information indicates the software version.
•
If the version number is V1.5.x or higher, you can skip the
rest of this section and read the user guide as normal.
•
If the version number is V1.2.x please read the sections below
regarding how to use specific features.
4. Press [MODE] twice to exit settings.
NOTE: When you send your watch to an authorized Suunto
service center for a battery change or other servicing, the software
will be updated to the latest version.
Dive modes
Each time you enter dive mode, you have the option of selecting
which mode to use.
To change dive modes:
1. While in time mode, press [MODE] to enter dive mode.
2. Scroll to the dive mode you want to use with [UP] or [DOWN].
3. Wait for the pre-checks to complete.
13

To change settings for a dive mode, keep [DOWN] pressed while in
that mode. For further information about dive mode settings,
please refer to the respective dive mode section of this user guide.
Stopwatch
Access the stopwatch in time or dive mode as explained in .
To use the stopwatch:
1. Press [DOWN] to start the stopwatch.
2. While the stopwatch is running, press [DOWN] to take split
times.
3. Press [UP] to stop the stopwatch.
4. Keep [UP] pressed to reset the stopwatch.
Apnea timer
Access the apnea timer and adjust settings as explained in
3.4 Apnea timer
To use the apnea timer:
1. Press [DOWN] to start the fist interval.
2. Press [DOWN] to start the apnea cycle.
3. Press [DOWN] again to start the next ventilation cycle.
4. Repeat until the end of the defined number of intervals. Press
[UP] to pause the timer.
5. Keep [UP] pressed to reset the timer and press [MODE] to exit.
14
.

3 FEATURES
3.1 Activation and pre-checks
Unless the dive mode turned off, the dive mode activates
automatically when you dive deeper than 1.2 m (4 ft). However, you
should switch to dive mode before diving to check altitude and
personal settings, battery condition and so on.
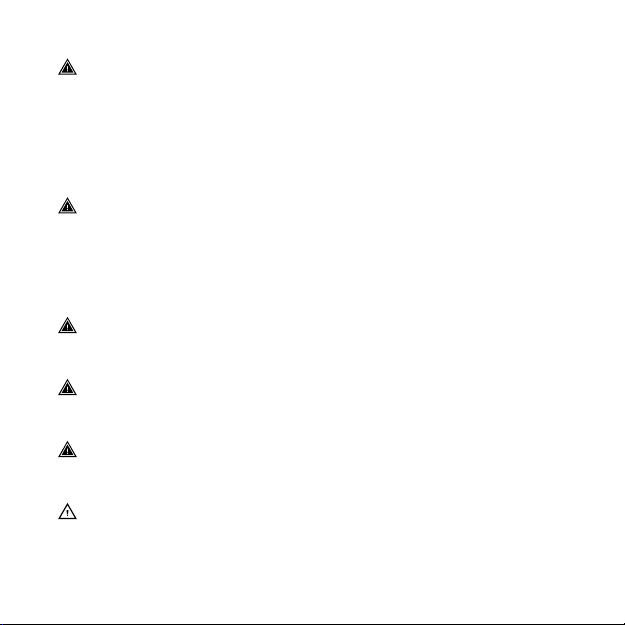
Each time your Suunto D4i enters dive mode, a series of automatic
checks are performed. All graphical display elements are turned ON,
and the backlight and the beep are activated. After this, your
altitude and personal settings are displayed along with the
maximum operating depth (MOD), gas content, and PO2 values.
Then the battery level is checked.
15
12:00
1.12
TH
DIVE
Air
66.2m
PO
AO
21 1.6
Battery
OK
Between consecutive dives, the automatic checks also show current
66.2m
PO
AO
21
1.6
tissue saturation.
Before leaving on a dive trip, it is highly recommended that you
switch to dive mode to make sure everything is functioning
properly.
16

After the automatic checks, Suunto D4i enters surface mode. At this
point, you should perform your manual checks before entering the
water.
Ensure that:
1. Suunto D4i is in the correct mode and provides complete
displays.
2. Altitude setting is correct.
3. Personal setting is correct.
4. Deepstops are set correctly.
5. Unit system is correct.
6. Correct temperature and depth are shown.
7. The alarm beeps.
3.1.1 Wireless Transmitter pre-check
If the optional wireless tank pressure transmitter is used, check that:
1. Tank gas and O2 settings are correct.
2. The transmitter is properly installed and the tank valve is open.
3. The transmitter and Suunto D4i are paired.
4. The transmitter is sending data (wireless transmission icon blinks,
tank pressure is displayed).
5. There is no transmitter low battery warning.
6. There is enough air for your planned dive. Check the pressure
reading against your back-up pressure gauge.
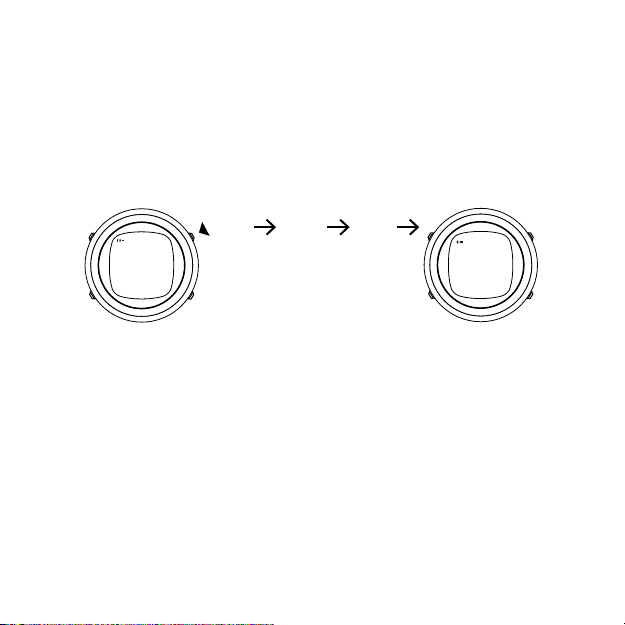
3.1.2 Battery indicators
Temperature or internal oxidation can affect the battery voltage. If
you store your Suunto D4i for a long period or use it in cold
17
temperatures, the low battery warning may appear even though
Replace
Battery
Battery
Low
12:00
1.12
TH
the battery has enough capacity.
In these cases, re-enter dive mode and check the battery power. If
the battery is low, the Low Battery warning comes on.
If the low battery icon appears in surface mode, or if the display
looks faded, the battery may be too low. Battery replacement is
recommended.
NOTE:
For safety reasons, the backlight and buzzer (sound)
cannot be activated when the low battery warning is displayed.
3.2 Air time
Air time can only be displayed when a wireless tank pressure
transmitter is installed and in use.
To activate air time:
1. While in a dive mode, keep [DOWN] pressed.
2.
Press [DOWN] to scroll to Air Time.
3. Press [UP] to turn on the air time reading.
4. Press [SELECT].
18
5. Press [MODE] to exit.
3.3 Alarms, warnings and notifications
Suunto D4i has audible and visual alarms designed to let you know
when important limits or presets are being reached.
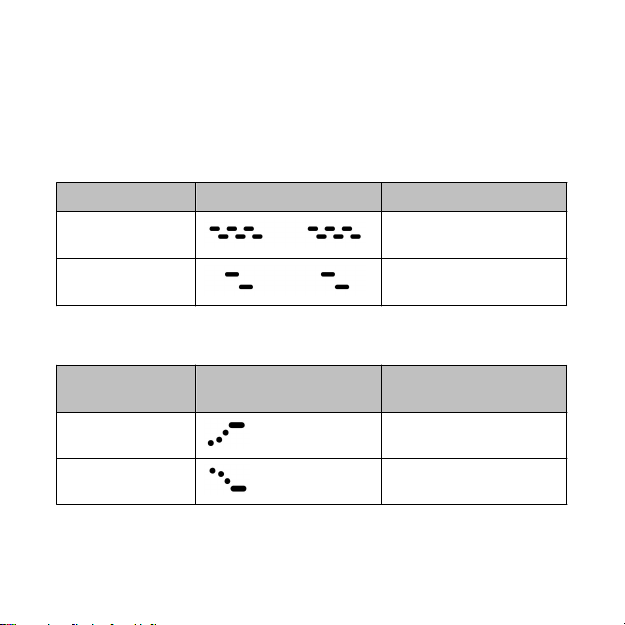
The two audible alarm types indicating high or low priority:
Alarm type Sound pattern Duration
High priority
Low priority
In addition, there are two audible guidance notifications:
2.4 s sound + 2.4 s
break
0.8 s sound + 3.2 s
break
Instructional
beep
Ascending Start ascending
Descending Start descending
Suunto D4i displays information during the alarm breaks in order to
save battery life.
Sound pattern Interpretation
19

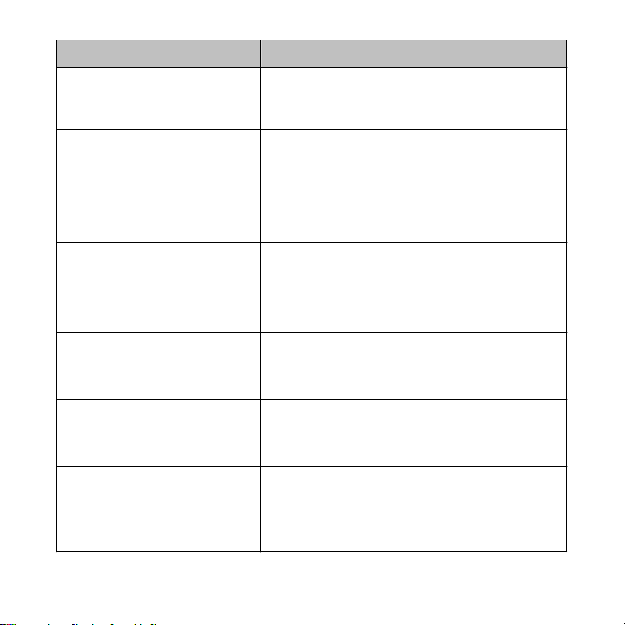
High priority alarms:
Alarm Explanation
High priority alarm
followed by 'Start
ascending' beep,
repeated for maximum
three minutes
PO2 value blinks
High priority alarm
followed by 'Start
descending' beep,
repeated for maximum
three minutes Er blinks
and an arrow points
downwards.
High priority alarm,
repeated three times.
SLOW blinks.
Low priority alarms:
Alarm type Alarm reason
Low priority alarm
followed by 'Start
20
PO2 value greater than the adjusted
value. Current depth is too deep for
the gas in use. You should immediately
ascend or change to a lower O2% gas.
Decompression ceiling depth
exceeded. You should immediately
descend to, or below, the ceiling.
Maximum ascent rate of 10 m/min (33
ft/min) exceeded. Slow down your
ascent rate.
No-decompression dive becomes a
decompression stop dive. Depth is

Alarm type Alarm reason
ascending' beep,
sounded two times.
ASC TIME blinks and an
arrow points upwards.
Low priority alarm
followed by 'Start
descending' beep.
DEEPSTOP blinks and an
arrow points
downwards.
Low priority alarm
followed by 'Start
descending' beep,
repeated for three
minutes.
An arrow points
downwards.
Low priority alarm
followed by two short
beeps.
DEEPSTOP and timer
displayed.
Low priority alarm,
repeated twice.
below the decompression floor level.
You should ascend to, or above, the
floor.
Mandatory deepstop violated. You
should descend to complete the
deepstop.
Mandatory safety stop violated. You
should descend to complete the safety
stop.
Deepstop depth reached. Make the
mandatory deepstop for the duration
shown by the timer.
Tank pressure reaches the defined
alarm pressure or the fixed alarm
21
Alarm type Alarm reason
Tank pressure value
blinks.
Low priority alarm,
repeated twice.
OLF% value blinks if PO
value is greater than 0.5
bar.
Low priority alarm,
repeated twice.
Maximum depth value
blinks
Low priority alarm,
repeated twice; dive time
value blinks
Low priority alarm.
Maximum depth value
blinks.
Low priority alarm,
Surface time value blinks.
22
pressure, 50 bar (700 psi).
Acknowledge the alarm by pressing
any button.
OLF value at 80% or 100% (Nitrox dive
mode only). Acknowledge the alarm
by pressing any button.
2
Defined maximum depth or the
maximum depth of the device
exceeded. Acknowledge the alarm by
pressing any button.
Defined dive time exceeded.
Acknowledge the alarm by pressing
any button.
Defined depth reached (Free dive
mode only). Acknowledge the alarm
by pressing any button.
Duration of surface time until next
dive (Free dive mode only).
Acknowledge the alarm by pressing
any button.
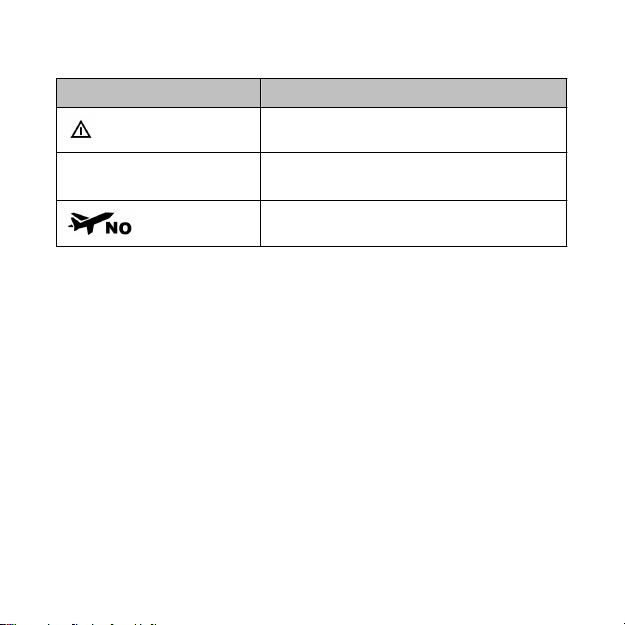
Visual alarms
Symbol on display Indication
Attention - extend surface interval
ER
Violated decompression ceiling or
bottom time is too long
Do not fly
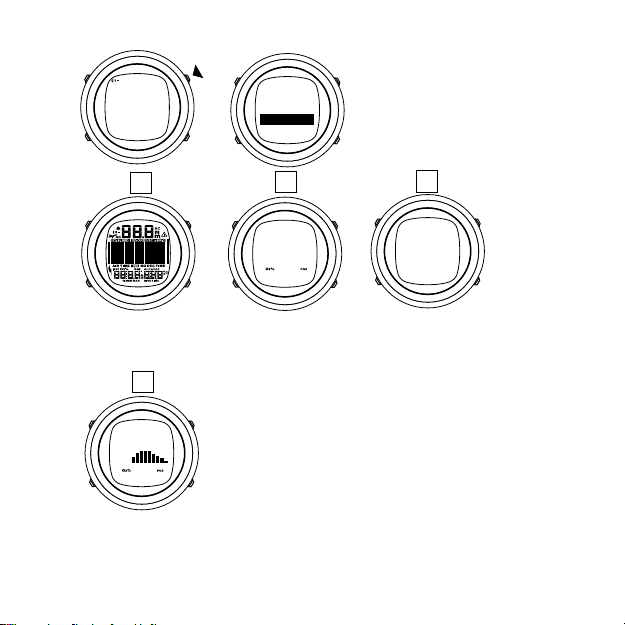
3.4 Apnea timer
You can use the apnea timer for interval training when freediving.
You can adjust the following settings:
•
Vent.
: ventilation time; this is the starting duration of the time
your breathing time. The time is increased by the increment time
for each interval.
•
Incr
: increment time; this is added to the ventilation time for
each interval. For example, if your ventilation time is 1:00
minute and your increment time is 0:30 seconds, the first interval
ventilation is 1:00, the second is 1:30, the third is 2:00, and so on.
•
Repeats
To adjust apnea timer settings:
1. While in time mode, keep [UP] pressed to enter the apnea timer
view.
: number of intervals
23
2s
12:00
1.12
TH
TIMER
Apena
1:00
15:00
TIME
START
2. Keep [DOWN] pressed to enter apnea timer settings.
3. Adjust the ventilation time with [UP] or [DOWN] and confirm
with [SELECT].
4. Adjust the increment time with [UP] or [DOWN] and confirm
with [SELECT].
5. Adjust the number of intervals with [UP] or [DOWN] and confirm
with [SELECT].
To use the apnea timer:
1. Press [SELECT] to start the first interval. The timer counts down
the ventilation time. The countdown continues up to -0:30
seconds beyond the defined ventilation time.
2. Press [SELECT] to start the apnea cycle. You can start this at any
time during the ventilation countdown.
The apnea time is not defined in the watch. It is as long or short
as you choose.
3. Press [SELECT] again to start the next ventilation cycle.
4. Repeat until the end of the defined number of intervals.
5. Press [MODE] to exit the apnea timer.
You can reset the apnea timer by keeping [SELECT] pressed.
24
 Loading...