

surfans F20 User Manual
F20 MP3 Player
User Manual
Website: https://www.surfans.net/
Email: help@surfans.net
Read Before Use
Thank you for your purchasing our F20 music player. Please read the manual carefully
before using the player.
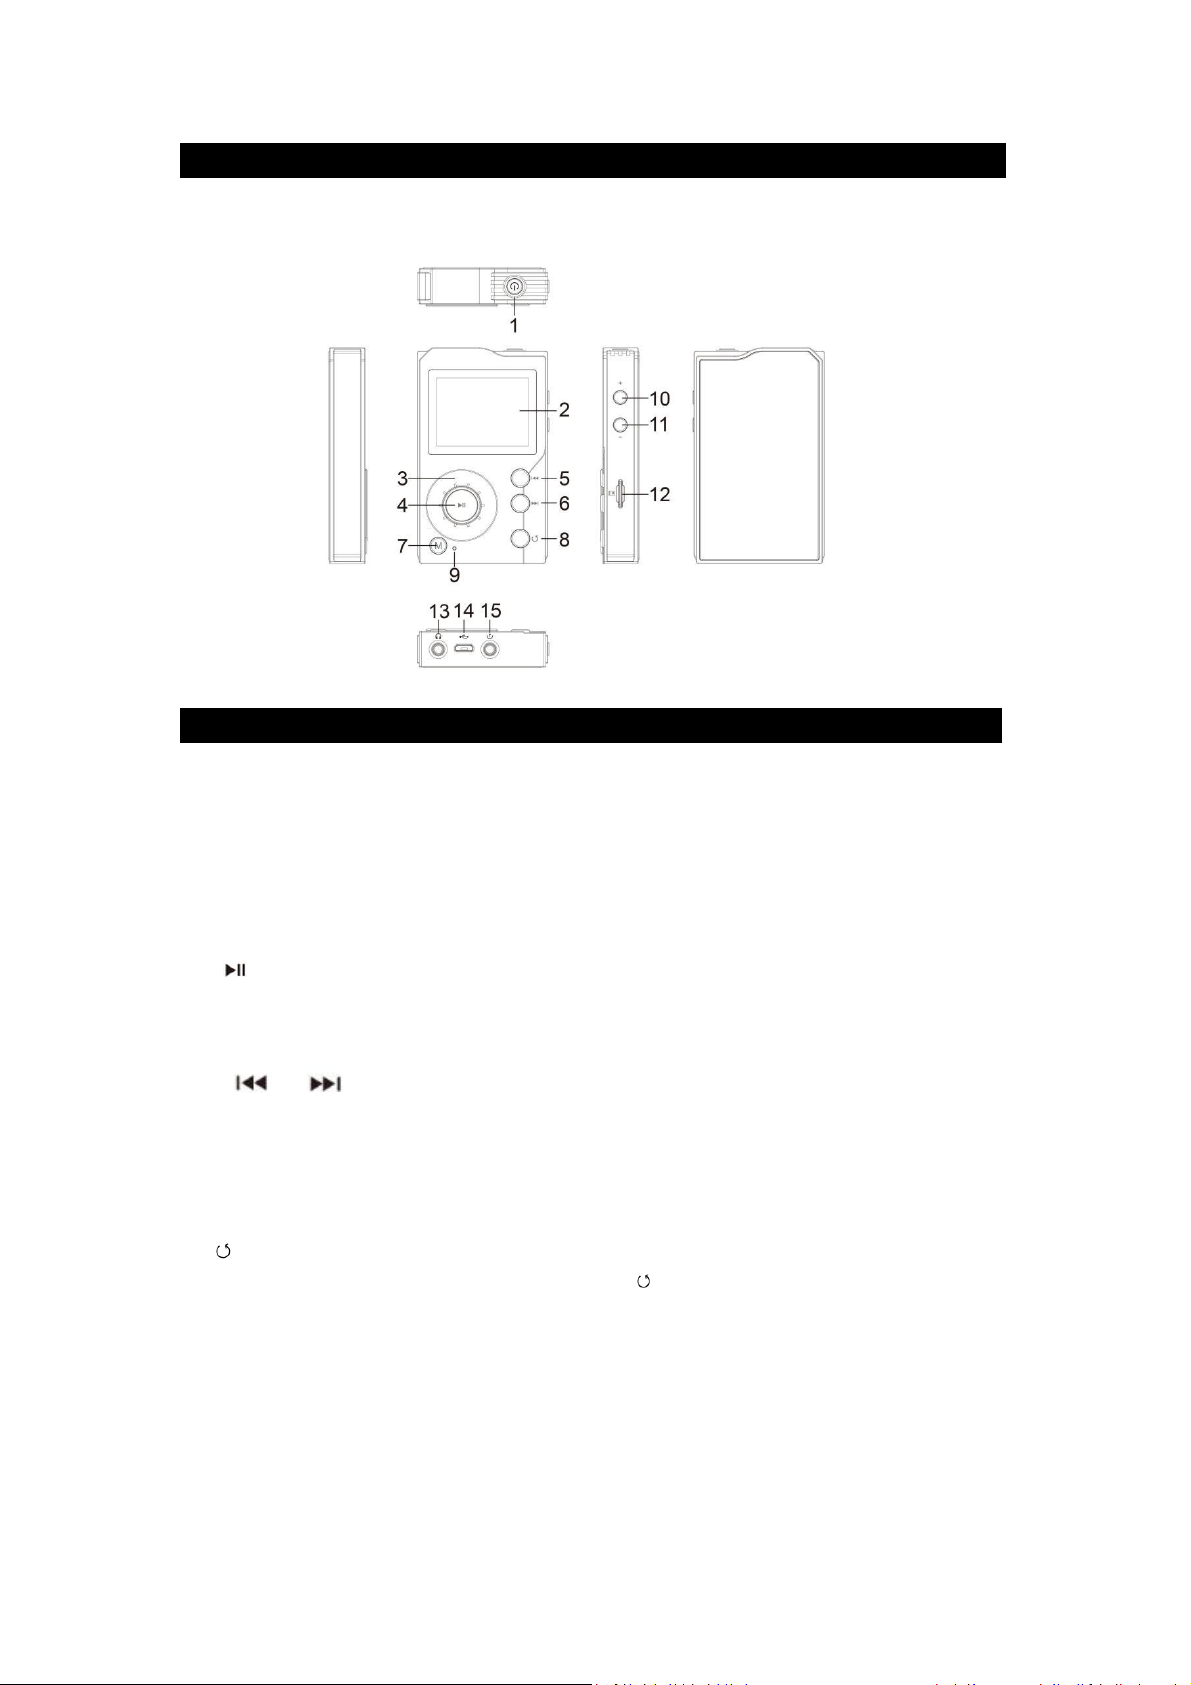
Buttons and Controls
1. Power Button; Screen ON/OFF
Hold to power on/off the player;
Press to turn on/off the screen.
2. Display Screen
3. Scroll Wheel
Scroll to select menu items;
4. Button
Executes the desired items;
Starts/pauses the playing music.
5/6. / Button
Press to select menu items; switch to previous/next song; fast backward/forward during music
playing.
7. “M” Button
Menu; on “All songs” playlist interface, long press to quickly search the target song.
8. Button
Go back; on any other interface, long press button to return to the mail interface; on main
interface, press to return to the music playing interface when there is music playing/paused on
the background.
9. Power Indicator Light
Light up when powered on and go out when powered off.
10/11. Volume Button
Press to increase/decrease volume.
12. Micro SD Card Slot

13. Earphone Jack
14. USB/OTG Port
15. Line-out Port
Quick Guide
1. Charge the Player
Charge by Computer
Use USB cable to connect this player with a running computer. The USB cable can be used for
both data transferring and player charging.
Use 5V/500mA~1000mA Charger (Charger not included)
Plug one end of the USB cable into the charger and the other end into your player. Normally, it
needs about 4 hours for fully charged.
2. Power ON/OFF
Long press the power button for about 3 seconds to turn on/off the player;
Blue indicator light will be on when powered on and light goes out when powered off.
Please Note:
When the system crashes or has no response, please hold the power button for 8 seconds to
restart the player.
3. Screen on/off
You can short press the power button to turn on/off the screen.
When the screen is off, the volume button, play/pause button and the previous/next song button
will not available while music playing in the background.
4. Insert/Remove Micro SD Card
Insert the Micro SD card into its slot, and the deck will automatically lock the SD card. When
remove the micro SD card, push the card inward and then let it go, the card will automatically
pops up.
5. Data Transfer
Use USB cable connect the player with computer, copy the music and other needed files in the
computer, and then paste them in the player, or just drag and drop the files directly when
connected to computer.
6. Main Interface
There are 4 parts on the main interface: Category, Explorer, Music Setting and System Setting.
Scroll the wheel or press / to browse and press to enter.
Please Note:
On any other interface, long press button to return to the main interface.
Music Playing Interface
You can find music files in both “Category” and “Explorer”. On any song list interface, scroll the
wheel or press / to browse and press to enter the music playing interface.
 Loading...