

Supersonic SC-4207 User Manual

7" TABLET

FCC Statement
This equipme nt has been tested and found to com pl y with the limits for a Class B digital
device,
pursuant to Part 15 of the FCC Rules. These limits are designed to provide reasonable
protection against harmful interference in a residential installation. This equipment generates
uses and can radiate radio frequency energy and, if not installed and used in accordance w i t h
the instructions, may cause harmful interference to radio communications. However, there is
no guarantee that interference will not occur in a particular installation. If this equipment does
cause harmful interferenc e to radio or television reception, which can be det ermined by turning
the equipment off and on, the user is encouraged to try to correct the interference by one or
more of the following measure s :
-- Reorient or relocate the receiving antenna.
-- Increase the separation between the equipment and receiver .
-- Connect the equipment into an outlet on a circuit different from that to which the receiver is
connected.
-- Consult the dealer or an experienced radio/TV technician for help.
This device complies with part 15 of the FCC Rules . Operation is subje ct to the following two
conditions:
(1) This device may not cause harmful interference, and (2) this device must accept any
interference received, including interference that may cause undesired operation.
1

Changes or modif i cations not expressly approved by the party responsible for compliance
could void the user's authority to operate the equipment.
MODEL: PHP_V710R
USER MANUAL
Preface
Thank you for buy i ng the MID. We wish you enjoy using it.
Please read and r etain all the operating instructi ons before operating the unit, we do not assume
any liability arising out of impr oper operation or incidental damages.
For better servic es, the content of this operati on manual may be changed.
If the actual setup and usage of the unit are different from this operation manual, please view
the website of our company to inquire about the latest product information.
2

Do not allow water or foreign objects to enter the unit.
I. Note:
1. Avoid the unit being dropped. Avo id the display been shake seriously, or the display
will be damaged or unusual.
2. Do not use metal object to touch the device to prevent it from short circuit.
3. Please backup your data in case your important data is lost, especially before you
upgrade the firmware. The company will not tak e charge in any loss that caused by
lost of data.
4. Do not disassemble. Do not wipe the surface of the unit by alcohol, thinner or
benzene.
5. Do not disconnect the unit while it is formatting or uploading/downloading, or the
procedures may lead to errors
6. We do not take responsibility to the flash damage caused by product broken, repair or
other reasons. Please operate strictly as per the user guide.
7. Avoid water or foreign objects enter the unit.
3
8. Do not use the unit in places that are extremely hot, cold, dusty, or humid.
9. Avoid the unit being dropped. Avo id the display been shake seriously, or the display
will be damaged or unusual.
10. Specifications are subject to change and improvement without notice
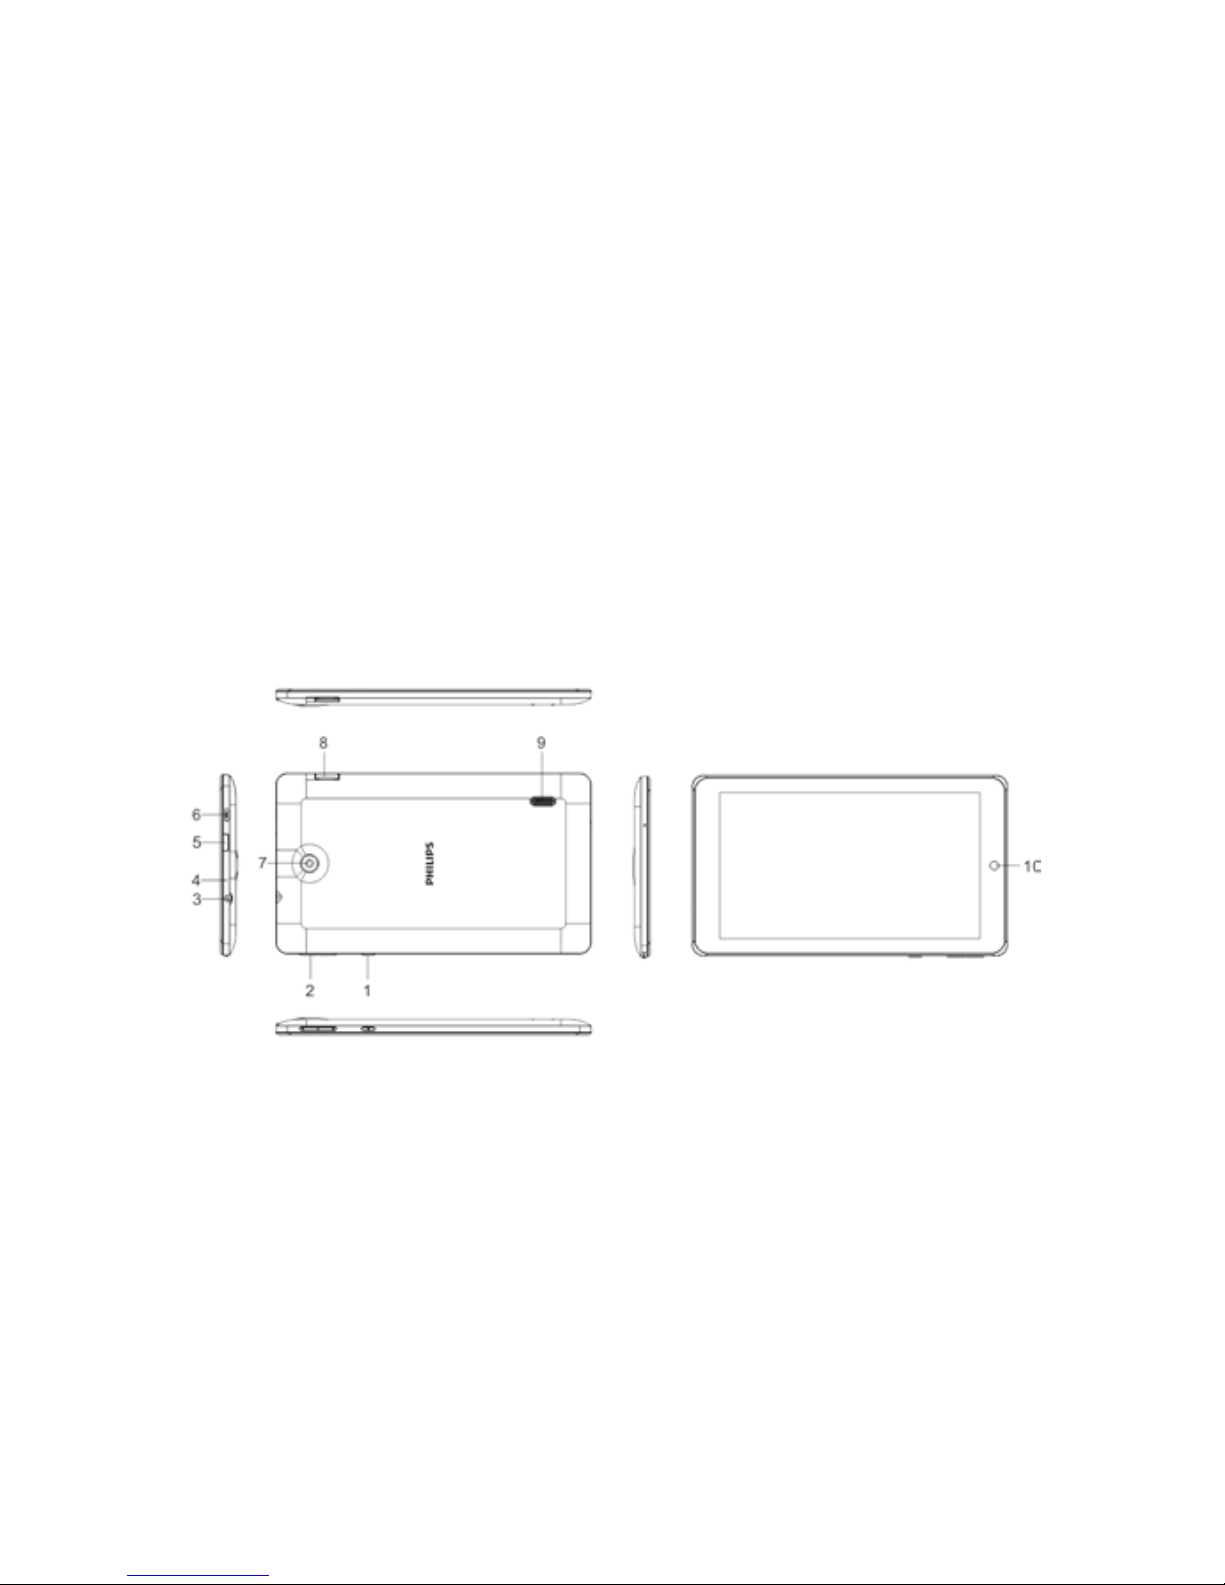
II. Introduction of cover:
1. Power on/off
4

2. Volume+, Volume –
3. Earphone Jack
4. Reset
5. IR
6. Micro USB interface
7. Back Camera
8. TF-CARD interface
9. Loudspeaker
10. Front Camera
III. Operation Instruction
1. Basic Operation
1.1. Power on/Power off
Power on:
Press and hold the power switch for 5 seconds; the unit displays the start-up logo
and enters the working mode.
Power off:
Press and hold the power switch for 3 seconds to turn the unit off.
Sleep:
5

While the device is at working status, press the power switch, it enters the sleeping
mode, and the screen will be off then. Press the power switch again, it shift to the
normal mode. You may use this function when you don’t’ use the device temporary
to save power.
1.2. Charging
When the device prompts low battery, please charge it by provided charger.
Note:
To improve the longevity of the battery, you may charge for another 15
minutes after it prompts the battery is full.
1.3. Main menu
Click the
icon in the main interface, the main menu is appeared. It
including the system setting, music playback, video playback, web browser and other
applications you installed in the main menu.
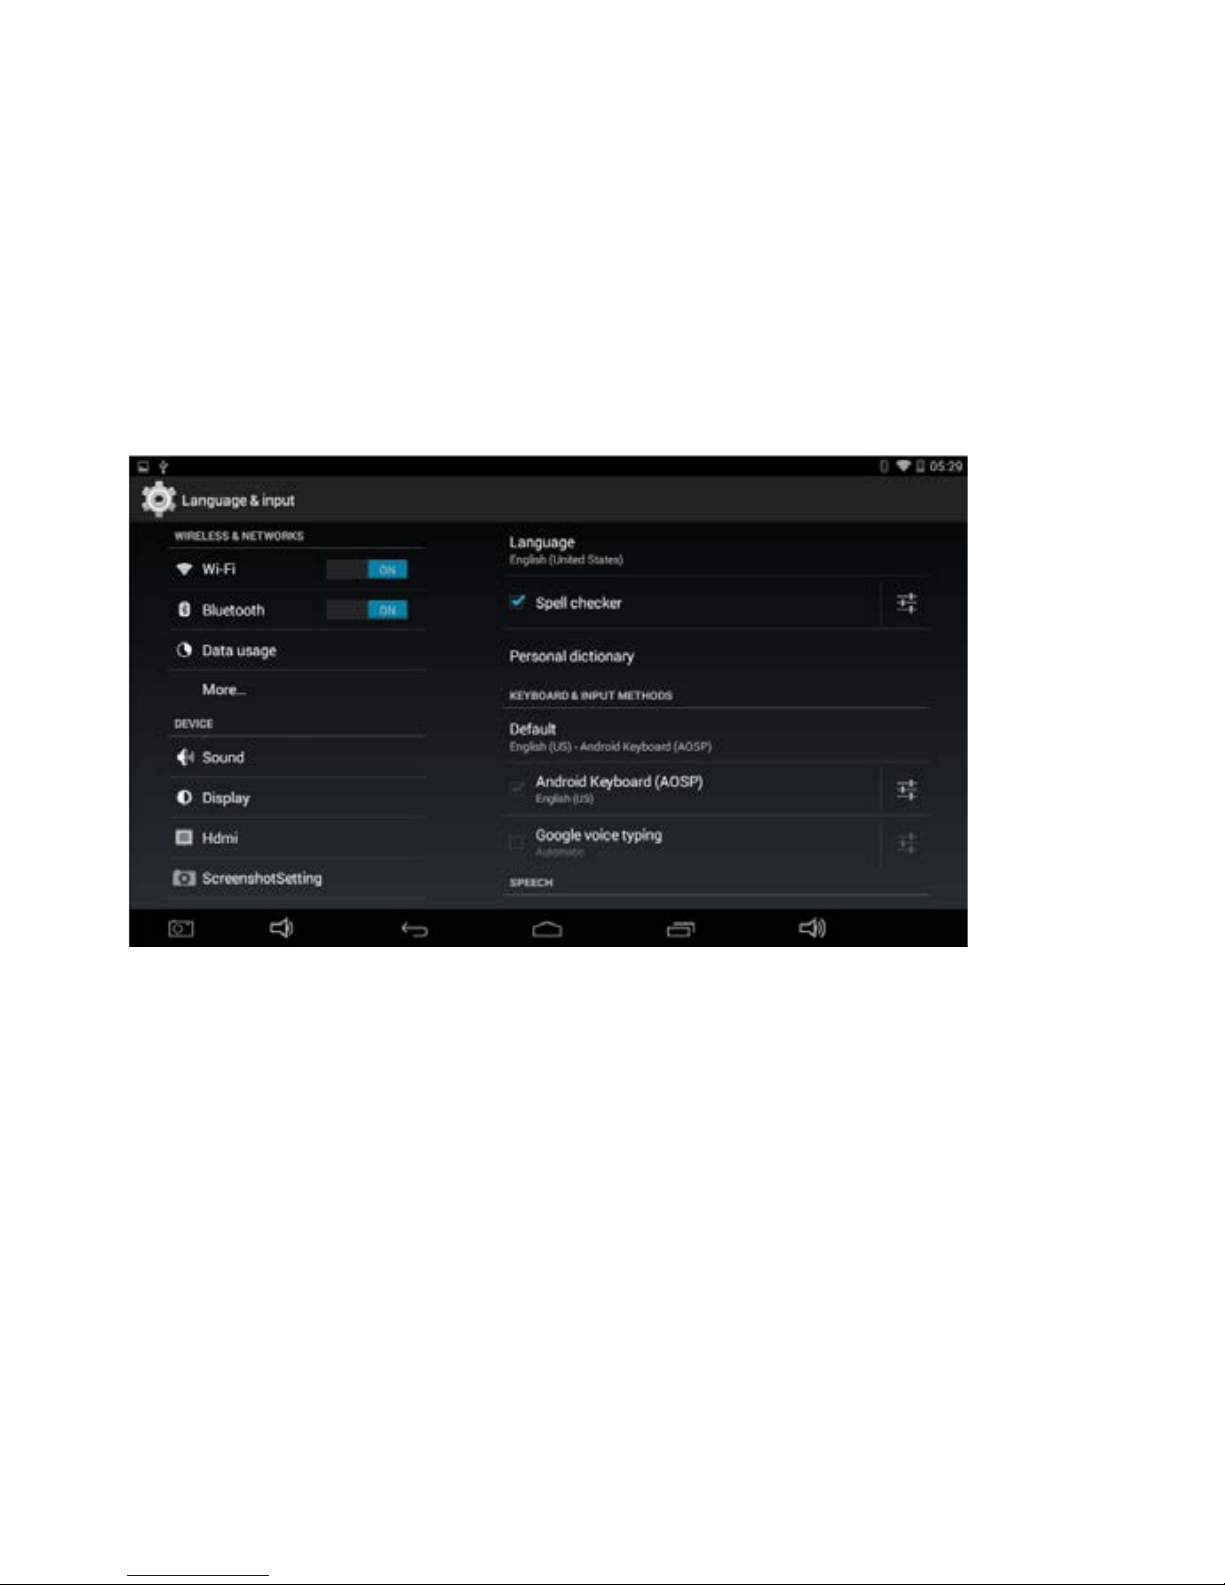
2. Settings
6

Click “ ” in the main interface to enter the setting interface. Click the
Corresponding setting items to operate.
7
8
 Loading...