

Supersonic IQ Sound IQ-5412DJBT Operation Manual
Car efully read ope rat ing manual to ope rate this unit prope rly,
and keep thi s manual handy for fur ther reference.
OPERATION MANUAL
ICBM-PAN
PANEL FUNCTION
3
IQ-5412DJBT
1
2
3
4
5
6
7
8
9
10
11
12
13
14
15
16
17
18
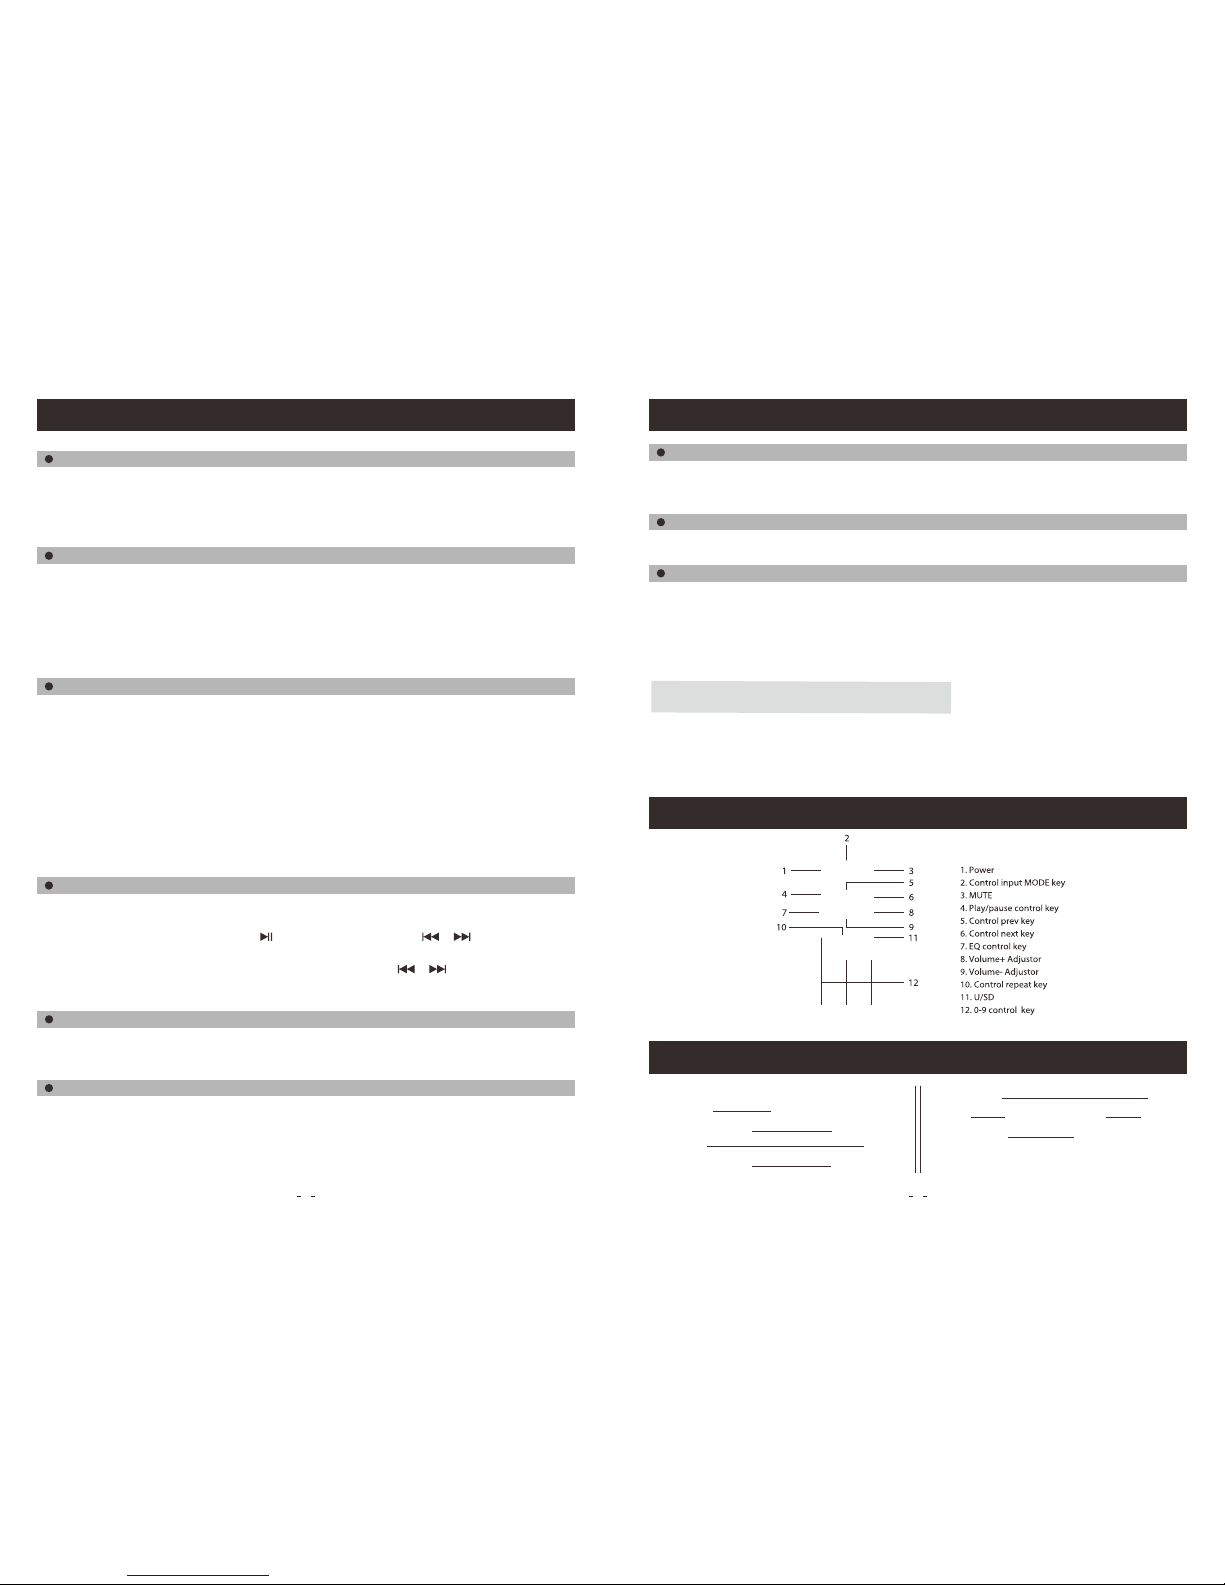
1.VOL UME
2.MOD E
3.USB /micr oSD Car d
playe r contr ol prev k ey
4.USB /micr oSD Car d
play/ pause c ontro l key
5.USB /micr oSD Car d
playe r contr ol next k ey
6.REC
7.POW ER
8.MP3 /INDI CATI ON
9.IR
10.LE D Light O N/OFF
11.U SB
12.mi croSD C ard
13.IN L INE
14.RE PEAT /MIC P RI ORT Y
15.EC HO
16.MI C.VOL
17.110 V-22 0V 50-6 0Hz
18.MI C.IN/ GUITAR.ON
War ra nty
Basic Warranty Statement
Sup ers onic Inc.("Supersonic ") wa rra nts this product to the or igi nal
pur cha ser ONLY, to be f ree f rom defects in materia ls an d wor kmanship
und er no rmal use, for ninety (90) DAYS from th e dat e of or iginal
pur cha se. Proof of purchase (rece ipt ) req uired.
Ple ase v isit http://www.sup ersonicinc.com/warr ant y for a dditional
inf orm ation.
FUNCTION DESCRIPTION
Listeni ng to the FM Radio from the Spea ker
1. To select FM use “MODE”but ton on unit main panel or from rem ote control or from remo te control press
“FM” .
2. From the unit control pan el. Long press to scan for st ation or press to manual ly access
preset sta tions up or down.
3. From remote control pr ess “SCAN” to scan for FM frequenc y or press to manu ally select prese t
statio n up or down.
4. “FM Antenna” to be used for better recep tion for FM station.
/
/
FUNCTION DESCRIPTION
Using Micr ophone
1. When using Microph one-plug your mic rophone into the micr ophone jack on unit mai n control pa nel .
2. Use the MIC VOL knob to control th e voice leve l of the microp hone
3. Use the “ECHO” knob to control mi crophone echo.
Using Guit ar Jack.
1. When using Guitar- plug your guitar into th e guitar ja ck on unit main control pan el.
2. Use the Guitar VOL knob to con trol the volume level of the Gu itar.
“BASS” & “TREBL E” on unit control pane l can be used to adju st sound when using MIC RO microSD Card,
USB, FM. “EQ”
button on uni t control panel or remot e control ca n be used to adjus t sound effect to prese t levels.
1 2
OPERATION INST RUCTION FOR KARAO KE & WIRELESS MIC ROPHONE
1. Insert the micr ophone plug into the mic rophone input MIC 2.
2. Adjust the microphone volume knob MIC VOL for proper volume. Then adjust the echo depth to the proper
positi on. Now you can start th e karao ke.
3. Open wireless MI C “ on & off ” button, Adjust the mi crophone volume k nob MIC VOL for proper volume.
and adjus t the echo dept h to the proper po sition. The you can start the wirel ess Microphon e.
1. Battery is i ntegrated in the u nit with an auto pro tection func tion. When the batter y is out of power and
you need to recha rge your speaker uni t be sure the power sw itch is ON before you connec t the system to
110V-2 40V power plug. When your unit is chargin g the red LED indicator wil l be ON. the unit, the battery
auto prote ction will take effe ct and the unit will NOT charge .
2. Full recharge take s 8-12 hour s.
3. Voltage for rec harge must be ~110V-2 40V
4. When you are using your unit whi le it is plugged to an extern al power source, be sure the batter y switch
is ON.
5. To protec t the life span of the built i n batter y, be s ure to f ully char ge your unit on the same day th e
batter y runs out. Not charging your uni t right away can hu rt the long term life span of you r unit.
6. When you change fuse, please use mo del (10A)
Matters ne ed attention
1. Pleas e press the “MODE” but ton to start the Bluet ooth conn ection. This will t urn on the Blue tooth
flashi ng LED light on the control pa nel.
2. Your unit will now be read y to pair with your mo bile device via Blue tooth. From your mobile device sc an
for “bt-sp eaker” . The password for connec tion is “0000“ and on ce you have paired your device to th e DJ
system, the LED flas hing light will becom e solid.
3. You can control t he volume and tra cks from the unit ’s con trol pane l or fro m your external Bluetooth
enable d device.
Bluetoo th Connection
SPECIFICATIONS & DIMENSIONS
System Type: 12" Woofers/ & 1" Tweeters
Frequenc y Response 40Hz-2 0KHz
Impeda nce 4ohm
Peak Power Capac ity 250 Watts
N.W. 10.97lbs. G.W. 13.18lbs.
Dimens ions
Specif ications:
15.07" x 12.9 9" x 22.91"
RMS Power 15Watts
Using Aux( LIN E IN 3.5mm)
1. To select Aux use ” MODE” button on uni t main pane l or from remot e control “LINE” will show on displ ay
2. Disconnect US B, TF Microphone whi le using Aux.
Record Func tion
Long press : IN the recording.
Short pr ess: play the recor ding and play USB conversi on.
REMARK : Need to inser t the USB/micr oSD Card when reco rding.
When recor ding the sound from outs ide (such as the voice of peop le) need to use WIRELESS MIC / WIRED
MIC.
When recor ding AUX IN / FM no need to use WIRELESS MIC / WIRED MIC jus t inser t USB.
1.Open th e carto n box to check the enc losurer:
Instruc tion book 1PC
Power line 1PC
Wired microph one: 1PC
Remote cont rol( IR sensor dista nce :arround 6m): 1PC
Installation and play:
Using USB/ microSD
1.Plug in you r USB Disk or SD Card in the sl ots provided. Please make su re you use the correct file for mat
in your media dev ices – MP3 FILES ONLY and correct mode sh ould be selected.
2.Plea se remember to turn off the pow er of the Speaker before re moving the USB Disk or SD Card.
ICBM-PAN
REMOTE CONTROL FUNCTION
 Loading...