

Page 1
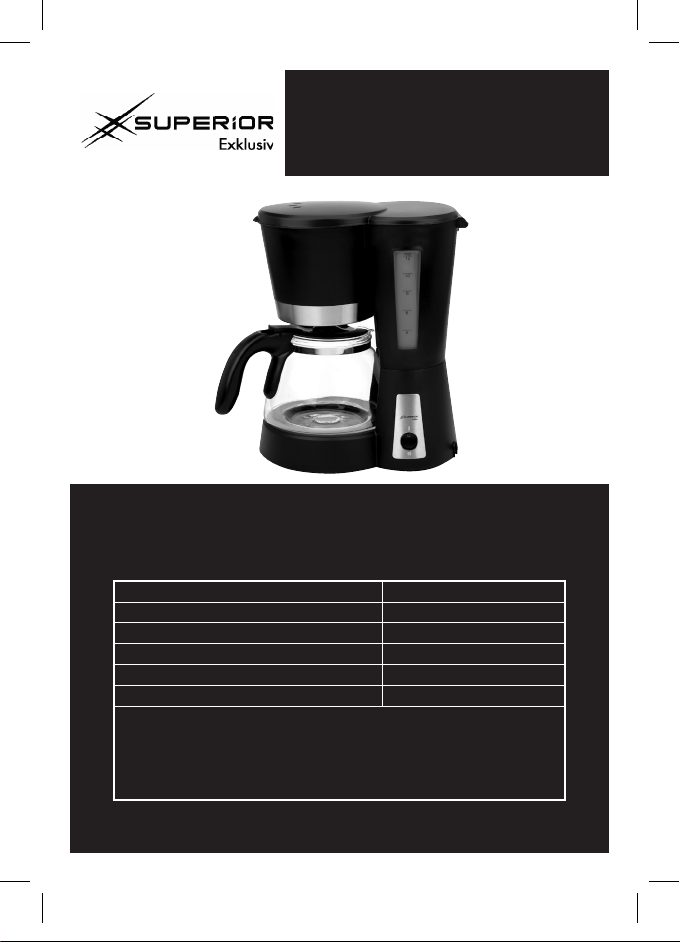
Coffee Maker
with Glass Carafe
INSTRUCTIONS FOR USE
ENGLISH
Article Number 10002102
Power supply 220 - 240 V ~ 50 Hz
Power consumption 900 Watt
Electrical protection class I
Volume capacity 1.2 Litre
Net weight 1.33 kg
Removable filter holder and filter
On/Off switch with indicator light
Warming function
Water level indicator
Drip protection
A120609_Markant_10002102_EB0068970_MD-213 IM_GB.indd 1 04/12/2012 3:32 PM
V02a
Page 2
TABLE OF CONTENTS
DECALCIFYING 09
IMPORTANT SAFETY INSTRUCTIONS 02
OVERVIEW OF DEVICE 05
HANDLING THIS DEVICE 06
FILLING WATER IN THE WATER TANK 06
INSERTING AND REMOVING FILTER INSERT 07
INSERTING AND REMOVING THE PERMANENT FILTER / THE FILTER HOLDER 07
USING THE COFFEE MACHINE WITH PAPER FILTERS 07
PREPARING COFFEE 07
TURNING ON AND OFF 08
REMOVING COFFEE 08
AFTER BREWING COFFEE 08
CLEANING AND CARE 09
DISPOSAL 10
SERVICE / WARRANTY 10
IMPORTANT SAFETY INSTRUCTIONS
When using electric devices, basic safety precautions must be
observed. To avoid the risk of burns, electric shocks, fire, and/or
personal injury, please read the instruction manual carefully before
using the device, and observe all of the instructions during the
operation of the device.
Store this manual carefully for further use.
Please include this manual when transferring the device to a third
party.
GENERAL INFORMATION:
• Electric devices are not toys! Keep children away from this device!
• Use this device for its intended purpose only.
• This device is suitable for use in private households and not for
commercial use.
• Do not leave this device unattended during use or while it is plugged in.
• Switch the device off and pull the power plug when not in use, in case
of malfunction or when cleaning.
• Do not carry this device by its power cord.
• Keep this device clean and dust-free.
• Do not operate this device outdoors.
• Check the device regularly for visible damages. Do not use the device
under any circumstances if you discover damages, if it has fallen or if it
does not function properly. Do not try to repair the device yourself.
• Repairs may only be done by qualified professionals.
• The power outlet must be located near the device so that it can be
pulled out effortlessly in case of emergency.
A120609_Markant_10002102_EB0068970_MD-213 IM_GB.indd 2 04/12/2012 3:32 PM
2
Page 3
RISKS FROM ELECTRICITY:
• The voltage of the device specified on the rating plate must match the
voltage of your electricity network.
• Connect the device to an approved installed outlet. Do not use table
power bars or extension cords.
• Do not operate this device with a timer or remote control.
• Never touch this device, the power cord or the power plug if your
hands are wet or if you are standing on a damp or wet floor.
• Do not pull the power cord over or through a sink.
• If the outside of the appliance has become wet, immediately pull the
power plug.
• Do not immerse in water.
• There is a danger of electric shock from immersion in water or other
fluids!
• Keep the device, power cord and power plug away from hot surfaces,
open flame, direct rays of the sun and sharp edges. Make sure that the
cord does not kink during use (e.g. in doors).
• When you pull the plug, always pull by the plug and never the cord.
• If the power cord becomes damaged, it must be replaced by a
qualified professional in order to avoid hazards. The same applies for
the power plug.
HAZARDS TO PERSONS:
• This device is not meant for persons (including children) with reduced
physical, sensory or mental abilities or lack of experience and / or lack
of knowledge to be used, unless they are supervised by a person who
is responsible for their safety or have received instructions on how to
use this device.
• Children must be supervised in order to ensure that they do not play
with this device.
• Children do not recognise the dangers which could occur in dealing
with electric devices. Keep children away from this device. Be especially
careful when using this device if children are in your midst!
• Keep packaging materials such as plastic bags and polystyrene parts
out of reach of children. Danger of suffocation!
• Make sure when laying the power cord that it cannot be tripped over.
• Make sure that the device itself does not become a tripping hazard.
A120609_Markant_10002102_EB0068970_MD-213 IM_GB.indd 3 04/12/2012 3:32 PM
3
Page 4

HAZARDS RELATED TO THIS SPECIFIC PRODUCT:
• Use this device only with the accessories included.
• Always use this device on an even, anti-slip, heat-resistant and water-
resistant surface!
• Make sure that this device is not switched on unintentionally and / or
without water.
• Pay attention to the full line markings of this device. Too much water
can cause the excess liquid to overflow.
• Make sure that the water tank lid is closed properly during the boiling
cycle. Danger of burns from escaping steam!
• Make sure that the device openings and the spout are not near
people, animals or objects because hot steam escapes through the
openings during boiling.
• Do not fill any hot water into the water tank and do not fill the water
tank as long as the water tank is still hot. Let the device cool off first
after each boiling cycle.
• To ensure the correct functioning of the drip-stop system, check that
the carafe lid is seated properly on the carafe and the carafe is placed
correctly under the filter opening.
• The device parts become hot during operation. Therefore, touch only
the intended operating elements and handles. Danger of burns!
• Do not use the device with liquids other than water, or to re-circulate
and re-heat previously brewed coffee. Do not use the carafe on any
other heat sources or in the microwave.
• When heating during initial use, a smell may occur and then again
evaporate. This is not a defect! Therefore, let the machine run at least
two times without coffee powder.
• Do not wash this device or its accessories in the dishwasher.
A120609_Markant_10002102_EB0068970_MD-213 IM_GB.indd 4 04/12/2012 3:32 PM
4
Page 5

OVERVIEW OF DEVICE
1. Flap to lift water tank lid 13. Guide bar
2. Water tank lid 14. Drip stop
3. Brewing head 15.
4. Brewing head holder 16. Permanent filter
5. Water tank 17. Thermal carafe lid
6. Filter holder 18. Drip stop lock
7. Warming plate 19. Spout
8. Water level indicator 20. Glass carafe
O / I main switch with indicator light
9.
10. Power cord with power plug 22. Carafe handle
11. Hinged handle of filter insert 23. Measuring spoon
12. Filter insert
Hinged handle of permanent filter
21. Carafe lid opener
5
A120609_Markant_10002102_EB0068970_MD-213 IM_GB.indd 5 04/12/2012 3:32 PM
Page 6

HANDLING THIS DEVICE
Remove all packing materials / cord ties from device and unwind the
completely.
We recommend that the device be cleaned before first use according to the
following handling instructions described by boiling water twice and then pouring
the water out. In this way, any possible dust or residues from the manufacturing
process can be removed. The
and
measuring spoon (23)
• Place the device on a stable, even, heat-resistant and water-resistant surface.
Make sure that the device cannot slip or tip over.
• Insert the
which can be reached at all times.
• This device is equipped with a
coffee to be taken during the brewing cycle. The
closed
immediately after taking the coffee in order to prevent the filter from
overflowing. Make sure that the
lock (18)
• Once the water has run through, wait to remove the carafe and switch off the
device until the rest of the water has flowed through the filter into the
carafe (20)
power plug (10)
carafe lid (17)
!
.
glass carafe (20), filter insert (12), permanent filter (16)
should once again be washed and dried by hand.
into an approved, properly installed power outlet
drip stop system (14, 18)
must again be placed correctly under the
drip stop (14)
glass carafe (20)
is placed exactly in the
power cord (10)
which allows some
with the
drip stop(14)
drip stop
glass
FILLING WATER IN THE WATER TANK
• Open the
• Fill the
for this.
• The amount of water must be between the
tank (5)
much water, it may overflow.
water tank lid (2)
water tank (5)
. If there is not enough water, the device can overheat. If there is too
using the
with clear, cold water. The
flap (1)
in order to fill the
indicator levels (8)
glass carafe (20)
of the
water tank (5)
can be used
water
.
A120609_Markant_10002102_EB0068970_MD-213 IM_GB.indd 6 04/12/2012 3:32 PM
6
Page 7

INSERTING AND REMOVING FILTER INSERT
• Hold the
• Insert the
filter insert (12)
filter insert (12)
guide rail (see arrow marks in the illustration).
by the
hinged handle (11)
into the device so that the
.
guide bar (13)
fits into the
• Fold down the handle of the
filter insert).
• To remove the
insert (12)
ATTENTION! The
Danger of burns.
filter insert (12)
out by the
filter insert (12)
filter insert (11)
unfold the
handle (11)
down again (on the edge of the
handle (11)
.
is very warm after coffee has been brewed!
upward and lift the
INSERTING AND REMOVING THE
PERMANENT FILTER / THE FILTER HOLDER
• Use the
• To remove the
handle (15) to insert
and then fold the
permanent filter (16)
ATTENTION! The
brewed! Danger of burns.
handle (15)
permanent filter (16)
out by the
permanent filter (16)
the
permanent filter (16)
of the
permanent filter (16)
unfold its
handle (15)
is very warm after coffee has been
handle (15)
.
into the
filter holder (12)
down.
upward and lift the
USING THE COFFEE MACHINE WITH PAPER FILTERS
• A size 4 paper filter can be used in the
filter (16)
.
filter insert (12)
instead of a
permanent
PREPARING COFFEE
• Put the desired amount of coffee powder into the
in the paper filter. A
spoonful, according to taste).
• Fill clear, cold water into the
indicator level (8)
measuring spoon (23)
water tank (5)
!
7
permanent filter (16)
can be used for this (one level
. Pay attention to the
water
filter
or
A120609_Markant_10002102_EB0068970_MD-213 IM_GB.indd 7 04/12/2012 3:32 PM
Page 8

• Close the
filter holder (6)
during coffee preparation! Danger of burns!
• Make sure that the
glass carafe (20)
sure that the
stop lock (18)
NOTE: Improper placement of the
the
lock(18)
water tank lid (2)
. The
on the
drip stop (14)
of the
filter insert (12)
into the
again. Press the
water tank lid (2)
glass carafe (20)
warming plate
of the
carafe lid (17)
because then the coffee cannot run through the
glass carafe (20)
filter insert (12)
!
!
water tank lid (2)
will lock in audibly and must remain closed
is dry on the exterior and place the empty
(7)
with its
carafe lid (17)
is correctly positioned in the
glass carafe (20)
can lead to overflowing of
TURNING ON AND OFF
• Switch the
the
• To turn off, switch the
main switch (9)
main switch (9)
to I to turn on the coffee machine. The indicator light in
will switch on.
main switch (9)
to 0. The
indicator light (9)
REMOVING COFFEE
• Wait until the coffee stops flowing into the
the brewed coffee.
• Take the
• Pour the coffee into a heat-resistant container / cup.
plate(7)
glass carafe (20)
.
by the
carafe handles (22)
glass carafe (20)
AFTER BREWING COFFEE
• Wait until the device has cooled off completely!
• Open the
• Carefully grab hold of the hinged handle of the
out the coffee grounds.
• Dispose the coffee grounds appropriately.
• If using a paper filter, lift the
paper filter with the coffee grounds.
water tank (2)
by pulling up the flap of the
filter insert (12)
permanent filter (15)
by its
lightly onto the
closed and make
will then switch off.
before removing
from the
handle (11)
warming
water tank lid (1)
and dispose the
drip
drip stop
.
and lift
A120609_Markant_10002102_EB0068970_MD-213 IM_GB.indd 8 04/12/2012 3:32 PM
8
Page 9

CLEANING AND CARE
Attention:
Always pull the power plug from the power outlet before cleaning and let the
device cool off completely!
• The device, the power cord and the power plug must not be immersed in water
for cleaning. Use a dry cloth to clean them.
• If the outside of the device has become heavily soiled, it may be wiped gently
with a damp cloth and then dried carefully. Make sure no moisture penetrates
into the interior of the device around the main switch and the warming plate.
• The accessories are not dishwasher safe. Wash them by hand and use a mild
detergent. Dry all accessory parts thoroughly.
• Do not use any harsh cleaning agents, steel brushes, scouring powder or other
hard items for cleaning which could scratch the surfaces.
DECALCIFYING
The device must be decalcified at regular intervals. The intervals depend on the
degree of hardness of the water used and the frequency of use.
The device must be decalcified in order to ensure the safe operation of this device,
especially if signs of calcification are detected.
Use a vinegar solution of water and vinegar (no vinegar concentrate!) at a
mixing ratio of 3:1 or a commercial decalcifying substance to decalcify. Follow the
manufacturer’s instructions regarding application of the commercial decalcifying
substance!
If using vinegar:
• Fill the
• Allow approximately 1 cup of the vinegar solution to run into the
• Let the rest of the vinegar solution sit in the device for approximately one hour.
• Then turn the device on again, let the rest of the vinegar solution run through
• In order to flush out the unit afterwards, you should allow 2 to 3 times the
water tank (5)
vinegar solution and turn the device on by switching on the
carafe(20)
and pour it away.
maximum filling amount of water to run through the device.
and then switch the device off.
of the device to the maximum filling level with the
main switch (9)
glass
.
A120609_Markant_10002102_EB0068970_MD-213 IM_GB.indd 9 04/12/2012 3:32 PM
9
Page 10

DISPOSAL
USED ELECTRIC HOUSEHOLD DEVICES
• If you do not want to use your electrical appliance any longer,
return it free of charge to a recycling depot for used electric
appliances.
• Used electric devices do not belong in the household garbage (see
symbol).
FURTHER DISPOSAL INSTRUCTIONS
• Return the electrical appliance in such a condition that its later
re-use or recycling is not adversely affected. Batteries must be
removed in advance and the destruction of parts which contain
fluids must be avoided.
• Electrical appliances can contain harmful substances. Improper
handling or damage to the appliance can lead to health problems
or water or ground contamination, when the appliance is recycled
later.
SERVICE / WARRANTY
The warranty period covers 3 years and begins with the purchase date. For proof of
the purchase date please retain the receipt.
The warranty covers defects and malfunctions occurring with normal use during the
warranty period.
Warranty repairs are carried out free of charge.
The warranty is void in case of damages, alterations or improper use of the device,
where these are not the responsibility of the warranty provider. This applies
especially to the following cases:
• Interference with the device by unauthorized persons.
• Alterations on or in the device, removing or effacing the serial number, removal
or alteration of the device seal.
• Damages due to impact, dropping or external influence.
• Damages due to incorrect handling or improper use.
• Damages due to external causes, e.g. voltage overload, lightning strike.
• Commercial utilization of the device.
Your legal rights in the case of a defective device (replacement, return, reduction,
compensation) are not restricted by this warranty.
A120609_Markant_10002102_EB0068970_MD-213 IM_GB.indd 10 04/12/2012 3:32 PM
10
Page 11

Please keep the original packaging in case of a return for repair.
Repaired or exchanged components are generally covered for the remaining
warranty period of the device.
Should you have any questions relating to this product or to the manual or in case
you should find any deficiencies with this product, please contact our service hotline
directly to discuss further steps.
IMPORTANT NOTE:
Please do not send your device to our address without having been requested to.
Always contact our service hotline first.
SERVICE HOTLINE: Phone: +49(0)431 53 039 171
E-Mail: superior@zhg-online.de
ARTICLE NO.: 10002102
PRODUCED FOR:
ZENTRALE HANDELSGESELLSCHAFT - ZHG - MBH,
HANNS-MARTIN-SCHLEYER-STRASSE 2,
D-77656 OFFENBURG,
www.zhg-online.com
MADE IN CHINA
All images serve as illustrations only and do not always show exact representations
of the device.
All rights reserved.
A120609_Markant_10002102_EB0068970_MD-213 IM_GB.indd 11 04/12/2012 3:32 PM
11
 Loading...