


SUN-WIFI-DATA-LOG

DATA LOGGER
USER GUIDE
Global Tech China Ltd, 3 Floor, Wai Yip Industrial Building.
171 Wai Yip Street, Kwun Tong, Kowloon, Hong Kong.
Tel: +852 2884 4318 Fax: +8522884 4816
www.sunsynk.com / sales@globaltech-china.com
www.globaltechhk.com
Version
4
.0 (0
7
/
27
/2021)

INDEX
1. INSTALLATION 3
1.1. DATA
LOGGER
INSTALLATION 3
1.2. CONNECTING
TO
WI-FI 4
1.3. NETWORK
CABLE 6
2. ACCOUNT MANAGEMENT 7
2.1. REGISTRATION 7
2.2. REQUESTING
USER
LEVEL
ACCESS
CHANGE 8
2.3. FORGOT
PASSWORD 8
3. PLANT MANAGEMENT 9
3.1. CREATING
A
PLANT 9
3.2. ADDING
A
DEVICE 12
3.3. EDITING
A
PLANT 13
3.4. TRANSFERING
A
PLANT 14
3.5. DELETING
A
PLANT 16
3.6. PLANT
MAP 17
3.7. INVERTER
STATISTICS 18
3.8. PLANT
OVERVIEW 19
4. EQUIPMENT 23
4.1. GATEWAY
MANAGEMENT 23
4.2. GATEWAY
DISTRIBUTION 24
4.3. INVERTER
MANAGEMENT 26
4.4. CHANGE
INVERTER
SETTINGS 27
4.5. INVERTER
FIRMWARE
MANAGEMENT 28
4.6. INVERTER
FIRMWARE
MANAGEMENT 30
5. ENTERPRISE MANAGEMENT 31
5.1. COMPANY
INFORMATION 31
5.2. ROLE
MANAGEMENT 32
5.3. STAFF
MANAGEMENT 33
5.4. SETTING
/
CHANGING
CUSTOMER
PERMISSIONS 34
5.4.1 C
REATING USER PERMISSIONS
34
5.4.2 A
SSIGNING CUSTOMER PERMISSIONS
36
5.5. SHARING
A
PLANT 37

Page | 3
1. INSTALLATION
1.1. DATA LOGGER INSTALLATION
Insert the Data Logger into the DB9 interface of the inverter, as shown in the following
figure.
Insert the two screws that come with the Data Logger trough the holes, and then tighten
them with a Phillips screwdriver, as shown in the figure below.
INSTALLATION

Page | 4
1.2. CONNECTING TO WI-FI
To connect the data logger to the Wi-Fi you need to go to the Wi-Fi setting on your
device and search for it. You will see an available connection with the SSID ‘EAP-*****’
(‘*****’ are the last 5 digits of the serial number on the data logger).
1) Select the correct connection and then enter the password 12345678.
2) Once you have connected to the EAP connection, you need to connect it to your
own Wi-Fi. To do this, open the Internet browser and search the IP address
10.10.10.1.

Page | 5
3) Once connected, click ‘Scan’ to search the Wi-Fi List and you should then see your
Wi-Fi connection.
4) Select your Internet / Wi-Fi connection, enter your password, and click
‘Connect’.
5) Once your data logger is connected to your Wi-Fi, you can then disconnect from
the data loggers EAP connection and connect back to your usual wi-fi
connection.

Page | 6
1.3. NETWORK CABLE
Use a flat-blade screwdriver to press the buckles on the left and right sides of the shell,
as shown in the following figure. Then extract the DB9 interface part manually.
Pass the network cable through its specific hole at the bottom of the shell. Then, insert
the RJ45 plug into the RJ45 socket, and place the sealing plug with the hole on the
network cable, as shown in the figure below.
Page | 7
2. ACCOUNT MANAGEMENT
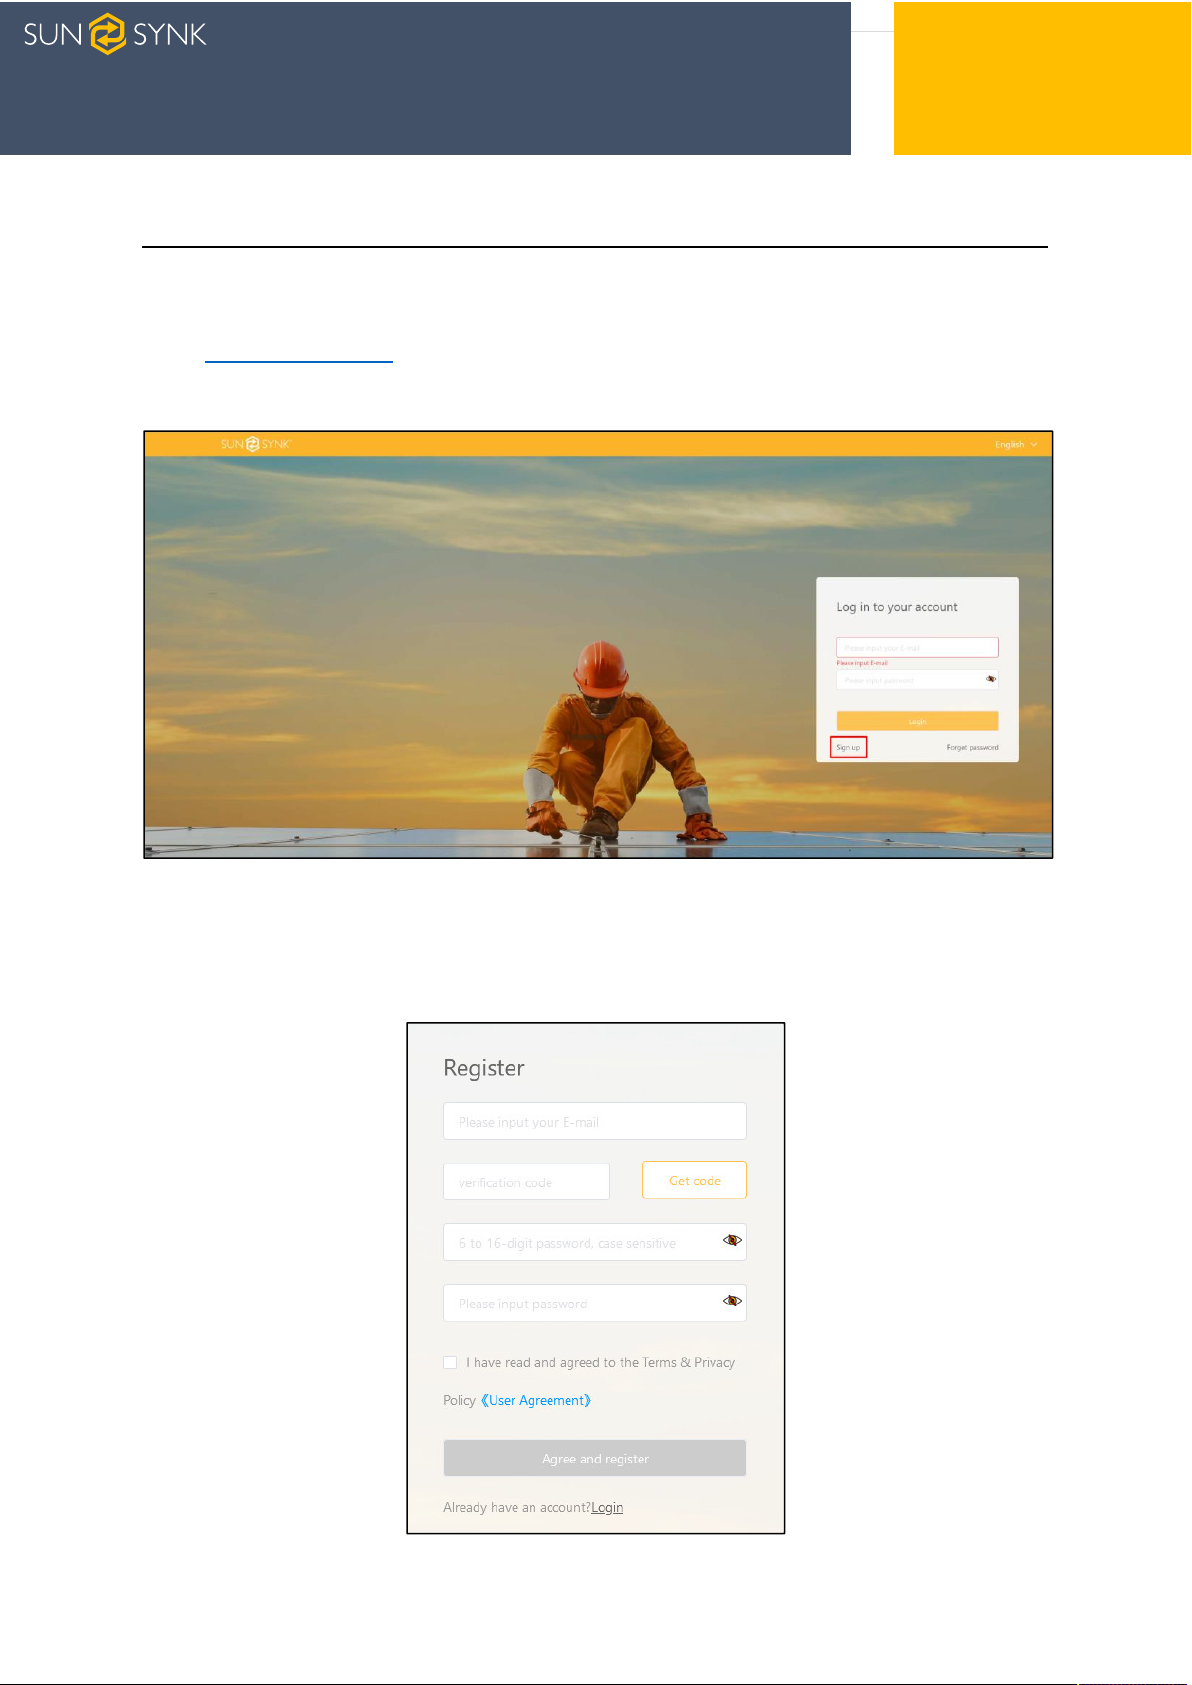
2.1. REGISTRATION
Enter http://sunsynk.net in your browser to access the web version of the management
tool. Then, click ‘Sign Up’ on the Login page to access the Registration page.
Enter a valid phone number or e-mail address to receive the verification code. After
completing the registration information, enter a password, check the box in the user
agreement to indicate that you have read and agree to the agreement, then click ‘Agree
and register’.
ACCOUNT MANAGEMENT
Page | 8
2.2. REQUESTING USER LEVEL ACCESS CHANGE
If you are an installer and have registered an account on the Sunsynk Logger platform,
you may have the default basic user account with limited permissions. Therefore, to
request a different user level so that you can change parameters, remotely upgrade
the inverter, in addition to other functions, please visit https://www.sunsynk.org/user-
level-access-change and fill in the form.
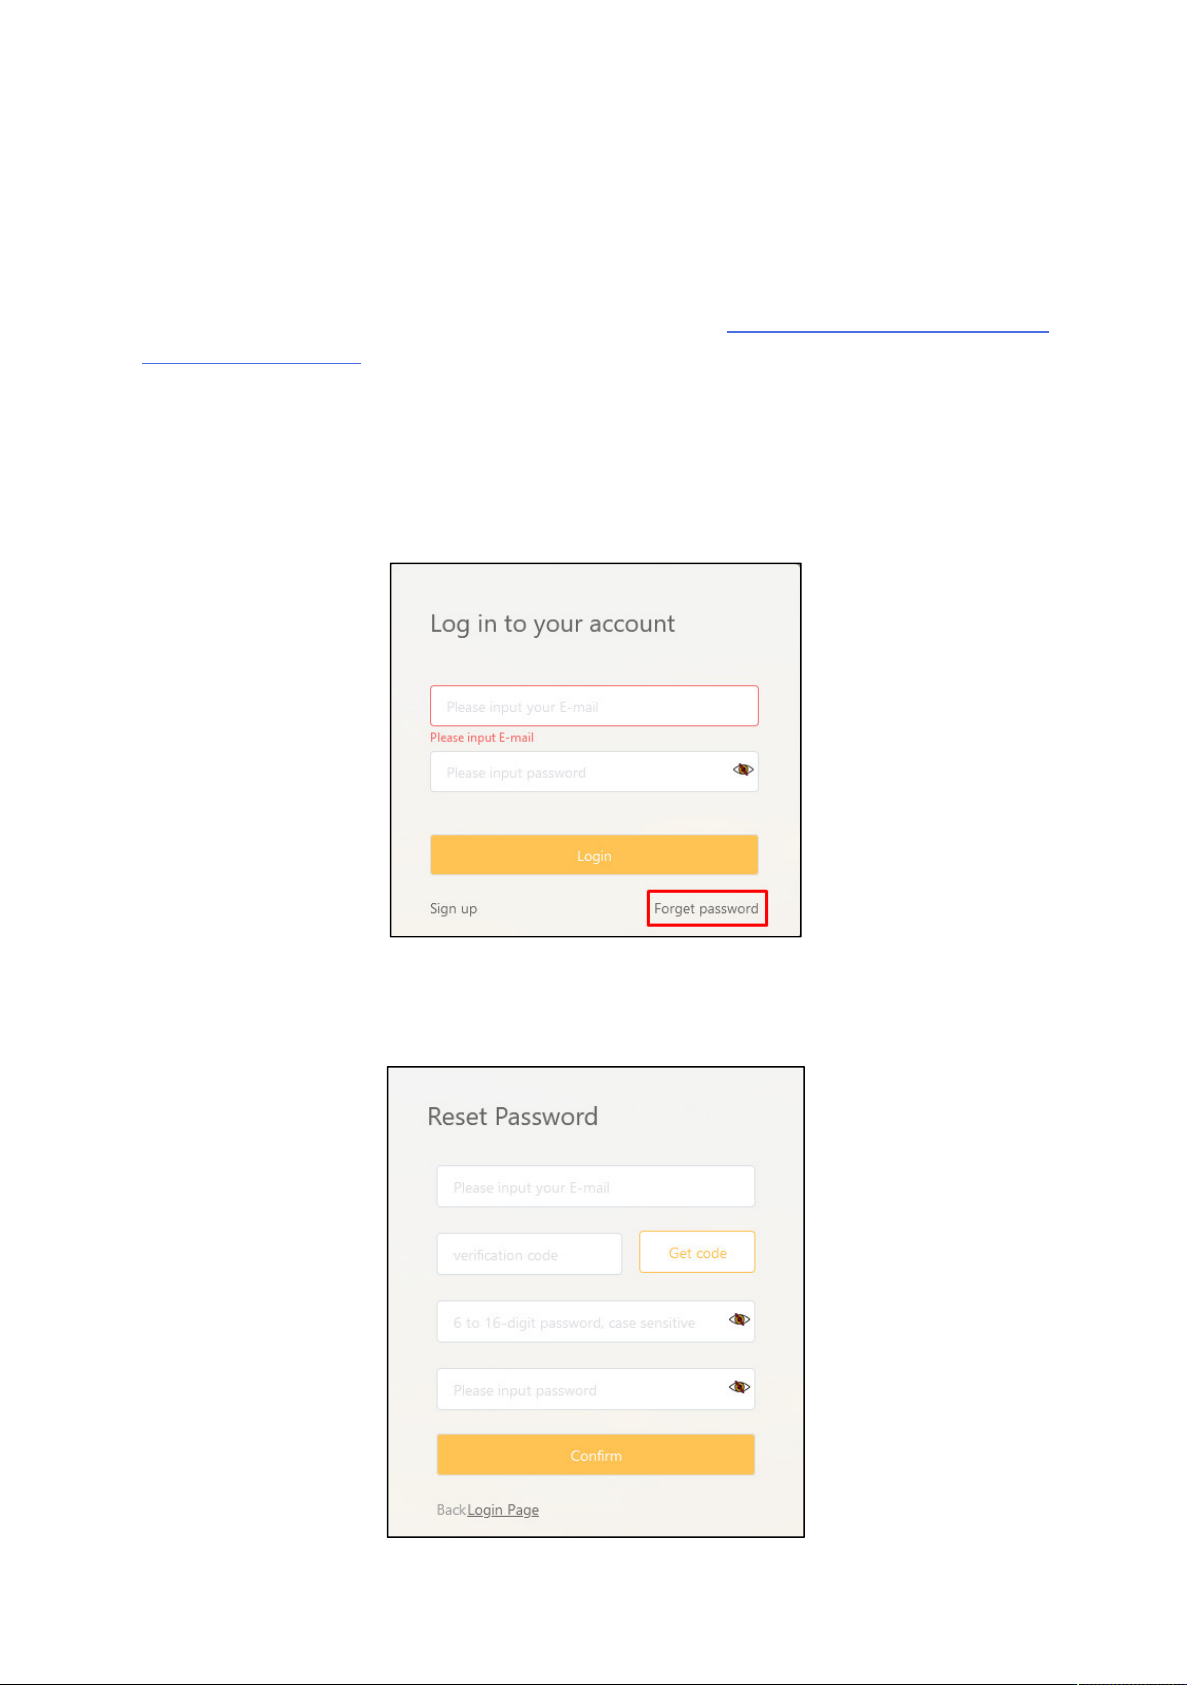
2.3. FORGOT PASSWORD
Click ‘Forget password’ at lower right corner on the Login page to access the Reset
Password page.
Enter your e-mail address to receive the verification code. Then, enter the verification
code, choose your new password, and click ‘Confirm’ to set the new password.
Page | 9
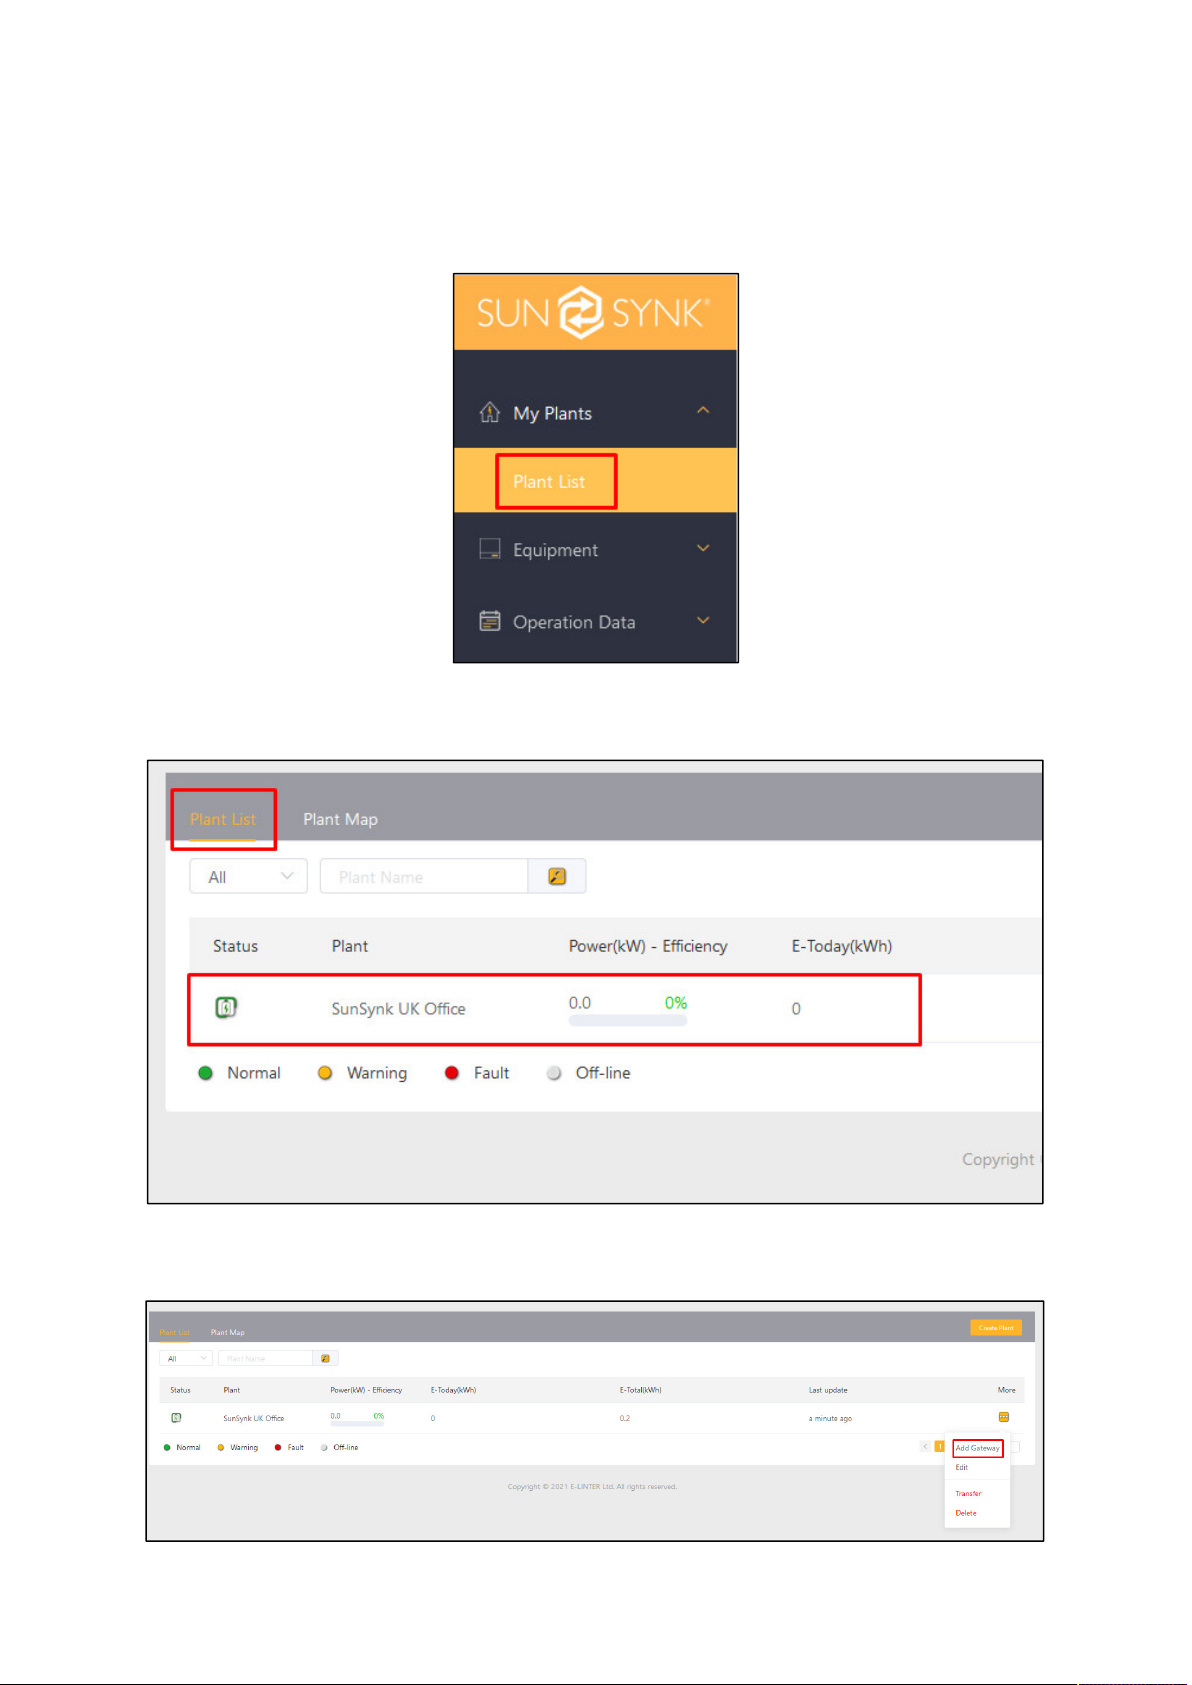
3. PLANT MANAGEMENT
3.1. CREATING A PLANT
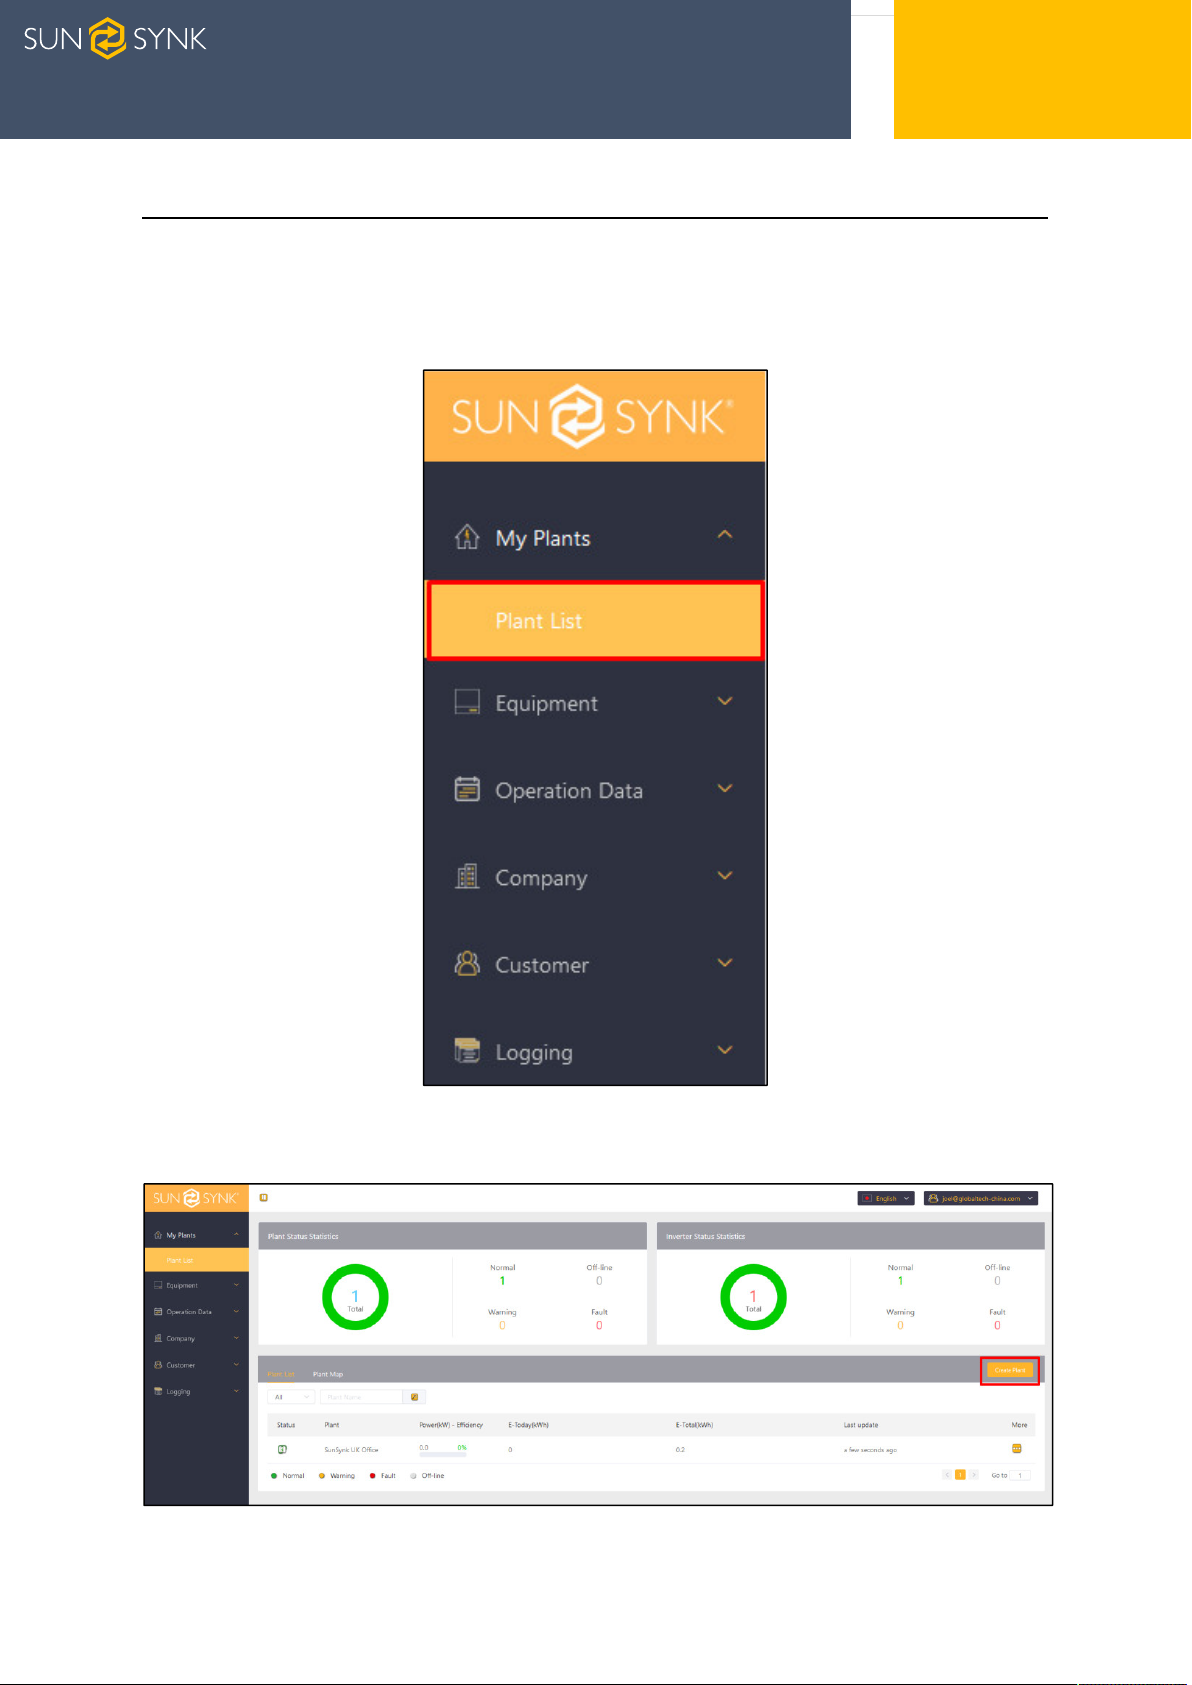
In the menu, first click ‘My Plant’, then ‘Plant List’.
1) To create a new plant, click ‘Create a Plant’ on the right corner of the page.
PLANT
MANAGEMENT

Page | 10
2) Enter the Serial Number (SN) and KEY on the Data Logger label, then click the
‘Next’.
3) Enter the total capacity in ‘Capacity’ select the correct type in ‘Plant Type’, the
information displayed on the page will be different if choose different types of plants.
To ensure the accuracy of the plant statistics, please fill in the information on the
page correctly.
4) You can enter the installation address of the plant in the address input box on the
map to locate the specific installation location or you can use the map to select the
correct installation location.
Page | 11
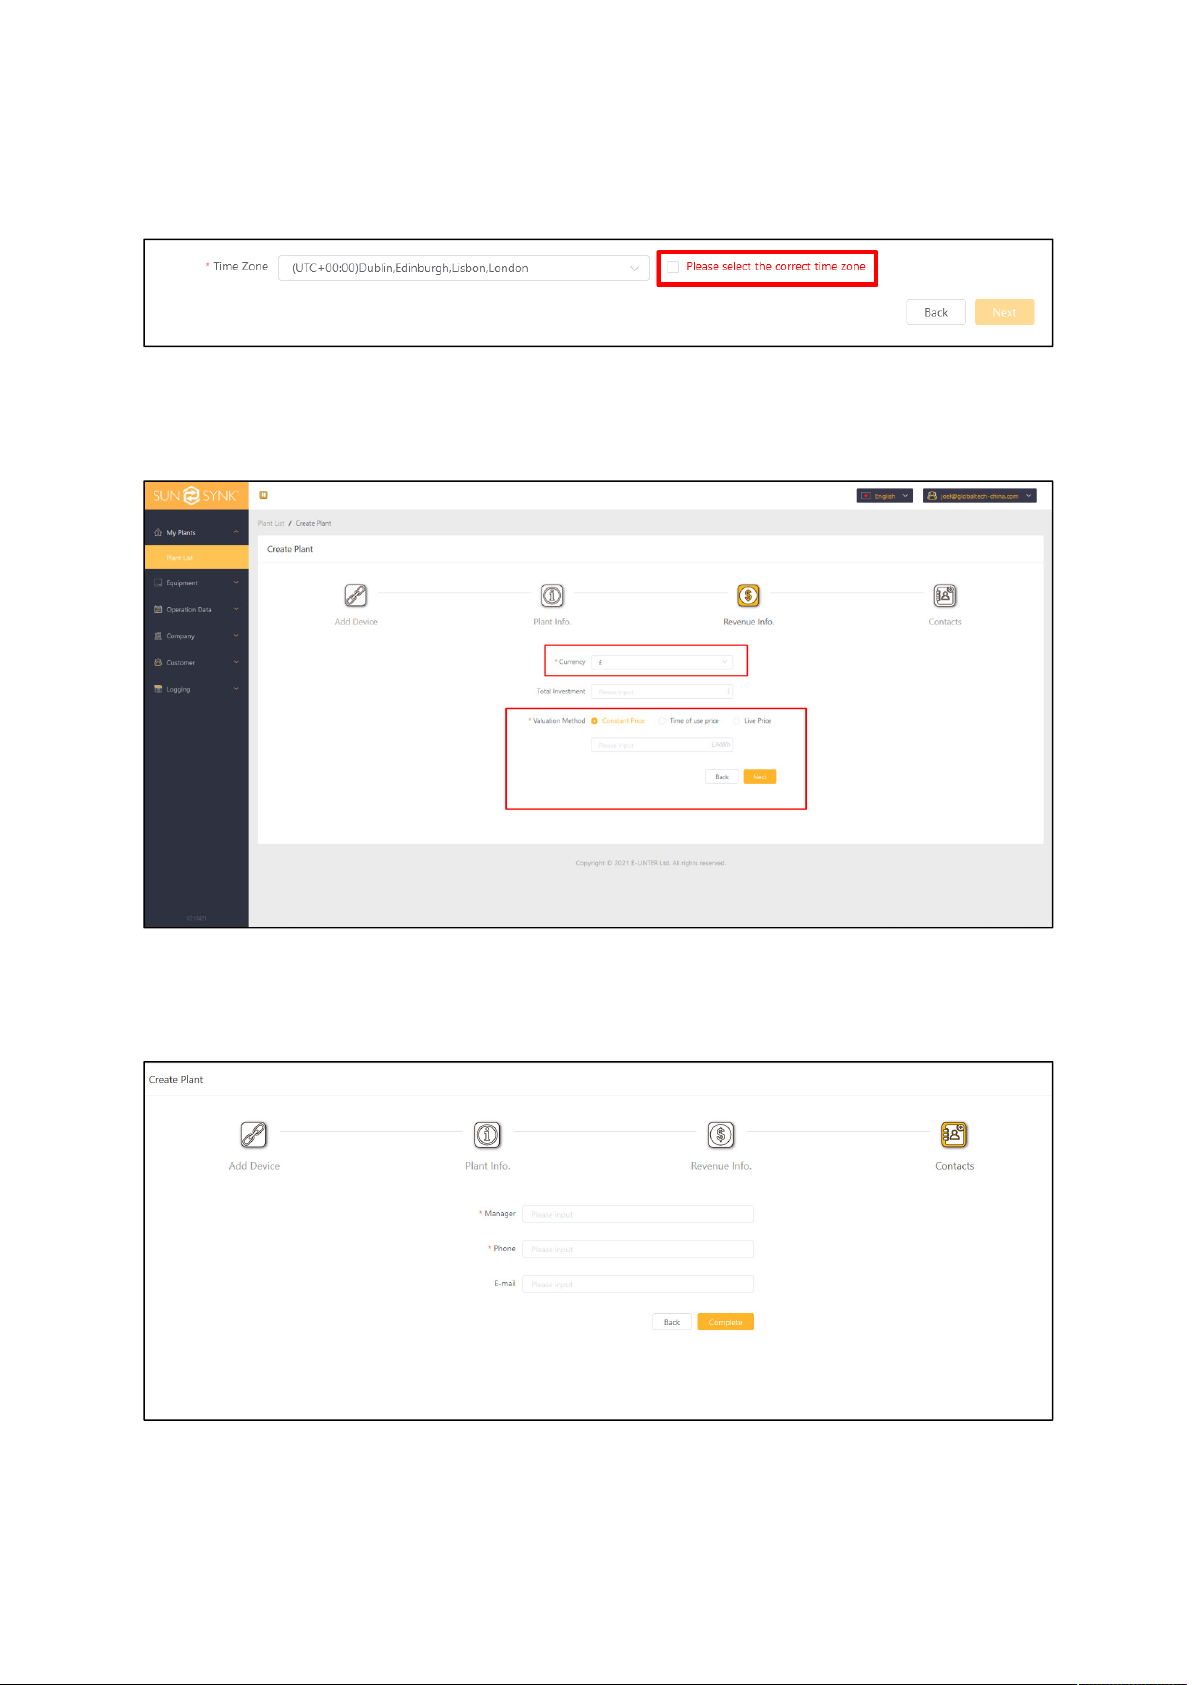
5) Also, please confirm if the time zone of the plant is correct. If it is not, please change
it. Finally, click ‘Next’.
6) Select your currency, your total investment, and your preferred Valuation Method.
Note: The Live Price option is only currently available for UK customers.
7) Enter the name of the user who is going to manage the system, their phone number,
and e-mail.
Page | 12
3.2. ADDING A DEVICE
In the menu, first click ‘My Plant’, then ‘Plant List’.
1) Select the plant that need to add equipment from the ‘Plant List’.
2) Click the ‘More (...)’ button and Select ‘Add Gateway’.
 Loading...