

ELECTRONIC SHELF LABEL
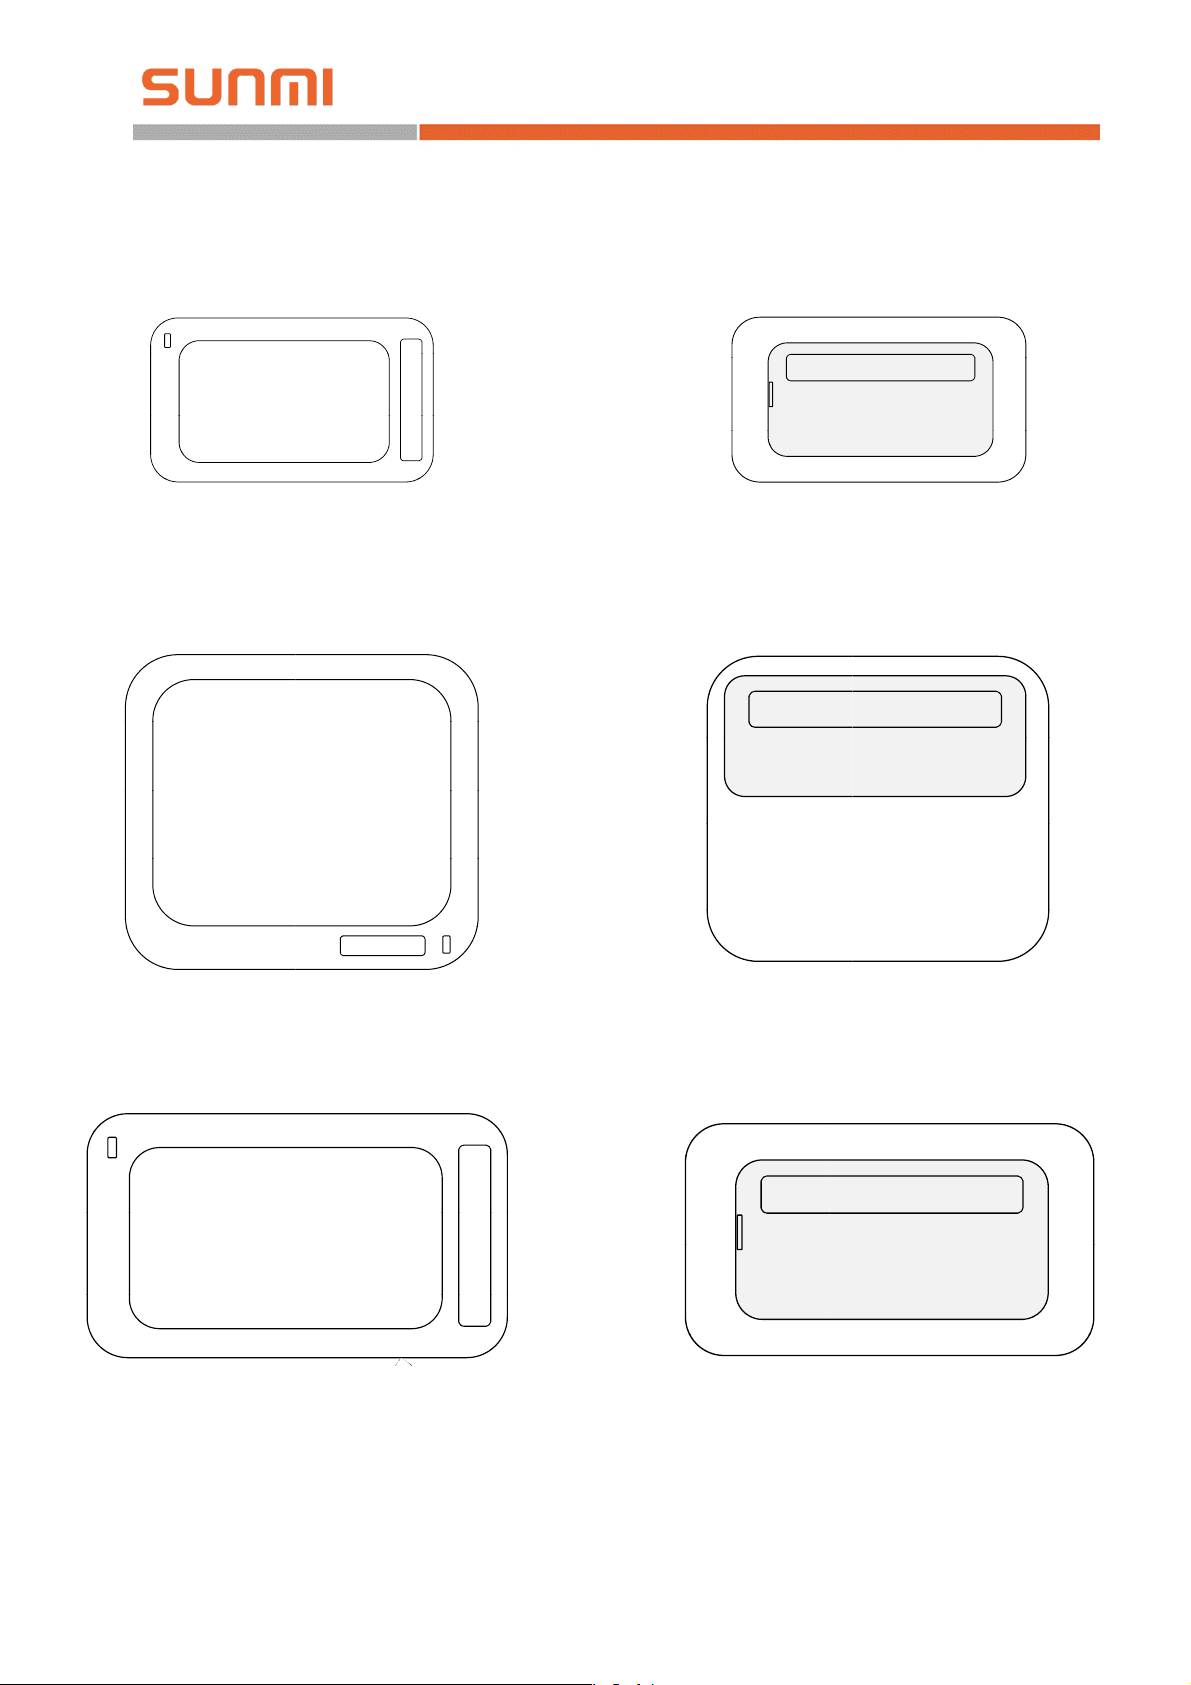
BL201
SUNMI Technology
BLA01/BLA02
BL202/BL203

SUNMI Technology
Implementation Process of SUNMI
ELECTRONIC SHELF LABEL(ESL)
Shanghai Sunmi Technology Co.,Ltd.
Version: V1.1
Sep. 15, 2019
Page 1/16

SUNMI Technology
Contens
Revision History .................................................................................................................................. 3
1 Preliminary Work .............................................................................................................................. 4
2 Product docking ................................................................................................................................ 4
3 Equipment Installation ...................................................................................................................... 4
3.1 Installation Preparation .......................................................................................................... 4
3.2 Access Point............................................................................................................................ 5
3.2.1 Introduction ................................................................................................................ 5
3.2.2 Base Installation .......................................................................................................... 6
3.2.3 Access Point Configuration ......................................................................................... 7
3.3 Labels and Accessories ........................................................................................................... 8
4 Software Operation ........................................................................................................................... 8
4.1 SUNMI digital store ................................................................................................................ 9
4.1.1 Register an account in SUNMI digital store ................................................................. 9
4.1.2 Set up docking of product information ....................................................................... 9
4.1.3 Template design ........................................................................................................ 11
4.2 SUNMI ESL APP ..................................................................................................................... 11
4.2.1 Access point configuration ........................................................................................ 11
4.2.2 ESL and product binding ........................................................................................... 13
4.2.3 ESL unbinding ............................................................................................................ 15
4.2.4 Product inquiry .......................................................................................................... 16
Page 2/16

SUNMI Technology
Revision History
Issued Date Revised Contents Ver si o n
2019-07-28 Draft V1.0
2019-09-15 English version V1.1
FCC Statement
Any Changes or modifications not expressly approved by the party responsible for
compliance could void the user’s authority to operate the equipment.
This device complies with part 15 of the FCC Rules. Operation is subject to the following two
conditions:
(1) This device may not cause harmful interference, and
(2) This device must accept any interference received, including interference that may cause
undesired operation.
RF warning :
The device has been evaluated to meet general RF exposure requirment.The device can be
used in portable exposure condition without restriction.
Page 3/16

SUNMI Technology
1 Preliminary Work
Before implementing a formal deployment, the following preparations need to be completed:
1. Business cooperation process;
2. Statistics on the number and type of store ESLs;
3. Statistics on the installation mode of store ESLs (the type and quantity of guide rails
and clamps);
4. Location determination of the access point installation (focus on the network wiring);
5. Cloud deployment mode confirmation (SaaS or private cloud).
For the specific preparation process, please see implementation preparation collected in the
separate project documentation.
2 Product docking
It is necessary to start the docking of product information as soon as possible, after the
confirmation of business contract and the confirmation of product docking demand.
It takes about two weeks for product information docking.
The general process of product information docking is as follows:
1. SUNMI, the software partner shall discuss docking requirements and release technical
documents;
2. Confirm the docking plan and schedule the project;
3. Developing docking interface and launching after multiple environmental tests.
The deployment and implementation of equipment shall start after product docking.
See separate product docking documents for specific product docking procedures and
instructions.
3 Equipment Installation
3.1 Installation Preparation
Tools to be carried with during installation:
1. Rags, used to clean shelves
2. Big scissors or cutting machines for cutting guide rails
3. Electric drill for fixing equipment
Page 4/16
SUNMI Technology
White flicker: during access point startup
Normally Red ON: access point cannot connect to the server
① ② ③
④
⑤
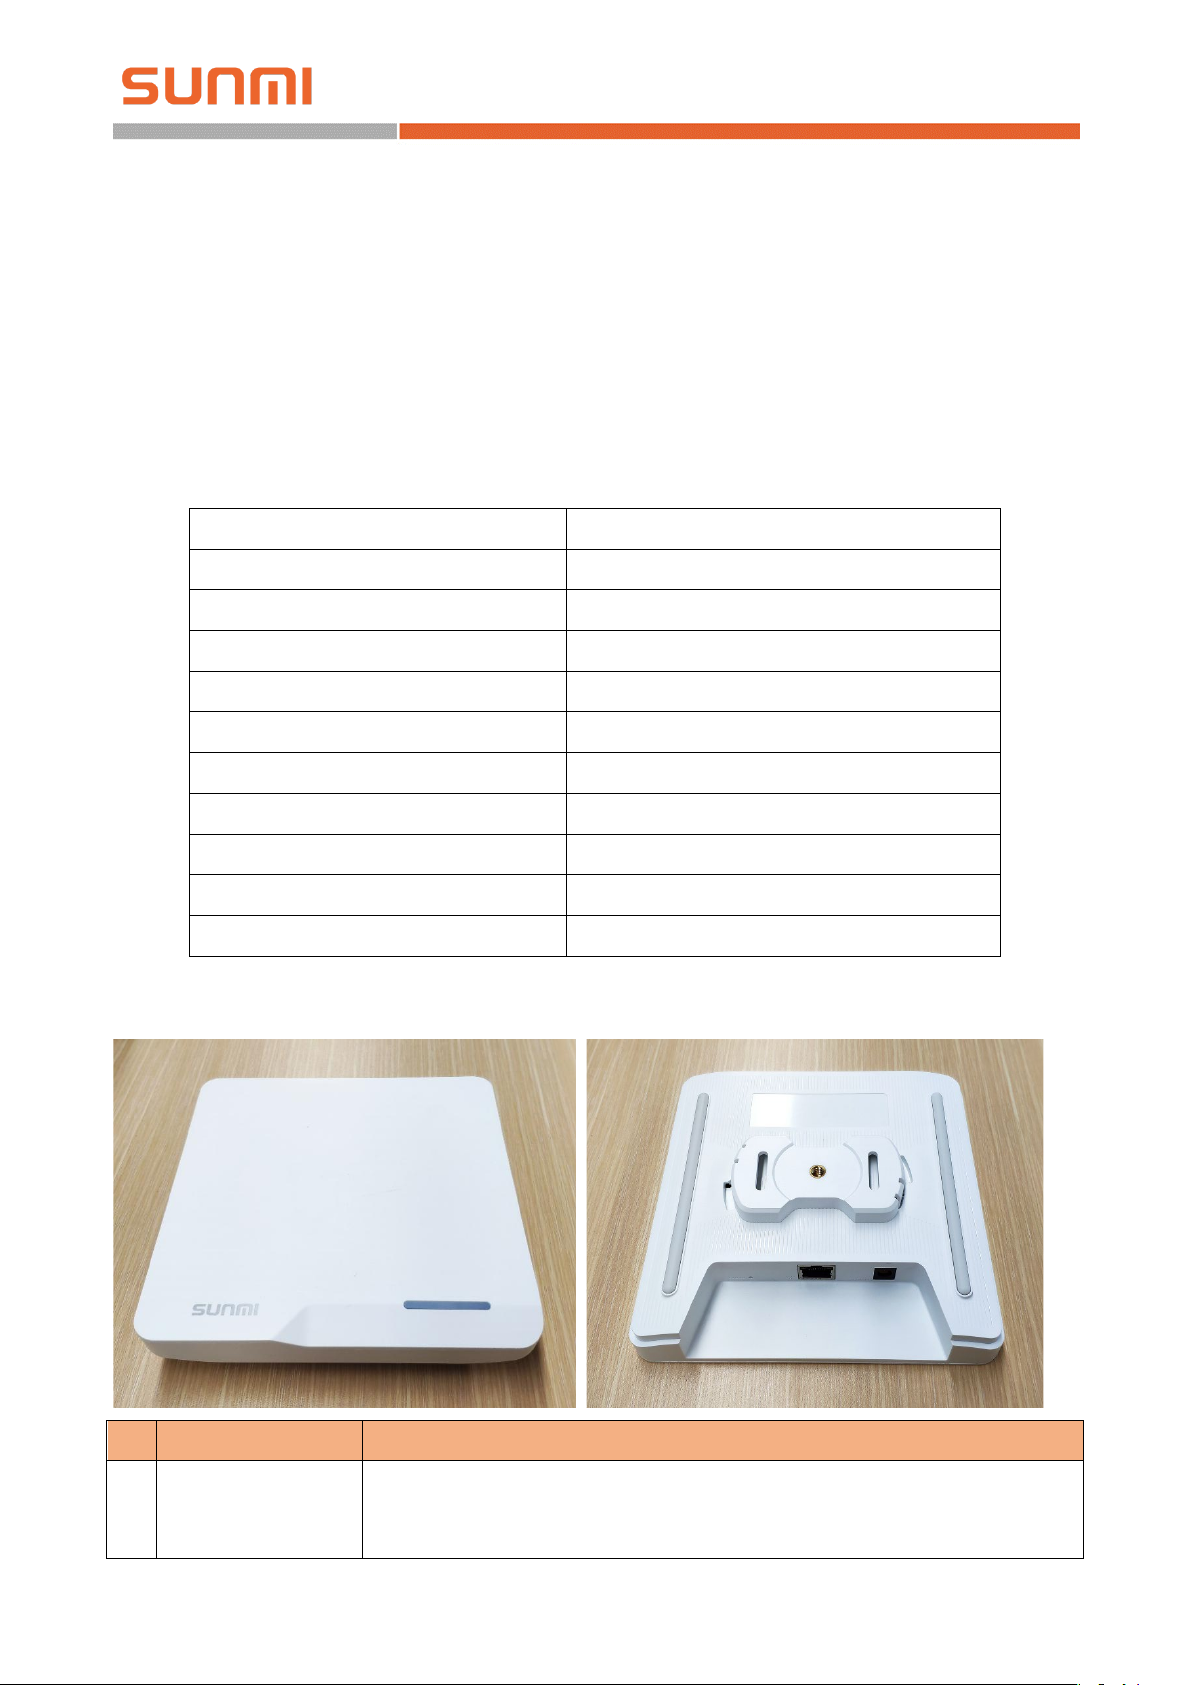
3.2 Access Point
3.2.1 Introduction
The access point (AP) for SUNMI smart ESLs is used to connect ESL equipment with SUNMI
digital store. The image and the instruction emitted by the digital store server are transmitted to the
wireless access point through the Ethernet, and the access point is further distributed to the ESL
through the wireless communication of the 2.4 G frequency band, so that the cloud change price and
the ESL refresh can be realized.
The following table shows the basic specifications of the wireless access point for smart ESLs:
Product name Electronic shelf label AP
Product model BL010
Marketing model SLAP1
Input Power DC 5V/1A or PoE
PoE Specification IEEE 802.3af
Ethernet interface RJ45 100M
Wireless communication band 2.4GHz
Oversize 156mm*156mm*25mm
Installation Ceiling/ Wall/ Desktop Placement
Coverage radius 25m
Supported quantity of ESLs Up to 10,000 single AP
The relevant interface description on the wireless access point for smart ESLs is as follows:
Ports Description
1 Power light
Normally White ON: access point is connected to the server and is working
properly
Page 5/16

SUNMI Technology
Bring its own detachable hooks so that the access point supports a variety of
installation methods
2 Reset button Press for 5 seconds to restore the access point to the factory state
3 Internet port RJ45 Ethernet port with indicator light, support for PoE power supply
4 Power port Power adapter port to support independent power supply
5 Installation hooks
3.2.2 Base Installation
3.2.2.1 Power Supply Mode
SUNMI wireless access point for smart ESLs supports power adapter and PoE power supply,
which power supply mode needs to be determined by in-store environment and installation mode.
The power adapter line is 2 meters long. Use the plug board if it is not long enough, while
strictly forbid to extend the power cord by yourself.
The installation of access point adopts ceiling and hanging-wall styles, but when the power
cord of adapter is not long enough, PoE can be used to power the access point. PoE power supply
needs to apply a separate PoE module or PoE switch, and the network line connected by PoE
module / switch can be plugged directly into the access point to supply power to the access point.
Note: it is strictly forbidden to use both power adapter and PoE power supply at the same time.
3.2.2.2 Internet Access
SUNMI access point for smart ESLs supports DHCP and static IP.
If it is only a single access point, ensure that the access point can connect to the cloud server or
the local server.
If there are more than one access point, it is necessary to let each access point be located under
the same LAN in order to realize the network roaming of access point and labels.
3.2.2.3 Installation and Fixation
The fixation of ESL access point supports ceiling, hanging walls and desktop placement.
It is recommended to install on the ceiling, which can get wider signal coverage; Wall hanging
and desktop placement are only suitable for the cases where the labels are less or close to the access
point.
For ceiling installation, the installation height is recommended as 3~3.5 meters (can be
adjusted by metal universal rod). Max coverage radius of a single access point is 25 meters
(laboratory test results), and 15 meters is recommended.
Page 6/16

SUNMI Technology
If multiple access points are needed, it is necessary to ensure that each access point signal has
an overlapping area, and each label is at least within the coverage of more than one access point.
If there are walls, columns, air pipes, refrigerators, etc., between the access point and the label,
the wireless signal will be affected and attenuated to a certain extent. When the access point is
installed, it should avoid the above objects as far as possible. If it cannot be avoided, it can be
regarded as reducing the coverage radius of the access point.
The signal frequency band of the ESL access point coincides with the band of 2.4G Wi-Fi. If
the ESL access point and the wireless router are installed together, the two will interfere with each
other, so the two should be installed separately.
Actually, when installing the access point, we also need to consider the number of ESLs that
the access point can support. Single SUNMI wireless access point for smart ESLs supports a
maximum of 10000 pieces of ESLs. But considering the refresh speed of batch push and system
redundancy, it is recommended that one access point be allocated for every 3000 pieces of labels.
The installation distance between access points can be adjusted accordingly.
3.2.3 Access Point Configuration
After all ESL access points are installed, it is necessary to use SUNMI assistant APP to
configure each access point, including the Internet access mode and name of each access point.
After configuration, the tie-up between access point and store will be completed to realize the
networking of access point, so that the labels can be connected to the access point.
Detailed configuration refers to the implementation process documentation of software
Page 7/16

SUNMI Technology
operations.
3.3 Labels and Accessories
The label cannot be installed independently, it needs to be installed with various types of
accessories to the shelf, basket rack and pile head.
4 Software Operation
Software configuration and usage include operations on the SUNMI digital store website and
on the SUNMI ESL APP of PDA.
In SUNMI digital store, you need to complete:
1. Register an account in SUNMI digital store;
2. Set up docking of product information;
3. Design template for ESL;
On the SUNMI ESL APP of PDA, you need to complete:
1. Configure the Internet access mode of the AP;
2. Bind ESL and product;
3. Unbind ESL and product;
4. Search product.
Check below for specific procedures.
Page 8/16

SUNMI Technology
4.1 SUNMI digital store
The operations of SUNMI digital store need to be complete before the deployment of
equipment installation.
4.1.1 Register an account in SUNMI digital store
Visit website store.sunmi.com through Chrome, Firefox, QQ browser and 360 browser on
computer to register account. If already registered, step over to sign in.
Create the company and store after sign-in. Step over if the account already created.
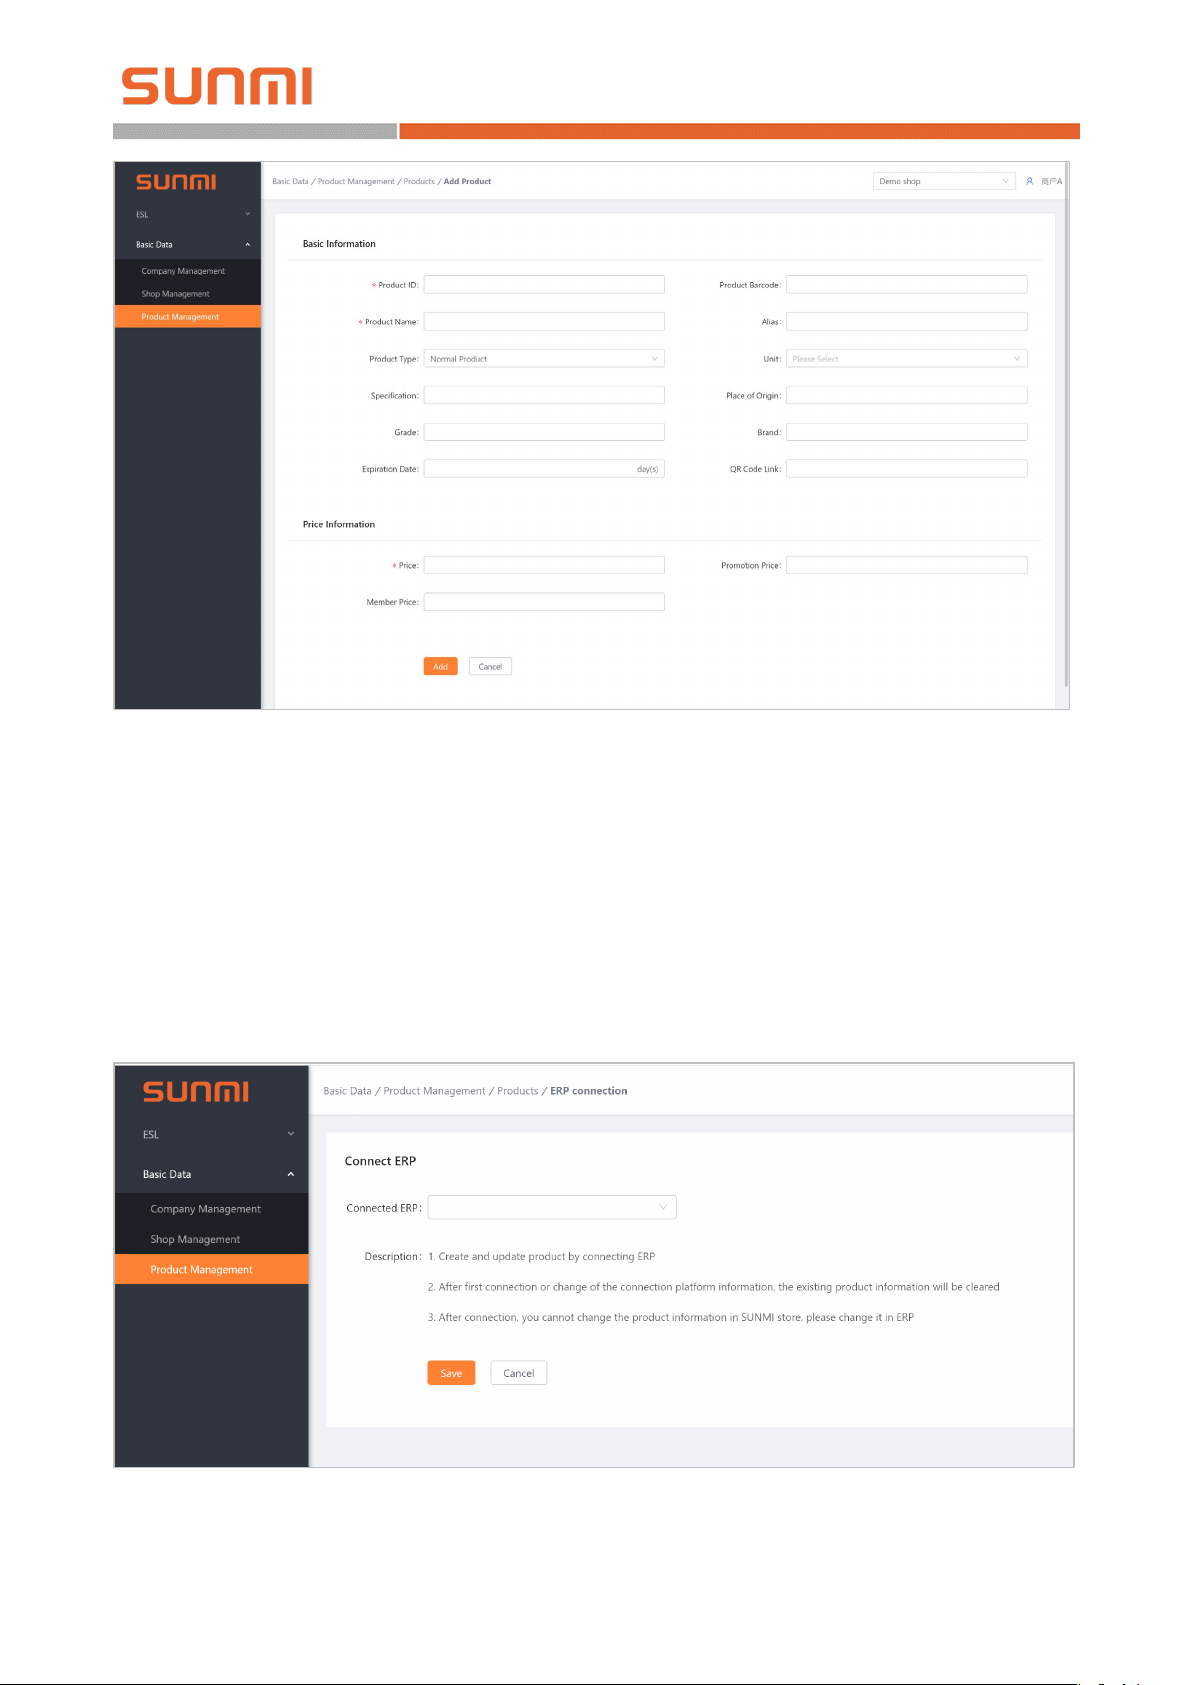
4.1.2 Set up docking of product information
Enter into [Basic data > Product management] from menu on the page left, you can see the
product list, and all products with bindable ESLs are listed here.
In the prior test or trial, you can input information and create product manually, or modify
product information manually.
In the formal usage, product library is generally necessary to dock with ERP/POS software to
realize auto-import, revise and delete.
Page 9/16
SUNMI Technology
Enter the [Docking ERP] function, select the ERP platform that has been docked in the
previous work, and input the authentication information (which can be obtained on the page under
some part of the ERP software, and some other part needs to be obtained by the ERP manufacturer).
The storage can complete the docking of the product library and start drawing the products.
After setting up ERP docking, the product library of the digital store will get all the product
information from the ERP through the API interface, and it will synchronize to the SUNMI digital
store after each modification in ERP, and then synchronize to the ESL.
Page 10/16

SUNMI Technology
4.1.3 Template design
Template is to present product information for ESL. Users can present through user-defined
function.
Enter [ESL > Template Management], you can edit existing templates, or create new templates
for design.
Templates are classified according to size and color. an ESL of a certain size can only use a
template of that size, a constant temperature ESL can use black and white red, black and white
templates, and a low temperature ESL can only use black and white templates.
Suggest to complete the validation of template in advance.
4.2 SUNMI ESL APP
The operations of SUNMI ESL APP are under equipments deployment.
Please acquire SUNMI ESL APP in SUNMI APP Store, and the APP is functioning in SUNMI
L2 only.
4.2.1 Access point configuration
The access point configuration shall be carried out before ESL installation when the access
point installation is completed, to make all ESLs easily to connect access point successfully at the
time of ESL binding.
After completing the installation of the access point, energize it, insert the cable, then wait for
the light is normally on white or red. At this time, you can add a configuration access point by using
the SUNMI ESL APP on L2. The concrete steps shall be as follows:
1. Start the SUNMI ESL APP, and sign in with the account of SUNMI digital store.
Page 11/16

SUNMI Technology
2. Go to the APP system page, click [AP management > Add AP], then start searching access
point signal with l2.
In order to ensure that the signal strength of the access point is strong enough to be connected
by L2, it is necessary to search as close as possible to the access point.
Page 12/16

SUNMI Technology
3. Select the access point that needs to be added (according to the signal strength or MAC
address, the scanned MAC address is the same as the MAC address on the bottom nameplate of the
access point) to enter the process of the access point adding and configuring.
First of all, you need to set up the access point Internet access mode, you can choose to
automatically obtain IP (DHCP) or manually input IP (static IP). The automatic acquisition of IP
(DHCP) mode can be used generally.
After setting the Internet access mode, set the access point name (required), click confirm add
to add the access point to the current store to complete the binding.
When the access point configuration is completed, the added access point will be seen in the
access point list, and if the access point status is online, it is in normal operate. If the access point is
offline, please check the connection status of power supply and the network, and try to reconfigure
the access point access mode.
For the added access point, you can choose to manage in the access point list, modify the
access point name, delete the access point, or modify the access point access mode.
To modify the access point access mode, you need to reconnect the access point, please
approach the access point and operate again. The modification is the same as access point adding.
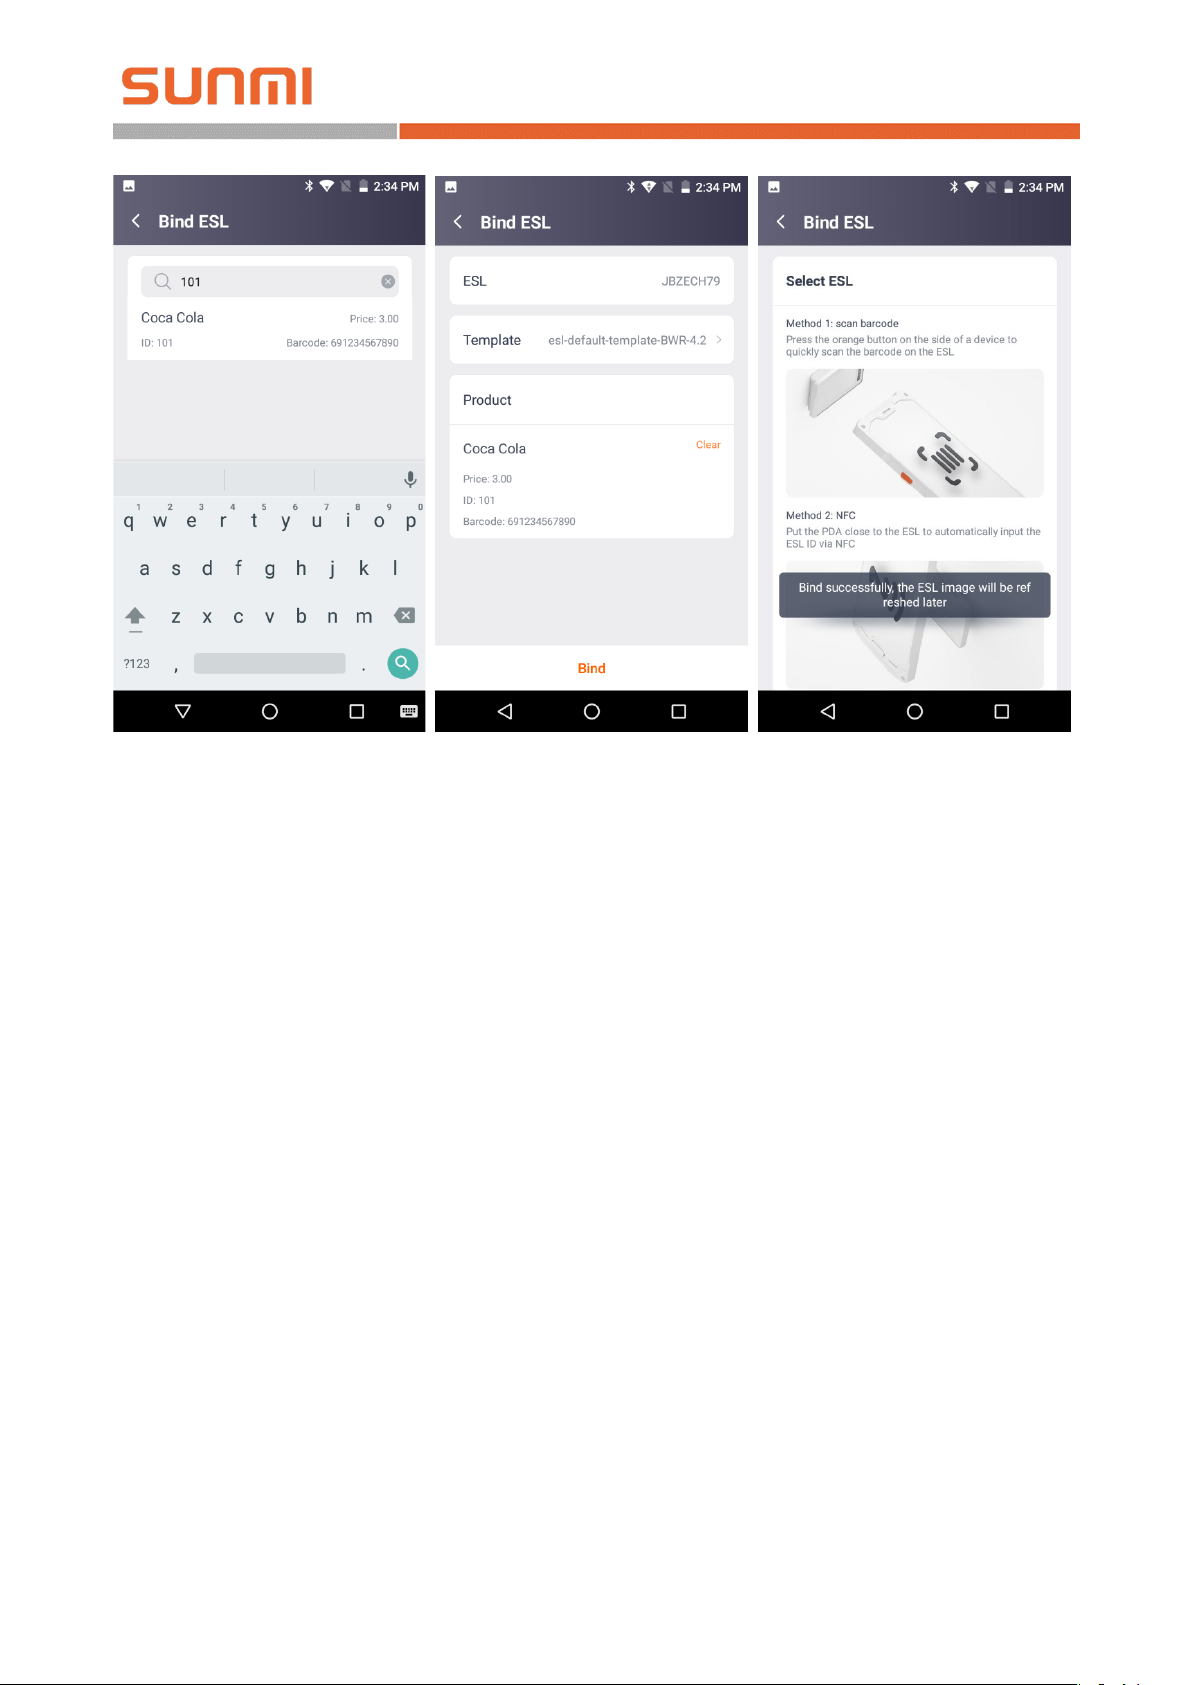
4.2.2 ESL and product binding
After the ESL is installed, you can start binding the ESL to the products.
Enter the binding page from the APP home page: select ESL, select template, select product,
Page 13/16

SUNMI Technology
and complete binding.
[Select ESL] can be achieved through the bar code on the L2 ESL (the bar code is the unique
identified ID), or through NFC by close L2 to the ESL to obtain the ID.
SUNMI ESL support NFC, which can obtain the ESL ID through NFC on the PDA, or reset
the ESL device.
[Select Template] is to choose the designed template in SUNMI digital store previously.
[Select Product] can be realized directly by scanning product bar code. If there is no bar
code, you can enter the product number / name / bar code to select the product.
After selecting the product, template and ESL, click on “Bind” to bind the product with the
ESL, and jump to the ESL selection page to facilitate the rapid binding of the next ESL with the
product.
Under normal circumstances, within half a minute of binding completion, the ESL will refresh
and display the product information with the selected template.
Page 14/16
SUNMI Technology
After completing the binding of all products and ESL, return to the home page of the SUNMI
ESL APP. When the number of ESLs to be pushed becomes 0, that means all the ESLs are
completed and the ESL system is deployed for the first time.
If it is any modification in need later, directly modify in the ERP, then the product information
will be immediately synchronized to the SUNMI digital store, and sent to the ESL.
If the products move location and no longer correspond to the ESL, you need to rebind or
unbind directly according to the above process.
4.2.3 ESL unbinding
If you do not want an ESL to display product information, you can unbind the ESL, THEN the
ESL will display the factory default picture.
Unbind method is similar to binding, using code sweeping or NFC to select the ESL, and click
unbind to complete work.
Page 15/16

SUNMI Technology
4.2.4 Product inquiry
Inquire through the product number / name / bar code, and the bar code of the product binding
ESL.
Enter the product details page to see the product information, as well as the ESL bound to the
product, click on the flash lamp to allow the ESL flashing immediately.
Page 16/16
 Loading...