

Page 1

Sun HIPPI/P 1.0 Installation and User’s Guide
Sun Microsystems Computer Company
A Sun Microsystems, Inc. Business
901 San Antonio Road Palo Alto, CA 94303-4900 USA
650 960-1300
fax 650 969-9131
Part No.: 805-7133-10
Revision A, March 1999
Page 2

1999 SunMicrosystems,Inc., 901 San Antonio Road, Palo Alto, California 94303-4900 U.S.A.
All rights reserved.
This product or document is protected by copyright and distributed under licenses restricting itsuse, copying,distribution, anddecompilation.
No part of this productor document may be reproducedin anyform byany meanswithout priorwritten authorizationof Sunand itslicensors,
if any.
Portions of this product may be derived from the UNIX® system, licensed from Novell,Inc., andfrom the Berkeley 4.3 BSD system, licensed
fromthe University of California. UNIX is a registered trademark in theUnited States and in other countriesand is exclusively licensed by
X/Open Company Ltd. Third-party software, including font technology in this product, is protected by copyright and licensed from Sun’s
suppliers. RESTRICTED RIGHTS: Use, duplication, or disclosureby the U.S. Government is subject to restrictions of FAR52.227-14(g)(2)(6/87)
and FAR52.227-19(6/87), or DFAR252.227-7015(b)(6/95) and DFAR227.7202-3(a).
Sun, Sun Microsystems,the Sun logo, and Solaris are trademarks or registeredtrademarks of Sun Microsystems, Inc. in the United States and in
other countries. All SPARCtrademarks are used under license and are trademarks or registeredtrademarks of SPARCInternational,Inc. in the
United States and in other countries. Productsbearing SPARCtrademarks are based upon an architecture developed by Sun Microsystems, Inc.
The OPEN LOOK® and Sun™ Graphical User Interfaces weredeveloped by Sun Microsystems, Inc. for its users and licensees. Sun
acknowledges the pioneering efforts of Xerox Corporation in researching and developing the concept of visual or graphical user interfaces for
the computer industry. Sun holds a nonexclusive license fromXerox to the Xerox Graphical User Interface, which license also coversSun’s
licensees who implement OPEN LOOK GUIs and otherwise comply with Sun’s written license agreements.
THIS PUBLICATIONIS PROVIDED “AS IS” WITHOUT WARRANTYOF ANY KIND, EITHER EXPRESS OR IMPLIED, INCLUDING, BUT
NOT LIMITED TO,THE IMPLIED WARRANTIESOFMERCHANTABILITY,FITNESS FOR A PARTICULARPURPOSE,OR NONINFRINGEMENT.
Copyright 1999 Sun Microsystems, Inc., 901 San Antonio Road, Palo Alto, Californie 94303-4900 U.S.A. Tousdroits réservés.
Ce produit ou document est protégé par un copyright et distribué avec des licences qui en restreignent l’utilisation, la copie et la décompilation.
Aucune partie de ce produitou de sa documentation associée ne peut être reproduitesous aucune forme, par quelque moyen que ce soit, sans
l’autorisation préalable et écrite de Sun et de ses bailleurs de licence, s’il y en a.
Des parties de ce produitpourront être derivées du système UNIX® licencié par Novell, Inc. et du systèmeBerkeley 4.3 BSD licenciépar
l’Université de Californie. UNIX est une marqueenregistrée aux Etats-Unis et dans d’autres pays, et licenciée exclusivement par X/Open
Company Ltd. Le logiciel détenu par des tiers, et qui comprendla technologie relative aux polices de caractères,est protégépar un copyright et
licencié par des fournisseurs de Sun.
Sun, Sun Microsystems,le logo Sun, et Solaris sont des marques déposées ou enregistréesde SunMicrosystems, Inc. aux Etats-Unis et dans
d’autrespays. Toutesles marques SPARC,utiliséessous licence, sont des marques déposées ou enregistrées de SPARCInternational, Inc. aux
Etats-Unis et dans d’autres pays. Les produits portant les marques SPARCsont basés sur une architecturedéveloppée par Sun Microsystems,
Inc.
Les utilisateurs d’interfaces graphiques OPEN LOOK® et Sun™ ont été développés de Sun Microsystems, Inc. pour ses utilisateurs et licenciés.
Sun reconnaît les efforts de pionniers de XeroxCorporation pourla rechercheet le développement du concept des interfaces d’utilisation
visuelle ou graphique pour l’industrie de l’informatique. Sun détient une licence non exclusive de Xeroxsur l’interface d’utilisation graphique,
cette licence couvrant aussi les licenciés de Sun qui mettent en place les utilisateurs d’interfaces graphiques OPEN LOOK et qui en outre se
conforment aux licences écrites de Sun.
CETTE PUBLICATIONEST FOURNIE "EN L’ETAT"SANS GARANTIE D’AUCUNE SORTE, NI EXPRESSE NI IMPLICITE, Y COMPRIS, ET
SANS QUE CETTE LISTE NE SOIT LIMITATIVE,DES GARANTIES CONCERNANT LA VALEUR MARCHANDE, L’APTITUDE DES
PRODUITS A REPONDRE A UNE UTILISATIONPARTICULIERE OU LE FAITQU’ILS NE SOIENT PASCONTREFAISANTSDE PRODUITS
DE TIERS.
Please
Recycle
Page 3

Please
Recycle
Page 4

Please
Recycle
Page 5

Contents
1. Sun HIPPI Overview 13
Feature Summary 13
HIPPI Conformance 14
2. Installing the Sun HIPPI Adapter 15
Device Instances and Device Names 15
Inventory Items 16
Installing Sun HIPPI PCI Cards 16
Connecting Fiber-Optic Cables 18
Cleaning the Fiber-Optic Cable 19
3. Installing the Sun HIPPI Software 21
Declaring IP Addresses for Sun HIPPI 21
Removing Conflicting Packages 22
Installing and Configuring Sun HIPPI 22
Loading and Mounting the CD-ROM 22
Installing Sun HIPPI By Using pkgadd 23
Installing the Device Driver (SUNWhip)24
Installing the Online Documentation (SUNWhipmn)28
Installing the Developer Utilities (SUNWhipc)28
Contents iii
Page 6

Finishing the Installation 28
Verifying the Installation 29
Deinstalling Sun HIPPI 30
Stopping the Driver 30
Unloading HIPPI Drivers 31
Removing Sun HIPPI 31
4. Configuring the Sun HIPPI Interface 33
High Performance HIPPI Networks 33
Data Throughput Improvement 33
Improving Performance 34
Changing the High Water Marks 34
Tuning the High Water Mark 35
Tuning Window Scaling 36
Tuning the Congestion Window Maximum 36
Tuning the High and Low Water Marks at Boot Time 36
Tuning the Socket Options 37
5. Troubleshooting and Diagnostics 39
Troubleshooting Checklist 39
Checking the MAC Address 39
Checking the Sun HIPPI Driver 40
Checking the IP Addresses 40
Checking the IP Routing 41
Checking the Protocol Statistics 41
Checking HIPPI Operation 42
Solving Common Problems 43
Loading the Device Driver Manually (Solaris 2.x)44
iv Sun Enterprise 10000 Dynamic Reconfiguration User’s Guide • May 1999
Page 7

6. HIPPI Network Architecture 47
Introduction to HIPPI Networking 47
Network Architecture 47
Switched Network Topology 48
I-Field 48
Framing Protocol 50
HIPPI Network Model 50
HIPPI Network Configuration 51
HIPPI Performance 52
7. Using the Sun HIPPI Network Utilities 55
Changing the Default MAC Address 55
Using the Sun HIPPI Device Driver Utilities 57
Displaying Sun HIPPI Statistics (hippistat)58
Contents v
Page 8

vi Sun Enterprise 10000 Dynamic Reconfiguration User’s Guide • May 1999
Page 9

Figures
FIGURE 2-1 HIPPI PCI Card 17
FIGURE 2-2 Aligning SC Type Fiber-Optic Cable Connectors 19
FIGURE 2-3 Cleaning the End of a Fiber-Optic Cable 20
FIGURE 6-1 I-Field 49
FIGURE 6-2 HIPPI Architectural Model 51
FIGURE 6-3 Basic HIPPI Point-to-point Configuration 51
FIGURE 6-4 HIPPI Network Configuration Using a Switch 52
Figures vii
Page 10

viii Sun Enterprise 10000 Dynamic Reconfiguration User’s Guide • May 1999
Page 11

Preface
The SunHIPPI 1.0 User’s Installation Guide provides instructions for the Sun™ HIPPI
adapter supported by the Sun HIPPI software. This manual also describes how to
install and configure the Sun HIPPI software.
The instructions in this manual are designed for a system administrator with
experience installing similar software and hardware.
How This Book Is Organized
The SunHIPPI 1.0 User’s Installation Guide is organized as follows:
Chapter 1 describes the Sun HIPPI implementation of the HIPPI protocols and
includes a list of the specifications to which it conforms.
Chapter 2 provides detailed instructions on how to install your Sun HIPPI PCI card
in your machine and describes how to connect the HIPPI cable.
Chapter 3 describes how to install the Sun HIPPI device driver and utilities on
machines running a Solaris™ 2.6 or 7 environment.
Chapter 4 describes the configurable network parameters and provides general
advice on how to obtain the best performance from your network.
Chapter 5 tells you how to detect and resolve problems with your HIPPI network.
Chapter 6 provides an overview of the HIPPI network model and describes how
HIPPI networks operate.
Chapter 7 describes the network utilities delivered with Sun HIPPI and tells you
how to use them to recover network statistics.
Appendix A contains a list of common questions and their responses.
ix
Page 12

Appendix B describes how to create applications that run over Sun HIPPI, using the
DLPI interface for a Solaris environment.
Using UNIX Commands
This document does not contain information on basic UNIX commands and
procedures such as shutting down the system, booting the system, and configuring
devices.
See one or more of the following for this information:
■ Solaris Handbook for Sun Peripherals
■ AnswerBook online documentation for the Solaris software environment
■ Other software documentation that you received with your system
Typographic Conventions
TABLEP-1 Typographic Conventions
Typeface Meaning Examples
AaBbCc123 The names of commands, files,
and directories; on-screen
computer output
AaBbCc123 What you type, when
contrasted with on-screen
computer output
AaBbCc123 Book titles, new words or terms,
words to be emphasized
Command-line variable; replace
with a real name or value
x SunHIPPI 1.0 User’s Installation Guide • March 1999
Edit your .login file.
Use ls -a to list all files.
% You have mail.
% su
Password:
Read Chapter 6 in the User’s Guide.
These are called class options.
You must be superuser to do this.
To delete a file, type rm filename.
Page 13

Shell Prompts
TABLEP-2 Shell Prompts
Shell Prompt
C shell machine_name%
C shell superuser machine_name#
Bourne shell and Korn shell $
Bourne shell and Korn shell superuser #
Related Documentation
TABLEP-3 Related Documentation
Application Title
Programming HIPPI Character Device Interface User’s Guide and Reference Manual
Sun Documentation on the Web
The docs.sun.comsmweb site enables you to access Sun technical documentation
on the Web. You can browse the docs.sun.com archive or search for a specific book
title or subject at:
http://docs.sun.com
xi
Page 14

Sun Welcomes Your Comments
We are interested in improving our documentation and welcome your comments
and suggestions. You can email your comments to us at:
docfeedback@sun.com
Please include the part number of your document in the subject line of your email.
xii SunHIPPI 1.0 User’s Installation Guide • March 1999
Page 15

CHAPTER
1
Sun HIPPI Overview
This chapter describes the Sun HIPPI (High Performance Parallel Interface)
implementation of the HIPPI protocols, including a list of the ANSI/HIPPI
standards to which it conforms. See Chapter 6 “HIPPI Network Architecture” for
more information on HIPPI architecture.
1.1 Feature Summary
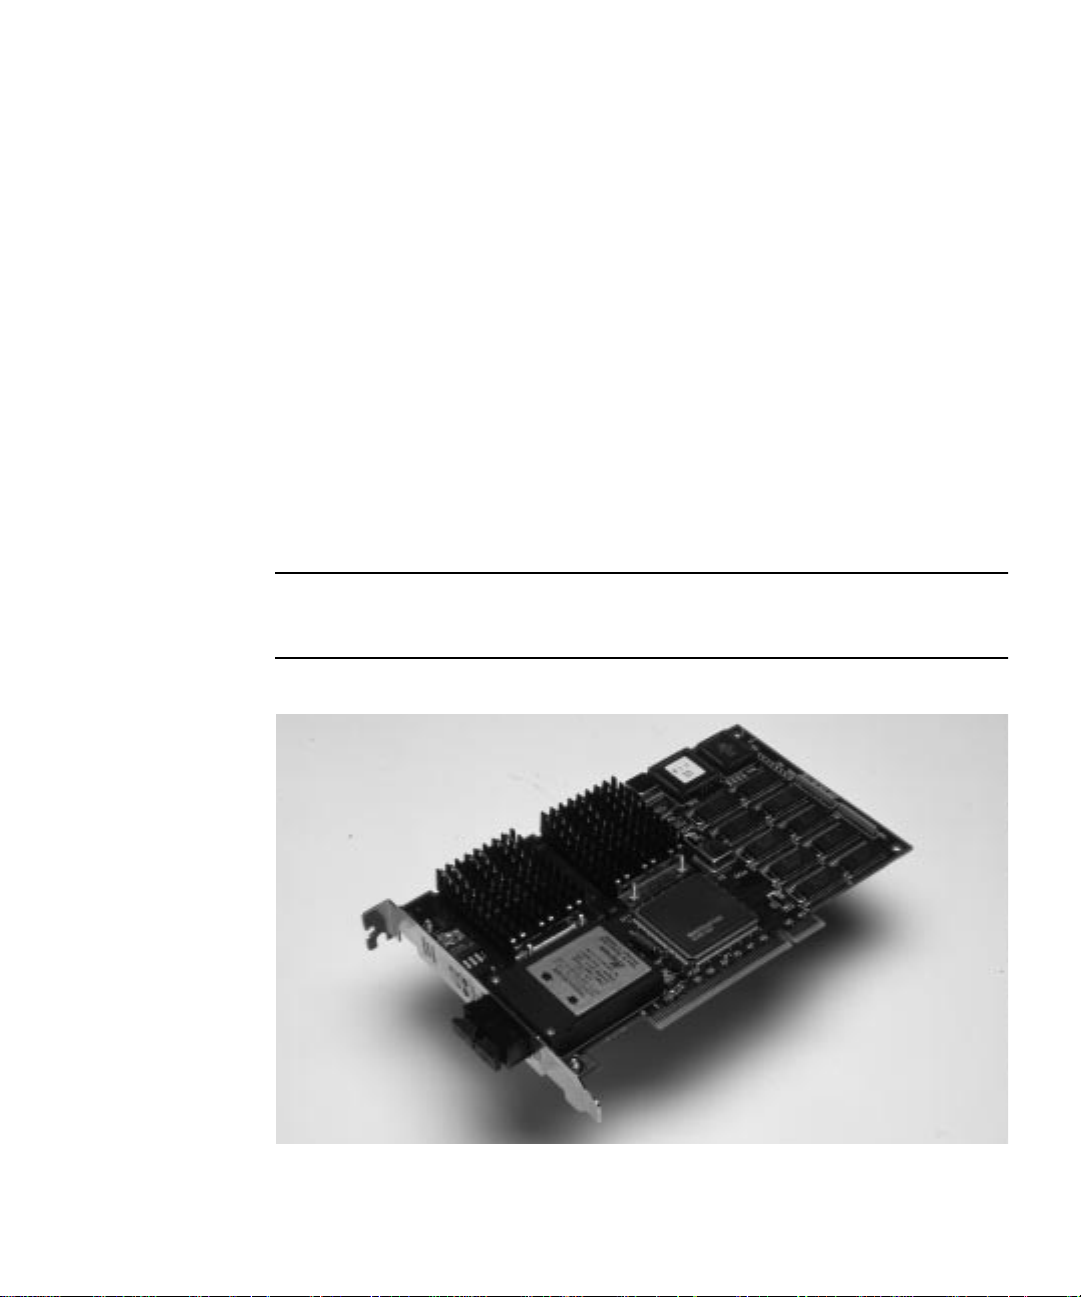
The Sun HIPPI PCI Adapter 1.0 is a combination of hardware and software that adds
HIPPI networking support to your system.
Sun HIPPI is a high-speed networking product that provides significantly greater
bandwidth (up to 80 times) compared to 10-megabit Ethernet networks. It is
designed for SPARC™ system architectures running the Solaris 2.6 or Solaris 7
operating environment.
Sun HIPPI does the following:
■ Provides connection to multimode fiber networks
■ Supports data transfer rates of up to 100 MBps or 800 Mbps
■ Provides full support for existing SunOS™ 5.x operating system network services
and utilities
■ Provides power-up self test and system diagnostic tests
■ Supports up to four Sun HIPPI PCI cards installed in one machine
1-13
Page 16

1.2 HIPPI Conformance
Sun HIPPI conforms to the following standards and specifications:
■ ANSI X3.183-1991 - Physical sublayer
■ ANSI X3.222-1993 - Framing protocol
■ ANSI X3.218-1993 - Link encapsulation
■ PCI specification, revision 2.1, part number 802-2387-02
■ RFC 1374 - IP and ARP on HIPPI
1-14 SunHIPPI 1.0 User’s Installation Guide • March 1999
Page 17

CHAPTER
2
Installing the Sun HIPPI Adapter
This chapter tells you where to find step-by-step procedures for installing PCI cards.
It describes the convention used to assign device names to Sun HIPPI PCI cards, and
tells you how to connect fiber-optic cables.
Caution – For your personal safety and to protect your machine, observe the
following precautions when you install a PCI card in a SPARC workstation or server.
Before opening your machine, always ensure that the power switch is off
(O position). When the power is off, the green light on the front of the machine is
unlit and the fan in the power supply is not running. Always take care to protect
your equipment from the effects of static electricity.
Be sure to wear a wrist strap when performing any of these procedures.
2.1 Device Instances and Device Names
You can install a Sun HIPPI PCI card in any available PCI slot. Sun HIPPI supports
up to four Sun HIPPI PCI cards installed in one machine.
Sun HIPPI PCI cards are assigned device names of the form hipipinst, where the
instance number inst is determined by the number and relative positions of the cards
installed. When you install a Sun HIPPI card in your machine for the first time, it
has instance number 0 and a device name hipip0. If multiple cards are installed, the
device name hipip0 is associated with the card in the lowest numbered slot, the
device name hipip1 is associated with the card in the next higher numbered slot,
and so on.
Refer to the hardware installation manual that came with your system for detailed
instructions on how to identify the PCI slots in your machine.
2-15
Page 18

Note – For a machine running the Solaris environment, if a Sun HIPPI PCI card is
moved from its initial slot to a different one, the operating system will find the
device in the new slot and assume that it is a new instance of the device. As a result,
the operating system will assign the next instance number to it and there will appear
to be two devices installed in the machine.
2.2 Inventory Items
Before proceeding with the installation, make sure you have received the following
items:
■ One Sun HIPPI PCI adapter
■ Disposable grounding wrist strap
■ CD-ROM containing Sun HIPPI software
■ 15-meter cable
■ SunHIPPI 1.0 User ’s Installation Guide
Contact your sales representative if any of these items are missing.
2.3 Installing Sun HIPPI PCI Cards
Caution – The Sun HIPPI PCI card is sensitive to static electricity. Always use the
wrist strap supplied with Sun HIPPI when handling the card and ensure that the
wrist strap is properly grounded. Handle the Sun HIPPI PCI card by the edges, and
avoid touching any of the components.
1. Confirm that your system supports 33-Mhz PCI operation, which is required for
this HIPPI PCI card.
2. Attach a properly grounded antistatic strap to your wrist.
3. Remove the PCI card from the antistatic bag.
Caution – Handle circuit cards only while wearing a properly grounded wrist
strap. This prevents potential damage to the card from static electricity.
2-16 SunHIPPI 1.0 User’s Installation Guide • March 1999
Page 19
4. Remove covers and boards as required to access the PCI slots in your system.
Refer to the hardware installation manual that came with your system for detailed
instructions on how to access the PCI slots in your machine.
5. Select a PCI slot and remove the lock-down screw securing the PCI cover plate.
6. Remove the cover plate.
7. If used, confirm that the riser card in your system is 5 volts.
Riser cards have etches noting the voltages. Also, riser cards are keyed to prevent
damage.
8. Install the PCI card into the selected slot.
Refer to the hardware installation manual that came with your system for detailed
instructions on how to install a PCI card in your machine.
9. Confirm that the card is firmly installed into the PCI connector then secure the
card with the lock-down screw.
10. Replace all covers and boards as required.
Note – There are no user-configurable jumpers or switches on the Sun HIPPI PCI
card. Altering any of the components on the card can affect its operation adversely
and will render any product warranty void.
FIGURE 2-1 HIPPI PCI Card
Chapter 2 Installing the Sun HIPPI Adapter 2-17
Page 20

2.4 Connecting Fiber-Optic Cables
Fiber-optic cable is fragile and should not be subjected to mechanical stress or
impact. Always observe the following precautions when handling fiber-optic cable
and connectors:
■ Fiber-optic cable connectors consist of a ceramic or steel ferrule through which
the optical fiber passes. Do not touch the tip of the ferrule, as marring or
depositing oil or dirt on its delicate surface will destroy its ability to transmit
light.
■ Use the protective caps provided on the fiber-optic cable connectors and optic
data links whenever the cable is not connected.
■ Fiber-optic cable has a limited turn radius. Do not bend it in a way that could
damage the fiber or cause signal loss.
1. Unpack the cable, remove the plastic protective caps from each end, and remove
the cap from the transceiver unit on the card.
2. Make sure the fiber-optic cable is properly oriented with its connector on the Sun HIPPI card.
Most fiber-optic cables have raised keys on one side of the connectors. There are also
keyway notches on the inside of the connector on the card; the fiber-optic cable
should be oriented so that the keys on the cable connectors line up with the keyway
notches on the card (
FIGURE 2-2).
Caution – Some cables do not possess raised keys to help you properly orient the
connection. When installing the cables, verify the source on one end of the cable
connects to the destination on the other end of the cable.
2-18 SunHIPPI 1.0 User’s Installation Guide • March 1999
Page 21
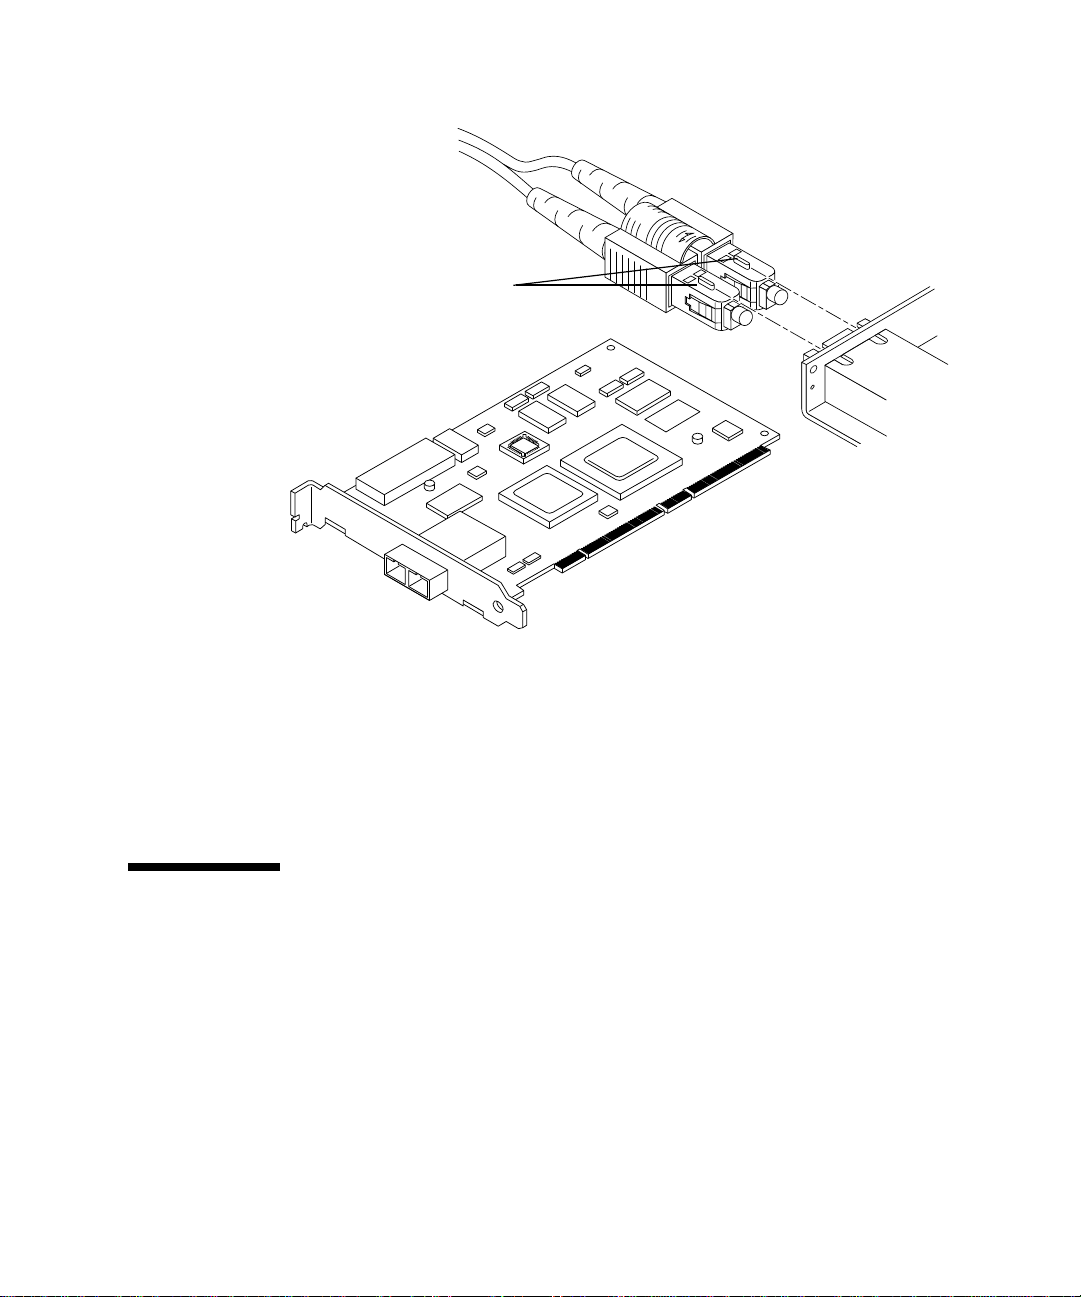
Keys
Port A
FIGURE 2-2 Aligning SC Type Fiber-Optic Cable Connectors
3. Once you have verified that the fiber-optic cable and the connector on the Sun
HIPPI card are properly oriented (see caution statement), insert the cable into the
card connector.
You should hear a distinctive click sound, indicating that the cable is properly mated
with the card connector.
Port B
A B
2.5 Cleaning the Fiber-Optic Cable
Fiber-optic cable connectors can be cleaned if they become contaminated with dirt,
dust or oil, which can cause signal noise on the network.
1. Gently wipe the end of the ferrule with an alcohol-moistened cotton swab.
Chapter 2 Installing the Sun HIPPI Adapter 2-19
Page 22

FIGURE 2-3 Cleaning the End of a Fiber-Optic Cable
2. Blow clean, dry compressed air around the end of the connector and around the
ferrule to dislodge loose dust and grit.
3. Clean the adapter by moistening the end of a pipe cleaner in alcohol and running
the pipe cleaner though the adapter.
Repeat with a dry pipe cleaner.
4. Blow the adapter with clean, dry compressed air again to finish drying the clean adapter.
2-20 SunHIPPI 1.0 User’s Installation Guide • March 1999
Page 23

CHAPTER
3
Installing the Sun HIPPI Software
This chapter tells you how to install the Sun HIPPI device drivers and utilities in a
Solaris 2.6 or Solaris 7 operating environment. It includes instructions on how to
check your installation and how to remove the Sun HIPPI software, if necessary.
TABLE3-1 Installation Requirements
Requirements Description
Hardware and
Software Platforms
Disk Space 2300 KBytes of disk space to install Sun HIPPI in a Solaris
Host names and IP
Addresses
SPARC system architectures (32 Mbytes RAM minimum) running a
Solaris 2.6 or Solaris 7 operating environment.
environment.
A unique host name and IP address for each Sun HIPPI device
installed in your machine. If you are installing more than one
interface in a single machine, each interface must be connected to a
different subnet of a network.
3.1 Declaring IP Addresses for Sun HIPPI
The files on your NIS/NIS+ server must be updated before installing the Sun HIPPI
software.
● Update the files on your NIS/NIS+ server to assign IP addresses and host names
for the Sun HIPPI interfaces that you are going to configure.
If you are not using an NIS/NIS+ name service, update the /etc/inet/hosts file
on each machine in the network to add the IP addresses and host names of the hosts
attached to the HIPPI network. See the hosts(4M) man page for additional
information.
3-21
Page 24

3.2 Removing Conflicting Packages
If you have existing Essential HIPPI packages installed, they must be removed prior
to installing Sun Microsystems HIPPI packages.
1. Determine if conflicting packages are present by, as root, typing:
# pkginfo | grep ESShip
2. If present, save all configuration files.
3. Remove the conflicting packages by typing:
# /usr/sbin/pkgrm ESShip
3.3 Installing and Configuring Sun HIPPI
Use pkgadd(1M) to install unbundled software on machines running a Solaris
environment. See the Solaris Software and AnswerBook Packages Administration Guide
for detailed information on installing software products using pkgadd.
3.3.1 Loading and Mounting the CD-ROM
1. Log in as root or become superuser.
2. Place the CD-ROM into the CD-ROM drive.
3. If not mounted automatically, mount the CD-ROM on a local directory.
■ If the Volume Manager (vold) is running on your machine, then the
CD-ROM is mounted automatically under /cdrom/sun_hippi_1_0.
3-22 SunHIPPI 1.0 User’s Installation Guide • March 1999
Page 25

■ If the Volume Manager (vold)isnot running on your machine, create a directory
called /cdrom/sun_hippi_1_0 and mount the CD-ROM manually.
# mkdir -p /cdrom/sun_hippi_1_0
# /usr/sbin/mount -o ro -F hsfs /dev/dsk/c0t6d0s0 \
/cdrom/sun_hippi_1_0
For detailed instructions on how to load software from a CD-ROM drive mounted
on a remote directory, see the Solaris Software and AnswerBook Packages Administration
Guide.
After mounting the CD-ROM, you will see the following directories in the /cdrom/
sun_hippi_1_0 directory:
■ Sol_2.6
■ Sol_7
These directories contain the HIPPI software packages for Solaris 2.6 or Solaris 7
operating environment and the examples directory.
3.3.2 Installing Sun HIPPI By Using pkgadd
The following instructions are for Sun HIPPI on a Solaris 7 operating environment. If
you are installing Sun HIPPI on Solaris 2.6, replace Sol_7 with your specific
operating environment, such as Sol_2.6.
1. Determine the system’s Solaris release version by typing:
% /bin/uname -r
2. Log in as root or become superuser.
3. Start pkgadd by typing:
# /usr/sbin/pkgadd —d /cdrom/sun_hippi_1_0/Sol_7
Chapter 3 Installing the Sun HIPPI Software 3-23
Page 26

4. Press Return to install all of the packages and respond to any prompts that appear
on the command line.
There are four packages associated with Sun HIPPI. They contain the device drivers,
developer utilities, and man pages used to manage your Sun HIPPI hardware. If
you are installing only a subset of the packages, enter the number that corresponds
to the package you want to install and press Return.
The following packages are available:
1 SUNWHIPAB Sun HIPPI 1.0 AnswerBook
(all) 445.1.9
2 SUNWhip SunHIPPI PCI Drivers
(sparc) 1.0,REV=5.7.xxxx.xx.xx
3 SUNWhipc SunHIPPI CDI Developer Utilities
(sparc) 1.0,REV=5.7.xxxx.xx.xx
4 SUNWhipmn SunHIPPI Online Documentation
(sparc) 1.0,REV=5.7.xxxx.xx.xx
Select package(s) you wish to process (or ’all’ to process
all packages). (default: all) [?,??,q]:
3.3.2.1 Installing the Device Driver (SUNWhip)
The package SUNWhip contains the Sun HIPPI device driver, utility commands, and
start-up scripts. By default, the base directory basedir for this package is /. You can
change the default base directory for this package when you start pkgadd(1M) with
the -R option. This package must be installed on every machine that runs Sun
HIPPI.
1. After installing the packages, as root:
3-24 SunHIPPI 1.0 User’s Installation Guide • March 1999
Page 27

■ If hardware is present, type answers similar to the responses in the following
example:
# /etc/opt/SUNWconn/bin/hipadmin
/etc/opt/SUNWconn/bin/hipadmin - SunHiPPI Administration Tool
Detected 1 HiPPI NIC(s) present
Enter the IP {hostname} or address for hipip0 [?] 192.215.165.2
Enter the netmask for hipip0 [?] 0xffffff00
Enter the HIPPI logical address for hipip0 in hex notation [?] 0x7
saving configuration to /etc/opt/SUNWconn/hippi/hip0.conf
setting tuning parameters into hip0 EEPROM
downloading firmware into hip0 EEPROM
Do you wish to patch the global network tunables for increased network
throughput? [y] [y,n,?] y
You will need to update the HiPPI ARP configuration file:
/etc/opt/SUNWconn/hippi/hippiarp.conf
in order to be able to communicate with other HiPPI hosts on
your network using the IP protocol.
#
After the questions have been answered, Go to Step l.
Note – If a HIPPI switch is not present, enter an unused arbitrary switch address
between 0 and 0xf8f. The unused arbitrary switch address must be unique for each
system.
Chapter 3 Installing the Sun HIPPI Software 3-25
Page 28

■ If no hardware is present, you will be asked to enter a number in the range 1 to 4
to indicate the number of NICs that you would like to configure. Press Return to
accept the default or type answers similar to the responses in the following
example.
# /etc/opt/SUNWconn/bin/hipadmin
/etc/opt/SUNWconn/bin/hipadmin - SunHiPPI Administration Tool
No HiPPI NIC present
How many HiPPI interfaces do you want to configure [1-4,?,q] 1
Enter the IP {hostname} or address for hipip0 [?] 192.215.165.2
Enter the netmask for hipip0 [?] 0xffffff00
Enter the HIPPI logical address for hipip0 in hex notation [?] 0x7
saving configuration to /etc/opt/SUNWconn/hippi/hip0.conf
NOTE: After installing the HiPPI NIC(s) in your system,
run /etc/opt/SUNWconn/bin/hipadmin -u to update the NIC(s) EEPROM contents.
Do you wish to patch the global network tunables for increased network
throughput? [y] [y,n,?] y
You will need to update the HiPPI ARP configuration file:
/etc/opt/SUNWconn/hippi/hippiarp.conf
in order to be able to communicate with other HiPPI hosts on
your network using the IP protocol.
#
Refer to the hipadmin(1M) and hippiarp(1M) man pages for more information.
a. Bring the system down.
b. Install the hardware.
Install the HIPPI hardware, and at the OBP prompt, boot the system by typing:
ok boot diskname -r
For more details about installing HIPPI hardware, see Chapter 2 “” and the
service manual for your platform.
3-26 SunHIPPI 1.0 User’s Installation Guide • March 1999
Page 29

2. Update the hippiarp.conf file. a. Obtain and retain the MAC address of the NIC card.
The machine_ULA, represented by 0:a0:88:1:2:59, is the MAC address of the NIC
card. After the HIPPI hardware is installed, the machine_ULA can be found by
typing the following command:
# /etc/opt/SUNWconn/hippi/bin/hippiarp -h
hip0: DOWN NOT_RUNNING
hip0: ULA 0:a0:88:1:2:59 Logical Address <Not Known>
Note – Use the form hipn to specify the HIPPI adapter on the local system. For
more information about this syntax, refer to the hippiarp(1M) man page.
b. Update the hippiarp.conf file with all the machine names in the HIPPI
network as shown in this example:
# vi /etc/opt/SUNWconn/hippi/hippiarp.conf
#!/bin/sh
PATH="‘pkginfo -r SUNWhip‘/etc/opt/SUNWconn/hippi/bin:${PATH}"
#
# Add the entries for all machines in the hippi network.
# The format is hippiarp -s hostname machine_ULA
machine_switch_address local_HIPPI_interface
# Example:
# hippiarp -s hipserv -h 0:0:82:90:1a:c 0x104 hip0
#
# Run this file after updating it.
#
hippiarp -s hostname machine_ULA machine_switch_address local_HIPPI_interface
Note – An entry must exist for all systems on the network. For additional
information, refer to the hippiarp(1M) man page.
Note – If the ULA of the remote host is unknown, machine_ULA for this host must
be given as 0:0:0:0:0:0.
c. Verify that the hostname and IP address are in either your local /etc/hosts
file or in the NIS hosts database.
Chapter 3 Installing the Sun HIPPI Software 3-27
Page 30

3. Bring the HIPPI interfaces online by typing:
# /etc/init.d/hippi start
3.3.2.2 Installing the Online Documentation (SUNWhipmn)
The SUNWhipmn package contains the Sun HIPPI man pages. By default, the base
directory basedir for this package is /opt. You can change the default base directory
when you start pkgadd(1M) with the -R option. This package can be installed on a
server and shared between multiple machines, if required.
3.3.2.3 Installing the Developer Utilities (SUNWhipc)
The SUNWhipc package contains the Sun HIPPI developer utilities. By default, the
base directory basedir for this package is /opt. You can change the default base
directory when you start pkgadd(1M) with the -R option.
3.3.3 Finishing the Installation
Type q to stop pkgadd when the list of available packages is displayed again..
The following packages are available:
1 SUNWHIPAB Sun HIPPI 1.0 AnswerBook
(all) 445.1.9
2 SUNWhip SunHIPPI PCI Drivers
(sparc) 1.0,REV=5.7.xxxx.xx.xx
3 SUNWhipc SunHIPPI CDI Developer Utilities
(sparc) 1.0,REV=5.7.xxxx.xx.xx
4 SUNWhipmn SunHIPPI Online Documentation
(sparc) 1.0,REV=5.7.xxxx.xx.xx
Select package(s) you wish to process (or ’all’ to process
all packages). (default: all) [?,??,q]:
1. Eject the CD-ROM from the CD-ROM drive.
3-28 SunHIPPI 1.0 User’s Installation Guide • March 1999
Page 31

■ If Volume Manager (vold) is running on your machine, then the CD-ROM is
unmounted automatically and the directory removed when the CD-ROM is
ejected:
# eject cdrom
■ If Volume Manager (vold) is not running on your machine, unmount the CD-
ROM before you eject and remove the directory that you created:
# /usr/sbin/umount /cdrom/sun_hippi_1_0
# eject cdrom
# rmdir /cdrom/sun_hippi_1_0
2. Reboot your machine to ensure correct system operation.
3. Verify that all of the latest HIPPI patches have been installed.
Refer to the SunSolve database for the latest released patches and instructions for
installing them.
3.3.4 Verifying the Installation
1. Use netstat(1M) to check for Sun HIPPI interfaces.
% /usr/bin/netstat -i
Name Mtu Net/Dest Address Ipkts Ierrs Opkts Oerrs Collis Queue
lo0 8232 loopback localhost 21 0 21 0 0 0
le0 1500 our-lan hanna 2146 0 950 1 13 0
hipip0 57344 our-hip hanna-h 1086 0 907 0 0 0
2. Use ifconfig(1M) to check the current state of the Sun HIPPI interfaces.
% /usr/sbin/ifconfig hipip0
hipip0: flags=843<UP,BROADCAST,RUNNING,MULTICAST> mtu 57344
inet host_address netmask netmask broadcast ip_address
ether mac_address
Chapter 3 Installing the Sun HIPPI Software 3-29
Page 32

3. Use ping(1M) to verify that you can send and receive data across the HIPPI connection.
If your Sun HIPPI host is attached to an active HIPPI network, try to access a remote
host.
% /usr/sbin/ping jojo-h
jojo-h is alive
Your Sun HIPPI interface should now be active, and you should be able to send and
receive data across a HIPPI connection.
For optimum performance from your HIPPI network, you may need to tune the
configurable network parameters. See Chapter 4 “ for detailed instructions.
If you have problems configuring or using your Sun HIPPI host, see Chapter 5 “ for
help.
3.4 Deinstalling Sun HIPPI
If you remove the Sun HIPPI hardware interfaces from your machine, you should
also remove the Sun HIPPI software to prevent the device driver from starting each
time you reboot the machine.
Use pkgrm(1M) to remove unbundled software from machines running a Solaris
environment. Refer to Installing Solaris Software for detailed information on removing
software packages by using pkgrm.
If you prefer to keep any of the configuration files, save these files prior to
performing the package removal.
3.4.1 Stopping the Driver
● As root, type:
# /etc/init.d/hippi stop
3-30 SunHIPPI 1.0 User’s Installation Guide • March 1999
Page 33

3.4.2 Unloading HIPPI Drivers
The driver for the Sun HIPPI PCI Adapter can be unloaded while the system is
running by using the modunload(1M) command.
● Type the following commands:
# modinfo | grep hip
# modunload -i module ID for hipip driver
# modunload -i module ID for hip driver
3.4.3 Removing Sun HIPPI
1. Log in as root or become superuser.
2. Use pkgrm to remove Sun HIPPI.
The post-remove script removes the modifications made to the system files and
updates the package information on your machine. If you prefer to keep any of the
configuration files, save these files prior to performing the package removal by
typing:
# /usr/sbin/pkgrm SUNWhip
# /usr/sbin/pkgrm SUNWhipmn
# /usr/sbin/pkgrm SUNWhipc
# /usr/sbin/pkgrm SUNWHIPAB
3. Reboot the machine to ensure correct system operation.
Chapter 3 Installing the Sun HIPPI Software 3-31
Page 34

3-32 SunHIPPI 1.0 User’s Installation Guide • March 1999
Page 35

CHAPTER
4
Configuring the Sun HIPPI Interface
This chapter tells you how to obtain the best performance from your HIPPI network.
It assumes that you are familiar with HIPPI network architecture and related
terminology. See Chapter 6 “ for a detailed description of the HIPPI protocols.
Caution – There are a number of ways to improve network performance, some of
which are discussed in this chapter; however, these should be undertaken only by
experienced system administrators. Tuning your network incorrectly can adversely
affect network performance.
4.1 High Performance HIPPI Networks
Think of a HIPPI network as having the potential to carry more information with
increased throughput, rather than as being a faster connection. If the applications
running over the network do not use the available bandwidth efficiently, you will
not see much improvement in the performance of your network by using HIPPI.
4.2 Data Throughput Improvement
The most significant improvements in throughput are achieved by maximizing the
rate at which data is transferred to and from the HIPPI network. If you are running
TCP/IP or UDP/IP applications, you can improve throughput by modifying the
parameters that control the rate at which these protocols transfer data to and from
the Sun HIPPI device driver—that is, between user space and kernel space.
4-33
Page 36

The send and receive buffers control the maximum rate at which data is transferred
between user space and kernel space by applications that use Sockets. The size of
these buffers defines the amount of data that can be transferred at one time.
To optimize performance, assign consistent values for the send and receive buffers.
The default value (4 Kbytes) assigned to these parameters is optimized for
transmission across Ethernet connections. For applications running over HIPPI, the
send and receive buffers should be set to 64 Kbytes.
4.3 Improving Performance
The following sections describe how to modify the user-configurable network
parameters. To obtain optimum network performance, you may need to tune some,
or all, of these parameters, depending on your network configuration and the type
of network traffic.
Note – The following performance changes are optionally installed as part of the
hipadmin(1M) portion of the Sun HIPPI installation process and are executed
during a system boot as part of the /etc/rc2.d/k84hippi startup script.
The variables used for tuning network performance are global and any changes
made by these variables will also affect other network connections. It is up to the
individual to determine the proper balance of changes.
4.3.1 Changing the High Water Marks
The maximum rate at which data is transferred between user space and kernel space
by applications that use STREAMS is controlled by the high water marks . These
parameters define the maximum amount of data that can be queued for transmission
to the TCP or UDP STREAMS modules. There are independent send and receive
high water marks for TCP and UDP applications.
When the number of bytes queued exceeds the high water mark, transmission is
halted temporarily to enable the backlog to be cleared. The low water mark specifies
the level to which the queue must drop before transmission is restarted.
4-34 SunHIPPI 1.0 User’s Installation Guide • March 1999
Page 37

4.3.2 Tuning the High Water Mark
For optimum performance, assign consistent values for the transmit and receive high
water marks. The default value (8192) assigned to these parameters is optimized for
transmitting across Ethernet connections. For applications running over HIPPI, the
high water marks should be set to 1024 Kbytes.
Use ndd(1M) to change the TCP and UDP high water marks.
1. Log in as root or become superuser.
2. Use ndd —get (the default) to check the current value of the TCP high water
marks (tcp_xmit_hiwat and tcp_recv_hiwat).
# ndd -get /dev/tcp tcp_xmit_hiwat
8192
# ndd -get /dev/tcp tcp_recv_hiwat
8192
3. Use ndd —set to modify the current value of the TCP high water marks
(tcp_xmit_hiwat and tcp_recv_hiwat).
For optimum performance over HIPPI connections, the TCP high water marks
should both be set to 1024 Kbytes.
# ndd —set /dev/tcp tcp_xmit_hiwat 1045876
# ndd —set /dev/tcp tcp_recv_hiwat 1045876
4. Use ndd —get (the default) to check the current value of the UDP high water
marks (udp_xmit_hiwat and udp_recv_hiwat).
# ndd —get /dev/udp udp_xmit_hiwat
8192
# ndd —get /dev/udp udp_recv_hiwat
8192
5. Use ndd —set to modify the current value of the UDP high water marks
(udp_xmit_hiwat and udp_recv_hiwat).
For optimum performance over HIPPI connections, the UDP high water marks
should both be set to 1024 Kbytes.
# ndd —set /dev/udp udp_xmit_hiwat 1045876
# ndd —set /dev/udp udp_recv_hiwat 1045876
Chapter 4 Configuring the Sun HIPPI Interface 4-35
Page 38

4.3.3 Tuning Window Scaling
The Solaris environment supports TCP window scaling as defined by RFC 1323. To
ensure that this feature is always used, a global flag can be set.
Use ndd(1M) to change the TCP window scaling flag.
1. Log in as root or become superuser.
2. Use ndd —set to modify the current value of the TCP window scaling flag (tcp_wscale_always).
For optimum performance over HIPPI connections, the window scaling flag should
be set to 1.
# ndd —set /dev/tcp tcp_wscale_always 1
4.3.4 Tuning the Congestion Window Maximum
Use ndd(1M) to change the TCP window scaling flag:
1. Log in as root or become superuser.
2. Use ndd —set to modify the current value of the TCP maximum congestion window (tcp_cwnd_max).
For optimum performance over HIPPI connections, the maximum congestion
window should be set to 1024 Kbytes.
# ndd —set /dev/tcp tcp_cwnd_max 1048576
4.3.5 Tuning the High and Low Water Marks at Boot Time
Each time you reboot your machine, the network variables used for tuning
performance are reset to their default values. The hipadmin(1M) portion of the Sun
HIPPI installation software optionally modifies boot scripts on your system so that
the high water marks, window scaling, and congestion window are modified
automatically each time you reboot the machine.
The effect of these scripts should be verified after system reboot. It is possible for
other boot scripts to set these global variables to conflicting values.
4-36 SunHIPPI 1.0 User’s Installation Guide • March 1999
Page 39

4.3.6 Tuning the Socket Options
For applications that use Sockets, the application developer can make more efficient
use of the increased bandwidth provided by a HIPPI connection by increasing the
size of the send and receive buffers used by a specific application. This manipulation
is restricted to applications and does not affect the other Socket connections.
The Solaris environment supports program calls to getsockopt(3N) and
setsockopt(3N). The options SO_SNDBUF and SO_RCVBUF are used to set the size
of the TCP send and receive buffers for a specified Socket. See the man page for
more detailed information.
To optimize performance, assign consistent values for the transmit and receive
buffers. The default value (4 Kbytes) assigned to these parameters is optimized for
transmitting across Ethernet connections. For applications running over HIPPI, the
send and receive buffers should be set to 64 Kbytes.
Chapter 4 Configuring the Sun HIPPI Interface 4-37
Page 40

4-38 SunHIPPI 1.0 User’s Installation Guide • March 1999
Page 41

CHAPTER
5
Troubleshooting and Diagnostics
This chapter describes how to detect and resolve common problems with your
HIPPI network. It includes instructions on how to load and configure the Sun HIPPI
device driver manually, if required. Note that Sun HIPPI supports almost all of the
standard SunOS network diagnostic utilities, including snoop(1M), netstat(1M),
and ping(1M).
For a Solaris environment, the default base directory basedir is:
/etc/opt/SUNWconn/bin
5.1 Troubleshooting Checklist
Use the following sections to verify the major components of your Sun HIPPI host,
and to check that it is installed, configured, and attached to the network correctly.
5.1.1 Checking the MAC Address
By default, the Sun HIPPI interface takes the card-resident MAC address stored in its
EEPROM.
5-39
Page 42

5.1.2 Checking the Sun HIPPI Driver
● Use netstat(1M) to check that the Sun HIPPI (hipip) driver is installed
correctly, and to check for an excessive number of errors and collisions:
% netstat -i
Name Mtu Net/Dest Address Ipkts Ierrs Opkts Oerrs Collis Queue
lo0 8232 loopback localhost 21 0 21 0 0 0
le0 1500 our-lan hanna 2146 0 950 1 13 0
hipip0 57344 our-hip hanna-h 1086 0 907 0 0 0
A sudden increase in the number of errors could indicate a noisy connection caused
by a dirty cable.
5.1.3 Checking the IP Addresses
You must assign a unique IP address to each Sun HIPPI interface. If you have more
than one IP interface installed in your machine—either multiple Sun HIPPI
interfaces, or some other LAN interface (for example, an Ethernet interface)—each
interface must be attached to a different subnetwork.
● Use ifconfig(1M) to check the IP addresses assigned to the two Sun HIPPI
interfaces:
# ifconfig -a
hipip0: flags=843(UP,BROADCAST,RUNNING,MULTICAST) mtu 57344
inet 123:123:201:71 netmask ffffff00 broadcast
123:123:201:255
hipip1: flags=843(UP,BROADCAST,RUNNING,MULTICAST) mtu 57344
inet 123:123:201:75 netmask ffffff00 broadcast
123:123:201:255
If the interfaces have the same subnetwork number, as shown in this example, you
must change the IP address assigned to one of the interfaces.
Ensure that the IP addresses and host names for each Sun HIPPI interface are
entered in the NIS map, or in /etc/inet/hosts on the local machine if you are not
using NIS/NIS+.
5-40 SunHIPPI 1.0 User’s Installation Guide • March 1999
Page 43

5.1.4 Checking the IP Routing
1. Check the IP routing table using the netstat(1M) command:
% netstat —nr
2. Check that the HIPPI subnetwork is featured in the routing table.
If the routing table is empty, check that the routing daemon (in.routed) is running
on your machine.
5.1.5 Checking the Protocol Statistics
1. Use netstat(1M) to check the per-protocol (IP, TCP, UDP, etc.) statistics for errors.
# netstat -s
UDP
udpInDatagrams = 1423udpInErrors = 0
udpOutDatagrams = 540
TCP tcpRtoAlgorithm = 4 tcpRtoMin = 200
tcpRtoMax = 60000 tcpMaxConn = -1
tcpActiveOpens = 38 tcpPassiveOpens = 1
tcpAttemptFails = 0 tcpEstabResets = 33
tcpCurrEstab = 2 tcpOutSegs = 427
tcpOutDataSegs = 264 tcpOutDataBytes = 15917
tcpRetransSegs = 38 tcpRetransBytes = 0
tcpOutAck = 143 tcpOutAckDelayed = 56
tcpOutUrg = 1 tcpOutWinUpdate = 0
tcpOutWinProbe = 0 tcpOutControl = 111
tcpOutRsts = 36 tcpOutFastRetrans = 0
tcpInSegs = 606
tcpInAckSegs = 292 tcpInAckBytes = 15949
tcpInDupAck = 62 tcpInAckUnsent = 0
tcpInInorderSegs = 311 tcpInInorderBytes = 99169
tcpInUnorderSegs = 0 tcpInUnorderBytes = 0
.
.
.
Chapter 5 Troubleshooting and Diagnostics 5-41
Page 44

2. Use netstat(1M) to check the driver statistics.
# netstat -k
hipip0
ipackets = A, ierrors = B, opackets = C, oerrors = D, opackets = E
defer = F, framming = G, crc = H, oflo = I, uflo = J, missed = K, \
late_collisons = L
retry_error = M, nocarrier = N, inits = O, nocanput = P, allocbfail = Q
.
5.1.6 Checking HIPPI Operation
Use SunVTS™ to verify the operation of the HIPPI components. Refer to the
following table for release information:
TABLE5-1 Release Support
Operating System SunVTS Version Support Release Date Release Mechanism
Solaris 2.6 2.1.3 12/04/98 Patch
Solaris 7 3.0 12/11/98 Patch
Solaris 7 3/99 3.1 FCS Integrated
1. Refer to the SunSolve database for the latest released patches and instructions for installing them.
1
5-42 SunHIPPI 1.0 User’s Installation Guide • March 1999
Page 45

5.2 Solving Common Problems
Use the following information to diagnose and resolve some of the common
problems that can occur when installing, configuring, or running Sun HIPPI.
TABLE5-2 Problems Installing Sun HIPPI in a Solaris 2.x Environment
Problem Action
The Sun HIPPI software package
(SUNWhip) cannot be found.
The Sun HIPPI developer utilities package
(SUNWhipc) cannot be found.
The Sun HIPPI man pages/utilities package
(SUNWhipmn) cannot be found.
Check that you have inserted the CD-ROM in the CD-ROM
drive and that the CD-ROM is mounted on a local directory. If
the Volume Manager (vold) is running on your machine, the
Sun HIPPI software is located in the following directory: /
cdrom/sun_hippi_1_0/Sol_2.x. If the Volume Manager
(vold) is not running on your machine, you must create a
directory and mount the CD-ROM as described in Chapter 3 “.”
The configuration script cannot configure
the IP address. “Enter the IP {hostname} or
address for hipipx[?] Illegal ip address. . . .
Try again”
The configuration script cannot find the
hardware devices installed in the machine.
The configuration script cannot load the
device driver.
The configuration script cannot configure
the device driver. The procedure fails with
the message, “Duplicate MAC address.”
Check that you have entered a valid IP address or hostname.
The script will keep prompting you until you enter a valid
address.
Check that the Sun HIPPI PCI card is installed correctly and is
seated firmly in the PCI slot. Use the prtconf command to see
if the hipip card exists.
Check whether the driver is already installed on the system.
Confirm that all previous versions of the package have been
removed.
Two or more interfaces have been assigned the same MAC
address. The most likely conflict lies between the first Sun
HIPPI 1.0 interface (hipip0) and other interfaces installed in
the same machine.
Chapter 5 Troubleshooting and Diagnostics 5-43
Page 46

TABLE5-3 Problems Running Sun HIPPI
Problem Action
The Sun HIPPI interface (hipip) is not
displayed by netstat.
Check that the Sun HIPPI device driver is loaded, using
modinfo(1M) to display information about loaded kernel
modules. If the device driver is not loaded, see Section 5.3 “Loading
the Device Driver Manually (Solaris 2.x)” on page 5-44 for detailed
instructions.
The Sun HIPPI interface (hipip) is not
displayed by ifconfig.
The local host can reach HIPPI hosts
located on the same subnetwork, but
these hosts cannot reach the local host.
The local host cannot reach other HIPPI
hosts located on the same subnetwork.
Check that the Sun HIPPI device driver is loaded, using
modinfo(1M) to display information about loaded kernel
modules. If the device driver is not loaded, see Section 5.3 “Loading
the Device Driver Manually (Solaris 2.x)” on page 5-44 for detailed
instructions.
Check that the IP address and host name of the local host is entered
in the NIS map or NIS+ tables (or in /etc/inet/hosts on each
remote host if you are not running NIS or NIS+).
Use ifconfig(1M) to verify that the Sun HIPPI interface (hipip)
is up.
Check that the IP address and host name of the remote host is
entered in the NIS map or NIS+ tables (or in /etc/inet/hosts on
the local host if you are not running NIS or NIS+).
Use hippiarp to verify that ARP entries are defined for all of the
remote hosts.
5.3 Loading the Device Driver Manually (Solaris 2.x)
Normally, the Sun HIPPI device driver is loaded and configured by the postinstallation script, which is launched automatically when the software is installed. If
you encounter problems when running this script, or if you want to customize the
installation, you may need to load the device driver manually.
1. Log in as root or become superuser.
5-44 SunHIPPI 1.0 User’s Installation Guide • March 1999
Page 47

2. Stop the driver.
# /etc/init.d/hippi stop
3. Check that there are no partially installed drivers for Sun HIPPI. a. Check for existing Sun HIPPI devices in the /dev directory.
# ls /dev | grep hip
hip
hipip
b. Unload the Sun HIPPI drivers.
# modinfo | grep hip
# modunload -i module ID for hip driver
# modunload -i module ID for hipip driver
c. Use rem_drv(1M) to remove any installed Sun HIPPI devices and remove the
device directories.
# /usr/sbin/rem_drv hipip
# /usr/sbin/rem_drv hip
# /bin/rm —f /dev/hipip
# /bin/rm —f /dev/hip
d. Check the /etc/name_to_major file for entries of the form hipip num and
hip num and remove these entries if they exist.
4. Use add_drv(1M) to inform the system about the new drivers.
# /usr/sbin/add_drv hip
# /usr/sbin/add_drv hipip
Chapter 5 Troubleshooting and Diagnostics 5-45
Page 48

5. Check that the device drivers have been added to the system correctly.
a. Look in the /devices/pseudo directory for entries of the form:
ls -l /devices/pseudo | grep hipip
crw------- 1 root sys 11,119 date clone@0:hipip
b. Look in the /dev directory for links to these entries:
ls -l /dev | grep hipip
lrwxrwxrwx 1 root other date hipip -> ../devices/pseudo/clone@0:hipip
ls -l /dev | grep hip
lrwxrwxrwx 1 root other date hip x -> ../devices/pci@49, 2000/ethernet@2:hip x/
clone@0:hip
6. Create a file called /etc/opt/SUNWconn/hipip/hipinst.conf for each Sun
HIPPI IP interface that you configure.
Each file must contain the host name assigned to the IP interface, netmask, and
switch address. Refer to hipadmin(1M). These files are used to configure the
interfaces when the system is rebooted. You should not assign the primary host
name to one of the HIPPI interfaces. The primary host name is that interface which
has its name entered in the /etc/nodename file.
7. Use ifconfig(1M) to configure the Sun HIPPI IP interfaces (hipipinst).
The host name assigned to the IP interface must be entered in the NIS map, NIS+
tables, or in /etc/inet/hosts on the local machine. Configure the interface using
an ifconfig command of the form:
# /usr/sbin/ifconfig hipipinst plumb hostname netmask + up
Note that the modifier netmask + takes the netmask defined in the
/etc/inet/netmasks file. If this entry is missing, you must specify the netmask
explicitly using dot notation.
Provided the installation and configuration was successful, your Sun HIPPI host is
now active and you can send and receive data transparently across a HIPPI
connection.
5-46 SunHIPPI 1.0 User’s Installation Guide • March 1999
Page 49

CHAPTER
6
HIPPI Network Architecture
This chapter provides a brief introduction to the High-Performance Parallel Interface
(HIPPI).
6.1 Introduction to HIPPI Networking
HIPPI (High-Performance Parallel Interface) was developed in the late 1980s to
provide high-speed I/O connectivity between supercomputers and other devices.
HIPPI has evolved beyond this original purpose to encompass high-speed local-area
networking.
The basis of HIPPI is a simplex, 100-megabyte per second (MBps), or 800-megabit
per second (Mbps), channel. Typically, two HIPPI channels are combined to create a
duplex connection.
Initially, the only link medium for HIPPI was parallel copper cables that could be up
to 25 meters long. It is now possible to establish multimode and single-mode fiber
connections that can be up to 10 kilometers long.
6.2 Network Architecture
HIPPI consists of several protocol layers, each of which is defined by a standards
document.
ANSI X3.183-1991 defines the HIPPI physical layer, referred to as HIPPI-PH. This
document defines the basic copper or fiber-optic cables, the interconnect
mechanisms, and the low-level movement of data. (Data is broken up into packets
and further subdivided into bursts of up to 256 four-byte words.)
6-47
Page 50

There are three layers on top of the physical medium to enable the basic HIPPI
channel to be used in a very efficient, low-latency network. These
are HIPPI-SC (switch control, ANSI X3.222-1993), HIPPI-FP (framing
protocol, ANSI X3.210-1992), and HIPPI-LE (link encapsulation, ANSI X3.218-1993).
The ANSI Serial-HIPPI Specification defines fiber-optic implementations.
These ANSI standards documents, along with RFC 1374, define how a TCP/IP
network can operate on top of a physical network of HIPPI channels and switches.
This mode of operation enables other protocols and proprietary applications to
access the HIPPI network.
6.2.1 Switched Network Topology
The HIPPI network itself consists of a number of systems that have full-duplex
HIPPI connections and are interconnected with a set of high-speed switches. The
HIPPI connections in these systems are either provided by add-on boards or are
intrinsic parts of the system. Host software enables you to set up the HIPPI channel
in a network orientation.
The switches used in HIPPI networks are non-blocking with very low latency. The
total throughput of a HIPPI switch is the total of the HIPPI connections on the
switch multiplied by two. For example, a 16 x 16 switch has 32 connections, for a
total throughput of 32 interfaces at 100 MBps, for a combined bandwidth of 3200
MBps.
To move data through the switch network to a specific destination, a special header
called an I-field is used. I-field format is defined in the HIPPI-PH document, and
I-field-based switching is defined in the HIPPI Character Device Interface User ’s Guide
and Reference Manual.
6.2.2 I-Field
The I-field defines destination routing for a data packet. The I-field is four bytes long
and carries two sequences of information: a control byte and a network/switch
route. The control byte tells the switch how to interpret the network/switch route
portion of the I-field.
6-48 SunHIPPI 1.0 User’s Installation Guide • March 1999
Page 51

31
24
0
Control
8 bits
FIGURE 6-1 I-Field
TABLE 6-1 defines the information fields within the routing control bytes.
TABLE6-1 Control Byte Information Fields
Bit(s) Designation Description
29-31 Reserved
28 Double-wide
mode
27 Direction Identifies which end of the I-field routing information to use (0 for right, 1 for
25-26 Path selection The two bits for path selection are defined as follows:
24 CAMP_ON If CAMP_ON is set to 1, the connection waits for the destination to be available.
Distinguishes between 32- or 64-bit connections when using a 64-bit port.
left).
1,1 Logical address with automation and random selection of one port from a
list.
1,0 Reserved for future use.
0,1 Logical address with automatic selection of the first available port to reach
destination.
0,0 Source routing.
If set to 0, the connection is rejected if the requested destination is not available.
Routing information
24 bits
There are two basic forms of HIPPI switch addresses: source route addresses and
logical addresses. The source route address uses the three routing bytes to guide the
packet through the switch network. The least-significant three nibbles (12 bits)
indicate which of the switch ports the data should be switched onto. The switch then
rotates the routing field three nibbles to the right so that the next switch (if there is
one) sees the next three nibbles as the port it should use. The switch also places the
incoming port in the most-significant three nibbles. This enables the final end point
to create a “reverse route” from the I-field that it receives. See the HIPPI-SC
document for additional information.
The logical address is a more elegant method of routing data. This mechanism takes
advantage of the switch internal routing tables. You can think of the logical address
in the same way as you think of an IP address, and the switch routing table as the
routing table found in an IP router. When the switch sees a packet with the logical
Chapter 6 HIPPI Network Architecture 6-49
Page 52

address flag set, it looks in its routing table and determines which port should send
the packet out. This is repeated in all the switches until the packet arrives at its final
and proper destination.
Note – Sun HIPPI uses logical addressing to send IP packets to remote hosts.
Another important I-field control bit is the camp-on field. This field enables the
switch to keep a packet waiting while other data is passing through a final or
intermediate destination that the waiting packet wishes to use. This enables a
guaranteed arrival when the end destination is active.
Note – The camp-on bit is always set for IP packets sent by the Sun HIPPI driver.
6.2.3 Framing Protocol
Because the HIPPI network can carry different types of traffic, a framing protocol
was developed. This protocol enables the destination to determine what type of
traffic it is receiving. The most common framing protocol used is ISO 802.2. This
protocol is typically used to carry TCP/IP traffic. Other protocols used are IPI3 (for
disk device traffic) and proprietary protocols.
The value in the ULP (upper-layer protocol) field of the framing protocol determines
the protocol being carried. Values include those for a number of well-known
protocols (for example, 802.2 is 4 and IPI3 are 6, 7, and 8) and a “local-use” bit that
enables you to specify that the protocol is a local one.
6.3 HIPPI Network Model
The High-Performance Parallel Interface (HIPPI) provides high-performance,
multistation networking at data transfer rates of up to 100 MBps/800 Mbps.
The ANSI/HIPPI specifications define a network model that consists of the
following components:
■ Physical Media Dependent (PMD) Layer
■ Physical (PHY) Layer
■ Switched Control Layer
■ Framing Protocol Layer
■ Link Encapsulation Layer
6-50 SunHIPPI 1.0 User’s Installation Guide • March 1999
Page 53

FIGURE 6-2 shows the organization of these components, and their relationship with
other network protocols that use them.
User Space
OSI TCP/IP
DLPI Interface V2 / BSD ifnet
Kernel Space
Link Encapsulation
Framing Protocol
Switch Control
Physical (PHY)
Physical Media Dependent (PMD)
FIGURE 6-2 HIPPI Architectural Model
Hardware
6.4 HIPPI Network Configuration
A typical HIPPI network can either be a point-to-point configuration ( FIGURE 6-3)or
a more complex topology requiring the purchase and installation of a HIPPI switch
(
FIGURE 6-4).
HIPPI station HIPPI station
FIGURE 6-3 Basic HIPPI Point-to-point Configuration
Chapter 6 HIPPI Network Architecture 6-51
Page 54

HIPPI station
HIPPI station HIPPI station
HIPPI switch
HIPPI station
FIGURE 6-4 HIPPI Network Configuration Using a Switch
6.5 HIPPI Performance
Although the HIPPI standards define a medium that supports data transfer rates of
up to 100 MBps or 800 Mbps, this does not translate directly to an increase in overall
system performance. If fact, it frequently transfers the bottleneck elsewhere, so that
the HIPPI connection is not used to full capacity.
A HIPPI network has the potential to carry more information rather than to be a
faster connection. If the applications running over the network do not use the
available bandwidth efficiently, you will not see much improvement in the
performance of your network above that of traditional Ethernet connections.
Among the factors that affect HIPPI network performance are:
■ Network topology
■ Network load
■ Network efficiency
■ Processor speed (on the HIPPI stations)
■ Bus architecture
6-52 SunHIPPI 1.0 User’s Installation Guide • March 1999
Page 55

There are a number of ways of improving the overall performance of the network,
some of which are discussed in Chapter 4 “.” However, the majority of these
suggestions should only be undertaken by experienced system administrators. Any
improvement made by modifying the actions of the HIPPI network is negligible
compared to what is gained by making more efficient use of the available
bandwidth.
Chapter 6 HIPPI Network Architecture 6-53
Page 56

6-54 SunHIPPI 1.0 User’s Installation Guide • March 1999
Page 57

CHAPTER
7
Using the Sun HIPPI Network Utilities
This chapter describes the network utilities delivered with Sun HIPPI.
Throughout this chapter, it is assumed that you have installed the Sun HIPPI
software under the default base directory basedir for your operating system:
For a Solaris environment, the default base directory basedir is:
/etc/opt/SUNWconn/bin
7.1 Changing the Default MAC Address
Each attachment to a HIPPI network is identified by a unique 48-bit MAC address.
By default, each Sun HIPPI PCI card adopts the card-resident MAC address stored
in its own EEPROM.
In general, this convention is sufficient to ensure that each Sun HIPPI PCI card
installed in the machine has a unique MAC address. However, if you need to change
the default MAC address assigned to a Sun HIPPI PCI card installed in the system,
use the following method.
1. Log in as root or become superuser.
7-55
Page 58

2. Modify the startup file on your machine so that the MAC address is assigned
correctly when the system is rebooted.
Edit the /etc/init.d/rootusr file to add the following if statement
immediately after the ifconfig command that initializes the interface hipipinst.If
you are changing the MAC address of more than one interface, add one if
statement for each interface.
ifconfig $1 plumb
if [ $1 = “hipipinst ” ]; then
ifconfig hipipinst ether mac_address
fi
3. Reboot your machine to assign the new MAC address to the Sun HIPPI interface.
Once a station starts sending packets on the network, the Address Resolution
Protocol (ARP) updates the ARP tables on other systems to include the MAC
address of its interface. If you swap Sun HIPPI PCI cards that use the card-resident
MAC address, you must wait until the ARP entries time-out, or remove the ARP
entries from every active station manually before packets can be routed correctly.
7-56 SunHIPPI 1.0 User’s Installation Guide • March 1999
Page 59

7.2 Using the Sun HIPPI Device Driver Utilities
The Sun HIPPI device driver software includes user-level utilities and diagnostics.
TABLE 7-1 provides a brief description for these commands. See the man pages for a
more complete description of the commands, required permissions, and commandline options.
TABLE7-1 Device Driver Utilities
Utility Function Description
hipadmin Network
configuration
program
hippiarp Controls HIPPI
address resolution
hippid Provides user
context with the
system support
daemon
hippidb Displays and
controls device
driver trace levels
hippidisp Displays internal
states
hippidmpd Dumps device state Used to generate device state dumps to enable offline device problem
hippidnld Downloads
RunCode
hippi Controls and queries
status
Used to enter the IP address, netmask, and HIPPI switch address into
the /etc/opt/SUNWconn/hippi/hipn.conf file.
Used to control and display the HIPPI address resolution table. It is
also used to add, delete and verify the contents of the HIPPI address
resolution tables.
Used to provide a user context for the ARP and IP agent to broadcast
ARP and IP requests to known hosts. It also provides a user context
for self-discovery activity as well as a watchdog mechanism to ensure
the NIC is operating correctly.
Used to display and control the debug trace levels of the Sun HIPPI
device driver.
Used to display information retrieved directly from an NIC or
information previously extracted from an NIC using the dump
daemon hippidmpd(1M). Much of the information that is displayed
contains internal state information of the driver. This tool does not
describe this information.
analysis. Dumping of the device state occurs automatically when the
device watchdog detects anomalous behavior on the NIC, and can
occur manually when requested.
Used to manage the on-board embedded code on the Sun HIPPI NIC.
Also used to update the on-board firmware.
Used to control the state of the Sun HIPPI device driver and
associated hardware, or to query the current status or version
information.
Chapter 7 Using the Sun HIPPI Network Utilities 7-57
Page 60

TABLE7-1 Device Driver Utilities (Continued)
Utility Function Description
hippistat Displays Sun HIPPI
statistics
hippitb Displays debug
traces
hippitune Provides tuning
performance
blast Monitors
performance using
the character driver
transmitter
sink Monitors
performance using
the character device
receiver
Used to retrieve NIC statistics (configuration, number of resets,
number of packets reassembled, and so forth). Also used to modify
and reset all counters.
Used to display a formatted version of the driver firmware and trace
buffers.
Used to dynamically change and update Sun HIPPI registers to tune
performance. Can be used to set the values into the Sun HIPPI
EEPROM so that the tuning values persist across system reboots.
Used to generate Sun HIPPI character sample device code. This
program includes most of the ioctl(2) interface settings for
transmitting. Can be used in conjunction with sink(1M) to generate
a rough estimate of Sun HIPPI channel performance.
This test code used in conjunction with blast(1M) to generate a
rough estimate of Sun HIPPI channel performance.
7.2.1 Displaying Sun HIPPI Statistics (hippistat)
The hippistat(1M) utility displays current hardware statistics for a HIPPI
Network Interface Card.
# basedir/hippistat [-D]
7-58 SunHIPPI 1.0 User’s Installation Guide • March 1999
unit
Page 61

Where unit is hip0, hip1, and so forth. The output from this command will be
similar to the following text:
# ./hippistat -D hip0
hip0 NIC STATISTICS:
Time when stats last updated 408098467 0x185316a3
Rings created 1 0x1
Stats updates by timer 20 0x14
Stats updates by command 22 0x16
Number of Watchdog commands 75 0x4b
HIPPI Link ready established 1 0x1
Connections established 263 0x107
Packets sent 263 0x107
Bytes sent 33608 0x8348
Connections accepted 262 0x106
Packets received 262 0x106
Bytes received 32488 0x7ee8
#
Chapter 7 Using the Sun HIPPI Network Utilities 7-59
Page 62

7-60 SunHIPPI 1.0 User’s Installation Guide • March 1999
Page 63

APPENDIX
A
Frequently Asked Questions About Sun HIPPI
This appendix contains the responses to some of the most frequently asked
questions about Sun HIPPI. It also contains references to more detailed information.
1. The network performance is much lower than I expected. Why can’t I transfer
data at 100 MBps over my HIPPI connection?
If the applications running over HIPPI do not use the available bandwidth efficiently
you will see much lower performance than expected. See Chapter 4 “” for advice on
how to get the best performance from your Sun HIPPI station.
2. What is the MTBF for Sun HIPPI?
The mean time before fail (MTBF) for each of the Sun HIPPI interface cards is
424,953 hours. This was obtained using the standard method for calculating MTBF.
3. Why is performance poor when I use the NFS™ file system over HIPPI?
For a single file transfer, the maximum data transfer rate is limited to
0.5 Mbytes/second when writing to an NFS mounted file system and
1.5 Mbytes/second when reading from an NFS mounted file system. This
performance limitation, which affects Ethernet, HIPPI, and any other fast network, is
due to the NFS version 2 protocol. It will be removed by NFS
version 3.
Note that when several NFS operations are performed in parallel (several reads and
writes in parallel), the aggregate throughput is much higher with HIPPI than it is
with Ethernet.
4. How do I disable the Sun HIPPI interface?
A-61
Page 64

Use ifconfig(1M) to disable the Sun HIPPI interface temporarily. It will be
reconfigured when you reboot your machine.
# ifconfig hipipinst down
To disable the Sun HIPPI interface so that it is not reconfigured when you reboot the
machine, change the name of the /etc/opt/SUNNconn/hippi/hipinst .conf
file.
# mv /etc/opt/SUNNconn/hippi/hipinst .conf /etc/opt/SUNWconn/hippi/ \
oldhipinst .conf
5. How do I disable the Ethernet interface? Use ifconfig(1M) to disable the Ethernet interface temporarily. It will be
reconfigured when you reboot your machine.
# ifconfig leinst down
To disable the Ethernet interface so that it is not reconfigured when you reboot the
machine, change the name of the /etc/hostname.leinst file.
# mv /etc/hostname.leinst /etc/oldhostname.leinst
6. How do I use the host name assigned to the Sun HIPPI interface as the primary
host name for my machine?
In a Solaris environment, the primary host name is defined in the /etc/nodename
file. Normally, this file contains the host name assigned to the Ethernet interface
built in to your machine. It is not possible to assign the primary network interface to
the Sun HIPPI interface.
7. Can I associate several IP addresses with a single Sun HIPPI interface? Yes. To associate multiple IP addresses with a single interface, type:
# ifconfig hipip0 ip_address_1 netmask mask up
# ifconfig hipip0:1 ip_address_2 netmask mask up
# ifconfig hipip0:2 ip_address_3 netmask mask up
.
.
.
A-62 SunHIPPI 1.0 User’s Installation Guide • March 1999
Page 65

8. How many Sun HIPPI PCI cards can I install in one machine?
You can install up to four Sun HIPPI PCI cards in one machine.
Appendix A Frequently Asked Questions About Sun HIPPI A-63
Page 66

A-64 SunHIPPI 1.0 User’s Installation Guide • March 1999
Page 67

APPENDIX
B
Developing Applications over Sun HIPPI
This chapter describes how to develop your own applications running over Sun
HIPPI networks. It assumes that you are an experienced programmer who is already
familiar with the DLPI Version 2 interface for use with Solaris 2.6 or Solaris 7
operating environment.
This chapter provides a brief overview of each of the programming environments
and concentrates on network addressing and other issues that are specific to the Sun
HIPPI implementation of these interfaces. It does not provide a detailed specification
of the interfaces.
B.1 Developing Applications with DLPI
The Data Link Provider Interface (DLPI) Version 2 enables any data link user to
access the services of a data link provider without any special knowledge about the
underlying protocols. In addition to HIPPI services, DLPI supports access to X.25,
LAPB, LAPD, ISDN, Ethernet, Token Ring, Token Bus, SDLC, BISYNC, and other
data link protocols.
DLPI is used to access the services of the Sun HIPPI link layer of the Sun HIPPI
device driver in a Solaris environment without the need for specialized knowledge
of the underlying protocol. You can obtain a copy of the STREAMS DLPI Specification
from Sun Microsystems, Inc. (part number 800-6915-10).
The DLPI header file provided in the Solaris 2.6 or Solaris 7 operating environment
is sys/dlpi.h. A detailed description of the functions contained in the header is
available in the STREAMS DLPI Specification.
B-65
Page 68

DLPI defines a STREAMS message set, state table, and conventions that support
interaction between a data link service user (for example, IP or ARP) and a data link
service provider (for example, the hipip HIPPI driver).
FIGURE B-1 illustrates the
relationship between DLPI and the layers of the HIPPI protocol.
OSI TCP/IP
Data Link Provider Interface (DLPI) V2
Link Encapsulation
Framing Protocol
Switch Control
Physical (PHY) Layer
Physical Media Dependent (PMD) Layer
FIGURE B-1 DLPI Access to HIPPI
Data Link Service Users
DLPI primitives are defined in terms of STREAMS messages. All DLPI messages are
either type M_PROTO or type M_PCPROTO and contain the appropriate DLPI message
structure. DPLI primitives are exchanged by confirmed negotiation—request
primitives are issued by the user, which then waits to receive an acknowledge (or
error) response primitive from the provider.
B.2 DLPI Connectionless Service Primitives
Applications developed to run over HIPPI use the DLPI connectionless service
primitives, which support the following set of operations:
■ Attaching a STREAM to a given addressable device
■ Getting and setting the physical address of the attached device
■ Binding a data link service access point (SAP) to the STREAM
■ Transmitting and receiving data link frames
B-66 SunHIPPI 1.0 User’s Installation Guide • March 1999
Page 69

■ Transmitting and receiving multicast addresses
■ Enabling physical and data link promiscuous mode
B.3 DLPI Addressing
DLPI addressing is implemented as a DLSAP (data link service access point)
address.
Information returned by the DL_INFO_ACK primitive (in response to a
DL_INFO_REQ) is used to specify the encoding and decoding rules to insert and
extract the DLSAP for a given data link provider. The information returned by the
Sun HIPPI device driver is shown in
TABLEB-1 DL_INFO_REQ Frame
Element Value Description
dl_max_sdu 65280 bytes Maximum MTU
dl_min_sdu 0 bytes Minimum MTU
dl_addr_length 8 bytes Length of DLSAP
dl_mac_type DL_ETHER HIPPI MAC layer
dl_reserved 0 Unused
dl_current_state — Current state of data link provider
dl_sap_length -2 bytes Length of DLSAP
dl_service_mode DL_CLDLS Connectionless service
dl_qos_length 0 Not supported
dl_qos_offset 0 Not supported
dl_range_length 0 Not supported
dl_range_offset 0 Not supported
dl_provider_style DL_STYLE2 Can be cloned
dl_addr_offset 76 Offset to address location
dl_version 2 DLPI Version 2
dl_brdcst_addr_length 6 Broadcast address length
dl_brdcst_addr_offset 84 Offset to broadcast address location
TABLE B-1.
Appendix B Developing Applications over Sun HIPPI B-67
Page 70

Note that the value dl_sap_length is set to minus 2, which indicates that the SAP
is 2 bytes beyond the physical address.
B.4 Developing Applications with CDI
The Character Device Interface (CDI) is an Application Programming Interface (API)
that permits application programs to access the HIPPI network using a UNIX
character device interface.
The CDI passes HIPPI packets to and from the HIPPI network and controls the
operation of the HIPPI PCI adapter.
The open(2), close(2), read(2), write(2), ioctl(2), select(3c), and
poll(2) interfaces are used to control the operation of the adapter and pass packets
over the HIPPI network.
For a complete description of this API see the HIPPI Character Device Interface User’s
Guide and Reference Manual installed as part of the AnswerBook package.
B-68 SunHIPPI 1.0 User’s Installation Guide • March 1999
Page 71

Glossary
This appendix contains a glossary of HIPPI-related acronyms, abbreviations, and
terms.
ARP (Address Resolution Protocol). A protocol used within local networks that
supports broadcast (such as Ethernet or HIPPI) and binds IP addresses to MAC
addresses. View the current contents of a Sun machine ARP table with the
Solaris command, arp -a; specified in RFC 826.
baud A measure of the rate of data transfer, based on the number of times per
second the signal can change states on the transmission line. The transmission
line ordinarily uses just two signal states to indicate data transfer, making the
baud rate equal the number of bits per second that can be transferred. See also
bps, Bps, Kbps, and Mbps.
bps (bits per second). A measure of the rate of data transmission. See also, baud,
Bps, Kbps, and Mbps.
Bps (bytes per second). A measure of the rate of data transmission. See also, baud,
bps, Kbps, and Mbps.
dotted decimal
notation A way of representing the 32-bit Internet address: four decimal integers
separated by decimal points, where each integer is the decimal value of one
octet of the Internet address. For example, the 32-bit Internet address (binary)
11000000 00001001 11001001 00000111 is represented as 192.9.201.7
(decimal).
gateway A dedicated computer that connects to two or more networks and routes
packets from one network “community” to the other. Gateways route packets
to other gateways until the packets can be delivered directly to their specified
destination across one physical network. In general usage, the term identifies
any computer that transfers information between networks.
Kbps (kilobits per second). A measure of the rate of data transmission. See also,
baud, bps, Bps, and Mbps.
Glossary-69
Page 72

MAC (Media Access Control). Local area network protocol functions corresponding
to the OSI data link layer (layer 2), but providing the following: 1) on
transmission, assembles data into a frame with address and error-detection
fields; 2) on reception, disassembles frame, performs address recognition and
error detection; 3) links communications management.
Mbps (millions of bits per second). A measure of the rate of data transmission. See
also, baud, bps, Bps, and Kbps.
NRZI-4B/5B (nonreturn to zero inverted). A differential encoding technique that encodes
four-bit data groups as five bits (data plus a signal element); satisfies the
minimum signal transition requirements to transmit synchronization (clock)
within the data stream.
OSI (Open System Interconnection). The OSI model is a standard for computer-
communications protocols and the implementation of these protocols. The
model is a product of the International Standards Organization (ISO), and
specifies a seven-layer architecture with one or more protocol standards at each
layer.
PHY (Physical Layer Protocol). Performs the clock recovery and serial-to-parallel (on
receive) or parallel-to-serial (on transmit) of data between the transmission
medium and the MAC entity.
RARP (Reverse Address Resolution Protocol). A protocol used by diskless machines
and their servers within local networks such as Ethernet or HIPPI. In a RARP
exchange, a diskless machine broadcasts its MAC address. A boot server
responds to that client with the client IP address, enabling the client to begin
the boot process.
Glossary-70 SunHIPPI 1.0 User’s Installation Guide • March 1999
Page 73

Index
SYMBOLS
/cdrom/sun_hippi_1_0 directory, 22
A
add_drv command, 43
ANSI/HIPPI standards, 50
B
bandwidth, 13, 33, 52
base directory
installing SUNWhip,24
installing SUNWhipmn,28
buffers, 34
C
card-resident MAC address, 39
checking the installation, 30
checklist, troubleshooting, 39
cleaning fibre optic cable, 19
commands
add_drv,43
getsockopt,37
ifconfig, 29, 40
mount_hsfs,23
ndd, 35, 36
netstat,29
ping,30
pkgadd, 22, 24, 28
pkgrm,30
setsockopt,37
umount,29
common problems, 39, 43
connectionless service primitives, 66
connectors
fiber optic, 19
D
daemons
in.routed,41
vold,29
data link provider interface, 65
data queues, 34
data transfer, 50
rate, 13, 33
declaring IP addresses, 21
default
buffer size, 34
developing applications, 65
device
names, 15
directories
/cdrom/sun_hippi_1_0,22
disk space, 21
DL_INFO_ACK,67
DL_INFO_REQ,67
dl_sap_length,68
Index 71
Page 74

DLPI, 65
addressing, 67
header file, 65
primitives, 66
E
efficient use of bandwidth, 53
ejecting the CD-ROM, 28
IP addresses, 21, 40
J
jumpers, 17
K
kernel space, 34
F
fiber optic components, 18
fibre optic cable cleaning, 19
framing layer, 50
G
getsockopt command, 37
H
handling
fiber optic cable, 18
PCI cards, 16
high water marks, 34
HIPPI performance, 52
host name, 21
I
ifconfig command, 29, 40
in.routed daemon, 41
installation
checking the, 30
requirements, 21
installing
multiple cards, 15
the hardware, 16 to 20
the software, 22 to 29
instance
names, See device names
numbers, 15
L
link encapsulation
layer, 50
list of packages, 24
low water mark, 34
M
maximizing data throughput, 33
maximum
number of cards, 13, 15
media dependent, 50
memory, 21
minimum requirements, 21
mount_hsfs command, 23
moving PCI cards, 16
N
ndd command, 35, 36
netstat command, 29, 40
network
architecture, 51
NIS/NIS+ servers, 21
noise, causes of, 19
number of cards supported, 13, 15
O
overall system performance, 52
72 Sun Enterprise 10000 Dynamic Reconfiguration User’s Guide • May 1999
Page 75

P
parameters
SO_RCVBUF,37
SO_SNDBUF,37
tcp_cwnd_max,36
tcp_recv_hiwat,35
tcp_wscale_always,36
tcp_xmit_hiwat,35
udp_recv_hiwat,35
udp_xmit_hiwat,35
PHY, physical layer, 50
physical
layer, 50
media dependent, 50
ping command, 30
pkgadd command, 22, 24, 28
pkgrm command, 30
potential performance, 33, 52
product list, 13
programming interface, 65
Q
queues, 34
R
rebooting the machine, 29
receive buffers, 34
relocating PCI cards, 16
removing the software, 30
routing tables, 41
S
safety notice, 15, 16
send buffers, 34
setsockopt command, 37
SO_RCVBUF parameter, 37
SO_SNDBUF parameter, 37
Sockets, 34, 37
solving common problems, 43
static electricity, 16
STREAMS modules, 34
subnetwork number, 40
Sun HIPPI features, 13
SUNWhipir package, 43
SUNWhipmn package, 43
switched control layer, 50
switches, 48, 51
sys/dlpi.h file, 65
system performance, 52
T
TCP
applications, 34
high water marks, 34, 35
low water mark, 36
tcp_cwnd_max parameter, 36
tcp_recv_hiwat parameter, 35
tcp_wscale_always parameter, 36
tcp_xmit_hiwat parameter, 35
transceiver unit, 18
transfer rate, 52
troubleshooting checklist, 39
tuning
high performance networks, 33
the socket options, 37
U
UDP
applications, 34
high water marks, 34, 35
udp_recv_hiwat parameter, 35
udp_xmit_hiwat parameter, 35
umount command, 29
user space, 34
user-configurable hardware, 17
V
volume manager (vold), 22, 29
Index 73
Page 76

W
water marks, 34
74 Sun Enterprise 10000 Dynamic Reconfiguration User’s Guide • May 1999
 Loading...