

Page 1
User’s Manual
Notice D’utilisation
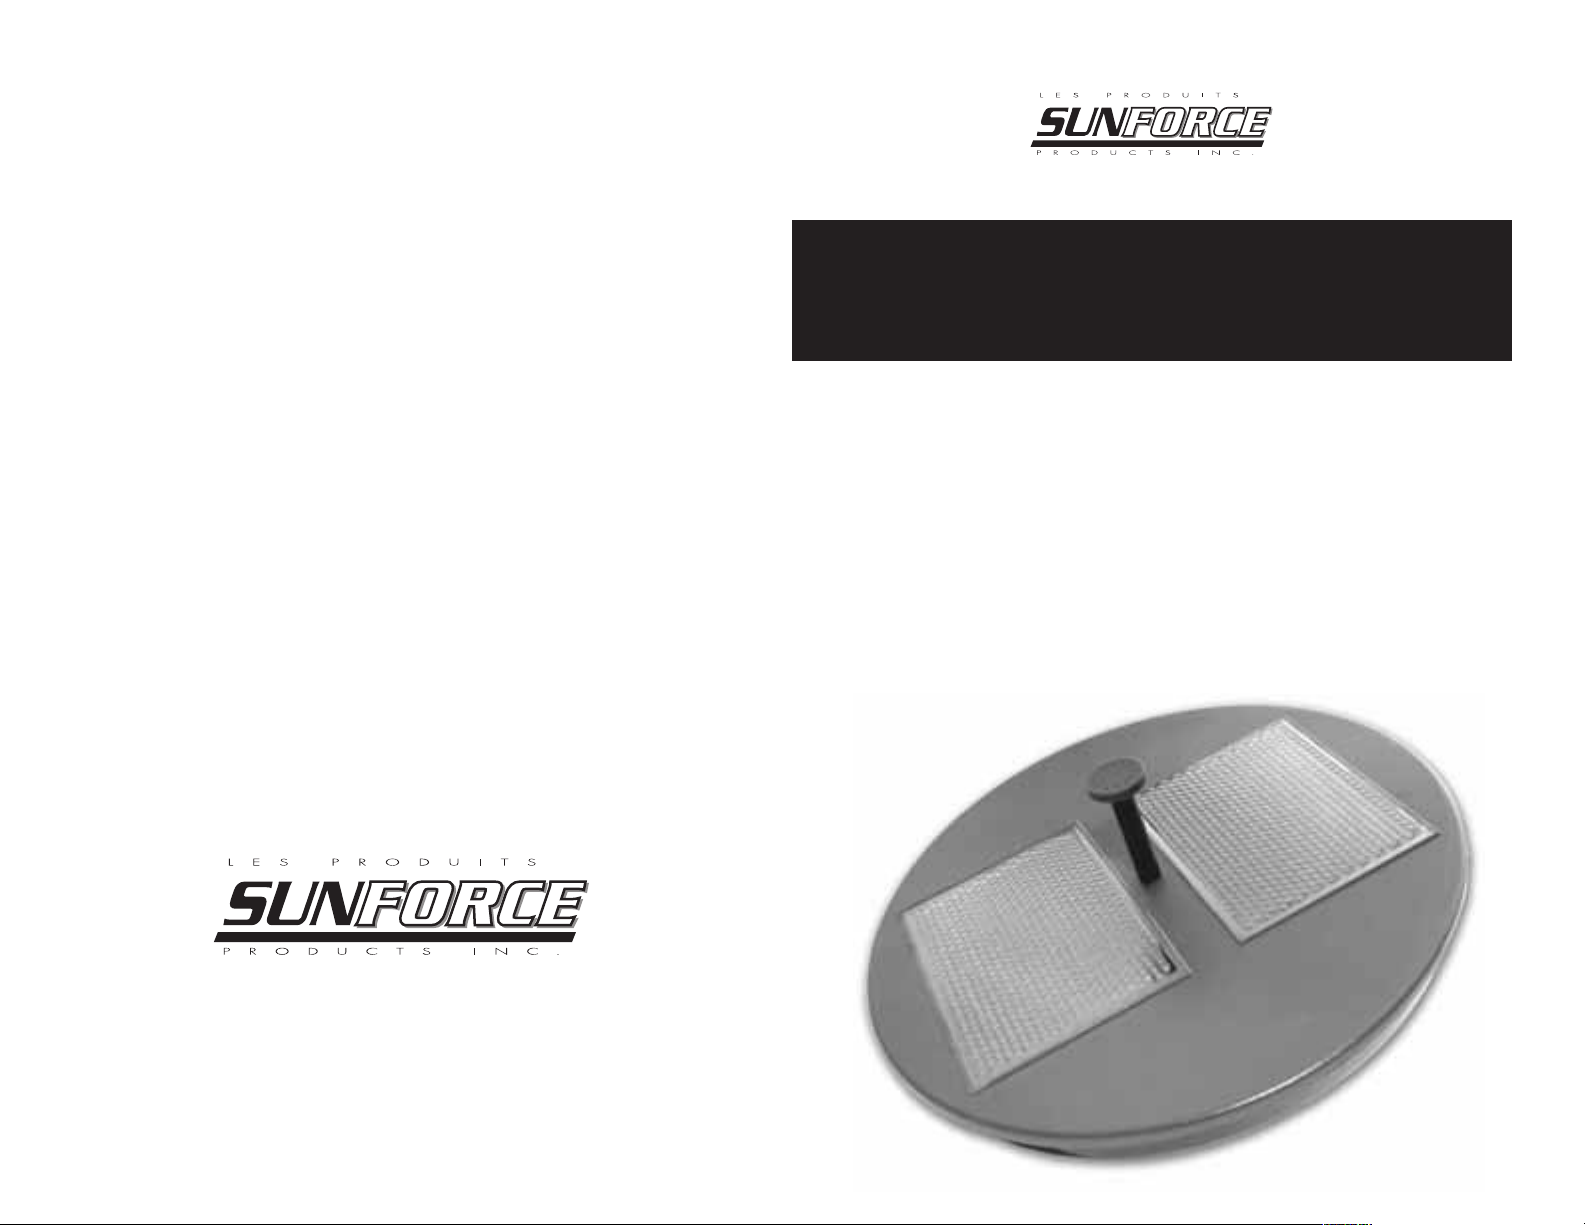
SOLAR FLOATING FOUNTAIN
WITH PUMP
LIMITED WARRANTY:
THESE PRODUCTS ARE WARRANTED FROM DEFECTS IN WORKMANSHIP AND FUNCTIONALITY FOR A
PERIOD OF 1 YEAR. THIS WARRANTY DOES NOT APPLY IN THE EVENT OF MISUSE OR ABUSE OF THE
PRODUCT OR AS A RESULT OF UNAUTHORIZED REPAIRS OR ALTERATIONS. TO ADDRESS WARRANTY ISSUES,
PLEASE CONTACT INITIAL POINT OF PURCHASE.
GARANTIE LIMITÉE:
CES PRODUITS SONT GARANTIS CONTRE TOUTE DÉFAUT DE FABRICATION ET DE FONCTIONNEMENT
PENDANT 1 AN. CETTE GARANTIE N'EST PAS VALIDE EN CAS D'USAGE INAPPROPRIÉ OU ABUSIF DU
PRODUIT OU DE MODIFICATIONS OU RÉPARATIONS NON AUTORISÉES. POUR TOUTES QUESTIONS AU SUJET
DE LA GARANTIE, PRIÈRE DE CONTACTER LE POINT D'ACHAT ORIGINAL.
Montreal, Canada
Made in China
Fabriqué en Chine
FONTAINE FLOTTANTE
SOLAIRE AVEC POMPE
Page 2
USER’S MANUAL
NOTICE D’UTILISATION
TECHNICAL DATA
• Size: 320mm (Diameter) x 98mm (Height)
• Solar cell: Two solar cells,150x100x3mm - Peak Power output: 1.3Watt / 7V
• Operating voltage: 6 - 9V
• Fountain Height : Max. 45CM
CAUTION
• This product only works in direct sunlight. Its performance (height of fountain) depends strongly on the
strength of sunlight that shines on its built-in solar cell. It is not designed to work under cloudy
weather conditions or at night.
• A rope and weight could be used to limit the floating range of the solar fountain pump to prevent it
from floating into areas where the sun is not shining.
• To avoid possible damage to this unit do not expose the solar cells to direct sunlight until the unit is
place in its water source.
STORAGE
• Remove fountain sprinkle heads before storing.
• Take care to drain the water from fountain before storing.
• The original box serves as an excellent storage container.
• Store this fountain in a secure place out of direct sun light.
• It is not recommend to store this fountain in an area where the temperature falls below freezing point
of 32 degrees.
MAINTENANCE
• Solar cell should be cleaned periodically with a soft cloth to ensure best performance.
• Filter cabinet should be washed with clean water periodically to make sure there is no dirt or debris
blocking the flow.
• If the pump impeller becomes stuck, pull off the filter cabinet. Open the impeller cover by unscrewing
it, and then clean the impeller with clean water.
HOW TO USE
• Fountain requires a minimum of 6” of water to work.
• Submerge the solar fountain pump below the water surface, while still keeping the nozzle above the
water so as to force water to flow into the filter cabinet, and allow air to escape from the pumping
system.
• Allow the solar fountain pump to operate for a minute before attaching sprinkle head onto the nozzle.
HOW TO REPLACE AN OLD PUMP
• Remove nozzle and sprinkle head from the base.
• Unscrews the pump from the base and remove the old pump by pulling it upwards
• Unscrews the junction cabin and remove the cabin cover.
• Locate the connection of the two wires. (One wire from the old pump, and the other one from base).
The connection is usually protected by an insulated tube and white resin.
• Cut off the connection and discard the old pump
• Cut two pieces of insulate heat shrink tube of 2cm each and slide them onto the two wires (one red,
one black) coming from the base. (One tube for each wire).
• Connect the wires coming from the base to the wires from the new pump with correct polarity. Red
wire to red wire and black wire to black wire
• Cover the connection with insulate heat shrink tube and shrink. A hair dryer is recommended for such
purpose.
• It is recommended to soak the connection with silicone to prevent water from seeping into the
connection
• Put all the wires back into the junction cabin and secure the cover with screws.
• Secure the new pump to the base with screws.
FICHE TECHNIQUE :
• Dimensions : 320 mm (diamètre) x 98 mm (hauteur)
• Panneau solaire : Deux cellules solaires, 150x 100 x 3 mm - Puissancede sortie de pointe : 1,3watt/ 7 volts
• Tension defonctionnement : 6 - 9 volts
• Hauteur dujet vertical : Maximum de 45 cm
AVERTISSEMENT :
•Ceproduitne fonctionnequ'en pleinsoleil. Saperformance (hauteurdujet)dépend grandementdela force desrayons
solairesqui frappentsonpanneau solaire intégré.Il n'a pasété conçu pour fonctionnerdans desconditions
atmosphériques nuageuses ou le soir.
• Unecorde ou un poidspeuventêtre utilisépourlimiterle rayon de flottaison de la fontaine solaire pour l'empêcherde
flotter dans des endroits oùle soleil ne brillepas.
• Pour éviter des dommages possibles à cetappareil, éviter d'exposerlescellules solairesen pleinsoleil avant de le
placer dans l'eau.
ENTREPOSAGE :
• Retirer latêtede ruissellement dela fontaine avantl'entreposage.
• S'assurer de vider l'eau dela fontaineavant l'entreposage.
• L'emballageinitialestun excellent contenantpour l'entreposage.
• Entreposer cettefontaine dans unendroit sûrhorsde la lumière solaire directe.
• Iln'est pasrecommandé d'entreposer cette fontaine dans un endroit oùla température chutesous le pointde
congélationde 32 °F(0 °C).
ENTRETIEN :
• Pour assurerlameilleure performance, lescellules solairesdevraientêtre nettoyées périodiquementavecunlingedoux.
• Lecompartiment du filtredevrait être lavé périodiquementavec de l'eaupropre pour assurerl'absencede saletés ou
dedébris pouvant bloquerla circulation.
• Si laturbinedelapompe se bloque, enlever le compartiment du filtre, dévisser le couvercle de la turbine et nettoyerla
turbine à l'eaupropre.
MODE D'EMPLOI :
• Pour fonctionnercorrectement, la fontaine requiertun minimum de 6”(15,2 cm)d'eau.
• Plonger lapompe de la fontainesolaire sous la surface del'eau tout en maintenant labusehorsde l'eau pour forcer
l'entréede l'eau dans lecompartimentdu filtre et permettreà l'air de s'échapper de lapompe.
• Permettre à la pompede la fontaine solaire de fonctionner pendant une minute avant defixer la tête de ruissellement
sur la buse.
COMMENT REMPLACER UNE VIEILLE POMPE :
• Retirer labuseet la tête de ruissellementde la base.
• Dévisserla pompede la base et retirer lavieille pompe entirant vers lehaut.
• Dévisserle compartiment dejonction et retirer lecouvercledu compartiment.
• Localiser la connexion des deux fils. (Un filde la vieille pompe et l'autre de labase.) La connexion estnormalement
protégéepar untubed'isolement etde la résineblanche.
• Couper la connexion etjeter la vieille pompe.
• Couper deuxpiècesde tube thermo-rétrécissable d'isolementde2 cmchacuneetles glisser surlesdeuxfils(unrouge,
unnoir) sortant dela base. (Un tube pour chaquefil.)
• Brancherles fils sortant de la base auxfilsdela nouvellepompeenrespectantlapolarité (fil rouge au fil rouge, fil noir
aufil noir).
• Couvrir les connexions avec les tubes thermo-rétrécissables et rétrécir. Un sèche-cheveux est recommandé pour
cettetâche.
• Ilest recommandé detraiter la connexionau siliconepourempêcher l'eaud'ypénétrer.
• Glisser tous les fils dans le compartiment de jonction etfixer le couvercleavec lesvis.
• Fixerla nouvellepompe à la base au moyen de vis.
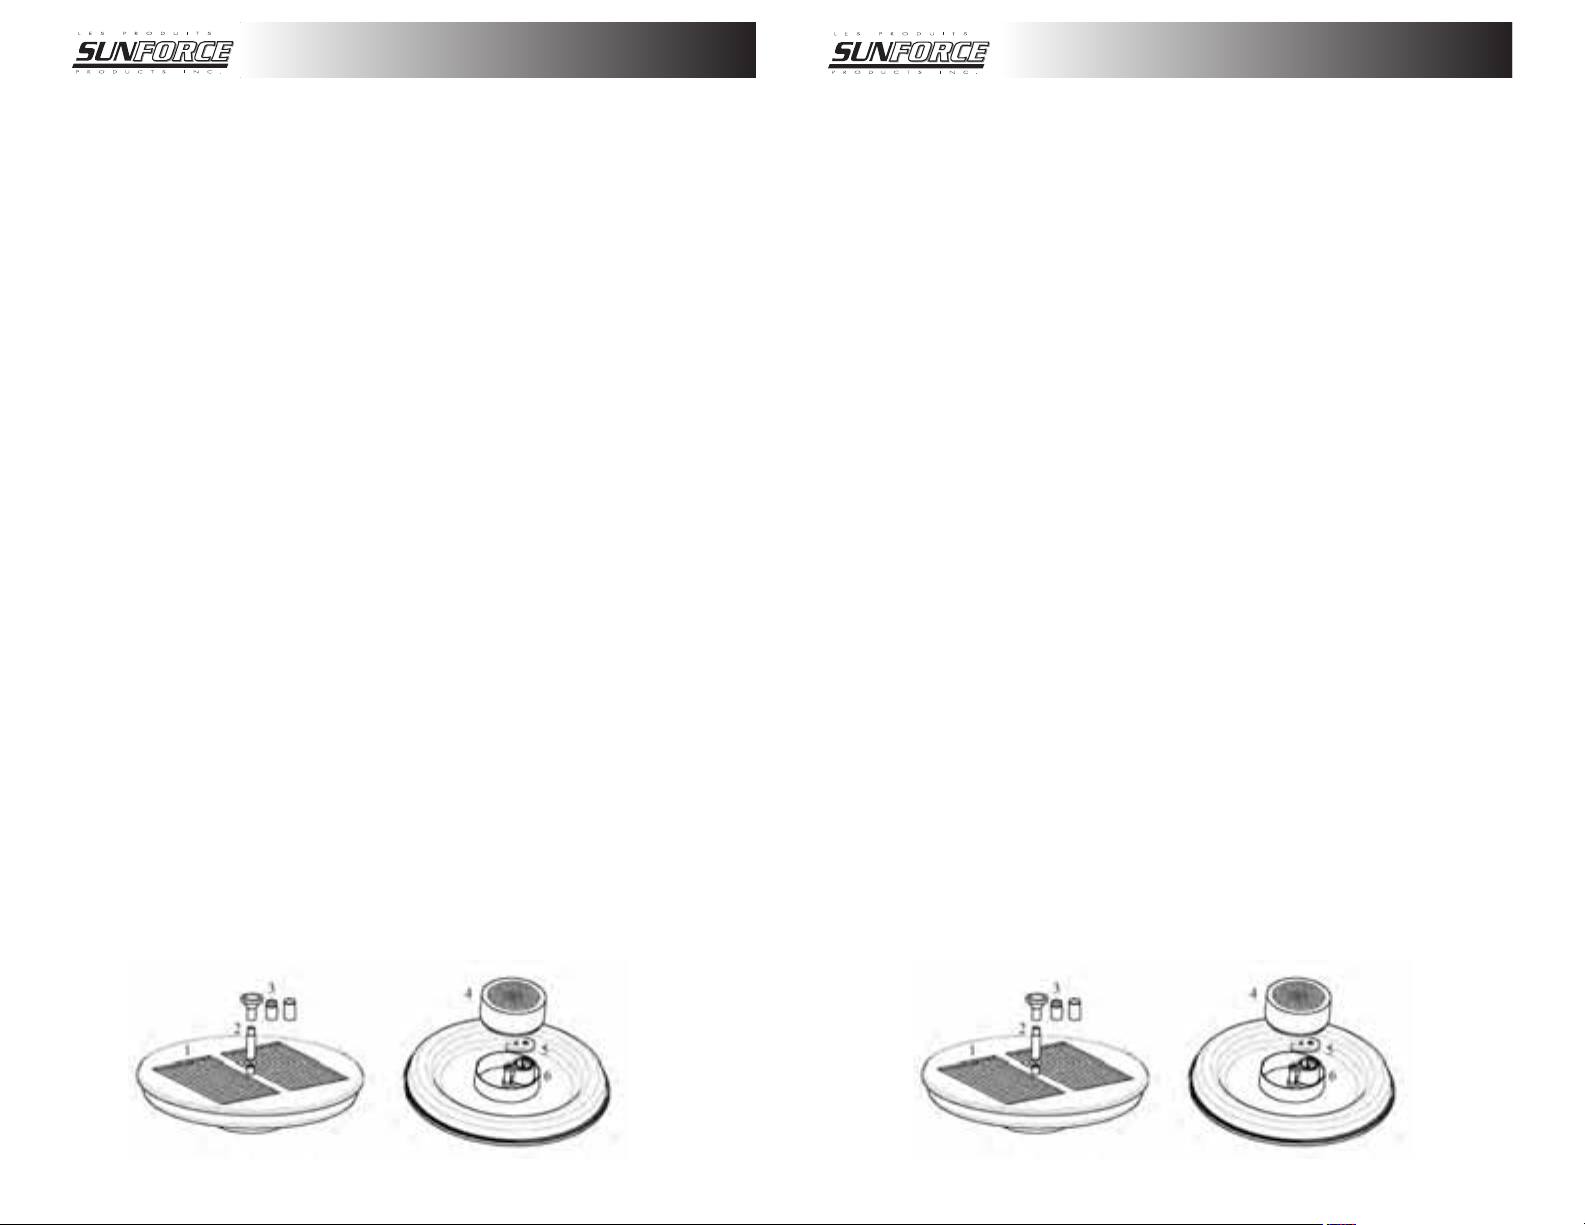
1. Solar cell 2. Nozzle 3. Sprinkle heads (Three pieces) 4. Filter cabinet 5. Impeller cover 6. Pump
1.Cellules solaires 2.Buse 3.Têtes de ruissellement (3) 4. Compartimentdufiltre 5.Couvercle de la turbine 6. Pompe
 Loading...