

Page 1
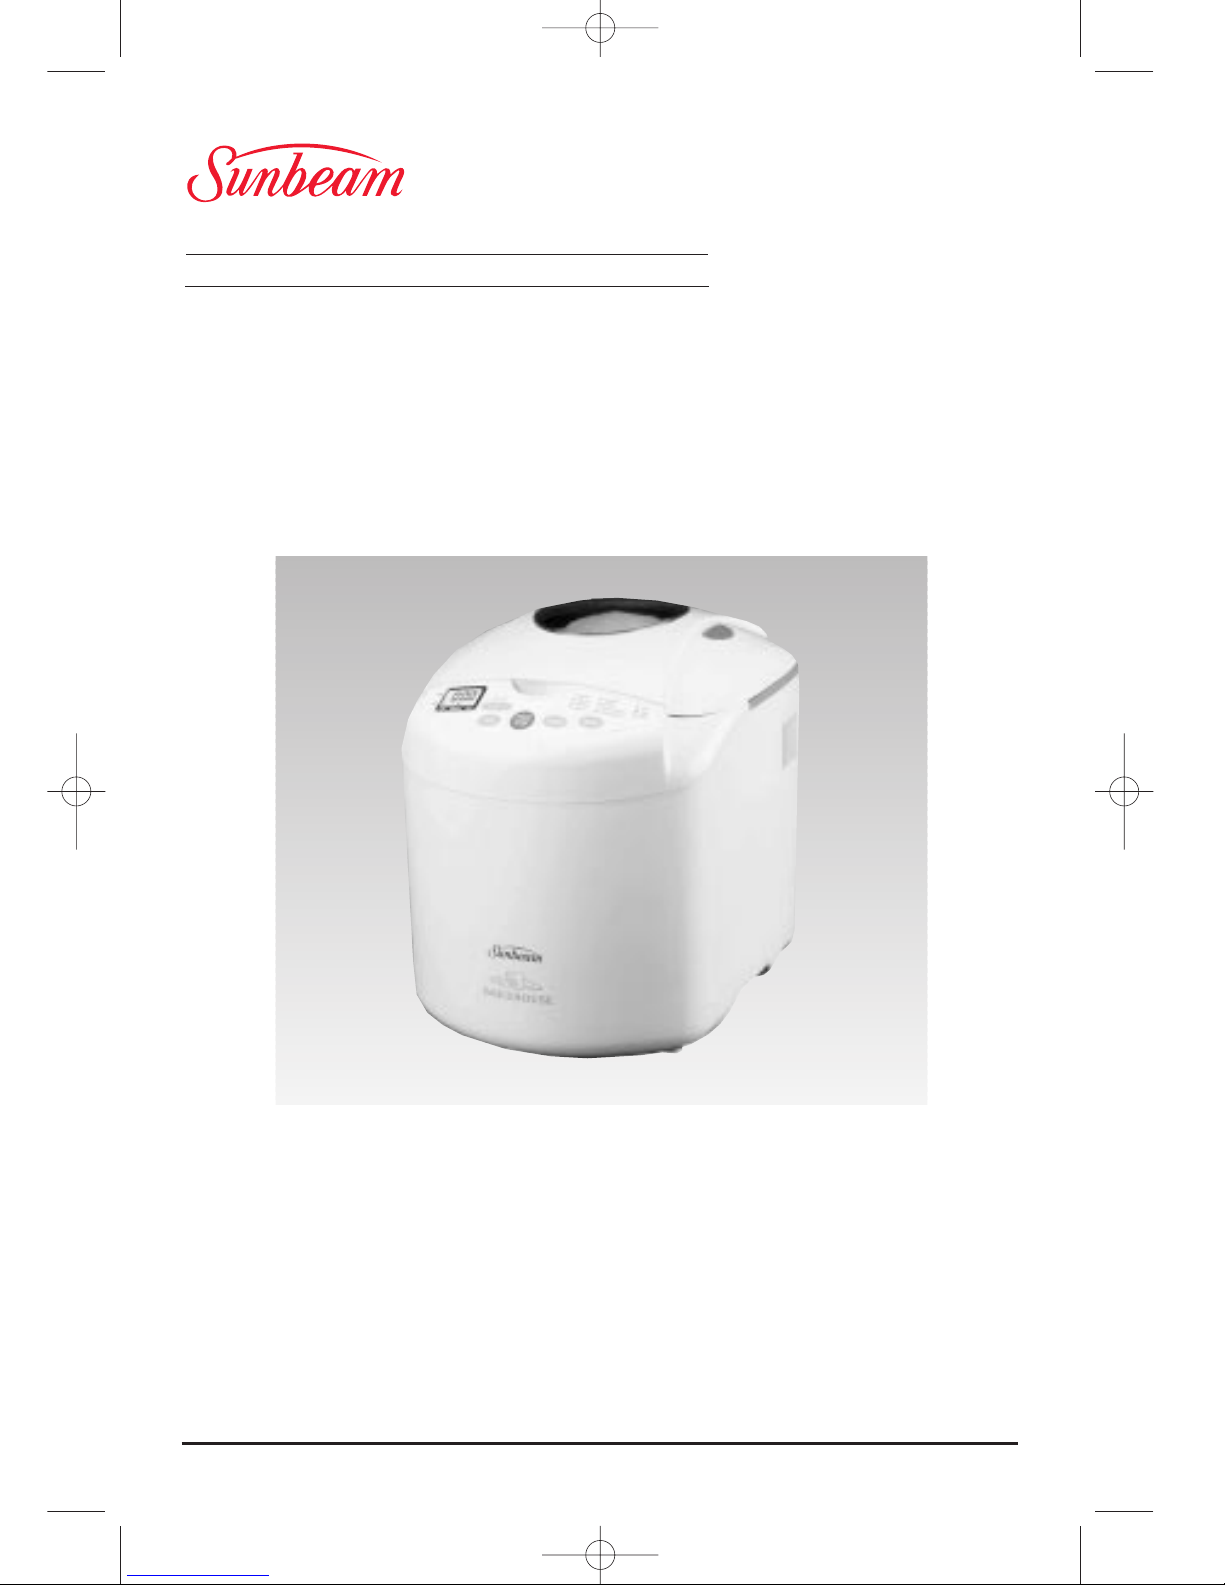
Bakehouse
Automatic dough & bread maker
INSTRUCTION/RECIPE BOOKLET AND GUARANTEE.
BM3400
BM3400 Bakehouse Inst. 21/1/00 2:16 PM Page 1
Page 2

Congratulations.
Fresh, warm home made bread is just a few easy
steps away with your new Sunbeam Bakehouse.
With your Bakehouse you can have delicious home
made bread in under 2 hours.
And your only limited by your imagination ......olive
and tomato bread, soy and linseed bread, herb and
garlic bread, pasta, doughs and specialty
breads...the variety is endless! You can also make
your favourite jam, pastries and cakes!
And it really is as easy as 1....2....3!
Step 1. Remove the bread pan from the
breadmaker and add the ingredients.
Step 2. Position the bread pan and select the
desired program setting.
Step 3. In a few hours, freshly baked bread is
ready to enjoy.
Imagine waking up to the aroma of freshly
baked bread. This is so easy to do because your
Bakehouse has a 13 hour pre-set timer. Set it
the night before and wake up to the aroma of
freshly baked bread.
Before you start, read all the instructions in this
book to ensure you get the most from your
breadmaker.
We’ve done everything we can do to make
bread baking a breeze, but if you have any
concerns regarding the performance and use of
your breadmaker, please call....
Sunbeam Customer Service (toll-free)
Australia 1800 025 059
New Zealand 0800 505 570
BM3400 Bakehouse Inst. 21/1/00 2:16 PM Page 2
Page 3

Contents.
Using your Bakehouse safely. . . . . . . . . . . . . . . . . . . . . . . . . . . . . . . . . . . . . . . . . . . . . . . . . . . . . . . . . . . . . . . . . . . . . . . . . . . . . . . . . 1
Getting to know your Bakehouse
. . . . . . . . . . . . . . . . . . . . . . . . . . . . . . . . . . . . . . . . . . . . . . . . . . . . . . . . . . . . . . . . . . . . . . . . . . 3
The Control Panel
. . . . . . . . . . . . . . . . . . . . . . . . . . . . . . . . . . . . . . . . . . . . . . . . . . . . . . . . . . . . . . . . . . . . . . . . . . . . . . . . . . . . . . . . . . . . . 4
Role of ingredients
. . . . . . . . . . . . . . . . . . . . . . . . . . . . . . . . . . . . . . . . . . . . . . . . . . . . . . . . . . . . . . . . . . . . . . . . . . . . . . . . . . . . . . . . . . . . 6
What ingredients to use
. . . . . . . . . . . . . . . . . . . . . . . . . . . . . . . . . . . . . . . . . . . . . . . . . . . . . . . . . . . . . . . . . . . . . . . . . . . . . . . . . . . . . . 7
Using your Bakehouse
. . . . . . . . . . . . . . . . . . . . . . . . . . . . . . . . . . . . . . . . . . . . . . . . . . . . . . . . . . . . . . . . . . . . . . . . . . . . . . . . . . . . . . . . 8
Select Program settings
. . . . . . . . . . . . . . . . . . . . . . . . . . . . . . . . . . . . . . . . . . . . . . . . . . . . . . . . . . . . . . . . . . . . . . . . . . . . . . . . . . . . . . . 9
Using the Time Delay Function
. . . . . . . . . . . . . . . . . . . . . . . . . . . . . . . . . . . . . . . . . . . . . . . . . . . . . . . . . . . . . . . . . . . . . . . . . . . . . . 10
Turbo, Jam, Bake, Damper, Pasta Dough& Pizza Dough settings
. . . . . . . . . . . . . . . . . . . . . . . . . . . . . . . . . . . . . . . 11-12
Power Interruption Program Protection & Important Measuring tips
. . . . . . . . . . . . . . . . . . . . . . . . . . . . . . . . . 13
Handy Hints
. . . . . . . . . . . . . . . . . . . . . . . . . . . . . . . . . . . . . . . . . . . . . . . . . . . . . . . . . . . . . . . . . . . . . . . . . . . . . . . . . . . . . . . . . . . . . . . . . . . . 14
Care & Cleaning, Help Guide
. . . . . . . . . . . . . . . . . . . . . . . . . . . . . . . . . . . . . . . . . . . . . . . . . . . . . . . . . . . . . . . . . . . . . . . . . . . . . . . . 15
Recipes: Bread Mix
................................................................................................................................... 17
White bread
............................................................................................................................. 19
Whole Wheat bread
.......................................................................................................... 22
French bread
............................................................................................................................ 24
Sweet bread
............................................................................................................................. 25
Damper
......................................................................................................................................... 28
Pasta Dough
............................................................................................................................. 29
Pizza Dough
............................................................................................................................. 31
Rye
.................................................................................................................................................... 35
Jam
................................................................................................................................................... 36
Program Setting Times & Display Information
. . . . . . . . . . . . . . . . . . . . . . . . . . . . . . . . . . . . . . . . . . . . . . . . . . . . . . . . . . . . 37
Trouble Shooting
. . . . . . . . . . . . . . . . . . . . . . . . . . . . . . . . . . . . . . . . . . . . . . . . . . . . . . . . . . . . . . . . . . . . . . . . . . . . . . . . . . . . . . . . . . . . . . 39-40
Replacement Guarantee
. . . . . . . . . . . . . . . . . . . . . . . . . . . . . . . . . . . . . . . . . . . . . . . . . . . . . . . . . . . . . . . . . . . . . . . . . . . . . . . . . . . . . . 41
Sunbeam Appliance Service Centres
. . . . . . . . . . . . . . . . . . . . . . . . . . . . . . . . . . . . . . . . . . . . . . . . . . . . . . . . . . . . . . . . . . . . . . . . 42-44
BM3400 Bakehouse Inst. 21/1/00 2:16 PM Page 3
Page 4

1
Using your Bakehouse safely.
Before use.
1. Read all instructions, product labels and
warnings. Save these instructions.
2. Remove all foreign matter from the bread
pan and baking chamber.
3. Wipe over bread pan and kneading blade
before use.
4. Always use the breadmaker from a 230-240V
AC power outlet.
5. Do not allow anything to rest on the power
cord or allow it to touch any hot surface. Do
not plug in cord where people may walk or
trip on it or allow the cord to dangle over
the edge of a table or benchtop.
Whilst in use.
1. This breadmaker is ‘cool touch’, but does get
quite warm during operation. Be careful to
keep your hands and face away from the unit.
2. Do not open the lid or remove the bread pan
during operation except as indicated in the
instructions.
3. Do not place anything on the breadmaker
lid. Do not cover vents.
4. This breadmaker unit has built-in Power
Interruption Program Protection to maintain
your baking cycle, in the advent of an
interuption in your power supply (black out).
Any extented power outage may result in
the program being cancelled. See page 13
for full details.
5. Do not touch moving parts.
Where to use.
1. Use only on a stable, heat-resistant surface.
2. Do not use the breadmaker where it will be
exposed to direct sunlight or other heat
sources, such as a stove or oven.
3. Do not place on top of any other appliance.
4. Keep the breadmaker out of reach of
children as it does get quite warm. Also, if
any buttons are accidentally touched during
operation, baking may stop.
5. Place the unit at least 50 millimetres
away from walls as they may discolour
from the heat.
After use.
1. Always turn the unit off and remove the
plug from the power outlet after use, and
before cleaning.
2. Use oven mitts when taking out the baking
pan after baking.
3. Allow the breadmaker to cool down before
cleaning or storing.
4. Read instructions before cleaning. Do not
immerse the unit or plug in water. This will
cause electric shock or damage to the unit.
Safety Precautions
1. Do not use attachments not recommended
by Sunbeam. They may cause fire, electric
shock or injury.
2. Do not use outdoors or for commercial use, or
for any purpose other than its intended use.
3. Do not operate the unit if the cord or plug is
frayed or damaged. Do not operate if the
appliance has been dropped or damaged in
any manner. Return appliance to the nearest
authorised Service Centre for examination,
repair or mechanical or electrical adjustment.
As a service to customers, Sunbeam Factory
Outlets will carry out a free check on your
appliance to ensure it is electrically safe.
4. Remove the plug by grasping the plug – do
not pull on the cord.
5. Use of extension cords: A short power supply
cord has been provided to reduce the risk of
injury resulting from becoming entangled in
or tripping over a long cord. Extension cords
should be used with care. The cord should
be arranged so that it will not drape over the
benchtop where it can be pulled by children
or tripped over accidentally.
BM3400 Bakehouse Inst. 21/1/00 2:16 PM Page 4
Page 5

2
6. Electrical power: If the electric circuit is
overloaded with other appliances, your
breadmaker may not operate properly.
The breadmaker should be operated on a
separate electrical circuit from other
operating appliances.
7. For safety reasons and to avoid maintenance
by unskilled persons, some appliances are
‘Sealed’ using tamperoof means as specified
by SAA (Standards Association of Australia).
Such appliances should always be returned to
the nearest authorised Service Centre for
adjustment or repair if required.
8. For additional protection Sunbeam
recommend the installation of a Residual
Current Device (RCD) on all electrinal
appliances with a rated current not
exceeding 30mA is advisable in the electrical
circuit supplying the power outlet in use.
This unit is intended for household use only.
9. Close supervision is necessary when your
appliance is being used near children
or infirm persons.
10. Children or infirm persons should be
supervised to ensure they do not play
with the appliance.
11. Do not use the appliance for any purpose
other than its intended use.
12. Do not use the Breadmaker without any
ingredients in the baking tray.
Using your Bakehouse safely. (cont’d)
If you have any concerns regarding the performance and use of your appliance, please ring our Toll
Free number (Australia only) 1800 025 059. New Zealand - 0800 505 570
Ensure the above safety precautions are understood.
BM3400 Bakehouse Inst. 21/1/00 2:16 PM Page 5
Page 6

3
Getting to know your Bakehouse.
Your Sunbeam Bakehouse is a fully automatic
bread baking and dough making machine that
allows you to easily make fresh bread in only a
few hours.
There are a host of other features:
Turbo setting
A unique feature which enables you to have
cooked bread in under 2 hours. Ideal to cater
for last minute guests or when you need bread
in a hurry.
Cool Touch exterior
Make it safer when baking bread, particularly
when children are present.
Loaf Sizes – 500g or 750g
Makes bread in 2 sizes - ideal for sandwiches.
Power Interruption Program Protection
If there is a temporary power outage during the
use of your breadmaker, the machine will retain
its memory and continue the baking cycle when
the power returns. See page 13 for full details.
Viewing Window
Allows you to watch each stage of the
breadmaking cycle.
60 minute Keep-Warm function
Keeps bread warm for 1 hour after baking.
13 hour Time Delay
Pre-set your breadmaker and fresh bread is
ready when you want it. You can even wake up
to freshly baked bread.
Fruit & Nut beeper
Allows you to be more creative with your bread
making. The Bakehouse beeps to let you know
when it is time to add fruits and/or nuts. This
prevents excess crushing during the kneading
cycle.
Variety of bread types
Makes any type of bread you like from a
selection of settings including: Basic, Wheat,
French, Damper, Sweet and Rye.
Crust colour options
Choose from light, medium or dark crust colours
on most bread settings, to suit your own
personal taste.
Removable Lid
Multi-Option
Control Panel
Cool Touch exterior
Viewing
Window
BM3400 Bakehouse Inst. 21/1/00 2:16 PM Page 6
Page 7

4
Getting to know your Bakehouse.
Jam setting
Simply follow the delicious jam recipes in our
Recipe Section to make sweet or savoury
homemade jams.
Bake setting
Use this setting to complete the baking cycle in
case of an extended power failure.
Damper setting
Make an ultra-fast white loaf or traditional
damper style bread in under one hour.
Pasta Dough setting
Use this setting to make dough for fresh home
made pasta.
Pizza Dough setting
Takes the labour out of kneading dough for
pasta, pizza, bread rolls and other breads and
pastries.
Removable lid
Simply remove for easy cleaning.
Non-stick removable bread pan
For easy removal of bread and quick clean-up.
The Control Panel.
Display window
Indicates the program setting selected from (1)
to (11) and the Crust Colour and Loaf Size until
the Start button is pressed. The display will
show the number of hours and minutes until the
cycle is complete - “0.00”.
Start/Stop button
Press to commence selected setting or begin
timer countdown for delay timer.
To stop the operation or cancel a timer setting,
press and hold for 1-2 seconds until you
hear a beep.
Delay buttons
Allows you to delay the beginning of your
desired program setting. See page 10 for
instructions on how to use the Delay bake
function.
Menu button
Press this button to select the setting of your
choice from (1) to (11). A beep will sound each
time you press the button.
Crust colour button
Press to select the desired crust colour - Light (L),
Medium (P) or Dark (H).
BM3400 Bakehouse Inst. 21/1/00 2:16 PM Page 7
Page 8

5
Program Settings.
(1) Basic
Use this setting to make traditional white bread.
You have a choice of 3 crust colours - Light,
Medium or Dark. The Bakehouse lets you choose
your favourite crust colour for most breads.
(2) Wheat
Whole wheat breads require more rising time to
accommodate the slower rising action with
whole wheat flour. Therefore, it is normal for
whole wheat breads to be heavy and slightly
dense in texture.
(3) French
This cycle is for breads with crispier crusts, such
as French and Italian breads.
(4) Sweet
This cycle is for breads that require additional
ingredients such as sugar, dried fruits or
chocolate to sweeten the bread. To prevent the
crust from becoming to dark, the light crust
colour is recommended.
(5) Damper
Make an ultra fast (58 minute) white bread, or
damper style bread on this setting. The bread
will have a heavier and more dense texture than
the Basic or Turbo setting.
(6) Turbo
Use the Turbo setting for ready made bread in
approximately 2 hours. This setting lets you
save time on the bread recipes by reducing the
completion time and is ideal for when you need
bread in a hurry. Breads made using this setting
may be shorter and more dense due to the
reduced rising time.
(7) Pasta Dough
This setting is used to prepare the dough for
pasta. Feed the pasta through a pasta machine
to make fettucini, ravioli and lasagne.
(8) Pizza Dough
Use this setting to make dough only, so that you
can knead and shape a variety of breads to bake
in a conventional oven. Make dough for pizzas,
dinner rolls and croissants.
(9) Rye
Use this setting to make dark European breads
such as Rye and Black bread.
(10) Jam
Use fresh fruit to make sweet and savoury jams.
Ideal to store and use all year round.
(11) Bake
This setting can be used to complete the bread
baking process if there is an extended power
interruption. Set the program to Bake for an
immediate baking process.
BM3400 Bakehouse Inst. 21/1/00 2:16 PM Page 8
Page 9

6
Role of Ingredients.
Yeast
Yeast is actually a microscopic plant. Simply
stated, without yeast, your bread will not rise.
When moistened by a liquid, fed by sugar and
carefully warmed, yeast produces gasses that
power the dough to rise. If the temperature is
to cold, the yeast will not be activated; if it’s too
warm, it will die. Your Bakehouse takes care of
this worry for you by maintaining just the right
temperature in the baking chamber at all times.
Some yeasts may require the use of a bread
improver. The Bread Improver will provide
additional gluten to the flour to produce a
better loaf.
Note: We do not recommend the use of fresh or
compressed yeast in your breadmaker. Sunbeam
recommend the use of dry yeast only. Always
ensure it is used well within the use-by date, as
stale yeast will prevent the bread from rising.
Flour
In order for the bread to rise, the flour has to
have a sufficiently high protein content.
Sunbeam recommends the use of a good quality
plain or bread flour. Recommended brands are
listed on the page 7
Note: Do not use self-raising flour in any
recipes, except for program (5) Damper.
Unlike white flour, Wheat flour contains bran
and wheatgerm which inhibit rising. Wheat
breads therefore, tend to be heavier in texture
and smaller in size. A lighter larger loaf can be
achieved by combining Wheat flour with white
flour for whole wheat bread recipes.
Sugars
Sugars sweeten the bread, brown the crust, lend
tenderness to the texture and supply the yeast
with food. White or brown sugar, molasses,
maple or golden syrup, honey and other
sweeteners may be used in equivalent
quantities.
Artificial sweetener can be substituted in
equivalent amounts, however the taste and
texture of your bread will vary.
Liquids
When liquids are mixed with protein in flour,
gluten is formed. Gluten is necessary for the
bread to rise. Most recipes use dry milk and
water, but other liquids such as milk and fruit
juice can be used. Experiment with quantities of
these liquids to obtain optimum results. Liquids
should be used at room temperature.
A recipe with too much liquid may cause the
bread to fall during baking while a recipe with
too little liquid will not rise.
Salt
In small amounts, salt adds flavour and controls
yeast action. Too much salt inhibits rising, so be
sure to measure amounts correctly. Any
ordinary table salt may be used.
Fats
Many breads use fats to enhance the flavour
and retain moisture. Typically, we use
margarine in the recipes, softened butter or oil
may be used in equivalent quantities.
If you choose not to add any fat, your bread
may vary in taste and texture.
BM3400 Bakehouse Inst. 21/1/00 2:16 PM Page 9
Page 10

7
What Ingredients To Use.
To achieve an optimum loaf of bread, always
use fresh, quality ingredients.
Australia only - see insert for New Zealand
variations in recipes and ingredients.
Flour
A good quality flour should be used.
Recommended brands of flour include
Tip Top™, White Wings™, Defiance™, Greens™
and Mothers Choice™. A high protein bread
flour can also be used.
Generic brands of flour may give
inconsistent results.
It is important to weigh the flour required for
each recipe as flour naturally aerates. This will
ensure a perfectly baked loaf.
Bulk packs of flour may be used, however the
result of your bread may vary. The texture and
height of the bread will be inconsistent if the
flour is stored for long periods of time in
unsatisfactory conditions. Purchase bulk packs
of flour only if baking constantly.
Yeast
Bulk packs of yeast and yeast sachets such as
Fermipan™, Tandaco™, Kitchen Collection™
and Defiance™ can be used.
If using a combined yeast and Bread Improver
such as Winns Easy Bake™ or from Tandaco™,
we suggest you experiment with measurements
to achieve optimum results.
Bread Improver
The use of Bread Improver is recommended for
all recipes to achieve optimum results.
Bread Improver will increase the gluten content
of the flour mix. It will also influence the
structure, size and texture of the bread, so that
it does not collapse when baking.
The suggested quantity to use is stated in all
recipes.
Bread Improver has a flour like texture and can
be purchased through health food shops or
through selected supermarkets.
Bread mixes
A variety of bread mixes such as Defiance™ and
Kitchen Collection™ can be used in your bread
maker. Directions of use should be supplied on
the bread mix packaging.
Some bulk bread mixes may require the use of a
bread improver. If the centre of the baked bread
is collapsing, a bread improver may need to be
added. This should be done by trial and error
by adding
1
/2teaspoon of bread improver at one
time until desired results are achieved.
We recommend you contact the Bread Mix
manufacturer for further information on the
use of their product.
Hints
• Different brands of yeast, used with different
brands of flour, will influence the size and
texture of your bread. Experiment with
these ingredients to determine which
combination of ingredients gives you the
best result.
• It is normal for breads to be inconsistent in
height and texture even if you are using the
same ingredients time and time again. This
inconsistency is usually influenced by the
natural varying protein levels of wheat
in the flour.
BM3400 Bakehouse Inst. 21/1/00 2:16 PM Page 10
Page 11

8
Using your Bakehouse.
1. Before using your Bakehouse for the first time
remove the bread pan by gently pulling it
out. Wipe over the bread pan and kneading
blade with a damp cloth and dry thoroughly.
Do not immerse the bread pan in water
unless necessary. Do not use harsh abrasive
cleaners as they may damage the non-stick
surface. Do not place any parts of your
breadmaker in the dishwasher.
Select a recipe from the recipe section and
prepare the ingredients as directed. (See
Important Measuring Tips on page 13).
2. Add the ingredients into the bread pan in
the order listed. All ingredients should be at
room temperature and measured carefully.
Wipe all spills from the outside of the pan.
3. Insert the bread pan into the baking
chamber of the bread machine. To do this
place the bread pan into the baking chamber
so that the handle lines up with the two
stainless clips on each side of the chamber.
Apply pressure to push the baking tray
downwards and it will click into place.
Lay the handle flat toward the side
of the bread pan.
Close the lid securely, plug the machine into
a 230-240 volt AC power outlet and turn the
power ON.
Note: When the machine is first plugged in,
the LCD Display Window will beep and
defaults to ‘Basic’, ‘Medium’ crust, ‘750g’
loaf. The LCD will flash ‘1:P’, then change
to ‘3:00’ hours.
4. Select the desired program setting,
size and crust colour. Press Start. The
Bakehouse will display the hours and
minutes until the cycle is complete.
BM3400 Bakehouse Inst. 21/1/00 2:16 PM Page 11
Page 12

9
Select Program Setting.
1. To select a program setting use the Select
button until the desired number of the
program (from 1 to 11) is displayed on the
control panel. Each time you press the Select
button, a beep will sound.
2. Use the Size button to select the desired loaf
size. At this stage, the LCD Display will show
the hours and minutes until the cycle is
complete. This will change when the crust
colour is selected.
3. Use the Crust Colour button to select your
choice of crust colour. You are able to
choose from the Light (L), Medium (P), or
Dark (H) crust colours on selected settings.
Unless you select a crust colour the
Bakehouse will automatically default to a
Medium (P) crust colour.
Note: A choice of Crust Colours is available
from settings (1) to (4).
4. To start, press the Start/Stop button. The
Bakehouse will beep and will display the
hours and minutes until the cycle is
complete.
To cancel operation at any time, hold the
Start/Stop button down for 1-2 seconds.
Avoid opening the lid at any time during the
bread cycle unless adding fruits or nuts when
indicated.
The table below illustrates the Program
settings and Crust Colour options.
*Time delay is not recommended for recipes that require fruits or nuts to be added.
MENU SETTING CRUST TIME FRUIT & NUT 500g 750g
COLOUR DELAY BEEPER*
LIGHT (L) MEDIUM(P) DARK(H)
1 Basic ✔✔✔✔ ✔✔✔
2 Wheat ✔✔✔✔ ✔✔✔
3 French ✔✔✔✔ ✔✔✔
4 Sweet ✔✔✔✔ ✔✔✔
5 Damper ✔
6 Turbo
7 Pasta Dough ✔✔
8 Pizza Dough ✔
✔
9 Rye ✔✔
10 Jam ✔
11 Bake
BM3400 Bakehouse Inst. 21/1/00 2:16 PM Page 12
Page 13

10
Select Program Setting (cont’d).
To add fruit or nuts
You are able to add fruit or nuts on a number of
settings as detailed in the table on page 42.
The breadmaker will beep 12 times to prompt
you to add your ingredients.
Open the lid and add any fruits or nuts that the
recipe requires as the machine is kneading.
Close the lid and the Bakehouse will
automatically continue the cycle.
At the end of the baking cycle the machine will
beep and the display will read “0.00”. The
Bakehouse will automatically switch to a Keep
Warm cycle for 60 minutes. Warm air will
circulate throughout the baking chamber, to
help reduce condensation.
The bread can be removed from the baking
chamber at the end of the cycle or any time
during the Keep-Warm cycle. Simply press the
Start/Stop button to end the Keep-Warm
feature.
To remove the bread from the Bakehouse
The bread pan will be hot after the baking
cycle. Use a kitchen mitt to remove the pan
from the baking chamber. Gently pull out.
Allow the bread to cool in the bread pan for 10
minutes before removing. Turn the pan upside
down and shake until the bread slides out. If
necessary, use a plastic spatula to loosen bread
from the sides of the pan.
Allow the bread to cool on a wire rack for at
least 10 minutes before slicing. For easy slicing
we recommend the use of an electric knife or a
quality bread knife.
After using your Bakehouse, unplug the
machine and allow it to cool for 30 minutes
before commencing another program. If you
attempt to use the Bakehouse too soon, it will
beep and the display will read ‘E01’, indicating
the Bakehouse has not cooled sufficiently.
Press the Start/Stop and wait until the
Bakehouse has cooled.
Using the Time Delay.
The Bakehouse allows you to delay the cooking
of your bread by up to 13 hours, so you can
wake up to the smell of freshly baked bread, or
go out for the day while your Bakehouse does
all the work.
Note: Do not use the Time Delay when the
recipe has perishable ingredients such as milk,
eggs or cheese, as these will spoil.
Also, fruit and nuts should only be added
manually. Do not use the Time Delay for recipes
that require fruits and nuts to be added at a
later time. If you do add them on the Time
Delay, they will be excessively crushed during
the kneading cycle.
1. Follow steps 1, 2 and 3 on page 9.
2. Press the Delay (+ or -) buttons until you
reach the number of hours and minutes from
now that you want your bread to be ready.
3. Press the Start/Stop button to begin the
cycle. The Timer will start counting down.
The bread will be cooked and ready in the
hours and minutes displayed.
Note: If you make a mistake, or need to reset
the Timer, press the Start/Stop button for 1-2
seconds.
BM3400 Bakehouse Inst. 21/1/00 2:16 PM Page 13
Page 14

This program allows you to make pasta dough
for fresh pasta. Feed the pasta through a pasta
machine to make fettuccini, ravioli and lasagne.
Refer to the Pasta instructions in the
Recipe section.
Pasta Dough Setting.
11
Using the Time Delay (cont’d).
Example
Before leaving for work at 8am, you decide to
set the Time Delay so that the bread or selected
program will be ready and completed by 6pm
when you return home - which is 10 hours later.
After following instruction 1 above, press the
Delay button until the display reads “10.00”.
Then press Start.
This tells you that your bread or selected
program will be complete in 10 hours. The
Bakehouse will begin counting down and your
selected program will be complete by 6pm.
Note: You do not need to take into account the
amount of time required to cook the program
selected. This is automatically registered in the
Bakehouse when it is selected.
Turbo Setting.
Need bread in a hurry? The Turbo setting is
used to decrease the overall completion time of
your bread. This is especially handy when you
need bread in a hurry.
The breads made using this setting may be
shorter and denser because of a decrease in
rising times.
The Turbo setting should only be selected when
baking White, Wheat, Sweet & French breads.
To use the Turbo setting, put ingredients into
bread pan and then place in the Bakehouse and
select program setting (6) Turbo, then press
Start.
Damper Setting.
Have a damper style bread or normal white
bread ready in under 1 hour. Make a variety of
sweet and savoury damper breads on this
setting.
Breads made on this setting will have a dense
texture due to the short cycle time.
Once the Damper cycle is complete, we
recommend you select the Bake function to bake
for a further 15 minutes to ensure a crisp crust.
Due to use of Self Raising flour in the Damper
recipes the taste may be similar to that of a
scone.
Refer to the Damper instructions in the
Recipe section.
BM3400 Bakehouse Inst. 21/1/00 2:16 PM Page 14
Page 15

12
This program allows you to create a variety of
doughs for croissants, bread rolls and pizza to
bake in a conventional oven.
Refer to the Dough instructions in the
Recipe section.
Bake Setting.
This setting can be used to complete the bread
baking process in case of a power failure.
If there has been a power failure, allow the
dough to rise in the bread pan without power
until it reaches 3/4of the way up the bread pan.
Reconnect electricity and select program setting
(11) Bake, and press Start.
When you select the Bake setting, the
Bakehouse will immediately start baking. This
setting will bake for 1 hour and can be
controlled manually by pressing the Start/Stop
button to stop the function at any time.
This setting can also be used to increase cooking
time. If your bread is still dough like at the
completion of a bread cycle or you would like
your bread cooked for a longer time, simply
select the bake function to continue cooking.
Note: You may need to wait 15-20 minutes for
the machine to cool down, before you select the
bake program. If you attempt to use the Bake
option before the machine has cooled down, an
error message will appear on the display - ‘E01’.
Pizza Dough Setting.
Jam Setting.
You can now have fresh jam all year round. Use
this setting to make fresh savoury and sweet jams.
Refer to the Jam instructions in the
Recipe section.
BM3400 Bakehouse Inst. 21/1/00 2:16 PM Page 15
Page 16

13
Each ingredient in a loaf of bread plays a specific
role, so it is extremely important to measure the
ingredients correctly to get the best results.
For optimum results, we recommend weighing
ingredients on a kitchen scale. This is especially
important with flour. Because flour aerates, an
accurate amount is needed to achieve an
optimum loaf of bread.
Weight measurements are given for each recipe.
If kitchen scales are not available, ensure the
following instructions are followed:
Dry ingredients
Use a metric measuring spoon or cup. Do not
use tableware spoons or cups. Spoon the dry
ingredients loosely into the spoon or cup and
level off with a flat knife. This is particularly
important with flour. Do not pack dry
ingredients down into the cup or tap the cup
unless otherwise stated in the recipe.
Liquids
Fill a metric measuring spoon or cup to the level
indicated. Check your cup measurement by
placing the measuring cup on a flat surface and
reading the measurement at eye level.
Solid fats
Fill a metric measuring spoon or cups to the
level indicated and level off with a flat knife.
Last Things Last!
Always place the liquids in the breadpan first, the
dry ingredients in next, and the yeast in last. This
will ensure a well risen and evenly baked loaf.
Adding Fruits and Nuts
Fruits and nuts are added towards the end of
the kneading cycle. The machine will beep to
let you know it is time to add fruit or nuts. If
they are added before the Fruit and Nut beep,
the fruit will be pureed due to excessive
kneading.
Important Measuring Tips.
Power Interruption Program Protection.
Your Bakehouse features a 25 minute Power
Interuption Protection that protects the Program
memory in the advent of power surges, or short
term power failure (black-out).
This means that if there is a power interruption
during your bread making, the machine will
retain its memory for at least 25 minutes and
continue cooking when the power supply
returns. This feature is applicable whether the
machine is in the Kneading, Baking or Delay cycle.
Without this feature the machine would reset
and the breadmaking cycle would stop.
If you experience a power failure greater than
25 minutes you may need to discard your
ingredients and start again.
BM3400 Bakehouse Inst. 21/1/00 2:16 PM Page 16
Page 17

14
Handy Hints.
Order of ingredients.
Always place the liquids in the breadpan first, the
dry ingredients in next, and the yeast in last.
Fruits and nuts are added later, after the
machine has completed the first knead.
This will ensure a crisp and evenly baked loaf
every time.
Freshness.
Ensure all ingredients are fresh and used before
the specified use-by date.
Avoid using perishable ingredients such as milk,
yogurt, eggs or cheese, with the Time Delay
function.
Store dry ingredients in airtight containers,
to prevent drying out.
Slicing bread.
For best results, wait at least 10 minutes before
slicing, as the bread needs time to cool. Place
loaf on its side and cut in a sawing motion with
a bread knife. For easy and even slicing we
recommend the use of the Sunbeam Knife ‘n’
Easy electric knife.
Freezing bread.
To freeze fresh bread, let it cool completely and
wrap in plastic. Slice bread before freezing and
use at your convenience.
Removing bread from the bread pan.
Like a cake, the bread needs to cool slightly
before removing from the bread pan. Allow
the bread to sit in the pan for approximately 10
minutes before removing.
Toppings.
Ingredients such as herbs, sesame seeds and
chopped bacon can be added to the top of the
bread during the baking stage.
Open lid of Bakehouse, gently brush top of loaf
with a little milk or egg yolk and sprinkle with
topping. (Do not allow ingredients to fall
outside pan). Close lid and allow baking to
continue.
Note: This step needs to be done quickly to
prevent bread from sinking.
Crust colour.
It is normal for the top of the bread to be lighter
in colour than the sides. Different combinations
of ingredients can encourage or discourage
browning. If you would like the top crust to be
slightly darker, select the Bake program setting
and cook until desired colour is achieved.
Baking at high altitudes.
At high altitudes above 900 metres, dough rises
faster. Therefore, when baking at high altitudes
some experimentation is required. Follow the
suggested guidelines. Use one suggestion at a
time and remember to write down which
suggestion works best for you.
Suggestions:
1. Reduce the amount of yeast by 25%. This
will stop the bread from over-rising.
2. Increase the salt by 25%. The bread will rise
slower and have less of a tendency to sink.
3. Watch your dough as it mixes. Flour stored
at high altitudes tends to be drier. You may
have to add a few tablespoons of water,
until the dough forms a nice ball.
BM3400 Bakehouse Inst. 21/1/00 2:16 PM Page 17
Page 18

15
Care and Cleaning.
Should you require any further assistance on
using your breadmaker, please follow these
simple steps.
1. Consult Troubleshooting tips on pages 43
of this booklet.
2. To answer any further questions you may
have, call us toll free (Aust) 1800 025 059,
(NZ) 0800 505 570.
3. For any further concerns contact our
Sunbeam Appliance Service Centres listed on
the back of this booklet.
Help Guide.
Sunbeam is a Registered trademark. Bakehouse is a
trademark of Sunbeam Corporation. Made in China.
Due to minor changes in design or otherwise, the product you
buy may differ from the one shown in this booklet. Approved
by the appropriate Electrical Regulatory Authorities. Backed
by Sunbeam’s 12 Month Replacement Guarantee and National
Service Network.
© Copyright. SUNBEAM CORPORATION LIMITED 1999.
(INCORPORATED IN N.S.W.) A.C.N. 000 006 771
For more information or advice on any Sunbeam appliance,
contact the Sunbeam Consumer Service Line on 1800 025 059.
(Australia only). New Zealand - contact the Sunbeam Office in
Auckland.
Before cleaning the Bakehouse, unplug it from
the power outlet and allow it to cool completely.
To clean the exterior.
Wipe exterior with a slightly dampened cloth
and polish with a soft dry cloth.
Do not use metal scourers or abrasives as this
may scratch the exterior surface.
To clean the non-stick baking pan.
Wipe baking pan and kneading blade with a
damp cloth and dry thoroughly. Do not use any
harsh abrasives or strong household cleaners as
these may damage the non-stick surface.
Avoid immersing the bread pan in water.
However if necessary, gently wash bread pan in
warm soapy water using a soft cloth.
Caring for your non-stick baking pan.
Do not use metal utensils to remove ingredients
or bread, as they may damage the non-stick
coating.
Do not be concerned if the non-stick coating
wears off or changes colour over time. This is a
result of steam, moisture, food acids, mixing of
various ingredients and normal wear and tear.
This is in no way harmful and does not affect
the performance of your Bakehouse.
Do not wash any part of your breadmaker in a
dishwasher.
Do not immerse the Bakehouse in water.
Remove and clean lid
To remove lid, simply raise the lid just short of
the vertical position (approx. 50
o
). While
holding the base of the unit with one hand,
gently push lid to the right side to pop the left
hinge pin out. Reverse the procedure to put the
lid back in place. Then simply slide the lid to the
left to remove the right hinge pin.
Wipe interior and exterior of lid with a damp
cloth and dry thoroughly before replacing lid.
Storage
Make sure the Bakehouse is completely cool and
dry before storing. Store the Bakehouse with
the lid closed and do not place heavy objects on
top of the lid.
BM3400 Bakehouse Inst. 21/1/00 2:16 PM Page 18
Page 19

16
Recipes
Note:
Some recipes may vary depending on the moisture content of the
ingredients and may need to be adjusted. e.g. the weight of the flour
changes when it has absorbed moisture from the air. Please feel free to
experiment with slight variations to our recipes to get a better result.
Always record the amounts you try so that you can adjust the recipe to
your own liking.
You may find inconsistencies in the taste, texture and appearance of the
bread you bake in the Bakehouse. This is quite normal, and is normally
due to the ingredients being used. To avoid disappointment, please read
our list of recommended ingredients on page 7 before attempting any
of the recipes provided in this Instruction Book.
If your baked bread still appears undercooked after the completion of
the cycle, simply press the (11) Bake program to continue baking until
the desired result is achieved.
Note:
You may need to wait 15-20 minutes for the appliance to cool down
before you select the Bake program.
BM3400 Bakehouse Inst. 21/1/00 2:16 PM Page 19
Page 20

17
Breadmix recipes.
A breadmix will usually contain all the necesary ingredients such as flour, sugar, salt, etc. to make a loaf of
bread.
There are a variety of breadmixes available. It is important to refer to the packaging directions before use,
as the recipes and ingredients may vary.
Some breadmixes may require the use of a Bread Improver. If the centre of the baked bread is collapsing,
the addition of bread improver is likely to be needed.
Start off by adding
1
/2
teaspoon of bread improver and adjust if necessary. Because flour properties can
alter on a seasonal basis, you may need to experiment with measurements to obtain optimum results.
For further information on bread mixes, we suggest you contact the bread mix manufacturer.
White breadmix recipes
Method
1. Place ingredients into bread pan in the order listed. Wipe spills from the outside of the pan.
2. Place the bread pan into the breadmaker and close the lid.
3. Press the Menu button to program (1) Basic.
4. Select Size, Crust Colour and press “Start”.
Bread will be baked in the number of hours indicated.
Defiance™ White Breadmix 750g
Yeast 1 teaspoon
Breadmix 480g
Water 290ml
Kitchen Collection™White Breadmix
750g
Yeast 11/4
teaspoons
Breadmix 480g
Water 290ml
White Wings™Premium White Breadmix
750g
Yeast 11/4
teaspoons
Breadmix 480g
Water 290ml
BM3400 Bakehouse Inst. 21/1/00 2:16 PM Page 20
Page 21

18
Wholemeal breadmix recipes
Method
1. Place ingredients into bread pan in the order listed. Wipe spills from the outside of the pan.
2. Place the bread pan into the breadmaker and close the lid.
3. Press the Menu button to program (2) Wheat.
4. Select Size, Crust Colour and press “Start”.
Bread will be baked in the number of hours indicated.
Defiance™Wholemeal and Grain Breadmix
750g
Yeast 11/2
teaspoons
Breadmix 480g
Water 310ml
Kitchen Collection™Wholemeal Breadmix
750g
Yeast 11/2
teaspoons
Breadmix 500g
Water 320ml
BM3400 Bakehouse Inst. 21/1/00 2:16 PM Page 21
Page 22

19
White Breads.
Method
1. Place ingredients into bread pan in the order listed. Wipe spills from the outside of the pan.
2. Place the bread pan into the breadmaker and close the lid.
3. Press the Menu button to program (1) Basic.
4. Select Size, Crust Colour and press “Start”.
Bread will be baked in the number of hours indicated.
Note: If using the (6) Turbo Program setting, additional baking time may be required. If so, simply select
(11) Bake to continue baking.
Traditional White Bread 750g 500g
Tandaco dry yeast 11/4
teaspoons 11/2
teaspoons
Plain flour 480g (3 cups) 320g (2 cups)
Bread improver 1
1
/2
teaspoons 1 teaspoon
Skim milk powder 1 tablespoon 2 teaspoons
Sugar 2 teaspoons 2 teaspoons
Salt 1 teaspoon
1
/4
teaspoon
Margarine 1 tablespoon 2 teaspoons
Water 290ml 220ml
Garlic Herb Bread 750g 500g
Tandaco dry yeast 11/4
teaspoons 11/2
teaspoons
Plain flour 480g (3 cups) 320g (2 cups)
Bread improver 1
1
/2
teaspoons 1 teaspoon
Skim milk powder 1 tablespoon 2 teaspoons
Sugar 2 teaspoons 2 teaspoons
Salt 1 teaspoon
1
/4
teaspoon
Dried mixed herbs 2 teaspoons 2 teaspoons
Crushed garlic 2 cloves 2 cloves
Margarine 1 tablespoon 2 teaspoons
Water 290ml 220ml
For optimum results, weigh flour.
BM3400 Bakehouse Inst. 21/1/00 2:16 PM Page 22
Page 23

20
Tomato and Basil Bread 750g 500g
Tandaco dry yeast 11/4
teaspoons 11/2
teaspoon
Plain flour 480g (3 cups) 320g (2 cups)
Bread improver 1
1
/2
teaspoon 1 teaspoon
Skim milk powder 1 tablespoon 2 teaspoons
Sugar 2 teaspoons 2 teaspoons
Salt 1 teaspoon
1
/4
teaspoon
Tomato paste 1 tablespoon 1 tablespoon
Fresh chopped basil 1 tablespoon 1 tablespoon
Margarine 1 tablespoon 2 teaspoons
Water 290ml 220ml
Olive & Sundried Tomato Bread
750g 500g
Tandaco dry yeast 11/4
teaspoons 1
1
/2
teaspoons
Plain flour 480g (3 cups) 320g (2 cups)
Bread improver 1
1
/2
teaspoons 1 teaspoon
Skim milk powder 1 tablespoon 2 teaspoons
Sugar 2 teaspoons 2 teaspoons
Salt 1 teaspoon
1
/4
teaspoon
Sundried tomatoes, chopped 2 tablespoons 2 tablespoons
Olives, chopped 2 tablespoons 2 tablespoons
Margarine 1 tablespoon 2 teaspoons
Water 290ml 220ml
Salami Cheese Bread 750g 500g
Tandaco dry yeast 11/2
teaspoons 11/2
teaspoons
Plain flour 600g (3
3
/4
cups) 320g (2 cups)
Bread improver 1 teaspoon 1 teaspoon
Skim milk powder 1 tablespoon 2 teaspoons
Sugar 1 tablespoon
2 teaspoons
Salt 1
1
/2
teaspoons
1
/4
teaspoon
Salami, chopped
2
/3
cup
2
/3
cup
Mozarella cheese
1
/3
cup
1
/3
cup
Oregano, dried
1
/2
teaspoon 1 teaspoon
Margarine 1 tablespoon 2 teaspoons
Water 290ml 220ml
BM3400 Bakehouse Inst. 21/1/00 2:16 PM Page 23
Page 24

21
Onion Bread 750g 500g
Tandaco dry yeast 11/4
teaspoons 11/2
teaspoons
Plain flour 480g (3 cups) 380g (2 cups)
Bread improver 1
1
/2
teaspoons 1 teaspoon
Skim milk powder 1 tablespoon 2 teaspoons
Sugar 2 teaspoons 2 teaspoons
Salt 1 teaspoon
1
/4
teaspoon
Chopped onion
3
/4
cup
3
/4
cup
Margarine 1 tablespoon 2 teaspoons
Water 290ml 220ml
Lemon-Poppyseed Bread 750g 500g
Tandaco dry yeast 11/4
teaspoons 11/2
teaspoons
Plain flour 480g (3 cups) 320g (2 cups)
Bread improver 1
1
/2
teaspoons 1 teaspoon
Skim milk powder 1 tablespoon
2 teaspoons
Sugar
2 teaspoons 2 teaspoons
Salt 1 teaspoon
1
/4
teaspoon
Poppy seeds 2 tablespoons 1 tablespoon
Grated lemon rind 2 tablespoons 1 tablespoon
Margarine 1 tablespoon
2 teaspoons
Water 290ml 220ml
Bacon & Beer Bread 750g 500g
Tandaco dry yeast 11/4
teaspoons 11/2
teaspoons
Plain flour 480g (3 cups) 320g (2 cups)
Bread improver 1
1
/2
teaspoons 1 teaspoon
Skim milk powder 1 tablespoon
2 teaspoons
Sugar
2 teaspoons 2 teaspoons
Salt 1 teaspoon
1
/4
teaspoon
Onions, chopped
1
/2
cup
1
/4
cup
Mustard 1 tablespoon
2 teaspoons
Cooked bacon
1
/3
cup
1
/3
cup
Margarine 1 tablespoon
2 teaspoons
Water 180mls 120mls
Flat beer 110ml 100ml
BM3400 Bakehouse Inst. 21/1/00 2:16 PM Page 24
Page 25

22
Wheat Breads.
The (2) Wheat cycle begins with a 30 minute rest period to allow the wheat grains to soften. No blade
movement occurs in the pan during this stage
Method
1. Place ingredients into bread pan in the order listed. Wipe spills from the outside of the pan.
2. Place the bread pan into the breadmaker and close the lid.
3. Press the Menu button to program (2) Wheat.
4. Select Size, Crust Colour and press “Start”.
Bread will be baked in the number of hours indicated.
Note: If using the (6) Turbo program setting, additional baking time may be required. If so, simply select
(11) Bake to continue baking.
Wholemeal Bread 750g 500g
Tandaco dry yeast 11/2
teaspoons 11/2
teaspoons
Wholemeal plain flour 480g (3
1
/3
cups) 320g (21/4
cups)
Bread improver 1
1
/2
teaspoons
3
/4
teaspoon
Skim milk powder 1 tablespoon 1 teaspoon
Brown sugar 2 teaspoons 2 teaspoons
Salt 1 teaspoon
1
/2
teaspoon
Margarine 1
1
/2
tablespoons 2 teaspoons
Water 300ml 220ml
Crunchy Wheat and
Honey Bread 750g 500g
Tandaco dry yeast 11/2
teaspoons 11/2
teaspoons
Wholemeal plain flour 480g (3
1
/3
cups) 320g (21/4
cups)
Bread improver 1
1
/2
teaspoons
3
/4
teaspoon
Skim milk powder 1 tablespoon
1 teaspoon
Honey 1 tablespoon
2 teaspoons
Salt 1 teaspoon
1
/2
teaspoon
Slivered almonds
1
/2
cup
1
/2
cup
Margarine 1
1
/2
tablespoons 2 teaspoons
Water 300ml 220ml
For optimum results, weigh flour.
BM3400 Bakehouse Inst. 21/1/00 2:16 PM Page 25
Page 26

23
Wholemeal Raisin Nut Bread
750g 500g
Tandaco dry yeast 11/2
teaspoons 11/2
teaspoons
Wholemeal plain flour 480g (3
1
/3
cups) 320g (21/4
cups)
Bread improver 1
1
/2
teaspoons
3
/4
teaspoon
Skim milk powder 1 tablespoon 1
teaspoon
Brown Sugar 2 teaspoons 2 teaspoons
Salt 1 teaspoon
1
/2
teaspoon
Margarine 1
1
/2
tablespoons 2 teaspoons
Water 300ml 220ml
Mix-ins
Raisins
1
/2
cup
1
/4
cup
Chopped walnuts
1
/4
cup
1
/4
cup
Soy and Linseed Bread 750g 500g
Tandaco dry yeast 11/2
teaspoons 11/2
teaspoons
Plain flour 180g (1
1
/4
cups) 100g (3/4
cups)
Wholemeal plain flour 300g (2
1
/4
cups) 220g (11/2
cups)
Bread improver 1
1
/2
teaspoons
3
/4
teaspoon
Skim milk powder 1 tablespoon 1
teaspoon
Brown sugar 2teaspoons 2teaspoons
Salt 1 teaspoon
1
/2
teaspoon
Soy grits 3 tablespoons 2 tablespoons
Linseed meal 2 tablespoons 1 tablespoon
Margarine 1
1
/2
tablespoons 2 tablespoons
Water 300ml 220ml
For optimum results, weigh flour.
Multigrain Bread 750g 500g
Tandaco dry yeast 11/2
teaspoons 11/2
teaspoons
Wholemeal plain flour 300g (2
1
/4
cups) 220g (11/2
cups)
Plain flour 180g (1
1
/4
cups) 100g (3/4
cups)
Bread improver 1 teaspoon
3
/4
teaspoon
Skim milk powder 2 tablespoons 1 teaspoon
Brown sugar 1
1
/2
tablespoons 2 teaspoons
Salt 1
teaspoon
1
/2
teaspoon
Grain mix
1
/2
cup
1
/3
cup
Margarine 1
1
/2
tablespoons 2 teaspoons
Water 300ml 220ml
BM3400 Bakehouse Inst. 21/1/00 2:16 PM Page 26
Page 27

24
French Breads.
Method
1. Place ingredients into bread pan in the order listed. Wipe spills from the outside of the pan.
2. Place the bread pan into the breadmaker and close the lid.
3. Press the Menu button to program (3) French.
4. Select Size, Crust Colour and press “Start”.
Bread will be baked in the number of hours indicated.
Do not use Time Delay Setting when baking the Sourdough Bread as the ingredients will spoil.
Note: If using the (6) Turbo Program setting, additional baking time may be required. If so, simply select
(11) Bake to continue baking.
French Bread 750g 500g
Tandaco dry yeast 11/4
teaspoons 11/4
teaspoons
Plain flour 480g (3 cups) 320g (2 cups)
Bread improver 1
1
/2
teaspoons 1 teaspoon
Sugar 2 tablespoons 2 teaspoons
Salt 1 teaspoon
1
/4
teaspoon
Margarine 1
1
/2
tablespoons 2 teaspoons
Water 290ml 220ml
Sourdough Bread 750g 500g
Tandaco dry yeast 11/2
teaspoons 11/2
teaspoons
Wholemeal plain flour 480g (3
1
/3
cups) 320g (21/4
cups)
Bread improver 1
1
/2
teaspoons 1 teaspoon
Sugar 2 teaspoons 2 teaspoons
Salt 1 teaspoon
1
/2
teaspoon
Lemon juice 2 teaspoons 2 teaspoons
Plain yogurt
1
/2
cup
1
/2
cup
Margarine 2 teaspoons 2 teaspoons
Water 200ml 120ml
For optimum results, weigh flour.
BM3400 Bakehouse Inst. 21/1/00 2:16 PM Page 27
Page 28

25
Sweet Breads.
For optimum results, always select the Light Crust Colour to prevent the crust from burning.
Method
1. Place ingredients into bread pan in the order listed. Wipe spills from the outside of the pan.
2. Place the bread pan into the breadmaker and close the lid.
3. Press the Menu button to program (4) Sweet.
4. Select Size, Light Crust Colour and press “Start”.
Bread will be baked in the number of hours indicated.
Do not use Time Delay Setting when baking the Sweet breads as the ingredients will spoil.
Note: If using the (6) Turbo Program setting, additional baking time may be required. If so, simply select
(11) Bake to continue baking.
Old Fashioned Oatmeal Bread 750g 500g
Tandaco dry yeast 11/4
teaspoons 11/2
teaspoons
Plain flour 480g (3cups) 360g (2
1
/4
cups)
Bread improver 1
1
/2
teaspoons
3
/4
teaspoon
Skim milk powder 1 tablespoon 2 teaspoons
Honey 1 tablespoon 2 teaspoons
Salt 1
1
/2
teaspoons
1
/2
teaspoon
Rolled oats
1
/2
cup
1
/3
cup
Margarine 1
1
/2
tablespoons 2 teaspoons
Water 250ml 190ml
Cinnamon Raisin Bread 750g 500g
Tandaco dry yeast 11/4
teaspoons 11/2
teaspoons
Plain flour 480g (3cups) 360g (2
1
/4
cups)
Bread improver 1
1
/2
teaspoons
3
/4
teaspoon
Skim milk powder 1 tablespoon 2 teaspoons
Brown Sugar 1 tablespoon 2 teaspoons
Salt 1
1
/2
teaspoons
1
/2
teaspoon
Margarine 1
1
/2
tablespoons 2 teaspoons
Cinnamon 2 teaspoons 1 teaspoon
Water 250ml 190ml
Mix-ins
Sultanas
1
/2
cup
1
/4
cup
The above breads can only be done in the 750g size.
BM3400 Bakehouse Inst. 21/1/00 2:16 PM Page 28
Page 29

26
Chocolate Bread 750g 500g
Tandaco dry yeast 11/4
teaspoons 11/2
teaspoons
Plain flour 480g (3cups) 360g (2
1
/4
cups)
Bread improver 1
1
/2
teaspoons
3
/4
teaspoon
Skim milk powder 1 tablespoon 2 teaspoons
Sugar 1 tablespoon 2 teaspoons
Salt 1
1
/2
teaspoons
1
/2
teaspoon
Cocoa 1 tablespoon 2 teaspoons
Margarine 1
1
/2
tablespoons 2 teaspoons
Water 250ml 190ml
Mix-ins
Choc chips
3
/4
cup
1
/2
cup
Banana Macadamia Bread 750g 500g
Tandaco dry yeast 11/4
teaspoons 11/2
teaspoons
Plain flour 480g (3cups) 360g (2
1
/4
cups)
Bread improver 1
1
/2
teaspoons
3
/4
teaspoon
Skim milk powder 1 tablespoon 2 teaspoons
Sugar 1 tablespoon 2 teaspoons
Salt 1
1
/2
teaspoons
1
/2
teaspoon
Egg 1 x 60g 1 x 60g
Mashed banana
1
/2
cup
1
/3
cup
Macadamia nuts
1
/2
cup
1
/4
cup
Margarine 1
1
/2
tablespoons 2 teaspoons
Water 115ml 100ml
Apple Spice Bread 750g 500g
Tandaco dry yeast 11/4
teaspoons 11/2
teaspoons
Plain flour 480g (3cups) 360g (2
1
/4
cups)
Bread improver 1
1
/2
teaspoons
3
/4
teaspoon
Skim milk powder 1 tablespoon 2 teaspoons
Brown sugar 1 tablespoon 2 teaspoons
Salt 1
1
/2
teaspoons
1
/2
teaspoon
Cinnamon 2 teaspoons 1 teaspoon
Margarine 1
1
/2
tablespoons 2 teaspoons
Water 250ml 190ml
Mix-ins
Dried apples, chopped
1
/3
cup
1
/3
cup
BM3400 Bakehouse Inst. 21/1/00 2:16 PM Page 29
Page 30

27
Pina Colada Bread 750g 500g
Tandaco dry yeast 11/4
teaspoons 11/2
teaspoons
Plain flour 480g (3cups) 360g (2
1
/4
cups)
Bread improver 1
1
/2
teaspoons
3
/4
teaspoon
Skim milk powder 1 tablespoon 2 teaspoons
Sugar 1 tablespoon 2 teaspoons
Salt 1
1
/2
teaspoons
1
/2
teaspoon
Roasted coconut
1
/2
cup
1
/4
cup
Crushed pineapple, drained
2
/3
cup
1
/2
cup
Margarine 1
1
/2
tablespoons 2 teaspoons
Rum 1 tablespoon 2 teaspoons
Water 125ml 100ml
Apricot Bread 750g 500g
Tandaco dry yeast 11/4
teaspoons 11/2
teaspoons
Plain flour 480g (3cups) 360g (2
1
/4
cups)
Bread improver 1
1
/2
teaspoons
3
/4
teaspoon
Skim milk powder 1 tablespoon 2 teaspoons
Brown sugar 1 tablespoon 2 teaspoons
Salt 1
1
/2
teaspoons
1
/2
teaspoon
Ground nutmeg 2 teaspoons 1 teaspoon
Apricots, chopped
2
/3
cup
1
/3
cup
Margarine 1
1
/2
tablespoons 2 teaspoons
Water 250ml 190ml
Mixed Fruit Bread 750g 500g
Tandaco dry yeast 11/4
teaspoons 11/2
teaspoons
Plain flour 480g (3cups) 360g (2
1
/4
cups)
Bread improver 1
1
/2
teaspoons
3
/4
teaspoon
Skim milk powder 1 tablespoon 2 teaspoons
Brown sugar 1 tablespoon 2 teaspoons
Salt 1
1
/2
teaspoons
1
/2
teaspoon
Ground nutmeg 2 teaspoons 1 teaspoon
Ground cloves 1
1
/2
teaspoons 1 teaspoon
Mixed dried fruit
1
/3
cup
1
/3
cup
Margarine 1
1
/2
tablespoons 2 teaspoons
Water 250ml 190ml
For optimum results, weigh flour.
BM3400 Bakehouse Inst. 21/1/00 2:16 PM Page 30
Page 31

28
Damper.
The Damper setting is a 58 minute cycle that can
be used to make damper or an ultra fast loaf of
white bread.
Method
1. Place all ingredients into bread pan in the
order listed. Wipe spills from the outside of
the pan.
2. Place the bread pan into the breadmaker
and close the lid.
3. Press the Menu button to program
(5) Damper then press “Start”.
Important: Allow the machine to mix for 5
minutes. Open the lid of the Bakehouse. Using
a plastic spatula, scrape down the sides of the
pan and gently fold the ingredients together so
that they are well combined. Close the lid and
allow the machine to continue the cycle.
Note: These damper style breads have a rich
flavour and are heavy and dense in texture.
They should be approximately 15cm in height.
For a lighter loaf decrease the salt to
1
/2
teaspoon.
If they require more cooking time, simply allow
the machine to cool for 10 minutes, then select
the (11) Bake program to bake the bread until
desired. You can stop the baking process at any
time by pressing the Start/Stop button for a few
seconds.
Note: Sometimes the damper will not be the
width of the bread pan. This is normal as the
damper will take its own shape throughout the
rising cycle.
Damper
3 cups (480g) plain Self Raising flour
1 teaspoon salt
20g butter, melted
150ml milk
130ml water
Cheese & Herb Damper
3 cups (480g) plain Self Raising flour
1 teaspoon salt
20g butter, melted
1
/4
cup grated mozzarella or parmesan cheese
2 teaspoons mixed dry herbs
150ml milk
130ml water
Bacon & Chive Damper
3 cups (480g) plain Self Raising flour
1 teaspoon salt
20g butter, melted
1
/4
cupped chopped bacon
2 tablespoons freshly chopped chives
150ml milk
130ml water
Oatmeal and Honey Damper
3 cups (480g) plain Self Raising flour
1 teaspoon salt
20g butter, melted
1
/4
cup rolled oats
2 tablespoons honey
150ml milk
130ml water
You may also use pre-packaged damper mixes
from your supermarkets. The packaging should
include directions of use.
Defiance Easy Bake Scone & Damper Mix
1 x pack of mix
310ml milk
Defiance Easy Bake Pumpkin Scone
& Damper Mix
1 x pack of mix
310ml milk
Ultra Fast White Bread - 750g
1 tablespoon yeast
3 cups (480g) plain flour
1 teaspoon salt
3 teaspoons sugar
2 tablespoons oil
290ml tepid water
BM3400 Bakehouse Inst. 21/1/00 2:16 PM Page 31
Page 32

29
Pasta Dough.
Method
1. Place all ingredients into bread pan in the order listed. Wipe spills from the outside of the pan.
2. Place the bread pan into the breadmaker and close the lid.
3. Press the Menu button to program (7) Pasta Dough, then press “Start”.
Pasta Dough
Plain flour 500g
Eggs 4 x 60g
Salt
1
/2
teaspoon
water 125ml
If pasta dough appears too sticky, knead dough with additional flour.
Variations:
Spinach pasta: Add 100g of very well drained spinach to the dough recipe
Tomato pasta: Add 2 tablespoons concentrated tomato paste to dough recipe.
Pumpkin and Cheese Ravioli
1 quantity pasta dough
Filling
150g pumpkin, skin removed, baked and mashed
100g ricotta, mashed
Salt and pepper, to taste
300g breadcrumbs
Pinch of nutmeg
1 teaspoon minced garlic
1. Combine all filling ingredients in a large bowl. Mix well to combine. If the mixture appears too
dry, add an egg to combine. Season to taste with salt and pepper.
2. Divide dough into 4 portions. Roll each portion into a 25cm x 25cm square.
3. Place 2 teaspoons of filling 5cm apart on 2 sheets of the rolled out dough. Brush edges with a
little water or beaten egg and top with remaining pieces of rolled pasta. Press firmly between
the filling and sides to seal in filling. Cut ravioli into squares using a pastry wheel.
4. Cook ravioli in a large saucepan of boiling water for 5-8 minutes or until al dente. Drain well
and serve with your favourite tomato or cream sauce.
Serves 4-6
BM3400 Bakehouse Inst. 21/1/00 2:16 PM Page 32
Page 33

30
Fettucini with Tomato Sauce
1 quantity Spinach pasta dough
Sauce
3 tablespoons olive oil
1 onion, chopped
2 x 400g cans peeled tomatoes
2 tablespoons concentrated tomato paste
Salt and pepper, to taste
1
/2
cup parmesan cheese
1. Using a pasta machine, roll out pasta dough into three 10cm x 40cm rectangular pieces. Using
the pasta machine, roll the pasta through the fettucini guide to cut pasta.
2. Bring a large saucepan of water to the boil. Add 1 tablespoon of oil and cook fettucini for 5-8
minutes or until al dente. Serve with fresh tomato sauce.
Tomato Sauce
1. Place the oil and onion in an electric frypan and cook until the onion is transparent.
2. Puree tomatoes in a small bowl and add to frypan. Add tomato paste and salt and pepper to
taste. Allow to simmer for 20 minutes.
3. Fold parmesan cheese through sauce just before serving.
Spagetti Carbonara
1 quantity pasta dough
Sauce
3 tablespoons olive oil
1
/2
cup parmesan cheese
2 cloves garlic, crushed 4 eggs
6 rashes bacon, chopped pepper to taste
1
/3
cup wine 2 tablespoons chopped parsley
1
/4
cup cheddar cheese
1. Using a pasta machine, roll out pasta dough into three 10cm x 40cm rectangular pieces. Using
the pasta machine, roll the pasta through the spaghetti guide to cut pasta.
2. Bring a large saucepan of water to the boil. Add 1 tablespoon of oil and cook spaghetti for 5-8
minutes or until al dente. Serve with fresh tomato sauce.
3. Heat oil in a large frypan and add garlic. Stir until garlic is golden. Add bacon and cook until
crisp. Add wine and simmer for 1 minute.
4. Whisk cheese, eggs, pepper and parsley in a bowl. Add mixture to the pan and stir until well
combined over low heat.
5. Add the cooked pasta to the pan and toss through sauce until well combined. Serve warm with
extra parmesan cheese.
BM3400 Bakehouse Inst. 21/1/00 2:16 PM Page 33
Page 34

31
Pizza Dough Only.
Method
1. Place ingredients into bread pan in the order listed. Wipe spills from the outside of the pan.
2. Place the bread pan into the breadmaker and close the lid.
3. Press the Menu button to program (8) Pizza Dough, and press “Start”.
4. Remove dough from breadpan and follow instructions given for each recipe.
Breadsticks
Dough Topping
Tandaco dry yeast 21/2
teaspoons 1 teaspoon water
Plain flour 480g (3 cups) 1 egg white
Bread improver
3
/4
teaspoon Sesame seeds
Sugar 2 teaspoons
Salt
1
/2
teaspoon
Margarine 2 tablespoons
Water 240ml
1. Remove completed dough from bread pan. Line a baking try with baking paper. Heat oven to
180˚C.
2. Divide dough into 30 pieces. Roll each piece into a 20cm rope. Place 2.5cm apart on baking tray.
Cover and allow dough to rise for 30 minutes or until puffy.
3. Beat water with the egg white; brush dough. Sprinkle with sesame seeds. Bake for 25 minutes
or until breadsticks are golden brown.
Makes 30.
Bread rolls
Dough Topping
Tandaco dry yeast 21/2
teaspoons margarine, melted
Plain flour 520g (3
1
/4
cups)
Bread improver
3
/4
teaspoon
Sugar
1
/4
cup
Salt
1
/2
teaspoon
Margarine 2 tablespoons
Egg 1 x 60g
Water 250ml
1. Remove completed dough from bread pan. Line a baking try with baking paper. Heat oven to
180˚C.
2. Divide dough into 15 pieces and shape each piece into a ball. Place on baking tray, cover and
allow to rise for 30 minutes or until doubled in size.
3. Brush with margarine. Bake for 15 minutes or until golden brown.
BM3400 Bakehouse Inst. 21/1/00 2:16 PM Page 34
Page 35

32
Cinnamon Rolls
Dough Filling
Tandaco dry yeast 21/2
teaspoons Margarine 3 tablespoon, melted
Plain flour 520g (3
1
/4
cups) Sugar
1
/2
cup
Sugar 2 tablespoons Cinnamon 2 tablespoons
Salt
1
/2
teaspoon
Egg 1 x 60g
Margarine 2 tablespoons
Water 250ml
1. Remove completed dough from bread pan. Grease and line a 25cm square baking pan.
2. Mix sugar and cinnamon. Roll out dough into 45x22cm rectangle on lightly floured surface.
Brush with margarine; sprinkle with sugar-cinnamon mixture. Roll up beginning at short side.
Pinch edge of dough into roll to seal. Cut into 2.5cm slices and place in pan.
3. Cover and allow to rise for 1
1
/4
hours or until doubled in size.
4. Place in pre-heated oven and bake for 30 minutes at 180˚C or until golden brown. Lightly
drizzle with glaze.
Glaze: Mix
1
/2
cup icing sugar, 1/4
teaspoon vanilla essence and 2 tablespoons milk until thin
enough to drizzle.
Pizza Dough
Dough
Tandaco dry yeast 21/2
teaspoons
Plain flour 480g (3 cups)
Sugar 1 teaspoon
Salt
1
/2
teaspoon
Olive oil 2 tablespoons
Water 290ml
1. Remove completed dough from bread pan. Grease two pizza trays. Heat oven to 180˚C.
2. Divide dough in half. Roll dough to fit pizza trays. Spread with favourite toppings and bake for
20 minutes at 180˚C or until cooked.
BM3400 Bakehouse Inst. 21/1/00 2:16 PM Page 35
Page 36

33
Herb Foccacia
Dough Topping
Tandaco dry yeast 21/2
teaspoons 2 tablespoons olive oil
Plain flour 480g (3 cups) 1 teaspoon oregano
Sugar 2 teaspoons 1 teaspoon chopped basil
Skim milk powder 1 tablespoon
Salt
1
/2
teaspoon
Olive oil 1 tablespoon
Water 330ml
1. Remove completed dough from breadpan. Grease rectangular baking tray.
2. Knead dough with a little extra flour until elastic and dough springs back when pressed. Shape
to fit baking tray.
3. Cover and allow to rise for 30 minutes. Using your knuckles, press small indents into dough.
4. Brush surface with oil and sprinkle with herbs and bake in a preheated oven for 30 minutes or
until golden.
Hot Cross Buns
Dough Crosses
Tandaco dry yeast 21/2
teaspoons Plain Flour 80g (
1
/2
cup)
Plain flour 520g (31/4
cups) Water 80mls
Brown sugar
1
/4
cup Sugar 2 teaspoons
Salt
1
/2
teaspoon
Nutmeg
1
/2
teaspoon Glaze
Sultanas
3
/4
cup
Egg 1 x 60g
Water 2 tablespoons
Margarine 2 tablespoons Sugar 2 tablespoons
Water 310ml Gelatine 1 teaspoon
1. Remove completed dough from bread pan. Line a baking tray with baking paper.
2. Knead dough on a floured surface until elastic and springs back when pressed. Divide dough
into 12 pieces. Shape each piece into a ball. Place close together on baking tray. Cover and allow
to rise for 30 minutes.
3. CROSSES: Mix flour and water together until smooth. Pipe crosses over risen dough.
4. Bake buns for 30 minutes in a pre-heated oven at 180˚C until golden brown.
5. GLAZE: Combine ingredients in a jug. Microwave on Medium for 1-2 minutes. Brush over hot
buns.
Makes 12 buns.
BM3400 Bakehouse Inst. 21/1/00 2:16 PM Page 36
Page 37

34
Caramel Pecan Rolls
Dough Filling
Tandaco dry yeast 21/2
teaspoons Margarine, melted 80g
Plain flour 520g (31/4
cups) Brown sugar
1
/2
cup
Sugar 2 tablespoons Pecan halves
2
/3
cup
Salt
1
/2
teaspoon Cinnamon 2 teaspoons
Egg 1 x 60g
Margarine 2 tablespoons
Water 250ml
1. Remove completed dough from bread pan. Grease and line a 22cm square baking pan.
2. Mix margarine, brown sugar, pecan halves and cinnamon.
3. Roll out dough into 45cm x 22cm rectangle on lightly floured surface.
Spread with filling. Roll up beginning at short side.
Pinch edge of dough into roll to seal. Cut into 2.5cm slices and place in pan.
3. Cover and allow to rise for 1 hour or until doubled in size.
4. Place in a pre-heated oven and bake for 30 minutes at 180˚C or until golden brown.
Calzones
Dough Pesto Filling
Tandaco dry yeast 21/2
teaspoons 6 sundried tomatoes
Plain flour 400g (21/2
cups) 6 tablespoons pesto
Sugar 1 teaspoon 11/2
cups shredded mozzarella
Salt
1
/2
teaspoon 1 cup mushrooms, sliced
Olive Oil 1 tablespoon
3
/4
cup chopped bacon
Water 250ml salt/pepper to taste
1 egg, lightly beaten, for brushing
1. Remove completed dough from bread pan. Line a baking tray with greaseproof paper. Heat
oven to 180˚C.
2. Divide dough into 6 equal parts. Roll each part into 18cm circle on a lightly floured surface with
a rolling pin. Spread a layer of pesto onto each circle within 2cm of edge.
3. Layer cheese, bacon, mushrooms and tomatoes on half of each circle within 1 inch of edge.
Sprinkle with salt and pepper.
4. Fold dough over filling; fold edge up and pinch securely to seal. Place on baking tray. Brush with
egg. Bake 25-30 minutes or until golden brown.
Makes 6.
BM3400 Bakehouse Inst. 21/1/00 2:16 PM Page 37
Page 38

35
Rye.
Russian Black Bread
1
1
/2
teaspoons yeast
380g (2
3
/4
cups) wholemeal flour
100g rye flour
1
1
/2
teaspoons bread improver
1 tablespoon skim milk powder
3 teaspoons sugar
1 teaspoons salt
1 tablespoon cocoa powder
1 teaspoon coffee powder
2 teaspoons caraway seeds
2 teaspoons anise seeds
1
1
/2
tablespoons margarine
1 teaspoon vinegar
280ml water
Finnish Rye Bread
1
1
/2
teaspoons yeast
300g (2
1
/4
cups) wholemeal flour
180g rye flour
1
1
/2
teaspoons bread improver
1 tablespoon skim milk powder
2 teaspoons sugar
1 teaspoon salt
1
1
/2
tablespoons margarine
300ml water
Use this setting to create dark European breads. Please be aware that these breads will have
a dense texture.
Method
1. Place ingredients into bread pan in the order listed. Wipe spills from the outside of the pan.
2. Place the bread pan into the breadmaker and close the lid.
3. Press the Menu button to program (9) Rye.
4. Select Size, press “Start”.
Bread will be baked in the number of hours indicated.
BM3400 Bakehouse Inst. 21/1/00 2:16 PM Page 38
Page 39

36
Jam.
Handy hints for optimum results.
• Use ripe, fresh fruit. Large fruits should be
cut into small pieces.
• Avoid processing fruit as the jam should be
chunky and contain pieces of fruit.
• Do not reduce the amount of sugar
specified or use substitutes.
• Pour the hot jam into sterilised jars, leaving
approximately 2cm from the top of the jar.
Seal the jars immediately.
• Label jam, allow to cool and then
refrigerate.
• Each recipe requires Jam Setta. This helps
form the gel like structure of the jam when
cooled. Jam Setta can be purchased from
most supermarkets.
Method
1. Place ingredients into bread pan in the
order listed. Wipe spills from the outside of
the pan.
2. Place the bread pan into the breadmaker
and close lid.
3. Press the Menu button to program (8) Jam
and press “Start”. Allow to mix for 5
minutes, open lid and scrape down sides of
bread pan with a plastic spatula.
Note: It is normal for excess steam to escape
from the steam vent during the cooking
process.
Strawberry Jam
500g strawberries, hulled and chopped
1
1
/2
cups sugar
3 tablespoons Jam Setta
Apricot Jam
500g fresh apricots, deseeded and chopped
1
1
/2
cups sugar
1
/4
cup lemon juice
2 tablespoons water
3 tablespoons Jam Setta
Apple & Rhubarb Jam
1 apple, peeled and chopped
300g rhubarb, chopped
150ml water
1 cup sugar
2 tablespoons lemon juice
3 tablespoons Jam Setta
Kiwi Jam
6 large kiwi fruit, peeled and chopped
1 cup sugar
1 tablespoon lemon juice
1 tablespoon water
3 tablespoons Jam Setta
Plum Jelly
500g fresh plums, peeled, deseeded and
chopped
1
1
/2
cups sugar
1 tablespoon lemon juice
3 tablespoons Jam Setta
BM3400 Bakehouse Inst. 21/1/00 2:16 PM Page 39
Page 40

Program Setting Times and Display Information.
37
DISPLAY READS: PROBLEM SOLUTION
“E00” Flashing Bakehouse is too cold to begin Press Start/Stop button to cancel.
program setting. Open lid and allow to reach
room temperature (above 0ºC)
.
“E01” Flashing Bakehouse is too hot to begin Press Start/Stop button to
another program setting. cancel. Open lid and allow to
cool down for 30 minutes.
All times are in hours and minutes unless otherwise stated.
The display will tell you if there is a problem with your Bakehouse. Always use your Bakehouse in a
room free of drafts. Do not use your Bakehouse outdoor, near a heat vent or in direct sunlight.
MENU SIZE TIME REST 1 KNEAD 1 RISE 1 KNEAD 2 RISE 2 REST 2 RISE 3 BAKE WARM DELAY
Basic 500g 2:50 - 10 20 15 20 30s 55 50 60 13:00 2:15
750g 3:00 - 10 20 15 20 30s 55 60 60 13:00 2:25
Wheat 500g 4:00 30 10 25 20 30 30s 70 55 60 13:00 2:50
750g 4:10 30 10 25 20 30 30s 70 65 60 13:00 3:00
French 500g 3:40 - 18 40 22 20 30s 60 60 60 13:00 2:37
750g 3:50 - 18 40 22 20 30s 60 70 60 13:00 2:47
Sweet 500g 2:40 - 10 5 20 30 30s 55 40 60 13:00 2:20
750g 2:50 - 10 5 20 30 30s 55 50 60 13:00 2:30
Damper 750g 0:58 - 13 - - 10 - - 35 60 13:00 N/A
Turbo 750g 1:43 - 3 5 5 - - - 90 60 13:00 N/A
Pizza Dough
1:30 - 5 5 20 - - 60 - N/A 13:00 1:12
Pasta Dough
1:50 - 20 - - 89 60s - - N/A 13:00 1:40
Rye 750g 3:30 - 10 10 26 40 30s 64 60 60 13:00 3:05
Jam 1:05 - 15 - - - - - 50 N/A 13:00 N/A
Bake 1:00 - - - - - - - 60 60 13 N/A
FRUIT
& NUT
TIME
BM3400 Bakehouse Inst. 21/1/00 2:16 PM Page 40
Page 41

38
You will hear a beep when:
Program Setting Times and Display Information.
Troubleshooting: The Machine.
Questions? Please call us toll-free on
(Aust) 1800 025 059 (NZ) 0800 505 570
The power is turned ON 1 short beep
Select a setting from the Menu 1 short beep
Fruit & Nut Beeper 12 short beeps
Completion of bread baking process 5 short beeps
During keep warm function 5 short beeps every 5 minutes
BM3400 Bakehouse Inst. 21/1/00 2:16 PM Page 41
Page 42

39
Troubleshooting: The Recipes.
Questions ? Please call us toll-free on
(Aust) 1800 025 059
(NZ) 0800 505 570
NOTE: For optimum results, weigh all ingredients
BM3400 Bakehouse Inst. 21/1/00 2:16 PM Page 42
Page 43

40
Notes.
BM3400 Bakehouse Inst. 21/1/00 2:16 PM Page 43
Page 44

41
Your Sunbeam Appliance is covered by a
Sunbeam Replacement Guarantee for a period
of 12 months (3 months commercial use) from
date of purchase, against defects in
workmanship and materials. Kindly retain
your Purchase Receipt for this product as this
proof of purchase must be presented if
making a claim under the terms of the
Sunbeam Replacement Guarantee.
Sunbeam will replace all defective
products, but where a product includes a
number of accessories, only the defective
product or the defective accessory will be
replaced.
If replacement is required the product,
with the purchase receipt, should be returned
to an Appointed Service Centre or place of
purchase. In the event of a product or
accessory being replaced during the
guarantee period, the guarantee on the
replacement will expire at the original date.
ie. 12 months from the original date of
purchase.
If service is required after the warranty
period has expired, the product should be
returned to an Appointed Service Centre.
Replacement will be of the faulty product
or accessory or an equivalent excluding
packaging, recipe books, instruction cards, etc.
Minor adjustments, which may not be due
to faults in workmanship and materials, may
be made at Sunbeam’s discretion instead of
replacement of the product or accessory.
Note: Superseded product models which no
longer have a replacement equivalent will be
repaired free of charge up to 12 months from
purchase date.
This Replacement Guarantee naturally does
not cover misuse or negligent handling used
in accordance with instructions. This
Replacement Guarantee excludes breakables
such as glass or ceramic items and normal
wear and tear.
In Australia, this Sunbeam Replacement
Guarantee is additional to the conditions and
guarantees which are mandatory as implied by
the Trade Practices Act 1974 and State and
Territory legislation.
Sunbeam Appointed Service Centres
throughout Australia and New Zealand are
established to provide convenient, fast service
facilities. If replacement or service under the
Sunbeam Replacement Guarantee is required
and distance prevents you calling personally,
forward your appliance FREIGHT PREPAID to
the nearest Sunbeam Appointed Service
Centre.
Be assured of quick service. If
replacement or service is required, prepare a
tag stating your full name and address.
Explain the nature of your complaint on the
tag and attach it to the appliance.
Pack your appliance carefully into a strong
carton with plenty of newspaper, making sure
that the plug is separately wrapped to prevent
damage to the appliance surface.
Securely wrap and tie the parcel. Clearly
address the package to the selected
Appointed Service Centre and include your
name and address on the outside of the
carton. By following these simple rules, you
will be sure of speedy and efficient service.
Note: Replacement Guarantee valid in country
of purchase only. If purchased in another
country, 12 month repair guarantee applies.
Your Sunbeam
12 Month Replacement
Guarantee.
BM3400 Bakehouse Inst. 21/1/00 2:16 PM Page 44
Page 45

NEW SOUTH WALES
CAMPSIE Sunbeam Factory Outlet
Cnr Alfred & Harp Streets
NSW 2194
Tel: (02) 9789 8647
Fax: (02) 9789 8887
POSTAL ADDRESS:
Locked Mail Bag No. 4
KINGSGROVE NSW 2208)
ALBURY Mid State Small Appliance
Service
435 Dean Street NSW 2640
Tel: (02) 6021 7410
BATEMAN’S BAY Bryan’s Appliance Service
Lot 42 Kylie Crescent
NSW 2536
Ph: 02 4472 4981
BATHURST Serv U Appliance Centre
Pty Ltd
107 George St NSW 2795
Tel: (02) 6331 1356
Fax: (02) 6331 2102
BEGA Bega Electronics
2 West St NORTH BEGA
NSW 2550
Tel: (02) 6492 2522
BONDI B&J Appliances
JUNCTION 240 Oxford St NSW 2025
Ph: (02) 9389 7396 / 7897
Fax: (02) 9369 1796
Contact: John Khairis
BROKEN HILL Visual Audio
510 Chapel Street
NSW 2880
Tel: (08) 8087 4055
CAMPBELLTOWN Viking Appliance Centre
5/9 Mill Rd NSW 2560
Tel: (02)4625 3540
CANBERRA Canberra Appliance Repairs
13 Lawry Place JAMISON ACT
2614
Ph: (02) 6251 6823
CHARLESTOWN Charlestown TV and Video
Service
Shop 2 163 Pacific Hwy
NSW 2290
Ph: 02 4943 7756
DUBBO Mid State Washer Service
5 Hopkins Pd NSW 2830
Ph: (02) 6882 4821
GOSFORD Gerry’s Electrical Appliance
225 Albury St NSW 2250
Ph: (02) 4324 1499
Fax: (02)4324 7407
GRAFTON Repairs & Spares
140 Fitzroy St NSW 2460
(02) 6642 1911
GRIFFITH Luke’s Appliance Service
144 Banna Ave NSW 2680
Tel: (02) 6962 7611
INGLEBURN Perfect Pool Centre
Shop 5. No 9
Lancaster Street
NSW 2565
Ph: 9829 7111
KEMPSEY Chris Conn Electrics &
Appliance
31 Forth St NSW 2440
Ph: (02) 6563 1998
Fax: (02) 6562 2944
LISMORE Lismore Appliance Rep
72 Keen St NSW 2480
Ph: (02) 6621 8432
LIVERPOOL Liverpool Washing Machine
Service Pty Ltd
Shop 6
11 Grimson Cresent NSW 2170
Ph:(02) 9821 1281
Fax:(02) 9821 1314
ORANGE Orange Electrical Works Pty Ltd
4 Barrett Court NSW 2800
Ph: (02) 6362 2733
Fax: (02) 6361 3837
PARRAMATTA O’Brien Electrical
Appliance Service Centre
7 Ferris St NSW 2151
Ph: (02) 9630 8288
PENRITH Young’s Appliance Spares
Shop 10
98 Henry St NSW 2750
Ph: (02) 47 323 594
PORT Bellbowrie Appliance
MACQUARIE Unit 24 Bellebowie Park NSW
2444
Ph: (02) 6584 3838
ROSEVILLE Chatswood Appliance Spare
Parts
486 Penshurst St NSW 2069
Ph: (02) 9417 3999
ST IVES St Ives Electronics
Shop 26 St Ives Village
NSW 2075
Ph: (02) 9988 4642
Fax: (02) 9449 8808
SUTHERLAND Southside Elements
752 Old Princess Hwy
NSW 2232
Ph: (02) 9521 8288
Fax: (02) 9545 1982
TAMWORTH Appliance Care
127 Bridge St NSW 2340
Ph (02) 6765 2865
TAREE Emertons Home Appliance
35 Manning St NSW 2430
Ph: (02) 6552 3444
Fax: (02) 6552 7351
WAGGA WAGGA Miller’s Appliance Repairs
& Sales
108 Kincaid Street NSW 2650
Ph: (02) 6921 2628
WOLLONGONG Upton’s Appliances
1/233 Crown St NSW 2500
Ph: (02) 4229 6632
Fax: (02) 4229 6632
VICTORIA
MARIBYRNONG Sunbeam Factory Outlet
8 Sloane St VIC 3032
Ph: (03) 9319 4965
Fax:(03) 9317 8123
Contact: Paul Borg
BAIRNSDALE Porters
132 Main St VIC 3875
Ph: (03) 5152 4540
Contact: Jack Porter
BALLARAT John Thomas & Co
4 Dawson St VIC 3350
Ph: (03) 5331 3099
Contact: John Thomas
BENDIGO Sumner Electronics Pty Ltd
66 Garsed St VIC 3550
Ph: (03) 5443 1977
Contact: George Sumner
BOX HILL All Appliance & Service Sales
943-945 Whitehorse Rd
VIC 3128
Ph: (03) 9890 9426
Contact: Michael Douglas
SERVICE CENTRE LISTING – AUSTRALIA AND NEW ZEALAND
We recommend that you contact your nearest Service Centre before posting of forwarding an appliance.
When requesting replacement Parts always quote the model number of your appliance.
42
BM3400 Bakehouse Inst. 21/1/00 2:16 PM Page 45
Page 46

BRUNSWICK Kinnear Electrical Appliance
Repairs
Cnr Brunswick & Grantham
Streets
West Brunswick VIC 3055
Ph: (03) 9387 9531
Contact: John Kinnear
DANDENONG Ellis Electrical
323 Thomas St VIC 3175
Ph: (03) 9791 1486
Contact: Brian Dwyer
ECHUCA Roy Vincent Electrical &
Refrigeration Service
174 Annesley St VIC 3625
Ph: (03) 5482 1966
Contact: Greg Vincent
GEELONG Julian’s Appliance Service
78 Ryrie St VIC 3220
Ph: (03) 5229 1971
Contact: Julian Lanning
HAMILTON Hamilton Refrigeration Pty Ltd
31 Brown St VIC 3300
Ph: (03) 5572 2436
Contact: Ted Thomas
HEIDELBERG All Appliance Service & Sales
154 Burgundy St VIC 3084
Ph: (03) 9459 9848
Contact: Marshall Dwyer
MALVERN Mian Electronics
196 Glenferie Rd, VIC 3144
Ph: (03) 9576 1600
Contact: Mian
MILDURA A G & J A Hartlett
96A Eighth St VIC 3500
Ph: (03) 5023 5661
Contact: Graham Hartlett
MORWELL Webster’s Appliance Service
Centre
Bldg 2, Lot 5 Vestan Drive
VIC 3840
Ph: (03) 5134 3543
Fax: (03) 513 41387
Contact: Bruce Carne
SHEPPARTON J & J Alford Appliance Service
Centre
69 McLennan St
MOOROOPNA VIC 3629
Ph: (03) 5825 3140
Contact: Jeff Alford
SWAN HILL Swan Hill Appliance Service
Drummond House
Beveridge St, VIC 3585
Ph: (03) 5032 3262
Contact: Robert Masters
WARRNAMBOOL Western Electrical Service
223 Lava St VIC 3280
Ph: (03) 5562 5060
QUEENSLAND
BUNDABERG Digger Theile Electric Pty Ltd
37 Perry St, QLD 4670
Ph:(07) 41 521 522
Contact: Digger Theile
CAIRNS Kennedys Electrical Services
134 Mcleod St QLD 4870
Ph:(07) 40 31 3155
IPSWICH Esk Appliances
219 Ipswich Street
QLD 4312
Ph:075 424 1871
INDOOROOPILLY Sparky’s Small Appliance
Electrical Spares & Sales P/L
Shop 3067 Indooroopilly
Shoppingtown
Moggill Road QLD 4068
Ph: (07) 3378 9121
Fax: (07) 3878 1691
KALLANGUR Eda’s Appliance Spares
1/1476 Anzac Avenue,
QLD 4503
Ph:(07) 3886 2941
Fax:(07) 3886 2943
Contact: Jillian or Denis
Atterbury
MACKAY Appliance Spares & Repairs
34 Gregory St QLD 4740
Ph: (07) 49 51 1644
Contact: Steve Hayes
MAROOCHYDORE Suncoast Appliance Services
11 Kayleigh Dr QLD 4558
Ph: (07) 54433644
Contact: Robert Cook
MT GRAVATT Mr. Sparky Appliance Repairs
Garden City Shoppingtown
Logan Rd QLD 4122
Ph: (07) 3349 7607
MT ISA P & R Electrical Servicing
31 Arline St QLD 4825
Ph: (07) 47 43 3354
ROCKHAMPTON Leendens Electrical
13 Murray St QLD 4700
Ph: (07) 49 27 2922
SOUTHPORT Electric Care
1 Windmill Street
QLD 4312
Ph: 07 5527 0506
STH Mac’s Electrix
TOWNSVILLE 51 Perkins St QLD 4810
Ph: (07) 47 72 1519
Contract: Alan McCahon
TOOWOOMBA Week’s Electrical Pty Ltd
233 Ruthven St QLD 4350
Ph: (07) 46 38 1033
Contact: Alan Weekes
SOUTH AUSTRALIA
ADELAIDE Adelaide Shaver Centre
21 Twin St SA 5000
Ph: (08) 8223 1094
Fax: (08) 8224 0511
Contact: Brian Bishop
MODBURY Adelaide Shaver Centre
Shop 8
Tea Tree Plus Shopping Centre
SA 5095
Ph: (08) 8396 6311
Contact: Bruce & Helen Penney
MT GAMBIER Moulden’s Home Appliance
Service
35 Percy St, SA 5290
Ph: (08) 8725 1244
Fax: (08) 8723 2065
Contact: David or Meredith
PARK HOLME Adelaide Shaver Centre
Park Holme Shopping Centre
319 Oaklands Road SA 5043
Ph: (08) 8357 5800
Contact: Bill Riddle
WEST LAKES Adelaide Shaver Centre
Shop 202
West Lakes Mall
West Lakes Boulevard SA 5022
Ph: 08 8
Northern Territory
WINNELLIE Duke Electrical Service
93 Winnellie Rd, NT 0820
Ph: (088)947 0027
Contact: Keith Duke
WESTERN AUSTRALIA
ALBANY Microwave TV & Electrical
Terrace Centre Arcade
96 Stirling Street
WA 6330
Ph: 08 9842 2188
FREEMANTLE Freemantle Element Centre
115 South Terrace WA 6160
Ph:(08) 9336 2788
Fax(08) 9336 3618
Contact: Jack Grego
MADDINGTON Monk’s Appliance Service
Shop 3
3 Malcolm Road WA 6109
Ph: (08) 9493 4456
Fax: (08) 9459 5912
Contact: Terry Monk / Loraine
Brown
43
BM3400 Bakehouse Inst. 21/1/00 2:16 PM Page 46
Page 47

MIDLAND B & JL Woodcock
4 Stafford Street WA 6056
Ph: (08) 9274 5122
Fax: (08) 9274 4824
ROCKINGHAM Rocky City Electrical
Unit 3
12 Robinson Road WA 6168
Ph:(08)9527 3599
Fax:(08)9592 1819
WANGARA Electrical Spares & Service
2/12 Buckingham Drive
WA 6947
Ph:(08) 9409 8411
Fax: (08) 9309 3830
Contact: Ken Stokes (prop)
WEMBLEY Goddens Electrical Pty Ltd
332B Cambridge St WA 6014
Ph:(08) 9387 4444
Fax: (08) 9383 7003
Contact: Steve or Denis
TASMANIA
HOBART Sunbeam Service Centre
25 Tasma St TAS 7000
Ph: (03) 6234 7722
Fax: (03) 6234 1173
Contact: Gayle Moore
BURNIE The Appliance Clinic Pty Ltd
14 North Terrace TAS 7320
Ph: (03) 6431 6857
Contact: Ross Arnold
DEVONPORT Quickserv TV & Electrical Pty
Ltd
4 Elisabeth St TAS 7310
Ph: (03) 6424 1033
Fax: (03) 6424 3545
Contact: Steve Posthumus
LAUNCESTON Northern Appliance Service
31 Frederick Street TAS 7250
Ph: (03) 6331 0900
Contact: Steve Tapsell
NEW ZEALAND
AUCKLAND New Zealand Electrical
666 Dominion Rd, Balmoral
Ph: 09 630 1320
Westmere Radio & Electrical
327A Wairau Rd, Takapuna
Ph: 09 444 8324
Manukau Appliance Serv
Centre Ltd
6 Mana Place, Wiri
Ph 09 262 3388
or 09 262 3170
Henderson TV & Electrical
103 Lincoln Rd
Ph: 09 8386940
BAY OF PLENTY Chaps Complete Home Service
TARANGA 173 Chadwick Rd, Greerton
Ph: 07 578 4182
The Electrical
Home Service Co.
512 Maunganui Rd, Mt
Maunganui
Ph: 07 574 0298
Waihi Electrical
Box 64 Seddon St, Waihi
Ph: 07 863 8742
Fax: 07 863 6863
CANTERBURY Saxon Appliance Ltd
383 Wilsons Rd, Christchurch
Ph: 03 365 6404
MID Electricity Ashburton Ltd
CANTERBURY Kermode St, Ashburton
Ph: 03 308 4169
HASTINGS Hector Jones Ltd
King St North
Ph: 06 878 9049
HAWKES BAY Gisborne Electrical
155 Grey St, Gisborne
Ph: 06 867 6319
HOROWHENUA K & S Appliances
44 Seaview Rd, Paraparaumu
Ph: 04 298 6783
LOWER HUTT Hutt Electrical Services Co Ltd
127 Queens Dr
Ph: 04 569 5469
Fax: 04 566 1597
UPPER HUTT Upper Hutt Electrical
208 Main St
Tel: 04 528 2195
KING COUNTRY Taumarunui Electrical Services
91 Hakinha St , Taumarunui
Ph: 07 895 7993
MANUWATU Leader & Watt Ltd
153-163 Rangitikei St,
Palmerston North
Ph: 06 356 5123
B M Electrical
PO Box 1964
Princess & Dahila Sts
Ph: 06 356 4466
MARLBOROUGH Blenheim Electrical House
42 Main St, Blenhein
Ph: 03 578 3564
NAPIER Duckworths Customer Services
Cnr Cadbury & Austin St,
Onekawa
Ph: 06 843 2540
NELSON Nelson Appliance Repair Centre
36 Gloucester St
Ph: 03 548 8738
OTAGO C J Clarke Electrical |Ltd
Dunedin
29 Leith St, Dunedin
Ph: 03 477 2350
CENTRAL OTAGO Central Home Appliance
Services
15 Tarbert St, Alexandra
Ph: 03 448 7317
NORTH OTAGO Waitaki Electric Power Board
52 Thames St, Oamaru
Ph: 03 434 8000
PORIRUA Mana Appliances
12 Prosser St,
Ph: 04 237 9408
RANGITIKEI Power Co
Cnr Guyton & Saint Hill St,
Wanganui
Ph: 06 345 4517
RICHMOND Nelson Home Appliance Centre
265 Queen St
Ph: 03 544 6317
ROTORUA Robertston’s Home Appliances
40 Haupapa St
Ph: 07 348 0313
SOUTHLAND P D Patton (1979) Ltd
96 Kelvin St, Invercargill
Ph: 03 218 2159
TARANAKI Des O’Connor Electrical
15 Richmond St, Waitara
Ph: 06 754 7836
TE ANAU Fiorland Electrical
120 Milford Rd
Ph: 03 249 7319
TIMARU Motor Bearing Specialist
53 North St
Ph/Fax: 03 684 4614
WAIKATO Amos Electronics
139 Ohaupo Rd, Hamilton
Ph: 07 843 4628
WELLINGTON Capital Power Service
90 Abel Smith St
Ph: 04 498 5200
WHANGAREI McKay Electrical Whangarei Ltd
38 Water St
Ph: 09 438 2879
44
BM3400 Bakehouse Inst. 21/1/00 2:16 PM Page 47
Page 48

1/00
Bakehouse
Automatic dough & bread maker
INSTRUCTION/RECIPE BOOKLET AND GUARANTEE.
BM3400
BM3400 Bakehouse Inst. 21/1/00 2:16 PM Page 48
 Loading...