

Page 1

Installation
Instructions
If you are in need of service, please either fill out a service request on our website,
http://www.summitappliance.com/support, or call us at 800-932-4267 or 718-893-3900.
Built-In Wall Oven
24” (61 cm) model
SEW24SS
Before You Begin
Read these instructions carefully and
completely.
• IMPORTANT— Save these instructions
for local inspector’s use.
IMPORTANT— Observe all governing
•
codes and ordinances.
• Note to Installer—Be sure to leave these
instructions with the consumer.
• Note to Consumer—Keep these
instructions for future reference.
• Proper installation is the responsibility of the
installer and product failure due to improper
installation is NOT covered under warranty.
• NOTE—This appliance must be properly
grounded.
• ATTENTION INSTALLER
All electric wall ovens must be hard wired
(direct wired) into an approved junction box. A
plug and receptacle is NOT permitted on
these products.
1
317B9887P002
Page 2
Installation Instructions
Important safety instructions
For Your Safety
• Be sure your oven is installed properly by a
qualified installer or service technician. Never
install the wall oven in a horizontal cabinet.
• Be sure the oven is securely installed in a cabinet
that is firmly attached to the house structure.
Weight on the oven door could cause the oven to
tip and result in injury. Never allow anyone to
climb, sit, stand or hang on the oven door.
• Make sure the cabinets and wall coverings around
the oven can withstand the temperatures (up to
93°C [200°F]) generated by the oven.
WARNING: The electrical
power to the oven supply line must be
shut off while line connections are being
made. Failure to do so could result in
serious injury or death.
Electrical
Requirements
This appliance must be supplied with the proper
voltage and frequency, and connected to an
individual, properly grounded branch circuit,
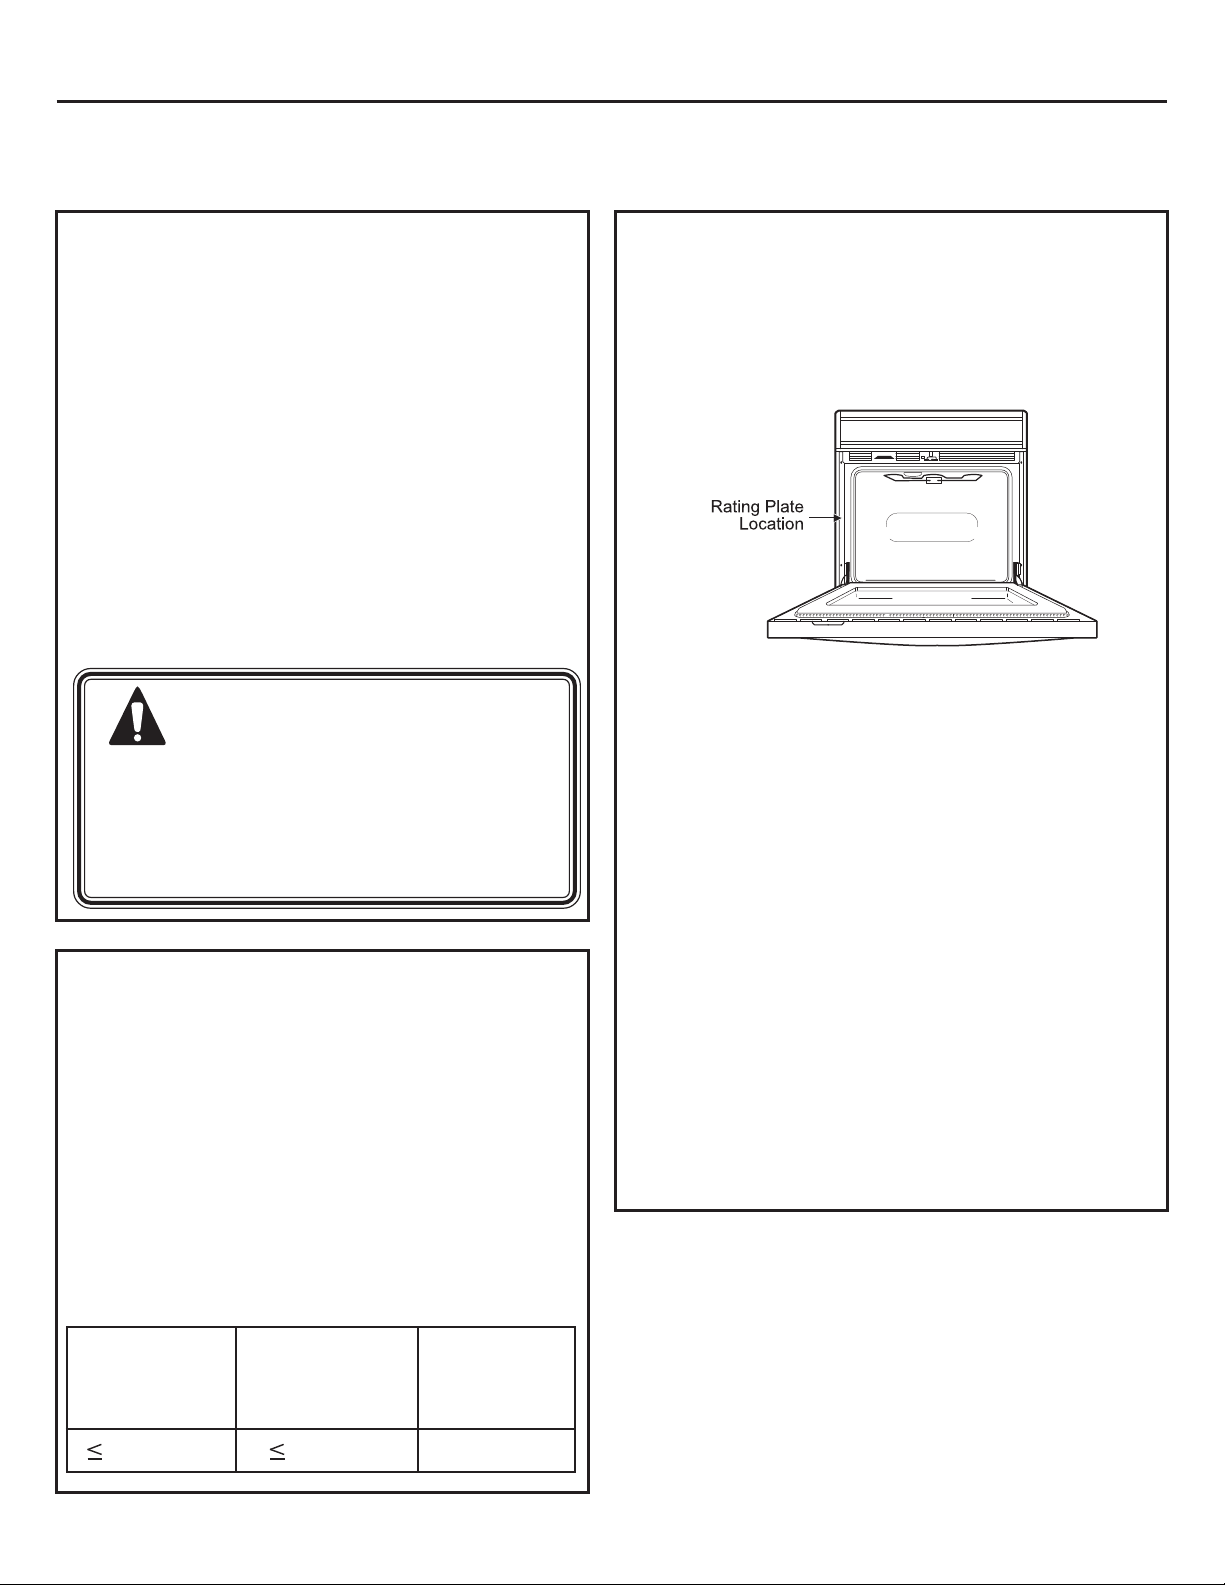
protected by a circuit breaker or fuse. See the rating
plate located on the oven frame to determine the
rating of the product. Use the chart below to
determine the minimum recommended dedicated
circuit protection.
Electrical
Requirements
Rating Plate location.
We recommend you have the electrical wiring and
hookup of your oven connected by a qualified
electrician. After installation, have the electrician
show you where your main oven disconnect is
located.
Check with your local utilities for electrical codes
which apply in your area. Failure to wire your oven
according to governing codes could result in a
hazardous condition. If there are no local codes,
your oven must be wired and fused to meet the
requirements of CAN/CSA C22.2 No. O-M91 or
latest edition.
You must use a three-wire, single-phase A.C. 208Y/
120 Volt or 240/120 Volt, 60 hertz electrical system.
If you connect to aluminum wiring, properly installed
connectors approved for use with aluminum wiring
must be used.
(cont.)
KW Rating
240V
3.0 kW 2.5 kW 20 Amp
KW Rating
208V
Recommended
Circuit Size
(Dedicated)
2
Page 3

Installation Instructions
Cutout for 24" (61 cm) Single Built-In Ovens only
A
The furniture must
B
support 50 kg (110 lb)
Dim.
A
B
C
D
E
F
G
H
I
C
D
J
24” Single Electric Wall Oven
25 in (63.5 cm) min.
3/4 in (1,8 cm) min.
13/16 in (2,0) max.
23 1/8 in (58,7 cm) min.
23 3/16 in (58,9) max.
22 1/8 in (56,1 cm) min.
22 3/16 in (56,4) max.
5/16 in (0,8 cm) min.
3/8 in (1,0 cm) max.
1 in (2,5 cm) min.
1 1/8 in (2,8 cm) max.
11/16 in (1,8 cm) min.
3/4 in (2,0 cm) max.
1 1/4 in (3.1 cm) min.
1 3/8 in (3,5 cm) max.
2 in (5 cm) min.
Juction box
BB
F
E
recommended to
be in left side
adjacent cabinet.
A
Allow a minimum of 50.8
cm (20 in) for clearance
to adjacent cabinets,
drawers, walls, etc.
When door is open.
Minimum
recommended
cutout location
from floor 91.4 cm
(36 in)
J
5 1/2 (14 cm) min.
I
J
F
E
H
G
H
3
Page 4
Installation Instructions
B Electrical Connections
ATTENTION INSTALLER
All electric wall ovens must be hard wired (direct
wired) into an approved junction box. A plug and
receptacle is NOT permitted on these products.
DO NOT shorten the flexible conduit. The conduit
strain relief clamp must be securely attached to the
junction box and the flexible conduit must be
securely attached to the clamp. If the flexible
conduit will not fit within the clamp, do not install the
oven until a clamp of the proper size is obtained.
NOTE TO ELECTRICIAN: The 3 power leads
supplied with this appliance are CSA recognized for
connection to heavier gauge household wiring. The
insulation of these 3 leads is rated at temperatures
much higher than the temperature rating of
household wiring. The current carrying capacity of
the conductor is governed by the wire gauge and
the temperature rating of the insulation around the
wire.
Turn off the circuit breaker or remove fuses to
B1
the oven branch circuit.
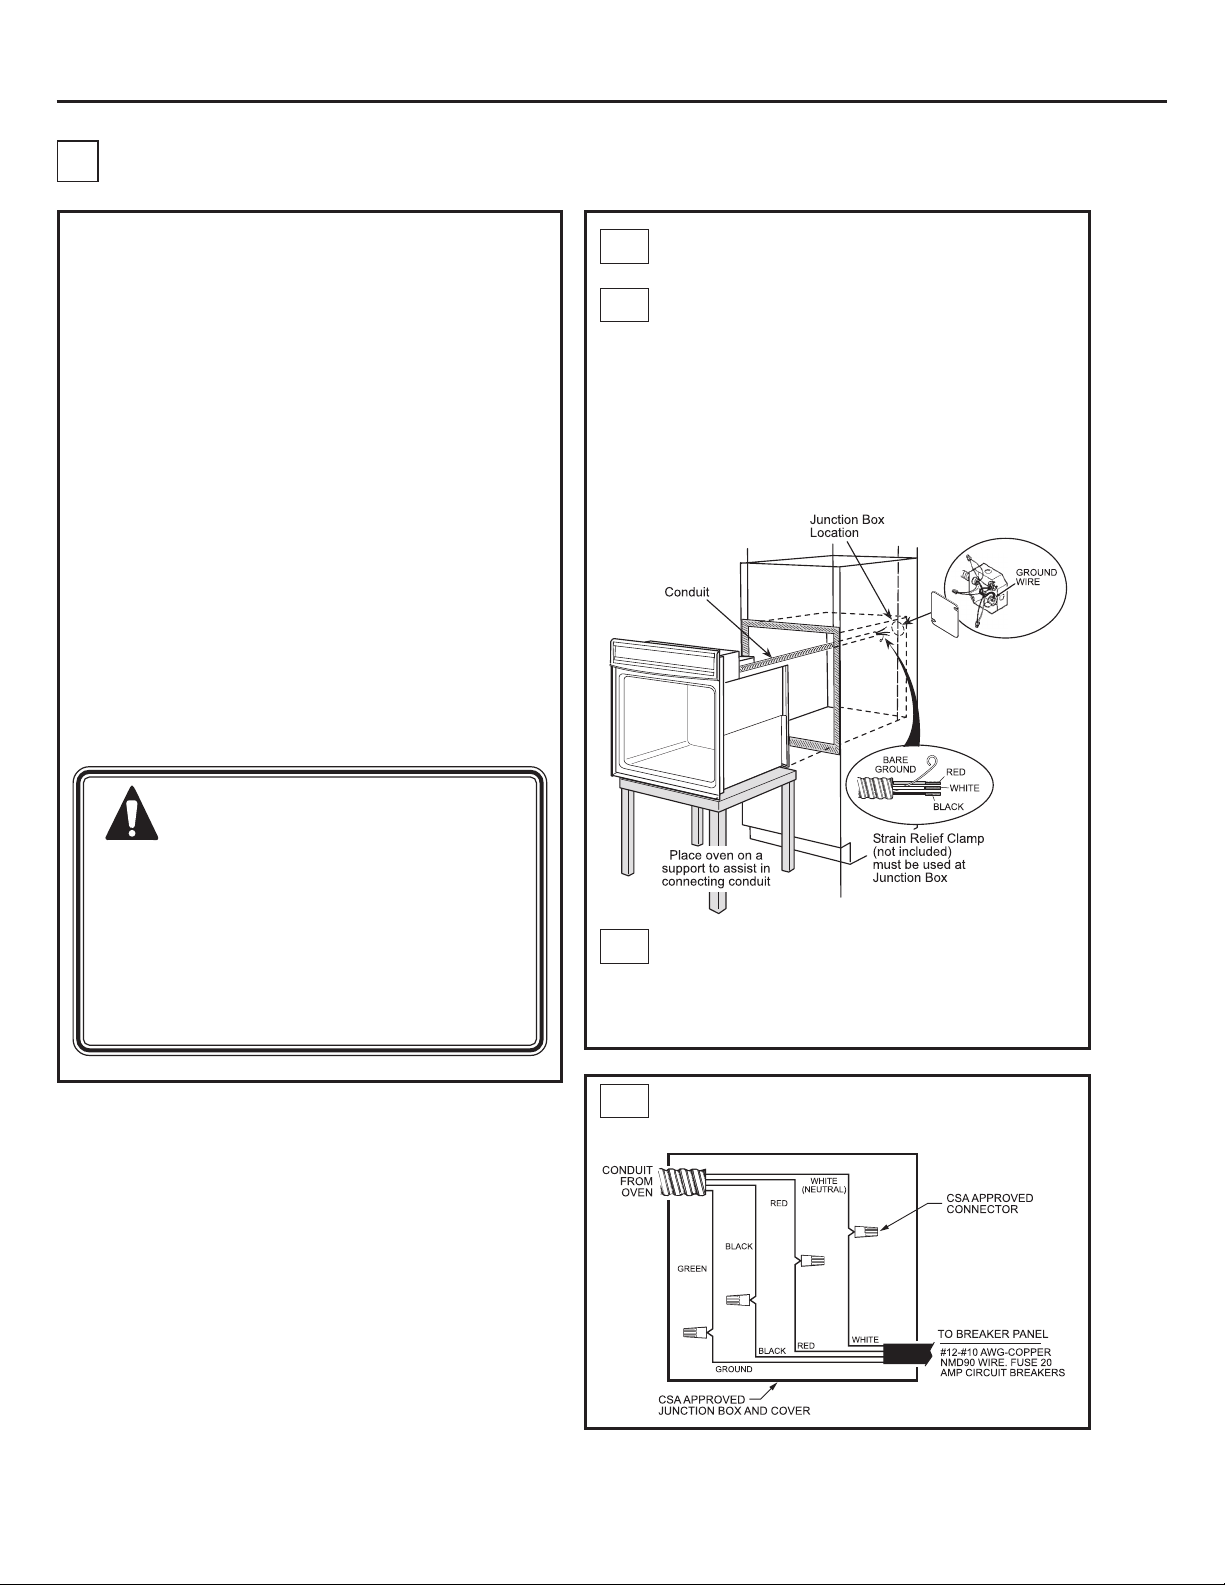
With the oven supported on a table or platform
B2
in front of the cabinet opening, connect the
flexible conduit to the electrical junction box as
shown below. Position the conduit in such a
manner that it will lie on top of the oven in a
natural loop when the oven is installed. You will
need to purchase an appropriate strain relief
clamp to complete the connection of the
conduit to the junction box.
WARNING: Improper connec-
tion of aluminum house wiring to copper
leads can result in an electrical hazard or
fire. Use only connectors designed for
joining copper to aluminum and follow
the manufacturer’s recommended procedure closely.
This oven is supplied with a 123 cm (48”) long
B3
flexible conduit consisting of:
• 3 insulated conductors (copper)
• 1 insulated ground conductor (copper)
Suggestion: Attach conductors to residence
B4
wiring as shown by wiring diagram.
4
Page 5
Installation Instructions
C Securing the Oven in the Opening
Drilling the Pilot Holes and
Mounting the Oven
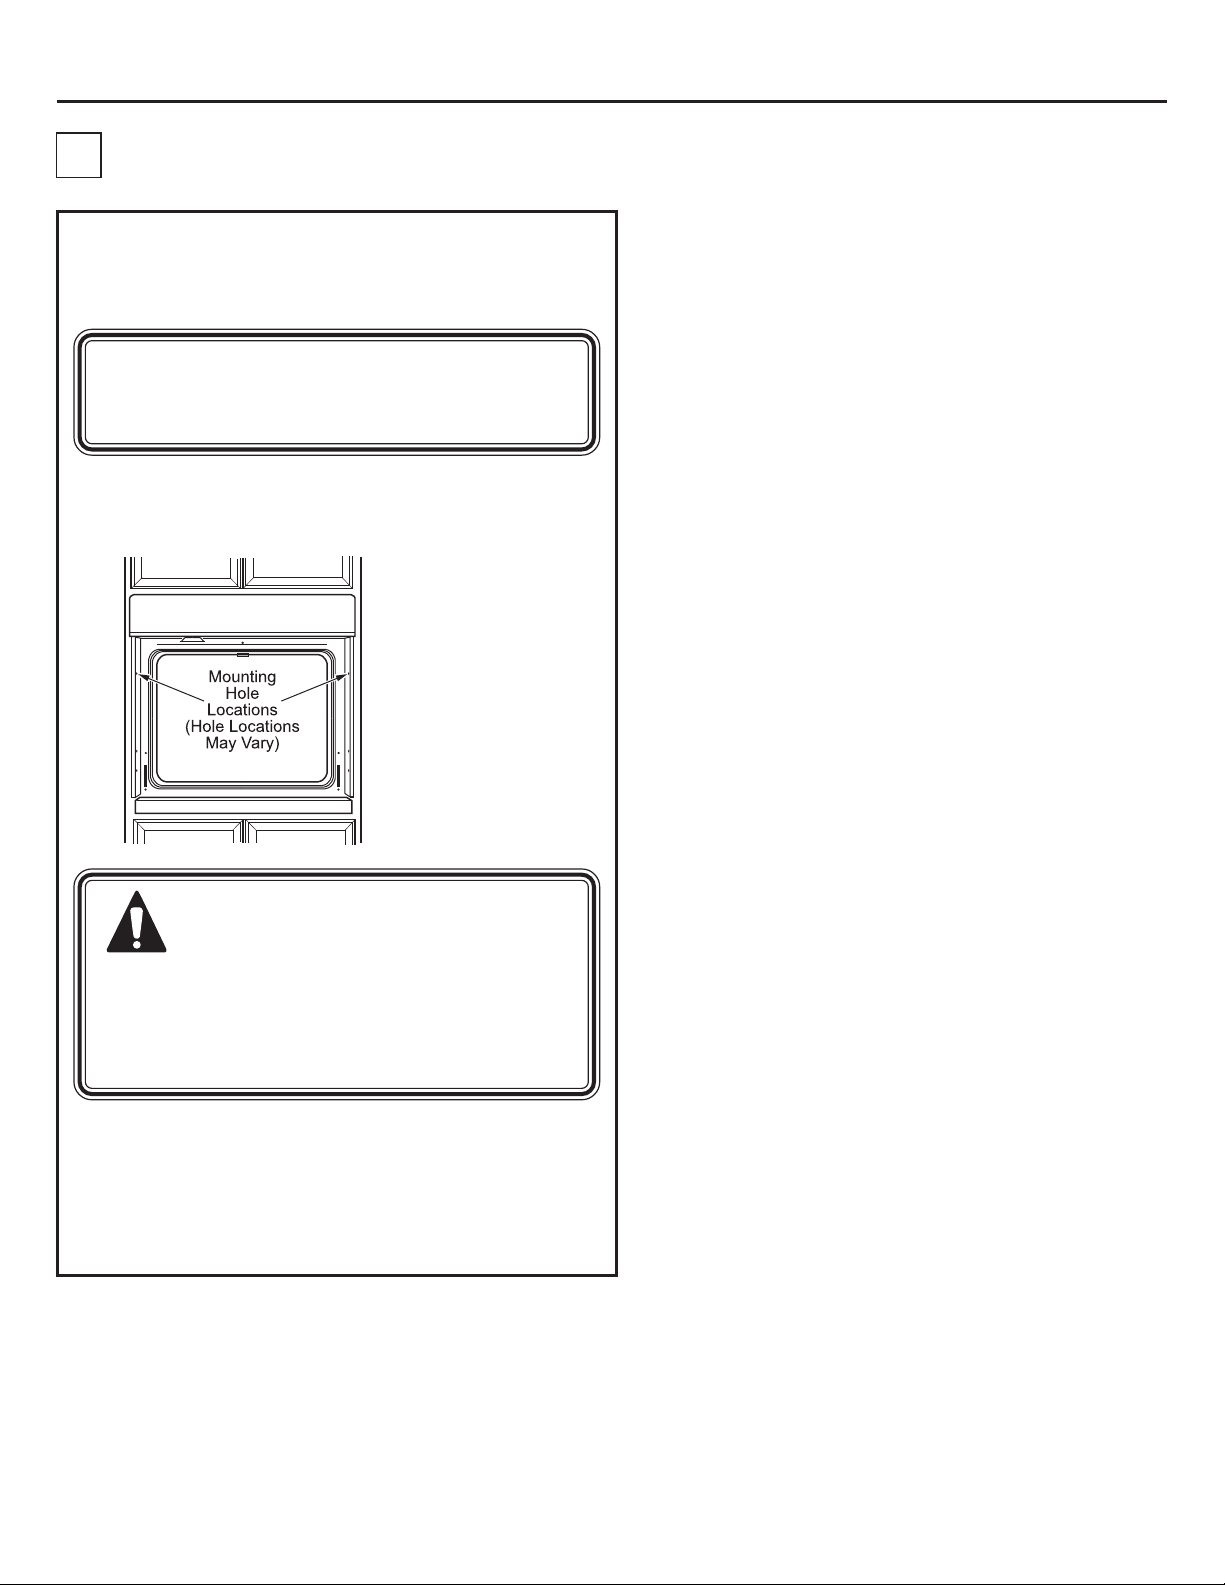
NOTE: Before drilling the pilot holes, make sure
the oven is pushed as far back into the opening as
it will go and is centered.
a. Drill through the mounting holes in front frame,
for the #8 screws provided.
The screws must be a
minimum of 6 mm (1/
4") from the front of
the cutout.
WARNING: Mounting screws
must be used. Failure to do so could
result in the oven falling out of the cabinet, causing serious injury.
b. Secure the oven to cabinet with screws provided.
NOTE: If the cabinet is particle board, you must use
#8 x 19 mm (3/4”) particle board screws. These may
be purchased at any hardware store.
5
Page 6

Notes
6
Page 7

Notes
7
Page 8

Notes
8
 Loading...