

Page 1
Metal Side Panel (with Optional Base Cover)
7015550 / Rev A / February, 2010
Page 1 of 3
CONTAINS: QTY DESCRIPTION
1 Panel Assembly, Side
2 Bracket, Side Panel (rear)
Figure 1. Reposition Lower Front Bracket (Over / Under Models Only)
IMPORTANT NOTE: When a side panel
is to be mounted on the hinge side of an
over / under model, it will be necessary to
reposition the lower front bracket down to
the bottom mounting position in order to
avoid interference between the lower
bracket and the lower hinge plate.
(See Figure 1)
QTY DESCRIPTION
6 Screw, #10X3/4 Drill PH Hex Wash
1 Cover, Base
1 Instruction Sheet
REPOSITION
LOWER FRONT
BRACKET TO
BOTTOM
POSITION
LOWER
HINGE PLATE,
OVER / UNDER
MODELS ONLY
Page 2
Metal Side Panel (with Optional Base Cover)
7015550 / Rev A / February, 2010
Page 2 of 3
NOTE: Side panels and base cover must be installed before the unit is placed in its final position.
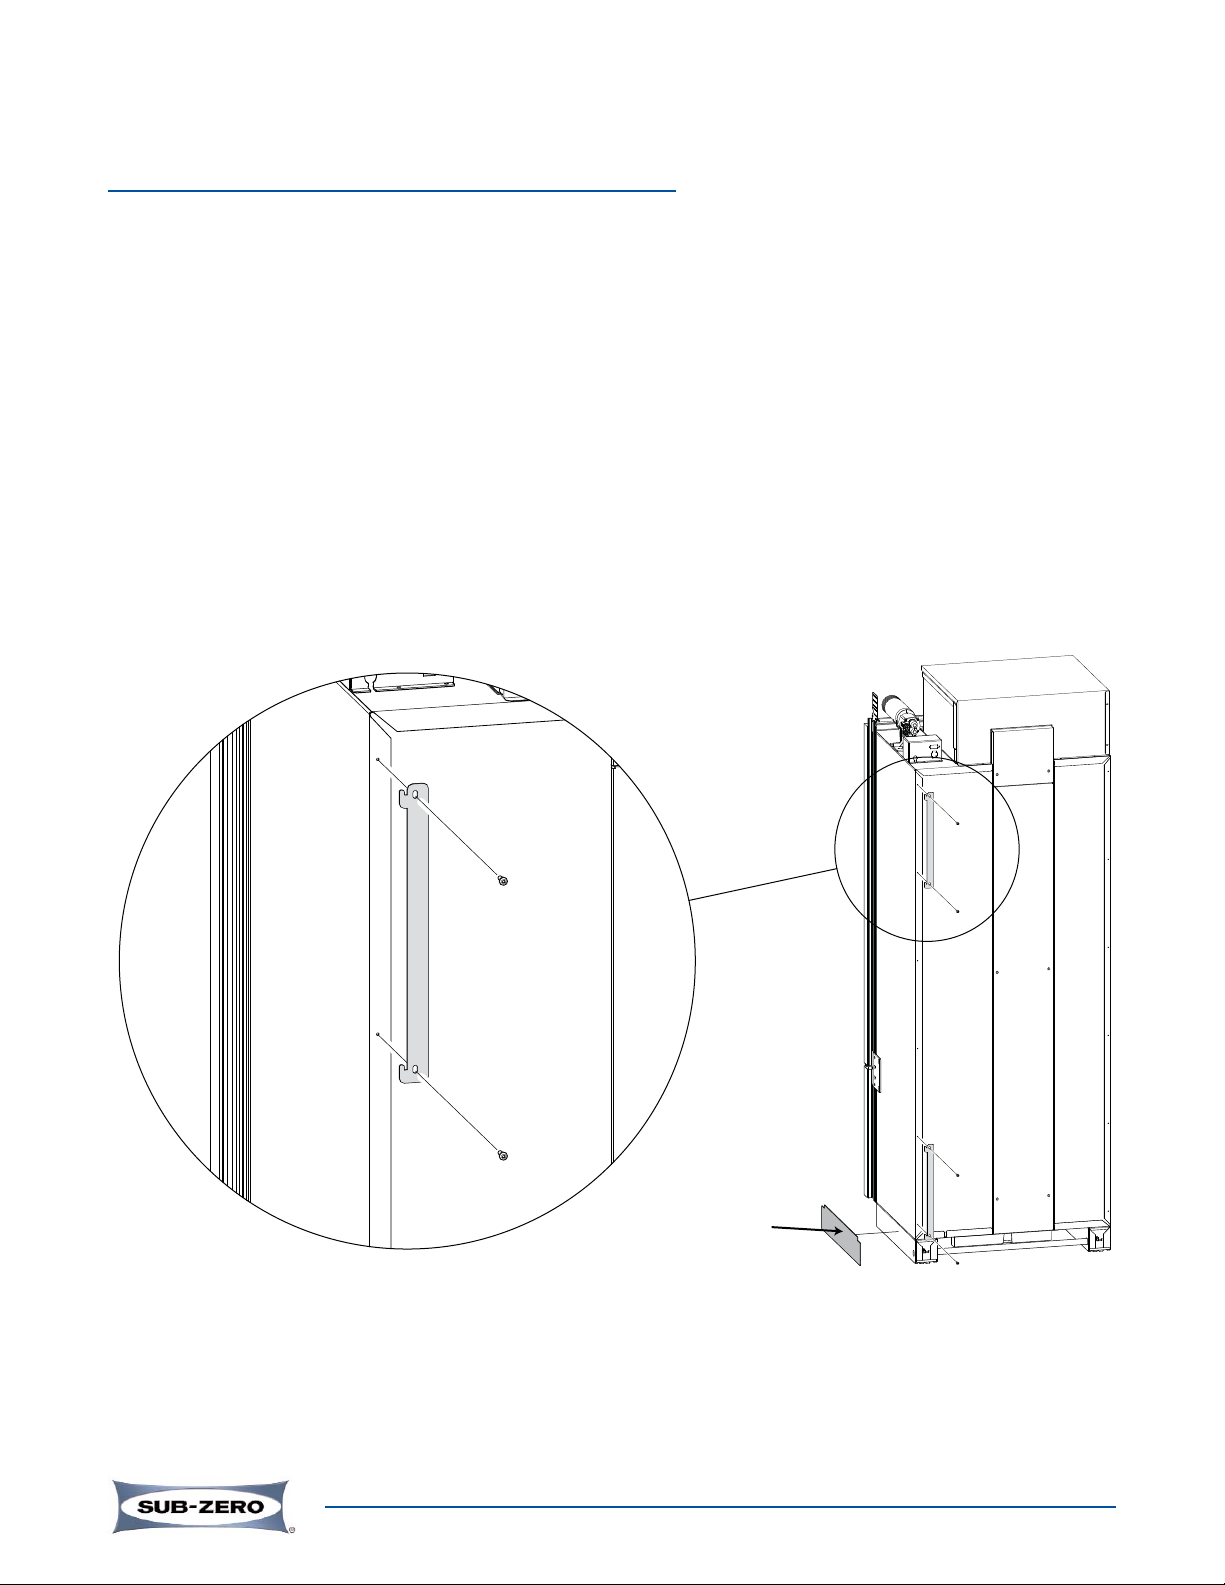
ATTACH REAR SIDE PANEL BRACKETS TO BACK OF UNIT:
1. Align mounting holes of brackets with pre-punched locator holes along back side edge of unit, making sure
bracket hooks are facing up and outward.
2. insert the #10X3/4 Drill PH Hex Washer Screws through the bracket mounting holes (two each bracket), then
use a power driver with a Phillips or 5/16” Hex bit to drive the screws into the pre-punched locator holes.
NOTE: It is not necessary to drill holes into the back of the unit in order to mount the brackets. It should be
possible to push the screw tips through the unit shell while spinning the screws clockwise with a power driver. If a drill bit is used, be sure it is a 1/8” (3 mm) drill bit, but do NOT penetrate deeper than 3/4” (19 mm).
3. Attach optional base cover to side of unit base at this time. it has a magnetic back and can be adjusted after
the unit is installed.
Figure 2. Attach Rear Side Panel Brackets
SIDE PANEL
BRACKET
(REAR)
BASE COVER
(OPTIONAL)
Page 3

Metal Side Panel (with Optional Base Cover)
7015550 / Rev A / February, 2010
Page 3 of 3
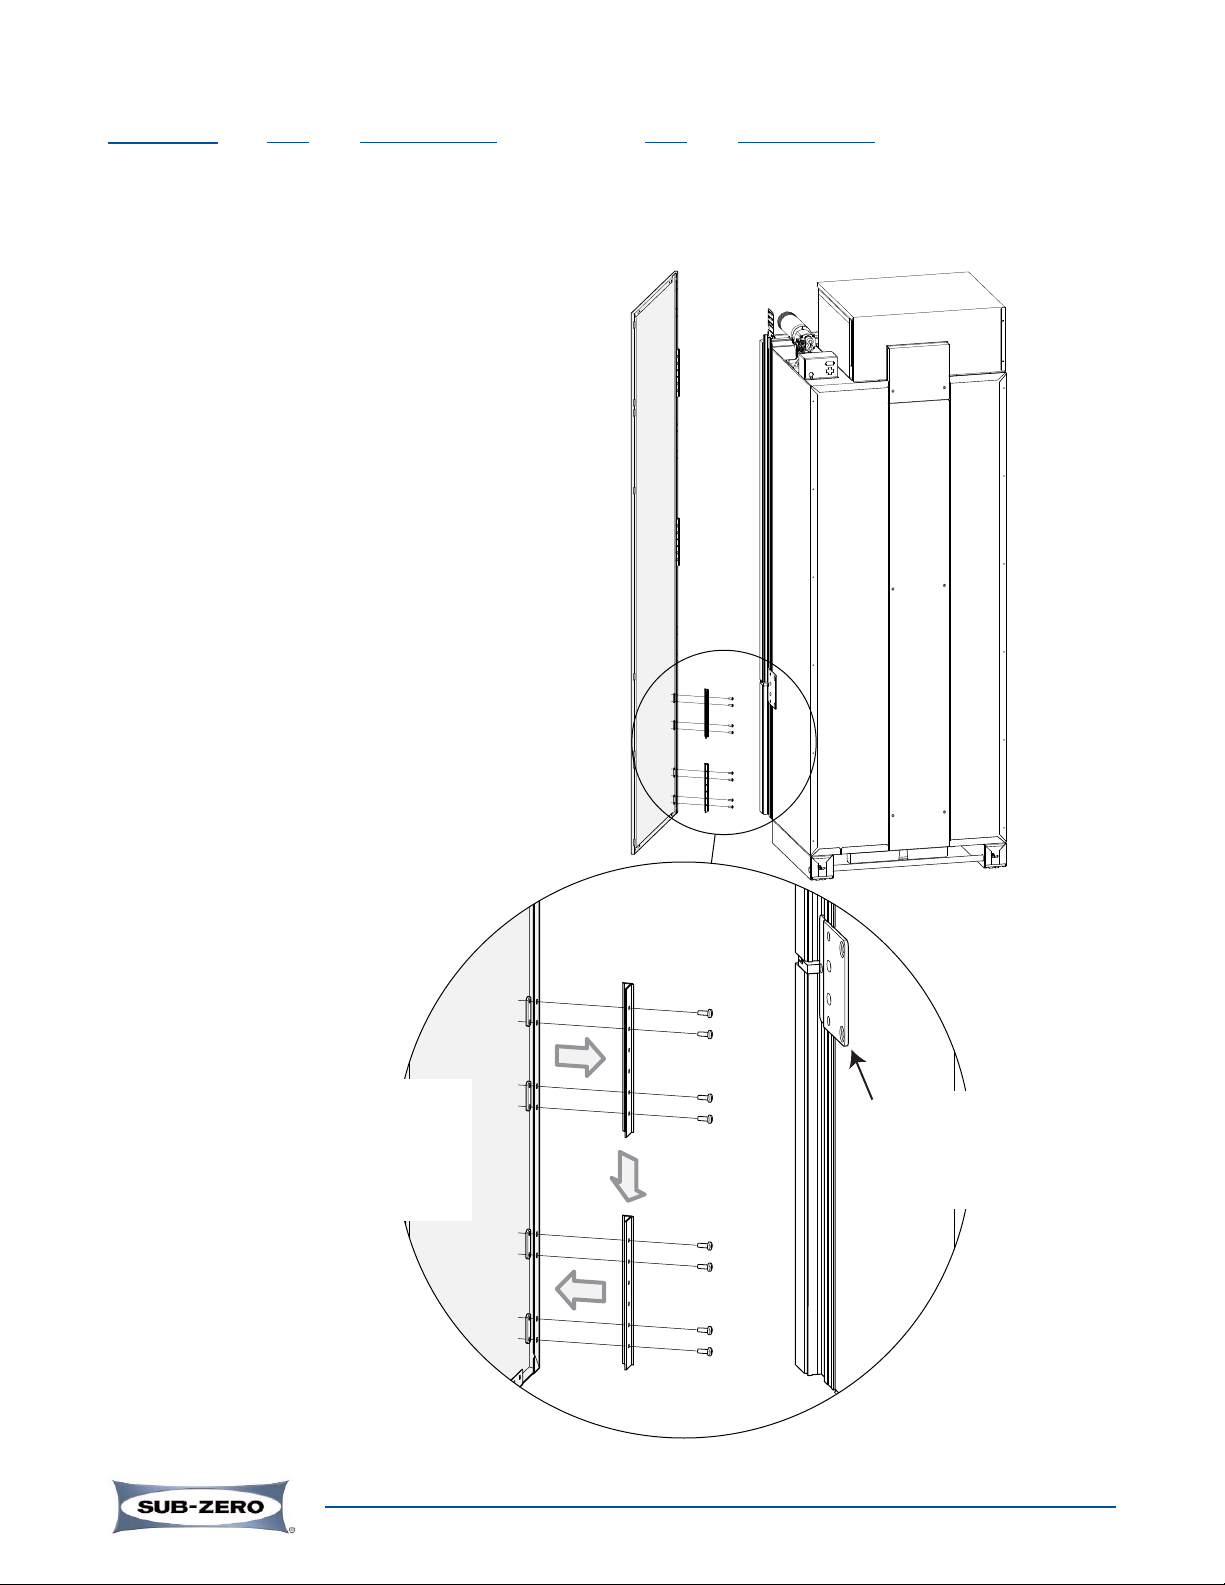
HANG SIDE PANEL:
1. With the side panel held at an angle to the side of the unit, engage the front brackets behind the mainframe
(See Figure 3 and Figure 5), then rotate the back of the panel toward the unit so the front brackets hook in
behind the mainframe (See Figure 4 and Figure 5) and the slots at the back of the side panel align with the
rear bracket hooks (See Figure 5).
2. With the side panel tight against the side of the unit, pull the side panel down so the bracket hooks engage
the tops of the slots at the back of the side panel.
NOTE: After unit is slid into position, adjust optional base cover at this time (See Figure 5). If base cover
needs to be removed, unit must be pulled from installation so base cover can be slid toward back
and out through rear slot of the side panel .
Figure 5. Hanging Side Panel, Rear View
SIDE PANEL
MAIN FRAME
Figure 3. Hanging Side Panel, Top View
SIDE PANEL
MAIN FRAME
Figure 4. Hanging Side Panel, Top View
SIDE
PANEL
SIDE
PANEL
BRACKET
(REAR)
BASE COVER
(OPTIONAL)
 Loading...