

Page 1
Wood Side Panel Kit
subzero.com 800.222.7820
CONTENTS
6 Screw, #10 × 3/4" drill PH hex wash
24 Screw, #8-18 × 1/2" PH truss Hd
3 Bracket, side panel front
2 Bracket, side panel rear
1 Instruction sheet
Note: Side panels must be a minimum of
mm) thick.
1
/2” (13
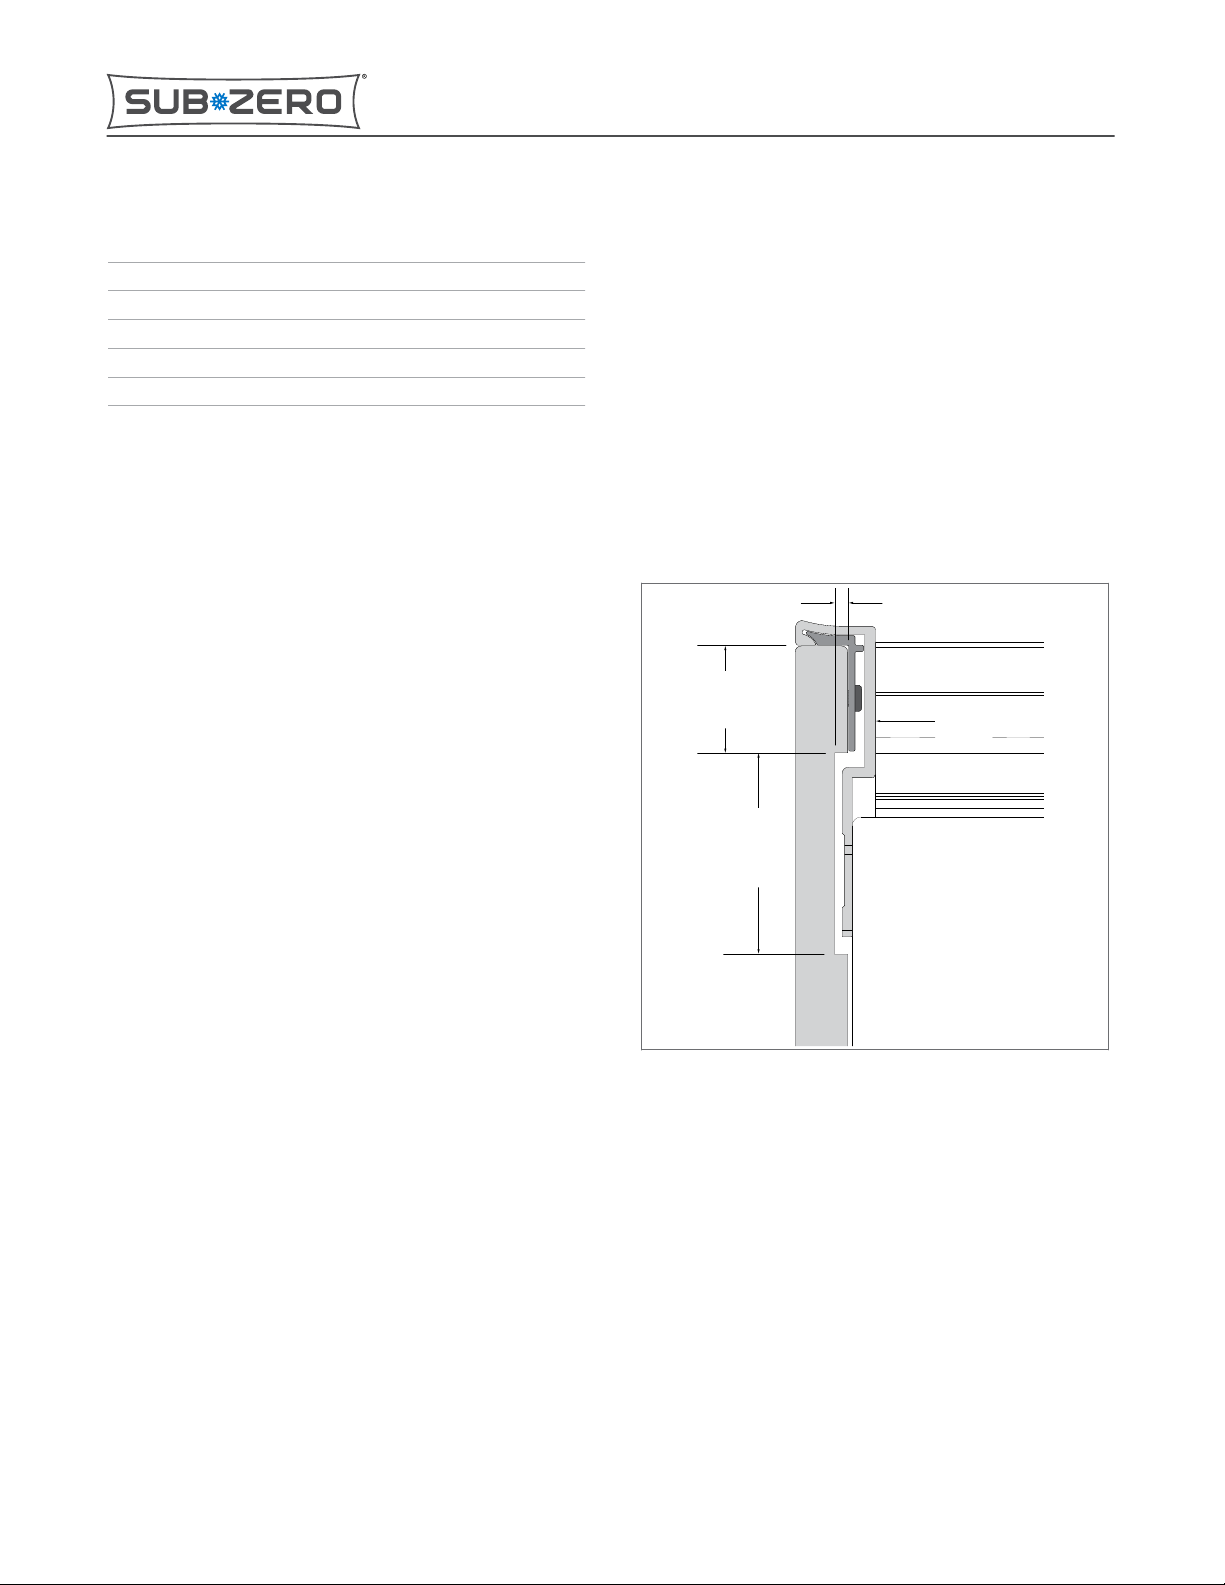
WOOD SIDE PANEL PREPARATION
1 Route
a 1-7/8” (48 mm) wide, 1/8” (3 mm) deep groove
into the side of the panel that will face the unit, 1” (25
mm) from the front edge. This is to accommodate the
main frame and to allow the side panel to fit flush
against the unit side.
2 If the panel is to be mounted on the hinge side of an
over/under model, route a 3/16” (5 mm) deep pocket
into the side of the panel that will face the unit. This is
to accommodate the lower refrigerator hinge plate.
3 After the side panel is cut to size and the appropriate
groove and pocket are routed, use the #8-18 × 1/
2
Phillips truss head screws to attach the three front
brackets and two rear brackets.
1
/8” (3)
1” (25)
Main
Frame
” (48)
8
/
7
1
Side Panel
Unit
7004563 REV. D 05/2018
Page 1 of 4
*7004563$REV.$D*
Page 2
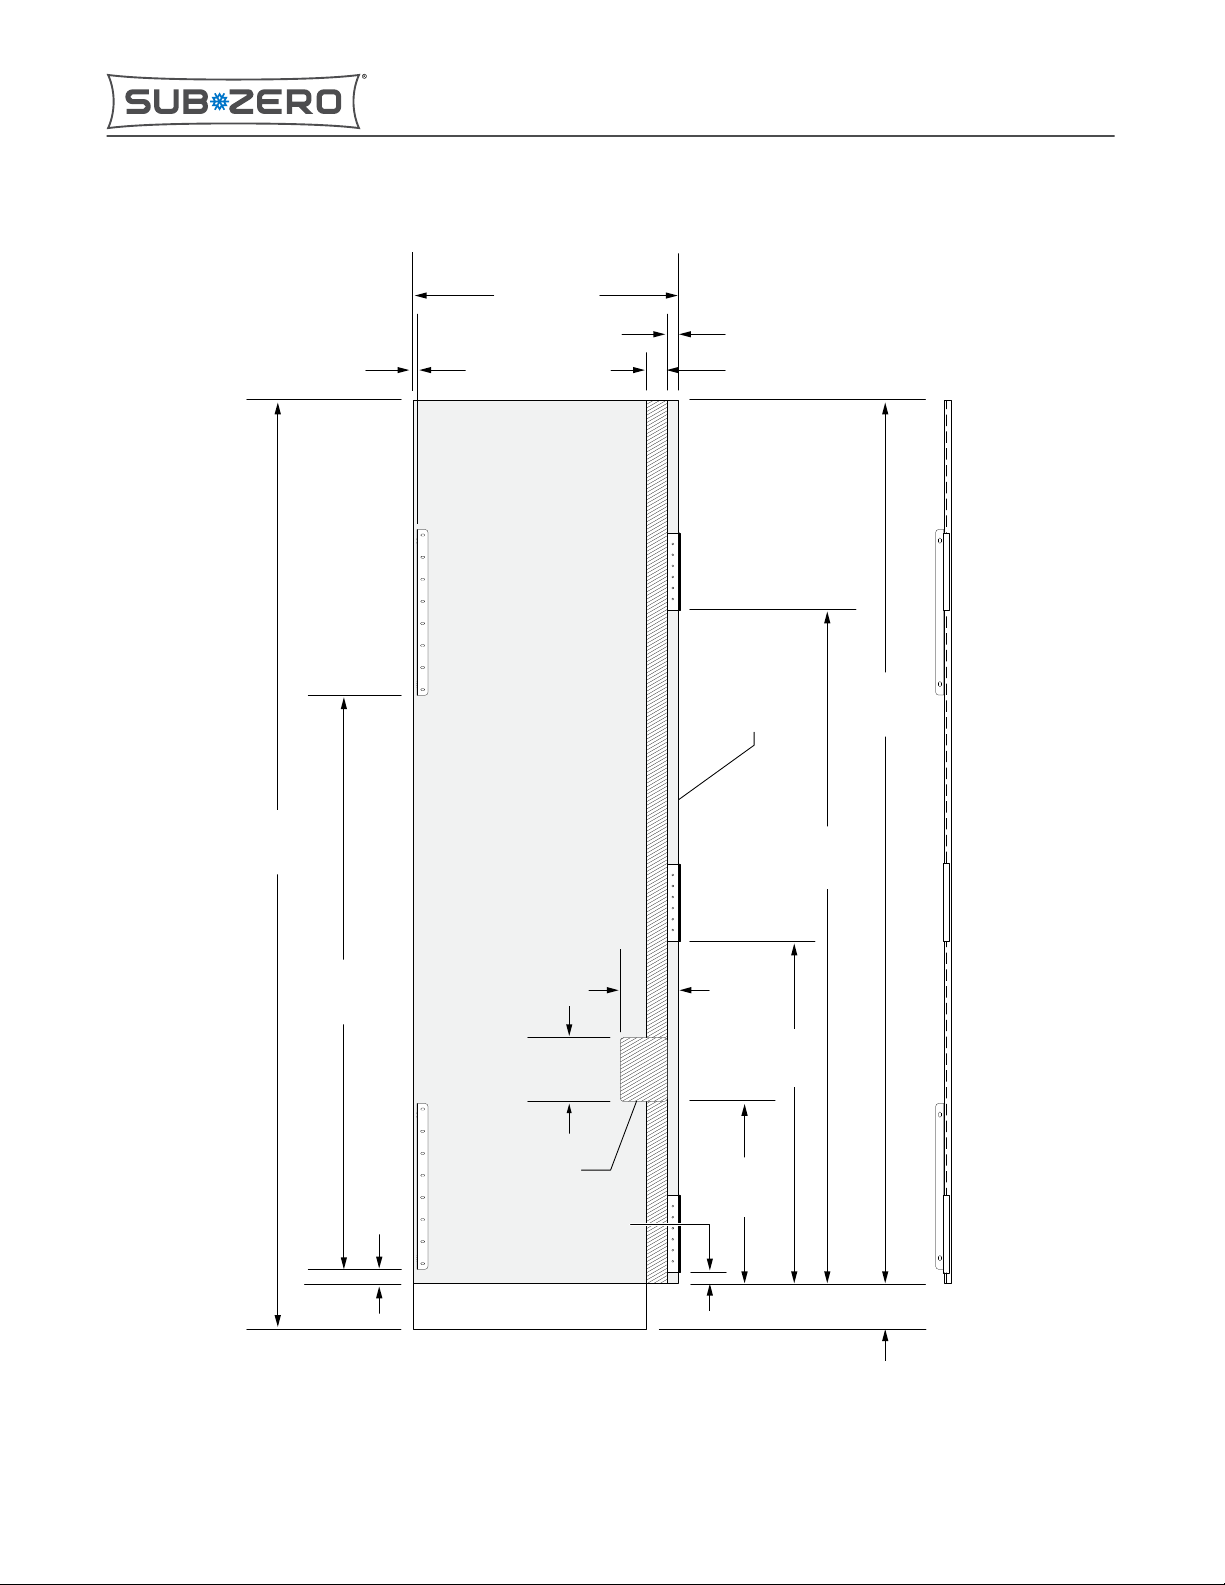
Wood Side Panel Preparation (continued)
5
/32” (4)
Wood Side Panel Kit
subzero.com 800.222.7820
24" (610)
1” (25)
17/8” (48),1/8” (3) Deep
84”
(2134)
531/4”
(1353)
11/4”
(32)
Wood Side Panel
(Side Facing Unit)
53/4”
(146)
3
/16” (5) Deep
Hinge Side
Pocket
1"
(25)
Unit
Front
41/4”
(108)
161/2”
(419)
* 80”
(2032)
61”
(1549)
31”
(787)
No Side Panel
* Dimension may vary depending on grille height; 80” (2032) tall panel is standard.
NOTE: Dimensions in parentheses are in millimeters.
Page 2 of 4
Page 3

Wood Side Panel Kit
subzero.com 800.222.7820
HANG THE SIDE PANEL
Note: Side panels must be installed before the unit is
placed in its final position.
1 With the side panel held at an angle to the side of the
unit, engage the front brackets behind the main frame.
Rotate the back of the panel toward the unit so the
2
front brackets hook in behind the main frame.
Align the rear bracket mounting holes with the pre-
3
punched locator holes at the back of the unit.
Insert the #10 × 3/4 drill PH hex washer screws through
4
the bracket mounting holes (two for each bracket), then
use a power driver with a Phillips or 5/16” hex bit to
drive the screws into the pre-punched locator holes.
Note: It is not necessary to drill holes into the back of
the unit in order to mount the brackets. It should be
possible to push the screw tips through the unit shell
while spinning the screws clockwise with a power
driver. If a drill bit is used, verify it is a 1/8” (3 mm) drill
bit, but DO NOT penetrate deeper than 3/4” (19 mm).
Main Frame
Main Frame
Side Panel
Side Panel
Page 3 of 4
Page 4

Wood
Side
Panel
Hang the Side Panel (continued)
Wood Side Panel Kit
subzero.com 800.222.7820
Page 4 of 4
 Loading...