

Page 1

SRT-5390
5390
FREE-TO-AIR
DIGITAL TERRESTRIAL PVR RECEIVER
USER’S MANUAL
STRONG&Co. (FAR EAST), LTD.
P. O. Box:85, YOKOHAMA, KANAGAWA-KEN
JAPAN 231-91 -FAX:+81 45 662-4957
Website:www.strong-technologies.com
E-mail:tech@strong-technologies.com
E109000197A
Page 2
IMPOR TANT SAFETY INSTRUCTIONS
All the safety and operating instructions should be read
before the product is operated.
The safety and operating instructions should be
retained for future reference.
All warnings on the product and in the operating
instructions should be adhered to.
All operating and using instructions should be followed.
Unplug this product from the wall outlet before
cleaning.
Do not use liquid cleaners or aerosol cleaners, Use
damp cloth for cleaning.
Do not use attachments not recommended by the
product manufacturer as they may cause hazards.
Do not use this product near water - for example, near a
bath tub, wash bowl, kitchen sink or laundry tub; in a
wet basement; or near swimming pool; and the like.
Do not place this product on an unstable cart, stand,
tripod, bracket, or table, The product may fall, causing
serious injury to a child or an adult and serious damage
to the product. Use only with a cart, stand, tripod,
bracket, or table recommended by the manufacturer, or
sold with the product. Any mounting of the product
should follow the manufacturer’s instructions, and
should use a mounting accessory recommended by the
manufacturer.
A product and cart combination should be moved with care. Quick stops, excessive forces
and uneven surfaces may cause the product and cart combination to overturn.
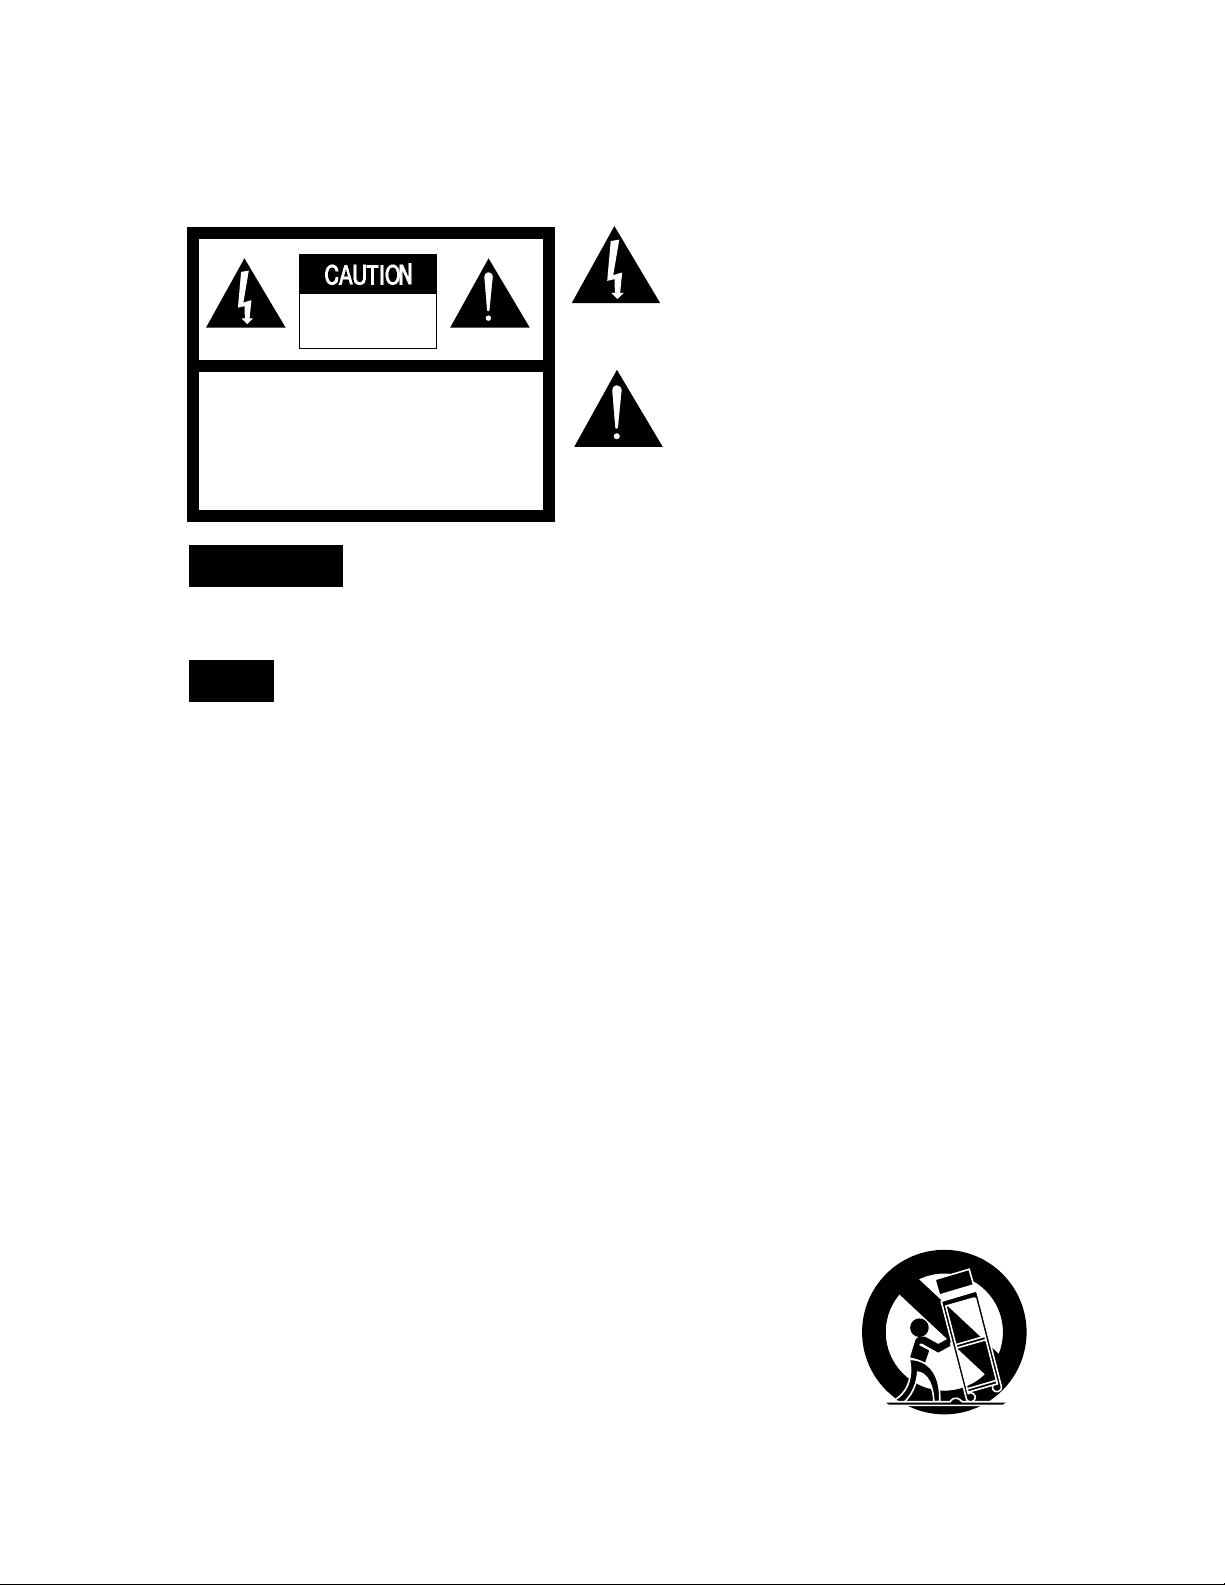
WARNING
To prevent fire or shock hazard, do not expose
the unit to rain or moisture.
AVIS
POUR EVITER LE RISQUE D’INCENDIE OU CHOC ELECTRIQUE-NE
PAS EXPOSER L’APPAREIL A LA PLUIE OU LA MOITEUR
ATTENTION : RISQUE CHOC LELECTRIQUE-NE
PAS OUVRIR
CAUTION : TO REDUCE THE RISK OF ELECTRIC SHOCK
DO NOT REMOVE COVER (OR BACK).
NO USER SERVICEABLE PARTS INSIDE
REFER SERVICING TO QUALIFIED SERVICE PERSONNEL
RISK OF ELECTRIC SHOCK,
DO NOT OPEN
This symbol is intended to alert the user to the
presence of uninsulated "dangerous voltage"
within the product's enclosure that may be of
sufficient magnitude to constitute a risk of electric
shock to persons.
This symbol is intended to alert the user to the
presence of important operating and
maintenance(servicing) instructions in the
literature accompanying the appliance.
CAUTION : TO PREVENT ELECTRIC SHOCK. MATCH
WIDE BLADE OF PLUG TO WIDE SLOT,
FUSE INSERT.
ATTENTION : POUR ÉVITER LES CHOC ÉLECTRIQUES.
INTRODURE LA LAME LA PLUS LARGE
DE LA FICHE DANS LA BORNE
CORRESPONDANTE ED LA PRISE ET
POUSSER JUSOU’AU FOND.
NOTE TO CATV SYSTEM INSTALLER : THIS REMINDER
IS PROVIDED TO CALL THE CATV SYSTEM
INSTALLER’S ATTENTION TO ARTICLE 820-40 OF THE
NEC THE PROVIDES GUIDELINES FOR PROPER
GROUNDING AND, IN PARTICULAR, SPECIFIES THAT
THE CABLE GROUND SHALL BE CONNECTED TO
THE GROUNDING SYSTEM OF THE BUILDINGS AS
CLOSE TO THE POINT OF CABLE ENTRY AS
PRACTICAL.
Page 3

Slots and openings in the cabinet are provided for ventilation and to ensure reliable operation of the product and to protect
it from overheating, and these openings must not be blocked or covered. The openings should never be blocked by placing
the product on a bed, sofa, rug, or other similar surface. The openings should not be placed in a built-in installation such as
a bookcase or rack unless proper ventilation is provided or the manufacturer's instructions have been adhered to.
This product should be operated only from the type of power source indicated on the marking label. If you are not sure of
the type of power supply to your home, consult your product dealer or local power company. For porducts intended to
operate from battery power, or other sources, refer to the operating instructions.
This product may be equipped with a polarized alternating-current line plug(a plug having one blade wider than the other).
This plug will fit into the power outlet only one way. This is a safety feature. If you are unable to insert the plug fully into the
outlet, try reversing the plug. If the plug should still fail to fit, contact your electrician to replace your obsolete outlet. Do
not defeat the safety purpose of the polarized plug.
Power supply cord should be routed so that they are not likely to be walked on or pinched by items placed upon or against
them, paying particular attention to cords at plugs, convenience receptacles, and the point where they exit from the
product.
If an outside antenna or clable system is connected to the product, be sure the antenna or cable system is grounded so as
to porvide some protection against voltage surges and built-up static charges. Article 810 of the National Electrical Code,
ANSI/NFPA 70, provides information with regard to proper grounding of the mest and supporting structure, gorunding of
the lead-in wire to an antenna discharge unit, size of grounding conductors, location of antenna-discharge unit, connection
to grounding electrodes, and requirements for the grounding electrode.
For added protedtion for this product during a lighting storm, or when it is left unattecded and unused for long periods of
time, unplug it from the wall outlet and disconnect the antenna or cable system. This will prevent damage to the product
due to lightning and power-line surges.
An outside antenna system should not be located in the vicinity of overhead power lines or other electric light or power
circuits, or where it can fall into such power lines or circuits. When installing an outside antenna system, extreme care
should be tacken to keep from touching such power lines or circuits as contact with them might be fatal.
Do not overload wall outlets, extension cords, or integral convenience receptacles as this can result in a risk of fire or
electric shock.
Never push any kinds of objects into this product through openings as they may touch dangerous voltage points or shortout parts that could result in a fire or electric shock. Never spill any kind of liquid on the product.
Unplug this product from the wall outlet and refer servicing to qualified service personnel under the following conditions:
When the power supply cord or plug is damaged.
If liquid has been spilled, or objects have fallen into the product.
If the product has been exposed to rain to water. If the product does not operate normally by following the operating
instructions. Adjust only those controls that are covered by the operating instructions as an improper adjustment of other
controls may result in damage and will often require extensive work by a qulaified technician to restore the product to its
normal operation.
If the product has been dropped or damaged in any way.
When the product exhibits a distinct change in performance - this indicates a need for service.
When replacement parts are required, be sure the service technician has used replacement part specified by the
manufacturer or have the same characteristics as the original part. Unauthorized subsitutions may result in fire, electric
Page 4

shock, or other hazards.
Upon completion of any service or repair to this product, ask the service technician to perform safety checks to determine
that the product is in proper operating condition.
The product should be situated away from heat sources such as radiators, heat registers, stoves, or other
products(including amplifiers) that produce heat.
Page 5

1
11. Introduction
2
1.1 Overview
1.2 Main Features
12. Safety/Precautions
3
2.1 Safety
2.2 Precautions
3. Check Point before Use 5
3.1 Accessories
14. Controls/Functions 6
4.1 Front Panel
4.2 Rear Panel
4.3 Remote Control unit
15. Using Remote Control unit 11
5.1 Batteries
5.2 Range Of Operation
16. How to Connect 13
17. Operation 16
7.1 Getting Started
7.2 Channel Editing
7.3 System Parameters
7.4 Manual Scan
7.5 Factory Set
7.6 Software Download
7.7 Other Function on Remote Control unit
18. Hard Disk Operation 68
8.1 Recording
8.2 Playing
8.3 Delete Programs
8.4 Lock Programs
8.5 Skip Play
8.6 Split Operation
8.7 Trick Play Controls without OSD
8.8 Direct Recoding & Pause
19. Trouble Shooting 83
10. Specifications 84
Page 6
2
Fully compliant with MPEG-2 and DVB standards
User friendly operating Menu and On-Screen Graphic Menu
Easy to use EPG(Electronic Program Guide
)
on screen
Age protection lock function
Manual PID control
Software downloading via RS-232C connector
Tele-text encoding
Hard Disk Functions
This terrestrial receiver is designed for giving you the opportunity to enjoy digital
broadcasting. This receiver is a technical masterpiece, assembled with the highest
qualified electronic parts.
Page 7
3
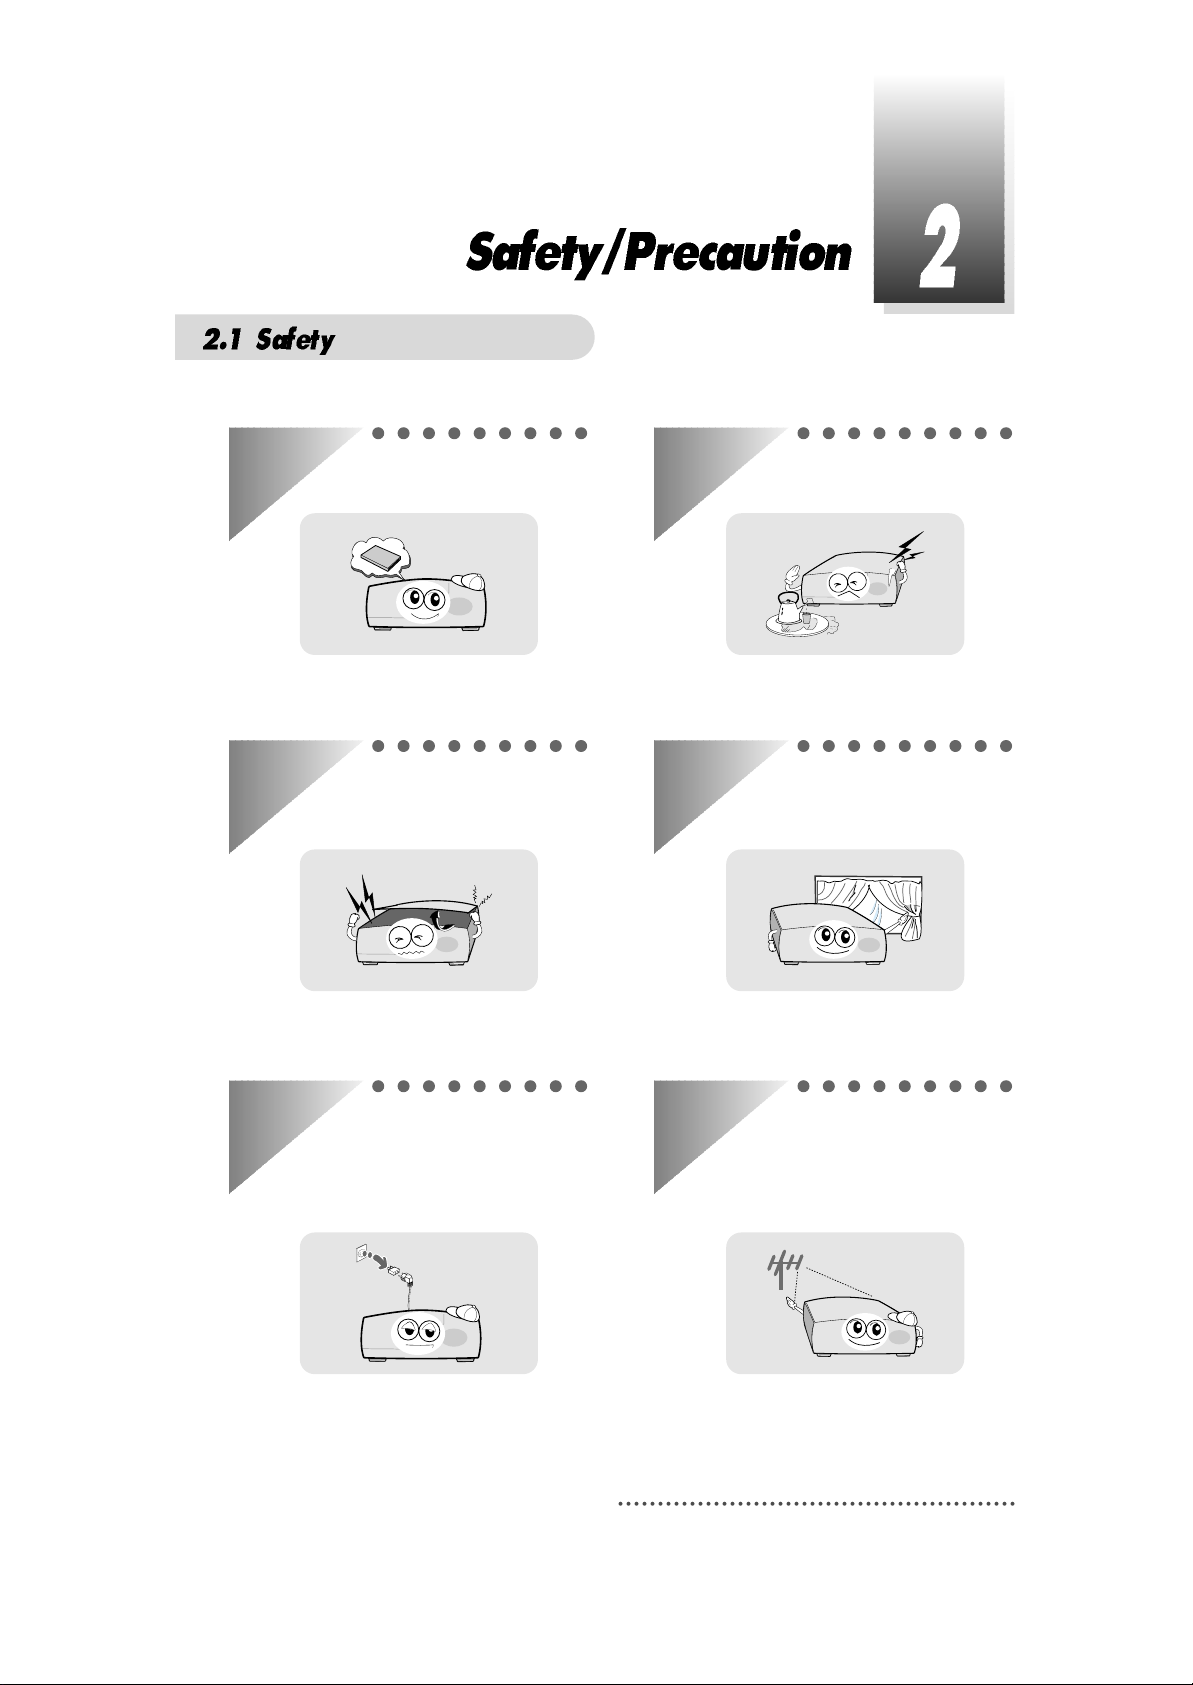
Be sure to read the user's manual before
starting the operation of the unit.
Never open the cover. It is very dangerous to
touch the inside of the unit due to possible
electric shock.
When you do not use this unit for a long time,
make sure that power cord is pulled out from
the outlet. Also do not use a damaged
power cord as it may cause fire or electric
shock.
Do not touch the power cord with wet hands
as it may cause electric shock.
A professional installation is required.
If reception is interrupted, contact your
local service centre.
Place the unit in a well ventilated and noheat environment.
Page 8
4
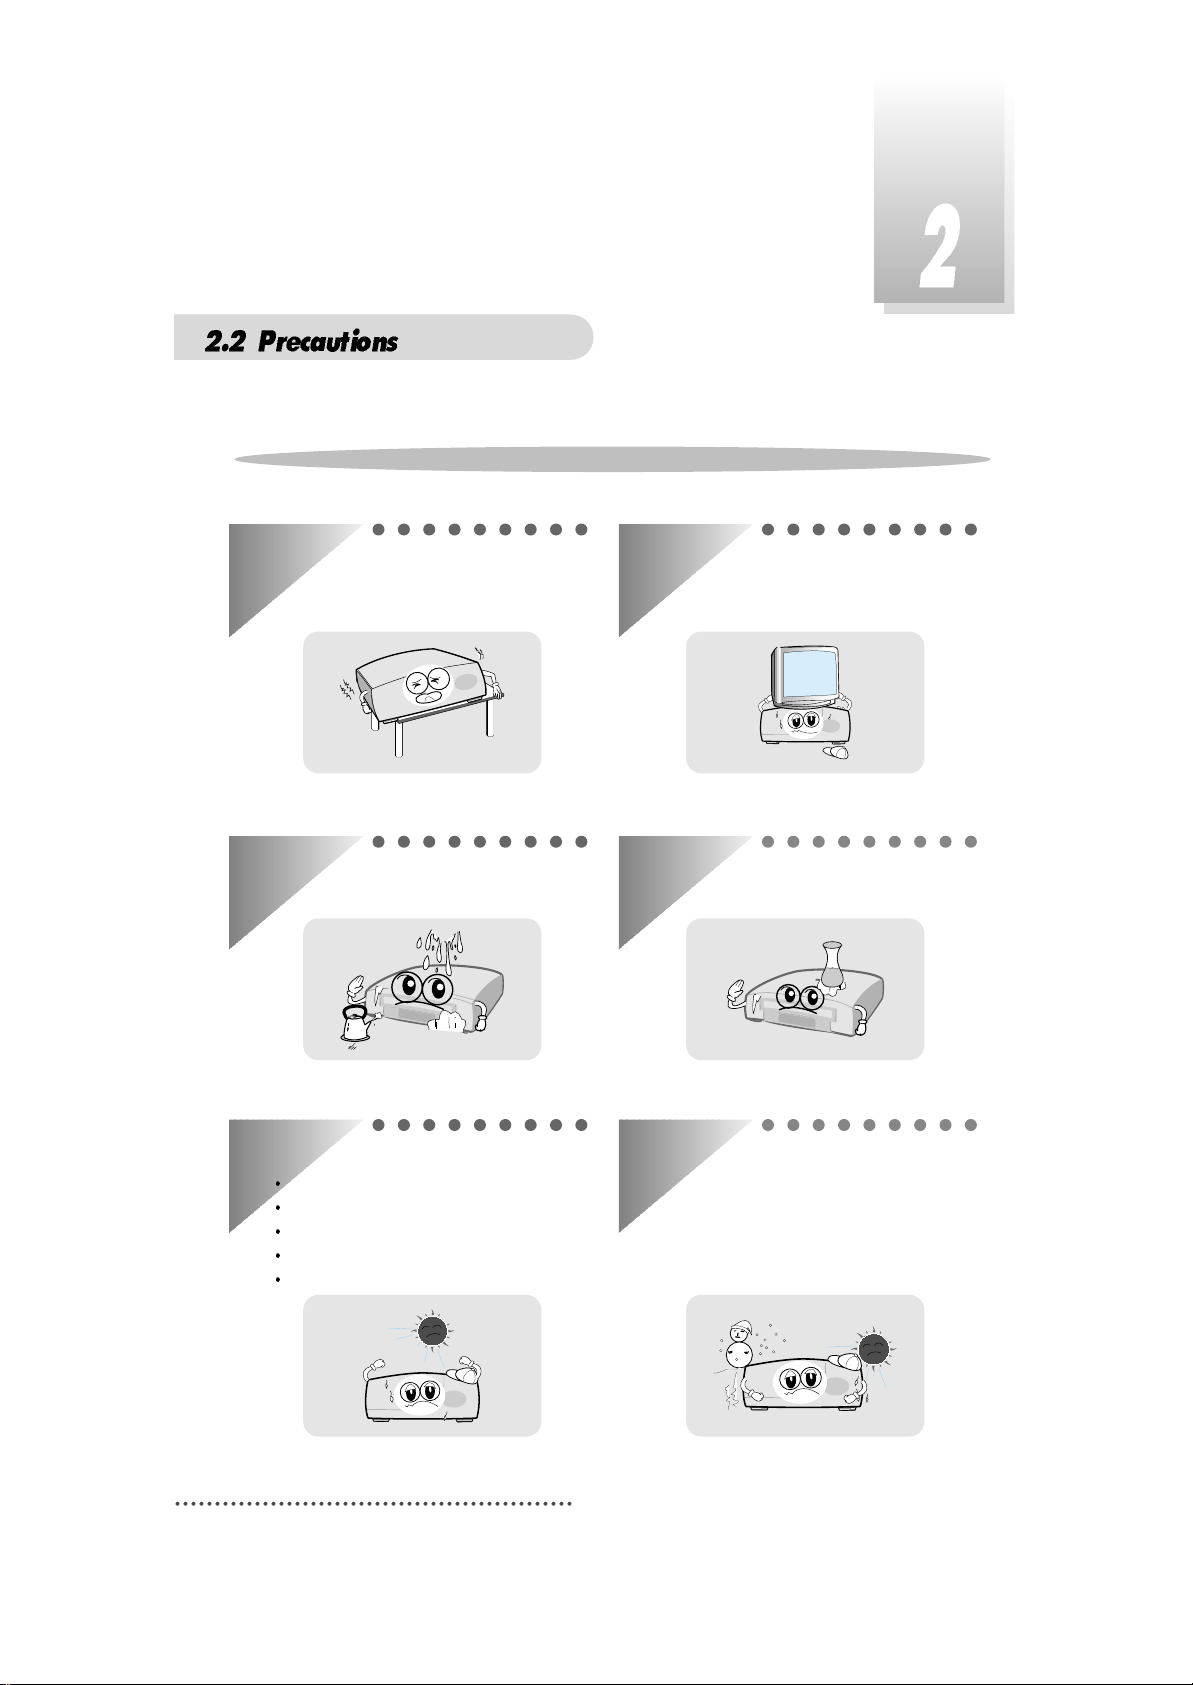
When installing the unit
Install the unit horizontally. An uneven
installation may cause the unit to be
damaged.
Do not put heavy items such as a TV on the
unit. That may cause the unit to be
damaged.
Moving the unit to a hot area from a cold
one will cause condensation.
Do not operate the unit for one or two hours
or until it has dried completely.
Where it is subject to vibrations
Where it is exposed to direct sunlight
Where there is humidity
Where the temperature is too high or too low.
Where there is no ventilation
Do not install the unit:
Do not put water holding items shch as vase
on the unit.
Do not leave the unit where the water
drops or splashs.
Page 9
5
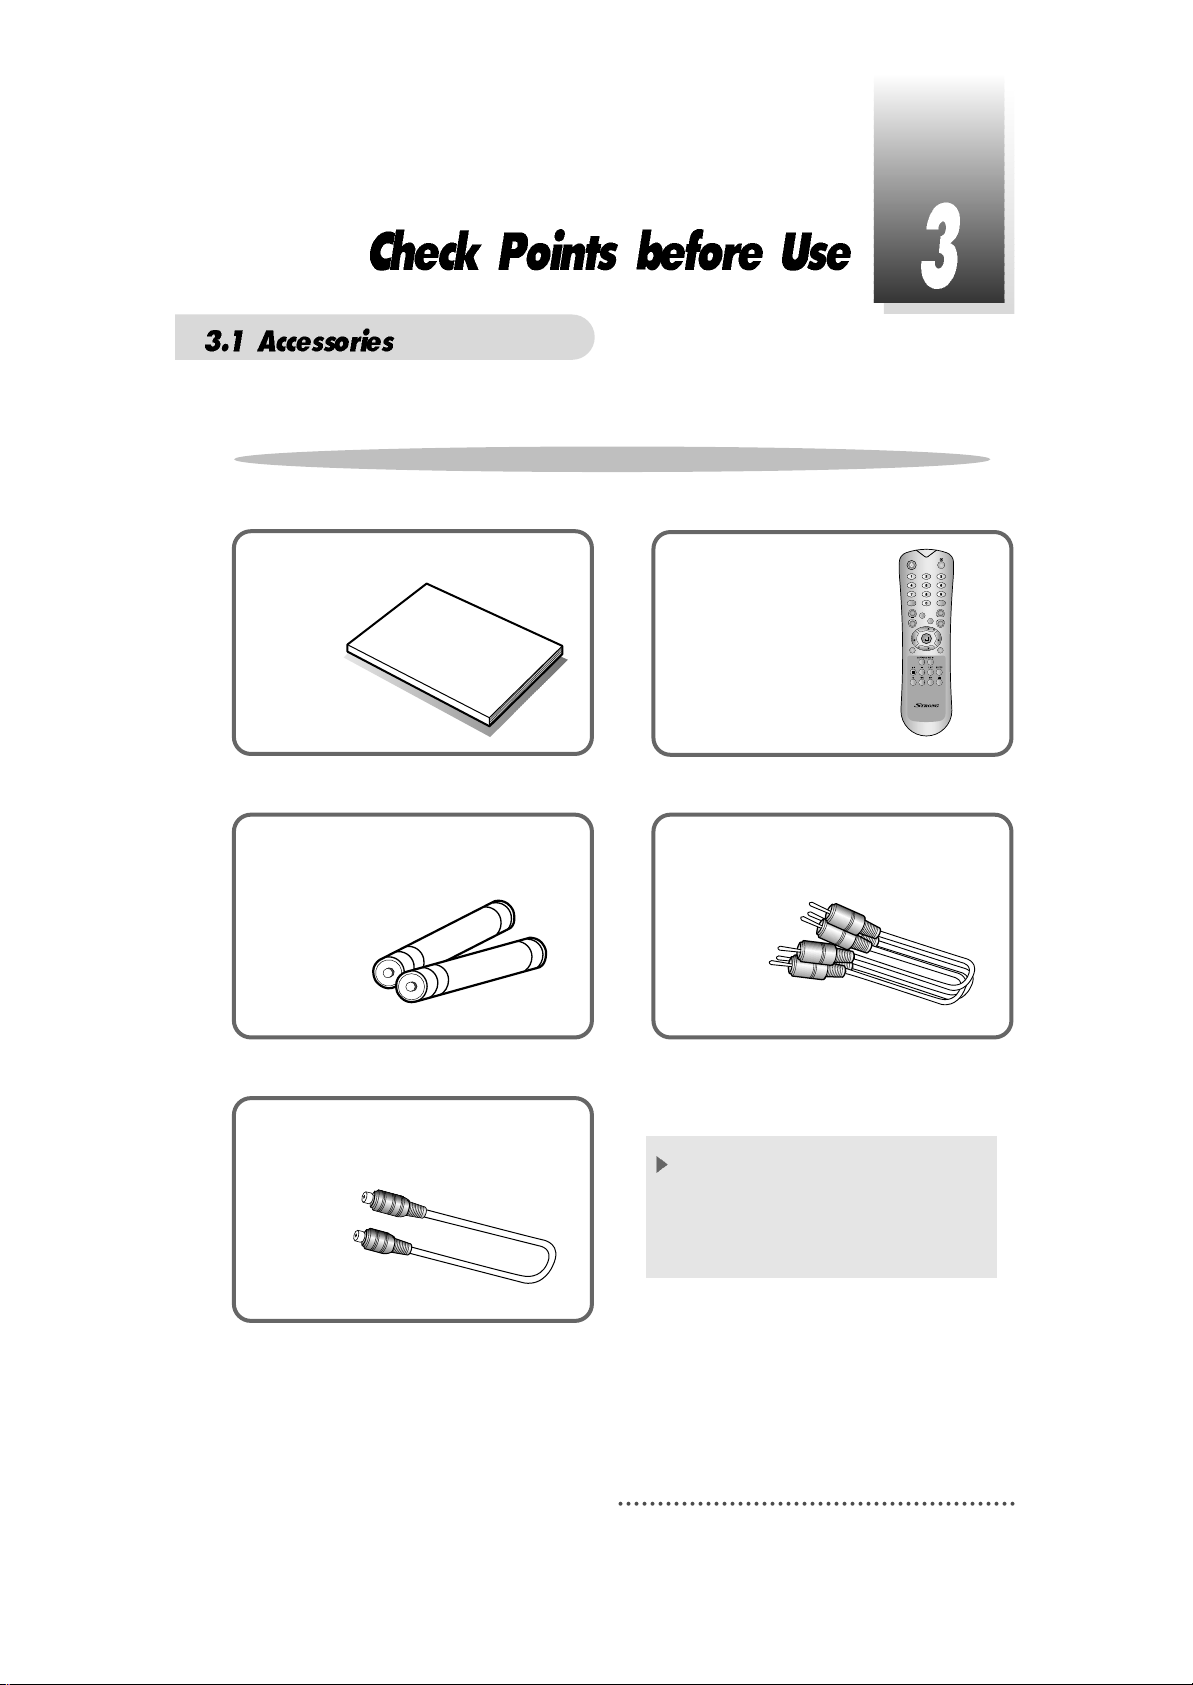
User's manual : 1
U
ser's m
a
nu
al
Remote control : 1
Batteries (AAA type) : 2
RF Cable(0.25M) : 1
RCA video/audio cable : 1
If any accessories listed above are
missing, contact the sales
representative where you purchased
this unit.
Accessories of the Unit
QZ-
ABC
DEF
GHI JKL MNO
PRS
TUV
WXY
INFO
AUDIO
GUIDE
CH.LIST
AUX IN
RECALL
TV/RADIO
TV/STB
MENU
EXIT
CH
VOLVOL
CH
Page 10
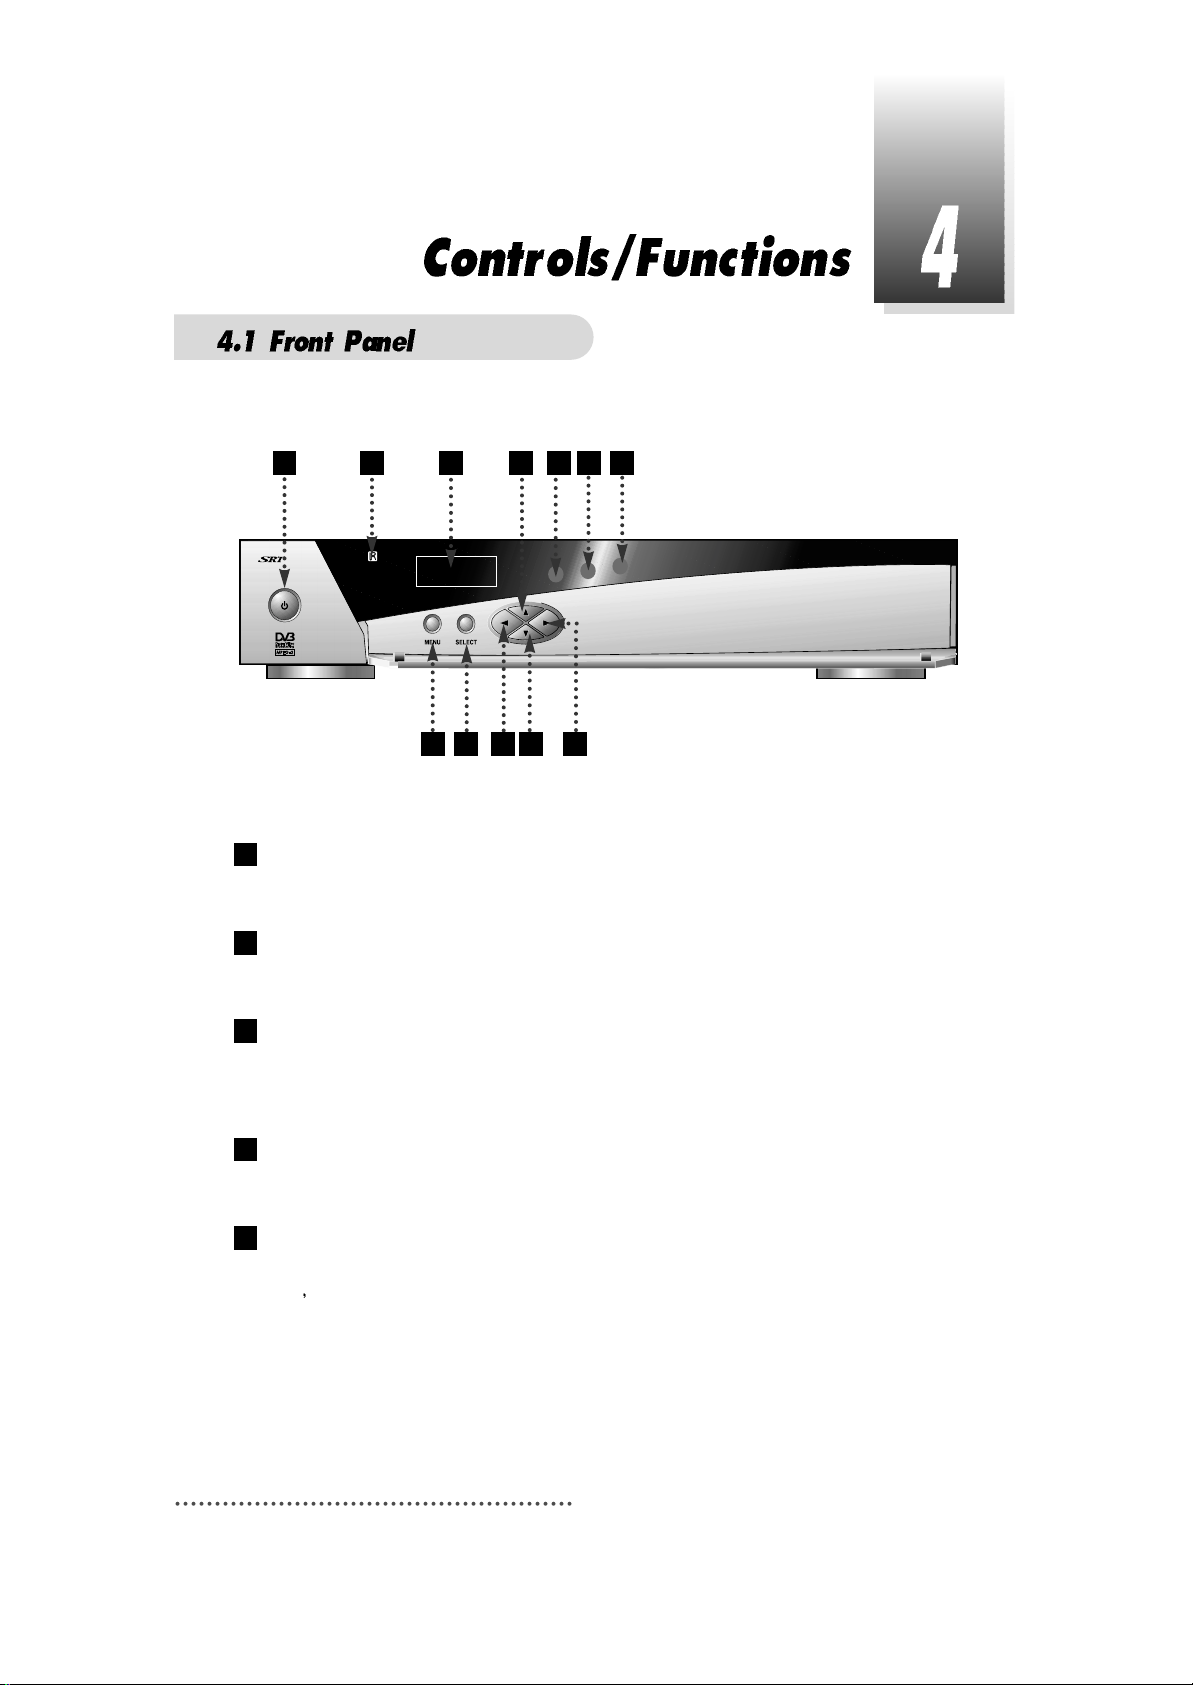
6
Power
To switch the receiver in “standby” mode or in power on mode.
Remote Sensor
Receives the infrared signal from remote control.
Channel Display(4 Digit)
- When you connect the power line of the receiver, the current time is displayed.
- After programming, the program number is displayed.
Menu
To launch or terminate the menu application.
Select
To activate a highlighted item or go to next level on hypertext menu or confirm the
user
s action.
5
4
3
2
1
5390
1 2
4 5 6 9 7
3 8
11 1210
Page 11
7
- Vol. /
To adjust the volume level or change the value of an item with preprogrammed
values. The Key
can be used as a backspace to cancel the numerical input.
- CH.
/
To change channel or cursor position on the application screen.
Remote Control indication light
Flashes orange when receiving data from remote control.
TV/Sat. mode Indication lamp light
Turn on green while receiving the signals from terrestrial UHF/VHF antenna.
Standby/Power on Indication light
Turn on red while in the “standby” mode and turn off the red light while in the power on
mode.
Slot A, B
PCMCIA-module : provided by a broadcaster for watching scrambled programs.
Smart Card Slot
Smart Card : provided by a broadcaster for watching IRDETO scrambled programs.
12
11
10
98
76
Page 12
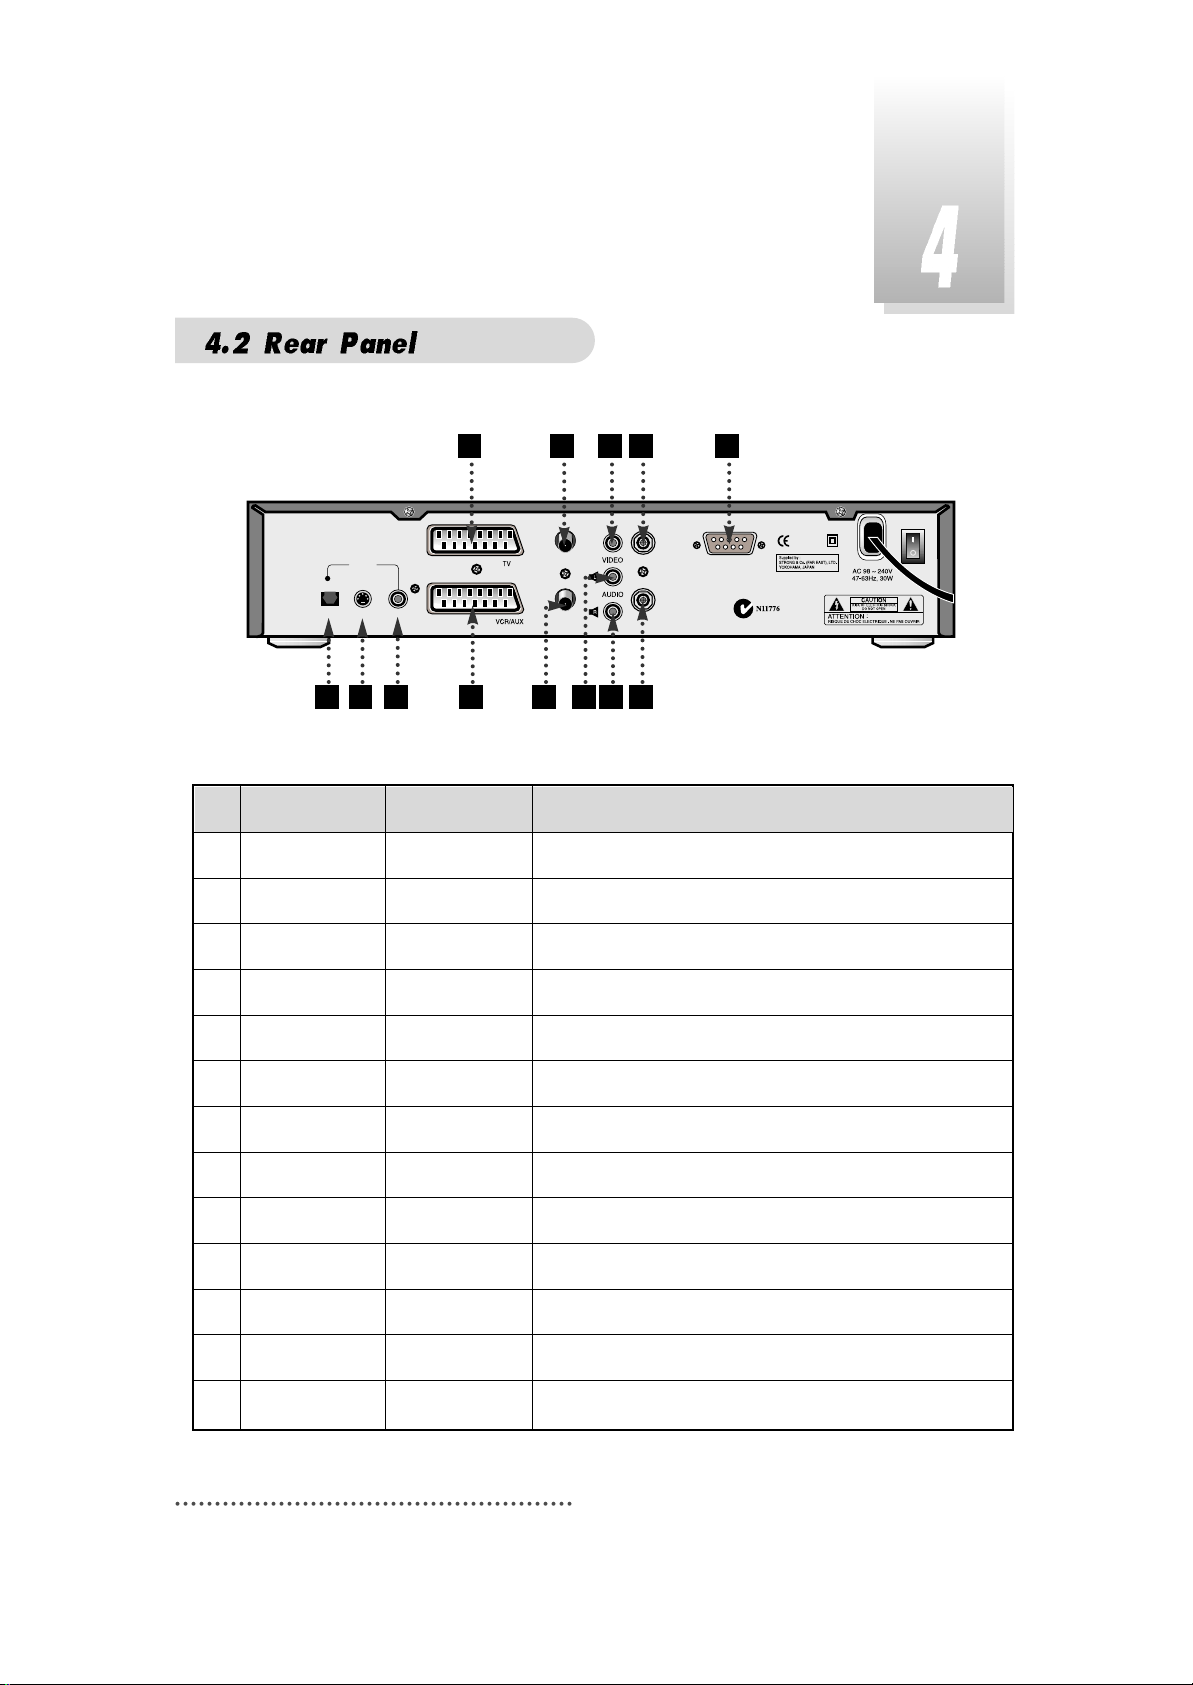
8
4
COAXIAL
RF LOOP IN
TV ANT
IN
RF LOOP
OUT
RS-232C
RF OUT
UHF 21-69
OPTICAL S-VIDEO
S/PDIF
1 2 3 5 7 9
10 12
6 8
11 13
No. Name Connector Function
1 DIGITAL AUDIO Optical port Digital audio output.
2 S-VIDEO S-Video jack S-Video output.
3 DIGITAL AUDIO RCA cinch Digital Audio Output.
4 TV SCART SCART SCART output to TV.
5 VCR/AUX SCART SCART SCART output to VCR, analog receiver or Hi-Fi.
6 RF LOOP IN
IEC 169-2 female
Input from general aerial antenna or analog cable jack
7
RF OUT UHF 21-69
IEC 169-2 male Output to TV.
8 VIDEO RCA cinch Composite video output.
9 AUDIO L RCA cinch Left audio output.
10 AUDIO R RCA cinch Right audio output.
11 TV ANT IN
IEC 169-2 female
Terrestrial steam input from antenna to digital tuner.
12 RF LOOP OUT IEC 169-2 male Terrestrial steam loop-through out from digital tuner.
13 RS-232C DB-9 serial port.
Page 13
9
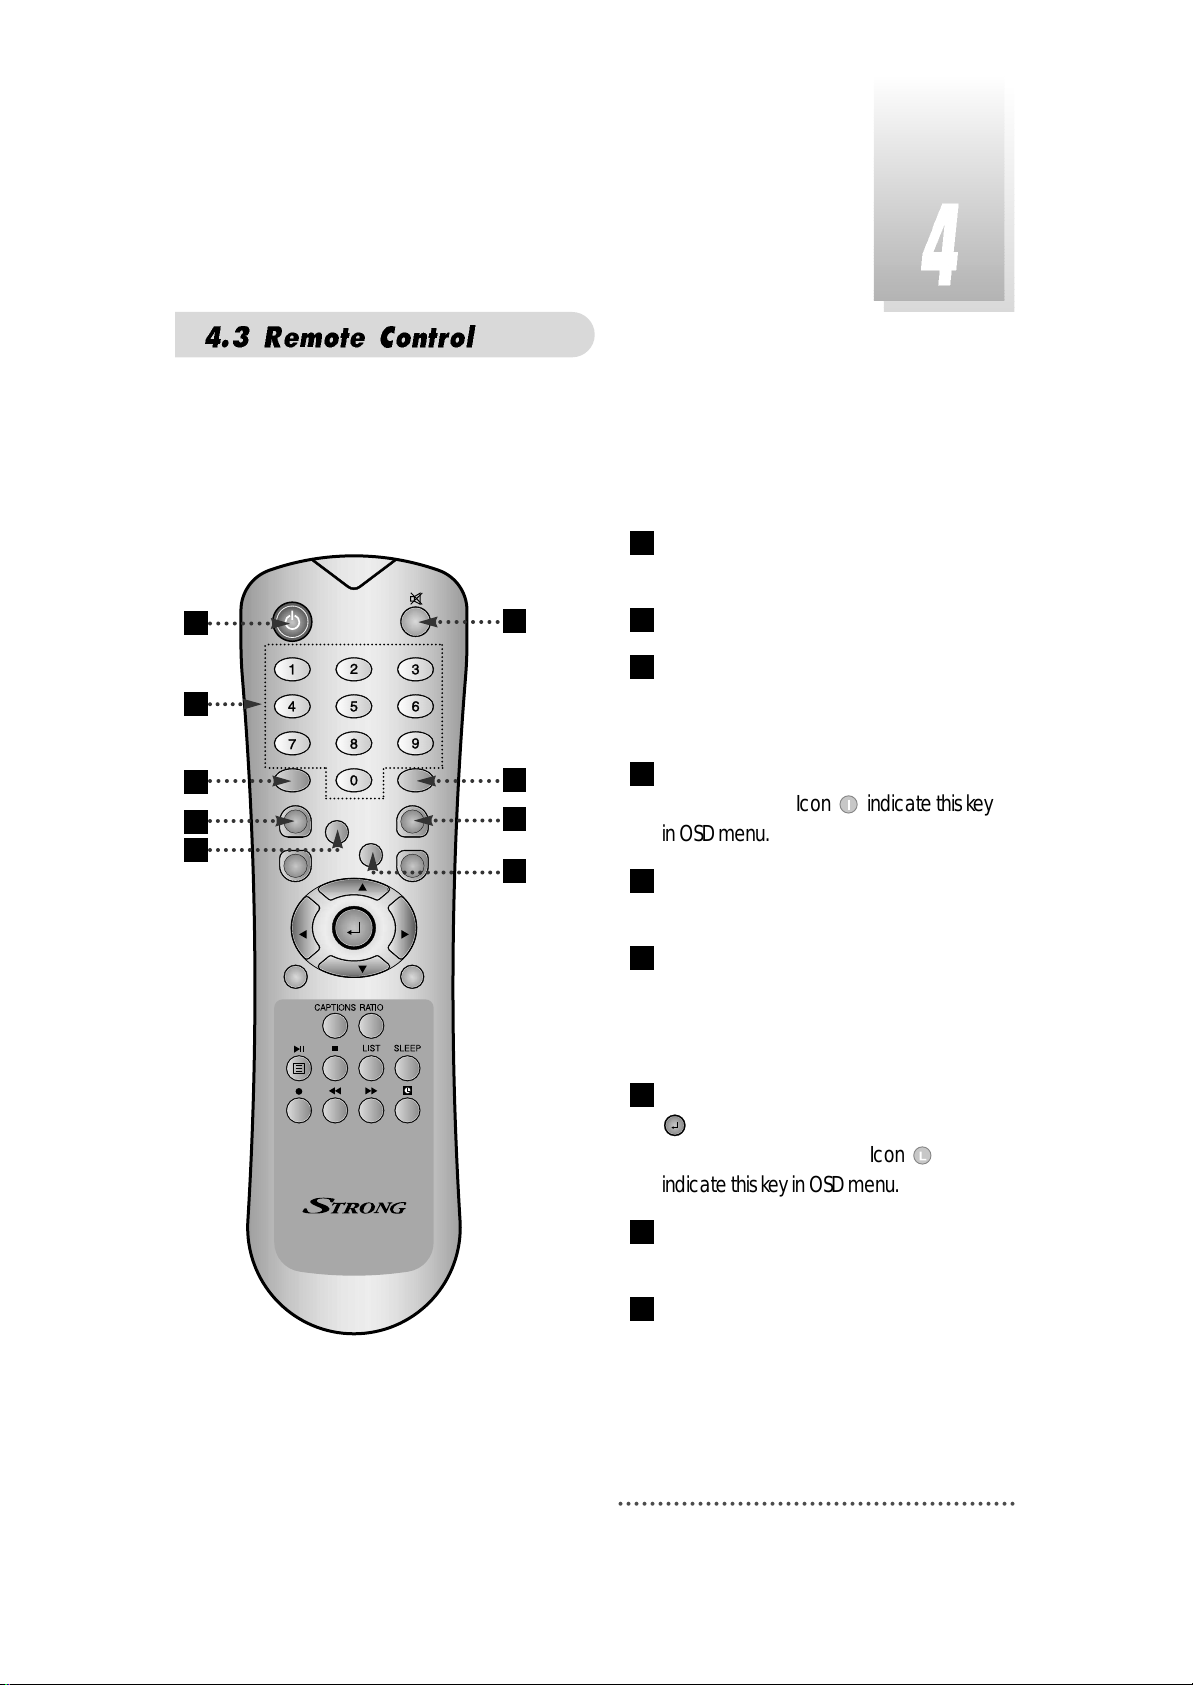
POWER :To switch into ‘standby’ or ‘power
on’ mode.
MUTE: To turn the sound on/off.
Numeric Keys(0-9): To select channels
and input of channel numbers or
characters.
INFO.:To display the information of the
current channel. Icon indicate this key
in OSD menu.
AUDIO:To change the audio track,
stereo-mono mode.
GUIDE
:
(EPG : Electronic Program
Guide)
To watch program information. Press once
more to return to normal mode.
CH LIST:To watch the channel list. Press
to confirm or press EXIT to return to
previous chosen channel. Icon
indicate this key in OSD menu.
AUX IN : To select the output mode of
scart connector.
RECALL :To return to the previous chosen
channel.
9
8
7
6
5
4
3
2
1
QZ-
ABC
DEF
GHI JKL MNO
PRS
TUV
WXY
INFO
AUDIO
GUIDE
CH.LIST
AUX IN
RECALL
TV/RADIO
TV/STB
MENU
EXIT
CH
VOLVOL
CH
1
3
4
6
8
2
5
7
9
Page 14
10
17
19
18
20
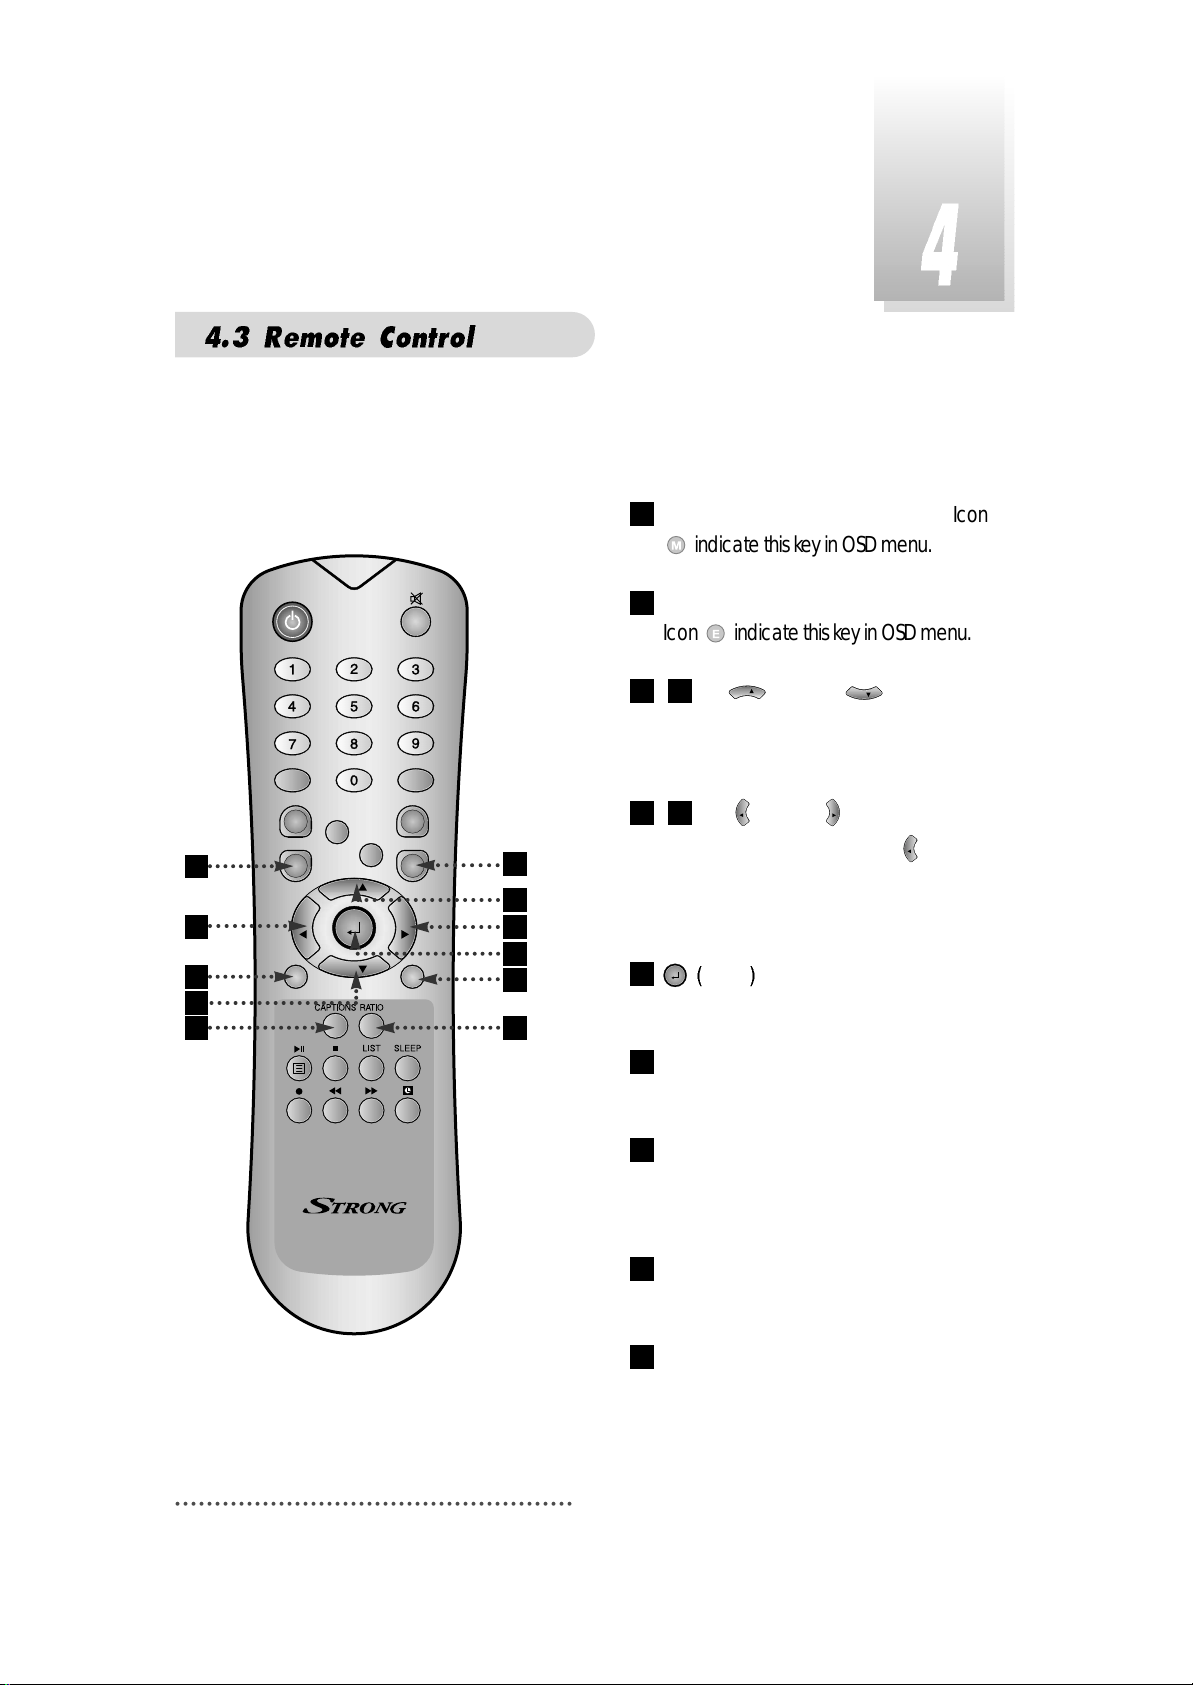
MENU: To enter/exit the main menu. Icon
indicate this key in OSD menu.
EXIT :To return to previous status or menu.
Icon indicate this key in OSD menu.
- Up & Down : To change
the value of a selected item with
preprogrammed values in menu.
- Left & Right : To move the
cursor up and down in menu. can be
used as a backspace to cancel the
numerical input.
ENTER
:
To select an item or to
confirm a menu. Pause function.
TV/RADIO :To switch between the TV and
radio channels.
TV/STB :To toggle the TV input A/V mode
between the digital STB mode and RF
mode.
CAPTIONS :To enable or disable subtitle,
hot key function.
RATIO : To change screen size (4X3, 16X9),
hot key function.
20
19
18
17
16
VOL
VOL
VOL
1514
CH
CH
1312
11
10
10
11
14
15
16
12
13
QZ-
ABC
DEF
GHI JKL MNO
PRS
INFO
GUIDE
MENU
TV/RADIO
TUV
AUX IN
RECALL
CH
CH
WXY
AUDIO
CH.LIST
EXIT
VOLVOL
TV/STB
Page 15
11
QZ-
ABC
DEF
GHI JKL MNO
PRS
TUV
WXY
INFO
AUDIO
GUIDE
CH.LIST
AUX IN
RECALL
TV/RADIO
TV/STB
MENU
EXIT
CH
VOLVOL
CH
21
22
25
26
24
23
28
27
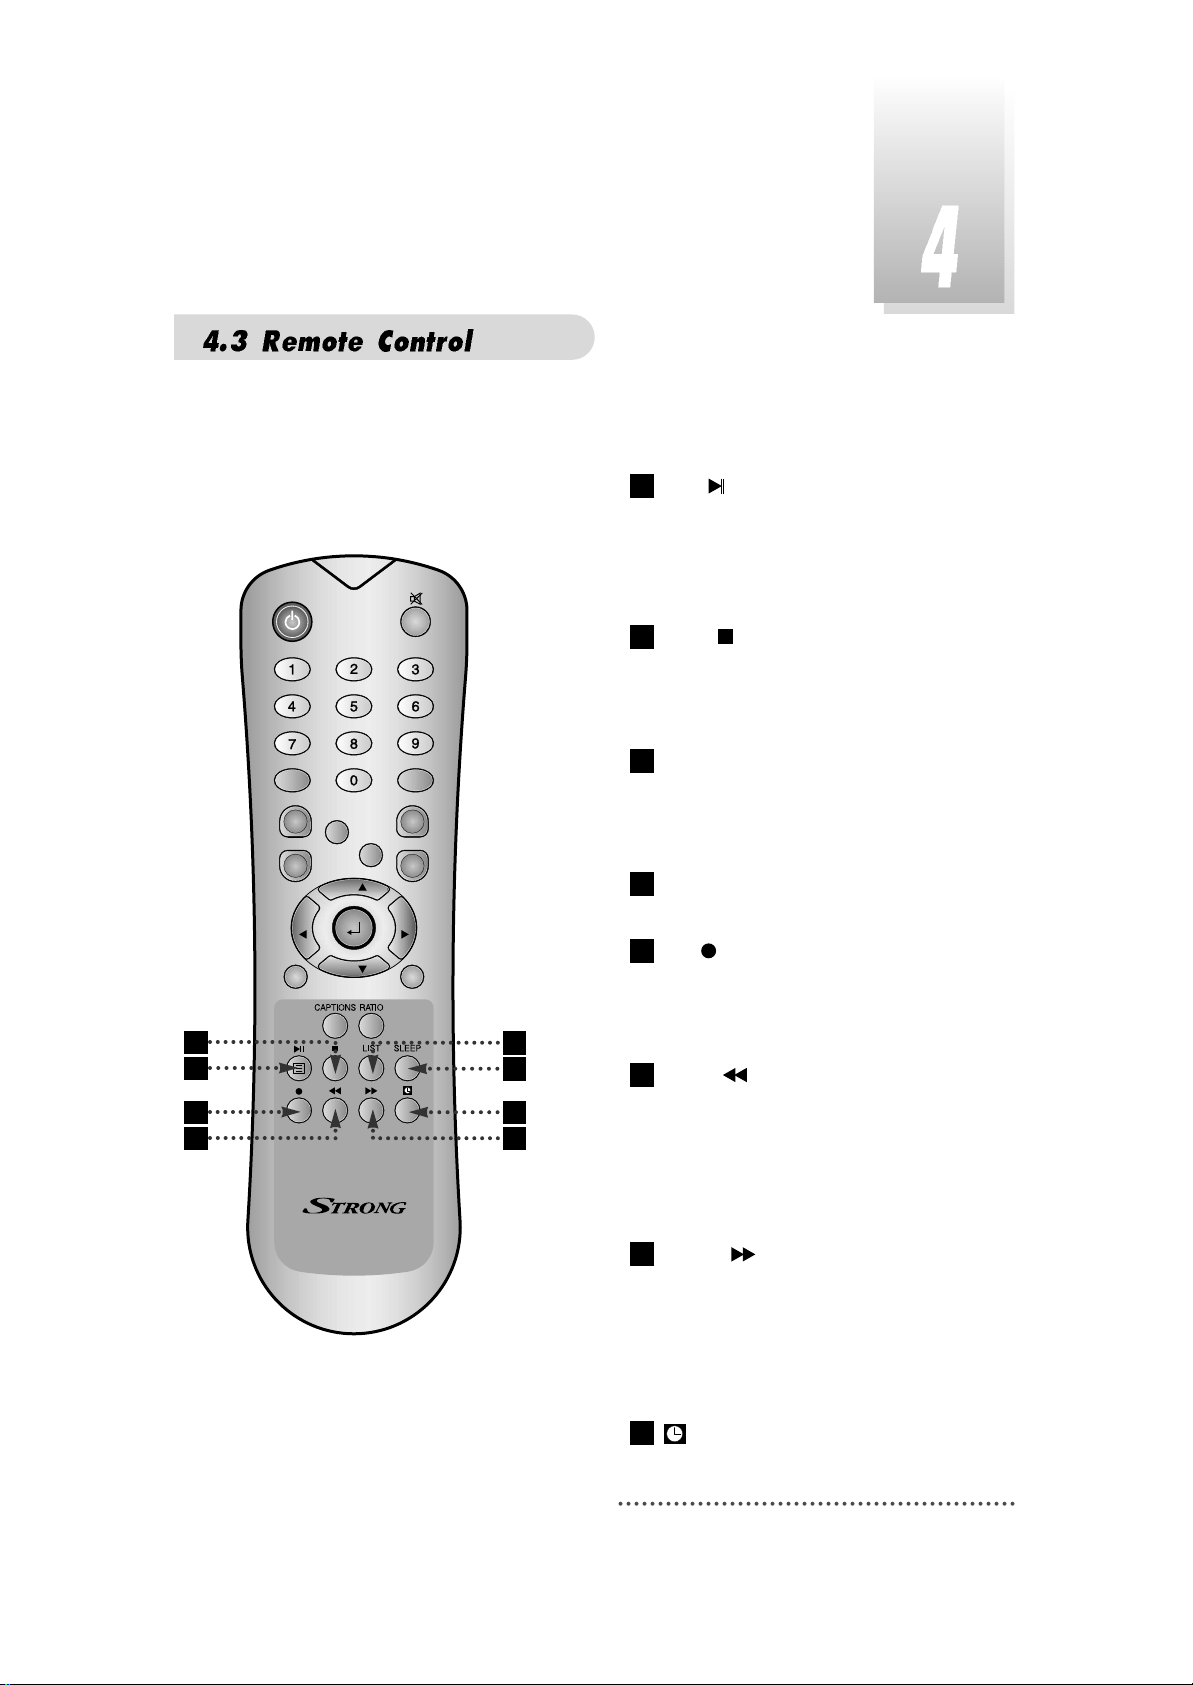
BLUE :To delete a channel from the
Channel List menu. To show extended
program information in the EPG menu. To
see Teletext Service Data. To play or
pause the stored programs on HD.
WHITE :To add a new channel to the
Channel List menu. To stop the played
programs on HD. To direct record current
channel with pause function.
ORANGE (LIST
)
:
To see variant channel
lists for user's convenience in the Channel
List menu. To watch the list of stored
programs on HD.
SLEEP :To switch off the receiver automati-
cally after between 30 and 150 minutes.
RED :To setup favorite channel lists in
the Channel List menu. To record the
program on to HD. To delete the stored
programs on HD or set skip points.
GREEN :To lock channel in the
Channel List menu. To show current/next
program information in the EPG menu. To
play the stored programs on HD with fast
rewind mode. Simply set up channel list
mode.
YELLOW :To move a channel to other
position in the Channel List menu. To show
program schedule information in the EPG
menu. To play the stored programs on HD
with fast foward mode. Simply set up
favorite channel list.
:
Automatic power on/off, hot key
function.
28
27
26
25
24
23
22
21
Page 16
12
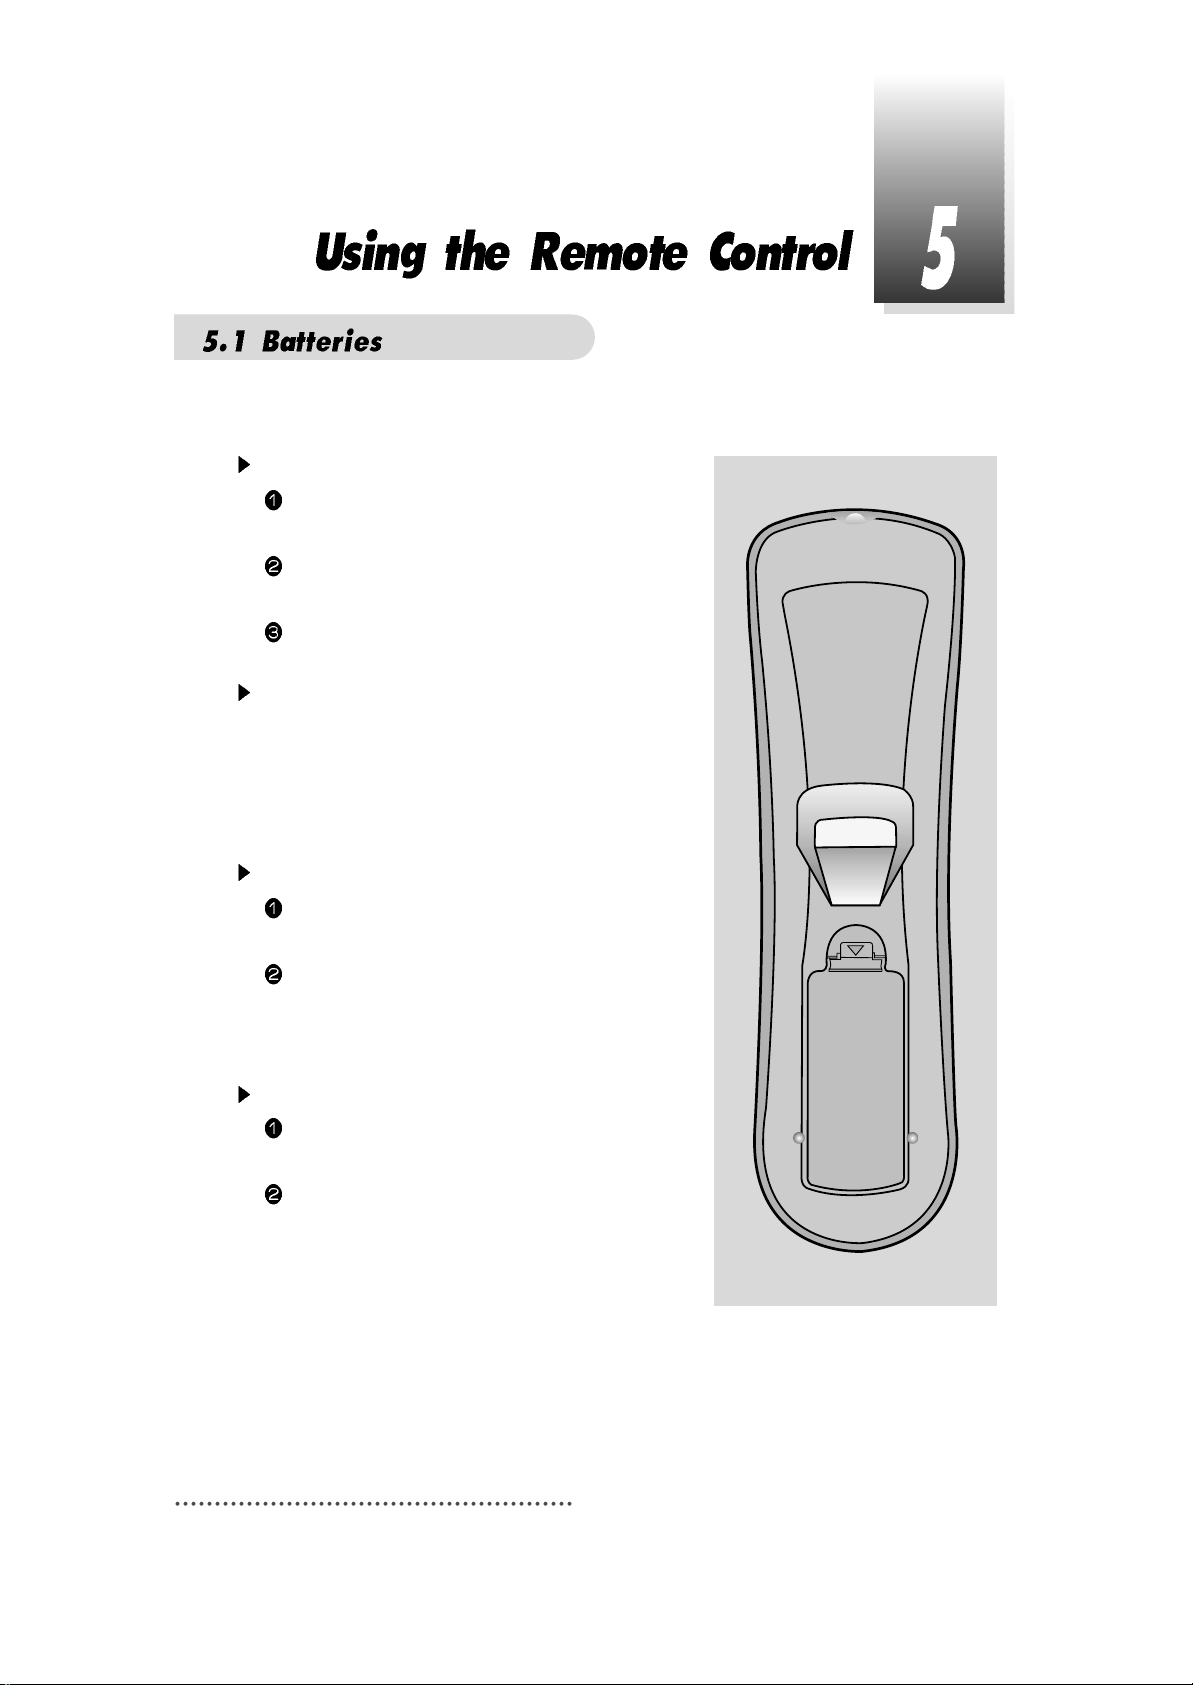
How to insert a battery
Open the cover at the top of the rear side
of the remote control.
Insert two AAA type batteries(1.5V) to be
aligned with appropriate +/- polarity.
Close the cover completely.
When to replace a battery
If the operational range of remote control is
getting smaller, it indicates batteries are
almost consumed.
Replace both batteries together.
How to replace a battery
Check +/- polarities and insert batteries to
be aligned with appropriate +/- polarity.
Even if old and new batteries are the same
in size, do not use batteries with different
characteristics.
Accident prevention
Do not recharge, heat or disassemble the
battery. Do not cross +/- polarities.
If remote controller is not going to be used
for a long time, take the batteries out.
Page 17
13
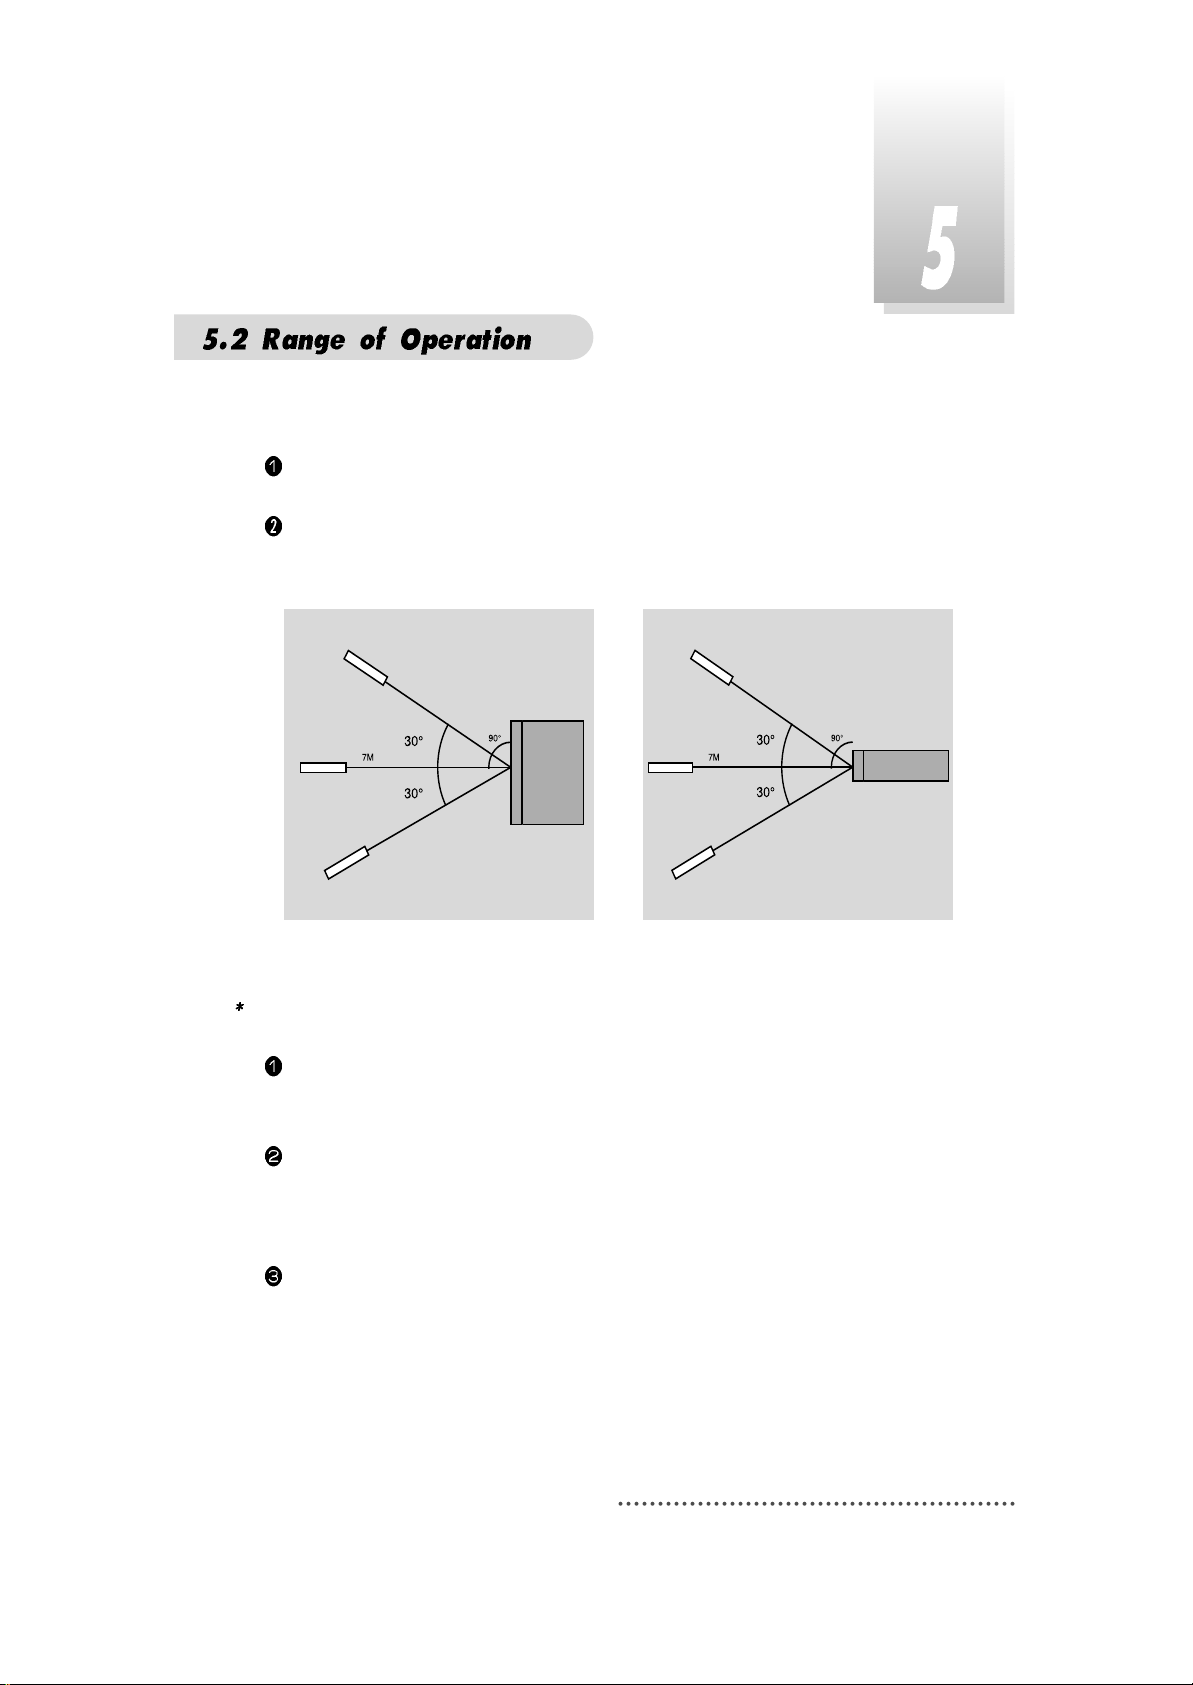
The remote controller can be detected by the receiver within an angle of 30
degrees to the left or right.
The transmission distance of the remote control is 7m in direct line of sight.
Notes
When the remote control is not operative
Replace batteries with new ones and check AC power plug on the receiver.
Abnormal operation
Disturbance from peripheral devices might occur. Ensure that other products which
might cause interference are placed further away from the receiver.
Notes for handling
If exposed to heat or water, the main body and the remote control may be
damaged, so be careful.
Page 18
14
COAXIAL
RF LOOP IN
TV ANT
IN
RF LOOP
OUT
RS-232C
RF OUT
UHF 21-69
OPTICAL S-VIDEO
S/PDIF
COAXIAL
RF LOOP IN
TV ANT
IN
RF LOOP
OUT
RS-232C
RF OUT
UHF 21-69
OPTICAL S-VIDEO
S/PDIF
Page 19
15
COAXIAL
RF LOOP IN
TV ANT
IN
RF LOOP
OUT
RS-232C
RF OUT
UHF 21-69
OPTICAL S-VIDEO
S/PDIF
COAXIAL
RF LOOP IN
TV ANT
IN
RF LOOP
OUT
RS-232C
RF OUT
UHF 21-69
OPTICAL S-VIDEO
S/PDIF
Page 20
16
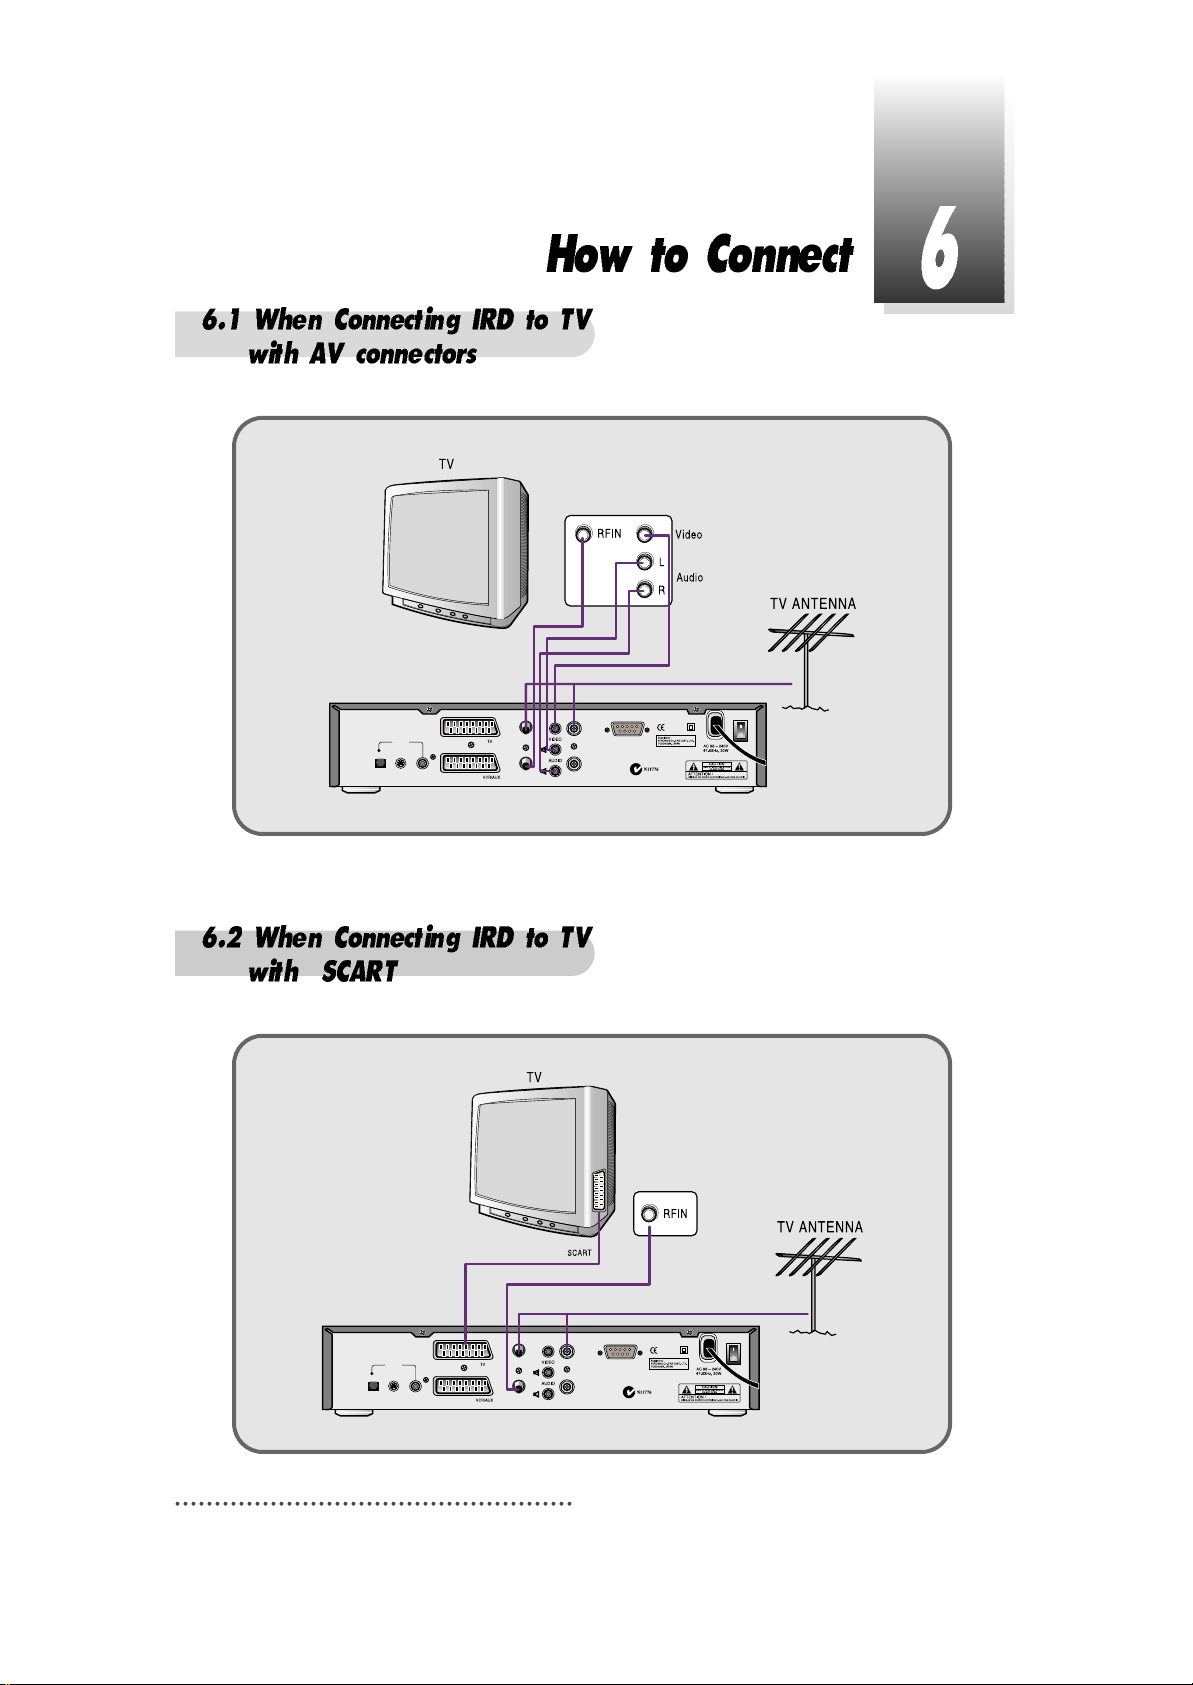
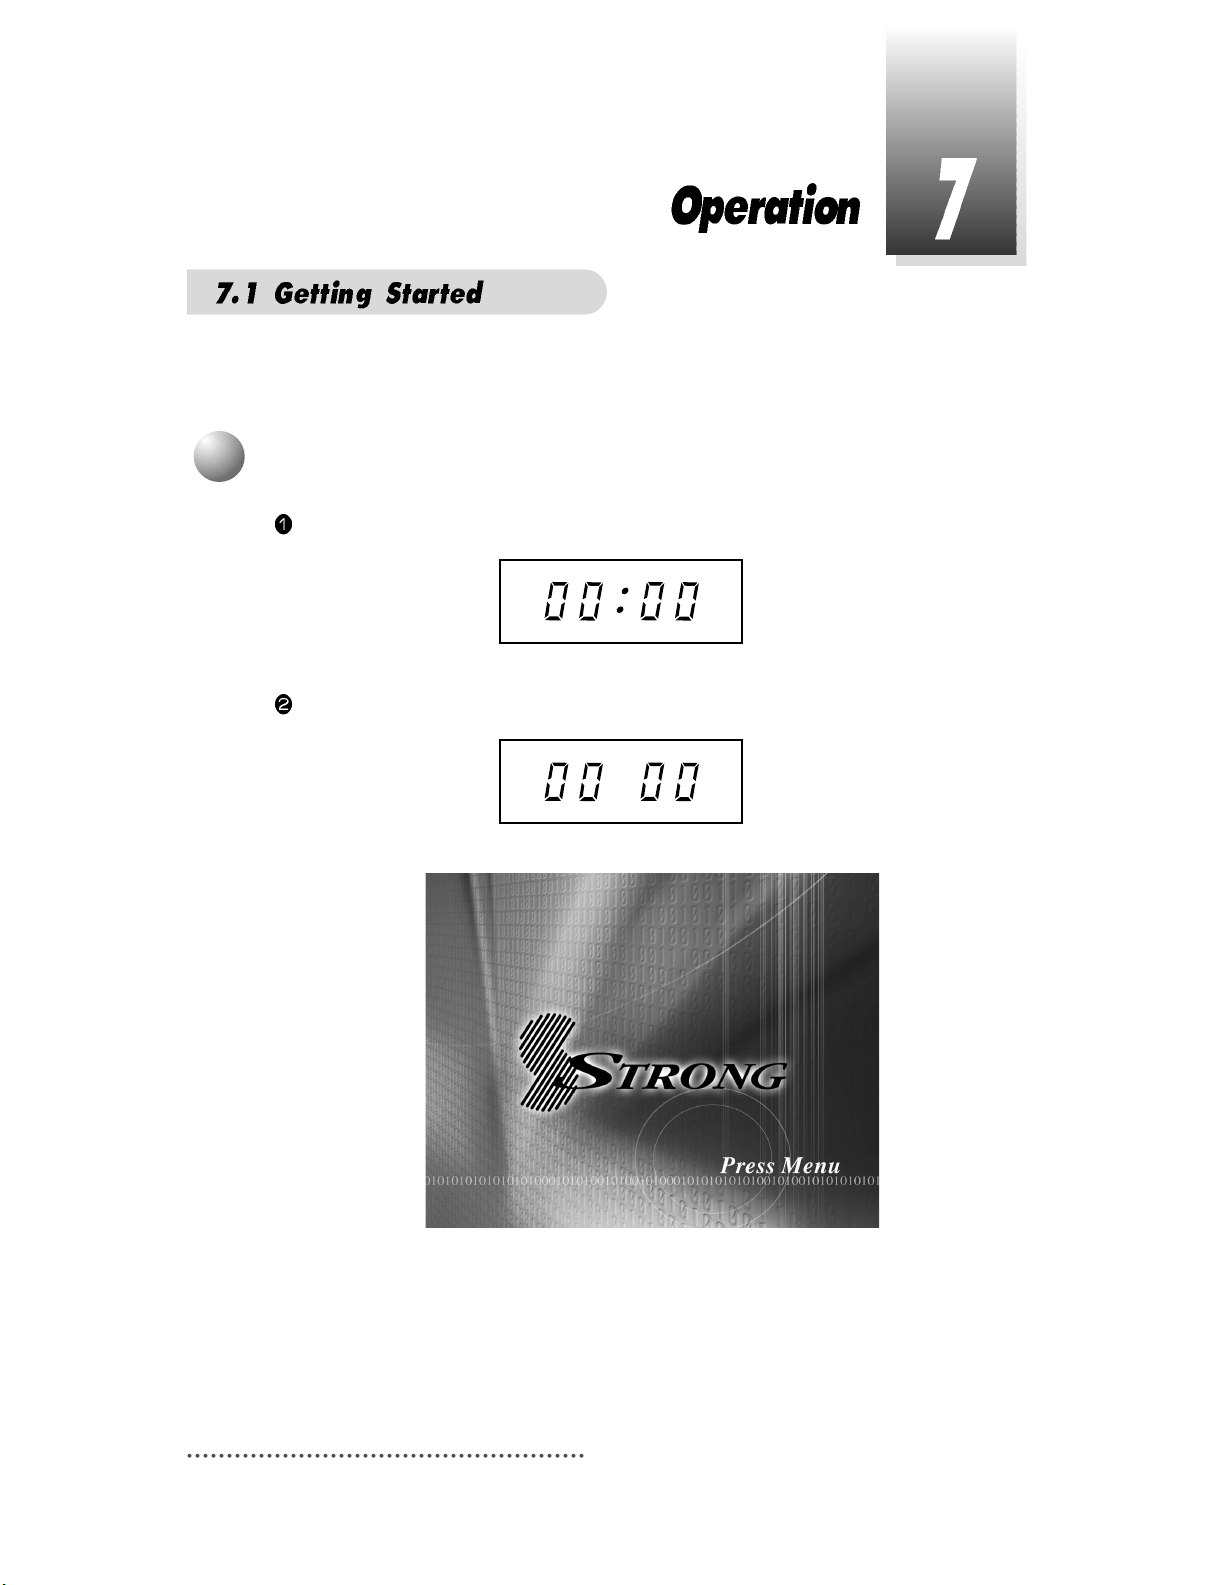
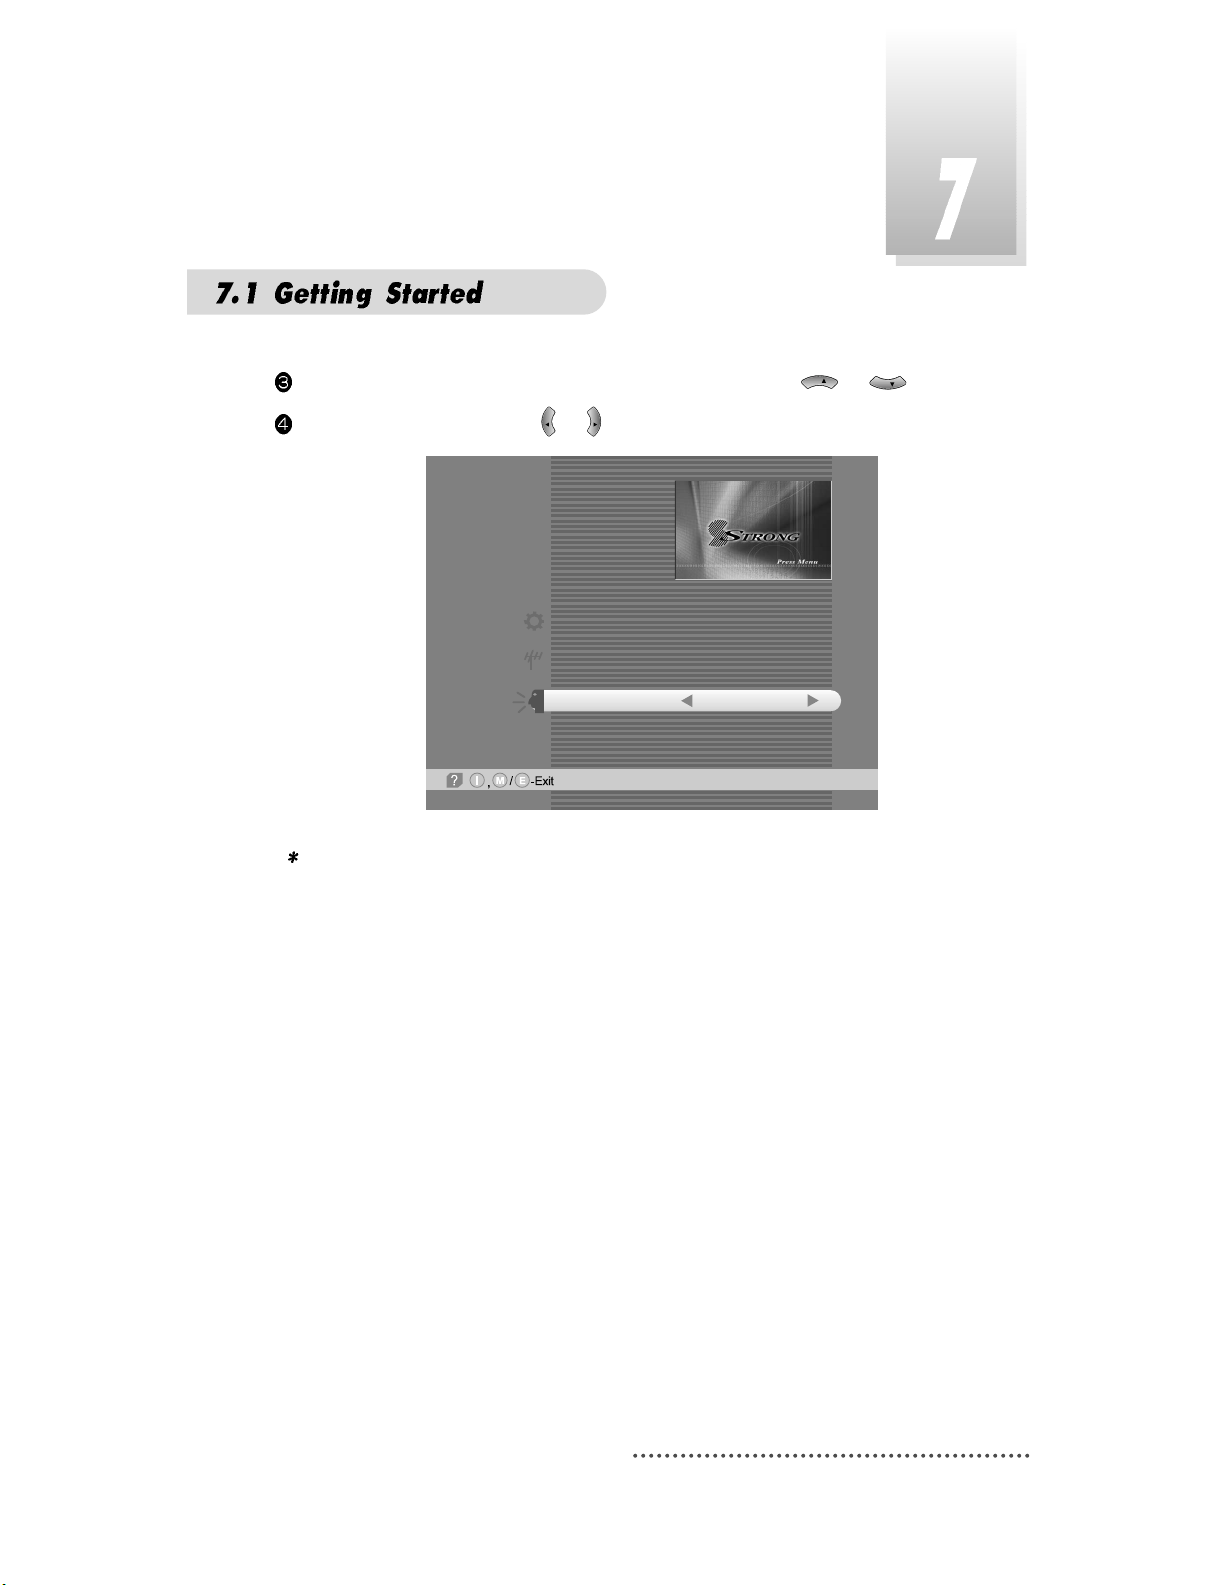
After your receiver is powered up, proceed with installation as follows:
When you plug in AC power, the following will be displayed on the front.
Press POWER on remocon, the LED number will be displayed as follows;
Screen
1
Menu Language Setting
Page 21
Press MENU key and position cursor on ‘Language' column with or .
Select language you want with or .
Screen
Note : Languages displayed in 'Language' column are supported by your receiver.
VOL
VOL
CH
CH
Main Menu
System Parameters
Installation
Language
English
17
Page 22
If you want to know how to use current part in the menu, use ‘help' function.
Select a content in the menu.
For example, if you want to know about the installation menu, select installation.
Screen
Press INFO. Then you can see the help window of the selected content.
Screen
2
Help
Main Menu
-Next,
System Parameters
Installation
Language
English
Main Menu
-Next,
System Parameters
Installation
Language
English
18
Page 23
You need to check signal state of your receiver.
Press MENU key.
Select ‘Installation’ with or , and press .
Screen
CH
CH
3
Tuner State
Select ‘Tuner State’ with or and press .
Screen
CH
CH
-Next,
Installation
Tuner State
Automatic Full Scan
Manual Scan
Factory Set
Software Download
Tuner State
-Prev.-Main,
Tx Mode
Bandwidth
Guard Interval
Mapping
Auto
7MHz
1/32
64-QAM
CH 7
Auto
184.5 MHz
Tuner Lock
FEC ;
Level
59% 75%
Qual.
7/8
19
Note : Enter 4-Digit password if need arise. The defaul t p assw ord is ‘0000’.
Page 24
20
After checking ‘Tuner State’, execute ‘Automatic Full Scan’.
Then you can get all program in the pre-programmed Channels. This function can also
be used to get the latest program data while receiver is in use.
Through this function, the receiver searches for all the available program and saves
them in the memory.
Press MENU key.
Select ‘Installation’ with or , and press .
Screen
CH
CH
4
Automatic Full Scan
Installation
Tuner State
Automatic Full Scan
Manual Scan
Factory Set
Software Download
-Next, -Prev.
Select the channel you want with or .
When the channel is selected, you can check the reception status of the signal. If the
reception signal status is bad, adjust antenna to get the following result.
VOL
VOL
Tuner Lock FEC 1/2, 2/3, 3/4, 5/6 or 7/8
Level over 30% Quality over 40%
Level Indicating selected channel signal strength level.
Quality Indicating signal to noise ratio.
Select ‘Automatic Full Scan’ with or , and press .
While scanning, you can see the following menu on the screen.
CH
CH
Page 25
21
Screen
Automatic Full Scan
-Select, -Main,M-Prev.
E
Bad
5%
TV: 0 Scanning:2% Radio: 0
366
367
368
369
370
371
372
373
374
BBC TWO
BBC ONE
BBC NEWS 24
BBC CHOICE
BBC PARLMNT
BBC PARLMNT
BBC PARLMNT
BBC PARLMNT
BBC PARLMNT
CH 7. 184.5 MHz
Auto 7 MHz
When scanning is finished, you can see the following menu on the screen.
Screen
After the scanning process, the first program of the last scanned channel will be dis-
played on the back screen.
Press , to finish the process. Then select a program and press to watch a pro-
gram or press MENU key or EXIT key.
Note : Now you have com pleted all steps needed for watching p ro gram s.
If you could not see the program after finishing t h ese procedure s,
please contact your engineer or representat ive.
Automatic Full Scan
-Watch, /M-Prev.
E
-Page Up/Down,
Bad
5%
TV: 20
Scanning:100%
Radio: 5
370
371
372
373
374
BBC PARLMNT
BBC PARLMNT
BBC PARLMNT
BBC PARLMNT
BBC PARLMNT
CH 69. 816.5 MHz
Auto 7 MHz
366
367
368
369
BBC TWO
BBC ONE
BBC NEWS 24
BBC CHOICE
Network scan is done.
Press Key.
Q
Page 26
22
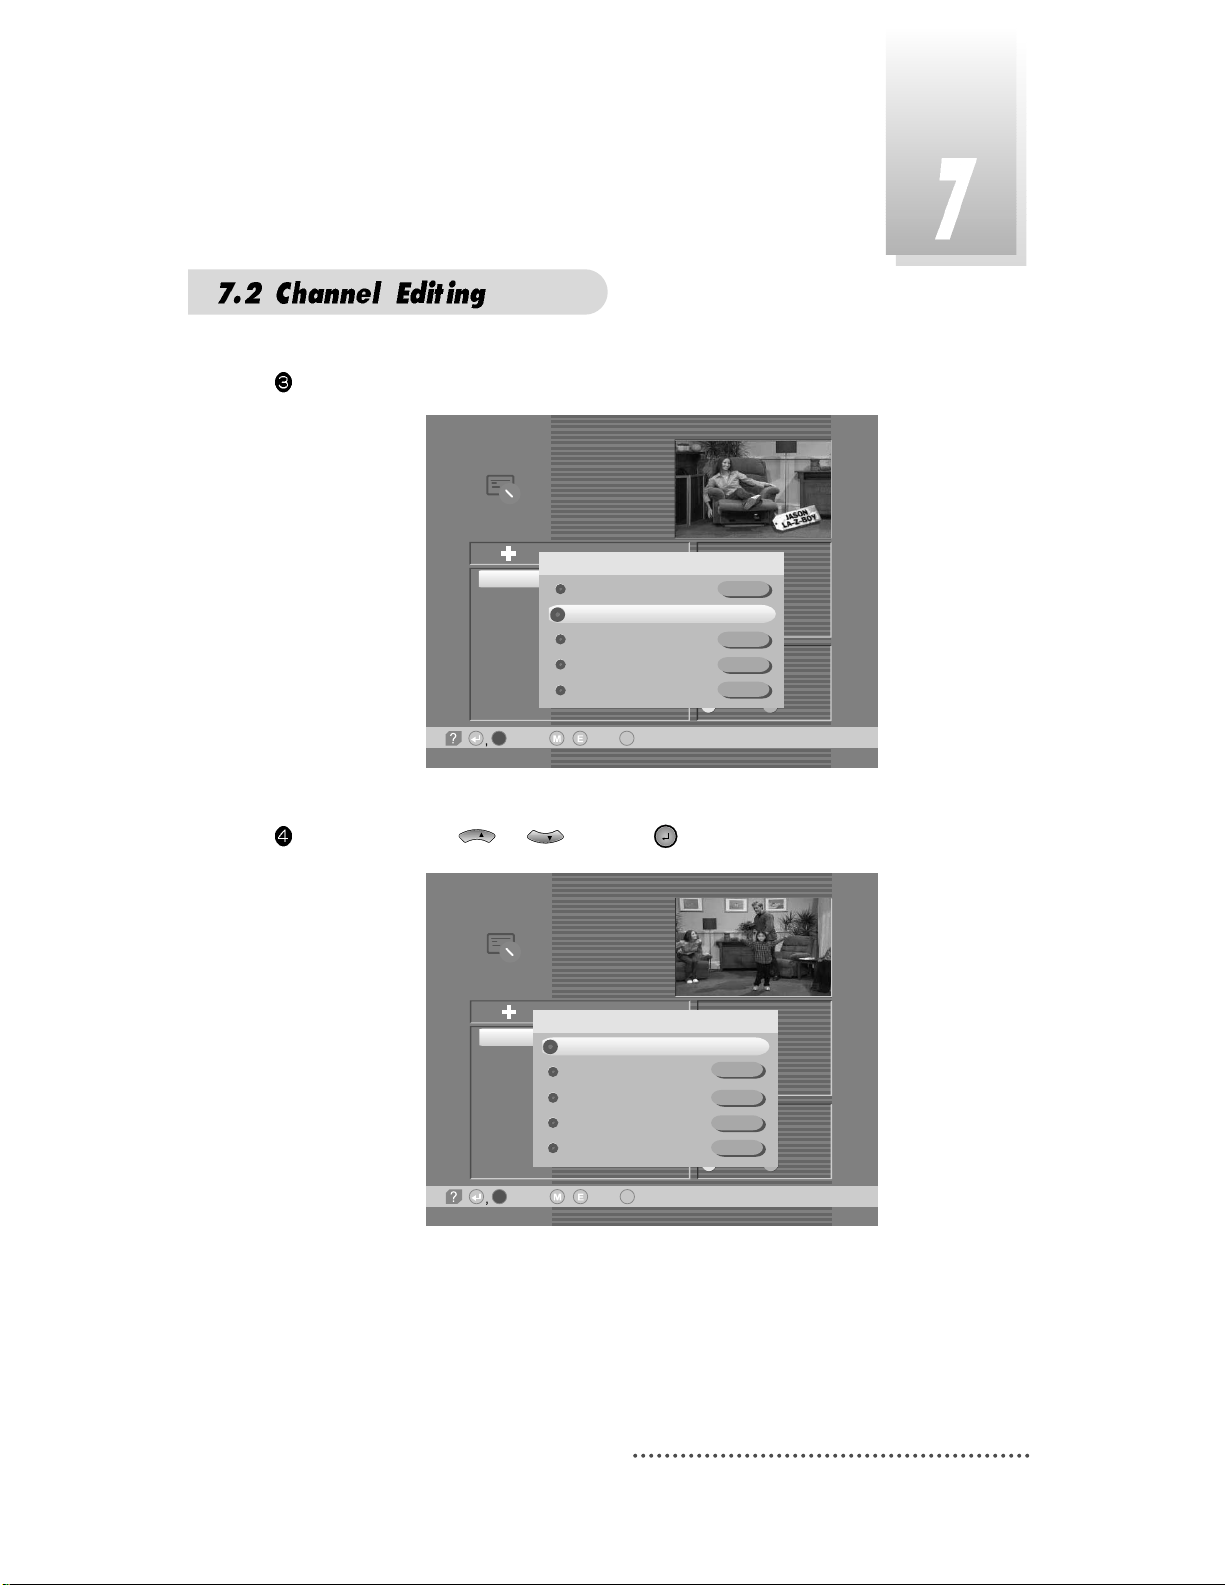
You can change the current channel to any other channel you want.
If you do not know the channel name, or you want to select a channel at random,
you can navigate between channels with or (CH. Up/Down) till you find
the channel you want.
If you know the channel number, enter the number and wait 5 seconds for the
channel to change.
If you know the channel name, press CH LIST key then channel list will pop-up.
Screen
In the right section, detailed information of the selected channel will be displayed.
(Name of network, frequency, bandwidth, etc.)
Select the channel you want with / (scroll up/down) or / (page
up/down).
When the scroll bar is positioned on the channel you want to see, press .
VOL
VOL
CHCHCH
CH
5
Select Channel
---
CH7. 184.5 MHz
Auto
7 MHz
FAV. DEL.
LOCK ADD
MOVE MODE
TV Channel List
All List
-Watch, -EXIT, ~ -Move
09
-Main,-Page Up/Down,
/
1
2
20
200
350
351
352
353
FACTS HD Test ..
FACTS HD Test ..
FACTS HD Test ..
FACTS HD Test ..
BBC TWO
BBC ONE
BBC NEWS 24
BBC CHOICE
Page 27
23
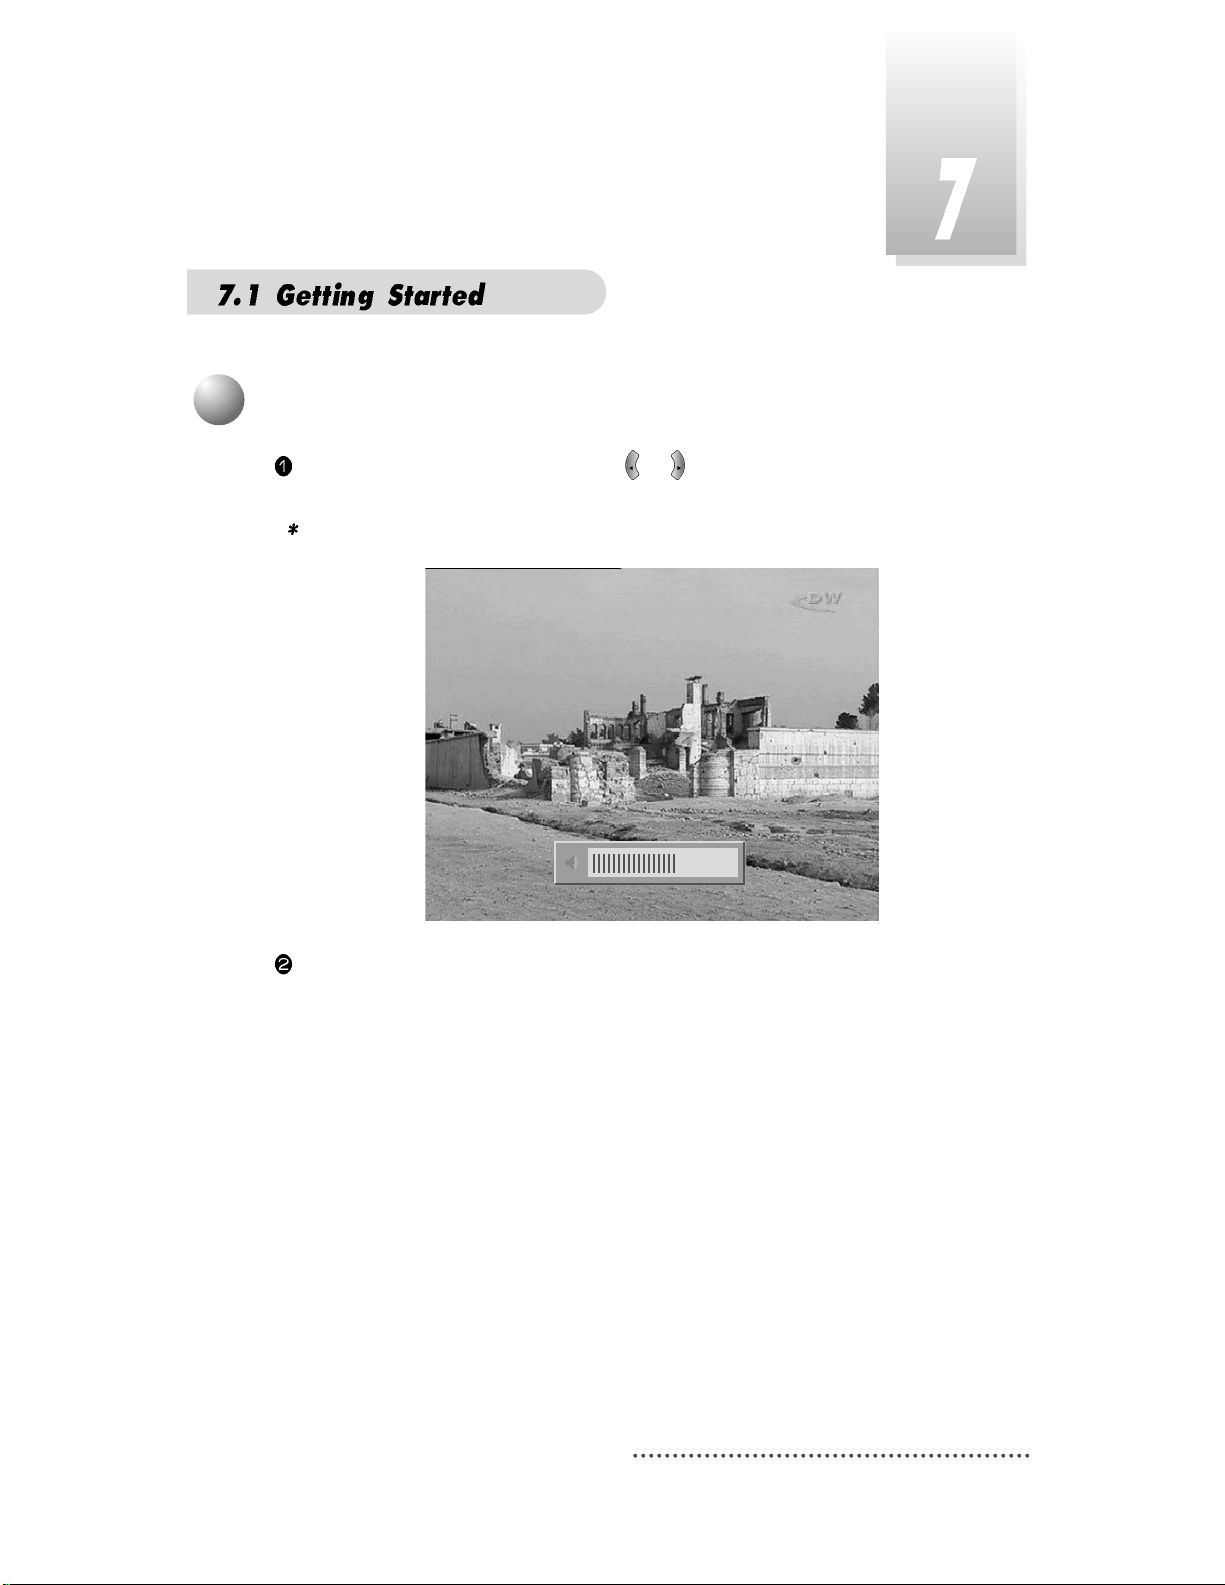
While you are watching a program, press or to control volume of the current
channel.
Note : You can configure volume of each chann el different ly.
Screen
When necessary, press MUTE key to remove the sound of the program temporarily.
Then, your receiver goes into mute condition and the volume bar will become red.
Press MUTE key again to turn the sound on.
VOL
VOL
6
Volume Control
Page 28
24
You can set up favorite channel lists as you want.
Note : If you press yellow key, you can set up favorite channel list without
channe l list menu.
For example, if you want to set favorite channel lists as following.
Favorite1 : BBC Two, Kika
Favorite2 : ZDF
Favorite3 : ABC Two, ABC One
Firstly, set favorite1 channels.
Press CH.LIST.
Select ‘BBC Two' channel with / or / .
Screen
VOL
VOL
CH
CH
---
CH 51. 690.5MHz
Auto
7 MHz
FAV. DEL.
LOCK ADD
MOVE MODE
TV Channel List
362
363
369
375
376
377
378
379
BBC TWO
BBC ONE
BBC CHOICE
KiKa
ZDF
ABC TWO
ABC ONE
ABC NEWS 24
1
All List
-Watch, -EXIT, ~ -Move
09
-Main,-Page Up/Down,
/
1
Favorite Channel
Page 29
25
Press RED.
Screen
---
CH 51. 690.5MHz
Auto
7 MHz
FAV. DEL.
LOCK ADD
MOVE MODE
TV Channel List
362
363
369
375
376
377
378
379
BBC TWO
BBC ONE
BBC CHOICE
KiKa
ZDF
ABC TWO
ABC ONE
ABC NEWS 24
1
All List
-Select, -Exit,/
-Rename
Favorite State
Favorite 1
Favorite 2
Favorite 3
Favorite 4
Favorite 5
Select favorite1 with or and Press .
Screen
CH
CH
---
CH 51. 690.5MHz
Auto
7 MHz
FAV. DEL.
LOCK ADD
MOVE MODE
TV Channel List
362
363
369
375
376
377
378
379
BBC TWO
BBC ONE
BBC CHOICE
KiKa
ZDF
ABC TWO
ABC ONE
ABC NEWS 24
1
All List
Favorite State
Favorite 1
Favorite 2
Favorite 3
Favorite 4
Favorite 5
-Select, -Exit,/
-Rename
Page 30
26
Screen
Do the same for the ‘Kika' channel.
Screen
---
CH 51. 690.5MHz
Auto
7 MHz
FAV. DEL.
LOCK ADD
MOVE MODE
TV Channel List
362
363
369
375
376
377
378
379
BBC TWO
BBC ONE
BBC CHOICE
KiKa
ZDF
ABC TWO
ABC ONE
ABC NEWS 24
1
All List
-Watch, -Exit, ~ -Move
0
L
/9
-Main,-Page Up/Down,
FA CTS Test
CH 45. 650.0 MHz
Auto
7 MHz
FAV. DEL.
LOCK ADD
MOVE MODE
TV Channel List
362
363
369
375
376
377
378
379
BBC TWO
BBC ONE
BBC CHOICE
KiKa
ZDF
ABC TWO
ABC ONE
ABC NEWS 24
1
All List
-Watch, -Exit, ~ -Move
0
L
/9
-Main,-Page Up/Down,
Page 31

27
Press RED.
Screen
Press .
Screen
Favorite1 ~Favorite5 are default name. Users can rename them for their convenience.
If you want to rename ‘Favorite1' (for example ‘Drama').
FA CTS Test
CH 45. 650.0 MHz
Auto
7 MHz
FAV. DEL.
LOCK ADD
MOVE MODE
TV Channel List
362
363
369
375
376
377
378
379
BBC TWO
BBC ONE
BBC CHOICE
KiKa
ZDF
ABC TWO
ABC ONE
ABC NEWS 24
1
All List
Favorite State
Favorite 1
Favorite 2
Favorite 3
Favorite 4
Favorite 5
-Select, -Exit,/
-Rename
FA CTS Test
CH 45. 650.0 MHz
Auto
7 MHz
FAV. DEL.
LOCK ADD
MOVE MODE
TV Channel List
362
363
369
375
376
377
378
379
BBC TWO
BBC ONE
BBC CHOICE
KiKa
ZDF
ABC TWO
ABC ONE
ABC NEWS 24
1
All List
-Watch, -EXIT, ~ -Move
09
-Main,-Page Up/Down,
/
Page 32

Press RED.
Screen
FA CTS Test
CH 45. 650.0 MHz
Auto
7 MHz
FAV. DEL.
LOCK ADD
MOVE MODE
TV Channel List
362
363
369
375
376
377
378
379
BBC TWO
BBC ONE
BBC CHOICE
KiKa
ZDF
ABC TWO
ABC ONE
ABC NEWS 24
1
All List
-Select, -Exit,/
-Rename
Favorite State
Favorite 1
Favorite 2
Favorite 3
Favorite 4
Favorite 5
Select ‘Favorite 1’ with or .
Screen
CH
CH
FA CTS Test
CH 45. 650.0 MHz
Auto
7 MHz
FAV. DEL.
LOCK ADD
MOVE MODE
TV Channel List
362
363
369
375
376
377
378
379
BBC TWO
BBC ONE
BBC CHOICE
KiKa
ZDF
ABC TWO
ABC ONE
ABC NEWS 24
1
All List
-Select, -Exit,/
-Rename
Favorite State
Favorite 1
Favorite 2
Favorite 3
Favorite 4
Favorite 5
28
Page 33

Press WHITE.
Screen
FA CTS Test
CH 45. 650.0 MHz
Auto
7 MHz
FAV. DEL.
LOCK ADD
MOVE MODE
TV Channel List
362
363
369
375
376
377
378
379
BBC TWO
BBC ONE
BBC CHOICE
KiKa
ZDF
ABC TWO
ABC ONE
ABC NEWS 24
1
All List
-Select, -Exit,/
-Rename
Favorite State
Favorite 1
Favorite 2
Favorite 3
Favorite 4
Favorite 5
Screen
Press MENU, EXIT or to finish the process.
You have finished favorite1 channel setting.
With similar way, you can set favorite2
~
favorite5 channel list.
You can use these favorite channel lists by using ORANGE key.
Refer to the next section for detail.
VOL
VOL
VOL
VOL
VOL
VOL
VOL
VOL
VOL
FA CTS Test
CH 45. 650.0 MHz
Auto
7 MHz
FAV. DEL.
LOCK ADD
MOVE MODE
TV Channel List
362
363
369
375
376
377
378
379
BBC TWO
BBC ONE
BBC CHOICE
KiKa
ZDF
ABC TWO
ABC ONE
ABC NEWS 24
1
All List
Favorite State
DRAMA
Favorite 2
Favorite 3
Favorite 4
Favorite 5
-Select, -Exit,/
-Rename
29
Page 34

30
If you have set up favorite channel lists as the previous section, you can use them as following.
Press CH.LIST.
Screen
Using this function, you can see variant channel lists which may enable you to edit and
select channels more conveniently.
Note : If you press green key, you can set up channel l ist mode without
channe l list menu.
---
CH7. 184.5 MHz
Auto
7MHz
FAV. DEL.
LOCK ADD
MOVE MODE
TV Channel List
350
351
352
353
354
355
356
357
ABC TWO
ABC ONE
ABC NEWS 24
ABC CHOICE
Darwin TWO
Darwin ONE
BBC NEWS 24
BBC CHOICE
1
All List
-Watch, -EXIT, ~ -Move
09
-Main,-Page Up/Down,
/
2
Channel List Mode
Favorite Mode
Page 35

31
Press ORANGE.
Screen
---
CH 7. 184.5 MHz
Auto
7 MHz
FAV. DEL.
LOCK ADD
MOVE MODE
TV Channel List
350
351
352
353
354
355
356
357
ABC TWO
ABC ONE
ABC NEWS 24
ABC CHOICE
Darwin TWO
Darwin ONE
BBC NEWS 24
BBC CHOICE
1
-Exit//
-Select,
All List
All List
A
B
Channel List Mode
Favorite
Network
Alphabet
Favorite 1
Australia
A
You can see ‘Channel List Mode' window. Select ‘Favorite' with or and
select ‘Favorite1' with or .
Screen
VOL
VOL
CH
CH
---
CH 7. 184.5 MHz
Auto
7 MHz
FAV. DEL.
LOCK ADD
MOVE MODE
TV Channel List
350
351
352
353
354
355
356
357
ABC TWO
ABC ONE
ABC NEWS 24
ABC CHOICE
Darwin TWO
Darwin ONE
BBC NEWS 24
BBC CHOICE
1
-Exit//
-Select,
All List
All List
A
B
Channel List Mode
Favorite
Network
Alphabet
Favorite 1
Australia
A
Page 36

32
You can see only favorite1 channels are listed. With similar way, you can see favorite2
~
favorite5 channel list.
If you want to return to all channel list (all channels of the selected Network), press
ORANGE and select ‘Network' with or and press .
Screen
CH
CH
---
CH 7. 184.5MHz
Auto
7 MHz
FAV. DEL.
LOCK ADD
MOVE MODE
TV Channel List
350
355
358
ABC TWO
Darwin ONE
Seven One
-Exit//
-Select,
Favorite 1
1
D
A
B
Channel List Mode
Favorite
Network
Alphabet
Favorite 1
Australia
A
Press .
Screen
---
CH 7. 184.5MHz
Auto
7 MHz
FAV. DEL.
LOCK ADD
MOVE MODE
TV Channel List
350
355
358
ABC TWO
Darwin ONE
Seven One
Favorite 1
1
-Watch, -EXIT, ~ -Move
09
-Main,-Page Up/Down,
/
Page 37

33
Select ‘D' with or .
Screen
VOL
VOL
FACTS
[CH 43] 650.0 MHz
Auto
8 MHz
FACTS
FAV. DEL.
LOCK ADD
MOVE MODE
TV Channel List
D
350
351
352
353
354
355
356
357
ABC TWO
ABC ONE
ABC NEWS 24
ABC CHOICE
Darwin TWO
Darwin ONE
BBC NEWS 24
BBC CHOICE
-Exit//
-Select,
All List
A
B
Channel List Mode
Favorite
Network
Alphabet
Favorite 1
Australia
D
Using this function, you can see the channel list which have same initial. This function is
useful when you search specific channel among the list of thousands channels.
For example, if you want to see the channel lists which start with ‘D'.
Press ORANGE in the channel list and select ‘Alphabet' with or .
Screen
CH
CH
FACTS
[CH 43] 650.0 MHz
Auto
8 MHz
FACTS
FAV. DEL.
LOCK ADD
MOVE MODE
TV Channel List
D
350
351
352
353
354
355
356
357
ABC TWO
ABC ONE
ABC NEWS 24
ABC CHOICE
Darwin TWO
Darwin ONE
BBC NEWS 24
BBC CHOICE
-Exit//
-Select,
All List
A
B
Channel List Mode
Favorite
Network
Alphabet
Favorite 1
Australia
A
Alphabet Mode
Page 38

34
By using this function, you can see all channel list of the selected Network.
Press ORANGE and select ‘Network’ item with
or
and press .
Screen
CH
CH
---
CH 41. 620.5 MHz
Auto
7 MHz
FAV. DEL.
LOCK ADD
MOVE MODE
TV Channel List
All List
361
355
354
DWtv
Darwin ONE
Darwin TWO
A
B
-Exit//
-Select,
D
D
A
B
Channel List Mode
Favorite
Network
Alphabet
Favorite 1
Australia
D
Network Mode
Press .
Screen
You can see the channel list where all channels have initial ‘D'.
---
CH 41. 620.5 MHz
Auto
7 MHz
FAV. DEL.
LOCK ADD
MOVE MODE
TV Channel List
D
361
355
354
DWtv
Darwin ONE
Darwin TWO
A
B
-Watch, -EXIT, ~ -Move
09
-Main,-Page Up/Down,
/
Page 39

35
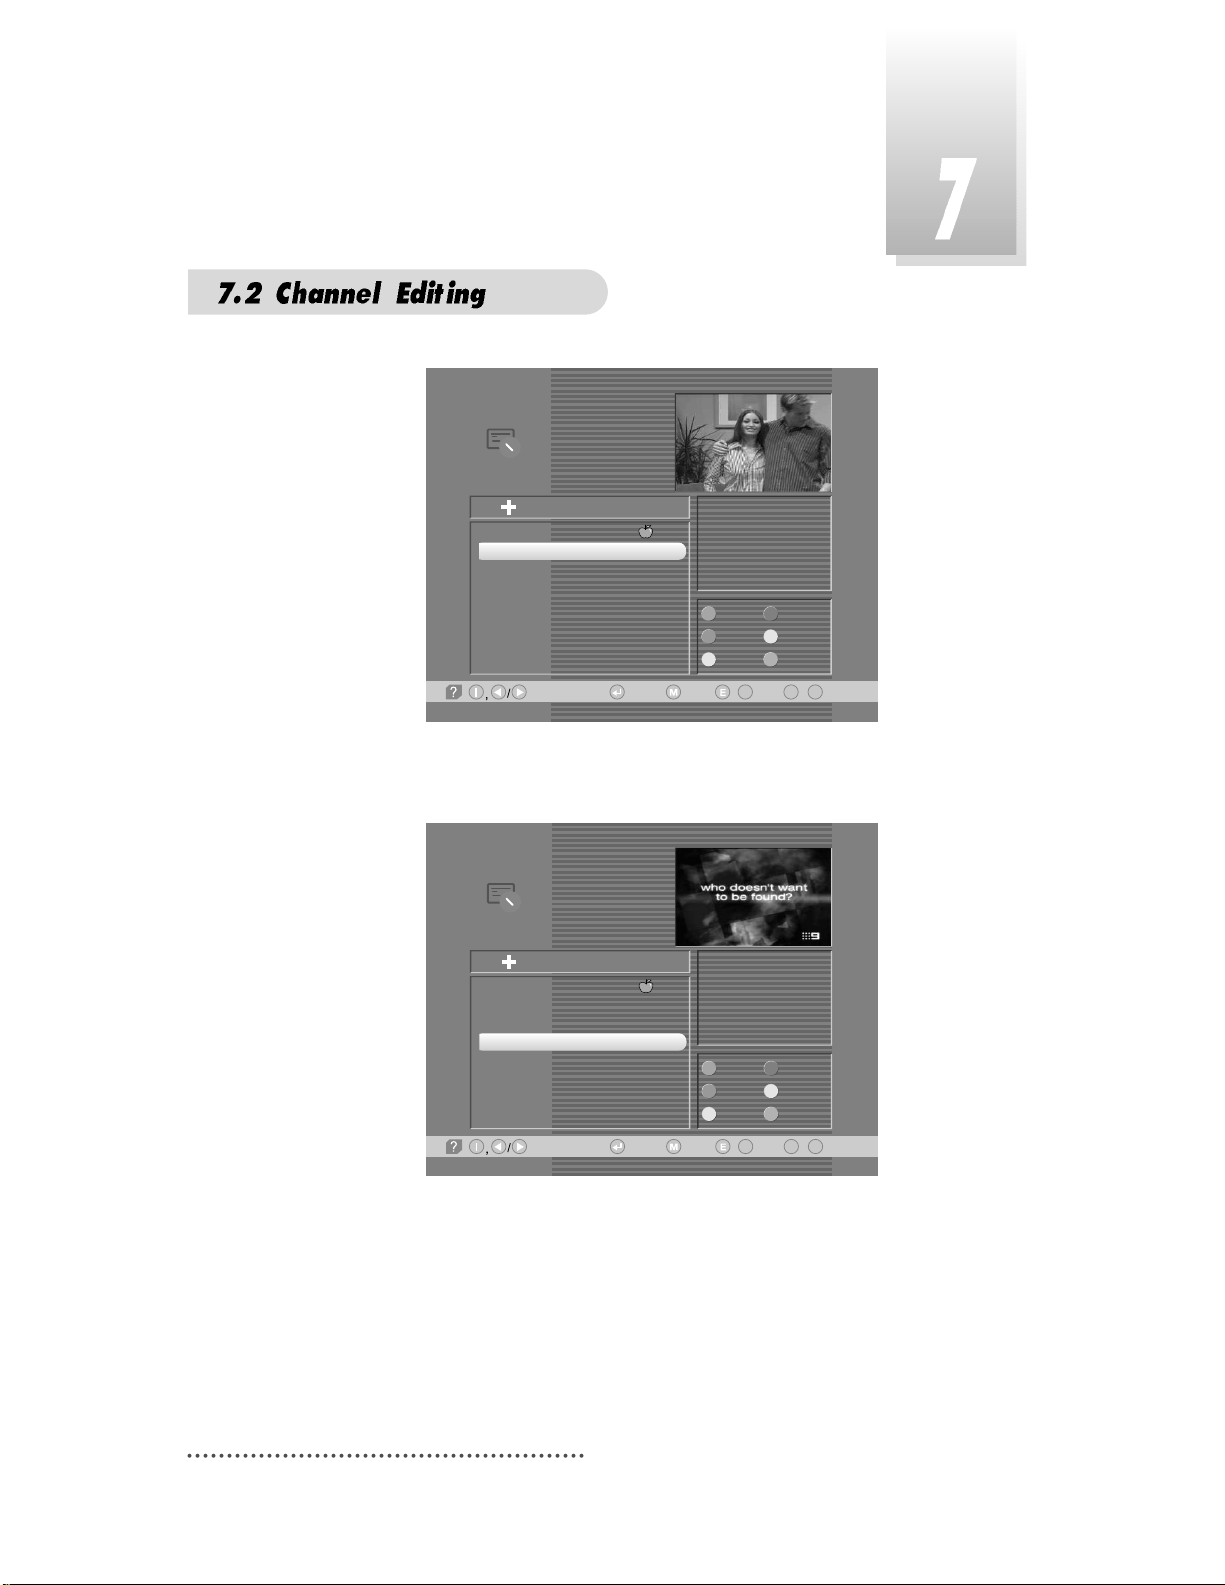
This menu enables you to prevent children from viewing programs unsuitable for their
age.
Press CH.LIST and Select the channel you want to lock with /
or
/
and press GREEN.
Then the selected channel is locked.
Screen
Note : If ‘password' window is risen as following picture, enter password with
numeric k eys (default password is' 0000'). Then you can lock the channel. If you don't want this window, change ‘Parental Cont ro l' set up in
t h e ‘System Parameters' menu. Refer to the ‘Parental control' in
‘System parameters' in this manual for detail.
VOL
VOL
CH
CH
3
Lock Channel
FA CTS Test
CH 45. 650.0 MHz
Auto
7 MHz
FAV. DEL.
LOCK ADD
MOVE MODE
TV Channel List
All List
-Watch, -EXIT, ~ -Move
09
-Main,-Page Up/Down,
/
362
363
369
375
376
377
378
379
BBC TWO
BBC ONE
BBC CHOICE
KiKa
ZDF
ABC TWO
ABC ONE
ABC NEWS 24
Page 40

Screen
Screen
FA CTS Test
CH 45. 650.0 MHz
Auto
7 MHz
FAV. DEL.
LOCK ADD
MOVE MODE
TV Channel List
All List
-Watch, -EXIT, ~ -Move
09
-Main,-Page Up/Down,
/
362
363
369
375
376
377
378
379
BBC TWO
BBC ONE
BBC CHOICE
KiKa
ZDF
ABC TWO
ABC ONE
ABC NEWS 24
All List
FACTS
CH 45. 650.0 MHz
Auto
7 MHz
FAV. DEL.
LOCK ADD
MOVE MODE
TV Channel List
All List
-Watch, -EXIT, ~ -Move
09
-Main,-Page Up/Down,
/
362
363
369
375
376
377
378
379
BBC TWO
BBC ONE
BBC CHOICE
KiKa
ZDF
ABC TWO
ABC ONE
ABC NEWS 24
All List
<< Authorized! >>
Press MENU, EXIT or to finish the process.
Without entering your password, you cannot watch a locked channel's program.
36
Page 41

Screen
If you want to cancel the channel lock, go to the channel list and select the channel
and press GREEN.
376 ZDF
hh:mm
-- : -- ~ -- : --
(
(
(
(
(
(
1/?
Information
You can organize the number or sequence of the channels.
Press CH.LIST.
Screen
---
CH 41. 620.5 MHz
Auto
7 MHz
FAV. DEL.
LOCK ADD
MOVE MODE
TV Channel List
All List
-Watch, -EXIT, ~ -Move
09
-Main,-Page Up/Down,
/
362
363
369
375
376
377
378
379
BBC TWO
BBC ONE
BBC CHOICE
KiKa
ZDF
ABC TWO
ABC ONE
ABC NEWS 24
4
Channel Order Setting
37
Page 42

38
Select the channel you want to move with / or / and press YELLOW.
Screen
Move the selected channel with / or / to the position you want.
Screen
VOL
VOL
CH
CH
VOL
VOL
CH
CH
TV Channel List
---
CH 61. 760.5 MHz
Auto
7 MHz
FAV. DEL.
LOCK ADD
MOVE MODE
/
09
362
363
369
375
376
377
378
379
All List
BBC TWO
BBC ONE
BBC CHOICE
KiKa
ZDF
ABC TWO
ABC ONE
ABC NEWS 24
-Watch, -EXIT, ~ -Move
-Main,-Page Up/Down,
TV Channel List
FA CTS Test
CH 45. 650.0 MHz
Auto
7 MHz
FAV. DEL.
LOCK ADD
MOVE MODE
-Main,-Page Up/Down,
/
09
362
363
369
375
369
377
378
379
All List
BBC TWO
BBC ONE
BBC CHOICE
KiKa
BBC CHOICE
ABC TWO
ABC ONE
ABC NEWS 24
-Watch, -EXIT, ~ -Move
Page 43

39
Press YELLOW.
Screen
Press MENU, EXIT or to finish the process.
---
CH 61. 760.5 MHz
Auto
7 MHz
FAV. DEL.
LOCK ADD
MOVE MODE
TV Channel List
All List
-Watch, -EXIT, ~ -Move
09
-Main,-Page Up/Down,
/
362
363
375
376
369
377
378
379
BBC TWO
BBC ONE
KiKa
ZDF
BBC CHOICE
ABC TWO
ABC ONE
ABC NEWS 24
5
Delete Channel
You can delete channels from the channel list.
Press CH.LIST and select the channel you want to remove with / or /
.
Screen
VOL
VOL
CH
CH
FA CTS Test
CH 45. 650.0 MHz
Auto
7 MHz
FAV. DEL.
LOCK ADD
MOVE MODE
TV Channel List
All List
-Watch, -EXIT, ~ -Move
09
-Main,-Page Up/Down,
/
362
363
375
376
369
377
378
379
BBC TWO
BBC ONE
KiKa
ZDF
BBC CHOICE
ABC TWO
ABC ONE
ABC NEWS 24
Page 44

40
Press BLUE.
Note : If ‘password' window is risen as following picture, enter password with
numeric k eys (default password is' 0000'). Then you can d elete t he
channel. If you don't want t his window, change ‘Parental Con t rol' set
up in the ‘System Parameters' menu. Refer to the 'Parental contro l' in
System parameters' in this manual for detail.
Screen
Then, you need to confirm the deletion. If you definitely want to delete, press .
If not, press EXIT.
Screen
Note : Please be caref ul when you delete channel(s).
Press MENU, EXIT or to finish the process.
---
CH 45. 650.5 MHz
Auto
7 MHz
FAV. DEL.
LOCK ADD
MOVE MODE
TV Channel List
All List
-Watch, -EXIT, ~ -Move
09
-Main,-Page Up/Down,
/
362
363
375
369
377
378
379
380
BBC TWO
BBC ONE
KiKa
BBC CHOICE
ABC TWO
ABC ONE
ABC NEWS 24
ABC CHOICE
PASSWORD
????
---
CH 45. 650.5 MHz
Auto
7 MHz
FAV. DEL.
LOCK ADD
MOVE MODE
TV Channel List
All List
-Watch, -EXIT, ~ -Move
09
-Main,-Page Up/Down,
/
362
363
375
369
377
378
379
380
BBC TWO
BBC ONE
KiKa
BBC CHOICE
ABC TWO
ABC ONE
ABC NEWS 24
ABC CHOICE
All List
Do you want to delete this channel?
Yes / No
Q
Page 45

41
Press CH.LIST.
Press White.
Screen
Move to ‘CH. Number' section (column) by pressing and change CH.
Number with
or
.
Move to ‘CH. Name' by pressing and enter the alphabetic characters
with numeric keys.
For example : if you want to enter SAT-1,
Note : Press for spa c e
Move to ‘VIDEO PID' by pressing key and enter the proper value with
numeric keys.
Move to ‘AUDIO PID' by pressing key and enter the proper value with
numeric keys.
Move to ‘PCR PID' by pressing key and enter the value between
0000~8192 with numeric keys.
Note : The above mentioned VIDEO PID, AUDIO PID, PCR PID are very impor-
tant for optimal terrestrial signal reception. We recommend you get
professional advice where available. Y ou cannot setup ‘VIDEO PID’
for RADIO channels.
CHCHCH
VOL
VOL
VOL
VOL
CH
VOL
VOL
CH
6
Add Channel
-Edit, -Prev.
CH. Number
CH. Name
Video PID
Audio PID
PCR PID
Add Digital Channel
CH 7
BBC ONE
0600
0601
0600
~
09
Page 46

42
This sub-menu allows you to set the age for parental locking and protect children from
viewing programs unsuitable for their age.
Press MENU key.
Press or to select ‘System Parameters' and press .
Screen
Press or to select ‘Parental Control' and press .
Screen
CHCHCH
CH
System Parameters
-Next, -Prev./
DL Saving
TV T ype
Aspect Ratio
Screen
A/V Mode
RF type
RF Channel
CVBS
PAL-G
46
No
MULTI
4x3
P/S
Parental Control
System Information
Local time/Timer
dd/mm/yyyy hh:mm
System Parameters
-Next, -Prev./
DL Saving
TV T ype
Aspect Ratio
Screen
A/V Mode
RF type
RF Channel
CVBS
PAL-G
46
No
MULTI
4x3
P/S
Parental Control
System Information
Local time/Timer
dd/mm/yyyy hh:mm
PASSWORD
????
1
Setting Age Restrictions
Page 47

43
Enter 4-digit password.
Note : The default password is '0000'.
Screen
Press or to select ‘Age Limit’.
Screen
CH
CH
System Parameters
-Next, -Prev./
DL Saving
TV T ype
Aspect Ratio
Screen
A/V Mode
RF type
RF Channel
CVBS
PAL-G
46
No
MULTI
4x3
P/S
Parental Control
System Information
Local time/Timer
dd/mm/yyyy hh:mm
PASSWORD
<< Authorized! >>
****
Parental Control
-Prev.-Main,
Age Limit
Lock Channel Editing
Lock Installation
New Password
Verify Password
Personal
No Block
No
No
????
????
SRT-5390
Press or to select age you want.
Note : ‘Age limit’ can be applicable only for the signal w hich carries age
limit information.
VOL
VOL
No Block No age limit Block all Block All
G General PG
Parental Guidance Recommended
M Mature Audience 15+ MA
Mature Adult Audience 15+
AV
Audience, Strong Violence 15+
R Restricted 18+
Page 48

44
You can set SECURITY CHECK to protect your current installation from being changed
(location shift, deletion, adding etc.) or modifying of installed data.
Press MENU key.
Press or to select ‘System Parameters' and press .
Press or to select ‘Parental Control' and press .
Enter 4-digit password.
Note : The default passw ord is '0000'.
Press or to select ‘Lock channel Editing’, or ‘Lock Installation’.
Press or to select ‘Yes’, or ‘No’.
Note : Your receiver is pre-set as 'Yes'.
VOL
VOL
CHCHCHCHCH
CH
Yes
When you process with ‘Channel Editing’ or ‘Installation’ of Main Menu, your receiver
will ask for password. If you enter wrong password, you cannot proceed further.
No You do not enter password during your processing.
2
Security Check
You can change your password.
Press MENU key.
Press or to select ‘System Parameters' and press .
Press or to select ‘Parental Control' and press .
Enter 4-digit password.
Note : The default password is '0000'.
Press or to select ‘New Password’.
Press
~
numeric numbers to enter new password.
Press
~
numeric numbers again to verify the new password.
Note : When you forget your new password, plea se co nsult the shop where
you bought the receiver or the nearest dealer.
CHCHCHCHCH
CH
3
Password Changing
Page 49

45
You can check the current information about your receiver such as receiver’s software
and hardware version or manufacturing date.
Press MENU key.
Press or to select ‘System Parameters' and press .
Screen
CH
CH
System Parameters
-Next, -Prev./
DL Saving
TV T ype
Aspect Ratio
Screen
A/V Mode
RF type
RF Channel
CVBS
PAL-G
46
No
MULTI
4x3
P/S
Parental Control
System Information
Local time/Timer
dd/mm/yyyy hh:mm
4
System Information
Press or to select ‘System Information' and press .
Screen
Note : This information is necessary when you download new software or
you need to r e pair the receiver.
CH
CH
System Information
-Prev.-Main,
Product Name
Hardware Version
Software Version
Channel List
Last Update
SRT-5390
SRT5390-001
SRT5390 0.51
SRT5390-003
Oct 29 2003
Page 50

46
Press or to select ‘Local Time/Timer’, and press .
Note : Without the local time setting, this ‘TIMER ’ func t ion d oes not work.
Screen
CH
CH
06/08/2003 01:53
Timer
Timer #1
Timer #2
Timer #3
Timer #4
Timer #5
Timer #6
Timer #7
-Prev./
CH. Type
CH. Number
CH. Name
Start Time
Stop Time
Status
HD record
TV
7
7 Digital
06/08/2003 01:55
06/08/2003 02:55
No
ON
You can pre-set the on/off time of your receiver.
During your absence, you can record programs on your VCR.
Press MENU key.
Press or to select ‘System Parameters’, and press .
Screen
CH
CH
5
Setting Timer (Automatic power On/Off)
System Parameters
-Next, -Prev./
DL Saving
TV T ype
Aspect Ratio
Screen
A/V Mode
RF type
RF Channel
CVBS
PAL-G
46
No
MULTI
4x3
P/S
Parental Control
System Information
Local time/Timer
02/07/2001 06:34
-Edit,
~
09
Page 51

47
You can adjust current local time when summer time is applicable.
Press MENU key.
Press or to select ‘System Parameters’, and press .
Press or to select ‘DL Saving’.
Press or to select ‘Yes’ or ‘No’.
VOL
VOL
CH
CHCHCH
Note : Without current local time setting, thi s menu cannot b e p ro cessed.
Press or to select ‘Timer #(number)’ you want to set and press .
determine ‘CH. Type' by selecting ‘TV' or ‘RADIO' with or .
Select 'CH. Number' with or and enter
channel number with numeric keys or with or .
Select ‘Start Time’ for your receiver power-on.
For example : For 1st of February in the year of 2000, 7:30 P.M.,
Enter in sequence
Select ‘Stop Time’ by pressing .
Enter power off time in the same way as you entered ‘Start Time’.
Select ‘Status’ and set ‘Yes/No’ with or .
Select ‘HD record’ and set ‘ON’ with or if you want to record auto matically.
Note : 1. Without ‘STATUS’ being actuated (ON), Timer does not work.
2. If Prior time than current is entered, Timer does not work.
3. Yo u ca n p re - s et 14 T IMER s s i mu l t a n e ou s ly. Re g a r dl e s s o f n u mb e r
of TIMER, Timer will work in sequence of time sequence.
4. R emo con Key does n’t wor k whil e VCR reco rdin g.( Whil e HDD
recording, remocon key works)
VOL
VOL
VOL
VOL
CH
VOL
VOL
CH
CH
VOL
VOL
CH
CH
Yes
Set for daylight saving function activated
The current time automatically moves one hour ahead
No
Set for daylight saving function deactivated
The current time automatically moves on hour behind
6
Setting Day Light Saving Time (Summer Time)
Page 52

48
You can set your TV display mode with this sub-menu.
Press MENU key.
Press or to select ‘System Parameters’, and press .
Press or to select ‘TV Type’.
Press or to select ‘Multi’, ‘PAL’, or ‘NTSC’.
VOL
VOL
CHCHCH
CH
Note : If the satellite signal and your TV type are mismatched, the TV picture
may be distorted. Even in this case, MENU will be displayed as normal.
(e.g. When you receive P AL satellite sign al with NTSC TV type setting
or vice versa)
Multi When your TV is compatible with NTSC/PAL dual mode.
PAL
When your TV is only for PAL reception. Regardless of satellite signal,
the display will be done in PAL format.
NTSC
When your TV is only for NTSC reception. Regardless of satellite signal,
the display will be done in NTSC format.
7
Setting TV Type
This sub-menu allows you to select your TV aspect ratio to 4:3 or 16:9 according to your wishes.
Press MENU key.
Press or to select ‘System Parameters’, and press .
Press or to select ‘Aspect Ratio’.
Press or to select ‘4x3’ or ‘16x9’ or ‘Auto’.
CHCHCHCHCH
CH
Note : If you set 4 x 3 when the Satellite input signal is 1 6 x 9, the right and
the left parts of the original picture m ay not be seen.
4x3 When your TV is 4:3.
16x9 When your TV is 16:9.
Auto When setting suitable aspect ratio automatically.
8
Setting Aspect Ratio
Page 53

49
You can set video output mode for 2 scart connectors on the rear panel for true video
quality.
Press MENU key.
Press or to select ‘System Parameters’, and press .
Press or to select ‘A/V Mode’.
Press or to select ‘CVBS’, ‘Y/C’, ‘RGB’.
VOL
VOL
CHCHCH
CH
Note : 1. If you select ‘L.Box’, the screen might be distorted. Upper and lower
p a rt of the s c reen will be blocked wi th black strip es.
2. ‘Screen’ function is helpful when receiving 16 x 9 signal with TV of
4x3 format.
You can select the terrestrial input signal display mode.
Press MENU key.
Press or to select ‘System Parameters’, and press .
Press or to select ‘Screen’.
Press or to select ‘P/S’ or ‘L. Box’.
VOL
VOL
CHCHCH
CH
P/S
When you set screen display boundary from Pan/Scan data of
Satellite input signal. (For signal for 16x9 program)
L.Box
You can watch 16 x 9 ratio screen by reducing original size vertically
and horizontally.
CVBS Video out signal from TV, AUX scart will be composite.
Y/C Video out signal from TV, AUX scart will be Y, C.
RGB
Video out signal from TV scart will be output as RGB. Video out signal
from AUX scart will be CVBS.
9
Setting Screen
10
Setting Scart Video Output mode
Page 54

50
After checking ‘Tuner State’, when necessary, you can edit parameters of certain channels
and scan them.
Press MENU key.
Select ‘Installation’ with or , and press .
Screen
Select ‘Manual Scan’ with or , and press .
Screen
CH
CH
CH
CH
Installation
-Next, -Prev.
Tuner State
Automatic Full Scan
Manual Scan
Factory Set
Software Download
Manual Scan
-Select, -Prev.-Main,
CH 7
184.5 MHz
Auto
High
7MHz
Bad
5%
Channel
Frequency
Tx Mode
Priority
Bandwidth
Scan
Page 55

51
Move to ‘Channel’ with and select the Channel you want to edit with or .
You can use the numeric keys to enter the channel you require.
If you press , you can see cursor is created. And if you enter channel number and
press , it will move to that channel.
Move to ‘Frequency’ with . If you want to modify the frequency, regulate it by
0.1MHz with or . If you want to move to a channel whose frequency you know,
enter the frequency value with numeric keys and press . You can see it moves to a
channel that is closest to the entered frequency .
VOL
VOL
CH
VOL
VOL
CH
Select ‘Tx Mode’ by pressing and set the proper value for the selected Channel
with or .
Select ‘Bandwidth’ by pressing and set the proper value for the selected Channel
with or .
After entering all values of the channel parameters, move to ‘SCAN’ section (column)
with and press for storing all the entered channel data.
As a result, you can get the following menu showing the scanning process.
Screen
CH
VOL
VOLCHVOL
VOL
CH
Manual Scan
-Select, -Prev.-Main,
CH 7
184.5 MHz
Auto
High
7MHz
Good
50%
Channel
Frequency
Tx Mode
Priority
Bandwidth
Scan
Scanning
Press to stop scanning
Q
Page 56

52
After scanning process, the first channel of scanned channel will be displayed.
Screen
Note : If the scan fails, please check whether your entered values are correct
or not and the signal r eception sensitivity is good or bad.
Manual Scan
Good
50%
TV: 4 Success Radio: 0
370
371
372
373
374
BBC PARLMNT
BBC PARLMNT
BBC PARLMNT
BBC PARLMNT
BBC PARLMNT
FA CTS Test
CH 45. 650.0 MHz
Auto 7 MHz
-Watch, -Prev./-Page Up/Down,
1
2
20
200
350
351
352
353
FACTS HD Test..
FACTS SD Test..
FACTS SD Test..
FACTS SD Test..
BBC TWO
BBC ONE
BBC NEWS 24
BBC CHOICE
Page 57

53
The status of the receiver will return to factory default parameters by using this function.
Press MENU key.
Select ‘Installation’ with or , and press .
Screen
Select ‘Factory Set’ with or , and press .
Screen
When the menu asks you to confirm the reset, press if you want to reset or press EXIT
key if you want to void the reset.
CH
CHCHCH
-Next,
Installation
Tuner State
Automatic Full Scan
Manual Scan
Factory Set
Software Download
-Next,
Installation
Tuner State
Automatic Full Scan
Manual Scan
Factory Set
Software Download
Do you want to reset all data?
Yes / No
Q
Page 58

54
Software Download function enables user to download and update new program from air.
Press MENU key.
Select ‘Installation’ with or , and press .
To start receiving the data through air, press on ‘Software Download'.
It takes a few minutes to search the group of programs & downloaded channel.
Move to next Menu if you succeed in searching the necessary information.
The explanations for ‘Software Download' menu are as follow,
- Start : Starting downloading the selected data.
- Display info : Displaying the updated contents & other text information.
- Main SW : Select whether you would update the main program of Receiver or not.
- Ch List : Select whether you would update the channel list of Receiver or not.
- Info : Select whether you would watch the updated contents & other information of this
version or not.
If you select ‘Start', it starts downloading selected data.
On finishing the download, if necessary, Receiver is restarted.
Note : 1. Do not turn o ff the Power, while upgrading Receiver.
2. This service is not provided yet.
CH
CH
Page 59

55
Press ‘TV/STB’. The signal reception path will change to RF modulator and
‘TV/STB’ LED on front panel will be lit.
The signal output through the RF modulator will be as follows :
1
TV / STB switching
You can use this menu when you change a TV channel to a Radio channel or vice
versa.
Press ‘TV/RADIO’.
When listening a radio channel, ‘r001’ will be displayed on the front panel.
2
TV / RADIO switching
TV/STB LED DC Power ON DC Power OFF (Standby
)
ON RF IN signal will be out.
OFF Decoded signal will be out through RF. RF IN signal will be out.
Page 60

56
You can check the channel information on the channels of the transponder you are
watching.
Press GUIDE key, then the following menu will be displayed.
Screen
Note : 1. You can check local t ime, channel name, an d other brief inform a-
t ion o n the current program.
2. If you didn't set lo cal time under ‘System Parameters’ sec t ion, the
GUIDE functio n may not wo rk properly.
3. EPG information is de livered by terrestrial sign al from service
providers. If the channel does not carry any signal on the guide
da ta, this function may not work properly.
3
GUIDE(EPG:Electronic Program Guide)
Program Guide
10:45
10:30 11:00
Current
PEOPLE AND POLOTOCS
465
466
467
468
469
470
471
472
CNN TURK
Genc Tv
Fashion Tv
Number One
Discovery T ur
DWtv
NN
TVE
PEOPLE AN..
-Schedule, -Extended, -List Mode-Current/Next,
Page 61

57
Select Channel with or .
Then you can see current or next program information of the selected channel.
If you press GREEN, current or next program information would be converted to next
or current program information respectively.
Screen
CH
CH
Program Guide
10:45
10:30 11:00
Current
PEOPLE AND POLOTOCS
465
466
467
468
469
470
471
472
CNN TURK
Genc Tv
Fashion Tv
Number One
Discovery T ur
DWtv
NN
TVE
PEOPLE AN..
-Schedule, -Extended, -List Mode-Current/Next,
Program Guide
10:45
09:00 09:30
Next
JOURNAL
465
466
467
468
469
470
471
472
CNN TURK
Genc Tv
Fashion Tv
Number One
Discovery T ur
DWtv
NN
TVE
JOURNAL
-Schedule, -Extended, -List Mode-Current/Next,
Page 62

If you press YELLOW, you can see program schedule list of the selected channel.
Screen
Program Guide
10:46
[470] DWtv
10:30~11:00
09:00~09:30
09:30~10:00
10:00~10:30
10:30~11:00
11:00~11:30
11:30~12:00
12:00~12:30
PEOPLE AND POLITICS
JOURNAL
IM FOCUS
JOURNAL
ART & UNLIMITED
JOURNAL
EUROMAXX
JOURNAL
-Schedule, -Extended, -Reserve-Current/Next,
28/08/2003 10:30~11:00
PEOPLE AND POLITICS
If you want to see program information of a program in the program schedule list,
select the program with or .
Then you can see the program information in the right window.
Screen
CH
CH
Program Guide
10:46
[470] DWtv
10:30~11:00
09:00~09:30
09:30~10:00
10:00~10:30
10:30~11:00
11:00~11:30
11:30~12:00
12:00~12:30
PEOPLE AND POLITICS
JOURNAL
IM FOCUS
JOURNAL
ART & UNLIMITED
JOURNAL
EUROMAXX
JOURNAL
-Schedule, -Extended, -Reserve-Current/Next,
25/08/2003 10:00~10:30
JOURNAL
58
Page 63

If you press BLUE, you can see extended program information of the selected pro-
gram.
Screen
You can set up automatic power on-off (Timer) or automatic recording on the pro-
gram schedule list. After press YELLOW in the Guide( EPG) menu, select a program
with / or / and press .
Select ‘Once/Daily/Weekly/No' of ‘Status' with or .
VOL
VOL
VOL
VOL
CH
CH
Program Guide
10:47
[470] DWtv
News, Business, Top Story, Weather
-Schedule, -Extended,-Current/Next,
25/08/2003 10:00~10:30
JOURNAL
-Page Up/Dn
Select ‘HD record' and set ‘ON' with it you want to record automatically.
Screen
Program Guide
06:47
[9] Nine Digital
08:30~09:00
09:00~09:30
--:--
--:--
--:--
--:--
--:--
--:--
THE PRICE IS PICHT
-Exit
E
-Reserve,
25/08/2003 10:00~09:00
JOURNAL
06/08/2003 08:29
Timer
Status
HD record
Once
ON
~ 06/08/2003 09:05
59
Page 64

60
Screen
Press MENU, EXIT or to finish GUIDE menu.
Screen
Note : 1. W ithout 'STATUS' being actuated (Yes), 'Timer' does not work.
2. If a program of prior time than current time ('Local Time ' i n ' System
Parameters' menu ) is selected, Timer does not work.
3. Refer to 'Se tting Timer' in 'System Parameters' in this manual.
Program Guide
06:47
[9] Nine Digital
08:30~09:00
09:00~09:30
--:--
--:--
--:--
--:--
--:--
--:--
THE PRICE IS PICHT
-Exit
E
-Reserve,
25/08/2003 10:00~09:00
JOURNAL
06/08/2003 08:29
Timer
Status
HD record
Once
ON
~ 06/08/2003 09:05
Program Guide
06:47
[9] Nine Digital
08:30~09:00
09:00~09:30
--:--
--:--
--:--
--:--
--:--
--:--
THE PRICE IS PICHT
-Exit
E
-Reserve,
25/08/2003 10:00~09:00
JOURNAL
Reserved at Timer #1
!
Page 65

61
You can adjust the subtitle and audio condition/status of the current channel.
Press ‘AUDIO’ and subtitle and audio related window will be displayed on the screen.
Screen
In this example, program spoken language is ‘English' and user's selected subtitle
language is ‘Swedish'.
Screen
4
Subtitle/Audio
-Subtitle On/Off
Subtitle T rack
Audio T r ack
Audio Mode
Dig.Output
2 of 10 [Swedish]
1 of 8 [English]
Stereo
Non-compressed
Subtitle/Audio
Page 66

Subtitle Track
(Subtitle language #) of (all subtitle language available in this
program) [ Current selected subtitle language ]
Audio Track
(Audio track #) of (all tracks available in this program ) [spoken
language in this program ]
Audio Mode Stereo -> Mono-Left -> Mono-Right
Dig.Output MPEG STEREO / Dolby Digital (AC 3)
Note : The se subtitle and audio p arameter s are workable only when the
receiving channel suppo rts these f un ctions.
Your receiver will automatically power-off when the time you set is passed.
Press ‘SLEEP’ key until the right time you want appears.
Screen
Note : 1. You can set SLEEP TIMER in 30 minute steps up to 150 minutes.
2. The SLEEP TIMER doe s not work while you are in ‘MENU’, ‘GUIDE’ or
‘CHANNEL LIST’.
5
Sleep Timer
150
The contents of each parameter are as follows ;
62
Page 67

You can set in/out mode of the two scart connectors (TV, AUX) on the rear panel.
Press ‘Aux in’ key until the scart mode you want is displayed.
Screen
6
Aux in
Screen
63
Page 68

64
Screen
Input terrestrial signal will be output to TV Scart and AUX (VCR) Scart. ( can
connect VCR to AUX connector for recording )
Input signal from AUX scart connector will be output to TV scart. If there is
no input from AUX scart, your receiver will work as if you chose STB mode.
Input signal from AUX scart connector will be output to TV scart by force.
Input signal from TV scart connector will be output to AUX scart. (Only for
CVBS)
STB
AUX
AUX 2
TV
Note : You cannot see picture w hen set to AUX 2 mode a nd there is no input
signal fr om outside.
Page 69

65
Brief information is displayed, such as current channel type, name, local start/end time,
guide information, current time, fav/normal mode, Audio mode and Audio ID.
Press INFO, then the information bar will pop-up.
Screen
Note : If you have no inform ation :
- Check your local time se tting is correct.
- Information is not sent by th e chann el provider.
7
Channel / Information
200 FACTS SD Test.. 06:32
10:15 ~ 10:21
(
(
(
(
(
(
1/2
FA CTS Test
Page 70

Hot-Key Captions On/Off
If there is captions in stream, you can see caption data by Caption Hot-Key.
Screen
8
Captions
If there is no captions in stream, You cae see ‘None’ Title Bar.
Screen
None
66
Page 71

Hot-Key for Aspect Ratio Change
By Ratio Hot-key you can select aspect ratio.
Screen
9
Ratio
4 x 3 Letter Box
Hot-Key for Timer function
If you press this key, you can setting Timer function directly.
Screen
10
06/08/2003 01:53
Timer
Timer #1
Timer #2
Timer #3
Timer #4
Timer #5
Timer #6
Timer #7
-Prev./
CH. Type
CH. Number
CH. Name
Start Time
Stop Time
Status
HD record
TV
7
7 Digital
06/08/2003 01:55
06/08/2003 02:55
No
ON
67
Page 72

68
You can record the current channel by pressing RED( ) key.
Direct Recording
Press RED( ) key only once.
Starting record current channel on the spot.
Screen
Note : While a program is recorded, if you press INFO or key, red R-icon is
displayed informa tion bar. Though you watch not only th e current
recording channel but also the other previous recording channel.
SEVEN MORNING NEWS
00:00:13 / 00:00:17
(
(
(
(
(
(
S
2
Stereo
R
1
Start Recording
Page 73

69
Manual Recording
Press RED( ) key twice.(Double click)
Program Guide menu appeared with recording dialog menu.
You can edit channel name and information.
Screen
You can change the record stop time with numerical key.
Using or to change the record stop time in 30 minutes intervals.
VOL
VOL
Program Guide
00:51
Current
7
70
71
72
73
77
7 Digital
7
7
7
7
7
25/0NING NEWS
00:35 02:05
Name
Information
Start
Stop
REC
7 Digital 1
SEVEN MORNIN..
00:51
02:51
-Record, -Exit,E~0-Edit
9
Page 74

70
Press key to start recording.
Screen
Program Guide
00:51
Current
7
70
71
72
73
77
7 Digital seven morn
7
7
7
7
7
25/0NING NEWS
00:35 02:05
REC
-Record, -Exit,E~0-Edit
9
Name
Information
Start
Stop
7 Digital 1
SEVEN MORNIN..
00:51
02:51
Program Guide
00:51
Current
7
70
71
72
73
77
7 Digital seven morn
7
7
7
7
7
25/0NING NEWS
00:35 02:05
REC
-Record, -Exit,E~0-Edit
9
Name
Information
Start
Stop
7 Digital 1
SEVEN MORNIN..
00:51
00:50
Note : Default reco rding duration time is set for 2 hours. You can set recording
duration 23hours 59 minutes maxi mally
Screen
Page 75

71
Reserve Recording
You can reserve recording by means of a timer function. please refer to the section
7.3.5 ‘Setting Timer’.
You can reserve recording by means of EPG function. please refer to the section
7.7.3 ‘GUDIE(EPG)’.
After the time, which is either given by the EPG or set by you, the recording automatically
stops. And the HD Program Guide menu appears. By pressing ORANGE(LIST) or EXIT key
you can return to live channel.
Note : After record stopped, the receiver have not any comm and for 5 min-
utes. Then the receiver will go automatically power off.
If you want to stop recording by force, you must enter HD-Program Guide menu.
If any program has been played, press ORANGE(LIST) key to enter HD-Program Guide
menu.
Screen
HD-Program Guide
-Delete, -Terrestrial Mode
/
-Watch,
06:49
13:13
14:27
04:16
REC
Title
Play time: REC
00/00/0000 00:00
Free:37.9 GB (49.6%)
THE PRICE IS RIGHT
Play Type
1
2
3
4
This is BBC CHOICE
This is BBC CHOICE
This is BBC CHOICE
THE PRICE IS RIGHT
R
2
Stop Recording
Page 76

HD-Program Guide menu is displayed, press ORANGE(LIST) once again or EXIT key.
Screen
You will be asked if you would like to stop the recording. Confirm selection by pressing key or cancel EXIT key.
HD-Program Guide
-Delete, -Terrestrial Mode
/
-Watch,
06:49
13:13
14:27
04:16
REC
Title
Play time: REC
02/07/2001 06:49
Free:37.7 GB (49.4%)
THE PRICE IS RIGHT
Play Type
1
2
3
4
This is BBC CHOICE
This is BBC CHOICE
This is BBC CHOICE
THE PRICE IS RIGHT
R
Do you want to stop recording?
Yes /
Q
No
E
72
Page 77

You must select a program to play stored programs.
For entering HD-Program Guide menu, press ORANGE(LIST) key.
Press ORANGE(LIST) key.
In HD-Program Guide, select a program by pressing or .
Screen
Press to start playing.
Note : For controllin g trick p l ay mo de, you must press or INFO key then
HD-Information Bar will pop-up.
CH
CH
HD-Program Guide
-Delete, -Terrestrial Mode
/
-Watch,
06:50
13:13
14:27
04:16
00:02
Title
Play time: 04:16
13/09/1999 13:45
Free:37.7 GB (49.4%)
This is BBC CHOICE
Play Type
1
2
3
4
This is BBC CHOICE
This is BBC CHOICE
This is BBC CHOICE
THE PRICE IS RIGHT
1
Start Playing
73
Page 78

74
For using trick play mode, you must press or INFO key then HD-Information Bar will
pop-up.
Screen
Trick Play Mode : Pause, Jump, Fast Forward, Fast Reverse, Resume.
- Pause Press BLUE .
- Jump
Press BLUE .
Press YELLOW or GREEN .
Press BLUE .
- Fast Forward Press YELLOW .
- Fast Reverse
Press GREEN .
- Stop
Press WHITE .
2 BBC CHOICE
00:00:28 / 86:27:07
This is BBC CHOICE
Stereo
(
(
(
(
(
(
S
2
Trick Play Controls
HD Playing HD Paused
YELLOW Fast Forward Jump Forward
GREEN Fast Reverse Jump Backward
BLUE Pause Resume
WHITE Stop Stop
INFO or Info On/Off Info On/Off
RED slow play slow play
Page 79

75
You can delete any program in HD-Program Guide menu.
Press ORANGE(LIST) key then HD-Program Guide menu will pop-up.
In HD-Program Guide, select a program with or .
Press RED( ) key to delete the program then Delete dialog menu will pop-up.
Screen
Press to delete the program or EXIT key to void.
Note : For deleting any stored program, you must stop both playing and
recording.
CH
CH
HD-Program Guide
-Delete, -Terrestrial Mode
/
-Watch,
06:49
13:13
14:27
04:16
00:02
Title
Play time: 00:02
02/07/2001 06:49
Free:37.7 GB (49.4%)
THE PRICE IS RIGHT
Play Type
1
2
3
4
This is BBC CHOICE
This is BBC CHOICE
This is BBC CHOICE
THE PRICE IS RIGHT
R
Do you want to delete this?
Yes /
Q
No
E
Page 80

76
If you want to lock any program, enter the advanced menu by pressing MENU key with HDInformation Bar.
After locking a program, you must enter the password for playing the program.
Start playing a program.
Press then HD-Information Bar will pop-up.
Press MENU key, the advanced menu will pop-up.
Screen
Select ‘LOCK’ using or .
Press , LOCK enable or disable will be setted with Yes or No.
Note : The password for playing a stored program is the same password for
any other lock operation.
CH
CH
Lock
Clear skip points
Split take
No
2 BBC CHOICE
00:01:40 / 86:27:07
This is BBC CHOICE
Stereo
(
(
(
(
(
(
S
Page 81

77
You can set the part you don’t want to play, such as advertise ments.
The skip part consists of start and end points.
In all, 10 skip points are available.
Select a program with or , and press to play in HD-Program Guide menu.
Start playing and search the start point of skip play you want using trick play controls.
Press RED( ) key to set the start point.
Screen
Temperary start point will be displayed with a red pointer on the Bar.
Press RED( ) key to set the end point you want.
CH
CH
2 BBC CHOICE
13:15:01 / 86:27:07
This is BBC CHOICE
Stereo
(
(
(
(
(
(
S
Page 82

78
Then a proper pair of start and end points will be displayed with yellow pointers on the Bar.
Screen
Note : To try setting on improper pair will be rejected.
Press RED( ) key at the position between start and end points, then the skip-point will
be removed.
Press MENU key and select ‘Clear skip points’.
Screen
Press , to remove all skip points.
5 Nine Digital
00:00:25 / 00:00:30
THE PRICE IS RIGHT
Stereo
(
(
(
(
(
(
S
5 Nine Digital
00:00:03 / 00:00:30
THE PRICE IS RIGHT
Stereo
(
(
(
(
(
(
S
Lock
Clear skip points
Split take
No
Page 83

79
You can split a program in two programs.
The operation takes a few minutes to complete splitting.
Select a program with or , and press to play in HD-Program Guide menu.
Search the split point you want using trick play controls.
Press MENU key, then the advanced menu will pop-up.
Screen
Select ‘Split take’ menu and press , then Split take dialog will pop-up.
Screen
CH
CH
5 Nine Digital
00:00:04 / 00:00:30
THE PRICE IS RIGHT
Stereo
(
(
(
(
(
(
S
Lock
Clear skip points
Split take
No
5 Nine Digital
00:00:23 / 00:00:30
THE PRICE IS RIGHT
Stereo
(
(
(
(
(
(
S
Lock
Clear skip points
Split take
No
Split this program in two ?
Yes /
Q
No
E
Page 84

80
Press to start splitting or EXIT key to void.
If split operation starts, the progress window will pop-up and you can see the status of
process.
Screen
After splitting, HD-Program Guide menu will pop-up and splitted program will be select-
ed.
Screen
HD-Program Guide
-Delete, -Terrestrial Mode
/
-Watch,
06:49
13:13
14:27
Title
Play time: 14:27
13/09/1999 13:45
Free:71.6 GB (93.8%)
This is BBC CHOICE
Play Type
12This is BBC CHOICE
This is BBC CHOICE
R
Now splitting program
5%
HD-Program Guide
-Delete, -Terrestrial Mode
/
-Watch,
07:00
13:13
00:01
14:26
Title
Play time: 14:26
13/09/1999 13:45
Free:71.4 GB (93.5%)
This is BBC CHOICE
Play Type
1
2
3
This is BBC CHOICE
This is BBC CHOICE
This is BBC CHOICE
Page 85

81
You can use trick play controls without HD-Information Bar.
Small yellow icon will be displayed for trick play controls.
Additional play control is available in this mode.
This function is activated at pause state using GREEN( ) / YELLOW( ). and make the
sequence played step by step.
Select a program with or , and press to play in HD-Program Guide menu.
Press INFO or to turn off HD-Information Bar.
Press BLUE( ), GREEN( ) or YELLOW( ) to start controlling trick play without any
OSD.
You can control trick play while yellow icons are displayed.
Besides, you can control step by step play with GREEN( ) / YELLOW( ) while pause
state.
Note : You can not co ntrol jump play without HD-Information Bar.
CH
CH
Page 86

82
Hot-Key for direct recording and pause function.
You can immediately record the current channel.
And replay the picture as you want.
Press white key.
Current channel recording starts with pause the picture.(Time-shift fuction starting)
Screen
If you press blue key the picture will replay.
Note : Refer to 8.2.2 Trick Play Cont rols &8.7 Trick Play Controls with o ut OSD in
this manua l.
4 Nine Digital
00:00:00 / 00:00:12
THE PRICE IS RIGHT
Stereo
(
(
(
(
(
(
S
R
Page 87

83
Remedy
Check the main power cable is
plugged into a power outlet.
Check the main power switch in the
rear panel.
Check the video cable(RCA, SCART)
Check the video input mode of the TV.
If your STB is set to the AUX2 mode, you
can’t see video. Press AUX IN key once
or more.(See page64)
If you are using RCA cable, check the
audio input/output terminal.
Check the volume level of the TV and
STB. Check the mute function of the TV
and STB.
Connect antenna cable correctly.
Check the tuner state of STB. If signal
level is weak, adjust the aerial antenna.
Check the broadcasting video format
in your TV and STB.(NTSC/PAL)
Set to the same mode.(CVBS, RCB,
Y/C)
Change the batteries.
Aim the remote control at the receiver.
Possible causes
AC Power is disconnected.
Wrong connection from the STB
video output to the TV input terminal.
Wrong setting of the TV input
mode.
Wrong setting of the STB video
output mode.
Wrong connection from the STB
audio output to the TV input terminal.
Volume level of the TV and STB is
low.
Wrong connection of the antenna cable.
Signal level is low.
TV or STB mode is different from
the broadcasting mode.
The STB A/V output mode is different from the TV.
Battery exhausted.
Remote controller is incorrectly
aimed.
Problem
LED on front panel
does not light.
No Picture
No sound
On screen displayed
‘Bad or no signal’
Black and white
screen or V-Hold.
The remote control unit
is not working.
There may be various reasons for the abnormal operation of the unit. Therefore, if the unit does not
work properly, check it according to the procedures shown in the table below :
Page 88

84
IEC 169-2, female/male
Input :170MHz~860MHz
Loop through out : 50MHz~860MHz
7MHz
COFDM
QPSK, 16QAM, 64QAM
2K, 8K, Auto
1/4, 1/8, 1/16, 1/32, Auto
Auto conversion
IEC 169-2, female/male
470~860MHz
UHF 21~69
32bit Processor
8M byte
2M byte
2K byte
Main Proflie @ Main Level
Up to 15M bit/s
720 X 576, 720 X 480
NTSC, PAL
4:3, 16:9
Mono, Dual mono, Stereo, Joint Stereo
32, 44.1 and 48KHz
9pin D-sub male, Max 115K bps
Fully DVB-T compliant
Connector
Frequency range
Channel bandwidth
Modulation
Constellation
Tx mode
Guard interval
Spectral inversion
Connector
Frequency range
output channel number
Processor
SDRAM
FLASH
EEPROM
MPEG 2
Data rate
Resolution
Video format
Aspect Ratio
MPEG 1 layer 1 & 2
Type
Sampling rates
Connector
System capabilities
Tuner
RF modulator
PAL G/I/K and NTSC
TV type
System resource
Video decoder
MPEG audio
Serial data interface
Page 89

85
NEC-IR
up to 7 Meter
Max 30W
98V 240V
47Hz 63Hz
1 X RCA cinch
2 X RCA cinch
1 X RCA cinch
1 X optical port
S-Video jack
9pin D-sub connector
IEC 169 2 female
IEC 169 2 male
CVBS, Y/C, RGB, audio
CVBS, Y/C, RGB(in), audio
IEC 169-2 female
IEC 169-2 male
335 X 58.5 X 268(mm)
3.0Kg
Code
Operating condition
Power consumption
Supply voltage
Supply frequency
Video out
Audio out
Digital audio out
S-Video
Serial data
Digital tuner input
Loop throughout tuner
TV SCART
VCR SCART
RF input
RF output
Size (W X H X
Weight (Net)
Remote control
Power supply
Rear Panel
connector
Physical
Specification
Page 90

DATA TRANSFER
is best carried out by an
authorized service person.
please contact your
appointed dealer for more
information regarding
this feature.
Page 91

SRT 5390
Connection & Recording
Supplement
Page 92

For connection of the SRT 5390 there are number of
alternatives depending what is your preference and
the connection types on your TV.
Please connect by either of the following methods
A. B. C. (D. is mandatory for antenna connection)
Refer to Page 8 of the Instruction Manual for the
Connector Reference Numbers listed below.
2
Connections
If your TV includes a 4 Pin Mini Din S-Video
connector, you may choose to connect in this way.
Although S-Video is available through the Scart, there is
an additional S-Video connector (connector 2) on the
rear panel and unit can be connected to the TV this way.
(You will need to purchase S-Video Lead separately)
If you choose to connect in this way, once unit is
POWERED (Refer Power On below), go into the SRT
5390 Menu button 10 and select System Parameters
and select S-Video in the AV Mode.
Important: Using this separate S-Video (Y/C) for your
Video connection, you will need to make connections
for Audio.
For Audio this can be done by using the supplied
RCA cable by connecting to Connector 9 for Left
Audio (RCA White) and Connector 10 for Right Audio
(RCA Red), and then connect to appropriate RCA
audio connectors of your TV.
These Left (white) & Right (Red) RCA Audio
connections will provide MPEGA-2 Stereo.
If you require Dolby Digital Audio Output (through
you’re Dolby Digital Decoder Amplifier) please refer to
Note: DOLBY DIGITAL AUDIO below)
Connector 2 S-VIDEO (Y/C) S-video jack S-video output
B. Separate S-Video (Y/C)
Connector
A. SCART Connection for:
RGB or S-Video or CVBS
If your TV includes a 21 Pin Scart Connector, you
may choose to connect in this way and select your
choice of RGB, S-Video (Y/C) or CVBS (Composite).
(You will need to Purchase Scart Lead separately)
Through the Scart, the Factory Default setting in the
Menu is listed as RGB.
If you decide to operate as CVBS (Composite), you
do not need to change to CVBS mode in the A/V
mode (as explained below), as the unit will
automatically default to CVBS mode.
However, if you choose to have S-Video (Y/C) from
the Scart, once unit is POWERED (Refer Power On
below), please go into the Main Menu of the SRT
5390 and select System Parameters, then Scroll
down to AV Mode and via the remote control left and
right centre buttons select the preferred AV Mode.
(Connector 4)
TV SCART
SCART 21 pin Scart output to TV:
3 video signals to choose from:
RGB
S-Video (Y/C)
CVBS (composite)
Also, by using Scart Output, Audio MPEG-2 is included
If you require Dolby Digital Audio Output (through
your Dolby Digital Decoder Am0plifer, please refer to
Note DOLBY DIGITAL AUDIO.
Page 93

Connections
3
D. Connecting the Antenna
Connect TV Antenna to Connector 11 (TV ant) on the
SRT 5390
Connector 11 TVANT IN IEC 169-2 female Terrestrial
stream input from antenna to SRT 5390
Having made the above connections to suit your
requirements: The next step is to make certain you
have selected a Video Mode on your Television from
your TV Remote Control
You can connect to your TV with the supplied RCA
cable to give you Video and Audio. This will give you
CVBS (Composite Video & MPEG-2 Stereo for Audio)
Connector 8 VIDEO RCA cinch Composite video
output Connector 9 AUDIO Left (White) RCA cinch
Left audio output Connector 10 AUDIO Right (Red)
RCA cinch Right audio output
C. CVBS (Composite) via
the supplied RCA Lead
Page 94

Turn the SRT 5390 ON. There is an ON/OFF Switch on
the rear panel of the Receiver. (Located beside the main
power cord from the receiver)
Now Push the On/OFF Power button on the Remote
Control (Red Button)
When Power is ON, you will view a Strong Image Banner
on the TV Screen and your Receiver is now ready to be
scanned to lock in all of the Broadcast Frequencies in
your area.
Power On
Automatic Scan Process
Press the Menu button (10) on the remote control and
a Main Menu Banner will appear listing 3 topics.
Select INSTALLATION and push the ENTER Button
16 (button in the middle of the Remote control) and a
secondary Banner will appear prompting you to enter
a 4 digit password. Enter the Default Password 0 0 0 0.
A Banner will appear with 5 topics. Select Automatic
Scan by using the Middle scroll up/down buttons of
the Remote Control.
With Automatic Scan selected, push ENTER Button.
Unit will now begin to scan and lock in all available
frequencies in your area. This will take a few minutes.
Once Scan has been completed, a Banner will appear
which will state:
NETWORK SCAN IS DONE and It will
prompt you to push the ENTER button (10).
Once ENTER button has been pushed, you will need
to push ENTER button again on the Remote Control,
and Data will be saved, and normal TV broadcast
channel will now displayed.
Time Setting - Automatic
There is a manual procedure to set up the Time in
your unit.
However, as the Time is taken from the “Time Print” in
each broadcaster’s signal, once you have scanned the
frequencies into your unit, time will be automatically
generated, thus avoiding the necessity to manually
input the time. It is important to ensure Time is in
correct Mode. I.e. Daylight Saving YES / NO.
Time Setting - Manual
Push MENU Button
Select System Parameters and press ENTER
Scroll down to Local Time/Timer by using button 13
Using right Scroll button 15, Adjust by inputting date
and time via the numeric buttons on the remote control.
Scroll down to DL Saving and select correct mode:
YES / NO.
Push EXIT to return to normal viewing.
4
Page 95

Assure the correct A/V Mode has been selected in the
Menu by Pushing Menu Button on the remote Control;
Main Menu Banner will appear; Select System
Parameters and then scroll down to A/V Mode and
select the preferred AV mode: i.e. RGB or S-Video
(Y/C) or CVBS (Composite)
Once preferred A/V mode has been selected, Push
EXIT button 11 on the remote control to return to
normal viewing broadcast.
5
Dolby Digital Audio
If you have a Dolby Digital Decoder Amplifier, you can
connect to the amplifier by Optical Cable or Coaxial
Cable (purchased separately). These connections will
provide for Dolby Digital Output when broadcast.
Connector 1 is the Optical audio output.
Connector 3 is the Digital audio output.
To ‘Enable’ Dolby digital to be heard when transmitted
within the broadcast stream, you will need to select
Dolby Digital in the System Parameters.
Push the Audio Button 5.
Scroll down via button 13 and select Dig. Output
IMPORTANT: If broadcaster is not transmitting in
Dolby digital at that time, you will not be able to
select topic of DIG. Output
All of the above connection/s and procedure
completes the Connections Installation, however,
there are other connections that can be made
(Not Essential), explained as below.
The Correct A/V Mode
Page 96

6
Connectors
Connector 12 RF Loop Out
For Aerial Signal Pass through to your TV and/or VCR
Channels 21 to 69
This is the signal coming from your antenna and
passing through the SRT 5390
This can be used for a variety of purposes as per
items A and B as follows.
A. With a separately purchased RF Lead, you can
connect from this connector to your TV antenna IN.
This enables you to switch back to normal analogue
viewing. I.e. you would switch back to normal TV
analogue mode by pressing the TV Mode button on
your TV Remote Control.
B. You can choose to connect RF from this connector
to your VCR (separately purchased Lead) which will
enable you to watch a normal Digital Broadcast
Channel through the SRT 5300 / SRT 5390 and at the
same time you can record a different broadcast
channel into the VCR.
Therefore, as you are watching your digital channel
through the SRT 5300 / SRT 5390, you would select a
channel via your VCR Remote Control and press
Record Button on your VCR.
E.g. you may be watching the Digital transmission of
CH7 through the SRT 5300 / SRT 5390 as normal
and recording CH9 RF analogue through your
attached VCR.
Connector 7 RF Out to enable
tuning of the UHF Signal
(Normally used when no Audio Video connections are
available on your TV)
With a separately purchased RF Lead, you can
connect from this connector to your VCR or TV.
When connecting to a VCR, you then Tune the VCR
to Default Channel 38.
This means that you are able to record into the VCR;
the same channel you are viewing through the SRT
5390. This would be RF analogue.
Page 97

Connectors
Connector 6 RF Loop In
This can be used for a variety of purposes as per
items A and B as follows.
A. For viewing on a second TV
(Using supplied RF Loop Lead)
With the SRT 5390 is a supplied RF Loop Lead.
When used, this is connected to Connector 6
(RF Loop In) and Connector 12 (RF Loop Out).
There may be circumstances where you want to
connect a Second TV (e.g. in another room) to the
SRT 5390, and thus receive the same digital
programs as viewed through the first ‘priority’ TV.
Firstly, you would connect a seperatly purchased RF
Lead from Connector 7 (RF out) to your second TV
and Tune this second TV to default Channel 38
In this situation, the Second TV would receive the
same channels as broadcast through the first TV.
The second TV would be a ‘Slave’ to the first TV and the
second TV would not be able to change to other Channels
(i.e. analogue channels), if preferred by the user.
However, by connecting the supplied RF Loop Lead
from connector 6 to Connector 12, the second TV
then has the ‘additional’ capability of changing
channels if required by the user. I.e. they can change
to normal analogue channels.
B. Where Video Inputs are Required on Your TV
There may be circumstances where you do not have
enough Video Inputs on your TV to enable the SRT
5300 / SRT 5390 to be connected. In this
circumstance, action in the following way:
Connect a separately purchased RF Lead from
Connector 7 (RF out) to your second TV and Tune
this second TV to default Channel 38.
Now connect the supplied RF Loop Lead from
connector 6 to Connector 12.
VCR AUX Scart (CVBS
Composite) for Video In & Out
On the rear panel there is a Second Scart called VCR AUX
(Requires separately purchased Scart Lead for
connection to VCR or DVD)
Essentially, there are 3 alternatives for using this
connection and would mainly be used where there
are not enough Video Connections on your TV.
Refer to the following alternatives A. B. C.
A. As a Switching device for other attached Video
devices e.g. DVD Player/VCR
Because this connector is also Video IN, this enables
you to switch to the Video IN source of your attached
VCR or DVD; in those cases where you may want to
watch your DVD Disk or VCR tape program
I.e. You can switch from watching your digital channel
broadcasts in STB mode to AUX mode for attached
video sources
To switch from normal viewing STB mode,
Push AUXIN button on the remote control, and select
AUX position for attached VCR/DVD viewing.
To return to normal digital STB mode, push AUXIN
and select STB.
B. To enable to RECORD to your attached video
devices: DVD Player / VCR
Because this VCRAUX Scart connector is also Video
Out, you can Record the broadcast signal of the SRT
5390 into your attached VCR/DVD.
Push Record on your VCR / DVD Remote Control.
C. Connection for SRT 5390 where no Video Inputs
available on your TV
If your TV does not have enough available connections
of Video Inputs, you can receive the STB digital Channel
signal and pass this through to your TV by using this
AuxIn Scart connection from the SRT 5390 to your TV
(This would be CVBS [Composite] Video Signal).
7
Page 98

Overview
Selecting and Changing
Channels
There are 2 methods to select and change channels
A. Press the desired Number Button on the remote
control.
Please note:
1 = CH10
2 = Ch 2 ABC
3 = SBS
7 = Ch 7
9 = Ch 9
B. Select and change channels by using the
Up/Down channel buttons
Button 12 CH, for Up
Button 13 CH, for Down
Checking your Aerial
Signal: Level & Quality
To assure that you can receive adequate picture quality
for digital transmissions, it is important to check that
you have enough Signal Level and Quality Level
(signal to noise ratio) through your antenna system.
Level: ideal is 70%, minimum is 50%
Quality: ideal is 100%, minimum is 80%
Press MENU button 10
Select INSTALLATION and press ENTER button
Input 4 digit password - 0000
Select TUNER STATE and press ENTER button
Banner will show the Level and Quality Bar Graphs
and Channel number.
To change to each channel number to check the %,
press Channel Up / Down buttons 12/13.
IMPORTANT: On the opened banner you will note a
channel number.
Examples:
Channel (MUX) number 6 on the banner. However,
you will note the broadcast station is actually Channel
7 and also indicated on the front display.
Channel (MUX) number 8 on the banner. However,
you will note the broadcast station is actually Channel
9 and also indicated on the front display.
Volume Control
To adjust Volume up and down, press the following
buttons on the remote control:
Volume Increase: VOL Button 15
Volume Decrease: VOL Button 14
Important: The Volume level is dependant on the
volume level that you firstly set within your TV I.e. via
your TV remote control volume setting.
Volume Mute
Press Button 2 to mute sound. Volume Bar in the
banner will be RED.
Press Button 2 again to reactivate sound.
8
Page 99

Setting Aspect Ratio
There are 2 methods to Set and Switch between your
preferred Aspect Ratio:
I.e. 4:3 Letterbox / 4:3 Full Screen / 16:9 Full Screen.
A. Menu Setting
Press MENU button 10
Select System Parameters and press Enter button
Select Aspect Ratio preferred i.e. 4x3 or 16 x9 or Auto
If you select Auto, when viewing a broadcast program,
aspect ratio will change according to the aspect ratio
being transmitted by the broadcaster at that time.
After selecting your preference, push EXIT twice to
return to normal viewing.
B. Hot Key for Aspect Ratio change
Whilst viewing a broadcast program, you can change
the aspect ratio to your preference by pushing RATIO
Button 20.
As you make your selection by this button, you will see
the aspect ratio type indicated on the TV screen banner.
I.e. 4x3 Full Screen / 4x3 Letterbox / 16x9 Full Screen.
9
Captions ON/OFF
IMPORTANT: Is dependant on when transmitted by
broadcast stream
To view Captions, Press CAPTIONS Button 19
Banner will state Captions ON
Push button to turn Captions OFF. Banner will state
Captions OFF.
Teletext
To view teletext, select a Channel 7 broadcast station
Press BLUE Button 21
To select your preferred Teletext topics, enter the
topic number via the channel numbers on the remote
control.
To turn Teletext OFF and return to normal viewing,
push EXIT button
Page 100

Enables setting of AGE LIMIT as a protection for
Children’s viewing.
There are 8 categories that can be selected.
No Block / Block All / Block G & Above / Block PG &
Above/ Block M & Above /
Block MA & Above / Block AV & Above / Block R &
Above
Press MENU button, select System Parameters and
press ENTER button
Select Parental Control and press ENTER button
Input 4 digit password 0000
Select AGE LIMIT and select preferred age boundary
by pressing scroll button 15
Push EXIT button 3 times to return to normal viewing
Note: Age Limit restriction is operational only when the
signal being broadcast, carries age limit information.
10
Lock Channel Editing &
Lock Installation
Factory default for these 2 modes is set to YES
This ensures your Password must be entered when
accessing the Installation & Channel Editing modes;
as a form of security.
If you prefer to have open access to these modes,
without the requirement of inputting a password each
time, you can set to NO in the Menu.
. Press MENU button
. Select System Parameters & push ENTER button
. Select Parental Control and push ENTER button
. Input 4 digit Password
. Using scroll down button 13, Scroll to Lock Channel
Editing and using Scroll button 15, change to NO.
. Repeat for Lock Installation
. Push EXIT button 3 times to return to normal viewing
New Password
Although the default 4 digit password is 0000, you
can set your own password if preferred.
• Press MENU button and select System Parameters.
Press ENTER button
• Select Parental Control and Press Enter button
• Input 4 digit password 0000
• Scroll down via button 15 and select New Password
• Choose your new 4 digit password number and
input by your selection of number
buttons on the remote control.
• Once you have input your new password, Verify
Password will be automatically
highlighted, re-enter your password
• Password Change banner will appear as verification
• Push EXIT button 3 times to return to normal viewing
Parental Control
 Loading...