

Page 1
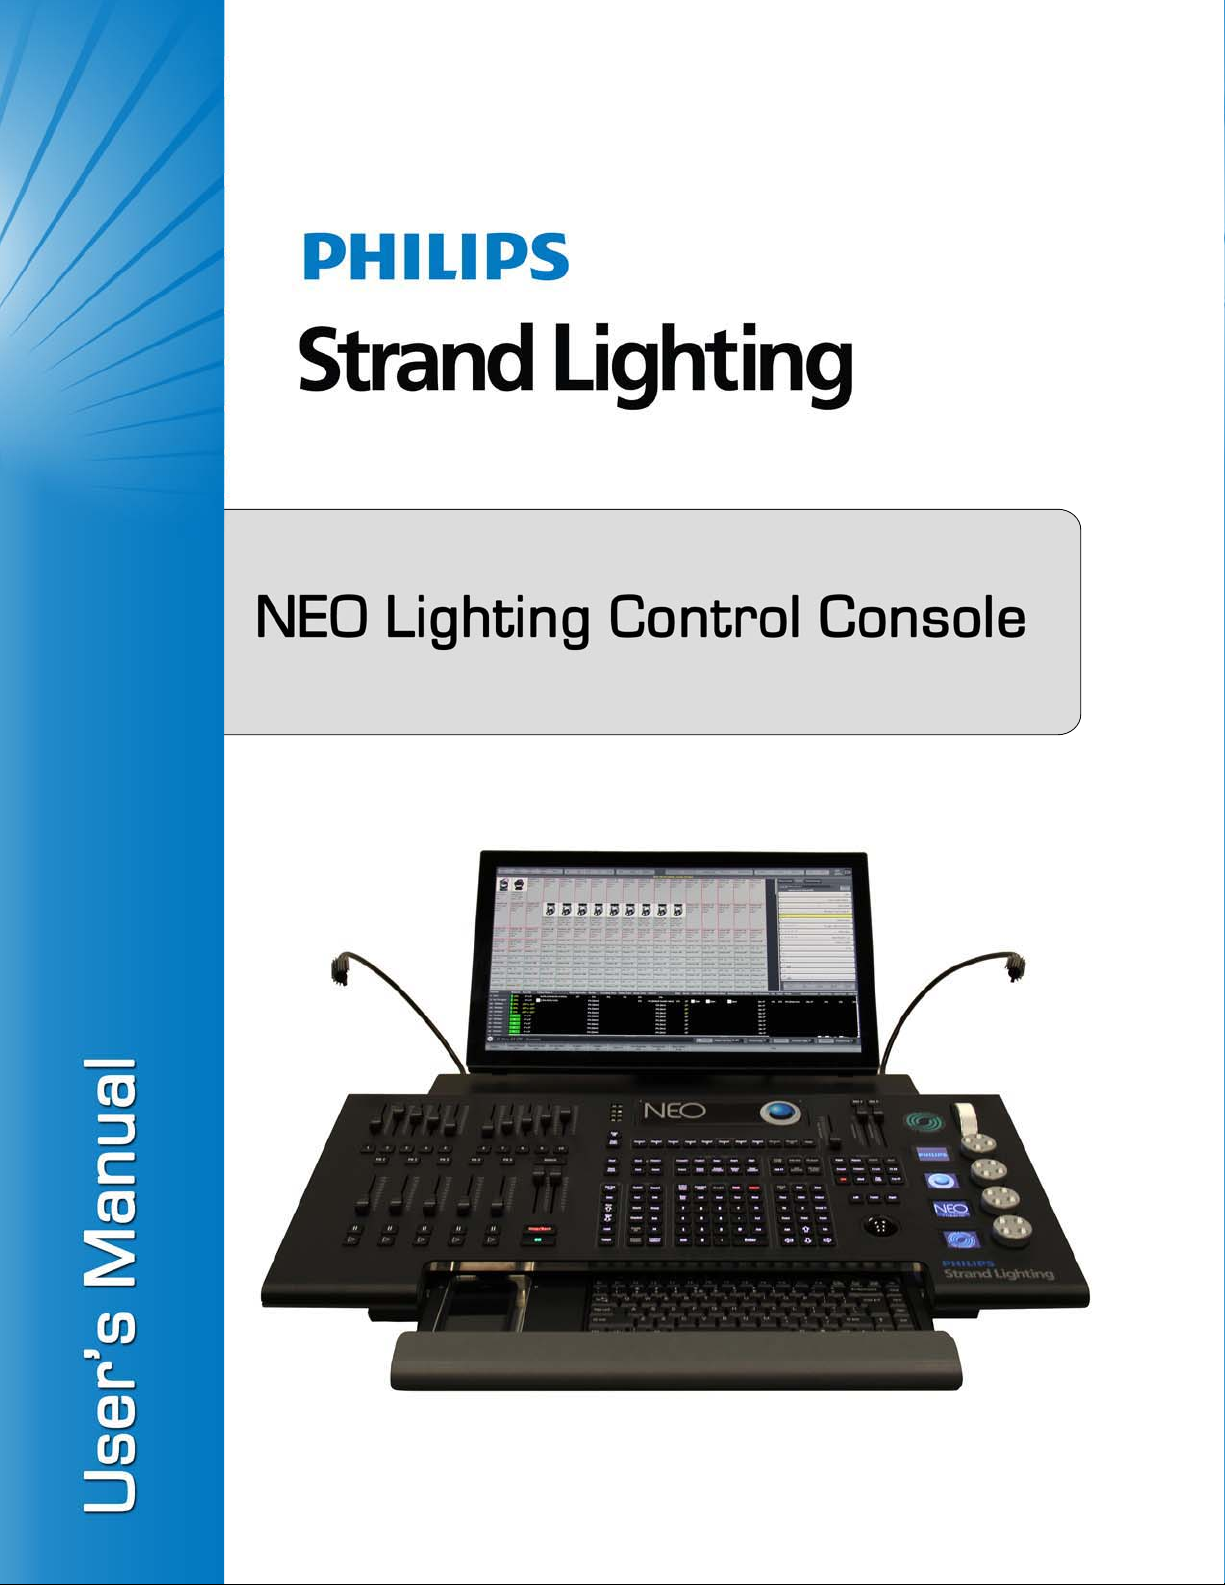
Software Version 3.0
Page 2

Strand Lighting Offices
Philips Strand Lighting - Dallas
10911 Petal Stree t
Dallas, TX 75238
Tel: 214-647-7880
Fax: 214-647-8031
Philips Strand Lighting - Auckland
19-21 Kawana Street
Northcote, Auckland 0627
New Zealand
Tel: +64 9 481 0100
Fax: +64 9 481 0101
Philips Strand Lighting - Asia Limited
Unit C, 14/F, Roxy Industrial Centre
No. 41-49 Kwai Cheong Road
Kwai Chung, N.T., Hong Kong
Tel: +852 2796 9786
Fax: +852 2798 6545
The material in this manual is for information purposes only and is subject to change without notice. Philips Strand
Lighting assumes no responsibility for any errors or omissions which may appear in this manual. For comments and
suggestions regarding corrections and/or updates to this manual, please visit the Philips Strand Lighting web site at
www.strandlighting.com or www.neocontrol.net or contact your nearest Philips Strand Lighting office.
El contenido de este manual es solamente para información y está sujeto a cambios sin previo aviso. Philips Strand
Lighting no asume responsabilidad por errores o omisiones que puedan aparecer. Cualquier comentario, sugerencia
o corrección con respecto a este manual, favor de dirijirlo a la oficina de Philips Strand Lighting más cercana.
Der Inhalt dieses Handbuches ist nur für Informationszwecke gedacht, Aenderungen sind vorbehalten. Philips
Strand Lighting uebernimmt keine Verantwortung für Fehler oder Irrtuemer, die in diesem Handbuch auftreten. Für
Bemerkungen und Verbesserungsvorschlaege oder Vorschlaege in Bezug auf Korrekturen und/oder
Aktualisierungen in diesem Handbuch, moechten wir Sie bitten, Kontakt mit der naechsten Philips Strand Lighting
Niederlassung aufzunehmen.
Le matériel décrit dans ce manuel est pour information seulement et est sujet à changements sans préavis. La
compagnie Philips Strand Lighting n'assume aucune responsibilité sur toute erreur ou ommission inscrite dans ce
manuel. Pour tous commentaires ou suggestions concernant des corrections et/ou les mises à jour de ce manuel,
veuillez s'il vous plait contacter le bureau de Philips Strand Lighting le plus proche.
Philips Strand Lighting - Europe
Rondweg zuid 85
Winterswijk 7102 JD
The Netherlands
Tel: +31 (0) 543-54 2516
Website:
www.strandlighting.com
www.neocontrol.net
Note: Information contained in this document may not be duplicated in full or in part by any person without prior written
approval of Philips Strand Lighting. Its sole purpose is to provide the user with conceptual information on the equipment
mentioned. The use of this document for all other purposes is specifically prohibited. All copyrights of others remain their
property.
Document Number: 85-6403 Rev. 0
Version as of: 30 July 2014
NEO Lighting Control Console User’s Manual
©2014 Philips Group. All rights reserved.
Page 3
IMPORTANT INFORMATION
Warnings and Notices
When using electrical equipment, basic safety precautions should always be followed including the following:
a. READ AND FOLLOW ALL SAFETY INSTRUCTIONS.
b. Do not use outdoors.
c. Do not use near gas or electric heaters.
d. The use of accessory equipment not recommended by the manufacturer may cause an unsafe
condition.
e. Do not use this equipment for other than intended use.
f. Refer service to qualified personnel.
SAVE THESE INSTRUCTIONS.
WARNING: You must have access to a main circuit breaker or other power disconnect device before installing
any wiring. Be sure that power is disconnected by removing fuses or turning the main circuit breaker off before
installation. Installing the device with power on may expose you to dangerous voltages and damage the device.
A qualified electrician must perform this installation.
NEO Lighting Control Console
WARNING: Do not open the console. There are no user serviceable parts inside. This equipment is designed to
operate from the mains electrical supply and contains voltages, which, if touched, may cause death or injury. It
should only be operated in accordance with the instructions provided and for the purpose of a lighting control
system.
WARNING: Avoid spilling liquid on the equipment If this should happen, switch the equipment off
immediately at the mains. To reduce the risk of fire or electric shock, do not expose the equipment to rain or
moisture. For indoor use only.
WARNING: Refer to National Electrical Code® and local codes for proper use specifications.
WARNING: This equipment is intended for use in accordance with the National Electric Code® and local
regulations. It is also intended for installation in indoor applications only. Before any electrical work is
performed, disconnect power at the circuit breaker or remove the fuse to avoid shock or damage to the control.
It is recommended that a qualified electrician perform this installation.
Philips Strand Lighting Limited Two-Year Warranty
Philips Strand Lighting offers a two-year limited warranty of its products against defects in materials or
workmanship from the date of delivery. A copy of Philips Strand Lighting two-year limited warranty containing
specific terms and conditions can be obtained from the Philips Strand Lighting web site at www.strandlighting.com
or by contacting your local Philips Strand Lighting office.
1
Page 4

User’s Manual
TABLE OF CONTENTS
Strand Lighting Offices................................................................................................................................... 0
IMPORTANT INFORMATION
Warnings and Notices............................... ....................................................................................................... 1
Philips Strand Lighting Limited Two-Year Warranty..................................................................................... 1
TABLE OF CONTENTS
Introduction
Preface .................................................................................................................................................................. 12
About This Guide ................................................................................................................................................. 12
NEO Software License
NEO Software License Agreement ...................................................................................................................... 13
Customer Support
How to Reach Us............................................................................................................................... ................... 16
Additional Resources............................................................................................................................................ 16
Additional Documentation - DMX512..................................................................................................... ..... 16
NEO Software & Documentation.................................................................................................................. 16
Overview
Components.......................................................................................................................................................... 17
Included Items............................................................................................................................................... 17
Processor............................................................................................................................................................... 17
Accessories and Expansion Devices............................................... ...................................................................... 17
Monitor/Touchscreen .................................................................................................................................... 17
Optional Accessories (sold separately) ......................................................................................................... 17
Software Upgrades........................................................................................................................................ ........ 17
DMX Output Universe Upgrades........................................................................................................ ................. 17
Features................................................................................................................................................................. 17
Standard Features ........................................................................................................................................ .. 17
Control:.......................................................................................................................................................... 18
Playback: ....................................................................................................................................................... 18
Display Functions:......................................................................................................................................... 18
Connectivity Features.................................................................................. .................................................. 19
External Control:.......................................................................................................................... ................. 19
Software Overview
NEO Software....................................................................................................................................................... 20
Benefits of NEO Software:............................................................................................................................ 20
Offline Editor........................................................................................................................................................ 20
Control of Connected Devices.............................................................................................................................. 20
External Control...................................................................................................................................... .............. 20
Installation and Setup
Unpack.............................................................................................................................. .................................... 21
Site Requirement........................................................................................................................................... 21
Product Care.................................................................................................................................................. 21
Unpack and Assemble Components.............................................................................................................. 21
Hardware Setup .................................................................................................................................................... 21
Connecting Console Components ................................................................................................................. 21
DMX512 Output..................................................................................................................................... .............. 22
MIDI/SMPTE....................................................................................................................................................... 22
Console Power Up Procedure.....................................................................................................
.......................... 22
2 TABLE OF CONTENTS
Page 5

NEO Lighting Control Console
Using The Manual
Controls
Desk Layout.......................................................................................................................................................... 24
Console Overview......................................................................................................................................... 24
Programming Button Layout................................................................................................................................ 24
Display Keys................................................................................................................................................. 25
Effects Keys .................................................................................. ............................................................... 25
Playback Keys .............................................................................................................................................. 25
Action Keys ..................................................................................................................... ............................. 26
Command Keys............................................................................................................................................. 26
Advanced Keys ............................................................................................................................................. 27
Shortcut Keys................................................................................................................................................ 28
Selection / Attributes Keys.......................................................................................................... .................. 28
Intelligent Lighting Buttons and Encoders........................................................................................................... 28
Level Wheel .................................................................................................................................................. 28
Automated Luminaire Encoders.................................................................................................................... 29
SUBMASTER Controls and Button Layout ........................................................................................................ 29
Playback Controls Layout .................................................................................................................................... 29
Primary Split Playback Faders...................................................................................................................... 29
Playback Faders...................................... ....................................................................................................... 30
Grand Masters and Master Fade Time Fader....................................................................................................... 30
Trackball/Mouse Controls.................................................................................................................................... 30
Software Configuration
Command Pulldowns............................................................................................................................................ 31
Command Pulldown - Selection.................................................................................................................... 32
Select Active Options.................................................................................................................................... 33
Command Pulldown - Level ......................................................................................................................... 33
ON Options ................................................................................................................................................... 36
Home Options ............................................................................................................................................... 36
Command Pulldown - Release.................................................................................................................. .... 37
Undo Options ................................................................................................................................................ 38
Release Option .............................................................................................................................................. 38
Command Pulldown - Record....................................................................................................................... 39
Command Pulldown - Items.......................................................................................................................... 44
Command Pulldown - View.......................................................................................................................... 46
Control Tabs................................................................................................................................... ............... 56
Side Bar Cue List ......................................................................................................................................... . 58
Clock ............................................................................................................................................................. 59
Split View..................................................................................................... ................................................. 59
Library FX Control........................................................................................................................................ 59
NEO Console Configuration Status...................................................................................................................... 60
Command Line..................................................................................................................................... ......... 60
Master Fade Time.......................................................................................................................................... 61
Shortcuts............................................................................................................................................................... 61
On-Screen Shortcuts...................................................................................................................................... 62
Options.......................................................................................................................................................... 63
Right click options ........................................................................................................................................ 63
Submasters and Submaster Pages.................................................................................................
Submas
On-Screen Submasters .................................................................................................................................. 65
ter Options ........................................................................................................................................ 64
........................ 64
3
Page 6

User’s Manual
Fader Mode.................................................................................................................................................... 65
Submaster Wheel.................................................................................................................. ......................... 66
Grid Mode ..................................................................................................................................................... 66
Playback Page................................................................................................................................................ 67
Display Options.................................................................................................................................................... 67
Options .......................................................................................................................................................... 67
Open a Saved Show....................................................................................................................................... 68
Open a Server Based Show File............................................................ ........................................................ 68
Save (Show) as….................... ........................................................................................................... ........... 68
External Triggers.................................................................................................................................................. 69
MIDI Control................................................................................................................................................. 69
MIDI Learn.................................................................................................................................................... 70
Note Triggers................................................................................................................................................. 70
Note Velocity............................................................................................................................................ ..... 71
Control Change Events.................................................................................................................................. 71
Timecode (MTC) / Clock..................................................... ......................................................................... 72
PC Line-In.................... ........................................................................................................... ...................... 72
Creating an Event....................... ..................................................................................................... .............. 73
Timecode....................................................................................................................................................... 73
mySQL Interface........................................................................................................................ ................... 74
Scheduled Tasks.................................................................................................................................................... 75
Create a Scheduled Task ...................................................... ......................................................................... 75
Modify a Scheduled Task.............................................................................................................................. 77
Remove a Scheduled Task............................................................................................................................. 77
Temporarily Turn Off a Scheduled Task(s) .................................................................................................. 77
User Permissions .................................................................................................................................................. 78
NEO Software License Registration.................................................................................................. ................... 79
Live Display.......................................................................................................................................................... 80
Groups Display............................................................................................................................................. ........ 81
Group Number ............................................................................................................................................... 81
Group Name ................................................................................................................................. ................. 81
Channels............................................................................................................................ ............................ 81
Overview ......................................................................................................................................... .............. 82
DMX.............................................................................................................................................................. 82
Timing ........................................................................................................................................................... 83
Delay.............................................................................................................................................................. 83
Channel Grid ................................................................................................................................................. 83
Matrix............................................................................................................................. ............................... 83
Add/Delete.....................................................................................................................
Value...
........................................................................................................................................................... 84
.............................. .. 83
Fade Time.......................... ......................................................................................................... ................... 84
Behavior ...................................................................................................................................................... .. 84
Submaster...................................................................................................................................................... 85
Selection Shortcut............................................. ............................................................................................. 85
Toggle Shortcut............................................................................................................................................. 85
Apply Shortcut............................................................................................................................................... 85
Snap Attributes.............................................................................................................................................. 86
Options.................................................................................................................................................................. 86
Add Selected Groups to a Cue...................................................................................... ................................. 86
Add Active Groups to a Cue ...................................................... ................................................................... 86
4 TABLE OF CONTENTS
Page 7

NEO Lighting Control Console
Snapshot When Adding Groups................................. ................................................................................... 86
Select Active Button...................................................................................................................................... 86
Select All / Unselect All................................................................................................................................ 86
Select Inactive............................................................................................................................................... 86
Sorting........................................................................................................................................................... 86
Filters............................................................................................................................................................. 87
Print Channel Groups............................................ ........................................................................................ 87
Cue List Display / Editor...................................................................................................................................... 87
Cue Lists.................................................................................................................................. ............................. 87
Behavior.............................................................................................................................. .......................... 88
Cue List Security.................................................................................................................................... ....... 88
Active vs. Selected Cue Lists........................................................................................................................ 88
Cue List Options Menu................................................................................................................................ . 89
Cue List Behavior.......................................................................................................................................... 89
Open Tracking Sheet............................ ..................................................... .................................................... 90
Open Visual Timecode Editor .............................................................................................................................. 91
Report............................................................................................................................................................ 92
Use Primary Playback................................................................................................................................... 92
Safety Playback Mode................................................................................................................................... 92
Keyboard Playback Options...................... ......................................................... ........................................... 93
Selected Cue to Follow Current Cue............................................................................................................ . 93
Cue Go to Always Apply to the Current Cue List ........................................................................................ 93
Edit Cue Channels Live......................................... ........................................................................................ 93
Record Current Channel State When Adding Cues...................................................................................... 93
Show / Hide Search Bar......................................................................................................................... ....... 93
Print........................................................................................................................................................... .... 93
Print Preview................................................................................................ ................................................. 93
Printing Settings......................................................... ................................................................................... 93
Export To CSV File....................................................................................................................................... 93
Export to CSD (CUESERVER) File............................................................................................................. 93
Reset Grid Layout to Default........................................................................................................................ 94
Visible Columns............................................................................................................................................ 94
Cue List......................................................................................................................................................... 94
Cue Options................................................................................................................................................... 95
Visualizer Preview Options...................................................................................................... ..................... 98
Run Cue................................................................................................................. ........................................ 98
Add Cue............................... ..................................................... ............................................. ........................ 98
Delete Cue.............................................................................................. ....................................................... 98
Cue Controls.................................................................................................................................................. 99
Cue Number .................................................................................................................................................. 99
Description.................................................................................................................................................... 99
Tricks for Editing Multiple Cells at Once................................................................................................... 100
Overview..................................................................................................................................................... 100
DMX............................................................................................................................................................ 101
Timing......................................................................................................................................................... 101
Delay ........................................................................................................................................................... 101
Profile.......................................................................................................................................................... 101
CH Grid........................................................................................................................
Palettes
Matrix.......................................................................................................................................................... 103
Playback Options......................................................................................................................................... 108
........................................................................................................................................................ 102
............................... 101
5
Page 8

User’s Manual
Testing a Show............................................................................................................................................ 109
Cue Go......................................................................................................................................................... 109
Cue Stop ...................................................................................................................................................... 109
Cue Back ..................................................................................................................................................... 109
Cue Reset..................................................................................................................................................... 109
FX List (Effects Editor)................................ ...................................................... ................................................ 109
Effect Filters..................................................... ........................................................................................... 110
Creating New Effects ................................................ ..................................................... ............................. 110
New Effects Builder Opening Page............................................................................................................. 111
DMX Recorder............................................................................................................................................ 114
Effect Library .............................................................................................................................................. 115
Effect Playback Controls............................... .............................................................................................. 115
Create an Independent FX Playback ........................................................................................................... 117
Add the Selected FX To Multiple Cues ...................................................................................................... 118
Simple Chase............................................................................................................................................... 119
Timeline Effects .......................................................................................................................................... 122
Channels / Fixtures...................................................................................................................................... 127
Matrix Effect ............................................................................................................................................... 129
Media Effect ....................................................................................................................................................... 132
Palettes & Groups............................................................................................................................................... 133
All Palettes Shown ................................................................................................. ..................................... 133
Options ........................................................................................................................................................ 133
Creating Color Palettes................................................................................................................................ 134
Palettes (Generic Palettes)........................................................................................................................... 134
Channel Groups (Specific Palette) .............................................................................................................. 135
On the Fly Control (Busking a Show)......................................................................................................... 135
Creating Position Presets............................................................................................................................. 135
Using the Color Palettes.............................................................................................................................. 137
Using the Position Presets........................................................................................................................... 137
Using Palettes from the Shortcut Window............................................................. ... .................................. 137
Cue List Based Shows................................................................................................................................. 138
Recording Palettes into Cues........................................................... ............................................................ 139
Manually Changing a Palette in a Cue .............................. .......................................................................... 140
Updating a Cue with a Palette..................................................................................................................... 141
Patch ................................................................................................................................................................... 141
P/T (Pan & Tilt) Adjust..................................................... .......................................................................... 142
Profile.......................................................................................................................................................... 142
Aux Dimmers .................................................................................. ............................................................ 143
Vis Patch...................................................................................................................................................... 143
Position........................................................................................................................................................ 143
Unit #........................................................................................................................................................... 143
Purpose........................................................................................................................................................ 143
Color Description ........................................................................................................................................ 143
Color............................................................................................................................................................ 143
Fixture Type ...................................................................................................................
Power
........................................................................................................................................................... 143
............................. 143
Weight ......................................................................................................................................................... 143
Circuit Name, Circuit Number & Dimmer Phase ....................................................................................... 144
Accessories.................................................................................................................................................. 144
Generic Data 1, 2 and 3............................................................................................................................... 144
DMX Settings.............................................................................................................................................. 144
6 TABLE OF CONTENTS
Page 9

NEO Lighting Control Console
Command Buttons and Pulldowns.............................................................................................................. 144
Standard Dimmer Patching ......................................................................................................................... 147
Command Line Patch.................................................................................................................................. 147
Intelligent Fixtures ................................. ..................................................................................................... 147
Other Information........................................................................................................................................ 148
RDM................................................................................................................................................................... 148
Automatic Patching..................................................................................................................................... 150
Edit Menu............................ ..................................................... ................................................................... 150
Cue Playbacks .................................................................................................................................................... 154
FX or Effects Playbacks.................................................... ................................................................................. 155
Options........................................................................................................................................................ 156
Timeline Effects Options ............................................................................................................................ 158
Chase Options ............................................................................................................................................. 159
Profile Effect Options.................................................................................................................................. 160
Matrix Effect Options.................................................................................................................................. 161
Media Effect Options.................................................................................................................................. 161
Playback Controls ................................................. ........................................................ .............................. 162
Macro Editor................................................ ....................................................................................................... 162
Additional Commands................................................................................................................................. 163
DMX View......................................................................................................................................................... 164
System Properties............................................................................................................................................... 165
System Input/Output (DMX) ...................................................................................................................... 166
Number of Desk Channel............................................................................................................................ 166
Max DMX Universes.................................................................................................................................. 166
Merge with Universe.................................................................................... ............................................... 167
Configuring DMX Universes...................................................................................................................... 167
Port.............................................................................................................................................................. 167
Network Interface........................................................................................................................................ 167
DMX Frame Rate........................................................................................................................................ 167
Information.................................................................................................................................................. 168
ArtNet & sACN Unicast options....................................................... .......................................................... 168
Telnet Command Line Interface ................................................................................................................. 168
System Input/Output - Advanced................................................................................................................ 169
System Settings .................................................................................................................................................. 169
System Properties, System Settings Tab..................................................................................................... 170
Show Command Syntax Help..................................................................................................................... 170
Command Line Single Digit Entry.............................................................................................................. 170
A/B Fader Mode....................................................................... ................................................................... 170
Cue List Split Crossfader ............................................................................................................................ 171
Automatic Show File Backup Service................................................................................................................ 171
Backup location................................................................................................................ ........................... 171
Intermediate Options.......................................................................................................................................... 172
Mouse Wheel Sensitivity .........................................................................................................
Fine Movement Sensitivity ......................................................................................................................... 172
Number of Submaster Pages....................................................................................................................... 172
Number of Submasters Per Page................................................................................................................. 172
Submaster Denounce Level......................................................................................................................... 172
Number of Cue List Playbacks Per Page .................................................................................................... 172
Select Fixtures After Setting ................................................................................. ...................................... 172
Immediately Select After Pressing @......................................................................................................... 172
................... 172
7
Page 10

User’s Manual
NEO Console & Software
Disable Double Click Function.............................................................................. ..................................... 173
Submasters Must Return to the Current Position After a Page Change...................................................... 173
Start New Show with Nothing Patched....................................................................................................... 173
Wheel Changes Ignore Master Fade Time.................................................................................................. 173
Use Attribute Default Values When Nothing is in Control......................................................................... 173
Don't Show Palette Options When Recording a Cue .................................................................................. 173
Use Advanced Color Heuristics .................................................................................................................. 173
Virtual Dimmer to Inhibit Colors................................................................................................................ 173
Apply Color Selection to All Color Mixers ................................................................................................ 174
Multiple Shortcut and Submaster Windows................................................................................................ 174
Disable Fader Move with Bump Buttons......................................................... ........................................... 174
GM (Grand Master) Affects Record............................................................................................................ 174
Tracking Backup Options............................................................................................................................ 174
Sunrise / Sunset ............................... ............................................................................................................ 175
Advanced System Settings ................................................................................................................................. 176
External Joystick Sensitivity ....................................................................................................................... 176
External Joystick Threshold........................................................................................................................ 176
Log Incoming Telnet Data........................................................................................................................... 177
Show "first time software is run" Dialog ............................................................ ........................................ 177
Remember Cue Update History........................... ........................................................................................ 177
Don't Prompt to Close the Software............................................................................................................ 177
Don't Show Startup Failure Warning .......................................................................................................... 177
Don't Apply Submasters for Merged Channels........................................................................................... 177
Check for Software Updates........................................................................................................................ 177
Disable Undo in the Cue List Window........................................................................................................ 177
Reset Chase When Submaster Reaches Zero.............................................................................................. 177
Shutdown System on Exit ........................................................................................................................... 177
Make Show File Smaller............................................................................................................................. 178
Restore Factory Defaults............................................................ ................................................................. 178
Show Defaults..................................................................................................................................................... 178
Basic Options - Cue List Defaults............................................................................................................... 178
Full Tracking Mode / Hybrid Tracking Mode Switch (Important) ............................................................. 179
Default Record Mode.................................................................................................................................. 179
Default Tracking Record Mode................................................................................................................... 179
Set Auto Mark ............................... ..................................................... ......................................................... 180
Include Running Effects.............................................................................................................................. 180
Include Submasters...................................................................................................................................... 180
Include Palettes and Presets......................................................................................................................... 180
Intermediate Options ............................................ ......................................................... ..................................... 180
Channel Group Defaults.............................................................................................................................. 181
Group Behavior.................................................................................................................
Advanced Level Programming Options
............................................................................................................. 182
.......................... 181
Appearance......................................................................................................................................................... 183
Create a taskbar button for every window................................................................................................... 184
Software Registration ......................................................................................................................................... 185
Upgrade this NEO system ................................................................................................ .................................. 185
Visualization ....................................................................................................................................................... 186
Media.................................................................................................................................................................. 187
Special Shortcuts ................................................................................................................................................ 188
8 TABLE OF CONTENTS
Page 11

NEO Lighting Control Console
Special Shortcuts: More.............................................................................................................................. 189
Shortcuts Window....................................................................................................................................... 189
Submaster Window..................................................................................................................................... 189
Playback Window ....................................................................................................................................... 190
DMX View.................................................................................................................................................. 190
Live Video Preview..................................................................................................................................... 190
Touchscreen Keyboard................................................................................................................................ 190
Timecode Monitor....................................................................................................................................... 190
Power Monitor............................................................................................................................................. 191
Console Debug Window ............................................................................................................................. 191
Desk Light Control...................................................................................................................................... 191
Control Panel...................................................................................................................................................... 192
Edit Fixture Library..................................................................................................................................... 192
Edit Matrices............................................................................................................................................... 193
Edit Profiles.................................................................................................................. ............................... 193
Edit Color Filters......................................................................................................................................... 194
Layout Setting .................................................................................................................................................... 194
Save Layout and Settings............................................................................................................................ 194
Load Layout and Settings............................................................................................................................ 195
Control Panel...................................................................................................................................................... 195
Start Up ..................................................................................................... ... ............................................... 195
Applications ................................................................................................................................................ 196
System......................................................................................................................................................... 197
Maintenance ....................................................................................................................................................... 206
General Concepts
Lighting Concepts ............................................ ...................................................... ............................................ 208
DMX System............................................................................................................................................... 208
RDM............................................................................................................................................................ 209
Dimmers...................................................................................................................................................... 209
DMX Value................................................................................................................................................. 210
DMX Universe............................................................................................................................................ 210
Channels (Logical/desk channels or Fixtures)............................................................................................ 210
Dimmer Patching......................................................................................................................................... 210
Channel Profile............................................................................................................................................ 210
Conventional fixtures.......................................................... ........................................................................ 211
Intelligent Fixtures ................................. ..................................................................................................... 211
Fixture Attributes ........................................................................................................................................ 211
NEO Concepts and Terminology
Channel Groups.................................................................................................................................................. 213
Submasters and Shortcuts................................................................................................................................... 213
Cues.................................................................................................................................................................... 214
Cue Number ................................................................................................................................................ 214
Blocking...................................................................................................................................................... 214
Fixture Block..................................................................................................................
Smart Block
Cue List....................................................................................................................................................... 215
Cue Lists...................................................................................................................................................... 215
Cue Playbacks............................................................................................................................................. 215
Cue Trigger ................................................................................................................................................. 215
Cue Channels............................................................................................................................................... 216
Cue Effects.................................................................................................................................................. 216
................................................................................................................................................. 215
............................. 215
9
Page 12

User’s Manual
Computer Concepts
Let's Get Started!
Reference / Window Overview
Cue Shortcuts............................................................................................................................................... 216
Cue Channel Groups.................................................................................................................................... 216
Tracking (Intelligent Cue Execution)................................................................................................................. 216
Hybrid Mode ............................................................................................................................................... 216
Full Tracking Mode..................................................................................................................................... 216
Tracking Options......................................................................................................................................... 216
Recording Modes.............................................................. .................................................................................. 217
Effects................................................................................................................................................................. 217
Effect Types................................................................................... .............................................................. 217
Effect Playbacks..................................................... ..................................................................................... 217
Exclusive Groups................................... ...................................................................................................... 218
Command Line Interface.................................................................................................................................... 218
Command History ....................................................................................................................................... 218
Telnet Interface ............................ ....................................................................................................................... 218
Palettes................................................................................................................................................................ 218
Macros ................................................................................................................................................................ 218
Modes ................................................................................................................................................................. 218
Shortcuts............................................................................................................................................................. 219
Trackball............................................................................................................................................................. 220
Mouse Scroll Wheel ........................................................................................................................................... 220
Drag-and-Drop.................................................................................................................................................... 220
Right-click Pop-up Menus.................................................................................................................................. 220
Screen Real Estate .............................................................................................................................................. 220
Window Docking................................................................................................................................................ 220
MIDI................................................................................................................................................................... 220
SMPTE................................................................................................................................................................ 220
Timecode ............................................................................................................................................................ 221
SQL Server ......................................................................................................................................................... 221
USB .................................................................................................................................................................... 221
Ethernet............................................................................................................................................................... 221
Tutorial................................................................................................................................................................ 222
Console Default Settings............................................................................................................................. 223
Storing and Editing Cues................................................................. ............................................................ 225
Adjusting Cue Parameters........................................................................................................................... 225
Patching an Automated Luminaire.............................................................................................................. 225
Controlling a Moving Light......................................................................................................................... 227
Creating a Basic Cue List............................................................................................................................ 228
The Cue List Editor..................................................................................................................................... 230
Running the Show ....................................................................................................................................... 231
Command Window Interface.............................................................................................................................. 232
Command Window Options........................................................................................................................ 233
Command Structure..............................................................................................................
Command History
....................................................................................................................................... 233
....................... 233
Channel Commands..................................................................................................................................... 234
Other Commands......................................................................................................................................... 236
Hardware Interfaces............................................................................................................................................ 242
10 TABLE OF CONTENTS
Page 13

NEO Lighting Control Console
CueServer.................................................................................................................................................... 242
Hardware Submasters.................................................... .............................................................................. 243
Hardware Shortcuts............................................................................................................................................ 244
Window Layout Options .................................................................................................................................... 244
11
Page 14
User’s Manual
INTRODUCTION
1. Preface
The introduction of the NEO lighting control console marks a new chapter in the evolution of control. This console
allows the ability to seize light; to grab, move, change position, colo r and motivate the lighting design simply and
effectively. The NEO lighting control console is the closest that a designer can get to actually touching the light;
encompassing the dreams and aspirations of both professionals and amateurs alike.
The NEO lighting control console starts with the inclusion of many timesaving features, allowing the user to program
faster and more accurately . NEO is a native graphical interface cons ole with Command Line support. NEO allows the
user to choose between traditional Command Line style operation and touchscreen style operation using the
Graphical User Interface.
With advanced features for all lighting situations, from museum to stage shows, NEO does it all. Control up to 1 00
DMX Universes with 25,000 control channels. Authorization can be purchased in DMX Universe blocks for a truly
scalable system.
This manual will take you through all of the features of the software and show you how to use it to its fullest
potential.
2. About This Guide
Congratulations on your purchase of a Strand Lighting NEO Lighting Control Console. This manual provides
important information regarding safety, installation, and operation for all console hardware components.
Familiarizing yourself with this information will help you get the most out of your lighting system .
This manual describes the installation and operation procedures for the following models:
• 91001, NEO Lighting Control Console
• Avoid spilling liquid on the equipment. If this should happen, switch the equipment off immediately. To reduce the
risk of fire or electric shock, do not expose the equipment to rain or moisture.
• For indoor use only.
• This equipment is designed and manufactured to comply with international safety standards IEC950, UL19 50,
CS950 and is intended for use as part of a lighting control system. It must not be used for other purposes where
there is a risk of safety to persons. The equipment contains power voltages, socket outlets will be installed near the
equipment and be easily accessible.
• Working Voltage/Current: 90 - 240VAC
• Frequency: 50/60 Hz
• Maximum Ambient Temperature: 50° C (122° F)
• Do not restrict ventilation
WARNING! It is important to read ALL included safety and installation instructions to avoid damage to the product
and potential injury to yourself or others.
NEO NOTES & TIPS: Important notes and tips will are shown in like this with the NEO logo on the left. The notes
often contain important information about the current topic.
12 Introduction
Page 15

NEO SOFTWARE LICENSE
1. NEO Software License Agreement
These terms and conditions (License) form a legally binding agreement between you (Licensee) and Philips Strand
Lighting and Dream Solutions Limited (Philips and DSL) of 18 Ascot Way, Orewa, Auckland, New Zealand.
The Licensee will be permitted to use the NEO console, encompassing all applications and databases (Software) only
by accepting the terms of this License. Clicking on the "I Agree" button will constitute acceptance of the terms of this
License. If you are not willing to enter into this License, the "Can cel" button should be clicked, and you must not
install or otherwise download the Software.
Where the Licensee is not an individual then the agreement of the person accepting the terms of this License shall be
deemed to be acceptance by the Licensee.
1. Intellectual Property
1.1 The Licensee acknowledges and agrees that all intellectual property rights, including copyright, relating to
the Software are the sole property of Philips and DSL.
1.2 The Licensee acknowledges and agrees that all source code and form definitions relating to the Software are
the sole property of DSL and may not be modified in any way.
1.3 The Licensee acknowledges and agrees that all enhancements, modifications or customizations, including
associated source code and form definitions, made by or on behalf of the Licensee and relating to the Soft ware, vest
on creation in and are the sole property of Philips and DSL.
NEO Lighting Control Console
1.4 Subject to clause 2.2, the Licensee does not obtain, either under this License or by reason of use of the
Software, any right to copy the Software, or any right to use the Software after the License has terminated.
2. License
2.1 The Licensee is granted a non-exclusive, non-transferable, non-sublicensable license to install and use the
NEO Software for the Licensee's own internal business purposes, provided that the Licensee pays the charges for the
Console and/or output authorization.
2.2 The Licensee is permitted to make one copy of the Software for backup purposes only.
2.3 The Licensee will during the continuance of the License:
2.3.1 use the Software only as allowed for under this License and will not resell, rent, sub-license or otherwise make
the Software available to any person or entity;
2.3.2 subject to clause 2.2 or as permitted by applicable law, not copy, decompile, adapt, modify or reverse engineer
the Software or allow it to be copied, decompiled, adapted, modified or reverse engineered by any third party, or
modify the source code or form definitions in any way;
2.3.3 not remove or alter any copyright or other proprietary notice contained in the Software;
2.3.4 effect and maintain adequate security measures to safeguard the Software from access or use by any
unauthorized person; and
2.3.5 retain the Software and all copies of it under the Licensee's effective possession and control.
3. Assignment
3.1 The Licensee may not transfer the benefit of this License or the Software to any person or entity without the
prior written consent of Philips and DSL. Philips and D SL m ay assign or transfer this License without the Licensee's
consent.
4. Warranty
4.1 Refer to "Philips Strand Lighting Limited Two-Year Warranty" on page 1 or Philips Strand Lighting web site
at www.strandlighting.com.
NEO Software License Agreement 13
Page 16

User’s Manual
4.2 Subject to clause 4.1, all conditions, warranties, terms, representations and undertakings, whether express or
implied, statutory or otherwise, in respect of the Software are hereby excluded to the extent permitted by law. In
particular, but without limitation, Philips and DSL disclaims, to the greatest extent permissible by law, any warranty
or representation, either express or implied, of the console or software's performance, non-infringement or fitness for
a particular purpose or process.
4.3 If a significant defect in the Console is found within the ninety (90) days warranty period from shipment, the
Licensee may return the Console for a refund with a 25% restocking fee on giving written notice to Philips
Entertainment. The Licensee is not entitled to any updates, patches, fixes or upgrades in respect of the Console unless
Philips Entertainment and DSL in its absolute discretion otherwise agrees. Philips Entertainment and DSL may in its
discretion provide limited email and telephone support in respect of the Console but, following the 90 day warranty
period, reserves the right to charge the Licensee for the provision of support.
5. Limitation of Liability
5.1 To the extent permissible by law, in no event will Philips and DSL be liable to the Licensee for any direct,
special, incidental, indirect or consequential loss, damage, cost or expense suffered or incurred by the Licensee or any
third party in connection with the Software.
5.2 The entire liability of Philips and DSL in connection with the Software will not exceed the price paid by the
Licensee for the Software.
6. T erm and Termination
6.1 This License will remain in effect until terminated.
6.2 Philips and DSL may terminate this License on ninety (90) days' written notice to the Licensee or
immediately if the Licensee fails to comply with any term of this License.
6.3 Upon termination by Philips and DSL, the Licensee will be required to return the Software to DSL and
confirm in writing that no copies of the Software have been made and retained.
6.4 The provisions of clauses 4, 5, 7 and 8 of this agreement shall survive termination of this License for
whatever reason.
7. Governing Law
7.1 This License shall be governed by the laws of the State of Texas and is subject to the exclusive jurisdiction of
the Courts of the State of Texas.
8. Miscellaneous
8.1 T his License records the entire understanding and agreement between the Licensee and DSL. This License
supersedes all previous understandings or agreements (whether written, oral or both) between the Licensee and DSL.
8.2 Philips and DSL reserves the right to amend the terms of this License on sixty (60) days' written notice, posted
on Philips and DSL's websites. Continued use of the Software by the Licensee following the sixty (60) day notice
period will constitute acceptance of the amended terms of the License, and the provisions of this License will be
deemed to be altered accordingly.
8.3 A ny waiver by Philips and DSL of its rights or remedies under this License will be effective only if it is
recorded in writing and signed by Philips and DSL. If the waiver related to a breach of any provision of this License,
this will not (unless stated otherwise) operate as a waiver of any other breach of that provision. No waiver of any
breach, or failure to enforce any provision, of this License at any time by Philips and DSL will in any way affect limit
or waive Philips and DSL's right to subsequently require strict compliance with this agreement.
8.4 If the Licensee has any dispute with Philips and DSL in connection with this License or the Software, it must
give written notice to Philips and DSL and may submit the dispute for mediatio n by a single medi ator nominated by
the Courts of the State of Texas In the event of any submission to mediation:
8.4.1 the mediator will not be acting as an expert or as an arbitrator;
8.4.2 the mediator will determine the procedure and timetable for the mediation; and
8.4.3 the parties will share equally the cost of the mediation.
14 NEO Software License
Page 17
NEO Lighting Control Console
8.5 The Licensee agrees that it will not issue any legal proceedings against Philips and DSL relating to any
dispute, unless the Licensee has first taken all reasonable steps to comply with clause 8.4. Nothing in this License will
prevent DSL from taking any steps it deems in its sole discretion necessary or desirable to protect its intellectual
property rights or otherwise to enforce any of its rights under this License.
8.6 If any provision of this License is or becomes invalid or unenforceable, that provision will be deemed deleted
from this License. The invalidity of unenforceability of that provision will not affect the other provisions of this
License, all of which will remain in full force and effect to the extent permitted by law, subject to any modifications
made necessary by the deletion of the invalid or unenforceable provision.
Note: If you have questions about the NEO Software License, please send an email to
[email protected] or call us at 1.214.647.7880 prior to using.
NEO Software License Agreement 15
Page 18

User’s Manual
CUSTOMER SUPPORT
1. How to Reach Us
Contact Strand Lighting Customer Service at: 1-800-4STRAND (U.S.) or 1-214-647-7880 (international).
For a complete list of support and field service contacts, go to www.strandlighting.com , select the Support tab and
then the "Support/Field Service Contacts" link.
2. Additional Resources
Additional Documentation - DMX512
For more information on installing DMX512 control systems, the following publication is available for purchase
from the United States Institute for Theatre T echnology (USITT), "Recommended Practice for DMX512: A Guide for
Users and Installers, 2nd edition" (ISBN: 9780955703522). USITT Contact Information:
USITT
315 South Crouse Avenue, Suite 200
Syracuse, NY 13210-1844 USA
1-800-938-7488 or +1-315-463-6463
www.usitt.org
NEO Software & Documentation
The console's graphical user interface (GUI) is provided by Dream Solution. For detailed instructions on using the
NEO operating software, refer to the NEO operating software Help Menu within the software itself.
For the latest software documentation updates, please visit: www.strandlighting.com or www.neocontrol.net.
For a printed or printable version of NEO Console documentation, visit: www.strandlighting.com or
www.neocontrol.net.
16 Customer Support
Page 19
OVERVIEW
1. Components
Included Items
The NEO Lighting Control Console system includes the following items:
• 1 x Console with built-in Trackball, Keyboard, and Rotary Encoders
• 3 x Power Cables for all countries (EU, UK, and USA)
• 1 x Neoprene Dust Cover
• 1 x Installation & Setup Guide on USB stick
• 2 x Littlite® Gooseneck Lamp
2. Processor
The console processor utilizes Microsoft® Windows7 to run a specially designed NEO lighting control software. The
processor will not accept nor run standard Windows-based applications. It is only intended for use with the NEO
software application.
3. Accessories and Expansion Devices
NEO Lighting Control Console
Monitor/Touchscreen
The processor supports the use of up to three HD touchscreen monitors. Refer to Touchscreen Calibration under
"System" on page 197.
Note: Using touchscreens will enhance the usability of the console software and is highly recommended.
Optional Accessories (sold separately)
• Touchscreens
• Android OS / iOS Remote device
4. Software Upgrades
Software upgrades are free of charge and are available at: www.strandlighting.com or www.neocontrol.net.
5. DMX Output Universe Upgrades
The DMX output functionality included with your console is pre-authorized at the level initially purchased. However,
the DMX output authorization can be easily upgraded at any time. To purchase a DMX output upgrade for your NEO
Lighting Control Console, please contact your Authorized Strand Lighting Dealer.
NEO NOTES & TIPS: You may need to purchase ShowNet nodes or other DMX512 output devices if you exceed
2048 DMX outputs.
6. Features
Standard Features
• 1 to 100 universe output (depending on number of universes purchased or utilizing Philips Advantage DMX)
• 2048 DMX512 out put
• Unlimited cues up to (Cue 99999.999)
• Unlimited group s
Components 17
Page 20

User’s Manual
• Unlimited sho rtcu ts
• Windows® 7 processor
• 120GB solid-state hard drive
• Installed, Internet Browser, Adobe Acrobat Reader
• Supports Pathport®, ShowNet, Art-Net, CKNet, Color Kinetics™, and streaming E1.31 (ACN) Ethernet Protocols
• Free offline editor available at: www.strandlighting.com or www.neocontrol.net
Control:
• Split up/down fade times
• Split up/down delay times
• 26 parts per cue (A thru Z)
• 32-bit fades
• Independent tim ing by attribute
• Fade times from 1/100 second to 20 days
• Follow tim e
• Cue loops
• Pre-programmed effects wizard
• Moving light patch (graphical or command line)
• Channel check
• Channel labels
• Tracking / Cue Only / Hybrid Tracking style operation
• Astronomical time clock and time events
• Macros
Playback:
• 10 Submasters on NEO base console (Unlimited Pages)
• 4 moving light encoders with LCD status screens
• Support for 3 HD touchscreen monitors
• 5 playback faders
•A/B faders
• True Last Action Tracking operation
• Unlimited cue li st with unlimited simultaneous fades
• Integrated Trackball
• Level wheel (accessible from top and bottom of console)
• Touchscreen monitor support
• Two programmable Grandmaster sliders
Display Functions:
• Live editing
• Blind editing
• Groups List / Details
• Cue List / Details
18 Overview
Page 21

• FX List / Details
• Palette List / Details
• Cue Playbacks
• FX Playbacks
• Macro Editor
• System Properti es
• Shortcuts Window
• Submaster Window
• Playbacks Window
•DMX View
• Live Video Preview
• Touchscreen Keyboard
• Timecode Monitor
• Power Monitor
• Console Debug Window
• Control Panel
• Fixture Library
NEO Lighting Control Console
• Matrix Editor
• Profile Editor
• Color Filter Edito r
Connectivity Features
• Supports Pathway®, ShowNet, Art-Net, KiNet 1 and 2 (Color Kinetics), and streaming E1.31 (ACN) Ethernet protocols.
• DMX512A / RDM
• RS232
• MIDI In/Out
• SMPTE In/Out
• Audio Out
External Control:
• Android app cont rol
• Apple app control
Features 19
Page 22

User’s Manual
SOFTWARE OVERVIEW
1. NEO Software
Benefits of NEO Software:
NEO is a tracking-based application.
NEO adds an easy to use Graphical User Interface to the already powerful command-line syntax that is common to
generations of Strand control. Now there is a choice to use traditional command-lin e syntax or use the mouse and
access pull-down menus and dialog boxes.
NEO displays a wealth of information on its graphical screen, allowing the user to work faster and more efficiently.
NEO can be upgraded, at no additional cost, when new software becomes available.
2. Offline Editor
A free off-line editor is available at: www.strandlighting.com or www.neocontrol.net.
3. Control of Connected Devices
Control of connected devices and/or lighting systems is achieved by using th e console desk hardware in conjunction
with the NEO software application. In some cases, actions can be performed using either the hardware or software,
providing you with a variety of choices suitable to your preferences and requirements.
For more information about external hardware controls, refer to "Hardware Interfaces" on page 242.
For more instructions on using the NEO software, please refer to the user manual within the program itself (by either
selecting it from the Options menu or Control Panel.
4. External Control
The console can accept several forms of external control, depending on your console's particular configuration.
These include, but are not limited to, Touchscreens and Remote Focus Units.
20 Software Overview
Page 23
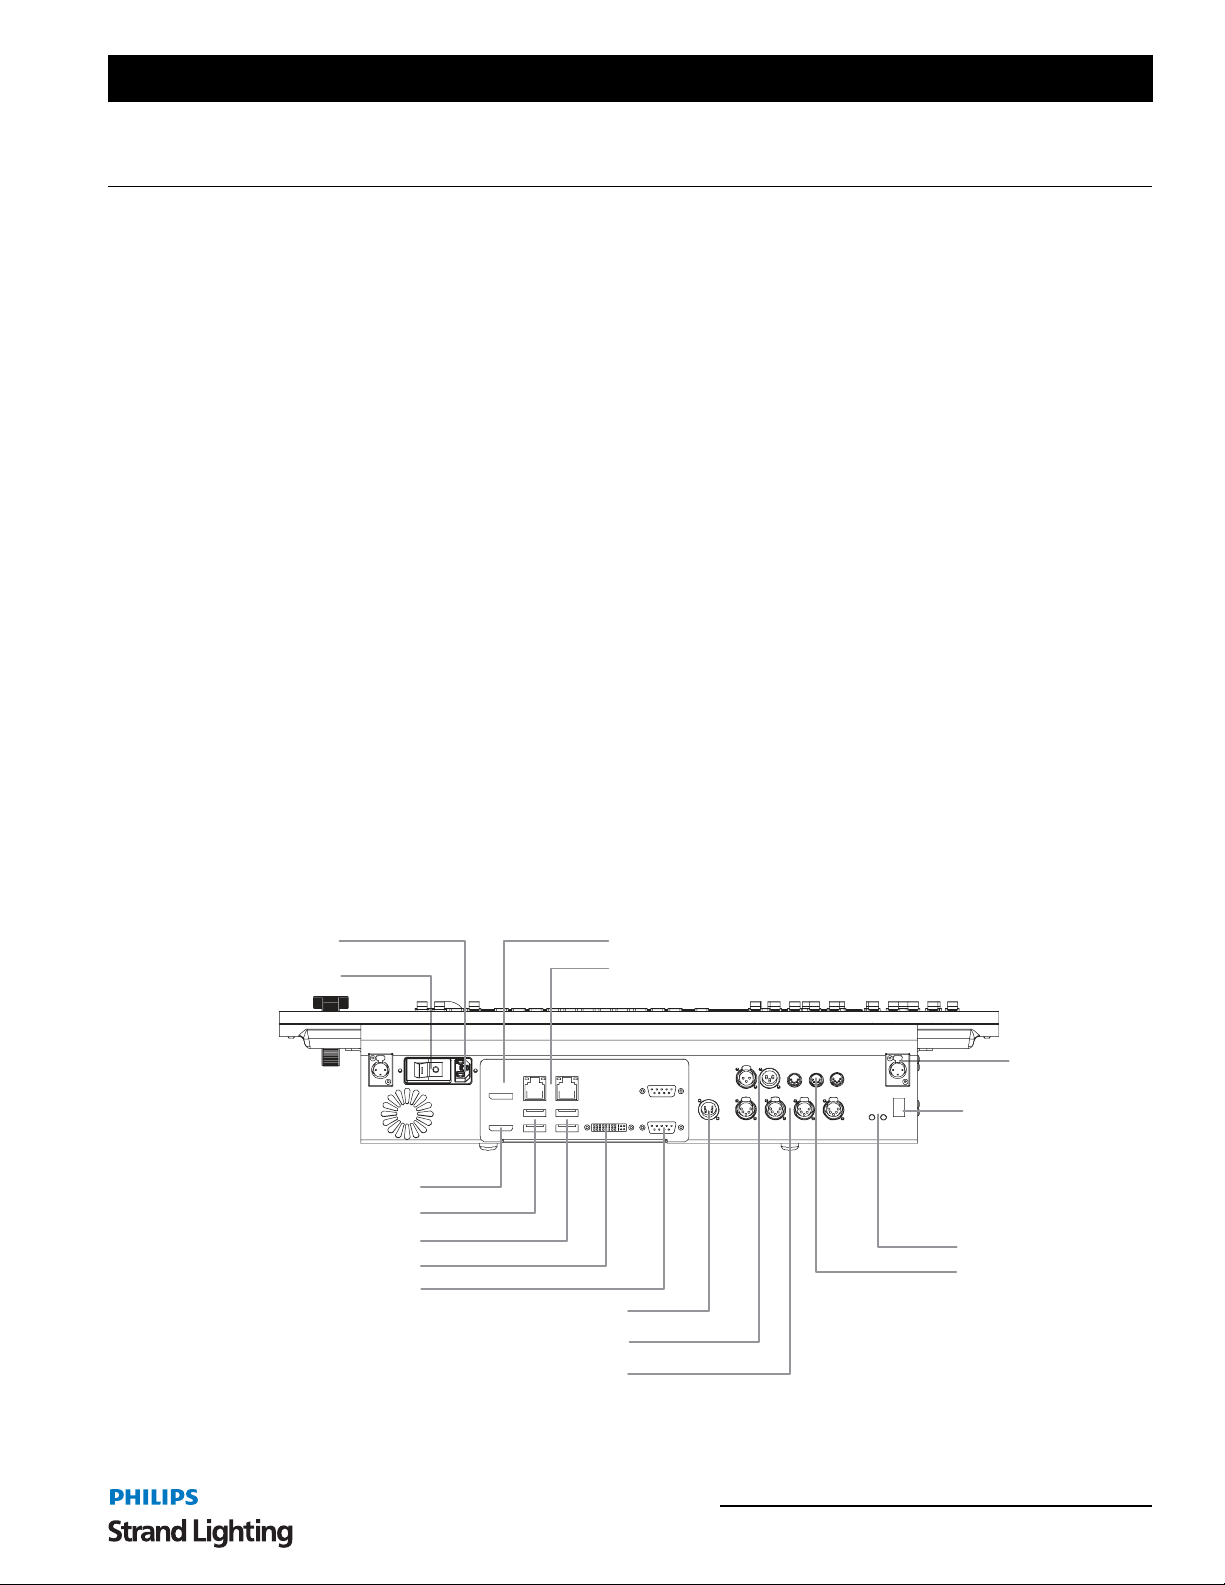
INSTALLATION AND SETUP
1. Unpack
Site Requirement
The console and its components require a sturdy, flat surface for installation. The surface should be able to support
the weight of the console (including monitors, etc.) and sh ould provide suitable ventilat ion. Also, the site should be
clean (i.e. absent of any construction dust or debris) and dry. Before setting up, ensure that the installation site meets
these requirements. Refer to product specification sheet on the Philips Strand Lighting web site for console
dimensions and power requirements.
Product Care
In the event the console needs to be cleaned, remove all power from unit and use only a very mild soap on a damp
cloth. Dry immediately with a soft lint-free cloth after cleaning. Never use harsh chemicals such as window cleaners,
paint removers, vinyl conditioners, etc.
It is recommended to gently blow out the sub pots and desk occasionally to prevent buildup of dust and dirt.
Unpack and Assemble Components
To unpack and assemble the console components, do the following:
Step 1. Remove console components from shipping container or case.
Step 2. Place console desk on installation surface.
Step 3. Place monitor(s)* and other external components close enough to console so that cabling will reach.
*Monitors sold separately.
NEO Lighting Control Console
2. Hardware Setup
Connecting Console Components
Figure 1 outlines the NEO Lighting Control Console’s connections.
AC Input
On/Off Switch
DisplayPort
HDMI
HDMI Port
USB 3.0 Ports
USB 2.0 Ports
DVI Port
COM Ports
DMX Input
SMPTE In/Out
DMX Output (x4)
VESA Display Port
Network Ports
DVI
Rear of Unit
Console Light
Receptacle (x2)
Kensington Security
Lock Slot
(security cable and lock
by others)
Status Indicators
MIDI In/Out
Figure 1: Console Rear Panel Connections
Unpack 21
Page 24

User’s Manual
To connect console components, do the following:
Step 1. At console rear panel, IEC power cable (included).
Step 2. Connect monitor(s)* or touchscreen(s)*.
Step 3. Install gooseneck lamps (included).
*Optional accessories sold separately.
3. DMX512 Output
The console provides four standard XLR 5-pin connectors for connecting to DMX512 devices. Each connector
supports one DMX512 universe of 512 DMX channels. Connect DMX512 devices as shown in Figure 1.
4. MIDI/SMPTE
The NEO has the capability to both send and receive MIDI and SMPTE time code.
5. Console Power Up Procedure
Once the console has been installed and all components connected, the console and processor can be powered up.
To power up:
Step 1. At back of console, toggle the power switch to on.
Step 2. After boot up is complete, go into System Properties and set the system to work to your preferences. See
Quick Start Guide for guidance.
Step 3. While in "System Properties," verify that other important and systemic features are set correctly for you.
• System Settings
• Show Defaults
22 Installation and Setup
Page 25

USING THE MANUAL
Using this manual to its full potential is aided by knowing the format in which the information is provided.
There will be Command Line instructions. These are commands that you enter by typing on the NEO console keys.
NEO Lighting Control Console
Figure 2: NEO console keys
All Command Line entries in this document will be displayed in brackets.
[1] [@] [30] [ENTER]
The monitor will offer lots of opportunities for direct entry to the graphical user interface. This can either be
accomplished by touching the monitor should you have a touchscreen. If you don't have a touchscreen then the
console's trackball can provide an alternative to the touchscreen.
Touchscreen entries will be listed as follows…
(View)
Congratulations on the purchase of your NEO console and let's get started!
Console Power Up Procedure 23
Page 26
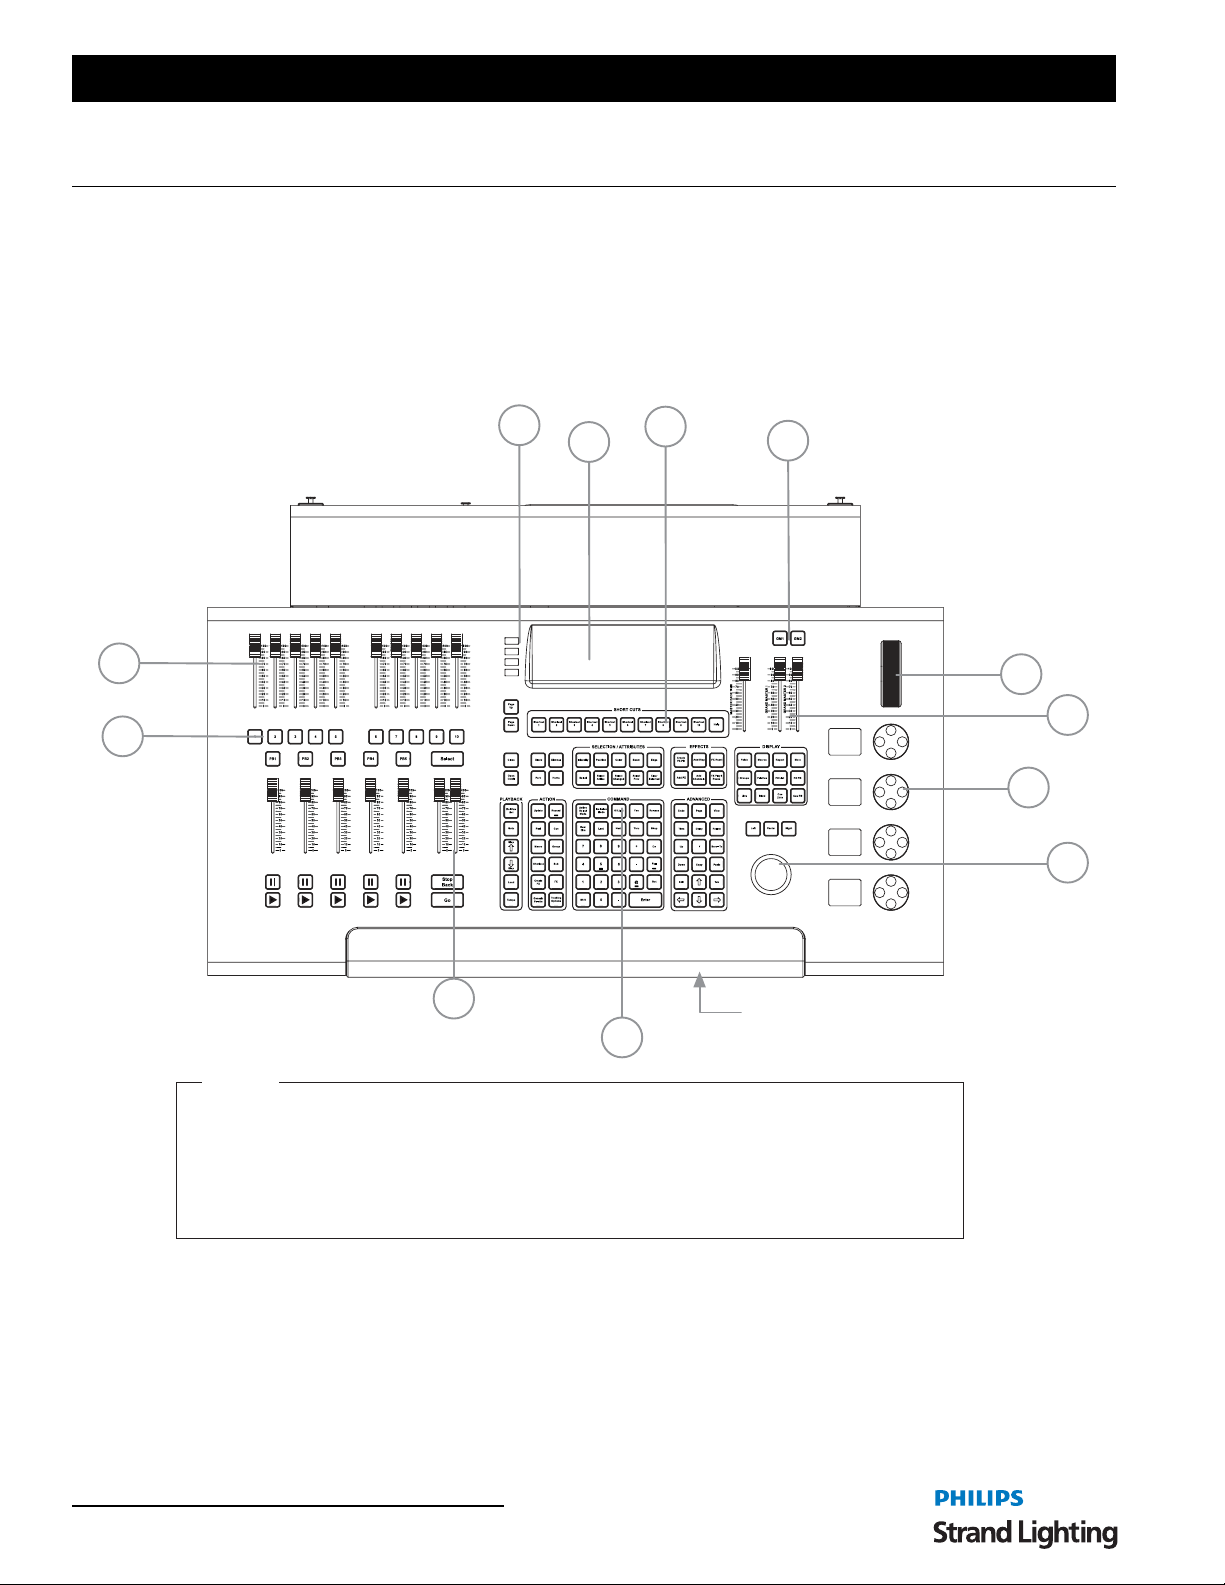
User’s Manual
CONTROLS
1. Desk Layout
Console Overview
Figure 3 provides an overview of console desk controls. Refer to subsequent pages for more in-depth explanations of
individual button and slider functions.
D
E
H
G
Top of Unit
A
C
K
J
Legend
Pull out Keyboard Drawer with
Phone Storage and USB Charger
(phone by others)
B
F
I
L
A. Motorized Faders / Submasters
B. Level Wheel
C. 10 Bump Buttons
D. USB Port (showfile storage, USB key sold separately)
E. Tablet Well with USB Power (tablet by others)
F. Grand Masters (2)
2. Programming Button Layout
The programming section of the desk provides direct access to intensity channels, channel attributes, playback
control, console setup and display options.
24 Controls
G. Black Out Buttons
H. Shortcuts (10 each)
I. Encoders with Encoder Status (4 each)
J. Programming Buttons
K. A/B Playback Controls (with Go and Stop/Back buttons)
L. Track Ball
Figure 3: NEO Control Console Overview
Page 27
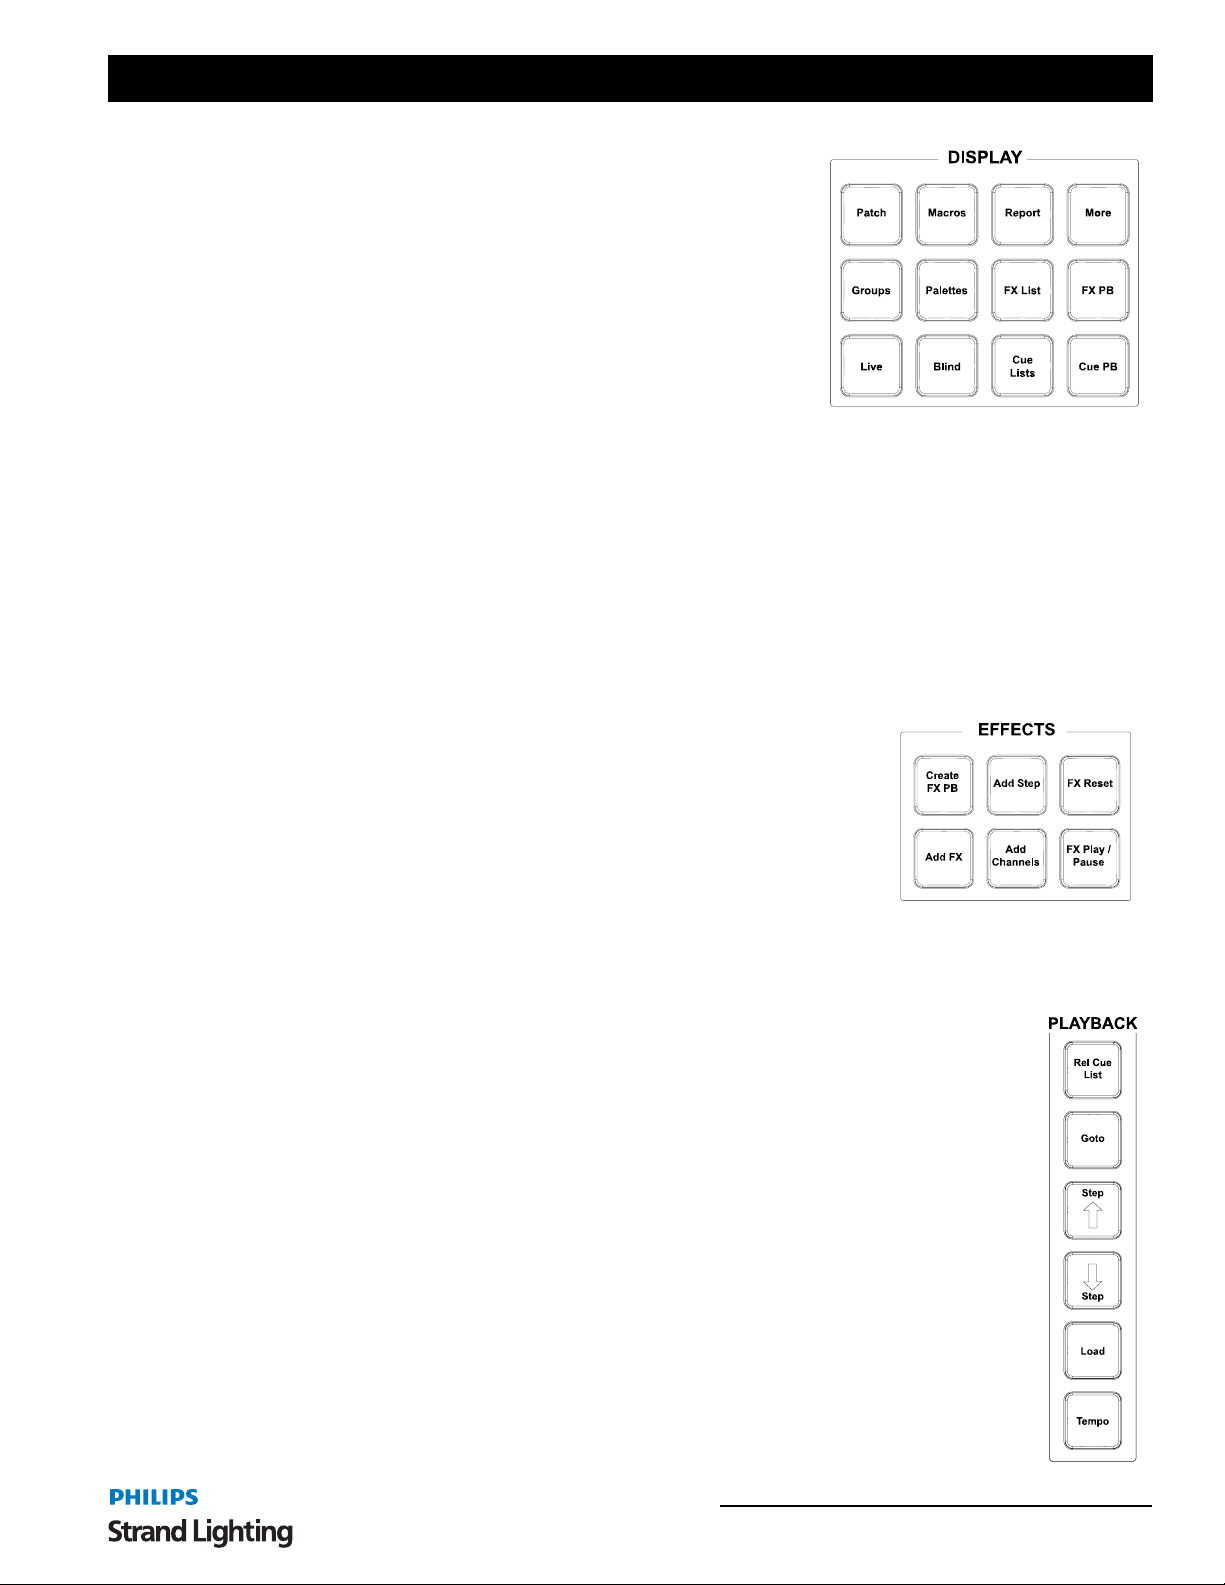
NEO Lighting Control Console
Display Keys
[Live] - Live is the main viewport and will show all active output for
fixtures and cues.
[Blind] - Activates Blind Mode. While in Blind, the channel grid has a
Grey background. Blind allows for non-Live viewing and editing.
[Cue Lists] - Opens the Cue List Details window. All details about cues
are available here.
[Cue PB] - Opens Cue playback popup window.
[Groups] - Opens Groups popup window. Allows editing of groups and
submasters assignment.
[Palettes] - Opens Palettes window. Allows editing/ adding/ deleting of Palettes for attributable fixtures.
[FX List] - Opens Effects editor window. Allows for adding, editing, and deleting effects.
[FX PB] - Opens effects playback window. Displays any saved effects for previewing.
[PATCH] - Switches the Screen display to view the patch screen (single monitor layout) or opens Patch popup
window (multiple monitor layout). Allows for editing of fixture assignmen t and ho w they are controlled.
[Macros] - Opens macro editor window. Allows for creating/editing/deleting of macros.
[Report] - Opens Selected Fixture Report popup window.
[More] - Brings up MORE menu from lower right, which allows access to additional screens and functionality.
Effects Keys
[Create FX PB] - Opens Effects editor popup window. Allows for adding, editing,
and deleting effects.
[Add Step] - Adds a step to the selected existing effect.
[FX Reset] -. Resets the currently running effect.
[Add FX] - Opens popup window with effects types to aid in the creation of
effects. Includes an Effects wizard to guide user through creating custom effects.
[Add Channels] - Adds channels to the selected step in effects creation/ editing.
[FX Play/Pause] - Acts as a GO/Stop button for the selected effect.
Playback Keys
[Rel Cue List] - Releases the current primary cue list and all fixtures will restore to default.
[Goto] - Places desired cue live on stage. Ex: [GOTO] [1] [ENTER].
[Step Up (arrow up)] - Cuts to the previous cue in the cue list.
[Step Down (arrow down)] - Cuts to the next cue in the cue list.
[Load] - Will preset the loaded cue as the next cue that runs on Go. [LOAD] [#] [ENTER]
[Tempo] - Allows the user to establish a tempo for manually stepped effects.
Programming Button Layout 25
Page 28
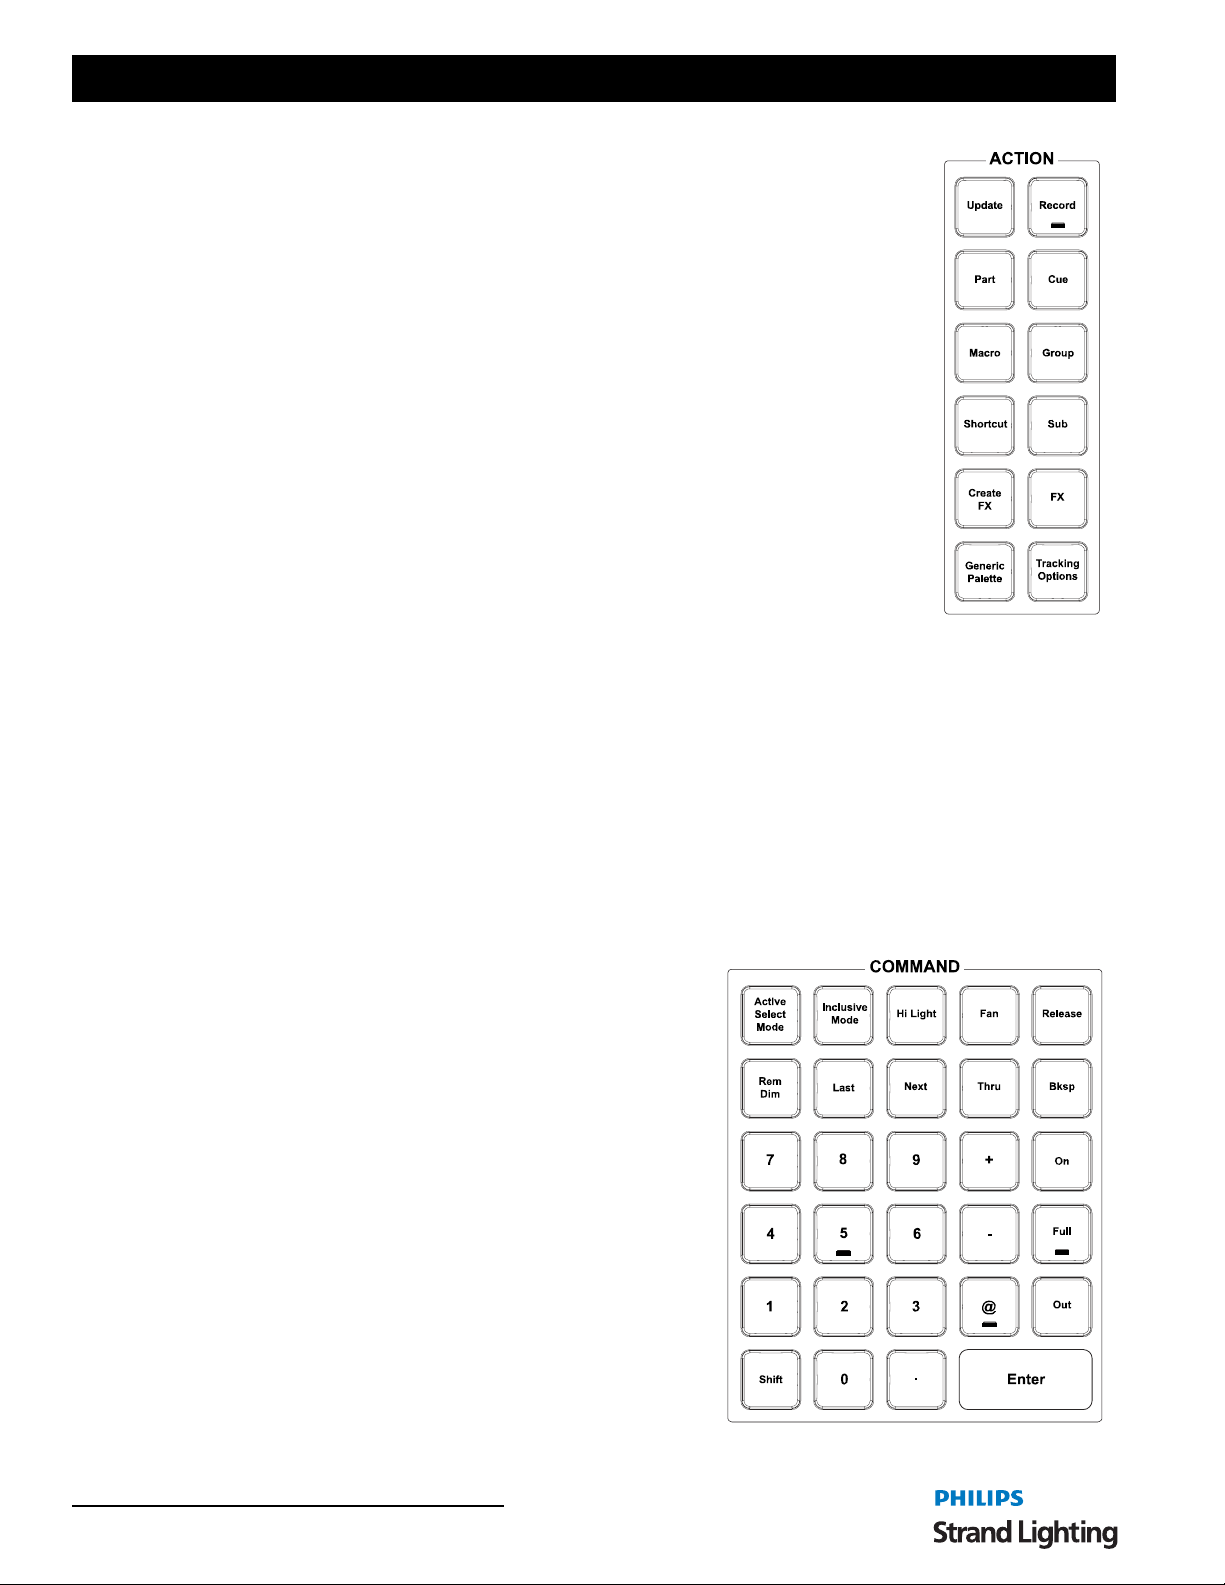
User’s Manual
Action Keys
[Update] - Stores changes to selected item. This could be a Cue, Group or other item. Ex:
[UPDATE] [CUE] [1] [ENTER].
[Record] - Stores lighting state as a selected item. This could be a Cue, Group or other item.
Ex: [RECORD] [CUE] [1] [ENTER].
[Part] - A portion of a single cue that can be assigned a unique time value. Ex: With channels
selected and changed [PART] [B] [ENTER] will assign selected channels to the desired part
(Part B in this example). Continue part assignment until completed. Then Record or Update
to store or edit the cue. Parts B thru Z are available.
[Cue] - A recorded state that can be played back in time.
[Macro] - Triggering device for stored keystroke entry.
[Group] - Specifies group selection. Ex: [GROUP] [1] [ON] or [RECORD] [GROUP] [1]
[ENTER].
[Shortcut] - A shortcut is a quick route to a particular setting or feature that is used
frequently. A Shortcut can be triggered from the Shortcut buttons on the console, from the
Shortcut page, a Cue, a Group or at startup.
[Sub] - A fader that controls a group. Look in the Groups display and you'll find a Submaster
column where you can assign a submaster to a group. In addition, when recording groups there is a box wh ere a
submaster can be assigned. Quick recording is available by typing [RECORD] [SUB] [#] [ENTER]. This will record
a group of the same number and apply the submaster as a fader to that group.
[Create FX] - Will take a current effect from the Effect Library and create a new show based effect.
[FX] - Places FX on the command line for command line operation. Allows the ability to assign effects to cues and
run effects manually.
[Generic Palette] - Places PALETTE on the command line for command line operation. Allows the ability to create
Generic Palettes. A generic palette is stored information that doesn't care what fixture or type of fixture it is applied
to. So you can build a Palette called Red and it can be applied to any fixture type patched and it will turn the light red.
(Assuming the fixture type can do it.)
[Tracking Options] - Toggles through the tracking options for recording and updatin g purposes.
Command Keys
[Active Select Mode] - Sets the selected fixture at Full and allows
NEXT/LAST to run through all fixtures to perform a rig check.
[Inclusive Mode] - Will add any fixtures selected to the existing
selection set.
[Hi Light] - Will send selected fixtures to the "Hi Light" value.
The goal of Hi Light is to allow the user to identify the
highlighted fixtures on stage when many fixtures are in use. This
usually will set the fixture to full intensity, clear all color
parameters and all beam parameters. However, each fixture type's
hi light values can be adjusted within the fixture library editor.
[Fan] - Launches the Fan tool. This is used for dynamic level
changes.
[Release] - First press - will release all selected fixtures. Second
press will release all fixtures.
[Rem Dim] - Switches all channels, except those which are
selected, off.
26 Controls
Page 29

NEO Lighting Control Console
[Last] / [Next] - Advances to next or reverses to previous channel. Also acts as a tab key for navigating dialog boxes.
[Thru] - Used when entering a range of numbers.
[Bksp] - Backspace
[0 - 9, .] - 10-Key Numerical Entry.
[On] - Takes intensity value to designated ON level for all selected channels. This level can be changed in: System
Properties > System Settings.
[Full] - Takes intensity value to 100% for all selected channels.
[Out] - Takes intensity value to zero for all selected channels.
[@] - Used to enter specific intensity value for all selected channels.
[Shift] - Used in conjunction with command/action keys for advanced functionality.
[Enter] - Completes an action or selection when entered from the Command Line.
Advanced Keys
[Undo] - Allows undoing of the last level change [UNDO] [ENTER], the last
record [UNDO] [RECORD] [ENTER], upda te, goto or delete action. Two presses
releases selected devices or undoes selected commands. See Undo command at the
top of the main monitor for more advanced Undo history options.
[Page] - Will "page" the channel display down to show additional fixtures. (Shift +
Page will "page" up.)
[View] - Allows the user to use VIEW on the command line. User can identify a
range of fixtures to view. Example: [VIEW][1][THRU][200][ENTER].
[VIEW][ALL] shall restore to default.
[Time - Allows you to set the times for cues and other elements. Example: [CUE]
[1] [TIME] [5] [ENTER].
[Delay] - Any delay value will hold the cue for the delayed amount of time prio r to
activating the cue. Example: [CUE] [1] [DELAY] [2] [ENTER]
[Follow] - Assigns a cue a follow command. A follow command on any cue will
allow the next cue to run automatically after the follow time has expired.
[Up] - Takes selected channel up a predetermined amount (e.g. 10%). Also works
in other instances, such as time windows, data fields, etc. Change this settin g in
System Properties > System Settings.
[If] - Allows the use of IF on the command line for advanced IF/THEN statements.
[Scroll To] - Allows display to "scroll to" a specified fixture.
[Down] - Takes selected channel down a predetermined amount (e.g. 10%). Also works in other instances, such as
time windows, data fields, etc. Change this setting in System Properties > System Settings.
[Copy] - Allows data to be copied* from selected channels. Example: [1] [@] [COPY]{COPY FROM} [2] [ENTER].
Note: *Also works as a traditional Windows copy when data is selected.
[Paste] - Will apply the copied data as a traditional Windows paste action.
[Edit] - Allows data to be editable.
[Tab] - Advances to the next edit cell with dialogue boxes.
[Arrow Keys] - Moves the cursor in the desired direction within dialogue boxes.
Programming Button Layout 27
Page 30
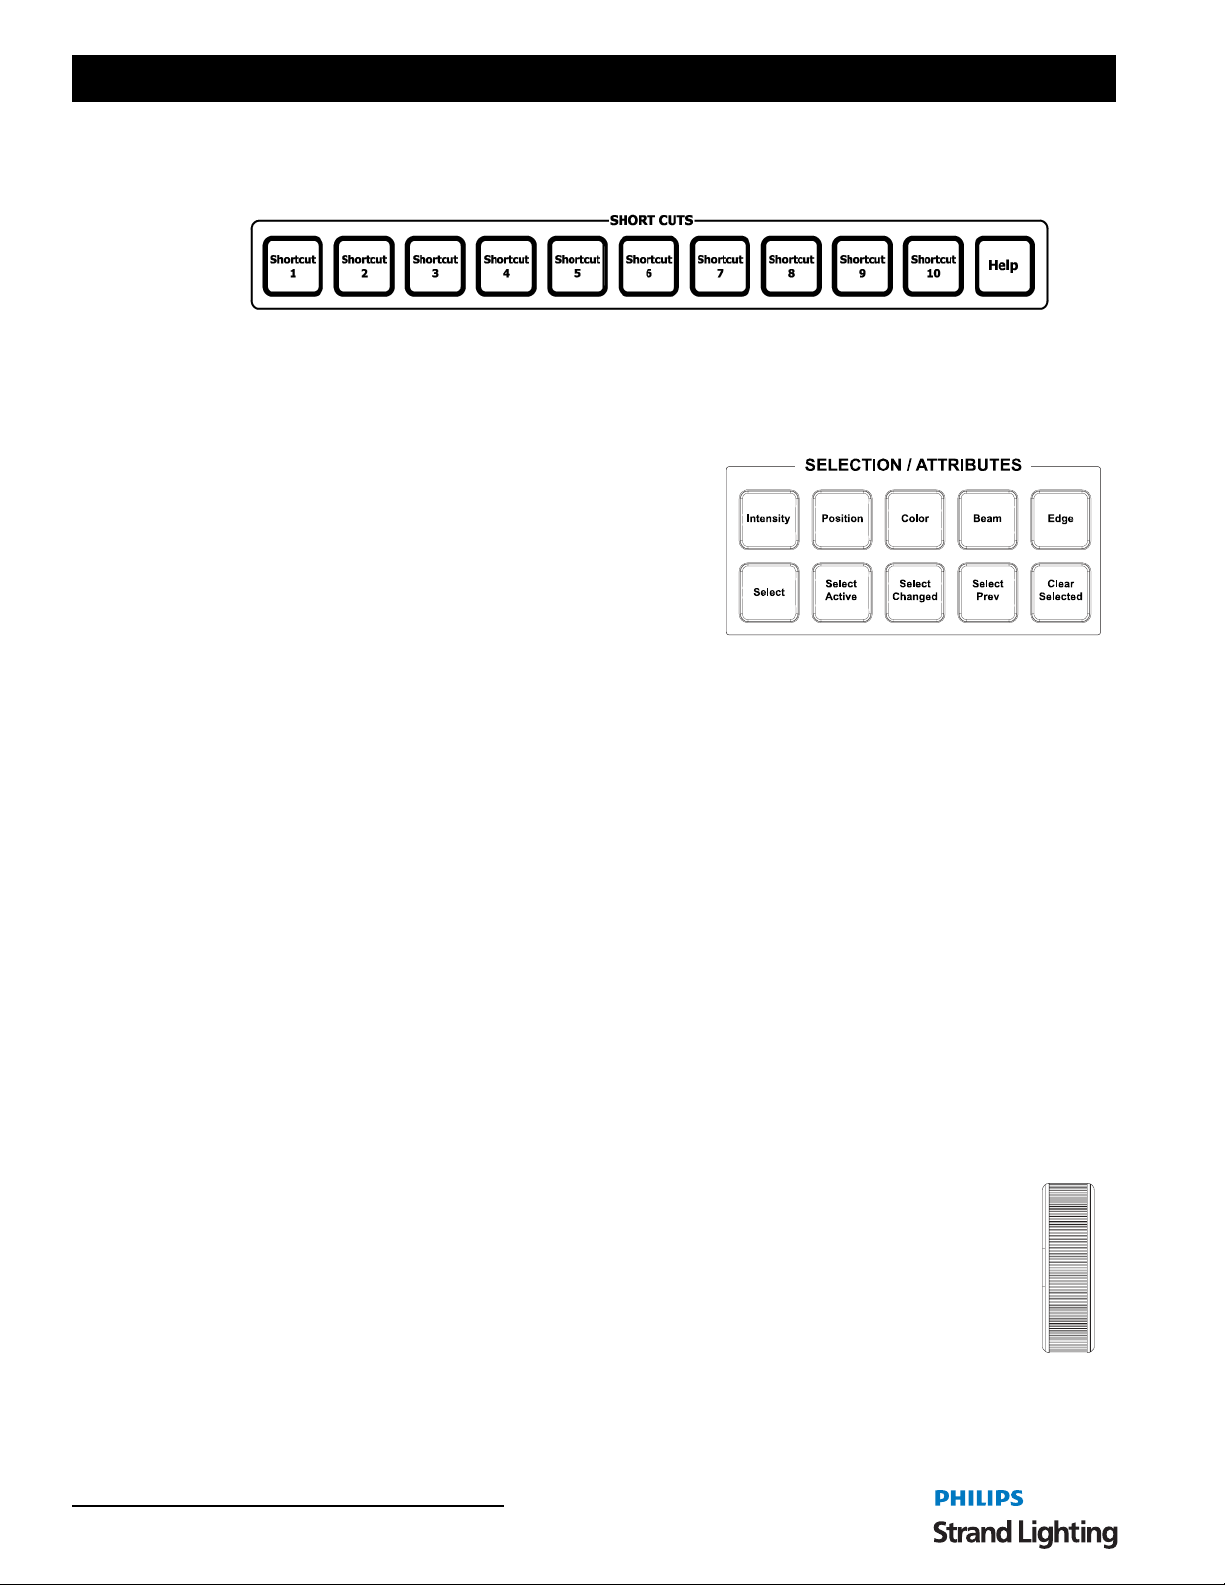
User’s Manual
Shortcut Keys
[Shortcut 1] / [Shortcut 10] - Quick access to the first 10 Shortcuts programmed on each Shortcut page.
[Help] - Opens up console documentation.
Selection / Attributes Keys
[Intensity] - Assigns any intensity attributes to the encoders.
Advanced functionality assigns utility parameters to the intensity
encoder assignments.
[Position] - Use Position Quick Selection button to select
position control on the four rotary encoders, or for recording
Position Preset Focus palettes.
[Color] - Use Color Quick Selection button to select position
control on the four rotary encoders, or for recording Color
palettes.
[Beam] - Use Beam Quick Selection button to select Gobo control parameters on the four rotary encoders, or for
recording Gobo Preset Focus palettes. Press again to bank the four encoders to other Gobo wheels.
[Edge - Use the Edge quick selection button to select all parameters that effect the edge of the beam of light. Typical
edge parameters are Focus, Iris, Zoom and Shutters.
[Select] - Will open NEO's Select box. The Select box will access show programmed items like groups. This also will
show items labeled in patch from columns like position, purpose and color.
[Select Active] - Will capture all fixtures with intensity.
[Select Changed] - Will capture all fixtures with adjusted values.
[Select Prev] - Will captures the previously selected fixtures.
[Clear Selected] - Will uncaptured all selected fixtures.
3. Intelligent Lighting Buttons and Encoders
The encoders and buttons found in these sections of the desk provide special controls for intelligent lighting fixtures.
The rotary four encoders provide navigation of the NEO software and control of channel attributes. The encoders are
context sensitive to allow appropriate control of attributes such as one percen t, one DMX512 step, one gobo, one
second of time, etc.
Level Wheel
The console features a level wheel which provides navigation of the NEO software and control of
channel attributes. The wheel is context sensitive to allow appropriate control of attributes such as one
percent, one DMX512 step, one gobo, one second of time, etc. By default, it controls the intensity level
of the selected channels.
Holding [SHIFT] while engaging the wheel will place the wheel in Fine Mode.
28 Controls
Page 31
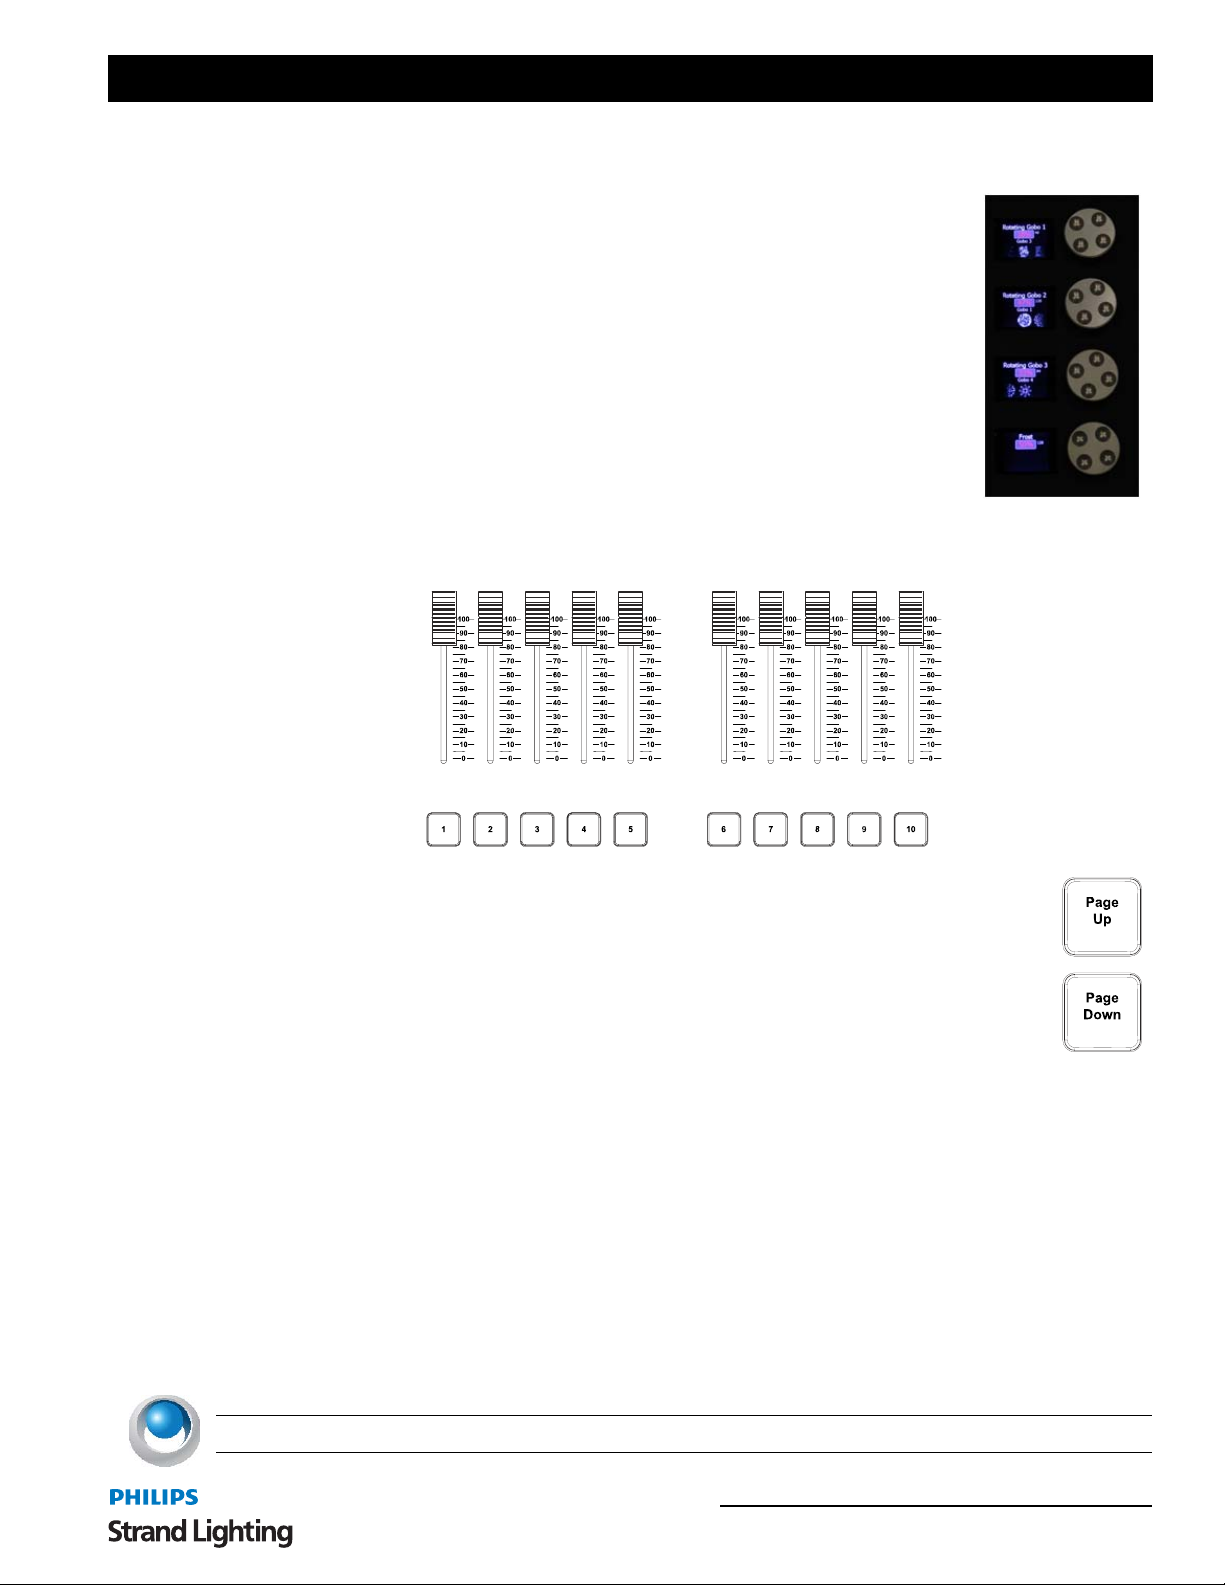
Automated Luminaire Encoders
The LCD display left of each wheel will change depending on [SELECTION/
ATTRIBUTES] Button pressed. [Beam] is shown below. Each encoder wheel rotates
clockwise and counterclockwise and then pressed to select current value.
4. SUBMASTER Controls and Button Layout
NEO Lighting Control Console
10 Submaster sliders are programmable to hold groups, effects, etc. Submasters can be programmed as
Additive, Subtractive, Pile-on, Exclusive and other modes.
[1] / [10] - Bump button for corresponding Submaster slider
[UP] / [DOWN] - Increments or decrements Submaster pages
5. Playback Controls Layout
The playback section of the desk provides controls for executing active cues and fading between two pre-stored
scenes. These faders consist of motorized A/B and single playback motorized faders.
Primary Split Playback Faders
The primary split playback faders are motorized and will always activate the primary cue list.
These faders have different configuration options.
1) Disabled
2) PB Master and Crossfader - left fader is master, right fader is crossfader.
3) PB Master and Disabled - left fader is master, right fader is disabled.
4) Cue List Split Crossfader - left fader controls levels going up, right fader cont rol s levels going down.
NEO NOTES & TIPS: PB faders can be configured in System Properties>System Settings.
SUBMASTER Controls and Button Layout 29
Page 32
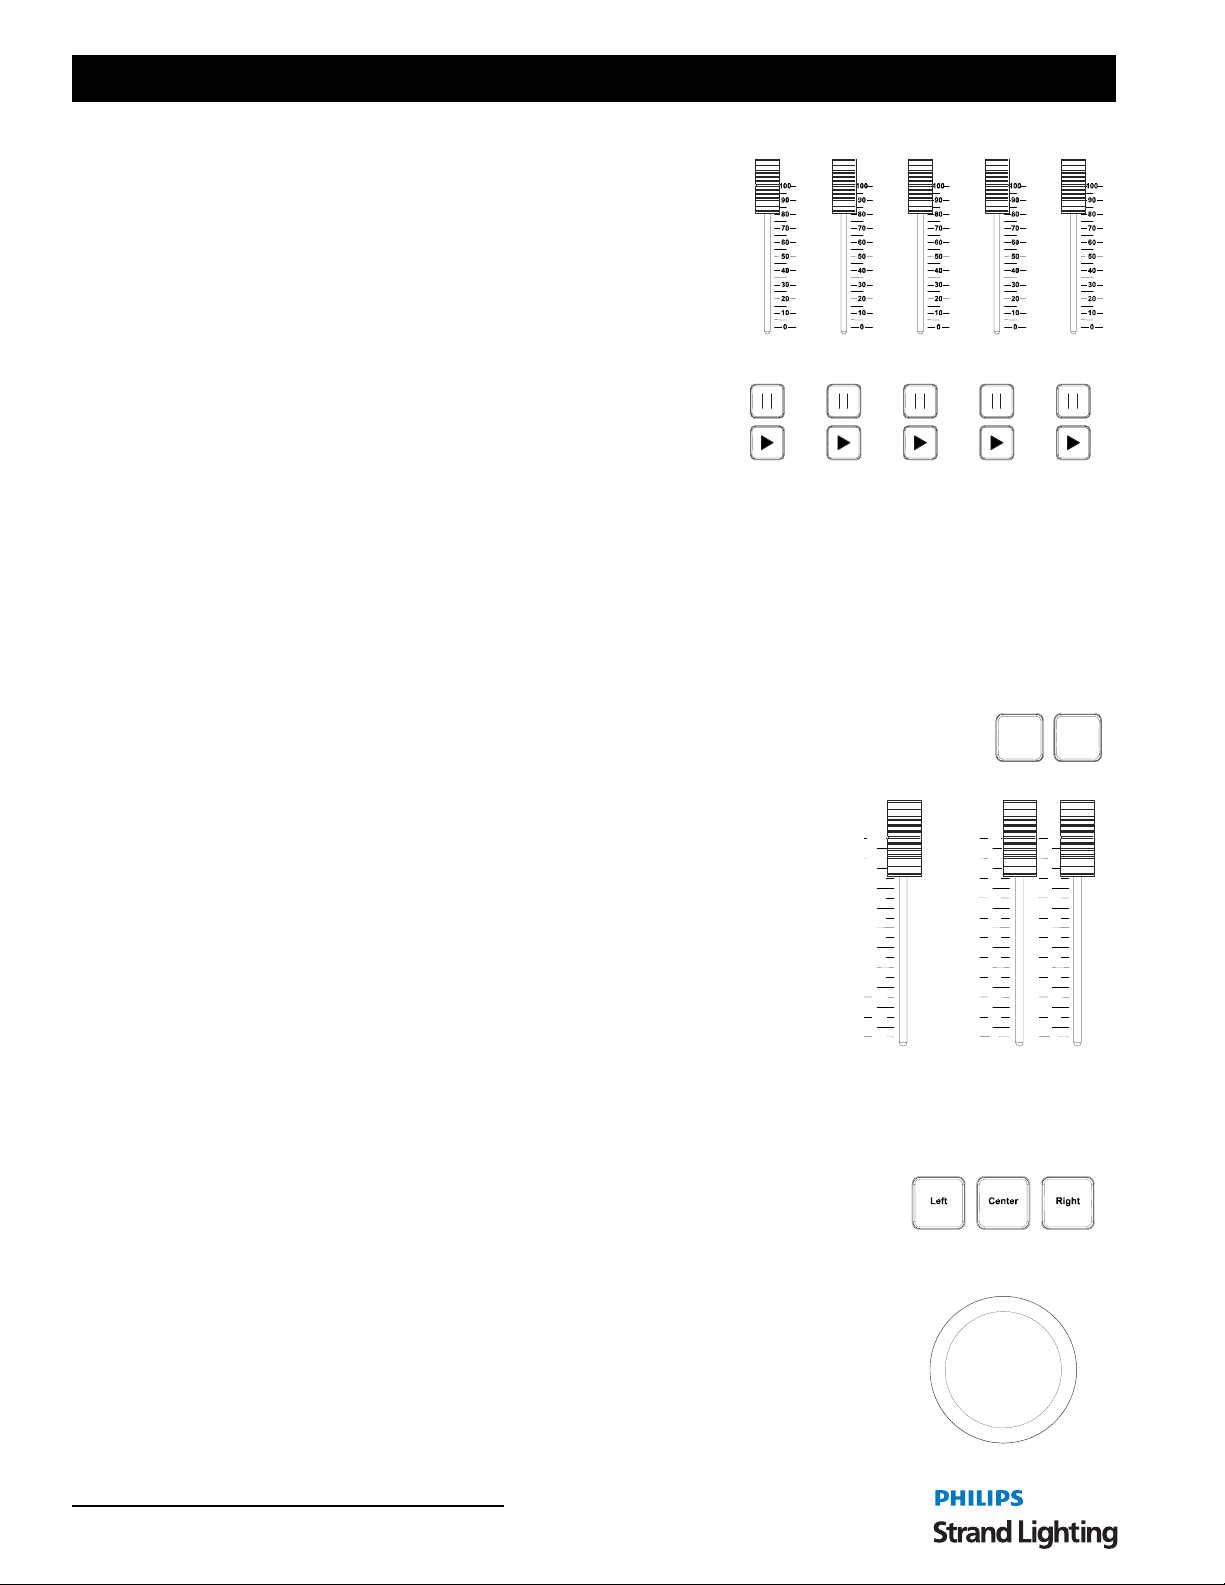
User’s Manual
Playback Faders
[PB1] / [PB5]/ [SELECT] - Selects cue list to display and default
record location. Solid white LED indicates there is a cue list on this
playback. Flashing white LED means this cue list is selected.
Playback Faders - Controls Fade times (in/out), cross faders,
intensity masters, scene masters or Look page master. The playback
faders can be setup to control different things as determined by the
NEO OS software.
[
stopped).
[
Outline LED will be solid when a cue list is active and no cues are
running. The outline LED will flash when cues are running.
[STOP/BACK] - Same function as the [II] keys. Halts act ive cue on A /B slider (if run ning) or steps back to previous
cue (if stopped).
II ] -Halts active cue (if running) or steps back to previous cue (if
d] - Activates next cue (following the active Cue) on the Cue List.
[GO] - Same function as [
d] Activates next cue on A/B slider (following the active Cue) on the Cue List. Green LED
will be solid when a cue list is active and no cues are running. The Green LED will flash when cues are running.
6. Grand Masters and Master Fade Time Fader
The NEO console features two programmable Grand Masters and a Master Fade
Time Slider.
[GM1]/ [GM2] - bump buttons for corresponding Grand Master slider.
1) Disabled
2) DBO Momentary - Dead Black Out as long as the button is pressed.
3) DBO Latch- Dead Black Out toggle.
4) Stop Attributes - stops all attributes from moving .
5) Full Momentary - all outputs are set to 0 as long as the button is pressed.
6) Full Latch - all outputs are set to 0 as a toggle.
Grand Master 1 / Grand Master 2 - Programmable Grand Masters. These are
special groups and can be edited in the Groups display.
MASTER FADE TIME
60s
50s
40s
30s
20s
15s
10s
5s
2s
1s
0s
Master Fade Time Slider - controls the rate for channel and shortcut recall. Does
not affect timed cues and effects.
7. Trackball/Mouse Controls
GM1 GM2
100
90
80
70
60
50
40
30
GRAND MASTER 1
20
10
0
100
90
80
70
60
50
40
30
GRAND MASTER 2
20
10
0
The NEO console features a trackball/mouse.
[LEFT] - mimics the left mouse button.
[CENTER] - toggles between mouse mode (white LED) and pan/tilt mode (red LED)
[RIGHT] - mimics the right mouse button.
30 Controls
Page 33
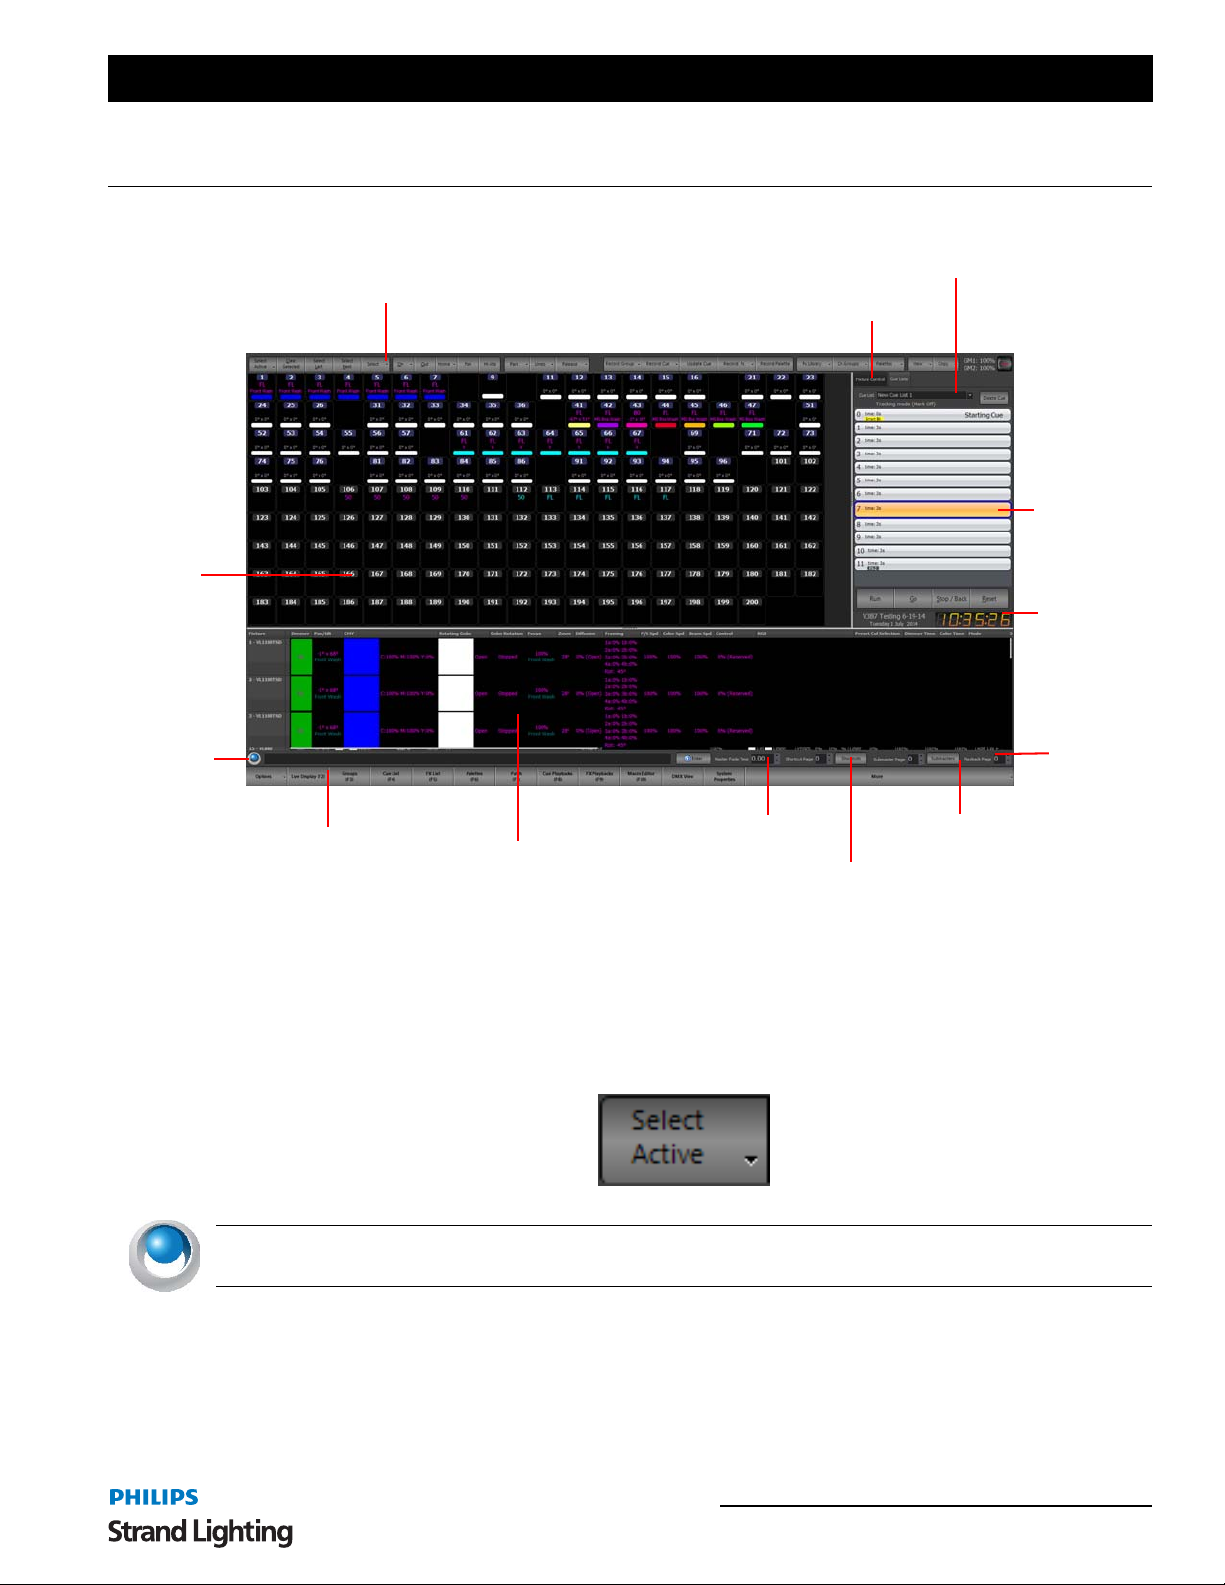
SOFTWARE CONFIGURATION
Commands / Pulldowns
Fixture
Grid
NEO Lighting Control Console
Cue List Selection
Control Tabs
Side Bar
Cue List
Clock
Command
Line
Display / Options
This is the Live Display and will always show the status of the fixtures as they are outputting Live.
This section will break down this screen and all of its components.
1. Command Pulldowns
The Command Pulldowns are single action buttons that also have a down arrow on the right hand side that reveal
advanced actions within the same action family.
NEO NOTES & TIPS: When discussing the advanced options, if the item/action shown with an icon, it has a NEO
console key for that feature.
Split View
Master Fade Time
Shortcut Page/Display
Playback
Page
Submaster Display
Command Pulldowns 31
Page 34
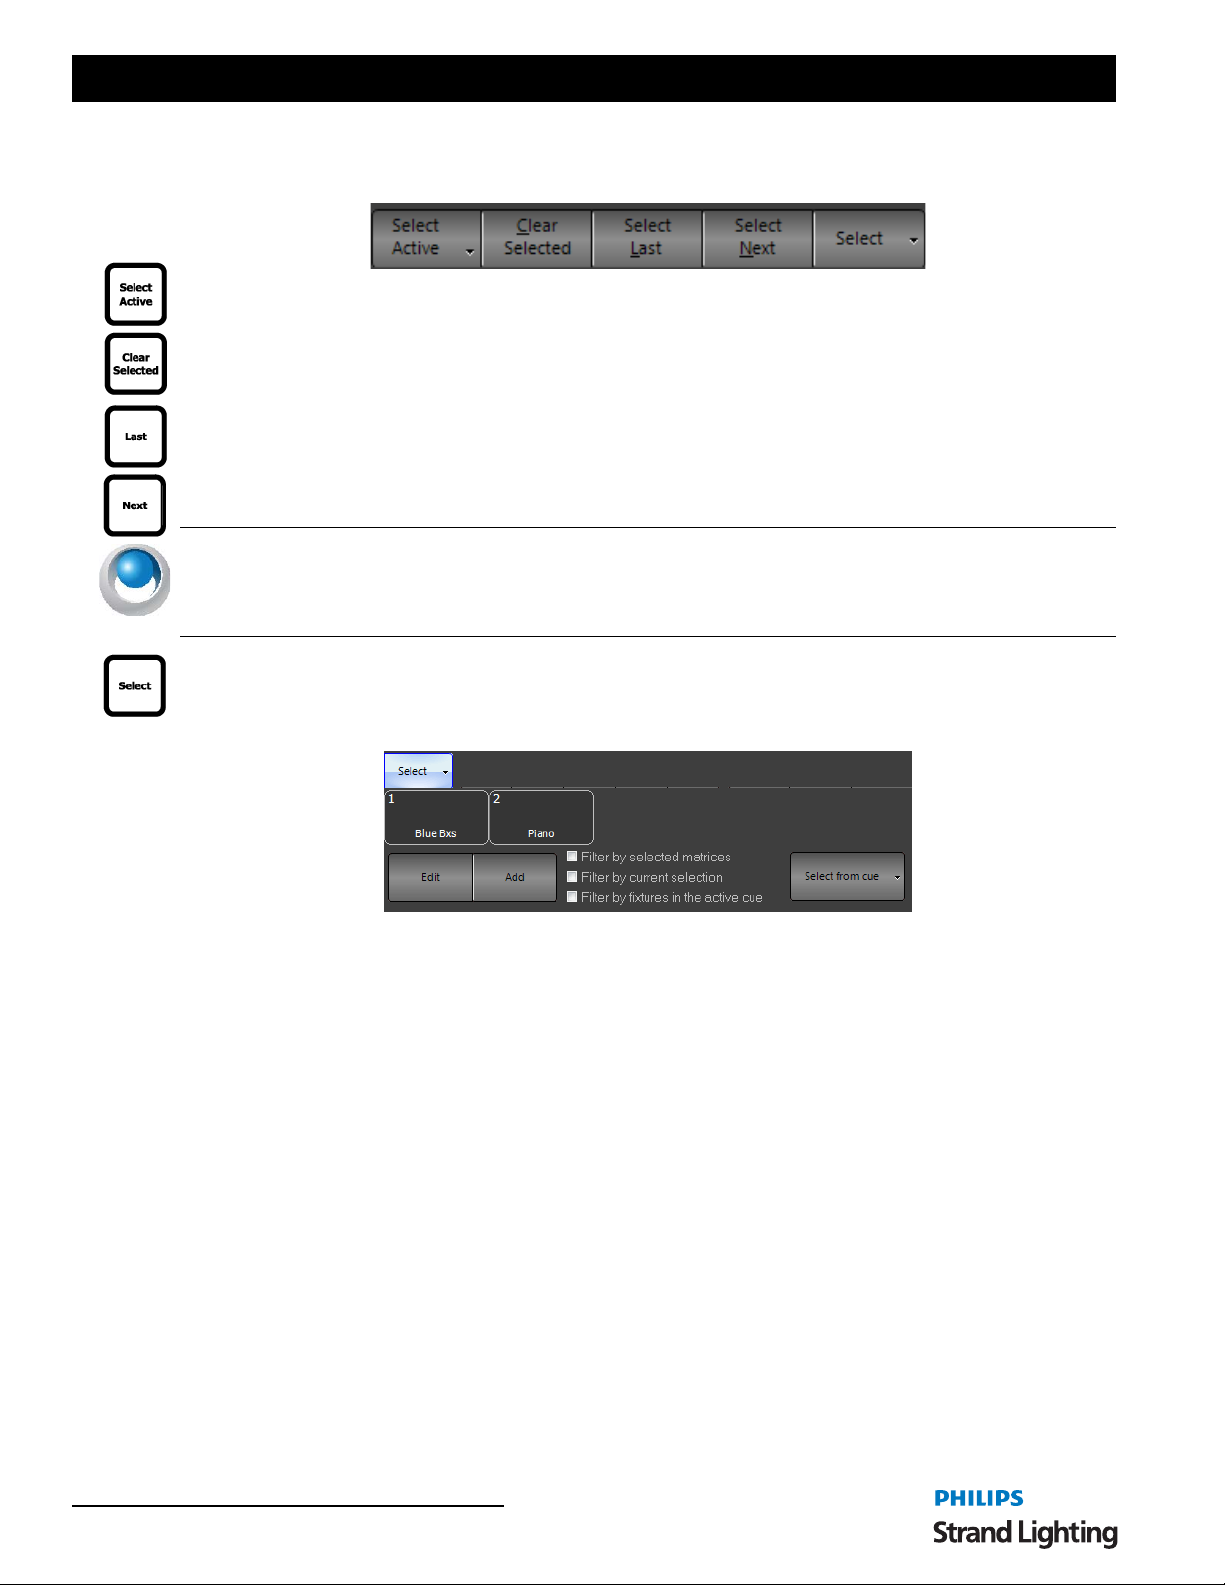
User’s Manual
Command Pulldown - Selection
Select Active - captures all fixtures with an intensity level above 0.
Clear Selected - uncaptures all captured fixtures.
Select Last - selects the previous numerical fixture.
Select Next - selects the next numerical fixture.
NEO NOTES & TIPS: For advanced functionality, if a group of fixtures is selected, NEXT / LAST will allow the
user to cycle through that group of fixtures only. For example, if 11 thru 15 are selected. Pressing NEXT will select
11. Pressing NEXT again will select 12. Continuing to press NEXT will cycle thru all fixtures in the group and then
cycle around and start over again. This same functionality works for LAST.
Select - opens advanced selection dialogue box. Allows quick selection of show built groups. From the Select
Pulldown menu, you can…
• Edit - opens the Group display window for group editing.
• Add - allows the creation of a Group.
Use the option "Filter by selected matrices" to sub-select channels by the currently selected matrices in the Magic
Sheet view.
Use the option "Filter by current selection" to sub-select only from what is currently selected. If nothing is currently
selected then the selection range will cover all channels.
Use the option "Filter by fixtures in the active cue" to limit the selection to only channels used in the currently
running cue. If a channel is not in the current cue it will remain unselected when using selection shortcuts.
The Select from cue button allows you to use a pulldown to select fixtures from a cue.
32 Software Configuration
Page 35
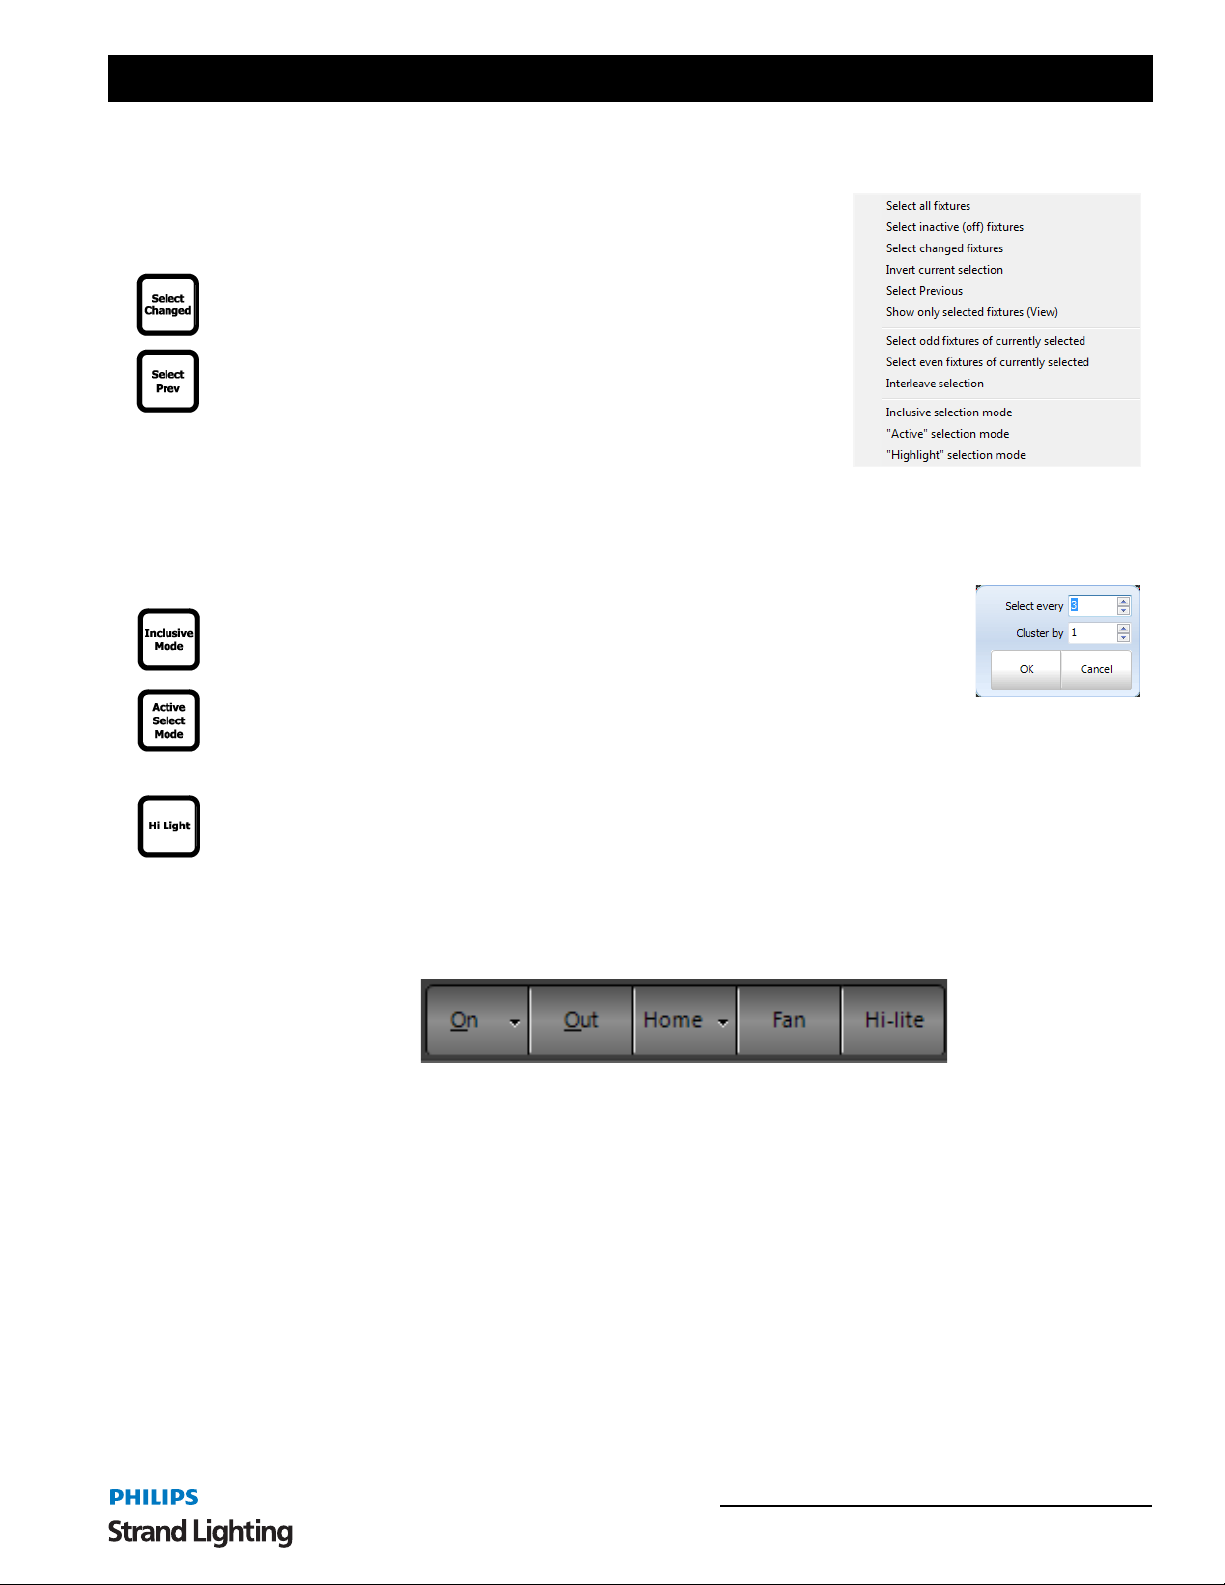
NEO Lighting Control Console
Select Active Options
Select all fixtures - selects all patched fixtures.
Select inactive (off) fixtures - selects all non-active fixtures. (with a level of
0).
Select changed fixtures - selects all fixtures that have had a value changed
(in red).
Invert current selection - will deselect all selected fixtures and select all
deselected fixtures.
Select Previous - select the previously selected set of fixtures.
Show only selected fixtures (View) - changes the current view to only
display selected fixtures. [UNDO] [ENTER] restores to the previous view.
Select odd fixtures of currently selected - takes current selection set and
filters to only the odd fixtures.
Select even fixtures of currently selected - takes current selection set and filters to only the even fixtures.
Interleave selection - from existing selection set, allows user to select every "number" and
choose the size of the cluster.
Inclusive Selection Mode - when mode is selected (button text is red) all selected fixtures
will add to currently selected fixtures. The Inclusive Mode button is a toggle. When off
(button text is white), all selected fixtures will replace any currently selected fixtures.
Active Select Mode - when mode is selected (button text is red) sets selected fixture value
to Full and allows [NEXT] / [LAST] buttons to advance while maintaining selected fixture at full level. This is the
best way to do a rig check or find a lamp. When off (button text is white, selected fixture's intensity goes back to
normal.
"Hi Light" Selection Mode - when mode is selected (button text is red) sets selected fixture to its "h i light" mode.
The specifics of the hi light mode is determined by the settings in the fixture within the fixture library editor.
The goal of Hi Light is to find a fixture in a complex cue where visual clarity is compromised by a large quantity of
fixtures being on onstage.
Command Pulldown - Level
On - applies the ON value to the selected fixtures.
Out - applies the Out value to the selected fixtures. It turns those fixtures off.
Home - applies the Home values (default values) to the selected fixtures.
Fan - opens the Fan dialogue box to apply a "fan" any attribute on the selected fixtures.
Fan
The "fan" function is a powerful way to create organized looks on stage without having to modify a number of
fixtures one at a time. There are a number of different looks that can be created depending on the attribute you want to
control.
Command Pulldowns 33
Page 36
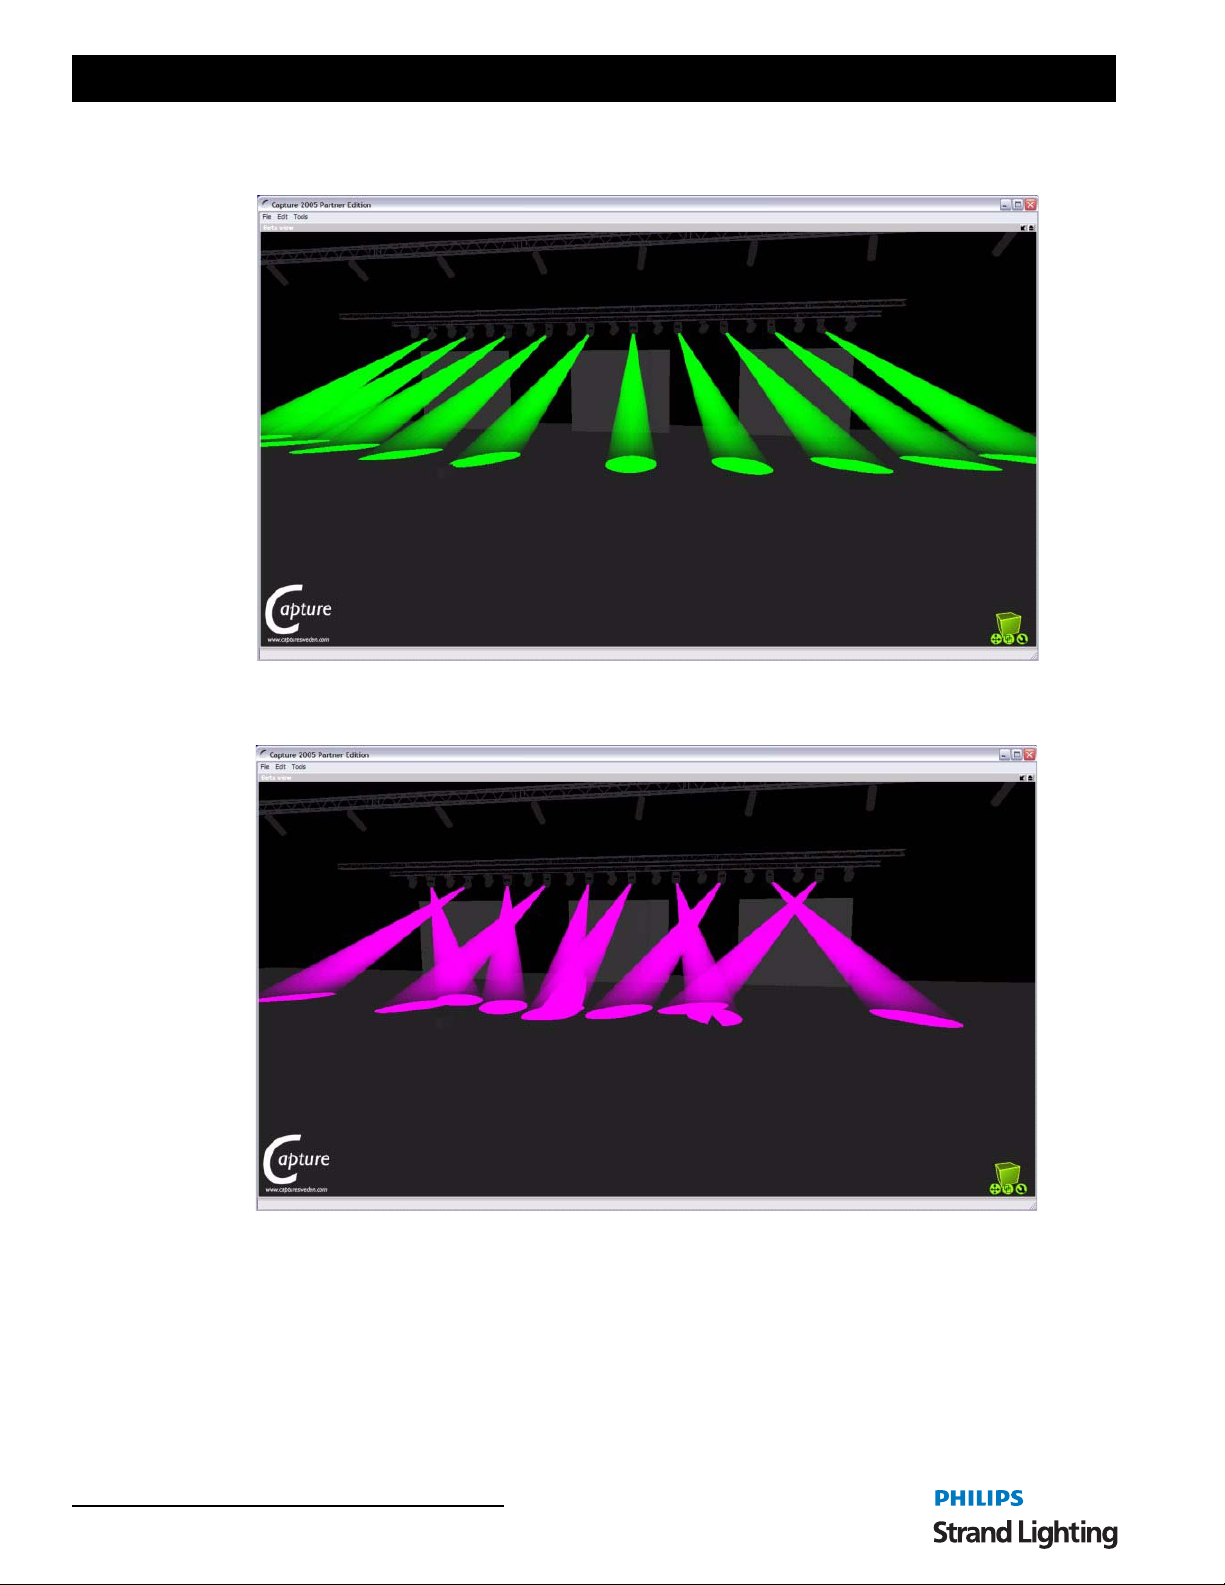
User’s Manual
In Figure 4, we see all of the fixtures fanned out across the stage and Figure 5 on page 34 shows the same fixtures
are crossed over each other in a two by two formation.
Figure 4: Fan
Figure 5: Fan (Crossed)
34 Software Configuration
Page 37
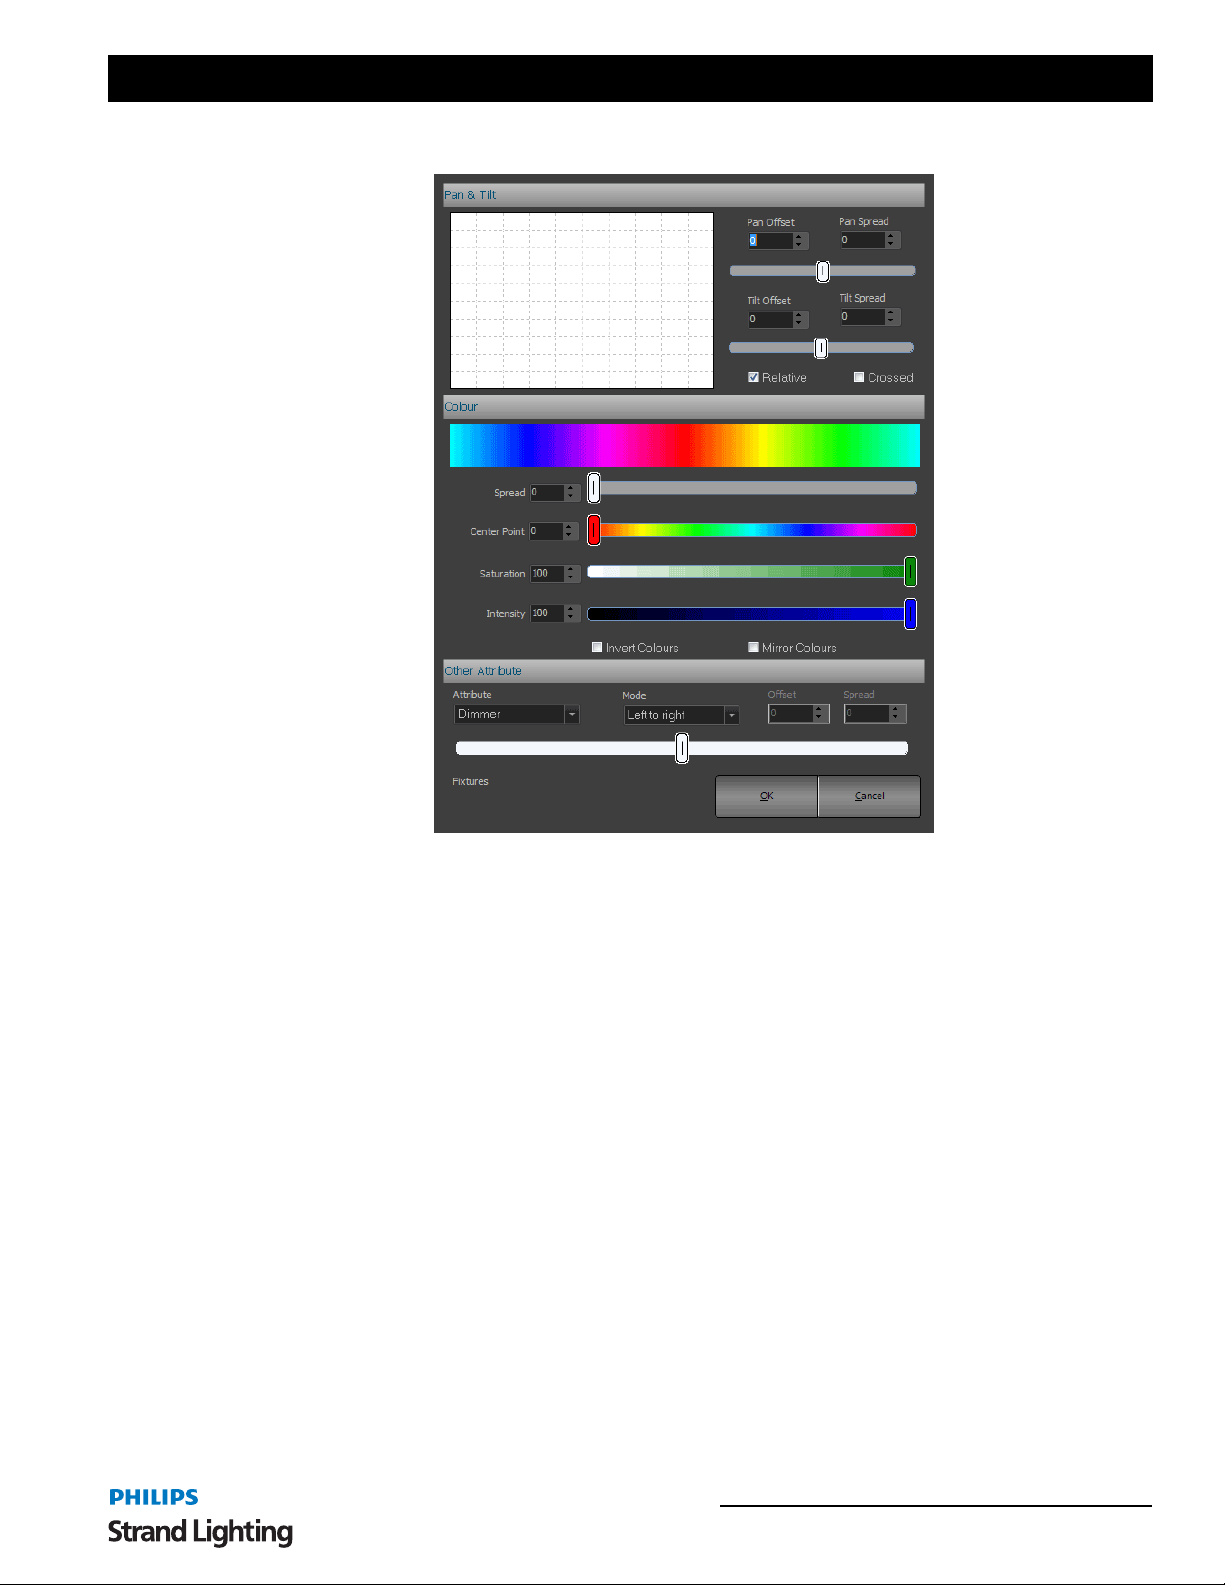
NEO Lighting Control Console
To use the "Fan" select the fixtures you want to modify and click on the button at the top of the screen.
Figure 6: Fan Options
Pan & Tilt
Use the pan and tilt offset to position the moving lights into the center of the stage. Adjust the Spread option until the
desired look is achieved. Use the check box at the bottom of this selection to switch between a fanned or crossed look
on stage.
You can fan the fixtures in both pan and tilt by adj ustin g the appropriate spread. The spread function also allows you
to set a negative spread that will change the look of the fan operation.
Use the "Relative" check box to fan pan and tilt relative to the current location of the fixtures.
Color
The color selection can be used to spread out the color of several fixtures across the spectrum. By default fully
saturated colors are used for this fan operation. To use different saturation and intensity levels adj ust the controls at
the bottom of this section.
Use the spread control to "fan" out the color of each fixture selected. You will see that each fixture is represented as
triangle that points at the color being set. As you move the spread control the triangles will move out from the center.
The center point can be moved using the control just below the spread.
The "Invert Colors" option will invert the color range used.
The "Mirror Colors" option will start the color range in the center and move out either side.
Other Attributes
NEO will also allow you to apply a fan to any of the generic attributes the system knows about. Select the attribute
from the drop down combo box and then use the spread control to fan the values.
The mode selection will adjust in what order the fan is applied to the attribute.
Command Pulldowns 35
Page 38
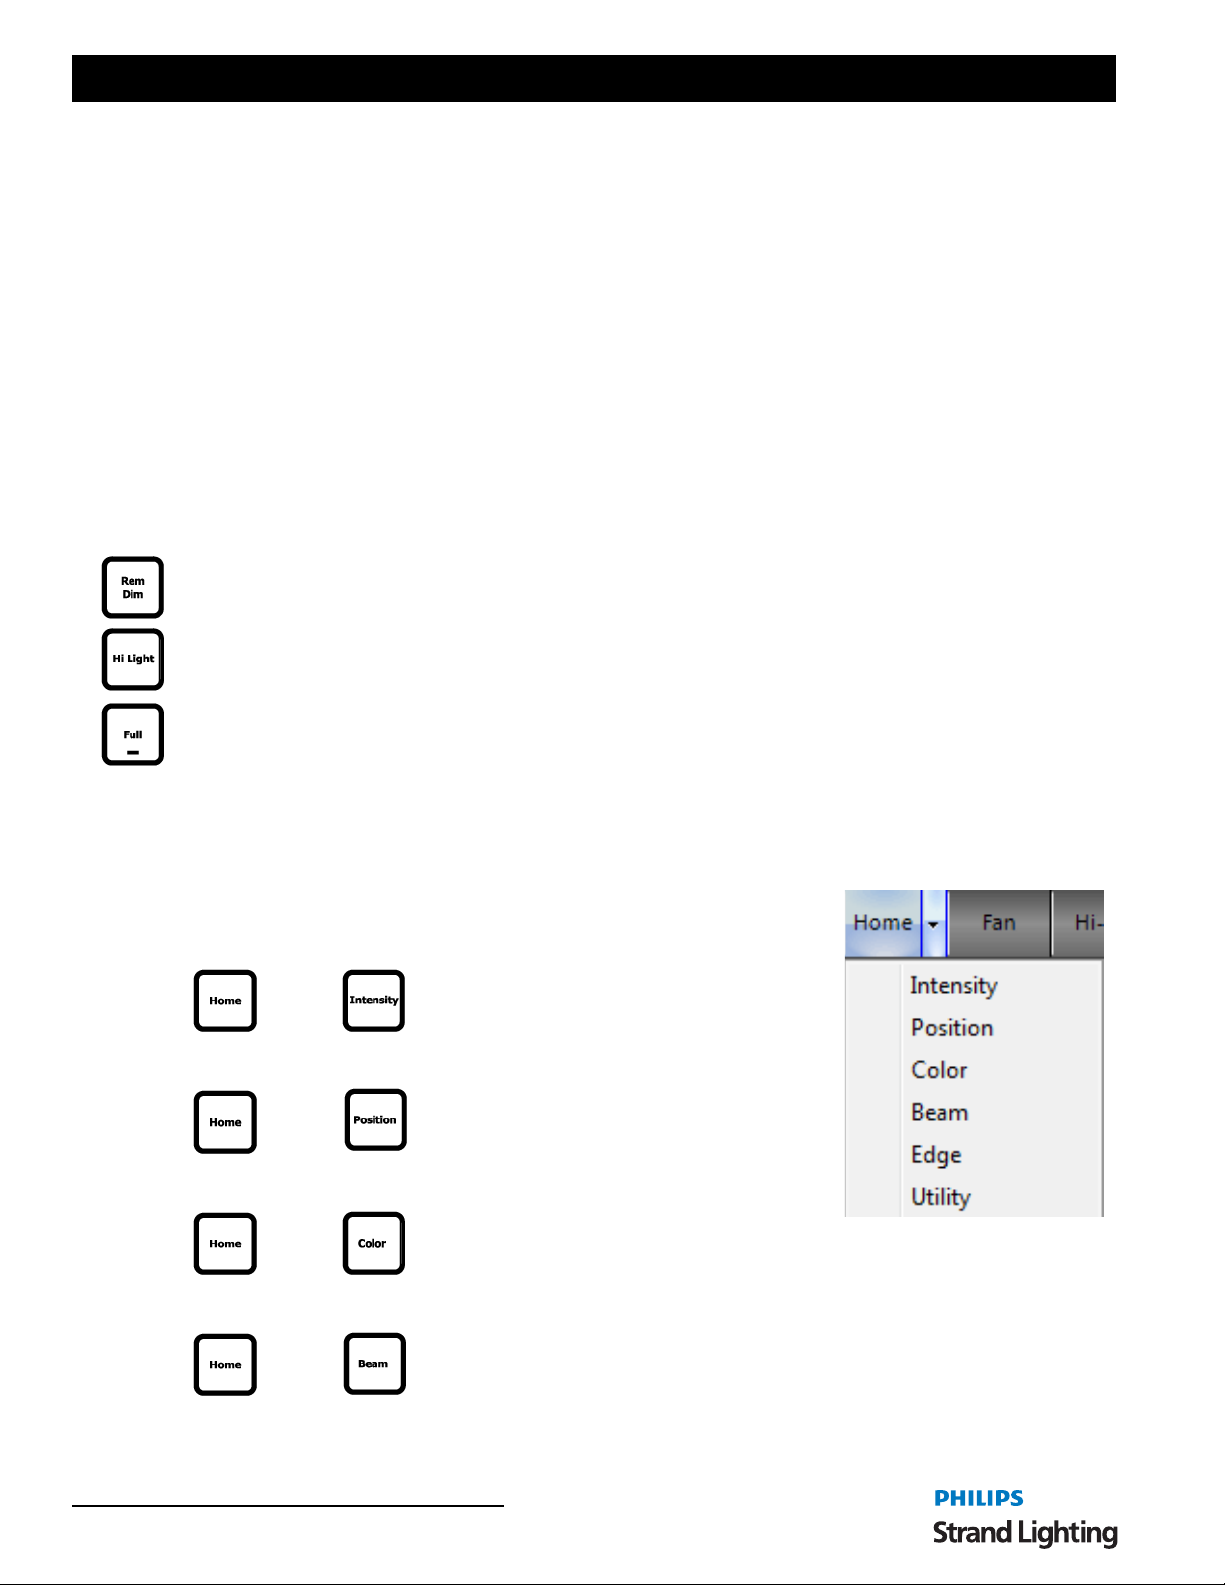
User’s Manual
Left to Right will leave the fist fixture unchanged and fan all of the other fixtures out from the first value.
Right to Left will leave the last fixture unchanged and fan all of the other fixtures in from the last value.
Middle out will cause the middle fixture to remain unchanged and fixture either side of it to fan appropriately.
Crossed is a mixture of middle out and outside in. Each alternative fixture will be either middle out or outside in.
Outside in will cause both the first and last fixtures to remain unchanged while the fixtures in between are
proportionally adjusted towards a center value.
Hi Light - applies the Hi Light values to the selected fixtures. The purpose of Hi Light is to clear out the beam of a
fixture so that it can be identified on a visually contaminated stage.
The value that each fixture is set to when hi-light is active can be defined in the fixture library. For most attributes this
is the same as the home value.
Highlight is a toggle option in NEO so that once you have identified the fixtures pressing the button again will return
you to the previous stage look.
ON Options
Rem Dim (Solo) - this turns off all non-selected fixtures.
"Hi Light" Selection Mode - when mode is selected (button text is red) sets selected fixture to its "h i light" mode.
The specifics of the hi light mode is determined by the settings in the fixture within the fixture library editor.
Full - takes selected fixture to 100%.
Lamp On - runs the lamp strike function to the selected fixture.
Lamp Off - runs the lamp douse function to the selected fixture.
Fixture Reset - runs the lamp reset function to the selected fixture.
The Lamp On/Off/Reset is an automated version of selecting the fixtures, taking the control channel to Lamp On/
Lamp Off/Fixture Reset, holding for 3 to 5 seconds and then placing the control channel back to idle.
Home Options
Command Line solutions here is press and hold the [HOME] key and then press
the [Attribute Family] button.
+
Intensity - sets selected fixtures to the default intensity value.
+
Position - sets selected fixtures to the default position value.
+
Color - sets selected fixtures to the default color value.
36 Software Configuration
+
Page 39
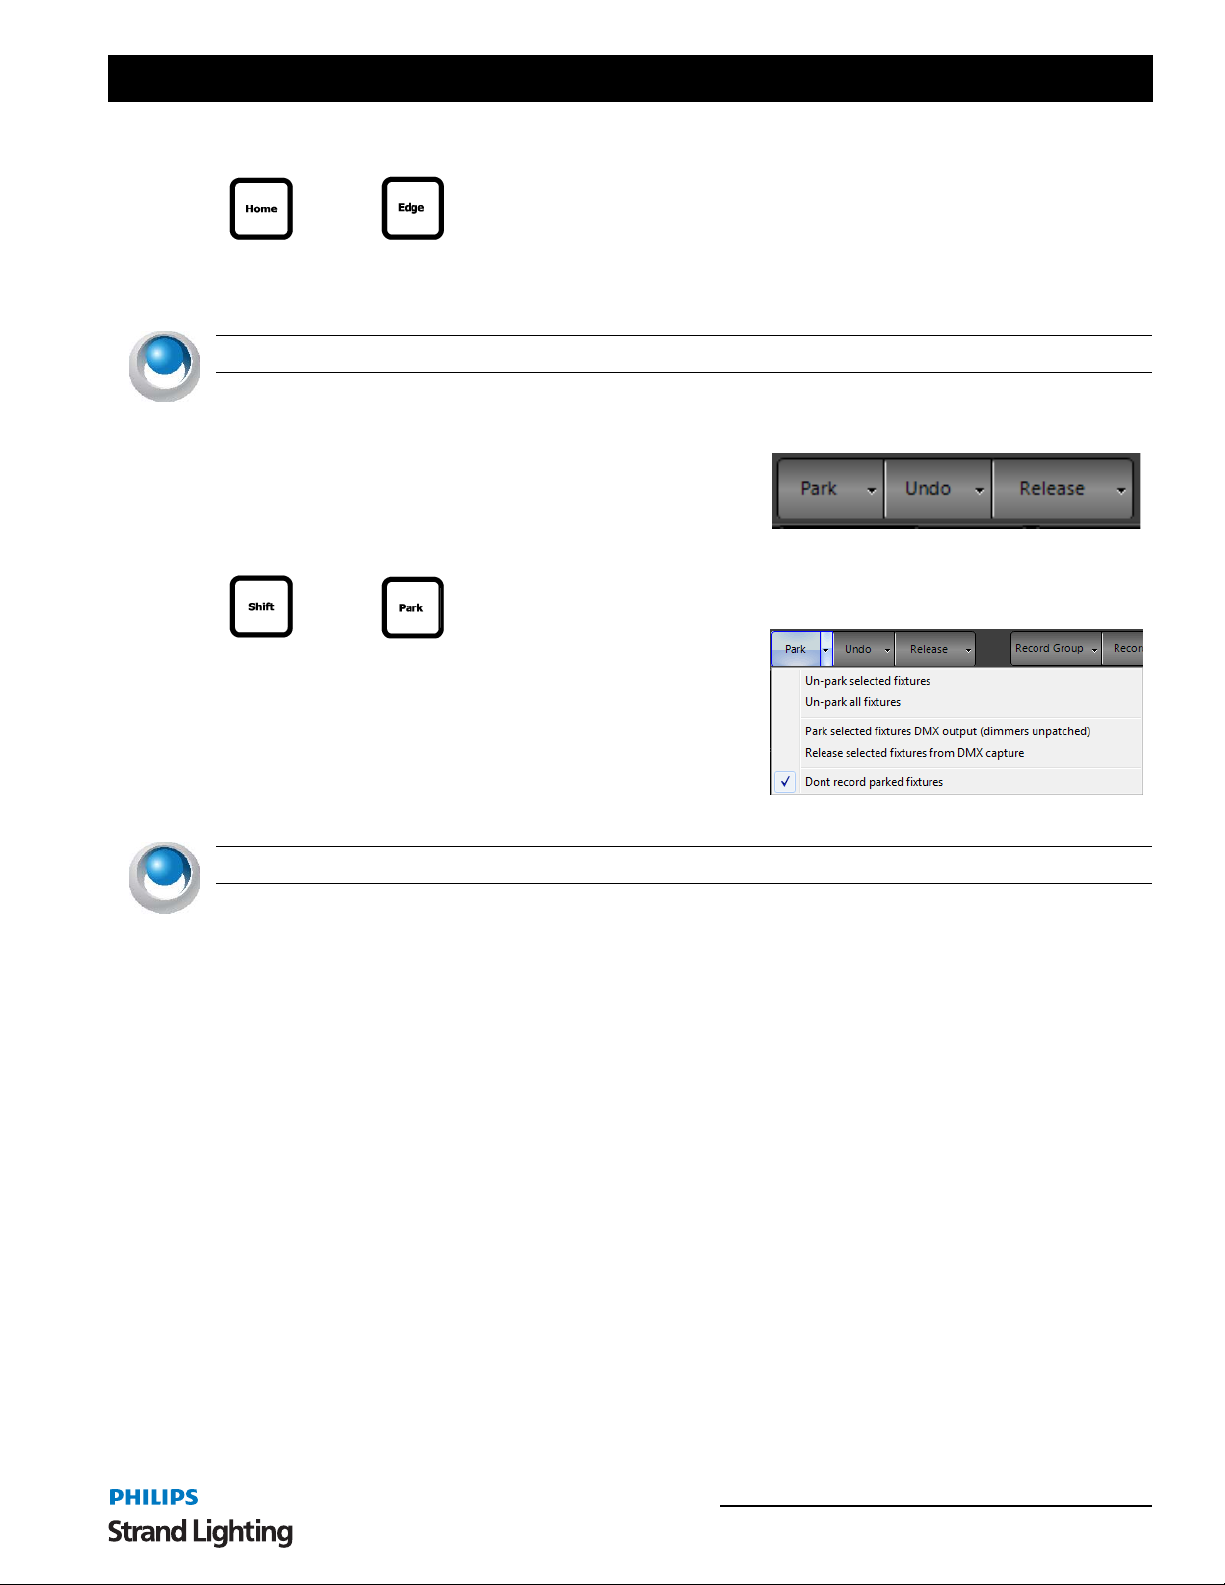
NEO Lighting Control Console
Beam - sets selected fixtures to the default beam value.
+
Edge - sets selected fixtures to the default beam value.
Utility - sets selected fixtures to the default utility value.
NEO NOTES & TIPS: All fixture default values are set in the Fixture Library Editor per fixture type.
Command Pulldown - Release
Park - assign the current fixture value to a locked level. This
"park"ed level will keep the fixture at its current level, will not
change it as cues are activated and it will not be recorded at this
value.
Park Options
+
Un-park selected fixtures - will unpark all selected fixtures.
Un-park all fixtures - will unpark all fixtures.
Park allows the user to assign a level to a fixture that will not be
controlled by a cue. It places that fixture in stasis until it is
unparked. By default, all Parked fixtures shall not be recorded.
NEO NOTES & TIPS: This default is in System Properties>Show Defaults>Intermediate Options.
Command Pulldowns 37
Page 40
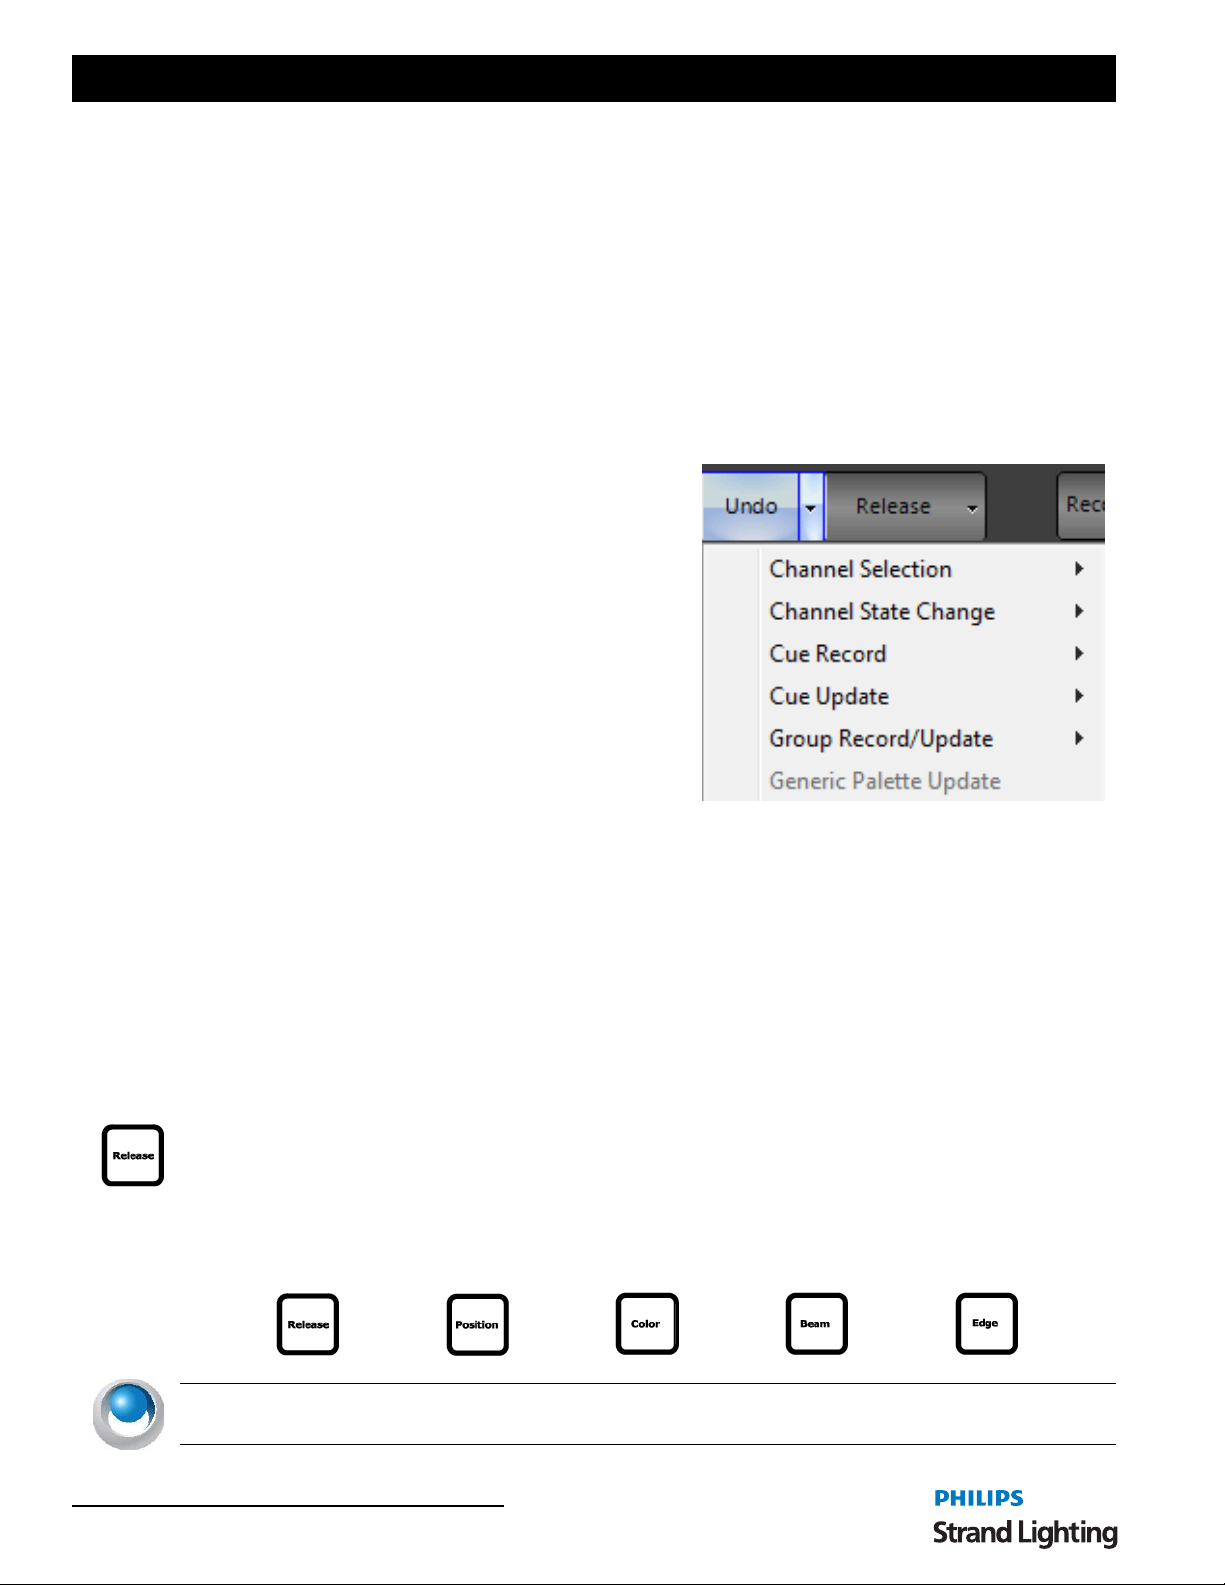
User’s Manual
Command Line Options
[PARK][ENTER] - will park all selected fixtures.
[Fixture List][PARK][ENTER] - Parks at current level.
[Fixture List][@][Level][PARK][ENTER]
[Fixture List][PARK][DIMMER][ENTER] - parks dimmer at current level.
[Fixture List][PARK][DIMMER][@][Level][ENTER]
[DIMMER][DIMMER] restores all parked dimmers.
Add [SHIFT] to any [PARK] command above and that will Unpark based on the command entered .
Undo Options
Undo - will return a fixture level to its previous value. Thi s
can work for intensity and attribute families.
Undo > Channel Selection - opens up a pullout that shows
channel selection history. The user can undo the channel
selection set in order. If the undo item selected is not at the top
of the list, it will undo every item up to and including that
item.
Undo > Stat e Chan ge - opens up a pullout that shows channel
state change history. The user can undo the channel state
change in order. If the undo item selected is not at the top of
the list, it will undo every item up to and including that item.
Undo per attribute family is available as well. For example:
[UNDO] + [POSITION] will under the last position change.
Undo > Cue Record - opens up a pullout that shows cue
record history. The user can undo the cues recorded in order. If the undo item selected is not at the top of the list, it
will undo every item up to and including that item.
Undo > Cue Update - opens up a pullout that shows cue update history. The user can undo the cues update in order.
If the undo item selected is not at the top of the list, it will undo every item up to and including that item.
Undo > Group Record/Update - opens up a pullout that shows group record/update history. The user can undo the
group record/update in order. If the undo item selected is not at the top of the list, it will undo every item up to and
including that item.
Undo > Generic Palette Update - opens up a pullout that shows generic palette update history. The user can undo
the generic palette update in order. If the undo item selected is not at the top of the list, it will undo every item up to
and including that item.
Release Option
Release - 1st press of RELEASE will restore all selected fixtures to their default state or another control items like a
cue. The 2nd press of RELEASE will restore all remaining fixtures to their default state or their state as determined
by another control item like a cue.
Release + Attribute Families
+ or
or
or
NEO NOTES & TIPS: Pressing [RELEASE] and any attribute family button will release that attribute families
attributes on the selected fixtures.
38 Software Configuration
Page 41
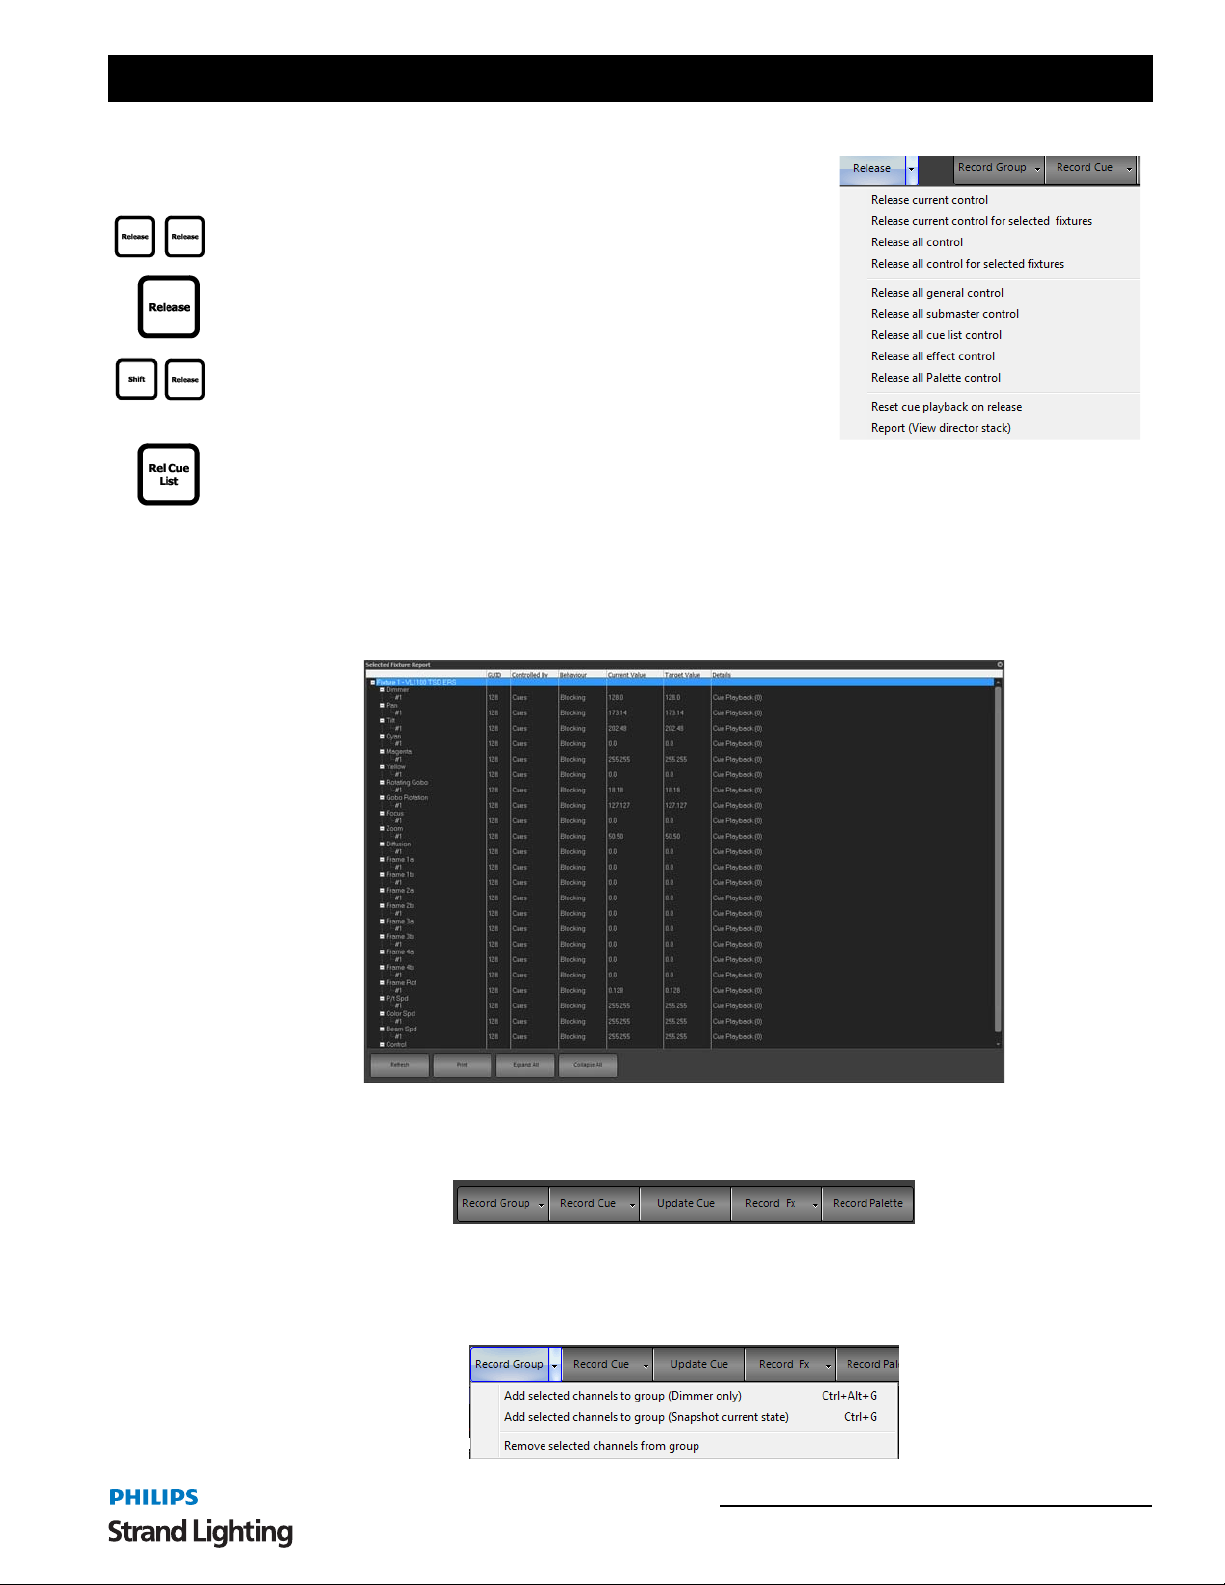
NEO Lighting Control Console
Release current control - releases control of current fixtures.
Release current control for selected fixtures - releases control for
selected fixtures only.
Release all control - releases all control. This is equivalent to the second
stage of the Release key. Example: [RELEASE][RELEASE].
Release all control for selected fixtures - release all control for selected
fixtures. This is equivalent to the first stage of the Release key. Example:
[RELEASE].
Release all general control - releases all selected channel control.
Changes due to groups, cues and effects are not touched.
Release submaster control - releases all control coming from submasters.
Release all cue list control - releases all channels that are outputting from a cue.
Release all effect control - releases all running effects.
Release all Palette control - releases all fixture palettes that are outputting.
Reset cue playback on release - (this is a mode and can be toggled on or off), will reset the cue playback when
fixtures are released.
Report (View director stack) - is a diagnostic tool to show diagnostic level detail about fixture status.
Command Pulldown - Record
Record Group - activates the Record / Update Group dialogue box in order to facilitate storing / editing a group.
RECORD GROUP OPTIONS
Command Pulldowns 39
Page 42
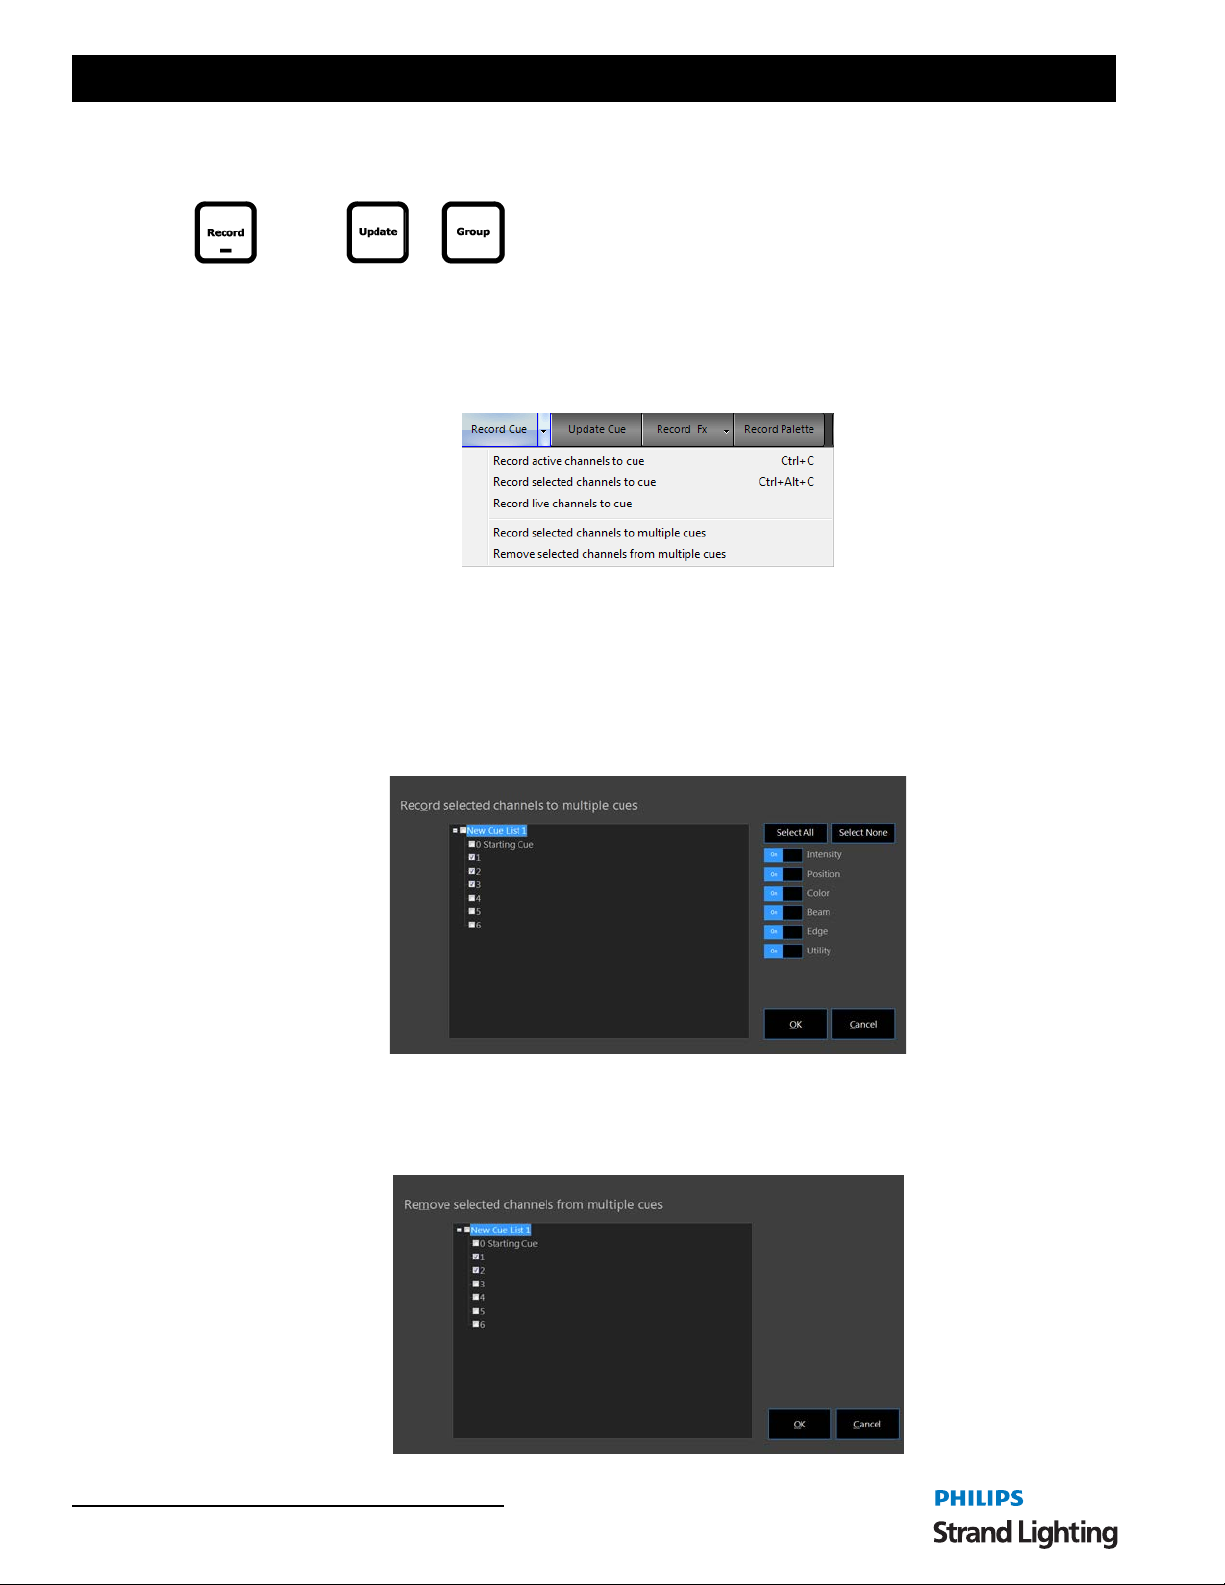
User’s Manual
Add selected channels to group (Dimmer only) - brings up the Record/Update Group dialogue box to add selected
fixtures' intensity to the designated group.
Add selected channels to group (Snapshot current state) - bring up the Record/Update Group dialogue box to add
selected fixtures to the designated group.
Record Cue - activates the Record Cue dialogue box in order to facilitate storing a cue.
RECORD CUE OPTIONS
Record active channels to cue - sets the Record Mode filter to Active and brings up the Record Cue dialogue box.
Record selected channels to cue - sets the Record Mode filter to Selected and brings up the Record Cue dialogue
box.
Record live channels to cue - sets the Record Mode filter to Live and brings up the Record Cue dialogue box.
Record selected channels to multiple cues - brings up a dialogue box to allow the user to check off cues where
selected fixtures will be stored.
or
Attribute family filtering is available.
Remove selected channels from multiple cues - brings up a dialogue box to allow the user to identify cues where
fixture instructions will be removed.
40 Software Configuration
Page 43
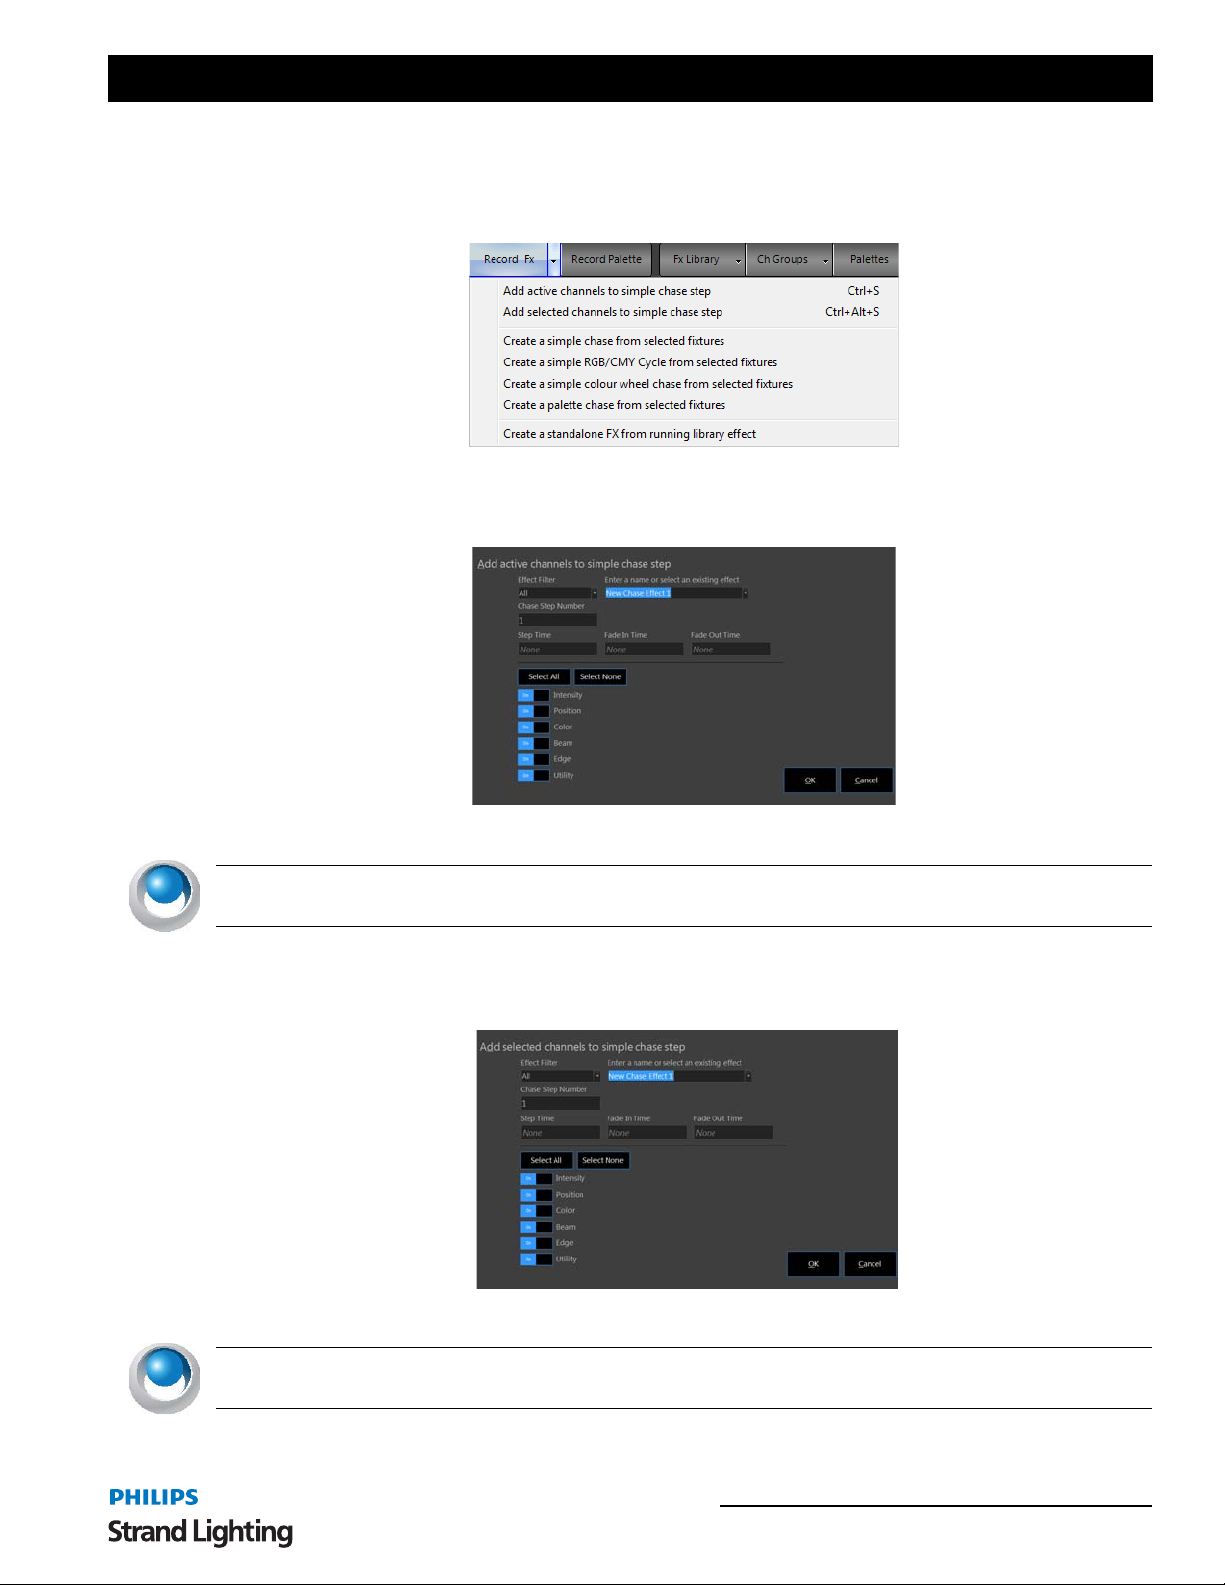
NEO Lighting Control Console
Update Cue - activates the Update Cue dialogue box in order to facilitate editing an existing cue.
Record FX - activates the Record FX dialogue box in order to facilitate creating a show effect.
RECORD FX OPTIONS
Add active channels to simple chase step - adds "active" fixtures to a newly created or existing chase effect
assigning each fixture to its own step in numerical order. This will activate a recording dialogue box to complete the
fx recording process.
Enter appropriate info in the presented dialogue box.
NEO NOTES & TIPS: The effect will be recorded/edited but must be triggered manually though the FX List
display.
Add selected channels to simple chase step - adds "selected" fixtures to a newly created or existing chase effect
assigning each fixture to its own step in numerical order. This will activate a recording dialogue box to complete the
fx recording process.
Enter appropriate info in the presented dialogue box.
NEO NOTES & TIPS: The effect will be recorded/edited but must be triggered manually though the FX List
display.
Command Pulldowns 41
Page 44
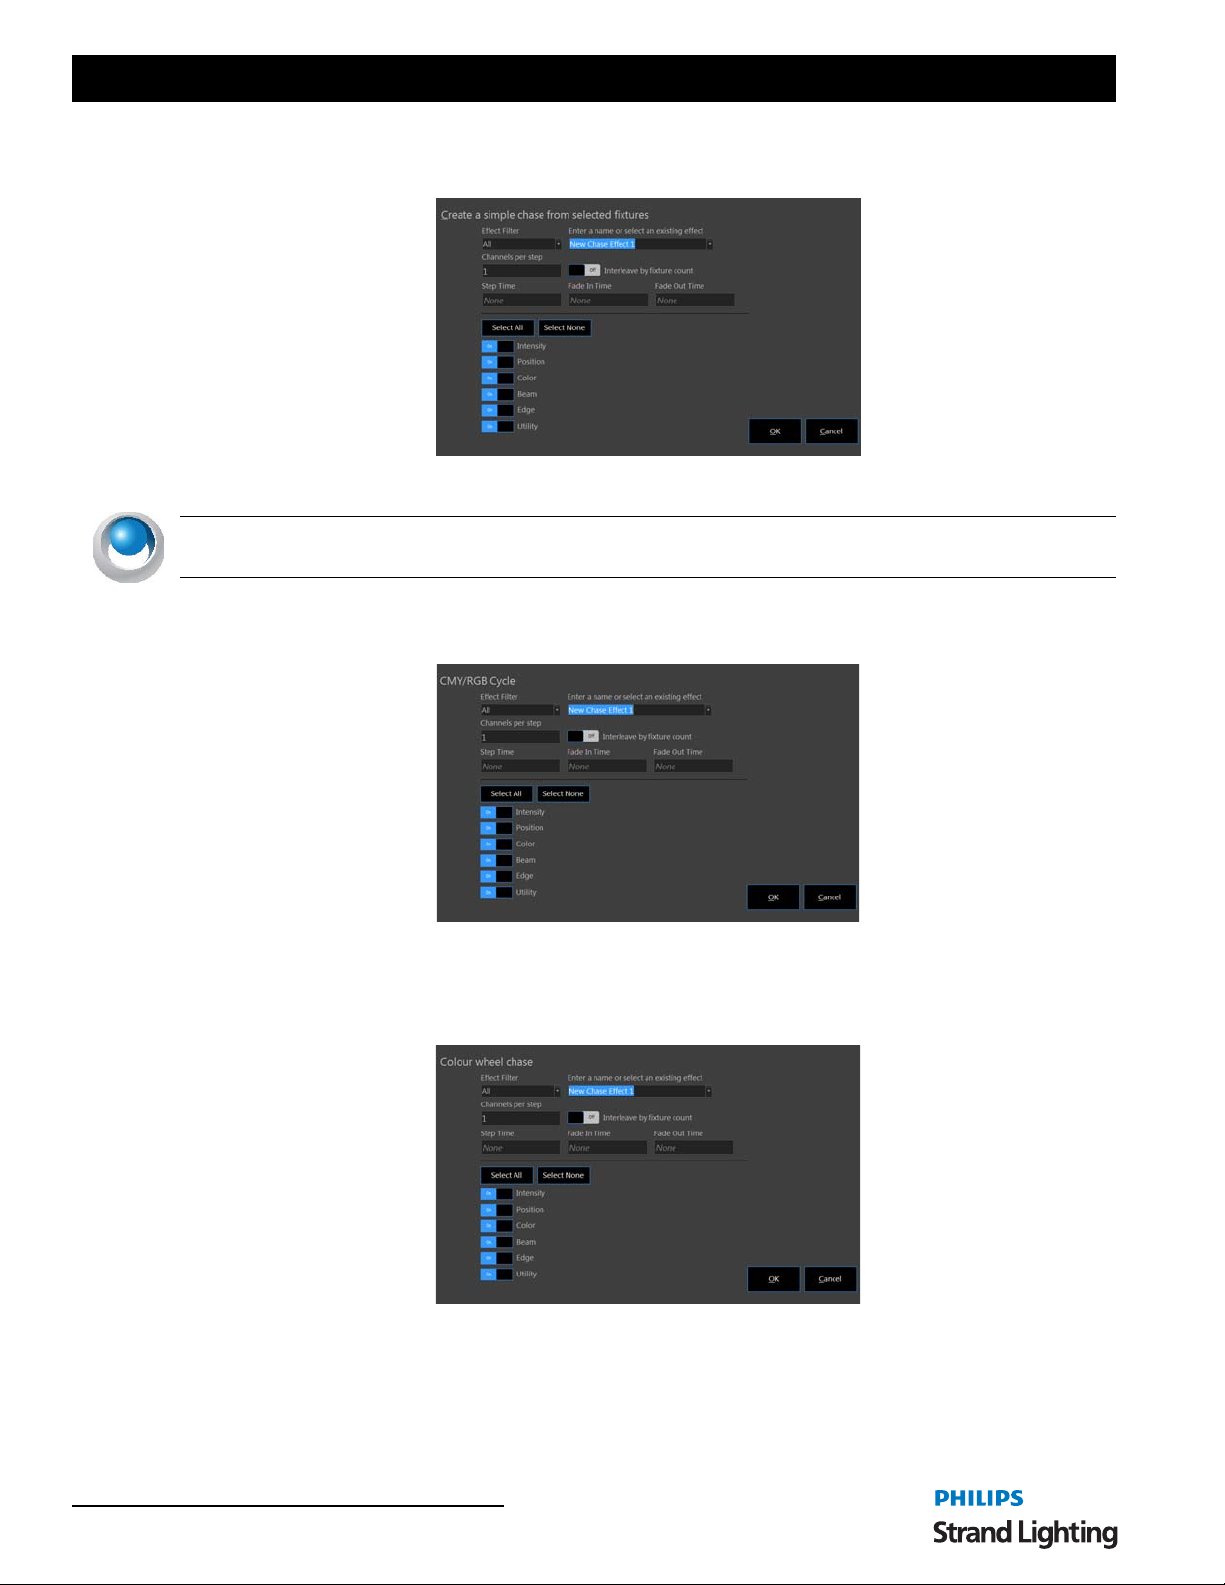
User’s Manual
Create a simple chase from selected fixtures - creates a traditional chase effect based on the selected fixtures. Each
fixture will be assigned to its own step on a 1 to 1 basis.
Enter appropriate info in the presented dialogue box.
NEO NOTES & TIPS: The effect will be recorded/edited but must be triggered manually though the FX List
display.
Create a simple RGB/CMY Cycle from selected fixtures - creates a simple step based color chase. All selected
fixtures color mixing parameters will be stored into 6 steps. Cyan, Blue, Magenta, Red, Yellow, and Green.
Enter appropriate info into the presented dialogue box.
Create a simple color wheel chase from selected fixtures - creates a simple step based color chase using the color
wheel. All selected fixtures color wheel will be stored into steps. 1 for each wheel position.
Enter appropriate info in the presented dialogue box.
42 Software Configuration
Page 45
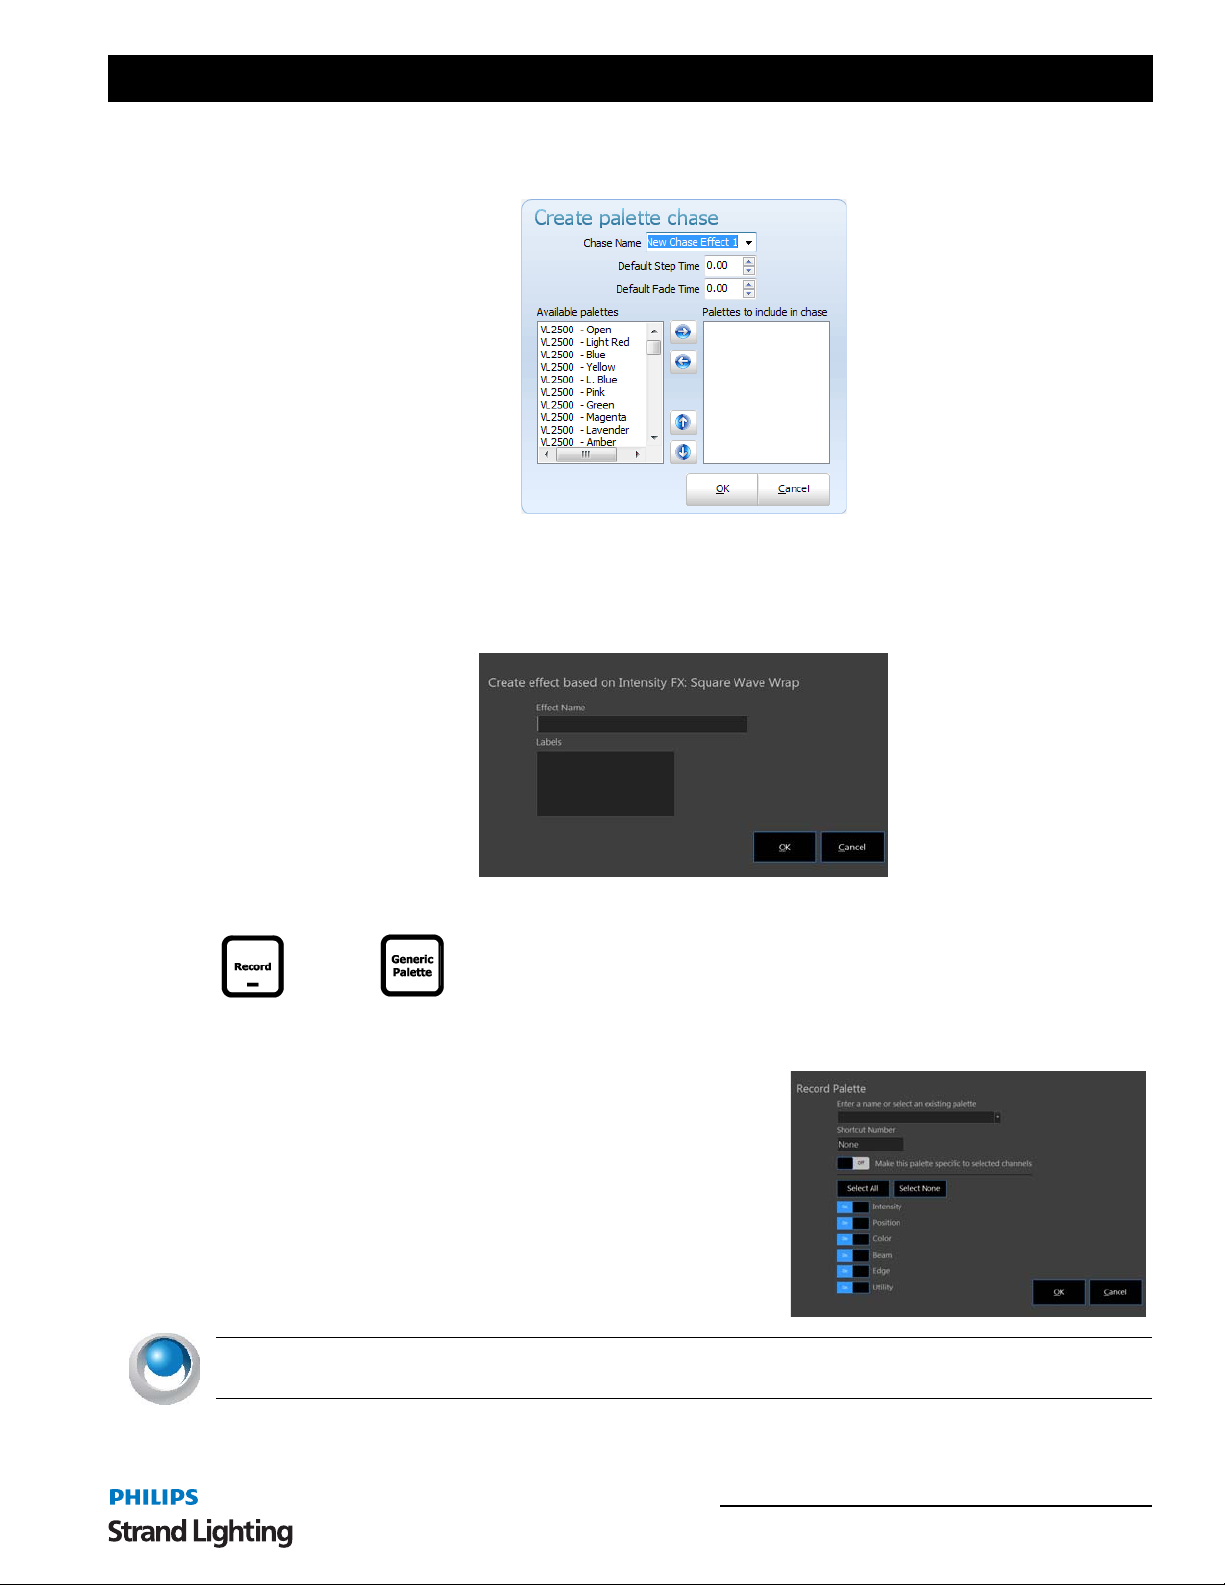
NEO Lighting Control Console
Create a palette chase from selected fixtures - creates as simple step based chase with the selected fixtures where
the contents of each step is selected from a list of palettes.
Use the left and right arrows to move palettes in and out of the available palette list.
Create a standalone FX from running library fx - this takes a running library effect and creates a show specific
effect based upon that running library effect. This is a great practice in order to keep the library as a stock resource
point by not recording over it.
Enter appropriate info in the presented dialogue box.
+
Record Palette - activates the Record Palette dialogue box in order to facilitate creating a Generic Palette.
To add selected channels to a palette:
Step 1. Set up the fixtures into the static state (dimmer, color, pan
and tilt etc)
Step 2. Click on the "Record Palette" at the top of the window or
press and hold [RECORD] while pressing [GENERIC
PALETTE] button.
Step 3. Enter the palette name and shortcut number you would like
to assign to the current state. You can also select what
attributes you want to include in the palette using the check
boxes provided.
NEO NOTES & TIPS: This operation only allows you to create new entries and cannot be used to add to an
existing palette.
Step 4. Enter the shortcut number you would like to assign and click the "OK" button to confirm the requested
action. If you have changed your mind, click "Cancel" to return to the channel window.
Command Pulldowns 43
Page 46
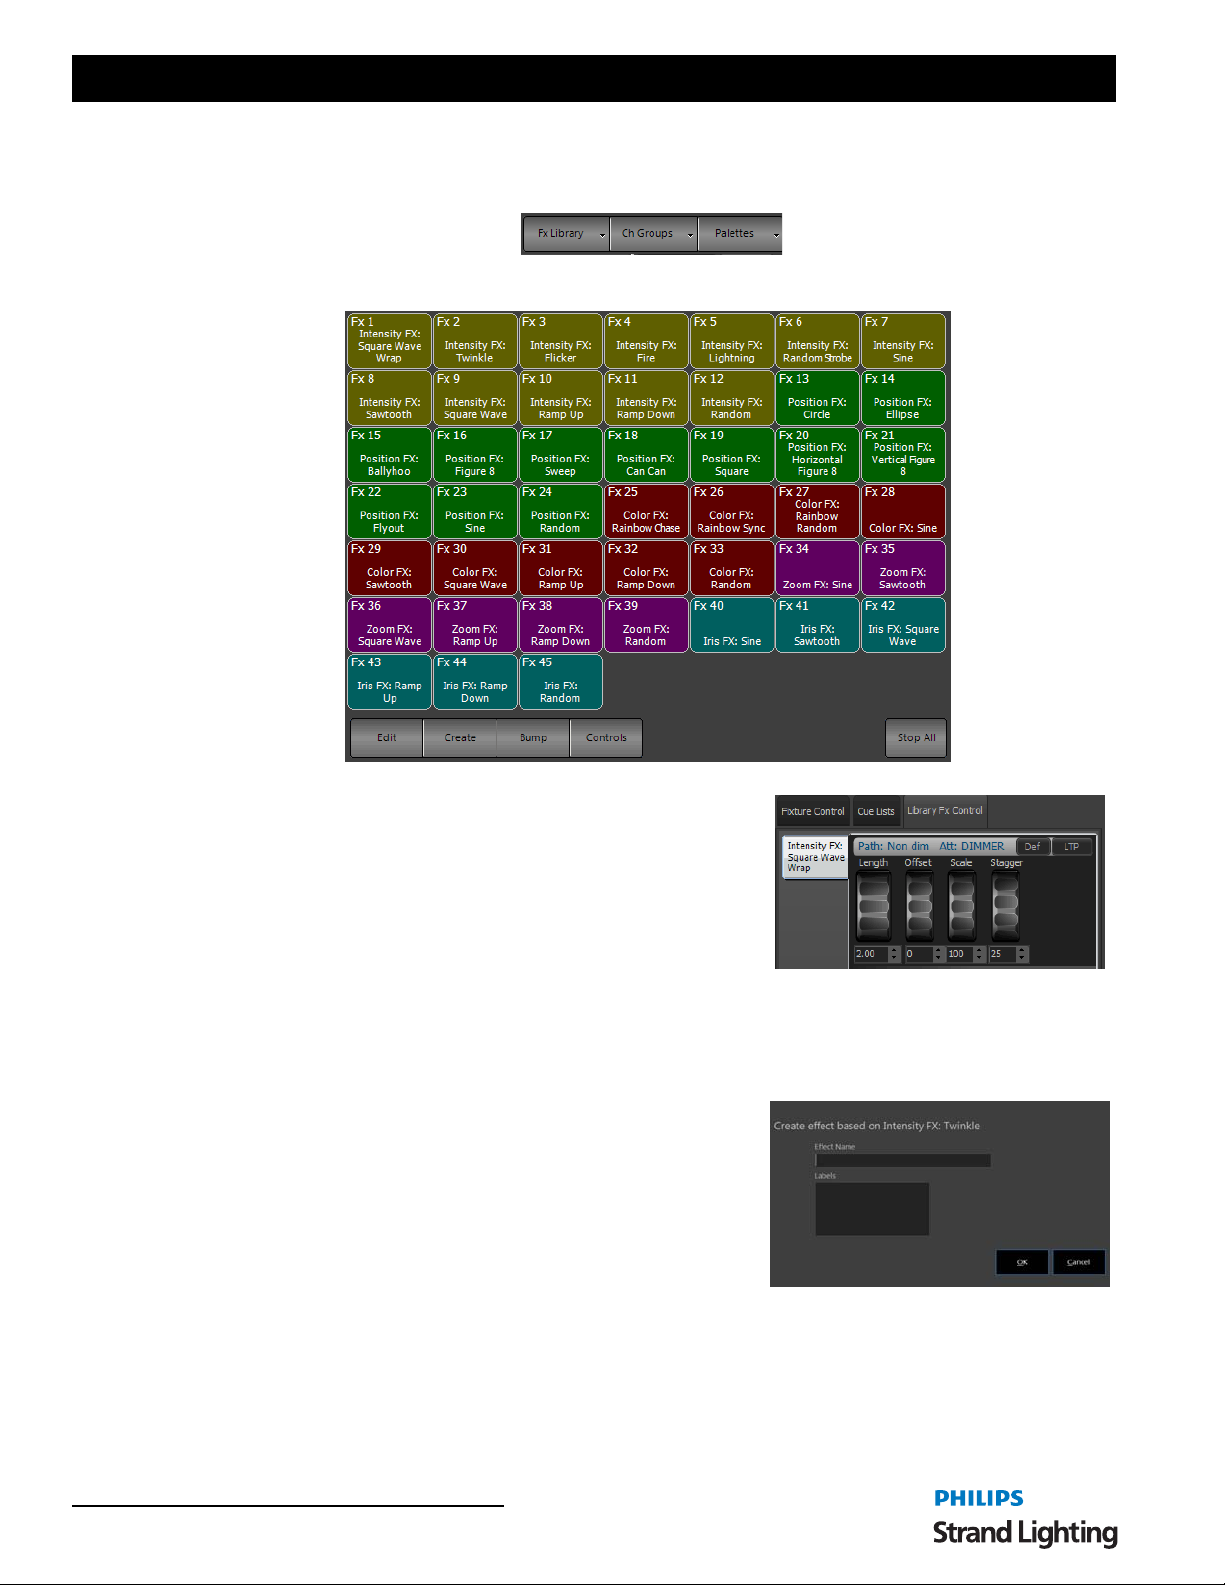
User’s Manual
Command Pulldown - Items
FX Library - opens the FX library. This allows you to apply a pre-built effect to the selected fixtures.
Once the library effect is running, the controls for the running effect is
available on the encoders or is available in the Side Bar > Library FX
Controls.
Should you want to edit and store this for the showfile, create a show fx
from the library fx so that it doesn't change the fx library.
Step 1. Select desired fixtures.
Step 2. Select fx from library.
Step 3. Press [CREATE FX] and follow the dialogue to create the show fx.
Step 4. Name the fx and press ENTER. Now the effect is running as a standalone. Modify and store with any cue.
Edit - opens the Effects Editor.
Create - opens up the "Create effect based on…" dialogue box.
Make sure you have a library effect running prior to pressing the Create
button.
Bump - will bump the FX out as a latched button. Pressing Bump again
will restart the FX.
Controls - will bring the FX controls into focus.
Stop All - will stop all running library FX.
44 Software Configuration
Page 47
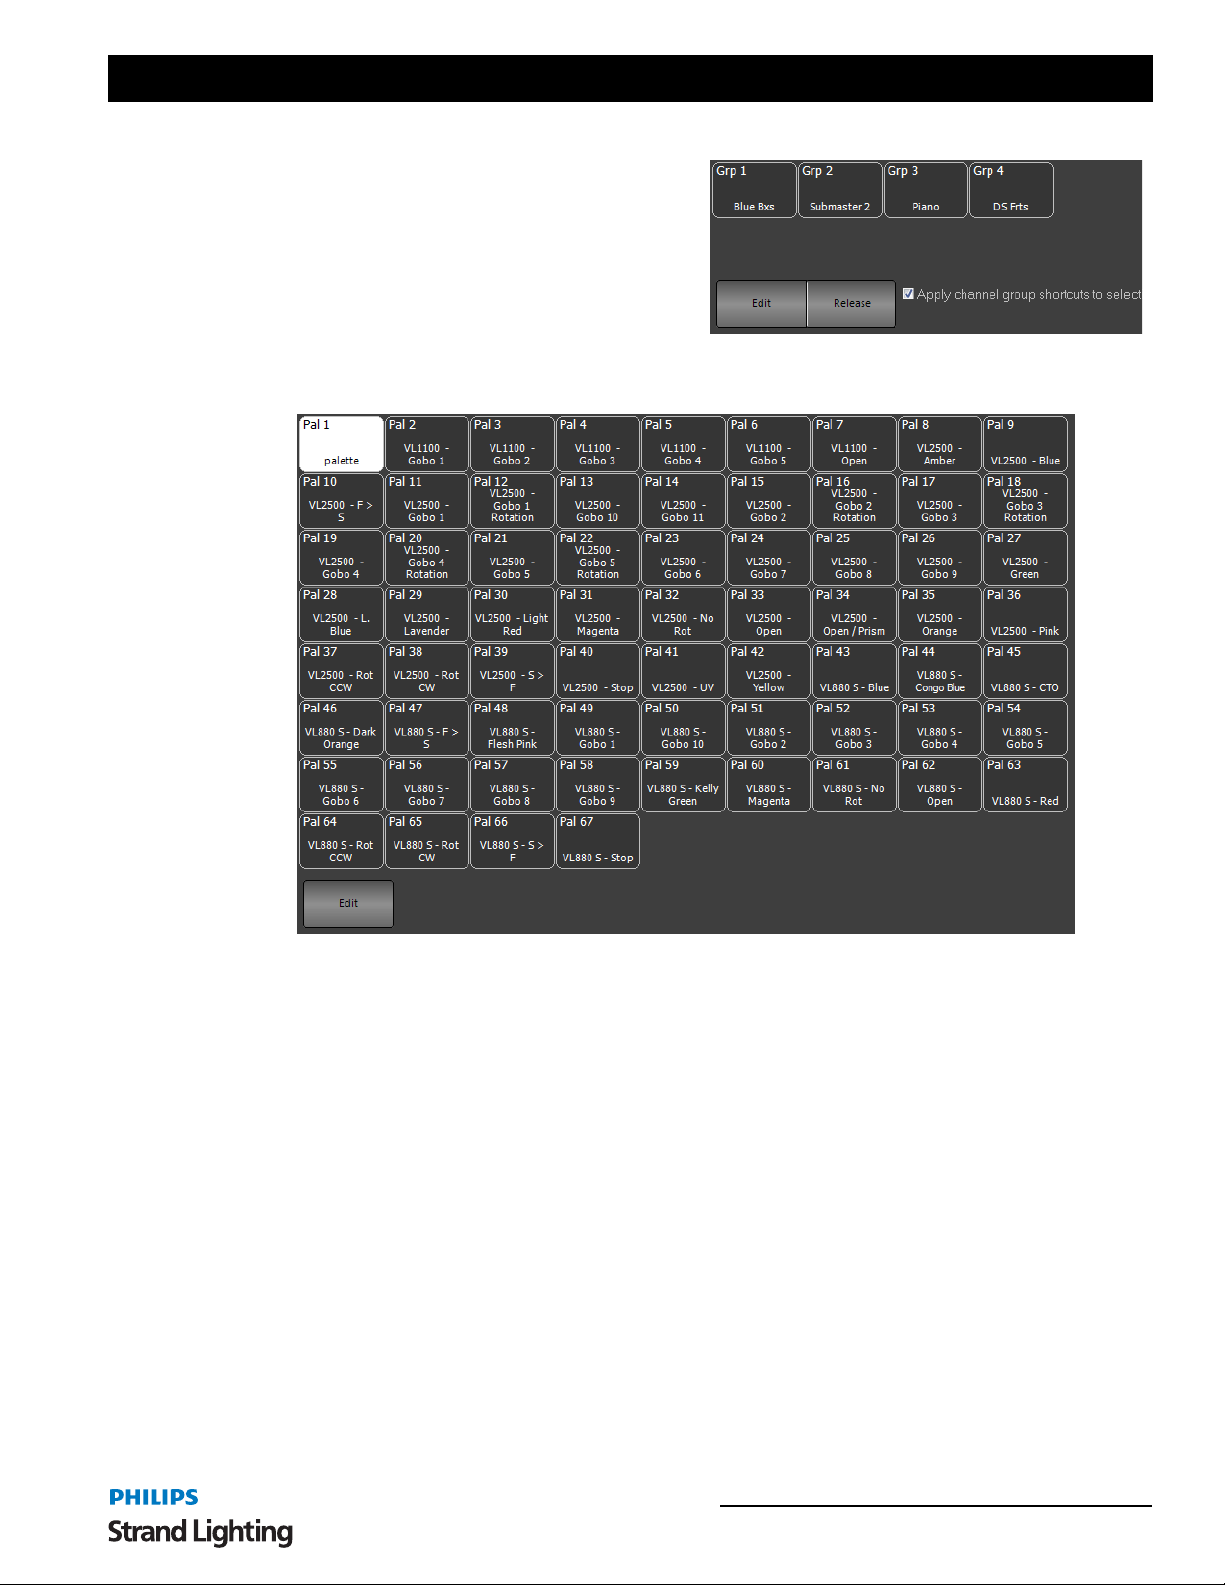
Channel Groups - opens the list of show built groups and
preset focus groups.
Press on any group displayed to select that group of
fixtures.
Edit - opens the Group Display window for editing
groups.
Release - releases selected channels from Build/HTP/LTP
behavior.
Palettes - opens the list of show built Generic Palettes.
NEO Lighting Control Console
These can be selected from this quick select palette window.
Edit - pressing Edit will open up the Palette display window for palette editing.
Command Pulldowns 45
Page 48
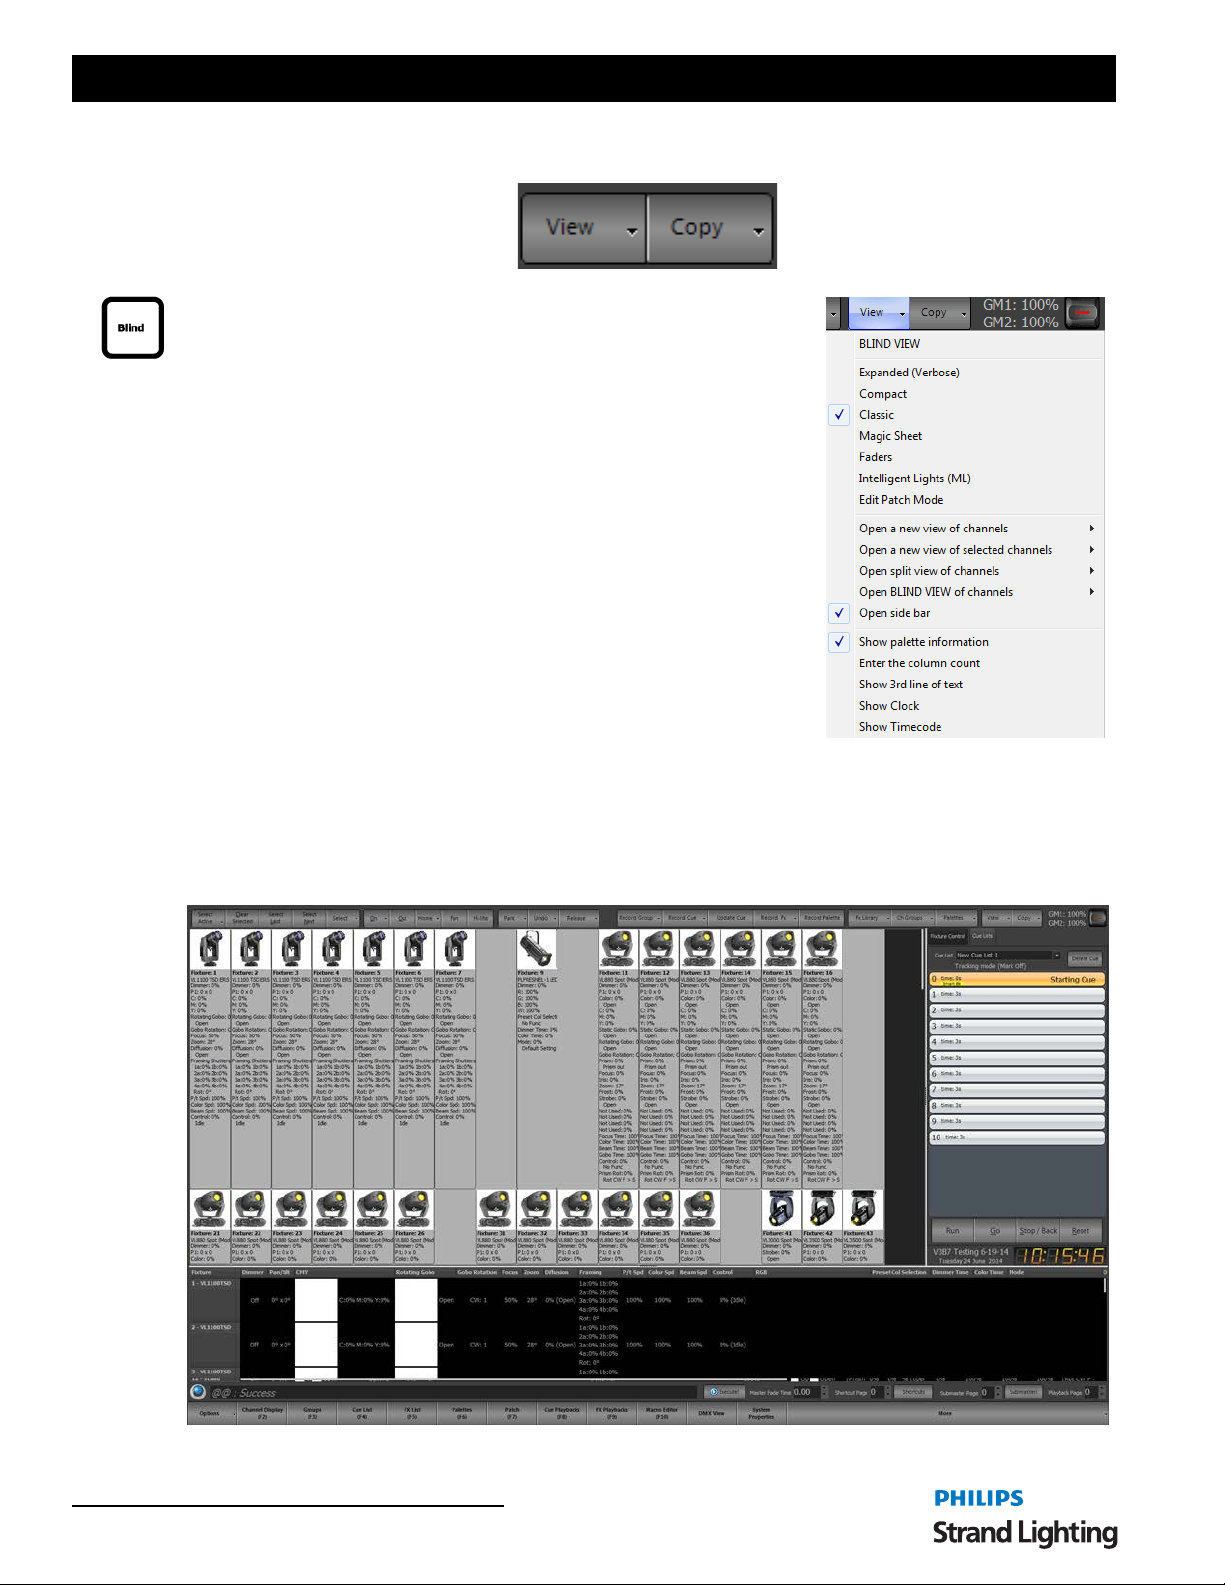
User’s Manual
Command Pulldown - View
View - change to different viewing style for the main single monitor window.
Blind - the non-Live display that allows the user to view and edit data without
the data outputting on stage.
The channel view window has six modes of displaying fixtures and channels.
Change the view click on the "View" button and selecting the desired view
from the drop down menu.
The different view modes are Expanded, Compact, Classic, Magic Sheet,
Faders and ML View. There is no issue using any views to control your
lighting rig as you may want to use conventional lights in the grid display and
intelligent fixtures in the intelligent view. NEO will switch between the views
without effecting the operation of the lights.
In the Expanded, Compact, and Classic view all of the channels and fixtures
are displayed sequentially in an n x n matrix of rows and columns. The
software will automatically display the maximum number of channels it can
across the columns and provide a scroll bar to view channels that are off the
bottom of the window.
You can however set a fixed number of columns in the View menu by
selecting "Set fixed column count". If a fixed column count is set then the
column widths will automatically resize to fit across the page. Setting this to 0 will return it to a dynami c column
count.
Expanded (Verbose) - The Expanded view will show all of the patched channels in an excel style grid of rows and
columns. This mode will show the maximum about of informatio n about the fixtures and their state. Each attribute
will be listed below the fixture name and dimmer level to show its current value.
46 Software Configuration
Page 49
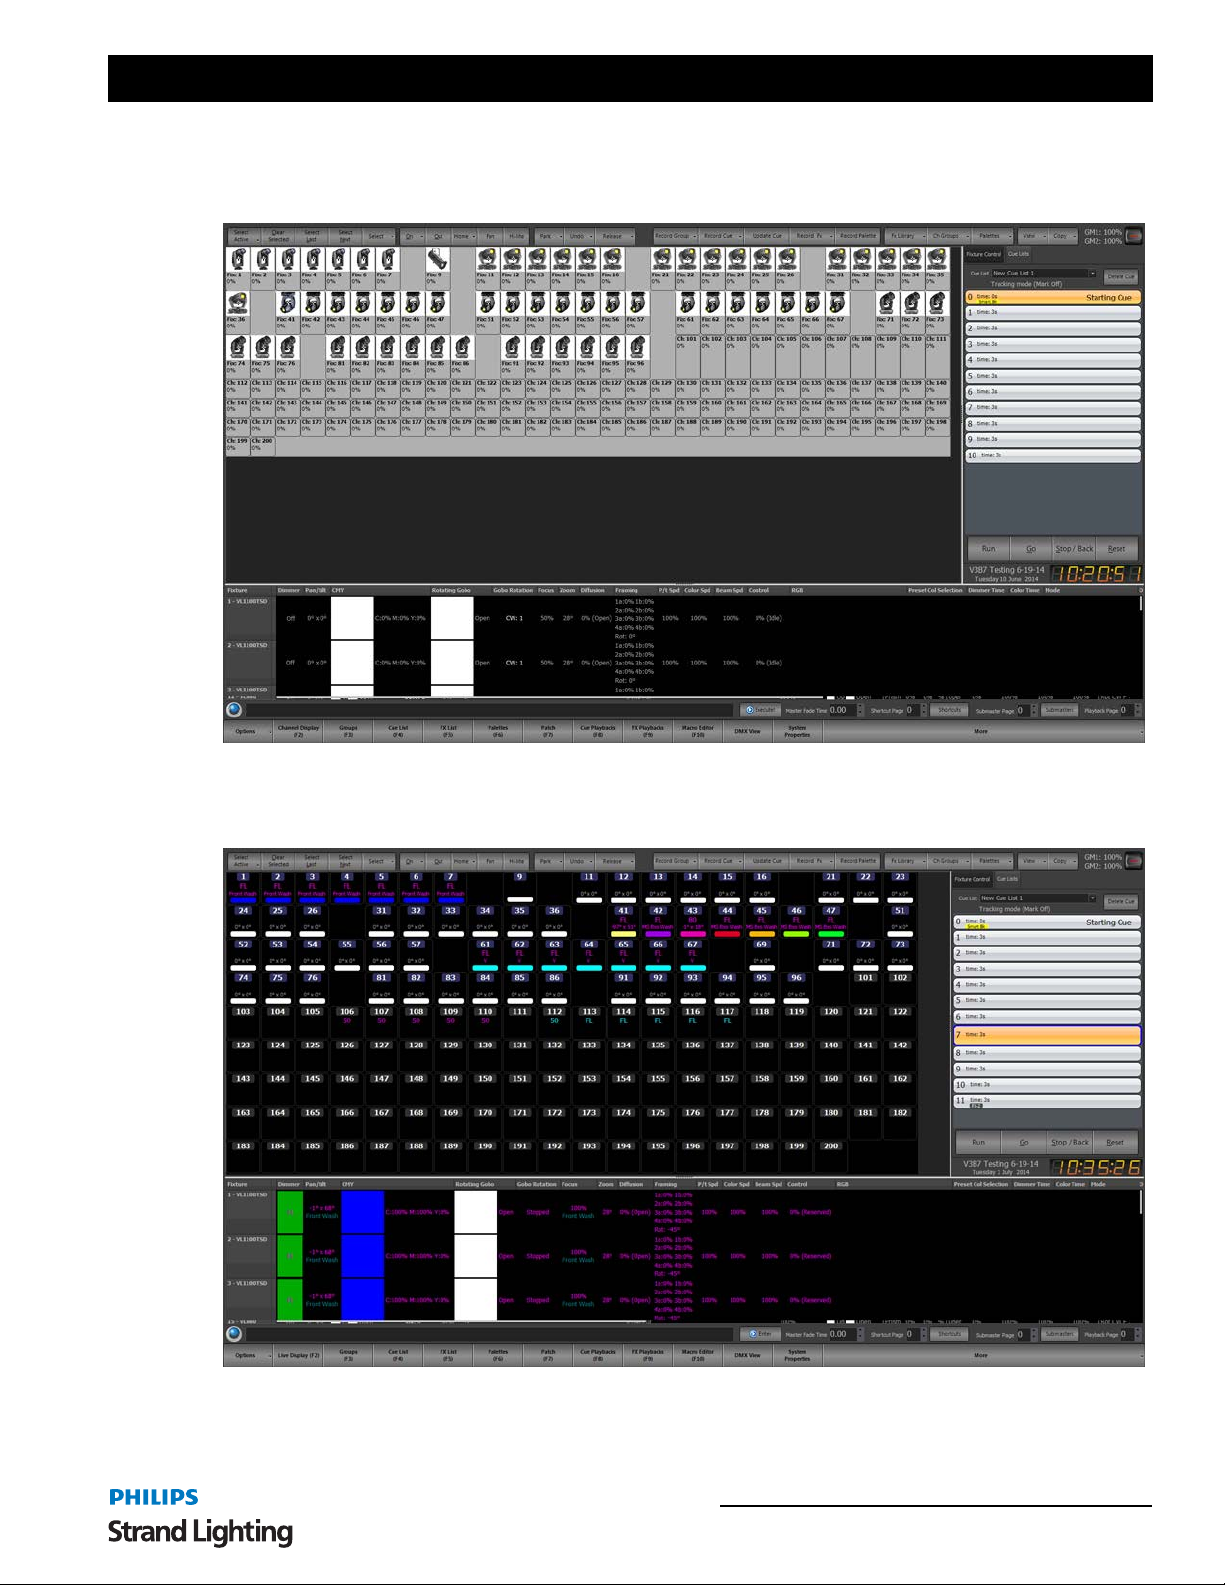
NEO Lighting Control Console
Compact View - Use the compact view to maximize the number of channels visible on screen at once. This view will
show the least amount of information per fixture and is limited to the basic channel number and dimmer level. It will
also show graphically a moving light position and color.
Classic - the most traditional theatrical view. This identifies conventional channels with a grey box around the fixture
number. An automated luminaire will have a blue box around the fixture number. The second line displays the
intensity using a traditional theatrical color scheme.
Command Pulldowns 47
Page 50
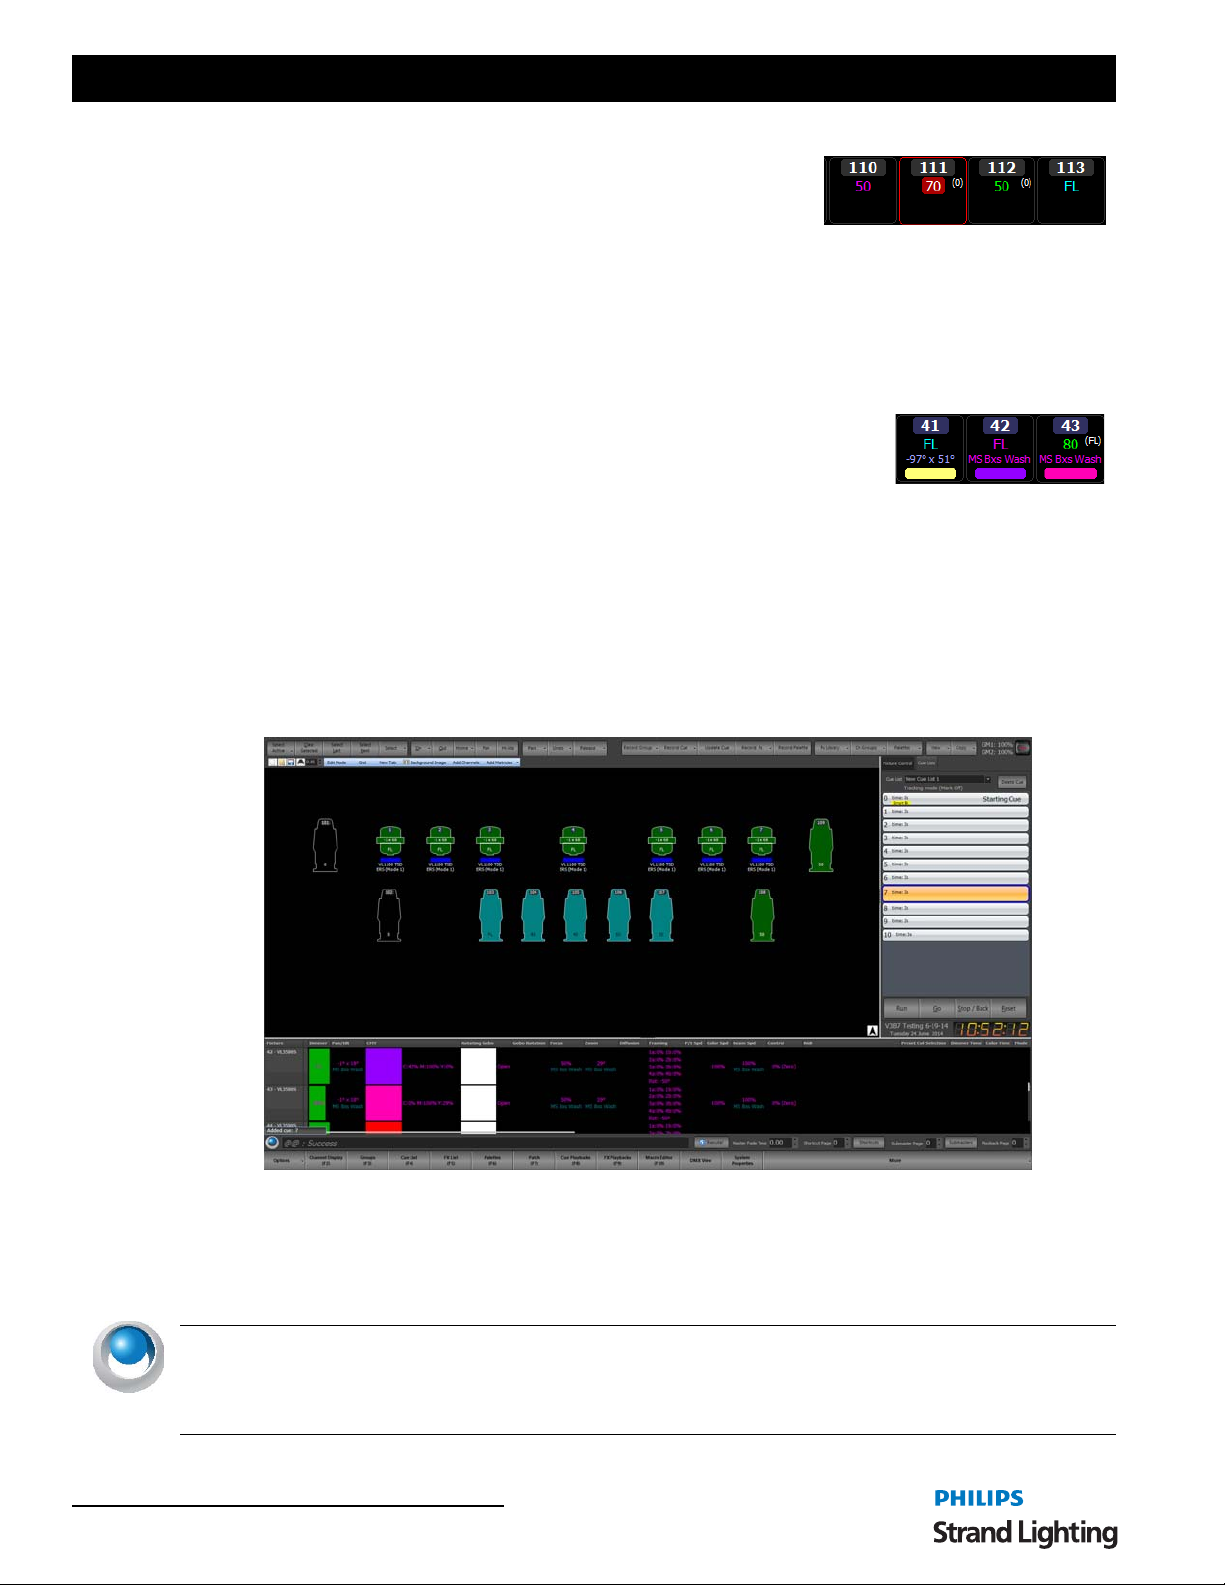
User’s Manual
Intensity Levels
• Red - adjusted.
• Light Blue - levels going up.
• Green - levels going down.
• Magenta - levels staying the same. (tracked).
• White - hard instructio n.
The red box around 111 indicates that fixture is currently selected. (The level of selected units can be adjusted
without reentering the fixture number(s).
Attribute Levels
• Red - adjusted.
• Blue - changed value.
• Magenta - levels staying the same (tracked).
• White - hard instructio n.
• Grey - no data (default).
The (bracketed) info shows the previous level of the fixture.
Magic Sheet - The Magic Sheet view is a free form that by default has nothing on it. Before using the Magic Sheet
view you must place fixtures in the desired location. Once you have placed fixtures on the form you can then control
them by selecting them in the same way as the grid view.
When placed on the layout window each fixture is represented by a symbol of the fixture, its channel number, name
and the current dimmer level. If the fixture is an intelligent fixture the positio n and color is also sh own. The symbol
showed is defined by the "Fixture Type" in the dimmer patching window. If no type is specified the fixture is assumed
to a conventional profile.
NEO NOTES & TIPS: The Magic Sheet view also supports a number of multi touch gestures to help when working
with large sets of fixtures. You can use the two finger pinch to zoom and two fingers on the screen to pan around the
layout. If fixtures are currently selected then sliding two fingers up or down the screen will increase or decrease the
dimmer level.
48 Software Configuration
Page 51
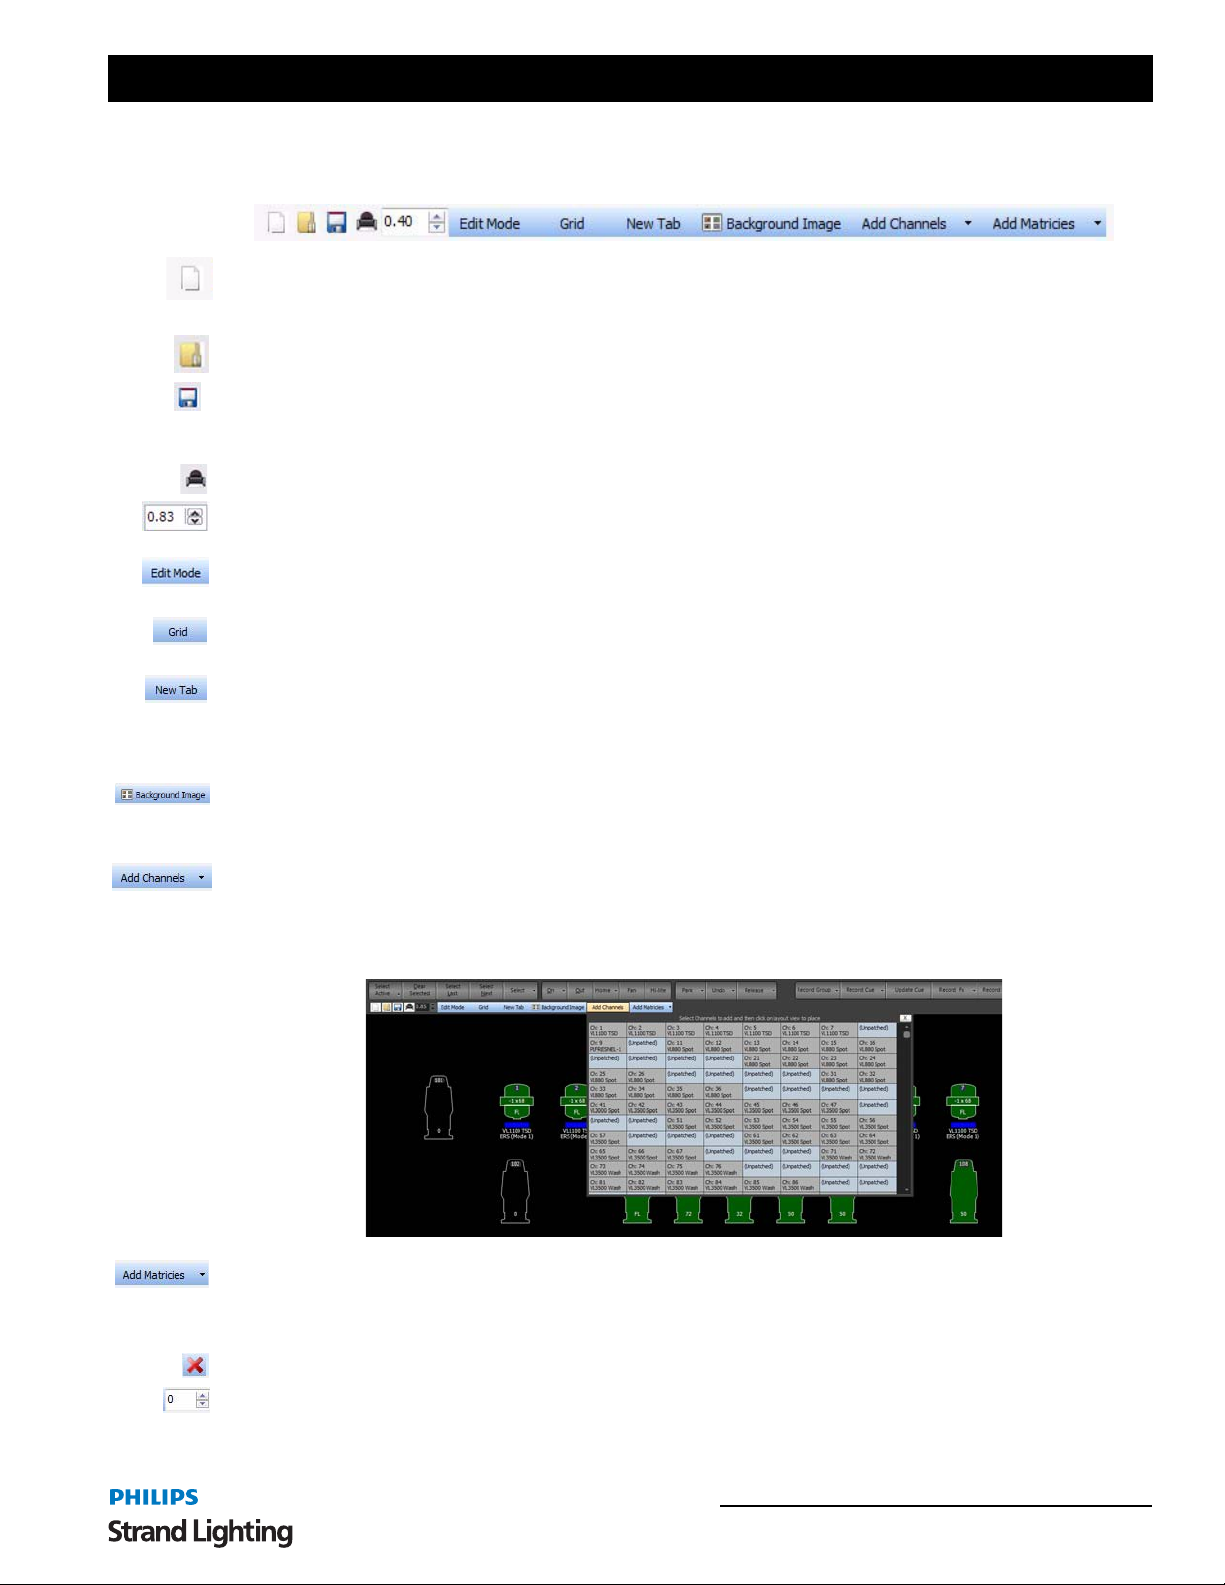
NEO Lighting Control Console
Just above the layout panel (black area of the window) is tool bar that is used to edit the layout and insert fixtures onto
the view.
New - Click on the "New" tool button to start a blank layout. This will clear all of the fixtures from the Magic Sheet
view (fixtures will remain patched in the system) provide a blank page to work with. A dialog box will prompt to
confirm the "New" operation as this cannot be undone.
Open - Click on the "Open" button to load a saved layout and replace the layout currently shown.
Save - The current layout is always stored along with your show however if you want to have several layouts you can
save it to a file on the hard driver separate to the show. Click on a save button and a standard windows save dialog
box will appear.
Print - Use the print option to print a hard copy of the layout on a system printer.
Zoom - Use the zoom option to modify the size of the view on screen. If the zoom is to too large to fit all of the
fixtures on screen then the scroll bars can be used to move around the layout.
Edit Mode - Toggle the edit mode button to change the position of the fixtures in the layout view. With the edit mode
off the fixture cannot be moved around.
Grid - To help line up fixtures in the Magic Sheet view a grid can be turned on. The fixtures will snap to the dots in
the grid when repositioning them.
New Tab - To help manage a large number of fixtures in the Magic Sheet view you can create tabs that will allow you
to quickly switch between views. Clicking on the "New Tab" button will prompt you for the name of the tab. Tab
names can be edited at any time by double clicking on the t ab. To remove a tab from the system click on the small
"X" on the right of the tab. When only one tab exists the tabs will not be visible.
Background image - Clicking on the "Background Image" button will open a standard windows file dialog that can
be used to select any bitmap or jpeg image. The loaded image will be shown as the background to the layout. This
image will be stored with your show or with any saved layout.
Add Channels - T o add channels to the layout click on the "Add Channels" button. A window will drop down below
the buttons with a grid showing all of the channels in the system. Click on the channels you want to add (as you click
the channels will become highlighted) and then click in the layout screen to play the fixtures.
You can hold down the shift or control key to select multiple fixtures in any order.
Add Matrices - As well as channel you can also add any configured matrices to the Magic Sheet view. This will
allow you to modify the entire matrix as a single fixture.
On the left of the window is the list of available fixtures and matrices that can be placed in the layout window.
Delete - Use the delete button (only visible in edit mode) to remove the selected fixtures from the layout.
Rotate Fixtures - When the Magic Sheet view is in edit mode you can rotate fixtures using the spin edit control to the
left of the delete button. The rotation angle set will apply to all of the selected fixtures. You can also rotate fixtures by
holding down the ALT key on your keyboard and click and dragging around the fixture with your mouse.
Command Pulldowns 49
Page 52
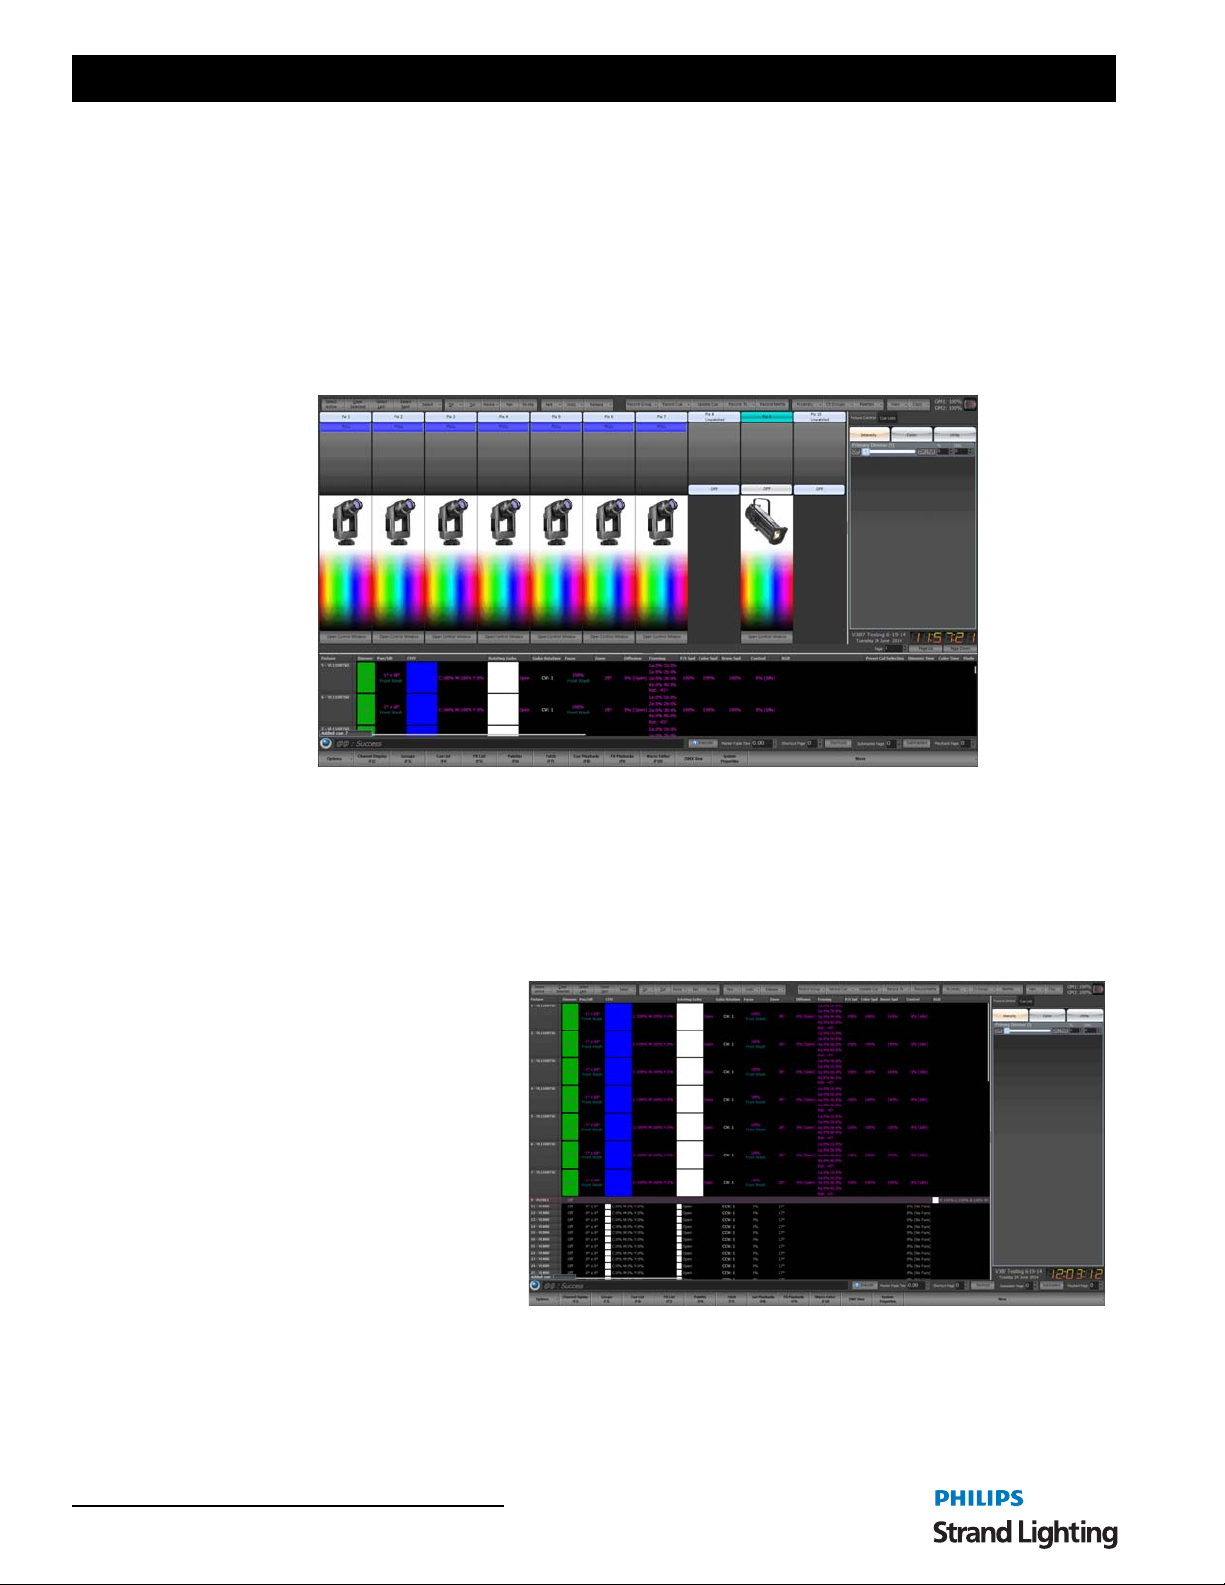
User’s Manual
Moving fixtures around in the layout - By default the Magic Sheet view is in control mode meaning it is expecting
the user wants to control and modify the fixtures output. When you click on a fixture it will highl ight it exactly as it
does in the grid display. To move fixtures around and change the position you must turn on the option "Edit Mode".
When this option is turned on you cannot select fixtures fo r control as your mouse is now used to move the fixtu re
where you want.
Click and while holding the mouse button dow n move the fixture to the desi red location. Release the mouse b utton
once you have placed the fixture where you want it.
Fader View - The fader view is a simple view designed for small installations where only a few fixtures are being
controlled. Each fixture is shown as a fader.
T o change the intensity levels for any channel simply drag the bar up and down the control. If the fixture supports pan
and tilt control you can click anywhere in the fixture image to set its position. Likewise you can also select the color
from the palette shown below the image.
Click on the "Open Control Window" to open the standard fixture control window for all other attributes.
At the bottom of this view is a page up and page down control to set the page of faders that are shown. In the view
menu is an option to set the number of faders shown on each page.
Intelligent View (ML) - The Intelligent
view (sometimes called the ML View) is
specifically designed to work with
intelligent fixtures (moving lights) and
groups fixtures by their type. Each
fixture is listed vertically with the
attributes shown horizontally. Each
fixture type is separated by a header that
displays the fixture name. Double click
on the header to collapse the grid below
it. This helps you manage what you are
viewing by hiding fixtures you do not
require.
Any of the attributes shown in this view
can be directly edited by double clicking
on the cell. An appropriate popup control will appear.
If a palette is in control of the attribute its will be shown in red under the attribute value.
To set the default row height for this view use the view menu opt ion "Set default row height".
50 Software Configuration
Page 53
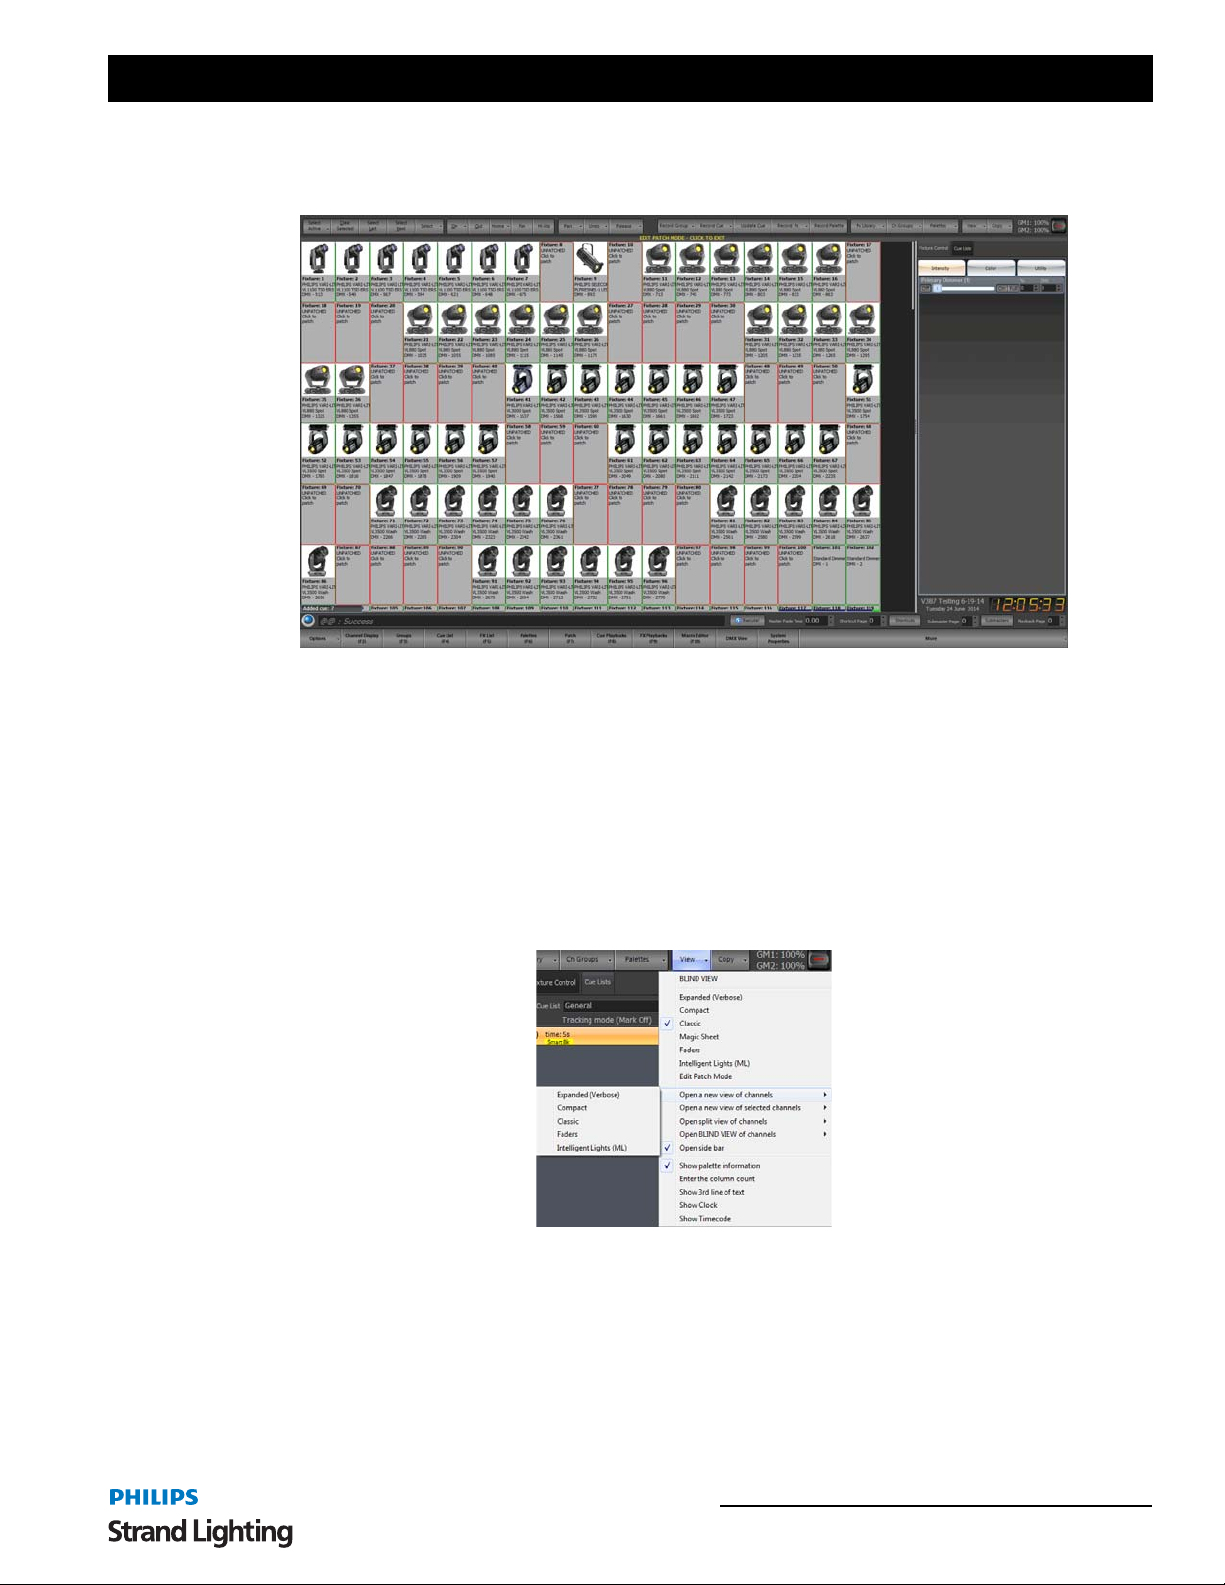
NEO Lighting Control Console
Edit Patch Mode - In addition to the six view modes you can also switch the channel view into patch mode. Patch
mode can be used to edit the fixture patching directly in the channel display window. If no channels are patched in the
system then the patch mode will display automatically.
In the patch mode channels that are patched are shown with a green border and the unpatched channels have a red
border.
To change the patch click with the left mouse button on any channel either patched or unpatched . Use the resulting
dialog to set the fixture you want to patch into the system.
At the bottom of the patch dialog is a spin edit option titled "Quantity for sequential patch". Use this to patch multiple
fixtures of the same type at once.
When you have finished patching the fixtures click on the bar separating the grid from the buttons. This will return
you to the previous view you have been using.
Open a new view of channels - opens a separate window of a fixture display. Choose from the following list of
options…
• Expanded
• Compact
• Classic
• Faders
• Intelligent Lights
Command Pulldowns 51
Page 54
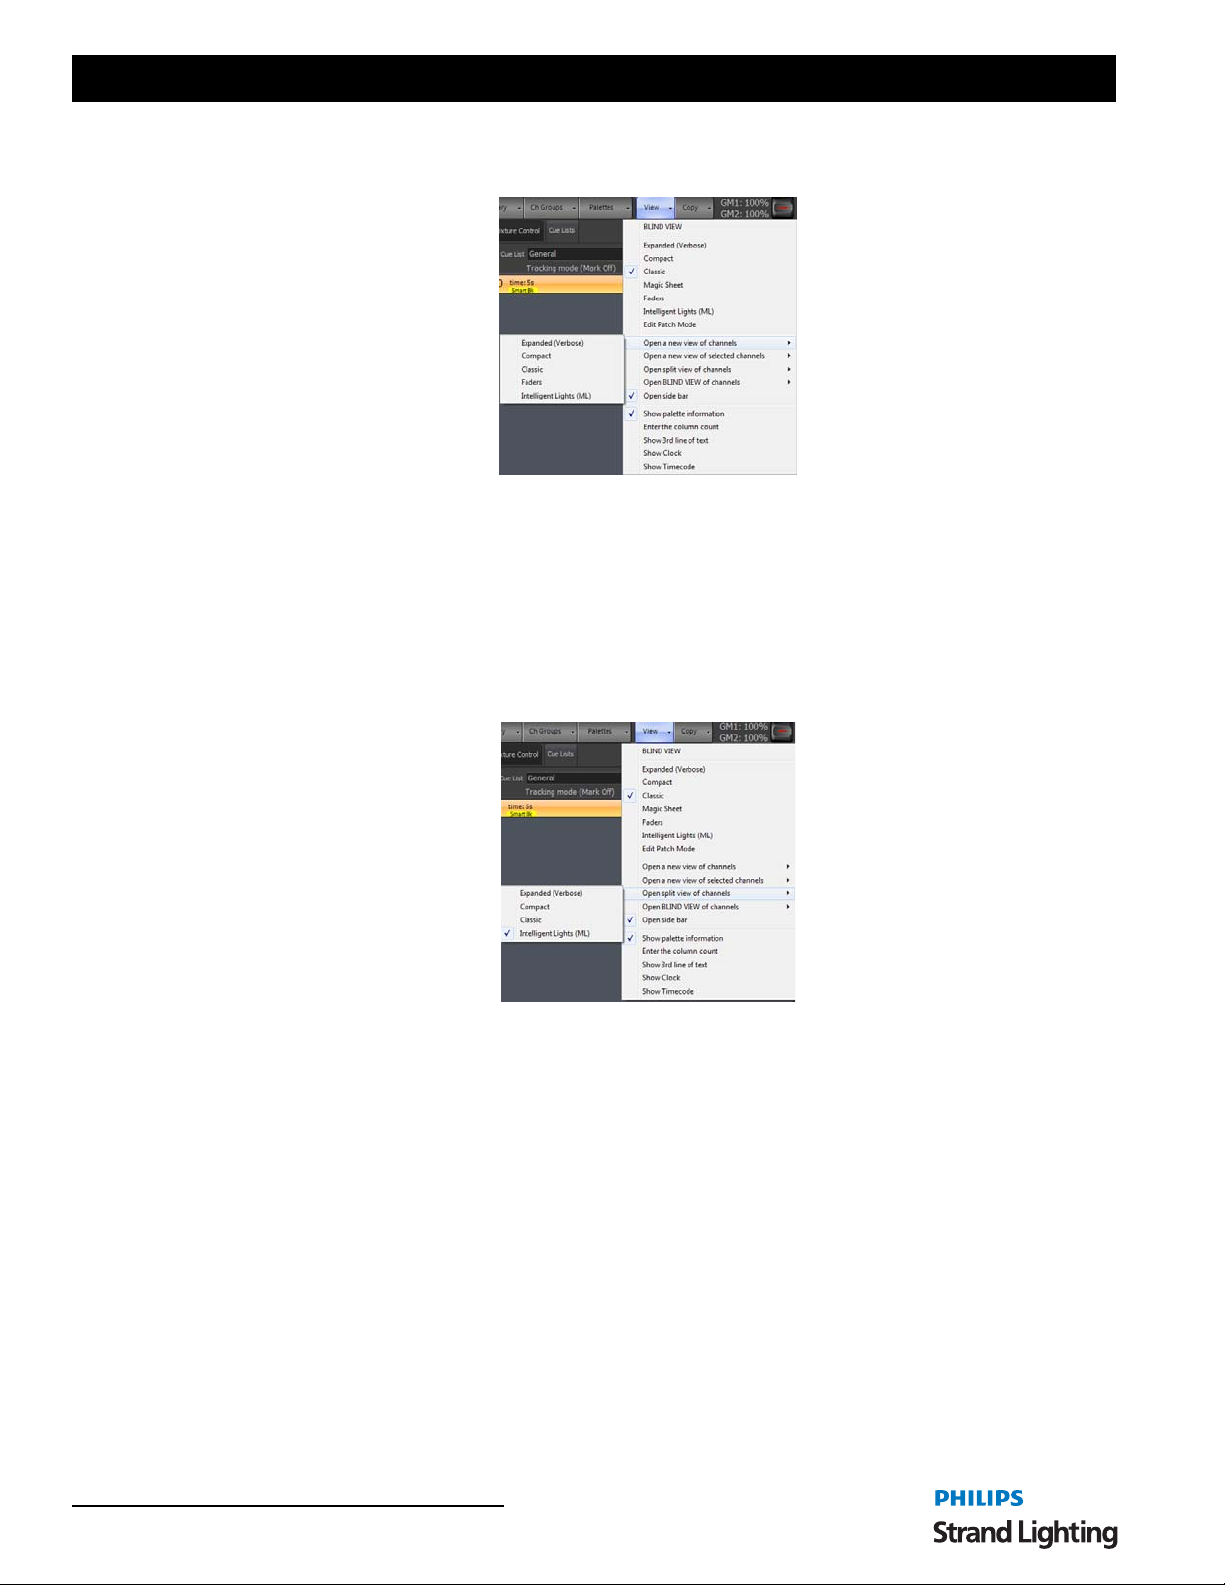
User’s Manual
Open a new view of selected channels - opens a separate window of a fixture display filtering to only display
selected fixtures. Choose from the following list of options…
• Expanded
• Compact
• Classic
• Faders
• Intelligent Lights
Open a split view of channels - opens a fixture window at the botto m of the main mon itors view. Choose from the
following list of options…
• Expanded
• Compact
• Classic
• Intelligent Lights
52 Software Configuration
Page 55
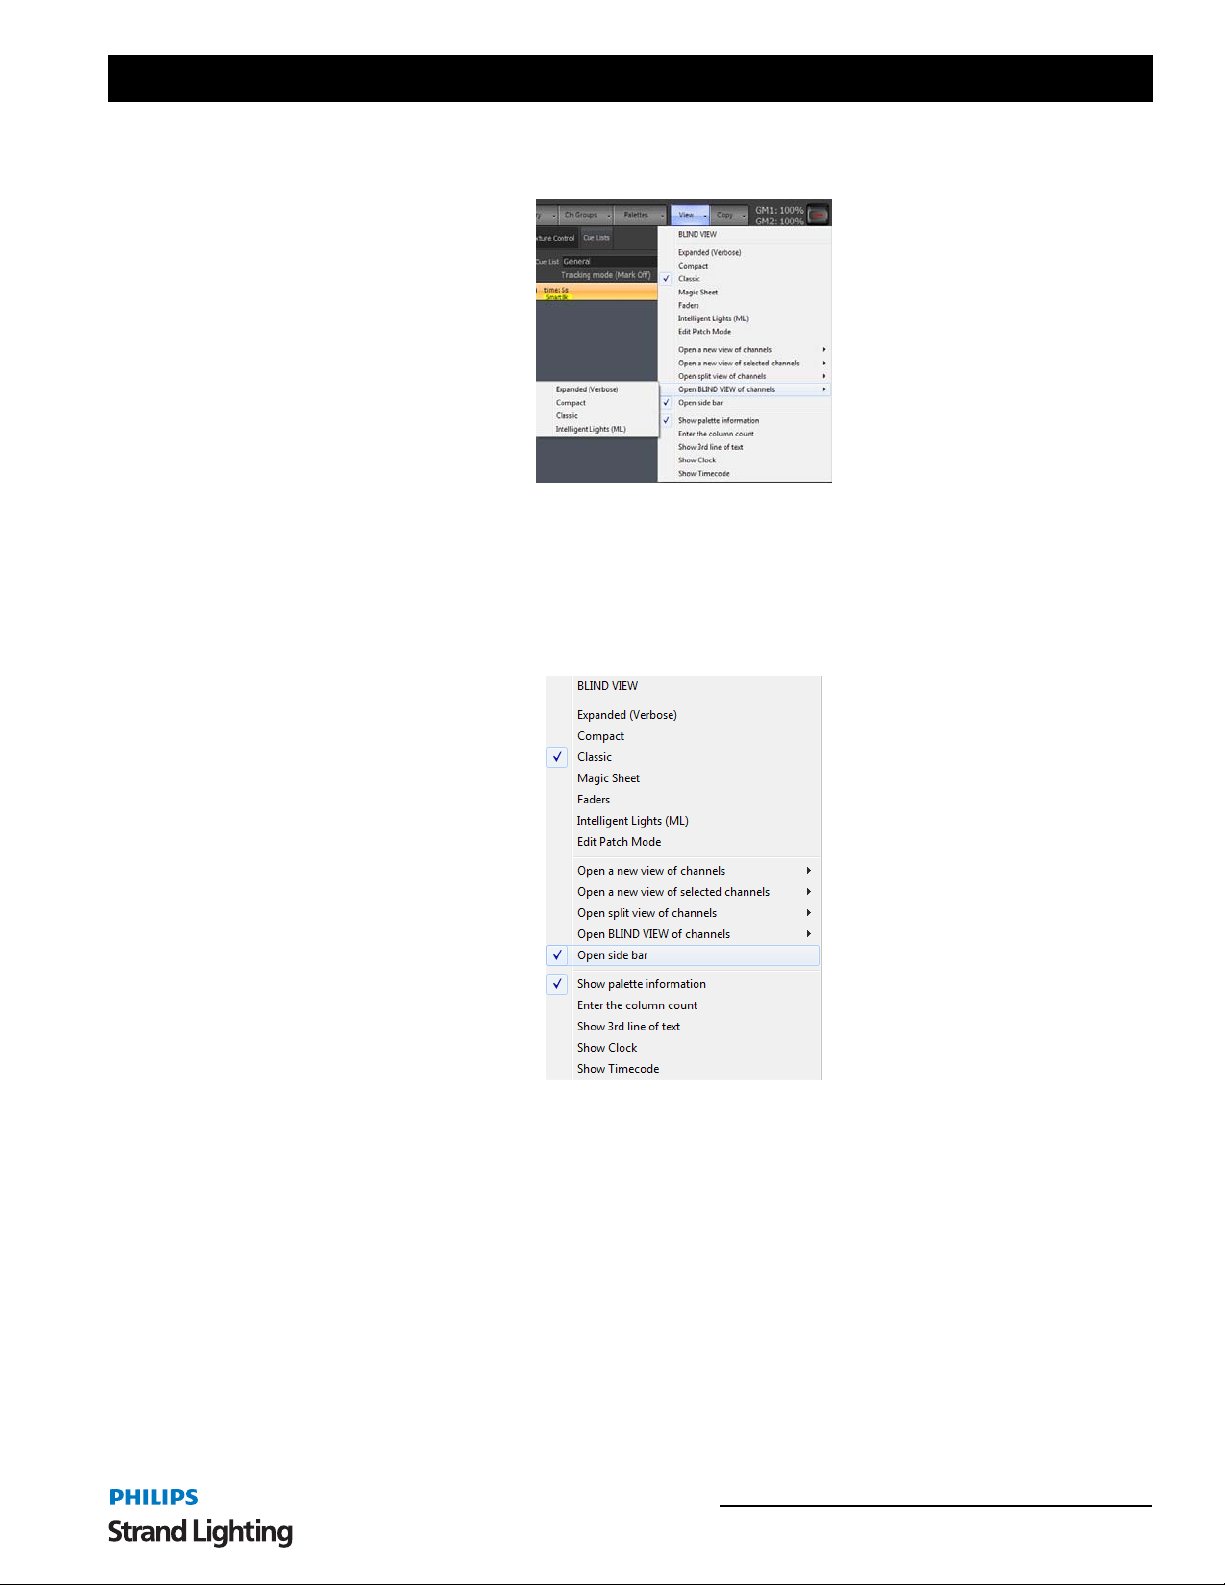
NEO Lighting Control Console
Open a blind view of channels - opens a separate window of a fixture display in the Blind view. Choose from the
following list of options…
• Expanded
• Compact
• Classic
• Intelligent Lights
Open Side Bar - the side bar is the right side section of the main monitor's screen. This displays…
• Cue List Summary
• Fixture Control
• FX Library Controls
A check mark on the left of the option indicates whether the side bar is open or closed (no check mark).
Command Pulldowns 53
Page 56
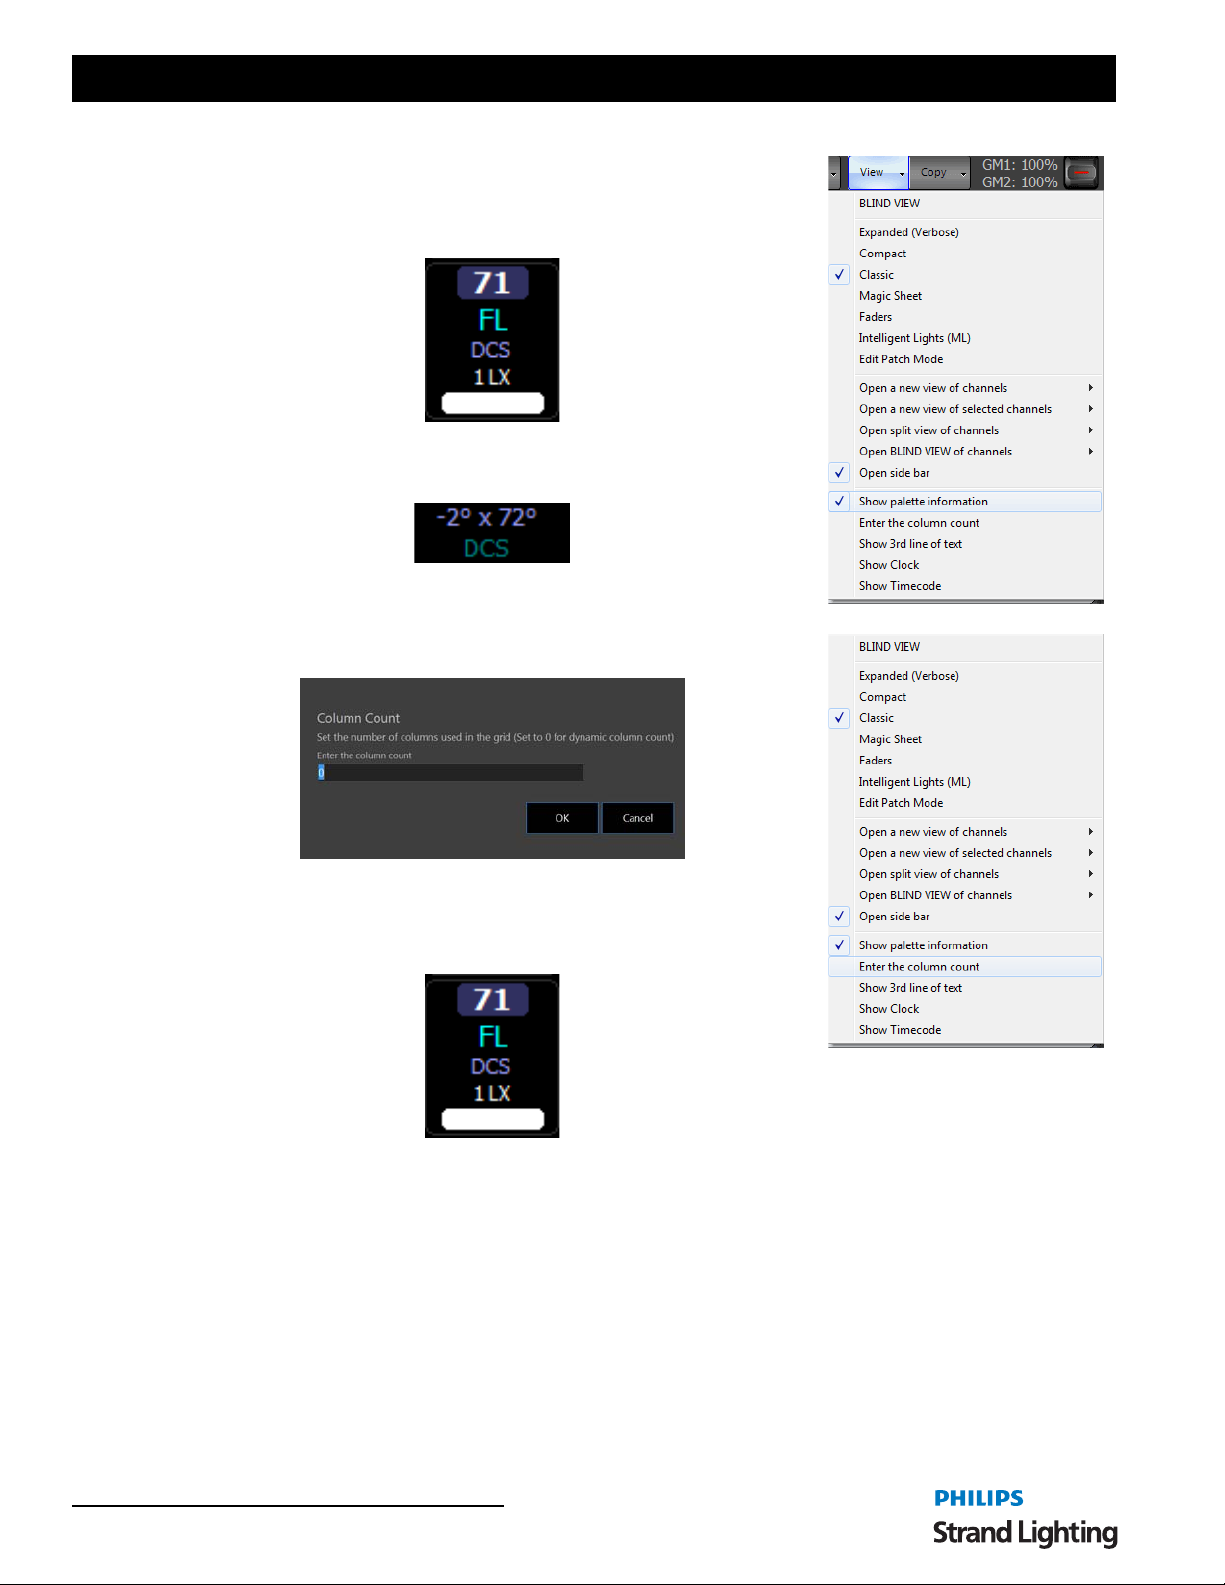
User’s Manual
Show Palette Information - when on, will show Palette and Preset Focus
Group labels in the fixture windows.
The fixture block shows pan and tilt info referencing a preset focus group
labeled "DCS" from the Classic view.
This shows the preset focus group label in the ML view where you see both
raw data and the referenced groups label.
Enter Column Count - allows the user to set the fixture column count width
on the fixture view.
Show 3rd line of text - adds a 3rd line of text to the fixture block on the
Classic view.
The fixture block shows info from the Position column in the Patch screen.
Info from the Position or Purpose column will appear here.
54 Software Configuration
Page 57
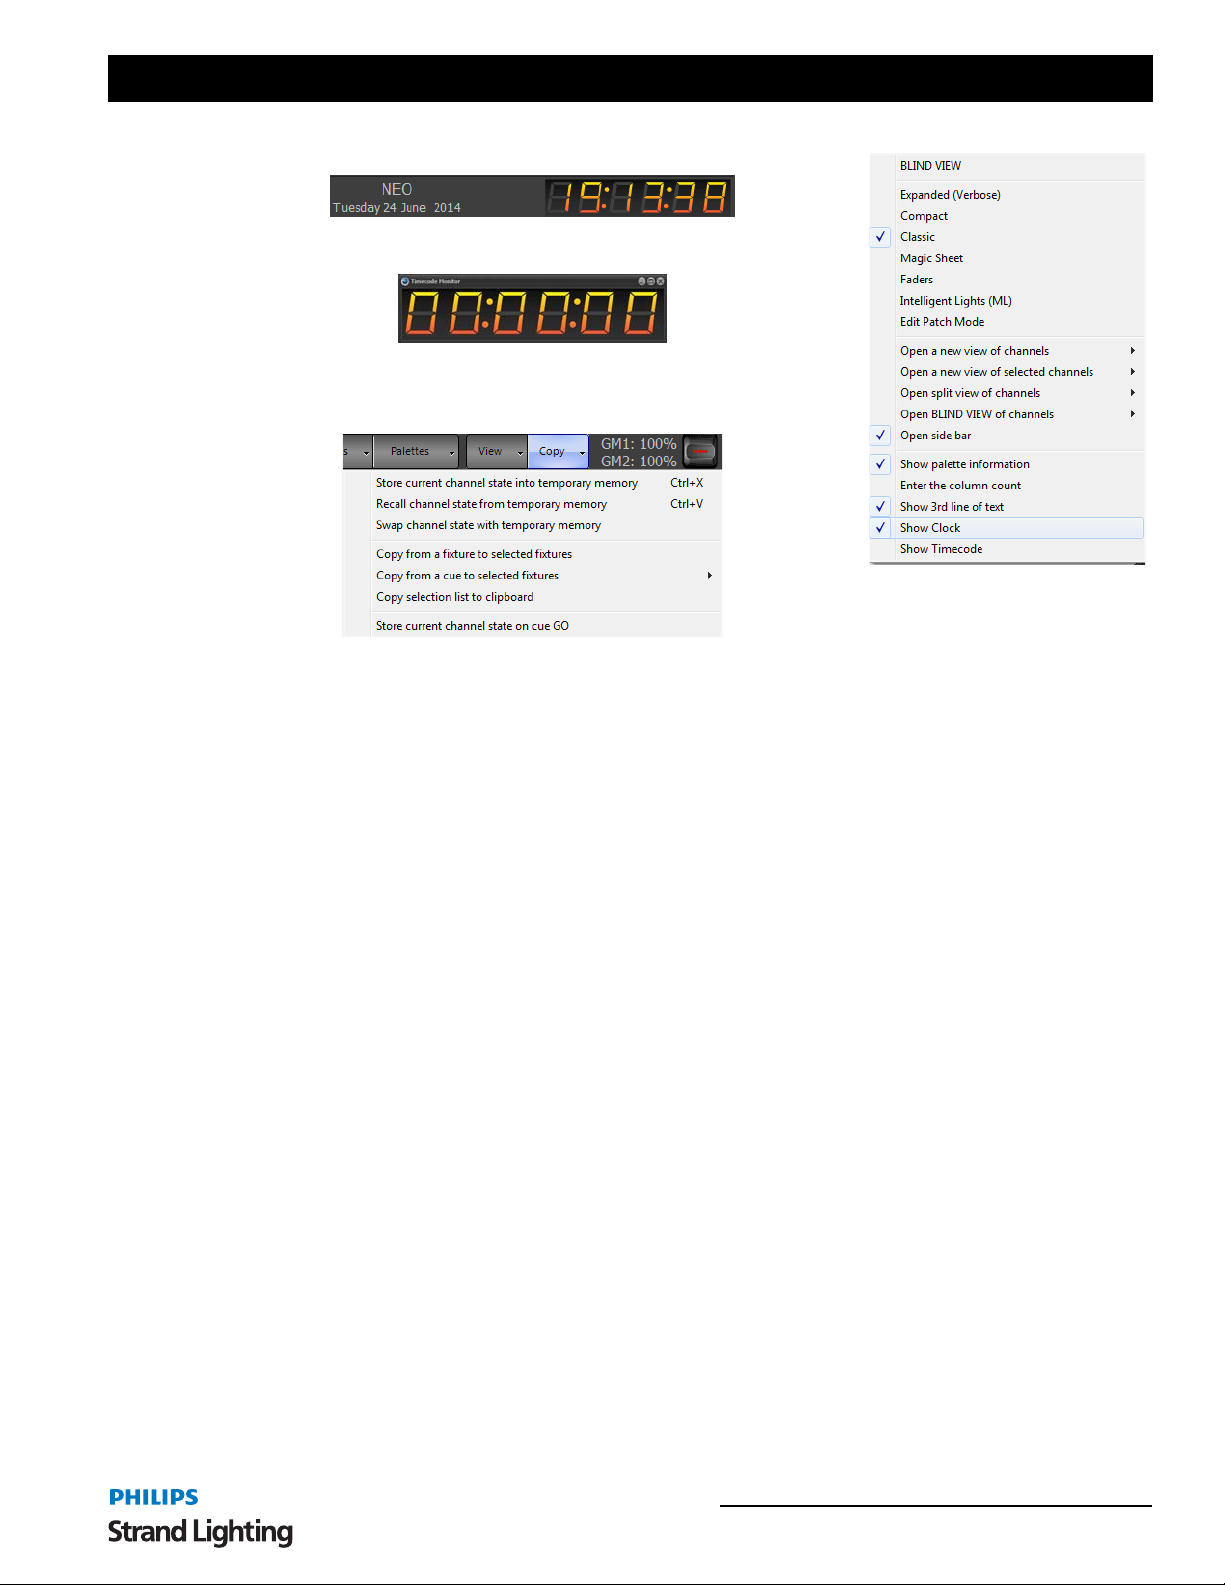
Show Clock - will turn on / off the clock / showfile name / date display.
Show Timecode - will turn on / off the timecode clock.
Copy - allows Store, Recall, Swap and Copy functionality for fixture data.
NEO Lighting Control Console
The copy button on the right hand side of the channel display window w ill drop down a menu with a number of
options for storing and recalling the channel state. You can use this to store and recall the channel state from a
temporary memory, copy from another fixture or copy the channel state form a cue.
Store current channel state into temporary memory - If you are half way through creating a look on stage and
need to run a cue or bring up some other lighting state then this option can be used to make a temporary back up of
the look you currently have. The state of every channel will be stored away in a separate memory to be recalled at any
time in the future.
Recall channel state from temporary memory - Use the recall option to return the live channel state to the one
stored in memory with the previous function. If no channel state is stored then the current state will remain
unchanged.
Swap channel state with temporary memory - Use the swap function to perform both a recall and a store in a single
operation. The current state of the channels will be stored in the temporary memory and then the state that was stored
will be loaded into the live state.
Copy from fixture to selected fixtures - Selecting this option will change your mouse cursor to a hand point er to
indicate that you need to select a "copy from" fixture. The attribute and dimmer state of the next fixture you select
will be copied to the currently selected fixtures.
If the selected fixtures are of the same type as the "copy from" fixture then an exact copy can be performed. If not
then the software will apply the generic attributes of the selected fixtures.
Copy from cue to selected fixtures - This is a convenient option to load the state of the selected fixtures form the
information stored in a cue. Selecting a cue from the sub menus found off this menu option will set the selected
fixtures to the same settings as they appear in the cue. If a selected fixture does not exist in the cue then its values will
remain unchanged.
Copy selection list to clipboard - Selecting this option will copy a comma separated list of channels to the windows
clipboard representing the current selected fixtures.
Store current channel state on cue GO - If this option is enabled then the "Store current channel state into
temporary memory" operation will occur before the next cue is run.
Command Pulldowns 55
Page 58
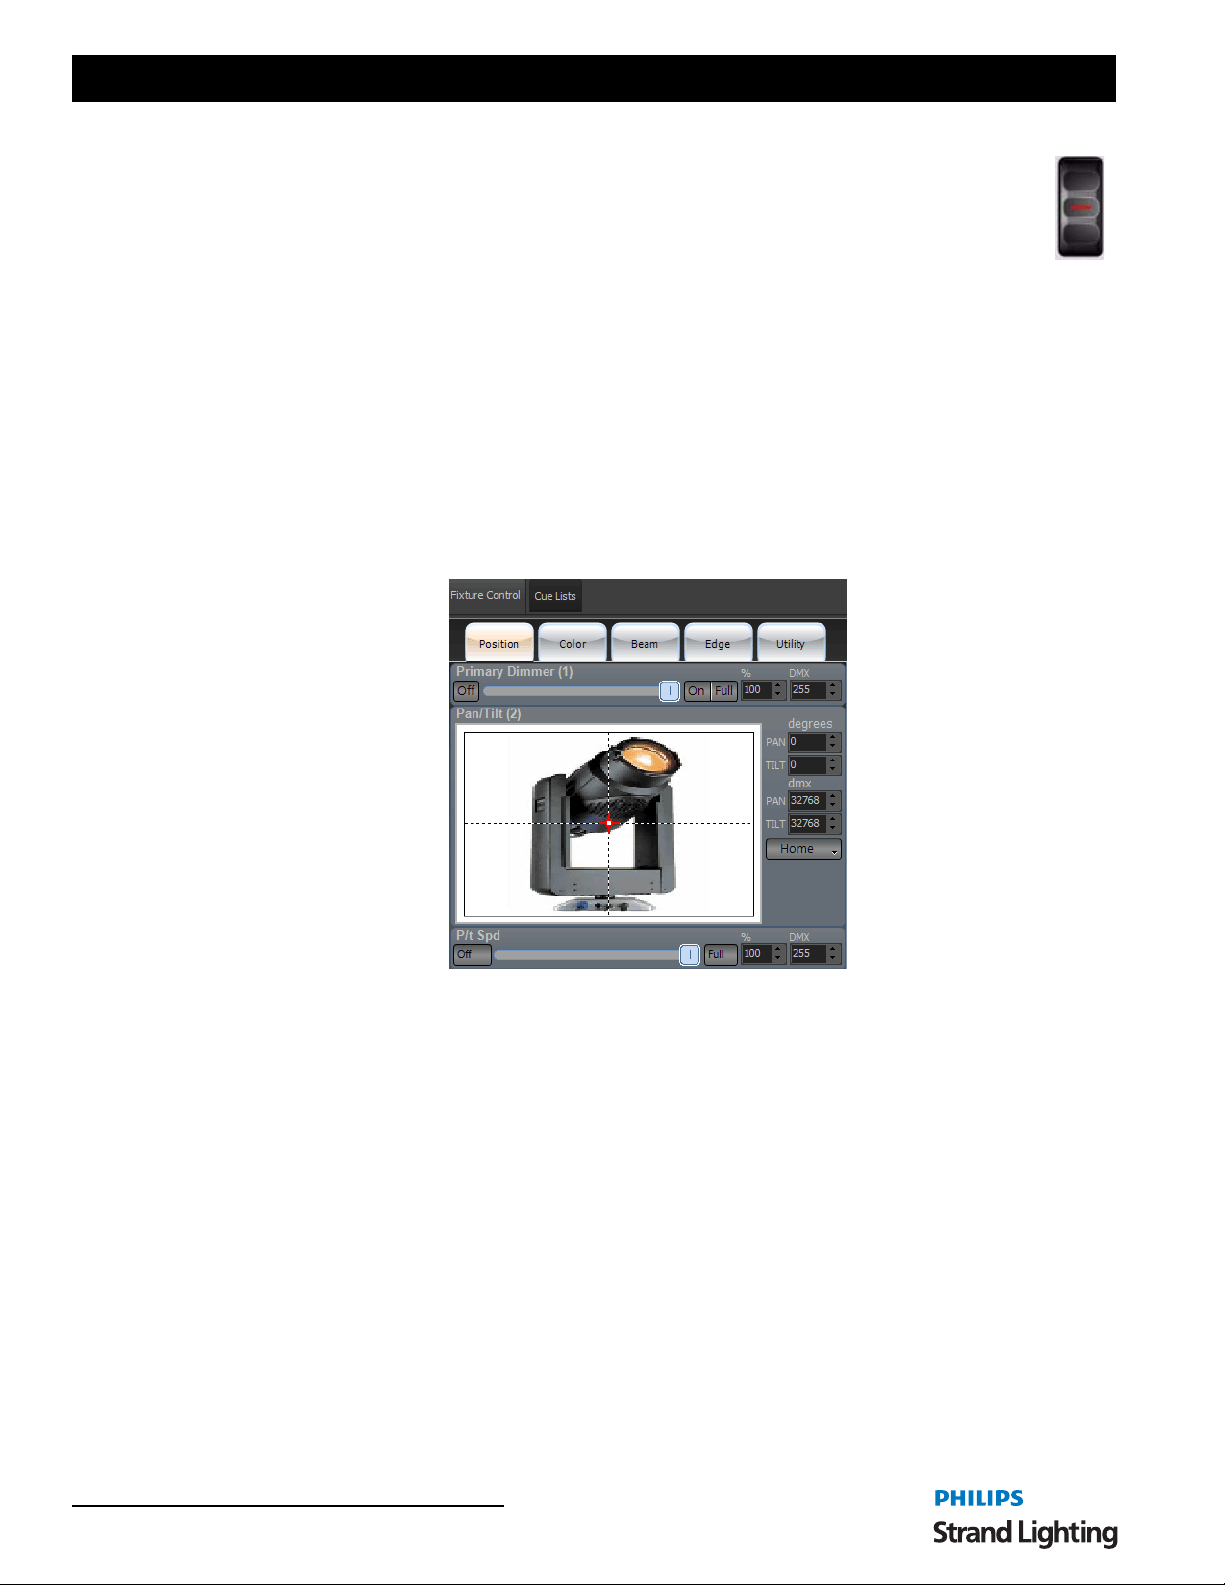
User’s Manual
Thumb Wheel
For systems that do not have a scroll wheel on the mouse or cursor (such as tablet or pen based systems)
you can use the on screen wheel provided. Click on this control and hold down the mouse button down. As
you move your mouse or cursor up and down the intensity of the channels will change in the sam e way as
the scroll wheel.
Control Tabs
The Control Tabs display onscreen control for the tabbed item. These onscreen controls link to the hardware as well
as Command Line operation.
Fixture Control
Fixture Control appears when any patched attributed fixture is selected. Attributes are collected into Attribute
Families. While the fixture library can be infinitely flexible, standard Attribute Families have been created to best
interface with the hardware.
These are Position (movement), Color (all colors), Beam (gobos, prism and all inside beam attributes), Edge (focus,
zoom, iris, shutters and all outside beam attributes).
Position Tab
The example fixture here is a VARI*LITE VL1100TSD Automated Luminaire. The Position page shows the Intensity
(Primary Dimmer), Pan/Tilt and Pan/Tilt Speed. These have shortcut buttons for On/Full/Off and edit boxes for
percentages/degrees and DMX values. The console itself has buttons for all of the Attribute Families.
56 Software Configuration
Page 59
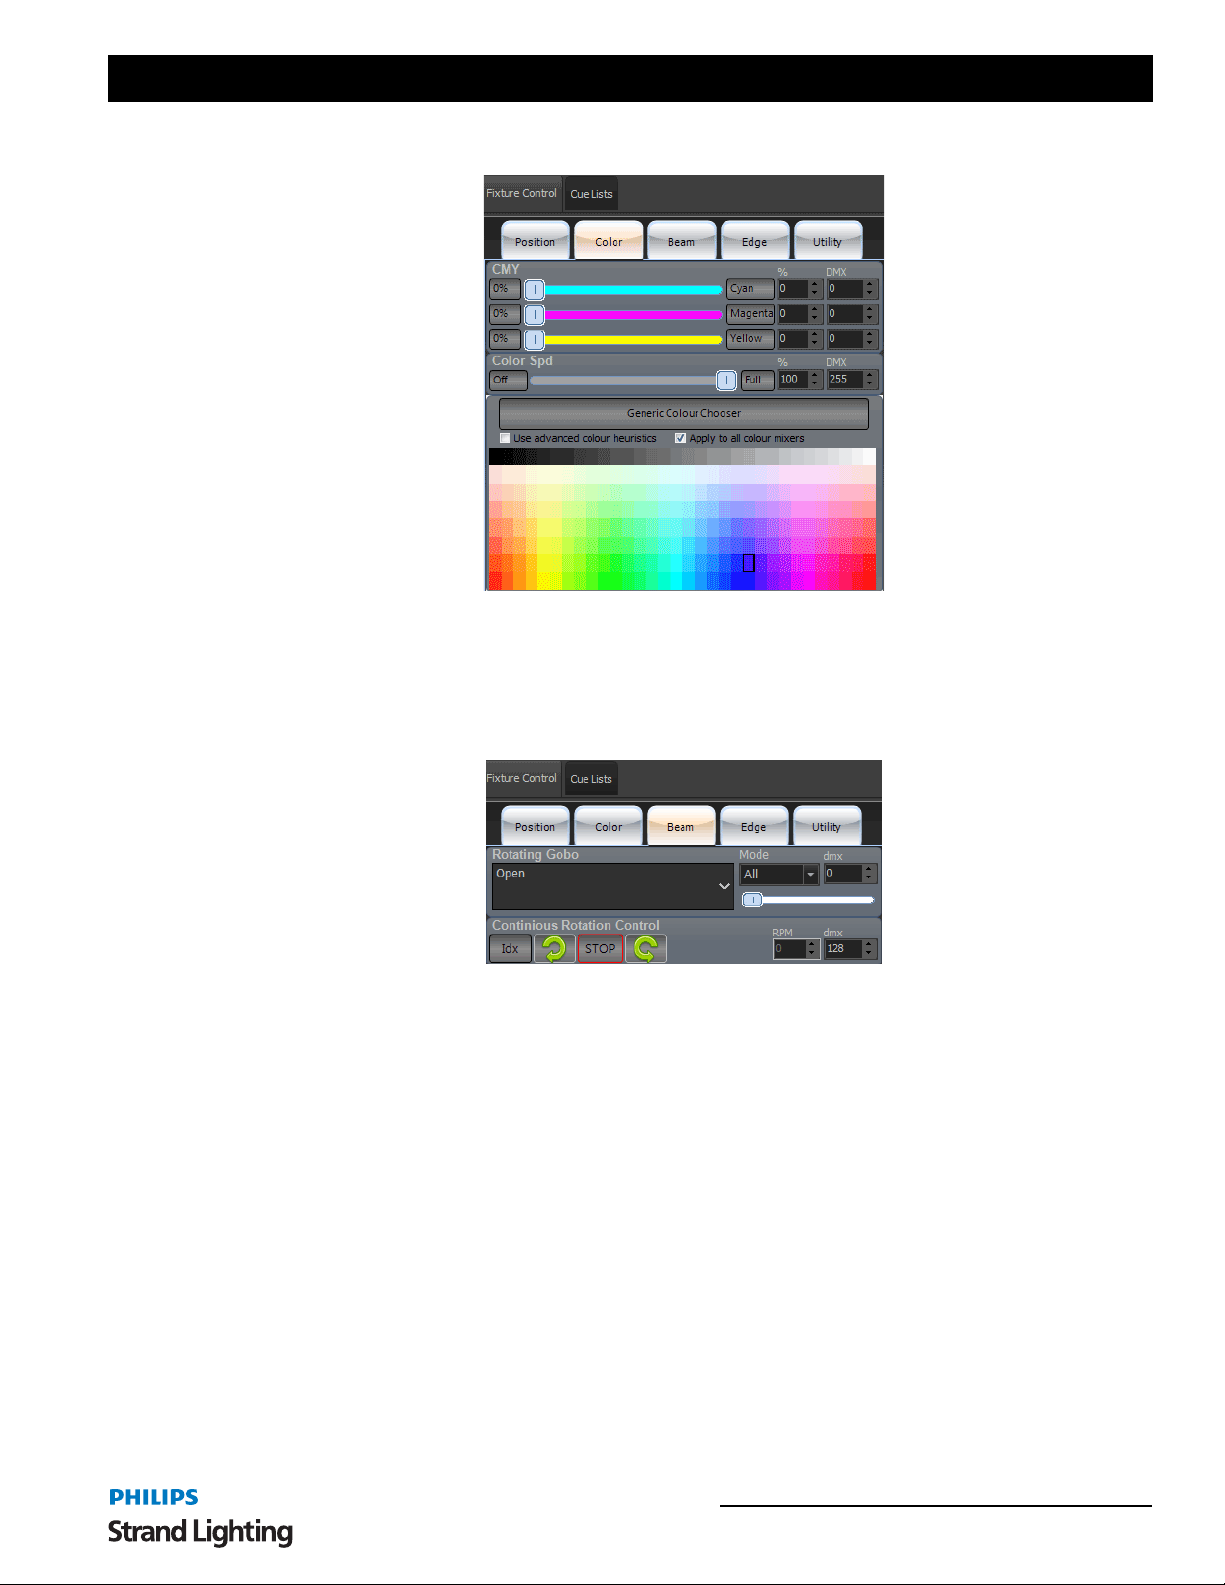
NEO Lighting Control Console
Color Tab
Slider bars appear for Color Mixing control. Again with Off (0%) and Full (t he color label bu tton), percent age value
box and DMX box. Color speed and a Color Picker is available.
"Use Advanced Color Heuristics". When checked, NEO will attempt to map the spectrum selected color across all
color controls. When unchecked, the spectrum selected color will apply only to the 3 main colors. In this case, CMY.
Beam Tab
This is for all attributes that effect the "inside" of the beam of light. Gobos, Prism and such. The VL1100 has a
Rotating Gobo, the pulldown will display all available stoc k gobos. Mode - if the gobo selection is in All, Index,
Rotating or other gobo movement mode. The DMX box is for the raw DMX value of the gobo att ribute. Continuous
Rotation Control allows going from Index Mode to Rotation Mode by selecting CW/Stop/CCW rotation. Once
selected, the interface will adjust to show the appropriate controls. This includes RPM speed and raw DMX values.
Both are adjustable by the presented interface.
Command Pulldowns 57
Page 60
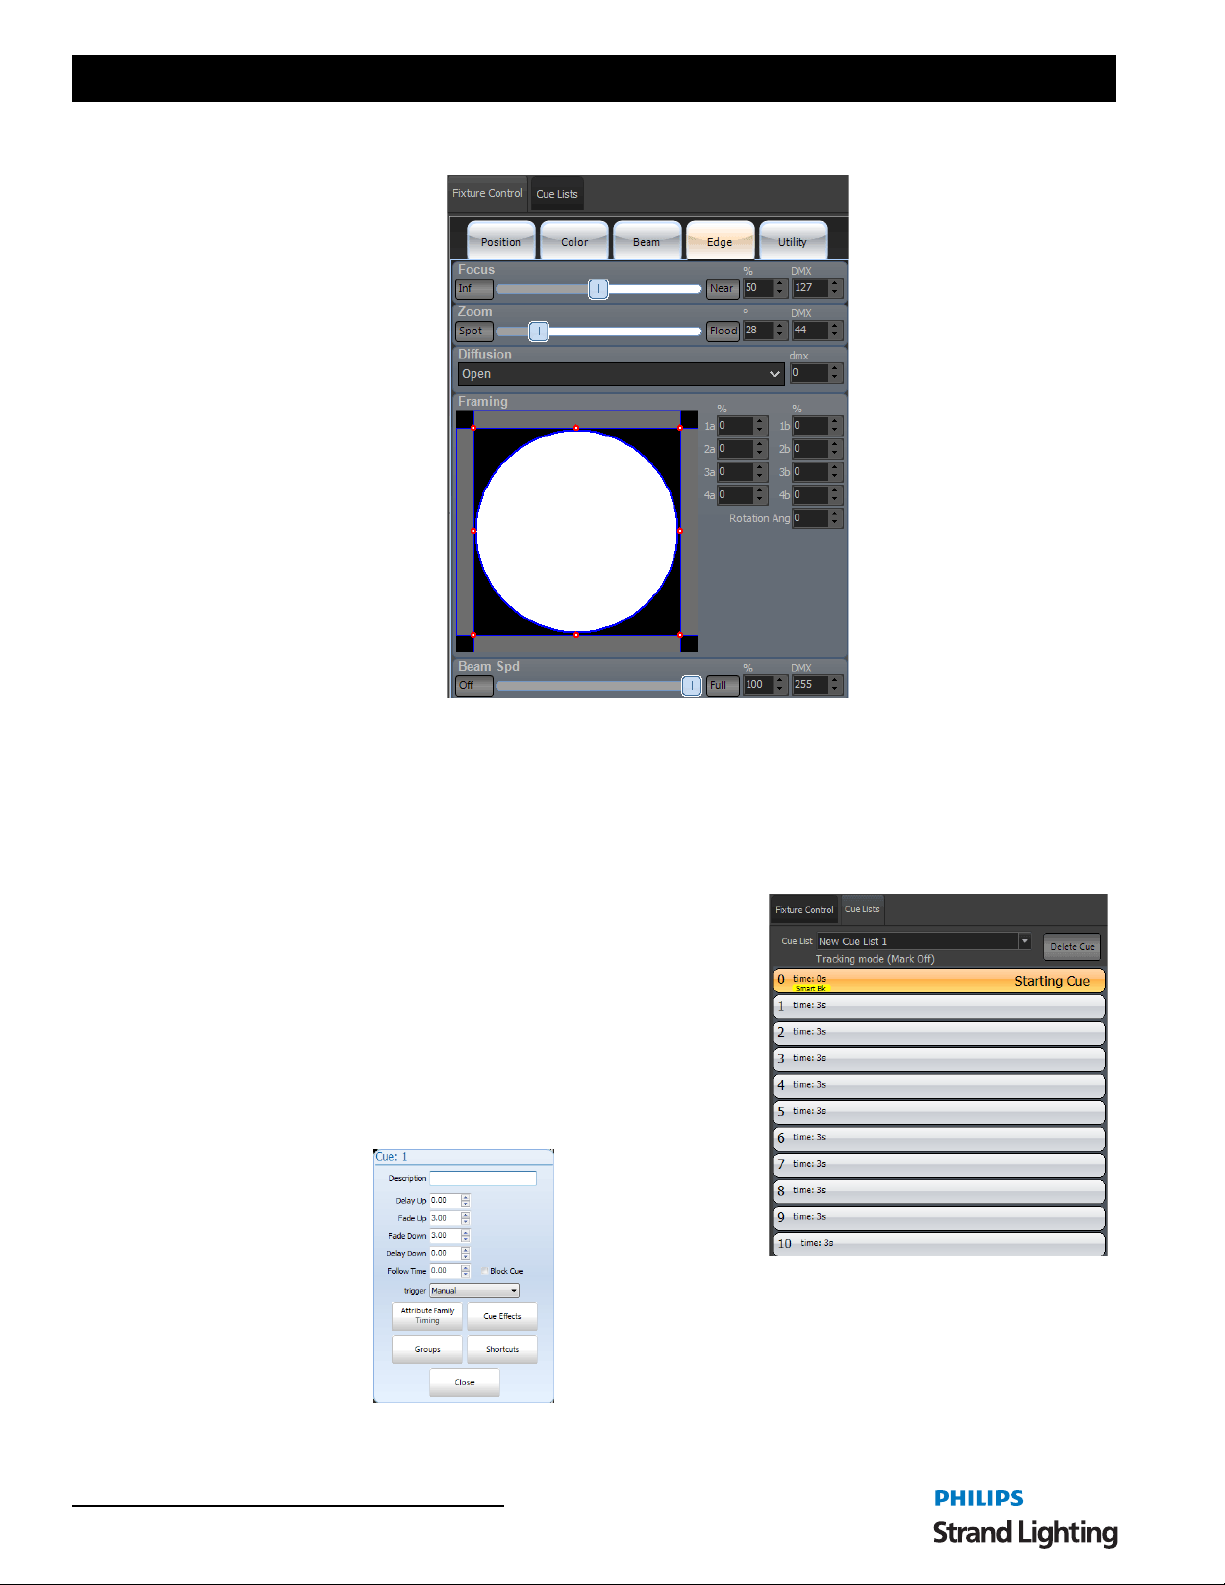
User’s Manual
Edge Tab
This is for all attributes that effect the "outside" of the beam of light. Focus, Zoom, Iris, Shutters and such. The
VL1100 has Focus, Zoom, Diffusion and Framing Shutters. All appear here with Minimum / Maximum buttons,
slider bar, percentage edit box and DMX edit box. Diffusion has a pulldown box much like a Gobo attribute because
it has two options (Open and Frost). Framing Shutters give you graphical control and percentage edit boxes.
The console hardware assigns all attributes to the 4 encoders. Pressing [EDGE] will page to the next set of encoder
assignments.
Side Bar Cue List
This is a simple cue list summary that is a quick list of the cues,
description and basic functionality.
It can be turned on/off from VIEW>Open Side Bar.
Delete Cue - the Delete Cue button will delete the selected cue. A
popup window will confirm before executing.
The Cue List pulldown allows the selection of the desired cue list. You
can scroll, select and double click to GO with simple touchscreen
functionality.
Clicking on the cue number itself will reveal the cue pop up window for additional functionality through the graphical
interface.
58 Software Configuration
Page 61
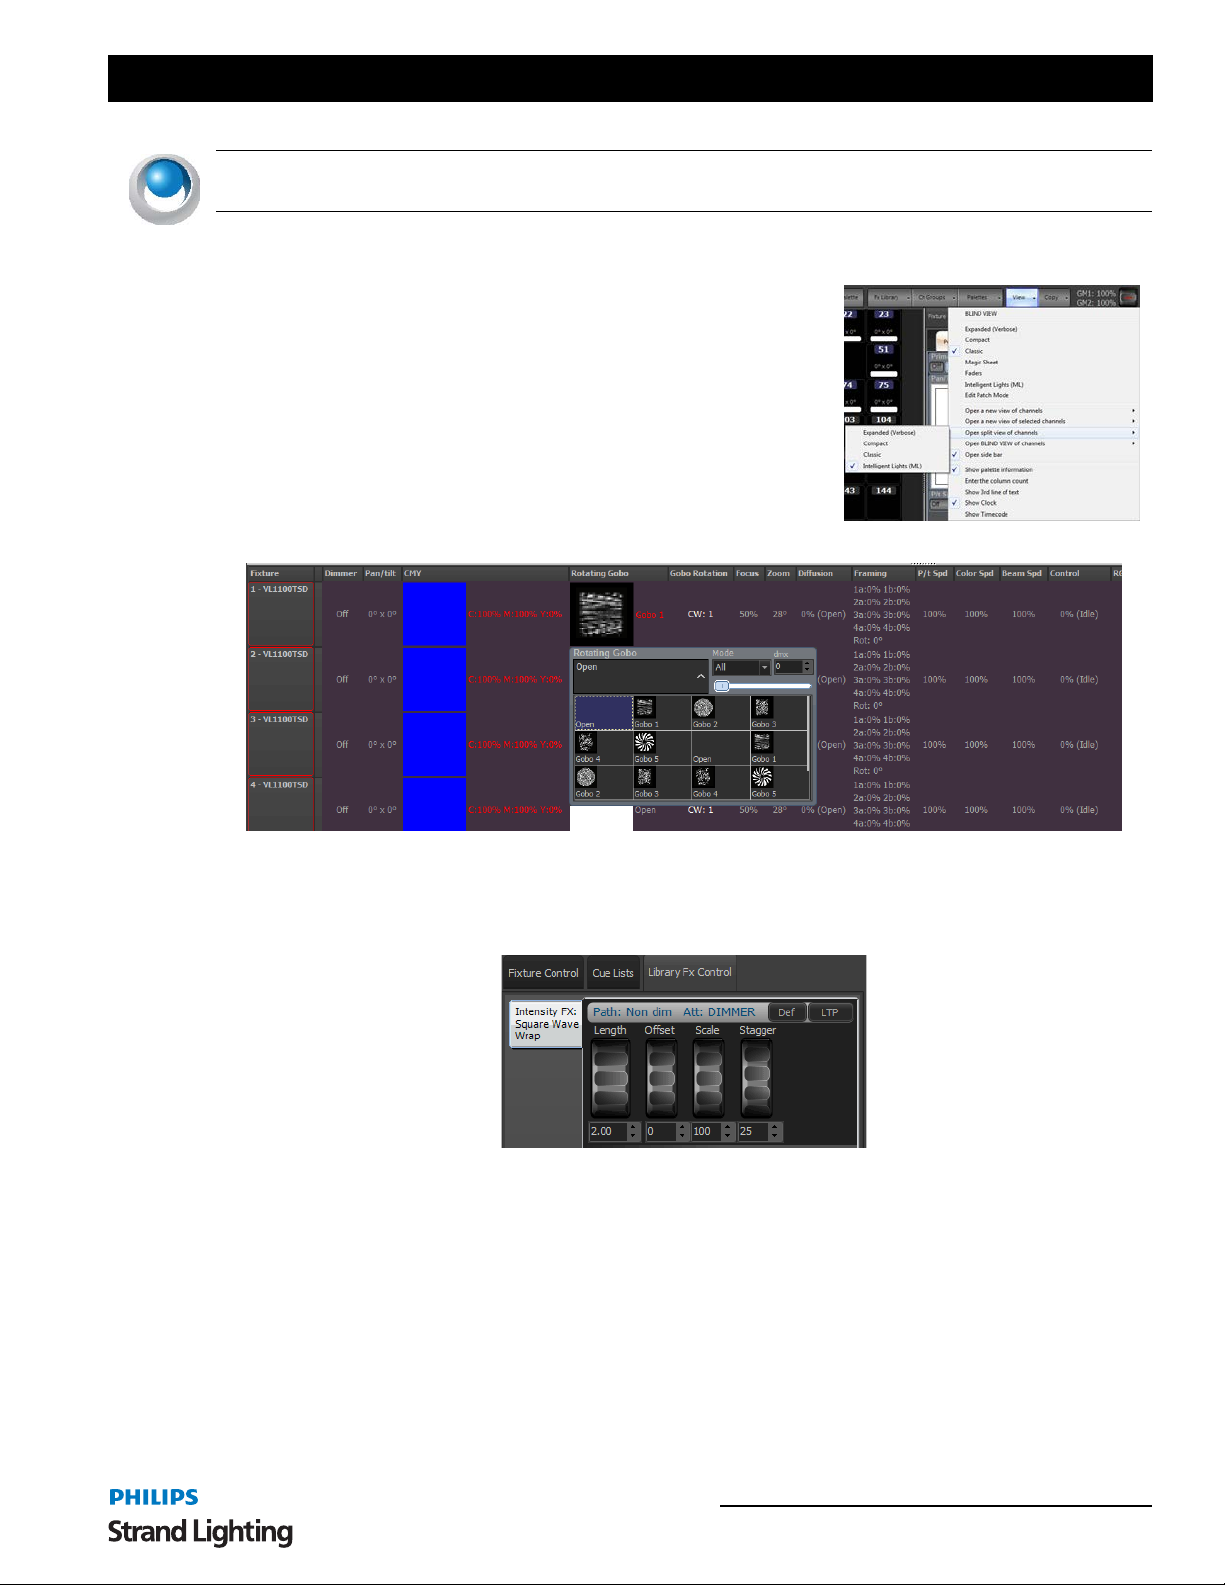
NEO Lighting Control Console
NEO NOTES & TIPS: The full cue list detail window can be displayed by selecting Cue Lists or F4 or the NEO
display button [CUE LISTS].
Clock
The clock is a display option under View. This will also display the
showfile name and date.
Split View
This displays a second view of patch fixtures. The sample screen above
shows ML Attributes as the selected view for the second view. This gives
the user a main window to see a more traditional view of intensities and a
ML attribute window that displays all attributes. The ML Attribute
window also gives the user the ability to program attributes directly from
that window so it's functional too.
Library FX Control
When fixtures are selected and a library fx is applied, Library FX Control parameters are available in the Side Bar for
adjusting the effect.
The FX attributes will also be automatically assigned to the encoders for quick access from the NEO console.
Command Pulldowns 59
Page 62
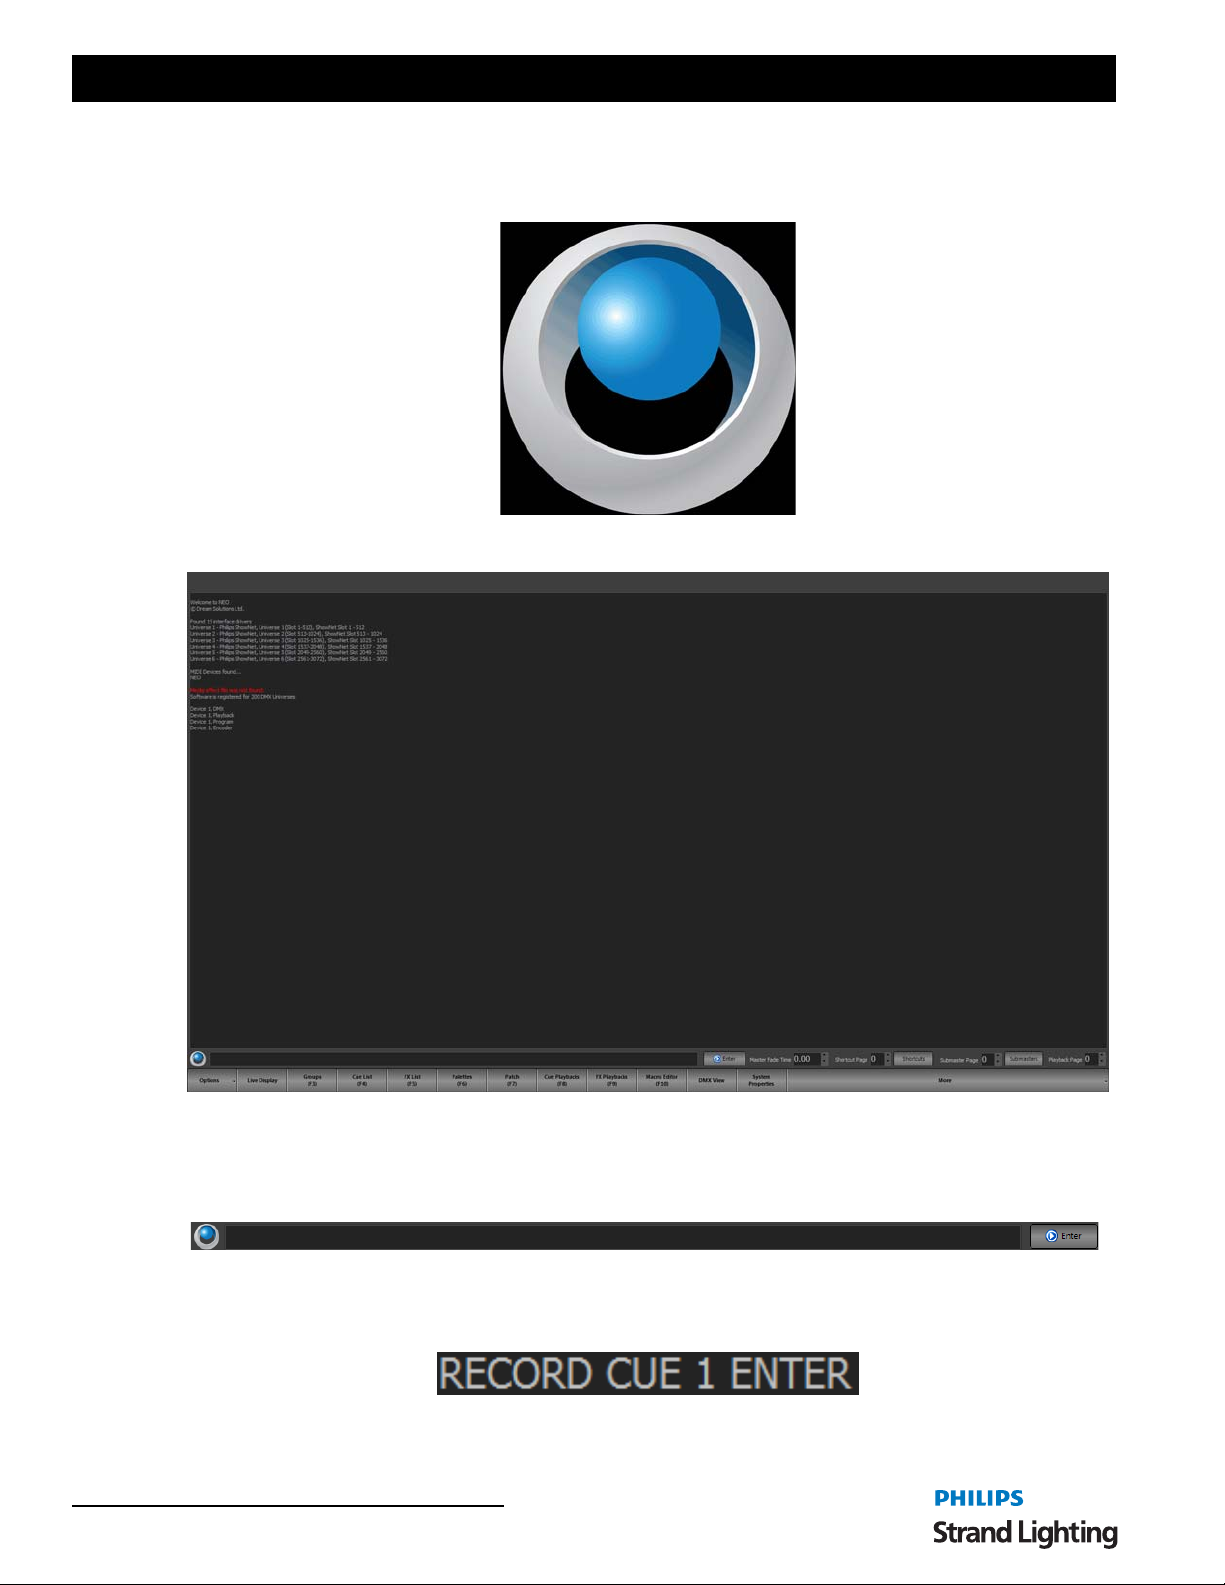
User’s Manual
2. NEO Console Configuration Status
Press the NEO icon and the Fixture Grid will be replaced with the Configuration Status screen.
This displays the connectivity of the console configuration.
Press the NEO icon again to restore to the Live display.
Command Line
The Command Line is the main point of ent ry for all NEO key press entry. Command Line entry has been around for
decades and remains the main focus for programmers as the fastest way to achieve the desired results onstage. When
a NEO key is pressed, it will populate on the Command Line.
On NEO, there is a fresh approach to Command Line. You are not limited to pre-built commands. You can also just
start typing. R E C O R D for record. Any command. You can even type group names for selection. If you have a
60 Software Configuration
Page 63
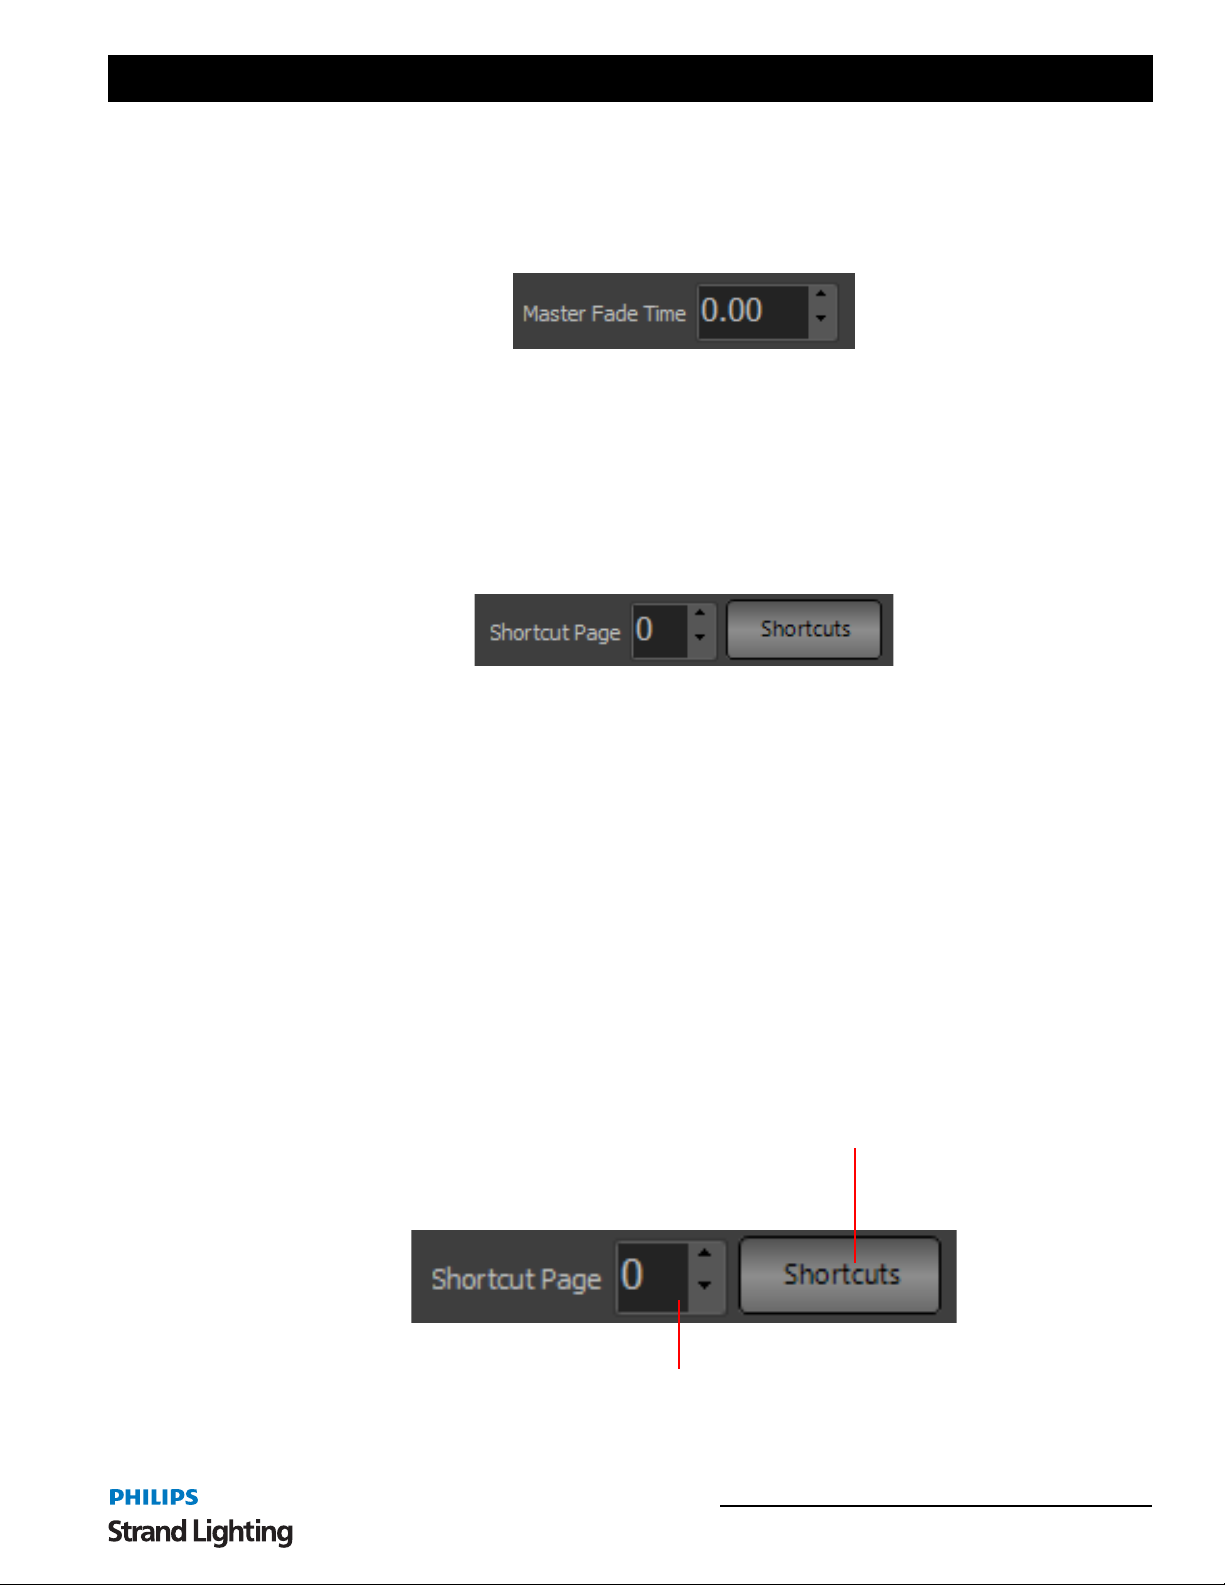
NEO Lighting Control Console
group named "Front Light", you could type FRONT LIGHT @ 100 ENTER to tu rn that gro up on. It 's very fl uid and
functional.
Master Fade Time
The master fade can be set for all channels by entering a value into a fade edit box to the left of the shortcut controls.
Once you have set the desired fade all changes made to the fixture will apply over this time.
The default fade time specifies the time a channel will take to get from its current value to the new value. Internally
this value will be overridden by the show and effects controls so it is not necessary to have the default fade at zero
when running shows.
3. Shortcuts
Shortcuts are designed to provide quick access to a number of functions within the software. Some of the assignments
that can be made to shortcuts include:
• Channel selectio n
• Channel Group Selectio n
• Cue Go / Back / Pause / Reset
• Execute Fixture Properties
• Effects Run / Pause / Reset
• Execute level gro ups
• And many more…
As with submasters, shortcuts can be accessed through an on-screen display or by the NEO console hardware. On-
screen shortcuts also have the added feature of being designed for use with a touch screen display.
NEO provides 100,000 user-assignable shortcuts that are accessed through 100 pages. Access to the on-screen
shortcuts is obtained by clicking on the button to the right of the shortcut page selection.
Open on-screen shortcut page
Shortcut Page
Shortcuts 61
Page 64
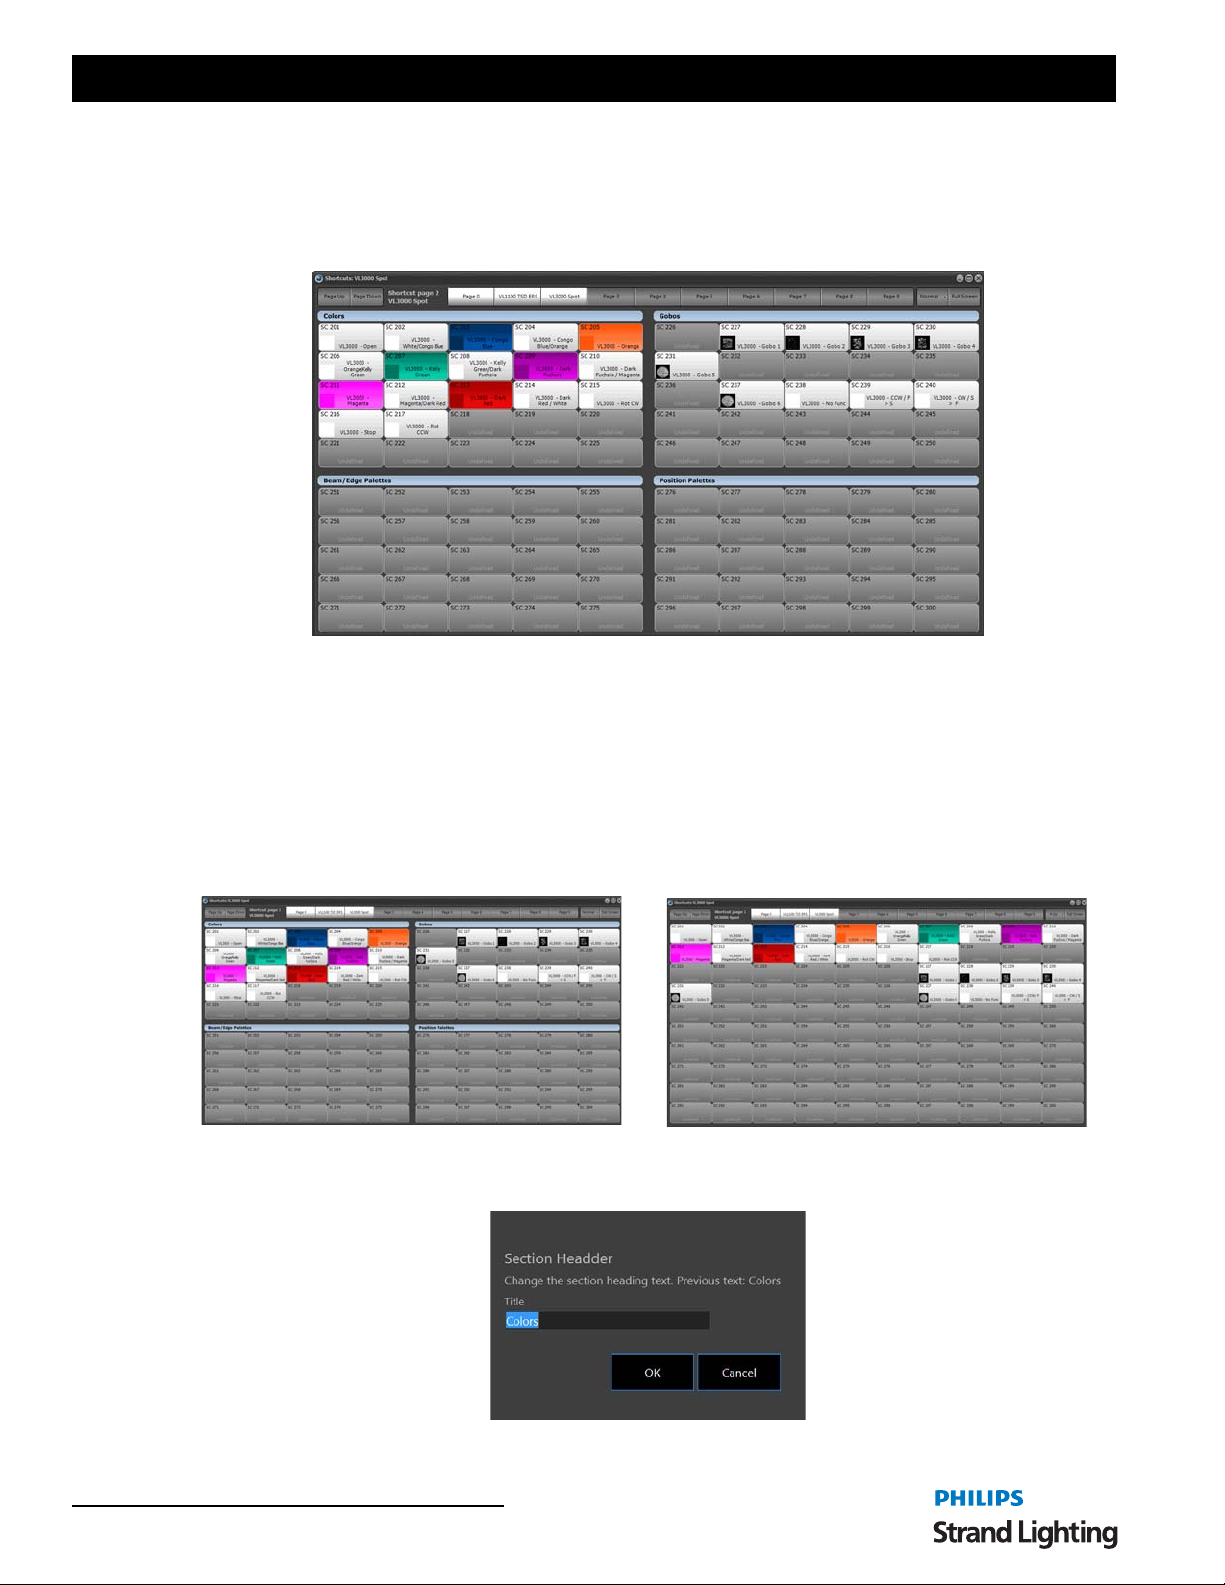
User’s Manual
On-Screen Shortcuts
The shortcut window is a grid of 100 buttons each tagged with a number, description, and color.
If a shortcut is not assigned the button will appear greyed out and cannot be selected. When a shortcut is assigned a
default description is created and appears below the shortcut number.
Figure 7: On-Screen Shortcuts
There are two (2) view modes that can change the display of the on screen shortcuts. You can switch between the
modes by clicking on the button to the left of the "Full Screen" button. The label of this button wil l toggle between
"Normal" and "4 UP" depending on the mode you are in. In "Normal" mode the shortcuts will appear as a 10 x 10 grid
with the shortcuts numbered with 1 in the top left corner and 100 in the bottom right corner. In "4 Up" mode the
shortcuts will be arranged in to 4 groups. Each of the g roups will have a user definable headin g that will default to
Color Palettes, Beamshape Palettes, Positions and Groups.
4 Up Mode Normal Mode
To change the label for each of the groups in "4 Up" mode click anywhere in the heading.
62 Software Configuration
Figure 8: Shortcut Grouping Title Edit
Page 65
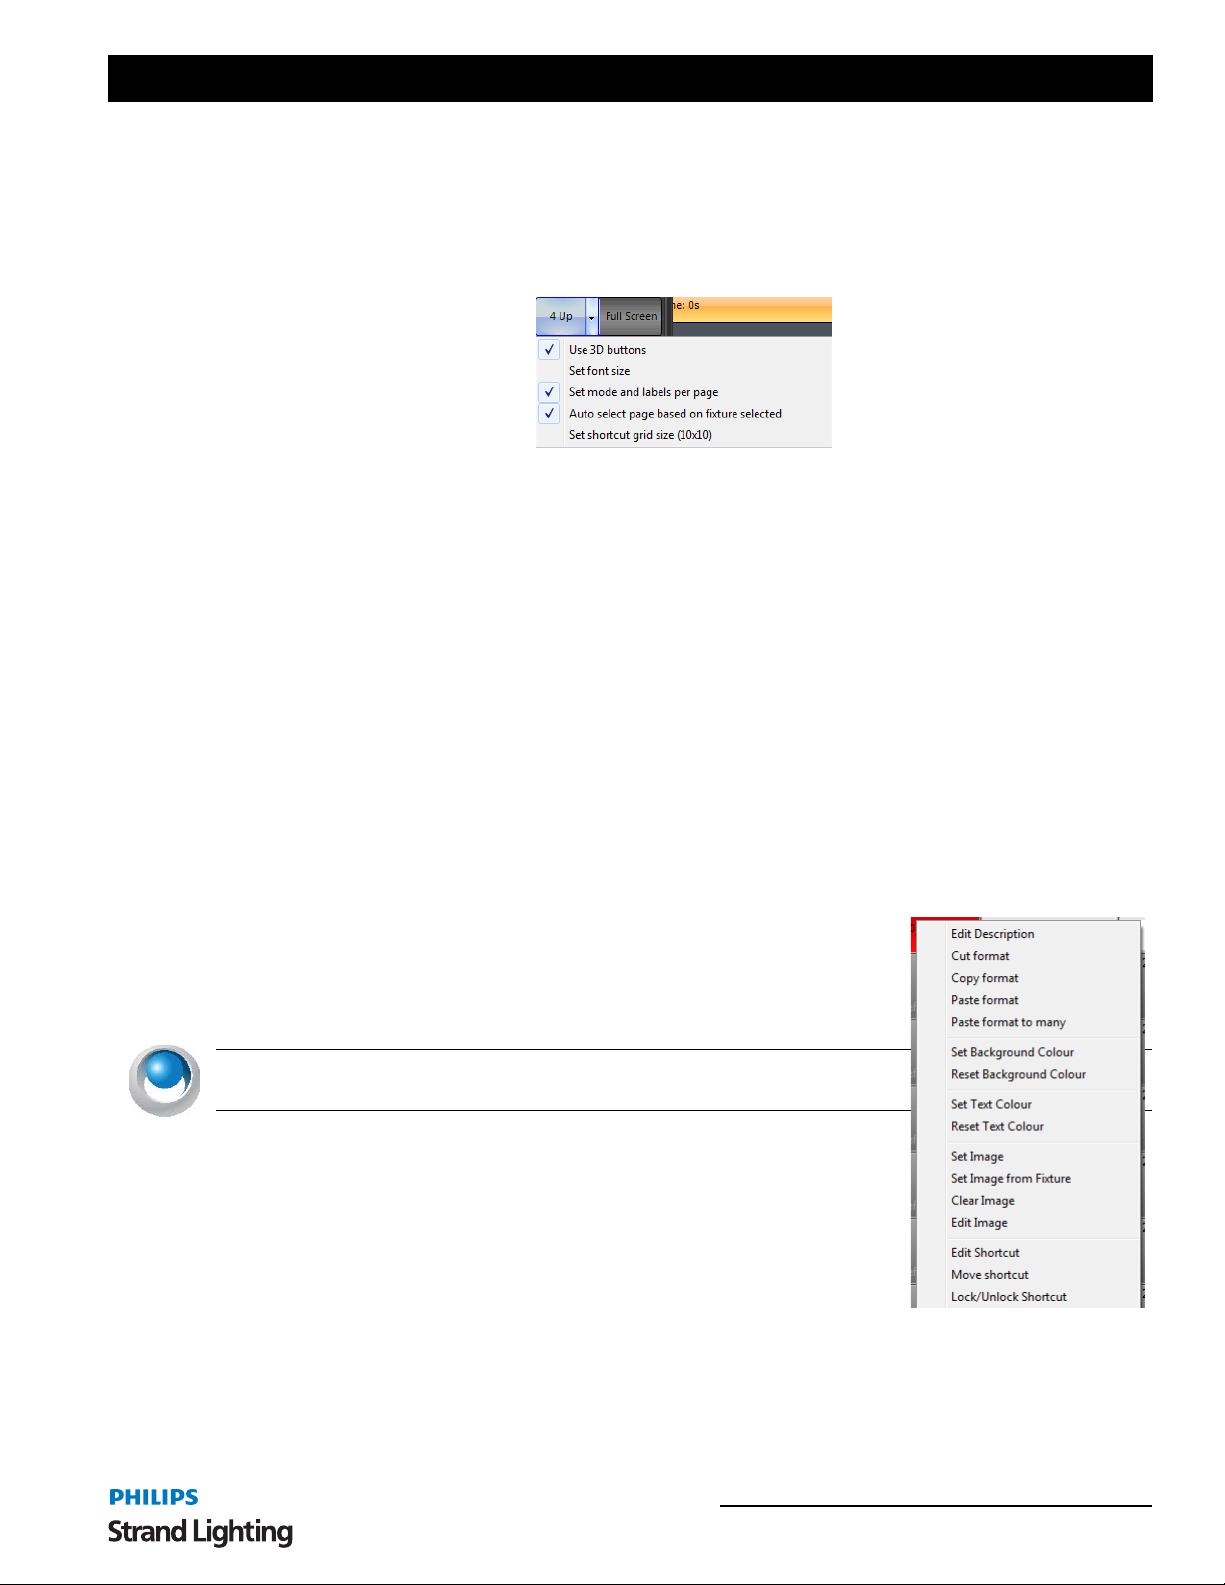
NEO Lighting Control Console
Enter the new name of the group into the box provided and click "OK" to save the change. The new label will be used
for all pages of shortcuts.
Options
To change the global display options fo r the shortcut window cli ck on the drop down menu on the right of the mode
button.
Figure 9: Shortcut window display options
Use 3D buttons - (Default on) Use this option to change how each button is displayed. When this option is on the
buttons will have a 3D style gradient.
Set font size - Use this option to change the overall size of the text in each of the shortcuts.
Set mode and labels per page - When this option is turned on the 4Up and normal mode can be set for each page.
The labels will also be remembered for each page separate to each other.
Auto Select page based on fixtures selected - With this option turned on the shortcut page will change if a palette
page is setup for the fixture. This works on the name of the shortcut page. If a single fixture type is selected then NEO
will search through the page labels to try and locate one that matches the fixture name. If a page name match is found
then the page will automatically switch. This is a convenient way for the window to always show the shortcuts related
to the fixture you have selected.
Set shortcut grid size (Columns x Rows) - Select this option to set the number of rows and columns you want to
appear in the shortcut grid. This can be a useful option to set t he on-screen shortcut s to match any ph ysical hardw are
you are using.
Right click options
Right clicking on any of the active shortcuts will produce a pop-up menu that will
allow you to edit the description and change the button and text color, add an image
or jump directly to the appropriate edit window of the shortcut.
You can also use the popup menu to copy and paste the formatting (color, text color
etc) of the shortcut to other shortcuts.
NEO NOTES & TIPS: Changes made to the description or color will remain
until the shortcut is reassigned.
Edit Description - Select this option to change the label displayed on the shortcut
button.
Cut/Copy/Past Format - These options allow you to copy and past the
background and text colors to other shortcuts. The "past to many" option is a
convenient way to set the colors of multiple shortcuts at the same time.
Background and Text Color - For every shortcut you can change the background
color and the text color. To reset either of these to the default use the "Reset
background color" and "Reset text color" options.
Images - Each shortcut can have an image assigned that will be displayed to the left of the label. The "Set image"
option will allow you to select an image from your system by bringing up a familiar image selection dialog . Use the
"Set image from fixture" option to select any of the images stored with the NEO fixture library.
Shortcuts 63
Page 66
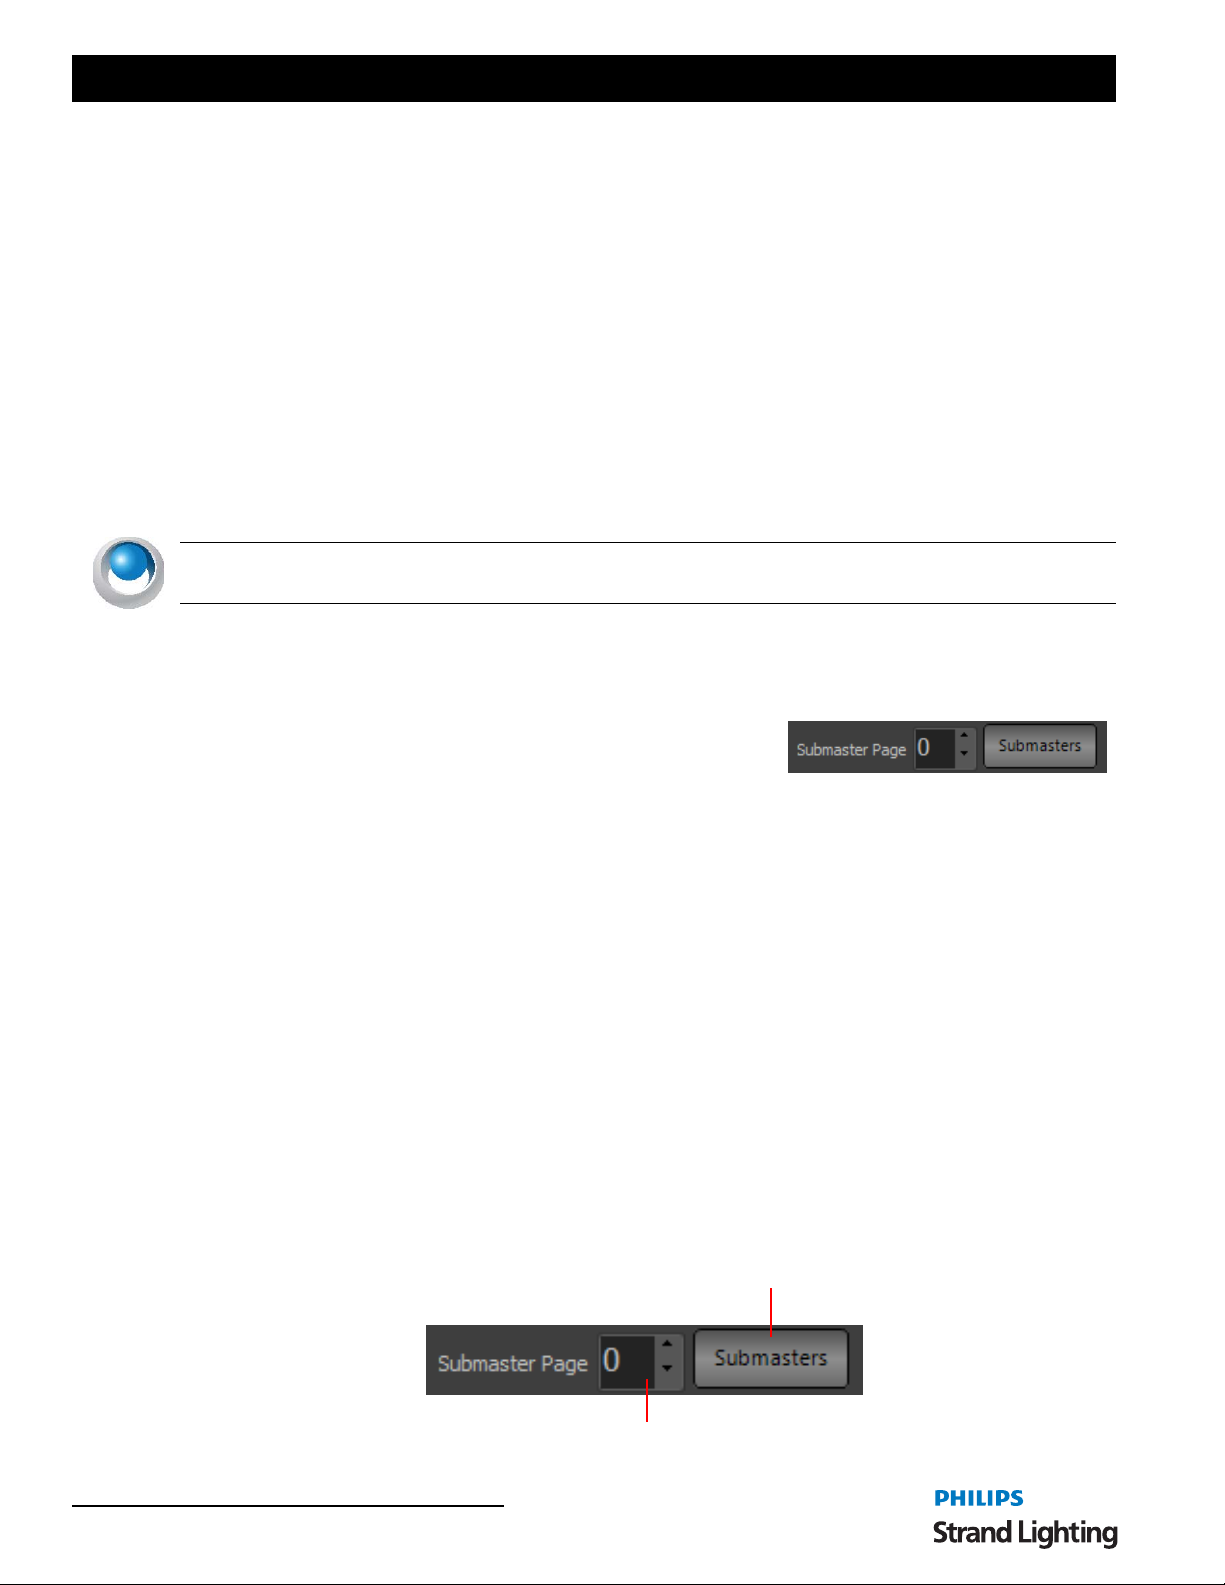
User’s Manual
Edit Image - The edit image option will open a paint w indow that will all ow you to modify or paint any im age you
want.
Edit Shortcut - Select this option to open the editor window associated with this shortcut.
Move Shortcut - Upon selecting the move shortcut option your mouse pointer will change to a small hand. Click on
any unassigned shortcut to move the original to this cell.
Lock/unlock shortcut - A locked shortcut will remain on screen regardless of the page change. This is useful for
keeping some operations on screen all of the time.
Add Quick Command (macro) - If you right click on a shortcut that is not assigned you will get a single menu item
"Add Quick Command". This is a special function that will allow you to assign a single com mand function to the
shortcut key. You can think of this as a one line macro that is assigned directly to the shortcut key.
After selecting this option a dialog will appear asking you to enter the command you want to assign. The command
can be any valid command line text (You may want to test your command in the command line window before
entering it here). Once entered click on the "OK" button to assign the new command. The command entered will
become the description for the shortcut.
NEO NOTES & TIPS: Clicking on the shortcut will cause the command to be immediately executed in the
command line window.
The full screen button to the right of the text size edit box allows you to toggle the window into a borderless full
screen mode. This can be useful when using the shortcuts page with a touch screen monitor. The window can be
returned to its original size by clicking on the same button.
4. Submasters and Submaster Pages
Submaster Options
Submasters can be assigned to perform a number of functions. Traditionally a submaster is a physical slide control
that allows the user to input a value between 0 and 255.
The following functions can be assigned to NEO submasters:
• Channel groups (Scenes & Su bmasters)
• Cue "go" execution
• Cue intensity override
• Effect Playbacks intensity override
• Chase step rate contro l
• Chase fade time control
NEO provides up to 100,000 submasters that are accessed through pages. The "System Properties" will allow you to
specify how many pages the system creates and how many submasters (up to 100) per page.
Obviously, computers do not typically come with a number of physical faders so NEO provides access to submasters
through either an on-screen interface or through add-on hardware.
Open Submaster Page
64 Software Configuration
Submaster Page Control
Page 67
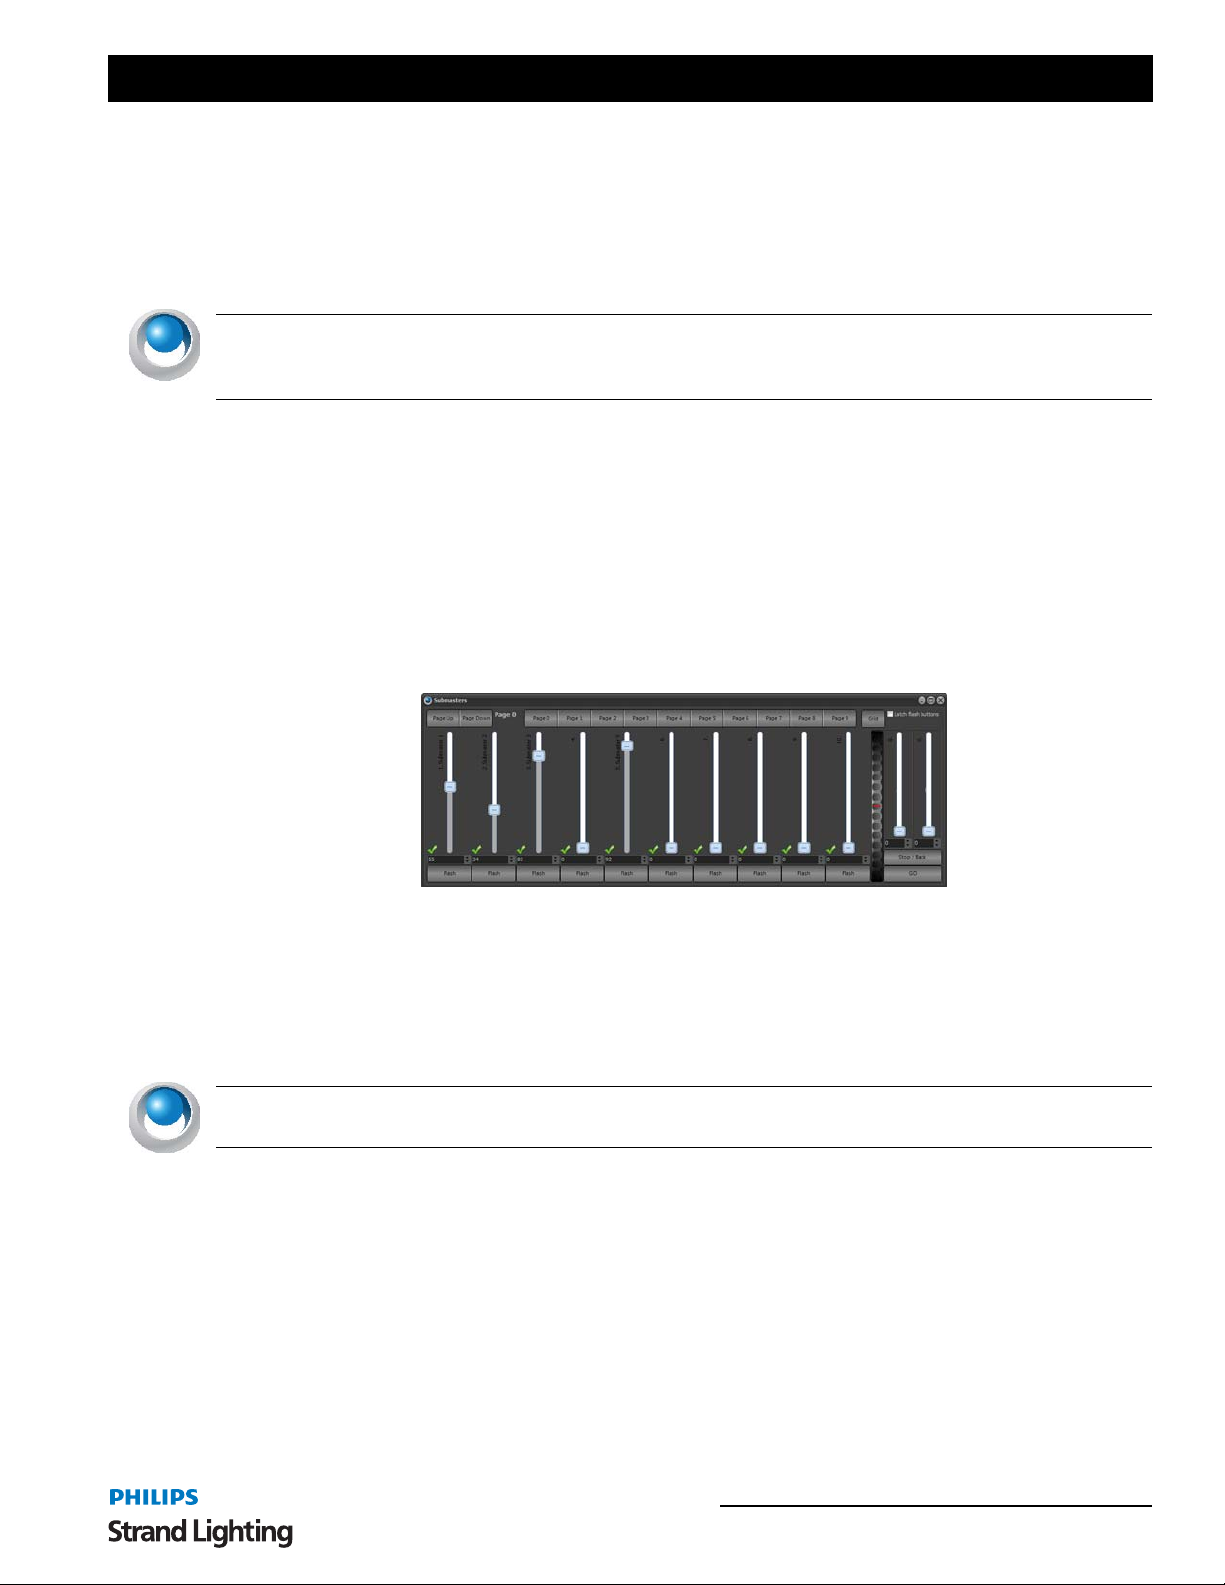
NEO Lighting Control Console
On-Screen Submasters
The on-screen submasters can be viewed as either a slider control or a grid similar to the channel display. The slider
view will provide access to up to 30 submasters per page. Each of the submasters per page is represented by a single
slide control and spin edit box. The grid view will display as many submasters per page as set in the system
properties. Each submaster is represented as a square in the grid that can be selected and modified using the scroll
wheel on your mouse.
NEO NOTES & TIPS: NEO can support up to 100,000 submasters by connecting external hardware to the system.
Not all submasters can be viewed on screen when in fader mode. If you configure more than 30 submasters per page
then only the first 30 will be visible in this mode.
To switch between the fader v iew and the grid view click on t he button to the right of t his window. Clicking on this
will toggle between each of the views.
At the top of this window is a series of buttons to change the submaster page. Changing the page in this window will
not change the page number on the main window as it is possible to have the on-screen submasters set to a different
page to any external hardware you might be using.
Fader Mode
Setting a submaster can be done by using your mouse to click-and-drag the sl ide control, or by typing a value in the
edit box below the slider. If you move the slide control, the value in the edit box will change to reflect the new
position and changes to the edit box will be reflected in the slide position.
Figure 10: Submaster Window - Fader Mode
The "Flash" button at the bottom of each submaster can be used to temporarily set the submaster to full. Once this
button is release the submaster will return to its previous state.
Selecting the "Latch flash buttons" option at the top of the window will change the behavior of the flash button so that
you do not need to hold the mouse button down. With the toggle option on, clicking and releasing the flash butt on
will take its position to full. To return to the previous state click the flash button again.
NEO NOTES & TIPS: If hardware submasters are being used, you will also see the slide position and edit box
value change to reflect the hardware.
Right clicking on a submaster will bring up additional options to help identity each fader.
Change Description - Use this option to label the submaster. The label will appear along the top of the fader.
Set Description Color - The color of the description can be changed by selecting it form this option.
Reset Description Color - Select this option to return the color of the description back to its original color.
Lock/Unlock Submaster to all pages - A locked submaster will remain on screen regardless of the page change.
This is useful for keeping some operations on screen all of the time.
When a submaster is locked to all pages a small yellow padlock will appear in the top right corner of the slider
control.
Submasters and Submaster Pages 65
Page 68
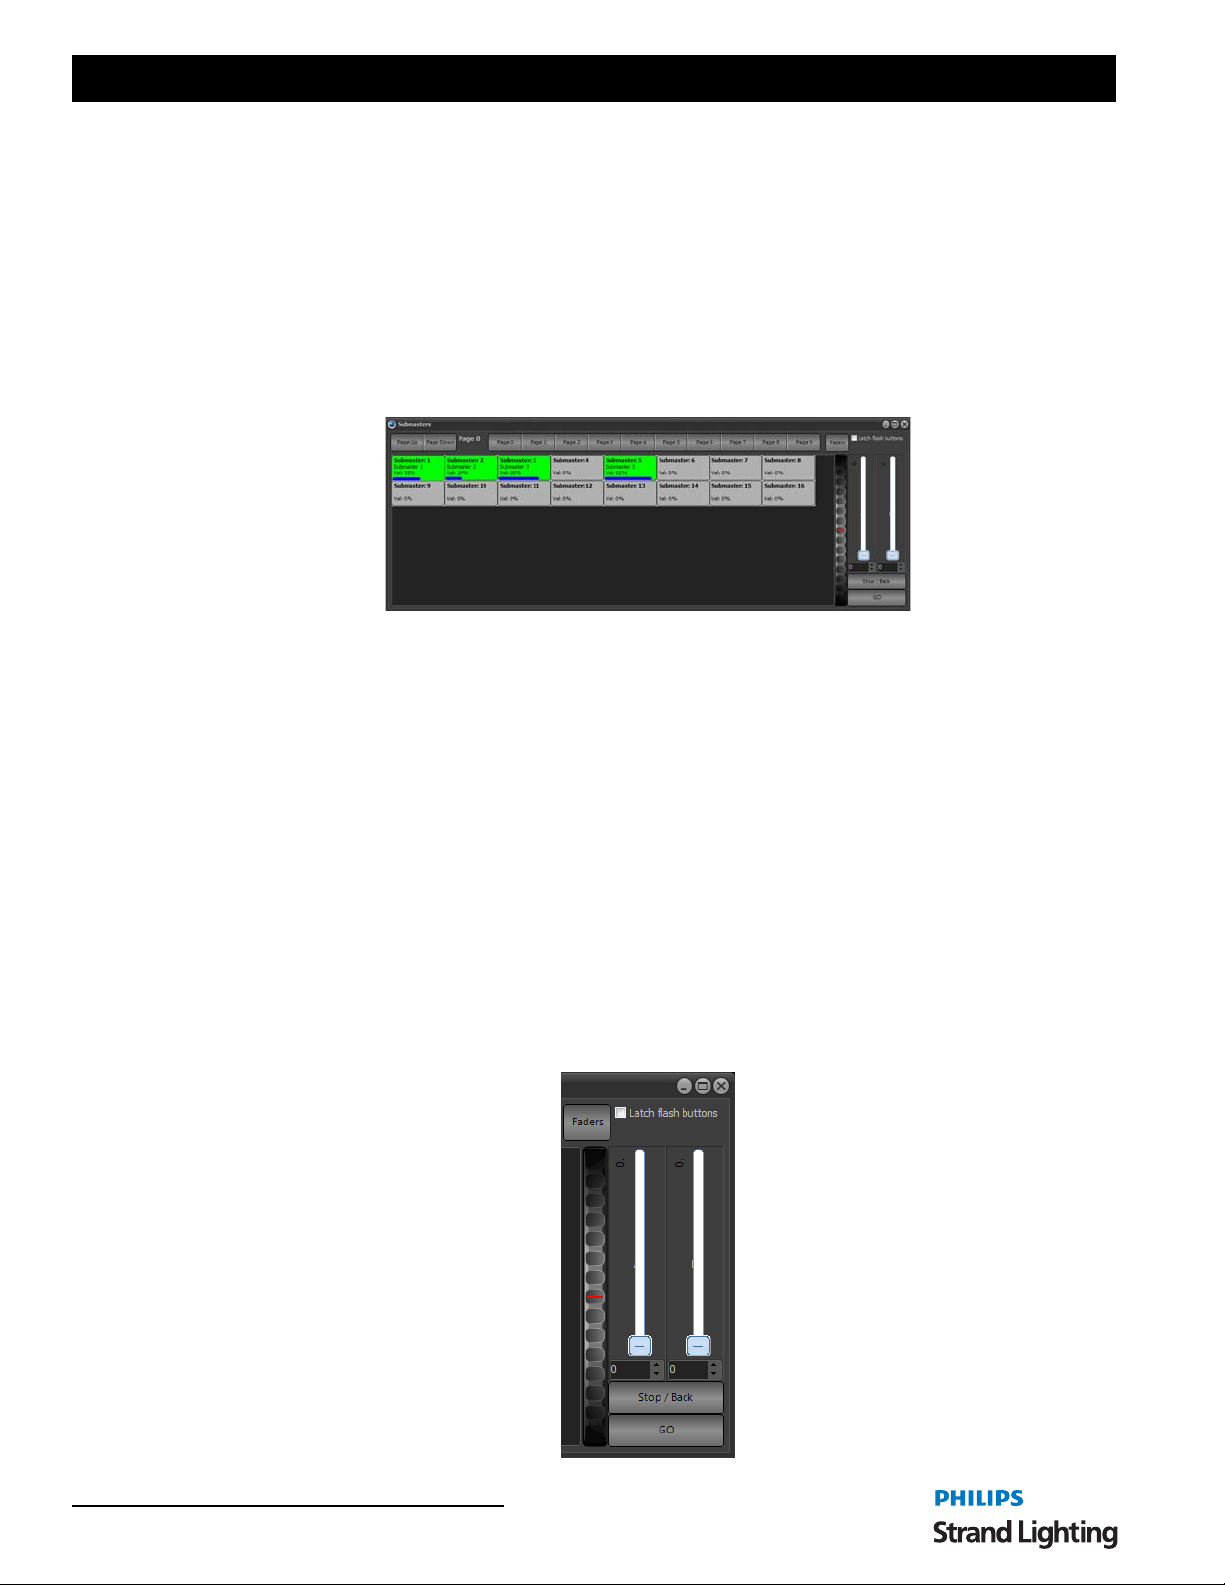
User’s Manual
Submaster Wheel
On the right hand side of this window is a large wheel that can be used to move all of the submasters on this page at
once. Click on the wheel and while holding the mouse button down move the mouse up or down to raise or lower the
levels. You will see all of the submasters on that page raise and lower with your mouse movements.
You can select what submasters the wheel will operate on by clicking to the left of the slider for each of the
submasters. The master wheel will operate on all submasters that have the small green tick in the bottom left corner.
Grid Mode
Setting submasters in the grid mode is similar to setting channels in the channel display. Each submaster is
represented by a cell in a two dimensional grid.
Figure 11: Submaster Window - Grid Mode
Submasters can be selected by simply clicking on the desired grid cell. By holding the left mouse button down you
can drag an area of the grid to select multiple submasters. Once selected use the mouse wheel or the spin wheel on the
right to change the value.
Right click on any of the cells in the grid for additional options.
Clear selection - Select this option to unselect all submasters.
Select active submasters (all pages) - All of the submasters currently above zero will be selected.
Clear selection when changing pages - Check this menu item so that all of the submasters are automatically
unselected when the page is changed.
Inclusive selection mode - This is toggle option that will have a small check mark next to it when turned on. If the
"inclusive selection" option is active then each selection made will be added to the previous selection. All submasters
currently selected will remain selected unless they are in the new selection area. Any selection will toggle the
selection state of a channel.
On the right hand side of the submaster page are the split playback faders for the primary cue list. This includes a
Stop/Back and GO buttons.
66 Software Configuration
Page 69
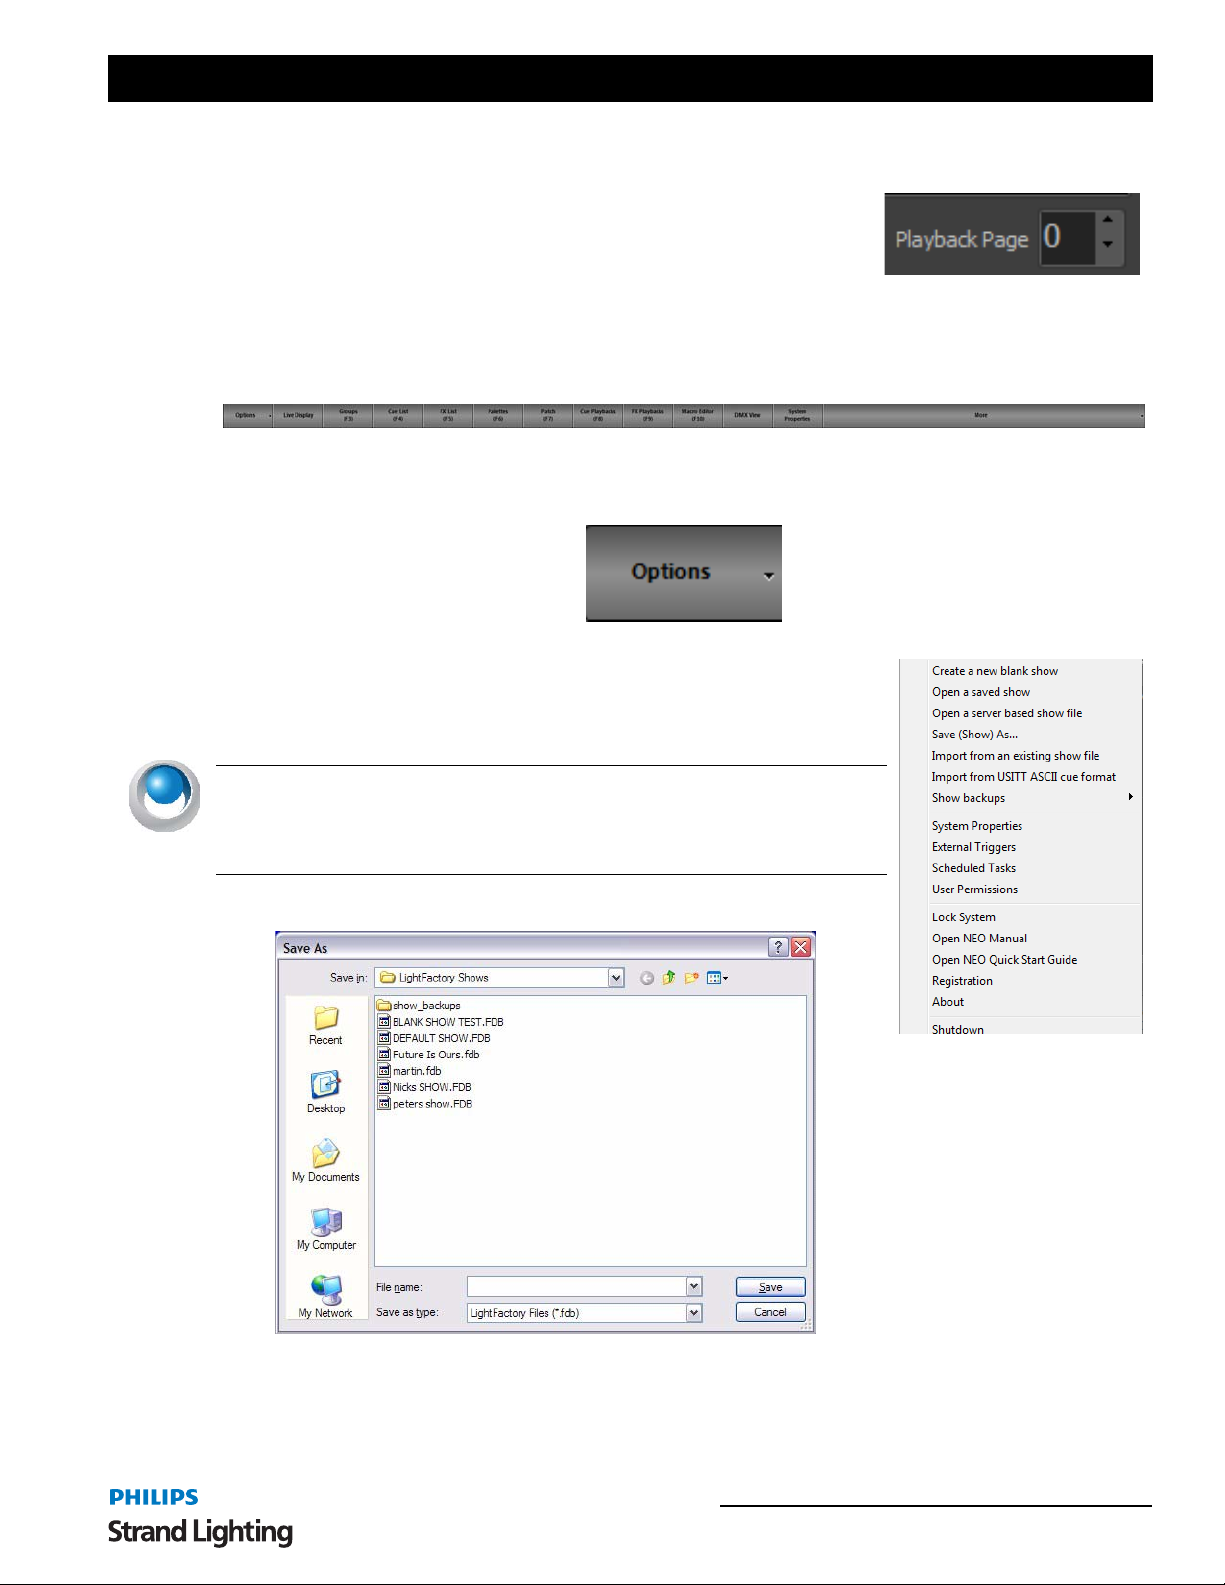
NEO Lighting Control Console
Playback Page
This identifies the playback page assignment for NEO’s 5 multi-function faders
to the left of the primary cue list playback faders.
5. Display Options
The display options will access the various console displays that are available to view either over the top of the main
view screen / monitor or easily on another monitor .
Options
Showfile based options, system properties and advanced items like external
trigger, scheduled tasks and user permissions are here.
Create a New Blank Show - Creates a new blank show file on the hard drive and
loads this as the current show.
NEO NOTES & TIPS: There is a setting in System Properties > System Settings
> Intermediate Options: Start new shows with nothing patched. This setting
determines if creating a blank show starts with nothing patched or with a default
patch.
When selecting this option a standard widows save dialog will prom pt you for the file name to save the new show
under. The new show file will be given an extension of ".FDB".
Enter the name for your show file in the "File Name" field and click save to proceed with creating the show.
Display Options 67
Page 70
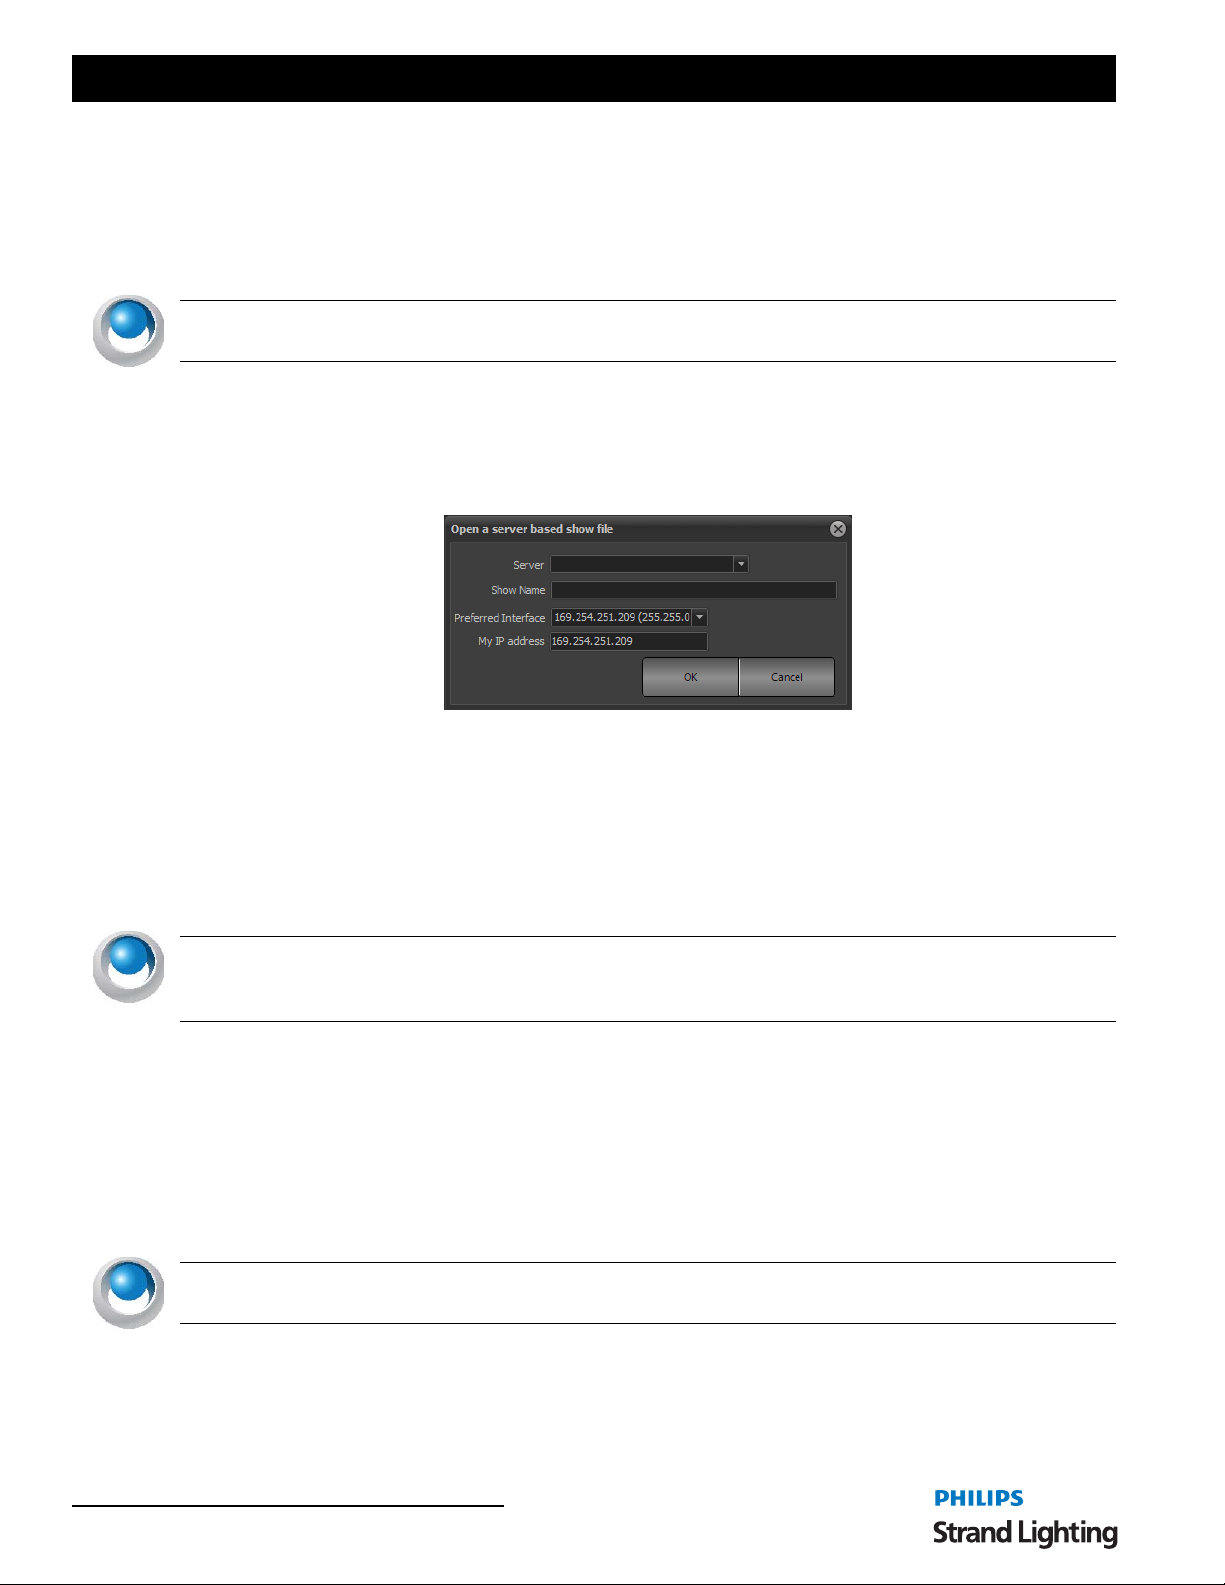
User’s Manual
Open a Saved Show
When you start-up NEO, the "current show" will be loaded automatically. Any programming or changes made will be
applied and saved to this "Current Show". Opening a saved show will make the selected show file the "Current
Show".
A standard windows "open file" dialog will appear when this option is selected.
NEO NOTES & TIPS: NEO always has the "current show" loaded. All changes made to the system such as
creating a new cue or effect is automatically saved to the current show.
Open a Server Based Show File
NEO can connect to a remote show file to allow multiple users to manipulate the same show. Opening a remote show
file is very similar to opening a local show file with the additional requirement of the remote server name.
After selecting this option the dialog below will appear:
Connecting to a remote show is similar to the opening a regular show fi le. You must enter the name of the remote
system in the "server name" field. This can be either the machine name or the IP address.
In the show name field enter the full path on the remote system to the file. Unfortunately Firebird does not provide an
ability to browse for the file name so you must enter the full patch manually.
The "preferred interface" option can be used to set the network interface that should be used for communication
between NEO systems. This is highly recommended that you not use the same network interface as your DMX output
(assuming Ethernet based DMX) as this may affect the DMX performance.
NEO NOTES & TIPS: If you are using NEO on the same host computer as the firebird system you must still
connect in the same way. If you open the show file using the regular "Open saved show" then the server will not be
able to open the file and all remote users will be locked out.
Once you have entered all of the settings click on the "OK" button to connect to the sho w. If successful you should
see the show file open normally.
Save (Show) as…
Saving a NEO show will make a new show file that contains all the same data as the current show . There should be no
change to the data you are actively working on in the system.
When selecting this option a standard Widows save dialog will prompt you for the file name to save the new show
under. The new show file will be given an extension of ".FDB".
NEO NOTES & TIPS: If you select an existing show, all information will be overwritten by the "current show". A
warning dialog will inform you if you are about to overwrite an existing show.
Import from an existing show file - Use this option to load elements from another show file and merge them into the
current show. When selecting this option a standard widows open dialog will prompt you for the file name of the
show file you want to import from.
68 Software Configuration
Page 71
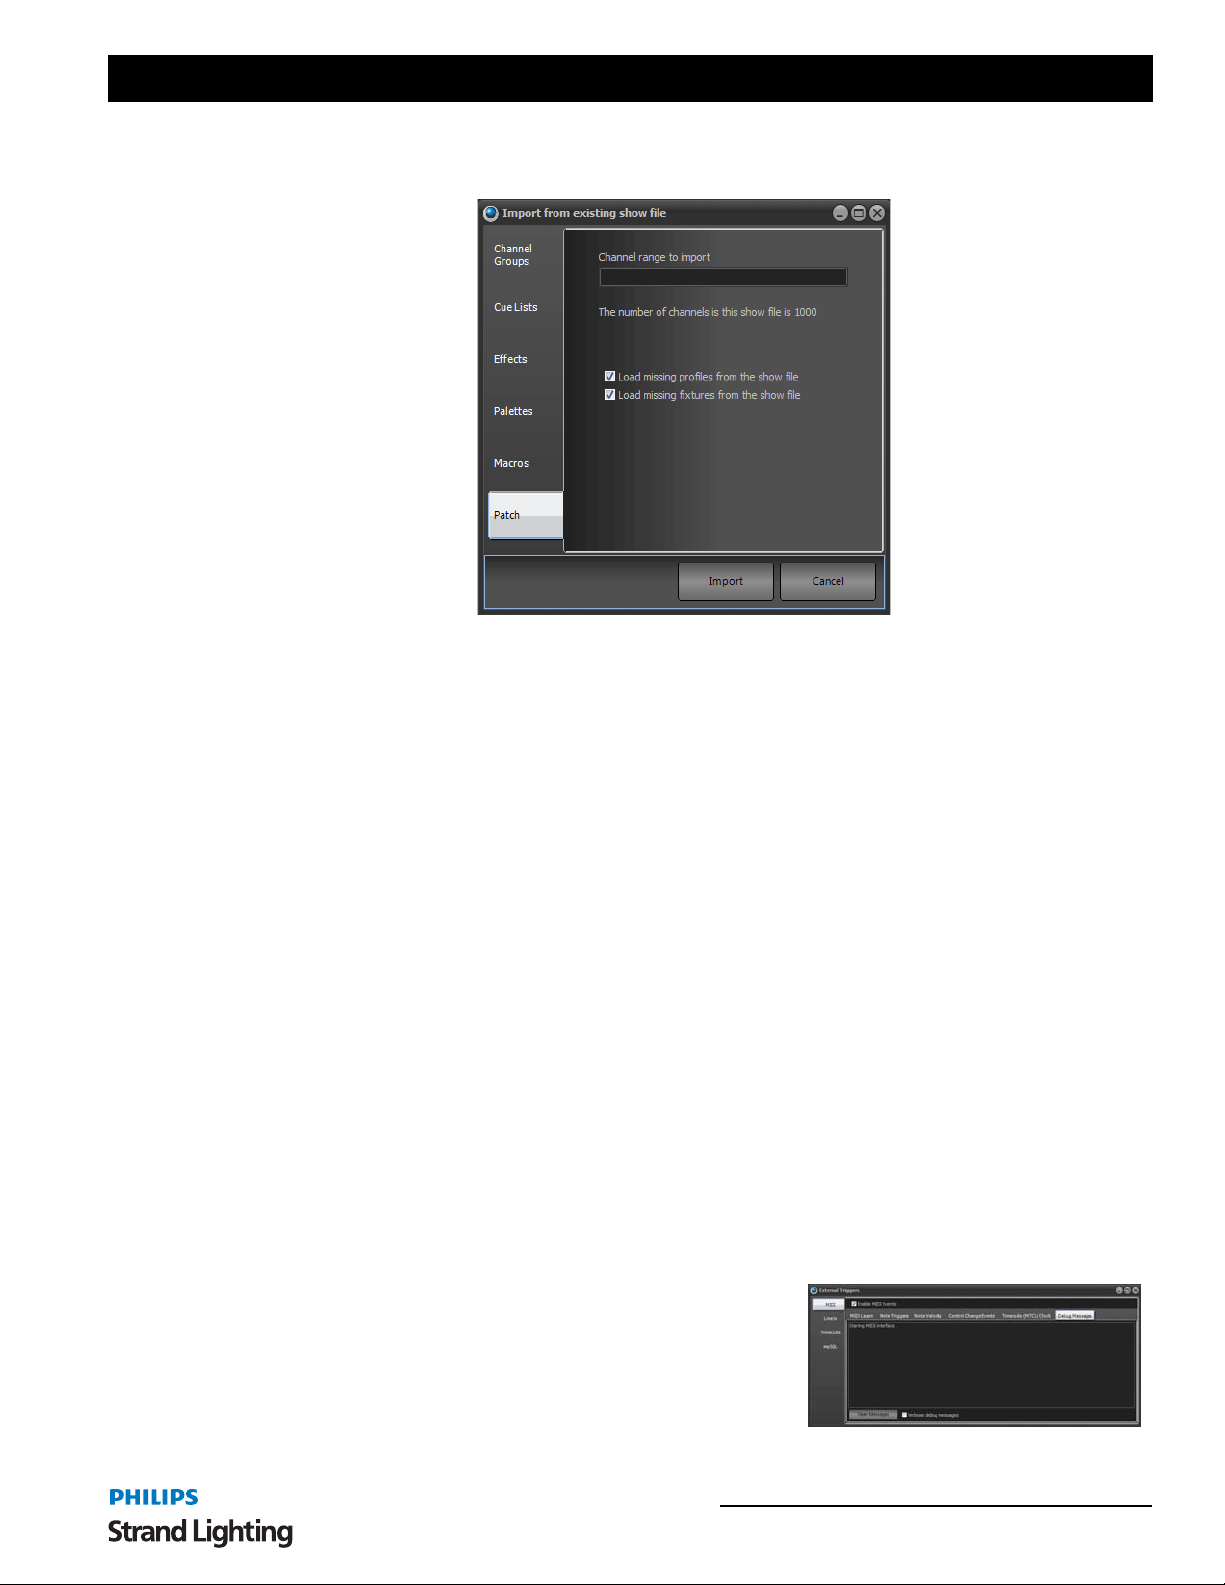
NEO Lighting Control Console
Once opened NEO will read all of the information about the show and allow you to select what elements you want to
import. You can select to import Channel Groups, Cue Lists, Effects, Palettes, Macros and Patch information.
T o select the elements of the show you want to import use the check box on the right of each line. There are 6 tabs on
the left that separate out the different parts of a NEO show.
If a name conflict is detected when importing any part of the show the imported element will be renamed as "Copy of
previous name".
Once you have selected the elements you want to import click on the "Import" button to proceed.
Import from USITT ASCII Cue Format - imports an ASCII file and places it into current memory.
Show Backups - allows current backup or restore from backup.
System Properties - a series of options allowing you to configure hardware, database, default settings, and change
your licensing information.
More information on System Properties will be outlined in the "Display Options" on page 67.
6. External Triggers
NEO provides the ability to connect external triggering devices to control the runni ng of shows. This feature allows
you to set up shows that run without user interaction.
External triggering is designed to trigger the "Cue Go" function in shows, however NEO can also use the MIDI and
Timecode triggers to execute any shortcut.
Configuration of the external triggers can be found in the file menu.
MIDI Control
MIDI is a flexible musical instrument-to-PC protocol that provides a number of different messages in the form of
notes.
To enable the MIDI functions you must turn on the "Enable MIDI Events" option.
The "Debug Messages" tab can be used to help identify any problems
with receiving MIDI messages. To display more information about
incoming MIDI data turn on the "Verbose debug messages" option at
the bottom of the window.
External Triggers 69
Page 72
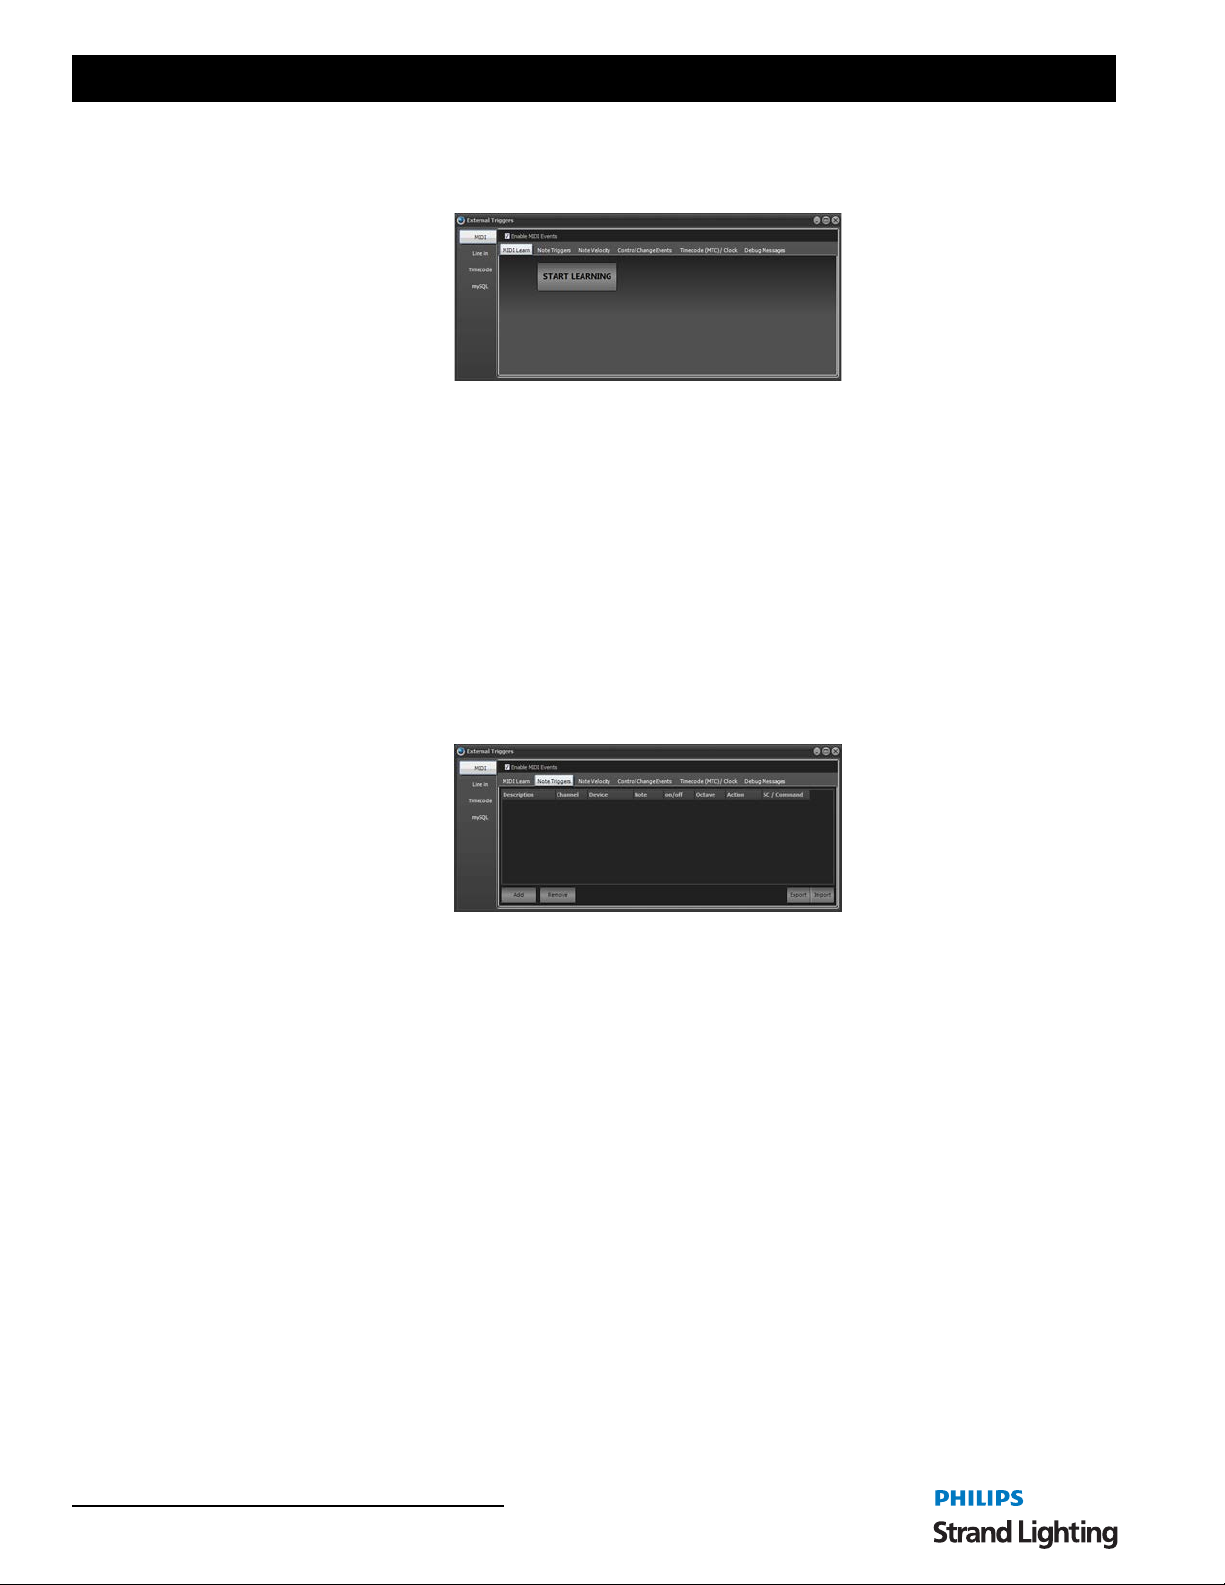
User’s Manual
MIDI Learn
To make it easier to setup MIDI triggers NEO can learn events as you go.
Click on the "START LEARNING" button begin listening for MIDI events. As soon as a MIDI event occurs in the
software the "Found MIDI event" options will be shown.
Use the ACTION options to determine what the MIDI event will do. T o the right of the action options will appe ar any
additional parameters requires. For example to fire a shortcut you must set what shortc ut number you want to fire.
Once you have set what you want the event to do click on the Save button.
Click on the Cancel button to return to the "Start Learning" state.
Use the "Save & Start" button to save the event action and return to the learn state.
Note Triggers
The "Note Triggers" tab provides the ability to add any number of note triggers to the system. Click on the "Add"
button to create a new line in the list of triggers. To remove a trigger click on the row you wish to remove and click on
the "Remove" button.
Each trigger requires the following settings;
Description - This provides a way to identify the trigger by entering a description for your reference.
Channel - Identify the MIDI Channel to listen on (1-16)
Device - Device number to listen to (default 0)
Note - This is an instrument note that will trigger the event.
On/Off - Determine if the system will trigger by a note on or note off event.
Octave - An interval between two notes that are seven steps apart on a musical scale.
Action - Each trigger can either execute the "cue go" operation, execute a system shortcut or run a command. Use the
drop-down combo to select one of these options.
Shortcut/Command - If the action is set to "shortcut", t his field is used to specify what shortcut num ber you want
this trigger to execute. If set to command enter the command syntax into this field.
Import / Export - To help manage a large number of MIDI note triggers you can import this inform ation from a
coma separated text file (csv). Click on each of these buttons to open a standard windows file dialog to select the file
you want to import or export.
When choosing the import option a dialog will pop up asking you if you want to remove existing entries before
importing the new data.
70 Software Configuration
Page 73
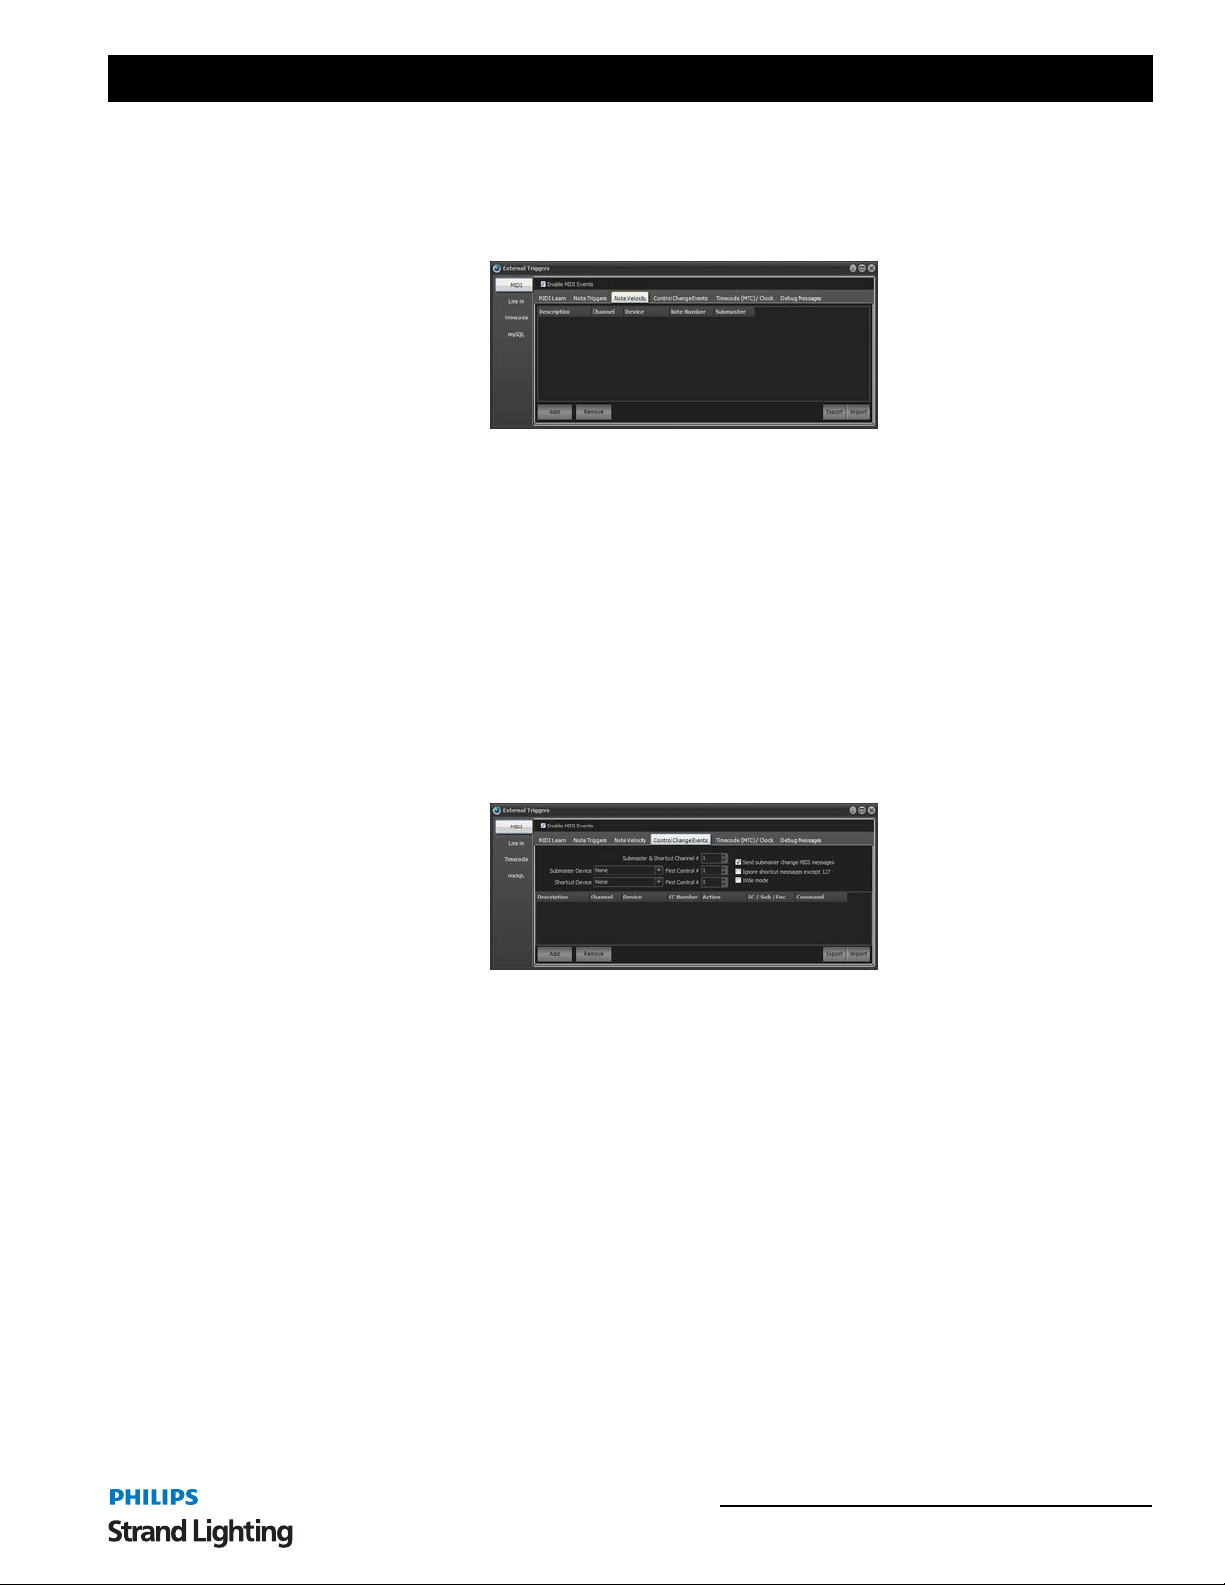
NEO Lighting Control Console
Note Velocity
The "Note Velocity" events can be used to directly control submasters within NEO. Click on the "Add" button to
create a new line in the list of velocity triggers. To remove a trigger click on the row you wish to remove and click on
the "Remove" button.
Description - This provides a way to identify the trigger by entering a description for your reference.
Channel - Identify the MIDI Channel to listen on (1-16 )
Device - Device to listen to.
Note - This is an instrument note that the software will listen for and translate the velocity into a submaster value.
Submaster - Set the submaster number that will be applied when the note is received.
Import / Export - To help manage a large number of MIDI note triggers you can import this informatio n from a
coma separated text file (csv). Click on each of these buttons to open a standard windows file dialog to select the file
you want to import or export. When choosing the import optio n a dialog will pop up asking yo u if you want to
remove existing entries before importing the new data.
Control Change Events
The "Control Change Events" tab allows you to setup NEO to respond to control change events.
Submaster & Shortcut Channel # - Set this option to determine the channel number that will be listened to for
control change events.
Submaster Device - MIDI devices can also be used to control NEO submasters in the same way as the DMX input
option. Low cost MIDI fader devices can be connected to provide this functionality. To activate this function select
the device from the combo box provided.
NEO will listen for "Control Change" messages and apply the received "Value 2" to the submaster defined by the
"Value 1". T o set the first control change identifying number use the "First Control #" option to the right of the device
selection box.
When submaster's are changed in NEO the software will also send MIDI messages to the selected device to activate
motorized faders (if supported).
Shortcut Device - The same function as above can also be applied to shortcuts. Select the device to listen to for
control change messages and set the start message number to correspond to shortcut 1 in NEO.
Send submaster change MIDI messages - If your device supports motorized faders then NEO can send MIDI
control messages back to the device to change the physical slider. This is useful when changing the submaster page in
NEO or if you make an on-screen change to a submaster. The physical sliders will move with the change you make. If
the device you are using does not support motorized faders then it is recommended to turn this option off.
External Triggers 71
Page 74
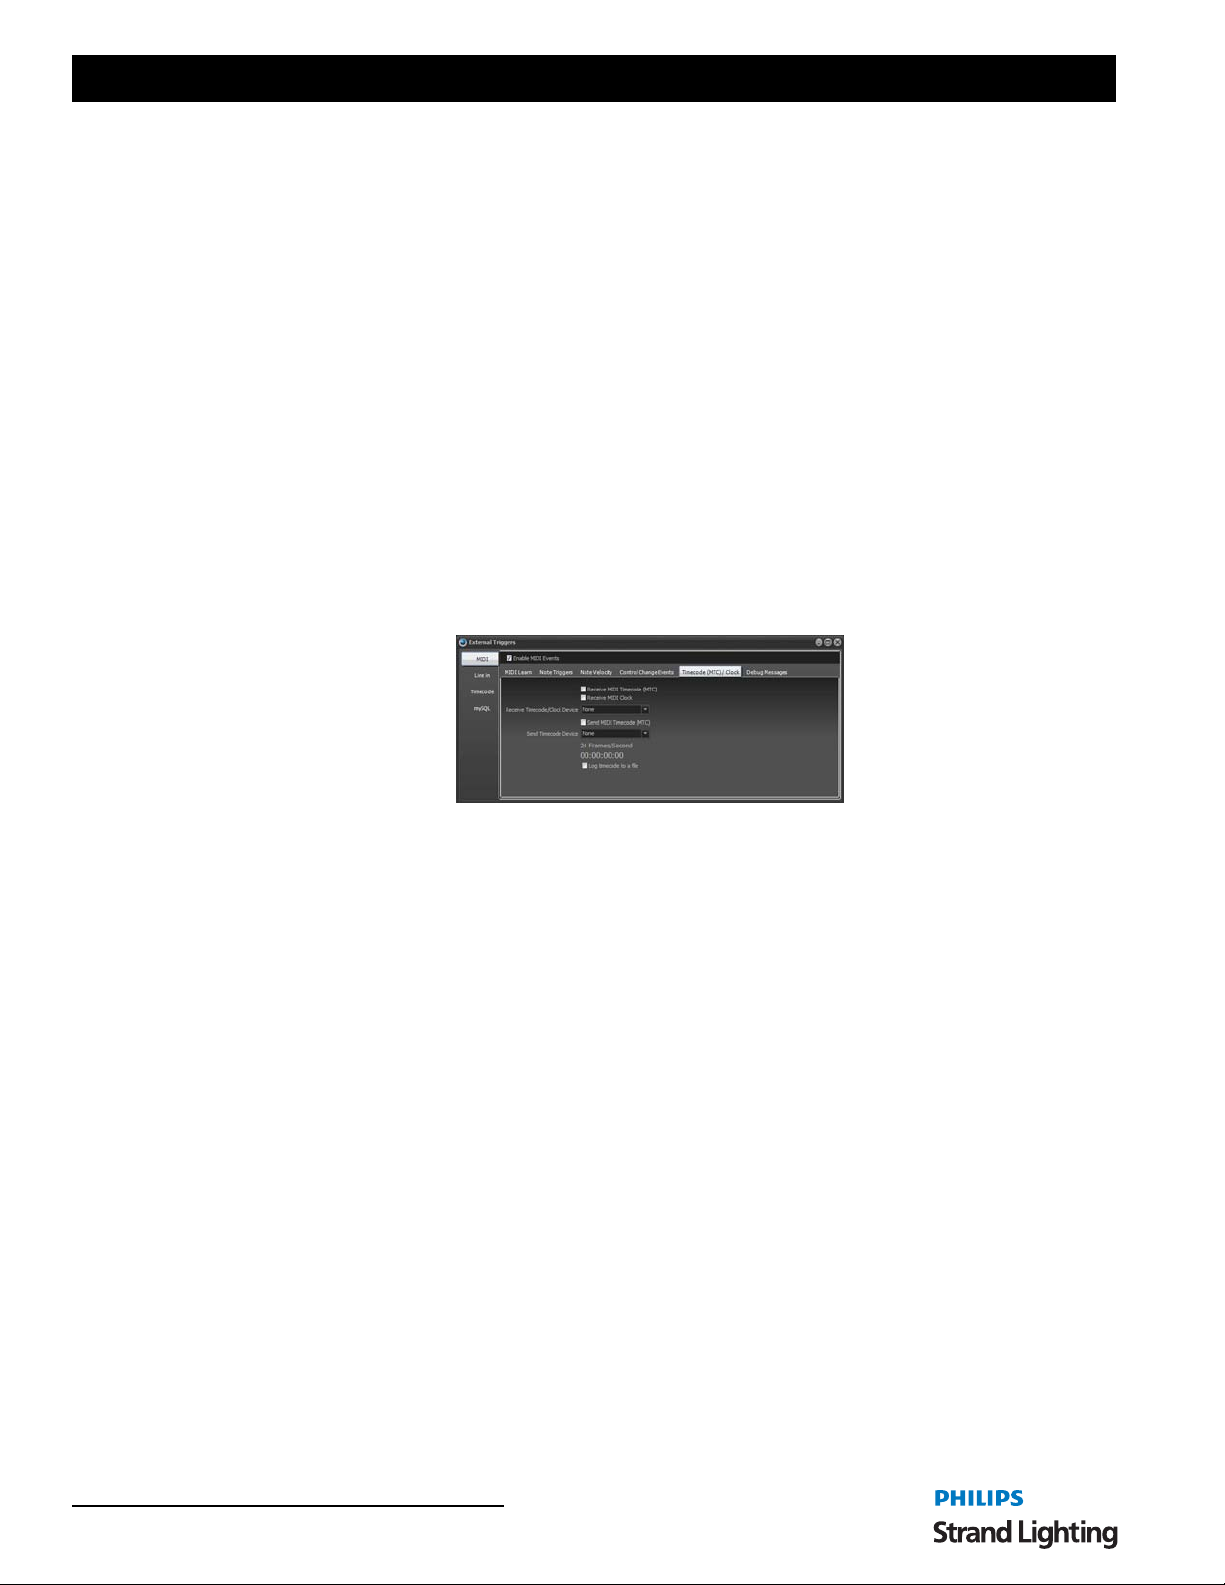
User’s Manual
Ignore shortcut up messages (127) - Some external MIDI devices send 2 messages for a button press. One message
for down and one for up. This can trigger the shortcut twice and is undesirable. If you experience this problem turn
this option on to ignore all message except 127.
Wide Mode - Wide mode will automatically map the maximum number of incoming MIDI control change messages
to submasters.
Control Change mapping - Below the primary options is a grid that can be used to map control change message
directly to shortcuts, submasters or encoders. Use the Add button to create a new event listener and set the channel,
device and control change number to listen for.
Use the action field to set what will happen when the CC message is received. The options for this field are Shortcut,
Submaster, Command or Encoder.
As with the MIDI note message the Import and Export options can be used to save and load the setting to and from a
CSV file.
Timecode (MTC) / Clock
The "Timecode (MTC) / Clock" tab allows you to setup NEO to listen to incoming MIDI timecode data and MIDI
clock signals. The MIDI timecode read by NEO can be used to trigger timecode events.
The MIDI clock signal can be used to setup the tap tempo function in the softw are and synchronize your show to a
common tempo.
Timecode Device - Select the device that timecode data will be read from or sent to. A separate device can be
selected for input and output.
Receive MIDI Timecode (MTC) - Enable this check box to begin receiving MIDI timecode form the selected
device. When turned on the Send option below it will automatically be turned off.
Receive MIDI Clock - Enable this check box to begin processing of MIDI clock data. The incoming clock messages
will be used to set the timi ng of t he t ap t emp o wi thi n NE O. If the t imi ng of t he i ncom ing clo ck change s th e tap te mpo
will automatically be updated.
MIDI Clock Divisor - The value of the MIDI clock divisor is used to slow down the internal tempo rel ative to the
incoming clock signals. The incoming beats per minute will be divided by this n umber when calculating the actual
Tap Tempo. For example if the incoming clock is running at 120 beats per second and the divisor i s set to 2 then the
Tap Tempo will register 60 beats per minute.
Send MIDI Timecode (MTC) - If this option is turned on then the receive option will be turned off. When using any
of the other four timecode options (found in the timecode tab) the timecode will be sent to the selected MIDI de vice
to allow other systems to synchronize with NEO.
Sending MTC Type - If you are sending MIDI timecode from NEO you will need to set the frame rate that you want
to generate. This is typically defined by the application (film, NTSC/PAL television) but if you are unsure set this to
25 fps.
Changes to the frame type will apply immediately so you can try different setting to see how it effects other
equipment that might be reading the timecode NEO is generating.
PC Line-In
The Line-in triggers can use any audio source to control NEO. An audio event can trigger a cue GO, fire a shortcut,
flash a submaster or run a command.
72 Software Configuration
Page 75
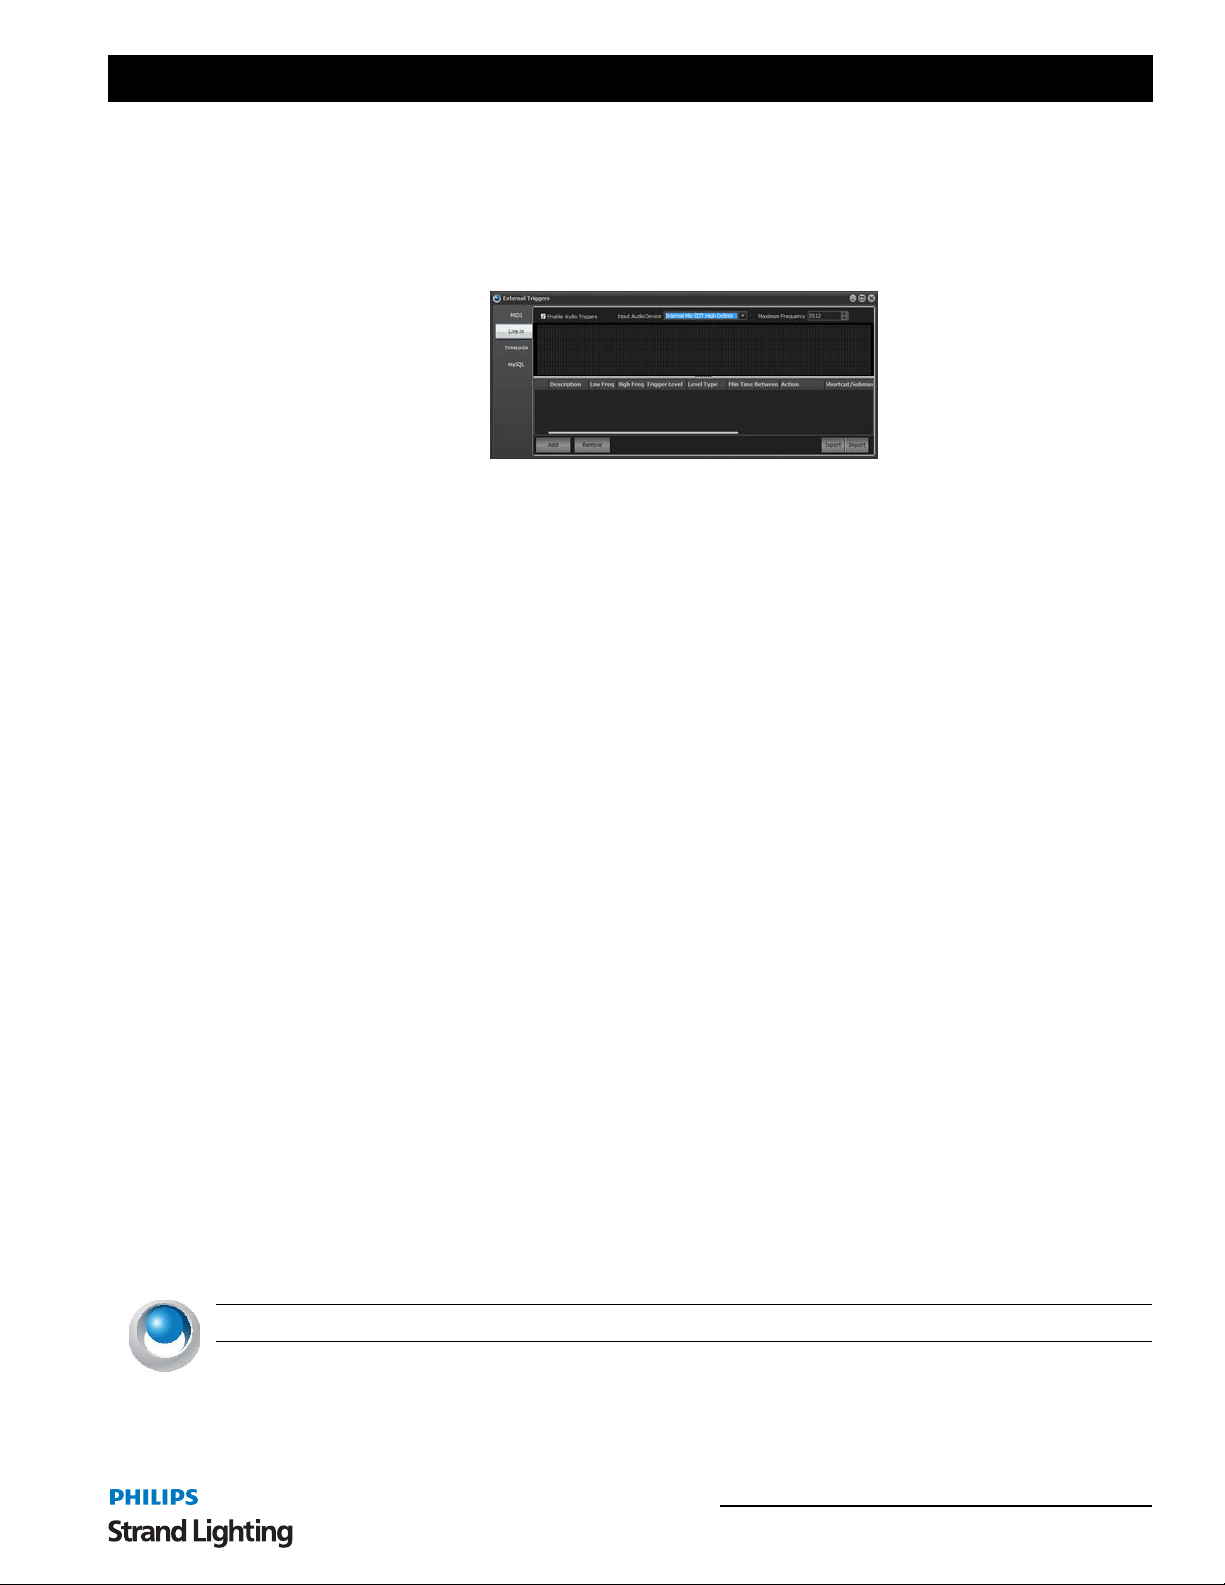
NEO Lighting Control Console
The "Line In" tab provides the ability to set the audio source and then create multiple events. Each event is
determined by the frequency range, trigger level, level type and minimum time between events.
For NEO to listen to the selected audio source you must enable it by clicking on the "Enable Audio Line In Control"
Above the event grid is a graphic display of the incoming audio frequencies. This is known as the audio spectrum that
shows the response to frequencies from 0 to the maximum frequency set.
Input Audio Device - Select the audio source device you want to use to trigger the system. This is the system device
that will be listed to and shown in the display.
Maximum Frequency - The maximum frequency determines the upper sample limit the software will listen to. The
default is just over 5kHz. A higher maximum frequency will require more CPU to sample continuously.
Creating an Event
An event in the audio trigger system is a list of conditions that when met will trigger the event. Th e event itself will
also have settings that determine what will happen.
Frequency Range (Low Freq, High Freq) - The frequency range for the event will limit the area of the spectrum
that is listened to. This is best understood by looking at the red lines in the spectrum display. The lower red line is the
low frequency and the upper red line is the high frequency. You can also use your mouse to click and drag either red
line to adjust the frequency.
T rigger Level - Select the audio level in percentage of the maximum that will trigger the event. This is represented as
the yellow line running across the spectrum display. You can also use your mouse to click and drag to move the line
and adjust the level.
Level Type - Use the level type to select how the trig ger level is used. You can select between "Average Frequency"
or "Any Frequency". If the level type is set to average frequency then all of the levels between the frequ ency range
specified are averaged. If the average exceeds the level set then the trigger is fired. If the level type is set to any
frequency then the trigger will fire if any level between the frequency range exceeds the level.
Min Time Between - Set the minimum time between trigger events. This options stops the trigger from firing
continuously if the level is exceeded for a long period of time.
Action - The action setting specifies what will happen when the trigger happens. This can be set to Global, Shortcut,
Submaster Flash or Command. Setting this to Global will ru n any cue that is primed with "Line in" as its trigger.
Shortcut will run the shortcut specified in the Shortcut/Submaster field. Submaster Flash will set the specified
submaster to full for the Flash Duration and then return it to its previo us level. Comm and will execute th e command
line text specified in the Command field.
Timecode
The timecode configuration provides the ability to set up shortcuts that are triggered by the timecode values being
reached. You can also setup a cue list and provide timecode values to each cue. Cues can then be automatically
triggered when the timecode value is reached.
NEO NOTES & TIPS: There is no configuration required for using timecodes to trigger "cue go".
To enable listening to timecodes, check the box marked with the appropriate timecode device you are using.
• DirectX timecode - Uses the internal windows timecode functions provided by the DirectX components.
External Triggers 73
Page 76
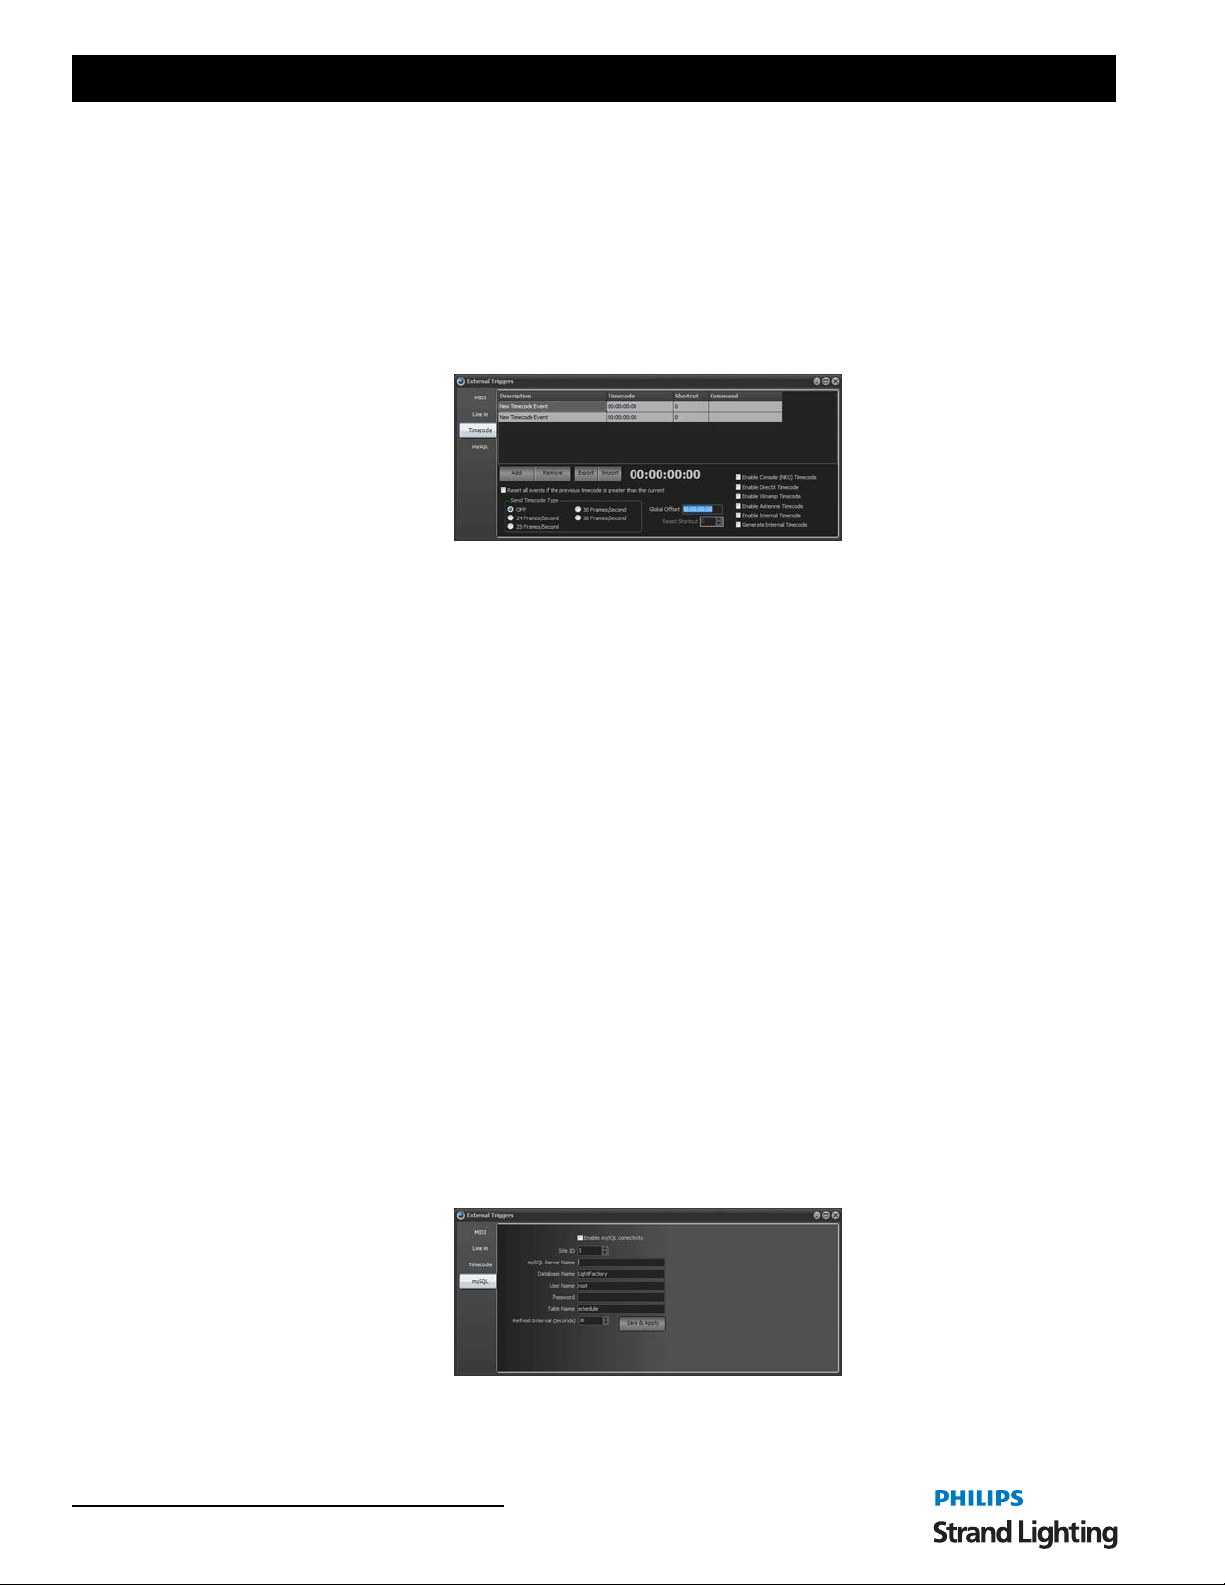
User’s Manual
• Winamp timecode - Winamp is a popular free media player that is capable of playing video and audio files. NEO
• Adrienne Timecode - The Adrienne devices are a collection of internal and USB devices that support a number of
• Internal Timecode - LightFactory can also read its own internal timecode produced by the media playback
• Generate Internal Timecode - This option will start the internal timecode generator. As soon as this option is
If you are using the internal timecode generator you can optionally set a shortcut to reset the clock back to
00:00:00:00.
To add a new timecode trigger, click on the "Add" button and edit the fields provided. To remove any trigger, select
the event from the list and click on the "Remove" button.
Description - This provides a way to identify the trigger by entering a description for your reference.
Timecode - Set the time code in the format HH:MM:SS:FF that will trigger the shortcut. The shortcut will only
trigger once when the time is reached.
can read timecode directly from this software when running on the same PC.
timecode formats. For more information visit http://www.adrielec.com
effects.
checked you will see the timecode clock start counting.
Shortcut - This field is used to specify which shortcut number you want this trigger to execute.
Command - To execute any other system command simply type the command into this field.
Global Offset - If the timecode being received does not start at zero you can apply a global offset. The offset will be
added to the incoming timecode value at every frame. Use negative values to remove time from the incoming values.
Reset all events if the previous timecode is greater than the current - When this option is turned on all events will
be flagged as "waiting to fire" if the timecode loops or the previous timecode received is greater than the latest
timecode received.
Import / Export - To help manage a large number of timecode events you can import this informat ion from a coma
separated text file (csv). Click on each of these buttons to open a standard windows file dialog to select the file you
want to import or export. When choosing the import option a dialog w ill pop up asking you if you want to remove
existing entries before importing the new data.
mySQL Interface
The mySQL interface provides the ability run NEO macro scripts from a mySQL server. mySQL is an industry
standard database often used by web servers. This option will allow you to trigger NEO from a web site or any
external application.
The mySQL interface is designed for advanced use of the software in specific applications. Please contact NEO
support ([email protected]) for more information about this option.
74 Software Configuration
Page 77
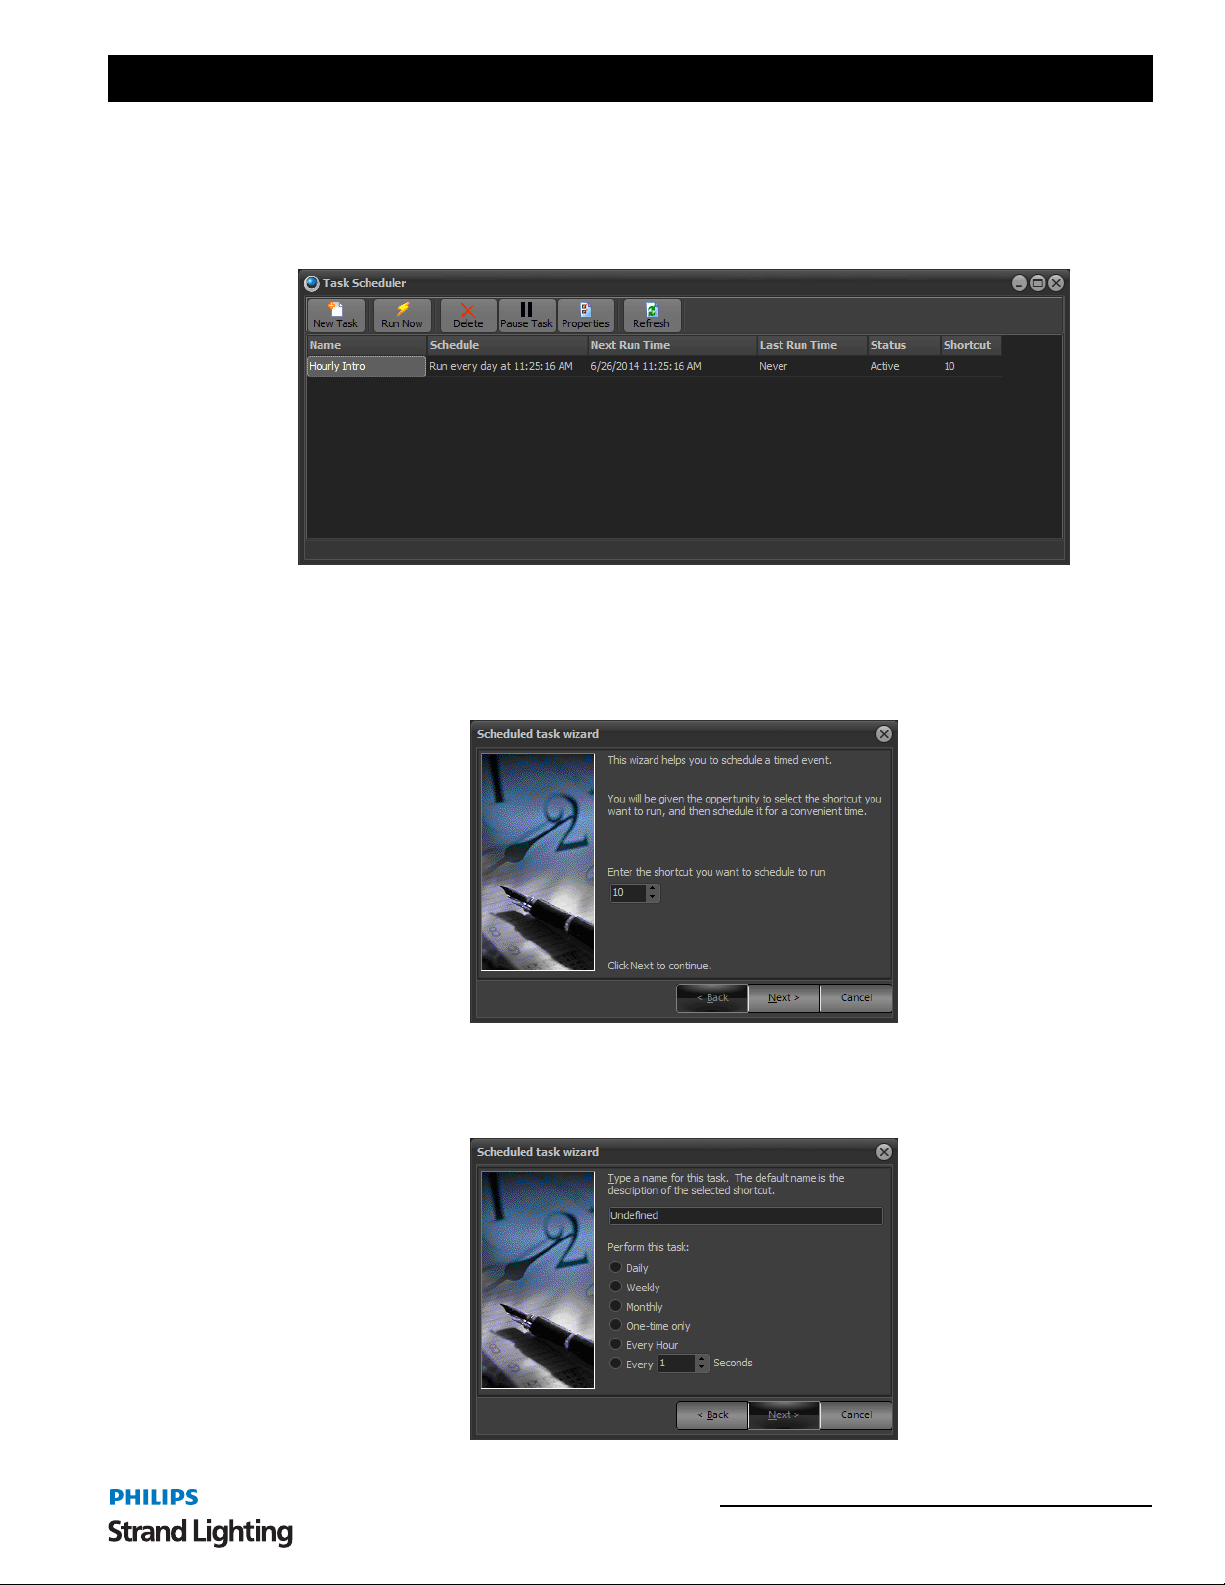
NEO Lighting Control Console
7. Scheduled Tasks
Scheduled tasks allow you to setup recurring lighting events using the real time clock of Windows. Each task can be
scheduled to run daily, weekly, monthly, one-time only, every hour, or every X seconds. Each task executes a NEO
shortcut.
The following tasks are frequently performed when you want to schedule a task to run on your computer.
Create a Scheduled Task
Before a task can be scheduled to run, one or more tasks must be created. To create a new task click on the "New
Task" button at the top left of the window.
1) As soon as you click select "New T ask" the scheduled task wizard will start. Select the shortcut you want to
execute on every occurrence of the task and click "Next" to continue.
Scheduled Tasks 75
Page 78
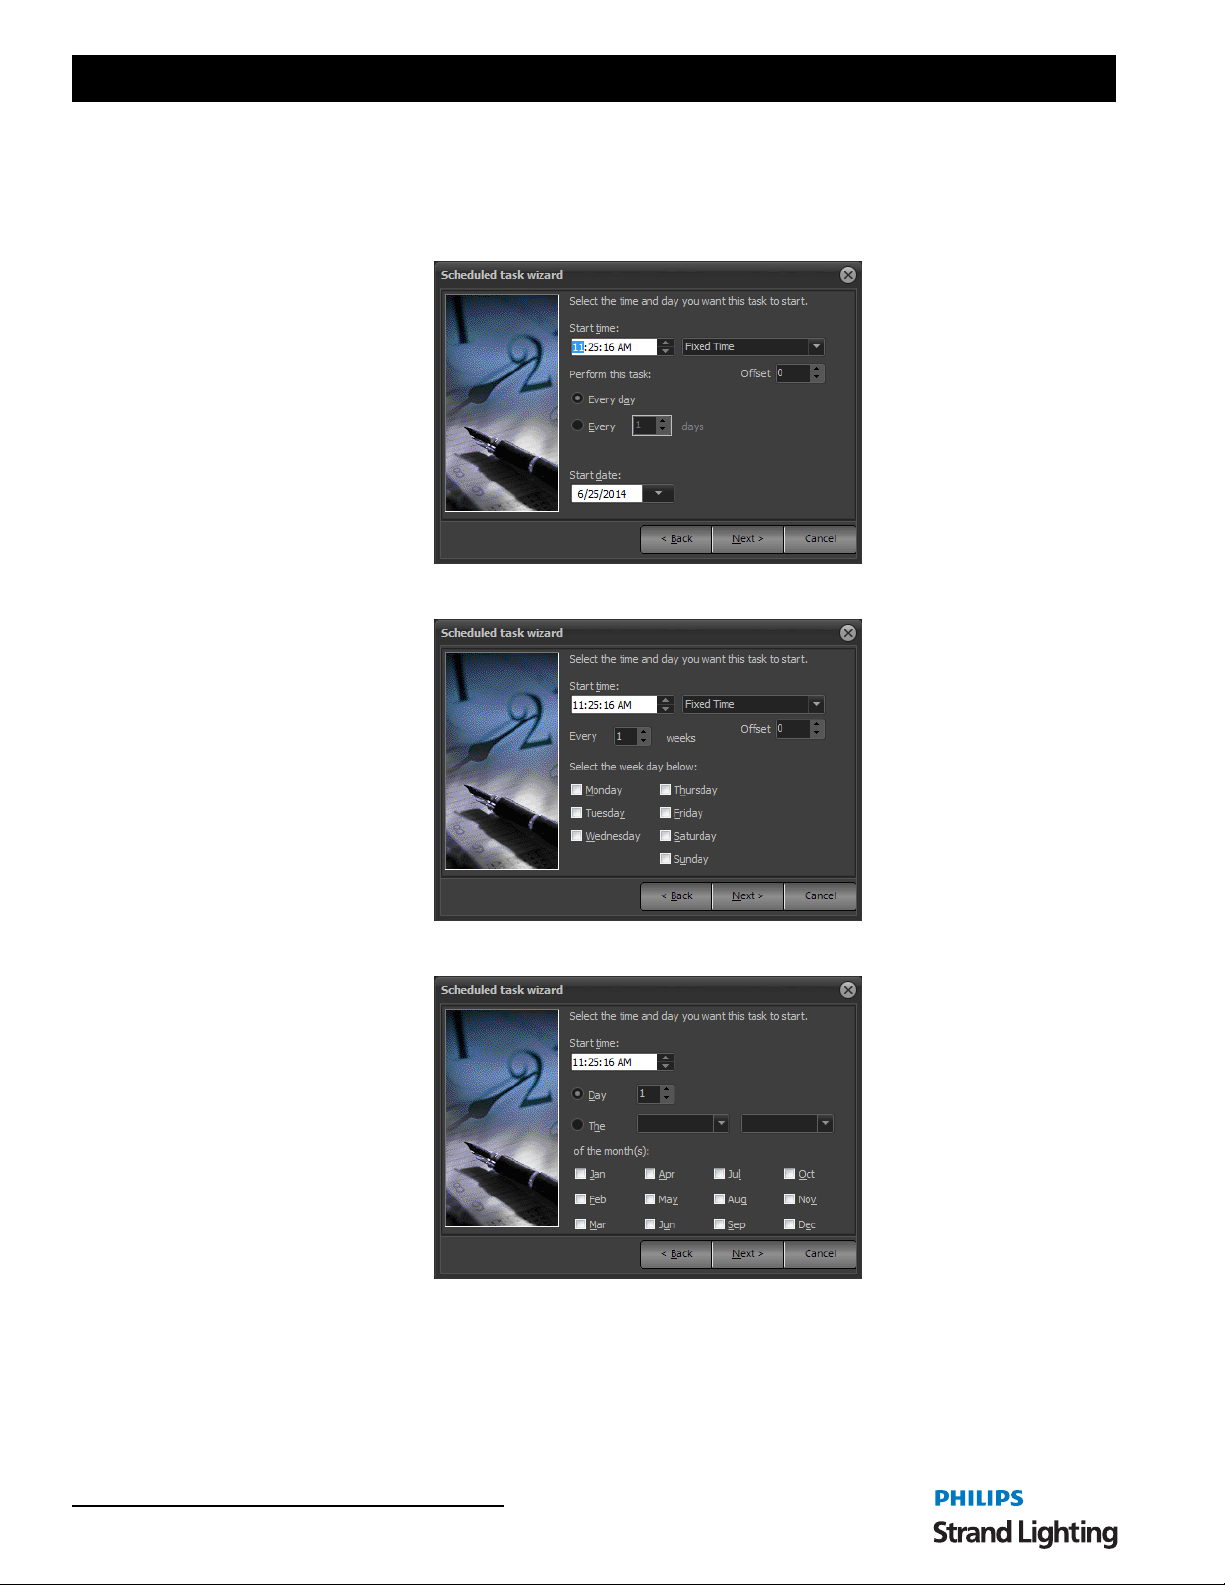
User’s Manual
2) In the space provided on the second page enter a meaningful name to describe the task. (e.g. Hourly
fountain show 1). Then select how often you want this task to run and click "Next" to continue.
3) The next page is specific to the frequency that you want the task to be performed.
a. Daily
b. Weekly
c. Monthly
76 Software Configuration
Page 79
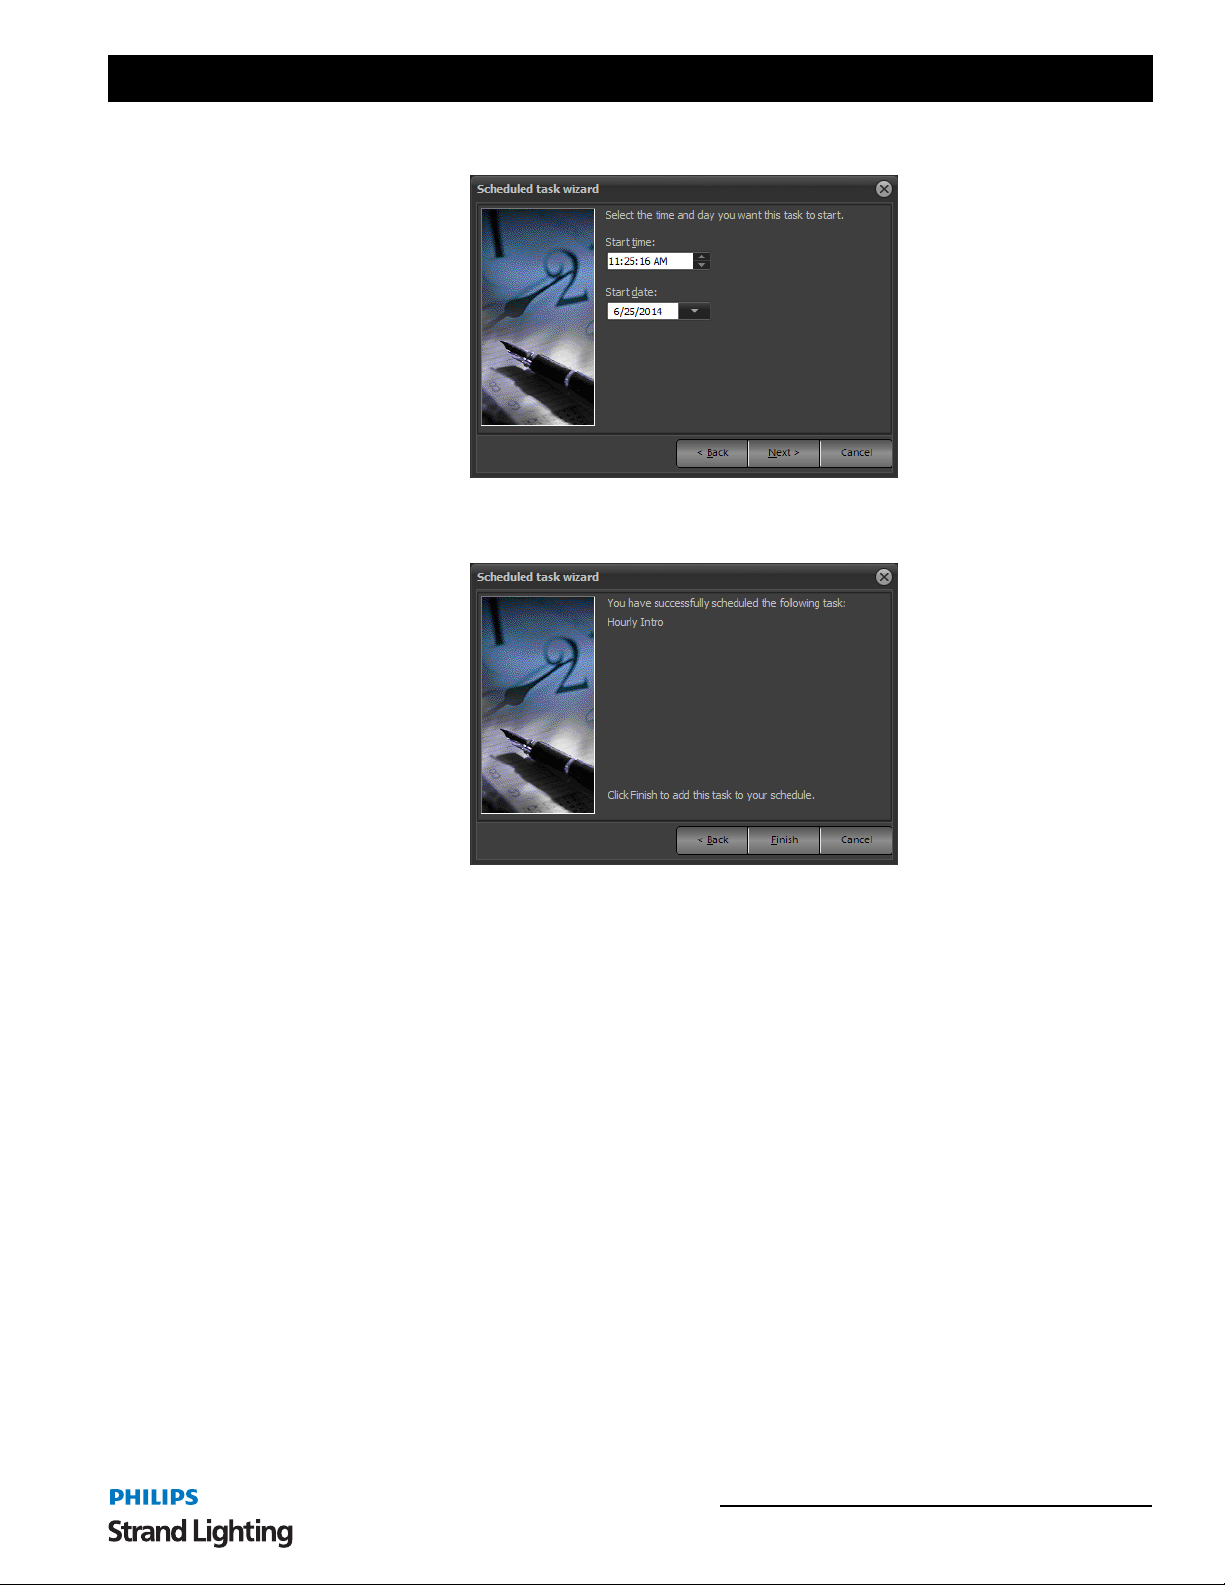
NEO Lighting Control Console
d. One Time Only
e. Every Hour or Every X seconds. No additional information is required for this option.
4) Once you have selected the schedule options for the task click "Next" to continue to the final page.
5) To complete the setup of the new task click on the "Finished" button. The new task will now appear in the
task list and will immediately become active.
Modify a Scheduled Task
Created scheduled tasks can be modified. You can modify the shortcut to run, the schedule, or the specifics of a
particular task. To modify a task double click on the desired entry or click on ce and select pro perties from the o ption
at the top of the window.
This will start the same wizard you used to create the task. Follow the same procedure to change any of the option or
click cancel at any time to return to the task scheduler window.
Remove a Scheduled Task
For scheduled tasks that are no longer needed, you can remove them entirely by selecti ng the correspond ing row and
clicking on the delete button at the top of the window.
Temporarily Turn Off a Scheduled Task(s)
You can temporarily turn off or pause scheduled tasks from running using the pause button provided. The status field
will show paused tasks. To turn a task back on simply slick on the pause button again.
In the special shortcuts (System Properties) you can assign a shortcut to toggle the pause stat e of all schedule tasks.
Scheduled Tasks 77
Page 80
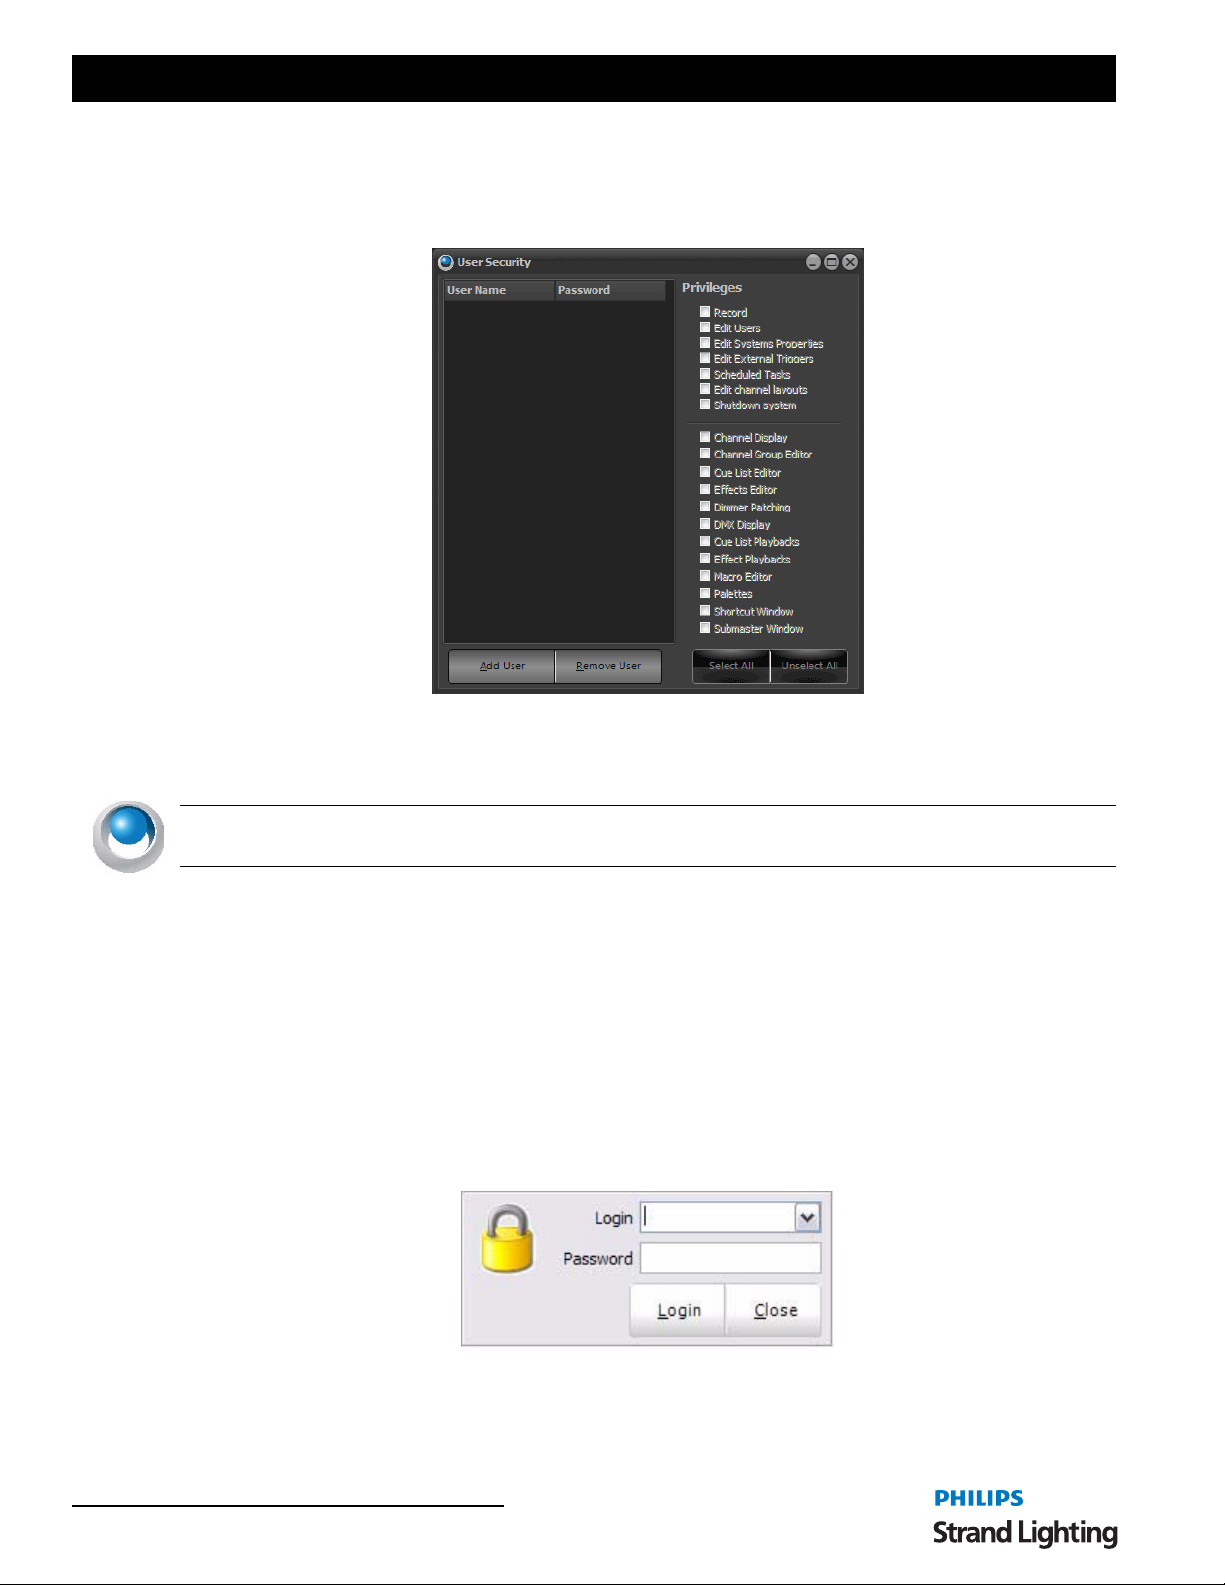
User’s Manual
8. User Permissions
To control access to various parts of the software you can setup users and passwords from the "Edit User
Permissions" window.
Once a user has been added to the software the security feature will become active and require a login each time the
software starts. By default no users will exists in the system. An empty user list is the equivalent of turning off the
security feature.
NEO NOTES & TIPS: The software will not allow you to disable the "Edit Users" option if the selected user is the
last one with this privilege.
To create a new user click on the "Add User" button in the bot tom left of the window. A new line will appear in the
grid above with the default name "New User". Once the user has been added you can edit the name, password and
define the security privileges.
Most of the security features center around allowing or denying access to the various windows within the software.
For example, if you would like to prevent a user from opening the "Cue List" window uncheck the option to the right
hand panel of the window. The "Record" privilege is a special option that can be used to prevent a user from
modifying the show while still providing access to windows like the "Show Runners" and "Channel" view.
By default a new user will have all privileges enabled. Use the "Uncheck All" to remove all access to the user. You
can then add access to the user as required.
Once you have setup a user in the software the security will become enabled. The next time you start the software you
will be asked to login with a username and password.
The user name will default to the last name used to login to the software and will automatically place the cursor into
the password field. Enter the password for the user and press the enter key or click "login " to proceed to the main
interface.
78 Software Configuration
Page 81
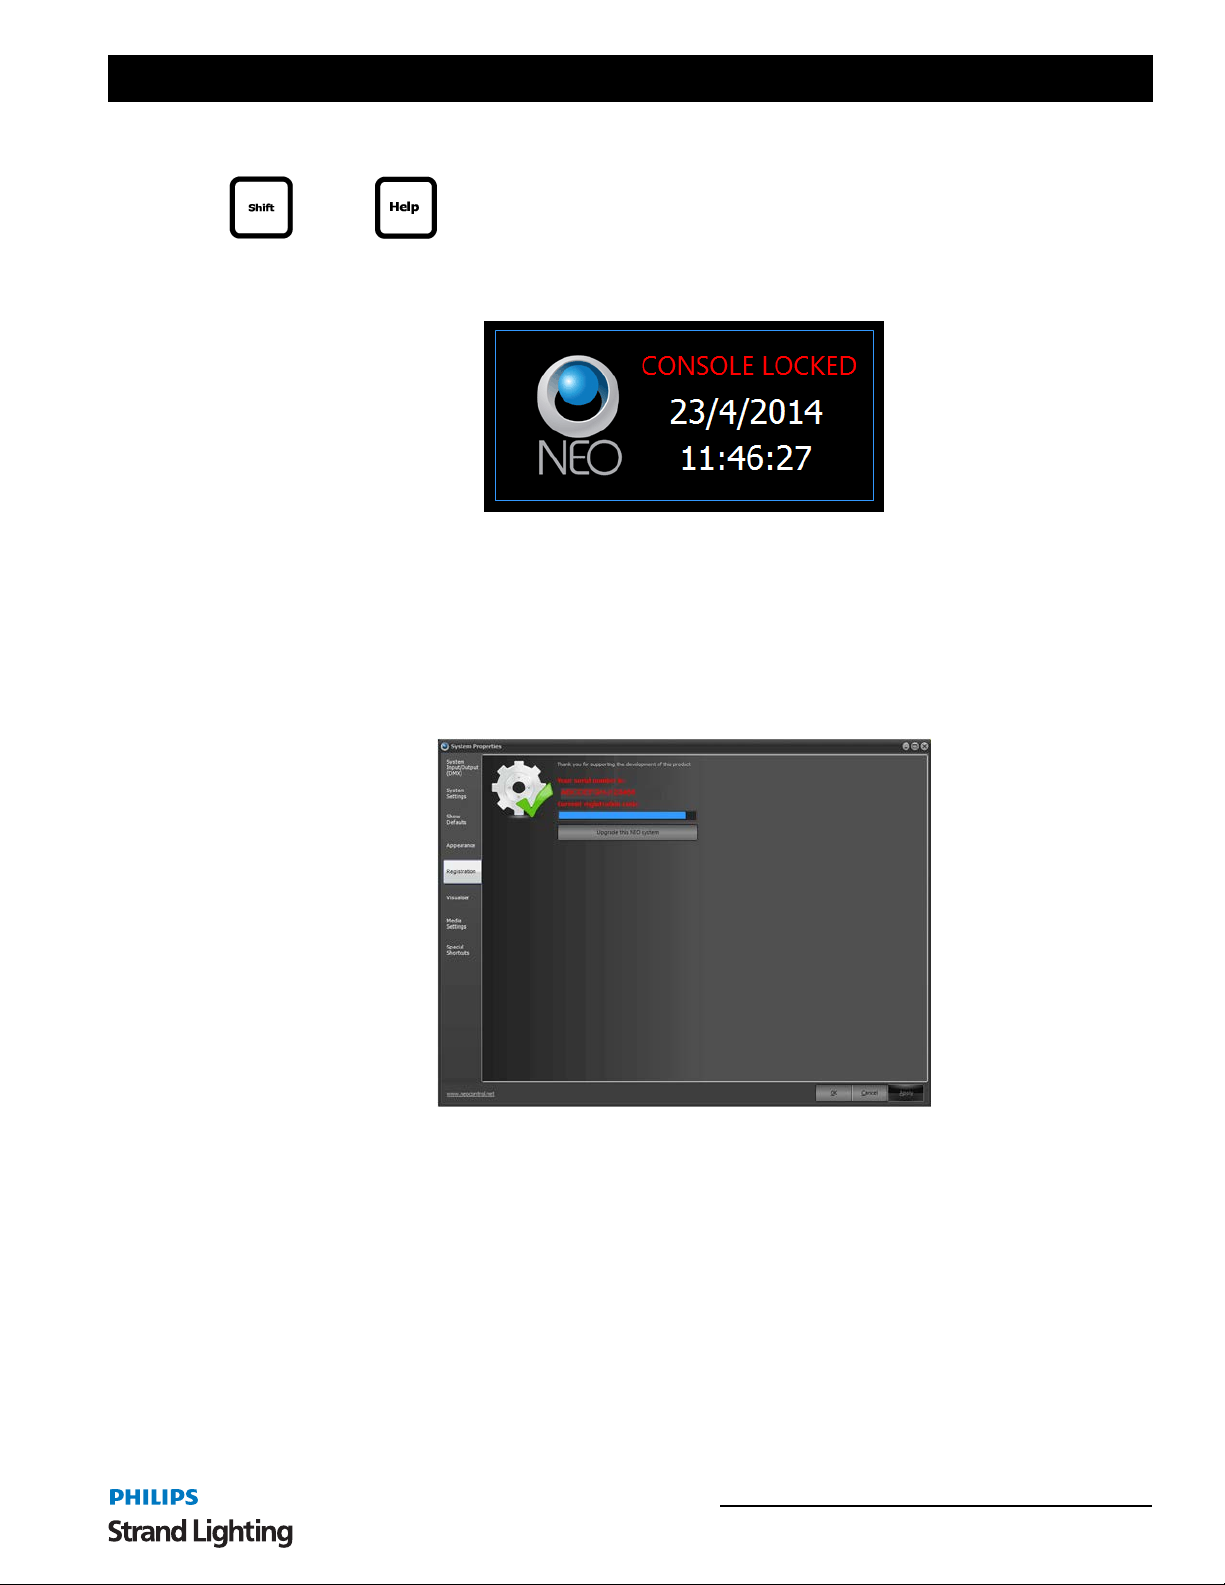
NEO Lighting Control Console
+
Lock System - locks the console faceplate. [SHIFT] + [HELP] is the Command Line solution for locking and
unlocking the NEO console.
Open NEO Manual - Opens the NEO console user’s manual (this document).
Open NEO Quick Start Guide - Opens the NEO console Quickstart reference guide.
9. NEO Software License Registration
NEO uses a software license to ensure that the product has been legally purchased. Without a valid registration code,
the software will still operate normally and no functionality will be restricted, however the software wi ll not pro duce
any DMX output.
T o enable the DMX hardware interface, a valid registration must be entered - whether at time of install, or through the
"Registration" tab in this window.
To change the registration code enter the deta ils into the edit box provided at the to p of this page. Registratio n of the
software is based on the "Serial Number" and the "Registration Code". Both of these number must match for a
registration to be valid.
Enter your registration details and click on the "Apply" to confirm th at the details entered are correct. A dialog will
inform you if incorrect details have been entered.
NEO Software License Registration 79
Page 82
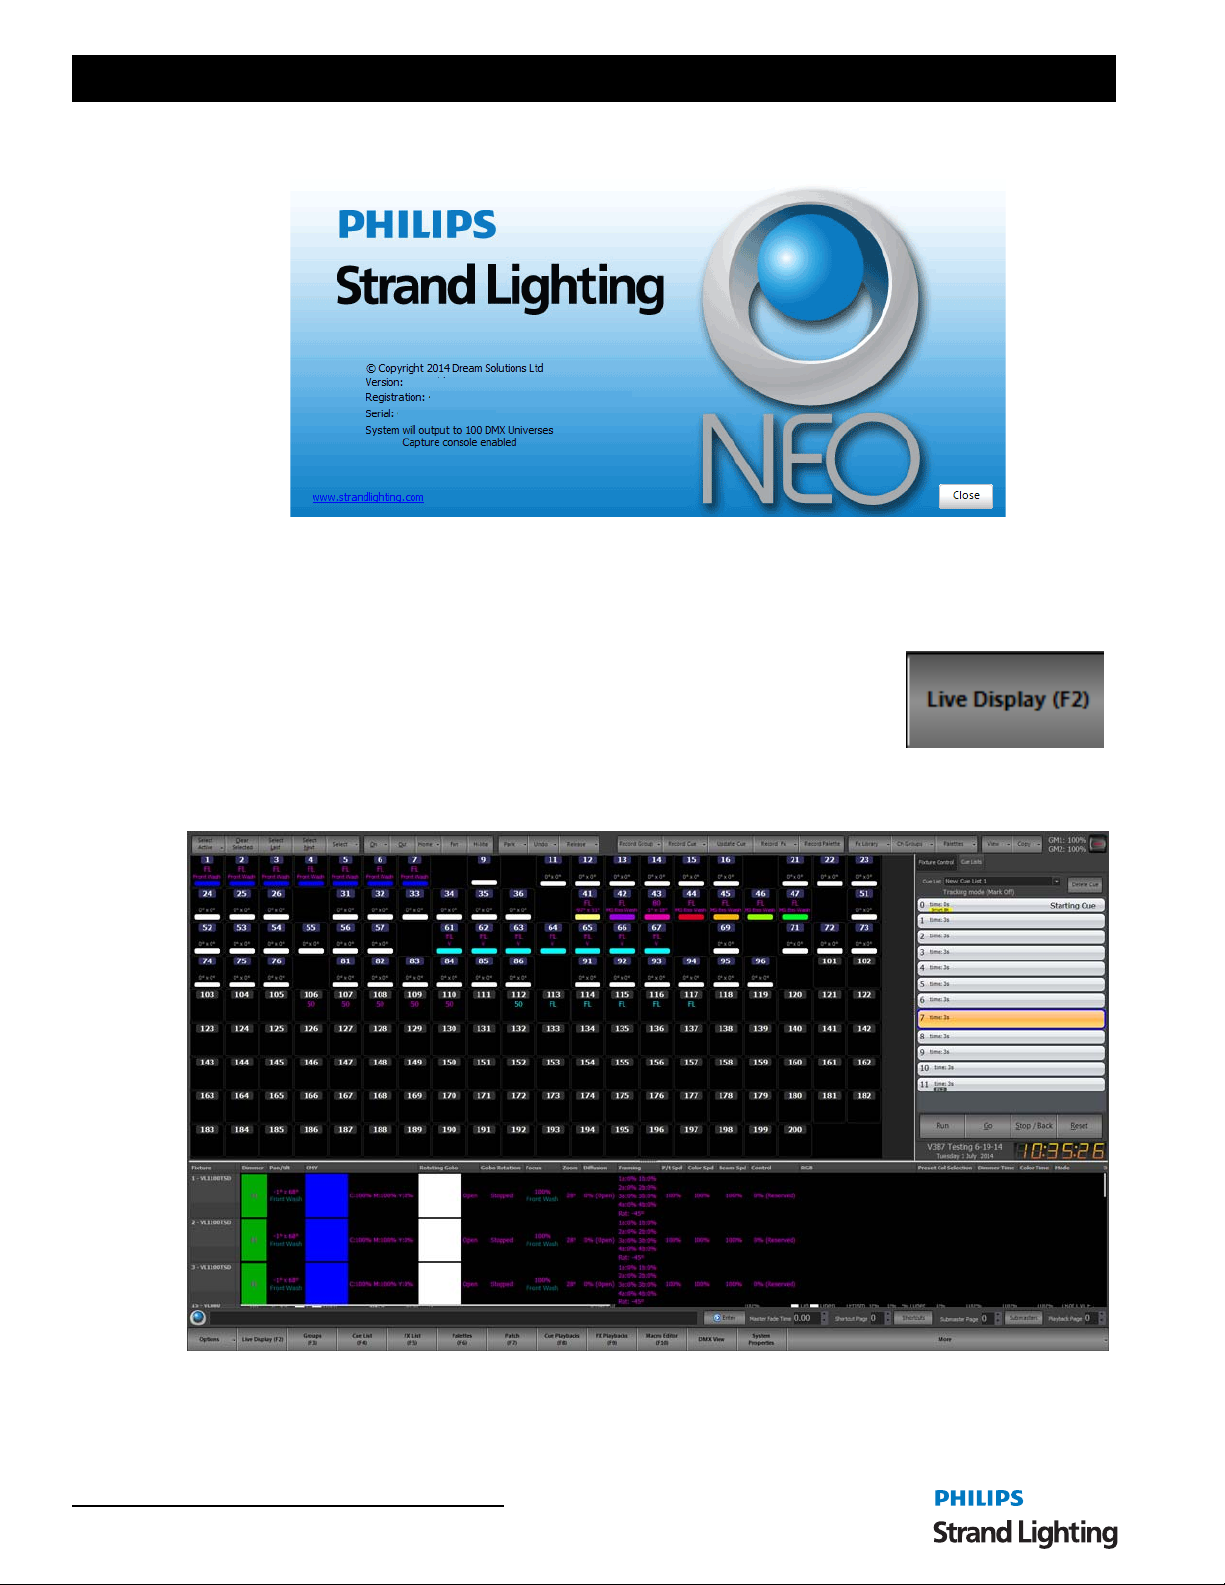
User’s Manual
About NEO - Shows the about screen for copyright message.
Restart - restarts the NEO console.
Shutdown - will shut down the NEO console. Once complete, DMX is held and the power switch needs to be toggled
off to complete the shutdown process.
10. Live Display
This is the traditional Live display single window for the main monitor screen. Pressing the Live Display button will
always open the Live display or bring it forward into focus.
See “Software Configuration” on page 31 for a breakdown of this screen.
80 Software Configuration
Page 83
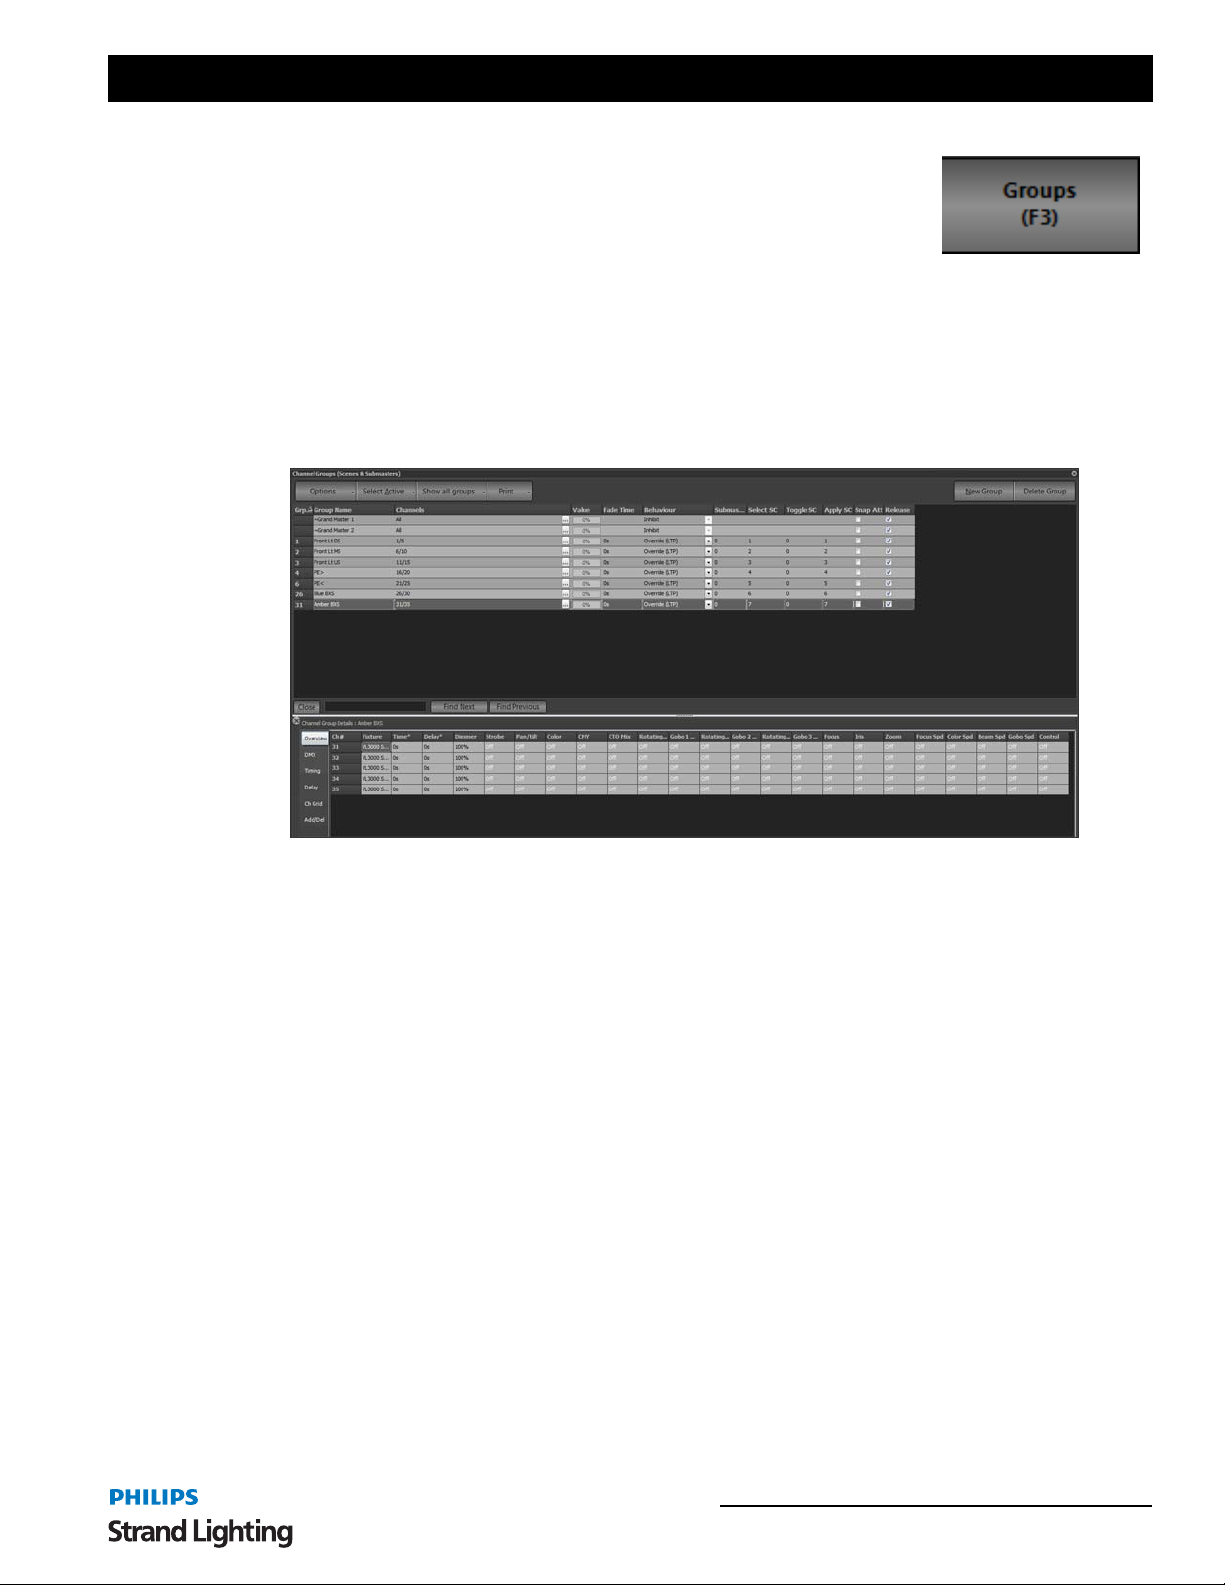
NEO Lighting Control Console
11. Groups Display
Channel groups (Scenes & Submasters) are a convenient way to manipulate a number of channels and fixtures with
one control. Channel groups can operate on any number of fixture attributes and do not need to operate on the
dimmer. You can also add channel groups into cues, thus creating stage looks that can be altered in one location and
applied across all cues.
Channel groups can also be used to aid with selecting fixtures in the channel display. By assigning a selection
shortcut the channels contained in the group can be selected or de-selected using either the shortcut or the menu
option on the channel display window.
Channel groups are most commonly associated with traditional scenes or submasters, however you do not need
submasters to use channel groups. A channel group is a snapshot of a lighting state where the output of each channel
in the group is a proportion of the group value.
To create a new blank group in blind, click on "New Grou p." This will create a group without any channels assigned
and all fields set with default values.
T o remove a group from the system, click on the row containing the group and click on the button "Delete Group." A
dialog box will prompt you to confirm that you wish to remove the group. Click on the "OK" button to remove the
group or "Cancel" to return to the previous window.
Group Number
The group number is the numerical ID of the group.
Group Name
The group name is a description field that provides easy identification of the group. Enter a meaningful description
for future reference.
Channels
This is a list of the channels included in the group. This list can be edited by entering the channels using Command
Line. You can also enter channels using the same syntax as the command window.
[1][+][3][+][9][ENTER] will add channels 1 and 3 and 9 to the editing group.
The channels included in the group can also be edited by clicking the (
clicking on the grid cell. This will bring up the "Channel Group Details" win dow. This window provides greater
...) button to the right of the field or by double
Groups Display 81
Page 84
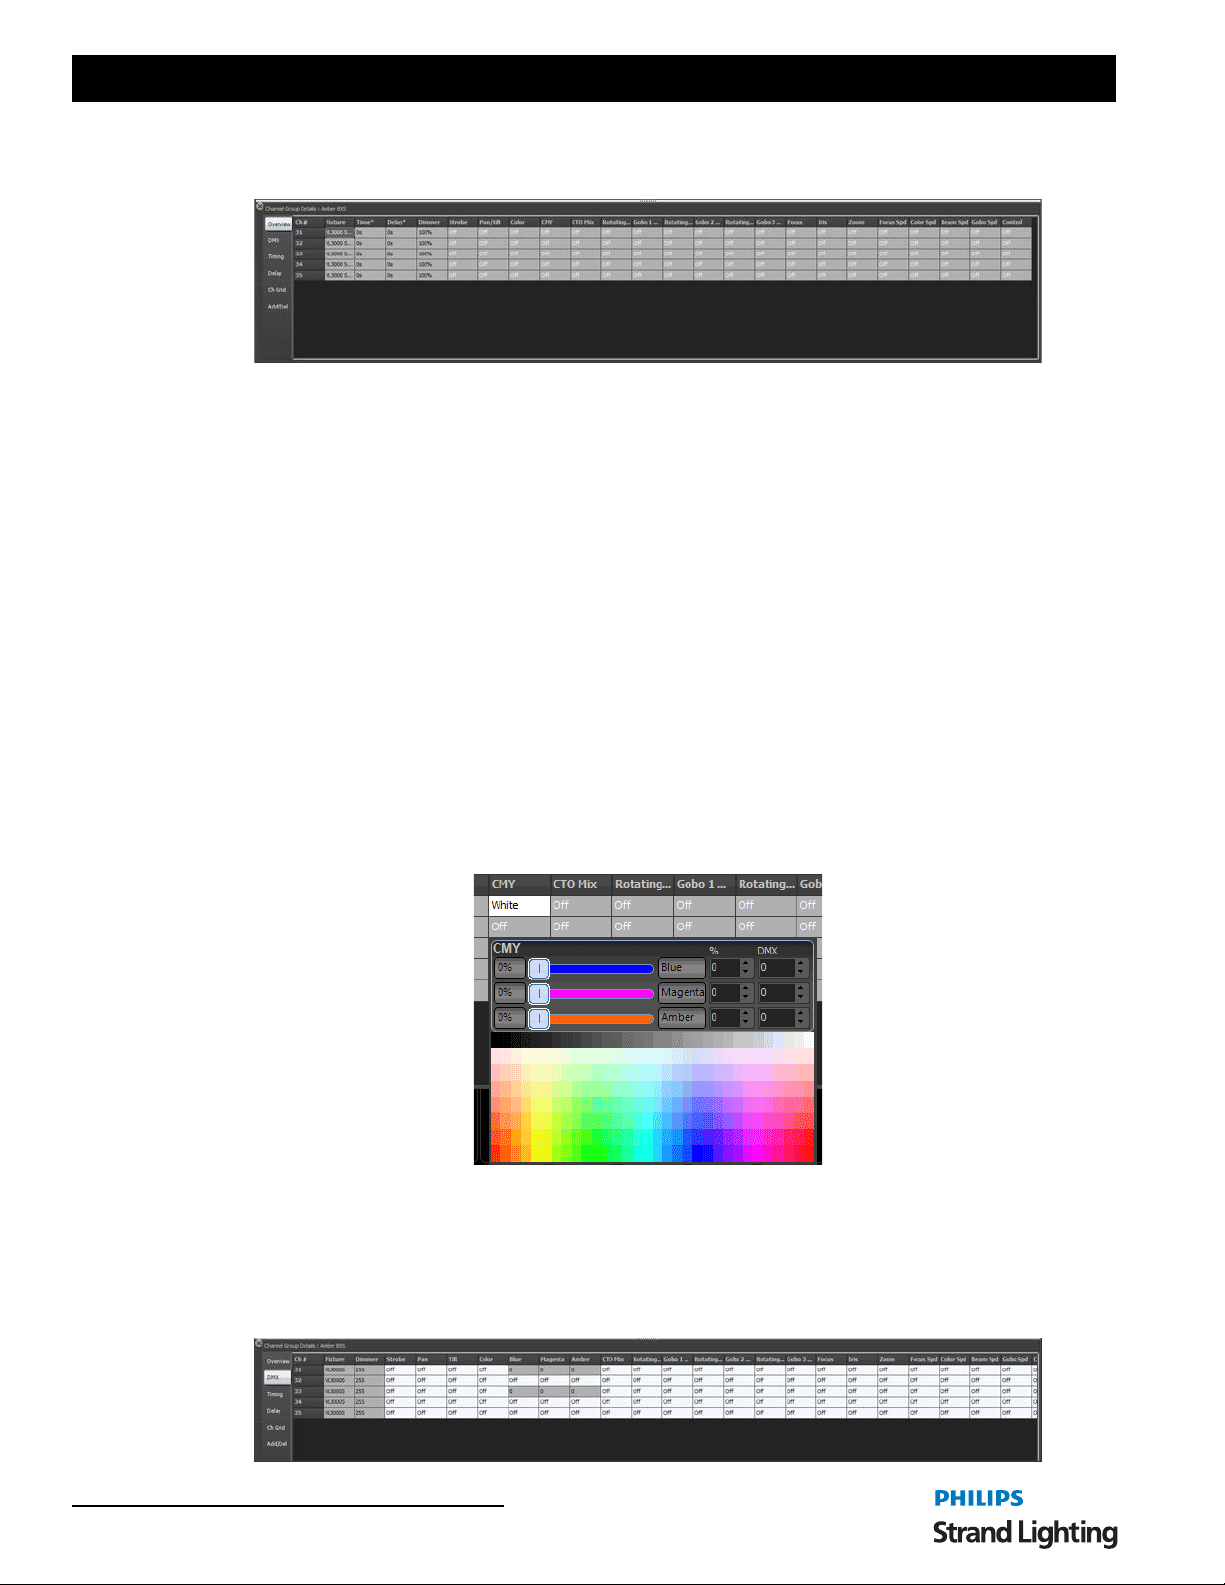
User’s Manual
control over the maximum value the channel will reach when the group is at 100% and provides access to intelligent
fixture attributes.
This window has five tabs down the left hand edge that correspond to the different information you may want to edit.
In channel groups the attributes can have an "Off" value. Cells that are in this state will also be greyed out to make
them easily identifiable. To set a value to the "Off" state simply types an O into the cell or any n on-valid character.
"Off" values will be ignored when the channel group applied.
The values set in the overview and DMX tabs will determine the maximum value that the attribute will reach when
the group is at 100%. For example if a channels dimmer value is set to 50% in the channel group detail w indow t hen
when the group is at 100% the channels dimmer will be set to 50%. If the group is set to 25% then the channels value
will be set to 12.5% (25% of 50%).
Overview
The overview tab will show the attributes values as real world information. Most values will be shown as percentage
information but some values may show other data. A gobo control for example will show an image of the gobo
selected and the color controls will show the color that is currently assigned.
This tab also provides optional time and delay for the individual channels. For attribute level timing see the "timi ng"
and "delay" tabs.
Each of the attribute tabs also provide helper controls that can be accessed by double clicking on the cell. For the
color cells the standard NEO color picker will appear. Once you have finished modifying the value with the helper
control click anywhere in the previous window to close it.
DMX
The DMX tab will show all of the same information as the over view tab but all of th e values will be shown as DMX
values. This provides the maximum resolution when modifying the data in the group. For example in the overview
tab the dimmer is shown as a percentage giving 100 possible values but the underlying DMX associated with the
dimmer has 255 possible values. When the percentage is changed is converted to a DMX value for storage in NEO.
82 Software Configuration
Page 85
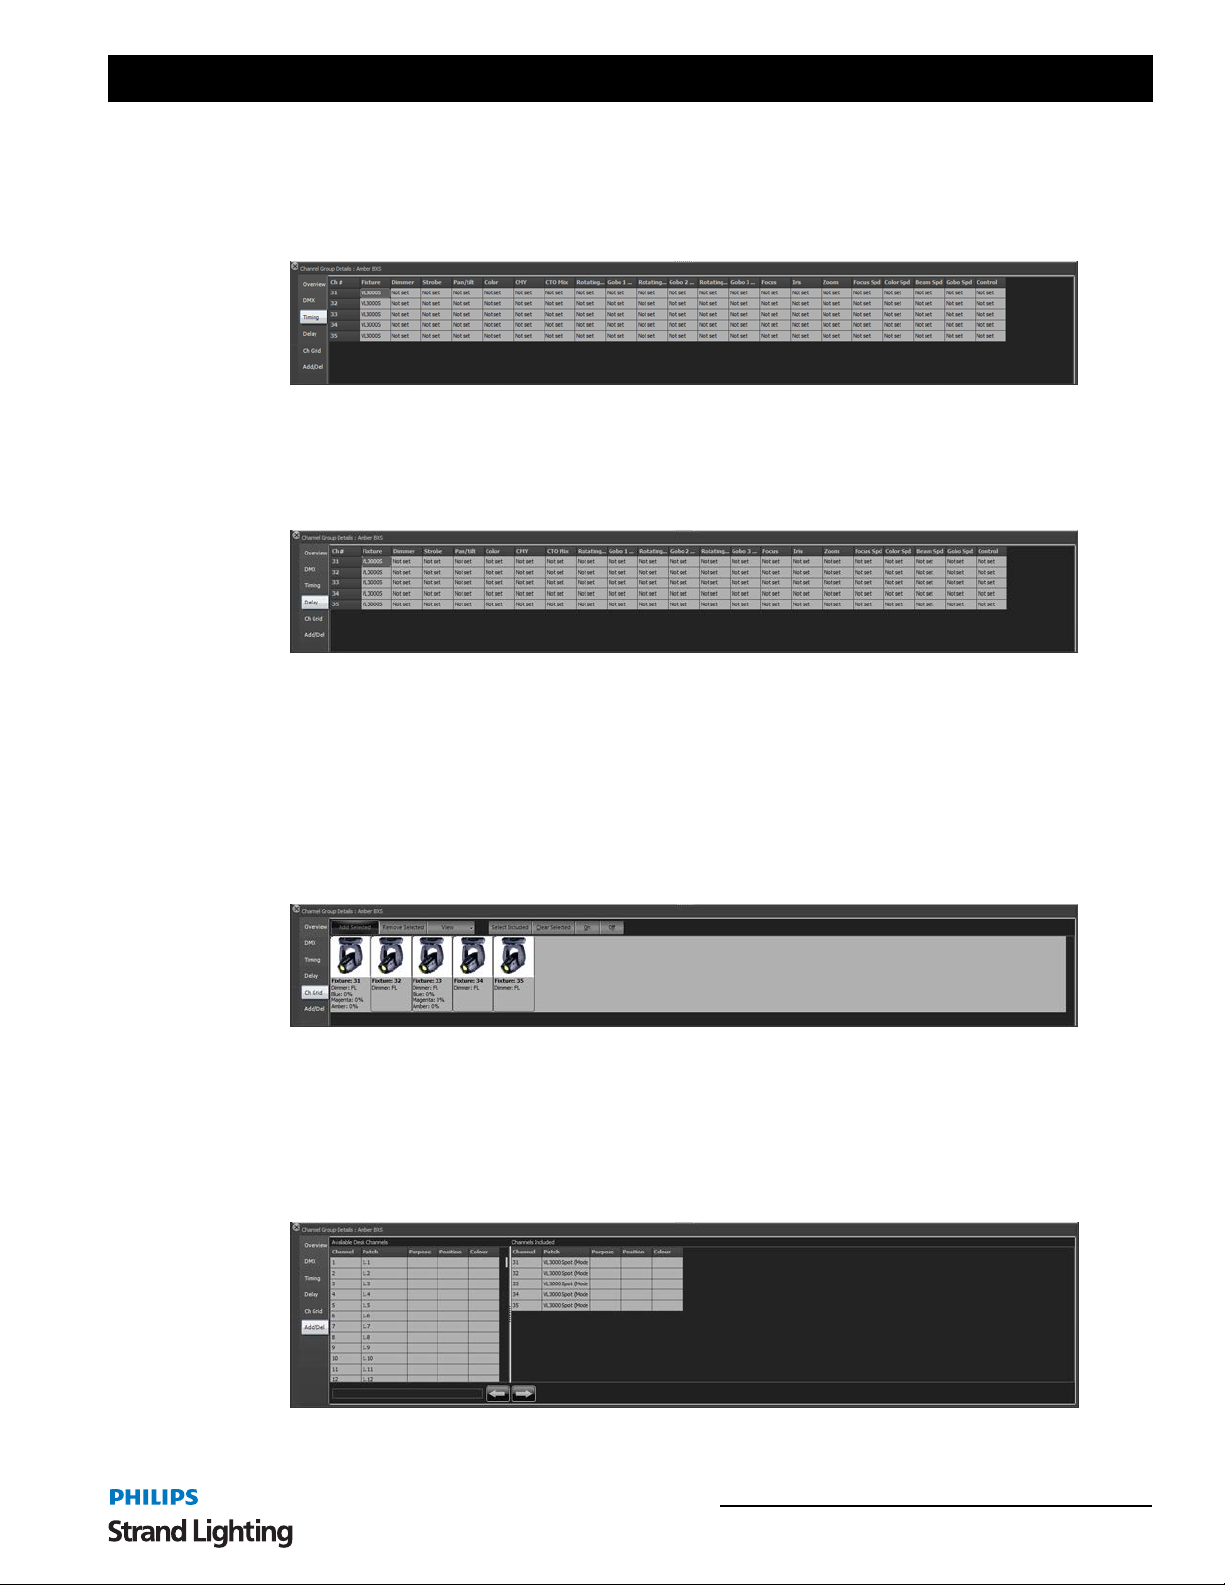
NEO Lighting Control Console
Timing
To set an individual fade tim e fo r any attri bute use the timi ng tab to enter a ti me v alue in seco nds. If t he value sh ows
"Not set" then no independent fade time exists. Any fade time set here will override the channel fade time and the
group fade time when the group value is set or the group applied.
Delay
To set an individual delay tim e fo r any attribute use the d elay tab to ent er a time val ue in seconds. If the valu e shows
"Not set" then no independent delay exists. Any delay set here will override the channel delay when the group value
is set or the group applied.
Channel Grid
The channel grid view displays the channels in the grid as they would appear in the channel display window. You can
switch between the various view modes used in the main channel display by clicking on the "View" menu - this
includes expanded, compact and Classic views. In the same view menu you can choose to display only the chan nels
currently in the group or all channels in the system. If all channels are shown then the ones not currently included in
the group will be display with a light grayed text.
In this view selected channels can be removed by clicking on the "Remove Selected" button and if all system
channels are shown you can add selected channels using the "Add Selected" button.
Matrix
Use the matrix view to work with the channels in the group as they are laid out in the pre-defined matrix. For more
information about using this view see the section "Matrix View" in the Cue list details section.
Add/Delete
The final tab provides convenient options for adding and removing channels from the grou p.
Groups Display 83
Page 86
User’s Manual
This window is divided into two halves. On the left hand side is a list of all the channels in the system. Addi tional
information such as purpose, positions etc are also provided to help identify channels. The right hand panel is the list
of channels that are included in the group.
Along the bottom of this tab are the add and remove buttons.
Remove
Channel Syntax
Select the desired channels in the left hand panel to add to the channel group and click on the add button (right arrow)
at the bottom of the page.
To remove select the desired channels from the right hand panel and click on the remove button (left arrow).
You can also use the channel syntax box to enter channels to be added. If text is entered into this edit box it will take
precedence over the selected channels when the add button is pressed.
NEO NOTES & TIPS: In any of the tabs you can enter data into multiple cells by highlighting the cells you want to
change and then typing the new value. As you type the value will only populate the first cell. Pressing the enter key
after you have finished typing will copy the value to all of the highlighted cells.
Add
Value
This is the current output state of the group and is a percentage value between 0 and 100%. By default this cell is
drawn as a graphical bar representing the value. Activating the edit control by clicking in the cell or starting to type a
value when the cell is current will cause the graphical bar to disappear and a standard edit box will appear. Once you
have finished editing the value the cell will return to the graphical bar.
This value can be set directly by entering a number int o the field or by selecting the row and using the mouse wheel
controls to raise or lower the value. The resulting output of each of the channels will be determined by the "max
value" for each of the attributes in the included channels
NEO NOTES & TIPS: If a submaster is assigned, the value will directly reflect its current position and will change
in real-time with the control.
Fade Time
The fade time (in seconds) specifies how long the system will take to go from t he current value to a new value.
Whenever the "Value" field is changed the fade time will affect how long it takes to reach this new value.
The fade time can be modified by clicking in the field and ch an ging th e value directly or by clicking on the up /do wn
buttons to the right of the field.
A channel fade time or an attribute fade time will override any value set in this field.
Behavior
A channel group can behave in one of six ways when setting the actual output values. To change the behavior of a
group select the desired option from the drop down menu accessed by clicking o n the small arrow to the right o f the
field.
Override (LTP) - Also known as "Latest Takes Precedence". This is the default behavior of channel groups. This
behavior will apply the channel levels set in the group to output channels and take over control of that channel. As
soon as something else sets the channel value the group value will get overridden. Likewise as soon as the group
value changes it will override the existing values set in the channel.
Build - The values set in the channel group will be added to the current output value of the channels.
84 Software Configuration
Page 87
NEO Lighting Control Console
Exclusive - All other channels will be set to zero and only the channels in this group will be applied.
Highest Takes Precedence (HTP) - When a group value is set with HTP behavior the output on the channel is
determined by what has a higher value. If the value set in the group is higher than the value in the channel then the
group will control the channel. If the value in the channel is higher than the group value it will remain unchanged.
Independent - Channels in an "Independent" group will override all other requests to modify the channel value. As
soon as the group level is above 0, channels within this group will be controlled by the group values.
Inhibit - With an inhibit group the value masters all channels that are in the group. The output value of the channel
will be scaled by the value of the inhibit group it belongs to.
Hue LTP - This behavior type will only work with fixtures that have color mixing capabilities. As the sub master is
raised from 0 to 100% the output generated will be a position in the HUE color space between 0 and 360 degrees.
Subtract - Similar to the "Build" behavior this option will subtract the value set by the group from the output value of
the channel and attributes.
Submaster
To assign a submaster to a channel group, enter a valid submaster number (1 - 100,000 ) into this field. Once entered,
the submaster will automatically be assigned and become active.
Submasters are split into pages of up to 100 possible submasters. The number of p ages and the number of su bmaster
per page can be defined in the system properties. If the system is defined with 100 submasters per pag e then use the
page number as the first digit followed by the submaster you want to assign. To access the submasters the first page
(page 0) simply enter the number between 1 and 100. For the second page (page 1) ent er submasters 1 01 through to
200.
NEO NOTES & TIPS: The value of the group will not change until the next time the submaster changes. To learn
how to use a submaster once it has been set up, see "Submaster Options" on page 155.
Selection Shortcut
The selection shortcut is a convenient way to select fixtures in the channel display by pressing a shortcut button. In
this operation only the channel numbers are used as the selection criteria. Nothing is changed in the group specifically the group value remains unchanged.
To assign a selection shortcut to a channel group , enter a valid shortcut number into this field. Once entered the
shortcut will automatically be assigned and become active. There are 100 shortcuts per page and 100 pages
(beginning at 0) of shortcuts. Use the page number as the first digit followed by the submaster you want to assign. To
access the submasters the first page (page 0) simply enter the number between 1 and 99 (note that shortcut 0 is
reserved). For the second page (page 1) enter submasters 100 through to 199.
Toggle Shortcut
A toggle shortcut can be thought of as a switch in the system that turns a lighting state on or off. When the assigned
shortcut is first pressed the channel group will be set to 100% (full) and the channels and attribu tes will go to their
respective values. Pressing the toggle shortcut again will cause the group to turn off (0 value).
Changing the value of the group between pressing the toggle shortcut will not chang e its beh a vio r. If for example the
group is turned on by a toggle shortcut and the value to then changed to 40% clicking the toggle shortcut will cause
the group to turn off.
T o assign a toggle shortcut to a channel group, enter a valid shortcut number into this field. Once entered the shortcut
will automatically be assigned and become active.
Apply Shortcut
Pressing an apply shortcut will apply the groups setting to the channels and fixtures using the fad e time set in the
group. When using apply shortcuts the ability to set individual attributes and properties to an "Off" state is very
important. For example, if you setup a channel group with pan and tilt information set for each fixture and have all
other attributes (dimmer, color, etc) set to off then channel groups become a position preset that can be called up at
Groups Display 85
Page 88
User’s Manual
any time. This is a useful feature for both on-the-fly control or when pre-programming shows away from the final
venue.
T o assign an apply shortcut to a channel group, enter a valid shortcut number int o thi s field. Once entered the shortcut
will automatically be assigned and become active.
To learn how to use a shortcut once it ha s been set up, see "Shortcut Options" on page 161.
Snap Attributes
When "Snap Attributes" is checked, intelligent fixtures attributes will immediately snap to their maximum val ue as
soon as the group value is raised above 0%.
If this option is not selected the value of the properties will operate the same as the dimmer and will rise and fall as a
proportion of the group value.
12. Options
Add Selected Groups to a Cue
To create a new cue or add groups to an existing cue:
1) Select the groups you want to add to the cue by click ing on the row to highlight it. Use the shift or control
key to select multiple groups.
2) Click on the options button and from the resulting drop down menu select "Add selected groups to cue".
3) The "cue selection" dialog will po p up to select the cue into which you want to add the group. Set the "cue
list" and "cue" number that you want to add the channels to.
4) If you want to add a short description to the cue being created, enter this into the field provided.
5) Select "OK" to complete this operation.
NEO NOTES & TIPS: The "cue selection" dialog will default to the last selected cue list and the next available
(integer) cue number.
To cancel the operation and return to the channel window click on the "Cancel" button.
Add Active Groups to a Cue
This operation will work exactly as the above option with active groups (groups with a value above zero) added to the
cue rather than selected.
Snapshot When Adding Groups
Toggle the "Snapshot when adding groups" option to record the current channel state in to all newly added groups.
Select Active Button
This button serves several functions. By clicking on the left hand side of the button will select all of the active
channel groups. Once selected you can use the mouse wheel to raise or lower all of the values.
Clicking on the drop down right side of the button will pop up a menu with furthe r options.
Select All / Unselect All
To select all of the groups click on the "Select All" menu option.
To unselect all of the currently selected groups click on the "Unselect All" menu item.
Select Inactive
Click on "Select Inactive" to select all of the groups where the value is currently 0%.
Sorting
You can sort the channel groups grid by any of the columns by simply clickin g on the column header. Clicking a
second time will reverse the sort order of the selected column.
86 Software Configuration
Page 89
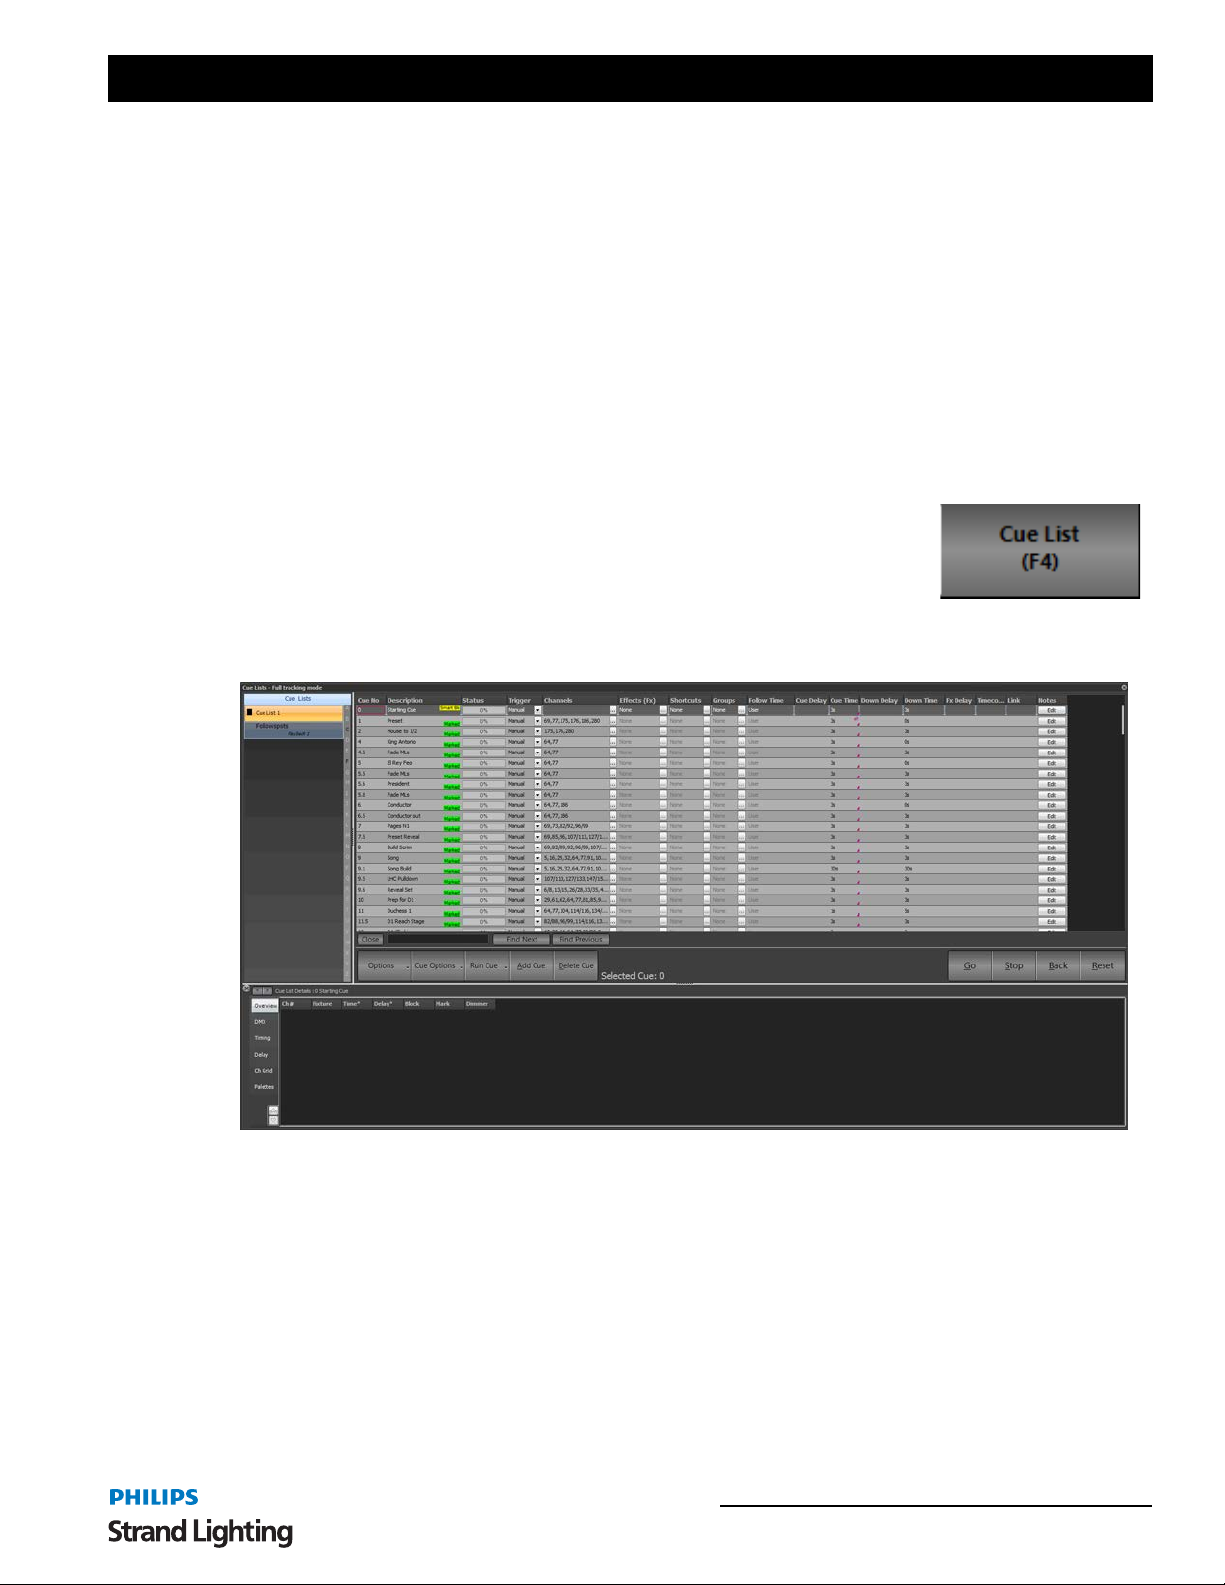
NEO Lighting Control Console
The column used to sort the channel groups will be indicated by a small triangle to the right of the column name.
Filters
Use the "Show All Groups" button to select the filter m ode you wan t. To make it easier to manage a large number of
channel groups you can turn off different groups by what shortcuts and submasters are assigned. The current filter
being applied will be shown in the button title.
Print Channel Groups
Click on the "Print" button to print out the channel groups in this show.
A drop down menu can be accessed by clicking on the right of this button. The resulting menu will provide access to
a preview window and the printer setting control.
The drop down menu also provides the ability to import and export the channel group list to a standard comma
separated (CSV) file format.
13. Cue List Display / Editor
T o access the cue list editor click on the "Cue List Editor" button on the Command Line interface window or press F4
on your keyboard.
Shows consist traditionally of a list of cues each of which contains a defined lighting state and/or effect sequence. A
cue can be considered any point in a live show when a signal is given for a lighting change to take place. When a cue
is triggered, the lighting state becomes active and channels attached to the cue will be set to their preset levels.
14. Cue Lists
NEO provides the ability to create multiple cue lists to help manage and run complex shows. A "cue list" is a way to
collect a number of cues and assign a name or short description.
Examples of how cue lists can be used include;
• Separate different "Acts" within a show.
• Manage a number of shows all runni ng in a si ngle venue.
• Create separate shows for a number of songs likely to play in a concert or venue.
Cue List Display / Editor 87
Page 90
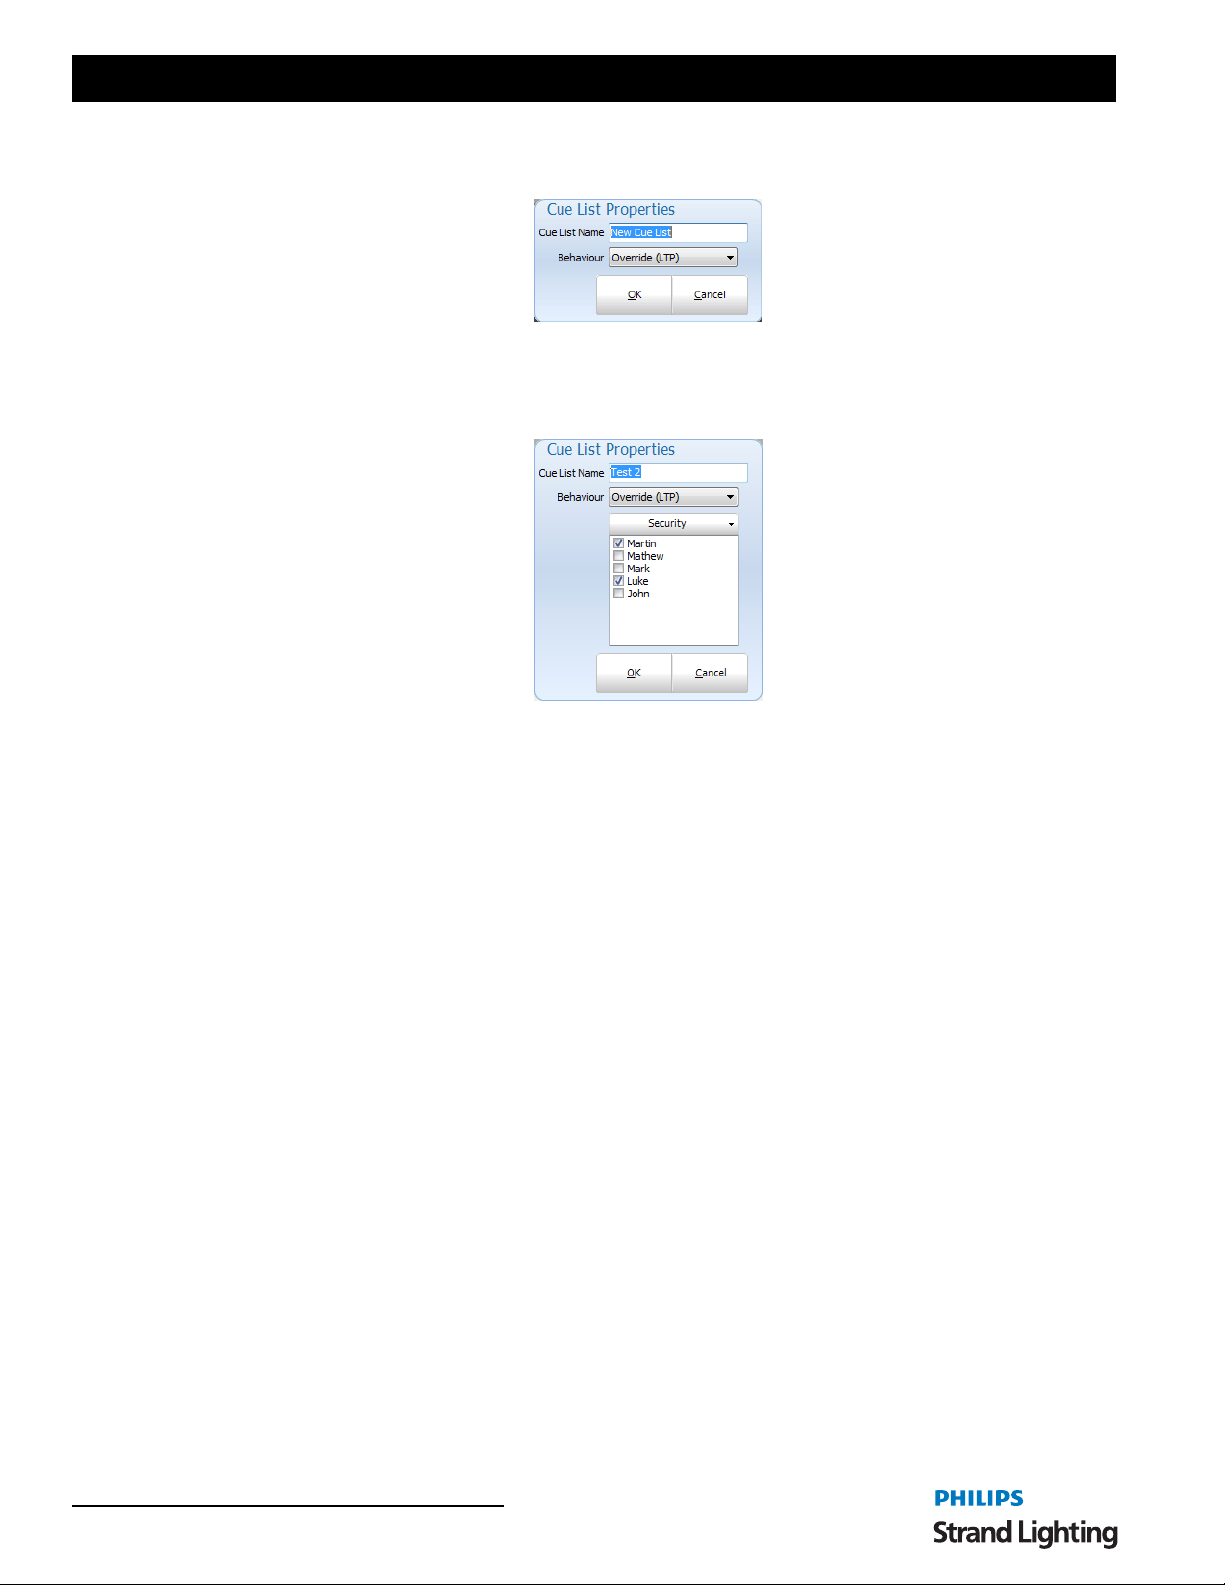
User’s Manual
T o create a new cue list click on the "Options" drop down menu and select "Create a new Cue List" from the resulting
options. A dialog will appear titled "Create New Cue List".
Enter the name of the cue list you want to create and click "OK" to continue.
To change the name, right click on the cue list name and select "Edit Cue List Name". A dialog will appear that is
used to not only set the name nut also change the behavior of the cue list during playback.
Behavior
Each cue list can be assigned a behavior type that is used when the cue list is played back. By default this is set to
Latest T akes Precedence (LTP) however you can change this to Build, Highest Takes Precedence (HTP) or Exclusive.
LTP is also called "override" in the channel groups as the output of this behavior will override whatever the channel is
currently set to and apply the new value.
The behavior set by this option will result in playback of the cue list following the same rules as the behavior set by
channel groups. See "Behavior" on page 213 for further details.
Cue List Security
If you have user security enabled then a security option will be visible. Click on the security button to open the
security list. This is a list of users in the system with a check box indicating if that user can modify the cue list. Any
user can view and run a cue list but only those allowed can modify it. T o prevent a user from viewing or running a cue
list use the security options in the main User Security window found in the Op tions menu of the Command Line
interface.
To remove a cue list select the desired cue list from the list (Selected cue lists will be highlighted) then cli ck on the
"Options" drop down menu and select "Remove current cue list".
A confirmation box will prompt you to confirm t his operati on. If you are sure you want to d elete t he group, click the
"OK" button
Active vs. Selected Cue Lists
A selected cue list is the cue list you are currently editing. The name of the cue list is highlighted to identify that it is
selected. To select a different list simply click on the desired cue list name. The selected cue list is always the one
shown in the right hand panel of the window.
The active cue list refers to the play controls in the bottom right of the window. The active cue list is the cue list
currently loaded into this master playback and is identified by the green triangle to the left of the name. The currently
active cue within the list is also highlighted in the same color if that cue list is showing.
88 Software Configuration
Page 91
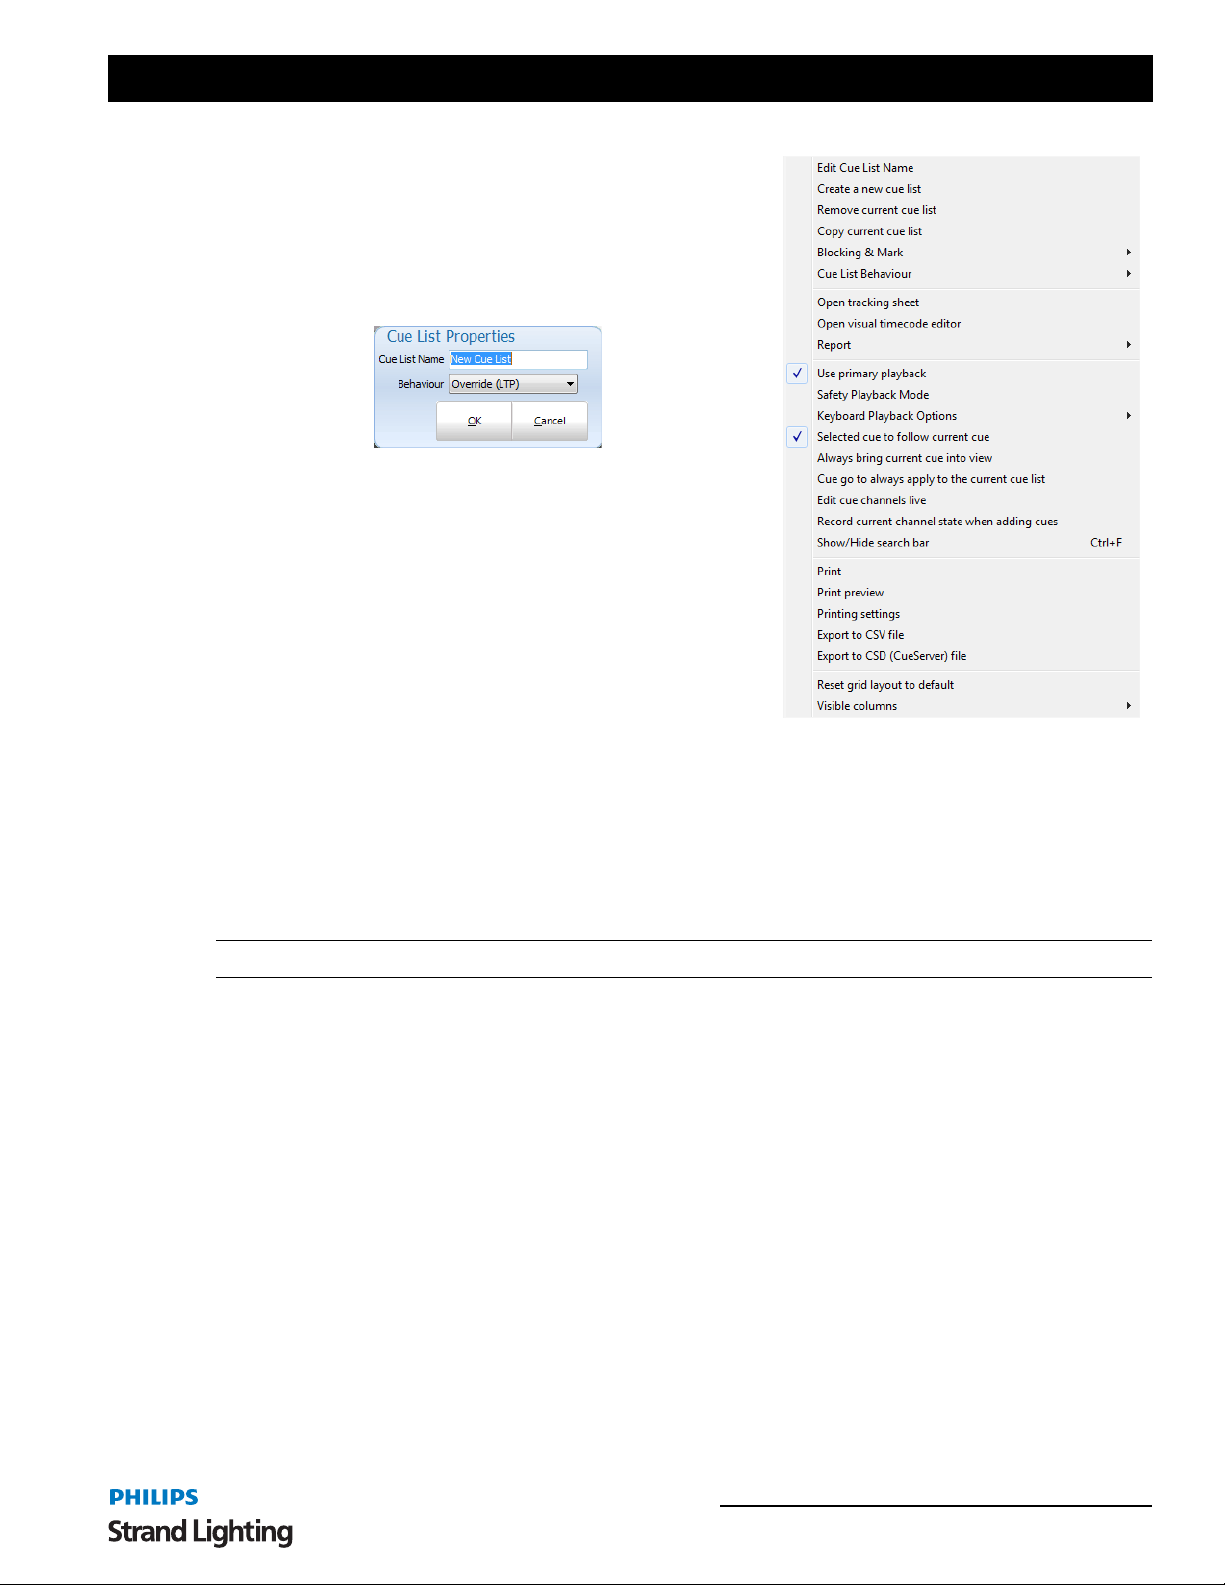
NEO Lighting Control Console
Cue List Options Menu
As well as creating and deleting cue lists the options menu has
several other functions to make working with cue lists easier.
Edit Cue List Name
This allows the user to change the name and behavior type to the
cue list.
Create a New Cue List
This allows the user to create a new cue list.
Remove Current Cue List
Will delete the selected cue list.
Copy Current Cue List
Use this option to make a duplicate copy of the selected cue list. The
new cue list will be named "Copy of" followed by the original cue
list name.
Blocking & Mark
Selecting the "Blocking & Mark" option in the menu will open up the submenu for globally sett ing the flags inside
the cue list.
Set "Block" on all cues - This option will check all blocking flags in the selected cue list.
Un-Set "Block" on all cues - This option will un-check all blocking flags in the selected cue list.
Set "Mark" on all cues - This option will check all mark flags in the selected cue list.
Un-Set "Mark" on all cues - This option will un-check all mark flags in the selected cue list.
Note: Must not be the active cue list.
Cue List Behavior
The cue list behavior sets defines how the cue list interacts with other parts of the software at the time of playback. By
default this is set to Latest Takes Precedence (LTP) however you can change this to Build and Highest Takes
Precedence (HTP). LTP is also called "override" in the channel groups as the output of this behavi or will override
whatever the channel is currently set to and apply the new value.
The behavior set by this option will result in playback of the cue list following the same rules as the behavior set by
channel groups. See “Behavior” on page 84.
Build will add the output from the cue list to whatever the output currently is set in the channels. HTP will only apply
the channel output from the cue list if that output is higher than what the channel is already outputting.
To set the behavior for the cue list select it from the sub menu from this option. The behavior will apply to all cues in
the cue list and across all playbacks that are using this cue list.
Cue Lists 89
Page 92
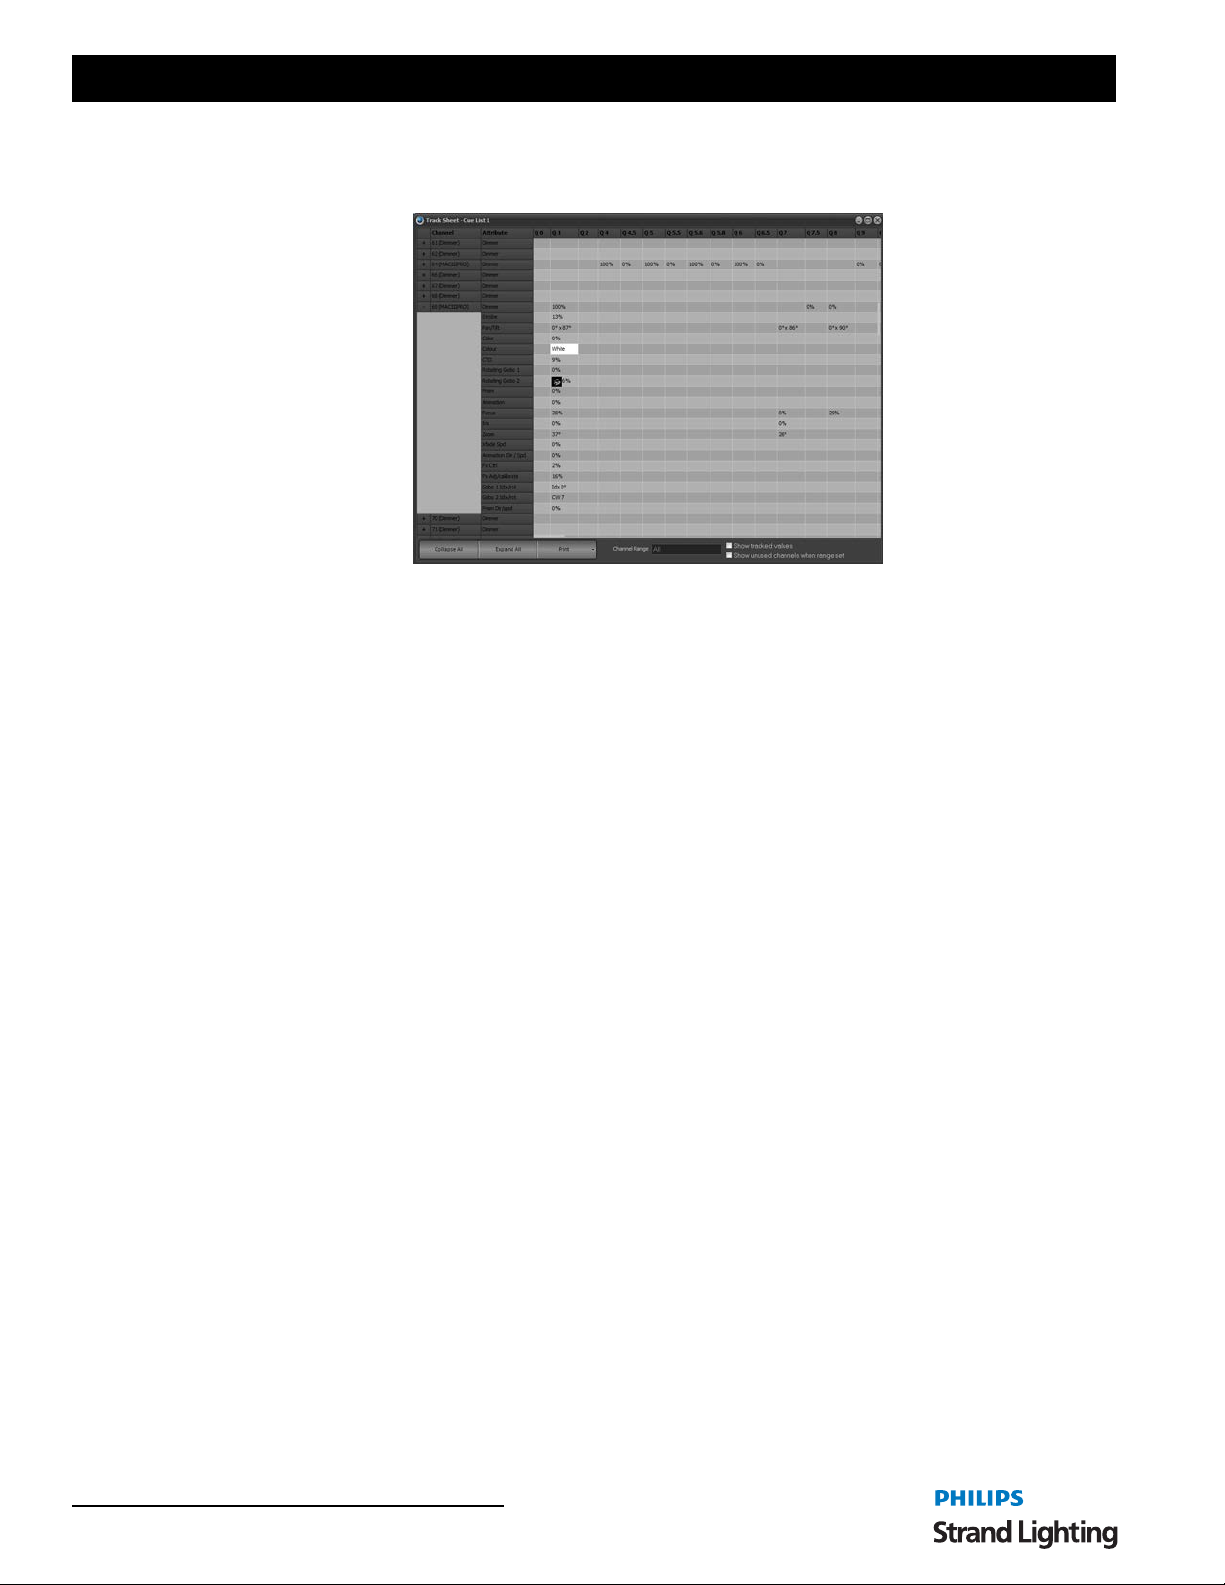
User’s Manual
Open Tracking Sheet
The tracking sheet is a convenient way to view how channels are changing between cues.
The view consists of a channels vs. cue grid. The channels used in the entire cue list are listed in each row while the
cues travel across the columns of the grid as above.
If you have intelligent fixtures recorded into cue you will see a small "+" sign at the start of the row. This indicates
that there is more information about the channel available. When you click on the "+" symbol the rows will expand to
show all of the attributes for that fixture and what values are set for each cue. After clicking on this the "+" will
become a "-" and can be used to collapse the view back down to the dimmer only.
The "Collapse All" and "Expand All" buttons at the bottom of the window can be used to open and close all if the
intelligent fixtures listed.
The "Channel Range" edit box can be used to enter a range of channels that will filter the view. You can use the
standard channel select syntax to filter the channels shown.
For example, 1/20-7 this will show only channels 1 thought to 20 except 7.
Check the "Show tracked values" to view what the channels will be in each cue if full tracking is turned on in the
system properties.
Use the "Show unused channels when range set" to view all of the channels regardless of if they are used by the cue
list. By default the track sheet will only display the channels that are used in the cue list to help minimize the
information presented. This however limits the ability to add channels t hat are not u sed. By tryi ng this option on and
applying a "Channel range" you can add a channel to the cue list by simply entering a value into the appropriate
column.
Printing & Exporting - Pressing the print button will print the track sheet to the selected printer. Use the drop down
menu to the right of this button to change the pri nt settings or preview the output. An Export option will save the
contents of the track sheet to a comma separated file format (CSV).
90 Software Configuration
Page 93
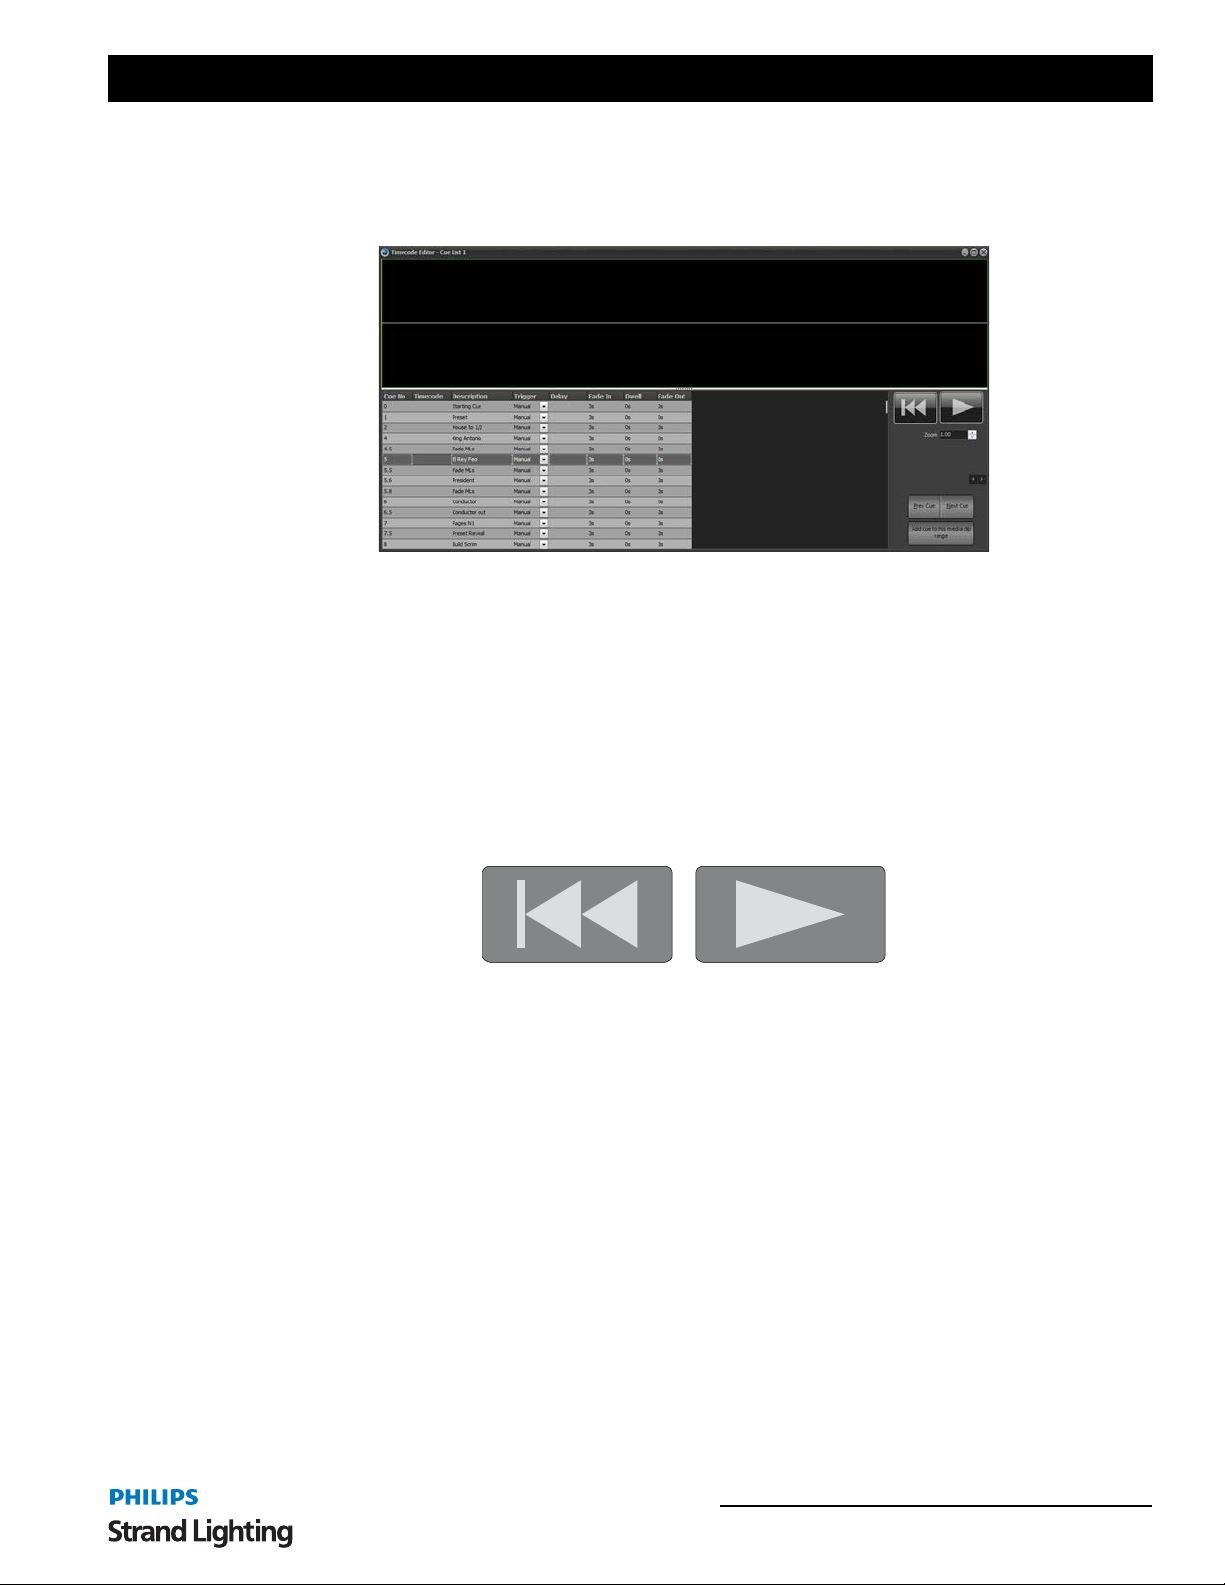
NEO Lighting Control Console
15. Open Visual Timecode Editor
To make working with timecoded shows NEO provides an advanced visual editor. For each timecoded section of the
cue list can be viewed as an audio waveform with each timecode point represented by a line in the display.
To use this window select any cue that contains a media track. You will see a "working…" dialog while th e softw are
builds the waveform display. Once this has been displayed it will only be regenerated if a different media track is
selected.
NEO will automatically calculate the first and last cue for this section of the show based on the media track. The first
cue that contains this media is shown on the right hand panel as with the last cue with this media.
The "Next Cue" and "Prev Cue" buttons can be used to traverse through the cue list. You can also use the keyboard
shortcut of ALT-P and ALT-N.
For each of the cues in the range selected a gray line will be shown representing each of the timecode points. Note
that these will only show if the trigger is set to "Timecode".
At any time you can play the media using the playback buttons at the top of the right hand panel.
Once the media is playing you can pause the track and move the play head by using the mouse to click and drag the
yellow line. As you move the line the audio is herd so that you can precisely work out the correct point to place a
timecode point.
To move a timecode point v isually select the corresponding cue you want to edit. The line representing this cue will
be highlighted in green and can be dragged using you r mou se left and right along the timelin e. As the po sitio n of the
line changes the timecode value shown in the grid will also change.
To insert a new timecode point ri ght click on the posi tion in the wavefo rm display and select "Insert new cue here"
from the resulting popup menu.
Open Visual Timecode Editor 91
Page 94
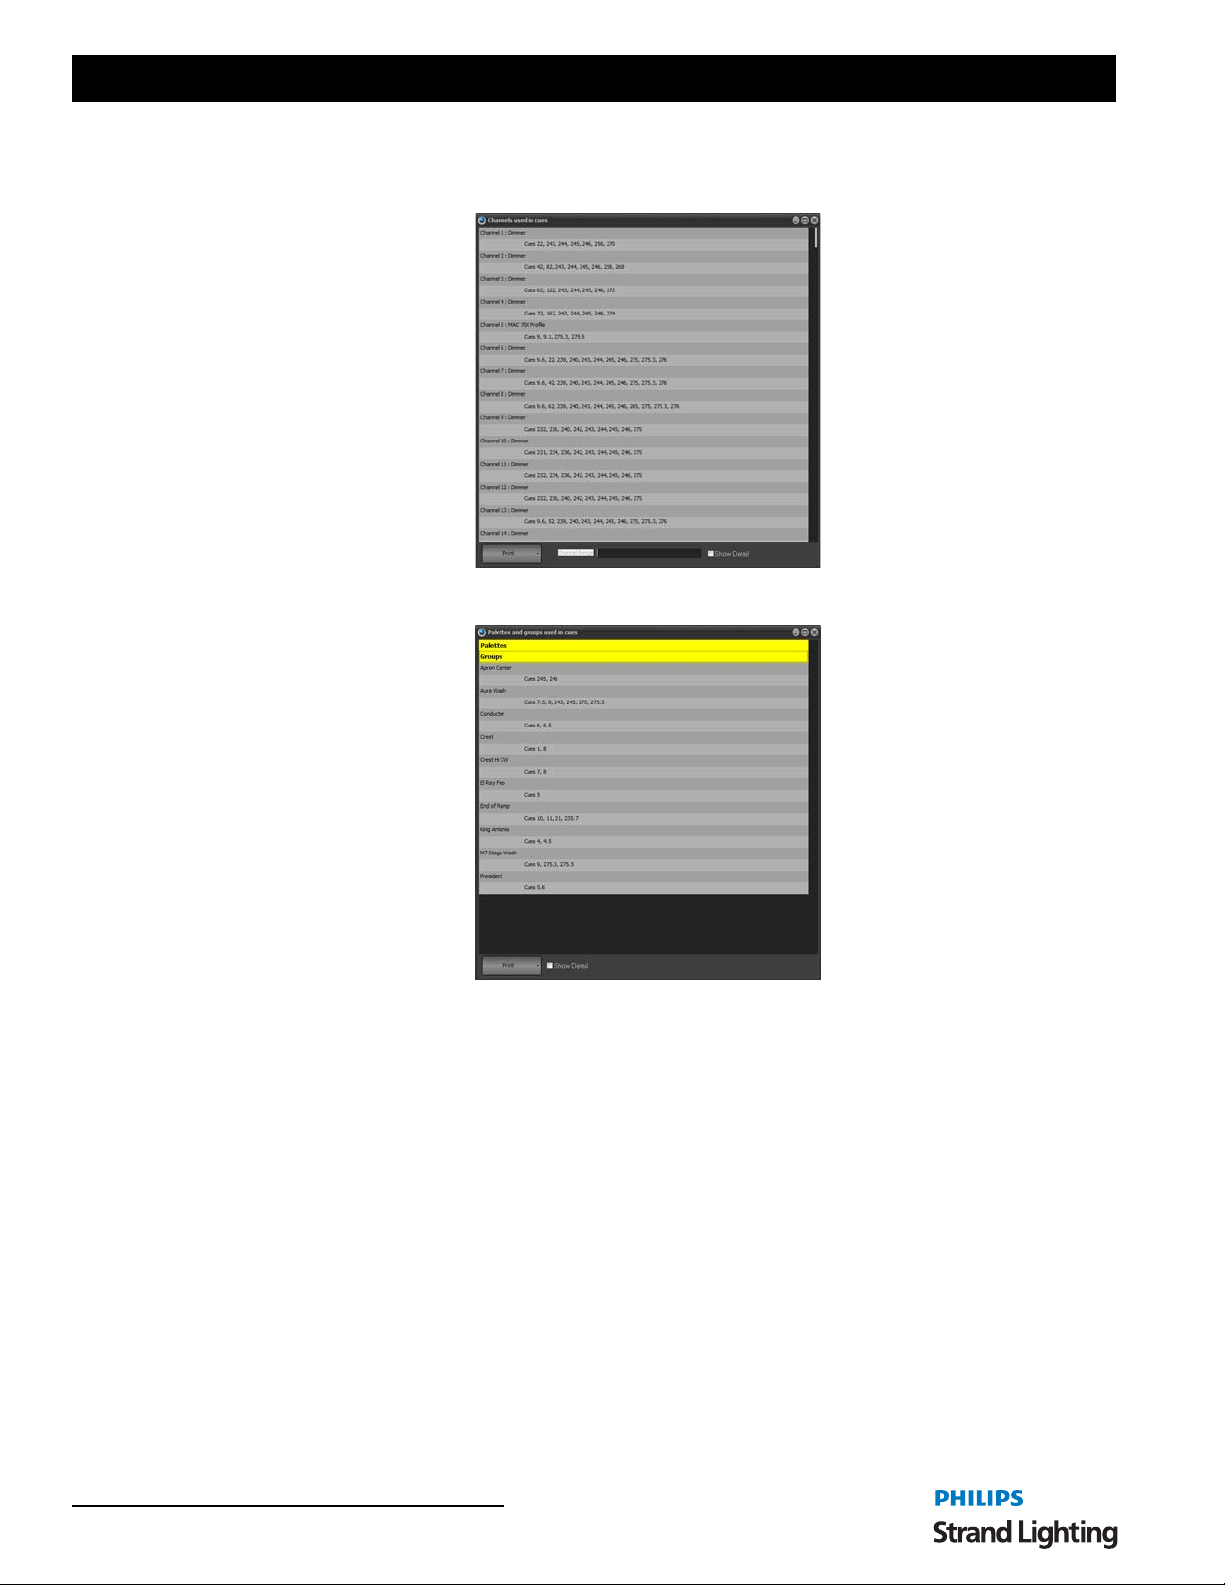
User’s Manual
Report
Channels Used In Cues - shows a list of cues and the channels stored in them.
Palettes / Groups Used In Cues - shows a list of Palette and then Groups with the cues that reference them.
Use Primary Playback
Check this option if you want that master playback on the external playback wing to be used to control the master cue
list playback.
You can also access this using a programmable keyboard in the same way as shortcuts. The key sequence to run this
special playback:
• Cue Go: control - q follo wed by "A1"
• Cue Back: control - q fol lowed by "Z1"
Safety Playback Mode
Safety playback mode is designed to prevent accidental triggering of cues during your show. When this option is
checked the "GO" button will not immediately execute the next cue when an existing cue is running or the cue is set
to follow on.
If the previous cue is still running or the next cue is setup to be a follo w on cue the "GO" button will be re-labeled
"Enable". Clicking on the "Enable" will change it to "GO" and a second press will force the cue to be executed.
This mode ensures that the button must be pressed twice if the use want s to skip over the normal execution rate
programmed.
92 Software Configuration
Page 95

NEO Lighting Control Console
Keyboard Playback Options
Use the submenu under this option to turn on various keyboard options for running cues.
Use "Space bar" for cue go - With this option on pressing the space bar on your keyboard will execute a cue go.
This will only work if the cue list window is currently active.
Use numeric "Enter" for cue go - With this option on pressing the enter key on the numeric section of your
keyboard will execute a cue go. This will work globally to the software - it does not matter what window is active for
cue execution.
Use numeric "+/-" for cue go/back - With this option on pressing the plus (+) or minus (-) key on the numeric
section of your keyboard will execute a cue go and a cue back. This will work globally to the software - it does not
matter what window is active for cue execution.
Use right "ALT" for cue go - With this option on pressing the right ALT key on the keyboard will execute a cue go.
This will work globally to the software - it does not matter what window is active for cue execution.
Selected Cue to Follow Current Cue
This option is useful if you have the cue list channel detail window open or docked to the cue list. As the cue list is
advanced the current selected cue will automatically follow the cue currently active on stage. The channel detail,
effects and groups window will automatically advance to show the information for that cue.
Cue Go to Always Apply to the Current Cue List
When this option is enabled pressing the GO button will always run the current cue list even if the current cue list is
not the active cue list. The active cue list will automatically be switched to the current cue list.
Edit Cue Channels Live
With this option turned on any changes made to the channels in the current live cue will automatically be reflected on
stage. With this option turned off (default) the cue list channel detail window is a blind editor meaning that changes
are not seen until the next time the cue runs.
Record Current Channel State When Adding Cues
Check this option to record the currently active channels in to the cue when a new cue is added from the button on
this window.
Show / Hide Search Bar
Check this item to turn on or off the search bar at the bottom of the cue list.
The print option will output the currently selected cue list to the selected printer.
Print Preview
Select the preview option to open a window that will display the printed page. From this window you can choose to
print.
Printing Settings
This option will open the page setting for printing the cue list.
Export To CSV File
This feature will export the cue list data to a CSV formatted file.
Export to CSD (CUESERVER) File
This feature will export the cue list data to a CSD (CueServer) file format.
Open Visual Timecode Editor 93
Page 96
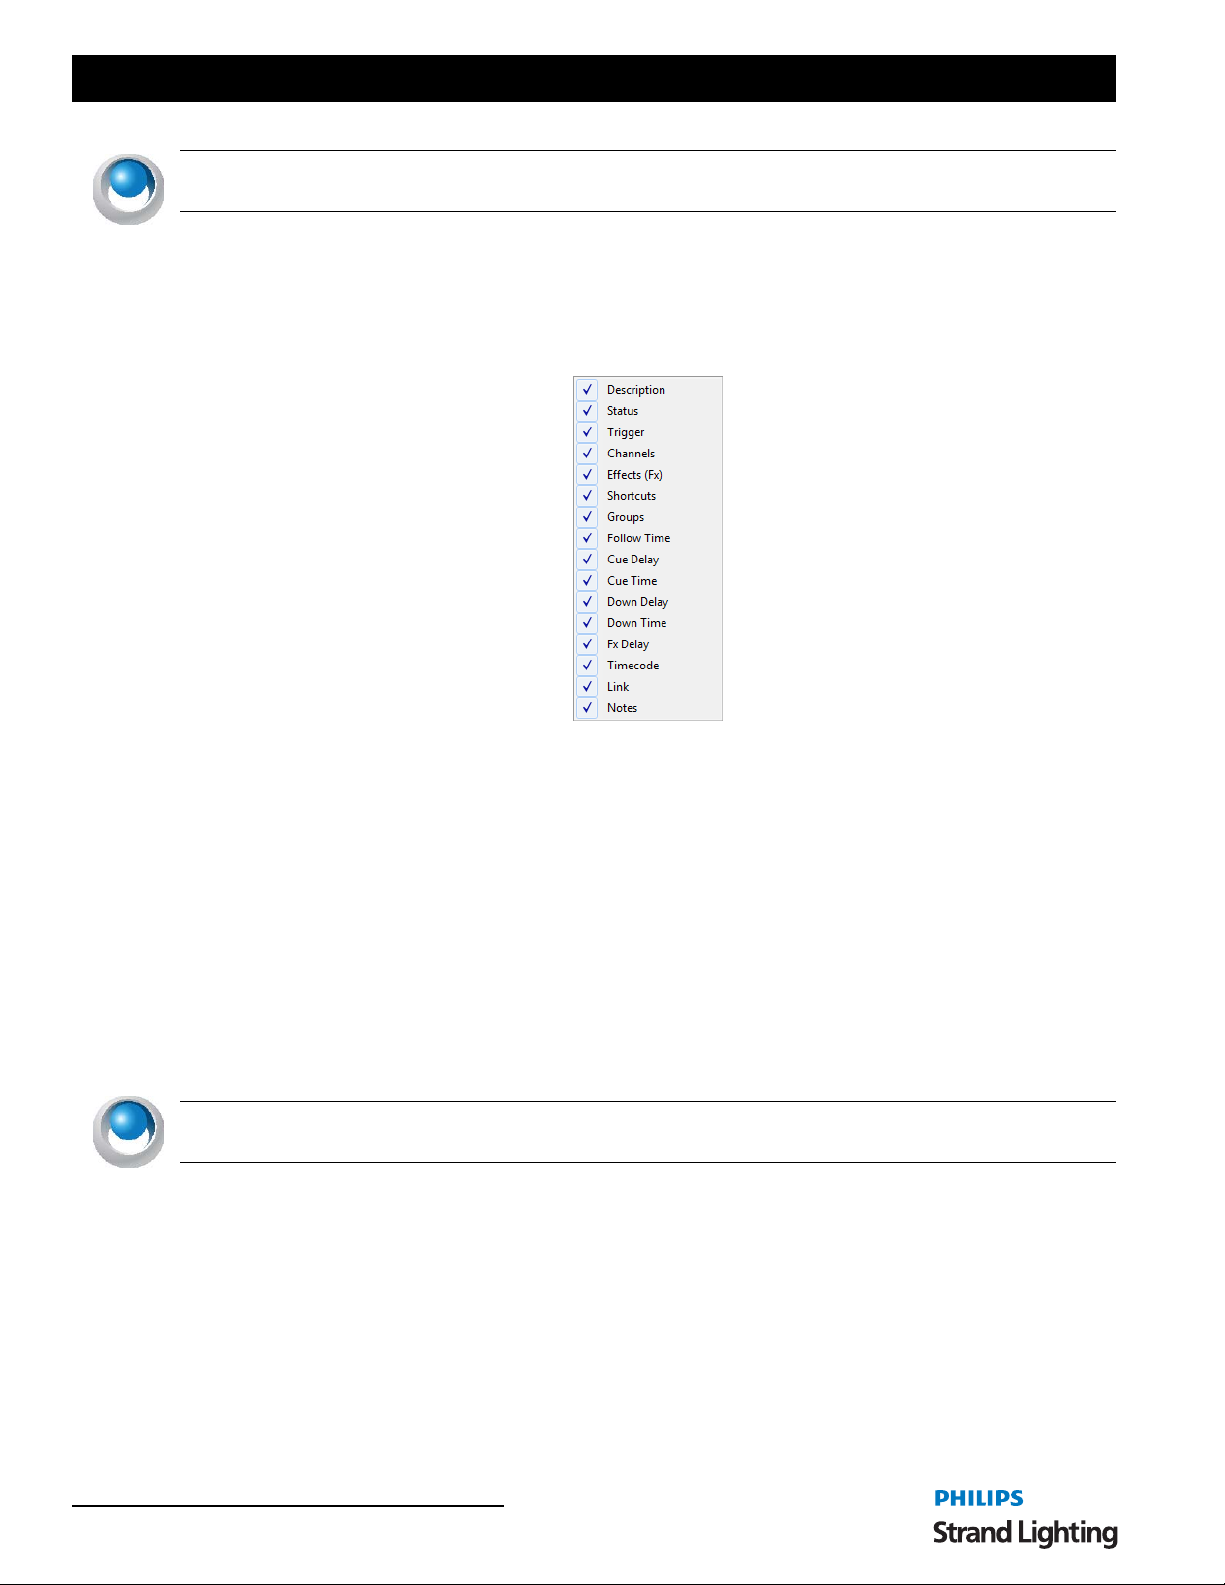
User’s Manual
NEO NOTES & TIPS: Point cues cannot be exported to a CSD file. Use the option in the cue menu to renumber as
whole cues before proceeding with export.
Reset Grid Layout to Default
If you have resized or moved columns in the cue list grid you can restore the default positions and size by selecting
this option.
Visible Columns
Selecting the "Visible Columns" option in the menu will open up th e submenu that will l ist all of t he colum ns in the
cue list window. Select each one to turn the column on or off in the grid.
Cue List
The "cue list" is a series of cues each numbered between 0.000 and 999999.999. The cue number determines the
default order that cue will be run; however, the strict order is determin ed by the "next cue" field.
To create a new cue:
1) Click the "Add Cue" butto n below the cue list editor.
2) The newly created cue will be added to the end of the list with a cue number one integer value above the last
cue e.g., if the last cue number was 2.35 then the newly created cue will be 3.00.
3) NEO will assign the "next cue" field to the first cue, thus creating a show that will automatically wrap
around. As the new cue is the last one in the sequence, NEO will also change the previous cue and set its
"next cue" value to the newly created cue.
NEO NOTES & TIPS: Double clicking on a cue will automatically make it the currently active cue and make this
cue list the currently active cue list. If a cue within this cue list is active then it will appear highlighted light green.
To remove a cue:
1) Select the cue from the cue list.
2) Click on the "Delete Cue" button.
3) A confirmation dialog will prompt you to confirm this operation.
94 Software Configuration
Page 97
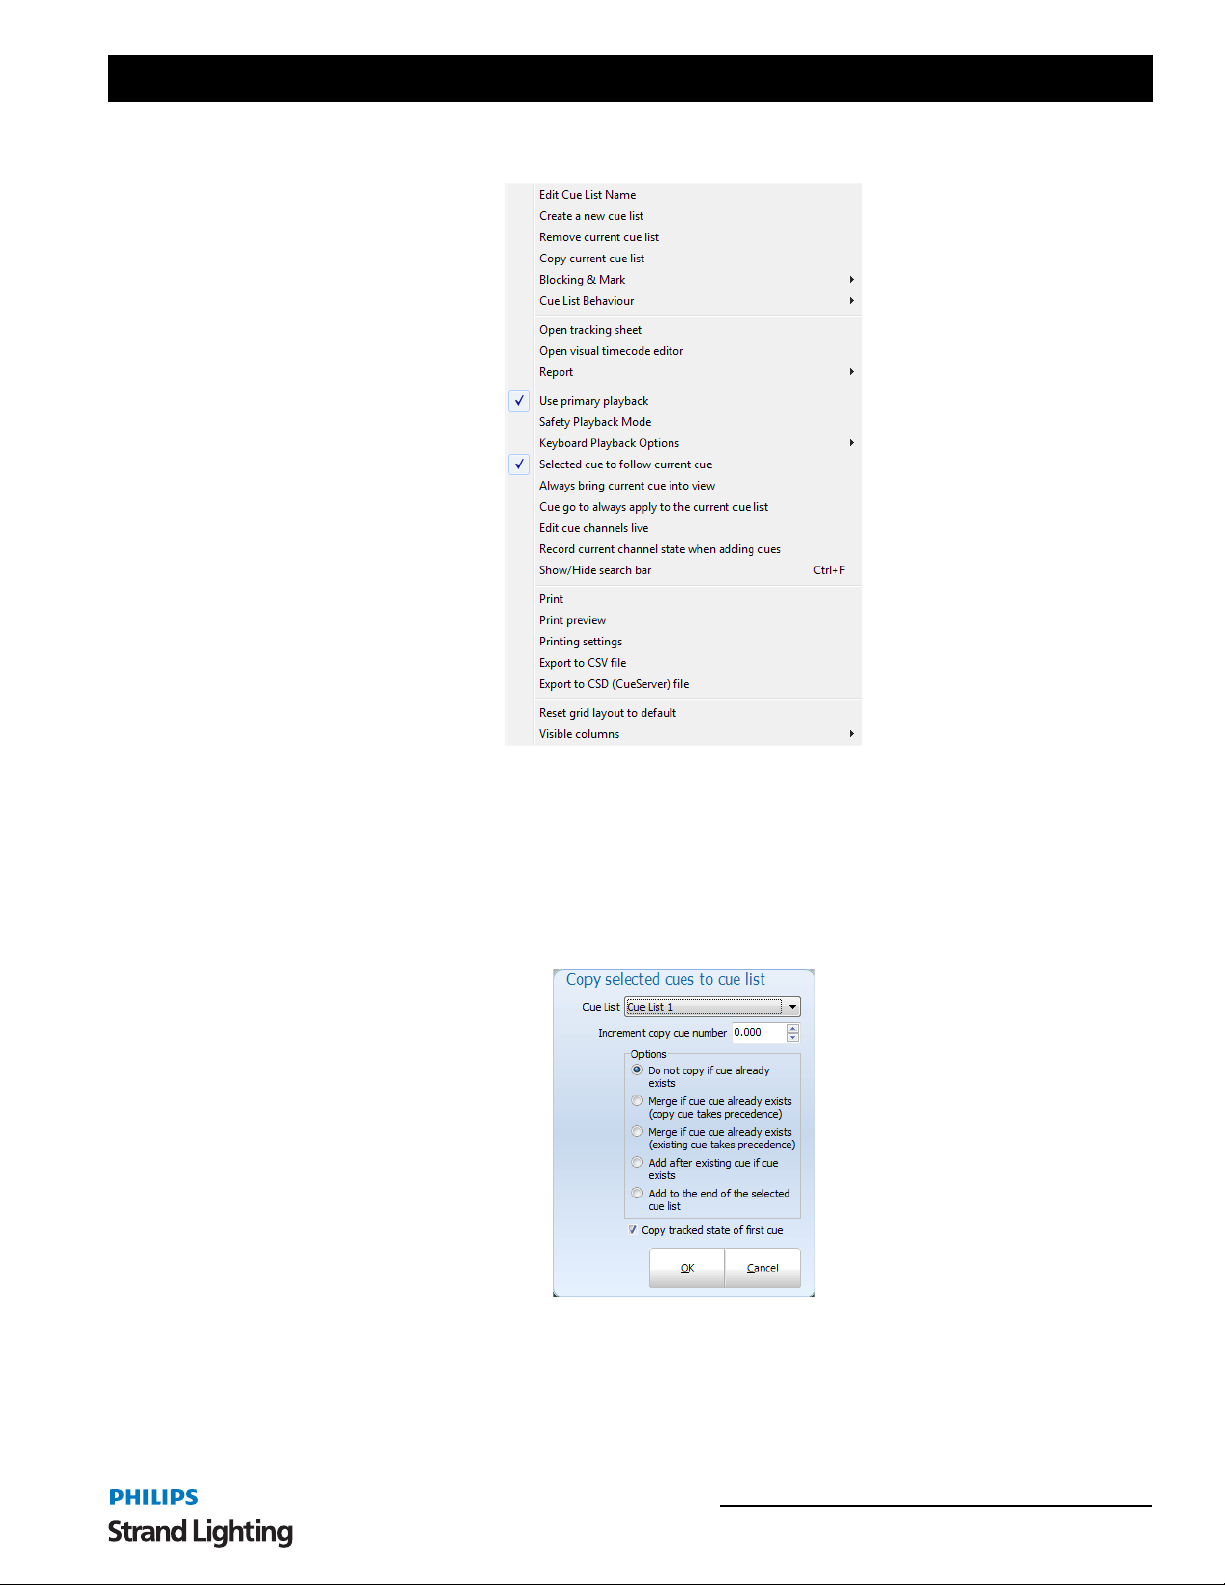
Cue Options
NEO Lighting Control Console
To assist with many tedious tasks th e "Cue Option s" drop d own menu p rovides several convenient op tions rel ated to
creating and managing cues.
Copy Selected Cue (Added to the End of the Cue List)
Selecting this will create a new cue at the end of the cue list. The cue number will be the next available integer value.
All of the properties of the current cue (channels, trigger, etc) will be copied from the cue at the position of your
mouse.
Copy Selected Cue to Another Cue List
Selecting this will create a new cue to the selected cue list. The shown dialogue box appears to give you options.
Insert a New Blank Cue Below
This option will create a new cue directly below the cue at the position of you mouse. The cue number will be exactly
half way between this cue and the next. The properties of the cue will be set to the system defaults.
Open Visual Timecode Editor 95
Page 98
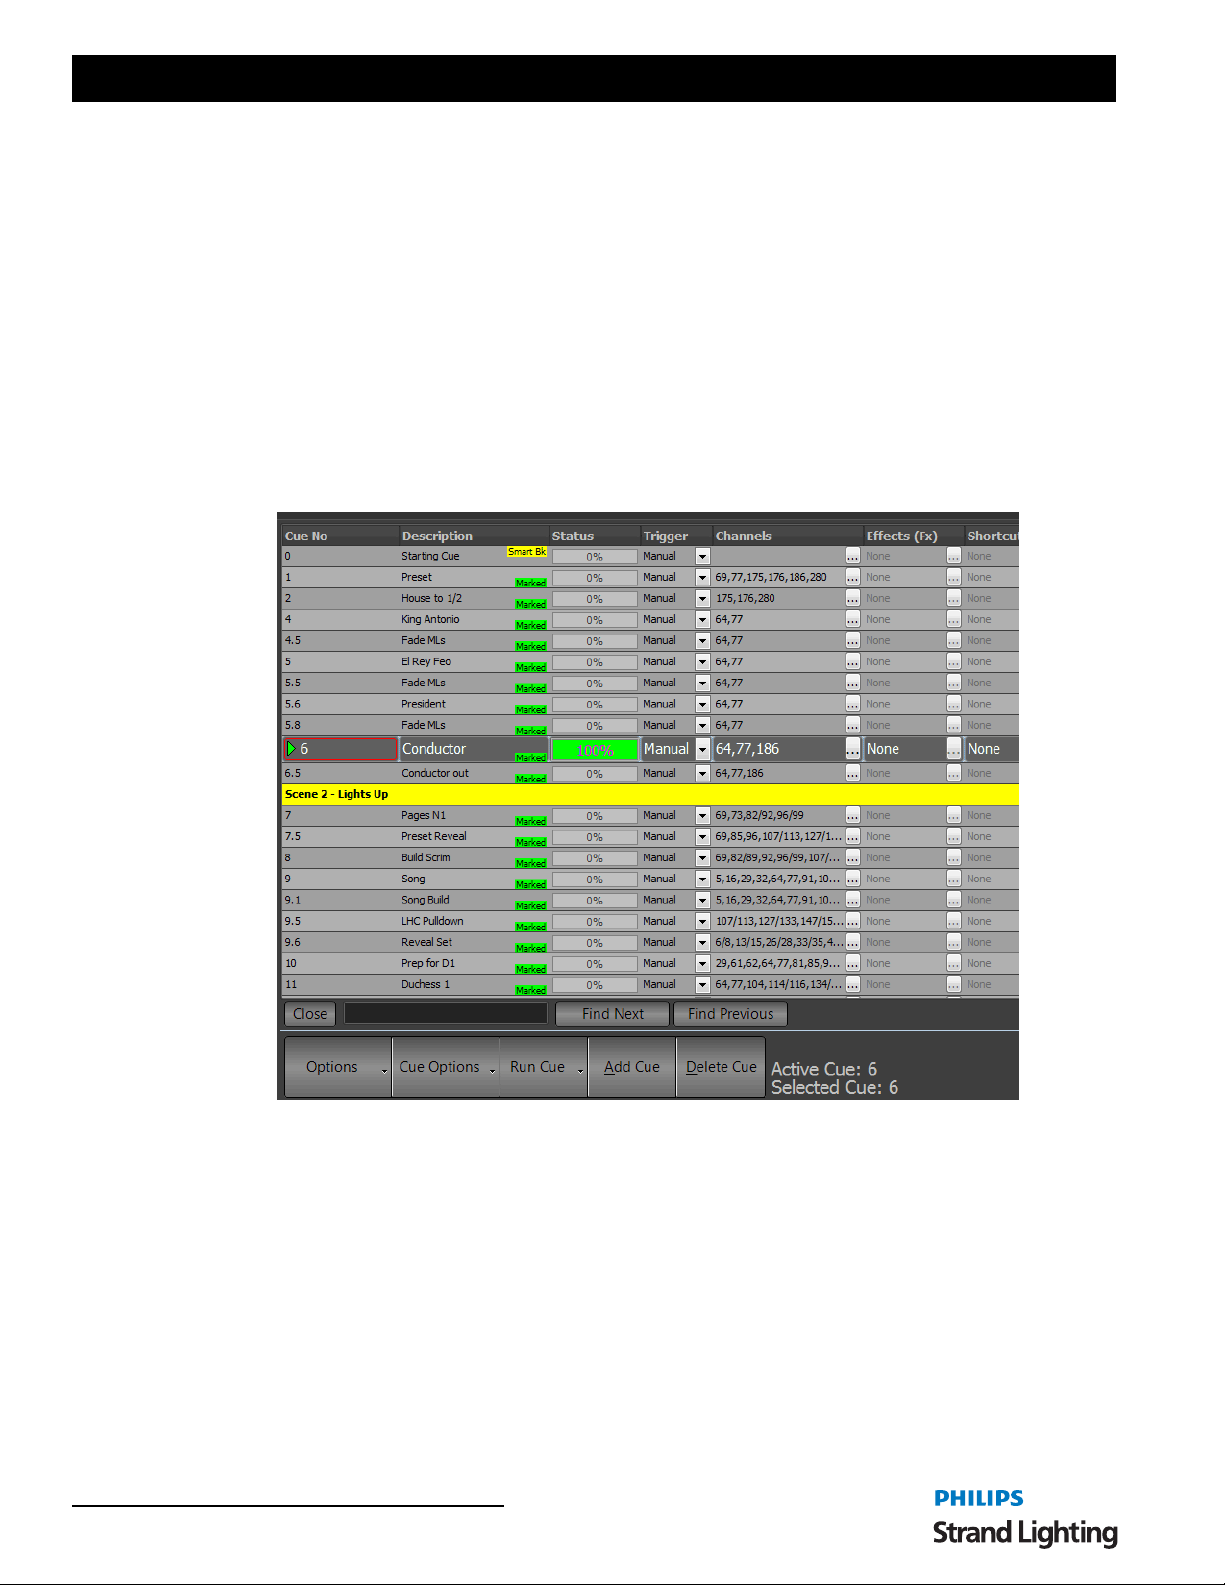
User’s Manual
Insert a New Cue Above (Copy This Cue)
This option will create a new cue above the current cue. The cue number will be half way between the previous cue
and the current cue. All of the properties (channels, trigger, etc) will be copied from the current cue to the new cue.
Insert a New Cue Below (Copy This Cue)
This option will create a new cue below the current cue. The cue number will be half way between the new cue and
the current cue. All of the properties (channels, trigger, etc) will be copied from the current cue to the new cue.
Insert a Scene Break Below This Cue
A scene break is a description only row that can be added to your cue list to help remember what is happening at this
point in the cue list. Scene breaks are not cues and do not execute any lighting operation. It is a convenient way to
label your cue list at key points and assist with cue list management .
After selecting this option the software will prompt you for the name of the scene you want to label. En ter the name
or description into the edit box provided and click "OK" to add the screen break. In the example below a scene break
has been added below cue 6.5.
Undo
Use the undo function (alternatively you can use control-z) to undo the last change made to the cue list. In the case of
the cue list channel detail window the undo command will revert back to the channel state when the cue was selected.
Open Cue Update History
The cue update history is a powerful system that remembers every state that has ever been recorded for this cue.
Whenever a cue is updated or changed the cue update history is added to. You can then use this window to try and
revert to a previous cue state.
96 Software Configuration
Page 99
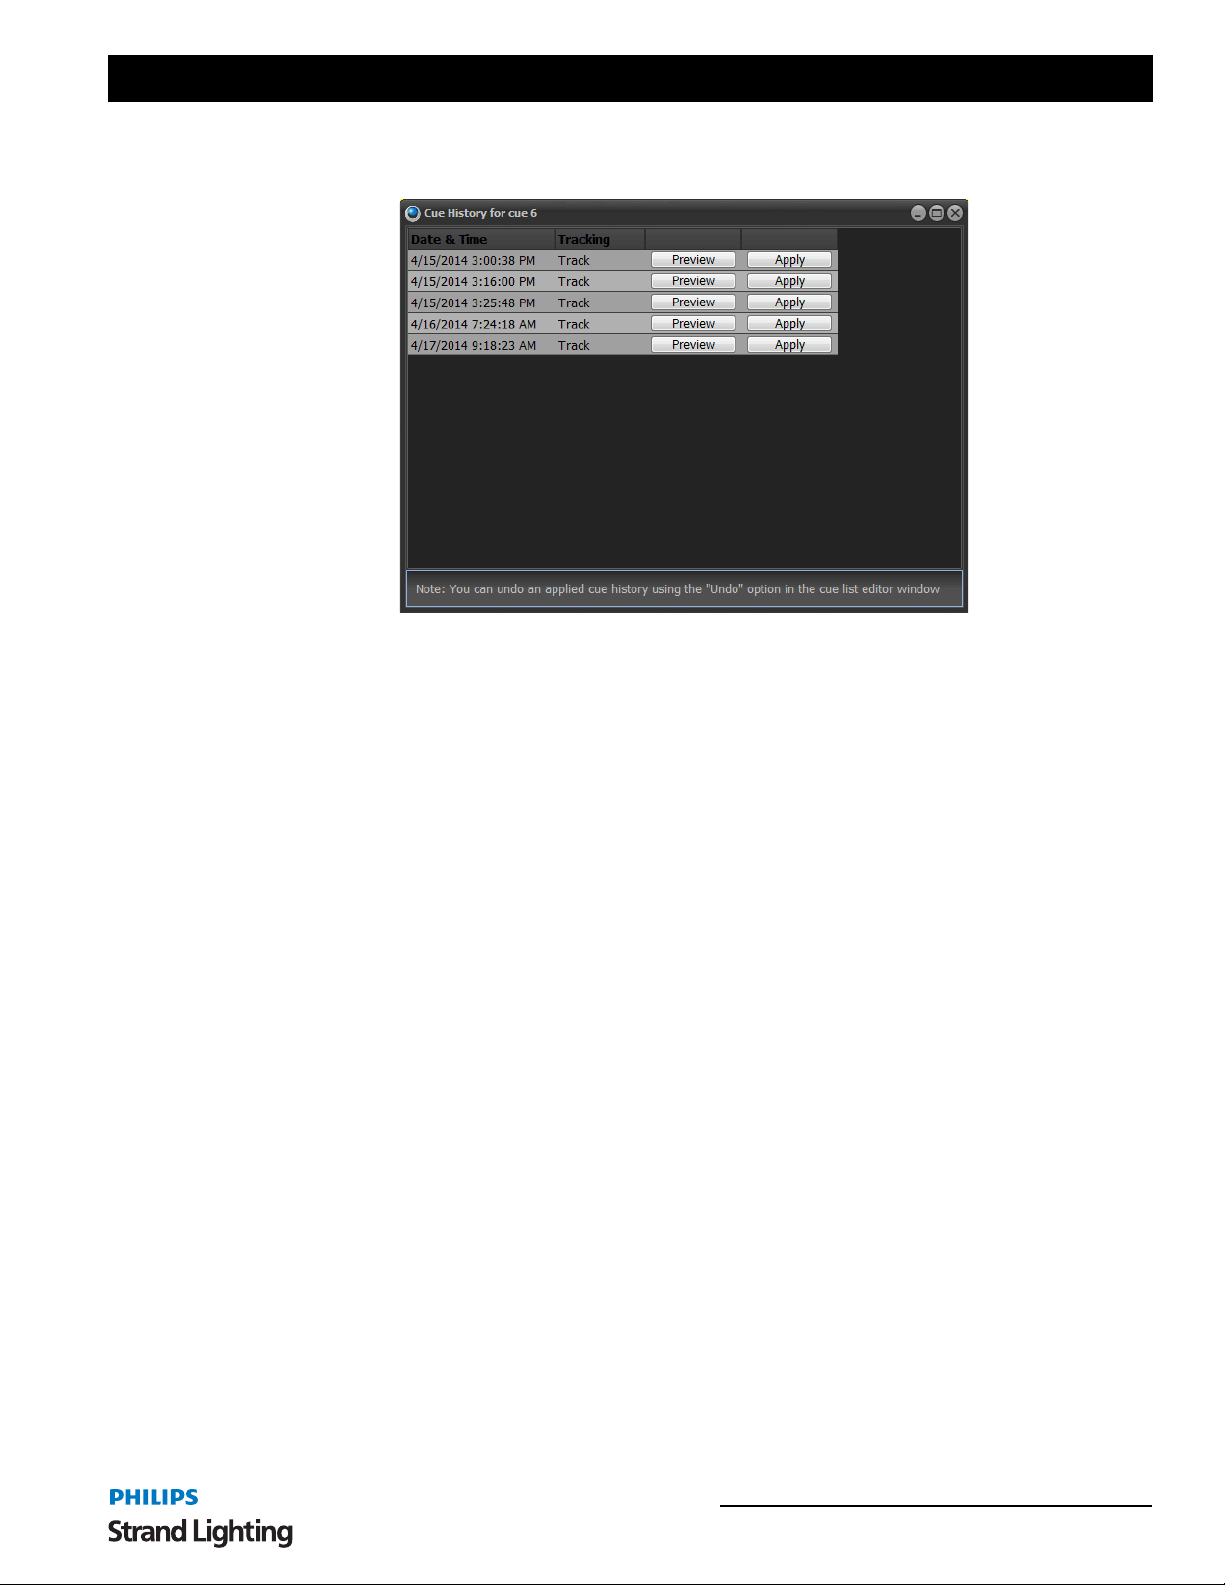
NEO Lighting Control Console
When a cue is reverted to a previous state the current state is also added to the history table so that no state is ever
lost.
Use the preview button to apply on stage what the cue looked like at the speci fied date and time. C lick on the app ly
button to set the state of the current cue to what it was at the selected date and time.
T oggle Blocking on the Selected Cues
When running in full tracking mode you can set an entire cue to be a block cue. A block cue will use the cue as the
absolute state that is expected. If a channel does not exist in the cue then it will be turned off. Use this option to toggle
the "block" flag for the cues that are currently selected.
Block Cue
This will open up the submenu for globally setting the flags on all fixtures inside the selected cue.
Set "Block" on all cues - This option will check all blocking flags in the selected cue.
Un-Set "Block" on all cues - This option will un-check all blocking flags in the selected cue.
Mark Cue
Set "Mark" on all cues - This option will check all mark flags in the selected cue.
Un-Set "Mark" on all cues - This option will un-check all mark flags in the selected cue.
Set Trigger (Selected Cues)
To modify the trigger setting of multiple cu es select the rows you want to change, right click and select the trigger
from the sub menu. You can select the rows by clicking on the very left of the row where the current row indicator is
shown. Hold the control and shift keys while clicking with the left mouse button to select more than one row.
If you have the "trigger" column selected then this menu option will apply to every cue in the current cue list.
Timestamp on Cue Go
Turn this option on to learn the timecode for a show by running it in real time. Every time the "Go" button is pressed
in the playback controls the timecode will be record for the next cue with no timecode recorded.
Timestamp on Doubleclick Timecode Field
Turn this option on to learn the timecode when you double click on the timecode field.
Lock 1st Column
This locks the first column from editing.
Lock Row Height
This locks all row heights.
Open Visual Timecode Editor 97
Page 100
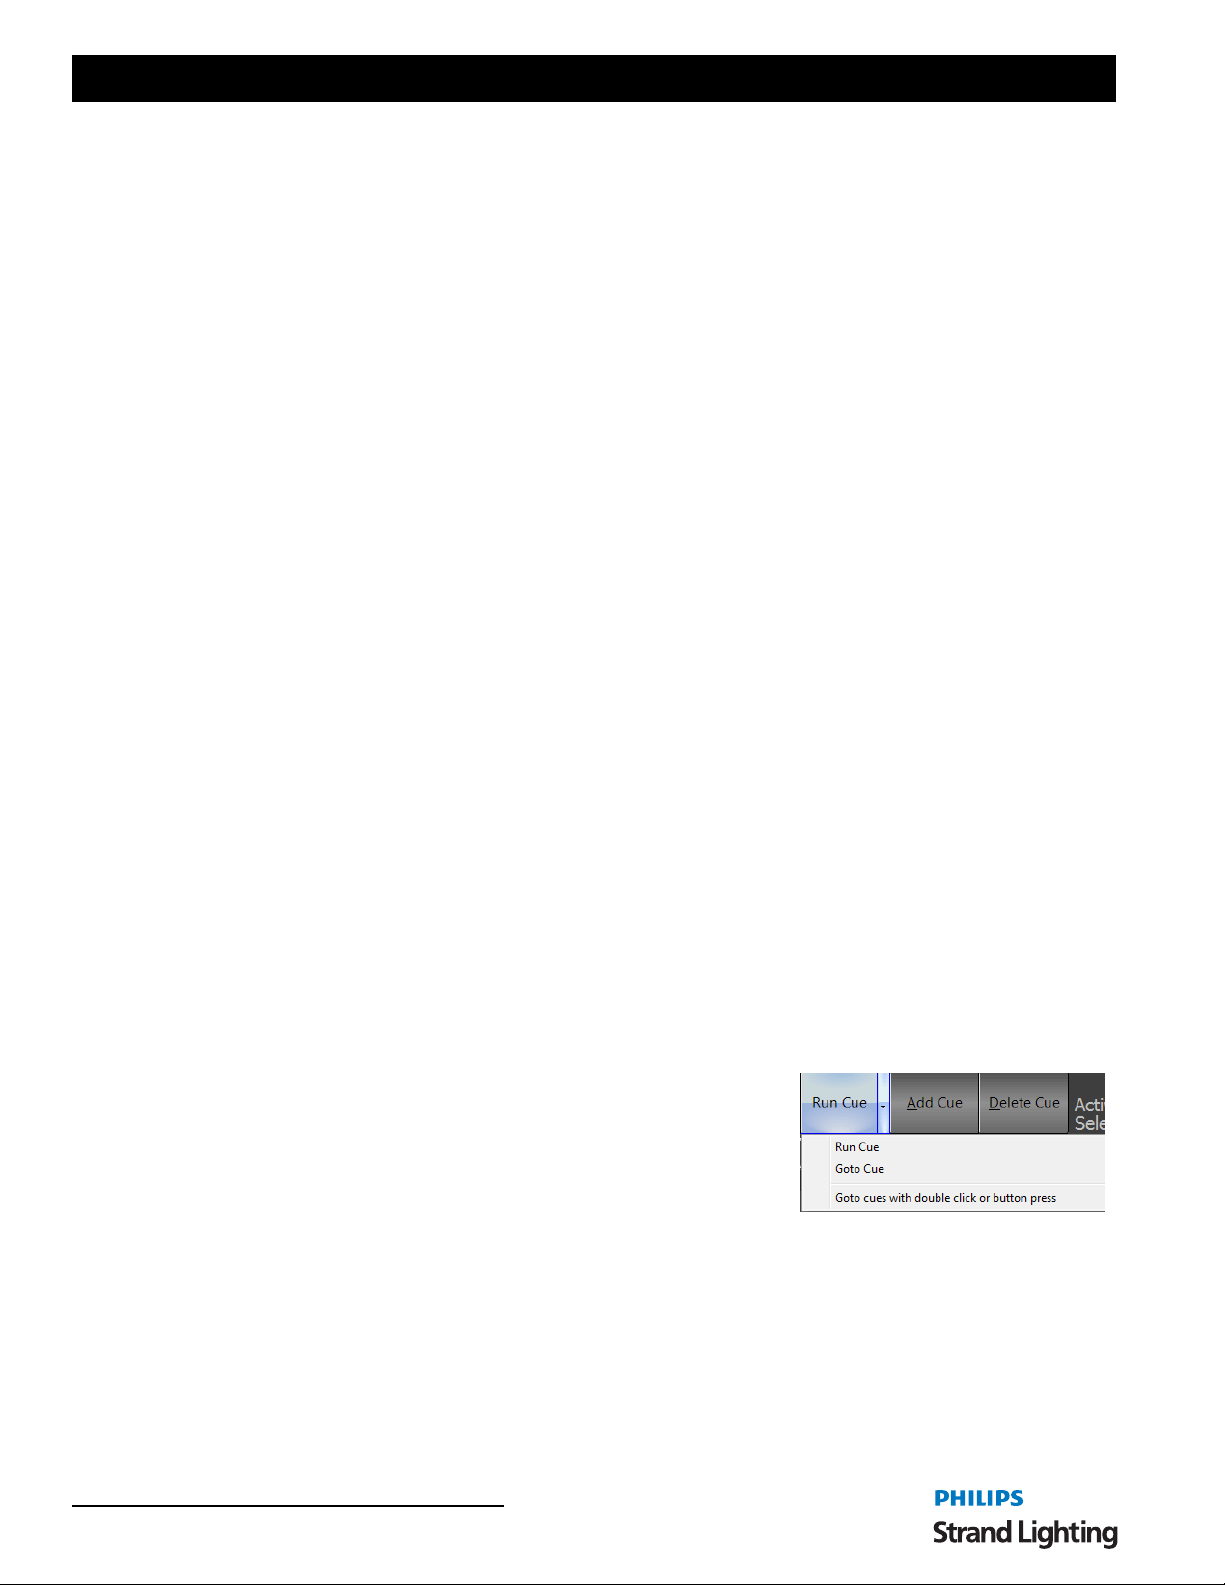
User’s Manual
Cleanup "Next Cue" Numbering from this Point
If you have got the "next cue" column out of sequence you can easily return it to the default sate (next cue always
follows the cue number) by selecting this option. The cl eanup will happen from the currently selected cue down. To
clean up the entire cue list select the first cue before selecting this option.
Re-Number as Whole Cues from this Point
If have a lot of point cues in the cue list from inserting cues or rearranging the order of the cue you can use this option
to quick re-number. After this operation every cue will be a whole number with no decimal part to it.
The re-number will happen from the currently selected cue down. To re-number the entire cue list select the first cue
before selecting this option.
Timestamp Next Non-Zero Cue
When working with timecodes it is often useful or con venient to create your cue list without any timecode values
loaded. Once you have created the cue list you must then go back and assign timecode values manually.
To aid with this operation NEO provides the ability to timestamp cues with the last read timecode. Once you have
created the cue list you can then play back the timecode track and stamp each cue in real time. Because using the right
click menu is not a quick enough operation when playing back media in real time a shortcut (control - t) is also
provided. Playback the timecode track and press the control-t to stamp the next non zero cue at the appropriate times.
Clear Notes for the Selected Cue
Use this option to empty the cue notes field for the selected cues.
Reset All Effects in the Selected Cue
The reset effects option is used during playback of the cue list. If the cue contains effects you can manually stop the
effect execution without stopping the cue using this option.
Force Resave of this Cue List
Use this option to force a resave of this cue list.
Visualizer Preview Options
This sub menu can be used to view the state of a cue in the attached visualizer without having to run it live.
Preview this cue in visualizer - Select this option and the currently selected cue will be shown in the visualizer
output. The live output will be blocked until you release it.
Release visualizer preview - Use this release option to return control of the visualizer back to the live output.
Always preview the next cue in the visualizer - This options can be toggled on or off. If this option is on and a cue
is run the next cue will be shown in the visualizer and the live output w ill be blocked until this option is turned off or
the release option is selected.
Run Cue
To the right of the cue options men u is the run cue button. Th e function of
this button will change depending on the setting. Options are…
Run Cue - triggers cue to run in recorded time.
Goto Cue - triggers cue using the default Goto time. Goto time is set in
System Properties>Show Defaults.
This button performs the same operation as double clicking on the "status" field of the cue list. It also provi des an
easy indication of what double clicking on a cue will do.
Add Cue
Adds a cue at the end of the cue list.
Delete Cue
Deletes the currently selected cue. There is an option here to delete the cue Cue Only. Otherwise, the cue will be
deleted Tracking.
98 Software Configuration
 Loading...