

Page 1
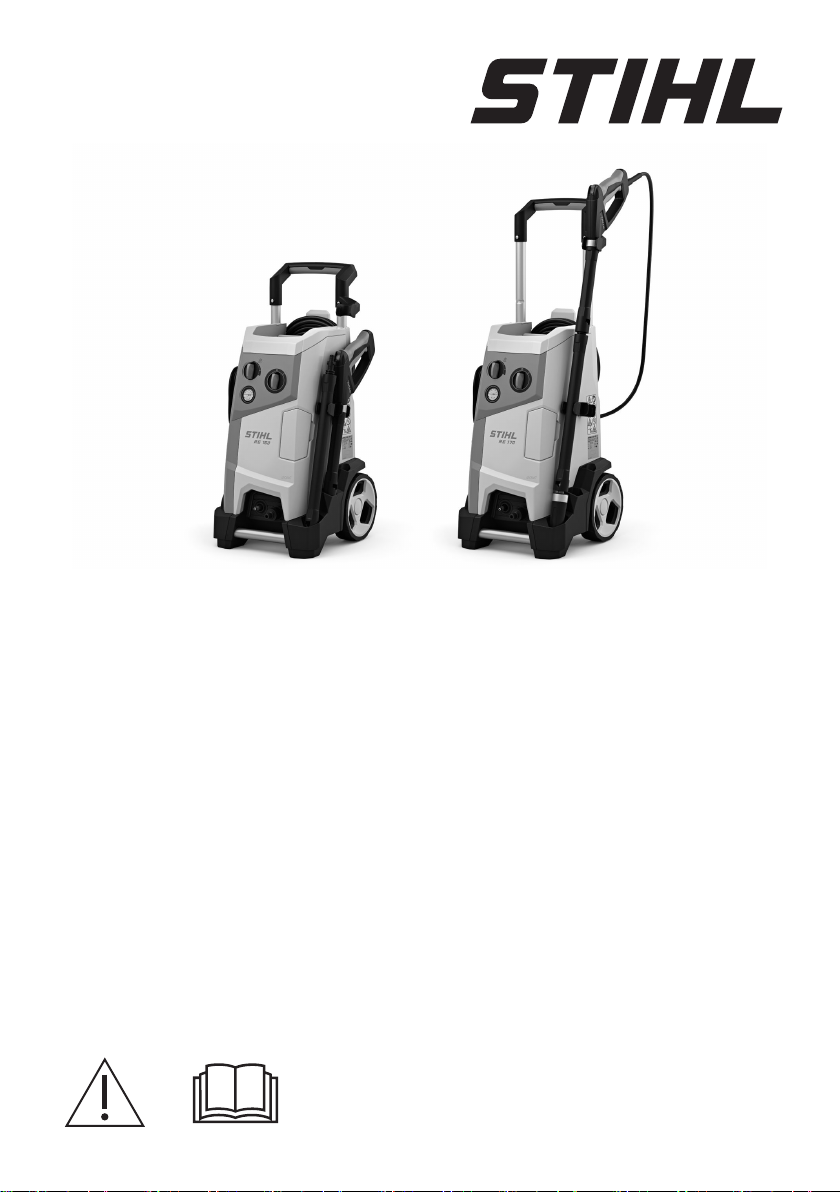
RE 150, 170
Instruction Manual2 - 24
Page 2

English
Contents
1 Introduction................................................. 2
2 Guide to Using this Manual.........................2
3 Overview..................................................... 3
4 Safety Precautions......................................4
5 Preparing the pressure washer for operation
.................................................................. 10
6 Assembling the pressure washer..............10
7 Connecting to a water source................... 12
8 Connecting the pressure washer to the
power supply.............................................14
9 Switching the pressure washer on and off 14
10 Operating the pressure washer.................15
11 After Finishing Work..................................17
12 Transporting..............................................18
13 Storing.......................................................19
14 Cleaning....................................................19
15 Maintenance............................................. 20
16 Repairing...................................................20
17 Troubleshooting........................................ 20
18 Specifications............................................21
19 Spare Parts and Accessories....................23
20 Disposal.................................................... 23
21 EC Declaration of Conformity................... 23
1 Introduction
Dear Customer,
Thank you for choosing STIHL. We develop and
manufacture our quality products to meet our
customers’ requirements. The products are
designed for reliability even under extreme con‐
ditions.
STIHL also stands for premium service quality.
Our dealers guarantee competent advice and
instruction as well as comprehensive service
support.
STIHL expressly commit themselves to a sus‐
tainable and responsible handling of natural
resources. This user manual is intended to help
you use your STIHL product safely and in an
environmentally friendly manner over a long
service life.
We thank you for your confidence in us and hope
you will enjoy working with your STIHL product.
2 Guide to Using this Manual
2.1 Applicable documents
The local safety regulations apply.
► In addition to this Instruction Manual please
read the following documents, make sure you
have understood them and keep them in a
safe place for future reference:
Instruction Manual and packaging of the
–
accessory used
Instruction Manual and packaging of the
–
detergent used
2.2 Warning Notices in Text
DANGER
■ This notice refers to risks which result in seri‐
ous or fatal injury.
► Serious or fatal injuries can be avoided by
taking the precautions mentioned.
WARNING
■ This notice refers to risks which can result in
serious or fatal injury.
► Serious or fatal injuries can be avoided by
taking the precautions mentioned.
NOTICE
■ This notice refers to risks which can result in
damage to property.
► Damage to property can be avoided by tak‐
ing the precautions mentioned.
2.3 Symbols in Text
This symbol refers to a chapter in this
instruction manual.
Translation of Original Instruction Manual
0000008682_005_GB
Printed on chlorine-free paper
Printing inks contain vegetable oils, paper can be recycled.
© ANDREAS STIHL AG & Co. KG 2022
0458-603-0121-B. VA1.C22.
Dr. Nikolas Stihl
IMPORTANT! READ BEFORE USING AND
KEEP IN A SAFE PLACE FOR REFERENCE.
2 0458-603-0121-B
Page 3
11
14
15
16
4
2
3
5
6
7
10
8
11
9
12
13
13
13
#
0000-GXX-9863-A0
1 2 3
4
5
78 6
0000-GXX-9164-A0
3 Overview English
3 Overview
3.1 Pressure washer
1 Rotary control
The rotary control is used to set the working
pressure and water flow rate.
2 Connecting cord
The connecting cord connects the pressure
washer to the mains plug.
3 Mains plug
The mains plug connects the connecting cord
to a socket.
4 Holder with clip
The holder serves to remove and store the
connecting cord and can be rotated. The clip
attaches the mains plug to the coiled connect‐
ing cord.
5 Trigger switch lockout
The trigger switch lockout blocks the adjust‐
ment of the handle.
0458-603-0121-B 3
6 Dosing handle
The dosing handle is used to set the desired
dosage of cleaning agent.
7 Rotary switch
The rotary switch is used to switch the pres‐
sure washer on and off.
8 Pressure gauge
The pressure of the high-pressure pump is
indicated by the pressure gauge.
9 Flap
The flap covers the supplied nozzles and
cleaning needle.
10 Connector
The connector is used to connect the highpressure hose.
11 Connector
The connector is used to connect the water
hose.
12 Carrying handle
The carrying handle is used to carry the pres‐
sure washer.
13 Support
The supports are used to store the spray gun.
14 Handle
The handle is used when carrying and mov‐
ing the pressure washer.
15 Support
The support is used to store the high-pres‐
sure hose.
16 Detergent container
The detergent container is used for cleaning
with cleaning agent.
# Rating plate with serial number
3.2 Spray attachment
1 Spray lance
The spray lance connects the spray gun with
the nozzle.
2 Spray gun
The spray gun is used to hold and guide the
spray attachment.
Page 4
L
W
A
English 4 Safety Precautions
Do not direct the water jet at
3 Retaining latch
The retaining latch unlocks the trigger.
4 Trigger
The trigger opens and closes the valve in the
spray gun. The trigger starts and stops the
water jet.
5 Locking lever
The locking lever holds the connector in the
spray gun.
6 Cleaning pin
The cleaning pin is provided to clean the noz‐
zles.
7 Fan-jet nozzle
The fan-jet nozzle creates a flat water jet.
8 Rotary nozzle
The rotary nozzle creates a hard, rotating
water jet.
3.3 Symbols
The symbols may appear on the pressure
washer and the spraying equipment. Their mean‐
ing is as follows:
In this position, the locking lever unlocks
the lever.
In this position, the locking lever locks the
lever.
Do not dispose of product with the house‐
hold waste.
Guaranteed sound power level in
accordance with Directive 2000/14/EC
in dB(A) to allow noise emissions of
different products to be compared.
These symbols indicate original STIHL
spare parts and original STIHL acces‐
sories.
4 Safety Precautions
4.1 Warning Symbols
The warning symbols on the high-pressure
washer have the following meanings:
Observe safety notices and take the
necessary precautions.
4.2 Intended use
The pressure washer STIHL RE 150 or RE 170
is used for example to clean vehicles, trailers,
patios, paths and facades.
The pressure washer must not be used in the
rain.
WARNING
■
Using the pressure washer other than for its
intended use can result in serious injuries or
death and damage to property.
►
Always use the pressure washer as descri‐
bed in this Instruction Manual.
The pressure washer STIHL RE 150 or RE 170
is not designed to be used for:
Cleaning asbestos cement and similar surfa‐
–
ces
Cleaning surfaces painted or varnished with
–
paints containing lead
Cleaning surfaces which come into contact
–
with foodstuffs.
Cleaning the pressure washer itself
–
4.3 Requirements concerning the
–
people and animals.
Do not direct the water jet at
–
electrical systems, electrical
connections, sockets and live
cables.
Do not direct the water jet at
–
electrical appliances and the
high-pressure washer itself.
If the connecting cable or the extension
cord is damaged: Unplug the mains
plug from the socket.
Do not connect the high-pressure
washer directly to the drinking water
main.
Switch off high-pressure washer during
breaks from operation and before
transport, storage, servicing or repair.
Do not use, transport and store the
high-pressure washers at temperatures
below 0 °C.
user
Read, understand and keep the User
Manual.
Wear safety glasses.
WARNING
■
Users who have not received instruction are
not aware of and cannot assess the dangers
of the pressure washer. The user or other peo‐
ple may be seriously injured or killed.
4 0458-603-0121-B
Page 5
4 Safety Precautions English
►
► Read the Instruction Manual, make
sure you have understood it and
keep it in a safe place for reference.
► If allowing another person to use the pres‐
sure washer: Give them the Instruction
Manual as well.
►
Make sure that the user fulfills the following
requirements:
The user is rested.
–
This machine must not be
–
used by persons (including
children) with reduced
physical, sensory or men‐
tal capabilities or lack of
experience and knowl‐
edge.
The user can identify and assess the
–
dangers of the pressure washer.
The user is of legal age or
–
the user is trained in a pro‐
fession in accordance with
national regulations under
supervision.
The user has received
–
instruction from a STIHL
servicing dealer or other
expert before operating
the pressure washer for
the first time.
The user is not under the influence of
–
alcohol, medicines or drugs.
►
If in any doubt: Contact a STIHL servicing
dealer.
4.4 Clothing and equipment
WARNING
■
Objects may be thrown into the air at high
speed while working. The user may be injured.
► Wear close fitting safety glasses.
Suitable safety glasses tested to
standard EN 166 or national stand‐
ards and bearing the corresponding
mark are available to buy.
Wear a long sleeved, close fitting top and
long trousers.
■ Spray (aerosols) may form while operating.
Breathing in aerosols can be harmful to health
and trigger allergic reactions.
►
Carry out a risk assessment according to
the surface to be cleaned and the surround‐
ing area.
►
If the risk assessment shows formation of
aerosols: Wear a respirator of protection
class FFP2 or equivalent protection class.
■
Wearing unsuitable footwear can cause the
user to slip and fall. The user may be injured.
► Wear sturdy, enclosed footwear with non-
slip soles.
4.5 Work area and surroundings
WARNING
■ Bystanders, children and animals are not
aware of the dangers of the pressure washer
and objects being thrown into the air and can‐
not assess them. Bystanders, children and
animals may be seriously injured and property
may be damaged.
►Keep bystanders, children
and animals away from the
work area.
►Do not leave the pressure
washer unattended.
►Ensure that children cannot
play with the pressure
washer.
■
If you work in the rain or in a damp environ‐
ment, an electric shock may occur. The user
may be seriously injured or killed and the pres‐
sure washer may be damaged.
►
Do not use in rain.
► Position the pressure washer so that it will
not be wet by dripping water.
► Position the pressure washer outside the
wet work area.
■ Electrical components of the pressure washer
can produce sparks. Sparks can cause fires
and explosions in a flammable or explosive
environment. This can result in serious injuries
or death and damage to property.
►
Do not work in a flammable environment or
in an explosive environment.
0458-603-0121-B 5
Page 6
English 4 Safety Precautions
4.6 Safe condition
The high-pressure washer is in a safe condition if
the following conditions are fulfilled:
The high-pressure washer is undamaged.
–
The high-pressure hose, the couplings and the
–
spray attachment are undamaged.
The high-pressure hose, the couplings and the
–
spray attachment are correctly attached.
The connecting cable, the extension cord and
–
their plugs are undamaged.
The high-pressure washer is clean and dry.
–
The spray attachment is clean.
–
The controls function properly and have not
–
been modified.
An original STIHL accessory for this high-pres‐
–
sure washer is fitted.
The accessories are correctly attached.
–
WARNING
■ If not in safe condition, components may no
longer operate correctly and safety devices
may be disabled. This may result in serous or
fatal injury to people.
►
Never use a damaged high-pressure
washer.
► Never use a damaged high-pressure hose,
couplings or spray attachment.
► Attach the high-pressure hose, couplings
and spray attachment as described in this
user manual.
►
Never use a damaged connecting cable,
extension cord or mains plug.
► If the high-pressure washer is dirty or wet:
clean the high-pressure washer and allow it
to dry.
►
If the spray attachment is dirty: Clean the
spray attachment.
► Do not modify the high-pressure washer.
► If the controls do not work: Do not operate
the high-pressure washer.
► Fit original STIHL accessories for this high-
pressure washer.
► Attach accessories as described in this
User Manual or in the User Manual for the
accessories.
►
Do not insert objects into the openings in
the high-pressure washer.
► Replace worn or damaged labels.
► If you have any doubts, be sure to consult a
STIHL dealer.
4.7 Working
WARNING
■
In certain situations, the user may no longer
be able to concentrate on their work. This may
result in the user stumbling, falling and suffer‐
ing serious injury.
►
Keep calm and plan your work.
► In poor light conditions and poor visibility:
Do not operate the high-pressure washer.
► Use the high-pressure washer on your own.
► Watch out for obstacles.
► Work standing on the ground and keep your
balance. If you have to work at a height:
Use a mobile elevating work platform or
secure scaffolding.
►
If you start feeling fatigue: Take a break.
■ If the high-pressure washer starts behaving
differently or in an unusual way while operat‐
ing, the high-pressure washer may be in an
unsafe condition. This may result in serious
injury to people and damage to property.
►
Stop working, unplug the mains plug from
the socket and consult a STIHL dealer.
► The high-pressure washer must always be
operated in an upright position.
► To ensure an adequate exchange of cool‐
ing air, do not cover the high-pressure
washer.
■
When the spray gun trigger is released, the
high-pressure pump switches off automatically
and water stops flowing out of the nozzle. The
high-pressure washer is then in stand-by
mode and is still switched on. If the spray gun
trigger is squeezed, the high-pressure pump
switches on again automatically and water
flows out of the nozzle. This may result in seri‐
ous injury to people and damage to property.
► When not operating the machine: Lock the
spray gun trigger.
► Switch off the high-pressure washer.
► Unplug the mains plug of the high-pressure
washer from the socket.
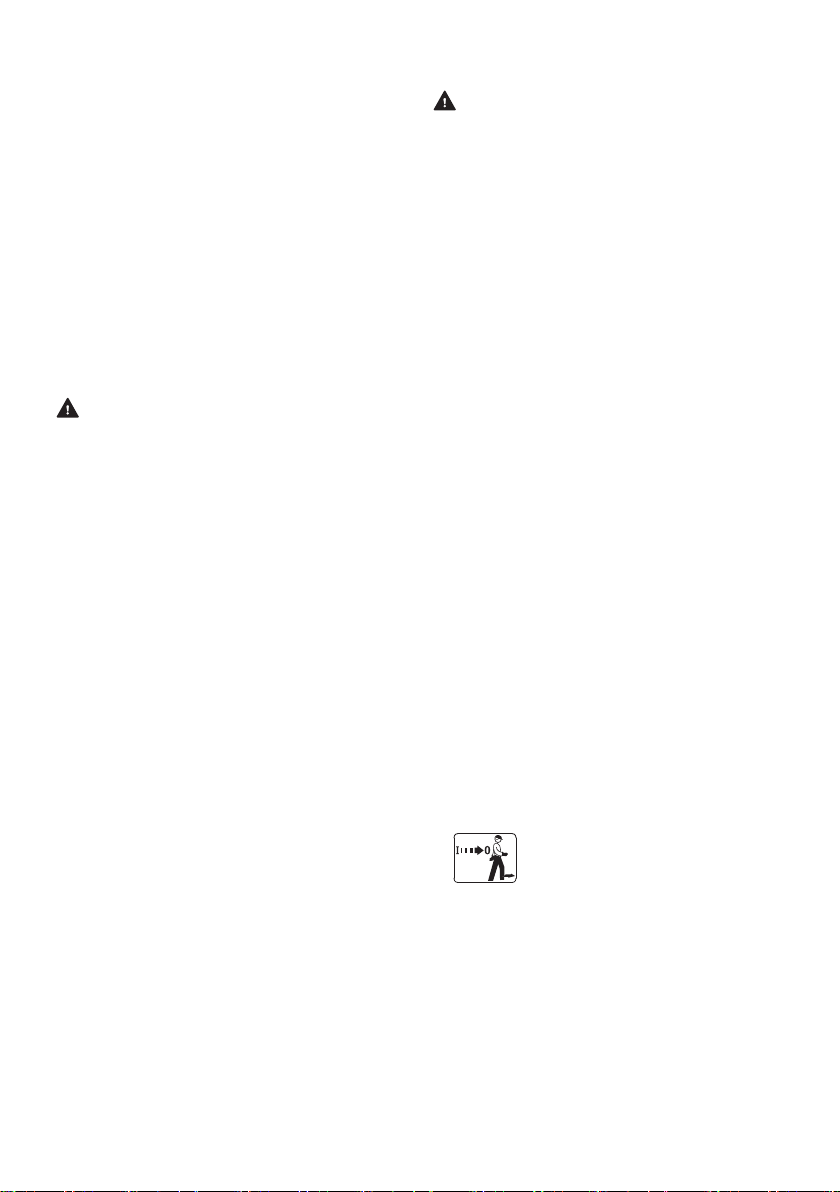
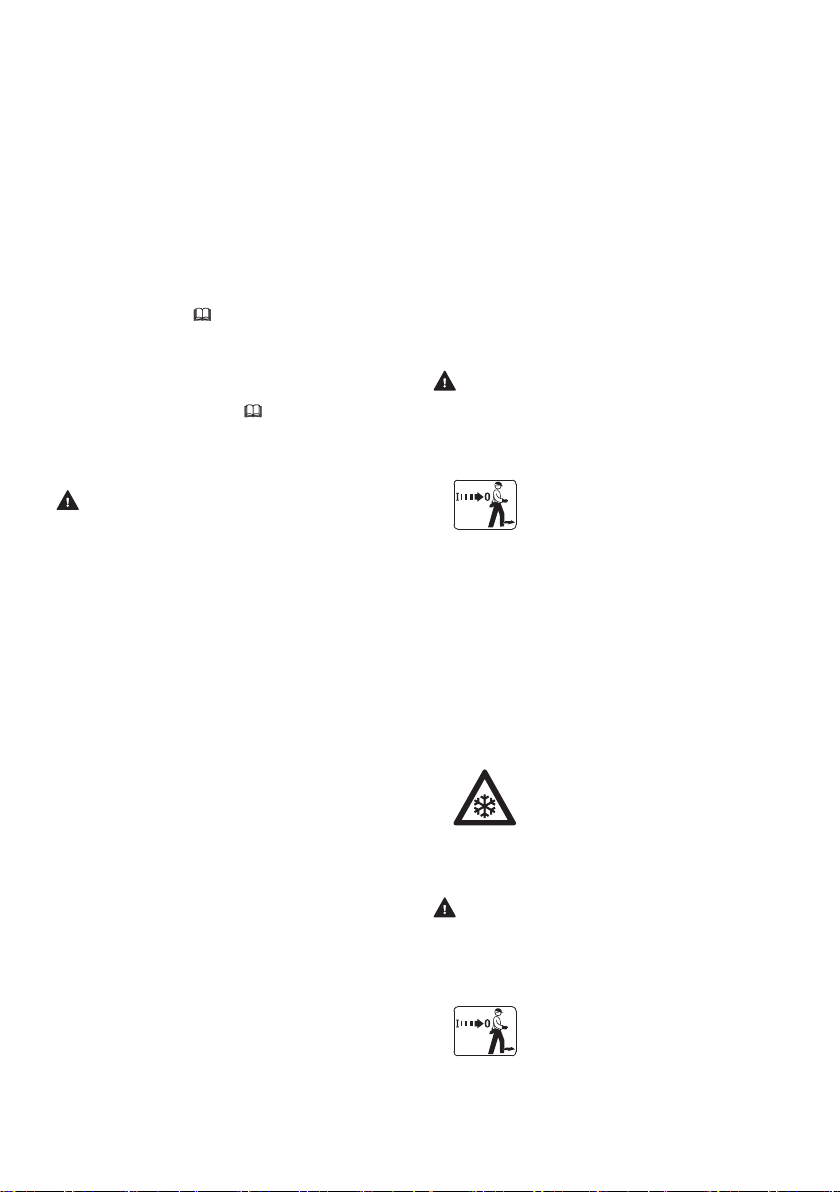
■ At temperatures below 0° C water can freeze
on the surface to be cleaned and in the com‐
ponents of the high-pressure washer. The
user may slip, fall and be seriously injured.
Damage to property may occur.
►
Do not use the high-pressure washer at
temperatures below 0° C.
■ Pulling on the high-pressure hose, water hose
or connecting cable can cause the high-pres‐
6 0458-603-0121-B
Page 7
4 Safety Precautions English
sure washer to move and topple over. Dam‐
age to property may occur.
► Do not pull on the high-pressure hose,
water hose or connecting cable.
■ If the high-pressure washer is placed on a
sloping, uneven or soft surface it may move
and topple over. Damage to property may
occur.
►
Place the high-pressure washer on a hori‐
zontal, flat, hard surface.
■ If working at a height, the high-pressure
washer or the spray attachment may fall to the
ground. This may result in serious injury to
people and damage to property.
►
Use a lift bucket or secure scaffolding.
► Do not place the high-pressure washer in a
lift bucket or on scaffolding.
► If the high-pressure hose does not have
sufficient reach: Extend the high-pressure
hose by connecting a high-pressure hose
extension.
►
Secure the spray attachment so that it can‐
not fall.
■ The water jet may detach asbestos fibers from
surfaces. Asbestos fibers may spread through
the air after drying and be breathed in. Breath‐
ing in asbestos fibers can be harmful to health.
►
Do not clean surfaces containing asbestos.
■ The water jet may remove oil from vehicles or
machinery. The oily water may enter the soil,
the water system or the drains. That would
create an environmental hazard.
►
Vehicles or machinery should only be
cleaned at places where there is an oil trap
in the water drain.
■
In combination with leaded paint the water jet
can form leaded aerosols and leaded water.
Leaded aerosols and leaded water may enter
the soil, the water system or the drains. Inhal‐
ing aerosols can be harmful to health and trig‐
ger allergic reactions. That would create an
environmental hazard.
►
Do not clean surfaces that are painted or
lacquered with leaded paint.
■ The water jet can damage sensitive surfaces.
Damage to property may occur.
► Do not clean sensitive surfaces with the
rotary nozzle.
► Sensitive surfaces made of rubber, fabric,
wood and similar materials should be
cleaned at a lower operating pressure and
from a greater distance.
■
If while in use the rotary nozzle is immersed in
dirty water and then operated, the rotary noz‐
zle may be damaged.
►
Do not use the rotary nozzle with dirty
water.
► If cleaning a container: Empty the container
and allow the water to flow away while
cleaning it.
■
Easily combustible and explosive liquids that
are sucked in can cause fires and explosions.
Persons may be seriously or fatally injured
and property may be damaged.
►
Do not suck in or spread easily combustible
or explosive liquids.
■ Drawing in irritant, corrosive and toxic liquids
can endanger health and damage components
of the high-pressure washer. Persons may be
seriously or fatally injured and property may
be damaged.
►
Do not suck in or spread irritating, caustic
or toxic liquids.
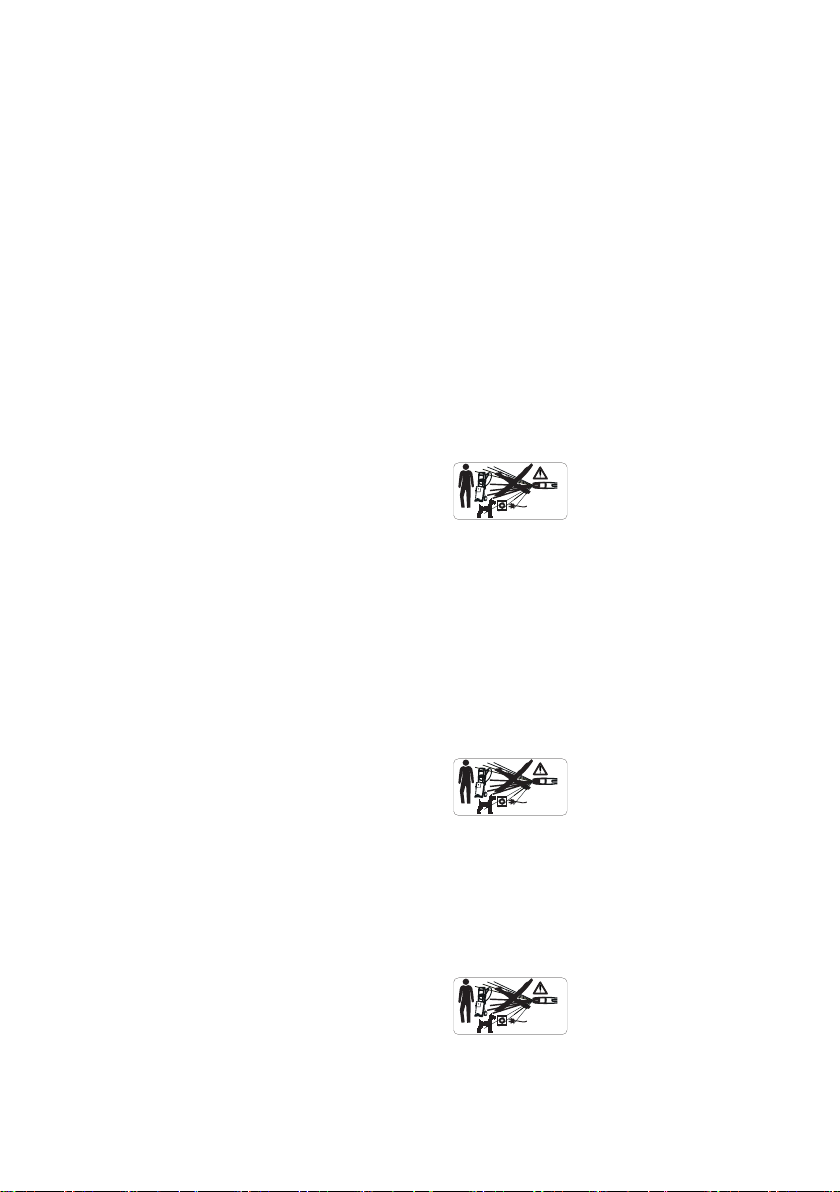
■ The strong water jet can seriously injure peo‐
ple and animals and cause damage to prop‐
erty.
► Do not direct the water jet at
people and animals.
► Do not direct the water jet at places that are
not fully visible.
► Do not use the water jet to clean clothing
while wearing it.
► Do not use the water jet to clean shoes or
boots while wearing them.
■ If electrical equipment, electrical connections,
sockets and live power cords come into con‐
tact with water, electric shock may result. Per‐
sons may be seriously or fatally injured and
property may be damaged.
► Do not direct the water jet at
electrical systems, electrical
connections, sockets and live
cables.
►
Do not direct the water jet at the connecting
cable or extension cable.
■ If electrical appliances or the high-pressure
washer come into contact with water, electric
shock may result. The user may be seriously
injured or killed and property may be dam‐
aged.
► Do not direct the water jet at
electrical appliances and the
high-pressure washer itself.
► Keep electrical appliances and the high-
pressure washer away from the surface to
be cleaned.
0458-603-0121-B 7
Page 8
English 4 Safety Precautions
■ An incorrectly routed high-pressure hose may
suffer damage. As a result of the damage,
water under high pressure may escape uncon‐
trolled into the surrounding area. This may
result in serious injury to people and damage
to property.
►
Do not direct the water jet at the high-pres‐
sure hose.
► Route the high-pressure hose so that it is
not under tension or tangled.
► Route the high-pressure hose so that it will
not be damaged, kinked or crushed, or cha‐
fed.
►
Protect the high-pressure hose from heat,
oil and chemicals.
■ An incorrectly routed water hose may suffer
damage and people may trip over it. People
may be injured and the water hose may be
damaged.
►
Do not direct the water jet at the water
hose.
► Route and mark the water hose so that
people will not trip over it.
► Route the water hose so that it is not under
tension or tangled.
► Route the water hose so that it will not be
damaged, kinked or crushed, or chafed.
► Protect the water hose from heat, oil and
chemicals.
■ The strong water jet produces reactive forces.
The user may lose control of the spraying sys‐
tem due to the reaction forces that occur. The
user may be seriously injured and property
damage may occur.
►
Hold the spray gun with both hands.
► Work as described in this user manual.
4.8 Detergents
WARNING
■
If detergents come into contact with the skin or
eyes, the skin or eyes may be irritated.
► Observe the user manual for the detergent.
► Avoid contact with detergents.
► If skin contact occurs: Wash affected areas
of skin with plenty of water and soap.
► If eye contact occurs: Flush eyes with
plenty of water for at least 15 minutes and
consult a doctor.
■
Using the wrong or inappropriate detergent
can damage the pressure washer or the sur‐
face of the object being cleaned and be harm‐
ful to the environment.
►
STIHL recommends the use of genuine
STIHL detergents.
► Observe the user manual for the detergent.
► If you have any doubts, be sure to consult a
STIHL dealer.
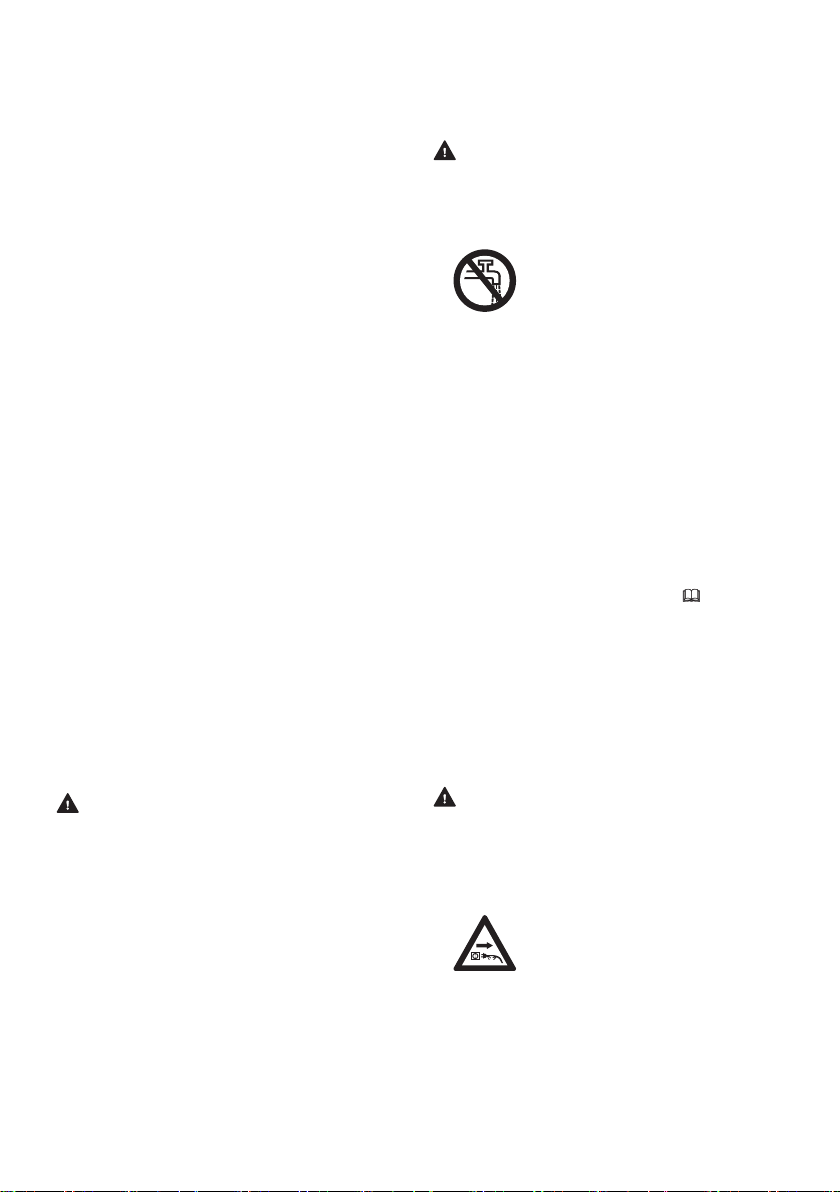
4.9 Connecting the water supply
WARNING
■
Releasing the spray gun trigger causes a kick‐
back in the water hose. A kickback can force
dirty water back into the drinking water main.
This can pollute the drinking water.
► Do not connect the high-pressure
washer directly to the drinking water
main.
► Observe the regulations of the water supply
company. If required, use proper system
separation (e.g. backflow preventer) when
connecting to the drinking water system.
■
Dirty or sandy water can damage components
of the pressure washer.
► Use clean water.
► If using dirty or sandy water: Use a water fil‐
ter with the pressure washer.
■ If the water supply to the pressure washer is
insufficient, components of the pressure
washer may be damaged.
►
Turn tap fully on.
► Make sure there is a sufficient supply of
water to the pressure washer, 18.
4.10 Connecting to the power supply
Contact with live parts can occur for the following
reasons:
The connecting cord or the extension cord is
–
damaged.
The mains plug of the connecting cord or
–
extension cord is damaged.
The socket is not properly installed.
–
DANGER
■
Contact with live parts can result in electric
shock. The user may be seriously injured or
killed.
►
Make sure that the connecting cord, exten‐
sion cord and their plugs are undamaged.
If the connecting cord or the extension
cord is damaged:
► Do not touch the damaged areas.
► Unplug the mains plug from the
socket.
►
Make sure your hands are dry before touch‐
ing the connecting cord, extension cord or
plugs.
►
Plug the mains plug of the connecting cord
or extension cord into a properly installed,
fused socket with the correct fuse rating.
8 0458-603-0121-B
Page 9
4 Safety Precautions English
► The mains connection must be carried out
by a qualified electrician and meet the
requirements of IEC 60364-1. It is recom‐
mended that the power supply to this
machine should either be connected via an
earth leakage circuit breaker, which inter‐
rupts the power supply as soon as the leak‐
age current to earth exceeds 30 mA for 30
ms, or has an earth tester.
■ A damaged or unsuitable extension cord can
result in electric shock. People can be seri‐
ously injured or killed.
►
Use an extension cord with the correct
cross-section, 18.3.
► Only use an extension cord which is splash-
proof and approved for outdoor use.
► Use an extension cord that has the same
characteristics as the connecting cord of
the pressure washer, 18.3.
►
It is recommended to use a cable reel that
holds the socket at least 60 mm above the
floor.
►
Route the connecting cord and extension
cord so that they are not under tension or
tangled.
►
Route the connecting cord and extension
cord so that they will not be damaged,
kinked or crushed and will not be chafed.
►
Protect the connecting cord and extension
cord from heat, oil and chemicals.
► Lay the connecting cord and extension cord
on a dry surface.
■ The extension cord warms up in operation. If
that heat cannot escape, it may cause a fire.
► If using a cable reel: Completely unroll the
cable reel.
4.11 Transport
WARNING
■ The pressure washer may topple over or move
during transport. This can result in injuries and
damage to property.
►
Lock spray gun trigger.
► Switch off pressure washer.
WARNING
■ During operation, an incorrect mains voltage
or incorrect mains frequency may result in an
overvoltage in the pressure washer. The pres‐
sure washer may be damaged.
►
Make sure that the mains voltage and the
mains frequency of the power supply match
the data on the rating plate of the pressure
washer.
■
Electrical components may be overloaded dur‐
ing operation if more than one electric power
tool is connected to a multiple socket. The
electrical components may heat up and a fire
may break out. This can result in serious inju‐
ries or death and damage to property.
►
Only ever connect one pressure washer to
one socket.
► Do not connect pressure washers to multi‐
ple sockets.
■ An incorrectly routed connecting cord or
extension cord may be damaged and people
may trip over it. People may be injured and the
connecting cord or extension cord may be
damaged.
►
Route the connecting cord and extension
cord so that the water jet cannot touch
them.
►
Route and mark the connecting cord and
extension cord so that people will not trip
over them.
► Unplug the mains plug of the pressure
washer from the socket.
► Empty detergent container and insert it into
the pressure washer.
► Secure the pressure washer using lashing
straps, belts or a net so that it cannot topple
over and cannot move.
■
At temperatures below 0 °C water may freeze
in components of the pressure washer. The
pressure washer may be damaged.
►
Drain high-pressure hose and spray attach‐
ment.
► If the pressure washer cannot be
transported in a frost-proof envi‐
ronment: Protect the pressure
washer using a glycol-based anti‐
freeze.
4.12 Storage
WARNING
■
Children are not aware of and cannot assess
the dangers of the pressure washer. Children
can be seriously injured.
►
Lock spray gun trigger.
► Switch off pressure washer.
► Unplug the mains plug of the pressure
washer from the socket.
0458-603-0121-B 9
Page 10

1
3
2
4
0000-GXX-9166-A0
English 5 Preparing the pressure washer for operation
► Store the pressure washer out of the reach
of children.
■ Moisture may cause the electrical contacts on
the pressure washer and metal components to
corrode. The pressure washer may be dam‐
aged.
►
Store the pressure washer in a clean, dry
state.
■ At temperatures below 0 °C water may freeze
in components of the pressure washer. The
pressure washer may be damaged.
►
Drain high-pressure hose and spray attach‐
ment.
► If the pressure washer cannot be
stored in a frost-free environment:
Protect the pressure washer using
a glycol-based antifreeze.
4.13 Cleaning, Maintenance and
Repair
WARNING
■ If the mains plug is plugged into a socket
when carrying out cleaning, servicing or
repairs, it is possible that the high-pressure
washer may be switched on inadvertently.
This may result in serious injury to people and
damage to property.
►
Lock the spray gun trigger.
► Switch off the high-pressure washer.
5 Preparing the pressure
washer for operation
5.1 Making the pressure washer ready for use.
The following steps must be performed before
commencing work:
► Make sure that the pressure washer, the high-
pressure hose, the hose coupling and the con‐
necting cord are in a safe condition, 4.6.
►
Cleaning the pressure washer,
► Set up the pressure washer on a firm and level
base, where it will not slide or tip over.
►
Connect the high-pressure hose, 6.3.
►
Connect spray gun, 6.4.
►
Fit spray lance, 6.5.
►
Attach nozzle, 6.6.
►
If using a detergent: Using detergents,
10.5.
► Connect pressure washer to a water source,
7.
►
Connect pressure washer to power supply,
8.1.
► If it is not possible to carry out these steps: Do
not use the pressure washer. Consult a STIHL
servicing dealer.
14.
6 Assembling the pressure
washer
► Unplug the mains plug of the high-pressure
washer from the socket.
■ Harsh detergents, cleaning with a water jet or
sharp objects can damage the high-pressure
washer. If the high-pressure washer is not
properly cleaned, parts may not function prop‐
erly and safety devices can be disabled. They
may cause serious injury to persons.
►
Always clean the high-pressure washer as
described in this user manual.
■ If the high-pressure washer is not properly
serviced or repaired, parts may not function
properly and safety devices can be disabled.
This may result in serous or fatal injury to peo‐
ple.
►
Do not attempt to service or repair the highpressure washer yourself.
► If the connecting cable is faulty or dam‐
aged: Have the connecting cable replaced
by a STIHL dealer.
►
If the high-pressure washer needs to be
serviced or repaired: Contact a STIHL
dealer.
10 0458-603-0121-B
6.1 Assembling the pressure washer
Insert nozzles and cleaning pin
► Open flap (1).
► Insert fan-jet nozzle (2) and rotary nozzle (3).
► Insert cleaning pin (4).
Page 11

2
1
0000-GXX-9864-A0
2
1
0000-GXX-9865-A0
1
2
0000-GXX-9877-A0
1
0000-GXX-9878-A0
0000-GXX-5095-A0
1
2
0000-GXX-5096-A0
1
2
6 Assembling the pressure washer English
6.2 Pulling out and pushing in the
6.3.2 Removing the high-pressure hose
handle
6.2.1 Removing the handle
► Pull off coupling (1)
6.4 Attaching and removing the
► Press locking knob (1) and pull out handle (2).
► Release locking knob (1) and pull out the han‐
dle (2) until it audibly engages.
6.2.2 Inserting the handle
► Press locking knob (1) and insert handle (2).
► Release locking knob (1) and insert handle (2)
until it audibly engages.
6.3 Fitting and removing the high-
6.4.1 Attaching the spray gun
► Push connector (1) into spray gun (2).
► If the connector cannot be pushed easily into
6.4.2 Removing the spray gun
spray gun
The connector (1) audibly engages.
the spray gun (2): Grease the gasket on the
connector (1) with grease for fittings.
pressure hose
6.3.1 Connecting the high-pressure hose
► Press and hold the locking lever (1).
► Pull out connector (2).
► Push the coupling (1) onto the connector (2).
The coupling (1) audibly engages.
► If it is difficult to slide the coupling (1) onto the
connector: Grease the gasket on the connec‐
tor (2) with a fitting grease.
0458-603-0121-B 11
Page 12

0000-GXX-4350-A0
1
2
0000-GXX-4351-A0
2
1
2
1
0000-GXX-9849-A0
2
1
0000-GXX-9850-A0
2
1
0000-GXX-9869-A0
English 7 Connecting to a water source
6.5 Attaching and removing the
6.6.2 Removing the nozzle
spray lance
6.5.1 Attaching the spray lance
► Press nozzle (1) and spray lance (2) together
and turn until stop.
► Pull nozzle (1) and spray lance (2) apart.
► Push spray lance (1) into spray gun (2).
► Twist the spray lance (1) until it engages.
► If the spray lance (1) cannot be pushed easily
into the spray gun (2): Grease the gasket on
the spray lance (1) with grease for fittings.
6.5.2 Removing the spray lance
► Squeeze spray lance (1) and spray gun (2)
together and twist as far as they will go.
► Pull spray lance (1) and spray gun (2) apart.
7 Connecting to a water
source
7.1 Connecting the pressure washer to the water supply
Connecting the water filter
If the pressure washer is operated with sandy
water or water from cisterns, a water filter must
be connected to the pressure washer. The water
filter filters sand and dirt out of the water and
thus protects the components of the pressure
washer from damage.
Depending on the market, the water filter may be
included with the pressure washer.
6.6 Attaching and removing the nozzle
6.6.1 Attaching the nozzle
► Unscrew connector (1).
► Screw water filter (2) onto the water supply
and tighten by hand.
► Screw connector (1) onto water filter (2) and
tighten by hand.
Connecting the water hose
► Push nozzle (1) onto the spray lance (2).
► Twist nozzle (1) until it locks into position.
► If it is difficult to slide the nozzle (1) into the
spray lance: Grease the gasket on the nozzle
(1) with a fitting grease.
The water hose must meet the following require‐
ments:
The water hose has a diameter of 1/2”.
–
The water hose is between 10 m and 25 m
–
long.
► Connect water hose to a water tap.
12 0458-603-0121-B
Page 13

2
1
0000-GXX-9870-A0
1
2
0000-GXX-9871-A0
a
0000-GXX-9880-A0
1
2
0000-GXX-9872-A0
5
2
3
1
4
1
0000-GXX-9873-A0
7 Connecting to a water source English
► Turn on the water tap fully and rinse the water
hose with water.
Sand and dirt will be rinsed out of the water
hose. The water hose will be vented.
► Turn off water tap.
So that the water can be drawn in, the height dif‐
ference between the pressure washer and the
water source must not exceed the max. suction
18.
► Push the coupling (1) onto the connector (2).
The coupling (1) audibly engages.
► Open water tap fully.
► If the spray lance is fitted to the spray gun:
Remove spray lance.
► Keep the trigger of the spray gun pressed until
an even jet of water is delivered by the spray
gun.
► Release spray gun trigger.
► Lock spray gun trigger.
► Fit spray lance.
► Attach the nozzle.
Removing the water hose
lift (a),
The appropriate STIHL suction set must be used.
The suction set includes a water hose with a
special coupling.
Depending on the market, the appropriate STIHL
suction set may be included.
Connect the water filter
If the pressure washer is operated with water
containing sand from water butts, cisterns or
from flowing or still rivers and lakes, a water filter
must be connected to the pressure washer.
Depending on the market, the water filter may be
included with the pressure washer.
► Turn off water tap.
► To release the coupling: Pull or turn ring (1)
and hold.
► Pull the coupling off the connector (2).
► Unscrew connector (1).
► Screw water filter (2) onto the water supply
and tighten by hand.
Connect the water hose
7.2 Connecting the pressure
washer to another water supply
The pressure washer can draw in water from
water butts, cisterns and flowing or still rivers and
lakes.
0458-603-0121-B 13
► Fill the water hose (1) with water so that no air
is present in the water hose any more.
Page 14

1
3
4
2
0000-GXX-9866-A0
0000-GXX-4357-A0
0000-GXX-4358-A0
English 8 Connecting the pressure washer to the power supply
► Screw coupling (2) onto the connector of the
water filter (3) and tighten by hand.
► Attach suction cup (4) to the water source so
that the suction cup (4) does not touch the
ground.
► Turn rotary control (5) in direction + up to the
stop.
► If the spray gun is fitted to the high-pressure
hose: Remove spray gun.
► Hold high-pressure hose downwards.
► Switch on pressure washer until an even water
jet flows out of the high-pressure hose.
NOTICE
■ If the pressure washer does not suck in water,
the pump may run dry and the pressure
washer may be damaged.
►
If no water escapes from the high-pressure
hose after two minutes: Switch off pressure
washer and check water supply.
►
Switch off pressure washer.
► Connect the spray gun to the high-pressure
hose.
► Press and hold down spray gun trigger.
► Switch on pressure washer.
8 Connecting the pressure
washer to the power supply
8.1 Connecting the pressure
washer to the power supply
9 Switching the pressure
washer on and off
9.1 Switch on high-pressure washer
When the pressure washer is switched on, volt‐
age fluctuations may occur under unfavorable
mains conditions. The voltage fluctuations may
negatively affect other connected electrical appli‐
ances.
► Turn the rotary switch to the I position.
9.2 Switching off the pressure washer
► Turn the rotary switch to the 0 position.
► Turn the rotary switch (1) to the 0 position.
► Swivel lower holder (2) downwards.
► Remove connecting cord (3).
► Plug the plug (4) of the connecting cord into a
correctly installed socket.
14 0458-603-0121-B
Page 15

0000-GXX-4359-A0
1
2
0000-GXX-9836-A0
0000-GXX-4360-A0
1
2
0000-GXX-4612-A0
1
2
10 Operating the pressure washer English
10 Operating the pressure
washer
10.1 Holding and controlling the
10.3 Pressing and locking the spray gun lever
Press spray gun lever
spray gun
►
► Hold the spray gun by the handle with one
hand, wrapping your thumb around the han‐
dle.
► Hold the spray lance firmly with your other
hand, wrapping your thumb around the spray
lance.
► Point the nozzle at the ground.
10.2 Setting the working pressure and the water flow rate
Move retaining latch (1) to the
► Press and hold lever (2).
The high pressure pump switches on automat‐
ically and water flows out of the nozzle.
Lock spray gun lever
► Release lever (2)
The high pressure pump switches off automat‐
ically and water no longer flows out of the noz‐
zle. The pressure washer is still switched on.
►
Move retaining latch (1) to the
position.
position.
10.4 Cleaning
The following nozzles can be used depending on
the application:
Fan-jet nozzle: The fan jet nozzle is suitable
–
for cleaning large surfaces.
Rotary nozzle: The rotary nozzle is suitable for
–
removing stubborn dirt.
Work can be carried out at a small distance if
Increase working pressure and water flow rate
► Turn rotary control (1) towards +.
Decrease working pressure and water flow rate
► Turn rotary control (1) towards –.
The pressure in the high-pressure pump is indi‐
cated by the pressure gauge (2).
stubborn dirt is to be removed.
Work can be carried out at a great distance if the
following surfaces are to be cleaned:
Varnished surfaces
–
Surfaces made of wood
–
Rubber surfaces
–
0458-603-0121-B 15
Page 16

0000-GXX-9848-A0
0000-GXX-5094-A0
1
2
0000-GXX-9837-A1
0000-GXX-9838-A0
2
1
0000-GXX-9876-A0
3
0000-GXX-9170-A0
English 10 Operating the pressure washer
► Grasp the recessed grip (1) of the detergent
container and remove it.
► Unscrew cover (2).
► Dose and use detergent as described in the
Instruction Manual of the surface cleaner.
► Turn the cover onto the detergent container
and tighten it firmly by hand.
► Grasp the recessed grip of the detergent con‐
tainer and insert it into the pressure washer.
The fan jet nozzle can be adjusted.
If the flat jet nozzle is turned in the + direction,
the working pressure increases.
If the flat jet nozzle is turned in the – direction,
the working pressure decreases.
► Before cleaning, point the water jet at an
10.5.2 Suction of detergent from separate
detergent container
The cover ot the detergent container has a
standard thread and fits all standard detergent
containers. A separate detergent container may
be used.
inconspicuous spot on the surface and check
that the surface is not damaged.
► Select the distance between the nozzle and
the surface to be cleaned so that the surface
to be cleaned is not damaged.
► Adjust the flat spray nozzle so that the surface
to be cleaned is not damaged.
► Remove detergent container.
► Unscrew cover of detergent container
► Screw the cap with intake hose onto a sepa‐
rate detergent container
10.5.3 Working with detergent
► Move the spraying equipment evenly along the
surface to be cleaned.
► Move forward slowly, in a controlled manner.
10.5 Working with detergent
10.5.1 Suction of detergent
Detergents can increase the cleaning effect of
the water.
STIHL recommends the use of genuine STIHL
detergents.
16 0458-603-0121-B
► Turn rotary control (1) in direction + up to the
stop.
► Turn fan jet nozzle (2) in direction - up to the
stop.
Page 17

A
x 100 = V
x 100 = 33,3%
( A + B )
1
( 1 + 2 )
0000-GXX-9861-A0
QR
Q
x V = K
0000-GXX-9862-A0
11 After Finishing Work English
► Set the desired dosage.
► Turn dosing handle (3) to the right (up to
5 %).
The addition of detergents is increased.
► Turn dosing handle (3) to the left (up to
0 %).
The addition of detergents is reduced.
► If the detergent concentration needs to be
adjusted accurately: Measure and calculate
detergent concentration.
► Soak extremely dirty surfaces with water
before cleaning them.
► Press the spray gun lever and spray the deter‐
gent onto the surface to be cleaned.
► Apply the detergent starting at the bottom and
working up and do not allow to dry.
► Turn the dosing handle to the left as far as it
will go.
Detergent is no longer sucked in.
► Clean surface.
Measuring and calculating the detergent concen‐
tration.
► Turn the rotary control to set the working pres‐
sure and water quantity in the + direction up to
the stop.
► Turn the dosing handle for cleaning detergent
to the right as far as it will go.
► Fill the detergent container with cleaning agent
up to the 0.5 liter mark.
► Turn the fan jet nozzle in the direction - up to
the stop.
► Switch on pressure washer.
► Hold the spray gun in an empty collecting con‐
tainer.
► Actuate the spray gun and fill 2 liters into the
collecting container.
► Determine the consumption of detergent
„QR“ from the detergent container.
Calculation of the actual detergent concentration:
10.5.4 Measuring and calculating the deter‐
gent concentration
For a few detergents, the concentration must be
precisely set. In this case, the water flow rate
and the consumption of detergent must be meas‐
ured.
Calculating the predilution of the detergent in %
If the predilution is not indicated as a % value on
the packaging of the detergent used, it can be
determined as follows:
Ratio value
1:1 = 50 %
–
1:2 = 33.3 %
–
1:3 = 25 %
–
1:5 = 16.6 %
–
1:10 = 9 %
–
Example: Calculation ratio value 1:2.
A = 1
–
B = 2
–
QR = Quantity of detergent used (in liters).
–
Q = 2 liters.
–
V = Pre-dilution of the cleaning agent (in %).
–
K = Concentration of the cleaning agent..
–
► If the calculated concentration differs from the
desired one: Reduce dosage at the dosing
handle and repeat measurement and calcula‐
tion.
11 After Finishing Work
11.1 After finishing work
► Switch off the pressure washer and pull the
mains plug out of the socket.
► If the pressure washer is connected to the
water supply: Turn off water tap.
► Press spray gun trigger.
The water pressure is released.
► Lock spray gun trigger.
► Disconnect pressure washer from the water
supply.
► Remove water hose.
► Remove high-pressure hose and let the
0458-603-0121-B 17
remaining water run out of the high-pressure
hose.
Page 18

2
1
0000-GXX-9867-A0
3
0000-GXX-9853-A0
5
4
0000-GXX-9840-A0
7
6
0000-GXX-9874-A0
8
8
8
8
8
8
8
0000-GXX-9868-A0
English 12 Transporting
► Remove and clean the nozzle and spray
lance.
► Remove the spray gun and let the remaining
water run out of the spray gun.
► Clean the pressure washer.
► Store the spray attachment in the holders (8)
on the pressure washer.
11.2 Protecting the pressure washer
with antifreeze
► Swivel lower holder (1) upwards
► Coil the connecting cord (2) on the holder (1).
► Secure the connecting cord (2) using the clip
on the support (1).
► Insert detergent container (3).
► Insert fan-jet nozzle (4) or rotary nozzle (5).
If the pressure washer cannot be protected from
frost during transport or storage, the pressure
washer should be protected by a glycol-based
antifreeze. The antifreeze prevents water inside
the pressure washer from freezing and causing
damage to the pressure washer.
► Remove spray lance
► Connect the shortest possible water hose to
the pressure washer.
The shorter the water hose, the less antifreeze
is needed.
► Mix the antifreeze as described in the anti‐
freeze Instruction Manual.
► Pour antifreeze into a clean container.
► Insert water hose into container of antifreeze.
► Squeeze and hold spray gun trigger.
► Switch on pressure washer.
► Hold down spray gun trigger until an even jet
of antifreeze is delivered from the spray gun
and point the spray gun into the container.
► Press and release spray gun trigger several
times.
► Switch off pressure washer and unplug mains
plug from the socket.
► Detach spray gun, high-pressure hose and
water hose and allow antifreeze to run into the
container.
► Store and dispose of antifreeze in accordance
with the applicable regulations and in an envi‐
ronmentally responsible manner.
12 Transporting
12.1 Transporting the high-pressure
► Roll up the high-pressure hose (6) and hang it
on the holder (7).
18 0458-603-0121-B
► Switch off the high-pressure washer and pull
► Empty or secure the detergent container so
washer
the mains plug out of the socket.
that it cannot topple over, fall down and cannot
move.
Page 19

1
2
1
0000-GXX-9875-A0
0000098883_A1
0000-GXX-4370-A0
2
1
0000-GXX-9881-A0
13 Storing English
Carrying or pulling the high-pressure washer
14.2 Cleaning nozzle and spray
lance
► Pull the high-pressure washer using handle
(1).
► Carry the pressure washer by the handle (1)
and the carrying handle (2).
Transporting the high-pressure washer in a vehi‐
cle
► Secure the high-pressure washer so that it
cannot turn over or move.
► If the high-pressure washer cannot be trans‐
ported in a frost-proof environment: Protect
the high-pressure washer using antifreeze.
13 Storing
13.1 Storing the pressure washer
► Switch off pressure washer and unplug mains
plug from the socket.
► The pressure washer should be stored in such
a way that the following conditions are fulfilled:
The pressure washer is out of the reach of
–
children.
The pressure washer is clean and dry.
–
The pressure washer is in an enclosed
–
room.
The pressure washer is in a temperature
–
range above 0 °C.
If the pressure washer cannot be protected
–
from frost in storage: Protect the pressure
washer with antifreeze.
14 Cleaning
14.1 Cleaning the high-pressure washer and accessories
► Switch off the high-pressure washer and pull
the mains plug out of the socket.
► Clean the high-pressure washer, high-pres‐
sure hose, spray gun and accessories with a
damp cloth.
► Clean the connectors and couplings on the
high-pressure washer, high-pressure hose and
spray gun with a damp cloth.
► Clean vents with a paintbrush.
► Rinse the nozzle and spray lance under run‐
ning water and dry with a cloth.
► If the nozzle is clogged: Clean the nozzle with
the cleaning pin.
14.3 Cleaning the water intake screen
► Unscrew the connector (1) of the water con‐
nection.
► Pull water intake screen (2) out of the water
connection.
► Rinse out the water intake screen (2) under
running water.
► Insert water intake screen (2) into water con‐
nection.
► Attach the connector (1) and tighten it by
hand.
14.4 Cleaning the water filter
The water filter must be disassembled to clean it.
0458-603-0121-B 19
Page 20

5
1
0000-GXX-4373-A0
2
3
1
4
English 15 Maintenance
15 Maintenance
15.1 Maintenance intervals
Maintenance intervals depend on the ambient
conditions and the operating conditions. STIHL
recommends the following maintenance inter‐
vals:
Monthly
► Remove gasket (1) from the fastener (2).
► Unscrew fastener (2) from filter housing (5).
► Remove gasket (3) from the fastener (2).
► Remove filter (4) from the filter housing (5).
► Rinse gaskets (1 and 3), fastener (2) and fil‐
ter (4) under running water.
► Grease the gaskets (1 and 3) with grease for
fittings.
► Reassemble the water filter.
► Clean water intake screen.
16 Repairing
16.1 Repairing the pressure washer
The user cannot personally repair the pressure
washer and accessory.
► If the pressure washer or accessory is dam‐
aged: Do not use the pressure washer or
accessory. Consult a STIHL servicing dealer.
17 Troubleshooting
17.1 Correcting faults in the pressure washer
Fault Cause Remedy
The pressure washer
does not start, even
though the trigger of
the spray gun is
pressed.
The pressure washer
does not start when
switched on. The
electric motor buz‐
zes.
The pressure washer
switches off while in
operation.
The plug of the connecting cord or
extension cord is not plugged in.
The circuit-breaker (fuse) or the earthleakage circuit breaker has tripped.
The circuit is electrically overloaded or
defective.
The fuse rating of the socket is too
low.
The extension cord has an incorrect
cross-section.
The extension cord is too long ► Use an extension cord with the cor‐
The electric motor is too warm. ► Allow the pressure washer to cool
The mains voltage is too low. ► Press the trigger of the spray gun
The extension cord does not have the
correct cross-section.
The extension cord is too long. ► Use an extension cord with the cor‐
The plug of the connecting cord or
extension cord has been pulled out of
the socket.
► Plug in connecting cord or extension
cord plug.
► Find and resolve the cause for the
trip. Engage circuit-breaker (fuse) or
the earth-leakage circuit breaker.
► Switch off other electrical consum‐
ers on the same circuit.
► Plug the connecting cord into a
socket with the correct fuse rating,
18.1.
► Use an extension cord with a suffi‐
cient cross-section. 18.3
rect length. 18.3
for 5 minutes.
► Clean the nozzle.
and keep it pressed and switch on
pressure washer.
► Switch off other loads connected to
the same circuit.
► Use an extension cord with an ade‐
quate cross-section, 18.3
rect length. 18.3
► Insert the plug of the connecting
cord or of the extension cord.
20 0458-603-0121-B
Page 21

1
1
1
1
1
0000-GXX-9879-A0
18 Specifications English
Fault Cause Remedy
The circuit-breaker (fuse) or the earth-
The high-pressure
pump switches on
and off repeatedly,
without the trigger of
the spray gun being
pressed.
The working pressure
fluctuates or drops.
The water jet has
changed shape.
Additional detergent
is not drawn in.
Venturi nozzle is worn Have the tool repaired by a STIHL
Connections on pres‐
sure washer, highpressure hose, spray
gun or spray lance
are difficult to con‐
nect to each other.
17.2 Greasing the gaskets
leakage circuit breaker has tripped.
The circuit is electrically overloaded or
defective.
The fuse rating of the socket is too
low.
The electric motor is too warm. ► Allow the pressure washer to cool
The high-pressure pump, the highpressure hose or the spray attachment
are leaking.
There is a water shortage. ► Open water tap completely.
The nozzle is blocked. ► Clean the nozzle.
The water intake screen or water filter
are blocked.
The high-pressure pump, the high-
pressure hose or the spray attachment
are leaking or are defective.
The nozzle is blocked. ► Clean the nozzle.
The nozzle is worn. ► Replace nozzle.
The detergent container is empty. ► Fill the detergent container with
Fan jet nozzle is not turned in direction
- up to the stop.
The connection seals are not lubrica‐
ted.
18 Specifications
► Find and resolve the cause for the
trip. Engage circuit-breaker (fuse) or
the earth-leakage circuit breaker.
► Switch off other electrical consum‐
ers on the same circuit.
► Plug the connecting cord into a
socket with the correct fuse rating,
18.1.
for 5 minutes.
► Clean the nozzle.
► Ask a STIHL servicing dealer to
check the pressure washer.
► Ensure that a sufficient quantity of
water is available.
► Clean water intake screen and water
filter.
► Ask a STIHL servicing dealer to
check the pressure washer.
detergent.
► Turn fan jet nozzle in direction - up
to the stop.
servicing dealer.
►
Lubricate the gaskets 17.2
18.1 Pressure washer STIHL RE 150
Version 230 V / 50 Hz
Fuse (characteristic "C" or "K"): 13 A
–
Power consumption: (EU) 2019/1781 §2(2) (j):
–
2.9 kW
Maximum permitted network impedance: 0.32
–
Ohm
Protection class: I
► Grease gaskets (1) with grease for fittings.
–
Degree of of electrical protection: IPX5
–
Working pressure (p): 14 MPa (140 bar)
–
0458-603-0121-B 21
Page 22

English 18 Specifications
Max. permissible pressure (p max.): 18 MPa
–
(180 bar)
Max. water supply pressure (p in max.): 1 MPa
–
(10 bar)
Max. water throughput (Q max): 10.2 l/min
–
(612 l/h)
Minimum water throughput (Q min.): 9.0 l/min
–
(540 l/h)
Maximum kickback force: 21 N
–
Max. suction lift: 0.5 m
–
Max. water temperature in pressure mode
–
(t in max): 60 °C
Max. water temperature in suction mode:
–
20 °C
sample inspection
Length: 383 mm
–
Width: 380 mm
–
Maximum height: 981 mm
–
Minimu height: 792 mm
–
Length of high-pressure hose: 9 m
–
Weight (m) with accessory attached: 30 kg
–
Version 220-240 V / 50 Hz
Fuse (characteristic "C" or "K"): 10 A
–
Power consumption: (EU) 2019/1781 §2(2) (j):
–
2.2 kW
Maximum permitted network impedance: 0.45
–
Ohm
Protection class: I
–
Degree of of electrical protection: IPX5
–
Working pressure (p): 12 MPa (120 bar)
–
Max. permissible pressure (p max.): 18 MPa
–
(180 bar)
Max. water supply pressure (p in max.): 1 MPa
–
(10 bar)
Max. water throughput (Q max): 8.7 l/min
–
(522 l/h)
Minimum water throughput (Q min.): 7.8 l/min
–
(468 l/h)
Maximum kickback force: 16 N
–
Max. suction lift: 0.5 m
–
Max. water temperature in pressure mode
–
(t in max): 60 °C
Max. water temperature in suction mode:
–
20 °C
sample inspection
Length: 383 mm
–
Width: 380 mm
–
Maximum height: 981 mm
–
Minimu height: 792 mm
–
Length of high-pressure hose: 9 m
–
Weight (m) with accessory attached: 30 kg
–
Version 220 V / 60 Hz
Fuse (characteristic "C" or "K"): 15 A
–
Power consumption: (EU) 2019/1781 §2(2) (j):
–
2.8 kW
Maximum permitted network impedance: 0.32
–
Ohm
Protection class: I
–
Degree of of electrical protection: IPX5
–
Working pressure (p): 13 MPa (130 bar)
–
Max. permissible pressure (p max.): 18 MPa
–
(180 bar)
Max. water supply pressure (p in max.): 1 MPa
–
(10 bar)
Max. water throughput (Q max): 10 l/min
–
(600 l/h)
Minimum water throughput (Q min.): 9.3 l/min
–
(560 l/h)
Maximum kickback force: 20 N
–
Max. suction lift: 0.5 m
–
Max. water temperature in pressure mode
–
(t in max): 60 °C
Max. water temperature in suction mode:
–
20 °C
sample inspection
Length: 383 mm
–
Width: 380 mm
–
Maximum height: 981 mm
–
Minimu height: 792 mm
–
Length of high-pressure hose: 9 m
–
Weight (m) with accessory attached: 30 kg
–
Parameters dependent on pressure have been
measured at an inlet pressure of 0.3 MPa (3
bar).
18.2 Pressure washer STIHL RE 170
Version 230 V / 50 Hz
Fuse (characteristic "C" or "K"): 16 A
–
Power consumption: EU) 2019/1781 §2(2) (j):
–
3.3 kW
Maximum permitted network impedance: 0.32
–
Ohm
Protection class: I
–
Degree of of electrical protection: IPX5
–
Working pressure (p): 15 MPa (150 bar)
–
Max. permissible pressure (p max.): 18 MPa
–
(180 bar)
Max. water supply pressure (p in max.): 1 MPa
–
(10 bar)
Max. water throughput (Q max): 10.8 l/min
–
(648 l/h)
Minimum water throughput (Q min.): 9.5 l/min
–
(570 l/h)
Maximum kickback force: 24 N
–
Max. suction lift: 0.5 m
–
22 0458-603-0121-B
Page 23

19 Spare Parts and Accessories
Max. water temperature in pressure mode
–
(t in max): 60 °C
Max. water temperature in suction mode:
–
20 °C
sample inspection
Length: 383 mm
–
Width: 380 mm
–
Maximum height: 981 mm
–
Minimu height: 792 mm
–
Length of high-pressure hose: 9 m
–
Weight (m) with accessory attached: 30 kg
–
Parameters dependent on pressure have been
measured at an inlet pressure of 0.3 MPa (3
bar).
18.3 Extension Cords
If an extension cord is used, it must have a
ground wire and the wire gage of its conductors
must meet the following minimum requirements –
depending on the line voltage and length of the
extension cord:
If rated voltage on the rating label is 220V to
240V:
Cord length up to 20 m: AWG 15 / 1.5 mm²
–
Cord length 20 m up to 50 m: AWG 13 /
–
2.5 mm²
If rated voltage on the rating label is 100 V to
127 V:
Cord length up to 10 m: AWG 14 / 2.0 mm²
–
Cord length 10 m up to 30 m: AWG 12 /
–
3.5 mm²
18.4 Sound and vibration levels RE 150, 170
The K-value for sound pressure levels is 2 dB(A).
K-value for sound power levels is 2 dB(A). The
K-value for vibration level is 2 m/s².
Sound pressure level LpA measured according
–
to EN 60335-2-79:
71 dB(A)
–
Sound power level LwA measured according to
–
EN 60335-2-79:
85 dB(A)
–
Vibration level ah measured according to EN
–
60335‑2‑79, spray gun: ≤ 2.4 m/s².
18.5 REACH
REACH is an EC regulation and stands for the
Registration, Evaluation, Authorisation and
Restriction of Chemical substances.
For information on compliance with the REACH
regulation see www.stihl.com/reach.
English
19 Spare Parts and Accesso‐
ries
19.1 Spare parts and accessories
These symbols indicate original STIHL
spare parts and original STIHL acces‐
sories.
STIHL recommends the use of original STIHL
spare parts and accessories.
Despite ongoing market observation, STIHL is
unable to judge the reliability, safety and suitabil‐
ity of other manufacturers' spare parts and
accessories; accordingly, STIHL cannot warrant
for the use of those parts.
Original STIHL spare parts and original STIHL
accessories are available from STIHL dealers.
20 Disposal
20.1 Disposing of the pressure washer
Contact the local authorities or your STIHL
dealer for information on disposal.
Improper disposal can be harmful to health and
pollute the environment.
► Take STIHL products including packaging to a
suitable collection point for recycling in accord‐
ance with local regulations.
► Do not dispose with domestic waste.
21 EC Declaration of Con‐
formity
21.1 Pressure washers STIHL RE 150, 170
ANDREAS STIHL AG & Co. KG
Badstraße 115
D-71336 Waiblingen
Germany
declare under our sole responsibility that
Type: high-pressure washer
–
Manufacturer's brand: STIHL
–
Model: RE 150, RE 170
–
Serial number: RE01
–
conforms to the specifications of Directives
2011/65/EU, 2006/42/EC and 2014/30/EU,
2009/125/EC and has been developed and built
in compliance with the versions of the following
standards valid at the production date:
EN 55014‑1, EN 55014‑2, EN 60335‑1,
EN 60335‑2‑79, EN 61000‑3‑2, EN 61000‑3‑11.
0458-603-0121-B 23
Page 24

English 21 EC Declaration of Conformity
The measured and the guaranteed sound power
level have been determined in accordance with
Directive 2000/14/EC, Annex V, and standard
ISO 3744.
Measured sound power level: 85 dB(A)
–
Guaranteed sound power level: 87 dB(A)
–
The technical documents are stored at
ANDREAS STIHL AG & Co. KG Produktzulas‐
sung.
The year of construction, country of manufacture
and the serial number are shown on the highpressure washer.
Waiblingen, 03.02.2021
ANDREAS STIHL AG & Co. KG
HRA 260269, Stuttgart local court
pp
Dr. Jürgen Hoffmann, Director Product Certifica‐
tion & Regulatory Affairs
24 0458-603-0121-B
Page 25

21 EC Declaration of Conformity English
0458-603-0121-B 25
Page 26

English 21 EC Declaration of Conformity
26 0458-603-0121-B
Page 27

21 EC Declaration of Conformity English
0458-603-0121-B 27
Page 28

www.stihl.com
*04586030121B*
0458-603-0121-B
*04586030121B*
0458-603-0121-B
 Loading...