

Stewart Filmscreen Corp Luxus A Electriscreen Owner's Manual
Owner’s Manual
LXSR-0111
TO THE INSTALLER: BE SURE TO LEAVE THIS MANUAL WITH THE OWNER.
• TO THE OWNER
• INSTALLATION INSTRUCTIONS
• OPERATING THE SCREEN
• MAINTENANCE
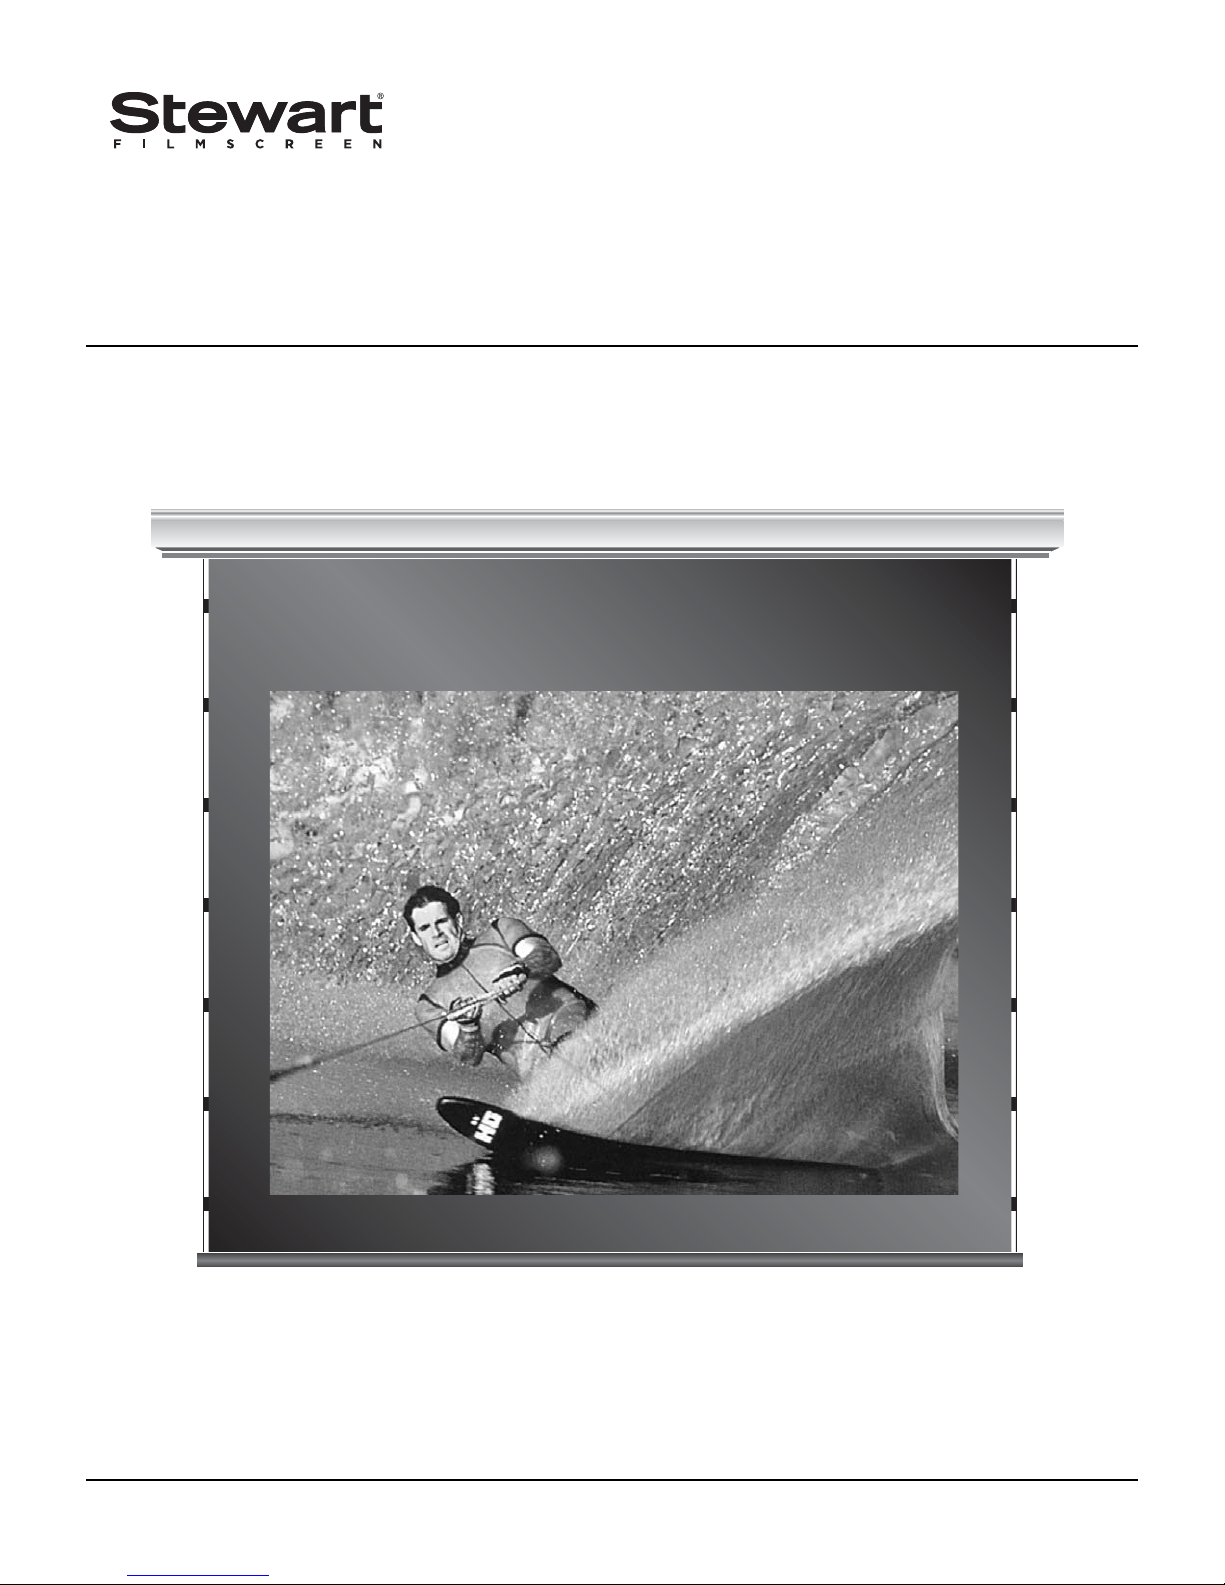
Luxus A Electriscreen

Printed in U.S.A.
©2003–2011 Stewart Filmscreen Corporation
Stewart Filmscreen reserves the right to make changes to the product specified in this document.
From time to time, this document is updated. Current versions of documentation are posted on the Stewart Filmscreen website at:
www.stewartfilmscreen.com

Contents
To the Owner . . . . . . . . . . . . . . . . . . . . . . . . . . . . . . . . . . . . . . 2
Preparing the Installation . . . . . . . . . . . . . . . . . . . . . . . . . . . . . 2
Step 1. Hanging the Case . . . . . . . . . . . . . . . . . . . . . . . . . . . . 4
Step 2. Electrical Hook-up . . . . . . . . . . . . . . . . . . . . . . . . . . . . 6
Operating the Screen . . . . . . . . . . . . . . . . . . . . . . . . . . . . . . 12
Adjusting the Screen Extension . . . . . . . . . . . . . . . . . . . . . . . 13
Screen Care and Cleaning . . . . . . . . . . . . . . . . . . . . . . . . . . 15
Troubleshooting . . . . . . . . . . . . . . . . . . . . . . . . . . . . . . . . . . . 16
Product Warranty . . . . . . . . . . . . . . . . . . . . . . . . . . . . . . . . . 17
Luxus AElectriscreen: Owner’s Manual 1
Owner’s Manual
Luxus A Electriscreen
Congratulations on your purchase of the finest optical viewing screen
available anywhere in the world!
Please take a moment to review this manual, it will help ensure you many
years of trouble-free service from your new Stewart Filmscreen product.
About your Luxus A Series Electriscreen
This is Stewart’s most popular electric roll up unit because it can
accommodate screen sizes up to 66” x 122” / 167 x 310 cm. Typically, the
screen housing is hidden above the ceiling, and the screen descends
through a slot in the ceiling.
Preparation
Specifications regarding the individual screen dimensions, weight, mounting
type, and controls are provided by the factory when the unit is ordered.
Before beginning the installation:
Check the specifications for the type of mounting and switch
control to be used.
Ensure that the mounting area and electrical connection are
prepared.
Check the size and weight of the screen to be installed so that
you can plan for the number of people required for the mounting
procedure. You need at least two people to mount the smaller
screens; more are needed for larger, heavier screens.
On the screen housing, note the removable Image Centerline
sticker. Use the sticker to help you accurately position the
screen. Be sure to remove this sticker after installation.
You will need:
Enough ladders for the personnel supporting the screen during
the mounting process
A level
Fasteners appropriate for the surface on which the screen is
being mounted
2 Stewart Filmscreen Corporation
TO THE OWNER
P
REP ARING THE INSTALLA TION
Before proceeding with the installation of this screen,
be sure to thoroughly read and understand all the
installation and operating instructions.
All electrical wiring installations must conform to local
and national codes and should be performed by
qualified service personnel.
There are no user-serviceable parts contained within the
unit.
Note: This manual refers to “AC” to represent electrical power. Your
location may use 120V, 220V, or other electrical power. Screen systems are
manufactured using the electrical power type specified for the location. Use
appropriate power sources for your location.
Unpacking
1. Remove the outer plastic covering and white wrapping paper
surrounding the screen case.
2. Do not remove the wrapping paper surrounding the screen roller.
You should remove it only after the unit is hung and all electrical
connections have been made.
3. Remove the batten lock-down screws located on the back side of
the case.
Luxus AElectriscreen: Owner’s Manual 3
Caution
During installation, do not place the unit on an unstable cart,
stand, table, or ladder. The unit may fall, causing injury to a
child or adult and damage to the unit.
Warning!
Failure to remove the batten lock-down screws can result in
permanent damage to the screen.
To avoid damage to the screen while unpacking, lifting, or
installing this electric projection screen, do not compact the
screen's batten bar against the screenroll assembly.
Installers should never use their hands or allow any
tools or equipment to come into contact with the
screen's batten or screenroll assembly.
Lifting should be performed only at the ends of the
housing. If manual support is required, use hands only,
and only on the exterior of the housing.
Projection screens should always be protected when installed
in unfinished rooms. Damage will result if left unprotected in
these situations. Make sure screen is retracted at all times
and electrical service to the unit is shut off. Cover the ceiling
opening with plastic sheeting to guard against foreign debris
(such as dry wall dust or paint) from entering screen housing.
Remember to remove protective plastic sheeting prior to
screen's first-time activation upon room's completion.
Professional mounting techniques should be used. Stewart Filmscreen
Corporation cannot be liable for substandard or faulty installations.
Make sure that you mount the screen so that the electrical box is on the left
side (audience left).
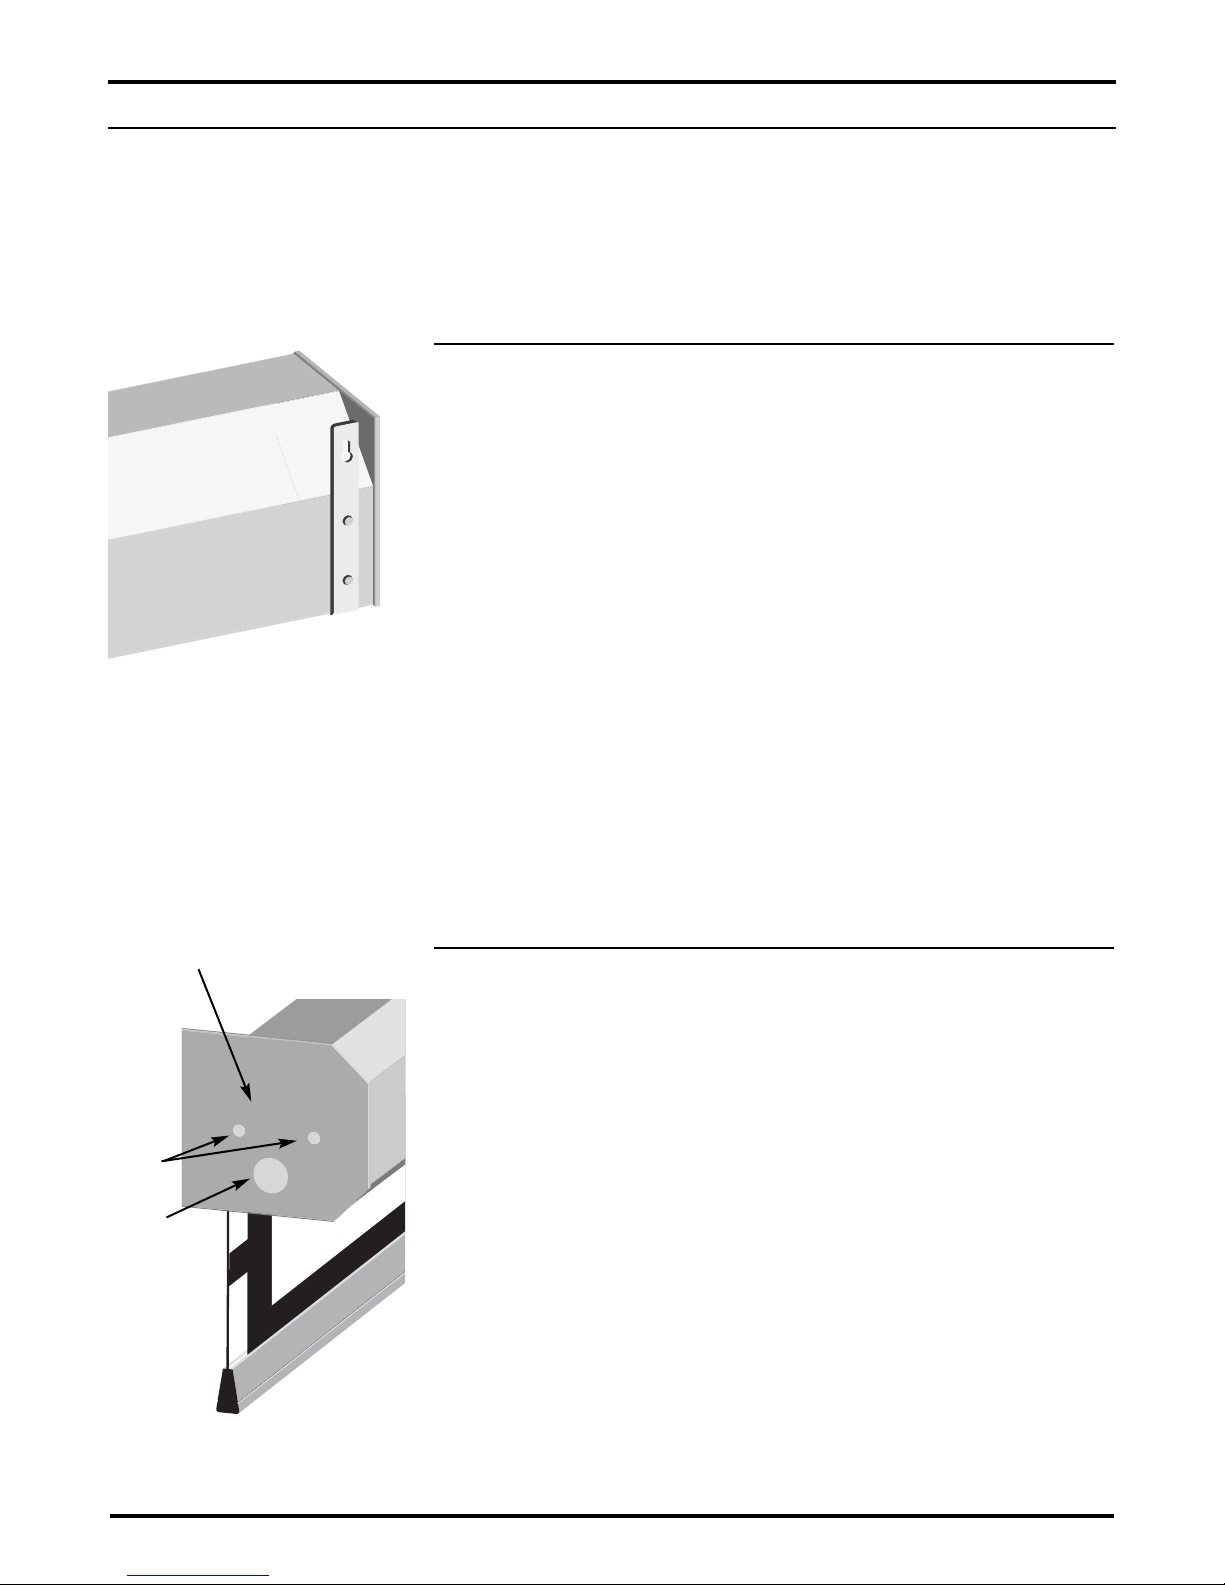
Wall installation
1. Mount screen through the holes in the wall mount brackets.
Refer to Figure 1.
– If mounting onto a wood substructure, #12 screws can be used.
– If the unit is to be mounted to plaster, drywall, masonry, or other-
type of surface, use an appropriate fastener. (These might include
toggle or molly bolts or similar fasteners.)
2. Make sure the unit is level from side to side and front to back.
Ceiling or top mount installation
The Luxus Electriscreen can be installed into the ceiling or soffit. A false
ceiling is not intended to support the weight of a Luxus Electriscreen.
Make sure that you mount the screen so that the electrical box is on the left
side (audience left). Refer to Figure 2
If the unit is to be mounted to plaster, drywall, masonry, or other type of
surface, use an appropriate fastener. (These might include toggle or molly
bolts or similar fasteners.)
There are two types of ceiling or top mount: recessed or suspended. Follow
the procedure for the specified type of mounting.
4 Stewart Filmscreen Corporation
Figure 2: Ceiling or top mount
STEP 1. HANGING THE CASE
Figure 1: Wall mount using
optional brackets
Electrical Connection
Box (behind end plate)
Electrical
Knockout
(optional)
Socket
Cap
Screws
 Loading...