

Page 1
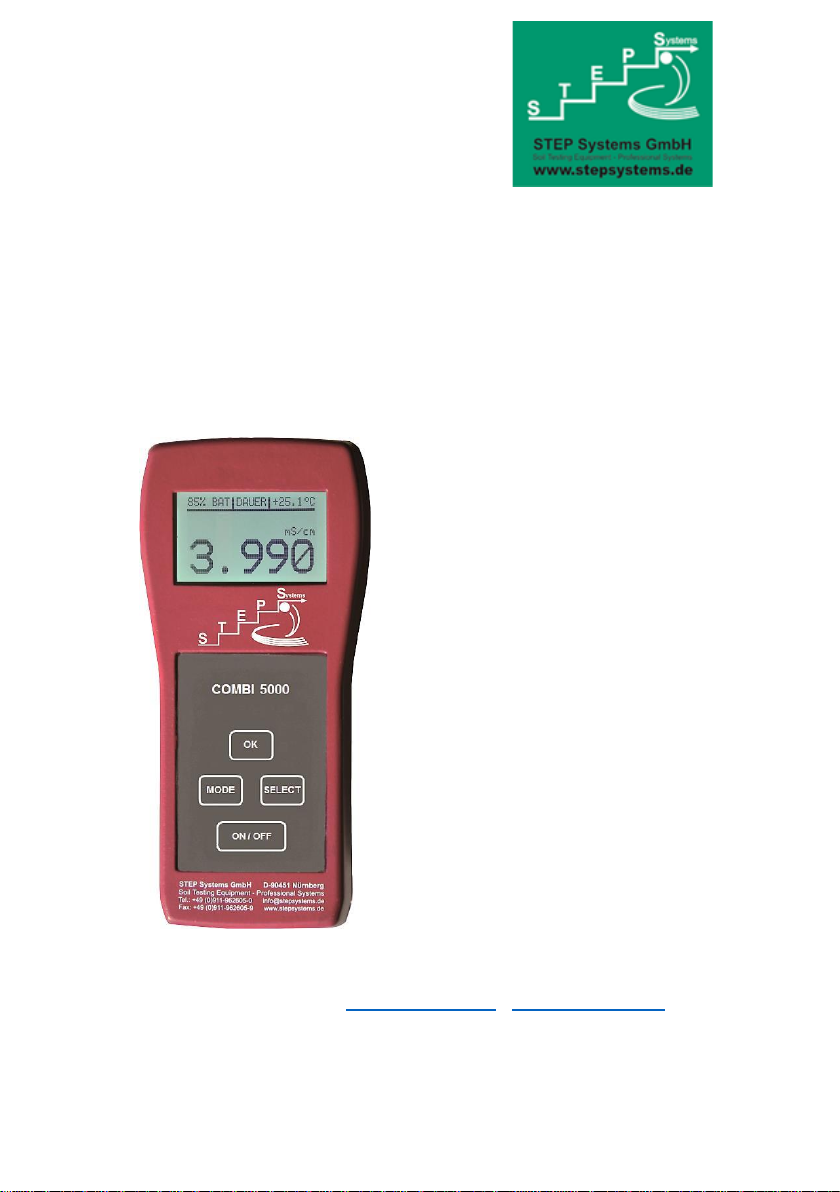
COMBI 5000
Instruction manual
STEP Systems GmbH * Duisburger Str. 44 * 90451 Nuremberg, Germany
Tel: 0911-9626050 * www.stepsystems.de * [email protected]
Printed in Germany 2018.
All rights reserved
Page 2

Technical data
Content
1. Technical data ............................................................................ 2
2. General information .................................................................... 5
2.1. Safety information .................................................................. 5
2.1.1. Use of hazard information .................................................. 5
2.1.2. Precautionary labels .......................................................... 6
2.2. Product overview.................................................................... 7
3. Starting ....................................................................................... 9
3.1. Display and keys .................................................................... 9
3.1.1. Key ON/OFF .................................................................... 10
3.1.2. Key MODE ....................................................................... 10
3.1.3. Key OK ............................................................................ 11
3.1.4. Key SELECT.................................................................... 11
4. Operation .................................................................................. 12
4.1. pH measurement.................................................................. 12
4.1.1. pH calibration ................................................................... 13
4.2. EC measurement ................................................................. 14
4.2.1. EC calibration .................................................................. 14
4.3. AM measurement ................................................................. 16
4.3.1. AM measurement check .................................................. 16
4.4. Temperature measurement .................................................. 17
4.5. Soil moisture measurement (optional) .................................. 18
4.5.1. SMT sensor check ........................................................... 19
1
Page 3

Performance specifications
Measuring unit
Hand-held meter for pH, EC, activity, moisture and
temperature measurement
Housing
Splash-proof according to IP40, EN60529
Dimensions
(w x h x d)
83 x 180 x 55 mm
Weight
0.3 kg
Operating
temperature
0 ─ 40 °C
Display
Graphical display, 54 x 32 mm, 128 x 64 pixel,
transflective , contrast adjustable
Lighting
adjustable by pressing "ON"
Connector
8-pin plug (DIN 45326) and BNC (pH electrode)
Power
9-Volt battery (for approx. 8h continuous operation)
Current
consumption
22 mA, temporarily pulses 40 mA for 45 ms with
SMT100 sensor
Operation
Continuous operation, timer operation (approx.
4 min), automatic switch-off in case of weak battery
Measurement
time
0.5 s for temperature, pH and moisture;
0.5─2 s for EC und activity measurement
Switch over of
measuring range
Automatic with floating-point
Switch over of
measuring unit
Automatic, depending on the connected probe
Operation
4 keys: ON / OFF, MODE, SELECT, OK
Languages
German, English (other languages on request)
Warranty
2 years
1. Technical data
Technical data
2
Page 4

Technical data
pH measurement
Probe
pH insertion probe, gel-filled with glass body
Measuring range
0 ─14 pH
Resolution
0.01 pH
Accuracy
0.02 pH
Temp. compensation
provided that an external temperature sensor
is connected (on request)
Meas. value acquisition
analog
Measuring method
DC
Calibration
automatic, with pH 4, pH 7; optional pH 10
Storage temperature
+15 °C ... +30 °C
EC measurement
Probe
EC-plastic probe with platinum sensor and
integrated NTC-temperature sensor
Measuring range
0.001 ─ 200 mS/cm
Resolution
0.001 / 0.01 / 0.1 mS/cm, depending on the
measuring range
Accuracy
2 % of measured value
Temperature
-20 ─ +80 °C
Temp. compensation
with integrated NTC-temperature sensor
Meas. value acquisition
analog
Measuring method
Multi-frequency sinusoidal AC-current
Calibration
Automatic with 0.084 mS/cm; 1.41 mS/cm;
5 mS/cm; 12.88 mS/cm; 111.8 mS/cm
AM measurement
Probe
Insertion stainless steel AM electrode with
alloyed 2-pin sensor, various lengths
Measuring range
0.00 ─ 10.00 g/l
Resolution
0.01 g/l
Accuracy
10 % of measured value
Meas. value acquisition
analog
Measuring method
Multifrequency sinusoidal AC
Calibration
Factory-provided
3
Page 5

Technical data
Temperature measurement
Probe
external NTC-temperature sensor
Measuring range
-20 ─ +80 °C
Resolution
0.1 °C
Accuracy
0.5 % of measured value
Temperature
-20 ─ +80 °C
Measured value
acquisition
analog
Measuring method
DC
Calibration
Factory-provided
Moisture measurement
Probe
SMT100 (moisture and temperature) with
serial data transmission via RS485
Measuring range
0.00 ─ 96.40% vol.
Resolution
0.01% vol.
Accuracy
2% of measured value
Temperature
-20 ─ +80 °C
Measured value
acquisition
Serial RS485
Calibration
Factory-provided
4
Page 6
General information
DANGER
Indicates a potentially or imminently hazardous situation which, if not
avoided, will result in death or serious injury.
WARNING
Indicates a potentially or imminently hazardous situation which, if not
avoided, could result in death or serious injury.
2. General information
The contents of this manual were carefully verified and have been
compiled to the best of our knowledge. However, the Manufacturer does
not accept liability for possibly contained statements in this manual. In no
event will the manufacturer be liable for direct, indirect, special, incidental
or consequential damages resulting from any defect or omission in this
manual. The manufacturer reserves the right to make changes in this
manual and the products it describes at any time, without notice or
obligation. Revised editions can be found on the manufacturer’s website.
2.1. Safety information
Please read the entire manual before unpacking, setting up or
operating this equipment. Pay attention to all danger and caution
statements. Failure to do so could result in serious injury to the
operator or damage to the equipment.
Make sure that the protection provided by this equipment is not
impaired. Do not use or install this equipment in any manner other
than that specified in this manual.
2.1.1. Use of hazard information
5
Page 7
General information
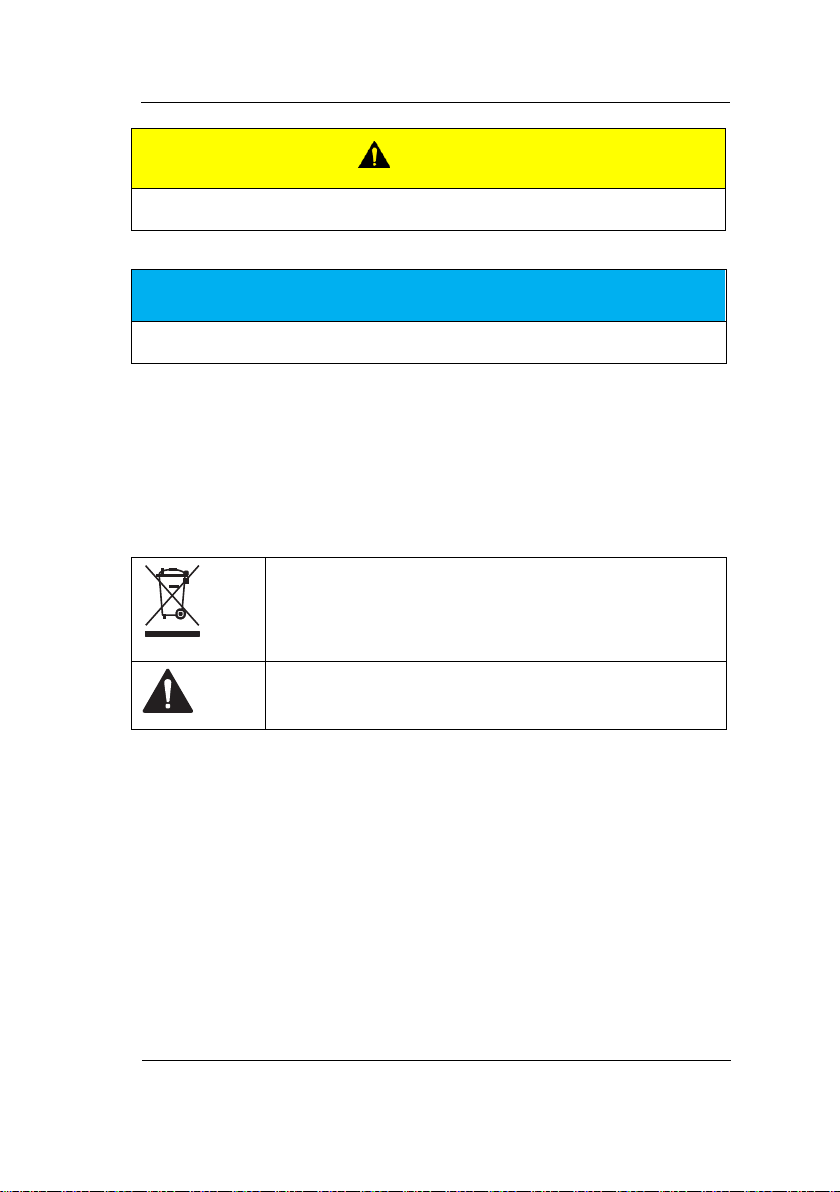
ATTENTION
Indicates a potentially hazardous situation that may result in minor or
moderate injury.
REFERENCE
Indicates a situation which, if not avoided, may cause damage to the
instrument. Information that requires special emphasis.
Electrical equipment marked with this symbol may not
be disposed of public disposal systems. Electrical
equipment users must return old or end-of-life
equipment to the Manufacturer for disposal at no
charge to the user.
This symbol, if noted on the instrument, references the
instruction manual for operation and/or safety
information.
2.1.2. Precautionary labels
Read all labels and tags attached to the instrument. Personal injury or
damage to the instrument could occur if not observed. A symbol on the
instrument is referenced in the manual with a precautionary statement.
6
Page 8

General information
2.2. Product overview
The COMBI 5000 is a multi-functional device for five different
parameters:
pH
EC (conductivity)
AM (salt content)
Temperature
Soil moisture und temperature
The hand-held meter has two interfaces for connecting of electrodes.
The probes are automatically recognized and the corresponding
measurement method is called up. Probes with 8-pin or 5-pin plug can be
connected (probes from 3000 series need an adapter).
COMBI 5000 is powered with a 9 Volt battery.
Operation occurs via the graphic display of the menu and four keys.
7
Page 9
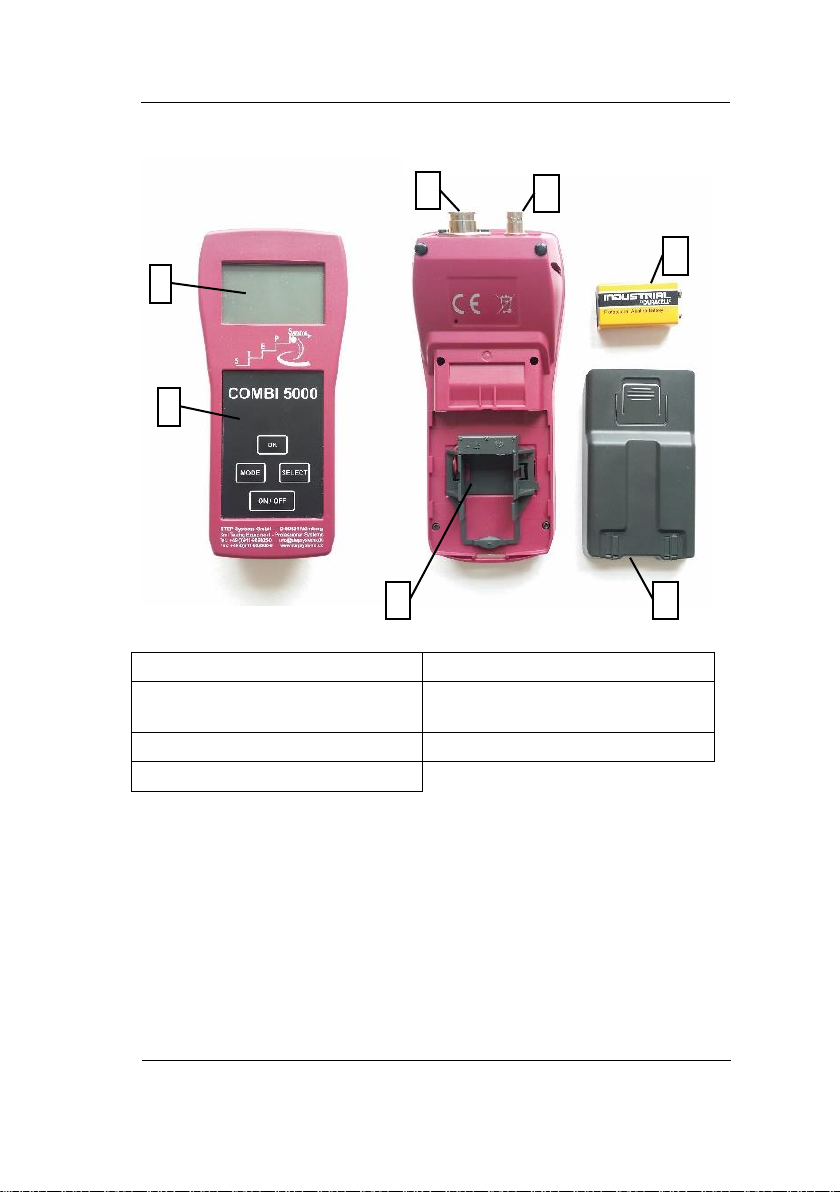
1. Keypad
2. Display
3. 8-pin plug (also for 5-pin plug
suitable)
4. BNC plug for pH probe
5. 9 V battery (included)
6. Battery cover
7. Battery holder
1 2 3 4 5 6 7
Figure 1. COMBI 5000
General information
8
Page 10
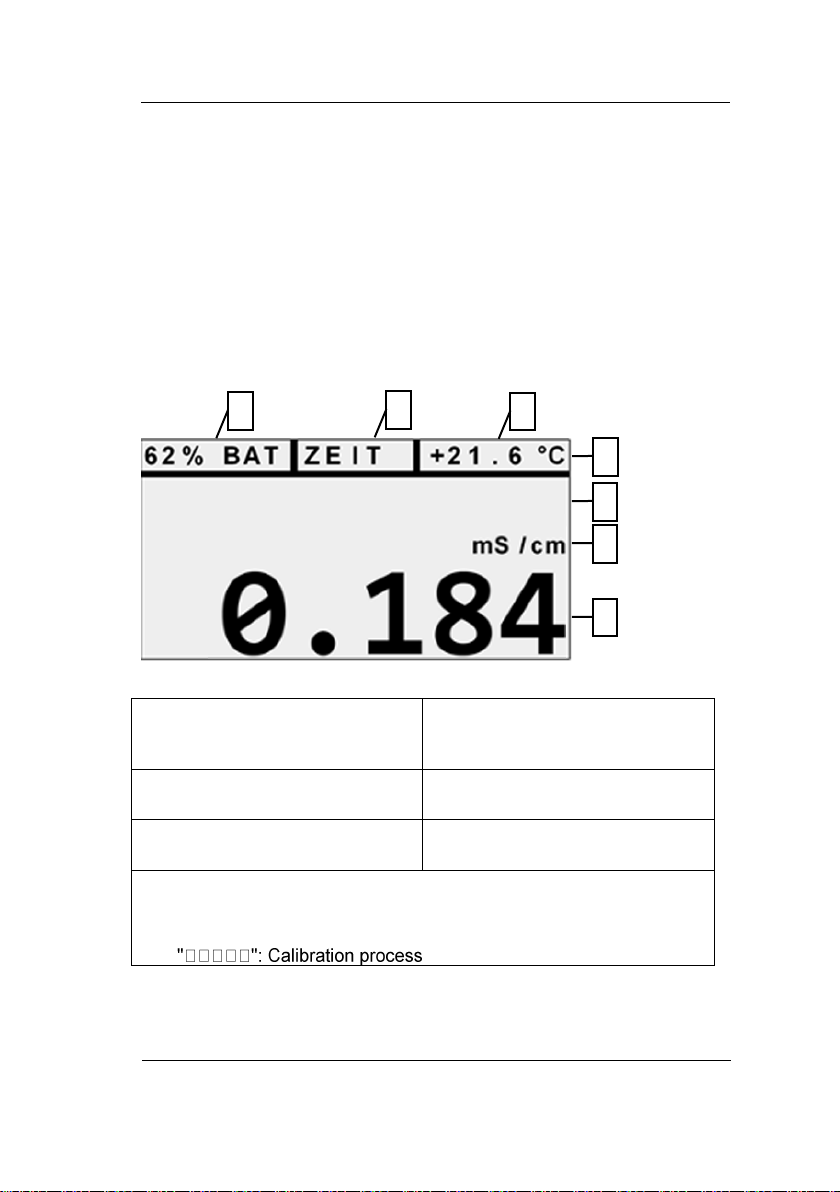
Starting
1. Battery capacity in % (a new
battery shows up to 110%
capacity)
2. TIMER/CONTI operations
3. Temperature (EC-, MST- or
external temperature sensor)
4. Status line with 3 segments
5. Info line 1: selectable mode,
pH status, calibration results
6. Info line 2: measured value,
SELECT or OK call
7. Measurement value display
"1.234": measurement value with floating point
"- - - - -": no measured value available
1 2 3
4 5 6
7
3. Starting
Place the provided 9V battery into the battery holder inside the battery
compartment in the rear bottom part of the unit. Pay attention to the
correct polarity.
3.1. Display and keys
Operation occurs via the graphic display of the menu and four keys.
Figure 2. Display
9
Page 11
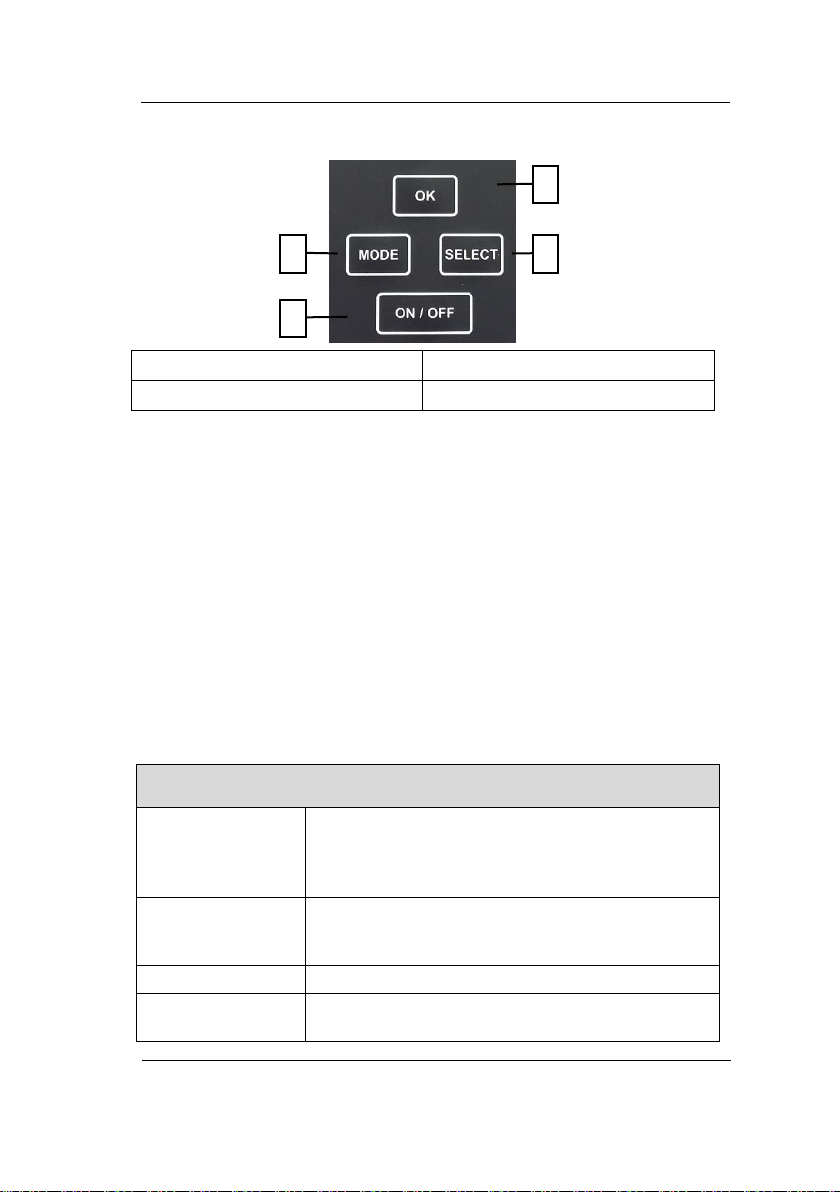
Starting
1. ON/OFF
2. MODE
3. OK
4. SELECT
MODE
CONTI
By CONTINUAL OPERATION, the status line
shows CONTI and the device remains switched
on. After re-starting the TIMED OPERATION is
active.
TIMER
By TIMED OPERATION, the status line shows
TIMER and the unit will be switched off after
approx. 4 minutes automatically.
CALIBRATION
The calibration procedure starts
DISPLAY
CONTRAST
Change of the contrast
(00025─00050). Factory setting: 30
1 2 3
4
Figure 3. Keypad
3.1.1. Key ON/OFF
Briefly press ON/OFF for switching the instrument on and off. Display
shows the device type, version and manufacturer's address.
Measurement mode starts automatically depending on the connected
sensors.
The device is switched off by pressing ON/OFF, automatically after 4
minutes in TIMER OPERATION or after reduction of the battery voltage
to 1 %.
3.1.2. Key MODE
With MODE it is possible to upload different instrument setting and
adjustment functions, depending on the connected sensors. Each
function must be confirmed with OK.
10
Page 12

pH-SENSOR
STATUS
Appears only with connected sensor. Display
shows the slope in mV/pH and the current sensor
voltage in mV
LANGUAGE /
SPRACHE
Selecting of the menu language (German,
English).
3.1.3. Key OK
Confirm with OK the displayed information in the info line 1.
Fix the current display with lighting by pressing OK.
Switch with OK the display lighting on.
3.1.4. Key SELECT
Confirm with SELECT the displayed selection in the info line 1.
Fix the current display without lighting by pressing SELECT.
Starting
11
Page 13
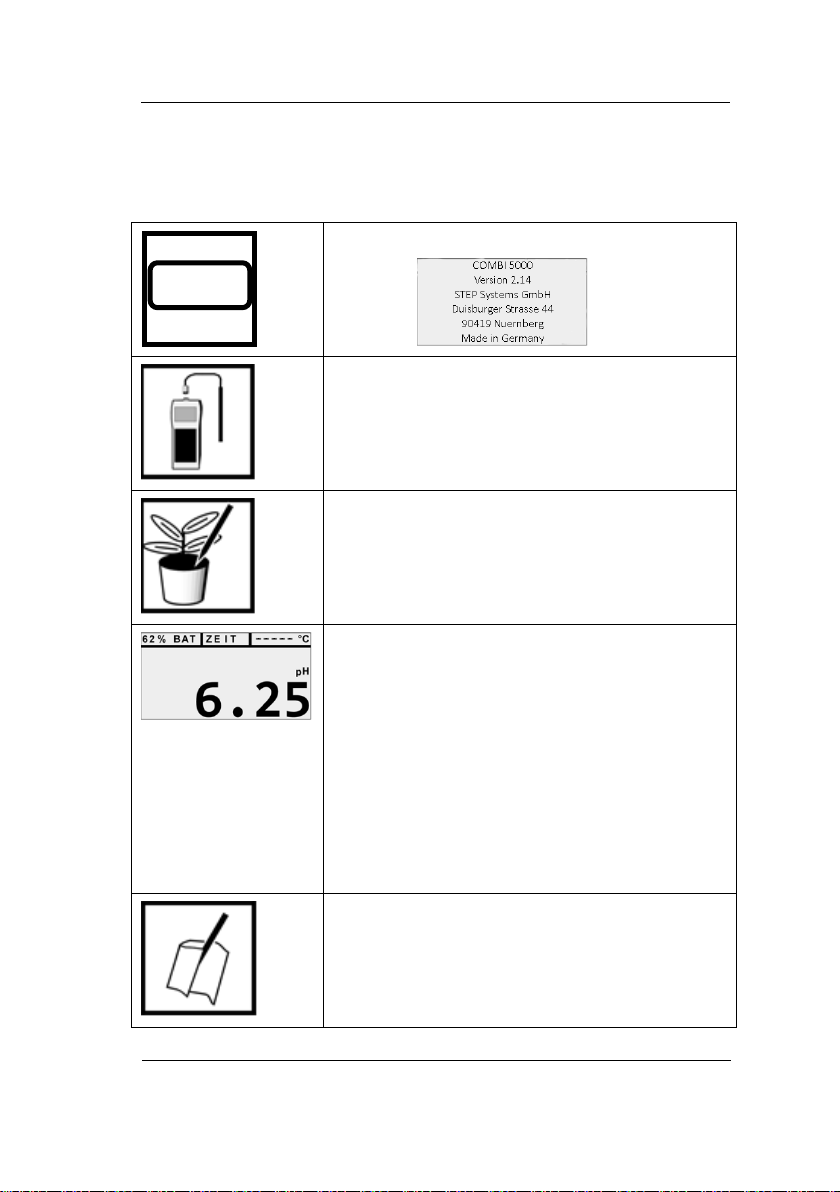
Switch on the unit. The display shows:
Connect the pH electrode to the BNC plug.
Attention: during pH measurement no other
probe can be connected to the 8-pin plug, except
external NTC-temperature sensor.
Insert the pH electrode into the soil / substrate
(use the piercing pin) or immerse into the
solution and stir slightly.
After approx. 10 seconds the measured value
will be stable and can be read.
Measured values outside the normal
measurement range will be displayed as "-----".
If an external NTC-temperature sensor is
connected and in the same solution, pH value
will be compensated to 25°C and displayed
accordingly.
Measurements without temperature sensor are
displayed as "-----°C" and the pH value is not
temperature-compensated.
Clean pH electrode with a dry tissue.
Further measurements can be carried out
immediately.
ON / OFF
4. Operation
4.1. pH measurement
Operation
12
Page 14

Operation
4.1.1. pH calibration
Calibration of the pH probe is required regularly (at least after 20
measurements) and with each new probe.
1. Immerse a clean pH electrode at first in buffer solution pH 7 and stir
it slightly.
2. Select MODE>CALIBRATION.
3. Start calibration with SELECT. The display shows “please wait…”.
4. The info line 1 indicates the buffer solution pH 7. The calibration
process is displayed as a progress bar.
5. After the pH 7 calibration is finished, the display shows "now change
to pH 4 and then start with OK".
6. Remove and clean the pH electrode. Immerse the electrode in the
buffer solution pH 4 and stir it slightly. Then start the calibration with
OK. Display shows “please wait…”.
7. The info line 1 indicates the buffer solution pH 4. The calibration
process is displayed as a progress bar.
8. After the pH 4 calibration is finished, the display shows "pH10
calibration? no = MODE yes = OK".
9. If a 3-point calibration is desired, remove and clean the electrode,
immerse it in the buffer solution pH10 and stir it slightly. Then start
the calibration with OK. The display shows “please wait…”.
10. The info line 1 indicates the buffer solution pH 10. The calibration
process is displayed as a progress bar.
11. Calibration values are stored.
12. Calibration can be repeated as often as required.
False calibration sequence, false buffer solutions, defect of the pH
electrode or other failure will be displayed with "Check sensor/medium /
confirm with OK ".
The slope of the pH electrode [mV/pH] and the current sensor voltage
[mV] can be called up any time under MODE>pH-SENSOR STATUS.
13
Page 15
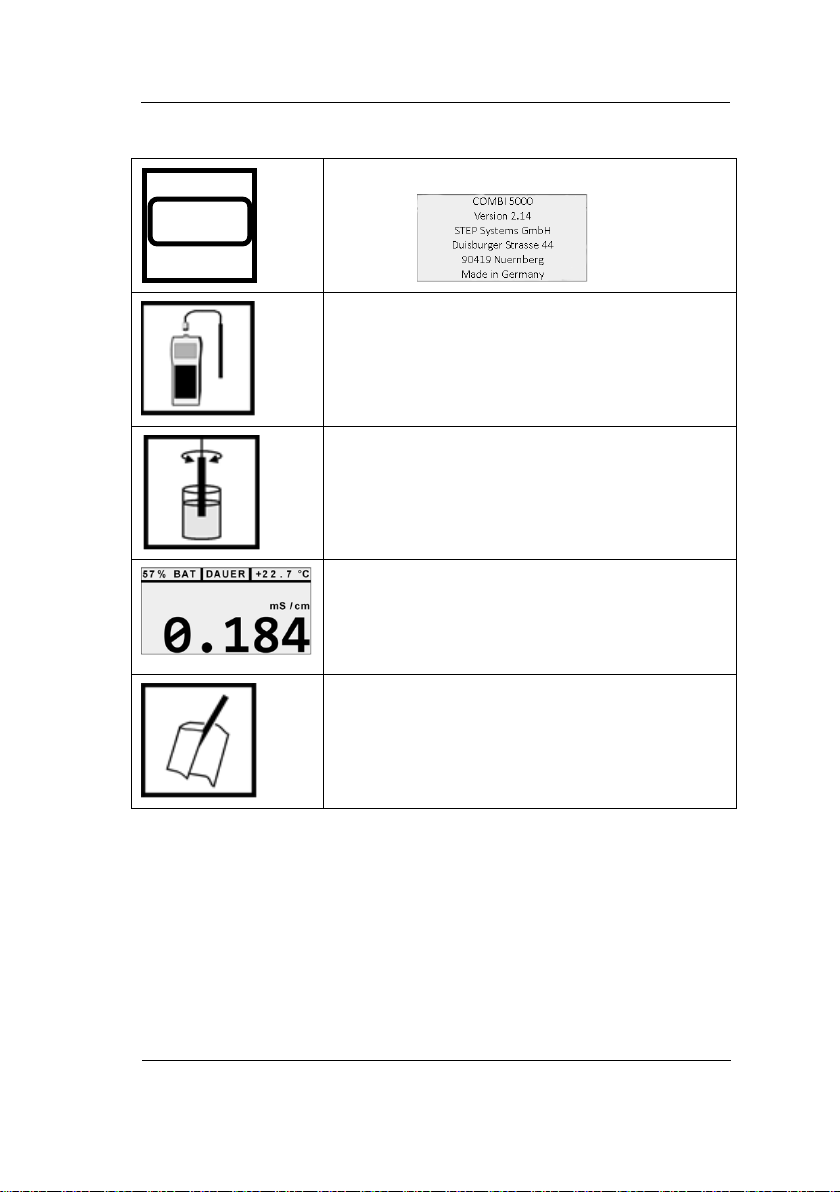
Switch on the unit. The display shows:
Connect the EC electrode to the 8-pin plug.
Attention: old EC electrodes with 5-pin plug can
be used only with adapter.
Dip the EC electrode into the solution and stir
slightly.
After 20 seconds the measured value will be
stable and can be read.
Temperature is displayed in the status line.
Measured values are compensated to 25°C.
Clean the EC electrode with a dry tissue.
Further measurements can be carried out
immediately.
ON / OFF
4.2. EC measurement
Operation
4.2.1. EC calibration
Each new EC electrode should be calibrated. Calibration can be
repeated as often as required and arranged in any sequence with
calibration solutions 0.084 mS/cm, 1.4 mS/cm, 5 mS/cm, 12.88 mS/cm
and 111.8 mS/cm.
1. Hold EC electrode in calibration solution for min. 10 sec. and stir it
slightly. Accurate values will be displayed after 20 sec (temperature
adjustment).
2. Select MODE>CALIBRATION.
14
Page 16

Operation
3. Start calibration with SELECT.
4. The info line 1 shows the buffer solution. The calibration process is
displayed as a progress bar.
5. Remove and clean the EC electrode. Confirm with OK.
False calibration solution, defect EC electrode or other failure will be
displayed with "Check sensor/medium / confirm with OK ".
15
Page 17
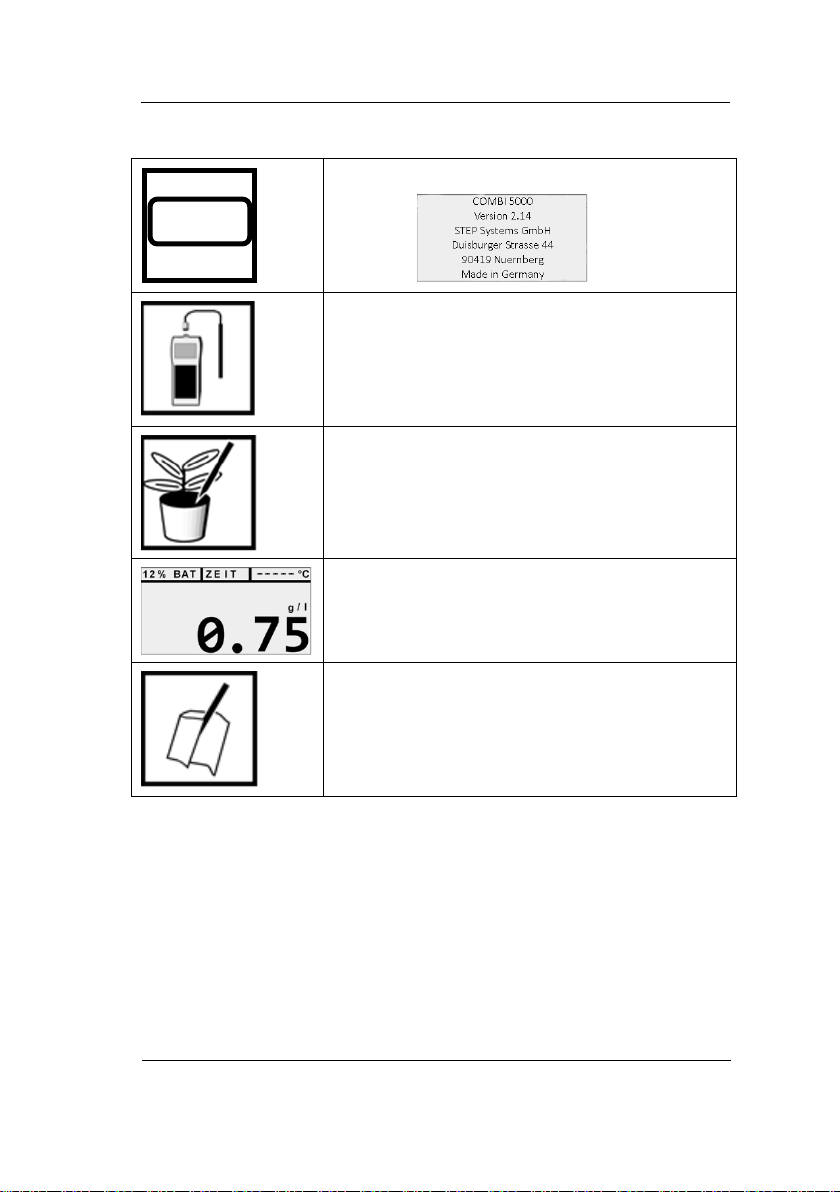
Switch on the unit. The display shows:
Connect the AM electrode to the 8-pin plug.
Attention: old AM electrodes with 5-pin plug can
be used only with adapter.
Insert the AM electrode into the soil.
After 4 sec. the measured value is stable and
can be read.
Clean the AM electrode with a dry tissue.
Further measurements can be carried out
immediately.
ON / OFF
4.3. AM measurement
Operation
4.3.1. AM measurement check
The AM electrode has properly been calibrated during the production
process and re-calibration is not required. The AM measurement check
can be performed with a new EC calibration solution 1.4 mS/cm.
1. Dip the clean AM electrode vertically and centrically into the
calibration solution. The two brass electrodes must be completely
covered with the calibration solution.
2. The measured value should be 0.75 g/l (± 0.075 g/l).
3. Remove and clean the AM electrode.
16
Page 18
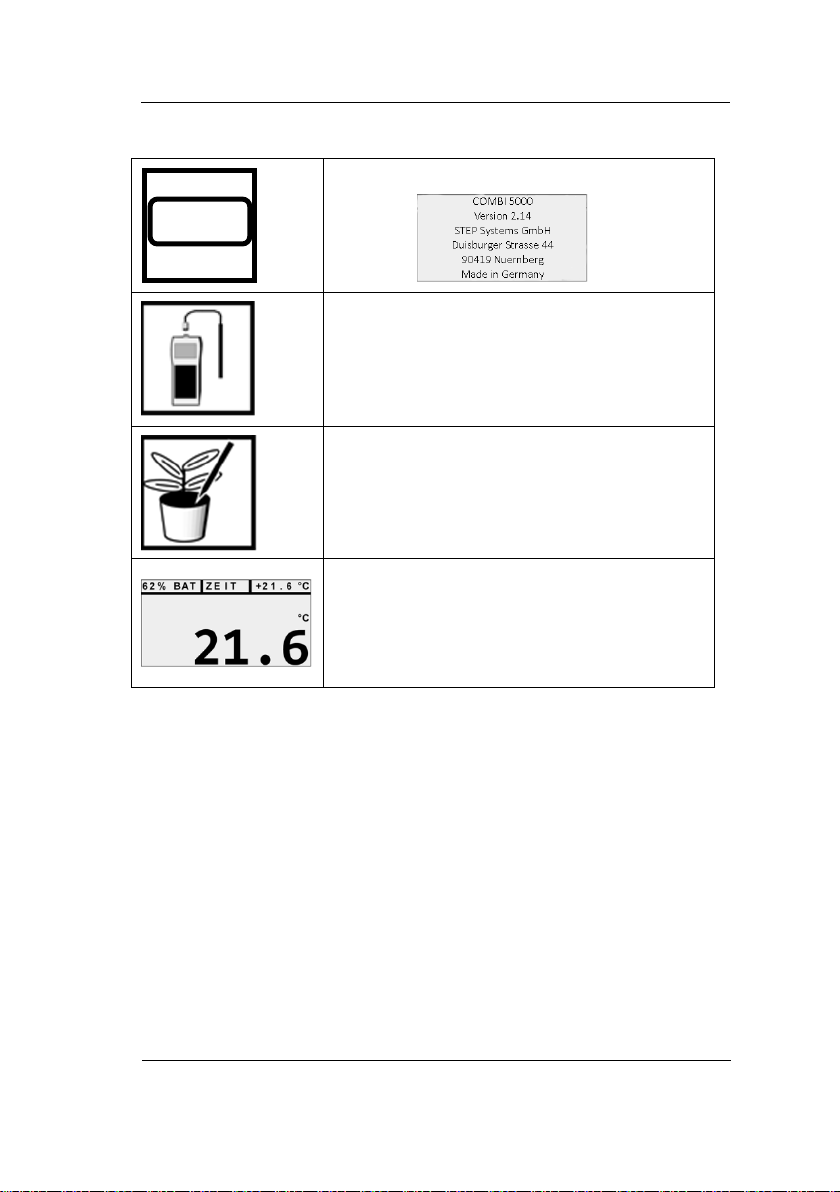
Switch on the unit. The display shows:
Connect the external temperature sensor to
the 8-pin plug.
Insert the temperature sensor into the soil /
substrate, dip into the solution or hold in the
air.
Measurement value display shows the same
temperature as the status line.
Measured values outside the normal
measurement range or a lack of sensor are
displayed as "-----".
ON / OFF
4.4. Temperature measurement
Operation
17
Page 19
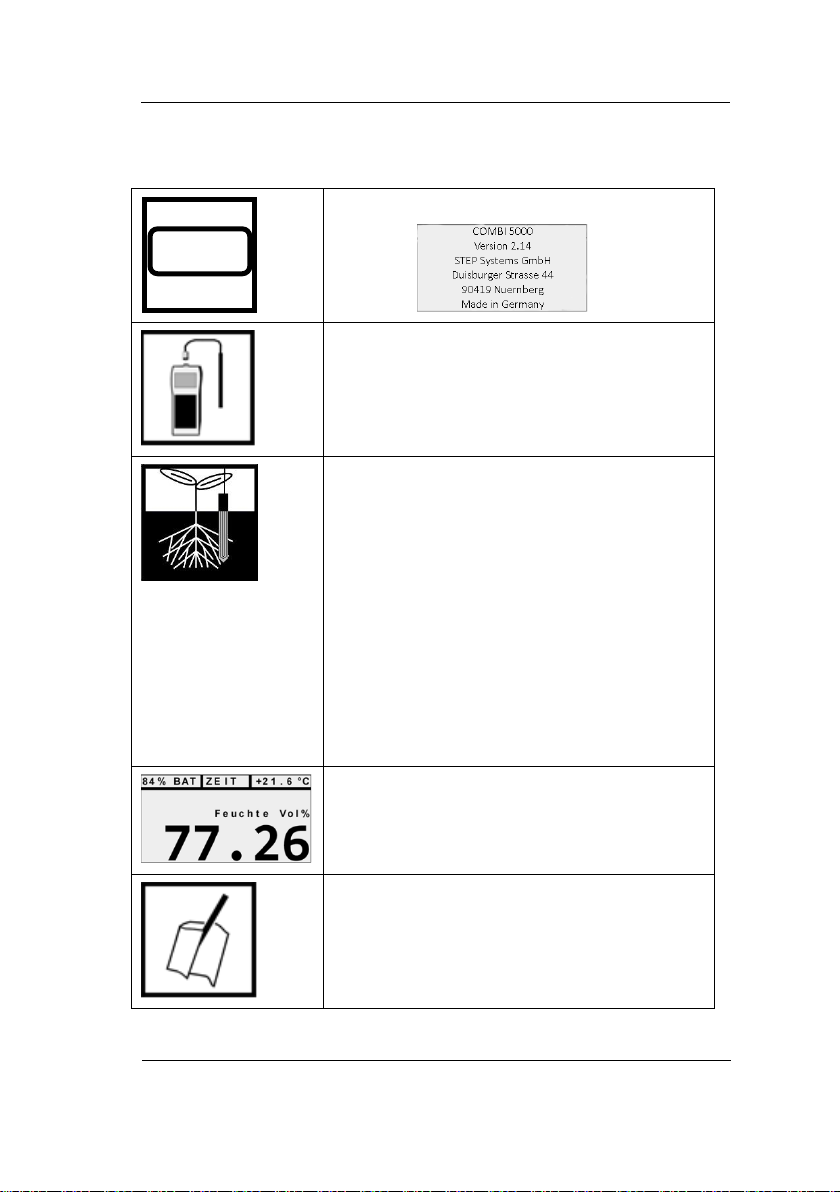
Operation
Switch on the unit. The display shows:
Connect the SMT electrode to the 8-pin plug.
The SMT 100 sensor measures volumetric
water content within a radius of 5 cm.
To avoid measuring errors, always insert the
sensor completely, without tilting. Measure in
the middle of the pot and make sure that the
sensor has close contact with the soil.
Do not move the sensor any more after
insertion.
Attention: temperature sensor is located in
the black shaft of the SMT sensor. Therefore,
to avoid errors in temperature measurement,
always insert the sensor completely with the
black shaft.
After 2 sec. the measured value is stable and
can be read. Temperature is displayed in the
status line.
Clean the SMT sensor with a dry tissue.
Further measurements can be carried out
immediately.
ON / OFF
4.5. Soil moisture measurement with separate
temperature sensor SMT-100 (optional)
18
Page 20

Operation
4.5.1. SMT sensor check
The SMT electrode has properly been calibrated during the production
process and re-calibration is not required. The SMT sensor check can be
performed with tap water.
1. Dip the SMT sensor vertically and centrically into a measuring cup
filled with 1 liter tap water.
2. The measured value should be round about 96.5 %.
19
Page 21

Table for Optimal AM-Values
Values shall never fall below 0.1 AM.
If the value falls below the optimal values, fertilisation is required.
For pot plants, fertilisation with liquid fertilisers is recommended.
For bed plants, a fertilisation with mostly Nitrate and Potassium is recommended.
0,2-0,4
Substrate (peat soil) for young plants (salt-tolerable young plants)
Abies balsamea Zwergtanne
6,0-8,0 0,2-0,4
5,5-7,5 0,2-0,4
Abies homolepis Nikkotanne
5,0-7,0 0,2-0,4
Abies koreana Koreatanne
6,0-8,0 0,2-0,4
Abies lasiocar pa Compacta
6,0-8,0 0,2-0,4
Abies nordmanniana Nordmanntanne
6,0-8,0 0,1-0,3
Abies pinsapo Kelleristanne
6,0-8,0 0,2-0,4
Abies procera Silbertanne
5,0-7,0 0,2-0,4
Abies veitch i i Veitchtanne
5,0-7,0 0,1-0,3
Acer campestre Feldahorn
6,0-7,0 0,1-0,3
Acer capillipes Schlangenhautahorn
5,5-6,5 0,2-0,4
Acer ginnala Feuerahorn
5,5-6,5 0,2-0,4
Acer japonicum Japanischer Feuerahorn
6,0-7,0 0,2-0,3
6,0-7,0 0,2-0,4
Acer palmatum Fächerahorn
6,0-7,0 0,2-0,3
Acer pensylvanicum Streifenahorn
6,0-7,0 0,2-0,3
Acer plantanoides Spitzahorn
6,5-7,5 0,1-0,3
Acer pseudoplatanus Bergahorn
6,0-8,0 0,1-0,3
Acer rubrum Rotahorn
5,5-6,5 0,2-0,4
Acer rufinerve Rostbartahorn
6,0-7,0 0,2-0,4
Acer saccharinum Silberahorn
6,0-7,0 0,1-0,3
Acer saccharum Zuckerahorn
6,0-7,0 0,2-0,4
Achimeues hybrida 5,0-6,5 0,2-0,3
Actinidia argu ta Strahlengriffel
6,0-7,0 0,2-0,4
Actinidia chinesis Kiwi
6,0-7,0 0,2-0,4
Adiantum 4,5-6,0 0,2-0,3
Aechmea fasciata 5,5-6,5 0,3-0,4
Aesculus carnea Kastanie
6,0-8,0 0,1-0,3
6,0-8,0 0,1-0,3
Aesculus parviflora Strauchkastanie
6,0-8,0 0,1-0,4
Ailanthus altis sima Götterbaum
6,0-7,0 0,1-0,3
Akebia quinata Klettergurke
6,0-7,0 0,2-0,5
Alnus cordata Erle
6,5-7,5 0,1-0,3
Alnus glutinosa Schwarz-Rot-Erle
5,5-6,5 0,1-0,3
Alnus incana Grau-Weiß-Erle
7,0-8,0 0,1-0,3
Alstromeria 6,0-7,0 0,3-0,5
Amaranthus-Fuchsschwanz 5,5-6,5 0,3-0,5
Amelanchier laevis Hängende Felsenbirne
6,5-7,5 0,1-0,3
Amelanchier lamarckii Kupfer-Felsenbirne
6,5-8,0 0,1-0,3
6,5-7,5 0,2-0,4
Amorpha fruticosa Bastardindigo
6,5-7,5 0,2-0,6
Anemone coronaria 5,5-6,5 0,3-0,4
Activity Meter: optimal AM-Values at good soil moisture.
The values are valid during maturity time and growth period of the plants.
Substrates: pH-Value AM-value
Substrate (peat soil) for young plants (salt-sensitive young plants)
Substrate (peat soil) for seeding
Substrate (peat soil) for propagation
0,1-0,2
0,2-0,3
Botanic Name German Name pH-Value AM-Value
Abies concolor Grautanne
Acer negundo Eschenahorn
Aesculus hippocastanum Roßkastanie
Amorpha Canescens Bleibusch
1 / 14
Page 22

Botanic Name German Name pH-Value AM-Value
Anthurium andreanum 4,5-5,5 0,3-0,4
Anthurium scherzianum 4,5-5,5 0,2-0,3
Antirrhinum-Löwenmaul 5,5-7,0 0,4-0,6
Aphelandra squattosa 5,0-6,5 0,3-0,5
Aralia elata Aralie
6,5-7,5 0,2-0,6
Araucania araucana Schmucktanne
7,0-8,0 0,2-0,4
Aristoloch ia macrrophyl la Pfeifenwinde
6,5-7,5 0,2-0,4
Asparagus plumus 5,5-7,0 0,2-0,3
Asparagus sprengeri 5,5-7,0 0,5-0,8
Azalea indica 3,8-5,0 0,3-0,5
Begonia bertinii 5,0-6,5 0,3-0,5
Begonia elatio r 5,0-6,5 0,3-0,6
Begonia Kno ll enbegonien 5,0-6,0 0,3-0,5
Begonia Lorraine 5,0-6,0 0,3-0,5
Begonia semperflorens 5,0-6,5 0,3-0,5
Bellis perennis 6,0-7,0 0,3-0,5
Berberis buxifolia Berberitze
6,5-7,5 0,1-0,3
Berberis candidula Berberitze
6,5-7,5 0,1-0,3
Berberis gagnepainii Berberitze
6,5-7,5 0,1-0,3
Berberis hookeri Berberitze
6,5-7,5 0,2-0,4
Berberis julianae Berberitze
6,5-7,5 0,2-0,4
Berberis parkjuweel Berberitze
6,5-7,5 0,2-0,4
Berberis red jewel
Berberitze
6,5-7,5 0,2-0,4
Berberis stenophylla Berberitze
6,5-7,5 0,1-0,3
Berberis superba Berberitze
6,5-7,5 0,1-0,3
Berberis thunbergii Berberitze
6,5-7,5 0,2-0,4
Berberis verrucandi Berberitze
6,5-7,5 0,2-0,4
Berberis w i lsoniae Berberitze
6,5-7,5 0,2-0,4
Betula albosinensis Kupferbirke
6,5-7,5 0,2-0,4
Betula ermannii Goldbirke
6,5-7,5 0,2-0,4
Betula maxim owicziana Birke
6,5-7,5 0,2-0,4
Betula nana Polar Zwergbirke
6,5-7,5 0,2-0,3
Betula nigra Schwarzbirke
6,0-7,0 0,3-0,6
Betula papyr ifera Papierbirke
6,0-8,0 0,1-0,3
Betula pend. Dalecartica Ornas Birke
6,5-7,5 0,2-0,4
Betula pend. Fastigata Säulenbirke
6,5-7,5 0,2-0,4
Betula pend. Purpurea Purpurbirke
6,5-7,5 0,2-0,4
Betula pend. Tristis Hängebirke
6,5-7,5 0,2-0,4
Betula pend. Youngii Trauerbirke
6,5-7,5 0,2-0,4
Betula pendule Weiß-Sandbirke
6,0-7,0 0,1-0,3
Betula platyphylla Japanische Birke
6,5-7,5 0,2-0,4
Betula utillis Himalaya Birke
6,0-6,5 0,1-0,4
Brassica oleracea 6,0-7,0 0,4-0,6
Bromelien 4,0-5,5 0,2-0,4
Buddlera alternifolia Sommerflieder
6,0-8,0 0,1-0,3
Buddlera davidii Hybriden
6,0-8,0 0,1-0,3
Buxus sempervierens Buxbaum
6,0-8,0 0,2-0,4
Calceolaria Hy briden 5.0-6,5 0,3-0,5
Callicarpa bodinieri Schönfrucht
6,0-6,5 0,2-0,4
Calluna vulgaris Besenheide
4,0-5,0 0,1-0,3
Calyanthus floridus Gewürzstrauch
6,5-7,5 0,2-0,4
Camelia japonica 4,0-5,5 0,3-0,5
Campanula 6,0-6,5 0,3-0,6
Campsis radicans Trompetenblume
6,0-7,0 0,2-0,4
Caragana arboresens Erbsenstrauch
6,0-8,0 0,1-0,3
Carpinus betulus Hain-Weißbuche
6,0-8,0 0,1-0,3
Caryopteris clandonensis Bartblume
6,5-7,5 0,2-0,4
2 / 14
Page 23

Botanic Name German Name pH-Value AM-Value
Castanea sativa Eßbare K as t anie
6,0-7,0 0,1-0,3
Catalpa bignoni oides Trompetenbaum
7,0-8,5 0,2-0,4
Cattleya mossiae 4,0-5,5 0,2-0,3
Ceanothus Gloire de Vers a il s Säckelblume
6,5-7,5 0,2-0,4
Cedrus atlantica Zeder
7,0-8,0 0,2-0,4
Cedrus deodara Himalajazeder
5,0-7,0 0,2-0,4
Cedrus glauca Blauzeder
6,5-8,5 0,2-0,4
Cedrus pyramidalos Pyramidenzeder
6,5-8,5 0,2-0,4
Cedrus pendula Hängezeder
6,5-8,5 0,2-0,4
Celastrus orbiculatus Baumwürger
6,5-7,5 0,2-0,4
Cercidiphyll um japonicum Judasblattbaum
6,5-7,5 0,2-0,4
Cercis siliquastrum Judasbaum
6,5-8,0 0,2-0,4
Chainomeles japonica Scheinquitte
6,0-6,5 0,1-0,3
Chainomeles lagenaria Scheinquitte
6,0-6,5 0,1-0,3
Chamecyparis alumil Gold Scheinzypresse
6,0-8,0 0,1-0,3
Chamecyparis column. glauca Scheinzypresse
6,0-8,0 0,1-0,3
Chamecyparis ellwoodii Scheinzypresse
6,5-8,0 0,1-0,3
Chamecyparis glauca spek Scheinzypresse
6,5-8,0 0,2-0,4
Chamecyparis golden wonder Scheinzypresse
6,5-8,0 0,2-0,4
Chamecyparis keleris aurea Scheinzypresse
6,5-8,0 0,2-0,4
Chamecyparis lanei Scheinzypresse
6,5-8,0 0,2-0,4
Chamecyparis lawsoniana Scheinzypresse
6,0-8,0 0,1-0,3
Chamecyparis minima glauca Scheinzypresse
6,5-8,0 0,2-0,4
Chamecyparis nootkat. glauca Scheinzypresse
6,5-8,0 0,2-0,4
Chamecyparis nootkat. lutea Scheinzypresse
6,5-8,0 0,2-0,4
Chamecyparis nootkat. pend. Scheinzypresse
6,0-8,0 0,2-0,4
Chamecyparis obtusa Scheinzypresse
6,0-8,0 0,2-0,4
Chamecyparis pisif. filifera Scheinzypresse
6,0-8,0 0,2-0,4
Chamecyparis pisif. plumosa Scheinzypresse
6,0-8,0 0,1-0,3
Chamecyparis pisif. squarrosa Scheinzypresse
6,0-8,0 0,1-0,3
Chamecyparis pisifera boule. Scheinzypresse
6,0-8,0 0,1-0,3
6,5-8,0 0,2-0,4
Chamecyparis stewartii Scheinzypresse
6,5-8,0 0,2-0,4
Chamecyparis white spot Scheinzypresse
6,5-8,0 0,2-0,4
Chionanthus virginicus Schneeblume
6,0-6,5 0,2-0,4
Chriysanthemum indica 5,5-7,0 0,5-0,8
Cissus antarctica 5,0-6,5 0,4-0,6
Clematis alpina Alpenwaldrebe
6,5-7,5 0,2-0,4
Clematis hyb riden Waldrebe
6,5-7,5 0,2-0,4
Clematis montana Rote Waldrebe
6,5-8,0 0,2-0,4
Clematis paniculata Herbstwaldrebe
6,5-8,0 0,2-0,4
Clematis tangutica Goldwaldrebe
6,5-8,0 0,2-0,4
Clematis vitalba Waldrebe
6,5-8,0 0,1-0,3
Clematis vitic ella Ital. Waldrebe
7,0-8,0 0,1-0,3
Clethra alnif olia Scheinelle
6,0-7,0 0,2-0,4
Clivia minata 5,5-6,5 0,3-0,4
Codiaeum (Croton) 5,0-6,0 0,2-0,4
Coleus 6,0-7,0 0,4-0,6
Columnea 5,0-6,0 0,2-0,4
Colutea arborescens Blasenstrauch
6,5-7,5 0,1-0,3
Convallaria 6,0-6,5 0,3-0,5
Cornus alba Gemeiner-Hartriegel
6,0-8,0 0,1-0,3
Cornus alba kesselringii Schwarzholz-Hartriegel
6,5-8,0 0,1-0,3
Cornus alba marginata Weißbunter-Hartriegel
6,0-8,0 0,1-0,3
Cornus alba s ibirica Purpur-Hartriegel
6,0-8,0 0,2-0,4
Cornus alba spaethii Gelbbunter-Hartriegel
6,5-7,5 0,2-0,4
Cornus alte rnifolia Baumwachs
6,5-7,5 0,2-0,4
4,0-6,0 0,1-0,3
Cornus condroversa Etagen-Hartriegel
6,5-8,0 0,2-0,4
Chamecyparis stardust Scheinzypresse
Cornus canadensis Teppich-Hartriegel
3 / 14
Page 24

Botanic Name German Name pH-Value AM-Value
Cornus florida Blumen-Hartriegel
6,0-7,0 0,2-0,4
Cornus konsa Japanischer-Hartriegel
6,0-7,0 0,2-0,4
Cornus mas Kornelkirsche
6,0-8,5 0,1-0,3
Cornus sanguinea Roter-Hartriegel
6,5-8,5 0,1-0,3
Cornus stolonifera Hoher-Hartriegel
6,5-8,0 0,1-0,3
Cornus stolonifera sericea Rotholz-Hartriegel
6,5-8,0 0,1-0,3
Corylopsis panciflora Glockenhasel
6,5-7,5 0,2-0,4
Corylopsis spicata Glockenhasel
6,5-7,5 0,2-0,4
Corylus acellana Rotblättrige Zellernuß
6,0-8,0 0,2-0,4
Corylus av ellana Wald-Haselnuß
6,0-8,5 0,1-0,3
Corylus avellana contorta Korkenzieher-Haselnuß
6,0-8,0 0,2-0,4
Corylus colurna Baum-Hasel
6,5-8,5 0,2-0,4
Corylus ma xima Großfrüchtige Haselnuß
6,5-7,5 0,1-0,3
Corylus maxima purpurea Purpur-Haselnuß
6,0-8,0 0,2-0,4
Cotinus voggygria Perückenstrauch
6,5-8,0 0,2-0,4
Cotoneaster acutifolius Spitzblättrige Felsenmispel
6,5-8,0 0,1-0,3
6,0-8,0 0,1-0,3
Cotoneaster bullatus Strauchmispel
6,5-8,0 0,1-0,3 .
Cotoneaster d. skogholm Böschungsmispel
6,5-8,0 0,1-0,3
Cotoneaster d. streibs findl. Kriechmispel
6,5-8,0 0,2-0,4
Cotoneaster d. var. radicans Teppichmispel
6,5-8,0 0,2-0,4
Cotoneaster dammeri Zwergmispel
6,5-8,0 0,2-0,4
Cotoneaster dammeri Kriechmispel
6,5-8,0 0,2-0,4
Cotoneaster dielsianus Strauchmispel
6,5-8,0 0,1-0,3
Cotoneaster divaricatus Strauchmispel
6,5-8,0 0,3-0,5
Cotoneaster franchetti Strauchmispel
6,5-8,0 0,3-0,5
Cotoneaster horizontalis Fächermispel
7,0-8,0 0,1-0,3
Cotoneaster microphyllus Zwergmispel
6,5-8,0 0,2-0,4
Cotoneaster multiflorus Strauchmispel
6,5-8,0 0,1-0,3
Cotoneaster pendulus Hängemispel
6,5-8,0 0,1-0,3
Cotoneaster praecox Felsenmispel
6,5-8,0 0,1-0,3
Cotoneaster salicifolius Immergrüne Mispel
6,5-8,0 0,2-0,4
Crataegus carrierei Apfeldorn
7,0-8,5 0,2-0,4
Crataegus laevigata Rotdorn
7,0-8,0 0,1-0,3
Crataegus monogyna Weißdorn
6,5-8,5 0,1-0,3
Crataegus monogyna-stricta Säulendorn
7,0-8,0 0,2-0,4
Crataegus prunifolia Pflaumendorn
6,5-8,5 0,1-0,3
Crateagus coccinea Scharlachdorn
7,0-8,5 0,1-0,3
Crateagus crus-galli Hahnendorn
7,0-8,5 0,1-0,3
Crossandra 5,5-6,5 0,2-0,4
Cryptomeria japonica Sicheltanne
7,0-8,0 0,2-0,4
Cupressocyparis leylandü
6,0-8.0 0,1-0,3
Cyclamen 5,5-6,5 0,4-0,6
Cymbidium 4,5-6,0 0,2-0,4
Cytisus beanii Ginster
7,0-8,0 0,1-0,3
Cytisus decumbens Kriechginster
7,0-8,0 0,1-0,3
Cytisus kewensis Elfenbeinginster
7,0-8,0 0,1-0,3
Cytisus praecox Elfenbeinginster
6,0-6,5 0,1-0,3
Cytisus purpurens Purpurginster
6,5-8,5 0,1-0,3
Cytisus scoparius Besenginster
6,0-7,0 0,1-0,3
Cytisus scoparius hybriden Besenginster
6,0-6,5 0,2-0,4
Daboecia cantabrica Irische Heide
4,5-5,5 0,2-0,4
Dahlia-Topf 6,0-7,0 0,4-0,6
Daphne mezereum Weißer Seidelbast
7,5-8,5 0,1-0,3
Daphne oneorum Seidelbast
7,0-8,0 0,2-0,4
Davidiai nvolcurata Taubenbaum
6,5-8,0 0,3-0,5
Decaisnea fargesii Blauschote
7,0-7,5 0,2-0,4
Dendrobium 4,5-5,5 0,2-0,3
Deutzia gr a cilis Maiblumenstrauch
6,0-8,0 0,1-0,4
Deutzia kamiflora Deutzie weiß-rosa
6,0-8,0 0,1-0,4
Cotoneaster adpressus Zwergmispel
4 / 14
Page 25

Botanic Name German Name pH-Value AM-Value
Deutzia mag nifica Deutzie weiß
6,0-8,0 0,1-0,4
Deutzia mont rose Deutzie
6,0-8,0 0,1-0,4
Deutzia rosea Deutzie
6,0-8,0 0,1-0,4
Deutzia scabra Deutzie
6,0-8,0 0,1-0,4
Dianthus (Edelnelke) 6,0-7,0 0,5-0,8
Dieffenbachia 5,0-6,5 0,4-0,6
Dracaena 5,0-6,0 0,2-0,4
Elaeanus angustifolia Ölweide
7,0-8,0 0,1-0,3
Elaeanus commutato Silber-Ölweide
7,0-8,0 0,1-0,3
Elaeanus ebbingel Wintergrüne Ölweide
6,5-8,0 0,1-0,3
Elaeanus multiflora Eßbare Ölweid e
6,5-8,5 0,1-0,3
Elaeanus pungens Buntlaubige Ölweide
6,5-7,5 0,2-0,4
Enkianthus campanulatus Prachglocke
4,5-6,5 0,2-0,4
Enkianthus nigrum Krähenbeere
6,5-7,5 0,2-0,4
Erica alatus Echte Heide
6,0-8,0 0,1-0,4
Erica carnea 4,5-6,0 0,3-0,6
Erica cinerea E ch te Heide
4,5-6,0 0,1-0,4
Erica gracilis 3,5-4,5 0,3-0,5
Erica tetrali x Echte Heide
4,5-6,0 0,1-0,4
Erica vagans Echte Heide
4,5-6,0 0,1-0,4
Euonymus alatus Korkspindel
6,0-7,0 0,2-0,4
Euonymus eropaeus Pfaffenhütchen
7,0-8,5 0,1-0,3
Euonymus fortunei Purpurkriechspindel
6,5-8,0 0,1-0,3
Euonymus planipis Großfrüchtige Kriechspindel
6,5-8,0 0,1-0,3
Euphorbia fulgens 5,5-6,5 0,3-0,5
Euphorbia milii 5,5-6,5 0,4-0,6
Euphorbia pulch. 5,5-7,0 0,4-0,6
Exochorda racemosa Prachspiere
5,0-7,0 0,1-0,3
Fagus silvatica Rotbuche
6,0-8,0 0,1-0,3
Farne 4,5-6,0 0,3-0,5
Ficus decora 5,0-6,5 0,4-0,7
Ficus monstera 5,0-6,5 0,4-0,7
Forsythia Goldglöckchen
6,0-8,0 0,2-0,4
Fothergilla gardenii Niedriger Federbuschstrauch
5,5-7,0 0,2-0,4
Fothergilla m a yor Niedriger Federbuschstrauch
5,5-7,0 0,2-0,4
Fothergilla m onticola Niedriger Federbuschstrauch
5,5-7,0 0,2-0,4
Fraxinus excelsior Gemeine Esche
5,5-8,5 0,1-0,3
Fraxinus ornus Blumenesche
7,0-8,5 0,1-0,3
Fresia hybr i da 6,0-7,0 0,2-0,4
Fuchsia Hybriden 5,5-6,5 0,3-0,5
Gardenia grandiflora 5,5-6,5 0,2-0,4
Gaultheria procumbens Rote Scheinbeere
5,5-6,5 0,2-0,4
Gaultheria shallon Hohe Teppichbeere
5,5-6,5 0,2-0,4
Genista lydia Ginster
6,5-8,0 0,1-0,3
Genista radiata Strahlenginster
6,5-8,0 0,1-0,3
Genista sagittalis Pfeilginster
5,5-6,5 0,2-0,4
Genista tinctoria Färberginster
5,5-6,5 0,1-0,3
Gerbera Beet 5,0-6,0 0,4-0,6
Gerbera Container 5,0-6,0 0,4-0,6
Gerbera jamesonii 5,0-6,5 0,3-0,5
Ginkgo biloba Fächerblattbaum
6,0-8,0 0,2-0,4
Gladiolen-Haus 6,0-7,0 0,3-0,5
Gleditsia triacanthos Lederhülsenbaum
6,5-8,5 0,2-0,4
Gymnocladus clioecus Geweihbaum
6,5-8,5 0,2-0,4
Halesia carolina Maiglöckchenstrauch
5,5-7,0 0,2-0,4
Halesia montic ola Aufrechtes Silberglöckchen
6,5-7,0 0,2-0,4
Hamamelis japonica Zaubernuß
6,0-6,5 0,2-0,4
5 / 14
Page 26

Botanic Name German Name pH-Value AM-Value
Hamamelis mol lis Lichtmeß-Zaubernuß
6,0-6,5 0,2-0,4
Hamamelis virginisana Herbstblühende Zaubernuß
6,0-6,5 0,2-0,4
Hedera 5,5-7,0 0,4-0,6
Hedera colchiea Efeu
6,0-8,0 0,2-0,4
Hedera helix Gemeiner Efeu
6,0-8,5 0,2-0,4
Hedera helix - goldheart Bunter Kletterefeu
6,0-7,0 0,2-0,4
Hibiscus 5,5-6,5 0,4-0,7
Hibiscus syriacus Eibisch
6,5-8,0 0,2-0,4
Hippeastrum-Topf 6,0-7,0 0,3-0,5
Hippophae rhamnoides Sanddorn
7,0-8,5 0,1-0,3
Holodicus discolor Scheinspiere
6,0-7,0 0,1-0,3
Hydrangea arb. grandiflora Ball-Hortensie
6,0-6,5 0,2-0,4
6,0-7,0 0,2-0,4
Hydrangea aspera ssp. Hortensie
5,0-6,0 0,2-0,4
Hydrangea aspera var. Hortensie
4,0-6,0 0,2-0,4
Hydrangea blau 3,5-4,5 0,3-0,6
Hydrangea hybriden Bauernhortensie
6,0-6,5 0,2-0,4
Hydrangea paniculata Pispenhortensie
6,0-7,0 0,2-0,4
Hydrangea petiolaris Kletterhortensie
6,0-6,5 0,2-0,4
Hydrangea rot/weiß 5,5-6,5 0,3-0,6
Hydrangea sargentian a Samthortensie
4,0-6,0 0,2-0,4
Hypericum calycinum Johanniskraut
6,5-8,5 0,1-0,3
Hypericum moserianum Johanniskraut
6,5-8,5 0,1-0,3
Hypericum patulum Johanniskraut
6,5-8,5 0,1-0,3
Ilex aquifolium Stechpalme-Hülse
6,0-8,0 0,2-0,4
Ilex aquifolium - myrti folium Lanzen-Hülse
5,5-7,0 0,2-0,4
Ilex crenata Japanische Stechpalme
5,5-6,5 0,2-0,4
Ilex verticillata Korallen-Hülse
6,0-8,0 0,2-0,4
Impatiens 5,5-6,5 0,4-0,6
7,0-8,5 0,2-0,4
Juglans regi a Walnuß
6,5-8,0 0,2-0,4
Juniperus chin. mint julep Wacholder
6,0-8,0 0,1-0,3
Juniperus chin. old gold Wacholder
6,0-8,0 0,2-0,4
Juniperus chin. pfitzeriana Wacholder
6,0-8,0 0,1-0,3
Juniperus chin. plumosa Wacholder
6,0-8,0 0,2-0,4
Juniperus chinensis blaauw Wacholder
6,0-8,0 0,2-0,4
Juniperus chinensis hetzii Wacholder
6,0-8,0 0,1-0,3
Juniperus comm. horizontalis Wacholder
6,0-8,0 0,1-0,3
Juniperus comm. hornibrokii Wacholder
6,0-8,0 0,1-0,3
Juniperus comm. meyer Wacholder
6,0-8,0 0,1-0,3
Juniperus comm. repanda Wacholder
6,0-8,0 0,1-0,3
Juniperus comm. sabina femina Sadebaum
6,0-8,0 0,1-0,3
Juniperus comm. sabina tamar. Sadebaum
6,0-8,0 0,1-0,3
Juniperus comm. suecica Wacholder
6,0-8,0 0,1-0,3
Juniperus communis hibernica Wacholder
6,0-8,0 0,1-0,3
Juniperus grey owl Wacholder
6,0-8,5 0,1-0,3
Juniperus skyrocket Wacholder
6,0-8,0 0,2-0,4
Juniperus squam. blue star Wacholder
6,0-7,0 0,1-0,3
Juniperus squam. meyeri Wacholder
6,0-8,0 0,1-0,3
Juniperus squamata blue car. Wacholder
6,0-8,0 0,1-0,3
6,0-8,5 0,2-0,4
Juniperus virgiana glauca Wacholder
6,0-8,5 0,2-0,4
Kakteen 6,0-7,0 0,3-0,4
Kalanchoe 5,5-6,5 0,3-0,5
Kalmia angust ifolia Lorbeerrose
5,0-6,0 0,2-0,4
Kalmia latifolia Berglorbeere
5,0-6,0 0,2-0,4
Kerria japo nica Ranunkelstrauch
5,5-6,5 0,2-0,4
Koelreuteria paniculata Blasenbaum
6,5-8,5 0,2-0,4
Kolkwitz i a amabilis Kolkwitzie
6,5-8,5 0,1-0,3
Laburnum anagyroides Goldregen
6,0-8,0 0,1-0,3
Hydrangea arbores cens Hortensie
Jasminum nudiflorum Winter-Jasmin
Juniperus virgiana canaertii Wacholder
6 / 14
Page 27

Botanic Name German Name pH-Value AM-Value
Larix kaempferi Japanische Lärche
6,0-8,0 0,1-0,3
Larix kaempferi diana Japanische Lärche
6,0-8,0 0,1-0,3
Larix kaempferi pendula Japanische Hängelärche
6,0-8,0 0,2-0,4
Larix decidu a Europäische Lärche
6,0-8,0 0,1-0,3
Lathyros odoratus 6,0-7,0 0,3-0,5
Lespedeza thunbergii Buschklee
6,5-8,0 0,2-0,4
Leucothoe catesbael Lorbeerkrüglein
4,5-6,5 0,2-0,4
Ligustrum delavayanum Liguster
6,5-8,0 0,2-0,4
Ligustrum obtusifolium Liguster
6,0-7,5 0,1-0,3
Ligustrum ovalifolium Liguster
6,5-8,0 0,1-0,3
Ligustrum vulgare Gemeiner Liguster
6,0-8,5 0,1-0,3
Lilium hybri den 5,5-7,0 0,3-0,5
6,0-7,0 0,2-0,4
Liriodendron tulpifera Tulpenbaum
6,0-7,0 0,2-0,4
Lobelien 6,0-7,0 0,3-0,4
Lonicera acuminata Heckenkirsche
7,0-8,0 0,2-0,4
Lonicera caprifolium Heckenkirsche
7,0-8,0 0,2-0,4
Lonicera heckrottii Duft-Geißblatt
7,0-8,0 0,2-0,4
Lonicera henryi Immergrünes Geißblatt
7,0-8,0 0,2-0,4
Lonicera japonica Gelbbuntes Geißblatt
7,0-8,0 0,2-0,4
Lonicera korokowii Geißblatt
6,5-8,0 0,1-0,3
Lonicera ledeborwrii Geißblatt
6,5-8,0 0,1-0,3
Lonicera ma a cklii Geißblatt
6,5-8,0 0,1-0,3
Lonicera nitida Geißblatt
6,5-8,5 0,1-0,3
Lonicera pileata Geißblatt
6,0-8,0 0,1-0,3
Lonicera tatarica Geißblatt
6,0-8,0 0,1-0,3
Lonicera teilmanniana Geißblatt
6,5-7,0 0,2-0,4
Lonicera xylosteum Gemeine Heckenkirsche
7,0-8,5 0,1-0,3
Lycium halim i folium Bocksdorn
6,5-8,5 0,1-0,3
Magnolia kobus Magnolie
5,5-7,5 0,2-0,4
Magnolia lilliflo ra Magnolie
6,5-8,0 0,2-0,4
Magnolia loeb neri Magnolie
5,5-7,5 0,2-0,4
Magnolia sou la ngiana Tulpenmagnolie
5,5-7,0 0,2-0,4
Magnolia stella ta Sternmagnolie
6,5-8,0 0,2-0,4
Mahonia aquifolium Mahonie
6,0-8,0 0,1-0,3
Mahonia beallii Mahonie
6,0-8,0 0,1-0,3
Mahonie wintersun Wintermahonie
6,0-8,0 0,1-0,3
Malus hybr ida Zierapfel
7,0-8,0 0,2-0,4
Matthiola 6,0-7,0 0,4-0,6
Metasequoia glyptostrob. Urweltmammutbaum
6,0-8,0 0,1-0,3
Microbiota decussata Sibirischer Fäche rwacholder
6,0-8,0 0,2-0,4
Monstera deliciosa 5,0-6,5 0,4-0,7
Morus alba Maulbeerbaum
7,0-8,5 0,2-0,4
Nerium oleander 5,5-6,5 0,4-0,6
Nothofagus antarctica Pfennigbuche
5,5-6,5 0,2-0,4
Orchideen epiphyt. 4,5-5,5 0,2-0,3
Pachysandra terminalis Schattengrün
6,0-8,0 0,2-0,4
Palmen 5,5-7,0 0,3-0,5
Paphiopedilum 4,5-5,5 0,2-0,3
6,5-8,0 0,2-0,4
Parthenocissus quiquefolia Jungfernrebe
7,0-8,0 0,2-0,4
Parthenocissus trinspidata Jungfernrebe
7,0-8,0 0,2-0,4
Paulownia tomentosa Blauglockenbaum
7,0-8,5 0,2-0,4
Pelargoniu m peltatum 5,5-7,0 0,4-0,6
Pelargoniu m zonale 5,5-7,0 0,4-0,6
Peperomia 5,0-6,5 0,3-0,5
Liquidambar s tyraciflua Amberbaum
Parrotia persica Eisenholzbaum
7 / 14
Page 28

Botanic Name German Name pH-Value AM-Value
Pernettya mucronata Torfmyrte
5,0-6,0 0,2-0,4
Perovskia abrotanoides Blaurute
7,0-8,5 0,2-0,4
Petunia hybrida 5,5-6,5 0,3-0,5
Philadelphus inodorus var. Falscher Jasmin
6,5-8,5 0,1-0,3
Philodendron 5,0-6,0 0,4-0,6
Photinia fraserie Glanzmispel
5,0-6,0 0,2-0,4
Photinia villosa Glanzmispel
5,0-6,0 0,2-0,4
Physocarpus opulifoliu s Blasenspiere
6,0-7,0 0,1-0,3
Picae abies nid iformis Nestfichte
6,0-8,0 0,2-0,4
Picae abies ohlendorfü Kegelfichte
6,0-8,0 0,2-0,4
Picea abies Rotfichte
6,0-8,0 0,1-0,3
Picea abies acrocona Zapfenfichte
6,0-8,0 0,2-0,4
Picea abies co l umnaris Säulenfichte
6,0-8,0 0,2-0,4
Picea abies ec hiniformis Igelfichte
6,0-8,0 0,2-0,4
Picea abies inversa Hängefichte
6,0-8,0 0,2-0,4
Picea abies litt le gern Zwergkonifere
6,0-8,0 0,2-0,4
6,0-8,0 0,2-0,4
Picea abies procumbens Zwergkonifere
6,0-8,0 0,2-0,4
Picea abies pu mila glauca Zwergkonifere
6,0-8,0 0,2-0,4
Picea abies pygmaea Zwergkonifere
6,0-8,0 0,2-0,4
Picea abies virgata Schlangenfichte
6,0-8,0 0,2-0,4
Picea breweriana Mähnenfichte
6,0-8,0 0,2-0,4
Picea glauca alberts globe Kugelfichte
6,0-8,0 0,2-0,4
Picea glauca conica
Zuckerhutfichte
6,0-8,0 0,2-0,4
Picea glauca echiniformis Blauigelfichte
6,0-8,0 0,2-0,4
Picea koster Blaufichte
6,0-8,5 0,2-0,4
Picea omorika Serbische Fichte
6,0-8,0 0,2-0,4
Picea omorika nana Serbische Kegelfichte
6,0-8,0 0,2-0,4
Picea orien talis Orientalische Fichte
6,0-8,0 0,1-0,3
Picea orien talis area Orientalische Gold Fichte
6,0-8,0 0,2-0,4
Picea orien talis nutans Orientalische Fichte
6,0-8,0 0,2-0,4
Picea pendula bruns Serbische Hängefichte
6,0-8,0 0,2-0,4
Picea pungens glauca Blaustechfichte
6,5-8,5 0,1-0,3
Picea pungens glauca globos Fichte
6,0-8,0 0,2-0,4
Picea pungens hoopsii Silberfichte
6,0-8,5 0,2-0,4
Picea purpurea Purpurfichte
6,0-8,0 0,2-0,4
Picea sitchensis Sitkafichte
6,0-8,0 0,1-0,3
Pieris floribunda Lavendelheide
4,5-6,0 0,2-0,4
Pieris japonica Lavendelheide
4,5-6,0 0,2-0,4
Pinus aristata Fuchsschwanzkiefer
6,0-8,0 0,2-0,4
Pinus cembra Zirbelkiefer
6,0-8,5 0,1-0,3
Pinus cembra glauca BIaue Zirbelkiefer
6,0-8,5 0,2-0,4
Pinus cembra nana Zwergkiefer
6,0-8,0 0,2-0,4
Pinus contorta Drehkiefer
6,0-8,0 0,2-0,4
Pinus densiflora pumila Zwergkiefer
6,0-8,0 0,2-0,4
Pinus flex ili s glauca Kiefer
6,5-8,0 0,2-0,4
Pinus kor a i ensis glauca Kiefer
6,5-8,0 0,2-0,4
Pinus leucodermis
Bosnische Kiefer
7,0-8,5 0,2-0,4
Pinus mini m ops
Zwergkiefer
6,0-8,0 0,2-0,4
Pinus monticola
Kiefer
6,5-8,0 0,2-0,4
Pinus mops
Breitkiefer
6,0-8,0 0,2-0,4
Pinus mughus
Krummholzkiefer
6,0-8,0 0,2-0,4
Pinus mugo gnom
Zwergkiefer
6,0-8,0 0,2-0,4
Pinus mugo montana
Bergkiefer
6,0-8,0 0,1-0,3
Pinus mugo pumilio
Zwergkiefer
6,0-8,0 0,1-0,3
Pinus nigra austriaca
Österreichische Kiefer
6,0-8,5 0,1-0,3
Pinus nigra select
Kiefer
6,0-8,5 0,2-0,4
Pinus parv iflora glauca
Blaue Mädchen Kiefer
6,5-8,0 0,2-0,4
Pinus peuce
Rumelische Kiefer
6,5-8,0 0,2-0,4
Pinus pumila glauca
Zwergkiefer
6,5-8,0 0,2-0,4
Pinus schwerinii
Kiefer
6,5-8,0 0,2-0,4
Pinus sil. nana hibernica
Zwergkiefer
6,0-8,0 0,2-0,4
Pinus sil. w a terer
6,0-8,0 0,2-0,4
Philadelphus coronarius Falscher Jasmin
Picea abies maxwellii Zwergkonifere
6,5-8,5 0,1-0,3
Silberkiefer
8 / 14
Page 29

Botanic Name German Name pH-Value AM-Value
Pinus silvestris
Gemeine Kieferföhre
6,0-8,5 0,1-0,3
Pinus silvestris fastigiata
Säulenkiefer
6,0-8,0 0,2-0,4
Pinus silvestris glauca
Kiefer
6,0-8,0 0,2-0,4
Pinus strobus lilliput
Zwergkiefer
5,5-7,0 0,2-0,4
Pinus strobus radiata
Zwergkiefer
5,5-7,0 0,2-0,4
Pinus wall. densa hill
Kiefer
5,5-7,0 0,2-0,4
Pinus wallichiana
Tränenkiefer
5,5-7,0 0,2-0,4
Plantanus ac erifolia Platane
7,0-8,5 0,1-0,3
Polygonum aubertii Blätterknöterich
6,0-8,5 0,1-0,3
Populus alba Silberpappel
6,5-8,5 0,1-0,3
Populus bals a mifera Balsampappel
6,5-8,0 0,1-0,3
Populus berolinensis Lorbeerpappel
6,5-8,0 0,1-0,3
Populus canescens Graupappel
6,0-8,0 0,1-0,3
Populus lasiocarpa Graupappel
6,0-8,0 0,1-0,3
Populus nigra Schwarzpappel
6,5-8,0 0,1-0,3
Populus robusta Holzpappel
6,5-8,0 0,1-0,3
Populus simonii Birkenpappel
6,0-8,0 0,1-0,3
Populus tremula Zitterpappel-Espe
6,0-8,5 0,1-0,3
Potentilla arbuscula Fünffingerstrauch
5,5-7,0 0,2-0,5
Potentilla fruticosa Fünffingerstrauch
5,5-7,0 0,2-0,5
Primula obc onia 5,5-7,0 0,3-0,4
Primula vu lg./acaulis 5,5-6,5 0,2-0,4
Prunus avium Pflaume
7,0-8,5 0,2-0,4
Prunus avium Vogelkirsche
6,0-8,0 0,1-0,3
Prunus cerasifera Blutpflaume
7,0-8,5 0,2-0,4
Prunus cixtena Zierpflaume
7,0-8,5 0,2-0,4
Prunus laurocerasus Immergrün-Hartriegel
6,5-7,0 0,2-0,4
Prunus laurocerasus Otto Luyken
6,0-8,0 0,2-0,4
Prunus mahaleb Weichselkirsche
7,0-8,5 0,1-0,3
Prunus padus Traubenkirsche
6,0-8,0 0,1-0,3
Prunus sargentii Zierpflaume
7,0-8,5 0,2-0,4
Prunus serotina Späte Traubenkirsche
6,0-8,0 0,1-0,3
Prunus serrula Zierpflaume
7,0-8,5 0,2-0,4
Prunus serrulata Zierpflaume
7,0-8,5 0,2-0,4
Prunus spinosa Schlehe
6,0-8,5 0,1-0,3
Prunus subhirtella Zierpflaume
7,0-8,5 0,2-0,4
Prunus tenella Zierpflaume
7,0-8,5 0,2-0,4
7,0-8,5 0,2-0,4
Prunus yedoensis Zierpflaume
7,0-8,5 0,2-0,4
Pseudosasa japonica Bambus
6,0-8,0 0,2-0,4
Pseudotsuga menziesii
Douglasie
5,5-7,0 0,1-0,3
Pterocar ya fraxinifo l ia Flügelnuß
6,0-8,0 0,2-0,4
Pyracantha Feuerdorn
6,5-8,5 0,1-0,3
Pyrus calle ryana Birne
7,0-8,0 0,2-0,4
Pyrus salic ifolia Birne
7,0-8,5 0,1-0,3
Quercus cerris Zerreiche
6,5-8,5 0,2-0,4
Quercus coccinea Scharlacheiche
7,0-8,0 0,2-0,4
Quercus frainetto Ungarische Eiche
6,0-8,0 0,2-0,4
Quercus macranthera Persische Eiche
6,0-8,0 0,2-0,4
Quercus palustris Sumpf-Eiche
6,0-7,5 0,1-0,3
6,0-8,0 0,1-0,3
Quercus pontica Kaukasus-Eiche
6,0-8,0 0,2-0,4
Quercus pseudoturneri Wintergrüne Eiche
6,0-8,0 0,2-0,4
Quercus robur Deutsche Eiche
6,0-8,0 0,1-0,3
Quercus rubra Amerikanische-Roteiche
6,0-7,0 0,1-0,3
Rhamnus catharticus Kreuzdorn-Faulbaum
7,0-8,5 0,1-0,3
Rhamnus frangula Faulbaum-Pulverholz
6,0-8,0 0,1-0,3
Rhododendron diamant Azaleen
4,0-5,5 0,2-0,4
Rhododendron Gristeder Alpenrose
4,0-6,5 0,2-0,4
Rhododendron Hybriden Alpenrose
4,0-6,5 0,2-0,4
Rhododendron japanische Azaleen
4,0-5,5 0,2-0,4
Rhododendron kosteranum Azalea m ollis + pontica
4,0-5,5 0,2-0,4
Prunus triloba Zierpflaume
Quercus petraea Winter-Eiche
9 / 14
Page 30

Botanic Name German Name pH-Value AM-Value
Rhododendron sommergrüne Großblumige Azaleen
4,0-5,5 0,2-0,4
Rhododendron yakusimanum Alpenrose
5,5-7,0 0,2-0,4
Rhododendron Zwergformen Alpenrose
4,0-6,5 0,2-0,4
Rhus typhina Essigbaum
6,0-8,0 0,1-0,3
Ribes alpinum Johannisbeere
6,0-8,0 0,1-0,3
Ribes aureum Gold-Johannisbeere
5,0-6,0 0,1-0,3
Ribes divaric a tum Stachelbeere
6,0-8,0 0,1-0,3
Ribes sanguineum Stachelbeere
6,0-8,0 0,1-0,3
Robinia hispida Scheinakazie
7,0-8,0 0,1-0,3
Robinia pseudoacacis Scheinakazie
7,0-8,5 0,1-0,3
Rose blanda Wildrosen
7,0-8,5 0,1-0,3
Rose canina Hundsrose
6,5-8,5 0,1-0,3
Rose carolina Sandrose
5,5-6,5 0,1-0,3
Rose glauca Blaue Hechtrose
6,0-8,0 0,1-0,3
Rose multibrocteata Wildrose
6,0-8,0 0,1-0,3
Rose multiflora Wildrose
5,5-7,0 0,1-0,3
6,0-7,0 0,1-0,3
Rose pimpinellifolia Dünenrose
7,0-8,5 0,1-0,3
Rose polyantha Beetrosen
6,5-8,0 0,2-0,4
Rose polyantha Edelrosen
6,5-8,0 0,2-0,4
Rose polyantha Strauchrosen
6,5-8,0 0,1-0,3
Rose polyantha Kletterrosen
6,5-8,0 0,2-0,4
Rose polyantha Zwergbangalrosen
6,5-8,0 0,2-0,4
Rose rubiginosa Zaunrose
7,0-8,5 0,1-0,3
Rose rugosa Apfelrose
5,5-7,0 0.1-0,6
Rose rugotida Zwergrose
5,5-6,5 0,1-0,3
Rosen - Freiland 5,5-7,0 0,2-0,4
Rosen - Haus 5,5-7,0 0,3-0,6
Rubus calyci noides Teppich-Brombeere
6,0-8,0 0,2-0,4
Rubus fruticosus Gemeine Brombeere
6,0-8,0 0,1-0,3
Rubus idaeus Gemeine Himbeere
6,0-8,0 0,1-0,3
Rubus leucodermis Himbeere
6,0-8,0 0,1-0,3
Rubus odoratus Zimt-Himbeere
7,0-8,0 0,1-0,3
Rubus phoenicolasius Japanische Weinbeere
7,0-8,0 0,1-0,3
Rubus tricolor Japanische Weinbeere
5,5-7,0 0,2-0,4
Saintpaulia ionantha 5,0-6,5 0,3-0,5
Salix acutifo li a Weide
5,5-8,0 0,1-0,3
Salix alba Trauerweide
5,5-8,0 0,1-0,3
Salix aurita Ohrweide
5,5-7,0 0,1-0,3
Salix balsamifera Gelbe Stein-Weide
6,0-8,0 0,1-0,3
Salix caprea Salweide
4,0-8,0 0,1-0,3
Salix cinerea Aschweide
5,5-7,0 0,1-0,3
Salix daphnoides Reifweide
7,0-8,5 0,1-0,3
Salix purpurea Korbweide
6,5-8,5 0,1-0,3
Salix purpurea nana Kugelweide
6,5-8,5 0,1-0,3
Salix purpurea pendula Hängeweide
6,5-8,0 0,1-0,3
Salix repens Kriechweide
5,5-7,0 0,1-0,3
Salix rosmarinfolia Rosmarinweide
6,0-8,0 0,1-0,3
Salix sekka Drachenweide
5,5-7,0 0,1-0,3
Salix smithian a Küblerweide
5,5-6,5 0,1-0,3
Salix tortuosa Zickzackweide
6,0-8,0 0,1-0,3
Salix viminalis Hanfweide
6,0-8,5 0,1-0,3
Salix werhahnii Engadinweide
6,0-8,0 0,1-0,3
Salvia splende ns 6,0-7,0 0,4-0,6
Sambucus canadensis Holunder
6,0-8,0 0,1-0,3
Sambucus nigra Schwarzer Holunder
6,0-8,0 0,1-0,3
6,0-7,0 0,1-0,3
Sansevieria 5,0-6,5 0,3-0,5
Sciadopitys verticillata
Schirmtanne
5,5-7,0 0,2-0,4
Selaginella 4,5-5,5 0,3-0,5
Senecia Cineraria 5,5-6,5 0,4-0,6
Sequoiadendron giganteum
Mammutbaum
6,0-8,0 0,1-0,3
Rose nitida Glanzrose
Sambucus racemosa Trauben Holunder
10 / 14
Page 31

Botanic Name German Name pH-Value AM-Value
Sinarundinaria murilae Winterhafter Bambus
6,5-7,5 0,2-0,4
Sinarundinaria nitida Halbrohrbambus
6,5-7,5 0,2-0,4
Sinningia speciosa 5,0-6,5 0,3-0,6
Skimmia foremanii Skimmie
6,0-8,0 0,2-0,4
Skimmia japo nica japanische Skimmie
6,0-8,0 0,2-0,4
Solanum pseudocaps. 5,5-6,5 0,3-0,5
Sophora japonica Schnurbaum
6,5-8,5 0,2-0,4
Sorbaria so rbifolia Federspiere
6,0-8,0 0,1-0,3
Sorbus americana Eberesche
6,0-8,0 0,2-0,4
Sorbus aria Mehlbeere
6,0-8,0 0,1-0,3
6,0-8,0 0,1-0,3
Sorbus edulis Eßbare Eberesche
6,0-8,0 0,1-0,3
Sorbus fastigiata Säuleneberesche
6,0-8,0 0,1-0,3
Sorbus intermedia Schwedische Mehlbeere
6,5-8,5 0,1-0,3
Sorbus koehneana China Mehlbeere
7,0-8,0 0,2-0,4
Sorbus lombarts hybriden China Mehlbeere
6,0-8,0 0,2-0,4
Sorbus serotina China Mehlbeere
6,0-8,0 0,2-0,4
Sorbus thuringiaca thüringische Säuleneberesche
6,0-8,0 0,2-0,4
Sorbus vilmorinii Kübel-Eberesche
6,0-8,0 0,2-0,4
Spirea albiflora Weiße Zwergspiere
6,0-8,0 0,2-0,4
Spirea arguta Schneespiere
6,0-8,0 0,1-0,3
Spirea decumbens Polsterspiere
6,0-8,0 0,2-0,4
Spirea grefsheim Mittle re Spiere
Spirea little princess Zw er g Spiere
6,0-8,0 0,1-0,3
Spirea nipponica Hohe Spiere
6,0-8,0 0,1-0,3
6,0-8,0 0,1-0,3
6,0-7,0 0,2-0,4
Staphylea colchica Pimpernuß
6,0-8,0 0,2-0,4
Statice fatarica 6,0-7,0 0,3-0,4
5,5-6,5 0,1-0,3
6,0-7,0 0,2-0,4
Streptocarpus hybriden 5,0-6,5 0,3-0,5
Symphoricarpus albus Schneebeere
6,0-8,0 0,1-0,3
6,0-8,0 0,1-0,3
Syringia 6,0-7,0 0,2-0,4
Syringia josikaea Ungarischer Flieder
5,5-6,5 0,2-0,4
5,5-6,5 0,2-0,4
5,5-6,5 0,2-0,4
Syringia sw egiflexa Perlenflieder
5,5-6,5 0,2-0,4
Syringia ve lutina Samtflieder
5,5-6,5 0,2-0,4
6,0-8,5 0,1-0,3
Tamarix parviflora Frühlings-Tamariske
Tamarix pentandra Heide-Tamariske
7,0-8,0 0,1-0,3
Taxodium di stichum
4,5-6,5 0,1-0,3
Taxus bac. aureovariegata
6,0-8,5 0,2-0,4
Eibe
Taxus bac. fastigiata
Eibe
6,0-8,5 0,2-0,4
Taxus bac. nis. präsident
6,0-8,5 0,1-0,3
Eibe
Sorbus aucuparia Gemeine Eberesche
Spirea froebelii Kleine Spiere
Spirea prun i folia Mittlere Spiere
Spirea thunbergii Zwergspiere
Spirea vanhouttei Prachtspiere
Stephanandra crispa Kranzspiere
Stephanandra incisa Kranzspiere
Stranvaesia davidiana Stanvaesie
Strelitzien 5,0-6,5 0,4-0,6
Symphoricarpus orbiculatos Korallenbeere
Syringia chinensis Königsflieder
Syringia microphylla Kleiner Strauchflieder
Syringia re flexa Bogenflieder
Syringia saugeana Roter Königsflieder
6,0-8,0 0,1-0,3
6,0-8,0 0,1-0,3
6,0-8,0 0,1-0,3
6,0-8,0 0,2-0,4
6,0-8,5 0,2-0,4
6,0-8,0 0,2-0,4
Syringia vu lgaris Gemeiner Flieder
Tamarix odessana Sommer-Tamariske
Sumpfzypresse
Eibe
Taxus bac. dovastoniana
Taxus bac. fast. au reomarg.
Taxus bac. nissens corona
Taxus bac. overeynderi
Buschige Eibe
Eibe
Eibe
6,0-8,5 0,1-0,3
7,0-8,5 0,1-0,3
6,0-8,5 0,2-0,4
6,0-8,5 0,2-0,4
6,0-8,5 0,1-0,3
6,0-8,5 0,1-0,3
11 / 14
Page 32

Botanic Name German Name pH-Value AM-Value
Taxus bac. repandens
Eibe
6,0-8,5 0,2-0,4
Taxus bac. robusta
6,0-8,5 0,2-0,4
Eibe
Taxus bac. washingtonü
Eibe
6,0-8,0 0,2-0,4
Taxus baccata
6,0-8,5 0,1-0,3
Taxus cuspidata nan
6,0-8,0 0,2-0,4
Eibe
Taxus media densiformis
Eibe
6,0-8,5 0,1-0,3
Taxus media farme n
6,0-8,5 0,1-0,3
Taxus media hicksii
6,0-8,5 0,1-0,3
Taxus media strait hedge
Eibe
6,0-8,5 0,1-0,3
Thijopsis dolobrata
Hibalebensbaum
6,0-8,0 0,2-0,4
Thuja occid. columna
6,0-8,0 0,1-0,3
Thuja occid. danica
6,0-8,0 0,2-0,4
Lebensbaum
Thuja occid. holmstrup
Lebensbaum
6,0-8,0 0,1-0,3
Thuja occid. recurva nana
6,0-8,0 0,1-0,3
Thuja occid. rheingold
6,0-8,0 0,2-0,4
Thuja occid. sunkist
Lebensbaum
6,0-8,0 0,2-0,4
Thuja occid. tinny tim
6,0-8,5 0,2-0,4
Thuja occidentalis
6,0-8,0 0,1-0,3
Thuja plicata aurescens
Lebensbaum
6,0-8,0 0,1-0,3
Thuja plicata excelsa
Lebensbaum
6,0-8,0 0,1-0,3
Thuja standishii
6,0-8,0 0,1-0,3
Tilia cordata Winter Linde
Tilia euchlora Krim Linde
6,0-8,0 0,2-0,4
6,0-8,0 0,2-0,4
6,0-8,0 0,2-0,4
Tilia platyphyllus Sommer Linde
Tsuga canadensis
Hermlockstanne
5,5-7,0 0,2-0,4
Tsuga canadensis nana
Tanne
5,5-7,0 0,2-0,4
Tsuga canadensis pendula
5,5-7,0 0,2-0,4
Ulmus carpinifolia Feld Ulme
Ulmus glabra Berg Ulme
7,0-8,5 0,1-0,3
6,0-8,0 0,2-0,4
4,5-6,0 0,2-0,4
Viburnum bodnantense Winterschneeball
4,5-6,0 0,2-0,4
6,0-8,0 0,2-0,4
6,0-7,5 0,2-0,4
Viburnum davidii Schneeball
6,0-7,5 0,2-0,4
6,0-8,0 0,2-0,4
6,0-8,5 0,1-0,3
Viburnum plicatum Schneeball
6,0-8,0 0,2-0,4
Viburnum rhytidophyllum Immergrüner Schneeball
6,0-8,5 0,1-0,3
6,0-8,0 0,1-0,3
Vriesea splendens 4,5-5,5 0,2-0,4
Weigela florida Weigelie
6,0-7,0 0,2-0,4
Eibe
Taxus bac. semperaurea
Taxus bac. summergold
Taxus media brownii
Taxus media hillii
Thuja occid. europagold
Thuja occid. smaragd
Thuja orientalis aurea
Eibe
Gemeine Eibe
Zwergeibe
Eibe
Eibe
Eibe
Lebensbaum
Lebensbaum
Lebensbaum
Lebensbaum
Lebensbaum
Lebensbaum
Abendländischer Lebensbaum
Lebensbaum
6,0-8,5 0,2-0,4
6,0-8,5 0,2-0,4
6,0-8,5 0,1-0,3
6,0-8,5 0,1-0,3
6,0-8,0 0,2-0,4
6,0-8,0 0,1-0,3
7,0-8,5 0,2-0,4
Lebensbaum
Tilia american a Amerikanische Linde
Tilia intermd edia Holländische Linde
Tilia pallida Kaiser Linde
Tanne
Tsuga heterophylla
Ulmus wredei Gold Ulme
Vaccinium vitis idea Preiselbeere
Vaccinium corymbosum Heidelbeere
Verbenen 5,5-6,5 0,3-0,5
Viburnum burkwoodii Winterschneeball
Viburnum carcephalum Großblumiger Schneeball
Viburnum cariesii Schneeball
Viburnum fragrans Duftschneeball
Viburnum lautana W olliger Schneeball
Viburnum opulus Gemeiner Schneeball
Tanne
6,0-8,0 0,2-0,4
6,0-8,0 0,1-0,3
6,0-8,0 0,2-0,4
6,0-8,0 0,1-0,3
6,5-8,5 0,1-0,3
4,5-6,0 0,2-0,4
6,0-7,5 0,2-0,4
6,0-8,5 0,1-0,3
Vinca minor Immergrün
Viola-Freiland 6,0-7,0 0,1-0,3
Viola-Topfkultur 5,5-6,5 0,3-0,4
12 / 14
Page 33

Botanic Name German Name pH-Value AM-Value
Weigela purpurea Weigelie
6,0-7,0 0,2-0,4
6,0-7,0 0,2-0,4
Zantadeschia-Calla 5,0-6,0 0,4-0,6
Public Green Spaces:
Golf grass 5,5-6,0 0,2-0,4
Sports field grass 5,5-6,5 0,1-0,4
Ornamental lawn 5,5-6,0 0,2-0,4
Salad 6,0-7,5 0,3-0,5
Beans 6,0-7,5 0,3-0,5
Radish 5,5-7,5 0,3-0,5
Cucumber 5,5-7,5 0,4-0,7
Turnip-cabbage 6,5-7,5 0,3-0,6
Parsley 6,0-7,5 0,4-0,5
Vegetables (outside):
Salad
5,5-7,5 0,2-0,4
Beans 6,0-7,5 0,2-0,4
Endive 6,0-7,5 0,3-0,4
Carrot 6,0-7,5 0,3-0,4
Turnip-cabbage 6,0-7,5 0,2-0,4
Sweet pepper 6,0-7,5 0,2-0,5
Leek 6,0-7,5 0,2-0,5
Radish 5,5-7,0 0,2-0,3
Rhubarb 5,5-7,0 0,3-0,6
Red cabbage 6,5-7,5 0,3-0,4
Celery 6,0-7,5 0,3-0,5
August)
Spinach 5,5-7,5 0,2-0,4
White cabbage 6,5-7,5 0,3-0,5
Savoy 6,0-7,5 0,2-0,4
Onion 6,0-7,0 0,2-0,4
Apple (top layer) 6,0-7,5 0,2-0,4
Apple (30-60 cm soil depth) 6,0-7,5 0,2-0,3
Blackberry 6,0-7,5 0,2-0,4
Strawberry 6,0-7,0 0,2-0,4
Hazelnut 6,0-7,0 0,2-0,3
Red / Black currant 6,0-7,5 0,2-0,4
Sour cherry 6,0-7,0 0,2-0,4
Sweet cherry 6,0-7,5 0,2-0,4
Wisteria sinensis Blauregen
Zygocactus hybriden 5,0-6,5 0,3-0,5
Park lawn 5,5-6,5 0,1-0,3
Vegetables (in greenhouse):
Cauliflower 6,5-7,5 0,4-0,7
Tomato 6,0-7,5 0,4-0,7
Cauliflower 6,5-7,5 0,3-0,5
Radish 5,5-7,0 0,2-0,5
Peas 6,0-7,5 0,2-0,3
Cucumber 5,5-7,5 0,3-0,5
Parsley 6,0-7,5 0,2-0,4
Brussels sprouts 6,0-7,5 0,2-0,5
Asparagus (April until middle of June) 6,0-7,0 0,2-0,3
Asparagus (middle of June until
Tomato 5,5-7,5 0,3-0,5
6,0-7,0 0,3-0,5
Fruits:
Apricot 6,0-7,0 0,2-0,4
Pear 5,0-7,5 0,2-0,4
Blueberry 3,5-5,0 0,2-0,3
13 / 14
Page 34
Botanic Name German Name pH-Value AM-Value
Almond 6,0-8,0 0,1-0,3
Peach 6,0-7,5 0,2-0,4
Grape (30-60 cm soil layer) 6,0-7,5 0,2-0,3
Gooseberry 6,0-7,5 0,2-0,4
Lemon 6,0-7,5 0,1-0,3
Tropical and Sub-Tropical Fruits:
Ananas 5,0-6,0 0,2-0,3
Orange, Lemon 6,0-7,5 0,3-0,5
Banana 5,5-7,0 0,2-0,3
Cotton 5,0-6,0 0,2-0,4
Coffee 6,0-7,0 0,2-0,4
Soy beans 6,0-7,0 0,2-0,3
Tobacco 5,5-7,0 0,2-0,4
Tea 6,0-7,0 0,2-0,3
Agricultural Plants:
Barley 6,5-7,5 0,2-0,4
Maize 5,5-7,5 0,3-0,5
Rye 5,5-7,0 0,2-0,3
Duisburger Str. 44
Plum 6,0-7,5 0,2-0,4
Grape (top soil) 6,0-7,5 0,2-0,4
Avocado 6,0-7,0 0,2-0,4
Rice 5,0-6,5 0,3-0,4
Sugar cane 6,0-8,0 0,3-0,5
Oat 5,5-7,0 0,2-0,4
Potato 5,0-6,5 0,2-0,5
Wheat 6,0-7,5 0,2-0,4
Sugar beet 6,0-8,0 0,3-0,5
Tel: ++49 (0) 911 96 26 05-0
Fax: ++49 (0) 911 96 26 05-9
D-90451 Nürnberg
e-mail: [email protected]
www.stepsystems.de
All rights reserved.
Printed in Germany.
STEP Systems GmbH 2018
14 / 14
Page 35
This EC-table can facilitate and make safer the fertigation. These concentration specific figures are needed for the conductivity
controllers, as well as to control with hand-held instruments. The conductivity of the desired concentration is product-related
and to be read from the table, and then added the irrigation water-EC-value. Then the sum of both conductivities is the value
to be measured in the solution.
Deviations can indicate an error in the fertilization. Less known but very helpful is the measurement of the stock solution.
By means of checking the EC-value, a partially filled stock solution container can be refiled without weighing the container.
In order to meet these demands, it is necessary pay attention to the measuring range 0-2 EC, 0-20 EC and 0-200 EC.
All values were determined at 25 °C reference temperature. The tables are not complete and do not include all fertilizers.
Note: Urea has no conductivity.
No responsibility is taken for the correctness of the fertilizer conentrations given in the table.
Product:
Urea
NO3 NH4 P2O5 K2O MgO Ca 0,5‰ 1,0‰ 1,5‰ 2,0‰ 1% 5% 10% 20% liquid
Alkril -
9,2 10,8 20
-
16 2
-
0,8 1,6 2,2 3,1 12 50 103 184
Alkrisal -
6,8 13,2 20 5 10 2
-
0,8 1,5 2,1 2,8 11 54 96 172
Poly Crescal -
3,8 10,2 14 10 14 2
-
0,8 1,4 2,1 2,7 9 46 85 150
Poly Fertisal -
1,0 7,0 8 14 18 4
-
0,8 1,4 2,0 2,6
9
40 73 122
Hakaphos Grün - 7 13 20 5 10 2 - 0,86 1,63 2,37 3,1 13,3 55,6 101 169
Hakaphos Blau - 4,5 10,5 15 10 15 2 - 0,8 1,52 2,2 2,87 12,9 52,2 91,2 153
Hakaphos Rot - 3 5 8 12 24 4 - 0,76 1,45 2,1 2,7 11,2 44,9 79,4 133
Hakaphos Gelb - 8,6 11,4 20 - 16 1 - 0,8 1,53 2,23 2,9 12,8 53,8 97,4 168
Hakaphos soft Elite - 13 11 24 6 12 2 - 0,76 1,45 2,1 2,7 12,8 54,9 99,2 170
Hakaphos soft Ultra - 10,3 7,7 18 12 18 2,4 - 0,72 1,36 2 2,65 11,8 49,3 89 148
Hakaphos soft Spezial - 9,7 6,3 16 8 22 3 - 0,7 1,37 2,03 2,64 11,7 49,3 88 147
Hakaphos soft Plus - 7,6 6,4 14 6 24 3 - 0,75 1,45 2,14 2,77 12,1 50,3 89,9 152
Hakaphos soft Novell - 7,5 3,5 11 11 30 3 - 0,67 1,27 1,89 2,48 10,8 45,2 79,7 135
Hakaphos soft Extra - 7,3 2,7 10 20 30 2 - 0,6 1,15 1,7 2,24 9,9 41,3 73,3 120
Hakaphos basis 2 - 3 - 3 9 40 4 - 0,69 1,32 1,94 2,51 10,7 43,9 77,6 131
Hakaphos basis 3 - 3 - 3 15 36 4 - 0,67 1,28 1,88 2,4 10,3 41,4 71,5 120
Hakaphos basis 4 - 4 - 4 16 32 6 - 0,65 1,15 1,73 2,26 9,5 38 66,1 106
Hakaphos basis 5 - 4 1 5 20 30 5 - 0,61 1,15 1,68 2,19 9,3 37,8 64,8 101
NovaTec Solub 21 - - 21 21 - - - - 1 1,97 2,85 3,7 15,5 62,9 112 191
NovaTec Solub 20+5+10 - 5,8 14,2 20 5 10 1,3 - 0,86 1,62 2,42 3,14 13,4 54,2 99 170
NovaTec Solub 16+10+17 - 5 11 16 10 17 - - 0,78 1,5 2,22 2,86 12,4 51,1 91,2 155
NovaTec 18 fluid - 9 9 18 - - - - 0,59 1,15 1,69 2,22 10,3 83,1 151
Kamasol brillant Grün 8,5 1,5 - 10 4 7 - - 0,16 0,29 0,44 0,57 2,6 10,7 19,5 35,1
Kamasol brillant Blau 3,8 1,4 2,8 8 8 6 - - 0,24 0,44 0,66 0,86 4 17,1 31,4 56,3
Kamasol brillant Rot 4 (1) - 5 8 10 - - 0,2 0,38 0,57 0,75 3,5 15,4 28,3 52
Flory 1 MEGA
-
13 11 24 6 12 2
-
0,8 1,4 2,1 2,7 12 52 95 166
Flory 2 MEGA
-
11 5 16 6 26 3,4
-
0,7 1,3 2 2,6 11 47 85 146
Flory 3 MEGA
-
10 8 18 12 18 2
-
0,7 1,3 1,9 2,5 11 46 82 142
Flory 4 MEGA
-
7,4 2,6 10 20 30 2,7
-
0,6 1,1 1,7 2,2 9 39 70 118
Flory 5 Mega
-
8,4 2,7 11 11 33 2
-
0,7 1,3 1,9 2,5 112 46 82 139
Flory 6 MEGA
-
10 8 18 18 18
- -
0,6 1,2 1,8 2,4 12 50 89 149
Flory 8 MEGA
-
10,4 7,6 18
-
22 3,3
-
0,7 1,4 2,1 2,7 13 53 95 163
Flory 1 (rot)
-
8,5 11,5 20 5 10 2
-
0,8 1,5 2,2 2,9 12 52 93 160
Flory 1 (spezial)
-
6 12 18 6 12 2
-
0,8 1,5 2,2 2,9 12 50 91 157
Flory 2 (blau)
-
8,5 6,5 15 5 25 2
-
0,7 1,4 2,1 2,7 12 48 87 150
Flory 2 (spezial)
-
10,5 5,5 16 9 22 4
-
0,7 1,3 2 2,6 11 46 83 141
Flory 3 (grün)
-
4,5 10,5 15 10 15 2
-
0,8 1,5 2,1 2,8 12 48 86 146
Flory 4 (weiß)
-
2,5 5,5 8 16 24 4
-
0,7 1,3 1,9 2,5 10 42 73 121
Flory 8 (NK)
-
11,6 8,4 20
-
16 1,5
-
0,8 1,5 2,3 3 13 52 95 165
Flory 9 (Hydro)
-
10 5 15 7 22 6
-
0,7 1,3 2 2,6 11 46 82 138
Flory Basis 1
- - - -
14 38 5
-
0,6 1,3 1,9 2,5 10 40 71 117
Flory Basis 2
-
3
-
3 15 35 5
-
0,6 1,2 1,7 2,3 9,5 38 67 110
Flory Basis 3
-
2
-
2 11 39 4
-
0,6 1,3 1,9 2,5 10 42 74 122
Flory Basis 4
-
4
-
4 8 40 4
-
0,6 1,3 1,9 2,6 11 44 78 128
Flory Basis 5
-
4 1 5 20 30 5
-
0,5 1,1 1,6 2,1 9 36 63 105
Flory Basis 6
-
6
-
6 14 37 4
-
0,5 1,2 1,7 2,2 10 40 70 117
Flory Basis 7
-
0,8 3,20 4,00 16 32 6
-
0,6 1,2 1,7 2,2 10 37 65 107
Florymonid flüssig EC/I
-
9 9 18
- - - -
0,6 1,2 1,8 2,4 10 45 85 159
Stock solution
EC in ready-to-use solution
Fertilizer solution
Aglukon
Compo
Euflor
Single nutrient content in %
Table for Optimal EC-Values
total
N
Duisburger Str. 44
D-90451 Nürnberg
Tel: ++49 (0) 911 96 26 05-0
Fax: ++49 (0) 911 96 26 05-9
e-mail: [email protected]
www.stepsystems.de
All rights reserved.
Printed in Germany
STEP Systems GmbH 2018
Page 36
Product:
Urea
NO3 NH4 P2O5 K2O MgO Ca 0,5‰ 1,0‰ 1,5‰ 2,0‰ 1% 5% 10% 20% liquid
Universol Basis
- 4 - 4 19 35 4,1 - 0,6 1,2 1,8 2,4 9,6 40,4 70,3 114
Universol Violett
0,5 7 3 10 10 30 3,3 - 0,65 1,3 1,95 2,6 11,1 48,2 84,9 141
Universol Gelb
0,4 3,1 8,9 12 30 12 2,2 - 0,6 1,2 1,8 2,4 9,9 41,4 71,7 117
Universol Orange
0,4 10,5 5,3 16 5 25 3,4 - 0,7 1,4 2,1 2,8 12 52,6 93,2 157
Universol Blau
0,5 10 7,7 18 11 18 2,5 - 0,65 1,3 1,95 2,6 11,6 50,7 90 152
Universol Grün
0,4 11,7 11 23 6 10 2,7 - 0,75 1,5 2,25 3 12,8 56,3 101 170
Universol Weiß
- 13,4 1,7 15 - 19 2 9 0,6 1,2 1,8 2,4 10,5 45,7 80,3 134
Universol Spezial
0,4 8,2 - 9 3 39 3,5 - 0,65 1,3 1,95 2,6 10,1 43,7 76,3 124
Universol Special 104
1,1 12 5,9 19 6 27 2,4 - 7 1,4 2,1 2,8
Universol Special P
0,4 8,2 - 9 - 39 3,5 - 0,65 1,3 1,95 2,6 6,9 29,4 50,3 80
Peters Professional Allrounder
13,1 4,5 2,4 20 20 20 0,7 - 0,4 0,8 1,2 1,6
Peters Prof. Foliar Feed
20,5 3,6 2,9 27 15 12 0,8 - 0,3 0,6 0,9 1,2 9,3 41,5 74,7 128
Peters Prof. Combi-Sol 6-18-36
- 6 - 6 18 36 3 - 0,55 1,1 1,65 2,2
Peters Prof. Blossom Booster
- 5,2 4,8 10 30 20 2 - 0,5 1 1,5 2 9,5 40,6 71,7 117
Peters Prof. Grow Mix
13,3 6,3 1,4 21 7 21 3 - 0,4 0,8 1,2 1,6 9,3 40,1 70 114
Peters Professional Plant Starter
2,4 - 7,6 10 52 10 - - 0,5 1 1,5 2
Agrolution 114 - 10 - 10 100 40 - - 0,7 1,4 2,1 2,8
Agrolution 335 5,2 7,4 2,4 15 13 25 - - 0,8 1,6 2,4 3,2
Agrolution 316 2 11 0 13 5 28 2,5 2 0,65 1,3 1,95 2,6
Agrolution 313 2,3 11,7 0 14 7 14 - 14 0,65 1,3 1,95 2,6
Agrolution324 3,2 10,6 0,2 14 8 22 2 5 0,7 1,4 2,1 2,8
Agrolution 214 - 11,7 0,3 12 6 29 - 7 0,65 1,3 1,95 2,6
Agrolution 125 1,1 5,9 - 7 14 35 3,5 - 0,65 1,3 1,95 2,6
Solinure GT 1 - 9 1 10 5 39 2 - 0,7 1,4 2,1 2,8
Solinure GT 2 - 7 - 7 19 38 2 - 0,55 1,1 1,65 2,2
Solinure GT 3 1,8 8,1 2,1 12 5 35 2 - 0,7 1,4 2,1 2,8
Solinure GT 4 - 6,1 7,9 14 6 23 2 - 0,7 1,4 2,1 2,8
Solinure GT 5 10,3 5,9 3,8 20 20 20 - - 0,45 0,9 1,35 1,8
Solinure GT 8 20,8 1 1,2 23 10 10 5,6 - 0,35 0,7 1,05 1,4
Solinure GT 9 - 2,1 8,9 11 35 11 2 - 0,6 1,2 1,8 2,4
pH stabilisierend für weiches Wasser in einer Stammlösung
Peters Excel CalMag Grower
2,5 10,2 1,3 14 6 14 2,5 6,5 0,5 1 1,5 2
10,6 45,8 76,5 130
Peters Excel CalMag Finisher
1,8 10,2
-
12 6 20 2 6,5 0,5 1 1,5 2
10,7 46,4 80,3 131
Universol Soft Water 312R
1,2 12,3 5 18 7 12 2 6 0,6 1,2 1,8 2,4
Universol Soft Water 113R
1,2 10 0,1 11 11 31 2 2 0,55 1,1 1,65 2,2
Universol Soft Water 213R -
11,9 2,4 11 7 22 2 5 0,6 1,2 1,8 2,4
pH stabilisierend für hartes wasser in einer Stammlösung
Peters Excel Hard Water Grow Special
4,2 10,3 3,5 18 10 18 2
-
0,5 1 1,5 2
12 40,3 70,9 118
Peters Excel Hard Water Finisher
3,9 8,9 1 14 10 26 2
-
0,45 0,9 1,35 1,8
11,1 38 66,6 110
Peters Excel Extra Acidifier
6,1 8,9 0 15 15 25 0,9
-
0,4 0,8 1,2 1,6
11,7 40,3 70,9 118
Universol Hard Water 211
4 11,2 8,2 23 10 10 2
-
0,65 1,3 1,95 2,6
Universol Hard Water 225
4 5,8 1,8 11 10 28 2
-
0,6 1,2 1,8 2,4
Gabi Plus N 15 6 6 27
- - - -
0,4 0,9 1,3 1,7 8 33 61 108 173
Gabi N Super 15 6 6 27
- -
1
-
0,4 0,8 1,2 1,7 8 33 61 108 157
Gabi Plus P
- - - -
20
- - -
0,1 0,3 0,4 0,6 2 10 18 31 62
Gabi Plus K
- - - - -
20
- -
0,4 0,6 0,9 1,2 6 26 48 89
Gabi Plus Mg
- - - - - -
8
-
0,3 0,6 0,8 1,1 5 21 39 69 155
Gabi Plus SinPhos Ca 3
- -
3
- - -
15 0,5 0,9 1,3 1,7 7 32 57 99 163
Gabi Plus N-K 13
- -
13
-
11
- -
0,2 0,4 0,5 0,7 3 15 28 51 119
Gabi Plus P-K
- - -
13 14
- -
0,2 0,4 0,6 0,8 3 15 27 49 137
Gabi Hydro
-
2 2 4 2 5 0,5
-
0,2 0,4 0,6 0,8 4 17 31 57 191
Gabi Plus D
-
2 2 4 2 5 0,5
-
0,2 0,4 0,6 0,8 4 17 31 56 184
Gabi Plus 6-12-6
5 1
-
6 12 6
- -
0,2 0,4 0,5 0,7 3 13 24 41 101
Gabi Plus Super
5 1,5 1,5 8 8 6
- -
0,2 0,4 0,6 0,8 3 14 26 46 126
Gabi Plus Standard
9 1
-
10 4 7
- -
0,1 0,2 0,3 0,4 2 9 17 31 88
Gabi Plus 12-8-11
11 1
-
12 8 11 0,5
-
0,2 0,4 0,5 0,7 3 13 25 42 93
Gabi Plus 5
12 1
-
13 3 7 1
-
0,2 0,3 0,4 0,6 3 11 21 36 89
Gabi Plus Z
14 1
-
15 4 7
- -
0,1 0,2 0,3 0,4 2 9 17 30 72
Schwefels.Ammoniak
- - - 21 - - - - 1,0 1,9 2,8 3,7 17 63 109 186
Kalisulfat
- - - - - 50 - - 1,0 1,7 2,4 3,4 14 54 97
Monokaliumphosphat
- - - - 52 34 - - 0,5 0,8 1,2 1,6 7 28 47 78
Kalksalpeter
- 14,5 1,0 16 - - - - 0,6 1,1 1,6 2,1 11 42 66 103
Fertilizer solution
Stock solution
G a b i
total
N
Everris / ICL
EC in ready-to-use solution
Single nutrient content in %
Duisburger Str. 44
D-90451 Nürnberg
Tel: ++49 (0) 911 96 26 05-0
Fax: ++49 (0) 911 96 26 05-9
e-mail: [email protected]
www.stepsystems.de
All rights reserved.
Printed in Germany
STEP Systems GmbH 2018
Page 37
Product:
Urea
NO3 NH4 P2O5 K2O MgO Ca 0,5‰ 1,0‰ 1,5‰ 2,0‰ 1% 5% 10% 20% liquid
Plantaaktiv Azal 412
-
13,2 10,8
24 6 12 2
-
0,8 1,5 2,2 2,8
Plantaaktiv Azal 312
-
6 12
18 6 12 2
-
0,8 1,5 2,2 2,8
Plantaaktiv Typ K
11 5
16 6 26 3,3
-
0,7 1,4 2 2,6
Plantaaktiv Typ A
-
10 8
18 12 18 2
-
0,7 1,4 2 2,6
Plantaaktiv Typ B
-
7,4 2,6
10 20 30 2,6
-
0,6 1,2 1,8 2,4
Plantaaktiv Typ NK
-
10,4 7,6
18
-
22 3,3
-
0,8 1,5 2,2 2,9
Plantaaktiv Typ Hydro
-
10 5
15 7 22 6
-
0,7 1,4 2 2,6
Manna LIN ACIDIC 5,7 8,8 3,5 18 14 18 2 - 0,7 1,35 1,95 2,55
Manna LIN ACIDIC K Plus - 7,5 4,5 12 14 28 2 - 0,75 1,45 2,1 2,72
Manna LIN BASIS - 3 - 3 19 35 3 - 0,5 1,2 1,7 2,3 10 41 72 119
Manna LIN K spezial - 13 6 19 5 25 2 - 0,7 1,3 1,94 2,56
Manna LIN M spezial - 11 7 18 12 18 2 - 0,65 1,25 1,83 2,42 13 50 91 150
Manna LIN A spezial - 13 11 24 5 11 3 - 0,66 1,26 1,88 2,45
Manna LIN B spezial - 7 5 12 12 24 4 - 0,64 1,22 1,77 2,31
MANNA LIN K Plus - 7,2 2,8 10 10 30 3 - 0,71 1,34 1,99 2,56
Manna LIN K - 8,3 6,5 15 5 25 2 - 0,75 1,49 2,28 2,94
Manna LIN M - 4,5 10,5 15 10 15 2 - 0,7 1,35 1,98 2,58 13 51 92 154
Manna LIN A - 7 13 20 5 10 2 - 0,6 1,2 1,8 2,3 13 51 88 136
Manna LIN B - 2,5 5,5 8 12 24 4 - 0,64 1,22 1,77 2,31
Manna Lin Soft A 3 11,5 4,5 19 10 15 - 5 0,75 1,43 2,14 2,78
Manna Lin Soft K 1,25 12,3 0,5 14 5 32 - 5 0,69 1,33 1,96 2,6
Manna LIN F 2,4 2,5 3,1 8 8 6 - - 0,24 0,52 0,66 0,93 4 16 28 50
Manna LIN Protekt 3 - - 3 27 18 - - 0,21 0,4 0,6 0,79
Wuxal Top N 12 - - 12 4 6 - - 0,1 0,2 0,3 0,4 2 12 15 42 115
Wuxal Super 2 2,3 3,7 8 8 6 - - 0,3 0,5 0,8 1 4 18 33 61 272
Wuxal P-Profi - - 5 5 20 5 - - 0,3 0,55 0,81 1,05
Wuxal Top K - 1 4 5 8 12 - - 0,27 0,51 0,77 0,99
Wuxal Calcium 1,5 8,5 - 10 - - 2 15 0,42 0,88 1,16 1,5
Wuxal Microplant 3,6 - 1,4 5 10 - - - 0,27 0,53 0,75 0,98
Fertisal 20-5-10 - 7 13 20 5 10 2 - 0,75 1,44 2,08 2,72
Fertisal 8-12-24 - 2,5 5,5 8 12 24 4 - 0,64 1,22 1,77 2,31
Fertisal 15-10-15 - 4,5 10,5 15 10 15 2 - 0,7 1,35 1,98 2,58
Multi KMg spritzfähig - 12 - 12 - 43 2 - 0,56 1,09 1,81 2,42 7,5 42 73 126
Multi K Kaliumnitrat - 13 - 13 - 46 - - 0,55 1,1 1,54 2,15 10 47 86 153
Haifa MAP - - 12 12 61 - - - 0,35 0,66 0,96 1,24 5,9 27 46 74
Haifai MKP - - - - 53 34 - - 0,4 0,73 1,08 1,4 6,6 30 54 88,5
MAGNISAL - 11 - 11 - - 16 - 0,4 0,75 1,1 1,45 6,8 29 50 78,2
Ferty 1 MEGA - 13 11 24 6 12 2 - 0,8 1,5 2,2 2,8 13 56 101 174
Ferty 2 MEGA - 11 5 16 6 26 3,4 - 0,7 1,4 2 2,6 12 50 91 152
Ferty 3 MEGA - 10 8 18 12 18 2 - 0,7 1,4 2 2,6 12 49 88 149
Ferty 4 MEGA - 7,4 2,6 10 20 30 2,7 0,6 1,2 1,8 2,4 10 41 73 122
Ferty 6 MEGA - 10 8 18 18 18 - - 0,7 1,3 1,9 2,5 11 46 84 145
Ferty 8 MEGA - 10,4 7,6 18 - 22 3,3 - 0,7 1,5 2,2 2,8 13 53 95 163
Ferty 1 Rot - 8,5 11,5 20 7 10 2 - 0,8 1,5 2,3 3 13 54 96 164
Ferty 2 Blau - 8,5 6,5 15 5 25 2 - 0,7 1,4 2,1 2,7 13 53 93 159
Ferty 3 Grün - 4,5 10,5 15 10 15 2 - 0,8 1,5 2,2 2,9 12 52 90 153
Ferty 4 Weiß - 2,5 5,5 8 16 24 4 - 0,7 1,3 1,9 2,5 11 42 76 129
Ferty 5 - 0,1 5,9 6 36 20 2 - 0,6 1,1 1,6 2,1 9 35 60 99
Ferty 6 - 1,1 8,9 10 40 10 2 - 0,6 1,1 1,6 2,1 9 36 61 100
Ferty 8 - 9,2 10,8 20 - 16 2 - 0,8 1,6 2,4 3,1 14 59 106 183
Ferty 9 - 10 5 15 7 22 6 - 0,7 1,3 2 2,6 11 48 85 140
Ferty Hydrangea - 14,7 2,8 17,5 - 18 - 11 0,7 1,3 1,9 2,5 11,5 49 87
Ferty Primula - 9,5 2 11,5 10 35 2 - 0,7 1,3 1,9 2,5 11 47 74 143
FERTIPLANT Universal 10,2 5,8 4 20 20 20 - - 0,5 0,9 1,4 1,8
FERTIPLANT Blattgrün Booster 26 1 3 30 10 10 - - 0,3 0,6 0,9 1,1
FERTIPLANT Orchids 11 5,8 3,2 20 14 20 2 - 0,5 1 1,5 2
FERTIPLANT Phalenopsis 7 7,6 2,4 17 12 26 2 - 0,5 1,1 1,6 2,1
FERTIPLANT Jungpflanzenstarter - 1,4 8,6 10 52 10 - - 0,5 0,9 1,3 1,7
FERTIPLANT Phosphor-Booster - 6,7 8,3 15 30 15 - - 0,6 1,1 1,7 2,2
FERTIPLANT Topfpflanzen Spezial - 10,5 4,5 15 15 30 - - 0,6 1,2 1,8 2,4
Stock solution
total
N
Fertilizer solution
Planta
EC in ready-to-use solution
Single nutrient content in %
Manna
Hauert
Duisburger Str. 44
D-90451 Nürnberg
Tel: ++49 (0) 911 96 26 05-0
Fax: ++49 (0) 911 96 26 05-9
e-mail: [email protected]
www.stepsystems.de
All rights reserved.
Printed in Germany
STEP Systems GmbH 2018
Page 38
Product:
Urea
NO3 NH4 P2O5 K2O MgO Ca 0,5‰ 1,0‰ 1,5‰ 2,0‰ 1% 5% 10% 20% liquid
FERTIPLANT 10+20+30 - 5,9 4,1 10 20 30 - - 0,7 1,3 1,9 2,4
FERTIPLANT Blütenwunder - 3,5 6,5 10 30 20 1 - 0,6 1,2 1,7 2,2
Ferty Basis 1 - - - - 14 38 5 - 0,6 1,2 1,8 2,3 9,5 38 60 91
Ferty Basis 2 - 3 - 3 15 35 5 - 0,6 1,2 1,7 2,2 9 37 58 89
Ferty Basis 3 - 2 - 2 11 39 4 - 0,7 1,4 2,1 2,7 10 38,5 68 106
Ferty Basis 4 - 4 - 4 8 40 4 - 0,6 1,4 1,9 2,6 9,5 38 62 110
Ferty Basis 5 - 4 1 5 20 30 5 - 0,5 1,1 1,6 2,2 9 36 60 100
Ferty Basis 6 - 6 - 6 14 37 4 - 0,5 1,2 1,7 2,3 9,5 40 72 120
Ferty Basis 7 - 0,8 3,2 4 16 32 6 - 0,6 1,4 1,9 2,6 10 42 74 124
Fertiplant Acid 12+7+24 weich - 12 - 12 7 24 2 7 0,7 1,3 1,9 2,5 44 76 125
Fertiplant Acid 15+10+15 weich - 11,8 3,2 15 10 15 2 7 0,7 1,3 1,9 2,5 44 93 125
Fertiplant Acid 16+10+25 hart - 11,2 4,8 16 10 25 2 - 0,7 1,4 2 2,7 48 85 143
Fertiplant Acid 19+10+19 hart - 11,8 7,2 19 10 19 2 - 0,8 1,5 2,2 2,9 53 94 160
Agriplant 1
-
6,8 13,2 20 5 10 2
-
0,8 1,6 2,3 3 90 153
Agriplant 2
-
4 8 12 5 24 2
-
0,9 1,7 2,4 3,1 93 157
Agriplant 3
-
2,5 11,5 14 10 14 2
-
0,8 1,6 2,3 3 89 149
Agriplant 3S
-
5,2 9,8 15 15 15 2
-
0,7 1,4 2,1 2,8 81 136
Agriplant 4
-
2,5 5,5 8 14 25 3
-
0,7 1,4 2,1 2,7 80 132
Agriplant 5
-
7,5 11,5 19
-
15 2
-
0,9 1,7 2,4 3,1 102 175
Agriplant 6
-
10,5 4,5 15 5 30 2
-
0,7 1,4 2 2,6 81 136
Agriplant 7
-
3,8 2,2 6 12 36 2
-
0,7 1,4 2 2,6 80 135
Agriplant 7S
-
10,1 1,9 12 10 36 2
-
0,6 1,3 1,9 2,51 12 49 87 145
Agriplant 8
-
0,8 9,2 10 40 10 2
-
0,6 1,1 1,6 2,1 61 100
Formel 1 / De Weert 1
- - - 16 3 4 - - 0,5 1,0 1,4 1,8
Formel 2 / De Weert 2
- - - 10 4 7 - - 0,2 0,4 0,6 0,8
Formel 3 / De Weert 3
- - - 9 0 7 - - 0,2 0,3 0,4 0,6
Formel 5 / De Weert 5
- - - 5 10 15 - - 0,3 0,6 0,9 1,2 135
Formel 6 / De Weert 6
- - - 0 15 5 - - 0,2 0,3 0,5 0,6
Terraflor-AZ
- 4 - 4 - 14 2 - 0,4 0,7 1,1 1,5 6 23 38 60
Kristalon orange
- 4,5 1,5 6 12 36 3 - 0,7 1,3 1,9 2,5 10 41 71 118
Kristalon rot
- 10,1 1,9 12 12 36 1 - 0,7 1,3 1,9 2,6 11 43 75 122
Kristalon gelb
- 3,9 9,1 13 40 13 - - 0,5 1 1,5 2 9 33 62 98
Kristalon weißmarke
- 11,3 3,7 15 5 30 3 - 0,7 1,3 1,9 2,6 12 45 80 133
Kristalon spezial
9,1 5,3 3,6 18 18 18 3 - 0,5 0,9 1,5 1,9 9 36 62 88
Kristalon lilamarke - 1,8 17,2 19 6 6 2 - 0,9 1,6 2,2 3,1 13 50 90 145
Kristalon blaumarke
- 11,9 7,1 19 6 20 3 - 0,7 1,5 2 2,6 12 49 85 137
Kristalon grünmarke
- 9,8 8,2 18 18 18 - - 0,66 1,26 1,85 2,5 11,2 47,7 86 135
Kristalon azur
- 7,3 12,7 20 5 10 2 - 0,8 1,5 2,3 3 12 53 90 140
Kristalon azur spezial
- 9,1 6,9 16 11 16 4 - 0,7 1,4 2 2,6 12,3 46,3 82 135
Kristalon braun
- 3 - 3 11 38 4 - 0,7 1,3 2 2,5 10 41 71 115
Kristalon Scarlet
- 7,5 - 7,5 12 36 4 - 0,7 1,3 1,7 2,4 10 42 76 121
Kristalon Vega
- 9 8 17 6 25 - - 0,7 1,2 1,8 2,4 11 40 75 120
Kristalon Gena
- 9,5 2,5 12 12 36 - - 0,7 1,3 1,9 2,5 11 40 76 130
Yara Liva CalciNit
- 14,4 1,1 15,5 - - - 19 1,24
Krista-K Kaliumnitrat
- 13,5 - 13,5 - 46 - - 1,35
Krista-MAP
- - 12 12 61 - - 0,4 0,7 1,4 6,3 33,2 46,5
Krista-MKP
- - - - 52 34 - - 0,4 0,7 1,4 6,5 33,5 46,8
Krista-SOP
- - - - - 52 - - 0,8 1,5 3 10,6 41,9 82
Krista-MgS
- - - - - - 16 - 0,4 0,7 1,4 6,5 33,5 46,7
Krista-Mag
- - - 11 - - 15 - 0,5 0,9 1,7 8,1 45 88
Kristalon Calcium rot
- 10,6 0,4 11 11 24 1,6 6 0,7 1,3 2,35 9,9 66 102
Kristalon Calcium blau
- 12 3 15 5 17 2 6 0,8 1,5 2,45 10,5 72 113
Kristalon Calcium grün
- 9,9 4,1 14 14 14 2 6 0,7 1,3 2,25 9,7 66 104
Kristalon Calcium weiß
- 11,7 0,3 12 5 25 2 6 0,7 1,4 2,36 10,2 69 107
Kristalon Acid rot
- 9,7 1,3 11 11 32 2 - 0,8 1,6 2,6 11,1 75 120
Kristalon Acid blau
- 7,9 8,1 16 6 17 2,5 - 0,8 1,7 2,8 11,9 81 130
Kristalon Acid grün
- 9,2 6,8 16 16 16 3,8 - 0,8 1,6 2,6 11,2 76 120
Kristalon Acid weiß
- 8,8 4,2 13 6 26 3 - 0,8 1,6 2,7 11,4 77 125
Kristalon Acid gelb
- 3,5 7,5 11 38 11 3 - 0,6 1,2 2 8,8 56 87
Fertilizer solution
Stock solution
Planta
total
N
EC in ready-to-use solution
Single nutrient content in %
Yara
Terraflor
Duisburger Str. 44
D-90451 Nürnberg
Tel: ++49 (0) 911 96 26 05-0
Fax: ++49 (0) 911 96 26 05-9
e-mail: [email protected]
www.stepsystems.de
All rights reserved.
Printed in Germany
STEP Systems GmbH 2018
Page 39
Duisburger Str. 44
Tel: ++49 (0) 911 96 26 05-0
Fax: ++49 (0) 911 96 26 05-9
D-90451 Nürnberg
e-mail: [email protected]
www.stepsystems.de
All rights reserved.
Printed in Germany.
STEP Systems GmbH
Salt toleration of plants
Degree of salt
toleration
Plants
EC value for
substrates
(ratio 1:5;
substrate:water)
Max. EC value of
irrigation water,
per mil = tolerable
concentration of
fertilisation
Acceptable
carbonate
hardness
very salt
sensitive plants
Orchids, Nephrolepis
Bromelia, seedings
Propagation, Azalea,
Erica, Calluna
0,2 - 0,3
up to 0,63 EC 0,25 per mil
up to 0,47 EC 0,50 per mil
up to 0,31 EC 0,75 per mil
up to 0,16 EC 1,00 per mil
5
salt sensitive
plants
Azalea, Erica,
Araceen,
all types of young plants
0,4 - 0,6
up to 0,78 EC 0,25 per mil
up to 0,63 EC 0,50 per mil
up to 0,47 EC 0,75 per mil
up to 0,31 EC 1,00 per mil
up to 0,16 EC 1,50 per mil
10
not strongly salt
sensitive plants
Begonia, Cyclamen,
Freesia, Gerbera,
Roses
0,8 - 1 ,0
up to 1,00 EC 0,25 per mil
up to 0,78 EC 0,50 per mil
up to 0,63 EC 0,75 per mil
up to 0,47 EC 1,00 per mil
up to 0,31 EC 1,50 per mil
10 up to max. 15
plants tolerating
higher salt
concentration
Chrysanthemum,
Carnations
1 ,5 - 2 ,0
up to 1,56 EC 0,25 per mil
up to 1,25 EC 0,50 per mil
up to 0,94 EC 0,75 per mil
up to 0,63 EC 1,50 per mil
up to 0.47 EC 1,50 per mil
15
2018
Page 40
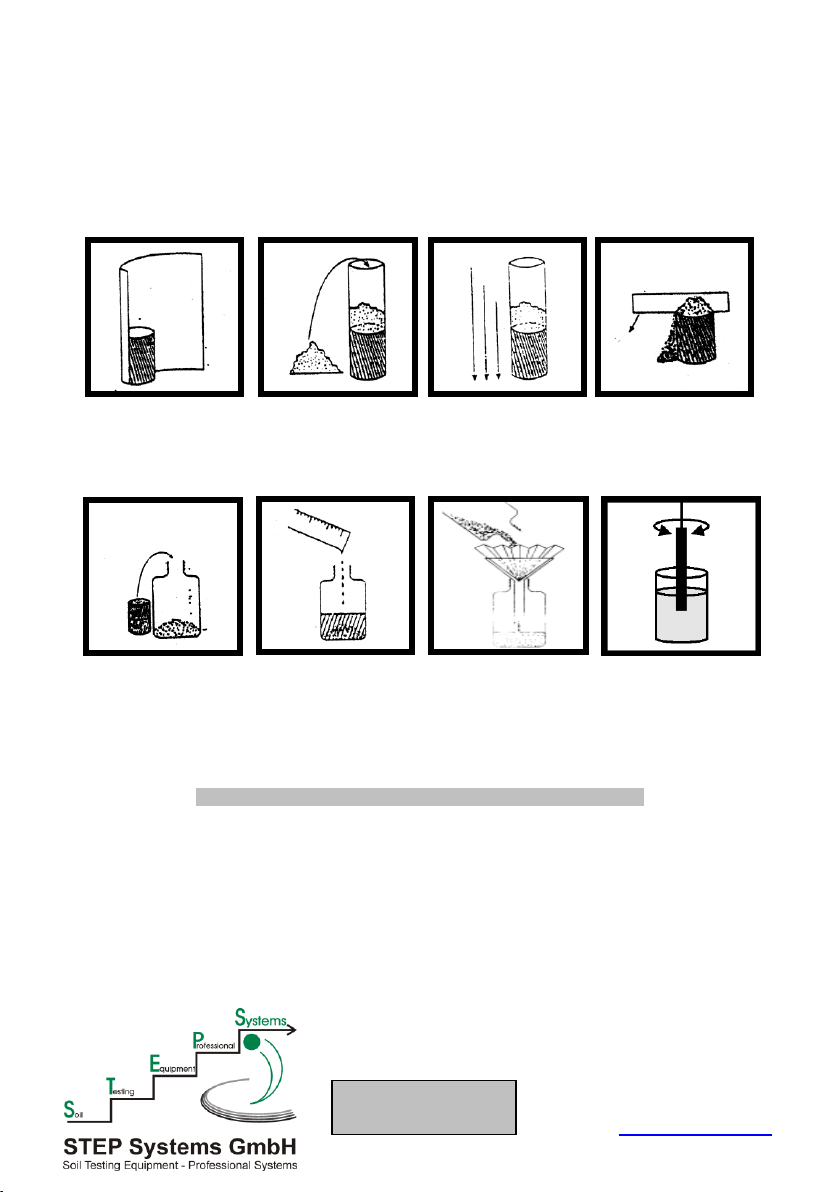
All rights reserved.
Printed in Germany.
STEP Systems GmbH
Duisburger Str. 44
Tel: ++49 (0) 911 96 26 05-0
Fax: ++49 (0) 911 96 26 05-9
D-90451 Nürnberg
e-mail: [email protected]
www.stepsystems.de
Determination of substrates’ salinity
1. Take a representative substrate sample
2. Thoroughly stir the substrate in order homogenise the sample
3. Determination of salinity in homogenised sample (see icons 1-8)
(1) Cylindrically
enwrap the enclosed 100
ml measuring cup with a
firm DIN-A4-sheet of
paper.
(2) Fill sample loosely
above the top of the cup.
(3) To compress
sample toss the cup 10x
on a solid surface.
(4) Remove paper
and surmounting sample.
(5) Fill measured 100
ml sample in 1-ltr-widenecked-bottle.
(6) Add 500 ml
distilled water, close
bottle and shake several
times.
(7) Filter the mixture
after 10 min. with fluted
filter.
(8) Measure
conductivity in filtrate.
1. Calculation of salinity:
Conductivity (in mS) x 0,528 x 5 = salinity in g/ltr. substrate
E.g.: A EC-measurement of 0,37 mS (= 370 µS) results in a salinity of:
0,37 x 0,528 x 5 = 977 mg salt/l substrate
2. Benchmarks:
Substrates for salt-sensitive cultures, piquet substrates 500 – 1000 mg/ltr.
Substrates for less sensitive cultures, pot substrates 1000 – 2000 mg/ltr.
Substrates for salt compliant cultures, e.g. chrysanthea 2000 – 3000 mg/ltr.
2018
 Loading...