

Page 1

STEP 1150
™
User’s Guide
STEP Communications
625 River Oaks Parkway
San Jose, CA 95134
Tel. 408-474-0272
www.stepcommunications.com
Page 2

Notices
This User’s Guide is published without warranty as to the Guide, and it
provides no warranty in the referenced product except as provided in the
End User Limited Product Warranty. Improvements and modifications to
this manual, including those necessitated by typographical errors,
inaccuracies or improvements to equipment may be made at any time and
without notice.
This device complies with part 15 of the FCC Rules. Operation is subject to
the following two conditions: (1) This device may not cause harmful
interference, and (2) this device must accept any interference received,
including interference that may cause undesired operation.
Changes or modifications to your device not expressly approved by STEP
Communications Corp. can void the user's authority to operate the
equipment.
BLUETOOTH is a trademark of the Bluetooth SIG, Inc. The Bluetooth
logo and trademarks are owned by Bluetooth SIG, Inc.
STEP 1150 is a trademark of STEP Communications Corporation
Copyright © 2004 STEP Communications Corporation All rights reserved
Part # 9500006-01 rev A
Page 3

Guidelines for Safe and Efficient Use
• Clean your headset with a lightly dampened soft cloth only. Solvents
or other chemicals may damage your headset and void your warranty
• Keep your headset away from extreme temperatures, water,
exceptionally high humidity environments, dusty environments, open
flame or fire.
• Do not drop your headset or expose it to severe physical shock or
vibration
• Do not dismantle or attempt to repair your headset. If your headset
fails, return your headset to your place of purchase for repair or
service
• Do not attempt to ‘pair’ your headset to your phone while driving
• Always use caution when using a cell phone while driving
• Keep your headset away from small children as your headset contains
small parts that may become detached from the unit and create a
choking hazard
Page 4

STEP 1150™ INTRODUCTION
What is Bluetooth Wireless
Technology?
Bluetooth™ wireless technology makes it possible to connect
compatible communication, computing and other consumer
electronic devices without using cables. The technology is based
on a radio link that offers fast and reliable transmission of
voice and data information. It does not require a line-of-sight
connection in order to establish communication. Bluetooth
wireless technology uses a globally available frequency range
intended to ensure communication compatibility with a wide
variety of devices worldwide.
Page 5

STEP 1150™ INTRODUCTION
How Can I Use My Headset?
You can connect your STEP 1150 headset to your mobile phone
or PC – or any device with Bluetooth™ wireless technology that
supports the Bluetooth headset or hands-free profile version 1.1 or
1.2 – to keep your hands free for more important tasks when
you are at the office or in your car. This User’s Guide focuses on
how to use the headset with your Bluetooth compatible mobile
phone. When the headset is connected to your mobile phone, you
can use voice control to make calls (if your phone supports this
function). The phone can be tucked away in your pocket or in a
bag. You can handle incoming and outgoing calls, and adjust the
volume using the single ‘rocker switch’ on your STEP 1150
headset. Simply rock the multi-function controller wheel forward
two times to increase the volume or back two times to decrease the
volume for each incremental level.
Page 6

STEP 1150™ INTRODUCTION
Contents
Overview ……………………………………….…. 1
Getting Started …... …………………………….…. 2
Features & Controls …………………………….…. 3
Using the Multi-Function Control ………………….. 4
Charging Your Headset …………………………… 5
Charging & LED Status Matrix ……………………. 6
Connecting Your Headset to the Charger ………….. 7
Adjusting Your Headset for Maximum Comfort …… 9
Pairing the Headset to Your Phone ………….…… 13
Resetting the Headset ……………………………. 15
General Operation ……………………………….. 16
(On/Off, volume control, making calls, voice
activated dialing, answering calls, muting calls)
Quick Reference Guide …………………………… 23
Troubleshooting ………………………………….. 24
Technical Specifications …………………………… 25
End User Limited Product Warranty ………………. 26
Page 7

STEP 1150™
1
Overview
Your STEP 1150 wireless Bluetooth
™
headset is designed to
provide you the greatest degree of freedom and comfort available in
wireless communication. Any device that you want to use with
your STEP 1150 headset has to be compatible with Bluetooth
wireless technology and support the Bluetooth headset or handsfree profile version 1.1 or 1.2. To be able to use the STEP
1150 headset together with a mobile phone that does not have
built-in Bluetooth capability, you will need to connect the optional
STEP BTA-1 wireless Bluetooth adapter to it.
The STEP 1150 can also be used with Bluetooth compatible
PDAs, PCs and other consumer electronic devices that support
the Bluetooth headset or hands-free profile version 1.1 or 1.2 or
are compatible with STEP’s optional Bluetooth adaptor.
Page 8

STEP 1150™
2
Getting Started
Before you use the STEP 1150 headset with a phone or other
device for the first time, you should do the following:
• Charge the headset.
• Decide on which ear you want to wear the headset (it
can be worn on your right or left ear)
• Pair the headset with a device, for example, a mobile
phone, PDA or desktop computer.
These processes are described in detail in the pages that follow.
Please register your unit at www.stepcommunications.com/register
for warranty purposes. Remember to always store and charge your
headset in a safe place when it is not being worn.
Page 9
STEP 1150™
3
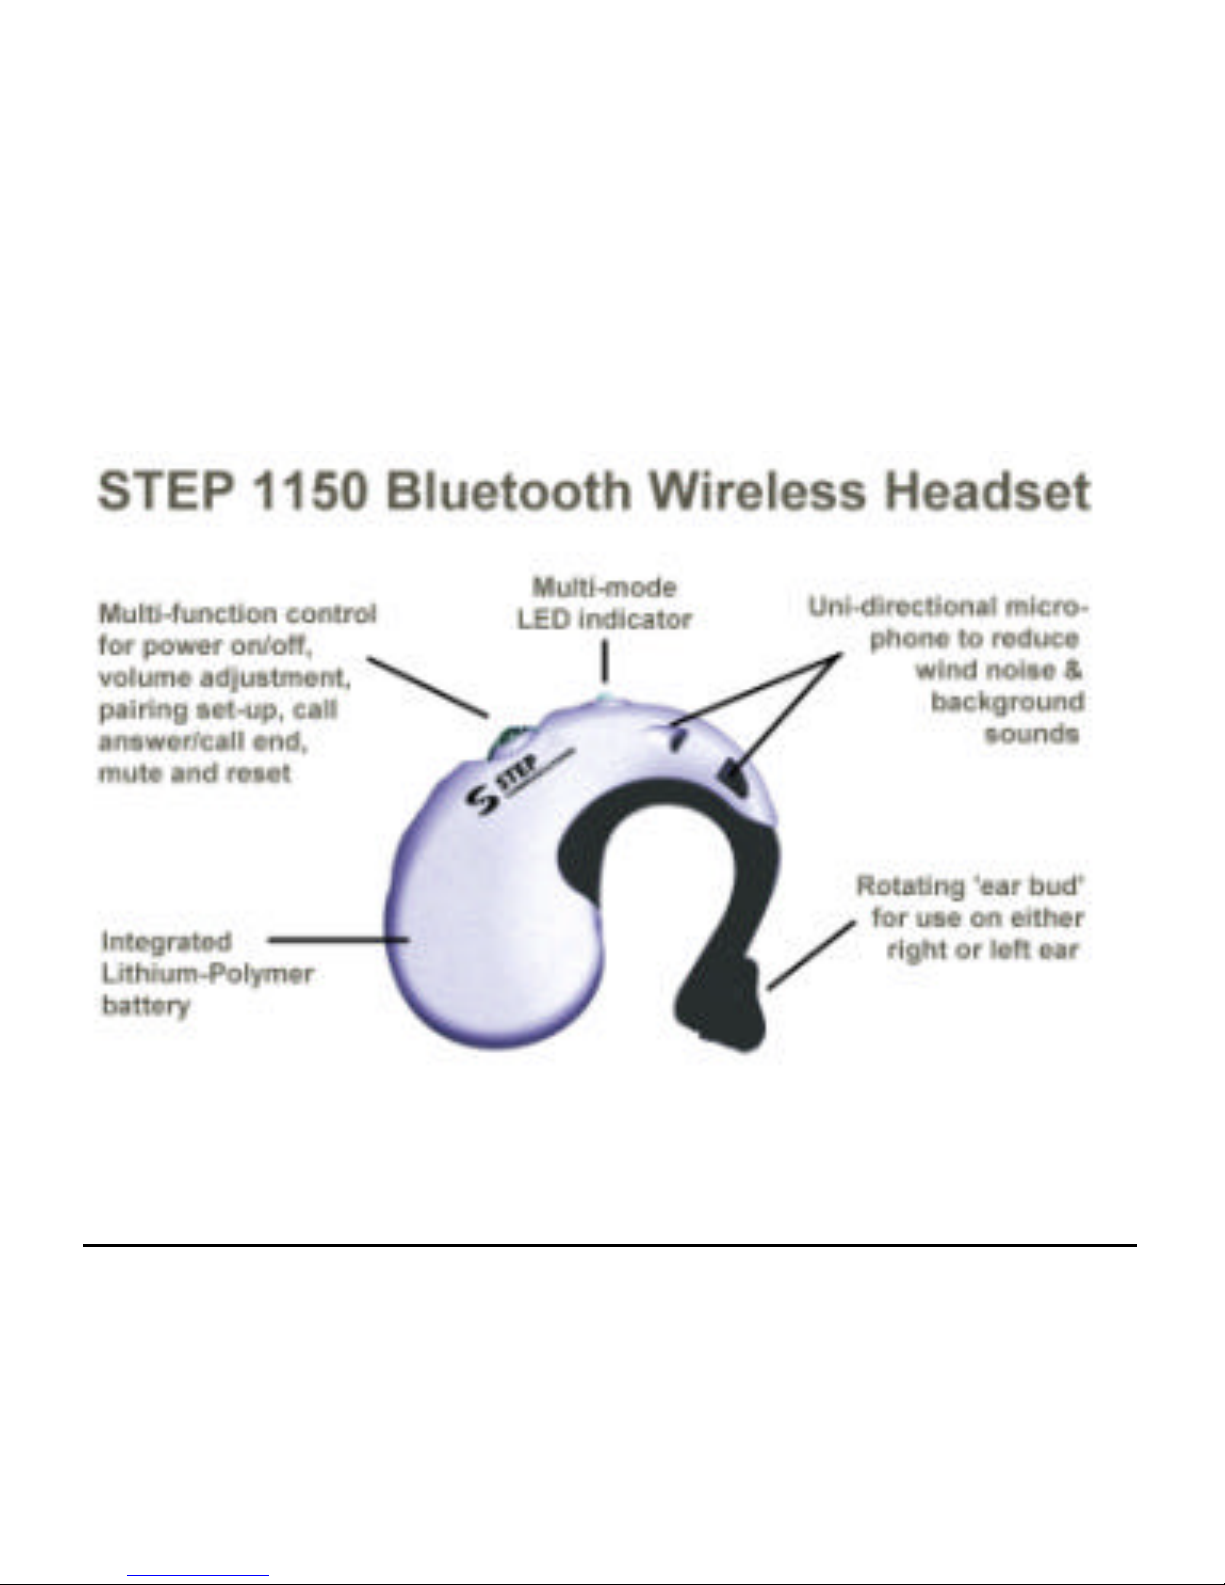
Features & Controls
(note: STEP 1150 available in black or silver)
Page 10
STEP 1150™
4
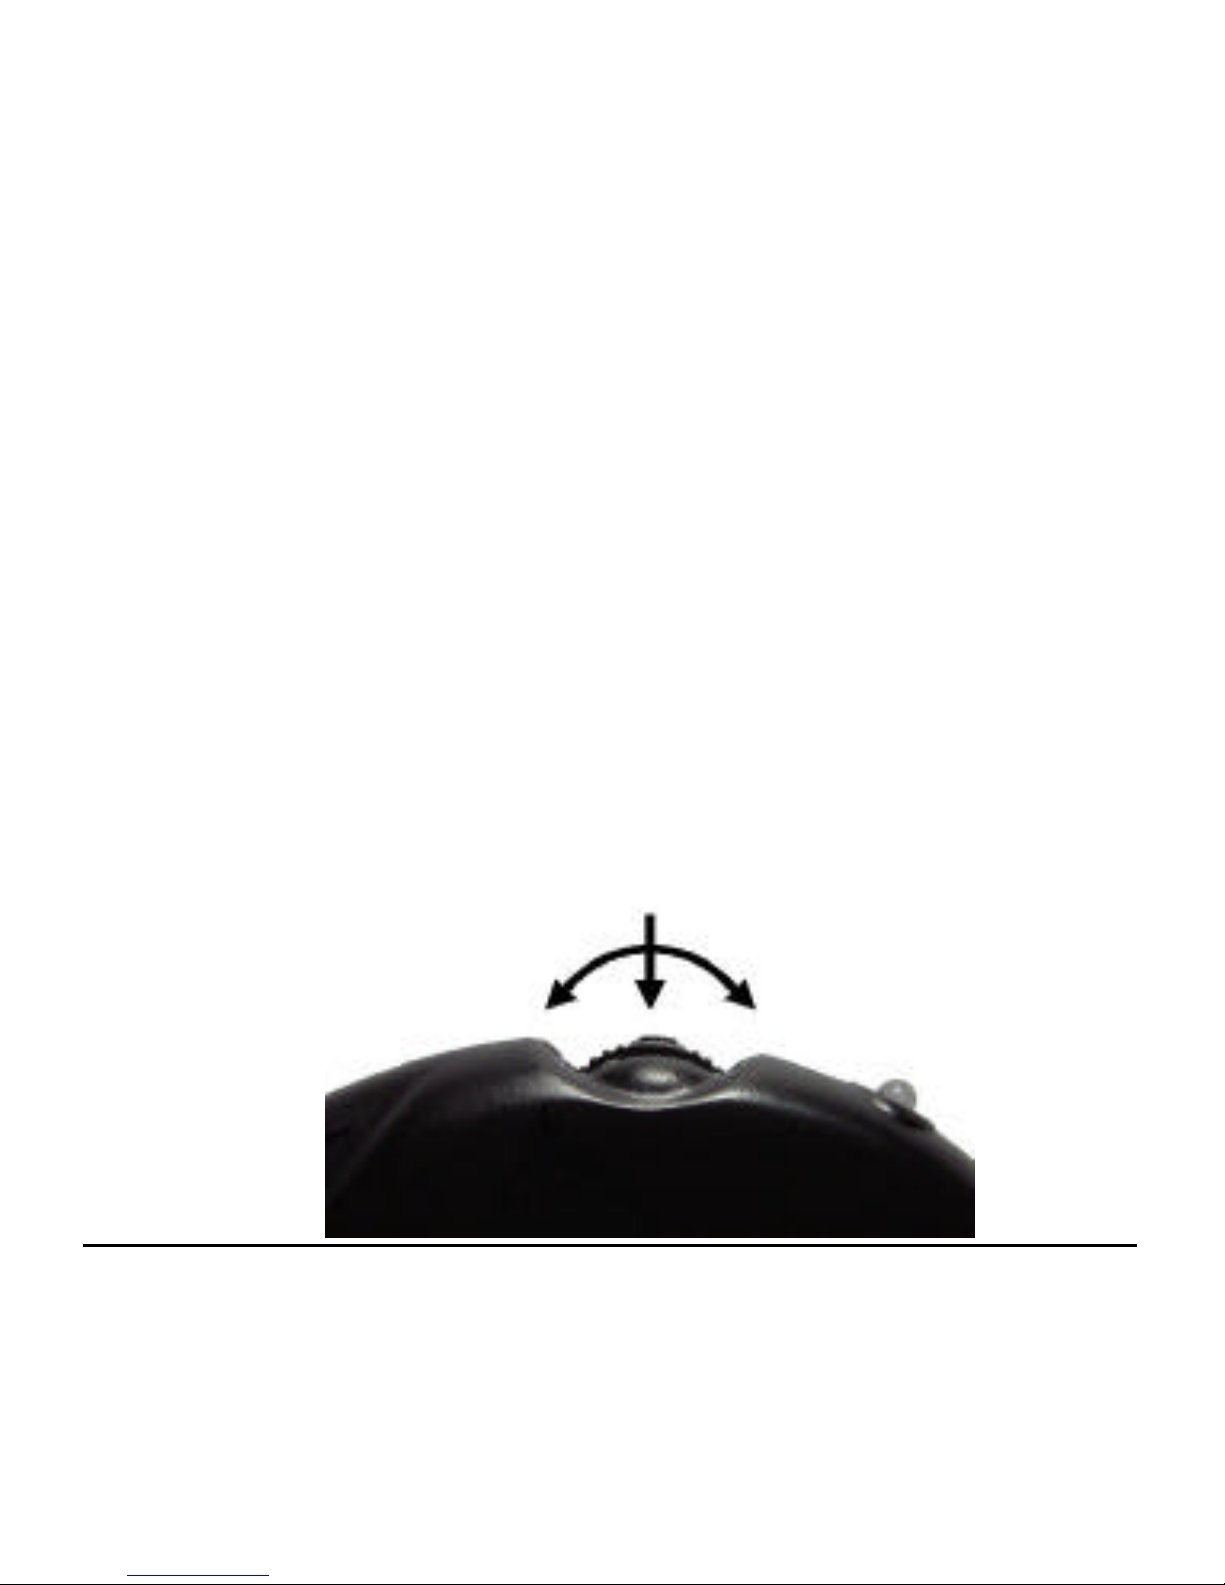
Using the Multi-function Control
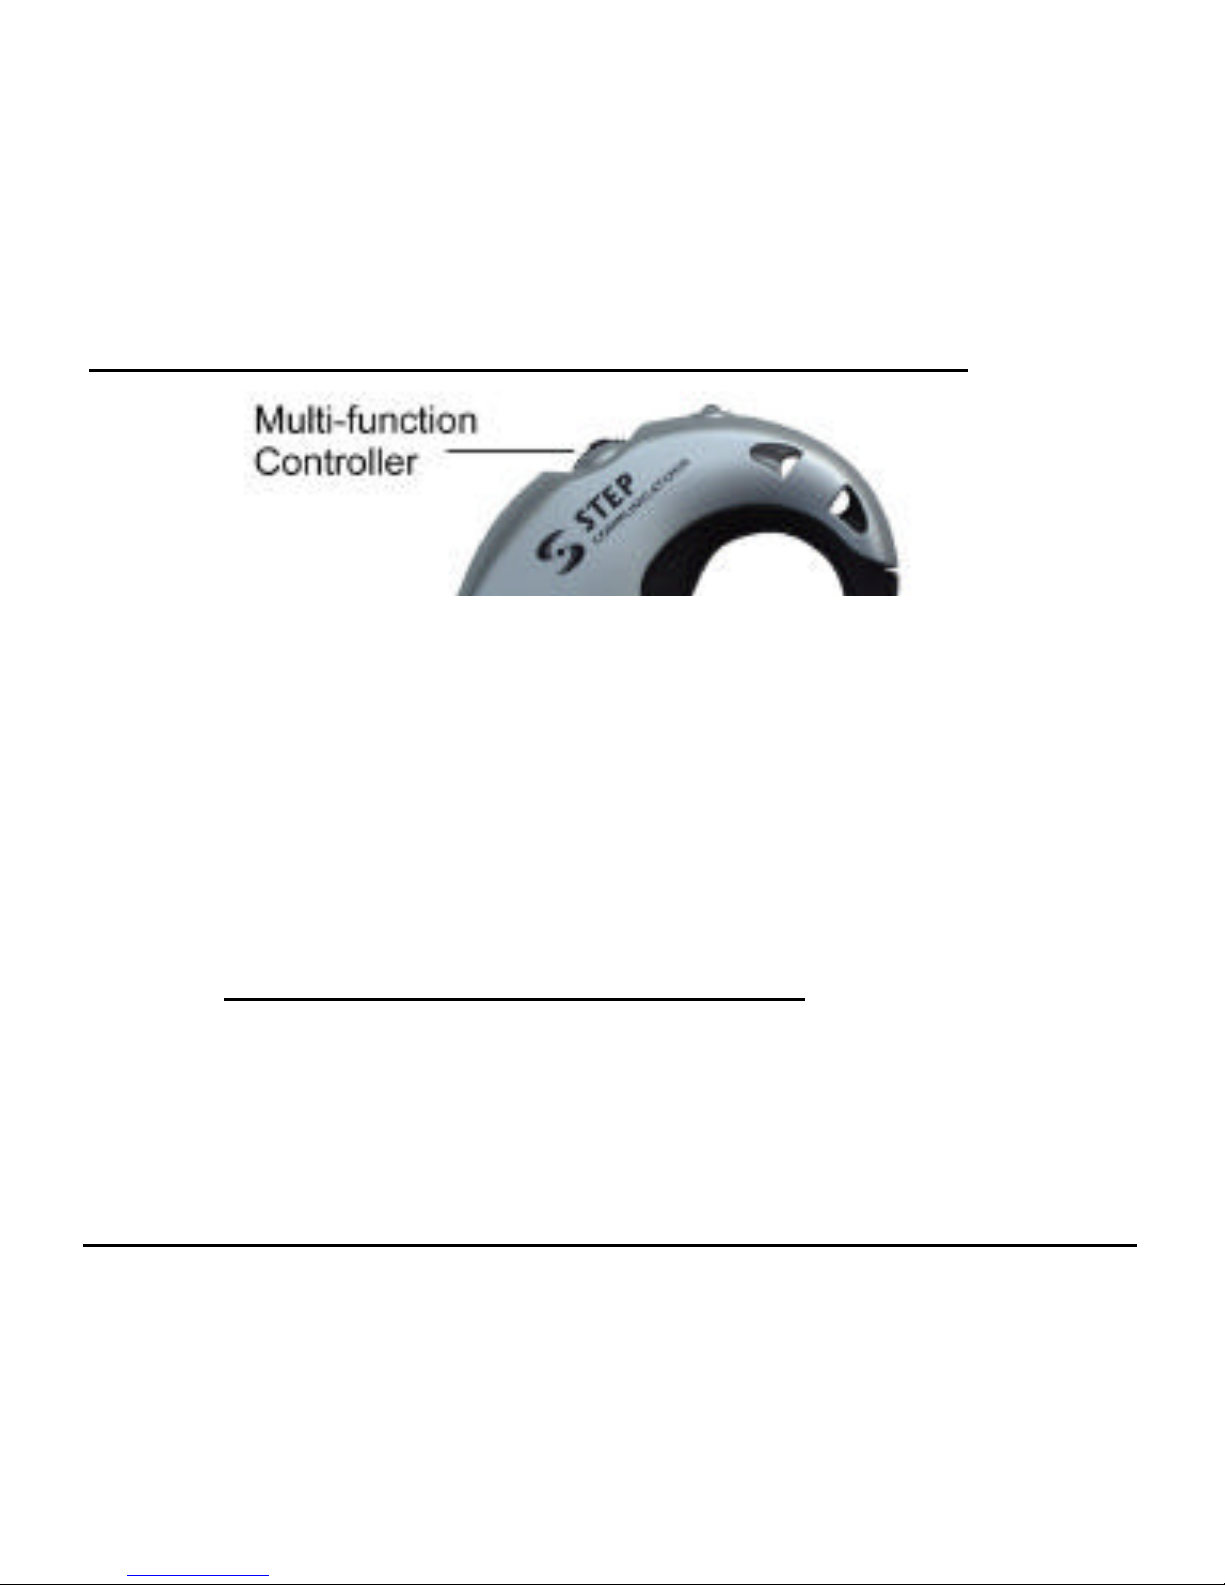
The multi-function control on the STEP 1150™ is used to
perform a variety of functions, including turning the headset on,
turning the headset off, adjusting the volume, performing basic and
advanced call functions and pairing your headset to your phone or
Bluetooth device. The control can be rocked forward, rocked
backwards or depressed as shown below.
Page 11

STEP 1150™
5
Section 1:
Charging Your Headset
The headset comes with a built-in rechargeable LithiumPolymer battery that will provide you with approximately 4
hours of talk time or 110 hours of standby time.
• Be sure to charge the headset for a minimum of 4 hours
before using the unit for the first time.
• Be sure to use only the charging adaptor supplied with
your headset or the optional STEP USB charging
adaptor. The use of other adaptors may damage your
unit and will void the warranty
• While charging your headset for the first time, the LED
indicator will glow a constant red.
• Other information provided by the LED indicator is
described in the following chart.
Page 12

STEP 1150™
6
Charging & LED Status Matrix
Your STEP 1150 will be fully recharged after
approximately 4 hours of charging, and approximately 80%
of a full charge after only 2 hours of charging. The table below
explains the various modes of the LED indicator during charging.
LED color Battery or Charging Status
Constant
Red
Battery charging while headset is off.
Flashing
Green
Battery charging while headset is on.
Solid
Green
When the headset is turned off and the headset
is fully charged, the LED will glow green.
1 Orange
flash
Low battery power (the LED will flash 1
orange flash to every 9 green flashes)
Page 13

STEP 1150™
7
Connecting Your Headset to the
Charger
Your STEP 1150 is shipped with an auto -switching power supply able
to be used with voltages between 100V-240V AC. The plug
configuration of the power supply is appropriate to the country in which
your headset was purchased. If you travel to foreign countries and wish
to charge your headset during your travels, you will need to purchase the
appropriate adaptor for use in the country you are visiting.
Your charger is also supplied with a charger adaptor cable
approximately 23 CM (9 inches) long. This adaptor cable is used to
connect your headset to your charger or to the optional charging devices
available from STEP. WARNING: do not attempt to
charge your step 1150 with charging adapters from
other companies. Doing so may damage your step 1150
and void your warranty.
Page 14
STEP 1150™
8
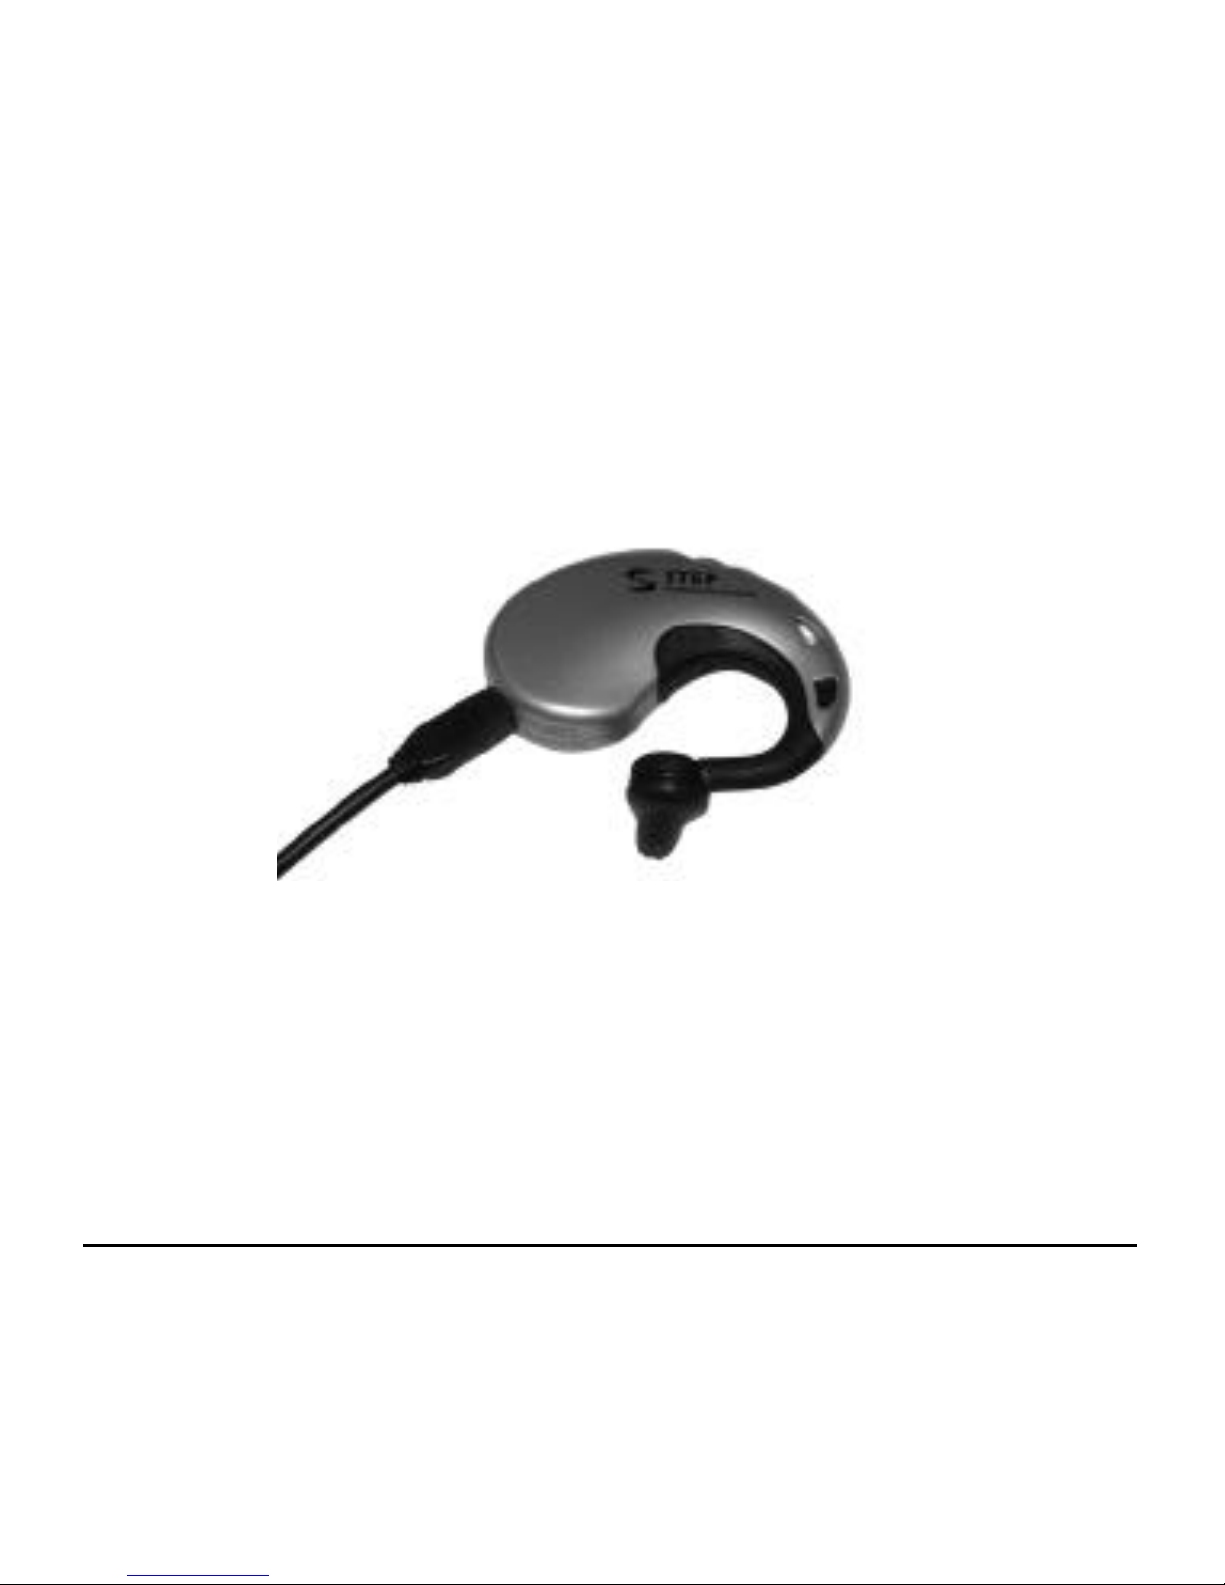
To charge your headset, connect the adaptor cable to the charger if it is
not already connected, and then plug the adapter cable to the headset as
shown.
• Note: the charging adaptor is ‘keyed’ to fit only one way
into your headset. Do not force the adaptor cable into the
connecting port of the headset as this may damage your
headset and void your warranty.
Page 15

STEP 1150™
9
Section 2:
Adjusting Your Headset for Maximum
Comfort
Everyone’s ear is shaped slightly different and is unique to their
physical characteristics. The neck and ear bud of your STEP 1150
can be adjusted to your ear for maximum comfort and sound clarity.
To assure that the sound is delivered directly into your ear canal, you
may wish to rotate the ear bud slightly up or down to position the
opening so that it points towards the opening of your ear canal. You
can also adjust the fit of your headset by gently forming or bending the
neck of the unit so that it is placed deeper into your ear. Remember
though, that the STEP 1150 was designed to deliver clear sound
without blocking your ear, and thereby removing surrounding natural
sounds. This allows you to carry on conversations both on the phone
and in person, as well as hear surrounding sounds.
Page 16
STEP 1150™
10
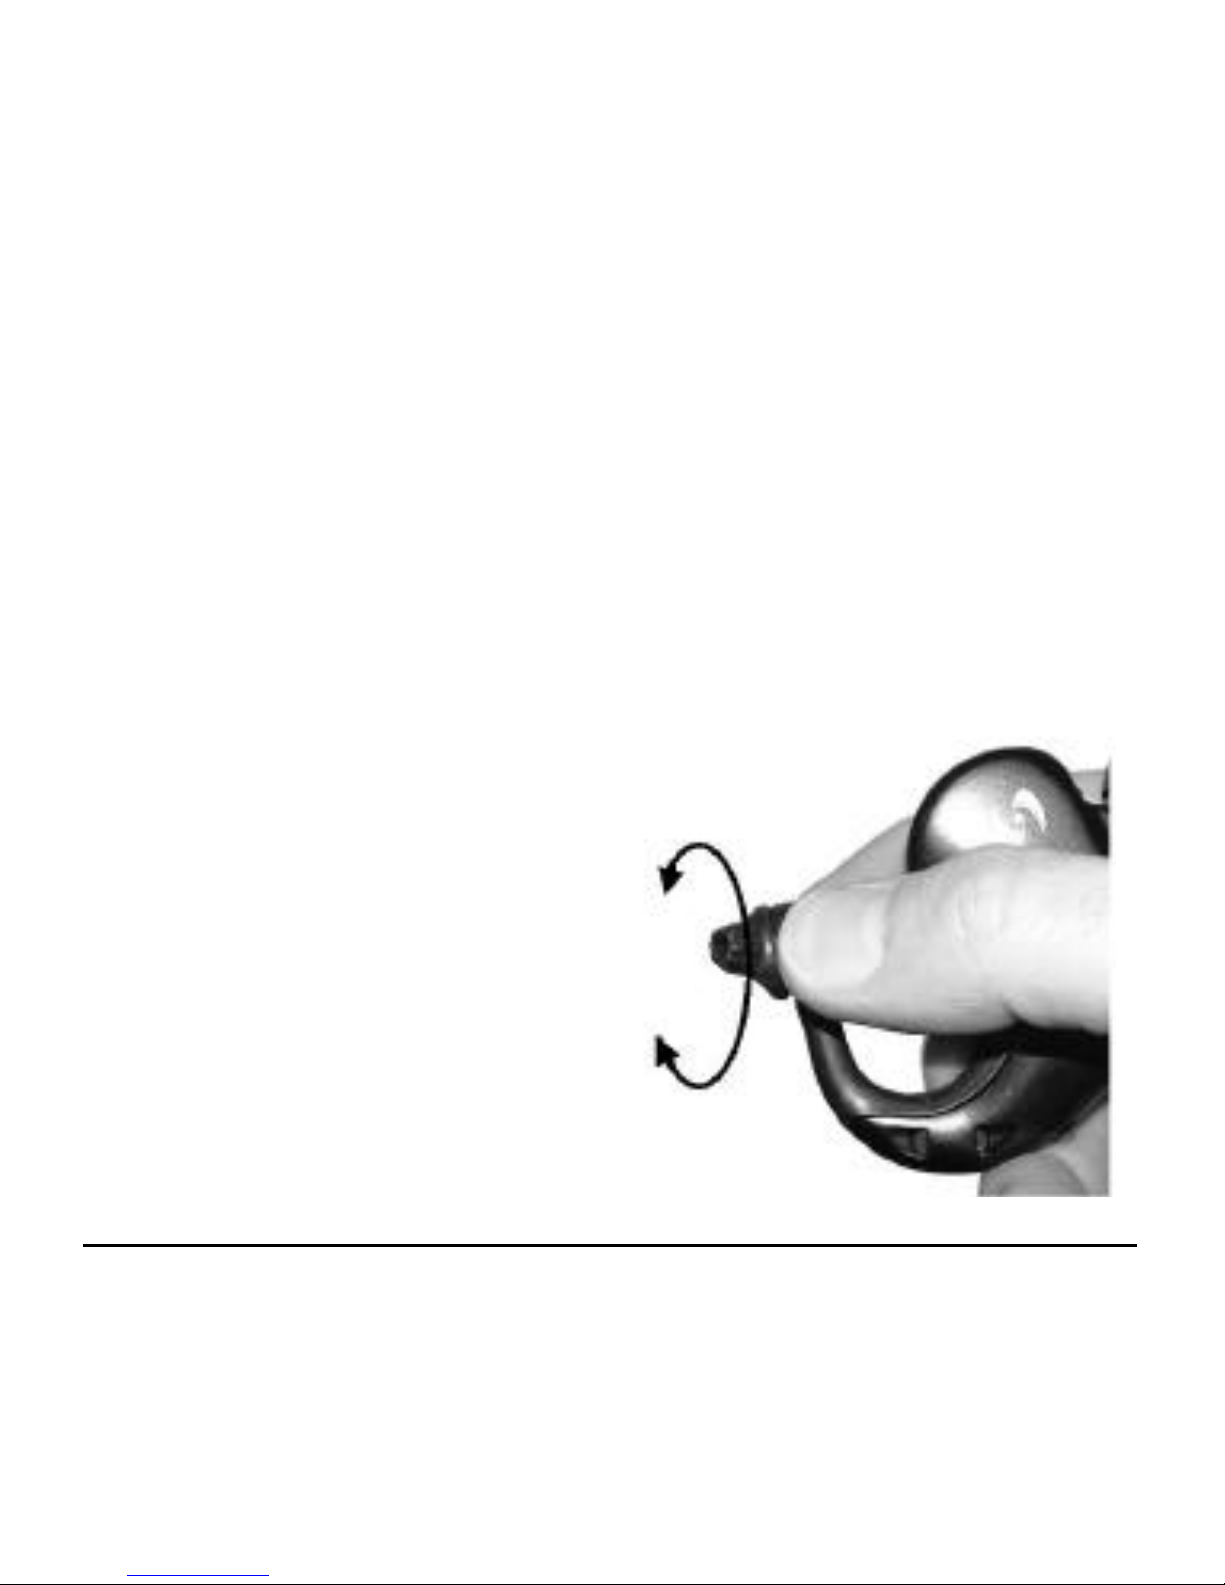
Preparing to Wear Your Headset
Your STEP 1150 can be worn on either your right or left ear.
The unit is set up at the factory for use on your left ear. If you
wish to wear the headset on your right ear, change the orientation
of the ear bud as follows:
Gently grasp the headset
as shown, and with your
other hand rotate the ear
bud clockwise or counter -
clockwise approximately
180° to the other side,
orienting the ear bud for the
preferred ear.
Page 17

STEP 1150™
11
Forming the Neck of Your Headset
The neck of your STEP 1150™ can be positioned or bent to
conform to the shape of your ear to provide maximum comfort
and sound delivery.
Hold the headset
as shown and
gently bend the
neck to place the
ear bud in a
comfortable depth
to your ear.
Page 18
STEP 1150™
12
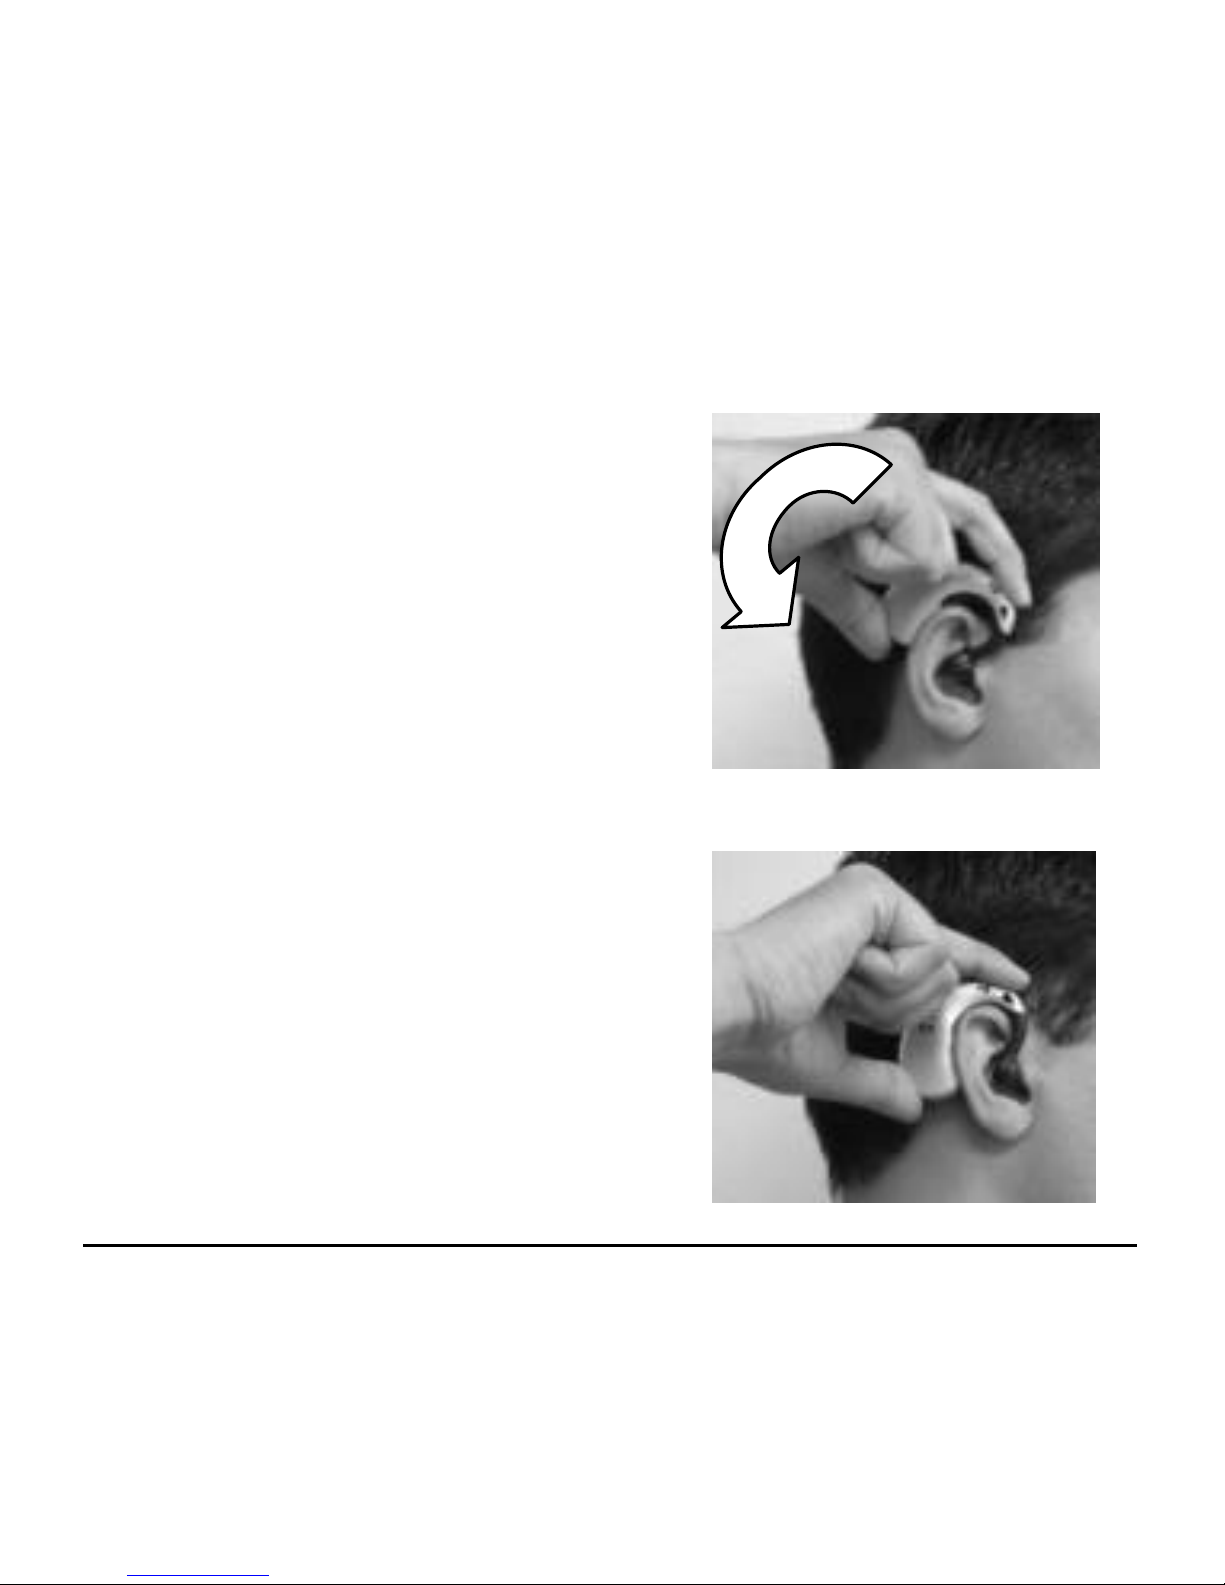
Putting on the Headset
When putting on the headset, first
place the ear bud at the entrance of
your ear, with the ‘body’ of the
headset slightly above your ear.
Gently place the body of the
headset behind your ear using
a slight rotational motion as shown
in the diagram.
Page 19
STEP 1150™
13
Section 3: Pairing the Headset
Before you start using the headset for the first time, you must pair
the headset with the mobile phone or device you want to use it with.
1. Begin by activating the Bluetooth™ pairing function on
your phone or other device. Please refer to the owner’s manual
of your phone or other device for detailed instructions on how to
access and activate the Bluetooth pairing or set-up procedure.
2. With the headset turned off, press and hold down
the multi-function control for approx. 5 seconds until the
LED indicator light on the headset flashes an alternating
green and red. Make sure the headset and the phone are in
close proximity to each other.
Page 20

STEP 1150™
14
3. Follow the Bluetooth™ pairing or set-up instructions and
screen prompts on your phone or other device to pair it with the
headset.
4. When prompted, enter the headset passkey of 0000.
5. If the pairing is successful, your headset indicator light will
flash green.
If your phone or device does not find the headset, turn off the
headset by pressing down the multi-function control for
approximately 5 seconds, reset your phone or device to the
beginning of the Bluetooth pairing process, and repeat steps
1-5. Once pairing is completed, your headset will work with your
cell phone anytime the two units are powered on and in working
proximity to each other.
Page 21

STEP 1150™
15
Resetting the Headset
When pairing the headset to a new Bluetooth™ device, you may
want to reset the headset to its default settings. This clears all
current pairings.
To reset the Headset:
1. With the headset turned off, depress and hold down
the Multi-function control for 12 seconds. The
LED will flash green for approximately 2-3
seconds, then red and green for approximately 7-8
seconds, then orange. Release the button.
2. The headset will power off automatically after a few
seconds. The headset has now been reset.
Page 22
STEP 1150™
16
Section 4: General Operation
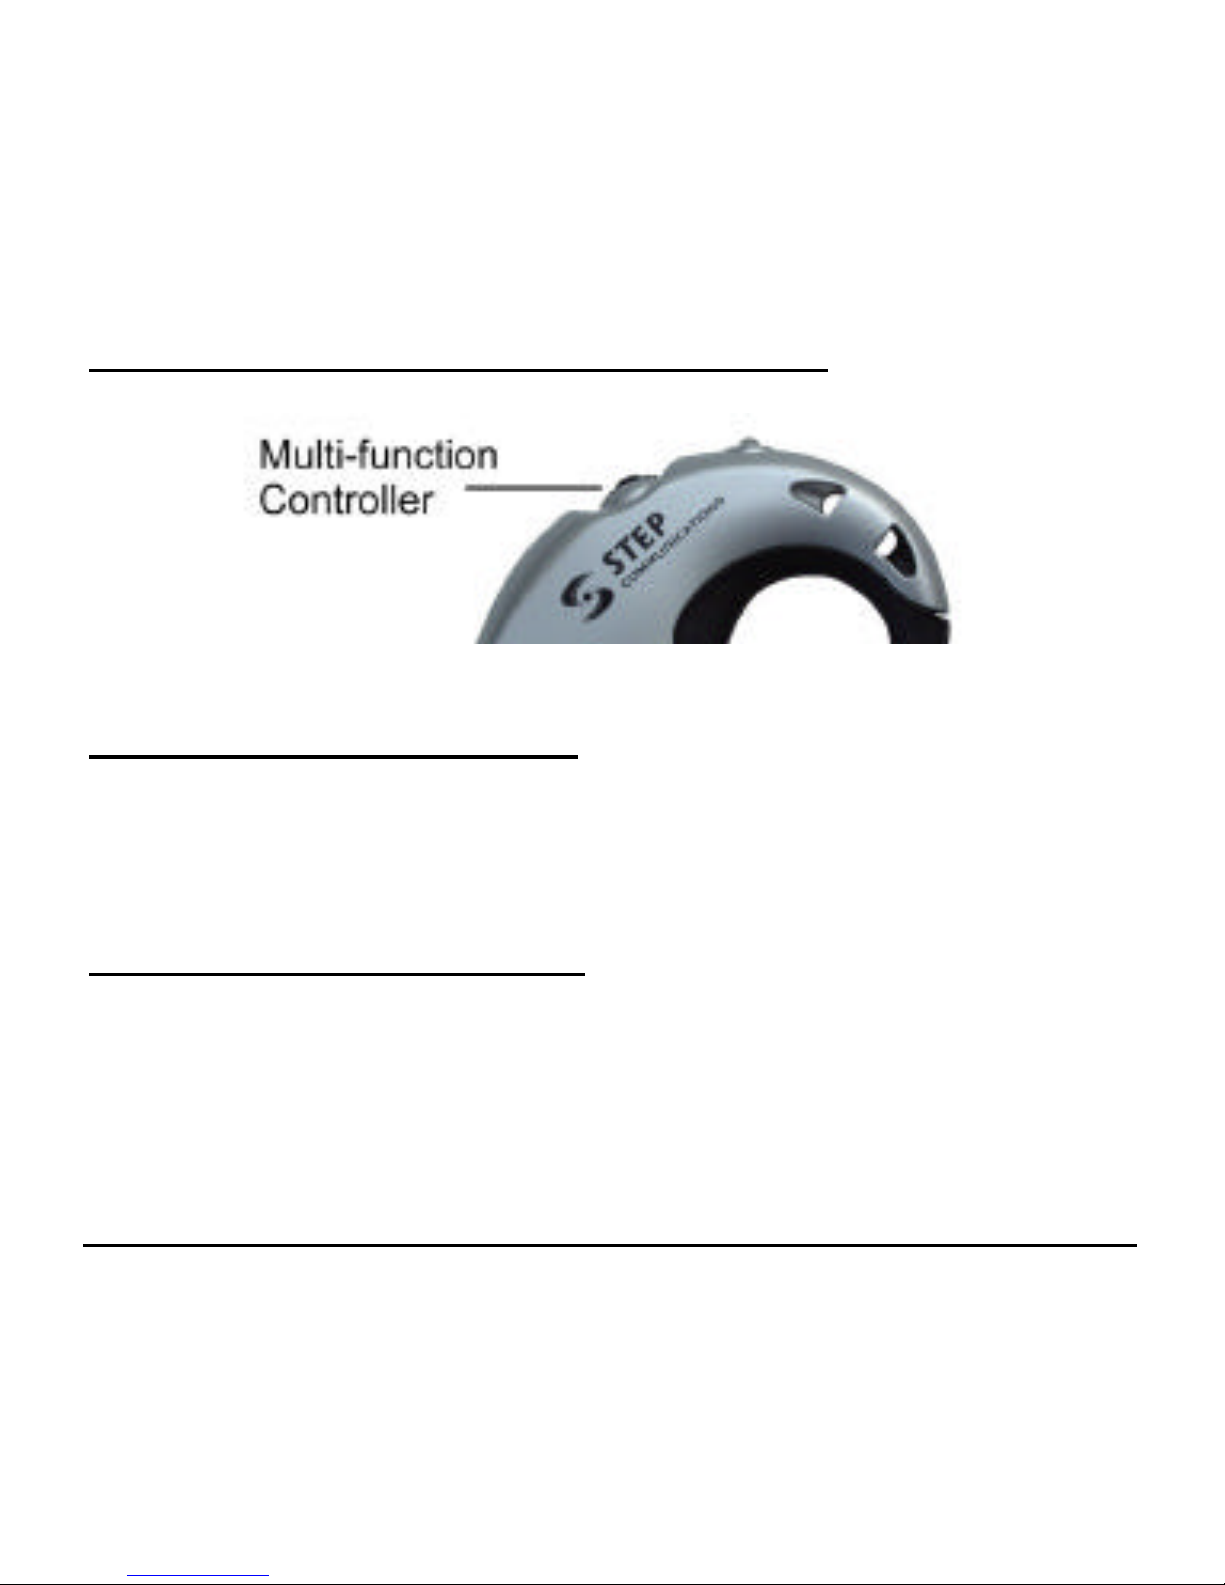
To turn the Headset on:
• Press and hold down the multi -function control for approximately
2 seconds or until you hear a series of short tones (low tones
followed by high tones)
To turn the Headset off:
• Press and hold down the multi -function control for approximately
4 seconds or until you hear a second series of short tones (this time,
high tones followed by low tones).
Page 23
STEP 1150™
17
Adjusting the Volume
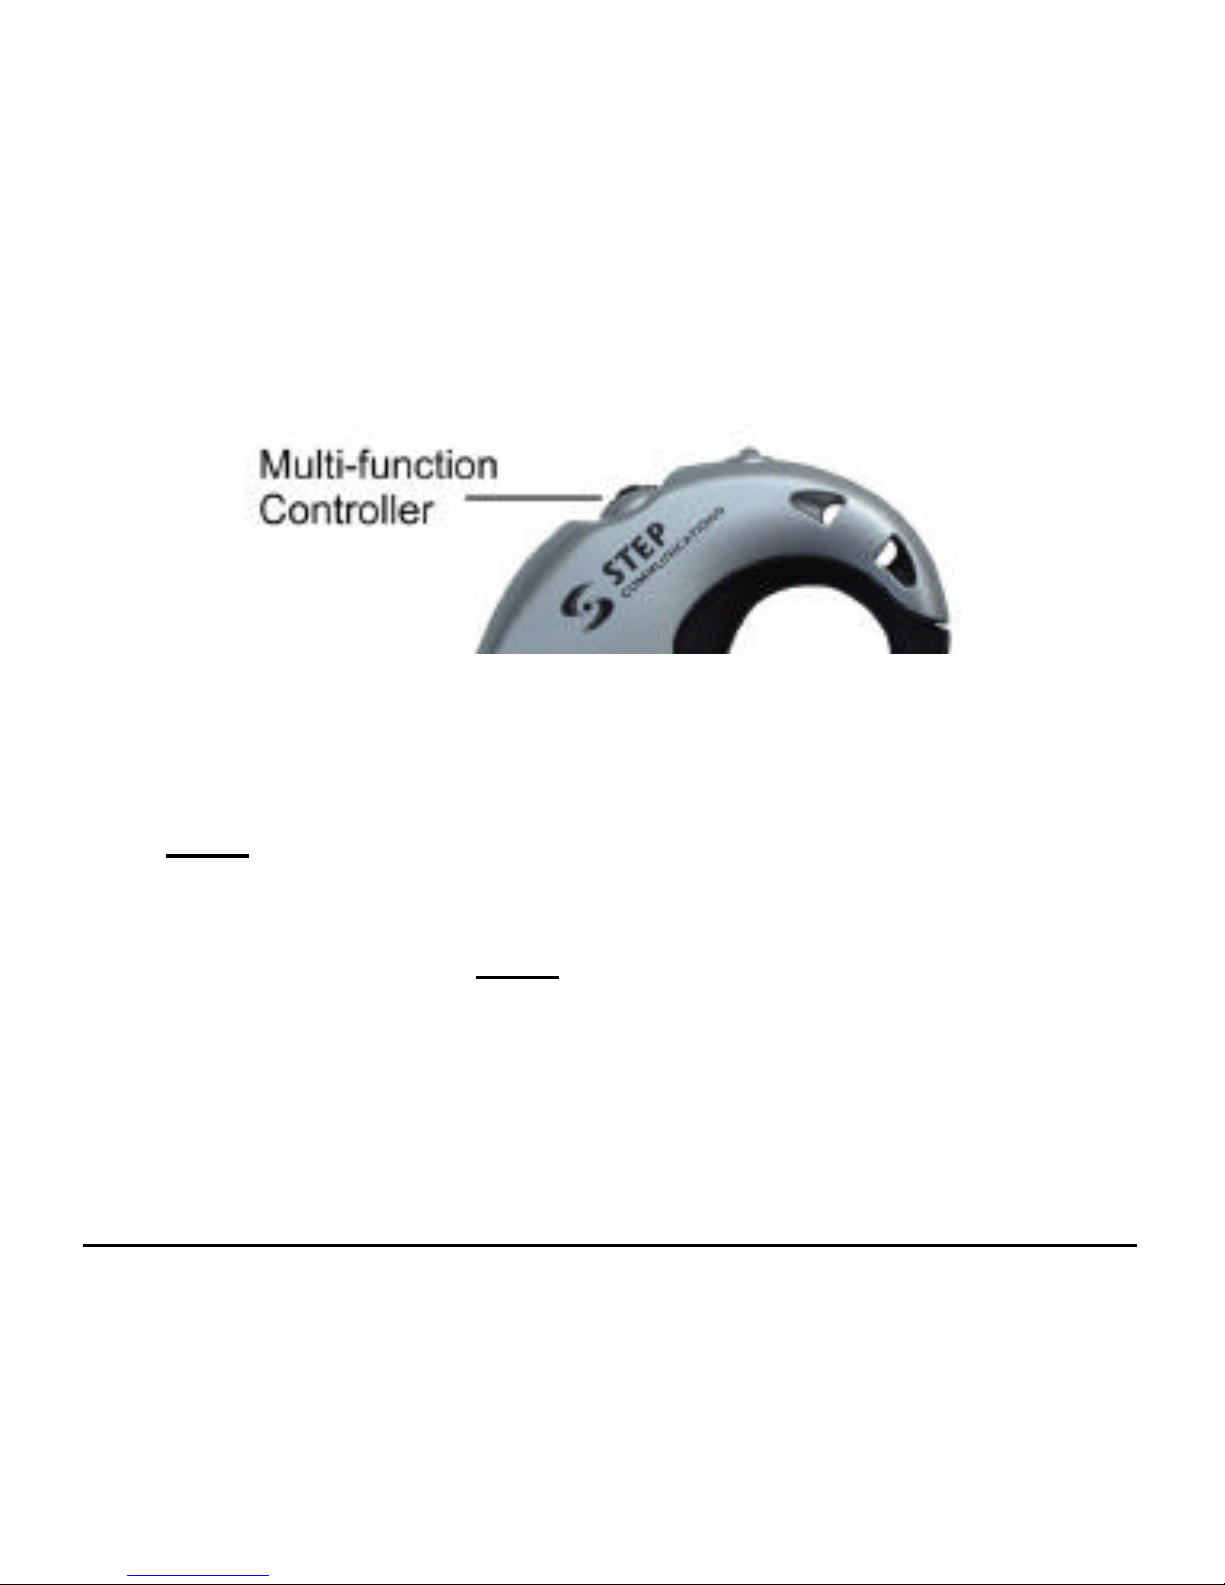
• You can adjust the headset listening volume during a call
by rocking the multi-function controller wheel forward
twice for each volume level increase you desire.
• To decrease the volume, rock the multi-function controller
wheel backwards twice for each volume level decrease you
desire. There are eight separate (8) volume levels.
• Note: be sure to merely rock the multi-function
controller wheel forward or backward during adjustments.
Do not press down, as you will end your call.
Page 24

STEP 1150™
18
Making and Receiving Calls
Once you have paired the STEP 1150 with your phone, you can
make and receive calls using the headset as long as it is turned on
and within range of the phone (up to 10m./30 ft).
Note: The Multi-function LED indicator flashes green more
rapidly during a call or active transmission of information (e.g.
dialing) to indicate it is communicating with your phone.
For phones without voice-dialing capability, once your headset is
paired to your phone, dial the number as you normally would using
the keypad on your phone and use the headset to converse with your
party. For voice-dialing, please refer to the section that follows.
When using the headset to receive a call, press down the multifunction control briefly once to answer a call. To end a call, press
down the multi-function control briefly a second time.
Page 25

STEP 1150™
19
Voice Dialing
If your phone is equipped with a voice-dialing mode, you can place
calls with your voice commands. To make a call using voice
dialing
1. Make sure the phone and the headset are on and within
range of each other. Press down the multi-function
control once.
2. After the beep, voice dial as you normally would.
3. End the call by pressing down the multi -function control
on your headset. You can also end a call by pressing the
END or NO key on the phone.
Please refer to your phone’s user manual or documentation for
more information on voice dialing and control.
Page 26

STEP 1150™
20
Answering Calls
To answer a call using the headset
1. When the phone rings or when you hear your phone ring
through the headset, briefly press down the multi-function
control once.
2. End the call by pressing down the multi-function control on
your headset, or the END or NO key on the phone.
Answering a second call (if your phone supports
multiple incoming calls)
• You must use the phone keypad to answer and handle a
second call, but you can still use the headset for talking and
listening. You cannot use the multi-function control to
answer the second call. Refer to your phone’s user manual or
documentation for details on how to handle more than one
call simultaneously.
Page 27

STEP 1150™
21
Muting a Call
If you need to ‘mute’ a call during your conversation, rock and
hold the multi-function control forward or backward for
approximately 5 seconds (be sure not to press down on the multifunction control as this will end your call). You will hear two
short tones (a high tone followed by a low tone) and the Multi-
function LED indicator will flash red while a call is muted. Once
your call is muted, you may release the multi-function control.
You will be able to hear the party you were speaking with on your
headset, but they will not be able to hear you. To continue your
conversation, simply rock the multi-function control forward or
backwards. No tone signal will be heard to indicate the normal
talk function has resumed, however, your party will be able to hear
you again and you can resume your conversation.
Page 28

STEP 1150™
22
Transferring Communication & Sound
from your Phone to the headset
If you initiate a call without using the headset, you can transfer the
call to the headset if the headset is on, paired with the phone and
within range.
To transfer sound to the headset, press down the multi-function
control briefly (or about 1/2 second) to transfer the sound to the
headset. You can now use the headset as if you originated the call
with the headset.
Page 29

STEP 1150™
23
Quick Reference Guide
To turn the unit on: depress & hold down the multifunction control for 2 seconds or until the LED flashes green
To initiate the pairing process: the unit must first be turned
off. Next, depress & hold down the multi-function control
for 5 seconds or until the LED flashes green and red
To answer a call or transfer call from phone to headset:
briefly press the multi-function control down once.
To end a call: briefly press the multi-function control down
once or terminate the call from your cellular phone
To mute a call: rock & hold the multi-function control
forward for 5 seconds. Rock the control again to unmute.
To adjust volume: when wearing the unit, to increase the
volume, rock the multi-function control forward two times for
each incremental level. To decrease the volume, rock the multi -
function control backwards two times for each incremental level
To turn the unit off: depress & hold down the multi-
function control for 4 seconds or until the LED stops flashing.
Page 30

STEP 1150™
24
Troubleshooting
As new phones and Bluetooth™ devices are being released at an
increasing rate, there may be updated pairing and operational
instructions available on-line for your particular device. For
additional instructions and instructions for new devices, please visit
www.stepcommunications.com/userguide/update
To view an interactive list of FAQs (Frequently Asked
Questions) and suggestions for troubleshooting, please visit
www.stepcommunications.com/faq
If you still have troubles with your device, you can contact STEP
directly at [email protected]
Page 31

STEP 1150™
25
Technical Specifications
Headset & Horn
Frequency Response 300 to 3400 Hz
Distortion (THD %) 2% (typical)
Microphone
Frequency Response 300 to 3400 Hz
S/N Ratio 36 dB @ 1 KHz
Wireless Link Type Bluetooth Radio Module
headset & hands-free profiles, v 1.2 & v1.1
Frequency 2.4 GHz - ISM Band (2400-2483.5 MHz)
Useful Range 10 meters (33 feet) from device
Compliance UL, FCC Part 15, EN 300 328-2, CE 0682,
ETS300-328, IC RSS-210, Bluetooth
™
Operating Temperature: 0°C to +40°C
Weight Headset: ~20 grams / Charger: ~99 grams
Size Headset: 63 mm L x 56 mm H x 15 mm W
Average Talk Time ~4 hours
Average Standby Time ~110 hours
Battery Type Lithium-Polymer
Battery Charger US charger: 100 to 240V
AC input
4.5 – 9.5V
output
, min. 450mA
output
Charge Time 2 hours to 80%, 4 hours to 100%
Page 32

STEP 1150™
26
End User Limited Product Warranty
STEP Communications warrants this product to be free from defects in
manufacturing for 1 year from the date of original retail purchase when used in
strict accordance with the guidelines set forth in the User Manual. This
warranty extends only to the original retail purchaser, and does not apply if the
product has been damaged or fails to function properly as a result of misuse,
abuse, alteration, unauthorized service or parts, improper cleaning or
maintenance, or failure to follow the installation, operation or maintenance
instructions. ANY IMPLIED WARRANTIES, INCLUDING
MERCHANTABILITY AND FITNESS FOR A PARTICULAR PURPOSE
ARE LIMITED IN DURATION TO THE TERM OF THIS WARRANTY.
STEP’s sole obligation under this warranty or any implied warranty, and the
purchaser’s sole remedy, is limited to the repair or replacement, at STEP’s
option, of the product or any defective part. IN NO EVENT SHALL STEP,
ITS AFFILIATES, SUPPLIERS, SUBSIDIARIES, RELATED ENTITIES
OR THEIR RESPECTIVE OFFICERS, DIRECTORS, OR EMPLOYEES,
BE LIABLE FOR INCIDENTAL, CONSEQUENTIAL, PUNITIVE,
EXEMPLARY, OR SPECIAL DAMAGES.
The duration, terms and conditions of this warranty are valid worldwide,
except where different limitations, restrictions or conditions may be required
by local law.
 Loading...