

Page 1
Q
TM
WIK
USING BUSHING ASSEMBLIES FOR KING PIN STEERING KNUCKLE REPAIRS
KIT
NO REAM INSTALLATION
REMOVAL
• Use established procedures for teardown.
STEERING KNUCKLE AND AXLE
PREPARATION
• Clean spindle and axle eyes, wipe dry.
• Remove any burrs from spindle bores and axle
eyes using brake hone or similar device.
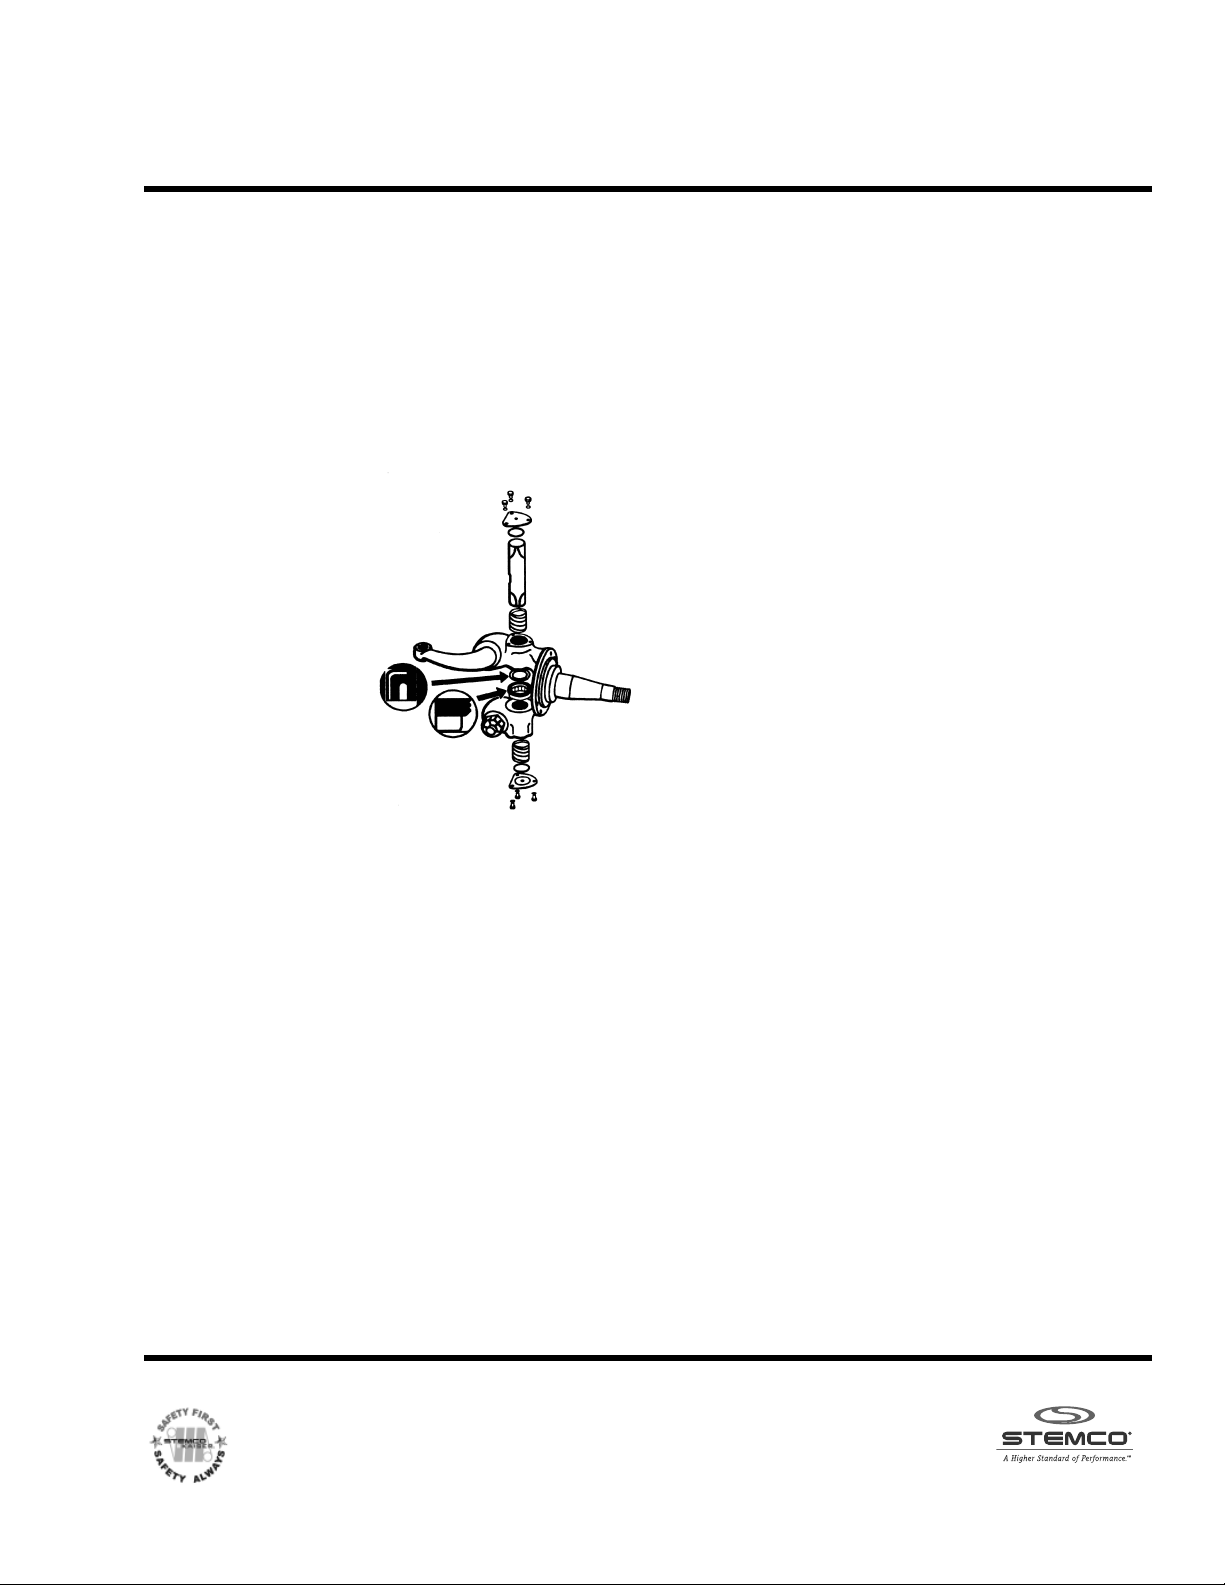
INSTALLING BUSHING LIP SEALS
• Handle with care, lip seals are easily damaged.
• Using a bushing driver or similar
device, drive the seals into the
bore leaving the seal ush with
the axle side of each spindle bore.
• Be sure to position the seal
so the lip is pointing
towards the axle eye.
(see gure
SPECIAL INSTRUCTIONS FOR
INSTALLING SPIRAL BUSHING
• Using the STEMCO Kaiser
speci cally designed for the kit, drive both
bushings into bores.
• Wipe bushings clean.
• Using king pin check for t, rst insert pin into
each bushing individually then insert pin into both
bushings, king pin should slide through both
bushings simultaneously.
• If pin ts through bushings individually but not
simultaneously the spindle has spread and may
need replacement.
• Prepack bearings with grease.
#
1)
Cross section
of bushing lip seal.
ASSEMBLY
TM
bushing driver
CHECK BEFORE ASSEMBLY
BEARING INSTALLATION
gure #1
#
• For proper bearing orientation refer to gure
• Place needed shims under upper spindle bore.
• Position king pin through upper spindle bore and
through needed shims, be sure TOP of pin is parallel to axle for proper lock at alignment.
• Place spindle, shims and pin into axle, allow pin
to drop into axle bore about 2”.
• Tap bearing into place, a properly t bearing will
require a slight tap t without damaging the
bearing case.
• If bearing is too tight or too loose, adjust the
number of shims being used.
• When working on an application where the
bearing has a shoulder, the bearing must be
installed before the shims.
COMPLETE PIN INSTALLATION
• Once the bearing t is correct, allow pin to slip
into lower bushing.
• Position lock pin ats on pin so they line up with
lock holes.
• Pound lock pins into place, lock pins with threads
apply 25-30 ft. lbs of torque.
END PLATE OR END PLUG
INSTALLATION
• Install end plates or end plugs, using the proper
seal under plates.
• Install grease tting into end plate or end plug.
GREASING
• Apply grease until it can be seen between axle
and spindle.
CHECK INSTALLATION
• Once greased the spindle should turn easily from
side to side.
• There should be very little up and down movement.
• If unit seems loose or too tight we recommend
calling our tech line for assistance.
1.
Customer Service - www.stemcokaiser.com or 888-854-6474
The fi rst step in using STEMCO Kaiser products is SAFETY FIRST SAFETY ALWAYS. Please take a moment
to make sure these safety precautions are in place. Some components are heavy! For your protection
wear safety shoes, safety glasses, safety gloves, use proper lifting techniques and secure the unit
before work begins.
4641 Industrial Drive, Millington, MI 48746 • 888-854-6474 • Fax: 989-871-4640
Qwik kit BUSHING ASSEMBLIES installation Febuary 2014 01 577 0103
an EnPro Industries company
 Loading...