

Page 1
NO REAM INSTALLATION
Instructions for the Mack & Volvo FXL Axle/K536M STEMCO Kaiser Qwik Kit
• Set axle down on jack
stands placing them under
spring perches.
• Disconnect steering arms
and remove grease fittings
from top knuckle caps.
• Remove top and bottom
caps.
• Remove nut from kingpin
using an inch drive socket
and breaker bar.
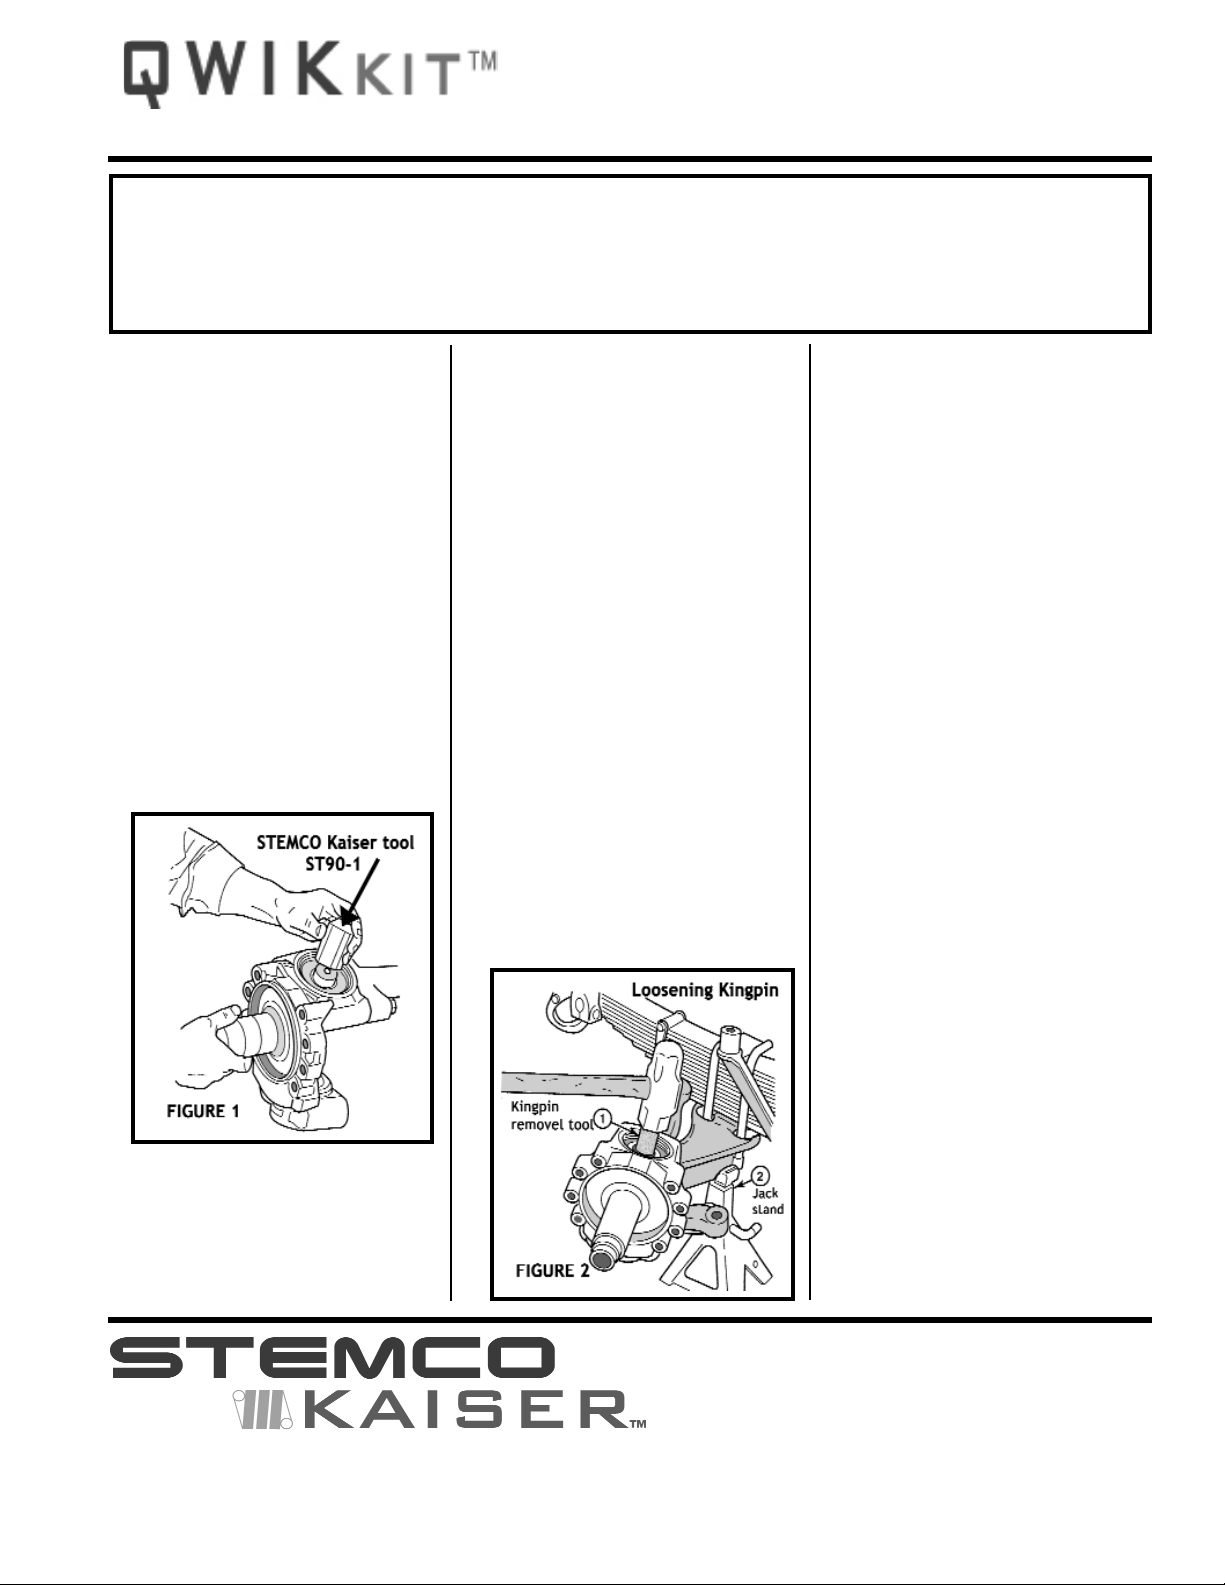
• Install kingpin removal tool
ST90-1 on top of king pin.
(FIG. 1)
• Strike the removal tool with a
large hammer to break kingpin loose from axle eye.
(FIG. 2)
• Remove the removal tool
from kingpin.
• Using a suitable brass drift
punch and hammer drive
kingpin down through axle
and spindle.
• Remove knuckle from axle.
• Remove lower seal from
knuckle and discard. Clean
knuckle thoroughly, so it is
free of grease and dirt.
• Remove old nylon bushing
from knuckle using a brass
drift punch. Remove top
bearing cup using a suitable
steel drift punch.
• Measure the thickness of
the bearing cup seat with a
micrometer. (Measure in
four places) Thickness
should be between .392 and
.394. If thickness is not within these specs replace
knuckle.
• Inspect axle and knuckle for
wear that might have been
caused by faulty wheel bearings or kingpin components
and replace if necessary.
• Install spiral bushing into
lower knuckle bore.
• Coat the under ledge surface, in the area of the
knuckle upper bearing, with
grease. This allows the
knuckle to slide onto the
axle during later assembly.
Clean all grease and dirt
from axle eye thoroughly.
• Position a new lower seal on
the knuckle (the white nylon
insert inside the seal faces
down against the knuckle).
Do not coat lower seal with
grease.
• Slide the knuckle onto the
axle eye while pressing the
lower seal down at the same
PAGE 1 01 577 1005 NOV-2010
GETTING HELP
USE THE STEMCO Kaiser TECHNICAL SERVICE LINE
888-854-6474
WARNING: STRIKING STEEL PARTS WITH HAMMERS CAN RESULT IN CHIP PROJECTILES, ALWAYS WEAR SAFETY GLASSES TO PROTECT YOURSELF AGAINST
INJURY. STEMCO Kaiser IS NOT RESPONSIBLE FOR ANY INJURY THAT MAY OCCUR DURING THIS PROCESS.
4641 Industrial Drive, Millington, MI 48746 • 888-854-6474 • Fax: 989-871-4640 www.stemcokaiser.com
CONTINUED
The following assembly instructions are recommended for completing the MACK &
VOLVO FXL front steering axle king pin repair. This is a very unusual and unique
designed axle in comparison to the majority of common axle assemblies. Reading and
following these instructions is critical to successfully performing the king pin procedure!
Page 2

NO REAM INSTALLATION
Instructions for the Mack & Volvo FXL Axle/K536M STEMCO Kaiser Qwik Kit
time. Make sure lower seal
is properly aligned when
knuckle is installed. (Be sure
the ABS sensor is on the
front side. If it is on the rear
side switch knuckle to the
other side of the axle)
• Insert kingpin up from the
bottom side of the knuckle
firmly by hand slowly to be
sure axle eye, knuckle and
seal are properly aligned.
The kingpin should begin to
seat into the axle eye.
• Using a bottle jack against
the bottom of the kingpin
jack up until axle is lifted
slightly off the jack stand (be
sure the weight of the axle is
supported by the kingpin on
the jack only) (FIG. 3).
Strike the top of the axle with
a large hammer just behind
the knuckle to seat the king-
pin into the axle eye (FIG. 4).
• Pack upper bearing with
grease. Assemble bearing
and cup with the new bearing seal on the flange of the
bearing cup.
• Install bearing assembly
(FIG. 5) in the knuckle using
a suitable bearing driver to
“TAP” the bearing assembly
into the knuckle far enough
down the kingpin threads to
get the nut started on the
kingpin (FIG. 6). Tighten nut
on kingpin to 200 ft. lbs. After
tightening remove bottle jack
from bottom of king pin.
Rotate knuckle back and
forth several times to make
sure knuckle turns freely. If
no binding occurs tighten
kingpin to 600 ft. lbs.
• Install top cap with new oring (coat o-ring with grease
before installing cap.) and
tighten to 120 ft. lbs. At this
time install grease fittings in
cap.
• Repeat above procedure for
lower cap.
• Grease top and bottom fittings while moving knuckle
back and forth. (Be sure
grease purges past upper
and lower seals)
• Reconnect steering arms
and wheel end components.
PAGE 2 01 577 1005 NOV-2010
GETTING HELP
USE THE STEMCO Kaiser TECHNICAL SERVICE LINE
888-854-6474
WARNING: STRIKING STEEL PARTS WITH HAMMERS CAN RESULT IN CHIP PROJECTILES, ALWAYS WEAR SAFETY GLASSES TO PROTECT YOURSELF AGAINST
INJURY. STEMCO Kaiser IS NOT RESPONSIBLE FOR ANY INJURY THAT MAY OCCUR DURING THIS PROCESS.
4641 Industrial Drive, Millington, MI 48746 • 888-854-6474 • Fax: 989-871-4640 www.stemcokaiser.com
 Loading...