

Page 1

Operation Manual
Page 2

Matthias Klag, Michael Ruf
Cristina Bachmann, Heiko Bischoff, Lillie Harris, Christina Kaboth, Insa Mingers, Matthias Obrecht, Sabine Pfeifer,
Benjamin Schütte, Marita Sladek
This PDF provides improved access for vision-impaired users. Please note that due to the complexity and number
of images in this document, it is not possible to include text descriptions of images.
The information in this document is subject to change without notice and does not represent a commitment on
the part of Steinberg Media Technologies GmbH. The software described by this document is subject to a License
Agreement and may not be copied to other media except as specically allowed in the License Agreement. No
part of this publication may be copied, reproduced, or otherwise transmitted or recorded, for any purpose,
without prior written permission by Steinberg Media Technologies GmbH. Registered licensees of the product
described herein may print one copy of this document for their personal use.
All product and company names are ™ or ® trademarks of their respective owners. For more information, please
visit www.steinberg.net/trademarks.
© Steinberg Media Technologies GmbH, 2019.
All rights reserved.
Anima_1.0.0_en-US_2019-11-28
Page 3

Table of Contents
4 Anima
5 Oscillator Pages
8 Sub Page
9 Mod Page
13 Voice Page
15 Filter Section
17 Amplier and Amplier Envelope
17 Env 3 Section
18 LFO Section
19 Arp Page
3
Page 4
Anima
The Anima synth is a wavetable instrument using HALion’s wavteable synthesis which crossfades
the waves smoothly in real time based on an integrated wavetable envelope. This envelope
makes it very easy to control the playback of the wavetable, because no further modulation
settings are required. All you have to do is set up the Speed parameter. The modulation matrix
allows you to control the playback position of the oscillator using one of the integrated LFOs, the
velocity, or the modulation wheel, for example.
Anima provides two wavetable oscillators that can be used in parallel. Each oscillator features a
multi-oscillator that allows you to create up to eight additional voices for each oscillator and then
separately detune them and distribute them in the stereo panorama.
The sub oscillator comes with classic oscillator waves like sine, triangle, saw, square and two
different pulses, and also features a noise generator. The noise generator delivers a large
number of different noise types. These range from classic noises like white and pink noise over
drum attacks and rhythmical noises to specically ltered colored noises and unique circuit
noises, recorded from various electronic devices. This powerful collection of noises can be used
to add inharmonic frequencies to create atmospheric sound or add transients for rich and
percussive attacks, for example. The integrated arpeggiator and step sequencer allows you to
play rhythmic patterns and/or add modulations to the synthesis parameters using the three
available controller lanes.
The oscillator is followed by a multi-mode lter that offers a large number of different lter
shapes. The lter can be modulated by modulation sources like the keyboard, velocity, and LFO,
but also by the controller lanes of the step sequencer, for example.
Anima includes two monophonic LFOs that can be synchronized to the host tempo and allow you
to modulate a large number of modulation destinations using the modulation matrix. In
addition, a user-dened envelope can be assigned to destinations like Pitch, Pan, or Wavetable
parameters in the modulation matrix.
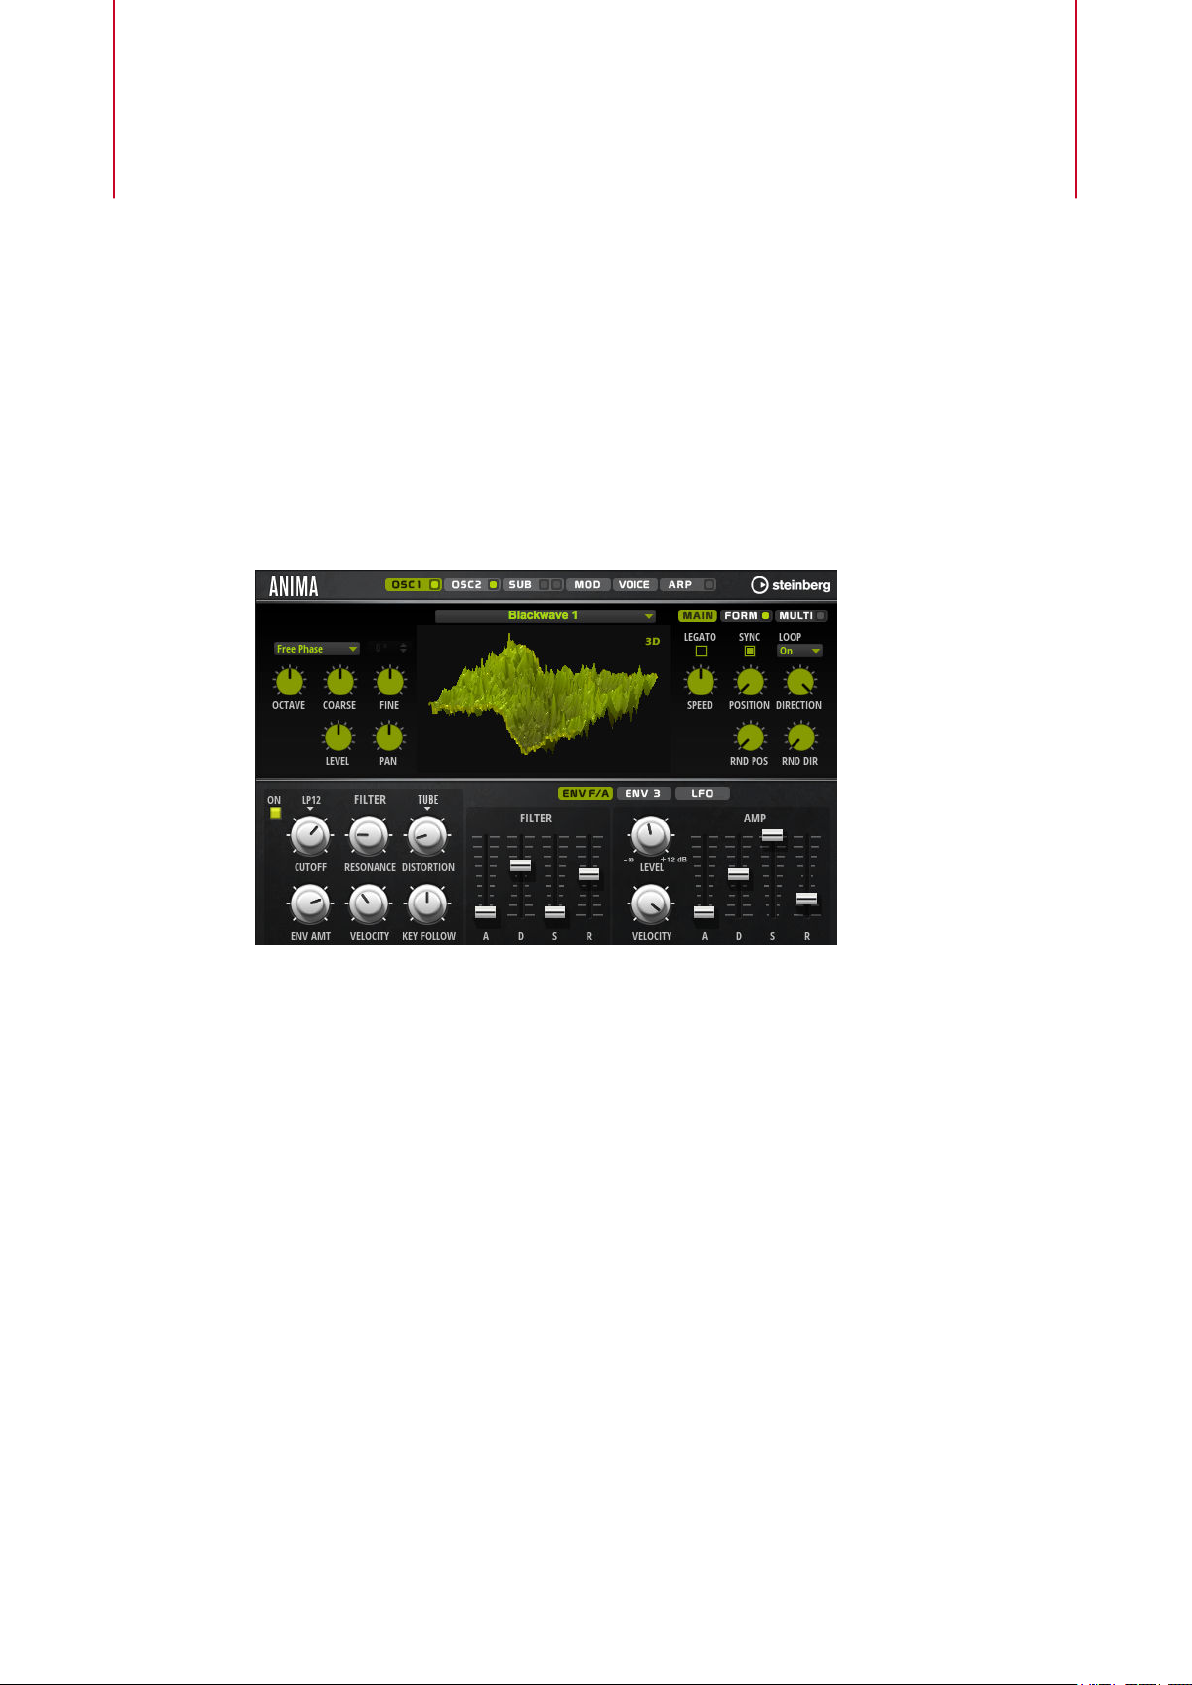
Anima contains six pages: Osc1, Osc2, Sub, Mod, Voice, and Arp. To show the settings for a
page, click the corresponding page button.
4
Page 5
Anima
Oscillator Pages
If a page button itself contains an On/Off button, which is the case for the Arp page button, for
example, you can use this to activate/deactivate the corresponding element without having to
open the page rst.
Oscillator Pages
The Osc 1 and Osc 2 pages contain the settings for the two main oscillators.
● To show the settings for oscillator 1 or oscillator 2, click the corresponding button.
● To activate/deactivate an oscillator, click the On/Off button on the right of the
corresponding page button.
Select Wavetable
This pop-up menu allows you to select one of the included wavetables for the
wavetable oscillator.
Show 3D Wavetable Map/2D Wave
Toggles between displaying a single cycle of the current waveform and a
topographic map of the entire wavetable.
Retrigger Mode
● If Free Phase is selected, the behavior of analog synthesizers is emulated. The
oscillator is running freely and continuously.
● If Random Phase is selected, the start phase is randomly set to a different
value each time that you trigger a note. In contrast to Free Phase, there is no
continuity in the phase of the waveform.
● If Fixed Phase is selected, the oscillator runs with a xed start phase that can
be specied between 0 and 360 degrees.
Octave
Adjusts the pitch in octave steps.
Coarse
Adjusts the pitch in semitone steps.
Fine
Adjusts the pitch in cent steps. This allows you to ne-tune the oscillator sound.
Level
Adjusts the output level of the oscillator.
Pan
Adjusts the position of the oscillator in the stereo panorama. At a setting of -100 %,
the sound is panned hard left, and at +100 %, it is panned hard right.
5
Page 6

Anima
Oscillator Pages
Main Tab
Legato
If Legato is deactivated, each note starts playback from the position cursor.
If Legato is activated, the rst note starts playback from the position cursor, and any
following notes start from the current playback position for as long as the rst note
is held.
Sync to Host
Allows you to sync the wavetable to the beats and measures of your host application.
Loop Mode
● Off: If Playback Direction is set to a positive value, the wavetable plays from
the position cursor to the end.
If Playback Direction is set to a negative value, the wavetable plays from the
position cursor to the start.
● On: Depending on the Playback Direction setting, the wavetable plays
forward or backward in a loop.
● Alt: The wavetable plays in an alternate loop, that is, the loop is alternately
played forward and backward. The rst direction depends on the Playback
Direction setting.
Speed
Determines the rate at which the envelope plays through the wavetables. At +100 %,
the envelope plays back at its original speed. A value of +50 % corresponds to half
the original speed, and +200 % to twice the original speed, for example.
This parameter is unipolar.
Position
Determines where the envelope starts.
Playback Direction
Allows you to set the playback speed in smaller increments. Furthermore, this
parameter determines the playback direction.
● If you enter negative values, you reverse playback, that is, the playback
position moves backward through the wavetable.
Random Position
Adds a random value to the current position when you play a note.
For example, if you want the position to vary between 25.0 % and 75.0 %, set
Position to 25.0 % and Random Position to 50.0 %.
Random Direction
Adds a negative or positive random value to the current direction when you play a
note.
For example, if you want the direction to vary between -100 % and +100 %, set
Direction to 0.0 % and Random Direction to 100.0 %. If you want the direction to
vary within the full positive range, set Direction to 50 % and Random Direction to
50 %, for example.
6
Page 7
Anima
Oscillator Pages
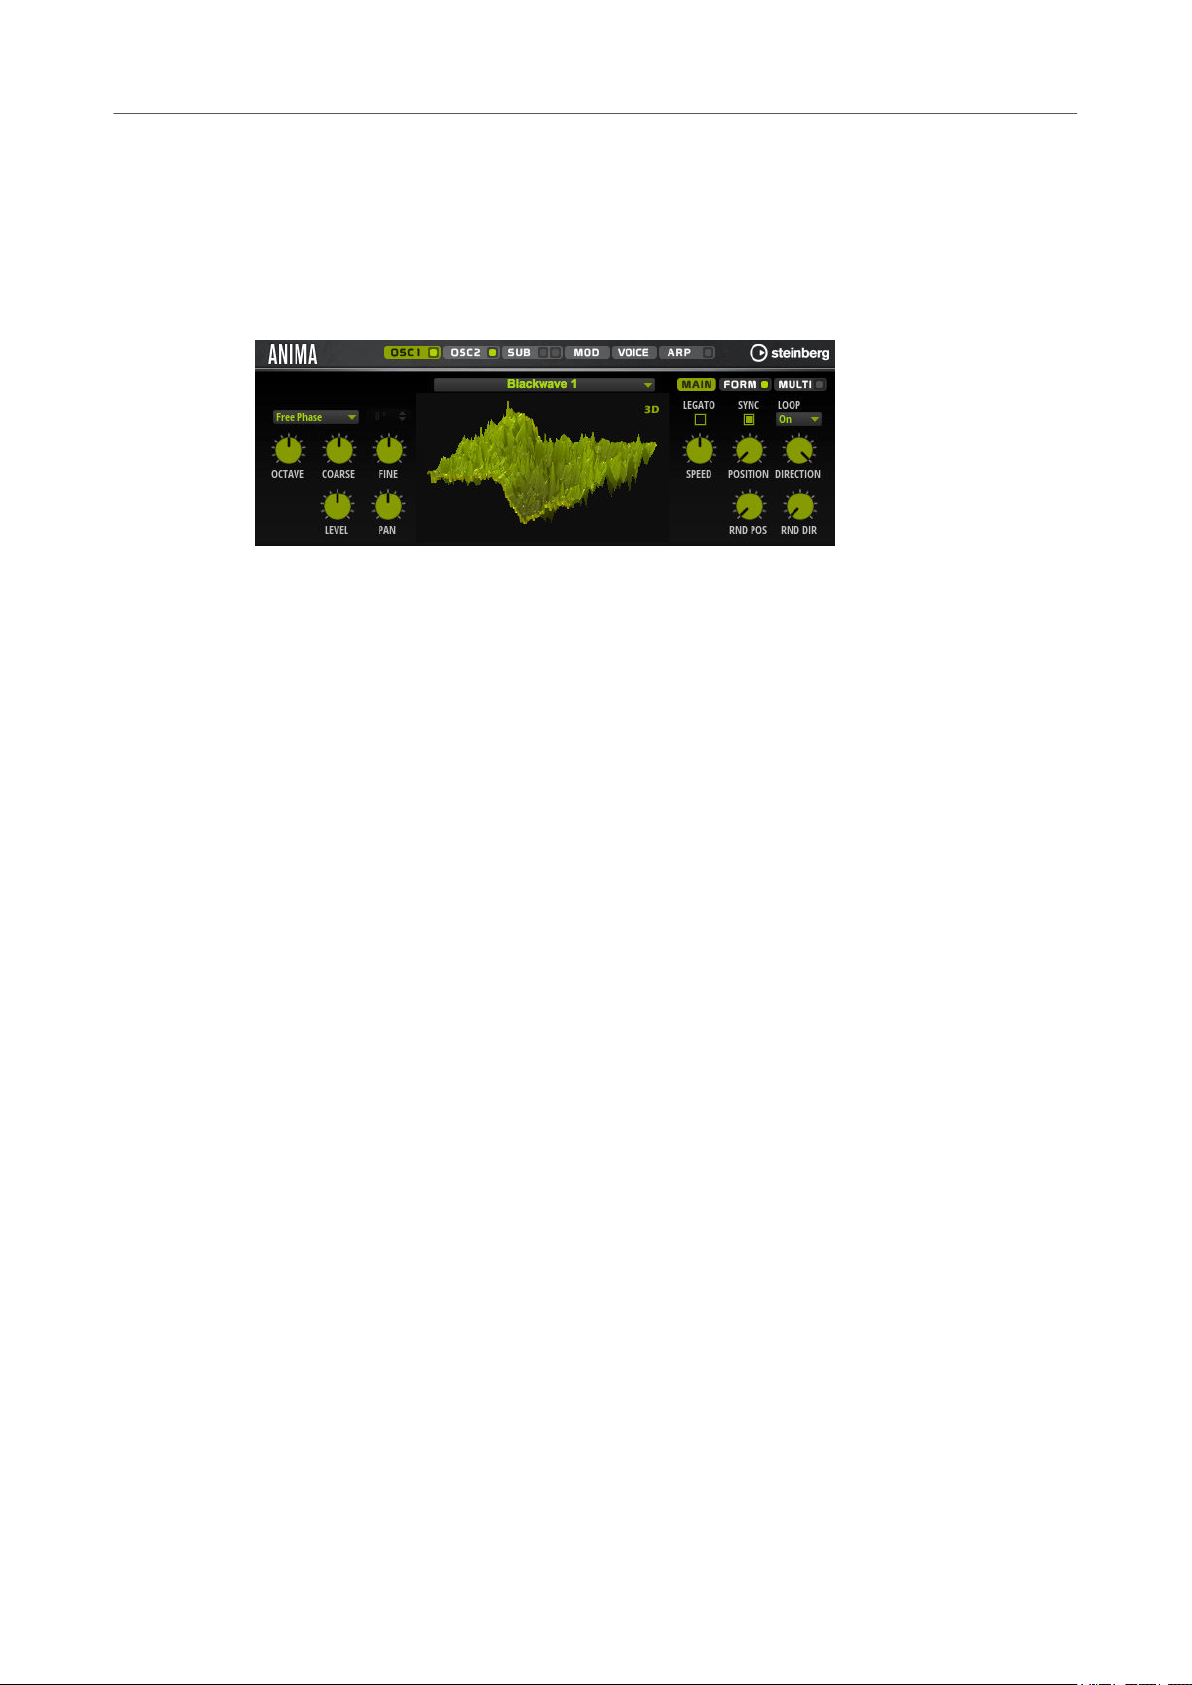
Form Tab
Formants are harmonics within the spectrum of a note which are pronounced and help to dene
the character of an instrument. The positions of the formants in the spectrum mainly depend on
the construction of an instrument, such as the body of a guitar, the form of the vocal tract in a
human body, the lter settings for electronic instruments, etc. These conditions lead to specic
frequency ranges that are emphasized regardless of the pitch of the note. Playing back samples
or wavetables with a different pitch than the original is usually done by increasing or decreasing
the playback speed. This leads to the well-known monster or Mickey Mouse effect, because all
harmonics are also affected, that is, the characteristic formants are shifted. To avoid this, you can
activate the Formant option.
On/Off
Activates/Deactivates the formant settings.
Formant
Allows you to shift the formants of the entire wavetable by a xed value.
Key Follow
Allows you to shift the formants depending on the played note.
● A value of 100 % means that the formant frequency moves with the played
note.
● A value of 0 % means that the formants are kept the same for all notes.
You can invert the behavior of the formant shift by setting Key Follow to negative
values.
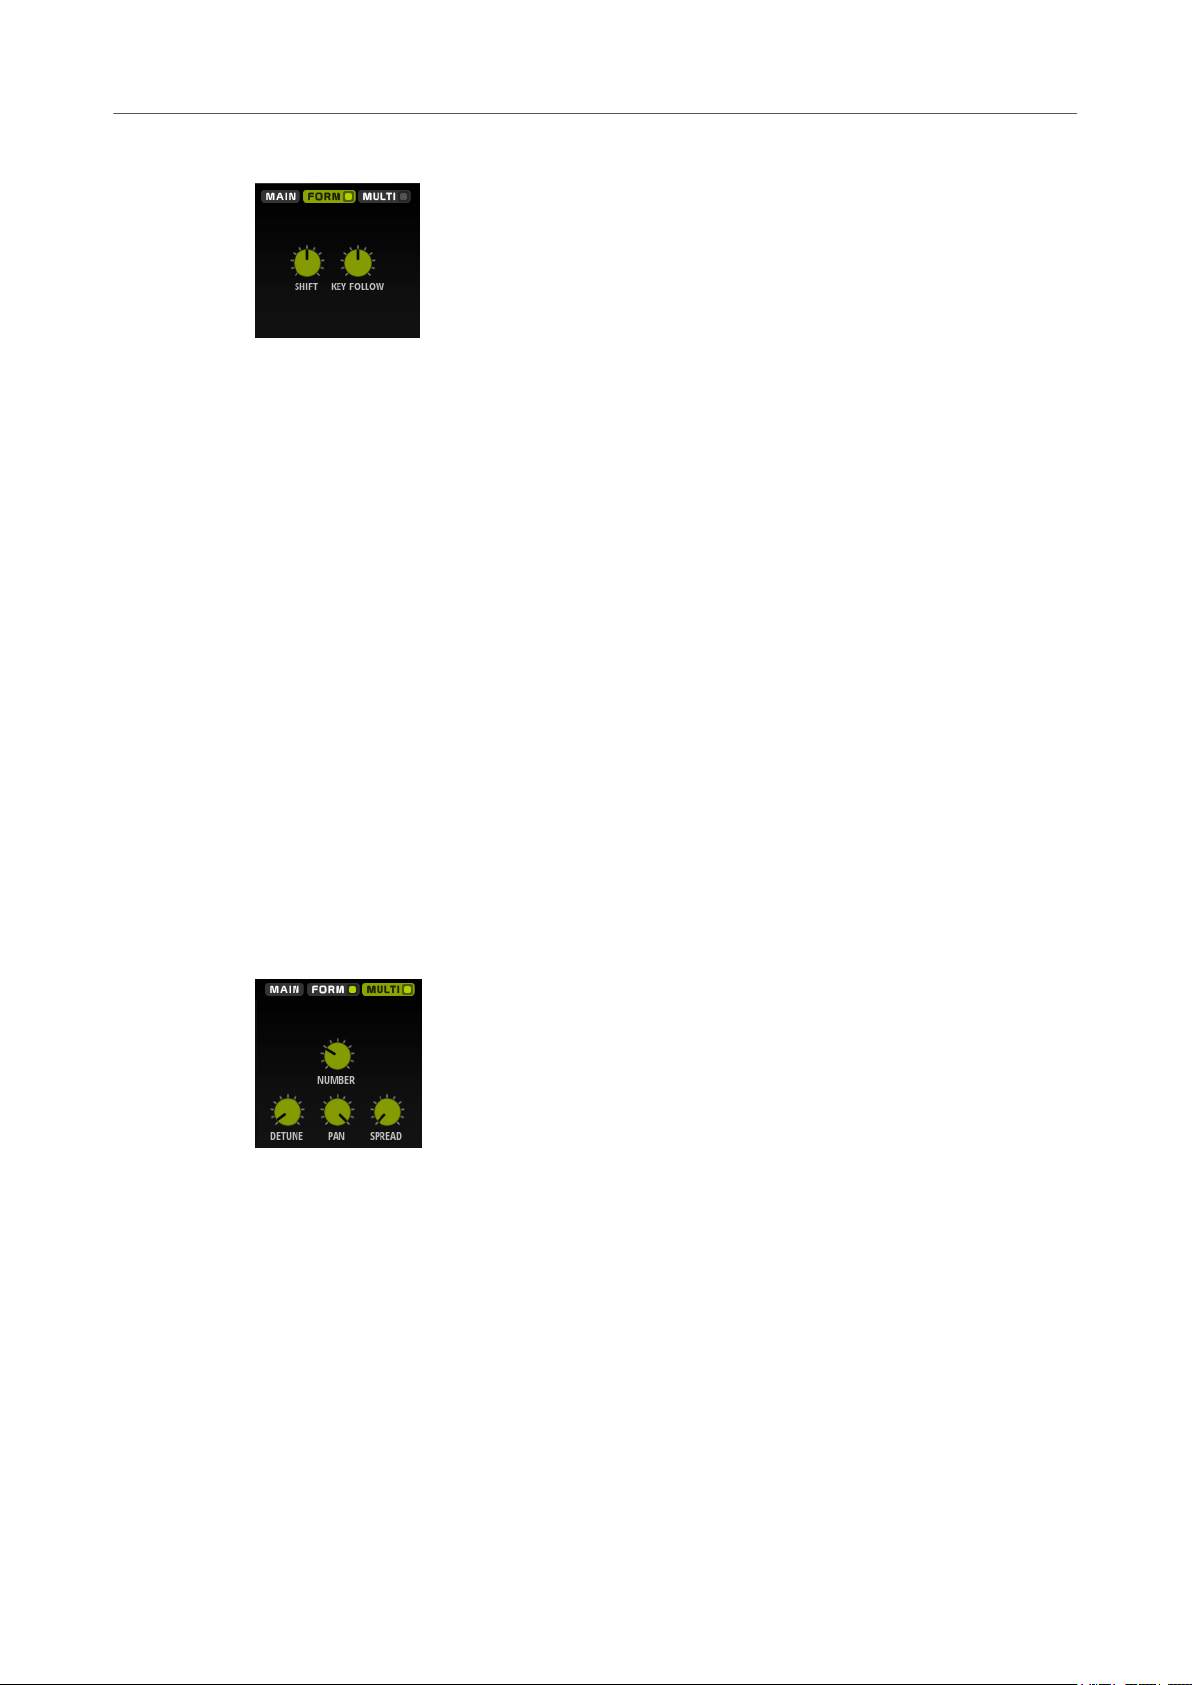
Multi Tab
The multi-oscillator function allows you to trigger multiple voices simultaneously with each note
that you play. If you activate Multi, the following parameters become available:
● Number determines the number of oscillators that play back simultaneously. You can also
set fractions of numbers. For example, with a setting of 2.5, you hear two oscillators at full
level and a third one at half level.
● Detune detunes the oscillators.
● Pan narrows or widens the stereo panorama. With a setting of 0 %, you create a mono
signal and with 100 %, you create a stereo signal.
● Spread distributes the oscillators so that each oscillator plays from a different position in
the wavetable.
7
Page 8
Anima
Sub Page
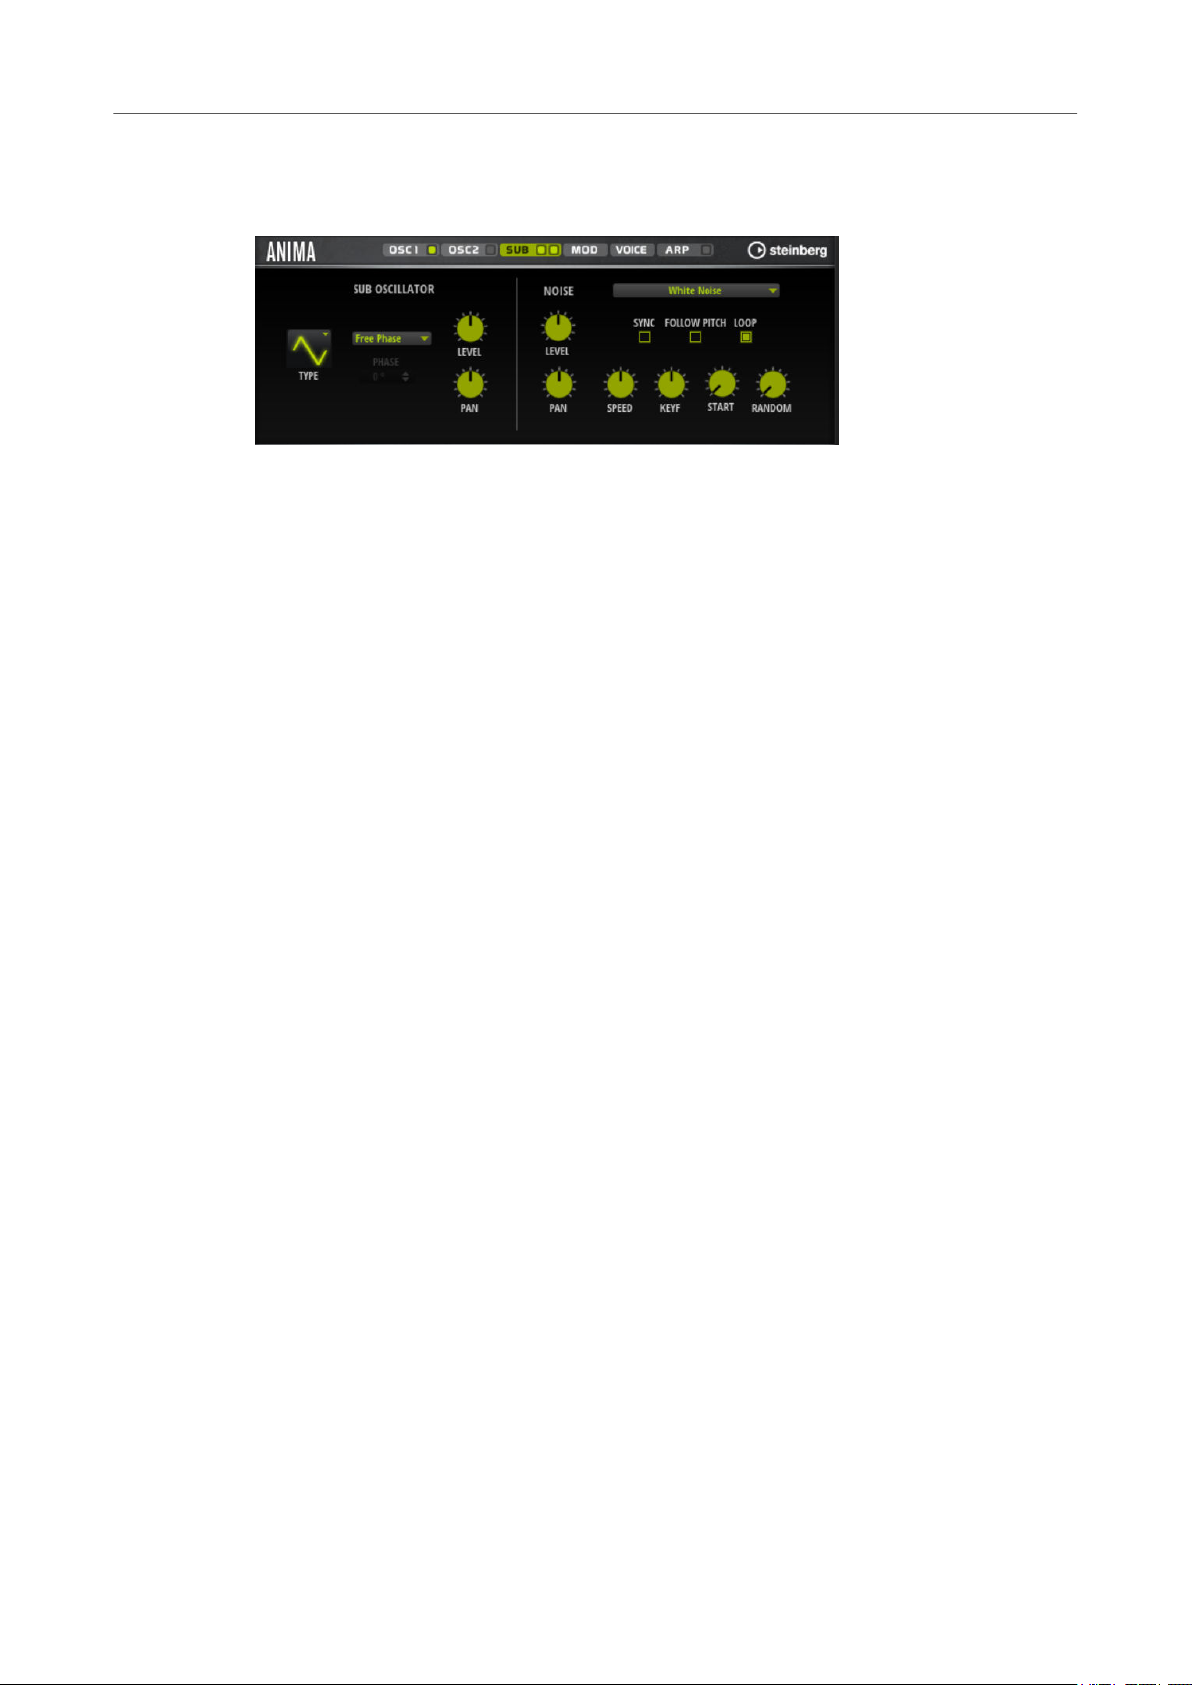
Sub Page
The Sub page contains the settings for the sub oscillator and the noise oscillator.
Sub Oscillator Section
Type
The wave shape of the sub oscillator. You can choose between Sine, Triangle, Saw,
Square, Pulse Wide, and Pulse Narrow.
Retrigger Mode
● If Free Phase is selected, the behavior of analog synthesizers is emulated. The
oscillator is running freely and continuously.
● If Random Phase is selected, the start phase is randomly set to a different
value each time that you trigger a note. In contrast to Free Phase, there is no
continuity in the phase of the waveform.
● If Fixed Phase is selected, the oscillator runs with a xed start phase that can
be specied between 0 and 360 degrees.
Level
Adjusts the output level of the sub oscillator.
Pan
Adjusts the position of the oscillator in the stereo panorama. At a setting of -100 %,
the sound is panned hard left, and at +100 %, it is panned hard right.
Noise Oscillator Section
The noise oscillator offers you a large amount of different noise types that can be used to add
inharmonic frequencies to the overall spectrum, either for the entire sound, with looped noises
or with one-shot noise samples. This allows you to add characteristic transients to percussive
instruments based on samples, for example.
Noise Type
This pop-up menu offers you a choice of classic noises, attack transients,
soundscapes, and ambience noise samples.
Level
Adjusts the output level of the noise oscillator.
Sync
Activate Sync to synchronize the speed of the noise oscillator to the host tempo. This
is particularly useful for rhythmic noises that are based on a tempo of 120 BPM.
Pan
Determines the position of the noise in the stereo panorama. At a setting of -100 %,
the sound is panned hard left, and at +100 %, it is panned hard right.
8
Page 9

Anima
Mod Page
Follow Pitch
If Follow Pitch is activated, zone pitch settings like Octave, Coarse, and Fine, as well
as modulations like Glide, Pitchbend, or other pitch modulations, affect the duration
length. A higher sample pitch leads to a shorter duration.
If Follow Pitch is deactivated, the duration is independent of the zone pitch and
determined by the Duration settings.
Loop
Activate this button to play the noise sample in a loop.
If this button is not activated, the sample is played once.
Speed
Adjusts the playback speed of the noise sample. A setting of 800.0 % equals an
increase of three octaves in pitch.
Speed Key Follow
Allows you to adjust the speed modulation by MIDI note number. At a setting of
+100 %, the speed doubles per octave.
Start
Adjusts the start of the noise sample. With a value of 50 %, playback starts in the
middle of the sample.
Random Start
Selects a random playback start within a specic range around the current position.
At a setting of 100 %, the playback position jumps to a random position between the
specied Start value and the end of the noise sample.
Mod Page
The Mod page contains the modulation matrix.
The modulation matrix offers you up to 16 freely assignable modulations, each with a source, a
modier, and a destination with adjustable depth. The polarity of each source and each modier
can be switched between unipolar and bipolar.
Creating Modulations
You create modulations by selecting a source, a modier, and a destination from the pop-up
menus in the modulation matrix.
PROCEDURE
1. Click the modulation Source eld and select the modulation source.
2. Optional: Click in the modulation Modier eld and select the parameter that you want to
use to modify the modulation.
This modier is used to scale the output of the modulation source.
9
Page 10

Anima
Mod Page
3. Optional: Specify whether you want the Source and Modier parameters to be unipolar or
bipolar.
4. Set the modulation intensity with the Depth parameter.
5. Click in the modulation Destination eld and select the parameter that you want to
modulate.
Modulation Matrix Parameters
Modulation Sources and Modulation Modiers
The following options are available as modulation sources and as modulation modiers.
LFO A/B
The LFOs A and B produce cyclic modulation signals.
Amp Envelope
The amplier envelope. The shape of the envelope determines the modulation
signal.
Filter Envelope
The lter envelope. The shape of the envelope determines the modulation signal.
Env 3
A freely assignable envelope. It is suitable for pan or pitch modulation, for example.
Key Follow
This produces an exponential modulation signal derived from the MIDI note number.
Exponential means this source works with destinations such as Pitch or Cutoff.
Note-on Velocity
Note-on velocity can be used as modulation signal.
Note-on Vel Squared
The squared version of Note-on Velocity. The harder you press the key, the higher
the modulation values.
Pitchbend
The position of the pitchbend wheel can be used as modulation signal.
Modulation Wheel
The position of the modulation wheel can be used as modulation signal.
Aftertouch
Aftertouch can be used as modulation signal. Some MIDI keyboards cannot send
aftertouch messages. However, most sequencer software is able to produce such
messages.
Arp Controller 1–3
The 3 controllers available on this submenu correspond to the three controller lanes
on the Arp page.
Bus 1–8
Modulations that are sent to one of the eight busses can be reused as sources. This
way, you can combine several modulations to produce more complex signals.
Quick Control 1–8
The quick controls can be used as modulation signal.
10
Page 11

Anima
Mod Page
Unipolar vs. Bipolar Sources
The polarity of a modulation source species the value range that it produces. Unipolar sources
modulate between 0 and +1. Bipolar sources modulate between -1 and +1.
● To change the polarity of a modulation source or modier from unipolar to bipolar,
activate its Bipolar button.
Modulation Destinations
Pitch
Modulates the pitch. For example, assign one of the LFOs to create a vibrato effect. If
Pitch is selected, the modulation depth is set in semitones.
Cutoff
Modulates the lter cutoff.
Resonance
Modulates the lter resonance. Resonance changes the character of the lter.
For example, to accent the lter the harder you hit a key, assign Velocity to
Resonance.
Distortion
Modulates the lter distortion.
Level
This modulation adds to the level setting. It can be used to create level offsets using
the mod wheel, for example.
Volume
Modulates the gain. The volume modulation multiplies with the level.
Pan
Modulates the position of the sound in the panorama.
WT 1/2 Pitch
Modulates the Pitch parameter of the corresponding wavetable oscillator.
WT 1/2 Level
Modulates the Level parameter of the corresponding wavetable oscillator.
WT 1/2 Pan
Modulates the Pan parameter of the corresponding wavetable oscillator.
WT 1/2 Multi Detune
Modulates the multi-oscillator Detune parameter of the corresponding wavetable
oscillator.
WT 1/2 Multi Pan
Modulates the multi-oscillator Pan parameter of the corresponding wavetable
oscillator.
WT 1/2 Multi Spread
Modulates the multi-oscillator Spread parameter of the corresponding wavetable
oscillator.
WT 1/2 Multi Voices
Modulates the multi-oscillator Voices parameter of the corresponding oscillator.
WT 1/2 Position
Modulates the Position parameter of the corresponding wavetable oscillator.
11
Page 12

Anima
Mod Page
WT 1/2 Direction
Modulates the Direction parameter of the corresponding wavetable oscillator.
WT 1/2 Speed
Modulates the Speed parameter of the corresponding wavetable oscillator.
WT 1/2 Formant Shift
Modulates the Formant Shift parameter of the corresponding wavetable oscillator.
WT Sub Pitch
Modulates the Pitch parameter of the wavetable sub oscillator.
WT Sub Level
Modulates the Level parameter of the wavetable sub oscillator.
WT Sub Pan
Modulates the Pan parameter of the wavetable sub oscillator.
WT Noise Speed
Modulates the Speed parameter of the wavetable noise oscillator.
WT Noise Level
Modulates the Level parameter of the wavetable noise oscillator.
WT Noise Pan
Modulates the Pan parameter of the wavetable noise oscillator.
Amp Env Attack
Modulates the attack time of the amplitude envelope. This modulation destination
cannot be modulated continuously. The time is updated only when the segment
starts.
Amp Env Decay
Modulates the decay time of the amplitude envelope. This modulation destination
cannot be modulated continuously. The time is updated only when the segment
starts.
Amp Env Sustain
Modulates the sustain level of the amplitude envelope. This modulation destination
cannot be modulated continuously. The level is updated only when the segment
starts.
Amp Env Release
Modulates the release time of the amplitude envelope. This modulation destination
cannot be modulated continuously. The time is updated only when the segment
starts.
Filter Env Attack
Modulates the attack time of the lter envelope. This modulation destination cannot
be modulated continuously. The time is updated only when the segment starts.
Filter Env Decay
Modulates the decay time of the lter envelope. This modulation destination cannot
be modulated continuously. The time is updated only when the segment starts.
Filter Env Sustain
Modulates the sustain level of the lter envelope. This modulation destination
cannot be modulated continuously. The level is updated only when the segment
starts.
12
Page 13

Anima
Voice Page
Filter Env Release
Modulates the release time of the lter envelope. This modulation destination
cannot be modulated continuously. The time is updated only when the segment
starts.
Env 3 Start Level
Modulates the start level of the user-denable envelope 3, that is, the level of the
rst envelope node. This modulation destination cannot be modulated continuously.
The level is updated only when the segment starts.
Env 3 Attack
Modulates the attack time of the user-denable envelope 3. This modulation
destination cannot be modulated continuously. The time is updated only when the
segment starts.
Env 3 Attack Level
Modulates the attack level of the user-denable envelope 3, that is, the level of the
second envelope node. This modulation destination cannot be modulated
continuously. The level is updated only when the segment starts.
Env 3 Decay
Modulates the decay time of the user-denable envelope 3. This modulation
destination cannot be modulated continuously. The time is updated only when the
segment starts.
Env 3 Sustain
Env 3 Release
Env 3 Release Level
Bus 1-8
Voice Page
Modulates the sustain level of the user-denable envelope 3. This modulation
destination cannot be modulated continuously. The level is updated only when the
segment starts.
Modulates the release time of the user-denable envelope 3. This modulation
destination cannot be modulated continuously. The time is updated only when the
segment starts.
Modulates the release level of the user-denable envelope 3, that is, the last user
envelope node. This modulation destination cannot be modulated continuously. The
level is updated only when the segment starts.
You can send any modulation to one of the 8 busses, for example, to produce more
complex modulation signals. Select the bus that you want to send the signals to as a
destination. To use the modulation that was sent to a bus, assign the corresponding
bus as a modulation source.
13
Page 14

Anima
Voice Page
Polyphony
If Mono mode is deactivated, you can use this parameter to specify how many notes
can be played simultaneously.
Mono
Activates monophonic playback.
Retrigger
This option is only available in Mono mode. If Retrigger is activated, a note that was
stolen by another note is retriggered if you still hold the stolen note when you
release the new one.
This way, you can play trills by holding one note and quickly and repeatedly pressing
and releasing another note, for example.
Trigger Mode
Denes the trigger behavior for new notes.
● Normal triggers a new note when the previous note gets stolen. The sample
and the envelope of the new note are triggered from the start.
To minimize discontinuities, use the Fade Out parameter of the zone.
● Resume does not always trigger a new note.
If the new note stays within the same zone, the envelope is retriggered, but
resumes at the level of the stolen note. The pitch of the zone is set to the new
note.
If the new note plays in a different zone, the sample and the envelope of the
new note are triggered from the start.
● Legato does not always trigger a new note.
If the new note stays within the same zone, the envelope keeps running. The
pitch of the zone is set to the new note.
If the new note plays in a different zone, the sample and the envelope of the
new note are triggered from the start.
● Resume Keeps Zone does not trigger a new note upon note stealing. The
envelope resumes at the level of the stolen note and the pitch of the zone is
set to the new note, even if the new note plays in a different zone.
● Legato Keeps Zone does not trigger a new note upon note stealing. The
envelope keeps running and the pitch of the zone is set to the new note, even
if the new note plays in a different zone.
Glide
Allows you to bend the pitch between notes that follow each other. You achieve the
best results in Mono mode.
Fingered
Activate this parameter to glide the pitch only between notes that are played legato.
Glide Time
Sets the glide time, that is, the time it takes to bend the pitch from one note to the
next.
Octave
Adjusts the pitch in octave steps.
Pitch Key Follow
Allows you to adjust the pitch modulation by MIDI note number. Set this parameter
to positive values in order to raise the pitch the higher you play. Use negative values
to lower the pitch the higher you play. At a setting of +100 %, the pitch follows the
played note exactly.
14
Page 15

Anima
Filter Section
Distribution
Pitchbend Up/Pitchbend Down
Filter Section
In the lter section in the lower left, you can activate and set up the lter.
Allows you to specify how unison voices are spread in pitch. Changing the unison
voice distribution will create different modulations between the unison voices.
● If this is set to 0, the distribution is linear, that is, all voices have an equal
distance in their pitch offset.
● Raising the value stretches the distribution using an exponential curve, so that
the rst unison voices have a smaller pitch offset than the second and third.
● Decreasing the value stretches the distribution using a negative exponential
curve, so that the rst unison voices have a larger pitch offset than the second
and third voices.
Determines the range for the modulation that is applied when you move the
pitchbend wheel.
Filter On/Off
Activates/Deactivates the lter.
Filter Shape
● LP 24, 18, 12, and 6 are low-pass lters with 24, 18, 12, and 6 dB/oct.
Frequencies above the cutoff are attenuated.
● BP 12 and BP 24 are band-pass lters with 12 and 24 dB/oct. Frequencies
below and above the cutoff are attenuated.
● HP 6+LP 18 and HP 6+LP 12 are combinations of a high-pass lter with 6
dB/oct and a low-pass lter with 18 and 12 dB/oct, respectively (asymmetric
band-pass lter). Frequencies below and above the cutoff are attenuated.
Attenuation is more pronounced for the frequencies above the cutoff.
● HP 12+LP 6 and HP 18+LP 6 are combinations of a high-pass lter with 12 and
18 dB/oct and a low-pass lter with 6 dB/oct (asymmetric band-pass lter).
Frequencies below and above the cutoff are attenuated. Attenuation is more
pronounced for the frequencies below the cutoff.
● HP 24, 18, 12, and 6 are high-pass lters with 24, 18, 12, and 6 dB/oct.
Frequencies below the cutoff are attenuated.
● BR 12 and BR 24 are band-reject lters with 12 and 24 dB/oct. Frequencies
around the cutoff are attenuated.
● BR 12+LP 6 and BR 12+LP 12 are combinations of a band-reject lter with 12
dB/oct and a low-pass lter with 6 and 12 dB/oct, respectively. Frequencies
around and above the cutoff are attenuated.
● BP 12+BR 12 is a band-pass lter with 12 dB/oct plus a band-reject lter with
12 dB/oct. Frequencies below, above, and around the cutoff are attenuated.
15
Page 16

Anima
Filter Section
● HP 6+BR 12 and HP 12+BR 12 are combinations of a high-pass lter with 6 and
12 dB/oct and a band-reject lter with 12 dB/oct. Frequencies below and
around the cutoff are attenuated.
● AP is an all-pass lter with 18 dB/oct. Frequencies around the cutoff are
attenuated.
● AP+LP 6 is an all-pass lter with 18 dB/oct plus a low-pass lter with 6 dB/oct.
Frequencies around and above the cutoff are attenuated.
● HP 6+AP is a high-pass lter with 6 dB/oct plus an all-pass lter with 18 dB/oct.
Frequencies around and below the cutoff are attenuated.
Cutoff
Controls the cutoff frequency of the lter.
Resonance
Emphasizes the frequencies around the cutoff. At higher settings, the lter selfoscillates, which results in a ringing tone.
Distortion
Adds distortion to the signal. The following distortion types are available:
● Tube adds warm, tube-like distortion.
● Hard Clip adds bright, transistor-like distortion.
● Bit Reduction adds digital distortion by means of quantization noise.
● Rate Reduction adds digital distortion by means of aliasing.
● Rate Reduction Key Follow adds digital distortion by means of aliasing, but
with Key Follow. The rate reduction follows the keyboard, so the higher you
play, the higher the sample rate.
Envelope Amount
Cutoff Velocity
Cutoff Key Follow
Filter Envelope
On the left on the Env F/A tab, you can set up the lter envelope.
Attack
Controls the cutoff modulation from the lter envelope.
Controls the cutoff modulation from velocity.
Adjusts the cutoff modulation using the note number. Increase this parameter to
raise the cutoff with higher notes. At 100 %, the cutoff follows the played pitch
exactly.
Controls the attack time of the lter envelope.
Decay
Controls the decay time of the lter envelope.
16
Page 17

Anima
Amplier and Amplier Envelope
Sustain
Controls the sustain level of the lter envelope.
Release
Controls the release time of the lter envelope.
Amplier and Amplier Envelope
On the right of the Env F/A tab, you can make settings for the amplier and the amplier
envelope.
Amplier Parameters
Level
Velocity
Amplier Envelope Parameters
Attack
Decay
Sustain
Release
Env 3 Section
The Env 3 section provides an additional envelope that can be routed freely in the modulation
matrix. This envelope is bipolar, therefore, it is particularly suited to modulate destinations like
pan or pitch, for example.
Controls the overall volume of the sound.
Controls the level modulation from velocity. At 0, all notes are played with the same
level.
Controls the attack time of the amplier envelope.
Controls the decay time of the amplier envelope.
Controls the sustain level of the amplier envelope.
Controls the release time of the amplier envelope.
The faders below the envelope display set the following parameters:
17
Page 18

Anima
LFO Section
● L0 sets the start level.
● A sets the attack time.
● L1 sets the attack level.
● D sets the decay time.
● S sets the sustain level.
● R sets the release time.
● L4 sets the end level.
● Vel determines how much the envelope intensity depends on the velocity.
LFO Section
In the LFO section, you can make settings for the two included LFOs.
If this fader is set to 0, the envelope is fully applied. Higher values reduce the intensity for
lower velocities.
LFO Waveform and Shape
● Sine produces smooth modulation, suitable for vibrato or tremolo. Shape
adds additional harmonics to the waveform.
● Triangle is similar to Sine. Shape continuously changes the triangle waveform
to a trapezoid.
● Saw produces a ramp cycle. Shape continuously changes the waveform from
ramp down to triangle to ramp up.
● Pulse produces stepped modulation, where the modulation switches abruptly
between two values. Shape continuously changes the ratio between the high
and low state of the waveform. If Shape is set to 50 %, a square wave is
produced.
● Ramp is similar to the Saw waveform. Shape increasingly puts silence before
the sawtooth ramp up begins.
● Log produces a logarithmic modulation. Shape continuously changes the
logarithmic curvature from negative to positive.
● S & H 1 produces randomly stepped modulation, where each step is different.
Shape puts ramps between the steps and changes the S & H into a smooth
random signal when fully turned right.
● S & H 2 is similar to S & H 1. The steps alternate between random high and low
values. Shape puts ramps between the steps and changes the S & H into a
smooth random signal when fully turned right.
Sync
If Sync is activated, the frequency is set in fractions of beats.
Freq
Controls the frequency of the modulation, that is, the speed of the LFO.
Phase
Sets the initial phase of the waveform when the LFO is retriggered.
18
Page 19

Anima
Arp Page
Arp Page
Sync
If Sync is activated, the frequency is set in fractions of beats.
Freq
Controls the frequency of the modulation, that is, the speed of the LFO.
Phase
Sets the initial phase of the waveform when the LFO is retriggered.
Rnd (Random Phase)
If this button is activated, each note starts with a randomized start phase.
NOTE
The Phase control cannot be used if Rnd is activated.
This page contains the integrated arpeggiator.
Arpeggiator On/Off
Activates/Deactivates the arpeggiator.
User Mode On/Off
Activates/Deactivates the user phrase and the user phrase editor.
Variations
Click the variation buttons to switch between the available variations.
Phrase
Allows you to select a phrase.
Drag Recorded MIDI to Sequencer
Allows you to drag the recorded MIDI phrase to your host sequencer.
Record Output
Allows you to record the MIDI output of the arpeggiator.
Loop
If this option is activated, the phrase plays in a loop.
19
Page 20

Anima
Arp Page
Sync
Synchronizes the phrase to the tempo of your host application.
NOTE
In addition, you can set Restart Mode to Sync to Host. This aligns the phrase with
the beats and measures of your host application.
Mute
Mutes playback. The phrase still plays in the background. If you deactivate Mute,
playback resumes immediately.
Hold
Allows you to prevent the phrase from stopping or changing when the keys are
released.
● If Off is selected, the phrase changes as soon as you release a key. The phrase
stops immediately when you release all keys.
● If On is selected, the phrase plays to the end, even if the keys are released. If
Loop is activated, the phrase repeats continuously.
● If Gated is selected, the phrase starts to play when the rst key is played. It
plays silently in the background, even if the keys are released, and resumes
playback at the current position when you press any of the keys again. This
way, you can gate the playback of the phrase.
Tempo
If Sync is deactivated, you can use the Tempo control to set the internal playback
speed of the arpeggiator. The playback speed of the phrase is specied in BPM.
If Sync is activated, the Tempo parameter is not available.
Tempo Scale
Denes the rate at which notes are triggered, that is, the speed at which the phrase
is running. In addition to the Tempo parameter, this gives you further control over
the playback speed. You can specify a value in fractions of beats. You can also set
dotted and triplet note values.
For example, if you change the Tempo Scale setting from 1/16 to 1/8, the speed is
cut in half. If you set it to 1/32, the speed is doubled.
Trigger Mode
Determines at which moment the arpeggiator scans for new notes that you play on
the keyboard.
● If Immediately is selected, the arpeggiator continuously scans for new notes.
The phrase changes immediately in reaction to your playing.
● If Next Beat is selected, the arpeggiator scans for new notes at every new
beat. The phrase changes in reaction to your playing on each new beat.
● If Next Measure is selected, the arpeggiator scans for new notes at the start
of new measures. The phrase changes in reaction to your playing on each new
measure.
Restart Mode
● If this is set to Off, the phrase runs continuously and does not restart at chord
or note changes.
● New Chord restarts the phrase on new chords.
20
Page 21

Anima
Arp Page
NOTE
The phrase does not restart upon notes that are played legato.
● New Note restarts the phrase with each new note that you play.
● Sync to Host aligns the phrase with the beats and measures of your host
application each time that you start the transport.
RstVar (Restart on Variation Change)
This option is available for new chords and new notes. If this button is activated,
changing a variation restarts the arpeggiator, even if no new notes or chords were
triggered.
Key Mode
Denes whether the order in which the notes are played on the keyboard affects the
playback of the phrase.
● If Sort is selected, the notes are played in the order of the selected phrase. The
chronological order does not have any inuence.
● If As Played is selected, the notes are played in the order in which you play
them on the keyboard.
● If Direct is selected, the phrase creates controller events instead of notes. You
hear the notes that you play plus any controller events of the phrase, such as
pitch bend, volume, pan, etc.
NOTE
Not all phrases contain controller data.
Vel Mode
● If Original is selected, the notes of the phrase play with the velocity that is
saved in the phrase.
● If As Played is selected, the notes of the phrase use the velocity of the played
note.
● If Original + As Played is selected, the phrase velocity is determined by the
combination of the velocity saved in the phrase and the velocity of the played
note.
Swing
Shifts the timing of notes on even-numbered beats. This way, the phrase gets a
swing feeling. Negative values shift the timing backward and the notes are played
earlier. Positive values shift the timing forward and the notes are played later.
Gate Scale
Allows you to shorten or lengthen the notes of the phrase. At a value of 100 %, the
notes play with their original gate length.
Vel Scale
Allows you to raise or lower the note-on velocities of the phrase. At a value of 100 %,
the notes are played with their original velocity.
Octaves
Extends the phrase playback to include higher or lower octaves. Positive settings
extend the playback to higher and negative settings to lower octaves. For example, a
value of +1 rst plays the phrase in the octave range that you originally played. Then,
it repeats the phrase one octave higher.
21
Page 22

Anima
Arp Page
Velocity Range
The Low Vel and High Vel parameters determine the velocity range that is used to
trigger phrase playback.
Key Range
The Low Key and High Key parameters determine the key range that is used to
trigger phrase playback.
User Mode Parameters
Save Phrase/Delete Phrase
The two buttons on the right of the phrase eld allow you to save/delete your
phrases.
Mode
Determines how the notes are played back.
● If Step is selected, the last note that is received triggers a monophonic
sequence.
● If Chord is selected, the notes are triggered as chords.
● If Up is selected, the notes are arpeggiated in ascending order.
● If Down is selected, the notes are arpeggiated in descending order.
● If Up/Down 1 is selected, the notes are arpeggiated rst in ascending, then in
descending order.
● If Up/Down 2 is selected, the notes are arpeggiated rst in ascending, then in
descending order. This mode depends on the set Key Mode.
If Key Mode is set to Sort, the highest and the lowest note are repeated.
If Key Mode is set to As Played, the rst and the last note are repeated.
● If Down/Up 1 is selected, the notes are arpeggiated rst in descending, then
in ascending order.
● If Down/Up 2 is selected, the notes are arpeggiated rst in descending, then
in ascending order. This mode depends on the set Key Mode.
If Key Mode is set to Sort, the highest and the lowest note are repeated.
If Key Mode is set to As Played, the rst and the last note are repeated.
● If Random is selected, the notes are arpeggiated in random order.
22
Page 23

Anima
Arp Page
Key Replace
With this parameter, you can deactivate the Key Select function or specify how
missing keys are replaced.
For example, if Key Select is set to 1 - 2 - 3 - 4 and you play a chord with 3 notes, key
4 is considered missing.
● Off deactivates Key Replace and Key Select. The selected arpeggio plays back
normally.
● Arp replaces the missing keys with the note that the arpeggio would normally
play.
● Rest does not replace any missing keys. The arpeggio plays a rest instead.
● 1st replaces the missing keys with the rst note in the note buffer.
● Last replaces the missing keys with the last note in the note buffer.
● All replaces the missing keys with all notes in the note buffer. The notes are
played as a chord.
NOTE
Key Replace can be set separately for each variation.
Wrap
For all modes except Step and Chord, you can use this parameter to restart the
arpeggio after a specied number of steps.
NOTE
Deactivated steps are taken into account.
In Step and Chord mode, this parameter only affects the Octaves setting.
If the Octaves parameter is active, the arpeggio traverses the octaves and restarts
from the original octave after the specied number of steps.
Groove Quantize
To adapt the timing of a phrase to an external MIDI le, you can drop this MIDI le
on the Groove Quantize drop eld.
The Groove Quantize Depth parameter to the right of the drop eld determines
how accurately the phrase follows the timing of the MIDI le.
Key Select
The arpeggiator scans the keyboard and writes the keys that are pressed into a note buffer.
Depending on the selected Key Mode, this note buffer is sorted either by pitch or in the order in
which you play the keys.
Key Select allows you to play back a dened key from the note buffer. You can set up Key Select
for each step separately, which allows you to create very elaborate phrases.
NOTE
Key Select cannot be used in Step or Chord mode.
● To access the Key Select values of the steps, click Show Transpose or Key Select to the
left of the editor, so that a keyboard icon is shown.
● To switch between the available Key Select values for a step, click the value and drag up/
down or use the scroll wheel.
The following options are available:
23
Page 24

Anima
Arp Page
● P (Phrase) plays the note of the user phrase, according to the selected mode, for
example, Up, Down, Up/Down 1, etc.
● The settings 1 - 8 play the corresponding keys from the note list. Which key is played
depends on the Key Mode setting. For example, if Key Mode is set to Sort, the
setting 1 plays the lowest key.
● L (Last) always plays the last key from the note buffer. Depending on the Key Mode,
this is the highest note or the last note in the note buffer.
● A (All) plays all keys from the note buffer as a chord.
Recording the MIDI Output of the Arpeggiator
The phrases that are played by the instrument depend on the played notes and can therefore not
be exported directly. However, it is possible to generate exportable phrases by recording the
MIDI output of the arpeggiator.
PROCEDURE
1. Click Record MIDI Output.
The arrow in the Drag MIDI eld starts blinking to indicate record mode.
2. Play some notes.
3. When you are done, click Record MIDI Output again.
Recording stops. In the Drag MIDI eld, the arrow remains lit to indicate that a MIDI
phrase can be exported.
4. Click the Drag MIDI eld and drag the phrase on a MIDI track in your host sequencer
application.
Creating Variations
PROCEDURE
1. Click one of the variation buttons.
2. You can either start from scratch or base the new variation on an existing variation.
● To start from scratch, load a phrase and edit the settings.
● To use an existing variation as base, use the Copy and Paste context menu
commands.
RESULT
The variation can now be recalled by clicking the corresponding variation button.
NOTE
The parameters Loop, Sync, Hold, Trigger Mode, Restart Mode, Key Mode, Vel Mode, Low/
High Key, and Low/High Vel are not part of the variations. You set them up only once.
Assigning Variations to Trigger Pads
If you assign the variations to trigger pads, you can use the trigger pads to switch between the
variations.
PROCEDURE
1. Right-click a variation button and select the trigger pad on the Assign Variation to
submenu.
24
Page 25

Anima
Arp Page
2. Repeat this procedure for all the variations that you have created.
User Phrases
The user phrase has up to 32 steps. Each step has an adjustable Velocity, Gate Length, and
Transpose value. By adding steps, adjusting their length, or leaving pauses, you dene the
rhythm of the user phrase. Consecutive steps can be combined to create longer notes. By
selecting a Mode, you dene how the notes play back. In addition, there are additional MIDI
control sequences, that is, each step can also send modulation signals.
To create your own phrases, activate the User button.
Editing User Phrases
You can make detailed settings for the user phrase in the editor for user phrases.
●
To set up the phrase, activate the Vel button above the step display.
●
To set up a controller curve for the phrase, activate one of the controller buttons.
● To specify the number of steps for the pattern, drag the Pattern Length handle to the
right or left.
Editing Steps
The height of a step represents its value. You can edit the steps in the following way:
● To activate all steps, select Enable All Steps from the context menu.
● To adjust a value, click a step and drag up or down.
● To adjust multiple steps, click and draw a curve.
● To adjust the velocity of all steps relatively, Shift-click and drag.
● To draw a ramp with steps, hold down Alt and draw a line.
● To draw symmetric ramps at the beginning and the end of the sequence, hold down Shift-
Alt and draw a line.
● To reset the velocity of a step to 127, Ctrl/Cmd-click the step.
● To reset the velocity of all steps to 127, hold Shift-Ctrl/Cmd and click a step.
25
Page 26

Anima
Arp Page
● To introduce a legato between two steps, click the number below the rst of these steps,
so that a small arrow is shown.
If Legato is activated, the Gate Scale parameter is not taken into account.
● To transpose a step, click in the eld below it and enter the number of semitones for the
transposition.
NOTE
You can only transpose steps if Show Transpose or Key Select is set to show the
transpose values.
Adjusting the Gate Length
For velocity steps, the width of a step represents its gate length.
● To adjust the gate length of a step, drag its right border.
● To adjust the gate length of all steps, hold down Shift and drag the right border of a step.
You can only adjust the length this way until a step reaches the next step. If you increase
the gate length of a step so that it overlaps the following step, this following step is
deactivated.
● To reset the length of a step to 1, Ctrl/Cmd-click its highlighted right border.
● To reset the length of all steps, hold down Shift-Ctrl/Cmd and click on a highlighted right
border.
● To ll the gaps between consecutive steps, select Fill Gap or Fill All Gaps from the context
menu.
Each MIDI controller lane can send a MIDI controller. By selecting the same MIDI controller as
source in the Modulation Matrix, you can modulate any of the destinations with the MIDI
controller sequence.
Adjusting the Phrase
● To shift the rhythm of the phrase, click Shift Phrase Right or Shift Phrase Left.
If you shift the rhythm of the phrase to the left, the rst step is moved to the end. If you
shift the phrase to the right, the last step is moved to the beginning.
● To reverse the phrase, click Reverse Phrase.
● To duplicate short phrases, click Duplicate Phrase.
NOTE
The maximum number of steps is 32. Therefore, phrases that contain more than 16 steps
cannot be duplicated entirely.
26
 Loading...