

Page 1
Installationsanleitung
Energy Generation Kit Solar Rise One 2.0
600077 • 12/2019
Allgemeine Sicherheitshinweise
Solarmodule erzeugen auch bei geringem Lichteinfall Strom!
Decken Sie das Solarmodul ab und gehen Sie bei der Montage
vorsichtig vor!
Montieren Sie den Solarladeregler in stabiler, ebener und tro-
ckener Umgebung. Beachten Sie, dass um das Gerät ein Abstand von 15 cm eingehalten werden muss!
Bei unsachgemäßem Umgang mit Batterien besteht Explosi-
onsgefahr! Durch austretende Batteriesäure besteht Verätzungsgefahr! Halten Sie Kinder von Batterie und Säure fern!
Beachten Sie die Behandlungshinweise und Gebrauchsanwei-
sung des Solarladereglers, Solarmoduls und der Batterie!
Bei Anschluss der Kabel ist auf die richtige Polarität zu achten!
Alle Arbeiten müssen in Übereinstimmung mit den nationalen
elektrischen Bestimmungen und den einschlägigen örtlichen
Vorschriften durchgeführt werden!
Benutzen Sie keine beschädigten oder defekten Komponen-
ten und halten Sie den bestimmungsgemäßen Gebrauch des
Systems ein!
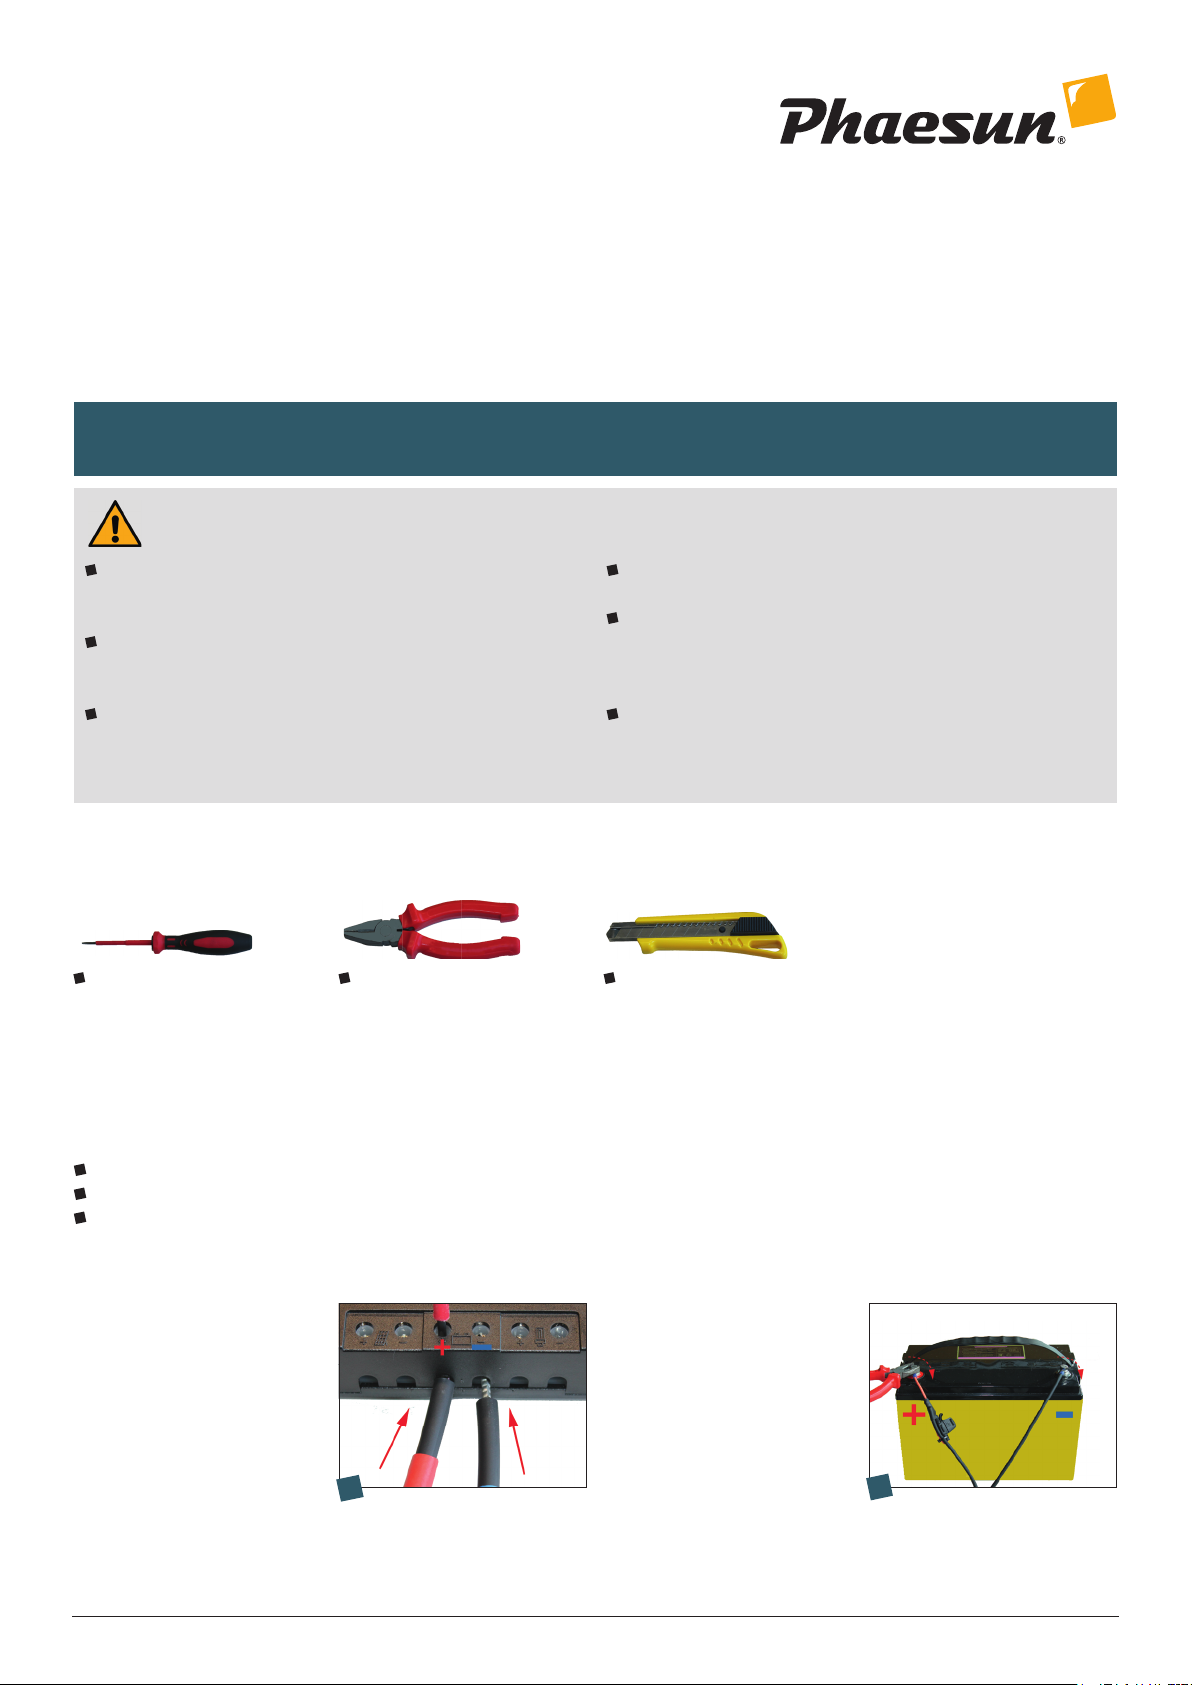
Zur Montage benötigen Sie gut isoliertes Werkzeug:
Kleiner Schraubenzieher Zange Teppichmesser
Batterie an Solarladeregler anschließen
Solarladeregler
Batterie
Batterie Kabel
1. Schritt
Sicherung während der
Installation vom Kabel
entfernen. Lösen Sie die mit
einer Batterie gekennzeichneten
Schrauben am Solarladeregler.
Rot markierte Aderendhülse des
Batteriekabels in den positiven
Anschluss (+), blau markierte
in den negativen Anschluss (–)
einführen. Schrauben anziehen.
Phaesun GmbH · Brühlweg 9 · 87700 Memmingen · Germany | Telefon +49 (83 31) 990 42 0 · Telefax +49 (83 31) 990 42 12 | info@phaesun.com · www.phaesun.com
1
2. Schritt
Lösen Sie die Schrauben an den
Polen der Batterie. Schrauben
Sie den rot markierten
Ringkabelschuh am positiven
Pol (+), den blau markierten
Ringkabelschuh am negativen
Pol (–) fest. Sicherung wieder
einsetzen.
2
Page 2
Solarmodul an Solarladeregler anschließen
Solarmodul
Modulkabel
600077 • S. 2
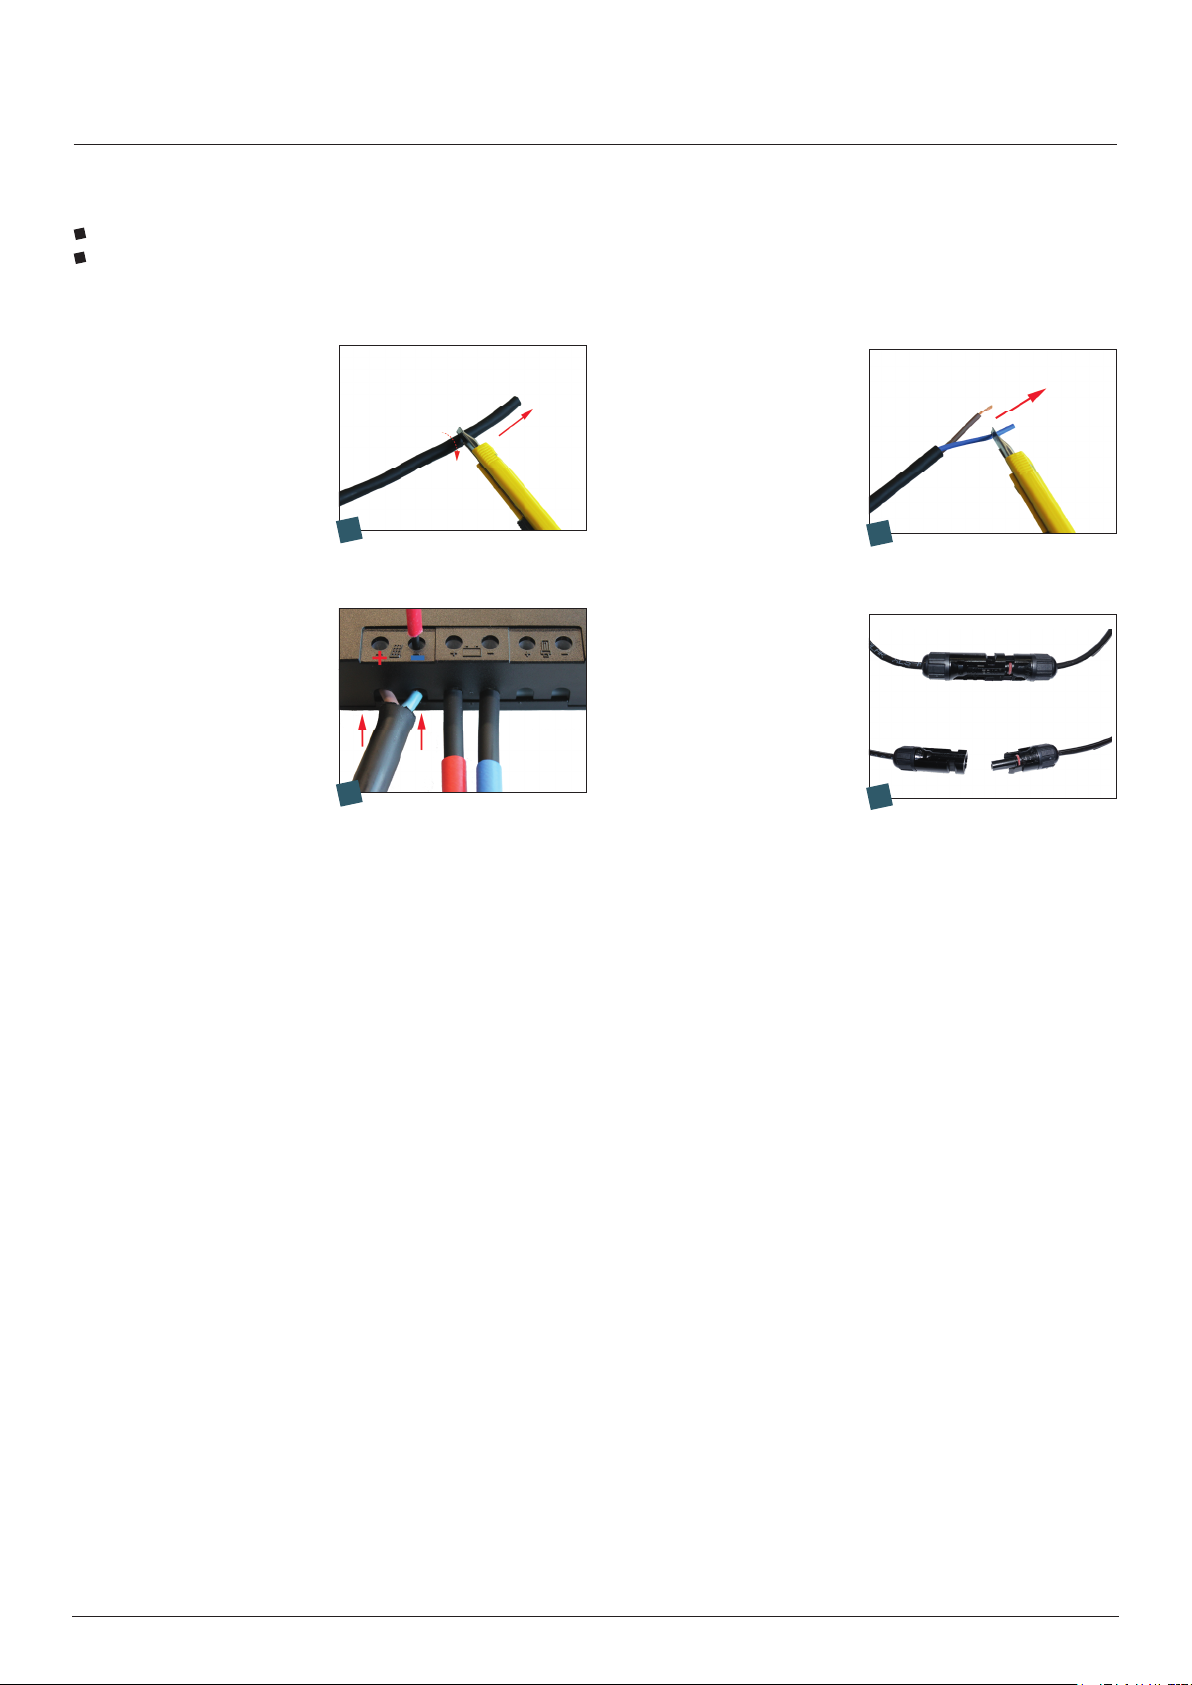
3. Schritt
Isolieren Sie das Modulkabel
ab. Schneiden Sie vorsichtig ein
Stück des oberen Mantels an
und ziehen Sie ihn ab, sodass
zwei einzelne Adern sichtbar
sind.
5. Schritt
Lösen Sie die mit einem
Solarmodul gekennzeichneten
Schrauben am Solarladeregler.
Positive Ader (braun) in den positiven Anschluss (+), negative
Ader (blau) in den negativen
Anschluss (–) einführen. Schrauben anziehen.
4. Schritt
Isolieren Sie beide Adern auf
10 mm ab. Schneiden Sie beide
Adern vorsichtig an und ziehen
Sie den Mantel ab.
3
4
6. Schritt
Verbinden Sie das Solarmodul
mit dem Solarladeregler.
5
6
Phaesun GmbH · Brühlweg 9 · 87700 Memmingen · Germany | Telefon +49 (83 31) 990 42 0 · Telefax +49 (83 31) 990 42 12 | info@phaesun.com · www.phaesun.com
Page 3

Manual
Energy Generation Kit Solar Rise One 2.0
600077 • 12/2019
General safety instructions
Solar modules generate electricity in low incidence of light
too! Cover the solar panel and work carefully!
Make sure that the installation of the solar charge controller
takes place in a stable, flat and dry environment. Please note
to keep a distance of 15 cm around the unit!
Danger of explosion due to improper handling of batteries!
Danger of receiving an acid burn through the battery acid!
Keep children away from batteries and acid!
Please note the operating instructions of the solar charge
controller, the solar module and the battery as well!
When connecting the cables, make sure the polarity is correct!
All work must be carried out in compliance with the national
provisions and the local regulations!
Do not use defective components and keep the intended use
of the system!
For the installation you need well isolated tools:
small screwdriver pliers carpet knife
Connect batterie with solar charge controller
Solar charge controller
Battery
Battery cable
Step 1
Remove the fuses during
the installation. Loosen the
screws distinguished with
a battery label at the solar
charge controller. Insert the
red labelled wire end sleeve
of the battery cable into the
positive contact (+) and the
blue labelled wire end sleeve
into the negative contact (–).
Tighten the screws.
Phaesun GmbH · Brühlweg 9 · 87700 Memmingen · Germany | Telefon +49 (83 31) 990 42 0 · Telefax +49 (83 31) 990 42 12 | info@phaesun.com · www.phaesun.com
1
Step 2
Remove the fuses during the
installation. Loosen the screws
marked with a battery label
at the solar charge controller.
Insert the red labelled wire end
sleeve of the battery cable into
the positive contact (+) and the
blue labelled wire end sleeve
into the negative contact (–).
Tighten the screws.
2
Page 4

Connect solar module to solar charge controller
Solar module
Module cable
600077 • S. 2
Step 3
Strip the insulation off the
module cable. Carefully remove
a piece of the upper coating so
two individual wires become
visible.
Step 5
Loosen the screws distinguished with a solar module label
at the solar charge controller.
Insert the positive wire (brown)
into the positive contact (+)
and the negative wire (blue)
into the negative contact (–).
Tighten the screws.
Step 4
Strip 10 mm of the insulation
of the two cable ends. Cut the
wires carefully and remove the
coating.
3
4
Step 6
Connect the solar module with
the solar charge controller.
5
6
Phaesun GmbH · Brühlweg 9 · 87700 Memmingen · Germany | Telefon +49 (83 31) 990 42 0 · Telefax +49 (83 31) 990 42 12 | info@phaesun.com · www.phaesun.com
 Loading...