

Page 1
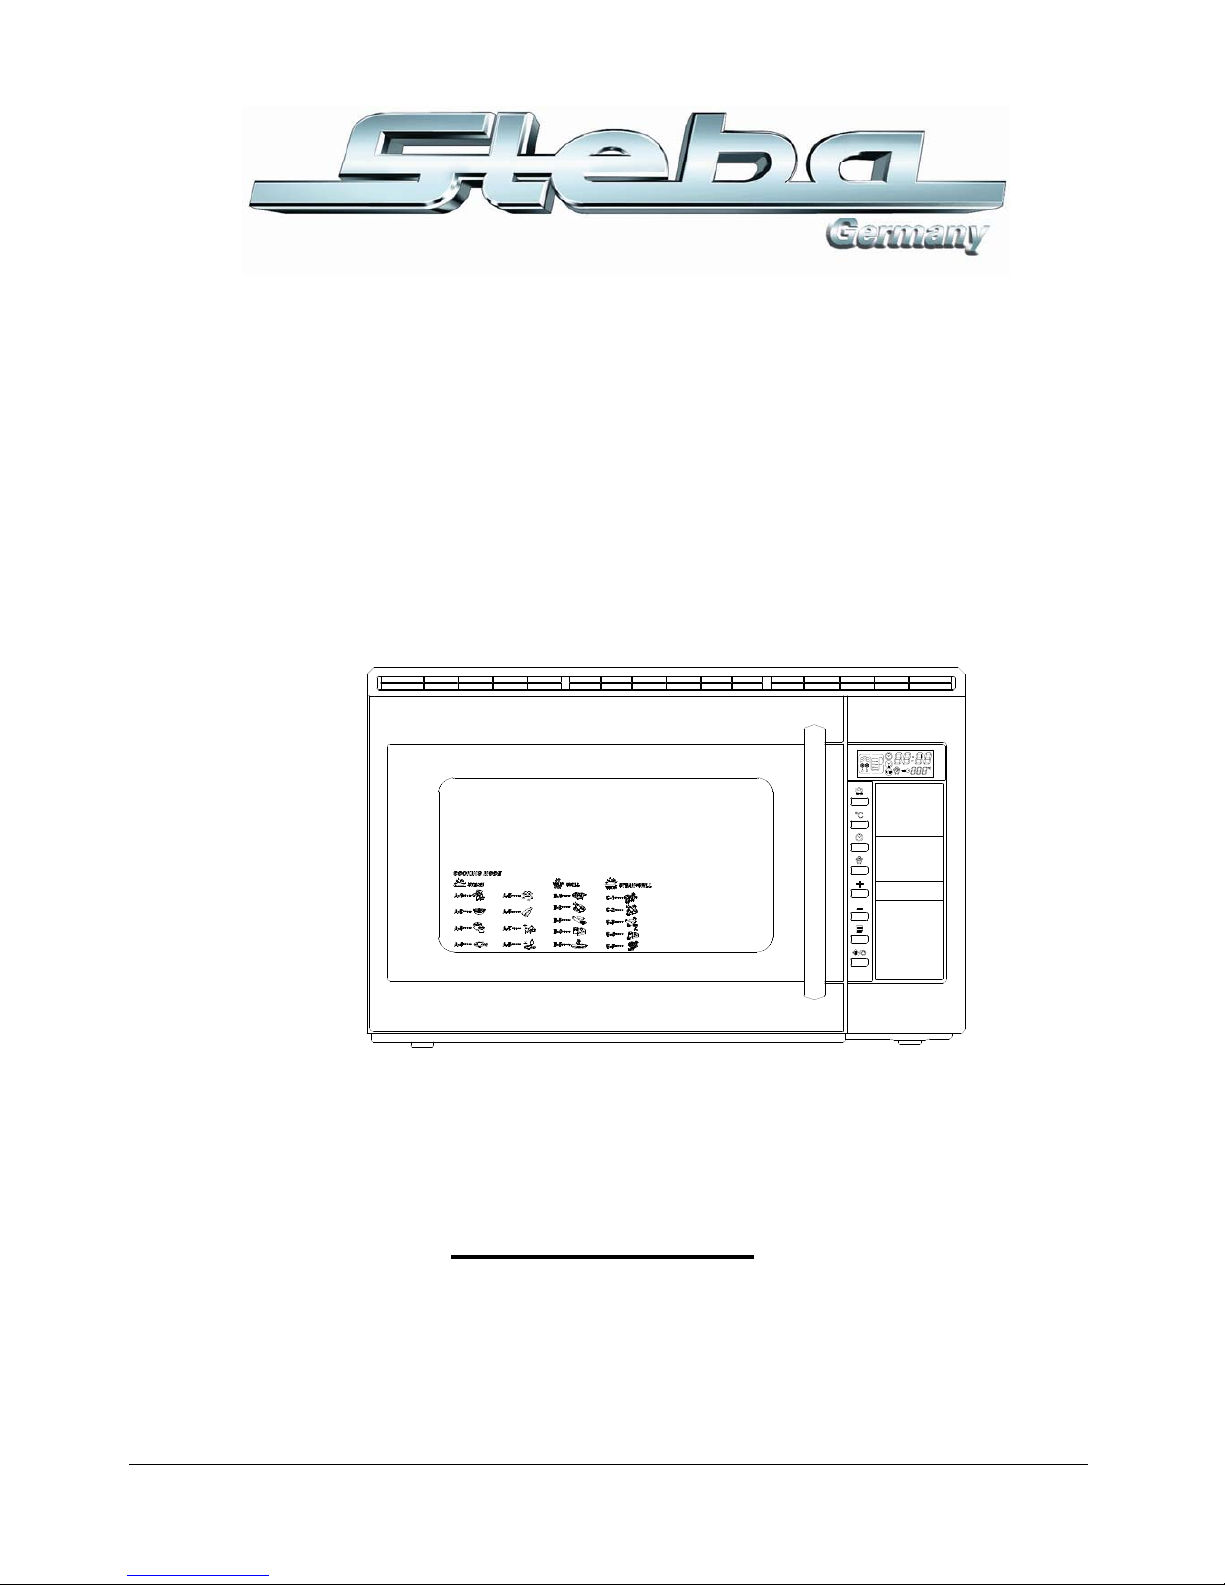
Steambaker
DG3
Instruction manual
1
Page 2

1
Contents
Specification 1
Installation 1
Diagram 2
Control Panel Description 3
Display Description 4
Important Safety Precautions 4
How to operate the oven 5
Setting the clock 5
Defrost food 5
Steam cooking 6
Grill cooking 6
Combination cooking 7
Child lock 7
Cooking mode 7
Cook Chart 8
Cleaning and Care 11
Problem-shooting 12
Specification
Model Ref. SN1653ESL22T-D50
Rated Voltage/Power 230V, 50Hz
Rated Input 1650W (steaming mode)
1250W (grill mode)
2000W (combination mode)
Dimensions 293mm×454mm×403mm
Cavity Dimensions 220mm×315mm×312mm
Capacity 22L
N.W. 12.3kg
The above data need to be confirmed or updated.
(Note: orders of dimensions are Height x Width x Depth)
Installation
1. Take out packing.
2. Check if the steamer is damaged. If yes, contact the dealer or Servicing Dept. immediately.
3. Steamer net weight is 12.3kg; it must be placed on a level surface able to hold it.
4. When placed in corner, it must be horizontally placed and the position be well checked.
5. The steamer must be used in a place with sufficient airflow and no corrosive gas.
6. Never place anything on the top of oven. Keep at least 20 cm distances to the top cabinet.
7. Keep 5cm to both sides and a minimum of 10 cm at back of the oven.
8. Warning: the oven should be well grounded to prevent from electric shocking.
Page 3
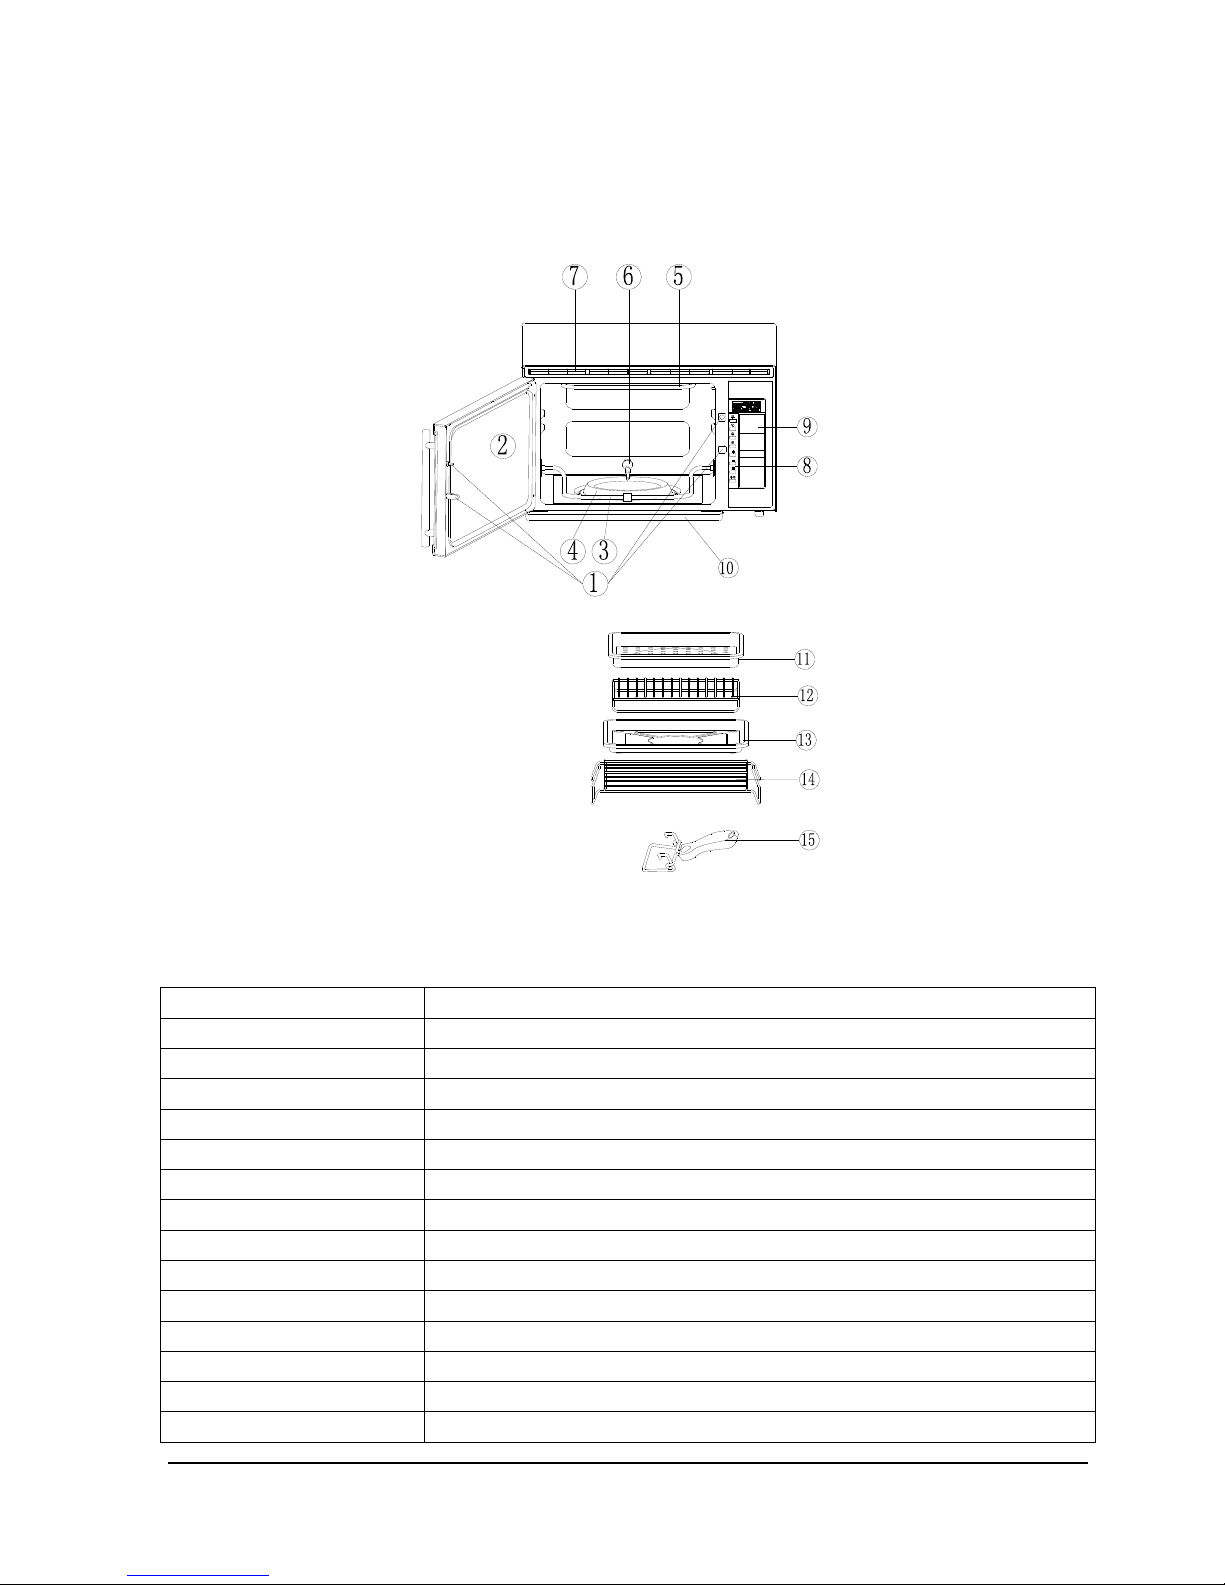
Diagram
1. Door Safety Lock To ensure safe lock and tight contact between door and cavity
2. Window Used to fasten the sealing rubber against the cavity
3. Bottom Heater Heating food from the bottom
4. Heating Plate To vaporize the water
5. Top Heater Heating food from the top
6. Water Pipe To pour water into heating plate
7. Shutter To dispel redundant steam from cavity
8. Control Panel See below control panel description for details
9. Water Tank To contain water
10. Water Trough To collect water
11. Food Tray Used primarily for baking
12. Top Rack Used to place food on
13. Oil Tray To collect oil, etc.
14. Rack Used primarily for placing cooking accessories
15. Handle Used to handle food.
2
Page 4
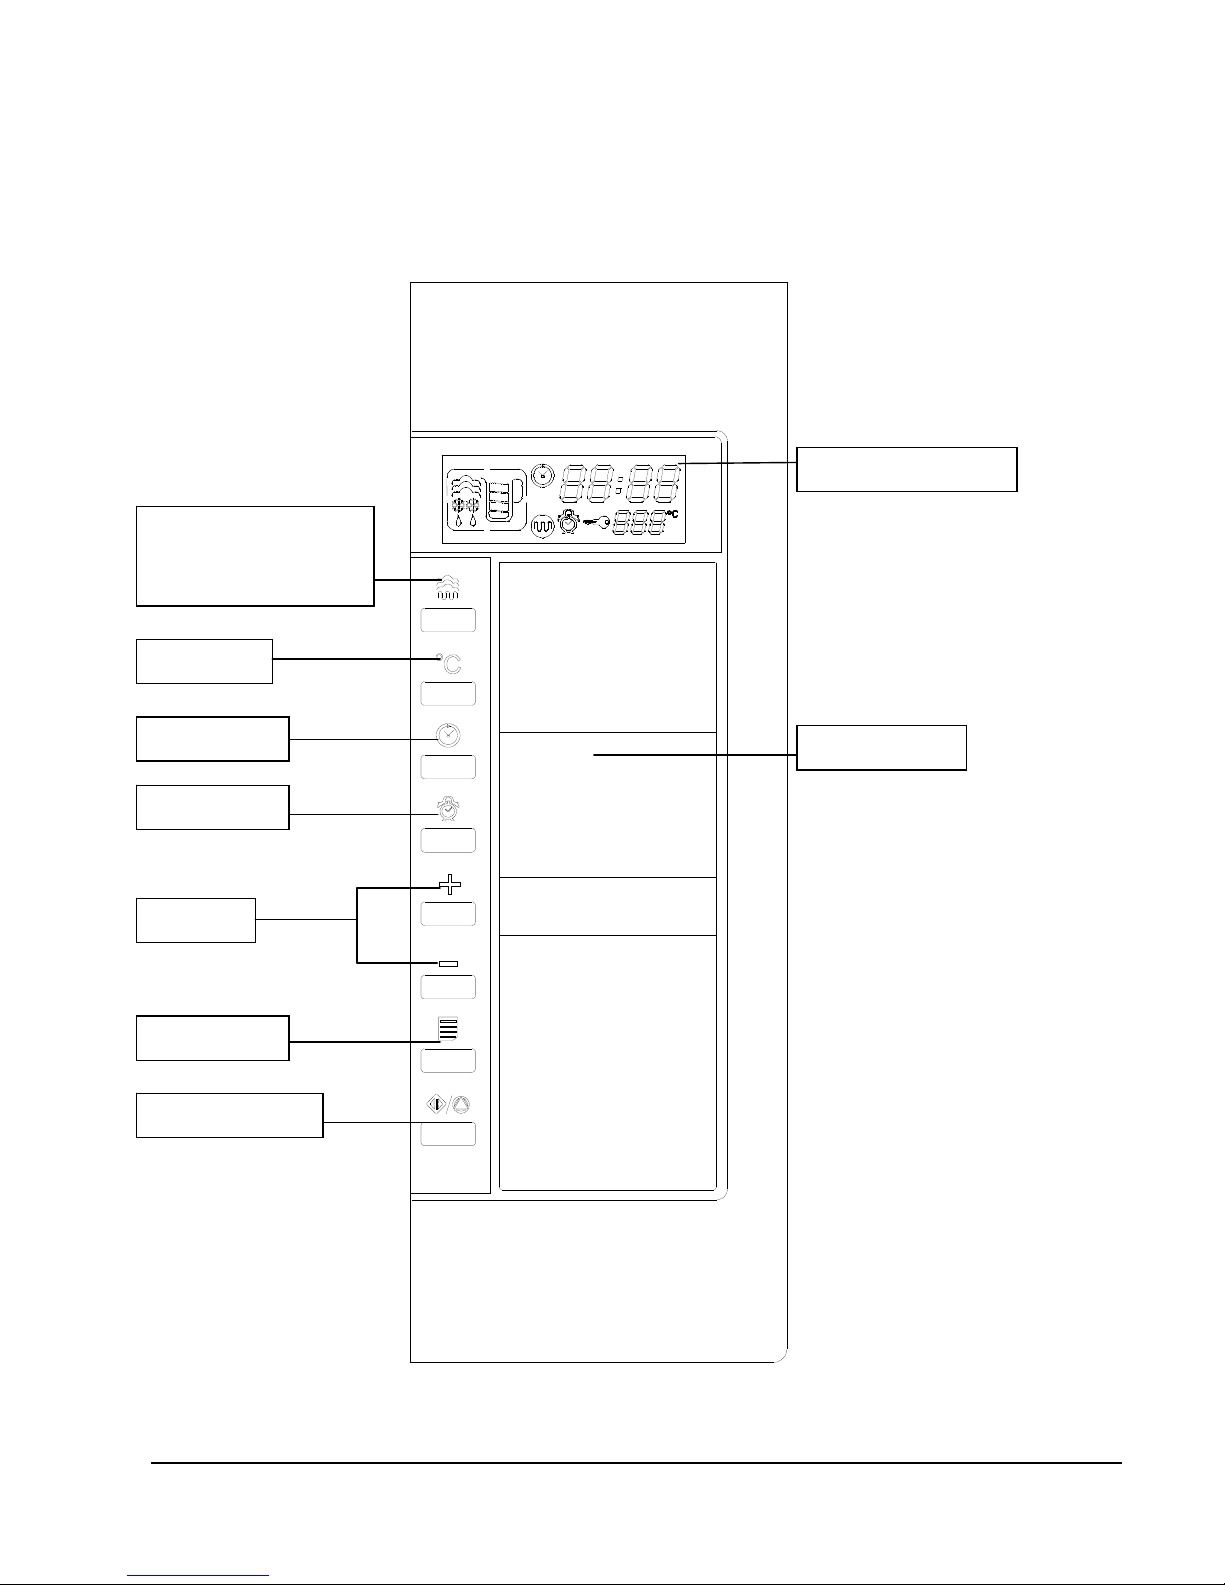
Control Panel Description
WATER TANK
FUNCTION SELECTION
(Steam/Gill/Combi)
TIME SET
COOK MODE
START/CANCEL
TEMP. SET
ADJUST
CLOCK TIME
FUNCTION DISPLAY
3
Page 5

Display Description
Temper at ur e
Cook di spl ay
Def r o st
Wat er Level
Cl ock di spl ay
Chi l d l ock
Cook t i me di sp l ay
Grill cooking
Important Safety Precautions
1. Read the manual carefully before using this oven.
2. The oven is designed for household use, not for commercial use.
3. Warning: only allow children to use the oven without supervision when adequate instruction s h ave been given so
that the child is able to use the oven in a safe way and understands the hazards of improper use.
4. Warning: water tank must be fully filled before cooking and it should not be displaced.
5. Warning: the oven is very hot in cooking and steam may burst out when door is opened. Please keep children
away.
6. If a problem occurs to water flow in cooking, out-of-water sign indicates on the display and the oven beeps. It is
because:
a. No water is left in the tank.
b. The tank is not placed.
Close the door, the oven will resume cooking after fixing the above problems.
7. If there is no food in the oven, it should not be operated to prevent damage.
8. Use gloves when taking food out of oven to avoid possible burns due to excessive heat.
9. Do not store food in the oven.
10. Baby bottle and food must be stiffed or shaken its temperature before serving to avoid burns.
11. After a grill or combination cooking program finished, let the oven stand at least for 5~10 minutes to cook down
the hot air in the cavity before starting a steam cooking program.
12. Warning: it is dangerous for anyone other than a qualified person to attempt the repair the oven.
13. Warning: if door or door seal is damaged, the oven should not be used before it is repaired.
14. Warning: do not use oven to heat liquid or other food in a sealed container, it may explode.
15. Warning: if power cord is found damaged, it must be replaced before next use.
16. Warning: the oven must be carefully attended; it should not be left alone in cooking.
17. Warning: Accessible parts may become hot during use. Young children should be kept away
18. The appliance becomes hot during use. Care should be taken to avoid touching heating elements inside the
oven.
19. When using grill or combination functions, do not touch the door/window and the frame with your hands.
20. When using grill or combination cooking for the first time, some smoke and smell may be observed, it is normal.
21. When taking out food after cooking ends, do not touch the grill heaters inside the oven.
22. Do not clean the oven cavity immediately after a cooking ends; wait for 30 minutes so the cavity and heaters have
cooled before cleaning.
4
Page 6

How to operate the o ven
One beep, oven accepts the entry, two beeps, oven does not accept the entry, check and try again.
SETTING THE CLOCK
After the oven is switched on, the screen displays the default clock setting of
12:00.
To set the clock time:
1. If the clock time is still
flickering on the screen, go to
the next step; if not, press and
hold
until clock time flickers
on the screen.
2. Press “ ” or “ ” to set the time of day.
3. Press “ ” to confirm.
Tip:
To quickly set the clock
time, press and hold
down “
” or “ “.
DEFROST FOOD
The oven can be ideally used to defrost food applying temperatures between
55°C~65°C.
To set a defrost program:
1. Press “
” once.
2. If you want to use the defrost temperature and time, just press
“
“ to start.
If you want to use different temperature and time, go to the next
step.
3. Press “ ” or “ ” keys to enter defrost time.
4. Press “ ” once.
5. Press “ ” once or twice to increase temperature.
6. Press “ ” to start.
Tip:
When temperature
exceeds 65°C, defrost
sign “
” will disappear
on screen; oven works in
cooking mode with
higher temperature.
5
Page 7

STEAM COOKING
When cooking temperature is set at 60°C or higher, the oven enters
steam-cooking mode.
To set a steam cooking program:
1. Press “
” once.
2. Press “ ” or “ ” to select a cooking temperature.
Note: temperature increases by 5°C each time and the maximum
steaming temperature is 100°C。
3. Press “ ” once, and press “ ” or “ ” keys to enter cooking time.
Note: the default cooking time is 10:00, maximum 60 minutes.
4. Press “ ” to start.
Tip:
During cooking, press
“
” once, the cooking
time flickers and can be
adjusted by using “
” or
“
”.
IMPORTANT:
1. When a cooking program just starts, press “
” once and the steam oven will continue
running for 3 minutes to exhaust the hot steam from the cavity and the display counts down
cooking time from ‘‘3:00’’.
2. Do not begin a steam cooking program immediately after a grill or combination cooking, let
the oven stand for 5~10 minutes to cool down the air in the cavity.
G
RILL COOKING
The oven can be used to grill poultry, slices of meat, etc.
To set a grill cooking program:
1. Press
2 times.
2. Press “ ” or “ ” to select a cooking temperature.
3. Press once, and press “ ” or “ ” to set grill cooking time.
4. Press “ ” to start.
Tip:
Temperature setting starts at
120°C increases by 20°C
each time and the maximum
temperature is 200°C。
WARNING:
6
Page 8

After a grill or combination cooking program finished, wait for 5~10 minutes to let the oven cool down
before starting a steam cooking program.
COMBINATION COOKING
The oven can be used to steam and grill at the same time.
To set a combination cooking program:
1. Press
3 times.
2. Press “ ” or “ ” to select a cooking temperature.
3. Press once and use “ ” or “ ” to set combination cooking time.
4. Press “ ” to start.
Tip:
Temperature setting starts
at 120°C and increases
by 20°C each time and
the maximum temperature
is 200°C。
CHILD LOCK
Child lock is used to prevent child from using the oven without supervision.
When child lock starts and “
” lights up and the steam oven cannot work.
1. Lock: keep pressing “
” till the beep sound is heard and “ ” displayed.
2. Unlock: keep pressing “
” till the beep sound is heard and then “ ” disappears.
Background lamp
To reduce energy consumption, when it is not in use, it can be set of the background lamp switch mode.
1. Press “
” and“ ” key 3 seconds,display shows “Lcd OFF”,background lamp goes off。
Now the steam oven is in waiting mode, 30sec. Later the background lamp automatically goes off.
2. Press “
” and“ ” keys 3 sec.,display shows “Lcd On”,background lamp display mode switched on,
it will continue to display.
COOKING MODE
There are 8 automatic cooking modes in the system.
1. Press “
” once or repeatedly to select “A-1”, ”A-2”, “A-3”, “A-4”, “A-5”, “A-6”, “A-7”, “A-8”.
2. Press “
” to start.
Note: cooking time has different settings according to the table below. After mode selection, press “
” key
once, the display shows menu default cooking time and temperature. And default cooking time flickers, press
“
” or “ ” key to adjust cooking time (Max 60mins and Min. 5mins).
Cooking mode
Modes (on display) Temperature Cooking modes Cooking example
A-1 100°C
Usual steam cooking
modes
Vegetable and meat
A-2 95°C Reheating
A-3 90°C
Fresh food and fruits
Eggs, tomato, pudding
A-4 85°C Cook fresh food Whole fresh fish
A-5 80°C Low temperature heating Chocolate, heating instant fruit
7
Page 9

8
A-6 75°C Fresh fish
A-7 60°C Defrost meat for grilling
A-8 55°C
Low temperature defrost
Defrost fish fillet
Grill
Modes (on display) Temperature Cooking modes Cooking example
B-1
200℃
Usual grill
cooking modes
Hamburgers,Steaks, Chicken Pieces,
Boneless poultry, Beef, Mutton, Meat
slice,fish steaks , Seafood ,Pizza, Corn
B-2
180℃
Poultry and meat
Chicken(whole), Cornish hens , Pork
chop, Meat slice
B-3
160℃
Sausage Hot dog , Ham
B-4
140℃
Cake Cheese cake, Chocolate cookies
B-5
120℃
Reheat Reheat food
Steam & Grill
Modes (on display) Temperature Cooking modes Cooking example
C-1
200℃
Usual steam +
grill cooking
modes
Hamburgers,Steaks, Chicken Pieces,
Boneless poultry, Beef, Mutton, Meat
slice,fish steaks ,Seafood ,Pizza, Corn
C-2
180℃
Poultry and meat
Chicken(whole), Cornish hens , Pork
chop, Meat slice
C-3
160℃
Sausage Hot dog , Ham
C-4
140℃
Cake Cheese cake, Chocolate cookies
C-5
120℃
Fresh Vegetable
and fruits
Heating instant fruit, Vegetable
COOK CHART
Example: cooking settings
Following are quick cook charts for steaming, the time settings are for reference only.
Food Temp.
Food preparation
(fresh food if not
specified)
Cooking time Note
Chop
100°C
Chop pieces 600g
Frozen chop 600g
18-25 min
30-40 min
Sausage 90°C 400g 15 min
Blood sausage
Ground meat
90°C
400g 10-15 min
Meat pieces
100°C
Pork, pieces, 500g
Frozen pork, pieces
500g
15-25 min
30-40 min
Meat cuts
100°C
Meat cuts(3cm thick)
500g
Frozen cuts(3cm
thick) 500g
30-40 min
50-60 min
Meat
Drumstick
100°C
Fresh 700g
Frozen 700g
30-35 min
35-45 min
Big pieces of meat may be
directly placed on food plate.
Page 10

9
Whole chicken,
duck
100°C
Fresh 1000g
Frozen 1000g
25-30 min
40-50 min
turkey 100°C 1400g 40-50 min
Beef piece
100°C
Beef pieces 500g
Frozen pieces 500g
15-25 min
25-40 min
Beef cuts
100°C
Beef cuts(3cm thick)
500g
Frozen cuts(3cm
thick) 500g
30-40 min
50-60 min
Celery root
100°C
Fresh , cuts, 400g
Frozen, cuts, 400g
15-20 min
20-25 min
Cauliflower
100°C
In small bundle, 300g
Cut to pieces, 300g
18-22 min
20-25 min
Red radish
100°C
Thin disk size, 500g
Frozen cuts, 500g
18-20 min
25-30 min
Fresh pea 100°C 300g 15-20 min
Pumpkin
100°C
Cubic shape, 500g
Frozen cubics, 500g
15-20 min
25-30 min
Potato
100°C
Cut to disks, 300g
Frozen disks, 300g
15-20 min
25-30 min
Spinach
100°C
Stir in middle
Frozen, stir in middle
15 min
25 min
Mushroom
100°C
Cut to think slice,
300g
Frozen, small, 300g
13-18 min
20 min
Apple, pear, peach 90°C Skinned, 1-3 pieces 10-15 min
Vegetables
and
fruits
Compote 95°C Fruit skinned, 500g 20-25 min
Different quantity of food
requires different cooking
time.
Cooking time may be affected
by shapes, sizes and
freshness of food.
Before cooking cut the thick
parts of vegetable to thin
slices.
Eggs
Fresh eggs under
room temperature 100°C
Use plate/dish 10min (soft)
12min(middle)
14min (hard)
3 eggs in 100g cold water add
some seasonings
Food Temp.
Food preparation (fresh
food if not specified)
Cooking
time
Note
Shrimp
90°C
Fresh 500g
Frozen 500g
12-16 min
20-25 min
Crab 95°C 600g 20-25 min
Crucian
85°C
Whole piece (500g)
Frozen whole pieces
(500g)
18-20 min
30-35 min
Grass carp
85°C
Whole (1000g)
Frozen whole (1000g)
22-28 min
40-45 min
Seafood
Trout
100°C
Whole (1kg)
Whole (300g)
18-25 min
13-15 min
Fish cuts 2-3cm long.
Ensure that fish is fresh.
After finished, it is easier to skin it
immediately.
Rice Rice 100g
100°C
Add water 150g, on
glass plate
25 min
Page 11

10
Rice 200g
100°C
Add water 250g, on
glass plate
30 min
Rice 300g
100°C
Add water 400g, on
glass plate
35 min
Whole
chicken (1kg)
60°C
25 min
Drumstick
(1kg)
60°C
35 min
Pork (700g) 60°C 20 min
Shrimp
(700g)
55°C
20 min
Defrost
Fish (700g) 55°C
- 18°C Frozen, place in
plate
25 min
Set a lower temperature in defrosting
food, less time, stand time longer to keep
food fresh.
Following are quick cook charts for Grill and combination cooking, the time settings are for reference only.
Item
Cooking
mode
Amount
Proposed total
time
Even cooking Remark
Grill
200℃
1100g 45:00-55:00
Whole
chicken
Comb
180℃
1150g 39:00-49:00
Turn food over in half
cooking time
Initial temperature is room
temperature
Grill
200℃
600g 35:00-43:00
Drumsticks
Comb
200℃
600g 38:00-46:00
Turn food over in half
cooking time
300g/piece , initial freezing
temperature 5℃
Grill
180℃
400g 28:00-36:00
Chicken
wings
Comb
180℃
400g 33:00-40:00
Turn food over in half
cooking time
6 pieces , initial freezing
temperature5℃
Grill
180℃
400g 24:00-30:00
Chop
Comb
180℃
400g 24:00-30:00
Turn food over in half
cooking time
initial freezing temperature 5℃
Grill
200℃
300g 18:00-24:00
Beef
Comb
200℃
320g 18:00-24:00
Turn food over in half
cooking time
Beef thickness 0.5cm, initial
freezing temperature 5℃
Page 12

11
Grill
200℃
300g 21:00-27:00
Pork
Comb
200℃
300g 24:00-30:00
Turn food over in half
cooking time
Pork thickness 0.5cm , initial
freezing temperature 5℃
Fish
Grill
160℃
350g 24:00-30:00 initial room temperature
Grill
180℃
300g 24:00-30:00
Meat
skewer
Comb
180℃
350g 24:00-30:00
Turn food over in half
cooking time
initial room temperature
Grill
160℃
400g
13:00-17:00
Pizza
Comb
160℃
400g
12:00-15:00
Turn food over in
horizontal direction
initial freezing temperature 5℃
Grill
180℃
300g 13:00-17:00
Hot dog
Comb
180℃
300g 15:00-20:00
Turn food over in half
cooking time
6 pieces , initial freezing
temperature 5℃.
Corn
Comb
180℃
550g 24:00-30:00
Turn food over in half
cooking time
Initial room temperature
Grill
140℃
500g 45:00-55:00
Cake
Comb
140℃
500g 42:00-52:00
Grill
120℃
300g 13:00-16:00
Reheat
pizza
Comb
120℃
300g 10:00-13:00
initial freezing temperature5℃
Cleaning and Care
Note: powerful cleansing agent、benzine、abrasive powders are forbidden to use lean any parts of the oven.
1. Before cleaning the oven cavity, switch off the oven and plug off from power socket.
2. Keep the cavity in constant clean state. When splash occurs in the cavity, wipe with wet cloth, if very dirty,
use a soft cleaning agent, and do not use an abrasive-cleaning agent
3. Heating plate must be kept clean; half cup of white vinegar may be used, let sit for a few minutes and wash
with water. Do not use sponge or abrasive powders.
4. Wash once a month the water intake tube,take off the tube and clean the dirt within it.
5. Cleaning the gutter by pulling it upward and wipe it clean then replaces it.
Page 13

12
6. Steam cleaner shall not be used.
7. Cleaning the door seal constantly. Use a soft cloth and soap water then wipe it with dry soft cloth.
8. If control panel is wet, wipe with a soft dry cloth, do not use abrasive cleaning agent to wash it. The door
should be opened when washing control panel to avoid activating the oven.
9. If not used for a long time, plug off the oven and placed in a dry airy place with no caustic gas.
10. If malfunction occurs, it must be repaired by qualified serviceman from the manufacturer; it is dangerous for
any other person to attempt to repair it.
11. The oven must be plugged off before replacing the lamp .the lamp must comply with requirement: 20W,
120V with temperature resistance of 300℃ and VDE socket.
12. Do not use harsh abrasive cleaners or sharp metal scrapers to clean the oven door glass or food tray since
they can scratch the surface.
13. Steam cleaner shall not be used.
14. Do not clean the oven cavity immediately after a cooking ends; wait for 30 minutes so the cavity and heaters
have cooled before cleaning.
Problem-shooting
Problems Possible causes Problem solving
Dark display window
Oven is not connected and
the power cord does not work
properly
Make sure oven is connected
(fuse is in place)
Contact the after sales service
Lamp does not work
Lamp, fuse not comply
standards,
Lamp does not connect to
power.
Replacement of lamp
Connect the power cord
properly
Change the fuse
During cooking, water or
water vapor leaks out from the
door.
Door does not close properly
Door seal is damaged
Contact after sales service
Code Analysis Solution
E-1
Cavity high temperature protection: more
than 240°C
Stop to cool down.
E-2
Cavity low temperature protection:
cooking 3 min. 40°C
Contact service. User should
not disassemble.
E-3 Heating plate protection: more than 240°C Stop to cool down.
E-4
Heating plate: after 3 min. Cooking, temp.
less than 40°C
Contact service. User should
not disassemble.
E-5 Heating plate sensor protection
E-6
Heating plate sensor short circuit
protection
E-7 Cavity open circuit protection
E-8 Cavity sensor short circuit protection
Contact service professional
user should not disassemble
the oven.
E-9
Signal malfunction protection after 30-40
sec. No signal checked
Check if the water tank is
placed well or water is enough.
Page 14

480-12995
13
 Loading...