

Page 1
Vent-Max
™
™
Vent-Max
™
Vent-Max
™
Vent-Max
COUNTERTOP
VENTILATION SYSTEM
MODEL
CV1R, CV1L
Installation and
Operation
Instructions
2M-Z16152 Rev. - 7/17/12
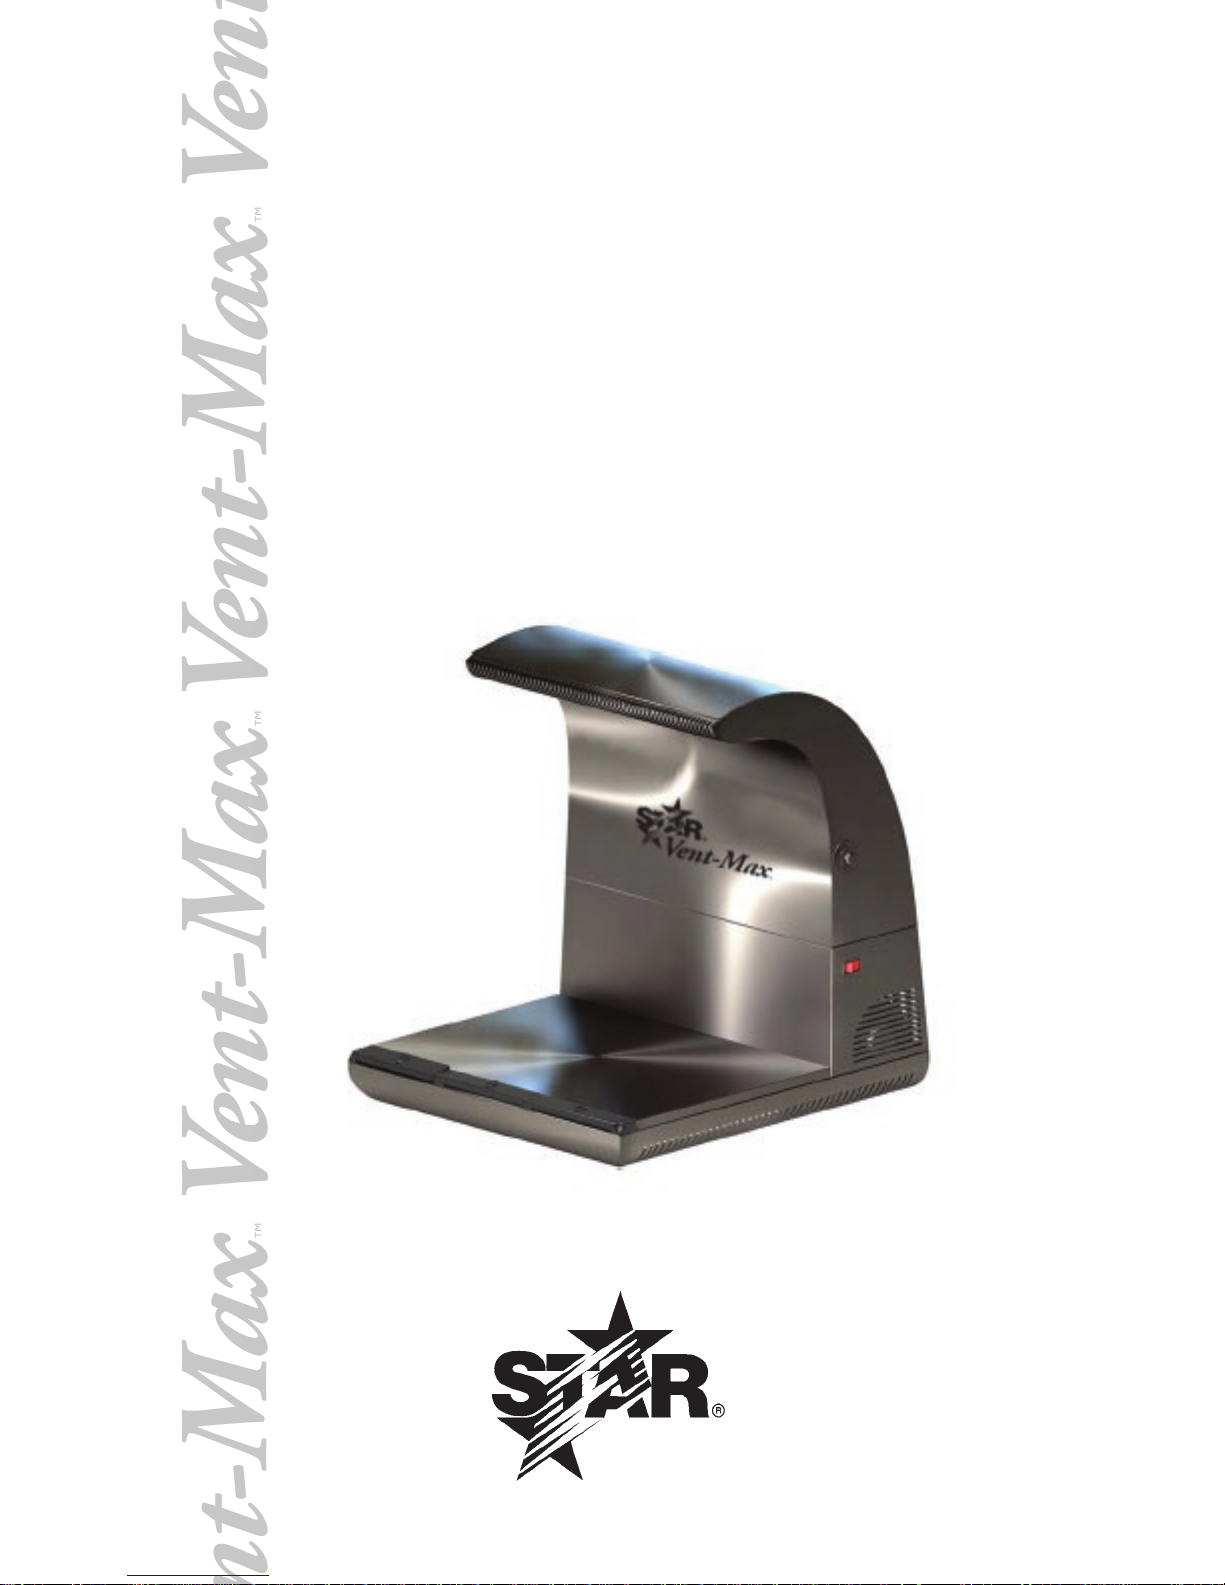
CV1R
Page 2

2
These symbols are intended to alert the user to the presence of
important operating and maintenance instructions in the manual
accompanying the appliance.
RETAIN THIS MANUAL FOR FUTURE REFERENCE
NOTICE
Using any part other than genuine Star factory supplied parts relieves the
manufacturer of all liability.
Star reserves the right to change specications and product design without
notice. Such revisions do not entitle the buyer to corresponding changes,
improvements, additions or replacements for previously purchased
equipment.
Due to periodic changes in designs, methods, procedures, policies and
regulations, the specications contained in this sheet are subject to change
without notice. While Star International Holdings Inc., Company exercises
good faith efforts to provide information that is accurate, we are not
responsible for errors or omissions in information provided or conclusions
reached as a result of using the specications. By using the information
provided, the user assumes all risks in connection with such use.
MAINTENANCE AND REPAIRS
Contact your local authorized service agent for service or required maintenance.
Please record the model number, serial number, voltage and purchase date in the area below and have it ready when
you call to ensure a faster service.
SAFETY SYMBOL
Model No.
Serial No.
Voltage
Purchase Date
Business 8:00 am to 4:30 p.m. Central Standard Time
Hours:
Telephone: (314) 678-6303
Fax: (314) 781-2714
E-mail Parts@star-mfg.com
Service@star-mfg.com
Warranty@star-mfg.com
Website: www.star-mfg.com
Service Help Desk
Authorized Service Agent Listing
Reference the listing provided with the unit
or
for an updated listing go to:
Website: www.star-mfg.com
E-mail Service@star-mfg.com
Mailing Address: Star International Holdings Inc., Company
10 Sunnen Drive
St. Louis, MO 63143
U.S.A
Page 3
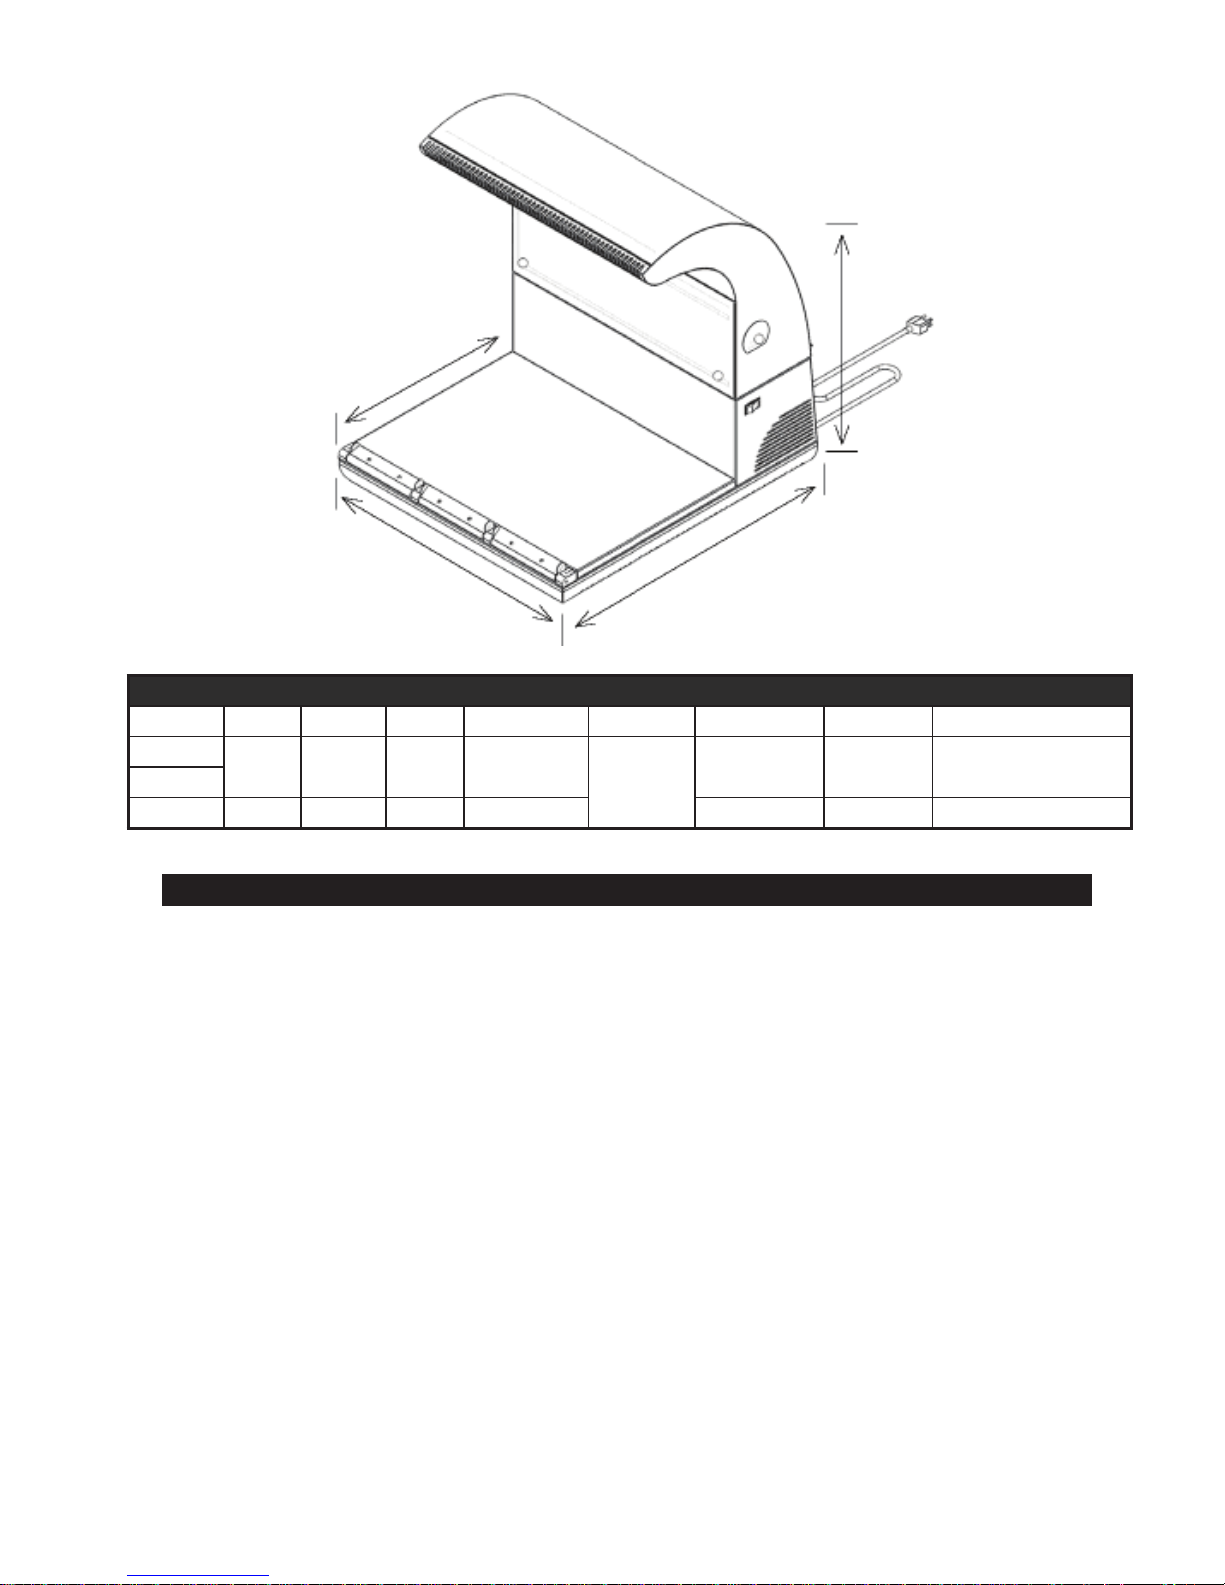
Specications
Model Voltage Amps Watts Plug Type Width (cm) Depth (cm) Height (cm) Appox Shipping Weight
CV1L
CV1R
Base - - - - 20.25” (51.4) - -
120V 5.5 350 NEMA 5-15P
26” (66.1)
29.75” (74.5) 31” (78.7) 180 lbs (81.6 kg)
GENERAL INSTALLATION INSTRUCTIONS
This equipment is designed and sold for commercial use only by personnel trained and experienced in
its operation and is not sold for consumer use in and around the home nor for use directly by the general
public in food service locations.
Before using your new equipment, read and understand all the instructions & labels associated with the
unit prior to putting it into operation. Make sure all people associated with its use understand the units
operation & safety before they use the unit.
All shipping containers should be checked for freight damage both visible and concealed. This unit has
been tested and carefully packaged to insure delivery of your unit in perfect condition. If equipment is
received in damaged condition, either apparent or concealed, a claim must be made with the delivering
carrier.
Concealed damage or loss - if damage or loss is not apparent until after equipment is unpacked, a
request for inspection of concealed damage must be made with carrier within 15 days. Be certain to
retain all contents plus external and internal packaging materials for inspection. The carrier will make an
inspection and will supply necessary claim forms.
These Electric Countertop Ventilation Systems are equipped for the voltage and wattage indicated on the
nameplate mounted on the front panel. These units are designed to operate on alternating current (AC)
2M-Z16152, Vent-Max, Countertop Ventilation System
only. DO NOT CONNECT TO DIRECT CURRENT (DC).
3
Page 4

Features & Benits
Grease Drawer
Power Cord
On/Off Switch
Air Intake
Front Panel
Base
The CV Vent is designed to improve the environment for kitchen staff and patrons by removing smoke, odors,
moisture and grease laden vapors from the ambient air. It works with compact countertop cooking appliances such
as convection ovens, toasters, Panini grills and griddles. The SA Vent unit operates from a standard 120V outlet, and
draws 3.5A. It comes with a preinstalled NEMA 5-15P cord. The platform will hold equipment up to 150 lbs. and 25
½” W x 18” D. The unit is equipped with interlock switches to insure that three all lters, and the front lter panel, are
installed and correctly positioned in order to operate.
The air ltering system consists of the following three lters.
Washable grease lter
•
• Disposable electrostatic particulate lter
• Disposable activated charcoal smoke lter
The Grease impinges upon the bafes and drains downward. Holes in the frame bottom divert the grease into a
trough and to a container away from the re danger area.
Installation:
The CV Vent is shipped assembled, except for the lters. Remove from packing materials and make sure the unit is
complete and undamaged. The SA Vent must be installed on a level surface, away from sources of excessive heat
and moisture. Insure that nothing is blocking the air intake cutouts that provide cooling of the motor, or the air exhaust
ports.
The grease lter is installed at a 45-degree angle, to allow grease to ow freely down the bafes and through the drain
holes. The grease channel below the lter is at a slight angle to allow the grease to run into the trap without pooling.
Operation:
First, make sure that the lters are correctly installed in the unit.
Remove the front panel by grasping the knobs and sliding it upward
until the bottom is free, then move the whole panel downward, while
pulling the knobs gently towards you, until it is off the unit. Insure
that the lters are all in place, and fully seated. The bottom lter is
the activated charcoal lter, the center is the particulate lter, and
the large metal lter on the top is the grease lter. The grease lter
should be installed with the holes that are punched in one side facing
toward the bottom of the unit, over the grease channel. Holes in the
frame bottom divert the grease into a trough and to a container away
from the re danger area. Please note that the removable grease
drawer must be in place. Reinstall the lter cover by reversing the
removal procedure. Plug the unit into an appropriate outlet, and ip
the lighted power switch, located on the right side of the unit, to the
on position. Unit is now ready to lter grease-laden vapors.
Filter Cleaning:
For moderate-use applications, run the grease lter through the dishwasher daily. For heavy use applications,
presoaking in a detergent solution prior to dishwasher cleaning is commended. The electrostatic and carbon pleated
lters are disposable.
DO NOT spray the unit with any cleaning liquid before unplugging it
DO NOT allow water to drip into the housing or around the electrical
CAUTION
components
DO NOT immerse in water for cleaning
2M-Z16152, Vent-Max, Countertop Ventilation System
4
Page 5
Cleaning Procedure
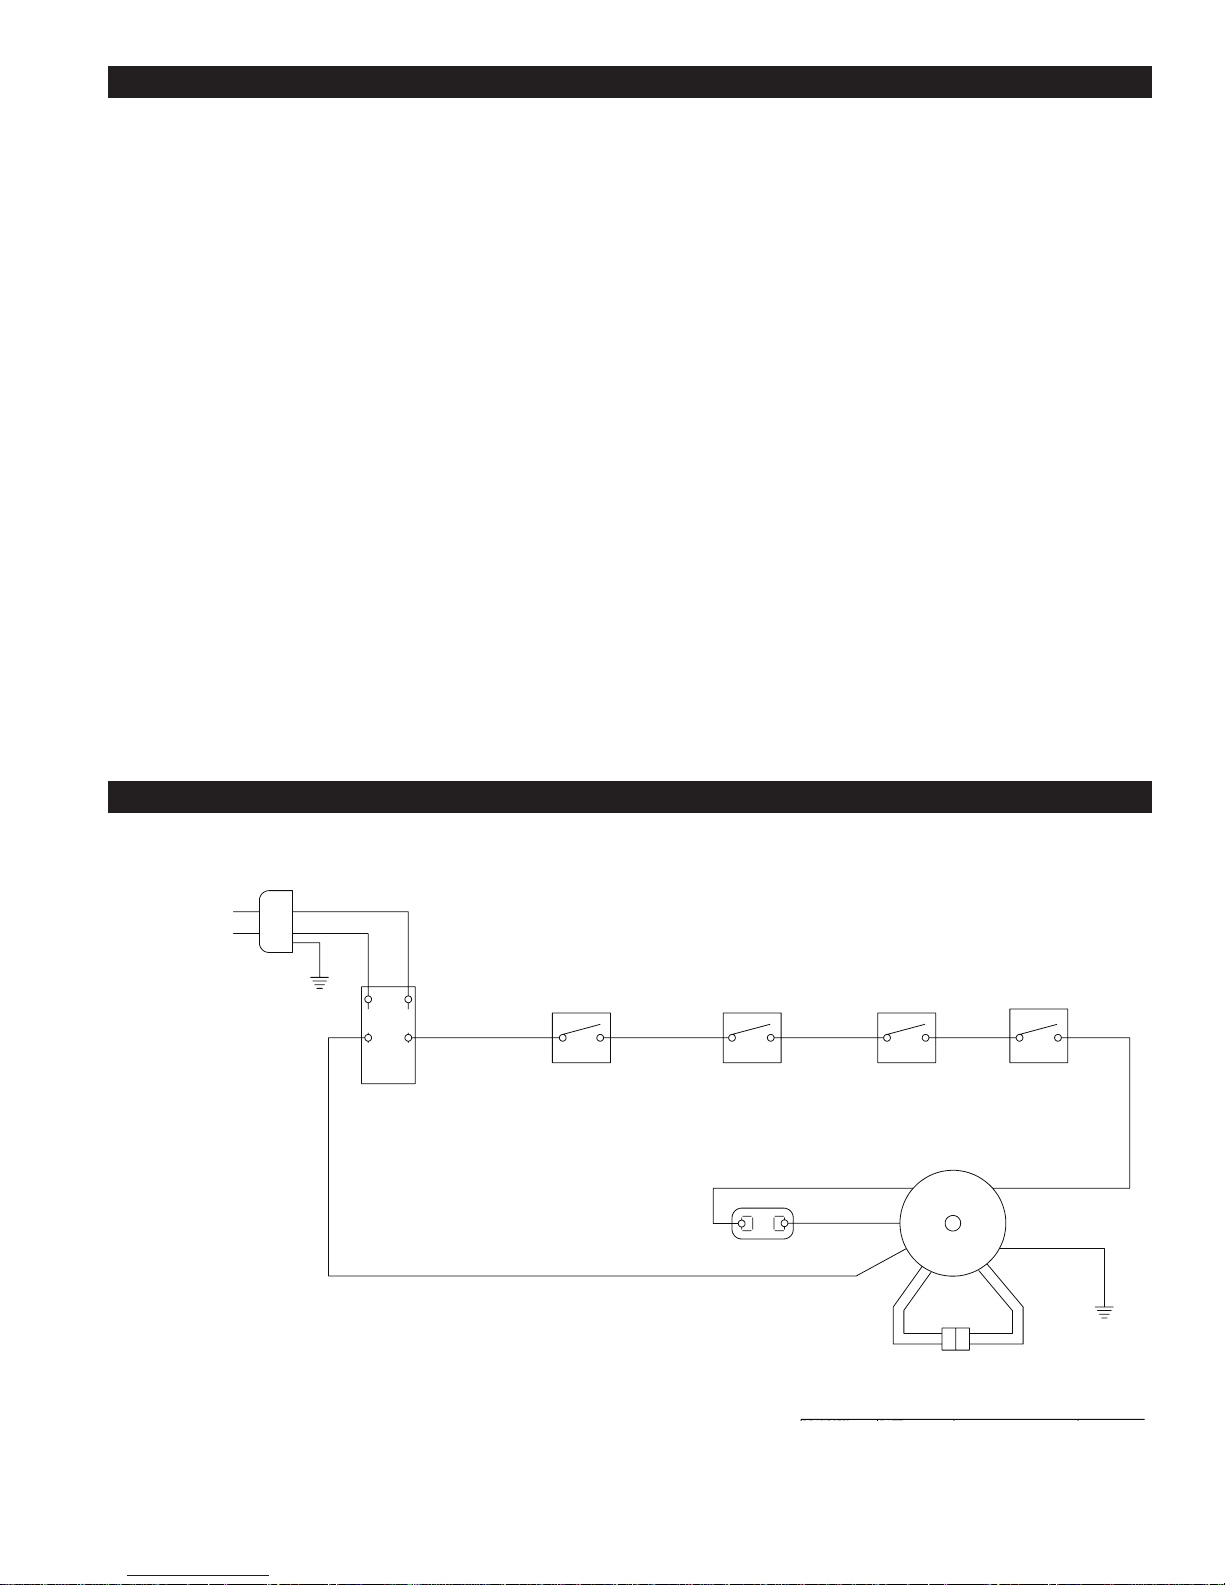
PANEL SW
FRONT ACCESS
5A@250V
FILTER SW
CARBON
5A@250V
ROTATION
ADAPTER
FILTER SW
GREASE
5A@250V
FILTER SW
PARTICULATE
5A@250V
CAPACITOR
370VAC
MOTOR, 1625RPM
1/3HP 120V
CCW 3.4A
POWER
SWITCH
DPDT 15A@120V
PLUG
120V NEMA 5-15
GND
GND
BK
BK B
K BK BK BK
BK
GR
GR
W
W
W
BR/W
BR
SPST/NO S
PST/NO SPST/NO SPST/NO
Y
PUR
YPUR
NOTES:
1. FILTER/PANEL SWITCH
ARCOLECTRIC P/N E3101AA (UL E45221/CSA LR10990)
2. MAIN POWER SWITCH
CARLINGSWITCH P/N TIGK516SBLWBL (UL LISTED/CSA APPROVED)
3. MOTOR
DAYTON P/N 3LU77 (UL RECOGNIZED/CSA CERTIFIED)
4. CAPACITOR
DAYTON P/N 2MDV9 (UL/CUL RECOGNIZED E224674)
Daily Maintenance:
1. Inspect grease drawer; empty and wash with soap and water as necessary; reinstall.
2. Clean exterior of Vent with soap and water or equivalent.
Weekly:
1. Remove front panel by grasping the two knobs on the front and pushing up until the bottom of the panel
disengages from the frame. Gently pull bottom of panel away from opening while sliding it downward.
2. Visually inspect lters.
3. If grease lter has accumulated grease, remove it and wash in pot sink or dishwasher.
4. The particulate lter may be rinsed in a pot sink.
5. Never expose the carbon lter to water!
6. Wipe any visible residue from the lter area, with a cloth dampened with soap and water or equivalent.
7. Be sure lters are dry before replacing them in the unit.
8. Reinstall front panel by reversing the above procedure.
Periodically:
1. Unplug unit from power source.
2. Remove front panel and lters as explained above.
3. Replace carbon and particulate lters when contaminant level impairs efciency.
4. Remove top air intake assembly, by unclipping both rear retaining clasps and removing grease cup, then lift
straight off.
Wipe any contaminants from inside unit with a cloth dampened with soap and water or equivalent.
5.
6. Replace top, lters, front panel, reinsert grease cup, and remember to refasten rear clips.
Wiring Diagram
2M-Z16152, Vent-Max, Countertop Ventilation System
5
Page 6

2M-4497-2 6/1312
The foregoing warranty is in lieu of any and all other warranties expressed or implied and constitutes the entire warranty.
FOR ASSISTANCE
Should you need any assistance regarding the Operation or Maintenance of any Star equipment; write, phone, fax or email our Service Department.
In all correspondence mention the Model number and the Serial number of your unit, and the voltage or type of gas you are using.
ALL:
* Pop-Up Toasters
* Butter Dispensers
* Pretzel Merchandisers
(Model 16PD-A Only)
* Pastry Display Cabinets
* Nacho Chip Merchandisers
* Accessories of any kind
* Sneeze Guards
* Pizza Ovens
(Model PO12 Only)
* Heat Lamps
* Pumps-Manual
Visit our Website at: www.star-mfg.com Email: service@star-mfg.com
THOROUGHLY INSPECT YOUR UNIT ON ARRIVAL
This unit has been tested for proper operation before leaving our plant to insure delivery of your unit in perfect condition. However, there are instances in which
the unit may be damaged in transit. In the event you discover any type of damage to your product upon receipt, you must immediately contact the transportation
company who delivered the item to you and initiate your claim with same. If this procedure is not followed, it may affect the warranty status of the unit.
LIMITED EQUIPMENT WARRANTY
All workmanship and material in Star products have a one (1) year limited warranty on parts & labor in the United States and Canada. Such warranty is limited
to the original purchaser only and shall be effective from the date the equipment is placed in service. Star's obligation under this warranty is limited to the repair
of defects without charge, by the factory authorized service agency or one of its sub-agencies. Models that are considered portable (see below) should be taken
to the closest Star service agency, transportation prepaid.
> Star will not assume any responsibility for loss of revenue.
> On all shipments outside the United States and Canada, see International Warranty.
* The warranty period for the Ultra-Max, Hot Plates, Griddles, Charbroilers is (3) years parts & labor.
* The warranty period for the Star-Max, Charbroilers, Griddles, Hot Plates, Fryers & Finishing Oven is (2) years parts & labor.
* The warranty period for the JetStar six (6) ounce & Super JetStar eight (8) ounce series popcorn machines is two (2) years.
* The warranty period for the Chrome-Max Griddles is ve (5) years on the griddle surface. See detailed warranty provided with unit.
* The warranty period for Teon/Dura-Tec coatings is one year under normal use and reasonable care. This warranty does not apply if damage occurs to
Teon/Dura-Tec coatings from improper cleaning, maintenance, use of metallic utensils, or abrasive cleaners, abrasive pads, product identiers and
point-of-sale attachments, or any other non-food object tha comes in continuous contact with the roller coating. This warranty does not apply to the
“non-stick” properties of such materials.
> This warranty does not apply to "Special Products" but to regular catalog items only. Star's warranty on "Special Products" is six (6) months on parts
and ninety (90) days on labor.
> This warranty does not apply to any item that is disassembled or tampered with for any purpose other than repair by a Star Authorized Service Center or
the Service Center's sub-agency.
> This warranty does not apply if damage occurs from improper installation, misuse, wrong voltage, wrong gas or operated contrary to the Installation and
Operating instructions.
> This warranty is not valid on Conveyor Ovens unless a "start-up/check-out" has been performed by a Factory Authorized Technician.
PARTS WARRANTY
Parts that are sold to repair out of warranty equipment are warranted for ninety (90) days. The part only is warranted, the labor to replace the part is NOT warranted.
SERVICES NOT COVERED BY WARRANTY
PORTABLE EQUIPMENT
Star will not honor service bills that include travel time and mileage charges for servicing any products considered "Portable" including items listed below.
These products should be taken to the Service Agency for repair:
1. Travel time and mileage rendered beyond the 50 mile radius limit
2. Mileage and travel time on portable equipment (see below)
3. Labor to replace such items that can be replaced easily during a daily cleaning
routine, ie; removable kettles on fryers, knobs, grease drawers on griddles, etc.
4. Installation of equipment
5. Damages due to improper installation
6. Damages from abuse or misuse
7. Operated contrary to the Operating and Installation Instructions
8. Cleaning of equipment
9. Seasoning of griddle plates
10. Voltage conversions
11. Gas conversions
12. Pilot light adjustment
13. Miscellaneous adjustments
14. Thermostat calibration and by-pass adjustment
15. Resetting of circuit breakers or safety controls or reset buttons
16. Replacement of bulbs
17. Replacement of fuses
18. Repair of damage created during transit, delivery, &
installation OR created by acts of God
* The Model 510FD, 510FF Fryer.
* The Model 526TOA Toaster Oven.
* The Model J4R, 4 oz. Popcorn Machine.
* The Model 518CMA & 526CMA Cheese Melter.
* The Model 12MC & 15MC & 18MCP Hot Food Merchandisers.
* The Model 12NCPW & 15NCPW Nacho Chip/Popcorn Warmer.
* All Hot Dog Equipment except Roller Grills & Drawer Bun Warmers.
* All Nacho Cheese Warmers except Model 11WLA Series Nacho Cheese Warmer.
* All Condiment Dispensers except the Model HPD & SPD Series Dispenser.
* All Specialty Food Warmers except Model 130R, 11RW Series, and 11WSA Series.
* All QCS/RCS Series Toasters except Model QCS3 & RCS3 Series.
* All Fast Steamer Models except Direct Connect Series.
6
2M-Z16152, Vent-Max, Countertop Ventilation System
Page 7

PARTS LIST June 17, 2012, Rev. -
Model: CV1L & CVIR Countertop Ventilation System
Part No Qty Description
2E-Z1
6138 1 Run Capacitor
2E-Z1
6139 4 Momentary Switch
2E-Z1
6140 1 On\Off Switch
2E-Z1
6144 1 Cord Connection
2E-Z1
6145 per 1ft Wiring
2E-Z1
6146 1 Connections
2E-Z1
6147 1 Power Cord, 120V, W\plug (5-15P)
2I-Z1
6142 2 Bumper
2I-Z1
6149 1 Grease Filter
2I-Z1
6150 1 Particulate Filter (
2I-Z16151 1 Carbon Filter (8 1/8 x 22 1/2 x
2M-Z16152 1 Manual
2M-Z1
6803 1 Label
2R-Z16141 4 Feet
2R-Z16143 3 Knobs
2R-Z16148 1 Hardware PKG (screws & nuts misc.)
2U-Z1
6097 1 Blower Fan & Housing
2U-Z1
6098 1 Blower Motor 120v
2V
-Z16093 1 Deck F Deck Front Assy
2V
-Z16094 1 Trunk Front Lower Assy
2V
-Z16095 1 Tray G Grease Tray
2V
-Z16096 1 Filter Panel
2V
-Z16099 1 Motor Mount
7 3/4 x 22 1/2 x 1 1/2)
3/4)
Some items are included for illustrative purposes only and in certain instances may not be available.
2M-Z16152, Vent-Max, Countertop Ventilation System
Star Manufacturing International, Inc.
7
Page 8

STAR INTERNATIONAL HOLDINGS INC. COMPANY
Star - Holman - Lang - Wells - Bloomeld - Toastmaster
10 Sunnen Drive, St. Louis, MO 63143 U.S.A.
(314) 678-6303
www.star-mfg.com
8
 Loading...