

Page 1
INSTALLATION INSTRUCTIONS
UPFLOW FILTERS
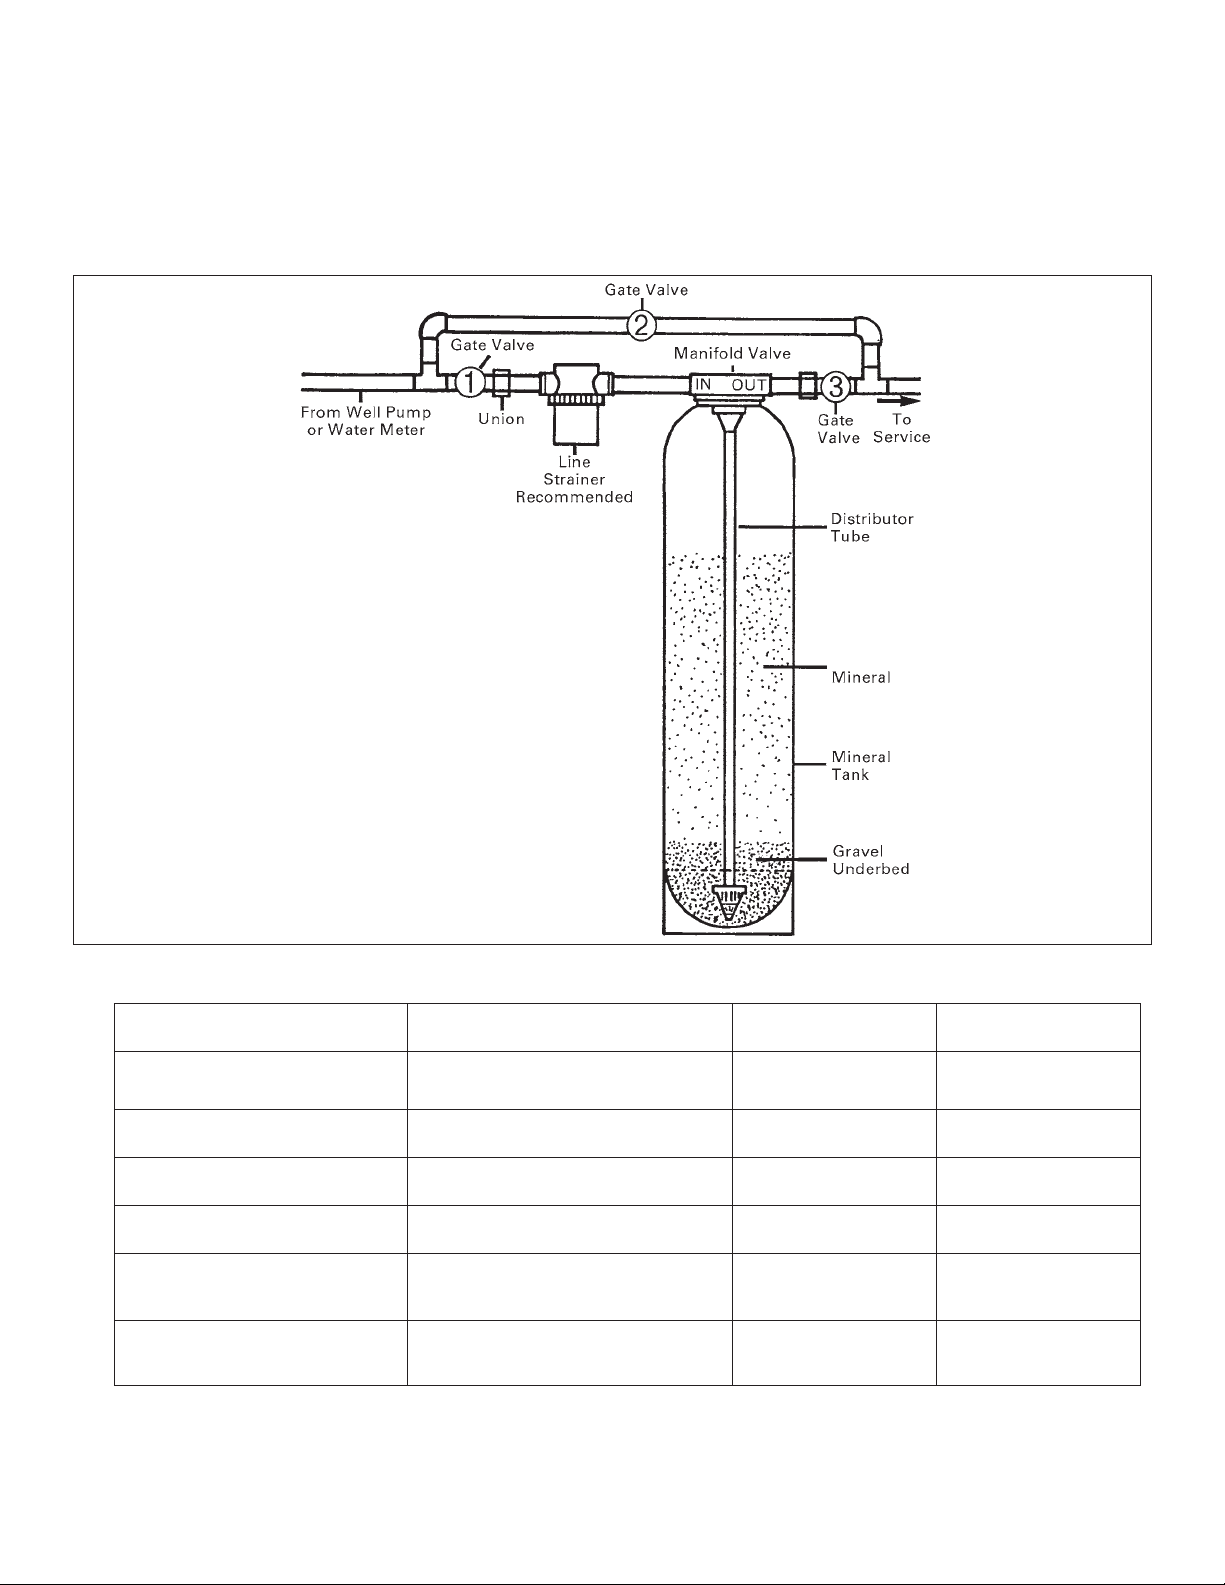
Service Position:
Valve 1 - Open
Valve 2 - Closed
Valve 3 - Open
FW0237
0611
Supersedes
0310
Bypass Position:
Valve 1 - Closed
Valve 2 - Open
Valve 3 - Closed
Illustration A
SPECIFICATION CHART A
S07UF1016BW UN10 UN20
Application
Mineral Used Carbon*1 Cu. Ft. Calcite** 1 Cu. Ft. Calcite** (2) Cu. Ft.
Gravel Underbed 20 lbs. 20 lbs. 30 lbs.
Taste, Odor, & Chlorine Removal
(Wide Range of Applications)
Acid Neutralizer Acid Neutralizer
Flow Rate (Continuous) 5 GPM 5 GPM 7 GPM
Total Space Required
(Inches)
Approx. Ship Weight
With Mineral & Gravel
*Mineral needs replaced approximately every three years with carbon and gravel underbed.
** Mineral needs replenished approximately every year with 136372 Calcite.
95 North Oak Street • Kendallville, IN 46755
10” x 46” 10” x 46” 12" x 54"
63 lbs. 133 lbs. 188 lbs.
139373
Page 2
UPFLOW FILTERS
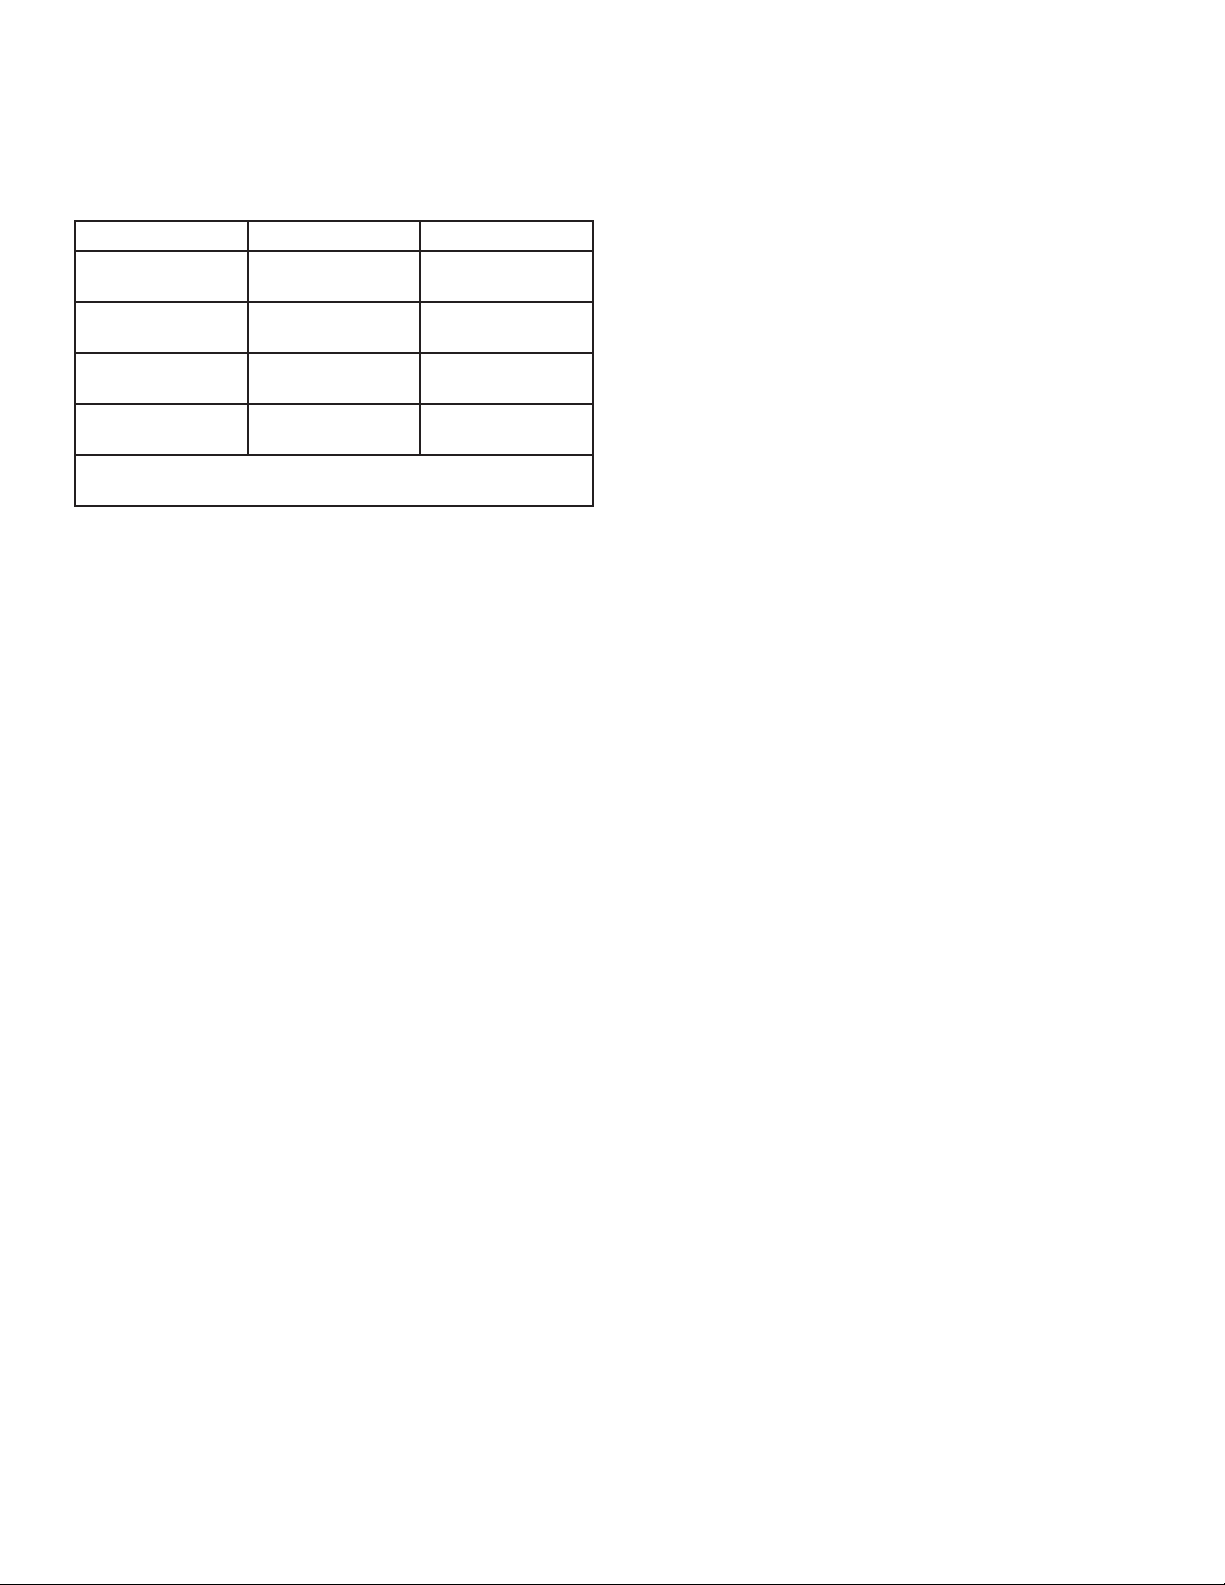
A. SPECIFICATIONS
UN10 UN20
Max. Operating
Pressure
Min. Operating
Pressure
Max. Operating
Temperature
Plumbing Port
Pipe Size
See Chart A for further specications.
Refer to Illustration A
100 psi 100 psi
20 psi 20 psi
100ºF 100ºF
3/4" NPT 1" NPT
B. UNPACKING
Check label located on outside of tank carton
against cartons received. The large carton
contains the filter tank, gravel and manifold
valve. Mineral is packaged separately.
C. LOCATION
For complete customer satisfaction, all water
in the home should be filtered, with the
exception of the outside faucets. Select a
location near the water service inlet. On a
private system, locate the filter after the pressure tank.
D. INITIAL MINERAL FILLING
E. WATER SUPPLY CONNECTIONS
Inlet and outlet connections are 3/4” NPT for
UN10 and 1" NPT for UN20 and are marked
on the valve manifold. See installation diagram. Turn off the water supply and connect
the supplied installation hoses, one end to
the manifold valve and the other end to the
plumbing. Connect the remaining optional
valves and fittings as shown in Illustration A.
Install the recommended in-line strainer. This
strainer is optional and not provided with the
equipment.
F. STARTING THE UNIT
Close by-pass valve and open outlet valve.
Also open a cold water faucet after the filter.
Remove the strainer on faucet aerator if present. Slowly open the inlet valve to fill the
mineral tank. Air will be expelled out the cold
water faucet. Allow water to run out faucet
for 10 minutes or until water clears.
CARBON UNITS ONLY: Initially, the water
will be black from the carbon fines. It takes
carbon a day or two to “wet out”, so periodic
black color may appear during this time, particularly when water is run at a high flow.
Close faucet and open inlet faucet fully.
The tank must be loaded with mineral after
being placed at the desired location. The filter
tank can be loaded through the mineral tank
plug. Place a funnel in plug hole. Pour several gallons of water in the tank. Next pour in
the mineral. The required quantity is shown
on the specification Chart A.
Fill tank with water by using a garden hose
or several buckets of water. This will permit
the mineral to become soaked while finishing the installation. Replace the tank plug.
Tighten snugly.
Replace the faucet aerator screen if removed.
Check this screen if pressure drop or low
flow is noticed during the first few days.
IMPORTANT: At start up, new mineral will
entrain air into the water stream. This can
cause the water to have a milky appearance.
This is a normal, harmless condition that
should last no more than a few days,
depending on water usage.
2
Page 3

G. REPLACEMENT OF GRAVEL AND
CARBON (S07UF1016BW ONLY)
The carbon mineral and gravel inside the
mineral tank needs to be replaced
approximately every three years. (The
plumbing that is hooked into the manifold
does not need to be disconnected for this
replacement.) To replace the old carbon and
gravel with new, proceed as follows:
1. Close the main water supply shut-off
valve.
2. Open nearest water faucet to relieve
pressure and drain plumbing lines.
4. Using a shop vac, place a tubing
extension into the mineral tank dome hole
and remove the old carbon and gravel in
the tank.
5. Using a funnel pour gravel into mineral
tank first, then pour carbon in. Clean hole
opening in tank and replace mineral tank
plug. Follow Section F: “STARTING THE
UNIT” instructions to remove initial
carbon fines.
3. Unscrew and remove the mineral tank
plug located near the top of the tank,
underneath the manifold valve.
H. REPLENISHMENT OF CALCITE
(UN10 & UN20 ONLY)
1. Follow steps 1 - 3 in Section G
2. Using a funnel pour calcite into mineral
tank . Replace mineral tank plug. Follow
Section F: “STARTING THE UNIT”
instructions
3
Page 4
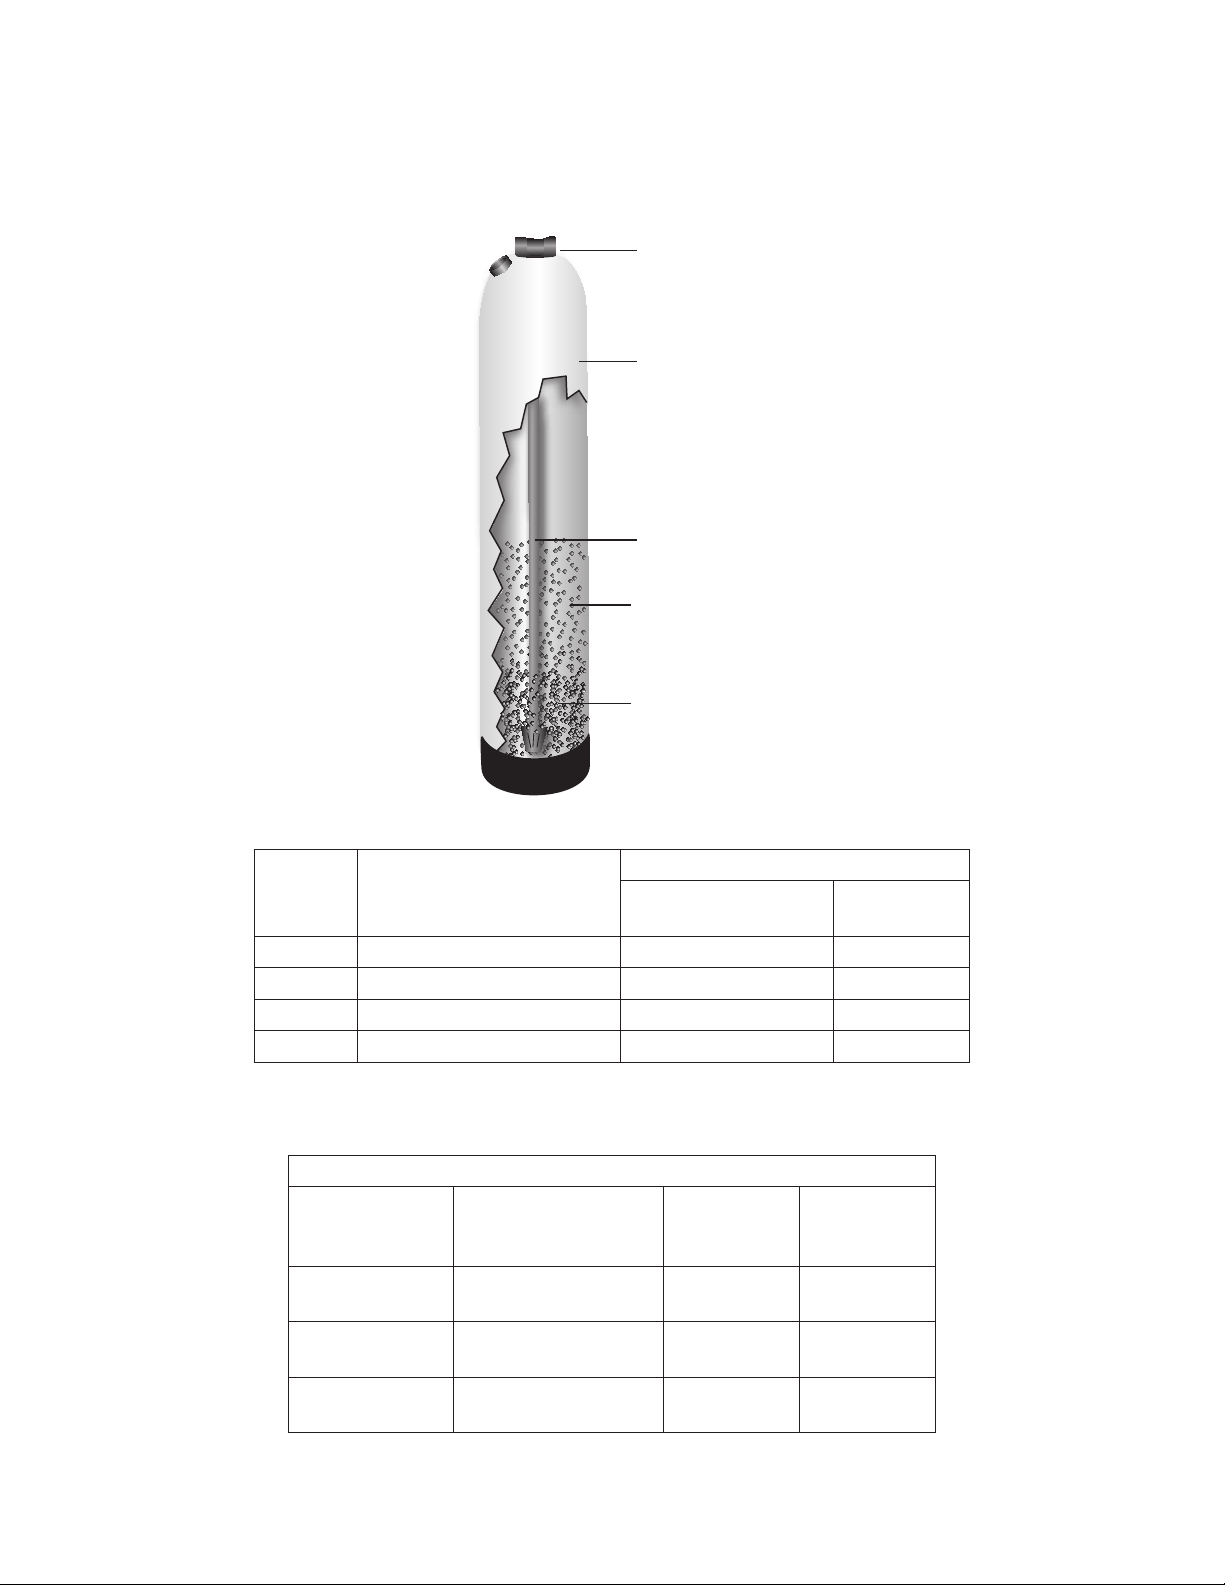
REPAIR PARTS
Upflow Filter
Mineral
Gravel
IL1036A
PART NO.
REF. NO. DESCRIPTION
1 Manifold w/Diffuser Basket 136143 023486
2 Mineral Tank w/Foot 023320 023491
3 Distributor Tube 134806 023488
* Installation Hose 139371 N/A
* Not Shown
MINERAL ORDERING INFORMATION
Filter Model No. Gravel Required
S07UF1016BW
UN10
UN20
Figures in parenthesis represent quantities required to order.
20 lbs.
135523 (1)
20 lbs.
135523 (1)
30 lbs.
023529 (1)
S07UF1016BE
UN10
Carbon
Mineral
Required
1 Cu. Ft.
135516 (1)
N/A
N/A
Calcite
Mineral
Required
1 Cu. Ft.
136372 (2)
1 Cu. Ft.
023357 (1)
UN20
N/A
4
 Loading...