

Page 1
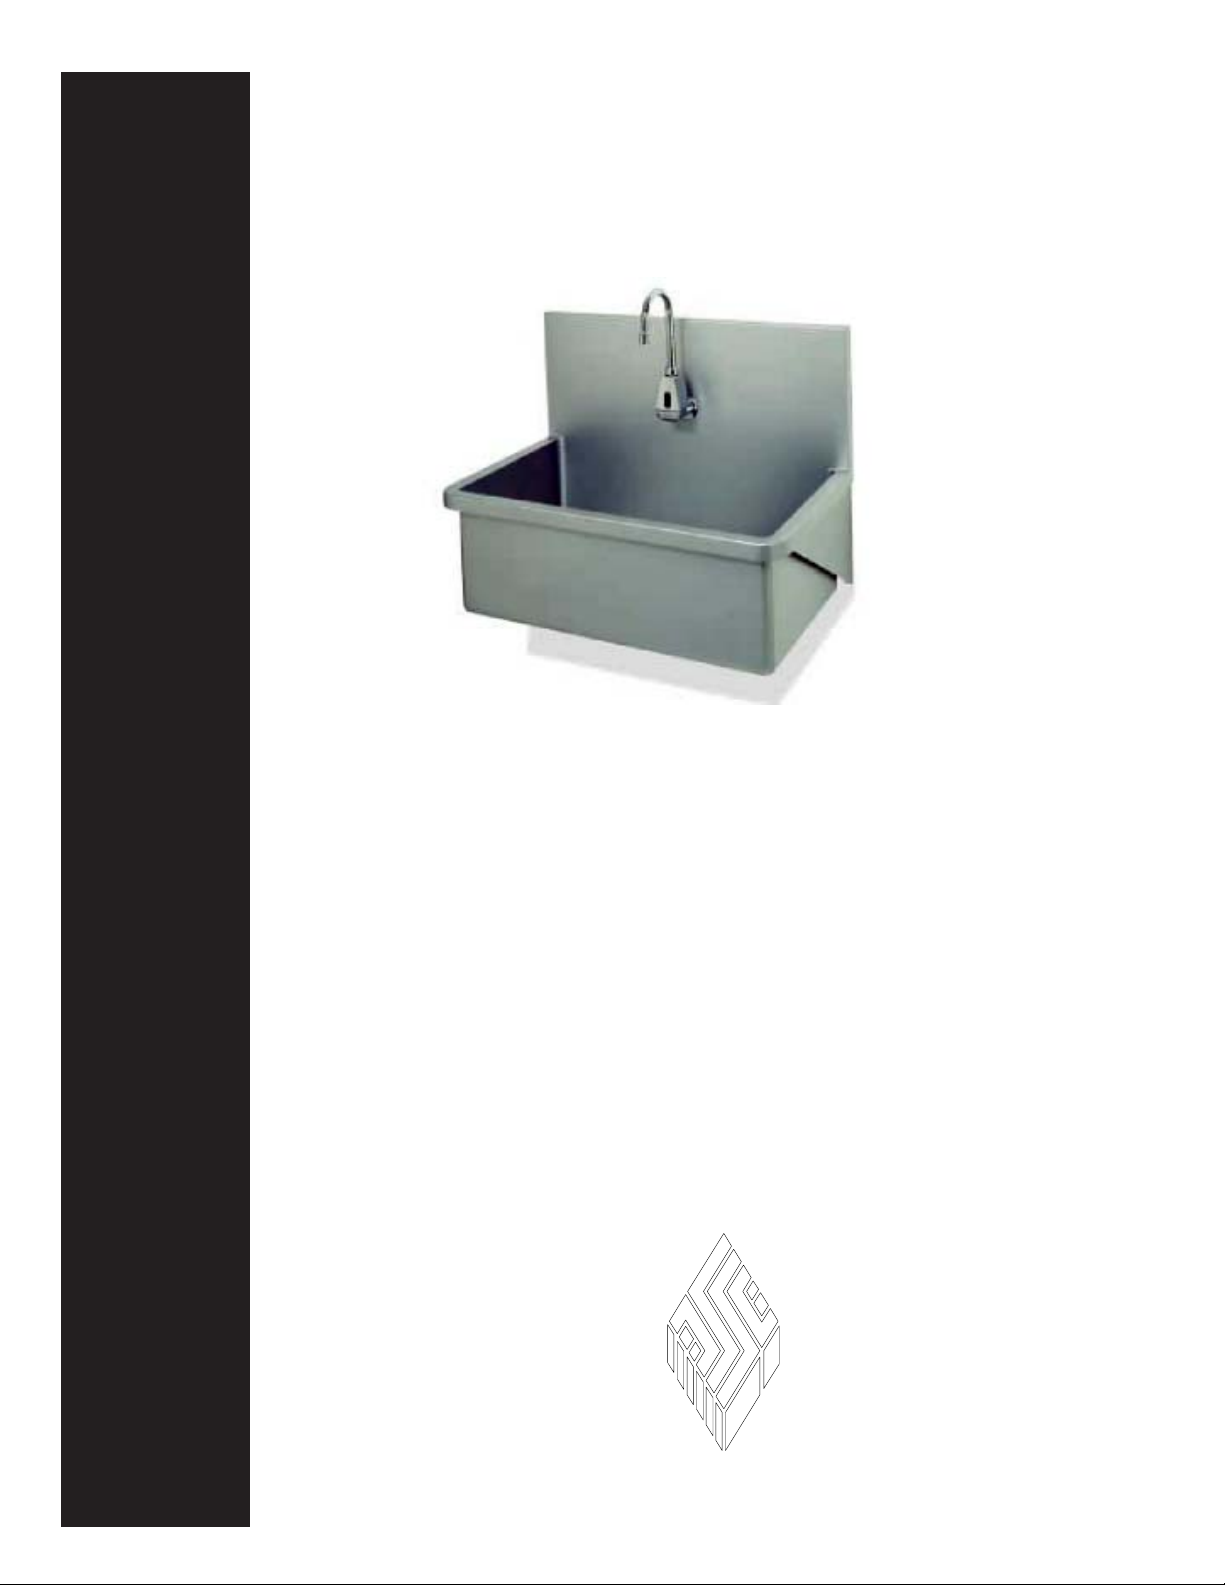
Single-Station
Surgeon Scrub Sink
Owner’s Manual
New Model Number: 13320-00-EPDMCX
Former Model Number: 102980
Heavy gauge stainless steel
Heli-arc welded for superior strength
Rounded corners for enhanced cleanliness
Uniform, non-glare finish
SSCI
Wheeling, IL 800 323 7366
Form No. 702712 02/04
Page 2

Owner’s Manual
Table of Contents
General Information ...................................................................................... 3
Introduction .......................................................................................................................... 3
About this Manual ................................................................................................................ 3
Information and Safety Notices ............................................................................................. 4
Notes ....................................................................................................................... 4
CAUTIONS ............................................................................................................ 4
Model Numbers ................................................................................................................... 4
Available Accessories ........................................................................................................... 5
Gooseneck Wall-mounted Faucets ............................................................................ 5
Faucet Valves ........................................................................................................... 5
Basket Strainer Drain Cover ..................................................................................... 5
Parts Ordering Procedure ..................................................................................................... 6
Care and Cleaning of Stainless Steel ...................................................................................... 6
Introduction .............................................................................................................. 6
Cleaning and Cleansers ............................................................................................. 6
Deodorizing Agents, Disinfectants and Sanitizers ........................................................ 7
Effect on Warranty .................................................................................................... 7
Cleaning Requirements .......................................................................................................... 7
Suburban Surgical Company Contact Information .................................................................. 8
Warranty .............................................................................................................................. 8
Installation ...................................................................................................... 9
General ................................................................................................................................9
Pre-Installation Preparation ................................................................................................... 9
Installation Procedures .......................................................................................................... 9
Un-packing and Inspection ....................................................................................... 9
Parts Included .......................................................................................................... 9
Tools and Supplies Required ................................................................................... 10
Installation Sequence .............................................................................................. 10
Determine the Sink Location ................................................................................... 11
Establish the Plumbing Dimensions .......................................................................... 11
Finish the Wall ........................................................................................................ 12
Install the Sink ........................................................................................................ 12
Install Plumbing Fixtures .......................................................................................... 14
Care & Cleaning .......................................................................................... 14
Introduction ........................................................................................................................ 14
Cleaning Procedures ........................................................................................................... 14
© Copyright 2004 by Suburban Surgical Co., Inc. All rights reserved.
No part of this document may be reproduced or utilized in any form or by any means, electronic or mechanical, including
photocopying, recording, or by any information storage and retrieval system without written permission.
Inquiries should be addressed to Suburban Surgical Co., Inc.
Wheeling, Illinois 60090, USA
2
SSCI - Suburban Surgical Company, Inc.
Page 3

General Information
Single-Station Surgeon Scrub Sink
Introduction
About this Manual
A clean surgical scrub area is an essential part of any sanitary,
bacteria-free procedure. SSCI makes it easy for you to scrub up
with this top-quality Single-Station Surgeon Scrub Sink. The sink
features a 10.50-in. (26.67 cm) deep tub, a 12-in. (30.48 cm) high
backsplash, and rounded corners to prevent the accumulation of
dirt and debris.
Smooth, easy to clean radius bends are present on all interior
surfaces, and the continuous rim on three exterior sides adds
structural strength. The sink is made of Type 304 stainless steel,
features a uniform, non-glare finish, and is heli-arc welded for long
life and durability.
SSCI offers a selection of faucets and valves to suit your individual
preferences. Take your choice of knee-action or foot-pedal faucet
valves to turn water on and off without contaminating your hands.
Faucets with electronic on/off sensors are also available for even
greater convenience and control.
Every attempt has been made to insure that the information in this
manual is correct and complete. SSCI, however, always welcomes
our customer’s suggestions for improvements to our products and
associated publications.
Form No. 702712 February, 2004
3
Page 4

Owner’s Manual
Information and
Safety Notices
CAUTIONS
Notes
In this manual you will find text under the headings Note:, and
CAUTION:.
Under the Note: headings, you will be given additional information
pertinent to the subject discussed in that paragraph or procedural
step.
Example:
Hold one side bracket in place against the wall and up
under the sink rim, and mark its location on the wall.
Note: The side brackets are intended to be load-bearing
and must make firm contact with the underside of the sink
rim to give proper support.
Under the CAUTION: heading, you will be alerted to potentially
hazardous conditions which, if ignored or mishandled, could result
in minor injury to yourself, or minor damage to the equipment.
Model Numbers
Example:
CAUTION: Unpacking and assembling the
scrub sink is not difficult. The sink is not
heavy, however, handling it can be awkward
for one person. We recommend that
unpacking and installation be done by at least
two people.
The model numbers for the single-station surgeon scrub sink are:
New Model Number: 13320-00-EPDMCX
Former Model Number: 102980
4
SSCI - Suburban Surgical Company, Inc.
Page 5

Single-Station Surgeon Scrub Sink
Available
Accessories
Gooseneck
Wall-mounted Faucets
noitpircseD rebmuNtraPweN rebmuNtraPremroF
evlavrosnescirtcele
evlavrosnes
The following accessories are available for use with the SSCI
single-station surgeon scrub sink. Further information on SSCI
products and accessories can be found in our current product
catalog. Order a catalog free of charge through SSCI Customer
Service at 1-800-323-7366.
SSCI standard gooseneck faucets operate with either knee-action
or foot-pedal valves. For even greater convenience, choose our
gooseneck faucet with battery-operated or electric sensor valve.
Both include an aerator and all hardware needed for installation.
detarepo-yrettabhtiwtecuafkcenesooG
cirtceleCAV021htiwtecuafkcenesooG
tecuafdetnuom-llaw,kcenesooG
Z-ZZZZ-ZZ-R-Z-346420385420
Z-ZZZZ-ZZ-R-Z-446420485420
Z-ZZZZ-ZZ-R-Z-246420306420
Table 1. Accessories - Faucets
Faucet Valves
noitpircseD rebmuNtraPweN rebmuNtraPremroF
evlavnoitca-eenK
evlavladep-toof,detnuom-llaW
Table 2. Accessories - Valves
Basket Strainer Drain
Cover
noitpircseD rebmuNtraPweN rebmuNtraPremroF
leetssselniats,retemaid.ni-5.3
These valves allow you to turn hot, cold or mixed water on and off
without risking contamination by using your hands.
Z-ZZZZ-ZZ-Z-Z-546420255420
Z-ZZZZ-ZZ-Z-Z-646420355420
Z-ZZZZ-ZZ-Z-Z-746420055420
Table 3. Basket Strainer Drain Cover
Form No. 702712 February, 2004
5
Page 6

Owner’s Manual
Parts Ordering
Procedure
Care and Cleaning of
Order new equipment, accessories and/or replacement parts from
your local dealer, or directly through SSCI Customer Service. You
can order by mail, telephone or fax. Refer to Contact Information
on Page 8 for address, telephone and fax numbers. When ordering
parts, please provide the following information:
Your name
Company name
Company account number
Your telephone number
Shipping address
Billing address (if different from shipping address)
Names, part numbers and quantities of items being
ordered
Credit card number and expiration date, or other
payment information
Preferred method of shipment
Information on whether the items are required on
a normal or urgent basis
Stainless Steel
Introduction
Cleaning and
Cleansers
Stainless steel is steel alloyed with chromium to make it highly
resistant to stain, rust and corrosion. Note: This does NOT mean
that stainless steel will never rust or corrode. Science has not yet
developed a steel which is completely stainless or corrosion
PROOF.
The type of stainless steel and finish selected by SSCI for the
single-station surgeon scrub sink is the best available for the
intended use.
The basic rule of thumb is to use the mildest cleaning agent that will
do the job effectively. After cleaning, always rinse thoroughly with
clear water, and dry completely. Frequent cleaning will prolong the
service life of stainless steel equipment and will help maintain a
bright, pleasing appearance.
Ordinary deposits of waste and fluids can usually be removed with
soap and water. More stubborn deposits or tightly adhering debris
may require harder scrubbing and possibly the use of commercial
cleaning products acceptable for use on metal surfaces. When using
any cleaning agent, rub in the direction of the polish lines or “grain”
of the metal. For high luster finishes, clean soft cloths or pads should
be used.
6
SSCI - Suburban Surgical Company, Inc.
Page 7

Single-Station Surgeon Scrub Sink
If especially rough cleaning is necessary, use “stainless steel” wool,
nylon or plastic scrubbers. Test these scrubbers in an inconspicuous
area first to be sure they do not mar or scratch the stainless steel
finish.
Minor scale build-up and some hard water spotting may be
removed by washing with vinegar, followed by a neutralizing rinse
with clear water and a thorough drying with a soft cloth. For heavy
deposits of scale, 5% oxalic acid (use warm), 5-15% sulfamic acid,
or 5-10% phosphoric acid may be used. Always follow with a
neutralizing rinse of clean water and a thorough drying.
Deodorizing Agents,
Disinfectants and
Sanitizers
The large selection of brands and combinations of chemicals
available for deodorizing, disinfecting and sanitizing is staggering.
Select one or more agents for use in your facility only after weighing
all the benefits claimed by each product. Often this choice is made
without adequate consideration of the effects these agents may
produce on equipment or furnishings.
CAUTION: Before selecting a chemical to employ in
your facility, review label statements regarding use
with metals (stainless steel). Always consult the
chemical supplier if there are any doubts.
Avoid prolonged use of chlorides (such as chlorine bleach),
bromides, iodides and thiocyanates on stainless steel surfaces as
these chemicals will cause pitting, corrosion and metal discoloration.
Allowing salty solutions to evaporate and dry on stainless steel may
also contribute to corrosive conditions.
In summary, select chemical deodorizers, disinfectants and/or
sanitizers only after weighing all possible benefits and known
adverse effects.
Effect on Warranty
Cleaning
Requirements
Form No. 702712 February, 2004
The warranty for this product is void if the care and
cleaning instructions provided in this manual are not
followed.
Clean the scrub sink exactly in accordance with the cleaning
instructions provided on Page 14 of this manual.
Failure to follow these instructions can void your warranty.
7
Page 8

Owner’s Manual
Suburban Surgical
Company Contact
Information
Warranty
SSCI Customer Service can be contacted via mail, telephone or
fax. The department is available from 8:30am to 5:00pm, Central
Time, Monday through Friday. Closed holidays.
Address: Suburban Surgical Co., Inc.
275 Twelfth Street
Wheeling, Illinois 60090
Telephone: Illinois - (847) 537-9320, ext. 3518
Toll Free - 1-800-323-7366
Fax: (847) 537-9061
Web: www.suburbansurgical.com
Suburban Surgical Company, Inc. warrants the original purchaser
that our products are of the highest standards in material and
workmanship. Our stainless steel components are guaranteed to last
a lifetime assuming they are used as intended, properly maintained
and cared for. Mechanical, electrical, electronic, hydraulic, and any
product’s devices carry a one year warranty.
Items purchased by Suburban Surgical Company, Inc. from other
manufacturers and incorporated into our equipment are covered by
the respective manufacturer’s warranties.
Warranties will not apply if it is determined by Suburban Surgical
Company, Inc. that the equipment became defective due to an
accident, misuse, abuse, improper maintenance or alteration.
Warranty freight charges are covered for the first year only.
8
SSCI - Suburban Surgical Company, Inc.
Page 9

Installation
Single-Station Surgeon Scrub Sink
General
Pre-Installation
Preparation
Installation
Procedures
This section guides you in installing the SSCI single-station surgeon
scrub sink. If you have problems or require additional assistance,
please feel free to call SSCI Customer Service at
1-800-323-7366.
On new construction, we recommend that, prior to finishing the
wall, you exactly determine where on the wall the sink will be
located. Back up the mounting screw locations with 2” x 6”s.
On an existing wall, you may want to open the wall and install these
supports. Note: These steps are not required for masonry walls.
Use lag screws for mounting into wood, or toggle bolts for
mounting into block.
CAUTION: Unpacking and installing the scrub sink is
not difficult. The sink is not heavy, however, handling
it can be awkward for one person. We recommend
that unpacking and installation be done by at least
two people.
Un-packing and
Inspection
Parts Included
If the shipping container appears damaged in any way, contact the
shipping company immediately. Save all damaged packing materials
to assist in proving liability for damage.
Carefully inspect your scrub sink while you unpack it. If any
damage is noted, or if parts appear to be missing, call SSCI
Customer Service at 1-800-323-7366.
Four parts are included in the shipment (Figure 1):
Single-station surgeon scrub sink P/N 207024
Top bracket P/N 601065
Right side bracket P/N 600431
Left side bracket P/N 601155
Note: Sink-to-wall mounting hardware is not included
Form No. 702712 February, 2004
9
Page 10

Owner’s Manual
Single-Station Surgeon Scrub Sink
Right Side
Bracket
Left Side
Bracket
Top
Bracket
Tools and Supplies
Required
Installation Sequence
Figure 1. Parts Included with Single-Station Surgeon
Scrub Sink
You will need the following tools and supplies to install your scrub
sink.
Pen or pencil
Tape measure
Carpenter’s level
Power drill with appropriate size bits
Wrenches or screwdrivers for mounting bolt/screws
Mounting hardware suitable for wall
We recommend the following installation sequence be followed:
1. Open the wall as necessary to plumb in the faucet, drain
and valve (This step is only required on other than new
construction.)
2. Determine exactly where you want the sink to be mounted.
3. Mark the required plumbing dimensions.
4. Install the plumbing piping (for faucet, drain, valve)
5. Finish the wall.
6. Install the sink.
7. Finish installation and connection of the faucet, drain and
valve.
10
SSCI - Suburban Surgical Company, Inc.
Page 11
Single-Station Surgeon Scrub Sink
Determine the Sink
Location
Establish the Plumbing
Dimensions
Rim of
Sink
Mounting Wall
Height of Rim
Above Floor
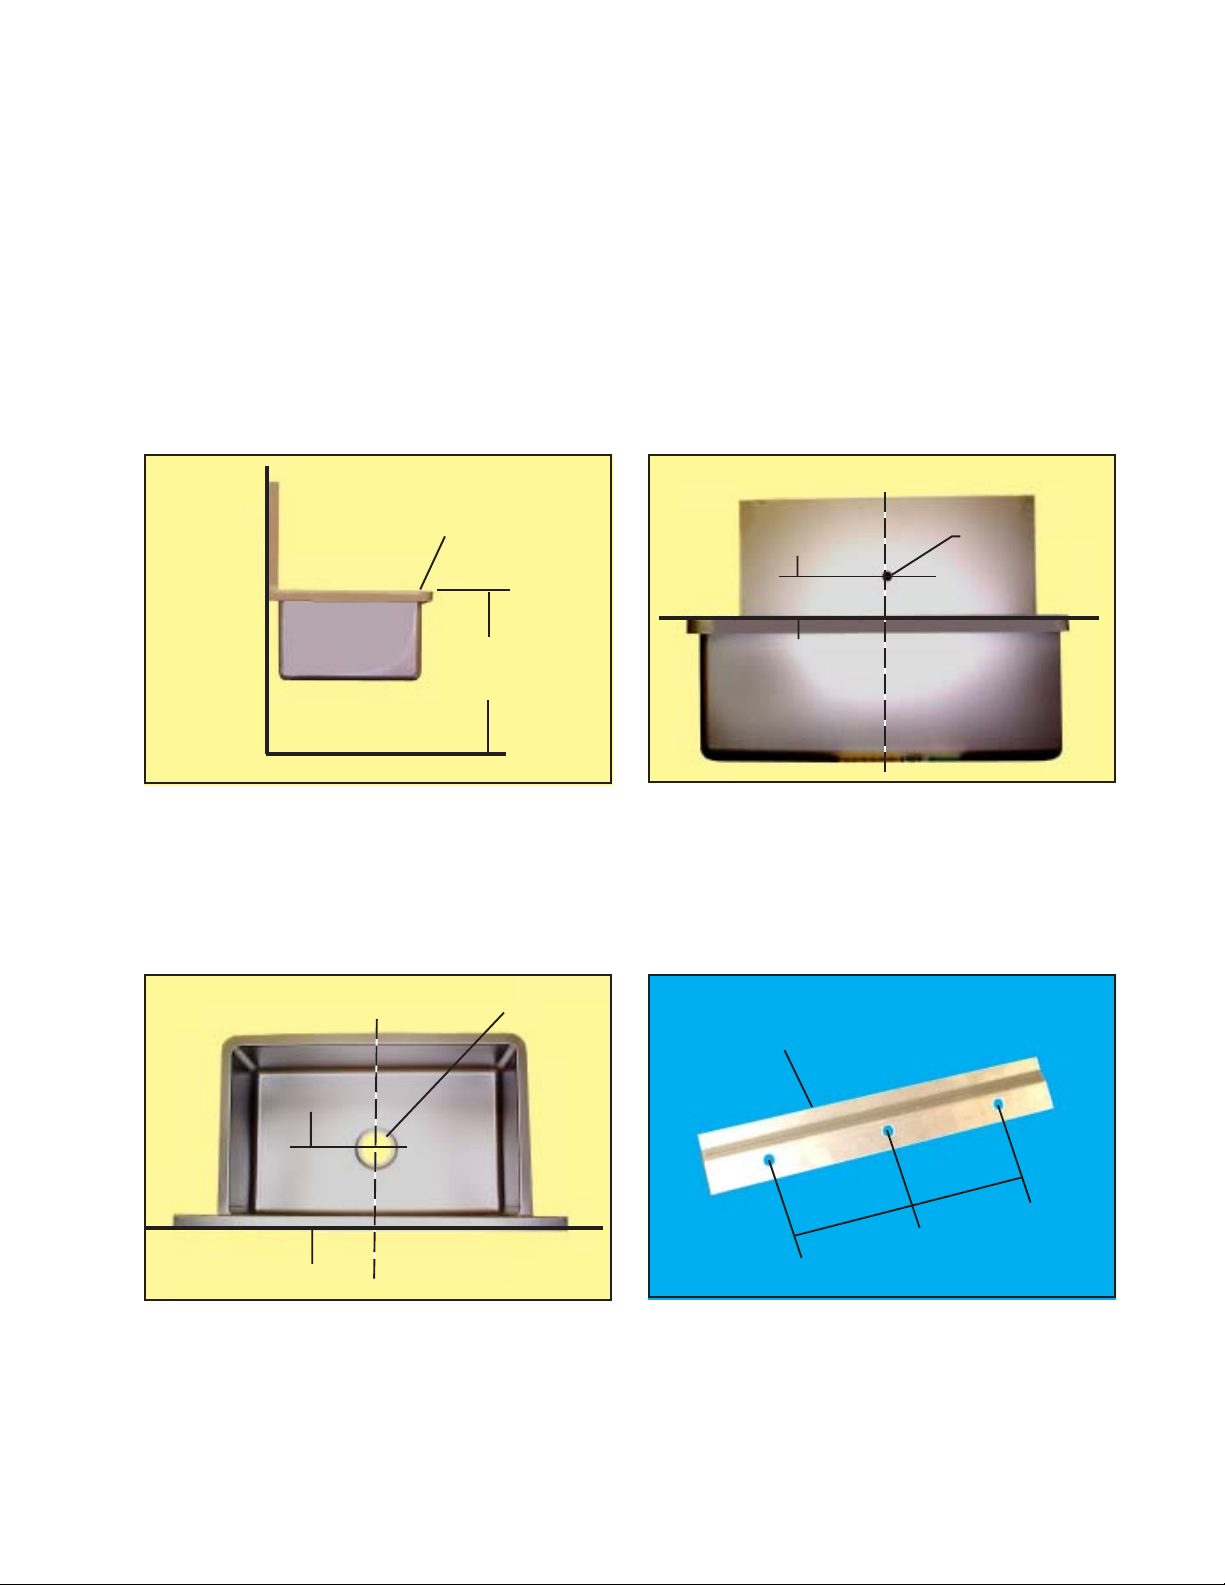
Determine exactly where you want the sink to be mounted. Find the
vertical centerline and decide how high above the floor you want the
rim of the sink to be (Figures 2 and 3). This is an important step as
other plumbing dimensions will be determined from these figures.
A rim height of 36 to 40-ins. (approximately 91.5 to 101.5 cm) is
usually satisfactory, however, you should select a height that you
find comfortable.
Refer to Figure 3 for faucet plumbing dimensions. Refer to the
installation instructions packed with your faucet.
CL
1” dia.
4.0”
Rim
Floor
Figure 2. Sink Mounting Height
CL
8.75”
Figure 3. Faucet Piping Dimensions
1. Pipe in the water line for the faucet. The faucet is centered
on the backsplash and 4-in. (10.16 cm) above the rim. The
hole is 1-in. (2.54 cm) in. diameter.
3.5” dia.
Wall
Raised Lip Fits
Under Sink Top
4”
4”
Figure 4. Top View of Sink Showing
Drain
Form No. 702712 February, 2004
Figure 5. Top bracket
11
Page 12
Owner’s Manual
2. Pipe in the drain line (Figure 4). Remember to leave space
under the sink for the foot or knee-activated valve as
necessary. The drain aligns vertically with the faucet, and is
about 8.75-in. (22.23 cm) out from the wall. The drain hole
is 3.5-in. (8.89 cm) in diameter.
Finish the Wall
Install the Sink
After all plumbing is complete, the wall can be finished. Be sure to
check Pre-Installation Preparation on Page 9 for information on
backing up the sink mounting screw locations (not required for
masonry walls).
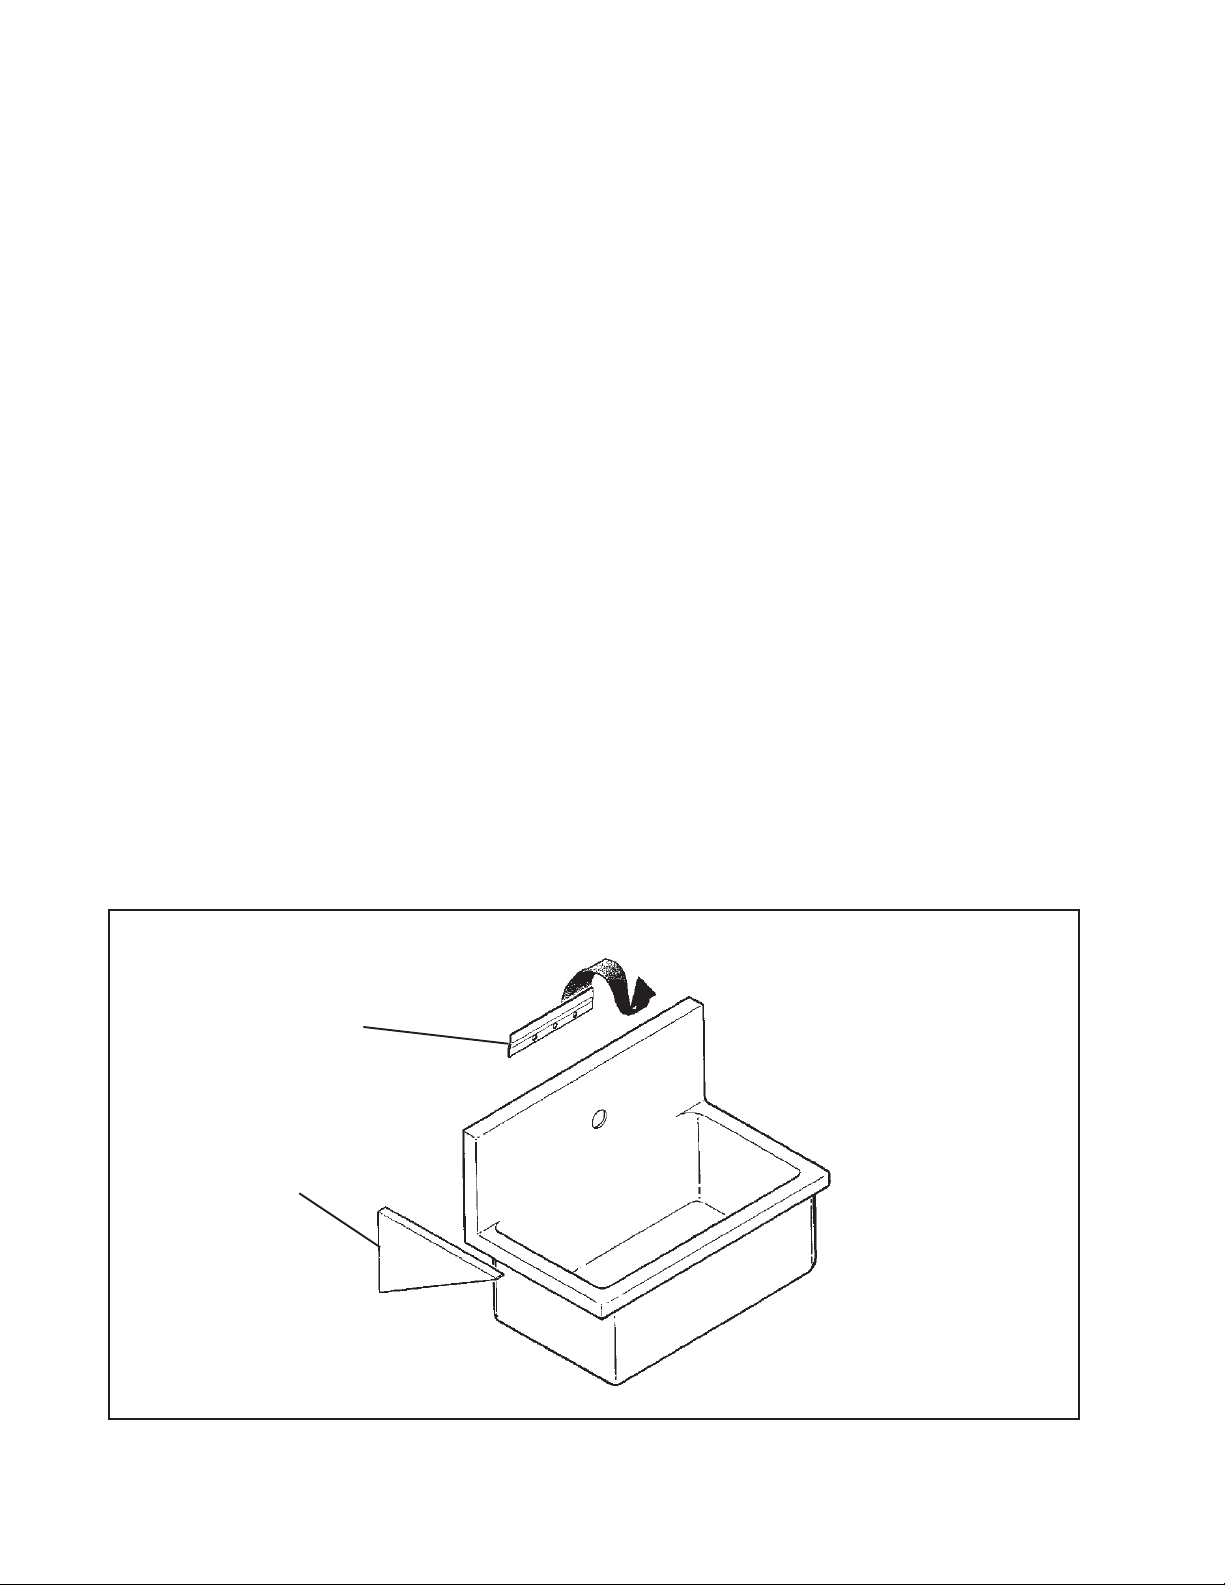
1. Hold the sink in place with the faucet hole aligned with the
piping and make sure the sink is level.
2. Measure 12-ins. up from the sink rim and mark a horizontal
line on the wall. Make sure the line is level.
3. Note the location of the vertical centerline.
4. Align the top edge of the top bracket with the horizontal
line and center it on the vertical line.
5. Hold the top bracket in place, make sure it is level, and
mark the centers of the three mounting holes on the wall
(Figure 5).
Top
Bracket
Side
Bracket
Figure 6. Sink Installation Plan
12
SSCI - Suburban Surgical Company, Inc.
Page 13

Single-Station Surgeon Scrub Sink
6. Drill these three holes into the wall.
7. Mount the bracket to the wall.
8. Hang the sink onto the bracket and make sure it is centered
and level.
Note: The side brackets are not symmetrical. Mount them so that
the flanges on the top and rear face inward.
9. Hold one side bracket in place against the wall and up
under the sink rim, and mark its location on the wall.
Note: The side brackets are intended to be load-bearing
and must make firm contact with the underside of the sink
rim to give proper support.
10. Repeat Step 9 with the other side bracket.
11. Remove the sink from the wall.
12. Hold each side bracket to the markings you made on the
wall, and mark the locations of the two mounting holes.
13. Drill these holes onto the wall.
14. Mount both side brackets to the wall.
15. Hang the sink onto the top bracket and side
brackets.
Inside
Face
Outside
Face
Form No. 702712 February, 2004
Mounting Hole
(2 each bracket)
Figure 7. Side Brackets
13
Page 14

Owner’s Manual
Install Plumbing
Fixtures
Care & Cleaning
Introduction
Cleaning Procedures
Install the faucet, valve and drain according to the instructions
packed with the items.
Installation is complete. Your single-station
surgeon scrub sink is now ready for use.
You will no doubt want to clean your scrub sink frequently.
Maintaining high standards of sanitation will be an important priority
for your facility.
Rinse the sink with clear water and dry thoroughly with clean, soft
cloths.
Ordinary deposits of waste and fluids can usually be removed with
soap and water. Stubborn deposits may require scrubbing with
“stainless steel” wool, nylon or plastic scrubbers and/or the use of
commercial cleaning products. Always scrub in the direction of the
“grain” of the metal. Rinse with clear water and dry thoroughly with
clean, soft cloths.
Minor scale build-up and some hard water spotting may be
removed by washing with vinegar, followed by a neutralizing rinse of
clear water and a thorough drying with clean, soft cloths.
For heavy deposits of scale, 5% oxalic acid (use warm), 5-15%
sulfamic acid, or 5-10% phosphoric acid may be used. As always,
rinse with clear water and dry thoroughly with clean soft cloths.
Avoid prolonged use of chlorides (such as chlorine bleach),
bromides, iodides and thiocyanates. Never allow salty solutions to
dry on the stainless steel.
CAUTION: The warranty for this product is void if the
care and cleaning instructions provided in this
manual are not followed.
14
SSCI - Suburban Surgical Company, Inc.
Page 15

Notes:
Single-Station Surgeon Scrub Sink
Form No. 702712 February, 2004
15
Page 16

Owner’s Manual
For more information on SSCI’s fine line of products and
accessories, talk to your SSCI sales representative.
16
SSCI
Suburban Surgical Company, Inc.
275 Twelfth Street Wheeling, IL 60090
Phone: (847) 537-9320 Fax: (847) 537-9061
Toll Free: 1-800-323-7366 Web: www.suburbansurgical.com
Form No. 702712 02/04
SSCI - Suburban Surgical Company, Inc.
 Loading...