

Page 1
USB Web Phone
User‘s Guide
Bedienungsanleitung
Mode d‘emploi
Instrucciones de manejo
Manuale di istruzioni
Page 2

234
Page 3

Page 4

Wichtig!
Bevor Sie dieses Produkt verwenden, lesen Sie bitte die Sicherheits- und Warnhinweise im Handbuch. Bewahren Sie dieses
Handbuch auf, um zu einem späteren Zeit
-
punkt darauf zurückgreifen zu können.
Haftungsausschluss
Die Jöllenbeck GmbH übernimmt keine
Haftung für Schäden am Produkt oder
Verletzungen von Personen aufgrund von
unachtsamer, unsachgemäßer, falscher
oder nicht dem vom Hersteller angegebe
nen Zweck entsprechender Verwendung
des Produkts.
Fehlerbeseitigung/Reparatur
Versuchen Sie nicht, das Gerät selbst zu
warten oder zu reparieren. Überlassen Sie
jegliche Wartungsarbeiten dem zuständi
gen Fachpersonal. Nehmen Sie keine Ver
änderungen am Gerät vor. Dadurch verlie
ren Sie jegliche Garantieansprüche.
Feuchtigkeit/Wärmequellen
Verwenden Sie das Gerät nicht in der
Nähe von Wasser (z. B.Waschbecken,
Badewannen etc.), und halten Sie es von
Feuchtigkeit, tropfenden oder spritzenden
Flüssigkeiten sowie Regen fern. Setzen
Sie das Gerät keinen hohen Temperatu
-
ren, hoher Luftfeuchtigkeit oder direktem
Sonnenlicht aus.
Reinigung
Verwenden Sie zum Reinigen des Gerätes
bitte ein weiches, trockenes Tuch. Lassen
Sie das Gerät nie mit Benzol, Verdünner
oder anderen Chemikalien in Berührung
kommen.
Standort
Legen Sie das Gerät bei Nichtgebrauch
auf eine stabile Unterlage, um zu ver
hindern, dass es herunterfällt und dabei
Personen oder das Gerät zu Schaden
kommen.
Bestimmungsgemäßer Gebrauch
Das Gerät dar f nur mit den dafür
vorgesehenen Originalteilen ver wendet
werden.
Das Produkt darf nur in geschlossenen
und trockenen Räumen verwendet wer
-
den.
Die bestimmungsgemäße Verwendung
beinhaltet das Vorgehen gemäß der In
-
stallationsanleitung. Für Schäden, die
durch unsachgemäßen Gebrauch ent
-
stehen, übernimmt der Hersteller keine
Haftung.
S
ICHERHEITSHINWEISE
Page 5

5
Einleitung
Vielen Dank, dass Sie sich für das
USB Phone entschieden haben. Nun
können Sie in Ihrem bevorzugten VoIPProgramm ohne Maus und Tastatur
navigieren und wie mit einem normalen
Telefon wählen und Anrufe annehmen
oder tätigen.
Produkteigenschaften
USB- Phone für das echte Telefon-
Feeling
Großes Display mit
Gesprächsanzeige, Uhrzeit,
Wochentag und Datum
Tasten für Gesprächsaufbau,
Abbrechen und Menünavigation
Ziffernblock mit # und * Taste
LED zeigt Gesprächsannahme an
Navigation über das USB-Phone
ohne Maus und Tastatur
1,40m langes Kabel
Anschluss an den PC
Schließen Sie den USB-Stecker
des USB Phones an eine freie USBSchnittstelle an Ihrem Computer an.
Windows erkennt das Gerät automa
tisch. Windows forder t Sie ggf. auf, die
Windows-Installations-CD einzulegen.
Folgen Sie dieser Anweisung, bevor
Sie die Treiber installieren.
Installation unter Windows
2000/XP
Legen Sie die mitgelieferte Treiber-
CD in Ihr CD-ROM-Laufwerk. Das
Setup- Menü startet automatisch (ist
dies nicht der Fall, klicken Sie im
Windows Explorer auf Ihr CD-ROMLaufwerk und doppelklicken Sie auf
die Datei setup.exe).
Klicken Sie auf die Schaltfläche
Driver / Treiber. Der InstallShield
Wizard führt Sie nun durch die
Installation.
Wählen Sie das Zielverzeichnis,
in das Sie den Treiber installieren
möchten und klicken Sie auf Weiter.
Klicken Sie nach der Installation der
Dateien auf Finish, um die Treiberin
-
stallation abzuschließen.
Klicken Sie auf OK, um Ihren
Computer neu zu starten.
Page 6
6
Einbindung in Skype
TM
Sofern noch nicht geschehen,
installieren Sie SkypeTM auf Ihrem
Computer.
Installieren Sie das USB Phone wie
beschrieben auf Ihrem Computer.
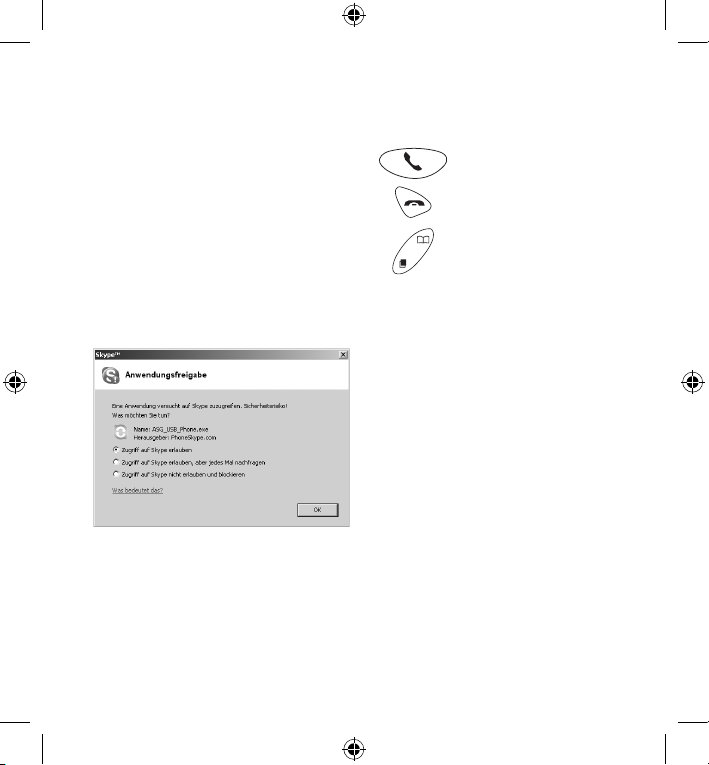
Starten Sie SkypeTM. Eine Meldung
erscheint, in der Skype Sie fragt,
ob der Zugriff des USB Phones auf
SkypeTM erlaubt werden soll. Wählen
Sie Zugriff auf Skype erlauben und
klicken Sie auf OK.
Sie können das USB Phone nun mit
Skype
TM
verwenden.
Navigation mit dem USB Phone
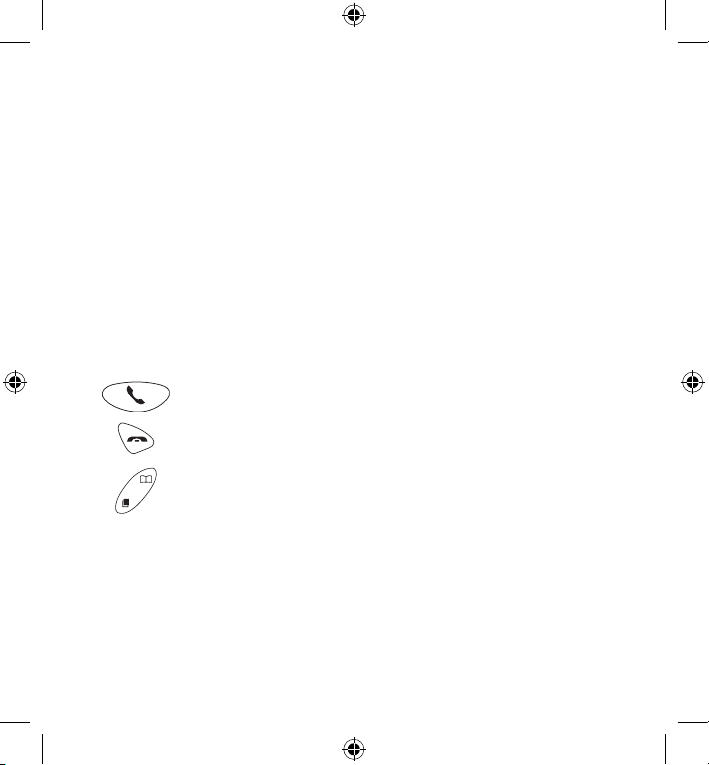
Anruf-Taste
Auflegen-Taste
Navigationstasten
Öffnen Sie das SkypeTM Fenster mit
der Anruf-Taste oder einer der beiden Navigationstasten (nur wenn
Skype aktiv ist, das SkypeTM Fenster
jedoch geschlossen ist).
Wechseln Sie die einzelnen Regis-
terkarten in SkypeTM mit der *-Taste.
Navigieren Sie innerhalb der Regis-
terkarte hoch und runter mit den Na
-
vigationstasten.
Wählen Sie einen Kontakt mit den
Navigationstasten.
Rufen Sie den gewählten Kontakt mit
der Anruf-Taste an.
Nehmen Sie Anrufe mit der Anruf-
Taste an.
Beenden Sie ein Telefonat mit der
Auflegen-Taste.
Schließen Sie das SkypeTM-Fenster
mit der Auflegen-Taste.
Page 7

7
Garantie
Für dieses Produkt gewähren wir Ihnen
eine Garantie von zwei Jahren ab Kaufdatum auf Verarbeitung und alle einge
bauten Teile.
Falls Sie Hilfe benötigen...
Bei technischen Problemen wenden
Sie sich bitte an unseren technischen
Support. Die Hotline-Nummer finden
Sie auf der Rückseite dieser Bedienungsanleitung.
Page 8

8
Important!
Before using this product, read the instruction manual for important safety
information. Please retain this manual
for future reference and warranty information.
Excemption from Liability
No liability will attach to Jöllenbeck
GmbH if any damage, injury or accident
is attributable to inattentive, inappropri
ate, negligent or incorrect operation of
the machinery whether or not caused
deliberately.
Troubleshooting & Servicing
Do not attempt to service or repair the
device yourself. Refer all servicing to
qualified service personnel. Do not
attempt to modify the device in any
way. Doing so could invalidate your
warranty.
Moisture and heat sources
Do not use this apparatus near water
(for example, sinks, baths, pools) or
expose it to rain, moisture, or dripping
or splashing liquids. Do not expose the
unit to high temperatures, high humidity or direct sunlight.
Cleaning
When cleaning the device, please use
a soft, dry cloth. Never use benzine,
paint thinner, or other chemicals on the
device.
Location
Place the device in a stable location,
so it will not fall causing damage to the
device or bodily harm.
Intended use
• The product may only be used with
the original parts intended for it.
• The product may only be used in
closed and dry rooms.
• The intended use includes adherence
to the specified installation
instructions. The manufacturer
accepts no liability for damage
arising due to improper use.
I
MPORTANT SAFETY INFORMATION
Page 9

9
Introduction
Thank you for purchasing the USB
Phone. Now you can navigate within
your preferred VoIP program without
needing to use a mouse or keyboard
– dial and take or make calls just like
you would on a normal telephone.
Features
USB Phone for that ‘real telephone’
look and feel
Large display with call information,
time, day and date
Buttons for call pick-up, cancel and
menu navigation
Number pad with # and * buttons
LED to indicate call acceptance
Navigate using the USB phone
without the need for a mouse or
keyboard
1.4m cable – gives you freedom to
move around
Connecting to the PC
Connect the USB connector on the
Phone to any free USB port on your
PC. Windows will automatically detect
the Phone. Windows may ask you to
insert the original Windows installation
CD. Read the following instructions be
-
fore you install the driver.
Installation under
Windows 2000/XP
Insert the supplied driver CD in your
CD-ROM drive. The setup menu will
load automatically (if this doesn't
occur open Windows Explorer,
navigate to your CD-ROM drive and
then double click on the file setup.
exe
)
Click on the button named driver..
The InstallShield Wizard will now
guide you through the installation
process
Select the target directory where the
driver should be installed and then
click on Next
After the driver has been installed
click on Finish to complete the
installation of the diver
Click on OK and reboot your
computer
Page 10

10
Using the Phone with Skype
TM
If not already done so, install Skype
on your computer
Install the USB Phone, as described,
on your computer
Start Skype. A message appears
where Skype asks if the USB Phone
should be allowed to access Skype.
Select Allow access to Sk ype and
then click on OK
You are now ready to use your new
USB Phone with Skype
Navigating using the USB Phone
Call button
Cancel button
Navigation buttons
Open the Skype window using the
call button or by using one of the two
navigation buttons (only when Skype
is running, but the Skype window is
closed)
Switch between the individual tab
menus in Skype using the * button
Navigate up and down inside the tab
menu using the navigation buttons
Select a contact using the navigation
buttons
Call the selected contact using the
call button
Accept a call using the call button
End a call using the cancel button
Close the Skype window using the
cancel button
Warranty
We guarantee this product to be free of
defects in workmanship and materials
for a period of two (2) years from the
original date of purchase.
Should you need assistance...
Our technical support team will be hap
py to help with any technical problems.
The hotline number can be found on
the back of this manual.
Page 11

11
Notes:
Page 12

12
Important!
Avant d‘utiliser ce produit, consultez le
manuel d‘instructions. Vous y trouver
ez des informations importantes sur la
sécurité. Conservez ce manuel pour
référence ultérieure.
Entretien
Ne tenez pas d‘effectuer vous-même
l’entretien du dispositif ni de le répa
rer. Pour les opérations d’entretien,
adressez-vous à du personnel qualifié.
N‘essayez jamais d‘apporter une quelconque modification au dispositif. Cela
pourrait annuler votre garantie.
Humidité et sources de chaleur
Évitez d’utiliser l’appareil à proximité
de l’eau (évier, baignoire ou piscine par
ex.) ou de l’exposer aux intempéries,
à l’humidité, ou à des écoulements ou
des projections de liquides. N‘exposez
pas le dispositif à une température éle
vée, une humidité excessive ou au ray
onnement direct du soleil.
Emplacement
Placez l‘unité sur un support stable,
car toute chute risquerait de les en
dommager ou de cuser des dommages
corporels.
Nettoyer l‘unité
Pour nettoyer l‘unité, veuillez utilisez un
chiffon doux et sec. N‘appliquez jamais
de benzine, de diluant ou autre produit
chimique sur le dispositif.
Utilisation conforme
• L’appareil ne doit être utilisé qu’avec
les pièces originales prévues à cet
effet.
• Le produit ne doit être utilisé que
dans des locaux fermés et secs.
• L’utilisation conforme implique
de respecter les instructions
d’installation.
• Le fabricant décline toute
responsabilité en cas de dommages
dus à une utilisation incorrecte.
I
NSTRUCTIONS DE SÉCURITÉ
Page 13

13
Introduction
Merci d’avoir choisi ce téléphone USB.
Vous pouvez à présent naviguer dans
votre programme VoIP favori sans sou
ris ni clavier et prendre les appels ou
téléphoner comme avec un téléphone
normal.
Caractéristiques
Téléphone USB recréant les mêmes
sensations qu’au téléphone
Grand écran avec affichage des
communications, de l’heure, du jour
de la semaine et de la date
Touches pour établir et couper la
communication et naviguer dans le
menu
Bloc numérique avec touches # et *
Les voyants indiquent la prise de la
communication
Navigation à l’aide du téléphone USB
sans clavier ni souris
Câble de 1,40 m
Raccordement à l’ordinateur
Raccordez la fiche USB du téléphone
USB à une prise USB libre sur votre
ordinateur. Windows détecte automa
tiquement le nouveau périphérique.
Windows vous demande éventuellement d’insérer le CD d’installation
de Windows. Suivez cette instruction
avant d’installer les pilotes.
Installation sous Windows
2000/XP
Insérez dans le lecteur de CD-
ROM le CD fourni avec le pilote.
Le menu d’installation démarre
automatiquement (si ce n’est pas le
cas, cliquez sur votre lecteur de CDROM dans l’Explorateur de Windows
et double-cliquez sur le fichier setup.
exe).
Cliquez sur Driver / Treiber.
L’assistant d’installation vous guide
alors à travers l’installation.
Sélectionnez le répertoire cible dans
lequel le pilote doit être installé et
cliquez sur Suivant.
À la fin de l’installation, cliquez sur
Terminer pour achever l’installation
du pilote.
Cliquez sur OK pour redémarrer
votre ordinateur.
Page 14
14
Intégration dans Skype
TM
Si ce n’est pas encore fait, installez
Skype sur votre ordinateur.
Installez le téléphone USB sur votre
ordinateur comme indiqué.
Lancez le programme Skype. Un
message s’affiche pour vous de
mander si vous souhaitez que le
programme Skype ait accès au télé
phone USB. Sélectionnez Autoriser
l’acc
ès à Skype et cliquez sur OK.
Vous pouvez alors utiliser le
téléphone USB avec Skype.
Navigation avec le téléphone USB
Touche Appel
Touche Raccrocher
Touches de navigation
Ouvrez la fenêtre Skype en appuyant
sur la touche Appel ou sur l’une
des deux touches de navigation
(uniquement si le programme Skype
est activé, mais la fenêtre Skype
fermée).
Pour naviguer entre les onglets de
Skype, utilisez la touche *.
Pour vous déplacer vers le haut
et vers le bas au sein d’un onglet,
utilisez les touches de navigation.
Sélectionnez une entrée à l’aide des
touches de navigation.
Appuyez sur la touche Appel pour
appeler la personne en question.
Utilisez la touche Appel pour prendre
les appels.
Pour mettre fin à une communication,
appuyez sur la touche Raccrocher.
Refermez la fenêtre Skype en
appuyant sur la touche Raccrocher.
Garantie
Nous offrons sur ce produit une garan
tie de deux ans à compter de la date
d’achat couvrant les défauts de fabrica
tion et tous les composants.
Si vous avez besoin d’aide…
En cas de problèmes techniques,
veuillez vous adresser à notre ser vice
d’assistance technique. Vous trouverez
le numéro de téléphone au dos de ce
mode d’emploi.
Page 15

15
Notes :
Page 16

16
Importante!
Antes de utilizar este producto, lea el
manual de instrucciones para obtener
informaciones importantes acerca de
la seguridad. Guarde el manual de
instrucciones para consultas en el fu
-
turo.
Soluciòn de problemas
No intente reparar el dispositivo usted
mismo. Remita todas las reparaciones
al personal de servicio cualificado. No
intente modificar el dispositivo de ninguna manera. Si lo hace, la garantía
perdería validez.
Humedad y fuentes de calor
No utilice este aparato en lugares cer
canos a agua (por ejemplo, fregadores,
bañeras, piscinas, etc.) ni lo exponga
a lluvia, humedad ni líquidos que pueden gotear o salpicar. Evite exponer la
unidad a altas temperaturas, humedad
excesiva o rayos del sol.
Colocación
Coloque el dispositivo en un lugar es
table para evitar posibles caídas que
pudieran ocasionar lesiones físicas o
dañar el producto.
Limpiar el dispositivo
Cuando limpie el dispositivo, por favor
utilice un paño suave y seco. Nunca
utilice bencina, removedor u otro quí
-
mico para limpiarlo.
Uso según instrucciones
• El dispositivo sólo se puede usar con
las piezas originales
correspondientes.
• El producto se utilizará siempre en
espacios cerrados y secos.
• El uso según las instrucciones incluye
un procedimiento de instalación
según las mismas instrucciones. El
fabricante no se hace responsable
de los daños que pudieran derivarse
de un uso inadecuado del producto.
N
OTAS IMPORTANTES SOBRE LA SEGURIDAD
Page 17

17
Introducción
Muchas gracias por la compra del phone USB. Ahora puedes navegar con
tu programa favorito VoIP sin ratón ni
teclado y efectuar llamadas o marcar
como si fuese un teléfono normal.
Características del producto
Phone USB para tener sensación
auténtica de teléfono
Display grande con indicación de
llamada, hora, día de la semana y
fecha
Botones para iniciación de llamada,
interrupción y menú de navegación
Bloque numérico con # y *
LED que indica que la llamada ha
sido atendida
Navegación por phone USB sin ratón
ni teclado
Cable de 1,40m de longitud
Conexión al PC
Conecta el cable USB del phone a un
puerto USB libre de tu ordenador. Win
-
dows detecta automáticamente el dis
positivo. Windows puede que emita un
aviso para colocar el CD que contiene
la versión de Windows con la que operas. Sigue estas instrucciones antes de
instalar el controlador.
Instalación en Windows 2000/
XP
Inserta a continuación el CD ROM
del controlador adjunto en la unidad
de CDs. El menú Setup se inicia
automáticamente (Si no fuese así, haz
clic en el Explorador de Windows de tu
unidad de CD-ROM y haz luego doble
clic en el archivo setup.exe
.
Haz clic en el cuadro Driver / Treiber.
El InstallShield Wizard te guiará por la
instalación.
Selecciona el directorio en el que
quieras instalar el controlador y luego
haz clic en Continuar
.
Después de instalar los archivos, haz
clic en Finalizar, para completar la
instalación del controlador.
Haz clic en Aceptar para reiniciar el
ordenador.
Page 18

18
Enlace con Skype
TM
Si todavía no lo has hecho, instala
Skype en tu ordenador.
Instala el USB Phone como se ha
descrito en tu ordenador.
Inicia Skype. Aparece un cuadro de
diálogo en el que Skype pregunta si
debe admitir el acceso del USB Phone
a Skype. Selecciona Permitir acceso a
Skype y a continuación Aceptar
.
Después ya puedes utilizar el USB
Phone junto con Skype.
Navegación con el USB Phone
Botón de llamada
Botón de colgar
Botón de navegación
Abre la ventana Skype con el botón
de llamada o cualquiera de los dos
botones de navegación (sólo si Skype está activado, pero la ventana de
Skype está cerrada).
Cambia entre las diferentes fichas de
Skype con el botón *.
Navega entre las fichas de arriba
abajo o viceversa con los botones de
navegación.
Selecciona un contacto con los boto-
nes de navegación.
Llama al contacto seleccionado con
el botón de llamada.
Recibe una llamada con el botón de
llamada.
Finaliza una conversación con el
botón de colgar.
Cierra la ventana de Skype con el
botón de colgar.
Garantía
Este producto tiene una garantía de
dos años a partir de la fecha de com
pra tanto para defectos de fabricación
como de sus componentes.
Si precisas ayuda...
En caso de surgir cualquier problema,
acude a los especialistas que te pro
porcionarán todo tipo de soporte técni
co. El número de nuestra línea Hotline,
se encuentra al dorso de estas instruc
ciones de manejo.
Page 19

19
Notas:
Page 20

20
I
MPORTANTI INFORMAZIONI IN MATERIA DI SICUREZZA
Importante!
Prima di utilizzare il prodotto, è necessario leggere attentamente nel manu
ale d’istruzione le avvertenze sulla sicurezza, nonché generali. Conservare
accuratamente il presente manuale
d‘istruzioni al fine di poterlo successi
vamente consultare nuovamente.
Ricerca guasti/riparazione
Non riparate l’apparecchio e non effet
tuate la manutenzione da soli. Per lavori
di riparazione o manutenzione rivolge
teVi a personale competente specia
lizzato. Non appor tate da soli nessuna
modifica all’apparecchio. Facendo ciò,
perderete ogni diritto di garanzia.
Umidità e fonti di calore
Non utilizzate l’apparecchio in pros
simità d’acqua (p. es. in prossimità di
lavandini, vasche da bagno o piscine)
e tenetelo lontano da luoghi umidi, da
sprizzi o gocce d’acqua, nonché dalla
pioggia. Non esporre il dispositivo ad
alte temperature, umidità o luce solare
diretta.
Pulitura
Pulire il dispositivo utilizzando un pan
no morbido e asciutto. Non usare mai
benzina, diluenti o altri prodotti chimici.
Collocazione
Sistemare il dispositivo in una
posizionare stabile. onde evitare di
ferirsi o danneggiare il volante stessi
se questi dovessero cadere.
Uso appropriato dei dispositivi
• È consentito utilizzare il dispositivo
solo ed esclusivamente con i
componenti originali previsti.
• È consentito utilizzare il prodotto
solo ed esclusivamente in ambienti
chiusi, nonché asciutti.
• Un uso appropriato del dispositivo
implica un procedimento conforme
alle disposizioni di installazione.
Il costruttore esclude ogni tipo di
responsabilità per danni derivanti da
un uso improprio del dispositivo.
Page 21

21
Introduzione
Congratulazioni per aver acquistato il
nostro USB Phone. Grazie a questo
telefono è adesso possibile navigare
all’interno del menù del Vostro
programma VoIP preferito senza
mouse e tastiera, selezionare il numero
da chiamare ed effettuare o ricevere
chiamate come con un normale
telefono.
Caratteristiche del prodotto
Telefono USB per aver la sensazione
di disporre di un vero telefono al PC
Grande display con indicazione di
chiamata, orologio, giorno della set
-
timana, nonché data
Tasti per attivazione chiamata, inter-
ruzione chiamata e navigazione di
menù
Tastierino numerico con tasti # e *
Il LED indica l’accettazione di chia-
mata
Navigazione nel PC mediante il tele-
fono USB senza mouse e tastiera
Lunghezza cavo 1,40 m
Collegamento al PC
Collegate il connettore USB del telefo
-
no USB ad una porta USB ancora dis
-
ponibile del Vostro PC. Windows rileva
automaticamente la presenza della periferica. Il sistema operativo Windows
Vi richiede eventualmente di inserire il
CD con il driver nell‘unità CD - ROM.
Prima di procedere all’installazione
del driver, atteneteVi alle istruzioni qui
riportate.
Installazione in ambiente
Windows 2000/XP
Inserite nell'unità per lettore CD-
ROM il CD-ROM con driver in
dotazione con la fornitura. Il menù
di installazione viene avviato
automaticamente (in caso contrario,
fate clic in Windows Explorer
sull’unità CD-ROM in cui è inserito
il CD-ROM ed in seguito fate doppio
clic sulla sul file setup.exe).
Cliccate sul pulsante Driver / Trei-
ber. L’installazione guidata In
stallShield Wizard esegue adesso
l’installazione.
Selezionate la cartella in cui deve
essere installato il software con il
driver e cliccate in seguito su Avanti.
Ad installazione dei file ultimata,
fate clic su Fine per completare
l’installazione del driver per la nuova
periferica.
Fate infine clic su OK per riavviare il
computer.
Page 22

22
Integrazione del telefono in
Skype
TM
Installate SkypeTM sul Vostro computer
a condizione che il programma non
sia stato già installato in precedenza.
Eseguite adesso l’installazione del
telefono USB come descritto nelle
presenti Istruzioni d’uso.
Avviate Skype. Viene visualizzato il
messaggio con cui Skype richiede
se autorizzare o non autorizzare
l’accesso al telefono USB. Selezionate
quindi Autorizza accesso a Skype e
cliccate infine su O K.
È adesso possibile utilizzare il telefono
USB con il programma Skype.
Navigazione di menù con il telefo
-
no USB
Tasto di chiamata
Tasto di fine chiamata
Tasti di navigazione
Per aprire la finestra di Skype
utilizzate il tasto di chiamata o uno
dei tasti di navigazione (solamente se
Skype è attivo e la finestra di Skype è
pertanto chiusa).
Con il tasto * è possibile muoversi
all’interno delle singole schede di
Skype.
Con i tasti di navigazione è possibile
inoltre muoversi all’interno delle
singole schede Skype verso l’alto,
nonché verso il basso.
Per selezionare una voce della rubrica
personale è possibile utilizzare i tasti
di navigazione.
Per effettuare una chiamata ad un
utente selezionato dalla rubrica
personale è necessario utilizzare il
tasto di chiamata.
Per accettare chiamate in entrata
premete il tasto di chiamata.
Per concludere una chiamata,
utilizzate il tasto di fine chiamata.
Utilizzate il tasto di fine chiamata per
chiudere la finestra di Skype.
Page 23

23
Garanzia
Per questo prodotto concediamo una
garanzia della durata di due anni a partire dalla data di acquisto. La garanzia
copre i difetti di fabbricazione, nonché
quelli derivanti dalle componenti inte
-
grate.
In caso di supporto tecnico...
Nel caso in cui dovessero verificarsi ul
teriori problemi tecnici, Vi preghiamo di
contattare i nostri tecnici. A tale proposito, troverete sul retro di questo manu
ale di istruzioni il numero del servizio di
assistenza tecnica.
Page 24

© Jöllenbeck GmbH. Diese Veröffentlichung oder Teile daraus dürfen ohne
die ausdrückliche Genehmigung des Herausgebers nicht vervielfältigt
werden.
© Jöllenbeck GmbH. This publication or parts of it may not be reproduced
without the express consent of the publisher.
 Loading...