

Page 1
Assembly Instructions
Instructions de montage
Instrucciones de montaje
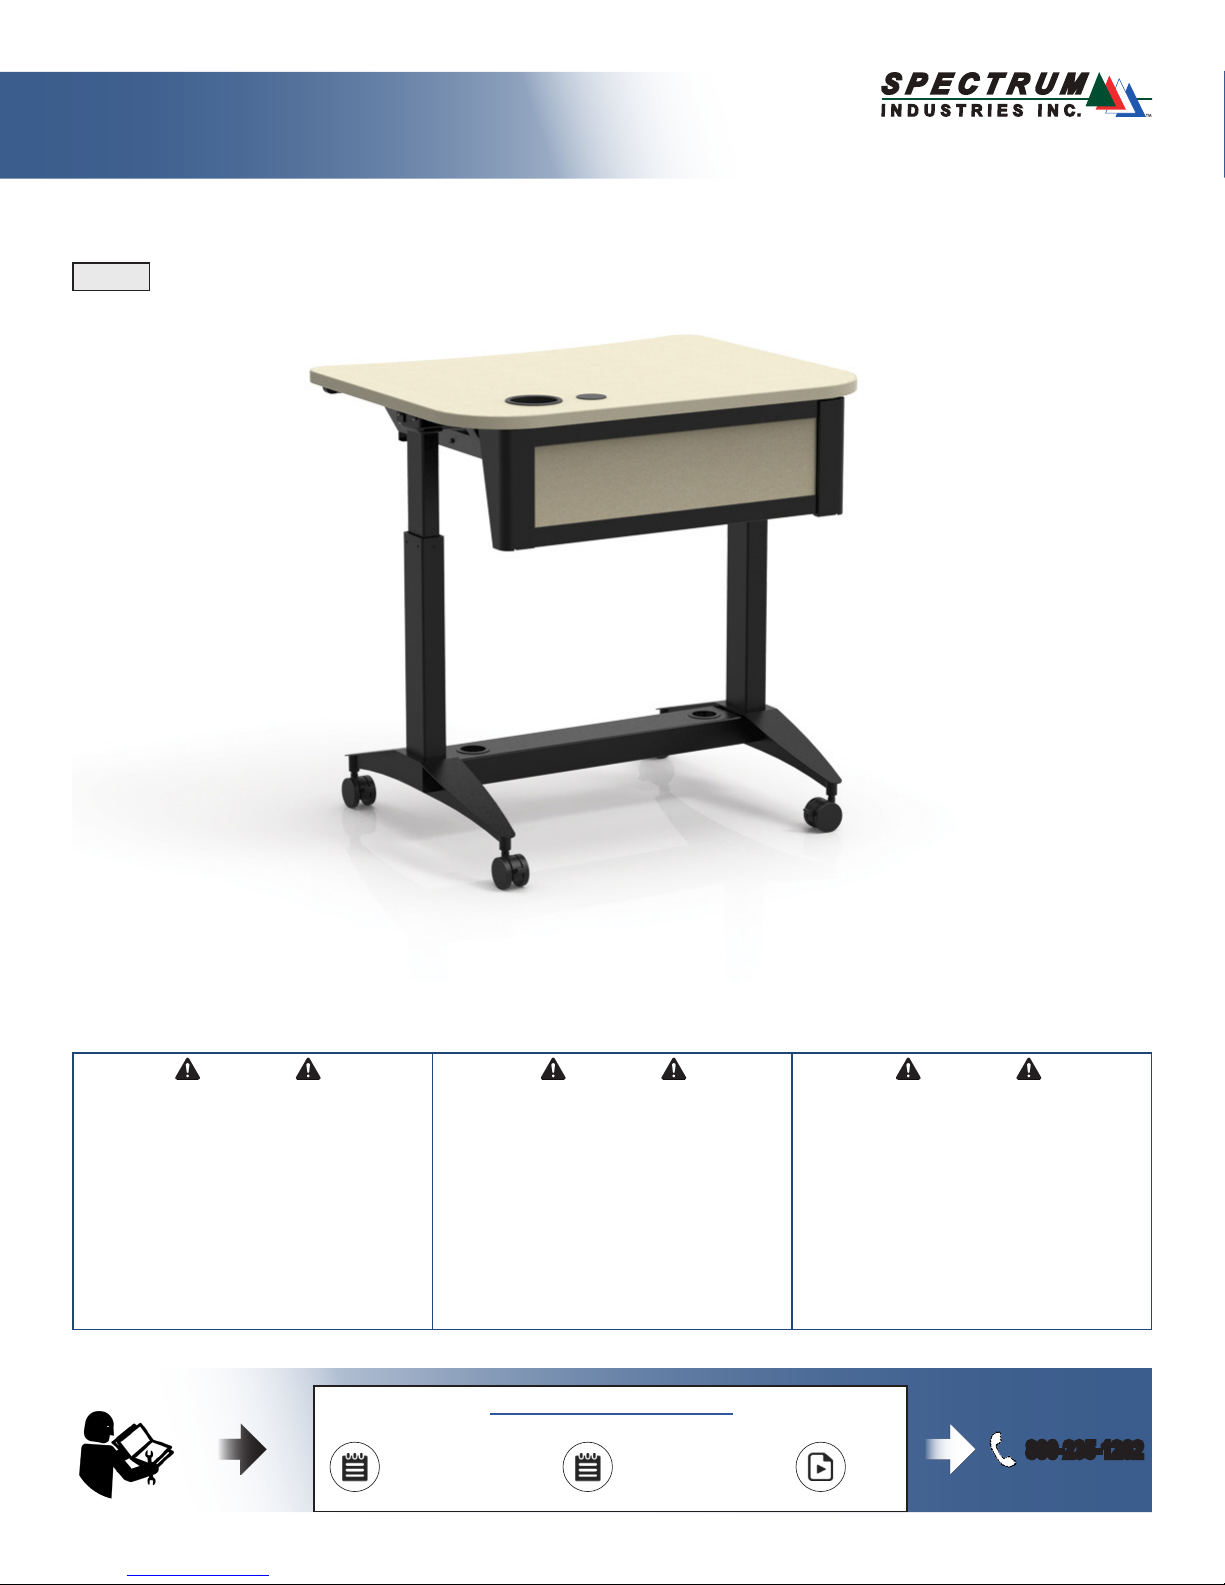
Pivot Workstation
37325
™
Important
Before using this product:
• Read this manual
• Comply with all safety and operating instructions
• Ensure all parts and correct quantities are included
Any parts damaged during shipment must be reported within 5
days of receipt. To report information regarding missing parts or
damage, to purchase parts or accessories, or if you have any
questions, please contact us.
Thank you for purchasing Spectrum products!
??
Owner’s Manual
Le manuel du propriétaire
El manual del propietario
Shown with optional modesty panel and footrest
Important
Avant d’utiliser ce produit:
• Veillez à lire ce guide
• Respectez les consignes de sécurité et d’utilisation
• Vériez que vous disposez de toutes les pièces
nécessaires à l’installation
Les pièces endommagées pendant le transport doivent faire
l’objet d’un rapport dans les 5 jours de leur réception. Veuillez
prendre contact avec nous si des pièces manquent ou sont
abîmées, si vous avez des questions, ou encore pour acheter
des pièces ou des accessoires.
Merci pour votre achat d’un produit Spectrum!
www.spectrumfurniture.com
Specs
Spécications
Especicaciones
Importante
Antes de utilizar este producto:
• Lea este manual
• Cumpla con todas las instrucciones de prevención de
accidentes y operativas
• Revise que todas las partes y las cantidades correctas
estén incluidas
Si alguna parte se dañó durante el embarque, deberá reportarla
en un lapso de 5 días a partir de la recepción. Para reportar
cualquier información sobre partes faltantes o dañadas, para
adquirirlas o comprar accesorios, o bien, si tiene alguna duda,
póngase en contacto con nosotros.
¡Gracias por adquirir productos Spectrum!
Video
Vidéo
Vídeo
800-235-1262
0190797R2 Page 1 of 7
Page 2
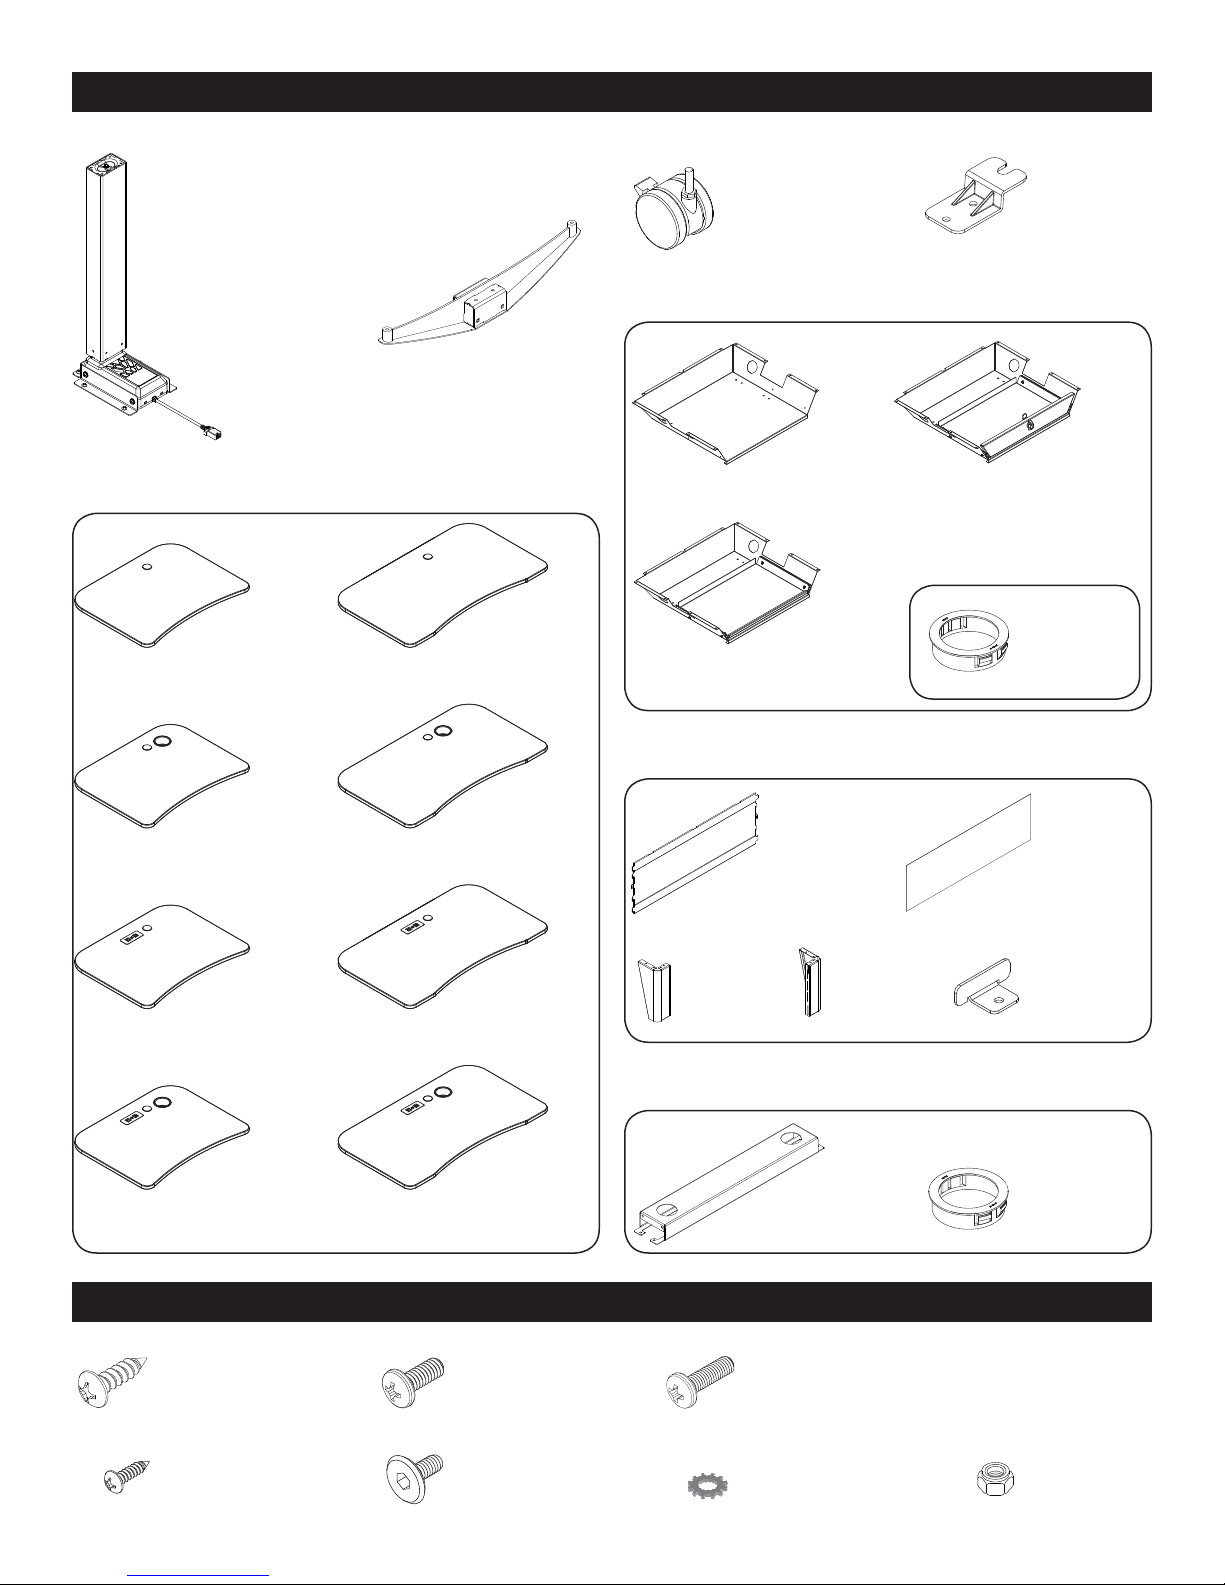
Components
0138782
36”W
(2) 0117390
Electric Leg
(1) Worksurface
(2) 0138736
Foot
0138927
48”W
(4) 0105662
Casters
(1) Worksurface option (if congured)
(1) 0138784
Storage Bin
(1) Pull-out
keyboard tray
assembly
(1) Modesty panel (if congured)
(2) 0116530
Cord wrap
(1) Locking
pull-out drawer
assembly
(2) 059984
2” Snap-in
Grommet
0138968
36”W w/ cup holder
0138929
36”W w/ Cove
cutout
0138969
36”W w/ cup holder
and Cove cutout
(34) 0101382
#14 x 7/8” PHSM
0138970
48”W w/ cup holder
0138928
48”W w/ Cove
cutout
0138971
48”W w/ cup holder
and Cove cutout
Hardware
(4) 026064
1/4-20 x 5/8” PHMS
(1) 0138391
Left corner
(1) 0138360
Modesty panel
(1) 0138392
Right corner
(1) Footrest (if congured)
(1) 0138388
Footrest
(8) 0137493
M6 x 1.0 x 20mm PHMS
(1) 0138361
Laminate insert
(if congured)
(1) 0134099
Bracket
(2) 059984
2” Snap-in
Grommet
(3) 037542
#8 x 5/8” PHSM
(4) 052605
1/4-20 x 15mm JC bolt
(8) 038391
1/4” External tooth
star washer
(4) 041943
1/4-20 Locknut
0190797R2 Page 2 of 7
Page 3
Note: Some options shown below may not be included-depending on conguration ordered. Some steps may not be necessary.
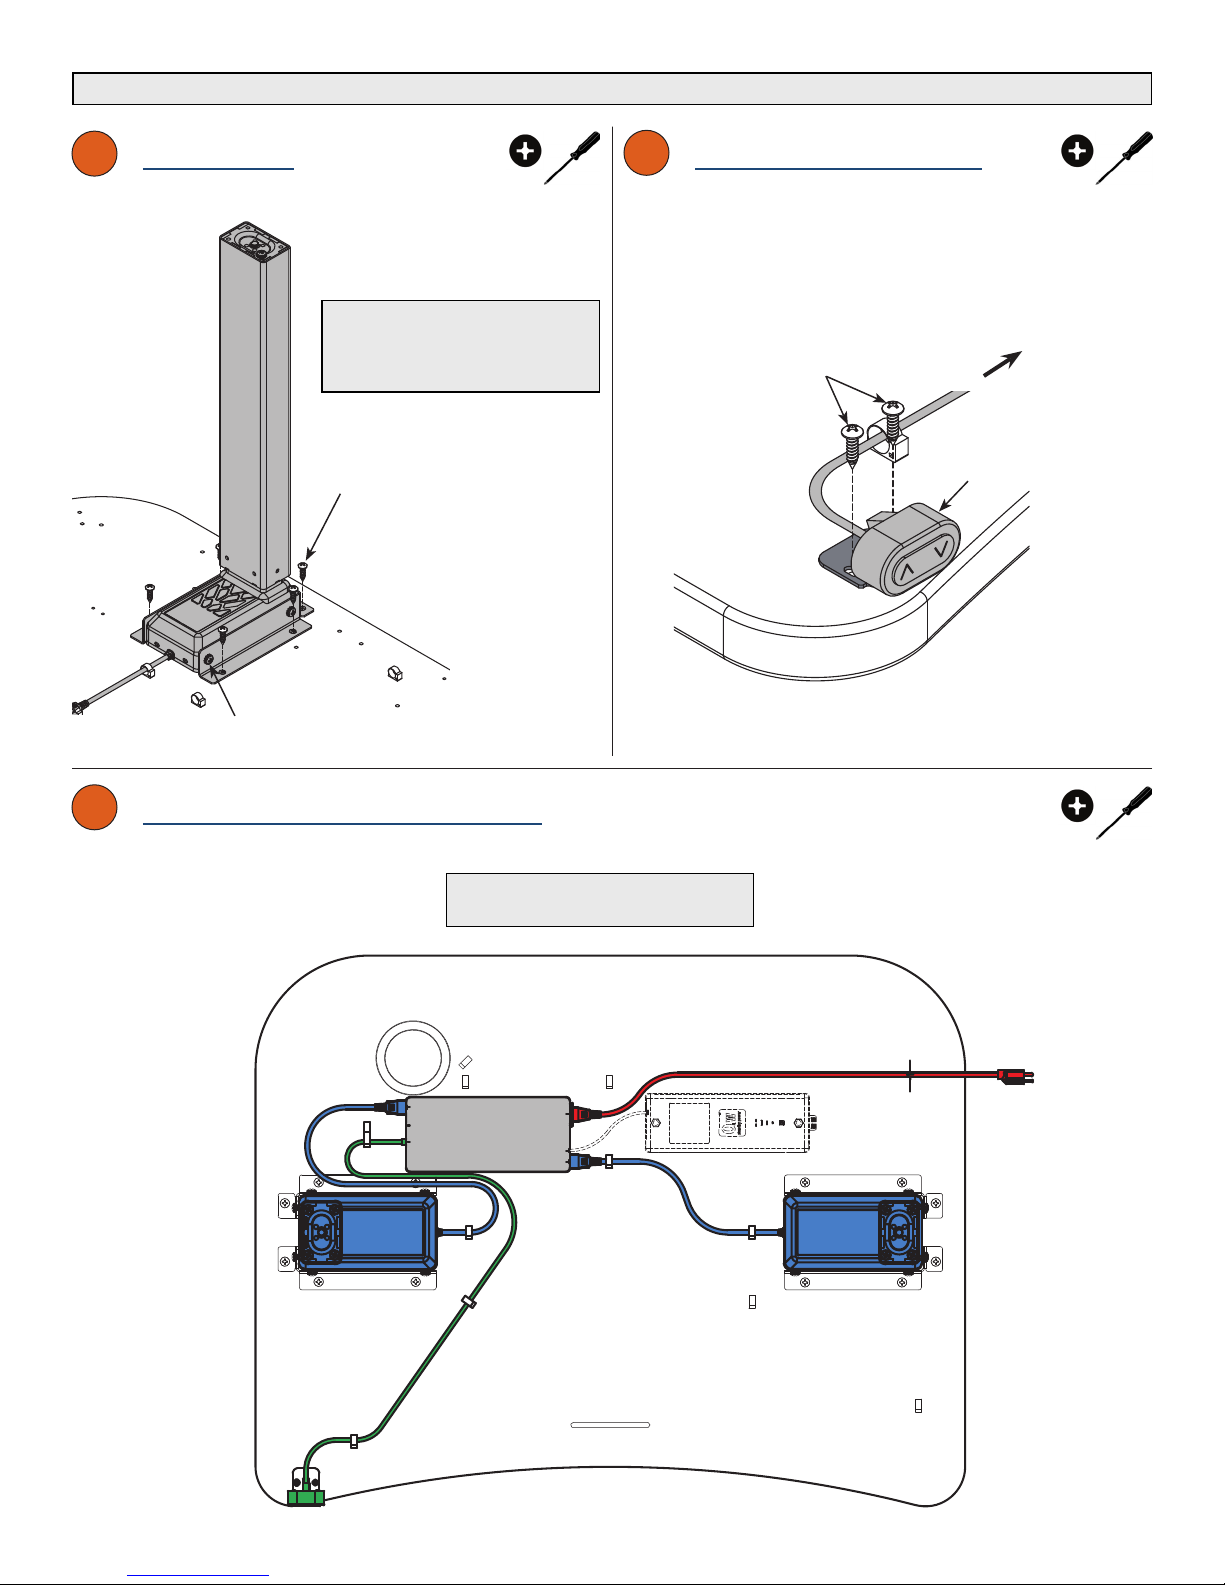
1
Install legs
X 2
Note: Be sure the legs are
perpendicular to the worksurface. If
they are not, loosen the side mounting
screws, adjust the leg and re-tighten.
(6) #14 x 7/8” PHSM
Side mounting screw
2
Install control button
#8 x 5/8” PHSM
To
Control
Box
Control
button
3
Connect cords to control box
Leg #1 Leg #2
• Make sure all connections are secure.
• Use pinetree clips to secure cords.
A1A21
Control box
ACDC2
AC
plug
Optional
battery
Control
button
0190797R2 Page 3 of 7
Page 4

4
Install cord wraps
7
”
/
16
4mm
(4) #14 x 7/8” PHSM
Worksurface
5
Connect power & test leg motion
(if equipped)
Worksurface accessory
6
Assemble modesty panel
(if congured)
(4) 1/4-20 locknut
(4) 1/4-20 x
15mm JC bolt
2
Skip to Step 9 if no modesty panel
1
1
1
Modesty Panel
2
Right Corner
2
2
2
3
Left Corner
3
0190797R2 Page 4 of 7
Page 5

7
Install modesty panel
8
Install worksurface accessory
(if congured)
(1) #8 x 5/8” PHSM
(4) #14 x 7/8” PHSM
Assembled
Modesty Panel
(if congured)
Skip to Step 9 if no accessory
(4) #14 x 7/8” PHSM
X 2
(10) #14 x
7/8” PHSM
Worksurface
9
Install feet Install casters
10
X 2
(4) M6 x 1 x 20mm PHMS
(4) 1/4 External Star Washer
X 4
1
”
/
2
Note: If a footrest is included, do not install the inner screws until step 11.
0190797R2 Page 5 of 7
Page 6

11
Install footrest (if congured)
Skip to Step 12 if no footrest
(2) M6 screws
(included with legs)
(2) M6 screws
(included with legs)
(4) 1/4-20 x 5/8” PHMS
Footrest
(2) 2” Snap-in
Grommet
12
14
Flip upright
Connect power
X 2
Do not allow the legs to contact
the oor until the unit is completely
ipped over. Excessive side-loading
of the legs could cause damage.
13
Install worksurface accessories
(if congured)
2
© 2018 Spectrum Industries Inc., All rights reserved.
0190797R2 Page 6 of 7
Page 7

DESIGNED AND ASSEMBLED IN
CHIPPEWA FALLS
WISCONSIN.USA
Important Safety and Care Instructions
• Read this owner’s manual before assembly or operation.
• Do not allow children to move the lectern.
• Proceed slowly and carefully when moving the lectern.
• For indoor use only. Do not install or store the lectern where it will be exposed
to moisture.
• Do not block the ventilation openings.
• Avoid uneven loading of the equipment into the lectern. Uneven weight
distribution could cause the lectern to tip when the lectern is moving.
• Do not allow anyone to sit, stand, or climb on the lectern.
• Use a damp, soft-cloth, or sponge, with mild soap or detergent solution to clean
dirty surfaces. Do not use harsh solvents or abrasives.
• This lectern is intended for institutional use. It does not have any userserviceable parts or user-maintenance requirements. If servicing is necessary,
please contact Spectrum Industries for assistance.
Warning - Relocating audio and/or video equipment to furniture not speci cally
designed to support audio and/or video equipment may result in death or
serious injury due to the furnishing collapsing or over turning onto a child.
Warning - Death or serious injury may occur when children climb on audio
and/or video equipment furniture. A remote control or toys placed on the
furnishing may encourage a child to climb on the furnishing and as a result the
furnishing may tip over on to the child.
Electrical Safety:
• Do not plug the power cord into an extension cord.
• Inspect power cords for damage before each use. Do not use power cords
that are damaged.
• Unplug power cord from electrical outlet by gripping the cord. Do not unplug
the power cord by pulling only on the cord.
• Do not step on, drive over, drag, or place objects on the power cord.
• For added safety, plug the lectern into a grounded outlet controlled by a GFI
(Ground Fault Interrupter) circuit breaker.
• Electrical devices are not toys. Children are often unaware of the hazards
associated with electrical devices. This lectern must always be used by
adults or with adult supervision.
© 2018 Spectrum Industries Inc., All rights reserved.
0190797R2 Page 7 of 7
 Loading...