

Page 1
49531 / 01
USER GUIDE • GUÍA DEL USUARIO • GUIDE D’UTILISATION
www.kwikset.com/kevo
Page 2

Page 3

CONTENTS
Kevo at a Glance 4
Kevo Overview 5
System Requirements for Smart Devices 6
Getting Started 6
Install the Kevo Lock 6
Download the Kevo Mobile App 6
Programming Instructions 7
Smart Devices 7
eKeys 8
Fobs 9
Resetting Your Kevo System 11
Normal Operation 12
Unlocking the Door 12
Locking the Door 13
Error Notifications 14
Audio/Visual Feedback 16
Battery Replacement 18
Fob 18
Deadbolt 19
Troubleshooting 20
System Updates 20
Regulatory Compliance 21
FCC 21
Industry Canada 21
Tech Support 22
ENGLISH
Page 4
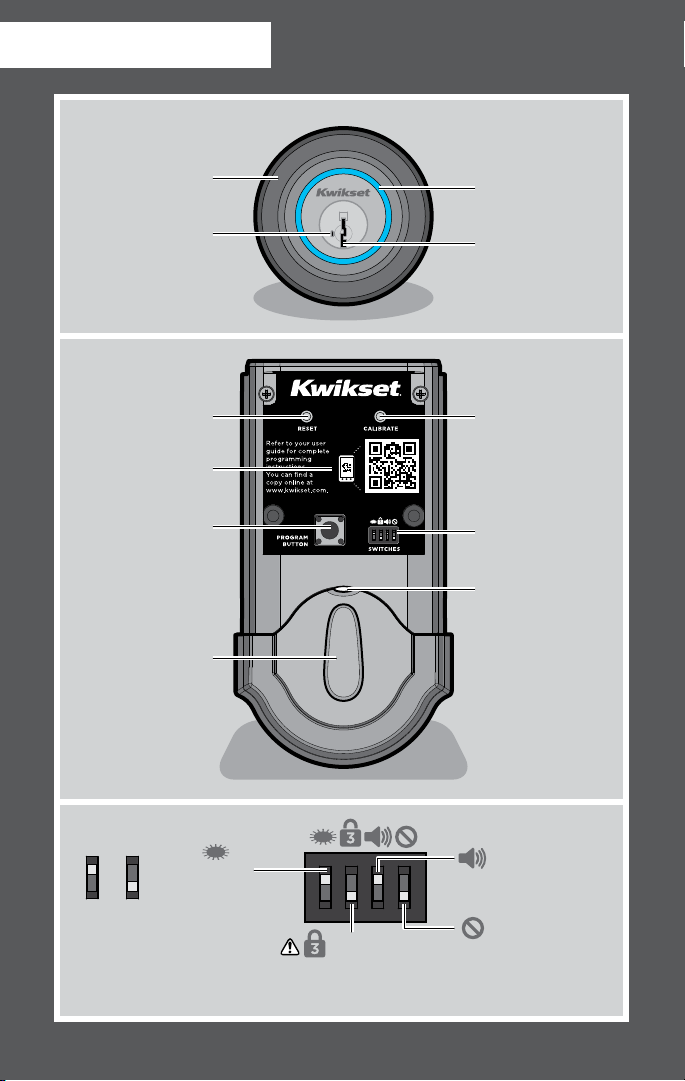
KEVO AT A GLANCE
Kevo fob
standard key
smart device
Exterior
Deadbolt rose
(touch surface)
SmartKey
tool hole
Interior
(cover removed)
Back panel
Program button
Turnpiece
Reset
button
Light ring
Keyway
Calibrate
button
Switches
Status LED
Switches
ON OFF
4
Turn On/Off
Status LED
(ON by default)
Triple Touch Lock
(OFF by default)
See page 14.
Turn On/Off
Beeping Sound
(ON by default)
Feature not used
Page 5
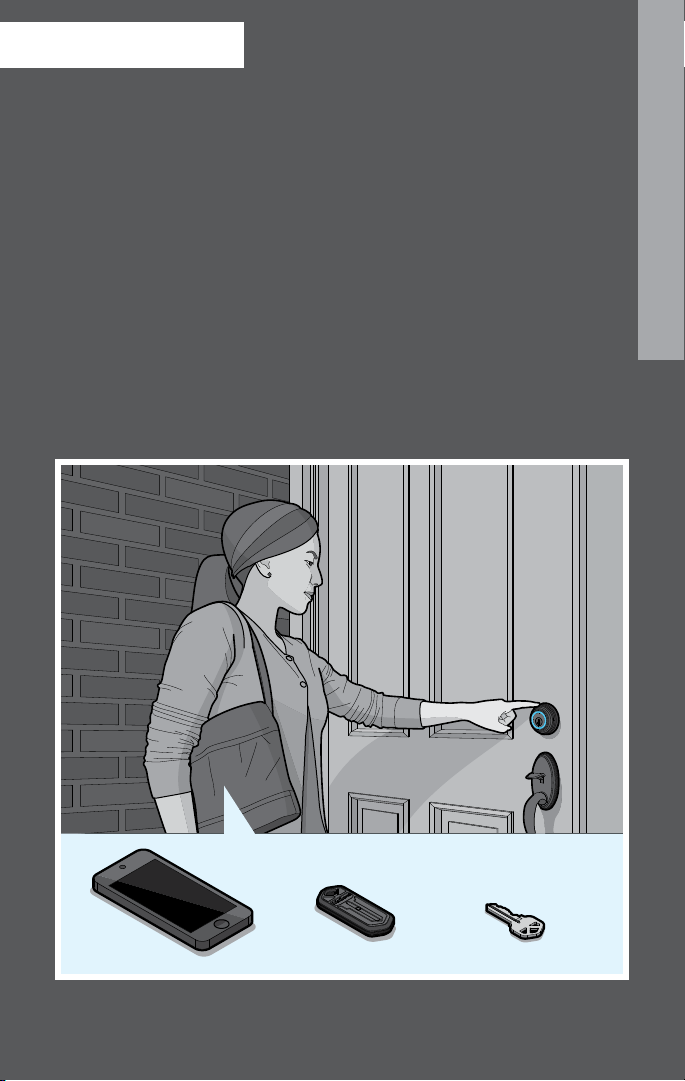
KEVO OVERVIEW
The Kevo lock communicates via Bluetooth wireless technology with your
smart device (phone, tablet or other mobile internet-connected device) or Kevo
fob, which can stay in your pocket or purse during lock operation. When you
touch the Kevo lock from the outside of the door, it recognizes your Kevo
enabled smart device or Kevo fob and locks or unlocks the door.
You may choose to use only Kevo fobs, only smart devices, or a mix of both in
your Kevo system. In order for your smart device to connect to the lock, you will
need to download the Kevo mobile app. The app acts as your virtual key and
runs in the background without you even having to remove it from your pocket
or purse to unlock the door. You can grant family and friends access to your Kevo
lock by giving them Kevo fobs or sending eKeys to their smart devices. Kevo
eKeys can be sent or disabled at any time through the Kevo app or web portal.
The Kevo lock can always be locked and unlocked with a standard key as needed.
You can use the SmartKey tool to rekey your lock so it works with your existing
Kwikset key. See the SmartKey rekey instructions for more information.
ENGLISH
smart device
Kevo fob
standard key
5
Page 6
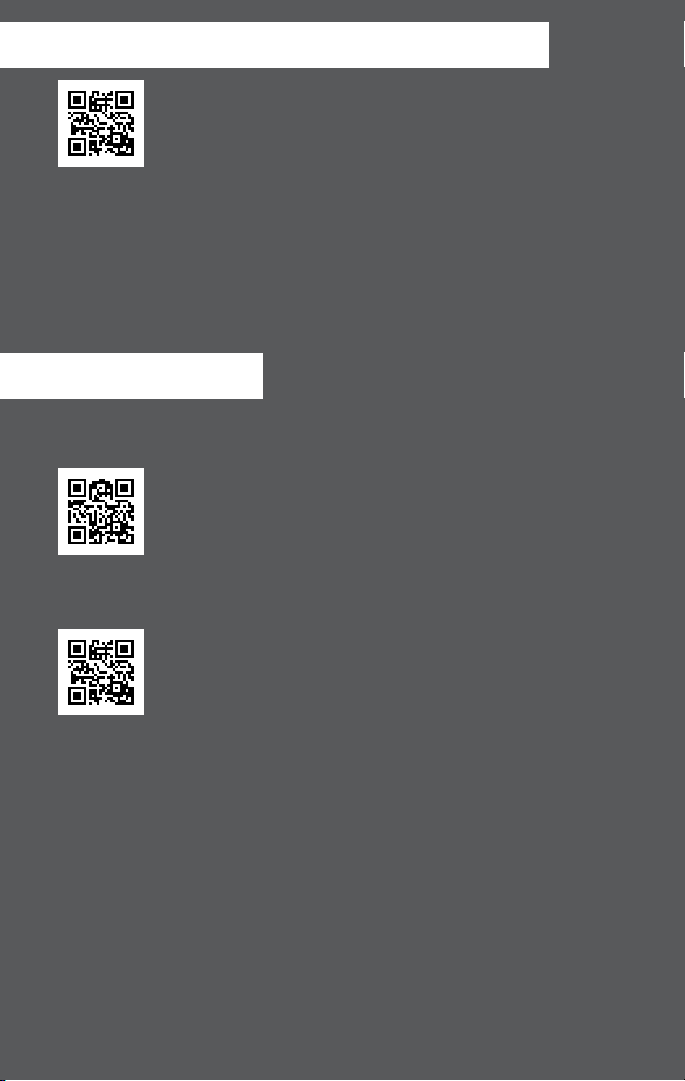
SYSTEM REQUIREMENTS FOR SMART DEVICES
A Kevo compatible smart device must have Bluetooth Smart Ready/
Bluetooth 4.0, and the Kevo app specific to the device must be
installed. Find out if your device is compatible by consulting our
website: www.kwikset.com/kevo/devices
If your device is compatible, the QR code above will transfer you directly to
your device’s app store so you can download the Kevo app. If your device is not
compatible, you can still use the Kevo fob to operate your lock. See page 9.
When sending eKeys, make sure your eKey receivers also have Kevo compatible
Bluetooth Smart Ready / Bluetooth 4.0 smart devices. They will be prompted to
download the Kevo app once they receive an eKey for the first time.
GETTING STARTED
Install the Kevo Lock
Before programming your Kevo system, make sure to install the
lock on your door. See the Kevo Installation Guide for complete
instructions or view the installation video at
www.kwikset.com/kevo/setup
Download the Kevo Mobile App
If you are using smart devices in your system, download the Kevo
app specific to your device to get started. You can find the link to
the app at www.kwikset.com/kevo/app
Web Portal
You can also configure your account settings through the Kevo web portal:
www.kwiksetkevo.com
6
Page 7

PROGRAMMING INSTRUCTIONS
Smart Devices
Note: Throughout this manual, smart devices (phones, tablets and mobile
internet-connected devices) will be referred to as “smartphones” or “phones.”
All smartphones will be configured through the Kevo app. The first phone you
setup with the lock will become the Owner of the lock. You can send eKeys to
friends and family with compatible smartphones and use the app to decide who
receives Admin rights in your system.
Like an Owner, an Admin user can send, disable and delete eKeys and enroll
Kevo fobs. An Admin user can delete other Admins, but they cannot delete
the Owner or the lock from the system. All other users can lock and unlock
the Kevo lock, but they cannot manage eKeys.
Configuring the Kevo Lock’s First Smartphone
Once the Kevo app is installed on your phone, follow the instructions inside the
app to create an account and set up your phone to work with the lock. Your
phone will become the Owner of the lock.
Calibrating Your Phone
When you set up your lock’s first phone, the app will prompt you to calibrate your
phone. The calibration process will help the Kevo lock learn where you normally
carry your phone while locking and unlocking the door. If you experience
any issues while trying to lock or unlock the door in the future, perform the
calibration process again from within the app.
When the light ring flashes magenta while you’re trying to lock or unlock the door, the
Kevo lock senses your phone is out of activation range. If this happens frequently, this
is an indication that you should perform the calibration process again.
Note: Activation range refers to the area close to the Kevo lock in which the lock
can detect your device and respond to touch. The calibration process can help
fine tune this range.
Note: The calibration process must be performed while you are standing next to
the Kevo lock.
WARNING: Fine tuning your Kevo lock’s activation range is an important
security measure, especially if part of your home extends into the activation
range. If you keep your phone near the Kevo lock, test to ensure your device
is not being detected within activation range, and perform the calibration
process to shorten this range.
ENGLISH
7
Page 8

Disabling Your Lost or Stolen Smartphone
If your phone is lost or stolen, use the Kevo web portal to delete or disable your
old phone: www.kwiksetkevo.com
Transferring Your Information to a New Phone
When you get a new phone, download the Kevo app and sign in. All of
your settings will be transferred to your new phone and deleted from
your former phone.
eKeys
When you set up your phone to work with the lock, an eKey is automatically
added to your account so you can send it to a friend or family member with a
compatible smartphone. Owners and Admin users can purchase additional eKeys
as needed through the app.
Sending an eKey
To send an eKey, navigate to the “Send eKey” section of the app and follow
the prompts.
Once someone receives an eKey, they will see the eKey listed as Pending in the
Kevo app. The eKey receiver must Accept the eKey inside the app.
Calibrating an eKey Receiver’s Smartphone
If an eKey receiver is a frequent user of your lock, it is recommended
that they run the app’s calibration process to help the Kevo lock better
communicate with their phone. This will not affect the calibration settings of
other users in the system.
When the light ring flashes magenta while an eKey user is trying to lock or
unlock the door, the Kevo lock senses their phone is out of activation range.
If this happens frequently, this is an indication that they should perform the
calibration process again from within the Kevo app.
Disabling an eKey
You can disable an eKey from an individual user within the app. Disabling an
eKey will temporarily disallow access to the Kevo lock until you re-enable it.
Deleting an eKey
Deleting a user’s eKey will permanently remove that eKey from your Kevo system.
Note: If you wish to add a user back after you delete their eKey, you will need to
purchase a new eKey inside the app.
8
Page 9

Fobs
The Kevo fob that came with your Kevo lock is already enrolled in the lock, but it
is recommended that you perform the calibration process below.
Note: You can purchase additional Kevo fobs as needed.
Note: In order to have a mix of smartphones and fobs in your Kevo system, a
Kevo compatible smartphone must be designated as the Owner of the lock.
See page 7.
Kevo Fob Calibration
The calibration process will help the Kevo lock learn where you normally
carry your fob while locking and unlocking the door. If you experience any
issues while trying to lock or unlock the door in the future, perform this
calibration process again.
WARNING: Fine tuning your Kevo lock’s activation range is an important
security measure, especially if part of your home extends into the activation
range. If you keep your fob near the Kevo lock, test to ensure your device
is not being detected within activation range, and perform the calibration
process to shorten this range.
Tip: It is recommended that this procedure is performed with each fob in your
system. This will not affect the calibration settings of other users in the system.
1. To put the lock in calibration mode, take the battery cover off the lock. Press
the Calibrate button once, then hold your fob close against the back panel
until you hear one beep.
2. Close the door, stand outside in front of the Kevo lock, and place your fob
where you would normally keep it (pocket, purse, bag, etc.).
The light ring will spin green. When it turns solid green, touch the deadbolt
rose. Repeat this touch sequence two more times.
After the third touch, the light ring will flash green. Your fob is now calibrated.
ENGLISH
Perform touch sequence three times.
deadbolt
rose
flashing green:
calibration is
complete
9
Page 10

The following sections show you how to enroll and remove Kevo fobs in a fob-only
system or in a fob-and-phone system.
Note: A single fob can be enrolled in multiple Kevo locks.
Note: The fob that came with your Kevo lock is already enrolled in the lock.
Fob-Only System
enrolling an additional fob
1. Push the Program button on the back panel.
2. Hold an already enrolled fob close against the back panel until you hear
one beep.
3. Use a ballpoint pen to press the enroll button on the new Kevo fob. The fob’s
LED will begin to blink green.
4. Hold the new fob close against the back panel.
Once the Kevo lock beeps twice and the fob’s LED turns solid green, the fob
has enrolled successfully. You may now perform the Kevo fob calibration
process on page 9.
1
3 4
LED
enroll button
new fob
10
2
already
enrolled
fob
new fob
Page 11

removing a fob
In order to remove a Kevo fob from a fob-only system, you will need to reset
your lock to factory default settings. Press and hold the Reset button on the back
panel for 10 seconds until the lock beeps. All fobs associated with the lock will
be deleted from memory.
Note: If you lose a fob from a fob-only system, you will need to reset the lock to
delete the fob from memory.
enrolling the first fob after a factory reset
1. Push the Program button on the back panel.
2. Press the enroll button on the fob.
3. Hold the fob close against the back panel.
Once the Kevo lock beeps twice and the fob’s LED turns solid green, the fob
has enrolled successfully. You may now perform the Kevo fob calibration
process on page 9.
Fob-and-Phone System
enrolling a fob
In a fob-and-phone system, you can enroll an additional Kevo fob with the help of the
Kevo app. Navigate to the “Enroll a Fob” section of the app, and follow the prompts to
enroll your new fob. Once fob enrollment is complete, you may perform the Kevo fob
calibration process on page 9.
removing a fob
If you need to remove a fob from your system, select the desired fob from within
the Kevo app and follow the app’s instructions to remove it.
Note: You must be within Bluetooth range of your lock to delete a fob from your
Kevo system through the app.
ENGLISH
Resetting Your Kevo System
If you wish to restore your Kevo lock to factory default settings and delete all
smartphones and Kevo fobs from memory, press and hold the Reset button on
the back panel for 10 seconds until the lock beeps.
Note: Resetting your Kevo lock will delete all eKeys associated with the lock;
however, you will be able to send eKeys at no charge to anyone who previously
had an active eKey at the time of reset.
11
Page 12

NORMAL OPERATION
Unlocking the Door
From the Outside
To unlock the Kevo lock (while your smartphone or fob is in your pocket or purse), hold
one finger against the deadbolt rose until the light ring spins blue. The light ring will
flash green twice and you will hear two beeps. The door will unlock.
Tip: The deadbolt rose is the entire metallic guard extending from the light ring to the
door. You can touch the rose in any location.
If someone with a Kevo device that is not authorized in your system touches the
rose, the light ring will spin blue, then flash red. The door will not unlock.
If someone without a Kevo device touches the rose, the light ring will just spin
blue. The door will not unlock.
deadbolt
rose
or
flashing green:
the door
will unlock
flashing red:
the door
will not unlock
Note: A standard key can always be used to unlock the door as needed.
From the Inside
The Kevo lock can be unlocked from the inside by simply rotating the turnpiece.
rotate the turnpiece
horizontally to unlock
12
Page 13

WARNING: If part of your home extends into the Kevo lock’s activation
range, do not keep your smartphone or fob in this area. If kept in this area,
the Kevo lock’s antennas may detect your device on the outside of the door,
allowing anyone to open your lock by touch. If you plan to keep your device
near your lock, test to ensure it is not being detected within activation range.
Performing the calibration process on your fob or phone can help fine tune
the activation range.
Locking the Door
From the Outside
To lock the door (while your smartphone or fob is in your pocket or purse), hold one
finger against the deadbolt rose until the light ring spins blue. The light ring will flash
amber and you will hear one beep. The door will lock.
If someone with a Kevo device that is not authorized in your system touches the
rose, the light ring will spin blue, then flash red. The door will not lock.
If someone without a Kevo device touches the rose, the light ring will just spin
blue. The door will not lock.
or
ENGLISH
flashing amber:
the door will lock
flashing red:
the door will not lock
Note: a standard key can always be used to lock the door as needed.
From the Inside
The Kevo lock can be locked from the inside by simply rotating the turnpiece.
rotate the turnpiece
vertically to lock
13
 Loading...