

Page 1

1
SpeedZone®P•Brain™Cyclocomputer,
Heart Rate Monitor and Altimeter
Congratulations on your purchase and welcome to the growing number of cyclists discovering a powerful new generation of bicycle conditioning and training tools. Your Specialized
SpeedZone P•Brain is designed to provide the best combination of performance, features,
durability, ease of use and installation.
Warning: The SpeedZone P•Brain heart rate monitor is a complex conditioning and training tool. You should consult a
physician before beginning any exercise program in order to establish the best heart rate zone for you.
The following functions are available on the SpeedZoneP•Brain:
• Current Speed
• Average Speed
• Maximum Speed
• Heart Rate
• Average Heart Rate
• Time in Heart Rate Zone
• Upper/lower heart rate limit
• Heart rate zone graph
• Current Altitude
• Accumulated Vertical Change
• Automatic Start/Stop Timer
• Trip Distance
• Odometer (total distance)
• +/- Average Speed Indicator
• Digital 12/24 Hour Clock
• Low Battery Indicator
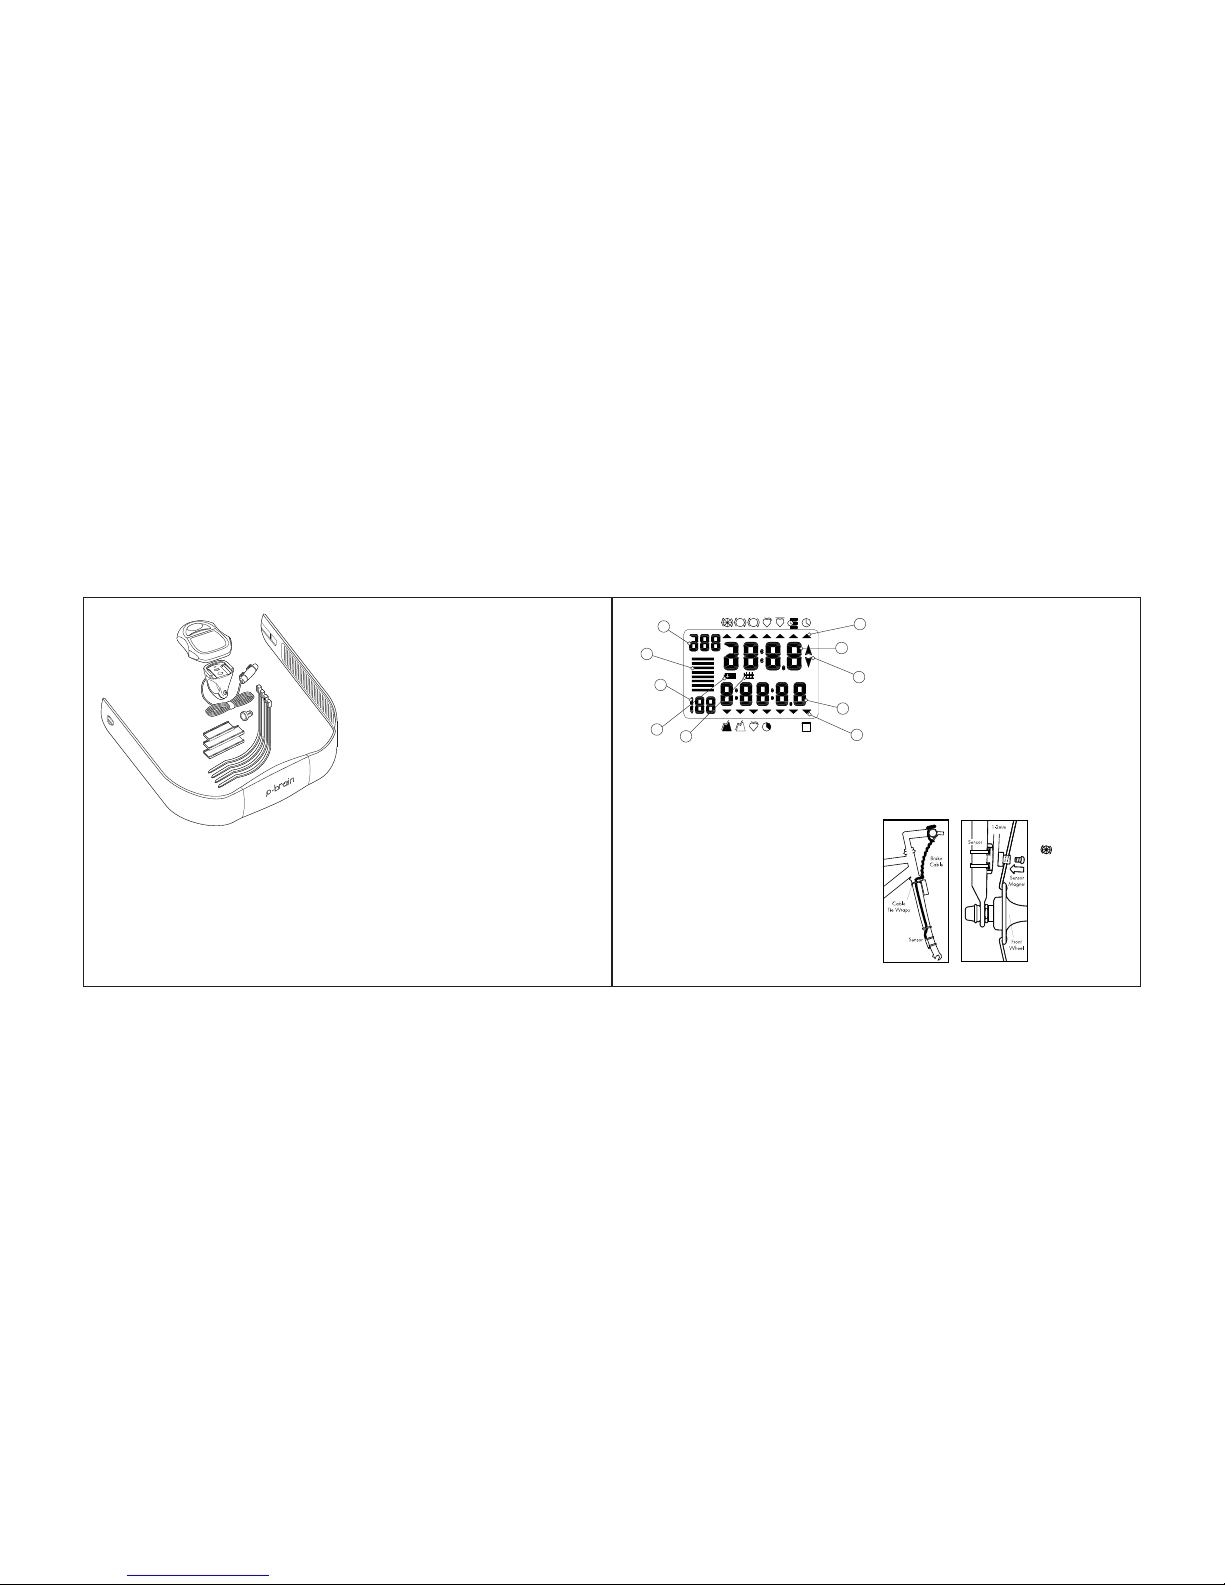
What is included in your SpeedZone P•Brain package:
• SpeedZone P•Brain Computer (1)
• Mounting bracket (1)
• Magnet with screw (1)
• Cable tie wraps (4)
• Mounting bracket sizing straps (3)
• Wireless Heart rate chest strap (1)
Page 2
3
If you purchased the SpeedZone P•Brain
with PC download capability the following
items are also included:
• Desktop download module
• 3.5" floppy disk with SpeedZone
P•Brain SportLog software
If you did not purchase your SpeedZone
P•Brain with the download module, you may
upgrade by visiting your local Specialized
dealer and purchasing the download kit.
(Part # 480-3200)
DISPLAY SCREEN AND BUTTONS
The SpeedZone P•Brain LCD screen has the
ability to display a wide range of information. Please refer to the accompanying chart
for a list of all the LCD functions. Your
SpeedZone P•Brain has three buttons which
are used for programming and for selecting
the various modes of operation. The right
side button selects the position of the TOP
LINE FUNCTION CURSOR and while programming scrolls the numerical displays up.
The left side button selects the position of the
BOTTOM LINE FUNCTION CURSOR and
while programming scrolls the numerical displays down. The top button is used for programming and for starting and stopping
DATA COLLECTION MODE.
2
MOUNTING
THE SPEEDZONE P•BRAIN
The SpeedZone P•Brain wheel sensor can
mount on the right or the left side of the fork
blade. Use the cable tie-wraps provided to
position the sensor. Do not tighten until the
final placement of the sensor magnet is correct.
(See Figure 1)
. Attach the magnet to a
spoke across from the sensor with the magnet screw. The clearance between the magnet and the sensor should be approximately
1/32"-1/16" (1-2mm). Tighten the magnet
and transmitter. Do not over-tighten the magnet screw
(See Figure 2)
.
Attach the mount to the handlebar using
the bracket screw provided. Tighten so that
the bracket cannot rotate on the handlebar.
There are several sizing straps provided to fit
different diameter bars.
Slide the computer forward onto the
mount until it ‘snaps’ into place with an
audible click. To remove the computer, push
it backward until it releases from the mount.
To test for proper installation of the magnet,
sensor and computer, push the right button
until the TOP LINE FUNCTION CURSOR is
under the
current speed
icon.
Pickup the
front of the
bicycle and
spin the wheel.
The top line
of the display
should show
km/hampm
m
ft
1
∑
A
M
DSTDST
ODOODO
Fig. 1
1. Heart rate zone upper limit
2. Heart rate zone lower limit
3. Heart rate bar graph
4. Top line function cursor
5. Bottom line function cursor
6. +/- Average speed indicator
7. Top line numeric display
8. Bottom line numeric display
9. Data collection mode indicator
10.Low battery indicator
2
10
6
5
4
7
Fig. 2
8
9
3
1
Page 3
2. Miles/Feet or
Kilometers/Meters Selection
Your SpeedZone P•Brain will record
speed/distance and altitude in either miles
(m/h) and feet (ft) or kilometers (km/h) and
meters (m). Either the left or the right side
button will toggle the display between m/h-ft
and km/h-m. When the desired selection is
displayed press a side button and the top
button simultaneously to enter the date
selection mode.
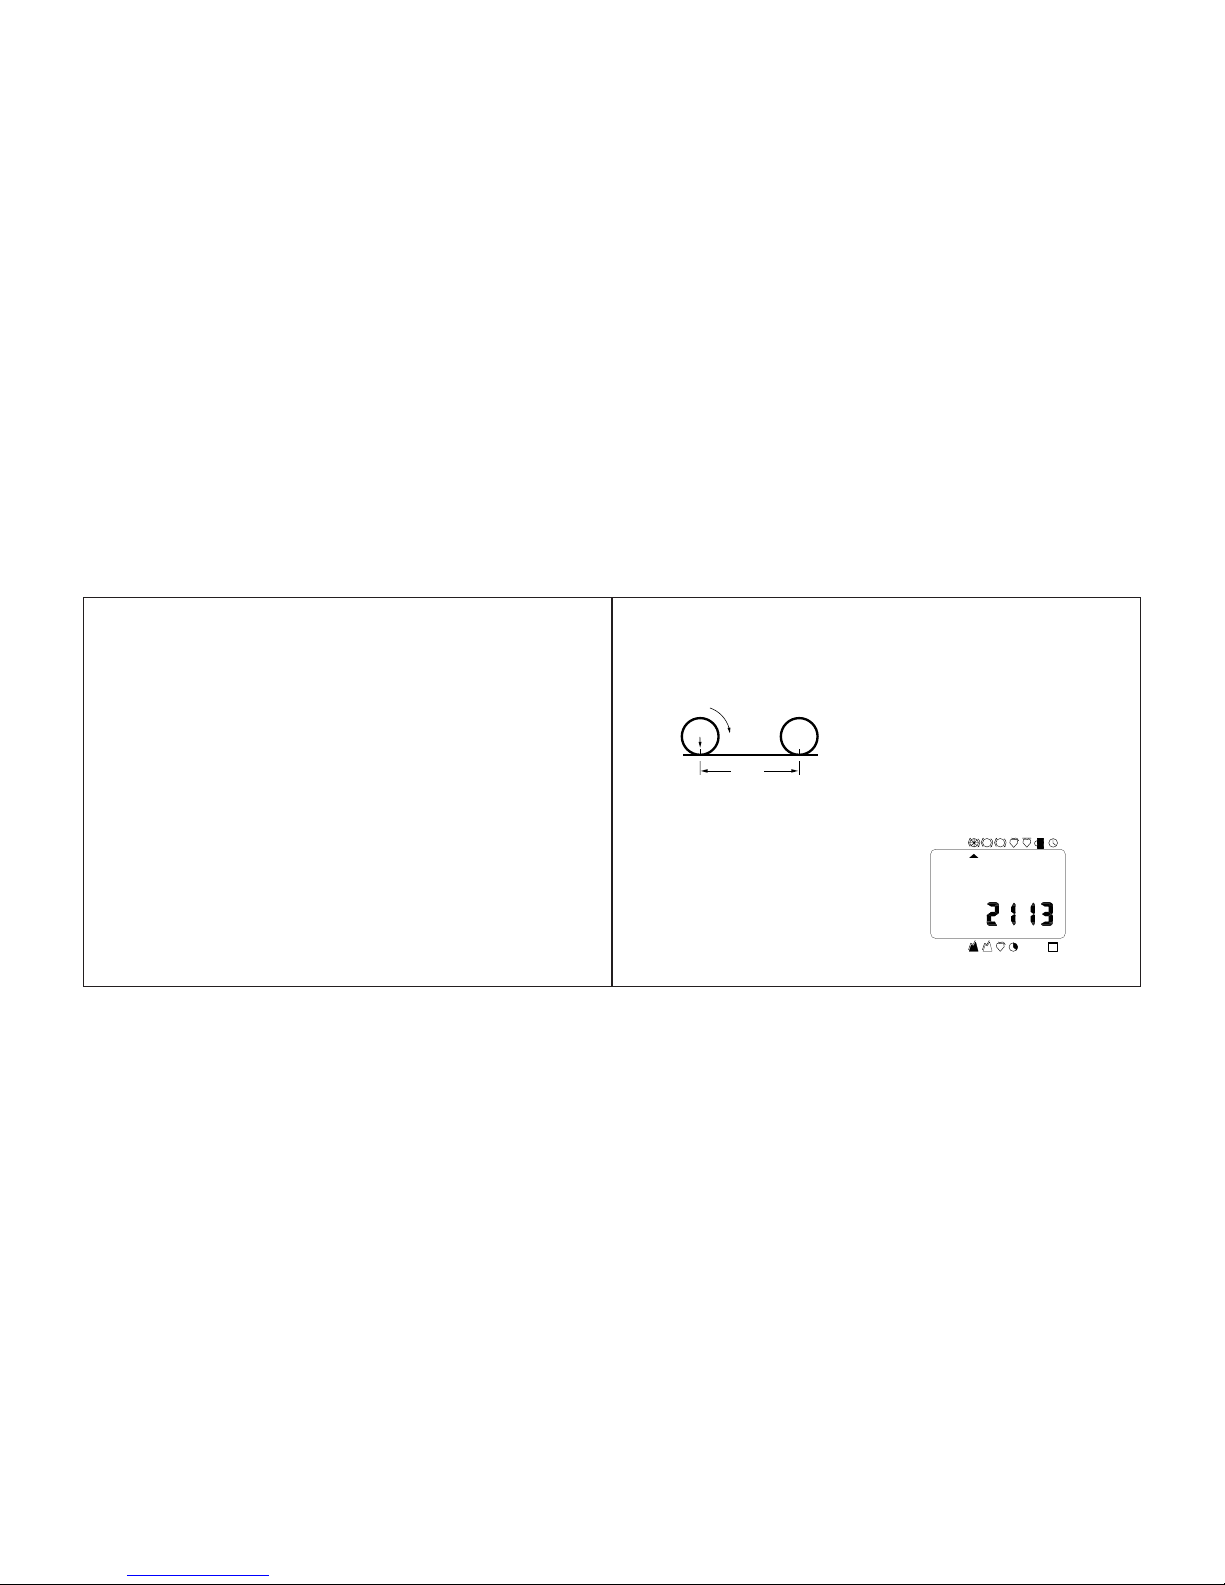
3. Year and Date Selection
Your SpeedZone P•Brain has a calendar
that includes year, month and day. When the
four digit year indicator is flashing you can
scroll up by pushing the right
side button and down by
pushing the left side button.
When the desired year selection is displayed press a side
button and the top button
simultaneously. The month
and day display will now begin flashing. Use
the right button to scroll up and the left one
to scroll down. Each push of the side button
will change one day at a time. Hold the right
or left button to scroll through the digits rapidly. When the desired selection is displayed
press a side button and the top button simultaneously to enter the clock mode.
Note:
If
you selected imperial units during setup, date
will be displayed as mm-dd. If metric units
were selected, date is displayed as dd-mm.
4. Setting the Clock
Your SpeedZone P•Brain has a digital clock.
Upon entering the clock programming mode,
The display will flash either twelve (12hr) or
twenty-four (24hr). Select
between 12 or 24 hour mode
by pressing either the left or
right side button. When the
desired selection is displayed
press a side button and the top
button simultaneously.
5
the current speed. Realign the magnet and
sensor if necessary until the current speed is
shown while the front wheel is spinning.
PROGRAMMING
Before programming, your SpeedZone
P•Brain must be initialized. The easiest way
to do this is to depress all three buttons
simultaneously for 3 seconds.
Note:
You
cannot enter Program Mode while in Data
Collection Mode (Data Collection mode is on
when this icon appears on the screen).
If Data collection mode is on, press the top
button once to turn it off. You can also initialize it by depressing the AC button on the
bottom of the SpeedZone P•Brain (by inserting a small object, such as the tip of a ballpoint pen, into the hole labeled “AC”), or
by removing the battery for 60 seconds. The
SpeedZone P•Brain will then automatically
enter the program mode.
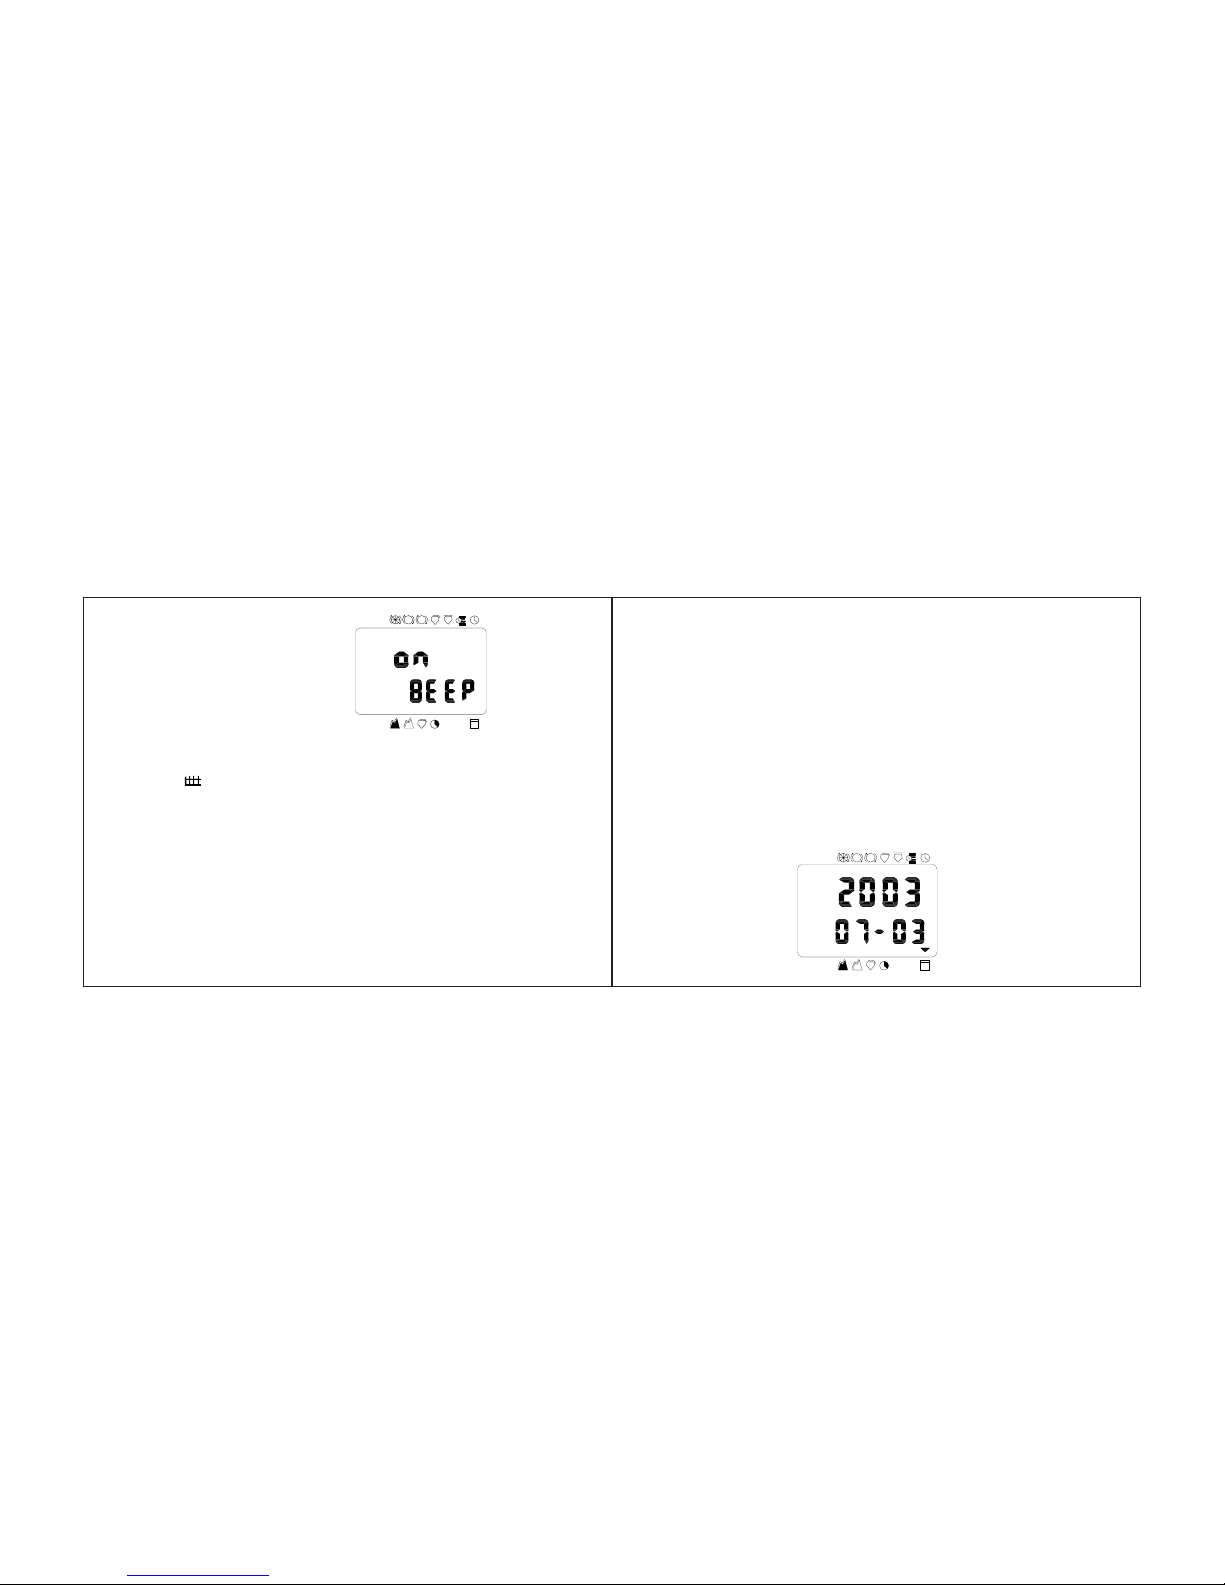
1. Beep ON/OFF selection
You can select if you would like your
SpeedZone P•Brain to give you an audible
beep when you are above or below your
target heart rate and every time you press
one of its buttons. Either the left or the right
side button will toggle the display between
ON BEEP and OFF BEEP. When the desired
selection is displayed press a side button
and the top button simultaneously to enter
the miles/kilometers selection mode.
4
1
∑
A
M
DSTDST
ODOODO
1
∑
A
M
DSTDST
ODOODO
Page 4
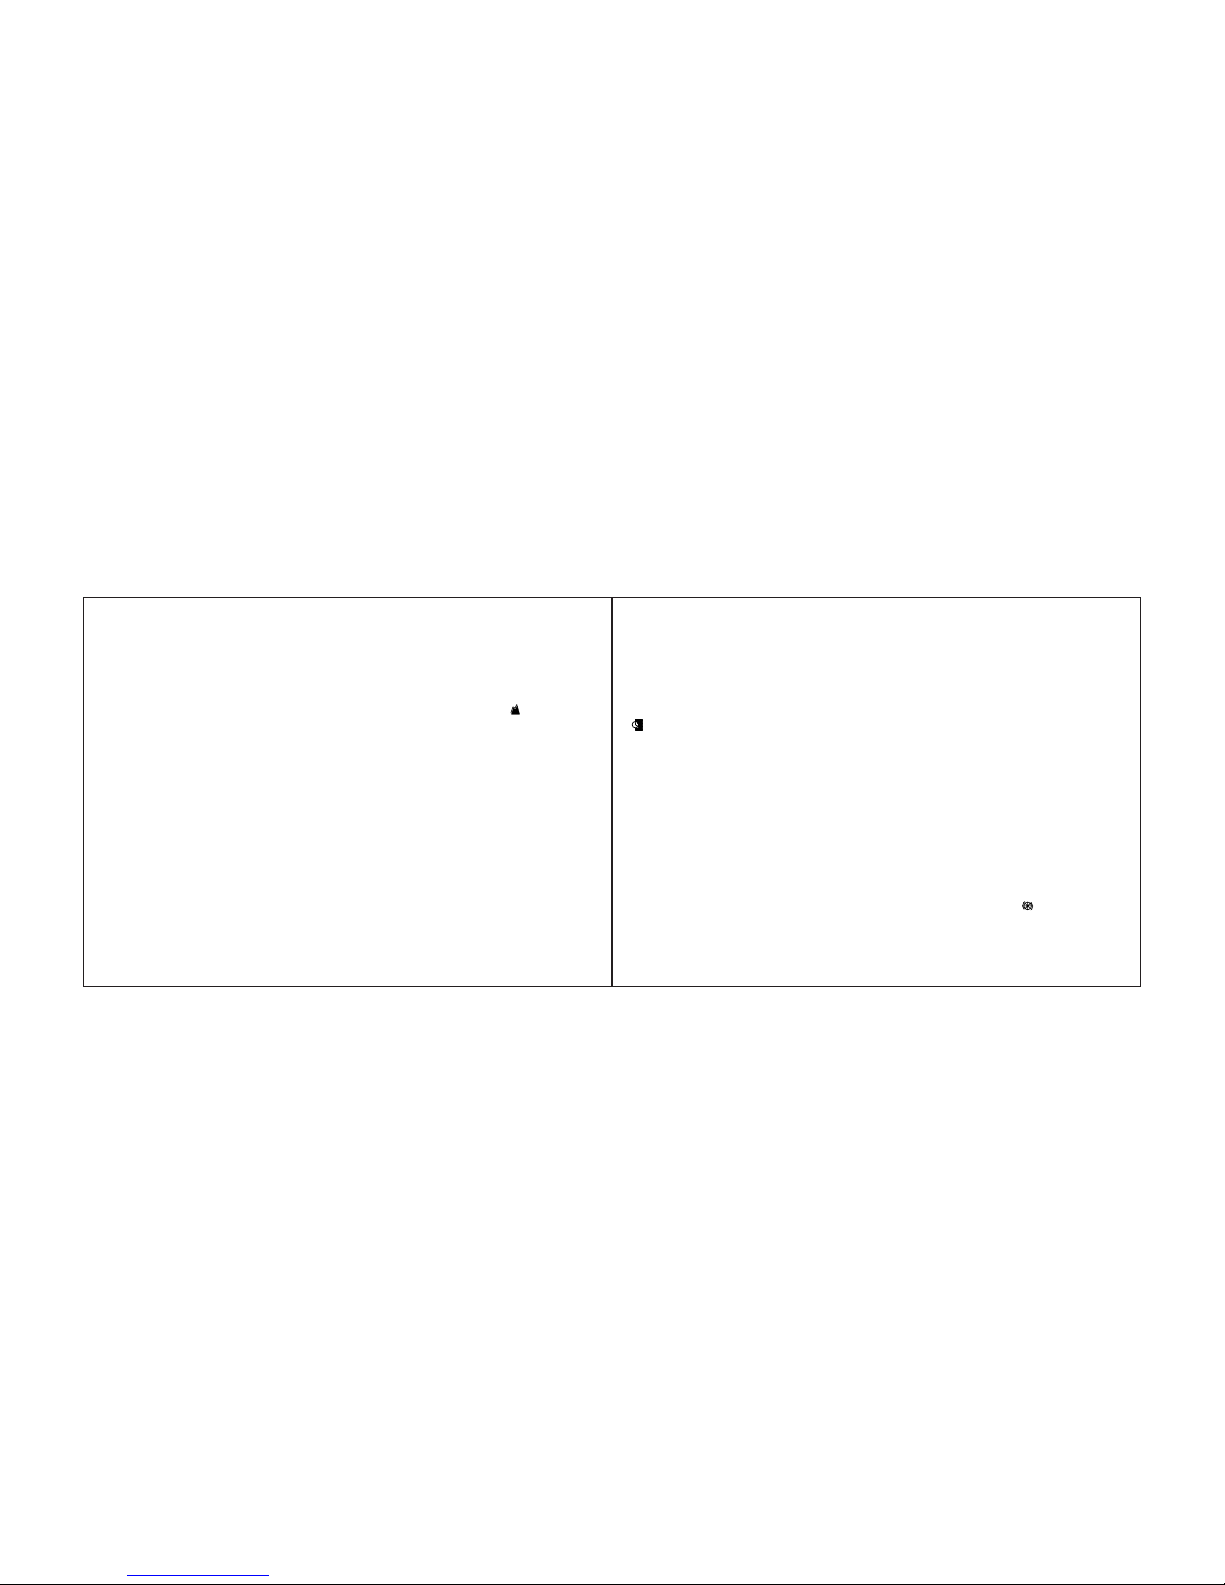
Roll Out Method
The roll out method will provide the most
accurate computer calibration accounts for
variables such as inflation pressure, rim
width and rider weight.
1. Extend a tape measure out to 3000mm
(120 inches) and lock it in place.
2. With your tire inflated to its proper pressure, place the valve at the 6:00 position
(at the bottom) directly over the start of the
measuring tape.
3. Roll the wheel one complete revolution
until the valve stem is again at the 6:00
position. Read the tape directly under the
valve and note the distance in millimeters.
(To convert inches to millimeters, multiply
inches by 25.4) . This number represents
your tire circumference in millimeters.
Programming the circumference
The tire circumference (in millimeters) will be
flashing when you are in circumference programming mode. Use the right button to
scroll up and the left one to scroll down.
Each push of the side button will change the
circumference one millimeter. Hold the right
or left button to scroll through the digits rapidly. When the desired selection is displayed,
press a side button and the top button simultaneously to enter the programmable
odometer mode.
7
The hour and minute digits will now
begin flashing. Again, use the right button to
scroll up and the left one to scroll down.
Each push of the side button will change one
minute. If either of the side buttons is held
down it will cause the time to scroll up or
down rapidly. When the desired selection is
displayed press a side button and the top
button simultaneously to enter the wheel
Circumference selection mode.
5. Wheel Circumference Selection
To set the circumference for the tires you
are using, you can either use the table below
to obtain an approximate tire circumference
or measure your actual tire circumference
by the roll-out method.
Specialized Tire Size Chart
SBC 20 X 1.8 1589
SBC 24 X 1.8 1893
SBC 26 X 1.0 1924
SBC 26 X 1.0 1962
SBC 26 X 1.25 1980
SBC 26 X 1.4 2010
SBC 26 X 1.5 2054
SBC 26 X 1.95 2061
SBC 20 X 2.0 2567
SBC 650 X 20 1930
SBC 700 X 20 2100
SBC 700 X 23 2113
SBC 700 X 38 2220
Generic Tire Size Chart
This chart is for non-Specialized tires
26 X 1.75 2140
26 X 2.0 2074
26 X 2.1 2090
650C X 20 1945
700C X 26 2124
700C X 38 2170
6
1
∑
A
M
DST
ODO
Wheel
Circumference
Stem
Roll Forward
Page 5
8. Heart Rate Zone Calibration
The heart rate zone can be adjusted to suit
your personal training program (For more
information on heart rate training please
consult your doctor). To enter heart rate zone
calibration mode push the right button until
the Top Line Function Cursor is under the
Time In Zone icon. Simultaneously hold the
top and right buttons down for three seconds. The heart rate zone lower limit will
begin flashing. Use the right button to scroll
up and the left one to scroll down. Each
push of the side button will change the heart
rate 5BPM (beats per minute). Hold the right
or left button to scroll through the digits rapidly. When the desired selection is displayed,
press a side button and the top button simultaneously. The heart rate zone upper limit
will begin flashing. Again, use the right button to scroll up and the left one to scroll
down. When the desired selection is displayed, press a side button and the top button to exit heart rate zone calibration mode.
Note:
If the heart rate lower limit is blink-
ing when you are not in calibration mode, it
is an indication that your heart rate is below
your lower limit setting.
COMPUTER FUNCTIONS
Clear stored data
To erase all of the stored data in the
P•Brain, press and hold the top button for
three seconds. This will reset the Average
Speed, Maximum Speed, Average Heart
Rate, Time in Zone, Altitude Sum, Timer and
Trip Meter to zero. After this data is cleared
your SpeedZone P•Brain is ready to begin
a new tour.
Note:
Clearing stored data will
not erase previous tours that are stored in
your P-Brain.
Speedometer
The current speed is indicated on the top line
of the screen when the Top Line Function
Cursor appears under the current speed
icon. The speed is shown continuously up to
67.0M/h (99.9 Km/h) with a resolution of
0.1 M/h (0.1 Km/h)
9
6. Setting the Programmable Odometer
The odometer digits are user settable. This is
convenient for transferring your hard-earned
mileage that is usually lost when changing
batteries or computers. The odometer reading will be flashing when you are in odometer programming mode. Use the right button
to scroll up and the left one to scroll down.
Each push of the side button will change the
odometer one mile (or kilometer if you
selected metric units). Hold the right or left
button to scroll through the digits rapidly.
When the desired selection is displayed,
press a side button and the top button simultaneously. You will now exit Program Mode.
7. Altimeter Calibration
Your SpeedZone P•Brain contains an
extremely accurate altimeter that is capable
of recording changes in altitude in increments as small as three feet (one meter). This
altimeter calculates altitude by precisely
measuring barometric pressure. Due to normal fluctuations in barometric pressure, you
may need to recalibrate your SpeedZone
P•Brain on a daily basis. You should be able
to find the altitude where you live on a topographical map or by contacting a nearby
airport. To enter altimeter calibration mode
push the left button until the Bottom Line
Function Cursor is above the Altitude
icon. Simultaneously hold the top and left
buttons down for three seconds. The altitude
will begin flashing. Use the right button to
scroll up and the left one to scroll down.
Each push of the side button will change the
altitude one foot (or meter if you selected
metric units). Hold the right or left button to
scroll through the digits rapidly. When the
desired selection is displayed press a side
button and the top button simultaneously.
The word ON or OFF will begin blinking.
You can now choose to enable or disable the
altimeter recording function. Either the left or
the right side button will toggle the display
between ON and OFF. When the desired
selection is displayed press a side button
and the top button simultaneously. You will
now exit Altimeter Calibration Mode.
8
Page 6
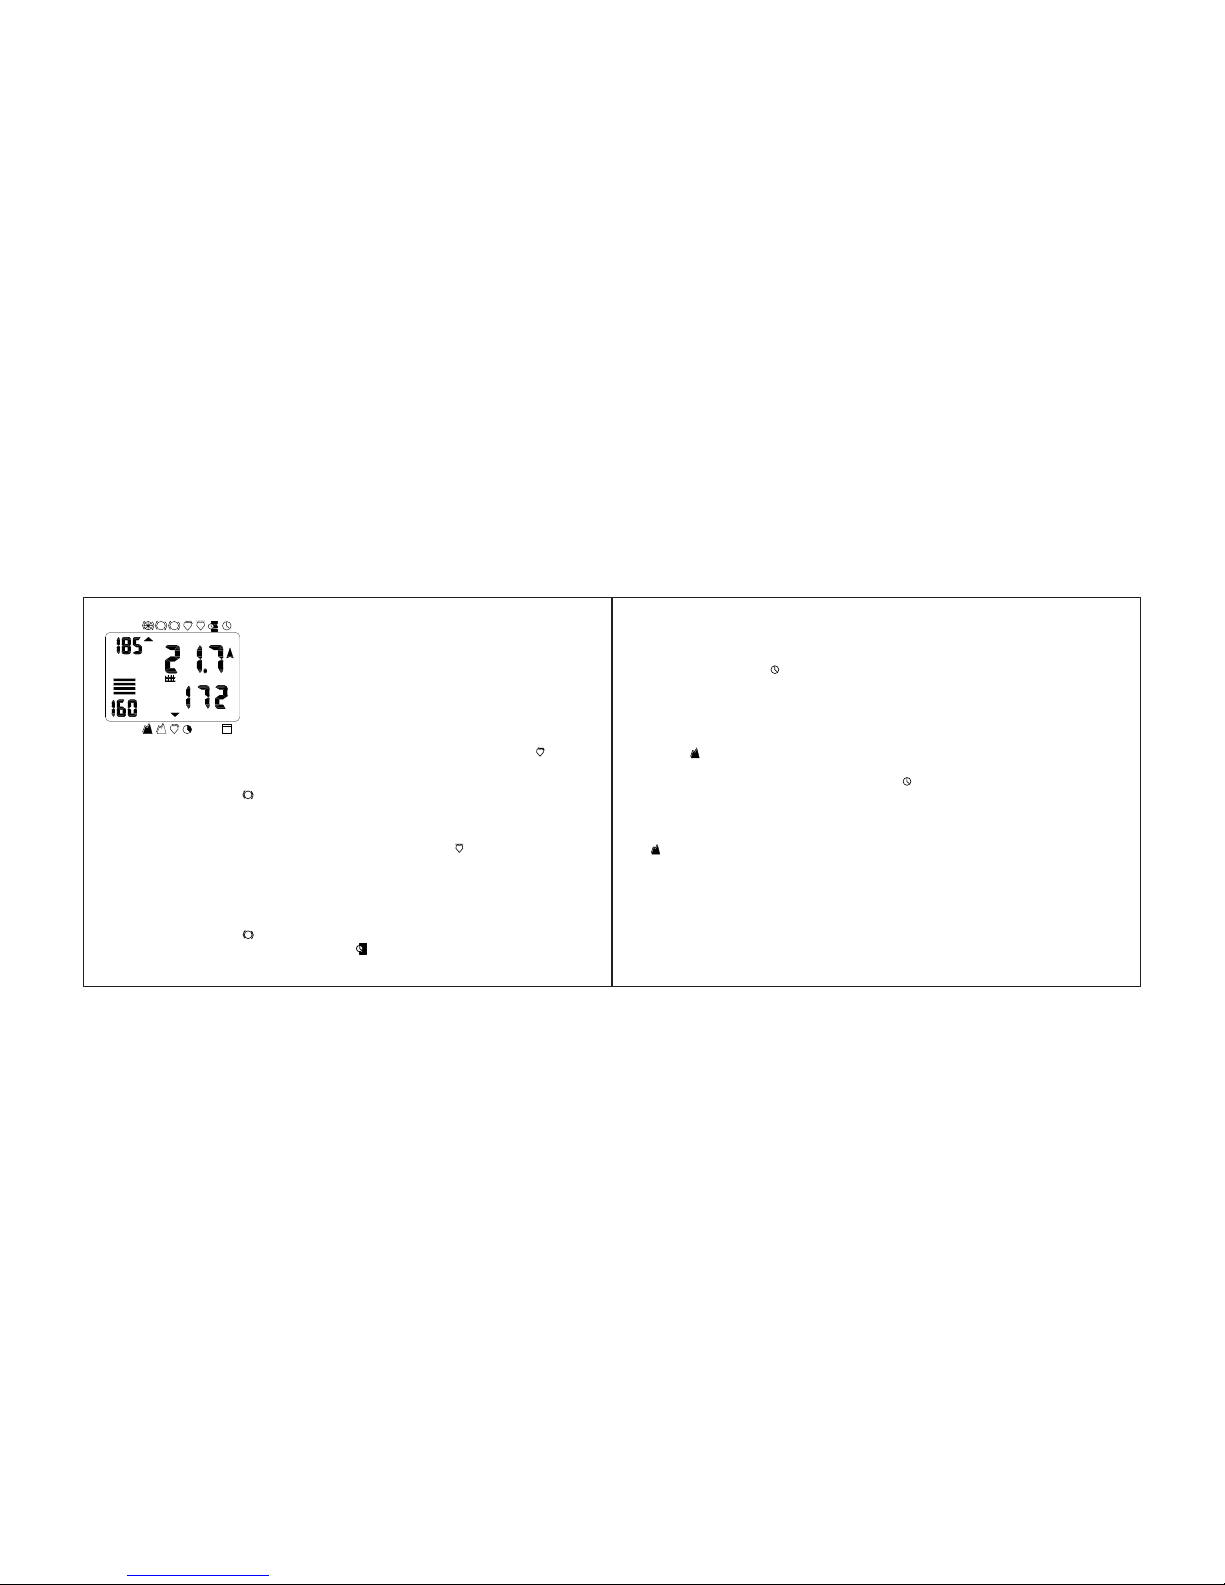
Current Time
The current time can be displayed on the top
line of the screen when the Top Line Function
Cursor appears under the icon.
Current Altitude
The current altitude can be displayed
on the bottom line of the screen when
the Bottom Line Function Cursor appears
above the icon.
Altitude Sum
The total accumulated vertical change in
altitude during a tour can be displayed on
the bottom line of the screen when the
Bottom Line Function Cursor appears above
the icon.
+/- Average Speed Indicator
In all modes, an up or down arrow displayed in the upper right side of the screen
shows whether the current speed is above or
below the average speed. When your cur-
rent speed is exactly the same as your average speed, no arrows will be displayed
Auto Start/Stop Timer
The timer function will operate only when
there is speed input and records the actual
time spent riding. Pressing the top button
for 3 seconds will reset the display to zero.
The Auto Start/Stop Timer can be displayed
on the bottom line of the screen when the
Bottom Line Function Cursor appears above
the icon
Trip Distance (DST)
Trip distance mode will record up to 999.99
miles or kilometers and then roll to zero.
Pressing the top button for 3 seconds will
reset the trip distance display to zero. The
resolution is 0.01 miles (0.01Kilometers).
The trip distance is shown on the lower line
of the screen when the Bottom Line Function
Cursor appears above the DST icon
11
Maximum Speed
The maximum speed is indicated on the top
line of the screen when the Top Line Function
Cursor appears under the Maximum
Speed icon. The maximum speed is retained
in memory and updated when a higher
speed is attained. The maximum speed can
be reset by pressing the top button for three
seconds.
Average Speed (AVS)
The average speed is indicated on the top
line of the screen when the Top Line Function
Cursor appears under the average speed
icon. The average speed is retained in memory and updated when a higher speed is
attained. The average speed can be reset by
pressing the top button for three seconds.
Current Heart Rate
Your current heart rate, in beats per minute,
can be displayed on the top and/or bottom
of the screen. When either the top or bottom
function cursor is aligned with the heart
rate icon.
Average Heart Rate
Your average heart rate, in beats per minute,
can be displayed on the top line of the
screen when the Top Line Function Cursor
appears under the icon.
Time in Heart Rate Zone
The time you have spent within the upper
and lower heart rate zones can be displayed
on the top line of the screen when the Top
Line Function Cursor appears under the
icon.
10
∑
m/h
1
∑
A
M
DSTDST
ODOODO
M
A
Page 7
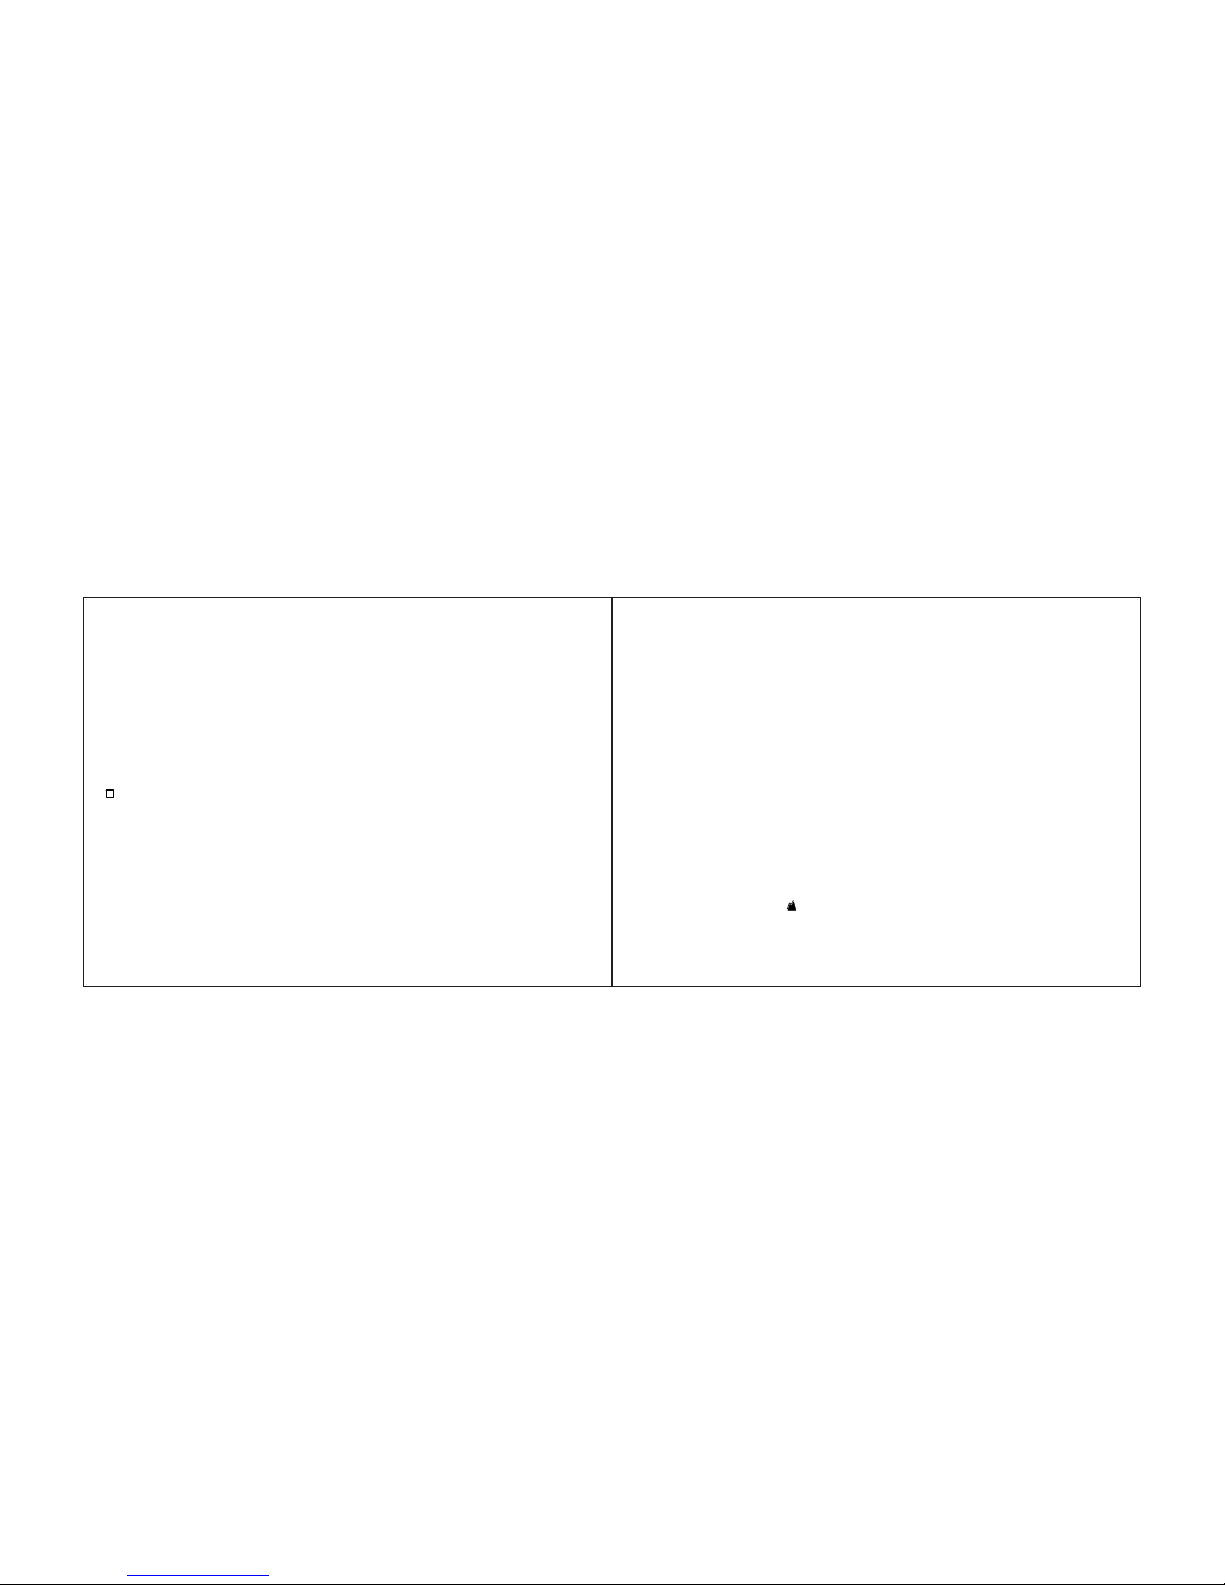
Set your heart rate zone
Hold the top and right buttons down for
three seconds. The heart rate zone lower
limit will begin flashing. Use the right button
to scroll up and the left one to scroll down.
Each push of the side button will change the
heart rate 5BPM (beats per minute). Hold the
right or left button to scroll through the digits
rapidly. When the desired selection is displayed press a side button and the top button simultaneously. The heart rate zone
upper limit will begin flashing. Again, use
the right button to scroll up and the left one
to scroll down. When the desired selection is
displayed press a side button and the top
button simultaneously to exit heart rate zone
calibration mode.
Re-calibrate the altimeter
Push the left button until the Bottom Line
Function Cursor is above the altitude icon.
Simultaneously hold the top and left buttons
down for three seconds. The altitude will
begin flashing. Use the right button to scroll
up and the left one to scroll down. Each push
of the side button will change the altitude one
foot (or meter if you selected metric units).
Hold the right or left button to scroll through
the digits rapidly. When the desired selection
is displayed press a side button and the top
button simultaneously. The word ON or OFF
will begin blinking. You can now choose to
enable or disable the altimeter function.
Either the left or the right side button will toggle the display between ON and OFF. When
the desired selection is displayed, press a
side button and the top button simultaneously.
Your altimeter is now calibrated.
Beginning a tour
Depending upon the recording interval, your
SpeedZone P•Brain can store more than 33
hours of Tour data. (For more information,
see section titled “Setting the Recording
Interval” ) It will begin collecting data as
soon as you start riding your bicycle and
stop recording 5 minutes after you stop riding. The Data Collection Mode may also be
started and stopped manually (this is called
13
Odometer (ODO)
The odometer will record the total distance
traveled up to 99,999 miles or kilometers
and then roll to zero. The total distance is
shown on the lower line of the screen when
the Bottom Line Function Cursor appears
above the ODO icon
Date
The current date can be displayed on the
bottom line of the screen when the Bottom
Line Function Cursor appears above the
icon
Heart Rate Zone Graph
Your SpeedZone P•Brain has a dynamic bar
graph that will display your position within
your programmed heart rate zone any time
there is a heart rate transmission signal. The
bar graph is determined by dividing the difference between the upper and lower limits
by eight. Upon entering your heart rate zone
the SpeedZone P•Brain will make a single
beep. If the current heart rate falls outside
the zone you will hear 3 short beeps and
the respective upper or lower target set point
will flash.
PREPARING TO RIDE
AND COLLECT DATA
Check to see that your SpeedZone P•Brain
and wheel sensor are securely fastened to
your bicycle.
Wearing the wireless heart rate chest strap
Adjust the elastic belt so that the transmitter
fits snugly below your pectoral muscles. It
may be necessary to moisten the conductive
rubber pads on the bottom of the chest strap
with saliva or ECG gel (available at your
local pharmacy), to improve electrical conductivity between your skin and the chest
strap. It may be necessary for some people
to shave the area of the chest below the
chest strap to improve conductivity between
the strap and skin.
12
1
Page 8
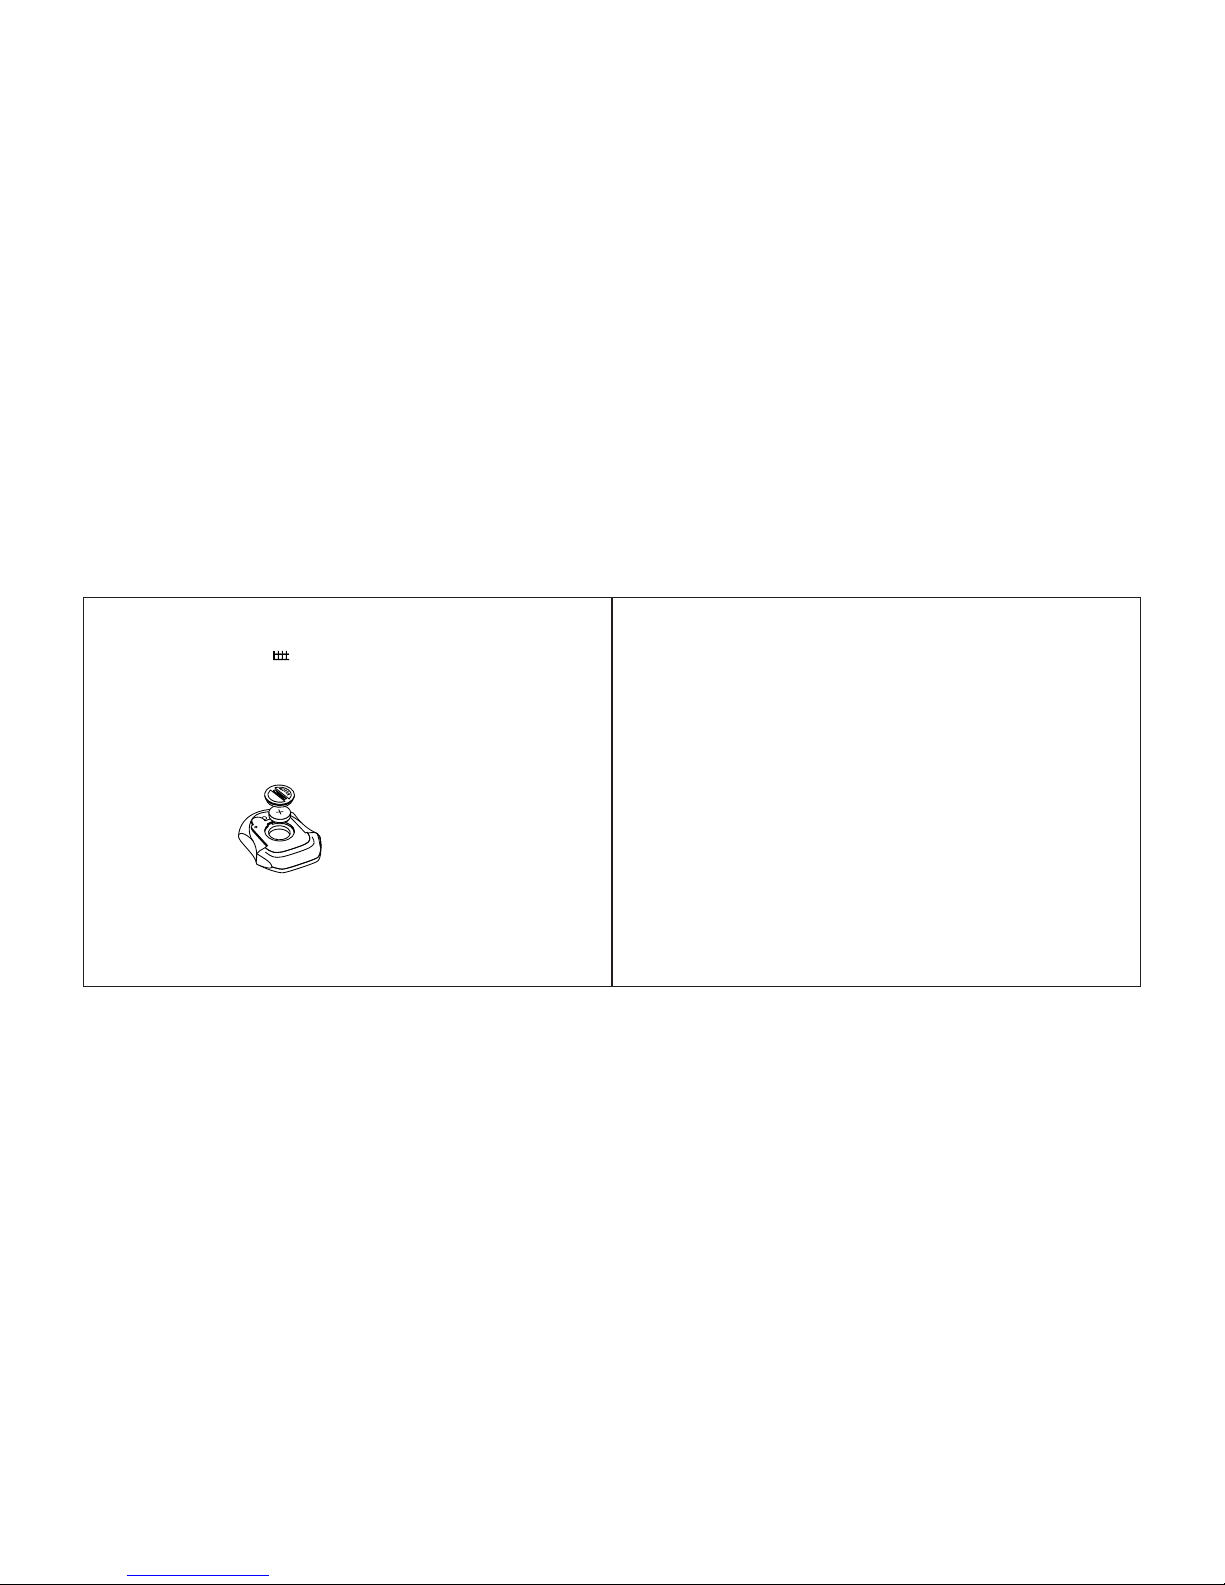
SPEEDZONE P•BRAIN
SPORTLOG SOFTWARE
Your SpeedZone P•Brain has the ability to
store data recorded during your ride. This
block of stored data is called a “Tour”. Tours
can be a single ride or comprise a series of
rides called “Trips”. The SpeedZone P•Brain
can store up to 33 hours and 24 minutes of
data. Tours can be downloaded to your PC
and analyzed with the SportLog software
provided with your P•Brain. (Note: If you did
not purchase your SpeedZone P•Brain with
the download module, you may upgrade by
visiting your local Specialized dealer and
purchasing the download kit, Part # 480-
3200). SportLog is compatible with Windows
95®, Windows 98®and Windows NT®.
Installation
To install the SportLog software, simply insert
the floppy disk into the disk drive on your
computer, double-click on the file named
“Setup”. The installer creates a folder named
“SportLog” in your "Program Files" folder on
your hard drive and will put all necessary
files in this folder. In addition to the SportLog
application, one sample tour called
“Example.slg” will be installed. In the event
your floppy disk becomes damaged or lost,
or for a free upgrade to the most current
version, you can download a new copy of
SportLog from the Specialized Website:
www.specialized.com
Reviewing your tours
In order to see your tours you must launch
the SportLog application by double clicking
on its icon. Once the application has started
you may choose to view a tour you have
stored in the past or download a tour from
the P•Brain.
Downloading from your P•Brain
In order to download data from your
SpeedZone P•Brain, you will need to connect the download module to your computer’s serial port (COMM 1 or COMM2).
15
“Hiking Mode”) by pressing the top button.
When Data Collection Mode is active the
Data Collection Mode indicator will
appear on the LCD screen.
MAINTENANCE AND CARE OF
YOUR SPEEDZONE P•BRAIN
Installing the Battery
In an effort to preserve batter y life, your
computer and chest strap ship from the factory without the battery installed. To install
the batteries turn the
computer or chest
strap upside down
and use a coin to
unthread the battery
cap. Install the battery
(type CR2032, available from your
Specialized dealer) with the positive pole (+)
facing upward. Carefully thread the battery
cap back onto the case with a coin. (See
Figure 3). If you are replacing the battery,
make a note of your odometer reading and
wheel circumference settings before removing the battery so that you can re-enter them
when you restart the computer.
Note:
A feature of this computer is that
information will be saved during battery
replacement if the battery is changed within
10 seconds. The current battery must not be
completely out of power in order for the
information to be maintained. (The display
may be dim, but not completely blank)
If the LCD display is blank or shows
incomplete digits, turn the computer over
and press the “AC” button on the bottom of
the case with the tip of a pen or a paper
clip. This will clear all the data and re-start
the computer. Reinstall the computer by
pushing it forward into the mount until it
snaps into place.
14
Fig. 3
Page 9
17
SportLog will automatically detect which port
your P-Brain is plugged into. You may need
to check your computer’s communication
port settings to be sure that your serial port
is enabled. To attach the SpeedZone P•Brain
into the download module, slide the computer forward onto the mounting until it ‘snaps’
into place with an audible click. To remove
the computer, push it backward until it
releases from the mount. Click on the
“Transfer” icon (the picture of a computer
with a red arrow) or select “Transfer” from
the “Tour” pull-down menu. The tour stored
in your SpeedZone P•Brain will now be
transferred to your computer and will
appear on your “Tour List” on the left-hand
side of the screen. The tour will be identified
by the date that it was created.
Note:
You cannot download data from
your P-Brain while in Data Collection Mode.
If Data collection mode is on, press the top
button once to turn it off.
Tech Note:
SportLog is designed to use
Windows default port settings. If you are
having difficulty communicating with your
P•Brain, check the settings of the COMM
port you are connected to. The correct settings are: BAUD Rate-9600bps, Data Bits-8,
Parity-None, Stop Bits – 1, Flow ControlXonXoff.
Opening saved tours
To open a stored tour, click on the “Open”
icon (picture of a folder) or select “Open”
from under the “File” pull-down menu. A
dialog box will open and allow you to select
the tour you want to view.
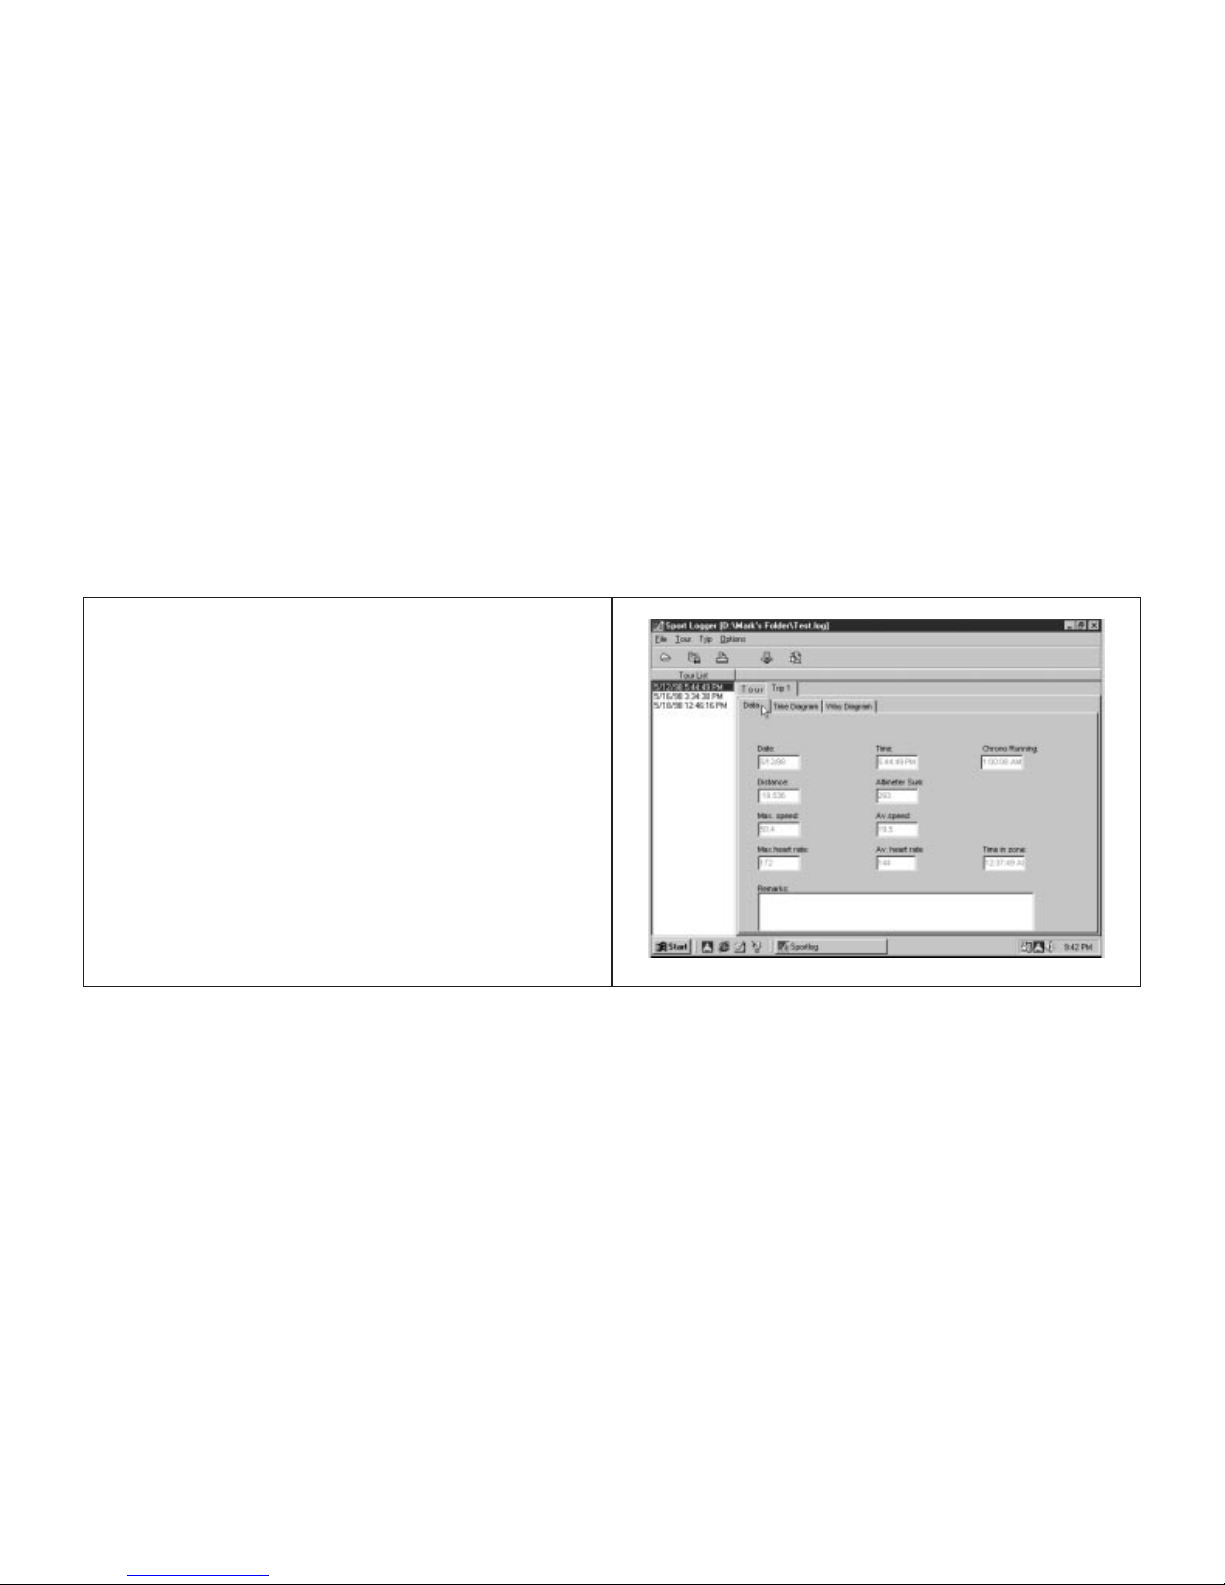
Viewing your data
From the "Tour List" on the left hand side of
the screen select the tour you would like to
review by clicking on it once. In the window
on the right side of the screen, you can select
one of the file tabs to view the data from
either your "Tour" or from one of the "Trips"
that make up the Tour. For each of the Trips,
you can view a graph that shows your heart
rate, speed, altitude and either your distance
or time. The "Time Diagram" will create a
16
Page 10
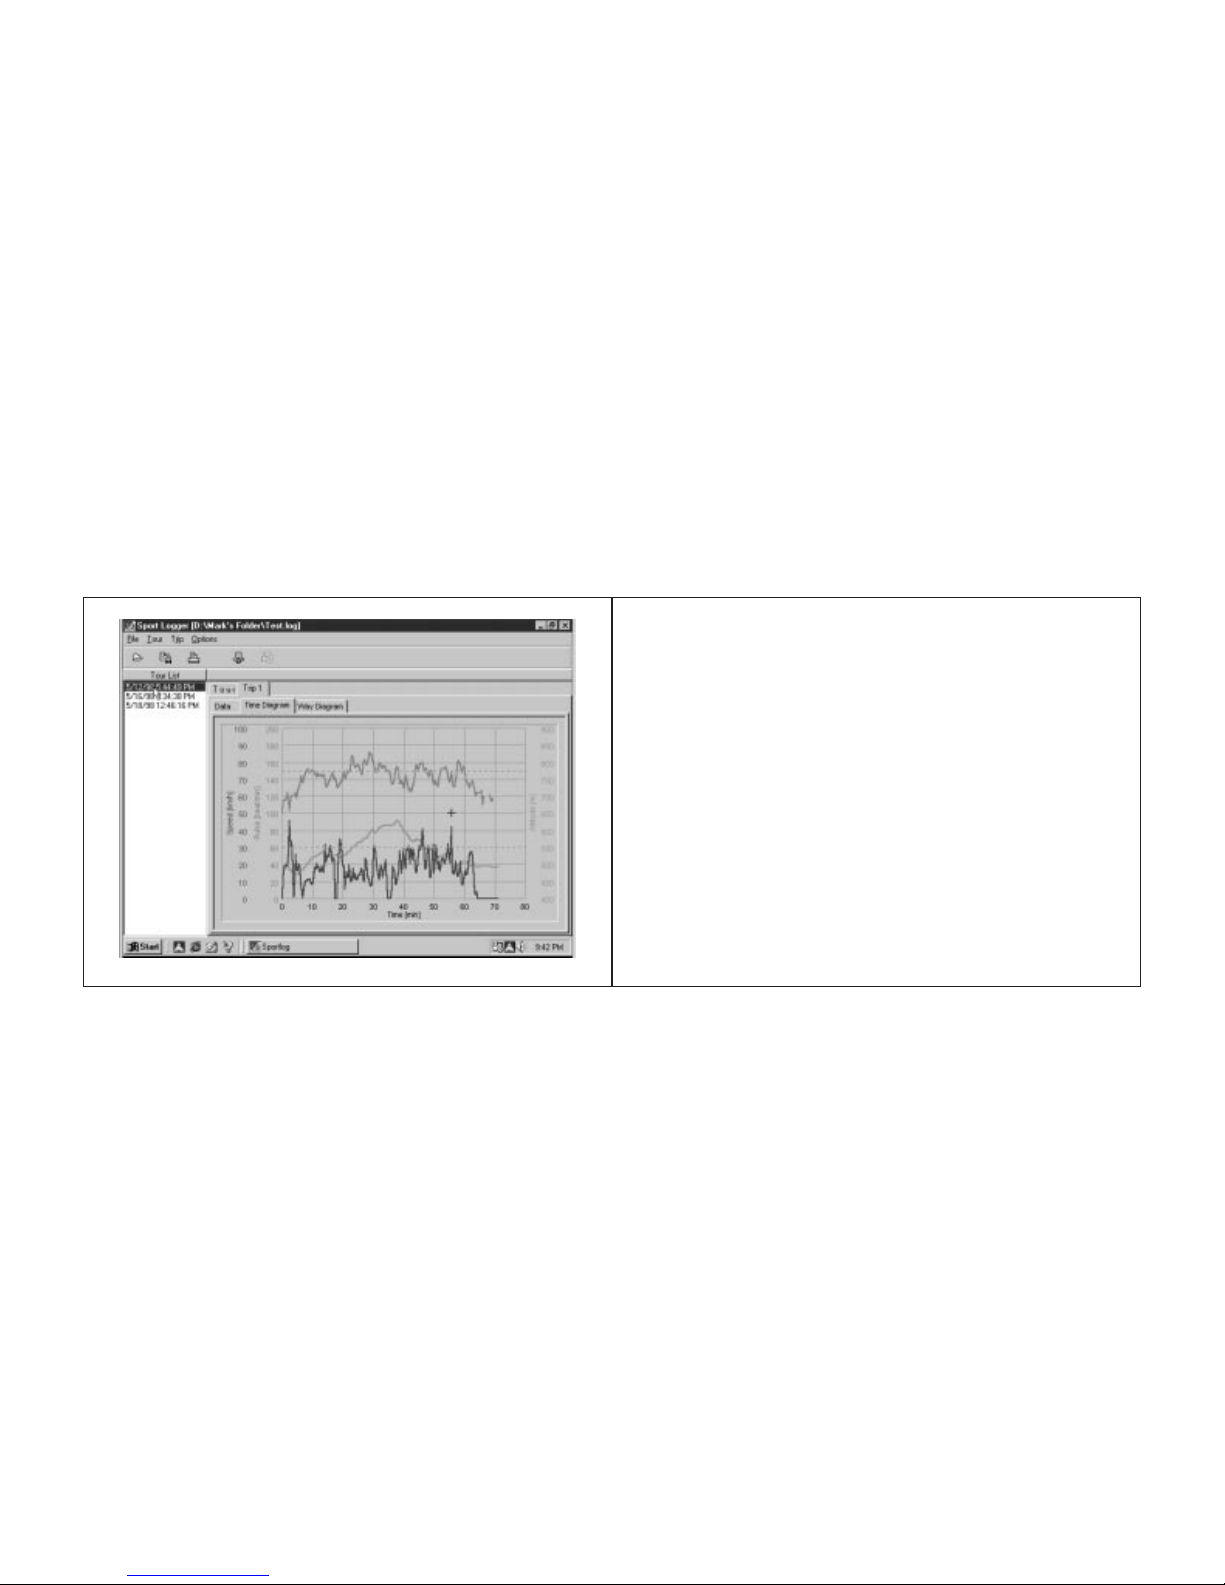
graph with your ride time (in minutes) on the
horizontal axis and the "Distance Diagram"
will show distance (in miles or kilometers) on
the horizontal axis.
Remarks
You may write notes in the "Remarks" field
of each trip. In order to enable this feature,
click the Remarks icon. After typing in your
notes, click the "OK" button to save them.
Setting your Recording Interval
You can adjust the time interval at which
your P-Brain collects data about your tour.
There are 4 interval choices: 10, 20, 30
and 60 seconds. The length of the Recording
Interval will determine how long (in hours
and minutes) a tour can be.
Recording Interval Max. Length of Tour (Hr:min)
10 seconds 5: 34
20 seconds 11:08
30 seconds 16:42
60 seconds 33:24
You may store as many trips as you want
until the memory is full. If a trip is longer
than the available memory time, the beginning of the trip will be over-written. When
the newest (current) trip reaches the beginning of the oldest remaining trip, the oldest
trip will be erased.
To set the Recording Interval, attach the
SpeedZone P•Brain to the download module
and select " Set Recording Interval" from
under the "Options" pull-down menu. A dialog box will open and allow you to select the
Recording Interval you want .
Tech Note:
There is 8064 bytes of memory available for storing tours. Each trip contains a header of 46 bytes and in each interval there are 4 bytes recorded If you set the
recording interval to 10seconds, the maximum length of a Tour is: (8064-46) / 4 *
10seconds = 20045seconds or 5hours34
minutes
1918
Page 11

TROUBLESHOOTING
• Display is blank:
Change the battery
or press the AC button on the bottom
of the case
• Display shows partial digits:
Press the
AC button on the bottom of the case.
• Speed/distance not recording:
Check
sensor/magnet alignment. Make sure that
the sensor is no more than 1/16" (2mm)
from the magnet.
• Entire screen is dark:
Did you leave the
bike parked in the hot direct sun when it
was parked? If so, move the bike to the
shade. The data will be OK.
• Computer moves on handlebar:
Tighten
mount or add sizing straps to improve fit
on handlebar.
IMPORTANT!
• Always consult your doctor before
beginning any new exercise program.
• Pay attention to traffic and road conditions
at all times. Your first obligation is to be
attentive and to ride safely.
• Your SpeedZone P•Brain is water-resistant
and will tolerate exposure to rain and wet
or muddy conditions. However, it is not
intended to be used underwater or while
swimming.
• Keep your computer in good shape and
use it safely:
• Do not expose it to direct sunlight except
when you are riding
• Do not disassemble it
• Make sure the magnet and the transmitter
are well aligned. Check them regularly.
• Keep the computer and all of its components tightly attached, and check them regularly. If any one of the components is
loose, it could become tangled in your
spokes and cause an accident.
• See your authorized Specialized dealer
if you have any trouble installing or maintaining your computer.
• Clean the unit with a mild detergent
and a soft dry cloth. Never use any kind
of solvent or alcohol.
21
Pull Down Menus
Under the "FILE" menu there
are 6 available selections:
• NEW- creates a new file into which you
can download a Tour from your P•Brain.
• OPEN- Allows you to open a stored Tour.
• SAVE- Allows you to save your current
tour and remarks.
• SAVE AS- Allows you to rename the current Tour.
• PRINT- Prints the current screen.
• EXIT- Closes the SportLog application.
Under the "Tour" menu there
are 2 selections:
• TRANSFER- Transfers the stored data from
the P•Brain to your computer.
• DELETE- Deletes the selected file from the
"Tour List."
Under the "Trip" pull down menu
there are 3 selections:
• MOVE- Allows you to move an individual
trip to a different Tour or create a new
Tour for the selected trip.
• DELETE- Erases the selected Trip.
• EDIT- Allows you to write notes in the
"Remarks" window of the selected Trip.
Under the "Options" menu there are
2 selections:
• UNITS- Allows you to view your data in
metric or imperial units.
• SET RECORDING INTERVAL- Allows you
to set your SpeedZone P•Brain to record in
either 10, 20, 30 or 60 second intervals.
CAUTION
While storing your chest strap you should
not allow conductive rubber pads on the
back to contact one another.
20
Page 12

• The SpeedZone P•Brain computer is intended for use on bicycles only and should
not be used on any motorized vehicle.
• The material presented in this manual is
for informational purposes only.
WARRANTY INFORMATION
Specialized cycling computers are guaranteed to be free from defects in materials
and/or workmanship (excluding battery)
for a period of two years from the date of
purchase. Specialized will, at its option,
repair or replace your defective computer.
To receive warranty service send the unit,
a copy of the sales receipt and a brief
description of the problem to:
Specialized Bicycle Components Inc.
15130 Concord Circle
Morgan Hill, CA. 95037
Attn: Product Services/Computer Warranty
SPECIFICATIONS
Current Speed 0.0 to 67.0 MPH
Average Speed (AVS) 0.0 to 67.0 MPH
Maximum Speed (MXS) 0.0 to 67.0 MPH
Timer 0 to 9hrs, 59min,
59sec. recycling
type
Trip Distance (DST) 0 to 9999.9 miles
or Km
Odometer (ODO) 0 to 99,999 miles
or Km
Operating Temperature 40°F to 104°F
(4°C to 40°C)
Replacement parts Part Number
SpeedZone P•Brain
Download Kit 480-3200
SpeedZone P•Brain
Second Bicycle Mount 480-3008
P•Brain Chest Strap 480-3201
Battery for SpeedZone
P•Brain and Chest Strap 480-3004
SpeedZone is a registered trademark of Specialized Bicycle
Components Inc. © 1999 Specialized Bicycle Components
Inc. www.specialized.com
22
 Loading...