

Page 1

设计人员: QQ:
Http:www.yattool.com
张妹珍 99739279
制作日期: 运用软件:
2018-1-26 Adobe Acrobat 7 Pro
名 称:
客 户:
料 号:
尺 寸:
材 质:
说明书
CH171
8458-4348042-011
A5(148.5x210mm)
80G双胶纸
颜 色:
页 数:
备注:
彩色印刷(PT 282U)
5 张A4纸
Page 2

INSTRUCTION
750W
ELECTRIC
POLE SAW S75EC
YT4348
MANUAL
Important - Please read these instructions
fully before starting assembly
These instructions contain important information that will help
you get the best from your pole saw, ensuring it is assembled correctly
and safely. If you need help or have damaged or missing parts,
call the Customer Helpline on 0345 605 2070
AFTER SALES SUPPORT
0345 605 2070
Page 3

SPEAR & JACKSON SINCE 1760
For more than 250 years gardeners have enjoyed high quality performance
and great results using Spear & Jackson tools.
Our garden power tools combine continuous innovation and the latest in
manufacturing technologies with a proud heritage.
Each product is carefully designed with performance,comfort and
durability rmly in mind,which has earned Spear & Jackson an enviable
reputation as a maker of tools to trust.
3 YEARS GUARANTEE
As a testament to the quality of our products, we offer a 3 year
manufacturers warranty and a comprehensive after sales service.
The warranty covers manufacturing faults, however in the event that the
item has been deliberately damaged, used in a commercial environment or
disassembled then the warranty will be null and void.
Please retain proof of purchase.
TECHNICAL SUPPORT
We want you to get the best out of your products. Our easy-to-read
instruction manual guides you with best practice use and maintenance
tips. Please call 0345 605 2070 for technical support, we can solve around
80% of questions directly over the phone.
We hope you enjoy your product and we look forward to any feedback, as
this allows us to develop even better products for the future.
2 AFTER SALES SUPPORT 0345 605 2070
Page 4

CONTENTS
SAFETY INFORMATION........................................................................................................04
Description of symbols...................................................................................04
General power tool safety warnings ..............................................................05
Work area safety.............................................................................................05
Electrical safety...............................................................................................05
Personal safety................................................................................................06
Power tool use and care.................................................................................07
Residual risks..................................................................................................08
Intended use/Not intended use ......................................................................08
IN THE BOX .....................................................................................................................09
Parts List ........................................................................................................09
ASSEMBLE .........................................................................................................................10
PREPARE.....................................................................................................................09
Oil filling...........................................................................................................10
Remove the bar sheath...................................................................................10
Check the chain tension..................................................................................10
Install the shoulder strap.................................................................................10
Adjust the pole length .....................................................................................11
Adjust the blade head.....................................................................................11
Settle power cord............................................................................................12
Connect to the power source.........................................................................12
Check the oil passes.......................................................................................12
OPERATE.........................................................................................................................13
Hold the machine............................................................................................13
Switch on/off...................................................................................................13
Start cutting.....................................................................................................13
Disconnect power source................................................................................14
MAINTENANCE....................................................................................................................15
Motor Cooling.................................................................................................14
Adjust the chain Tension.................................................................................14
Nuts and Screws.............................................................................................14
Chain sharpening............................................................................................14
Guide Bar Maintenance..................................................................................16
Chain Sprocket...............................................................................................16
Storage ...........................................................................................................16
Transportation.................................................................................................17
Recycle and disposal......................................................................................17
TECHNICAL DATA...............................................................................................................18
TROUBLESHOOTING............................................................................................................19
GUARANTEE........................................................................................................................20
AFTER SALES SUPPORT 0345 605 2070 3
Page 5
SAFETY INFORMATION
Please read these instructions fully before operating or maintaining your machine
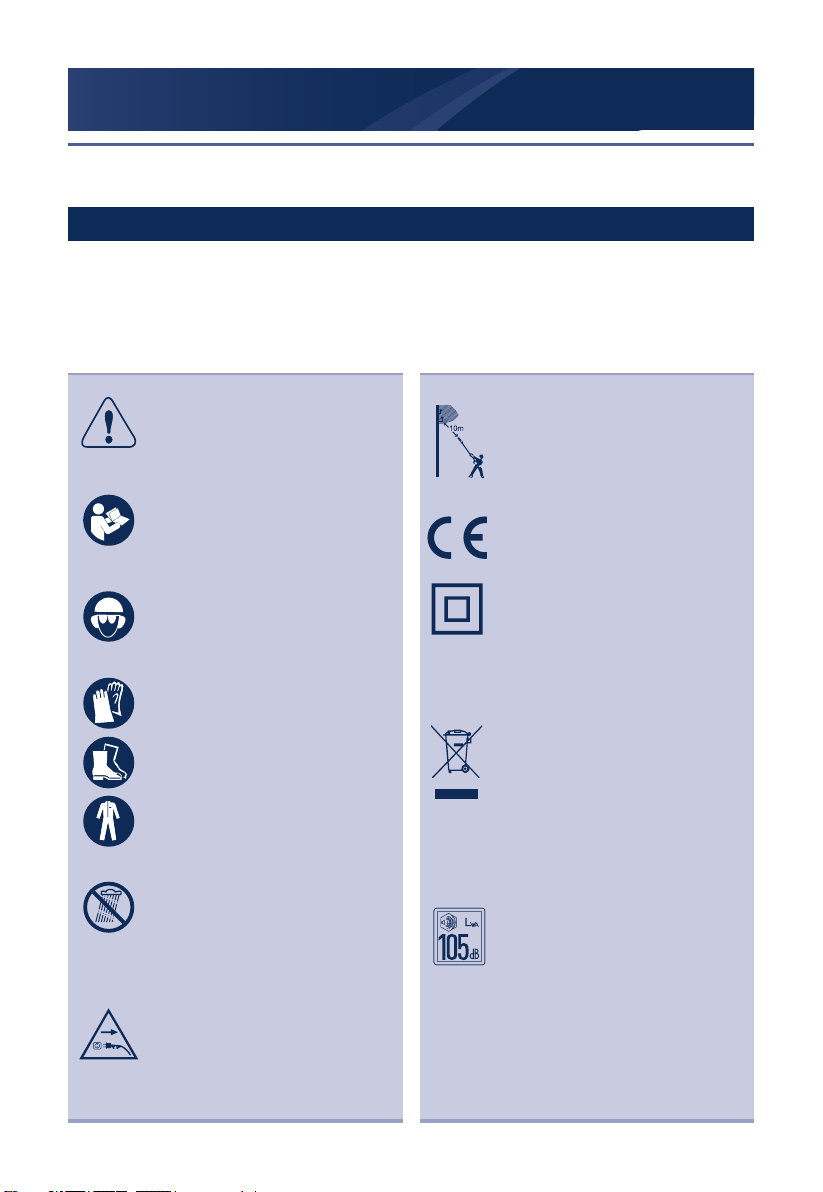
Description of symbols
Some of the following symbols may be used on your tool.Be sure to study
them and learn their meaning. Proper interpretation of these symbols will
allow you to use the machine more effectively and reduce the risk of accident.
Indicates danger, warning or
caution.
WARNING – To reduce the
risk of injury, user must read
instruction manual.
Wear ear protection, eye
protection and helmet when
using the product.
Wear gloves and safety boots
to protect against electric
shock Clothing must be
sturdy and snug-tting, but
allow complete freedom of
movement.
Protect the machine from the
damp and never expose it to
rain.
SWITCH OFF: Remove plug
from mains before cleaning or
maintenance.
SWITCH OFF: Remove plug
from the mains immediately if
the cable is damaged or cut.
Maintain a minimum clearance
of 10 m from current-carrying
lines. Life-threatening danger
from electric shock.
Conforms to relevant safety
standards.
This product is double
insulated electrically.
WEEE symbol. Tools that
are no longer usable should
not be disposed of with
household waste but in an
environmentally friendly way.
Please recycle where facilities
exist. Check with your local
council authority for recycling
advice.
Guaranteed sound power level
(tested according to Directive
2000/14/EC as amended by
2005/88/EC).
4 AFTER SALES SUPPORT 0345 605 2070
Page 6

SAFETY INFORMATION
Please read these instructions fully before operating or maintaining your machine
General power tool safety warnings
WARNING Read all
safety warnings and all
instructions.
Failure to follow the
warnings and instructions
may result in electric shock,
re and/or serious injury.
Work area safety
a) Keep work area clean
and well lit. Cluttered
or dark areas invite
accidents.
b) Do not operate power
tools in explosive
atmospheres, such
as in the presence of
ammable liquids, gases
or dust. Power tools
create sparks which may
ignite the dust or fumes.
c) Keep children and
bystanders away while
operating a power tool.
Distractions can cause
you to lose control.
Electrical safety
a) Power tool plugs must
match the outlet. Never
modify the plug in any
way. Do not use any
adapter plugs with
earthed (grounded)
power tools. Unmodied
plugs and matching
outlets will reduce risk of
electric shock.
b) Avoid body contact with
earthed or grounded
surfaces, such as pipes,
radiators, ranges and
refrigerators. There is an
increased risk of electric
shock if your body is
earthed or grounded.
c) Do not expose power
tools to rain or wet
conditions. Water
entering a power tool
will increase the risk of
electric shock.
d) Do not abuse the cord.
Never use the cord
for carrying, pulling or
unplugging the power
tool. Keep cord away
from heat, oil, sharp
edges or moving parts.
Damaged or entangled
cords increase the risk of
electric shock.
e) When operating a power
AFTER SALES SUPPORT 0345 605 2070 5
Page 7

SAFETY INFORMATION
Please read these instructions fully before operating or maintaining your machine
tool outdoors, use an
extension cord suitable
for outdoor use. Use of a
cord suitable for outdoor
use reduces the risk of
electric shock.
f) The use of a residual
current device (RCD)
when using this tool is
recommended. Use of an
RCD reduces the risk of
electric shock.
Personal safety
a) Stay alert, watch what
you are doing and use
common sense when
operating a power tool.
Do not use a power
tool while you are tired
or under the inuence
of drugs, alcohol or
medication. A moment
of inattention while
operating power tools
may result in serious
personal injury.
b) Use personal protective
equipment. Always wear
eye protection. Protective
equipment such as dust
mask, non-skid safety
shoes, hard hat, or
hearing protection used
for appropriate conditions
will reduce personal
injuries.
c) Prevent unintentional
starting. Ensure the
switch is in the offposition before
connecting to power
source and/or battery
pack, picking up or
carrying the tool. Carrying
power tools with your
nger on the switch or
energising power tools
that have the switch on
invites accidents.
d) Remove any adjusting
key or wrench before
turning the power tool
on. A wrench or a key
left attached to a rotating
part of the power tool
may result in personal
injury.
e) Do not overreach. Keep
proper footing and
balance at all times. This
enables better control
of the power tool in
unexpected situations.
6 AFTER SALES SUPPORT 0345 605 2070
Page 8

SAFETY INFORMATION
Please read these instructions fully before operating or maintaining your machine
f) Dress properly. Do not
wear loose clothing or
jewellery. Keep your hair,
clothing and gloves away
from moving parts. Loose
clothes,jewellery or long
hair can be caught in
moving parts.
g) If devices are provided
for the connection of dust
extraction and collection
facilities, ensure these are
connected and properly
used. Use of dust
collection can reduce
dust-related hazards.
Power tool use and care
a) Do not force the power
tool. Use the correct
power tool for your
application.The correct
power tool will do the
job better and safer at
the rate for which it was
designed.
b) Do not use the
power tool if the switch
does not turn it on and
off.Any power tool that
cannot be controlled with
the switch is dangerous
and must be repaired.
c) Disconnect the plug from
the power source and/
or the battery pack from
the power tool before
making any adjustments,
changing accessories,
or storing power tools.
Such preventive safety
measures reduce the risk
of starting the power tool
accidentally.
d) Store idle power tools out
of the reach of children
and do not allow persons
unfamiliar with the power
tool or these instructions
to operate the power
tool.Power tools are
dangerous in the hands
of untrained users.
e) Maintain power tools.
Check for misalignment
or binding of moving
parts, breakage of parts
and any other condition
that may affect the
power tool’s operation. If
damaged,have the power
tool repaired before
use. Many accidents
are caused by poorly
AFTER SALES SUPPORT 0345 605 2070 7
Page 9

SAFETY INFORMATION
Please read these instructions fully before operating or maintaining your machine
maintained power tools.
f) Keep cutting tools sharp
and clean. Properly
maintained cutting tools
with sharp cutting edges
are less likely to bind and
are easier to control.
g) Use the power tool,
accessories and tool bits
etc. in accordance with
these instructions, taking
into account the working
conditions and the work
to be performed. Use
of the power tool for
operations different from
those intended could
result in a hazardous
situation.
Residual risks
Even if you use this electric
power tool in accordance to
instructions, certain residual
risks cannot be eliminated.
The following hazards may
arise in connection with the
equipment’s construction
and layout:
a) Cut injuries if no safety
clothing is used.
b) Lung damage if no
suitable protective dust
mask is applied.
c) Damage to hearing if no
suitable ear protection is
applied.
d) Health damage caused
by hand-arm vibrations
if the equipment is used
over a longer period or is
not properly guided and
maintained.
intended use/Not intended
use
The chainsaw with
telescoping arm is intended
for removing branches
from trees. It is not suitable
for extensive sawing work
and felling trees or for
the sawing of materials
other than wood. Please
observe that our machine
was not designed for use
in commercial, technical
or industrial applications.
We assume no liability if
the machine is used in
commercial, technical or
industrial applications or for
equivalent activities.
8 AFTER SALES SUPPORT 0345 605 2070
Page 10

IN THE BOX
1.Guide bar
2.Saw chain
3.Adjusting knob for saw chain
tension
4.Adjusting knob (red) for guide bar
tension
5.Cap of oil tank
6.Cover of guide bar and saw chain
7.Adjusting knob for head angle (30
degrees)
8.Pole (tube)
14
12
18
13
19
11
9.Quick clip of telescopic pole
10.Sponge sleeve
11.Seat for shoulder strap
12.Rear handle
13.Switch on/off
14. Lock-off button (at the other side
of machine)
15. Shoulder strap
16. Sheath of guide bar and chain
17. Oil bottle
18. Power cord/cable
19.Cable clip
45
8910
67
123
15
16
17
AFTER SALES SUPPORT 0345 605 2070 9
Page 11

ASSEMBLE
The pole saw has been assembled in the standard
deliveryso no need for extra assembling steps.
PREPARE
1. Oil lling
Open the oil bottle (press the cap on the oil bottle and
turn counterclockwise to open it ),then open oil tank
cap to ll in the oil.
2.Remove the bar sheath
3.Check the chain tension
Always check the chain tension before use, after the
rst cuts and regularly during use, approx. every 10
minutes.
The lowest cutters should be underneath the bar
solidly and contact the bar,if not,adjust the chain with
protection gloves ( Please refer to the detailed info in
later chapter "Adjust the chain tension" ).
4.Install the shoulder strap
Shoulder strap is necessary for your cutting work,and
efcient,comfortable and safe to work with this
machine.
10 AFTER SALES SUPPORT 0345 605 2070
Page 12

PREPARE
5.Adjust the pole length
Adjust the length of the pole saw according to
working situation.
Pull the lever of the quick clip to release the pole
Extend the pole to the desired length.
Lock the pole in position by locking the quick clip lever and
ensure that the pole is secure. If the pole telescopes when
the quick clip lever is locked, the nuts need tightening.
6.Adjust the blade head
The pole chain saw head can be rotated for different
cutting angles from 0ºto 30º.
Turn the adjusting knob for head angle
counterclockwise to loosen the head.
Adjust the head to the desired position.
AFTER SALES SUPPORT 0345 605 2070 11
Page 13

PREPARE
Chain oil
Cable clip
Then turn the knob clockwise to tighten and x the
head in the position.
7.Settle power cord
The power cord should be wrapped around the
cable clip to avoid long lines stumbling pedestrians or
causing electric shock.
8.Connect to the power source
Insert the power cord/plug to the power source
before starting to work.
9.Check the oil passes
Start the machine and check whether the chain can
give off a spray of oil within a few seconds. If an oil
trace can be seen, the pole saw is lubricating.
NOTE! Never saw when a sufcient chain lubrication
is not guaranteed. Before starting work check the oil
level in the tank and the oil feeding.
12 AFTER SALES SUPPORT 0345 605 2070
Page 14

1.Safety lock button
2.Trigger
switch
OPERATE
Load
Second Cut
First Cut
1/3 Diameter
Finishing Cut
60º MAXIMUM
1. Hold the machine
Balance your weight with both feet on solid ground.
Your body should always be to the left of the chain
line.Grip handle tightly.The most typical cutting
application is to position the unit at an angle of 60°or
less depending on the specic situation. As the angle
of the pole chain saw shaft to the ground increases,
the difculty of making the rst cut (from the underside
of limb) increases.
2. Switch on/off
To turn the tool ON, push and hold the safety lock
button with your thumb and then squeeze the trigger
with your ngers. Once the tool is running.
you release the safety lock button.
Release the trigger switch to stop the chain.
3. Start cutting
Cut lower branches rst to allow the top branches
·
more room to fall.
When pruning trees, it is important not to make
·
the nishing cut next to the main limb or trunk until
you have cut off the farthest lying limb. This will
reduce the weight and prevent stripping the bark
from the main member.
Under cut the branch 1/3 through for your rst cut.
·
Your second cut should over cut to drop the
branch off
Be prepared to balance the weight of the pole
·
chain saw when the limb falls.
AFTER SALES SUPPORT 0345 605 2070 13
Page 15

OPERATE
4. Disconnect power source
When nished working,switch off the machine and
disconnect power source.
14 AFTER SALES SUPPORT 0345 605 2070
Page 16

MAINTENANCE
Max.2mm
9N
Motor Cooling
To avoid overheating and damage to the motor,
always keep the cooling air vents clean and free of
sawdust and debris.
Adjust the chain tension
Always check the chain tension before use, after
the rst cuts and regularly during use, approx.
every 10 minutes.
Loosen the bar locking knob(the inner circle) slightly,
but do not remove the side cover.
Hold up the nose of the guide bar and turn the chain
btensioning knob(the out circle) clockwise.
When the saw chain is tensioned with 9N (approx.1kg),
the gap between the saw chain and the guide rail
should never be more that 2mm.
Do not over tension the chain as this will reduce life of
chain bar and motor. With a correctly tensioned chain
you will get good cutting performance and a longer
life.
Tighten the bar locking knob(the inner circle) by
turning it counter-clockwise.
Nuts and Screws
Periodically check that all the nuts and screws are
tightened securely. Check that the cam-lock that
controls the telecoping pole is intact and in proper
working order.
Chain sharpening
Secure the bar rmly, with the chain mounted, in a
·
suitable vice.
Tighten the chain if it is loose.
·
Mount the le in the guide and then insert it in the
·
tooth at a constant angle from the cutting edge.
Sharpen in a forward motion a few times and
·
repeat this on all the cutting edges facing the
same way (right or left).
AFTER SALES SUPPORT 0345 605 2070 15
Page 17

MAINTENANCE
< 0.5 mm
Inspection tool
Depth limiter tooth
Cutting edge
Depth
limiter
tooth
To move the chain forward, use a screwdriver.
·
Turn the bar over in the vice and repeat on all the
·
other cutting edges.
Check that the depth limiter tooth does not stick
·
out farther than the inspection tool and le any
projecting parts with a at le, rounding off the
edges.
After sharpening, remove all traces of ling and
·
dust and lubricate the chain in an oil bath. Replace
the chain whenever:
– the length of the cutting edges decreases to 5
mm or less
– there is too much play between the links and the
rivets.
Guide Bar Maintenance
When the guide bar shows signs of wear, turn it over
on the saw to distribute the wear for maximum bar
life. Feathering or burring of the bar rails is a normal
process of bar wear. You should smooth such faults
with a le as soon as they occur.
Replace a bar with any of the following faults:
wear inside the bar rails permitting the chain to lay
·
over sideways
bent guide bar
·
cracked or broken rails
·
spread rails
·
Turn the saw over, check the underside of the guide
bar, and make sure that the lubrication holes and
chain groove are free from impurities.
Chain Sprocket
Regularly check the condition of the sprocket and
replace it when wear exceeds 0.5 mm.Do not mount
a new chain with a worn sprocket or vice-versa.
Storage
Clean the product as described above.
Store the product and its accessories in a dry, frost-
16 AFTER SALES SUPPORT 0345 605 2070
Page 18

MAINTENANCE
free place.
Always store the product in a place that is inaccessible
to children. The ideal storage temperature is between
10 to 30°C.
We recommend using the original package for
storage or covering the product with a suitable cloth
to protect it against dust. Clean the product as
described above.
Store the product and its accessories in a dry, frostfree place.
Always store the product in a place that is inaccessible
to children. The ideal storage temperature is between
10 to 30°C.
We recommend using the original package for
storage or covering the product with a suitable cloth
to protect it against dust.
Transportation
Switch the product off and disconnect it from power
supply before transporting it anywhere. Attach
transportation guards, if applicable.
Always carry the product by its handle.
Protect the product from any heavy impact or strong
vibrations which may occur during transportation in
vehicles.
Secure the product to prevent it from slipping or
falling over.
AFTER SALES SUPPORT 0345 605 2070 17
Page 19

TECHNICAL DATA
Model number YT4348
Rated voltage 220-240V/50Hz
Rated input power 750W
No-load speed 5600/min
Guide bar length 20cm
Oil tank capacity 60ml
Chain speed 11m/s
The total length(from the end of handle
to top of guide bar)
Protection class ll
Degree of protection IPX0
Net weight(with chain and bar) 3.7kg
Cable length 10m
Max. Vibration value 1.641m/s2 K=1.5m/s
Measured sound pressure level LPA 86.8dB(A) K=2.5dB(A)
Measured sound power level LWA 102.4dB(A) K=2.5dB(A)
Guaranteed sound power level LWA 105dB(A)
PART NUMBER ACCESSORIES
91PJ033X Chain
080SDEA041 Bar
1.92~2.60m
2
Recycling and disposal
The product comes in a package that protects it against damage during
shipping. Keep the package until you are sure that all parts have been
delivered and the product is function properly. Recycle the package
afterwards.
Old products are potentially recyclable under WEEE and do not, therefore,
belong in your household rubbish. You are requested to assist us and our
contribution to saving resources and protecting the environment by handing
in this appliance at an equipped collection centre (if there is one available).
18 AFTER SALES SUPPORT 0345 605 2070
Page 20

TROUBLESHOOTING
Suspected malfunctions are often due to causes that the users can x themselves.
Therefore check the product using this section. In most cases the problem can be
solved quickly.
WARNING! Only perform the steps described within these instructions! All
further inspection, maintenance and repair work must be performed by
an authorized service centre (call the helpline on 0345 605 2070) if you
cannot solve the problem yourself!
Fault Possible Cause Solution
Motor does not run No electricity Check socket, cables and
plugs.Damaged cable: Have
repairedby a service agent. Do
not patchcables with insulation
tape. Damaged switch: Have
repaired by a service agent.See
section on chain brake.
Worn carbon brushes Carbon brushes need replacing
Chain does not move Chain brake Check the chain brake and
release if necessary
Poor cutting
performance
Chain jumps off
guide bar
Chain works with
difculty
Chain becomes hot Chain lubricant Check oil level
Blunt saw chain Sharpen or replace the saw
chain
Chain tension Check chain tension
Saw chain tted incorrectly Check saw chain
Chain tension Check chain tension
Chain tension Check chain tension
Check chain lubrication
AFTER SALES SUPPORT 0345 605 2070 19
Page 21

WARRANTY
If your device develops a fault, please don’t hesitate to contact our customer service
department on 0345 605 2070, we can solve 80% of problems via the phone.
1. These warranty terms cover additional warranty rights and do not affect your
statutory warranty rights. All our products are covered by a 3 year manufacturer
warranty.
2. Claims must be accompanied by proof of purchase. This must be in the form
of a sales receipt or bank statement and must show that the product has been
purchased within the warranty period as described under point 1, from the retailer
that it was originally bought from. Please keep your receipt safe or staple it to the
back of this manual for future reference.
3. Our warranty covers problems caused by material or manufacturing defects, and
will result in the repair of these defects or replacement of the device with a like for
like or similar article.
4. Our devices have not been designed for commercial, trade or industrial
applications, any signs of use of the equipment in these application or equivalent
activities, invalidates the warranty.
5. The following are also excluded from our warranty:
A. Faults due to accidents, customer misuse or unauthorized repairs
B. Consumable Parts such as bar,chain and other accessories that are compatible
with the product.
C. Failure due to lack of routine maintenance.
D. Failure as a result of not using the equipment in accordance with the manual
and safety instructions
Warranty claims should be submitted before the end of the warranty period, see point
1,but a paid service exists for repairs commissioned after this period. The original
warranty period remains applicable to the device even if repairs are carried out or
parts are replaced. In such cases,the work performed or parts tted will not result in
an extension of the warranty period, and no new warranty will become active for the
work performed or parts tted.
If you have any problems or questions concerning your garden power tool, please
contact our after sales service at 0345 605 2070.
This device may be re-conditioned, like for like or upgraded replacement.
20 AFTER SALES SUPPORT 0345 605 2070
Page 22

AFTER SALES SUPPORT 0345 605 2070 21
 Loading...