

Page 1
INSTRUCTIONS FOR MODELS
92-CPT-12000-02
For additional assistance or service please contact:
SPEAKMAN
®
Company
400 Anchor Mill Road
New Castle, DE 19720
800-537-2107
www.speakman.com
SM-12000
Trim Installation
TOOLS AND SUPPLIES
IMPORTANT
Phillips
Screwdriver
Cover your drain to prevent loss of parts.
SAFETY TIPS
• Be sure to read instructions thoroughly before
beginning installation.
• Be sure to have properly adjusted the Temperature
Limiting Stop (TLS) as outlined in the Valve Installation
Manual.
• Inspect all connections after installation of valve.
• This valve has an operating range of 20-80 Psi.
• This valve is designed to be used in conjunction
with a shower-head rated at 1.75 gpm (6.6 L/min)
or higher flow rate.
Additional warranty information can be found at:
www.speakman.com
MAINTENANCE
WARRANTY
Your new Valve Trim is designed for years of
trouble-free performance. Keep it looking new by
cleaning it periodically with a soft cloth. The use of
harsh chemicals and abrasives on any of the Speakman
custom finish products may damage the finish and void
the product warranty. Please be sure to only use
approved cleaners. Please contact Speakman for any
clarification of acceptable cleaners.
Hex Key Wrench
(included)
1
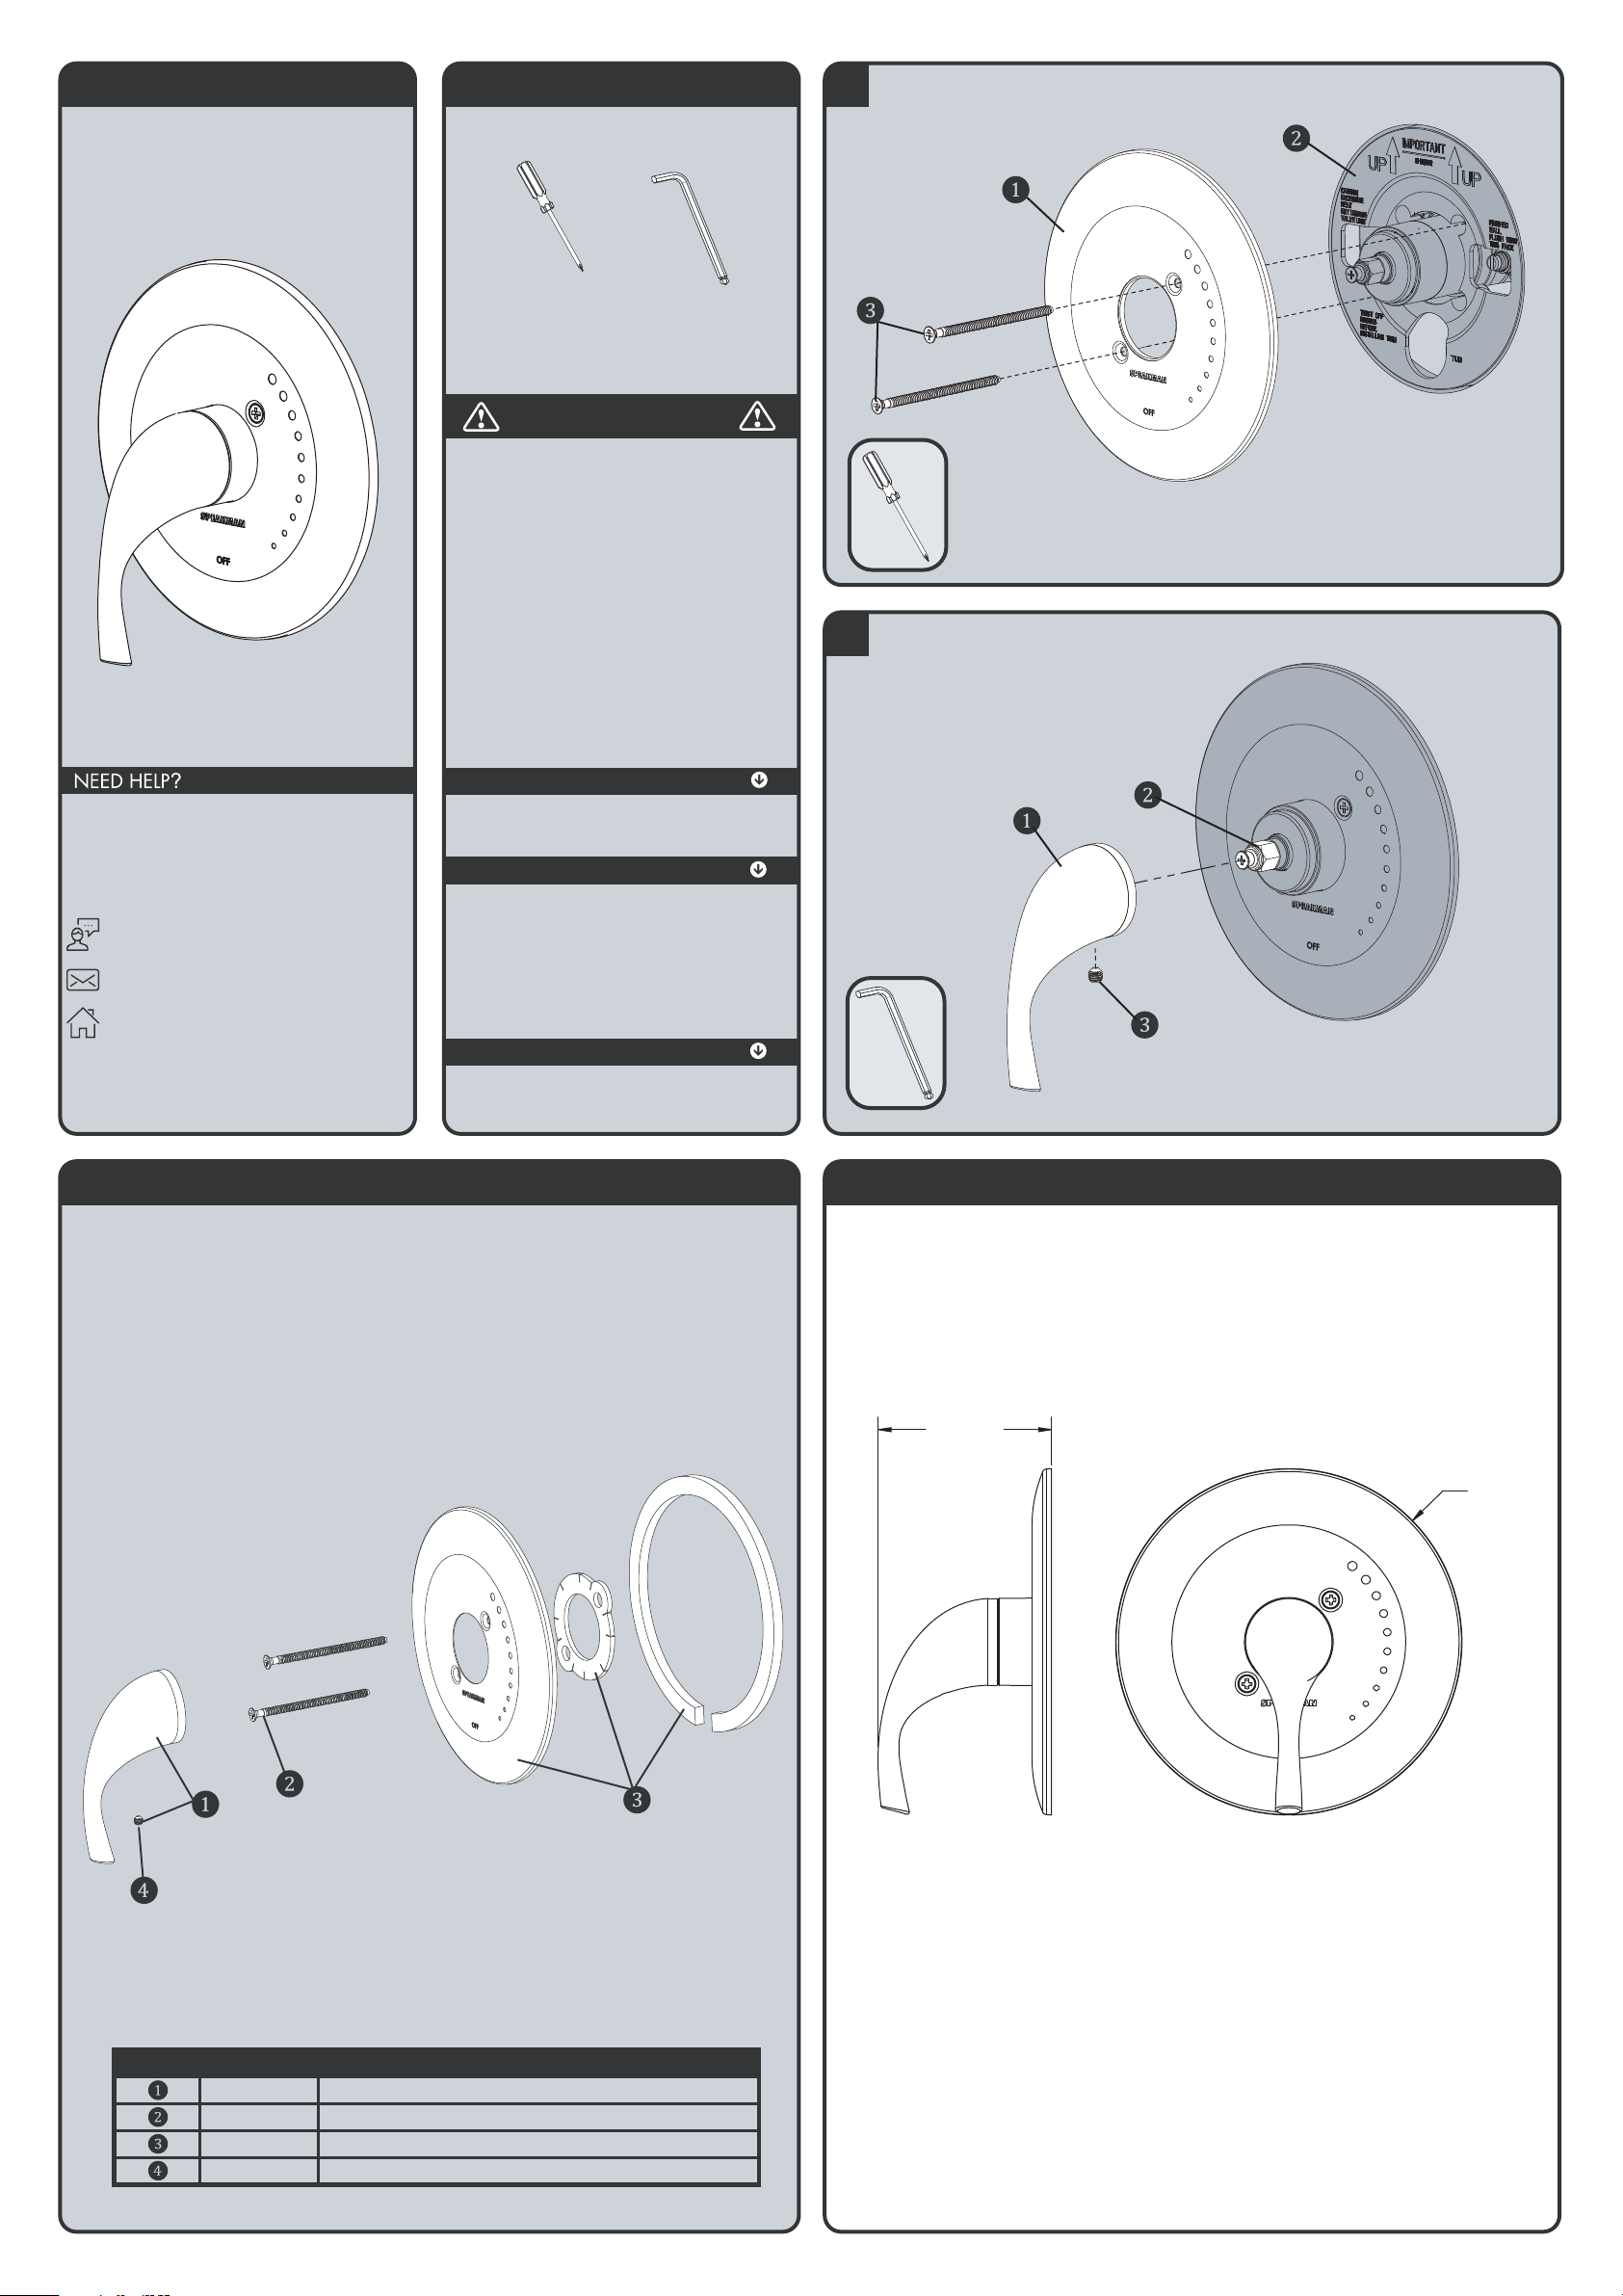
Align Wall Plate (1) to Valve (2) and secure with Screws (3). Take care to not over tighten the screws or damage
may occur.
2
Ensure the Valve is in the “Off” position. Align Handle (1) vertically as shown below. Install onto Spindle
Adapter (2), and secure Set Screw (3) with included Hex Key.
SM-12000 TRIM REPAIR PARTS
SPEAKMAN
®
ITEM NO. PART NO. DESCRIPTION
RPG04-34938 HANDLE ASSEMLBY (INCLUDES SET SCREW)
RPG48-21019 TRIM PLATE SCREWS (2)
RPG54-21018 TRIM PLATE ASSSEMBLY
RPG48-20993 HANDLE SET SCREW
SM-12000 TRIM ROUGH-IN DIAGRAM
DIMENSIONS SUBJECT TO CHANGE WITHOUT NOTICE.
3”- 4”
[76mm-102mm]
Ø7”
[178mm]
 Loading...