

Page 1
INSTRUCTIONS FOR MODELS
92-SA-2402-01
For additional assistance or service please contact:
SPEAKMAN
®
Company
400 Anchor Mill Road
New Castle, DE 19720
800-537-2107
www.speakman.com
SA-2402
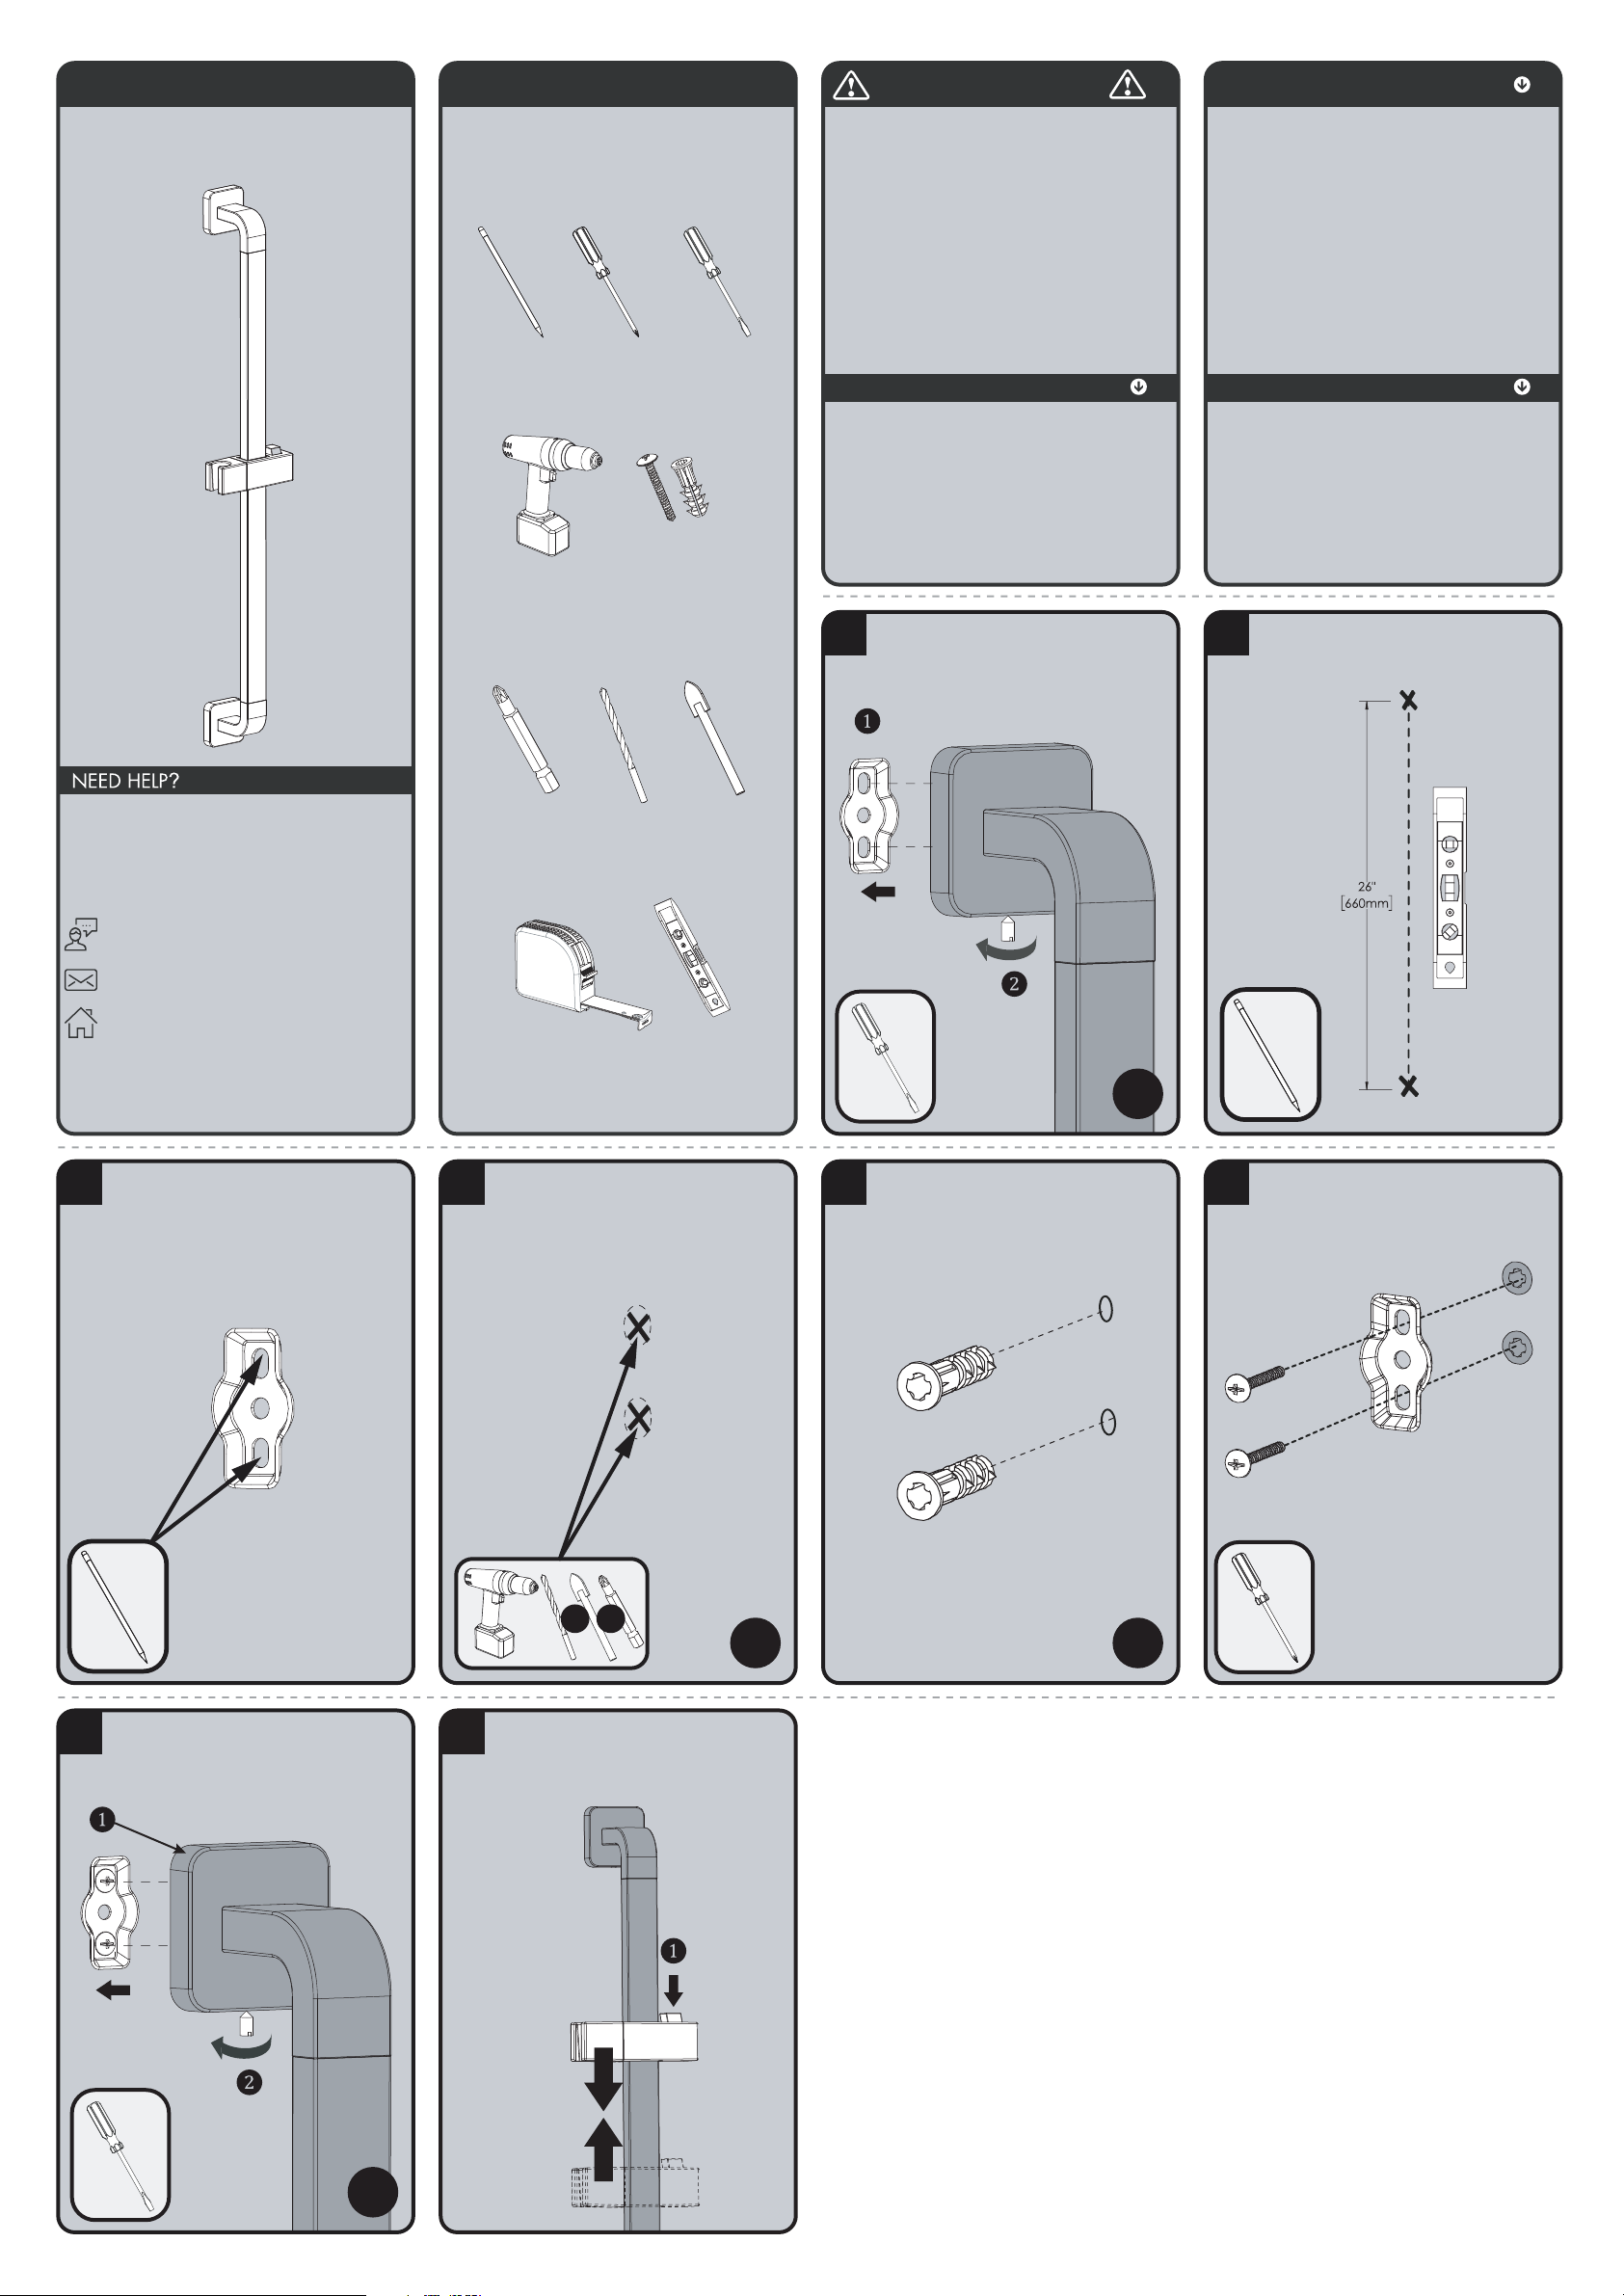
TOOLS AND SUPPLIES
Level
Phillips
Drive Bit
Measuring
Tape
Phillips
Screwdriver
Pencil
Drill
Drill Bit
Ø
3
/16”
Tile Drill Bit
Ø
3
/16”
Mounting Hardware
(included)
Small Flat Tip
Screwdriver
• Cover your drain to prevent loss of parts. Be sure
to wear eye protection.
SAFETY TIPS
IMPORTANT
• Be sure to read instructions thoroughly before
beginning installation.
• Do not over-tighten any connections or damage
may occur.
Additional warranty information can be found at:
www.speakman.com
WARRANTY
MAINTENANCE
Your new Speakman Product is designed for years of
1
If the Mounting Plate(s) (1) come pre-installed in the
Accessory (2), remove the Mounting Plate(s) by
loosening (but not removing) the pre-installed set
screw at bottom with a small Flat Tip Screwdriver.
X2
2
At the selected height, mark center point of
mounting locations onto wall referencing the
rough in diagram.
3
Align Mounting Plate over center point marked
in previous step. Mounting Plate should be
vertical as shown below. Mark Mounting Screw
locations onto the wall surface. Remove items
after marking mounting locations.
4
If mounting directly to wood stud, Plastic Anchors
are not required. If mounting to drywall or tile,
select appropriate 3/16" drill bit and drill guide
holes at marked locations.
Ø3/16”
OR OR
X4
5
Insert Plastic Anchors into drilled holes and
press/tap into place until the head is flush to the
wall surface. (Note: Plastic Anchors provided
may not be suitable for all types of wall
construction, seek professional help if in doubt).
X4
6
Secure Mounting Plate with the Mounting Screws
provided. Verify that the Mounting Plate is
aligned vertically.
7
Place Accessory (1) over Mounting Bracket and
secure the pre-installed set screw (2) with
a small
Flat Tip Screwdriver
.
X2
8
Orient the Hand Held Shower Bracket to your
desired position. Adjustments are made by
pressing the Locking Button (1) to release
the position and releasing to lock into the
desired position.
trouble-free performance. Keep it looking new by
cleaning it periodically with a soft cloth. The use of harsh
chemicals and abrasives on any of the Speakman custom
finish products may damage the finish and void the
product warranty. Please be sure to only use approved
cleaners. Please contact Speakman for any clarification
of acceptable cleaners.
Page 2
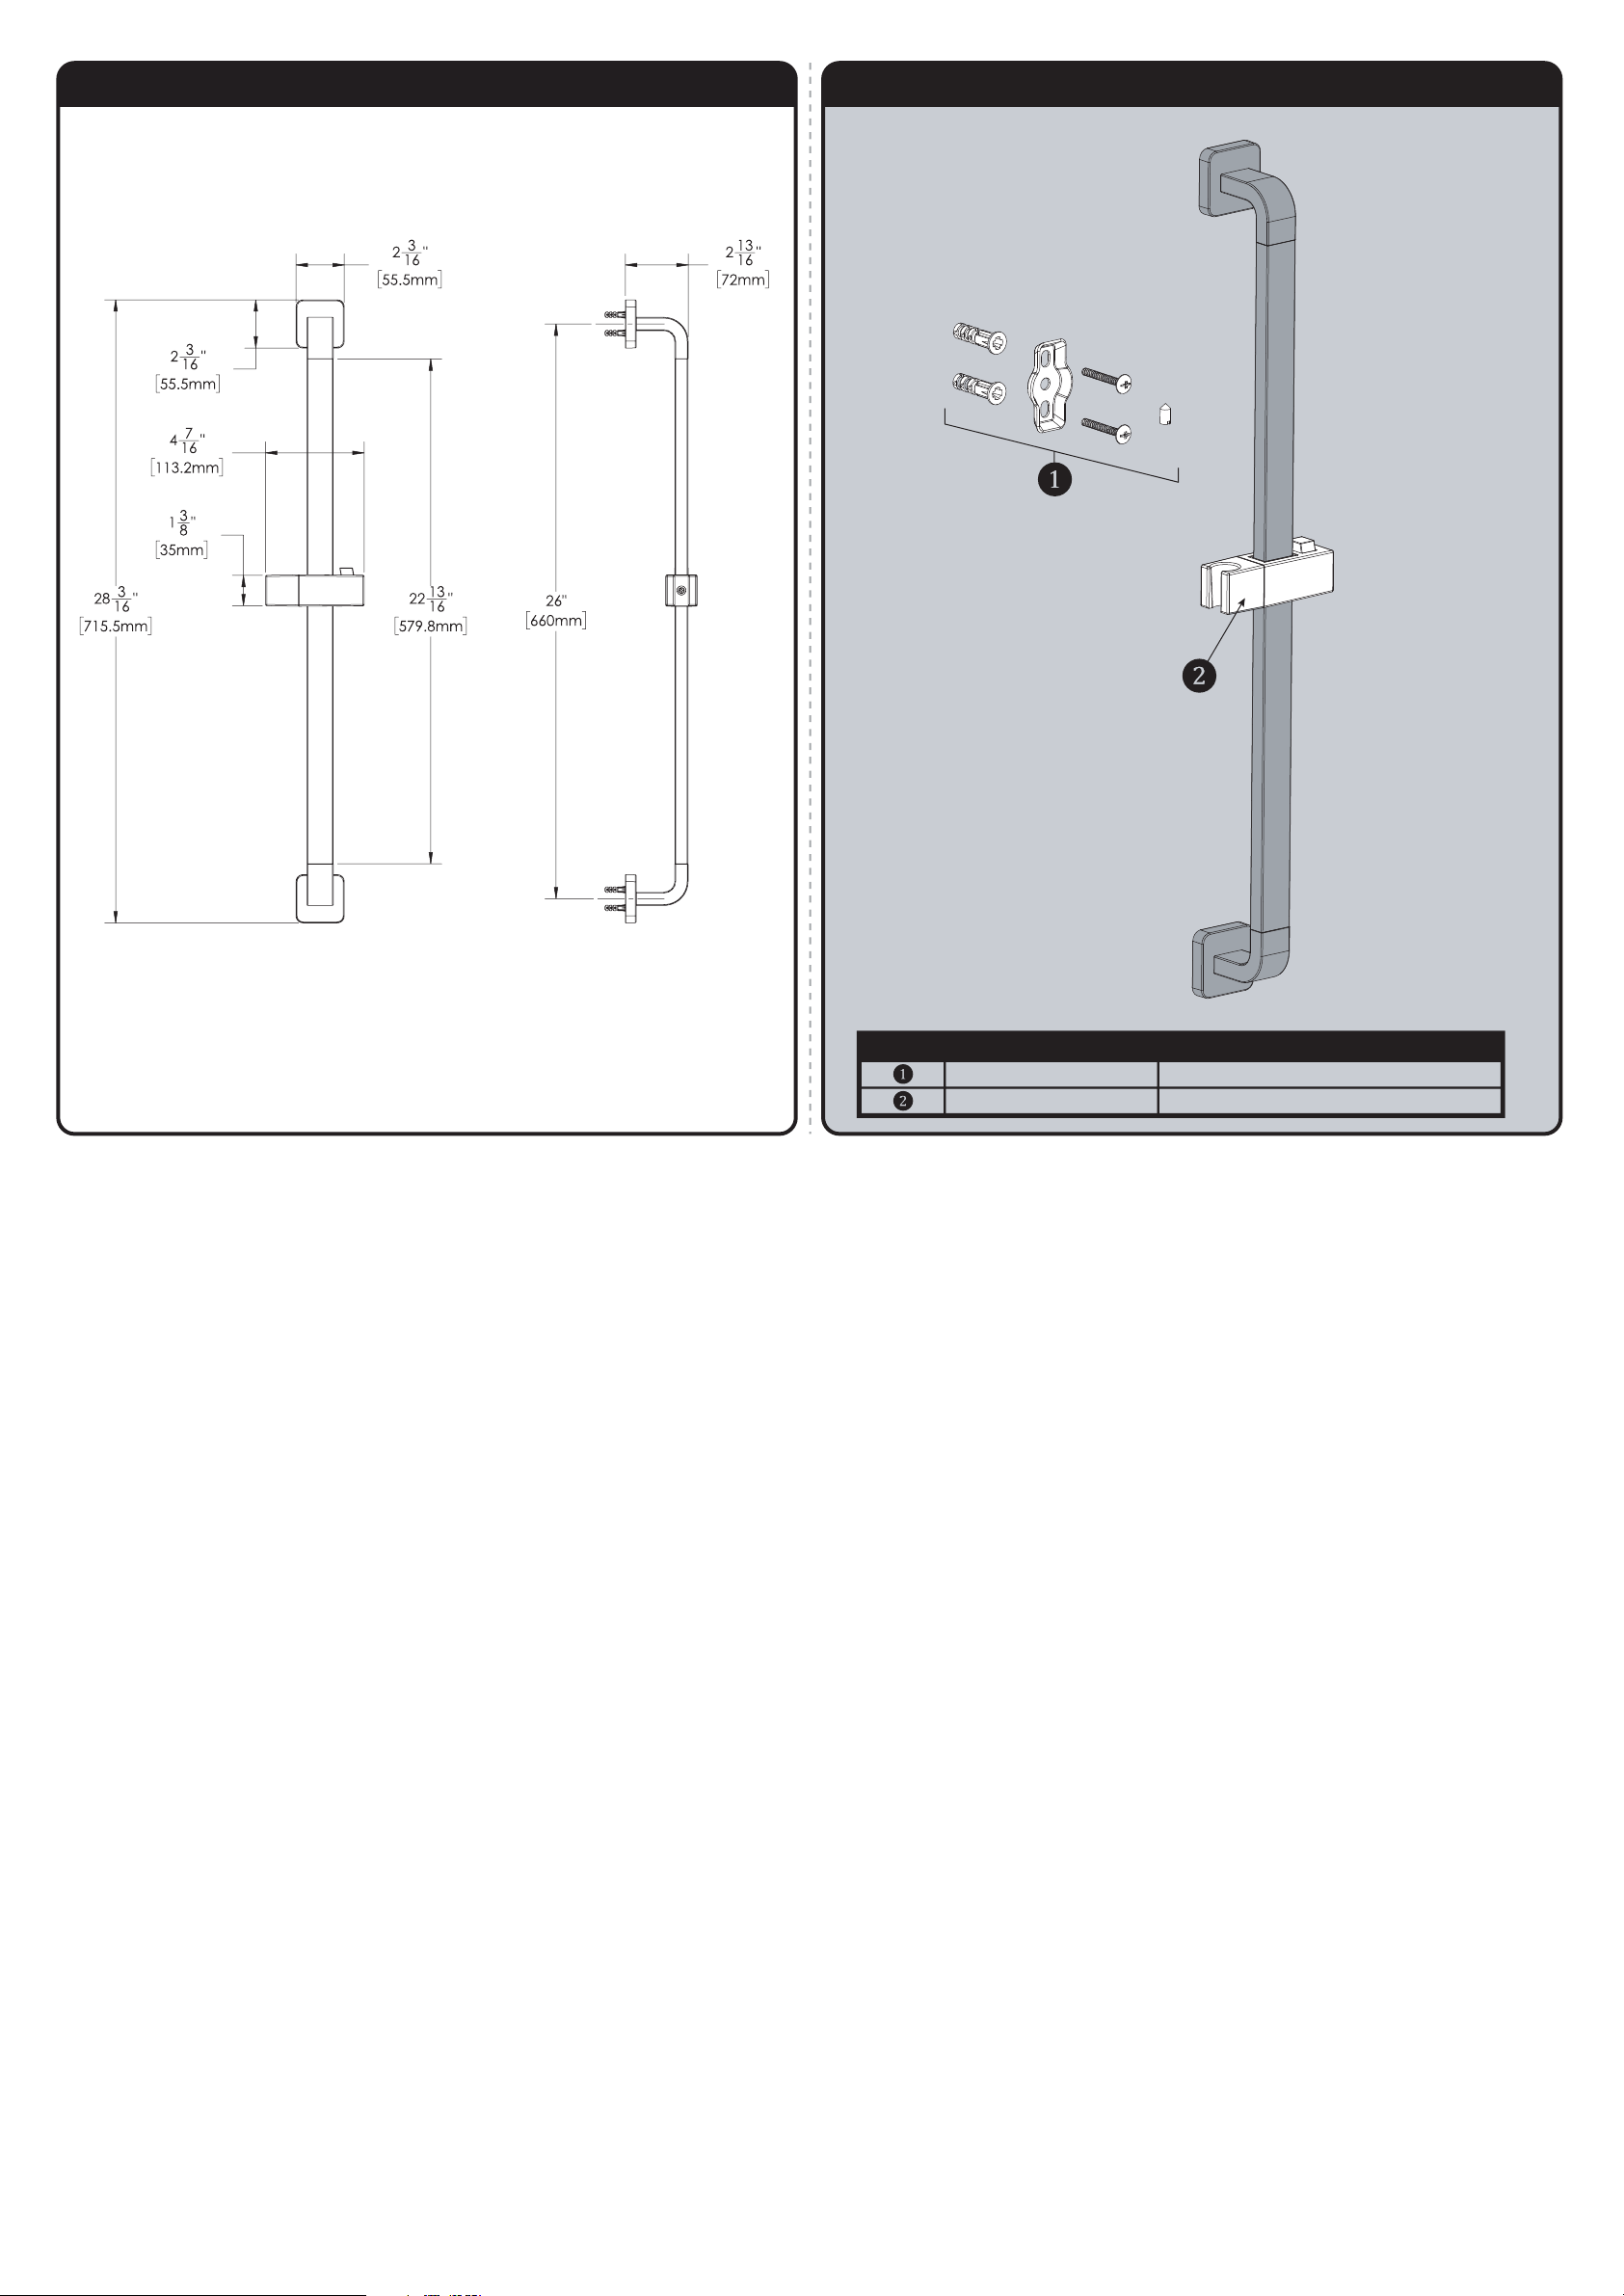
SA-2402 ROUGH-IN DIAGRAM
SPEAKMAN
®
DIMENSIONS SUBJECT TO CHANGE WITHOUT NOTICE.
SA-2402 REPAIR PARTS
SPEAKMAN
®
RPG48-106091 MOUNTING HARDWARE
RPG04-106206-XX (XX = FINISH) SLIDING MECHANISM
ITEM NO. PART NO. DESCRIPTION
 Loading...