


 Loading...

C O N T E N T S
CONTENTS |
2 |
|
|
THANKS! |
4 |
|
|
INTRO |
5 |
About Crystallizer |
5 |
What and Who is SoundToys? |
6 |
|
|
GETTING STARTED |
7 |
System Requirements |
7 |
Installing Crystallizer |
7 |
Registration |
8 |
Some Information on Pitch Shifting and Other Stuff… |
9 |
|
|
USING CRYSTALLIZER |
10 |
|
|
Basics |
10 |
Knobs |
10 |
Toggle Switches |
11 |
LED Displays |
11 |
|
|
Accessing Crystallizer |
12 |
Real-Time Processing (RTAS or HTDM) |
12 |
Non-Real Time Processing (AudioSuite) |
13 |
|
|
Using Crystallizer Within Pro Tools |
14 |
The Crystallizer Preset Library |
14 |
Compare Button |
15 |
Bypass |
15 |
Using Parameter Automation |
15 |
Locking Crystallizer to Tempo and Down Beat |
17 |
Using the HTDM Version of Crystallizer |
19 |
Optimizing CPU Usage |
20 |
|
|
The Crystallizer Control Panel |
21 |
Input and Output Level |
21 |
Mix |
21 |
Pitch |
22 |
Splice |
22 |
Delay |
23 |
Recycle |
23 |
Threshold |
23 |
Gate/Duck |
24 |
Forward/Reverse |
25 |
MIDI Sync |
25 |
Tweak Button |
25 |
FB Mode |
25 |
2

C O N T E N T S (continued)
Pitch Offset |
26 |
Splice Offset |
26 |
Delay Offset |
26 |
Attack |
27 |
Release |
27 |
Low Cut |
27 |
High Cut |
28 |
|
|
Summary |
29 |
|
|
FINAL PAGE |
30 |
Getting Help |
30 |
The UltraFX Product Line |
31 |
The UltraTools Product Line |
32 |
Trademark Info |
32 |
3

T H A N K S !
First off we’d like to give you a loud THANK YOU for purchasing Crystallizer!
We know there are an awful lot of plug-ins for you to choose from and we are truly grateful that you have chosen to spend your hard earned scratch (old school for cash) on our product. We take a lot of pride in our work and we sincerely hope that you find Crystallizer inspirational and musically useful.
We’d also like to thank all the people that helped in the development of Crystallizer and the whole new SoundToys line of plug-ins:
Nick Caiano for his super-cool demo sessions and guitar work.
Mikail Graham for letting us hi-jack his wonderful collection of guitar pedals (we’ll return them soon we promise!) and for all the help and feedback along the way.
Wendy Letven for her amazing design work on the SoundToys logo, all the SoundToys packaging, and much more.
Andrew Schlesinger for all of his help from the very start of the SoundToys concept from product names, design ideas, and presets, to his witty and useful contributions to this user guide and other sage advice.
Our whole crew of beta testers for Crystallizer, especially Arthur Alexander, BT, Jez Colin, Andy Gray, Fab, Lars Fox, Terry Fryer, Peter Freeman, Jon Goldstein, Rich Hilton, Michael James, Pete McCabe, Oliver Momm, Allan Speers, Morgan Page, Michael Costa, Andrew Souter, Willie Wilcox, Doc Wiley, and Richard Zvonar.
––– Ken, Bob, Jamey, Noah, Mitch and Aimee
4

I N T R O (the one that comes before the sequel!)
About Crystallizer
Crystallizer is the third in a series of totally cool new plug-ins to come out of the SoundToys (formerly Wave Mechanics) plug-in development lab. As with FilterFreak, our Analog Filtering module and PhaseMistress, our killer analog phase shifter, a truly ridiculous amount of programming time, head scratching, listening and tweaking has gone into the development and design of Crystallizer in order to provide you with an incredibly creative, powerful, new granular-pitch-splice-forward-backward-echo-plus- space-drive-shimmer-accumulator-effect-device for your Pro Tools rig. That makes sense, right? However, one of the most difficult things facing us is how to describe what Crystallizer does. It is a special tool and sounds unlike anything else so a little history may be in order.
A bunch of years ago the brains at our company (Sound Toys in case you did not know) worked for a little company called Eventide in the swamps of New Jersey (yes, there are swamps). While there, these geniuses created the H-3000 Harmonizer® which also contained a new algorithm called Reverse Shift. That algorithm sat around kind of unused for a little while until this sound designer by the name of Andrew Schlesinger (yours truly) realized that by using the algorithm with a lot of feedback and delay that you could create these incredible "Crystal-Like" echoes and shimmering effects that sounded absolutely incredible, especially on guitar. So a preset was created called "Crystal Echoes" which has subsequently been used by hundreds of artists and producers on tons of albums.
Fast-forward to 2004 and you now have an updated and more powerful Pro Tools plug-in device created by the same guys and based around the same concept (but with a lot more capabilities). And what does it do? Crystallizer basically grabs a "slice" of stereo or mono audio coming in from it’s input and plays it back either forward or in reverse with the ability to shift the pitch of the audio slice (4) octaves up, or (4) octaves down. It also includes the ability to delay the playback of the audio by up to (2) seconds and most importantly use regeneration or "Recycle" to feed the output back into the input allowing you to create some radical and beautiful effects on all sorts of input signals. We have also thrown in our standard fare of "Tweak" parameters to further mutate the signal, but that will be covered a bit later on.
Since Crystallizer is not your standard fare it is a little hard to accurately describe all the functions (some are clearer than others) and this is one of those devices that begs to be tweaked and futzed with. There is nothing to break, nothing to ruin and it won’t stain your carpet so you might as well just start digging in and playing around to see what this puppy can do.
5

As with all SoundToys devices we have included a whole bunch of really cool presets (at least we think so) that span the gamut from relatively tame to "out there". So for sure take a little time to go through them with different kinds of input material as it just might create the spark for your next hit record…CD…MP3…DVD…Film…Game…MUSIC! Right!
What and Who is SoundToys Anyway?
If you already own one of our other products like FilterFreak or PhaseMistress you can skip this section but if not, read on to find out who we are and what we do!
So what the heck is "SoundToys" anyway? SoundToys is a concept, a vision, a new line of totally cool, sonically superior audio FX plug-in devices designed to set a new standard in regards to plug-in processing and sound. And, it’s our new company name.
You see all of us at SoundToys (formerly Wave Mechanics) are a bunch of audio geeks that thirst for new ways to manipulate and mangle sound that are innovative, unique, and with sound quality that is in a class all its own.
While everyone and their grandmother is modeling older gear these days, we are busy wracking our collective brains to develop NEW devices that are truly inventive and will stand the test of time – the kind of things you’d take with you to a desert island.
Just so you know, we are the guys that were responsible for designing such groundbreaking and industry standard products as the Eventide H-3000, DSP-4000, and the Wave Mechanics UltraTools line of plug-ins for Pro Tools TDM. Our DSP algorithms can even be found in such high-end studio gear as the TC Electronics Fireworx, G-Force, and G-Major processors, and more.
Our approach in developing the SoundToys series of Pro Tools plug-ins is to create a series of dedicated processors that provide the absolute best possible sound quality, flexibility and creative sound manipulation in the wonderful world of digital, but that also possess that truly analog character and vibe.
6

G E T T I N G S T A R T E D
System Requirements
Crystallizer is a software plug-in for the Digidesign Pro Tools system. You’ll need to have at least one decent Macintosh computer (G3 or better – faster is always better) running OS 9.2 or later and of course you’ll need a copy of Pro Tools version 5.0 or later. To use Crystallizer you’ll also need one of those little "iLok" hardware keys. It’s a small blue plastic key that looks like this:
If you don’t have an iLok we’ll be happy to sell you one at a modest price or you can purchase one from Digidesign or your favorite Pro Tools dealer.
Installing Crystallizer
Installing Crystallizer is really pretty easy. First, make sure that you have your iLok hardware key connected to your computer, and that you have the Crystallizer license card handy. Once you’re ready, simply pop the Crystallizer CD into your computer’s CD-ROM drive and when the CD icon appears on your screen double-click the Crystallizer installer program to start the process.
Follow any instructions included in the installer and at the end of the installation process you will be prompted to ‘authorize’ Crystallizer. To do this, carefully detach the license chip from the license card, and insert the chip into the slot in the rear of your iLok.
Once installed, a copy of the Crystallizer plug-in will be located in your Digidesign plug-ins folder along with a cool set of Crystallizer presets. Finally, a SoundToys folder will be created in your Applications folder. Please note that if you already have FilterFreak, our totally cool analog filter box, this folder will already be on your hard drive and Crystallizer will be placed there. The SoundToys folder contains this manual, as well as other useful documentation and tools that you can read or ignore depending on your level of patience or interest in reading babbling things like this manual.
7

Registration
If you chose not to register your product during the Crystallizer installation, please take a moment to register Crystallizer by going to http://www.soundtoys.com/register. We also strongly recommend that you go to http://www.iLok.com, set up an iLok.com account, and register your Crystallizer authorization.
So, why should you bother with all this tedious registration stuff? When the day comes that your pet boa constrictor swallows your iLok in the middle of a recording session, and you NEED to use Crystallizer, we will be able to get you up and running again MUCH MORE QUICKLY. If you haven’t taken the time to do this, we will still try to help you, but we’ll have no easy way of knowing whether you are really you, or some bozo that swiped your copy of Crystallizer when you weren’t looking.
8

Some Information on Pitch Shifting and Other Stuff…
As we mentioned earlier, it is a bit hard to describe how this thing really works but a little more detail might be helpful as there are "oddities" involved in pitch shifting and reverse shifting that are worth noting. Nothing bad, just inherent aspects of the process that are worth a few words of explanation.
As we stated earlier, a pitch shifter grabs a slice of audio and plays it back at a different speed to create the alteration in pitch. The important thing to know is that in reality the pitched signal is really being "pushed up" or "pushed down" and modulated with a kind of saw tooth wave and the farther you move from the original frequency the faster this modulation occurs. This is sometimes referred to as "glitching" and is an artifact and byproduct of all pitch shifting algorithms.
It is not just how far you deviate from the original pitch (shifting up as opposed to down usually introduces more artifacts) but how big a slice of the audio you set the unit to sample that also has some affect on both the speed and depth of the modulation. In addition, the larger the slice the more inherent delay is introduced between the time the original signal is played and the slice of audio that is played back.
As the size of the slice increases so does the amount of delay between the original signal and the playback of the effected signal. But this delay time does not remain constant due to the modulation that is used in creating the pitch shift. So if you use a long slice and play a riff, the time between your playing the original riff and the playback for the effected riff can vary due to the modulation of the effected signal.
Most pitch shifters automatically adjust the size of the slice to keep it constant so that the effected signal is played back with just a little bit of delay. Crystallizer, on the other hand, offers you the ability to take much larger slices of audio, shift the signal up or down (4) octaves (that’s a lot of shifting!), play the pitch shifted signal back either in forward or reverse and allows you to feed the output of the shifted signal back into the input so as the signal repeats it is re-shifted with each successive repeat. It also provides the ability to tempo lock the playback so that the repeating signal always starts playing back on the selected beat.
So the important things to keep in mind are the fact that the pitched signal is constantly being modulated, and the larger the slice of audio the longer the inherent delay between the original sounds and the effected signal, and finally, that this delay is not always constant.
9
U S I N G C R Y S T A L L I Z E R
Basics
Note: Since you would probably not be reading this unless you own a Pro Tools system we kind of take it for granted that you have at LEAST a basic working knowledge of your computer and of Pro Tools. If you don’t, we strongly suggest you make yourself a strong cup of coffee (or two), get a comfortable chair and familiarize yourself with the ins and outs of your Pro Tools system before delving too much further into Crystallizer. Digidesign is really nice and provides lots of manuals for your reading pleasure!
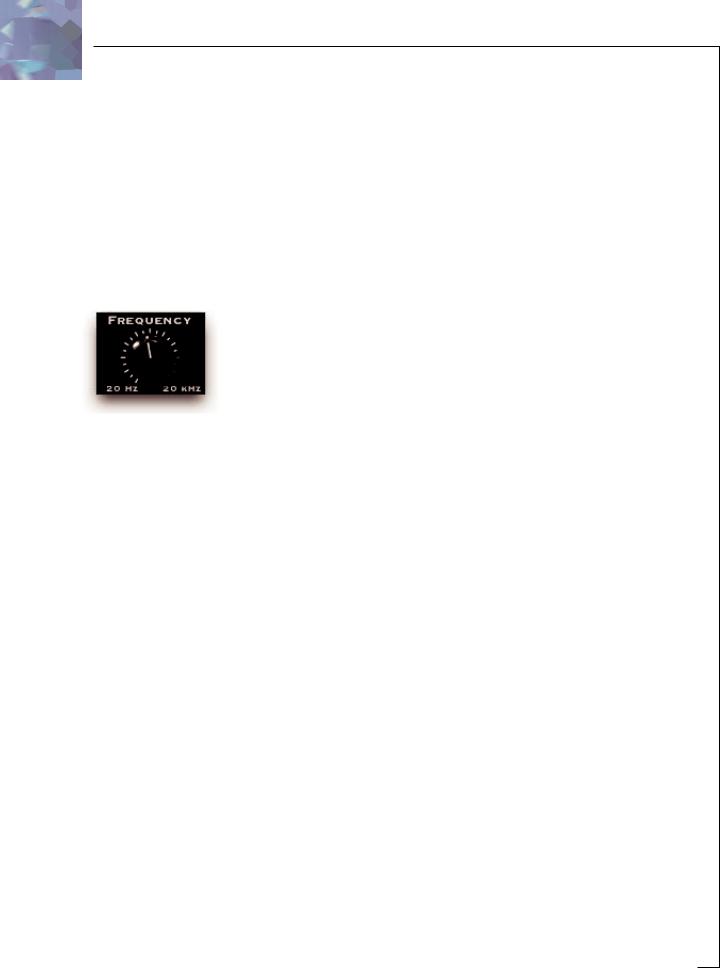
Knobs
You can use a mouse to control all of the knobs in Crystallizer and they all work in the same way: To turn a knob up, (to the right, clockwise etc), click on the knob with your mouse and drag the cursor to the right or slide the cursor up (towards the ceiling). To turn a knob down, (to the left, counter-clockwise), click on the knob with the mouse and drag the cursor to the left or down (towards the floor). "Mousing" around in a circle doesn’t really work; you’ll just get frustrated and or dizzy, neither of which is a lot of fun.
Jumping to a Value using Text Markings
Some knobs have text markings showing minimum, maximum, or other values. Clicking on one of these text markings will automatically move the knob directly to that value.
Returning a Knob to its Default Value
To return to the knobs "default value", simply hold down the option key and click on the knob. This will automatically move the knob back to its default value.
Viewing a Knob’s Exact Value
To view the exact numerical value of a knob simply hold down the control key and click on the knob. To see the knob’s title, hold down control and click on the knob a second time.
Adjusting a Knob with Fine Control
To get finer control over knob values, hold down the apple ð key while dragging the mouse.
10
Loading...