

Sony ericsson Z530I Imaging Manual
G
s
Imaging
Capturing, saving and editing.
etting
tarted
January 2006

Getting started Imaging
Contents
Introduction ............................................................................................... 2
Instruction symbols ................................................................................ 2
Activating the camera and video recorder ................................................ 3
Camera ...................................................................................................... 4
Camera functionality .............................................................................. 5
Camera options ...................................................................................... 6
Editing pictures ...................................................................................... 9
The video recorder .................................................................................. 12
Video recorder options ........................................................................ 12
Handling pictures and video clips ........................................................... 14
Picture and video clip formats ............................................................. 14
Viewing your pictures and video clips ................................................. 14
Assigning a picture to a phone contact ............................................... 15
VideoDJ™ ................................................................................................ 16
VideoDJ™ options ............................................................................... 17
Sharing pictures and video clips ............................................................. 17
Transferring pictures and video clips to your computer ...................... 17
Exchanging pictures and video clips ................................................... 17
Additional information .............................................................................. 18
1 January 2006
Introduction
Instruction symbols
The following instruction symbols may appear in this Getting started guide:
Note
Indicates that a service or function is network- or subscription-dependent. Contact your
network operator for details.
%
} Use the selection keys or the navigation key to scroll and select.
See also page ...
Press the navigation key centre.
Press the navigation key up.
Press the navigation key down.
Getting started Imaging
Press the navigation key to the left.
Press the navigation key to the right.
.
Your mobile phone has a VGA digital camera and digital video recorder
video clips, view them and send them in picture messages via MMS (Multimedia Messaging Service) or
as email attachments. To use email and picture messaging (MMS), you must subscribe to these services.
Please check with your network operator.
You can also use a picture as a screen saver or wallpaper, or save it together with a contact so that the
picture appears when that person calls.
You can save your camera pictures in four different sizes:
or
Extended. This allows you to decide on the number of pictures that can be saved in the phone memory
or on the Memory Stick Micro™ (M2™).
As soon as you take pictures or video clips, you can send them in a picture message (MMS). You can also
exchange them using Bluetooth™ wireless technology, Infrared, USB cable or email, (as long as your
phone holds these capabilities).
You need to have an email account to be able to exchange pictures or video clips via email.
Large 640x480, Medium 320x240, Small 160x120
You can take pictures, record
Before taking a picture, you can change settings and add effects or frames. After taking a picture, you can
edit your pictures by adding effects, frames or clipart objects. Easily create your own personal pictures!
For information on phone overview, using the menus, entering letters, quick keys and file manager, please
see the User guide for your phone.
2 January 2006
Getting started Imaging
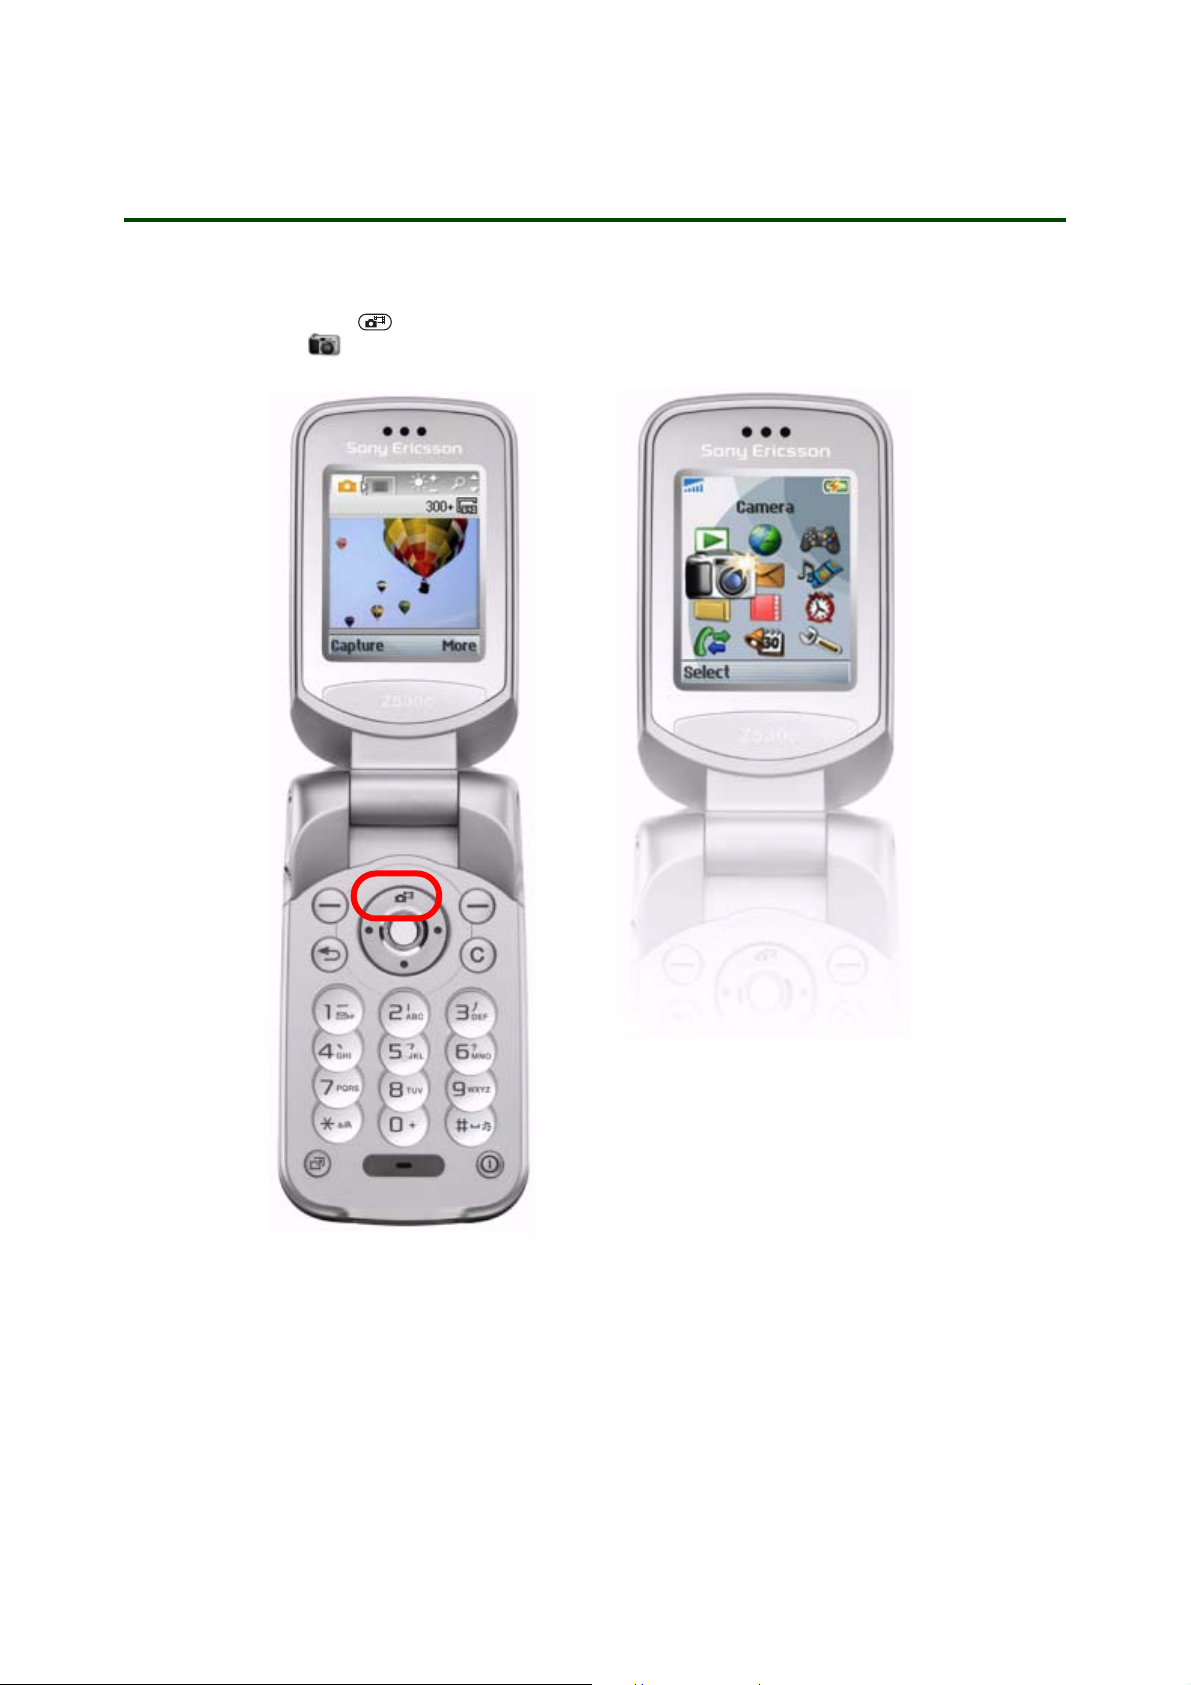
Activating the camera and video recorder
To activate the camera/video recorder from standby mode
• press the camera key , or
• scroll to
Camera in the menu overview.
3 January 2006
Camera
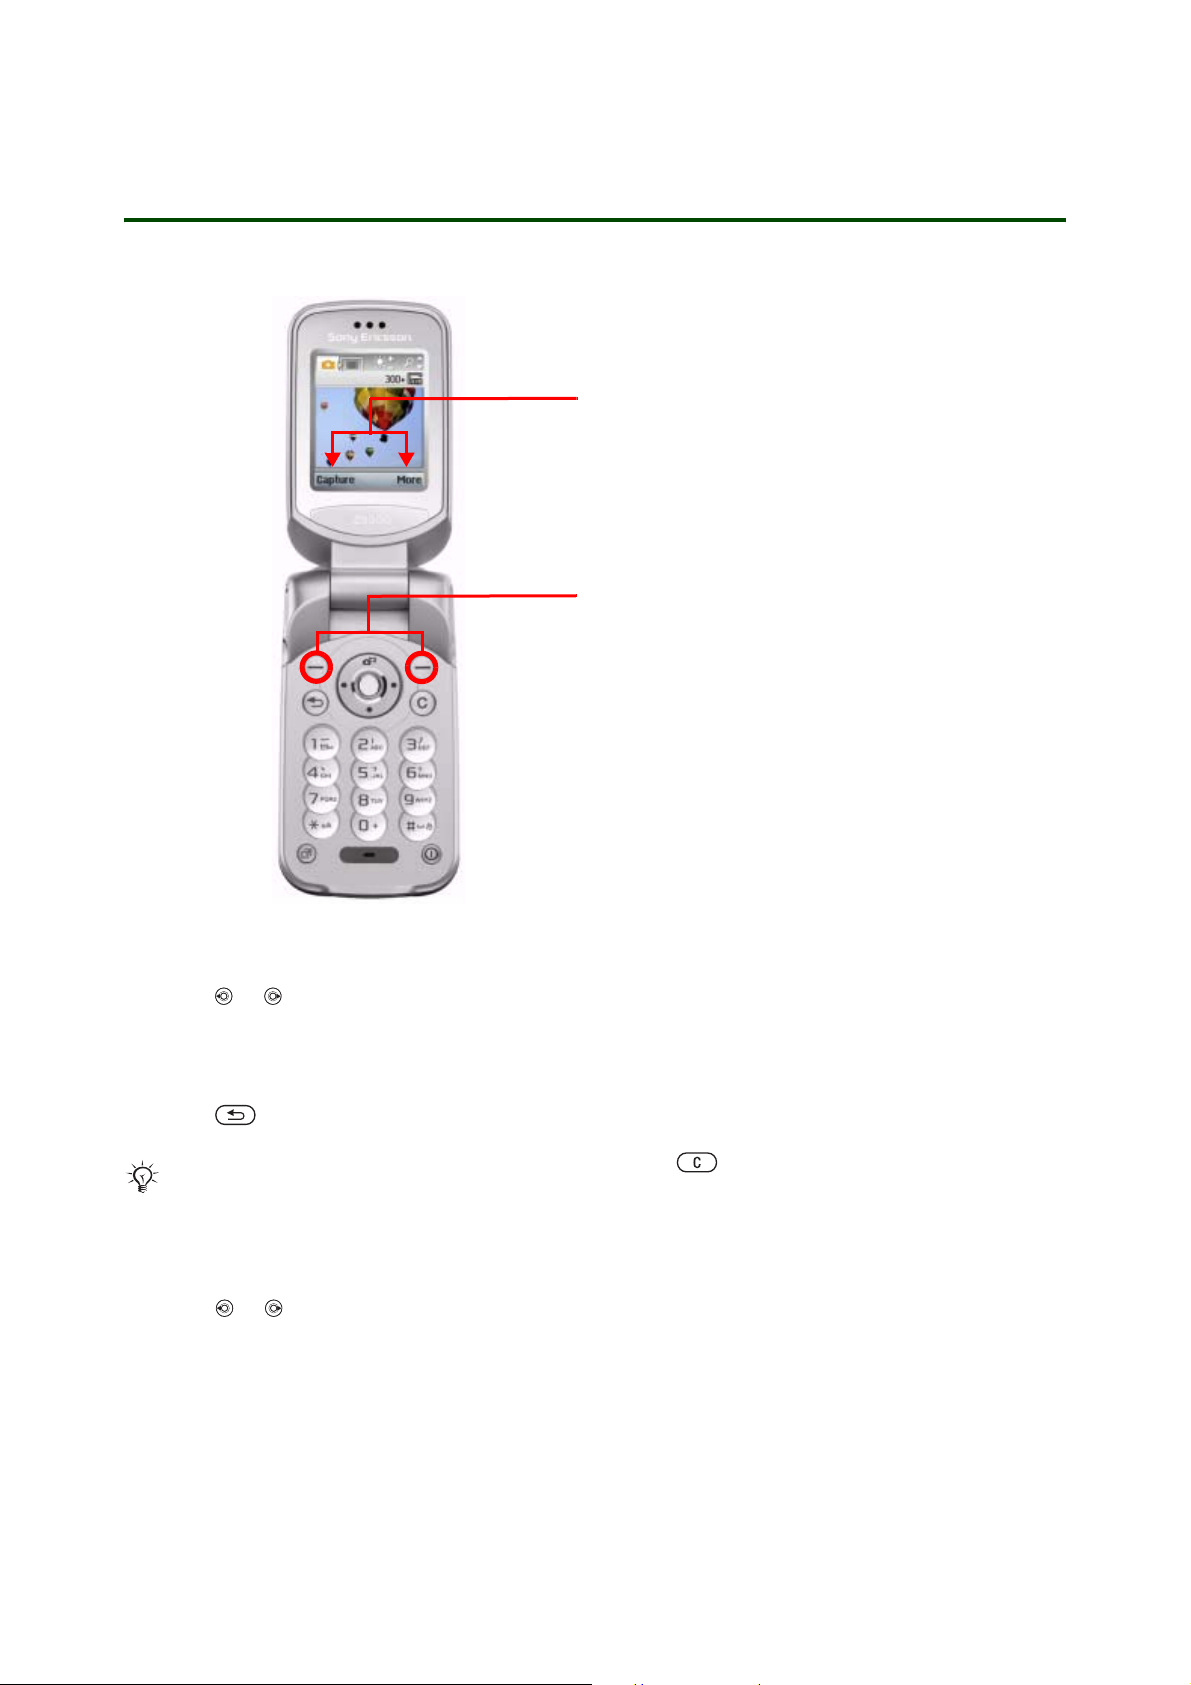
Keys used in camera and video mode
Getting started Imaging
Areas used for displaying functions
such as
the function displayed in these areas,
press the relevant selection key.
Selection keys
Capture and More. To select
To take picture
1. Make sure the camera is activated.
2. Press or to switch between camera and video recorder.
3. Press the left selection key to take a picture.
4. }
More } Take new picture to take another picture. The current picture will be saved and can be found
in
File manager/Pictures/Camera pictures, or
}
More } Delete } Yes to take another picture without saving current picture.
5. Press to exit the camera.
If you want to delete the picture immediately, press the button and } Yes. You are then
returned to the view where you can take new pictures.
To record a video clip
1. Make sure the video recorder is activated.
2. Press or to switch between camera and video recorder.
3. Press the left selection key to start recording a video clip.
4. Press the left selection key again to stop recording the video clip.
4 January 2006

Getting started Imaging
More } Record new video to record another video clip. The current video clip will be saved and can
5. }
be found in
}
More } Delete } Yes to record another video clip without saving the current video clip.
6. Press to exit the camera.
If you want to delete the video clip immediately, press the button and } Yes. You are then
returned to the view where you can record new video clips.
File manager/Videos/Cam. video clips, or
Camera functionality
The camera has different functions allowing you, for example, to take a self-portrait, or to get the best
picture quality with reference to your surroundings. You can zoom in on an object, adjust the brightness
or use the photo light when lighting conditions are poor. }
apicture.
To take a self-portrait
Settings to view more options before you take
To adjust the brightness
Hold the phone so that you can see
your reflection in the mirror next to
the lens. Press to take the
picture. You can also use the selftimer,
% 8 Self-timer.
Use the volume buttons on the side
of the phone to adjust the brightness.
Press to increase brightness and
to decrease brightness. You can
also press and hold the relevant button
to continuously increase or decrease
the brightness. The brightness
determines how much white is added
to each colour in the picture.
5 January 2006
 Loading...