


Contents
Getting started 3
Make and receive the first call.
Getting to know your phone 6
Key functions, quick keys, entering letters and characters.
Personalizing your phone 20
Choose ring signal, theme and other settings.
Calling 27
Use the phonebook, call options.
Setting up Mobile Internet 40
Set up internet and email.
Using Mobile Internet 54
WAP browser, bookmarks.
More features 58
Events, alarm clock, stopwatch, timer, games.
Security 61
SIM card lock, phone lock.
Troubleshooting 63
Why doesn’t the phone work the way I want?
Additional information 65
Sony Ericsson Consumer Web site, safe and efficient use,
warranty, declaration of conformity.
Messaging 45
Chat, email, text and picture messaging.
Icons 73
What do the icons mean?
Index 78
This is the Internet version of the user's guide. © Print only for private use.
Contents 1

Sony Ericsson T230c
GSM 900/1800
Second edition (January 2004)
This manual is published by Sony Ericsson Mobile
Communications AB, without any warranty.
Improvements and changes to this manual
necessitated by typographical errors, inaccuracies
of current information, or improvements to programs
and/or equipment, may be made by Sony Ericsson
Mobile Communications AB at any time and without
notice. Such changes will, however, be incorporated
into new editions of this manual.
© 2004
Sony Ericsson Mobile Communications AB
All rights reserved.
Publication number: EN/LZT 108 6575 R2A
Please note:
Some of the services in this manual are not
supported by all networks. This also applies to
the GSM International Emergency Number 112.
Sony ericsson advice users to backup their
personal data information.
Please contact your network operator or service
provider if you are not sure whether you can use
a particular service or not.
2 Contents
Please read the Guidelines for safe and efficient
use and the Limited warranty chapters before you
use your mobile phone.
The marble logo is a trademark of Sony Ericsson
Mobile Communications AB. Sony is a trademark
of Sony Corporation and Ericsson is a trademark
of Telefonaktiebolaget L M Ericsson.
T9™ Text Input is a trademark or a registered
trademark of Tegic Communications.
T9™ Text Input is licensed under one or more of
the following: U.S. Pat. Nos. 5,818,437, 5,953,541,
5,187,480, 5,945,928, and 6,011,554;
Canadian Pat. No. 1,331,057;
United Kingdom Pat. No. 2238414B;
Hong Kong Standard Pat. No. HK0940329;
Republic of Singapore Pat. No. 51383;
Euro. Pat. No. 0 842 463 (96927260.8) DE/DK, FI,
FR, IT, NL, PT, ES, SE, GB; and additional patents
are pending worldwide.
Other product and company names may be the
trademarks of their respective owners.
Any rights not expressly granted herein are
reserved.
This is the Internet version of the user's guide. © Print only for private use.

Getting started
About this user’s guide
For ease of reference, the “Getting to know your
phone” chapter gives a quick overview of the main
functions of the phone, shortcuts and general
information.
More information and downloads are available at
www.SonyEricsson.com or wap.SonyEricsson.com.
Note: Throughout this manual, WAP and Web are used
interchangeably to refer to internet services.
Available services
Some services and functions described in this user’s
guide are network- or subscription-dependent. Because
of this, some menus may not be available in your phone.
This symbol indicates that a service or
function is network or subscriptiondependent.
Please consult your network operator for
more information about your subscription.
This is the Internet version of the user's guide. © Print only for private use.
The SIM card
When you register as a subscriber with a network
operator, you get a SIM (Subscriber Identity Module)
card. The SIM card contains a computer chip that
keeps track of your phone number, the services
included in your subscription, and your phonebook
information.
Tip: Check if your information is saved to the SIM
card before you remove it from another phone.
For example, phonebook entries may be saved in the
phone memory.
Assembly
Before you can use your phone you need to:
• Insert the SIM card.
• Attach and charge the battery. See “SIM card and
battery information” on page 4.
Note: Always turn off the phone and detach the
charger before you insert or remove a SIM card.
Getting started 3
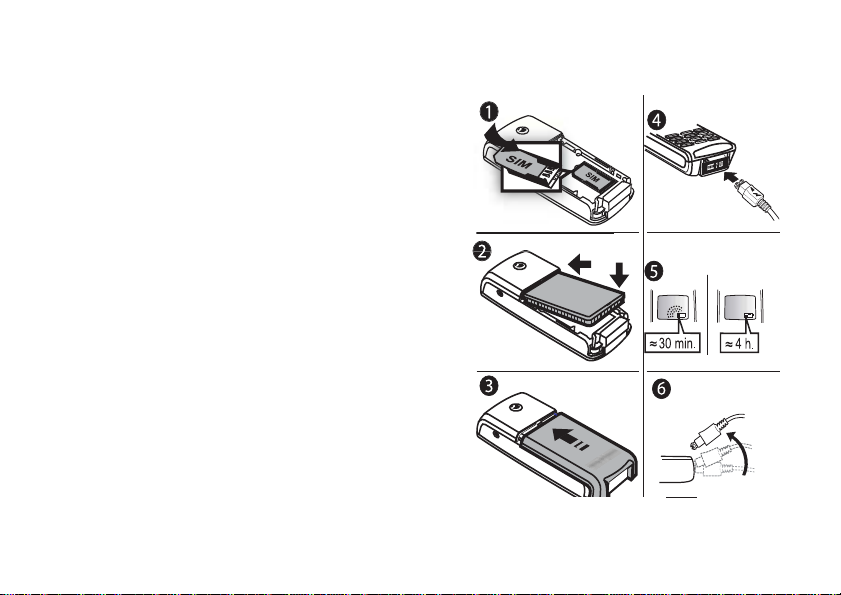
SIM card and battery information
It may take up to 30 minutes before an
icon appears when charging if the battery
is completely discharged.
1. Insert the SIM card. Make sure the SIM card is placed
under the metal clips.
2. Place the battery on the back of the phone with the
connectors facing each other (label side up).
3. Place the back cover into the bottom of the phone and
slide it up until it clicks into place.
4. Connect the charger to the phone at the flash
symbol. The flash symbol on the charger plug
must face upwards.
5. It may take up to 30 minutes before the battery
charging icon appears in the display. Wait
approximately 4 hours or until the icon indicates
that the battery is fully charged. If you do not see
the battery icon after this time, press any key or
the centre select key to activate the display. The
display will “sleep” during charging.
6. Remove the charger by tilting the plug upwards.
Note: You have to insert the SIM card and charge the
battery before you can use the phone.
4 Getting started
This is the Internet version of the user's guide. © Print only for private use.
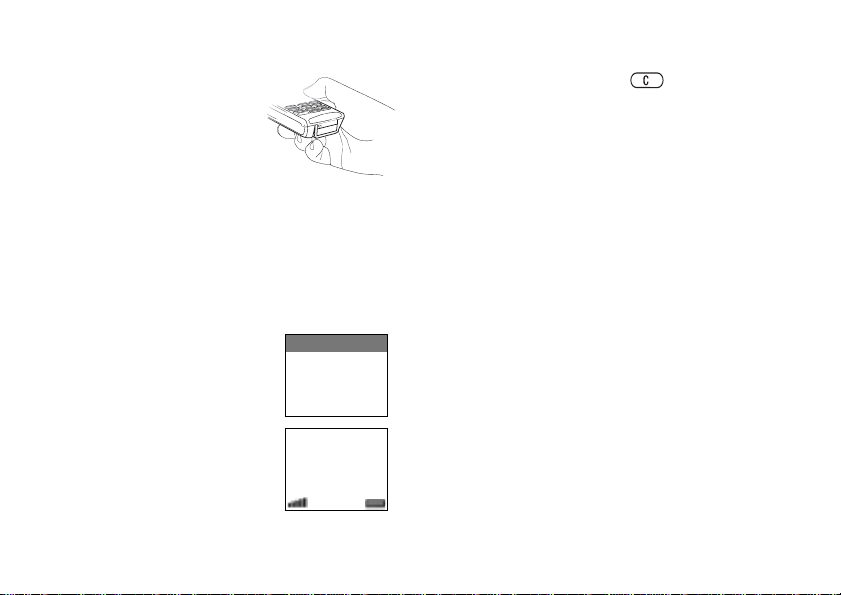
Holding the Phone
Hold your mobile phone
as you would any other
telephone. While
speaking into the
mouthpiece, angle the
phone up and over your
If you make a mistake while entering your PIN, delete
the wrong number by pressing .
If your PIN starts with the same digits as an emergency
number, for example 911, the digits are not hidden with
an * when you enter them. This is so that you can see
and call an emergency number without entering a PIN.
See “Emergency calls” on page 28 for more information.
shoulder.
Note: If you enter the wrong PIN three times in a row,
Internal Antenna
Your phone is equipped with an internal antenna. For
best reception, try to hold your phone so your hand
does not cover the internal antenna. The antenna is
the SIM card is blocked and the message PIN blocked
appears. To unblock it, you need to enter your PUK
(Personal Unblocking Key). Your PUK is provided by
your network operator.
located on the back of the phone above the back cover.
To make and receive calls
Turning On the Phone
NO
Press and hold
until you hear
a tone. Enter your PIN (Personal
Identity Number), if you have one
PIN:
Welcome
• Enter the area code and phone number, and press
to make the call.
• Press
NO
to end the call.
• When the phone rings, press
for your SIM card. Your PIN is
provided by your network
operator.
My Network
12:18
This is the Internet version of the user's guide. © Print only for private use.
YES
YES
to answer the call.
Getting started 5
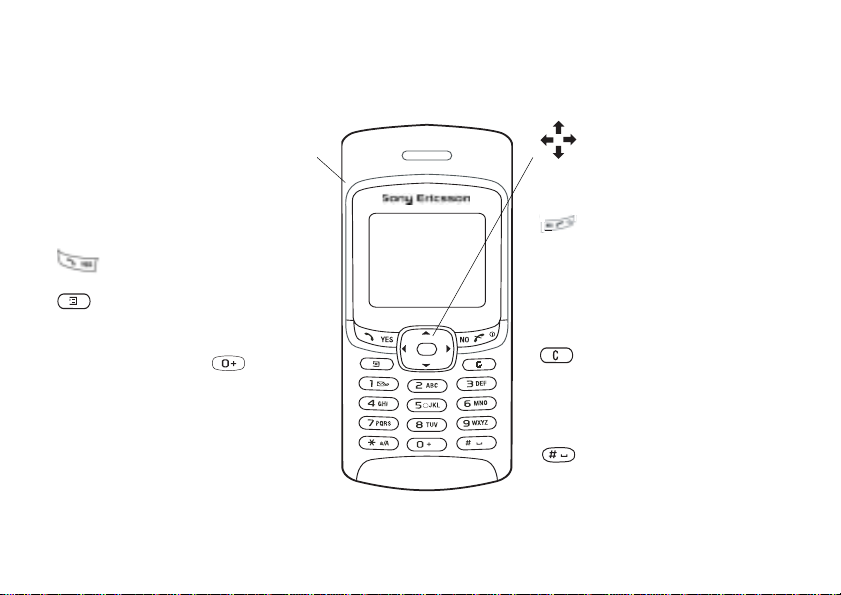
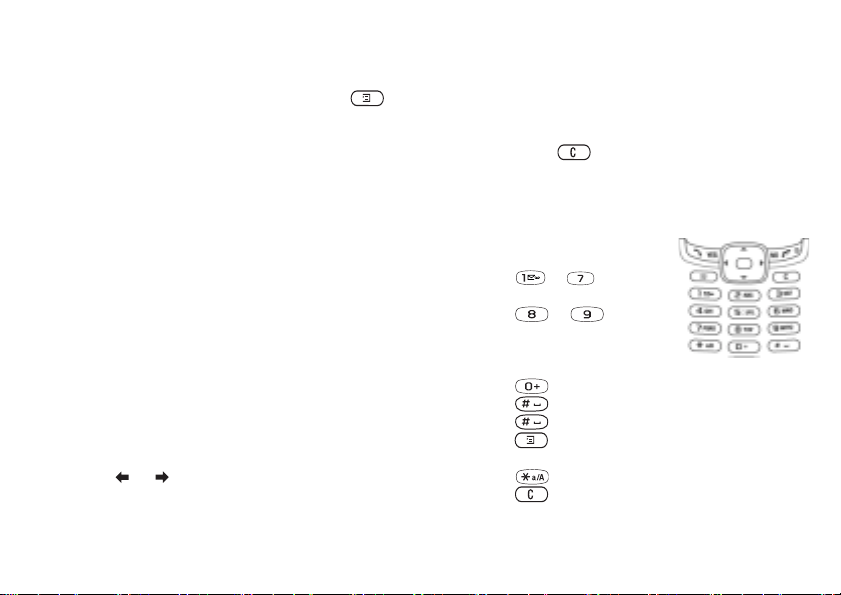
Getting to know your phone
Key functions
Vo l u m e
Increase/decrease the earpiece
key
volume during a call. Scroll
through lists under menus. Enter
the Phone status menu in standby.
Press once to mute the ring signal
when receiving a call. Press twice
to reject an incoming call.
Make and answer calls. Select
a menu, submenu or an option.
Press for options, help.
Press and hold for WAP.
1–9, 0 Enter digits, 0–9, and letters.
Press and hold to enter
the international prefix +. Move
through menus using shortcuts.
Press and hold (2-9) to find a
contact beginning with the first
letter on that key.
6 Getting to know your phone
This is the Internet version of the user's guide. © Print only for private use.
Tilt the navigation key up, down,
left or right to move through the
menus, lists and texts. Press the
centre select key as an alternative
to
Press and hold to turn the phone
on or off (in standby) or to go
back to standby mode from
menus. Press to end or reject a
call, go back one level in the
menus or leave an option
unchanged.
Delete numbers, letters or an
(clear)
item from a list. Press and hold
to mute the microphone (during
calls) or mute the phone or lock
the keypad (standby menu).
Enter # or a space.
YES
to select an option.
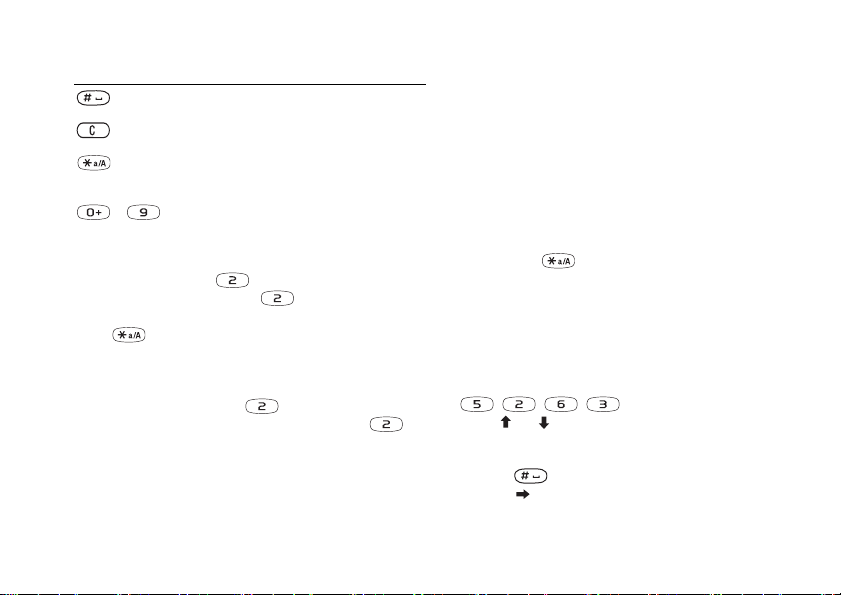
Quick keys
Useful key combinations are described below.
To... When in standby:
reach a contact beginning
To... When in standby:
make an emergency call enter the international
emergency number and
press
YES
enter and move through
press or
the main menus
enter Call contact press or
enter Call list press
YES
call your voice mail press and hold
enter the + sign press and hold
mute the ring signal when
receiving a call
press , or press one of
the side volume keys once
with a specific letter
reach a phone number at
a specific position on the
SIM card.
speed dial press any of the number
find a contact in the Call
contact list
enter the Phone status
menu to see today’s date
and the model name of the
phone (may also indicate
GPRS availability)
reject a call quickly press the upper
write a new text message press and hold
set the phone to silent or
press and hold
lock the keypad
Getting to know your phone 7
This is the Internet version of the user's guide. © Print only for private use.
press and hold any of the
keys –
press the position number
and
keys – and
YES
press and hold
press the volume key up
or down
or lower side volume key
twice when receiving a call
or press
NO
To... When in standby: To... When in the menus:
silence call ringer quickly press the upper
or lower side volume key
once when receiving a call
change the language
press 8888
to Automatic
change the language
press 0000
to English
change the language
press 0008
move through menu lists use the navigation key or
press (and hold) the upper
or lower side volume key
enter a quick options menu
press
or help, if available.
delete an item press and hold when
in lists
go back to standby press and hold
to Chinese
To... During a call:
put a call on hold press
retrieve the held call press
YES
YES
again
mute the microphone press and hold
To...
reach the second letter
or character of a key
reach the third letter
or character of a key
When entering letters
using multitap text input:
press and hold the upper
side volume key and press
any of the number keys
press and hold the lower
side volume key and press
any of the number keys
8 Getting to know your phone
This is the Internet version of the user's guide. © Print only for private use.
NO
To...
shift between capital
and lower-case letters
enter numbers press and hold any of the
enter a question mark press the upper side
@
enter the
-sign press the lower side
enter a space press
delete letters and numbers press
shift between multitap
or T9 Text input methods
(assuming T9 Text input
is set to On)
When entering letters
using multitap text input:
press , then the letter
number keys
volume key and press
volume key and press
press and hold
To. ..
shift between input
languages and other
character or numeric
input methods
To. ..
view alternative words press or
accept a word and add
aspace
enter a period press
view alternative
punctuation marks
shift between capital and
lower-case letters
enter numbers press and hold any of the
Getting to know your phone 9
This is the Internet version of the user's guide. © Print only for private use.
When entering letters
using multitap text input:
press and hold
When entering letters
using T9 Text Input:
press
press , then or
repeatedly
press , then the letter
number keys
To. ..
When entering letters
using T9 Text Input:
delete letters and numbers press
shift between multitap or
press and hold
T9 Text input methods
shift between input
press and hold
languages and other
character or numeric
input methods
To... When entering numbers:
enter a p (pause) press and hold when
entering numbers or saving
codes
To access the Icon Glossary
1. Scroll to the menu or function and press .
2. Select Icon glossary.
Delete, edit and rename
If you add items, for example, a contact, an event or
a web bookmark, it can be deleted, edited or renamed.
There are two ways to delete items:
• Select an item and press .
• Select an item, press , select Delete or Delete all.
There are two ways to edit items:
• Select an item, press , select Edit.
• Scroll to the item you want to edit and press
twice, select Edit.
Tip: You can rename an item in the same way.
Help texts/Icons
More information, explanations or tips about selected
menus or functions are available in your phone.
To get help
1. Scroll to the menu or function and press .
YES
2. Select Help (if available),
10 Getting to know your phone
.
This is the Internet version of the user's guide. © Print only for private use.
YES
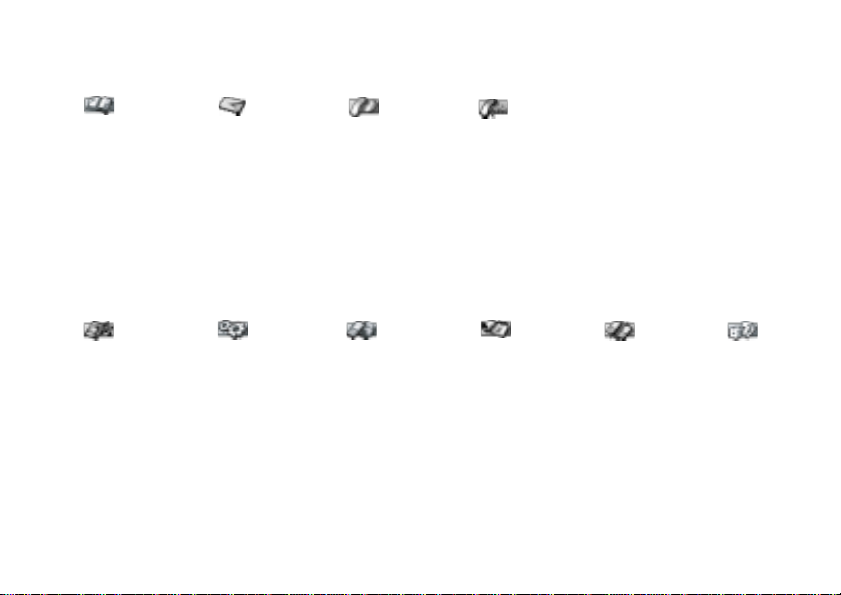
Menu overview
(1) Phonebook** (2) Messages (3) Calls or Ongoing call*
Note:
1 Call contact
2 Add contact
3 Manage contact
4 Pictures
5 Personal rings
6 Special numbers
7 Advanced
8 Options
Find and send*
(4) Pictures&Sounds (5) Settings (6) Web services** (7) Organizer (8) Connect (9) Games**
1 Text
2 MMS
3 Call voice mail
4 E-mail
5 Chat
6 Push inbox
7 Area info **
8 Options
1 Missed calls
2 Call list
3 Manage calls
4 Time and cost
5 Next call
6 Options
Calling local**
Switch to line 1**
Switch to line 2**
1 Turn off tones*
2 Hold call*
3 Switch calls*
4 Release active*
5 Join calls*
6 Transfer call*
7 Release all*
Extract part*
Release party*
Parties in conf.*
8 Calls*
9 Phone status
(1) Main menu numbering
does not appear (menu
numbering may change with
certain functions or services).
*Only available during a call
or conference call.
**Network- and subscriptiondependent.
1 My pictures
2 More Pictures
3 My sounds
4 More Sounds
5 Themes
6 More Themes
7 Composer
8 Record sound
9 CommuniCam™
1 Sounds & alerts
2 Display
3 Language
4 Time and date
5 Locks
6 Handsfree
7 Master reset
1 Sony Ericsson
2 Bookmarks
3 Push inbox
4 Enter address
5 Resume
6 Select profile
7 Advanced
8 Options
1 Events
2 Alarms
3 Timer
4 Stopwatch
5 Calculator
6 GSM Networks
7 Data comm.
8 Accessories
Getting to know your phone 11
This is the Internet version of the user's guide. © Print only for private use.
(if attached)
Entering letters and characters
You can enter letters, for example, when you add
names to the phonebook, write text messages or enter
web addresses.
In addition to the way you normally enter letters in
your phone, using multitap text input, you can use
T9™ Text Input to enter text messages and e-mail,
for example, if the input language you select supports
this. T9 Text Input is a predictive input method and is
a quicker way to write texts.
Input languages
Before you start entering letters, you need to select the
input languages that you want to use when writing.
Chinese input
This mobile phone has different input methods for
entering Chinese characters:
• Stroke input
• Pinyin input
You can use these methods to, for example, enter
Chinese names and Chinese short messages.
Before you start
Chinese is the default language. If you want to select
another language or input method before you start
entering Chinese characters, please refer to the
following procedures:
To select input languages
1. Scroll to Settings,
YES
, Language,
YES
, Input,
YES
To select a menu language
Scroll to Settings, Language, Menu.
.
2. Scroll to the language or alphabet that you want to use
for entering letters and press for each language
you want.
3. Press
YES
to exit the menu.
To select an input method
Scroll to Settings, Language, Input.
When writing, you can switch to one of your selected
input languages by pressing and then selecting
Language. See “The list of options” on page 19.
12 Getting to know your phone
This is the Internet version of the user's guide. © Print only for private use.
Switching between Chinese input methods
In the Chinese editing mode, you can select and switch
quickly to another input method by pressing and
holding .
in the candidate row, move the cursor to that character
and press
YES
. Alternatively, press and hold the key of
which the number corresponds to the character
position. For example, to enter the fourth character
from the candidate row, press and hold .
Switching between Chinese and English input
In the Chinese editing mode, you can select and switch
Input methods in detail
quickly to another input language by pressing and
holding .
Stroke input
A Chinese character is built up of strokes. There are
General instructions
Regardless of which input method you choose, your
phone has a function to speed up the entry of Chinese
characters. Whenever you enter a stroke or a Pinyin
letter, a candidate row of the most frequently used
characters containing that stroke or relating to that
letter, appears at the bottom of the input area.
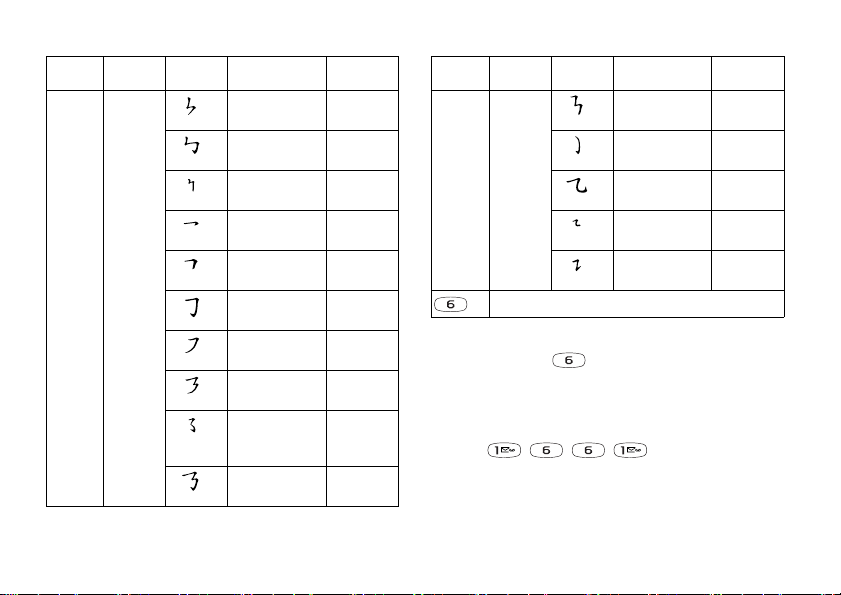
more than 30 basic strokes, which are grouped into
5 stroke categories. Each category is represented on
the keypad by one of the keys - . The Wild
Card key , is used when you are not sure of which
stroke to use. For more information, please see “For
example, to enter “ 信息 ”” on page 16 and “Example
of using the Wild card key” on page 15.
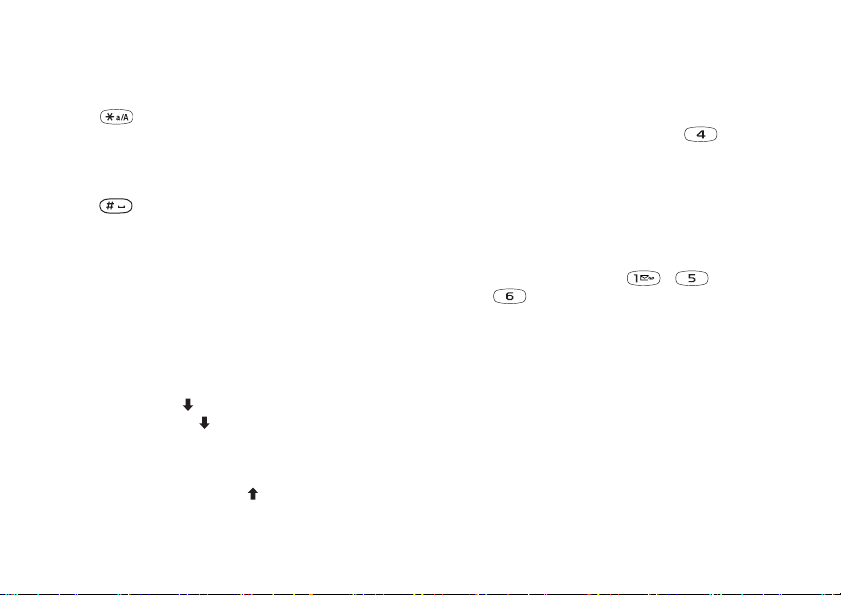
If the character you want is not displayed in the
candidate row, press to present another candidate
row. Continue pressing until the character you want
is displayed. Alternatively, you can enter the next
stroke or Pinyin letter and a new set of characters will
immediately be displayed in the candidate row. To go
back to the previous row, press . To enter a character
Getting to know your phone 13
This is the Internet version of the user's guide. © Print only for private use.

Stroke categories
The 5 stroke categories and the mapping of stroke
Number
Key
Stroke
Category
Basic
Stroke Stroke Name Character
letters on the keypad are defined in the table below:
Number
Key
Stroke
Category
Basic
Stroke Stroke Name Character
Over
Lift
Down
王 十 在
七 天
海 红 牡
状 习
中 业 上
门 丑
Down-Hook
Short
Slope Down
Long Left Slope
Over Slope
小 水 打
子 承
直 真 质
草
八 九 丹
风 片
香 千 匕
后 丢
Short left Slope
14 Getting to know your phone
而 页 面
学 殷
This is the Internet version of the user's guide. © Print only for private use.
Dot
Right Slope
Down-CurvedOver
Down-Over
Left Slope-Over
Left Slope-Dot
Down-Lift
Right SlopeHook
Down-OverHook
Down-OverCurved-Hook
六 学 雷
心 性
人 火 又
送 林
四 西 酉
酸
山 巨 屯
母 凶
么 去 公
约 能
女 要 好
巡 巢
衣 以 饭
收 长
我 或 民
成 伐
心 必 思
忘
电 也 毛
兄 孔
Number
Key
Stroke
Category
Basic
Stroke Stroke Name Character
Down-Over-Left
Slope
Down-OverDown-Hook
Down-OverDown
Over-Hook
Over-Down
专 传 转
马 与 张
号 费
鼎 鼐
写 字 皮
通 免
口 已 户
Number
Key
Stroke
Category
Basic
Stroke Stroke Name Character
书 骨
Over-DownHook
Over-Left Slope
Over-DownOver-Left Slope
OverLeft SlopeCurved-Hook
Over-DownOver-Hook
力 习 也
同 永
又 之 登
多 社
及 极 廷
建
阿 队 陈
那 部
乃 透 鼐
隽 杨
? (Wild card key)
Example of using the Wild card key
The Wild card key , is used to supplement unclear
strokes in entering characters. If you want to enter
“ 五 ”, but you only know that “ 一 ” is the first and the
last stroke of the character and that the total number of
strokes is four:
• Enter , , , .
• The character is displayed in the candidate row.
Getting to know your phone 15
This is the Internet version of the user's guide. © Print only for private use.
Over-DownOver-Down
Curved-Hook
Over-DownCurved-Hook
Over-DownOver
Over-Down-Lift
凸
狗 豹 家
逐 狂
乙 九 瓦
飞 风
投 沿 船
凹
话 计 认
讯

Components
The basic building units of Chinese characters are
components that are made of strokes. After entering
the first stroke of the desired character, the component
and character candidates that started with that stroke
are displayed in the candidate row. Using components
is a fast method for entering complex characters.
Note: The smaller candidates surrounded by dotted
frames are components, and the bigger candidates
without dotted frames are characters.
For example, to enter “
信息
”
1. Enter “ ”, “ ” and “ ”.
YES
2. Move the cursor to “ 信 ”,
.
Below is the key mapping of Pinyin letters on
the keypad:
Number Key Pinyin Letter
a b c
d e f
g h i
j k l
m n o
p q r s
t u ü
w x y z
4. Select “ 息 ”.
Pinyin input
Press the keys containing the required Pinyin letters,
and the phone will make various proposals on the
display, according to the pronunciation rules of
Mandarin.
Note: On the keypad, the letter ü is replaced by v.
For example, to enter “
1. Press , , .
2. When “xin” is highlighted, move the cursor left or
right and select “ 信 ”. If you want to enter any of the
other suggested Pinyin combinations, scroll or
to the desired combination, then press
3. Select “ 息 ”.
16 Getting to know your phone
This is the Internet version of the user's guide. © Print only for private use.
信息
”
YES
.
Input punctuations, symbols and smilies
Under input mode, press , to see the table of
punctuations, symbols and smilies. Press to enter
Note: Your selection of input languages and character
or numeric input methods determines what you can see
or enter.
a space into the text.
See the Latin alphabet, abc, table below:
Latin input
Multitap text input
When saving names in the phonebook or when writing
web addresses, you enter letters using multitap text
input. You press each key as many times as needed
to show the letter you want. The following example
shows how to write a name in the Phonebook.
Note: Multitap input only applies when latin
characters are selected.
To enter letters using multitap text input
1. Scroll to Phonebook,
Add contact,
YES, YES
YES
, Manage contact,
again.
YES
,
2. Press the appropriate key, – , or ,
repeatedly until the character you want appears.
You can view the characters in the row that appears
briefly at the top of the display when you press a key.
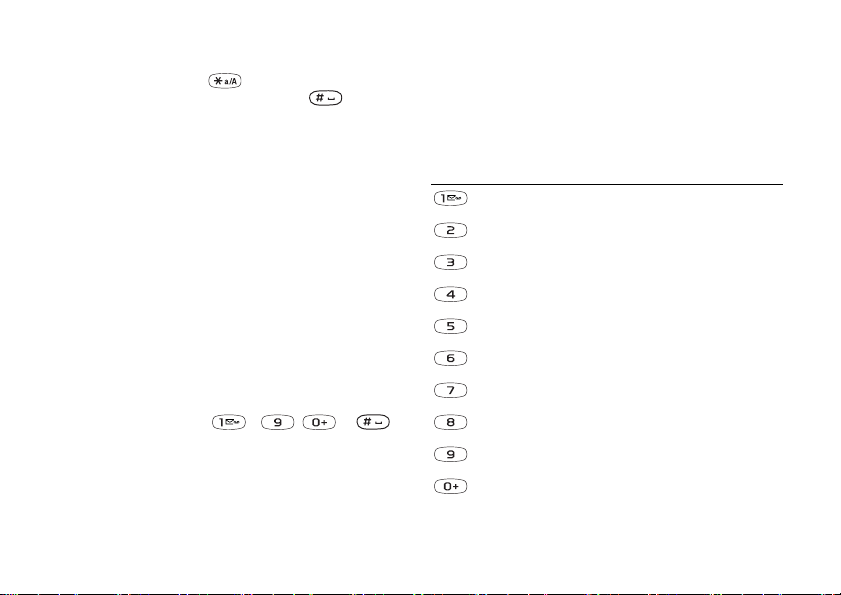
Press… to see/enter…
- ? ! ‚ . : ; " ' < = > ( ) _ 1
A B C Å Ä Æ à Ç 2 Γ
D E F è É 3 ∆ Φ
G H I ì 4
J K L 5 Λ
M N O Ñ Ö Ø ò 6
P Q R S ß 7 Π Σ
T U V Ü ù 8
W X Y Z 9
+ & @ / ¤ % $ € £ ¥ \ § ¿ ¡ 0 Θ Ξ Ψ Ω
Getting to know your phone 17
This is the Internet version of the user's guide. © Print only for private use.
Press… to see/enter…
Space # * ↵ ¶
to delete letters and numbers
to shift between capital and lower-case
letters
– press and hold to enter numbers
uses a built-in dictionary to recognize the most
commonly used word for each sequence of key
presses. This way, you press each key only once, even
if the letter you want is not the first letter on the key.
Note: A language must be selected to be able to use
the T9 Text Input method.
To turn T9 Text Input on or off
Note: You can toggle T9 Text Input on/off by pressing
Example:
and holding .
•To enter an ‘A’, press once.
•To enter a ‘B’, quickly press twice.
• To shift between capital and lower-case letters,
The following example shows how to start writing
a text message:
press , then enter the letter.
To enter letters using T9 Text Input
Tip: You can also use the volume key as a shortcut to
certain letters. To enter a ‘B’, press and hold the upper
side volume key and press . To enter a ‘C’, press
and hold the lower side volume key and press .
1. Scroll to Messages,
2. For example, if you want to write “lane”, press
,, , .
3. Press or repeatedly to view alternative words
YES
(candidates).
T9™ Text Input
You can use T9 Text Input when writing, for example,
text messages and e-mail. The T9 Text Input method
18 Getting to know your phone
4. If the word shown is the one you want:
• press to accept and add a space.
• press or
YES
to accept without a space.
This is the Internet version of the user's guide. © Print only for private use.
, Te xt ,
YES
, Write new,
YES
.
If the candidates do not include a word you want,
you can add a new word to the list during selection.
The list of options
Press when writing to enter a list of options:
• Add symbol – Symbols and punctuation marks
Note: To enter a digit while typing text, press and hold
the digit key. For example, to enter a ‘5’, press and
hold .
are shown. Move between symbols with the centre
select key.
• Insert item – Add a picture, sound effect, melody
or animation to a message.
To add a word to candidates
1. Scroll to a similar candidate to the word you want
to add, press , select Spell word,
YES
.
2. Press repeatedly to delete one letter at a time.
Write the new word using multitap text input,
YES
The word is added to the dictionary. The next time
you enter the word you just added to the dictionary,
it appears as one of the alternative words.
3. Continue writing your message. See also “Sending text
messages” on page 46.
• Spell word – For T9 Text Input only. Edit the suggested
word by using multitap text input.
• Text format – Edit size, style, alignment or start a
new paragraph.
• Language – Show the input language selected earlier.
.
• Input method – A list of input methods available for
the current input language is shown.
• Candidates – For T9 Text Input only. A list of
alternative words is shown.
• Help.
Tip: Press to enter a period. To enter other
punctuation marks, press and then or
repeatedly. Press to accept and add a space.
Press and hold to select an input method for
the text you are currently writing.
Getting to know your phone 19
This is the Internet version of the user's guide. © Print only for private use.

Personalizing your phone
For more information on sending themes in messages,
see “Messaging” on page 45.
You can adjust the phone settings to suit your own
requirements.
To send a theme
1. Scroll to Pictures&Sounds,
Themes
You can change the appearance of the display,
for example, the colours and background picture, by
2. Highlight a theme, press .
3. Select Send,
YES
.
4. Select a transfer method,
using themes. Your phone comes with some pre-set
themes. You cannot delete these, but you can create
new themes on the Sony Ericsson Mobile Internet and
Note: You are not allowed to exchange copyrightprotected material.
download them to your phone. For more information,
visit wap.SonyEricsson.com.
Pictures
Your phone comes with a number of pictures. You can:
To select a theme
• Scroll to Pictures&Sounds,
YES
, Themes.
• Set a picture as background when in standby mode.
• Assign a picture to a contact in the phonebook. When
that person calls, the picture appears in the display
Note: If you need to adjust the display contrast, scroll
to Settings,
YES
, Display,
YES
, Contrast.
(provided your subscription supports the Calling Line
Identification service). See “To add a picture to a
phonebook contact” on page 31.
Exchanging themes
You can send and receive a theme via multimedia
• Enclose a picture in a text message.
• Send a picture via picture messaging or e-mail.
messaging (MMS), interchangeable with picture
messaging, and e-mail or download it via WAP.
All pictures and are saved in Pictures&Sounds,
My pictures.
20 Personalizing your phone
This is the Internet version of the user's guide. © Print only for private use.
YES
YES
.
, Themes.
YES
,

Handling pictures
You can also add, delete or rename pictures in
Tip: When viewing your pictures, you can set
a background by pressing .
My pictures. The number of pictures that can be
saved depends on the size of the pictures. File
types supported are GIF, JPEG and WBMP.
To turn the background picture On or Off
• Scroll to Settings,
YES
, Activate.
YES
To view your pictures
YES
• Scroll to Pictures&Sounds,
, My pictures.
The pictures are shown in thumbnail view. To get a full
view, press
YES
.
Exchanging pictures
You can send pictures via picture messaging or e-mail
and receive via picture messaging. For more information
on sending pictures in messages, see “Messaging”
Note: Animations for picture messages can be viewed
on page 45.
in My pictures. Animations for text messages can only
be viewed when inserting an item in a text message.
See “To insert an item in a text message (EMS)”
Note: You are not allowed to exchange copyrightprotected material.
on page 46.
To send a picture
To view your camera pictures (if connected)
• Scroll to Pictures&Sounds,
• Scroll to Connect,
YES
, Accessories.
YES
, CommuniCam™ or
To select a picture as background
1. Scroll to Settings,
2. Select Set picture,
3. Select a picture,
YES
YES
YES
.
, Display,
.
YES
, Wallpaper.
1. Scroll to Pictures&Sounds,
or CommuniCam™.
2. Highlight a picture,
3. Select Send,
YES
YES
.
4. Select a transfer method.
Personalizing your phone 21
This is the Internet version of the user's guide. © Print only for private use.
, Display,
YES
. Press .
YES
, Wallpaper,
, My pictures
• When you receive a picture via a text message or a
picture message, a new message appears in your Inbox.
Highlight the picture in the message, press and
Warning! Exposure to excessive ring volume may
damage hearing. Answer the call or lower the volume
before placing the phone at your ear.
select Save to save in My pictures.
To turn the ring signal on or off
Ring signals and melodies
Your phone comes with a number of standard and
polyphonic melodies that can be used as ring signals.
• Press and hold from standby and select Turn on
silent or Turn off silent. All signals except the alarm
and timer signals are turned off.
You can create and edit standard melodies, and send
them to a friend in a text or picture message. You can
also download standard and polyphonic melodies
via WAP.
To compose a ring signal or melody
1. Scroll to Pictures&Sounds,
YES
, Composer,
YES
.
• Press – to enter
Note: You are not allowed to exchange copyrightprotected material.
anote.
• Press or to make
the note shorter or longer.
To select a ring signal
• Scroll to Settings,
Ringtones.
YES
, Sounds & alerts,
YES
,
There are six different lengths
of notes.
• Press to change octave.
• Press once to raise the note one semitone.
To set the ring signal volume
1. Scroll to Settings,
Ring volume,
YES
YES
, Sounds & alerts,
.
YES
,
2. Press or to increase or decrease the volume.
3. Press
YES
to save the setting.
22 Personalizing your phone
• Press twice to lower the note one semitone.
• Press to add a melody effect, and to set the
tempo, volume, style and duration.
• Press to enter a pause (rest).
• Press to remove notes.
This is the Internet version of the user's guide. © Print only for private use.
2. To listen to your melody, press
YES
3. Press
again to save and name it, or press NO
YES
.
to continue composing.
Note: To edit a melody, scroll to Pictures&Sounds,
YES
, My sounds, select the melody and press .
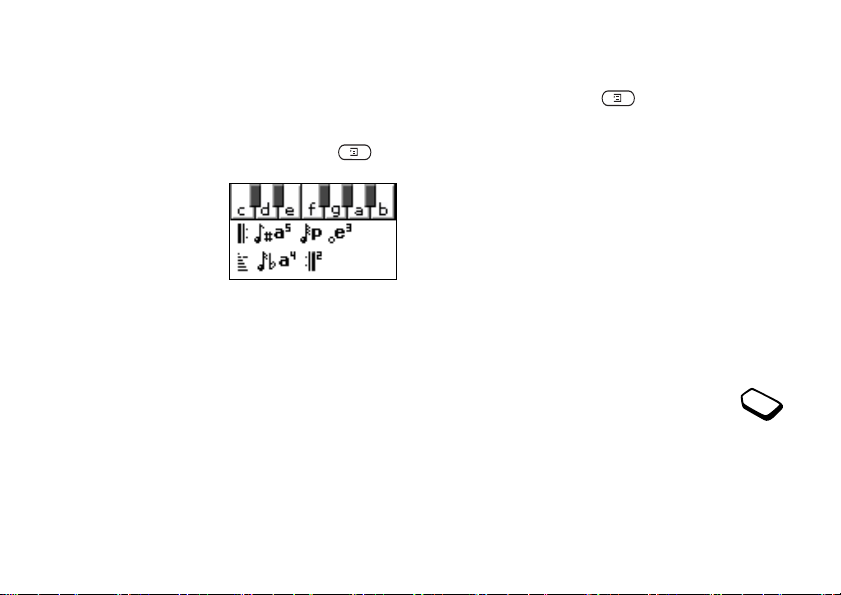
To use the piano
1. In the Composer, press
the upper or lower side
volume key to activate
the piano.
2. Use the centre select key
to move between the keys.
3. Press
YES
to select a note.
See “Icons” on page 73.
4. Press the upper or lower side volume key to deactivate
the piano.
To send a melody
YES
1. Scroll to Pictures&Sounds,
, My sounds,
2. Select a melody and press .
3. Select Send,
YES
.
4. Select a transfer method.
Note: To send a ring signal or melody in a text
message, see “To insert an item in a text message
(EMS)” on page 46.
Increasing ring
You can choose a ring signal that rises in steps from
the lowest volume to the highest.
To turn increasing ring On or Off
• Scroll to Settings,
YES
, Sounds & alerts,
YES
Increasing ring.
YES
,
.
Exchanging melodies
You can send and receive a sound or melody via SMS
or MMS, or download it via WAP.
Specific ring signals for personal calls
If you subscribe to the Two Line Service, you
can set different ring signals for the two voice
lines. Line 1 and Line 2 are displayed instead
Note: You cannot exchange a polyphonic melody
of Voice calls.
via SMS.
Personalizing your phone 23
This is the Internet version of the user's guide. © Print only for private use.

If your subscription includes the Calling Line
Identification (CLI) service, you can assign a
personal ring signal to numerous callers.
To set the vibrating alert
1. Scroll to Settings,
Vibrating alert,
YES
YES
.
2. Select the setting you want,
To set a specific ring signal for a caller
YES
1. Scroll to Phonebook,
Add new?,
YES
.
, Personal rings,
2. Enter the first letter of the contact name,
3. Select a contact,
4. Select a ring signal,
YES
.
YES
.
YES
YES
,
.
From Settings,
YES
, Sounds & alerts, you can
also select:
• Alarm signal that you hear during an alarm.
• Message alert when messages are received.
• Key sound when using the keypad.
• Minute minder to beep after every minute during calls.
Note: You cannot assign a ring signal to a number
stored only on your SIM card.
Menu language
Most SIM cards automatically set the menu language
Sounds & alerts
You can choose to be notified of an incoming call
by the buzzing of the vibrating alert. You can set
to the language of the country/region where you
bought your SIM card. If this is not the case, the preset
language is English.
the phone’s vibrating alert to one of the following:
• On – all the time.
• On if silent – on when the ring volume is turned off
or when you have set the phone to silent.
To change the menu language
1. Scroll to Settings,
2. Select a language,
YES
YES
• Off – all the time.
24 Personalizing your phone
This is the Internet version of the user's guide. © Print only for private use.
, Sounds & alerts,
YES
.
, Language,
YES
.
YES
, Menu,
,
YES
.
 Loading...