

Page 1
ABOUT
SEMC Troubleshooting Manual
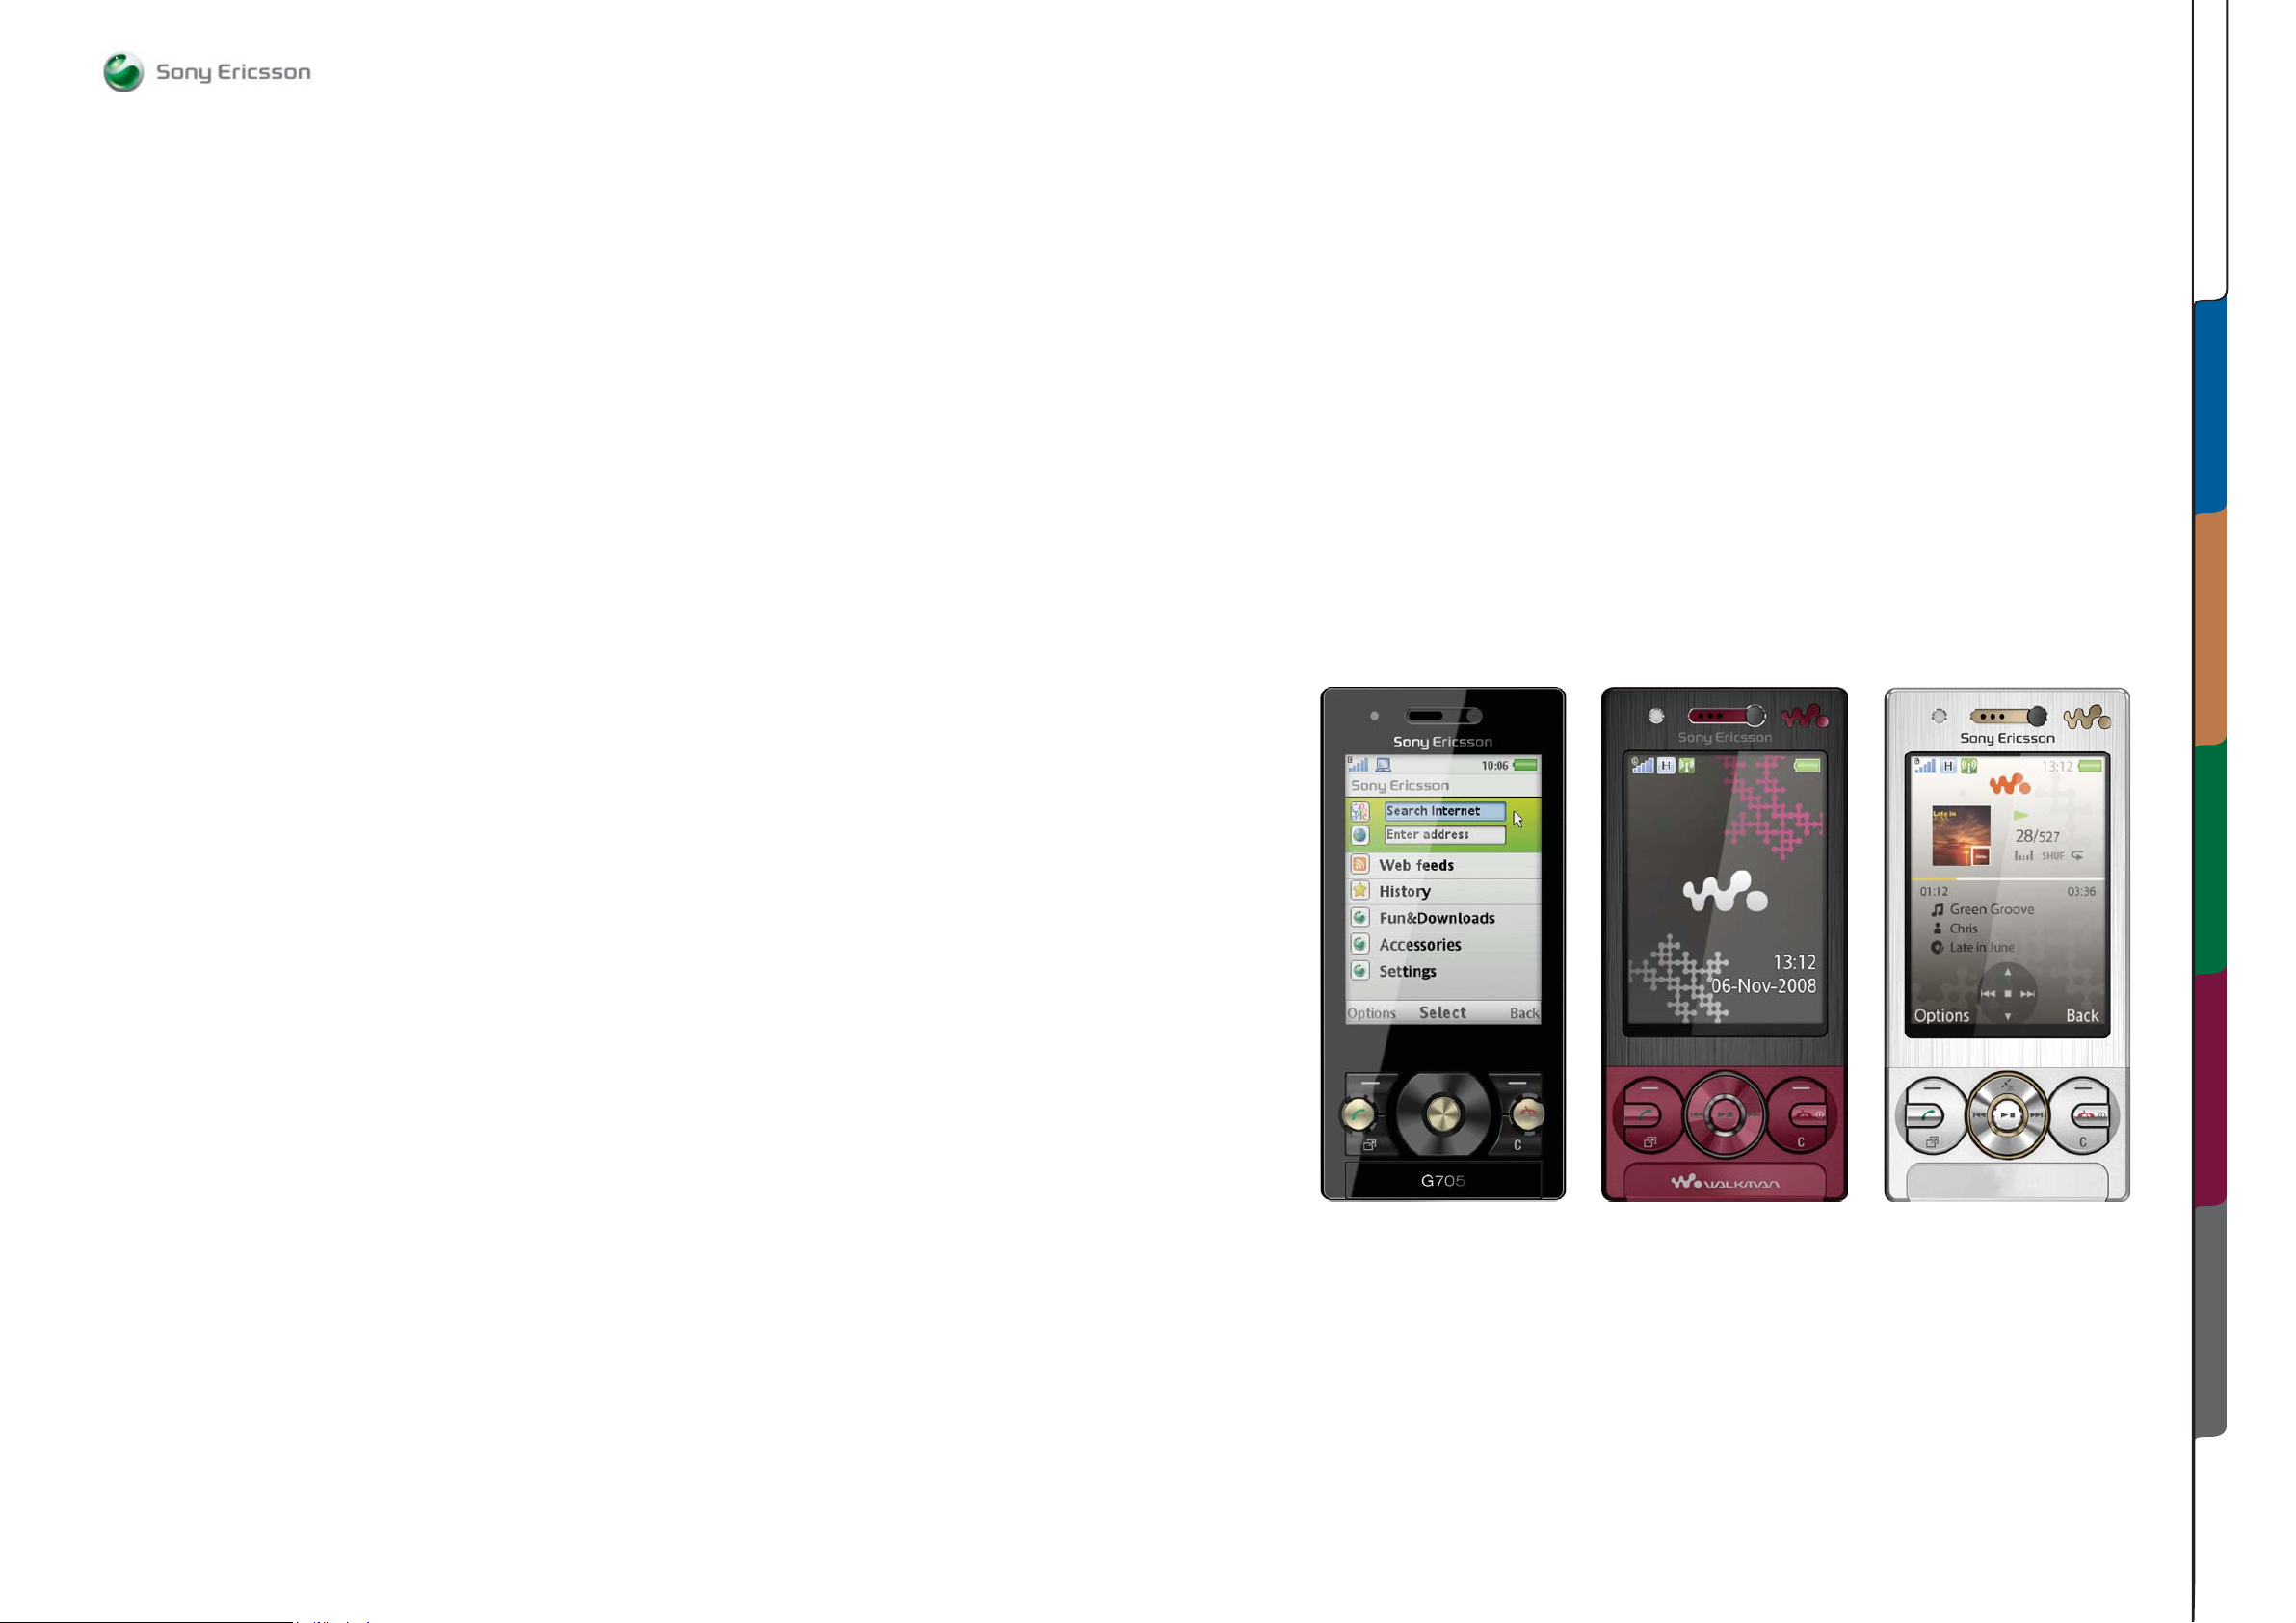
G705 - W705 - W715
Troubleshooting Manual
G705 - W705 - W715
ABOUT TROUBLESHOOTING MEASUREMENT POINTS
1225-4035 rev. 1
APPENDI XCOMPONENT OVERVIEW FUNCTIONAL OVERVIEW
1 (122)
Page 2

ABOUT Contents
SEMC Troubleshooting Manual
G705 - W705 - W715
ABOUT
General information
The purpose of this document is to provide enhanced technical information for Sony Ericsson
repair technicians in order to assist during service, repair and troubleshooting operations on Sony
Ericsson mobile phones. It should be used as a complement to other repair instructions and tools
as notifi ed by the local Sony Ericsson representative.
To search for components throughout the entire document use the “search” function in Adobe
Acrobat Reader 7.0 (or later version) and enter the component name or other word. Use zoom to
enlarge.
For easier navigation of the document you can use the bookmarks that appear in the Bookmarks
tab on the left side of the Adobe Acrobat Reader window. Each bookmark jumps to a page in the
document.
Disclaimer
This document is Sony Ericsson confi dential and should be treated as confi dential in accordance
with the agreement with Sony Ericsson. This document is intended for use by authorized service
technicians only. Sony Ericsson is not to be held responsible for any damages or losses caused
intentionally or unintentionally due to unauthorised use of the information in this document.
Note
When disassembling and reassembling the phone the instructions and processes described in the
Mechanical Working Instructions, the Generic Repair Manual and the Repair Center Handbook
must be followed.
Revision History
Rev. Date Changes / Comments
104/01/2009Initital revision.
ABOUT 2
General Information 2
Contents 2
Equipment List 3
TROUBLESHOOTING 8
Power On/Off Problems 8
USB and Software Flash Problems 8
Dead Phone Problems 9
Display Problems 10
Display Illumination Problems 11
Opto Sensor Problems 11
On-Off Key 12
Numeric Keypad Problems 12
Navigation Keypad Problems 13
Volume Up and Down Button Problems 13
Camera Button Problems 14
Walkman/Play & Stop Button Problems 14
Numeric Keypad LED Problems 15
Navigation Keypad LED Problems 15
Navigation Orange LED Problems 16
Web Shortcut LED Problems 16
Tally LED Problems 17
Flash LED Problems 17
Trickle Charge LED Problems 18
Main Camera Problems 19
VGA Camera Problems 19
Charging Problems 20
USB/VBUS Charging Problems 20
SIM Problems 21
Memory Stick Problems 21
Microphone Problems 22
Earphone Problems 22
Loudspeaker Problems 23
Handsfree (PHF) Problems 23
FM Radio Problems 24
FM Radio Antenna Problems 24
Bluetooth Problems 25
WLAN Problems 25
GSM Problems 26
WCDMA Problems 27
A-GPS Problems 28
Accelerometer Problems 29
Vibrator Problems 29
Real Time Clock Problems 30
Slide Sensor Problems 30
System Connector Protection Test 31
Current Consumption Test 31
Backup Capacitor Test 33
Charging Test 33
ASIC Revision Test 34
Measurement Points Pictures 35
MEASUREMENT POINTS 49
Primary Side 49
Secondary Side 50
Top Schematic 51
Audio Top 52
Audio Analog 53
Audio Digital 54
Audio FM Radio 55
Application & System Performance Top 56
System Top 57
System Control - Clocks & Resets 58
System Memories 59
System PoP IF 60
Power Top 61
Power - Regulators & Charging 62
Power - Imaging 63
Power - ASICs 64
Power - WLAN 65
Connectivity Top 66
Connectivity - I2C & ADC 67
Connectivity - Cards 68
Connectivity 69
Connectivity - Keypad 70
Imaging Top 71
Imaging - Display 72
Imaging - Camera 73
Access Top 74
Access - GSM & UMTS 75
Access - Bluetooth 76
Access AGPS 77
Access - WLAN 78
Test 79
COMPONENT OVERVIEW 80
Primary Side 80
Secondary Side B - C 81
Secondary Side D - Z 82
FUNCTIONAL OVERVIEW
Technical Description 83
Platform Block Diagram 94
Block Diagram Power Distribution 95
Block Diagram Clocking Concept 96
APPENDIX 97
Replaceable Components 97
Components - B1400, B2000, B2100, B3100 98
Components - B4410, C2214, L2200, 99
Components - L2401-05 , L2406, L2408 99
Components - L2452, L4200, N1210, N1211 100
Components - N1300, N1400 101
Components - N1410, N1510, N2200 102
Components - N2201, N2203, N2204 102
Components - N2300, N2401, N2411 103
Components - N2420, N2421 104
Components - N2422, N3101 104
Components - R2449, R2490, S2403 105
Components - S2404, S2405-06, V2200 105
Components - V2202, V2415-16, V2417, 106
Components - V2470, V3101, V4203 106
Components - X1000, X1002-03, X1005 106
Com p o n ents - X1001. X10 0 4, X12 0 0, X15 0 0 107
Components - X2201, X2401 107
Components - X2402, X2403 108
Components - X2405, X3102 108
Components - X4200, X4300 109
Components - Z2400, Z4200-02 109
Keypad Flex Module 110
Navigation Keypad PBA 110
Upper Board Schematics 111
LCD Assembly 111
SIM Flex Module 112
Slider Flex Module 112
Troubleshooting Software Documentation 113
Troubleshooting Fixture Setup Instructions 120
ABOUT
1225-4035 rev. 1
2 (122)
Page 3
ABOUT Equipment List
SEMC Troubleshooting Manual
G705 - W705 - W715
G705, W705, W715 Equipment List
Troubleshooting Fixture
Location: CSPN – Repair Instructions – Mechanical – Tool Catalogue – RepairToolsCatalogue.pdf
Part number: 1222-1854
Note! More information about the TRS Fixture Kit can be found in the Trouble Shooting Fixtures
Setup Instructions document at the end of this manual.
Dummy Battery
Location: CSPN – Repair Instructions – Mechanical – Tool Catalogue – RepairToolsCatalogue.pdf
Part number: NTZ 112 533
Note! The resistance between GND and BDATA should be approximately 120K Ohm.
Instruments
Power Supply Channel 1 (VBATT)
Agilent 6632B or similar
Location: CSPN – Repair Instructions – Mechanical – Tool Catalogue – RepairToolsCatalogue.pdf
Instrument Settings:
Voltage: 3.8 Volt
Limiter: 2.0 A
Note! The Maximal cable length between the Power Supply Channel 1 VBATT and the dummy
battery cannot be more than 1m. The cable must have a capacity for at least 16A.
ABOUT
Info: More information about the equipment used for TRS can be found on the following location:
CSPN – Repair Instructions – Mechanical – Tool Catalogue – RepairToolsCatalogue.pdf or matris.xls
– G and W Model Tab.
Power Supply Channel 2 (DCIO/SEPI)
Agilent 6632B or similar
Location: CSPN – Repair Instructions – Mechanical – Tool Catalogue – RepairToolsCatalogue.pdf
Instrument Settings:
Voltage: 5.0 Volt
Limiter: 2.0 A
Oscilloscope
Agilent DSO7052A or similar
Location: CSPN – Repair Instructions – Mechanical – Tool Catalogue – RepairToolsCatalogue.pdf
Digital Multimeter (DMM)
Fluke 83 or similar
Location: CSPN – Repair Instructions – Mechanical – Tool Catalogue – RepairToolsCatalogue.pdf
Note! The 0, 64 mm Test Probes are recommended by Sony Ericsson when the DMM is in use,
please see Picture 1.
Picture 1
1225-4035 rev. 1
3 (122)
Page 4
ABOUT
Equipment List
SEMC Troubleshooting Manual
G705 - W705 - W715
Spectrum Analyzer
R&S FSL 9 kHz – 3 GHz or similar
Location: CSPN – Repair Instructions – Mechanical – Tool Catalogue – RepairToolsCatalogue.pdf
RF probe
HP 85024A or similar
Location: CSPN – Repair Instructions – Mechanical – Tool Catalogue – RepairToolsCatalogue.pdf
Mobile Phone Tester
Yokogawa VC200 or similar
Location: CSPN – Repair Instructions – Mechanical – Tool Catalogue – RepairToolsCatalogue.pdf
FM Signal Generator
R&S SMC100A or similar
Location: -
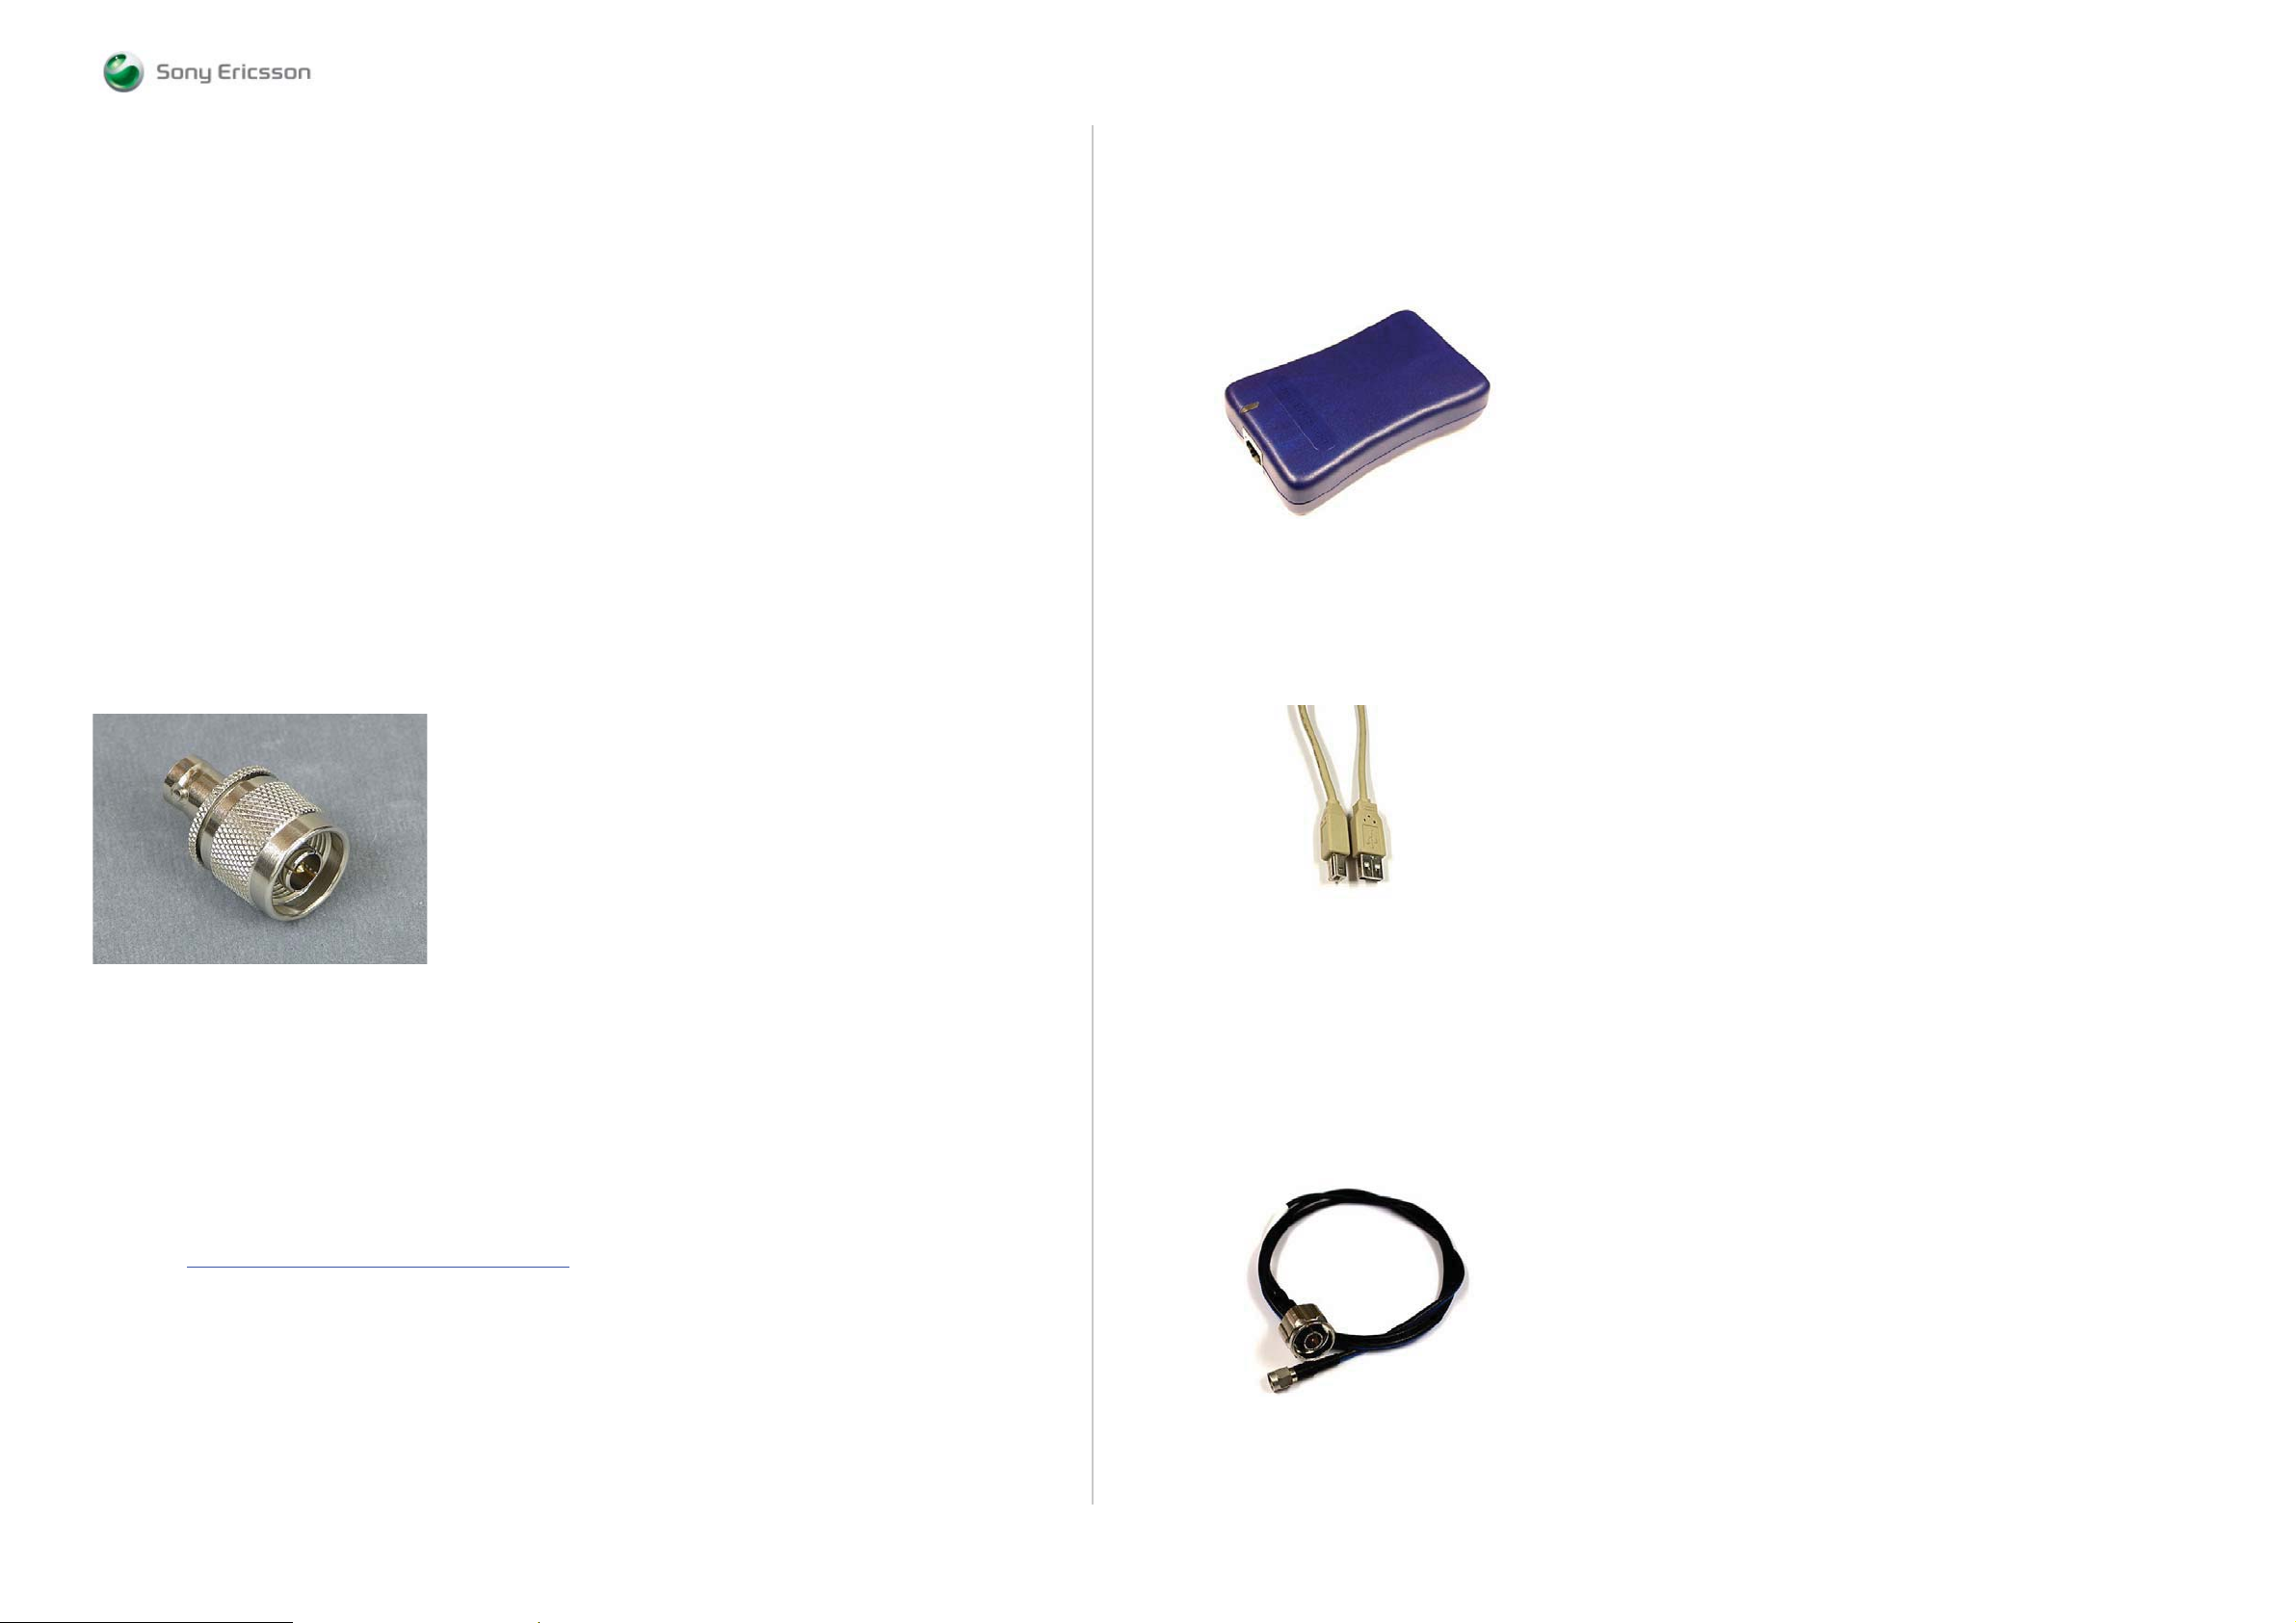
RF Adaptor
Adaptor 33 N-BNC-50-1
Adaptor to Signal Generator RF Output
See Picture 2
Location: -
Picture 2
SE Communication Interface SEPI BOX
Location: CSPN – Repair Instructions – Mechanical – Tool Catalogue – RepairToolsCatalogue.pdf
Part number: LTN 214 1484
See Picture 3.
Picture 3
Cables
USB Computer Cable
Location: CSPN – Repair Instructions – Mechanical – Tool Catalogue – RepairToolsCatalogue.pdf
See Picture 4.
Picture 4
ABOUT
PC Package & PC Software
PC Package (Computer)
Location: CSPN – Repair Instructions – Mechanical – Tool Catalogue – RepairToolsCatalogue.pdf
Urquell Fault Trace SW with project file
Location: CSPN – Repair Instructions – Electrical – G705, W705, W715 – Trouble Shooting
Application – Project File: G705, W705, W715 Project_R1A
Drivers
SEPI BOX Drivers
Location: http://emma.extranet.sonyericsson.com
/– Drivers – DSS / SEPI / SEMUTS
DSU-60/USB Cable
Location: CSPN – Repair Instructions – Mechanical – Tool Catalogue – RepairToolsCatalogue.pdf
Part number: KRY 101 1413
RF Test Cable Flexible
Location: CSPN – Repair Instructions – Mechanical – Tool Catalogue – RepairToolsCatalogue.pdf
Part number: RPM 119 885
See Picture 5.
Picture 5
1225-4035 rev. 1
4 (122)
Page 5
ABOUT
Equipment List
SEMC Troubleshooting Manual
G705 - W705 - W715
SEPI Interface Cable – A1
Location: CSPN – Repair Instructions – Mechanical – Tool Catalogue – RepairToolsCatalogue.pdf
Part number: KRY 101 1119/1
See Picture 6.
Picture 6
Power Cable RED to Power Supply Channel 1 (VBATT)
Maximum Length: 1m
Location: CSPN – Repair Instructions – Mechanical – Tool Catalogue – RepairToolsCatalogue.pdf
Power Cable BLACK to Power Supply Channel 1 (VBATT)
Maximum Length: 1m
Location: CSPN – Repair Instructions – Mechanical – Tool Catalogue – RepairToolsCatalogue.pdf
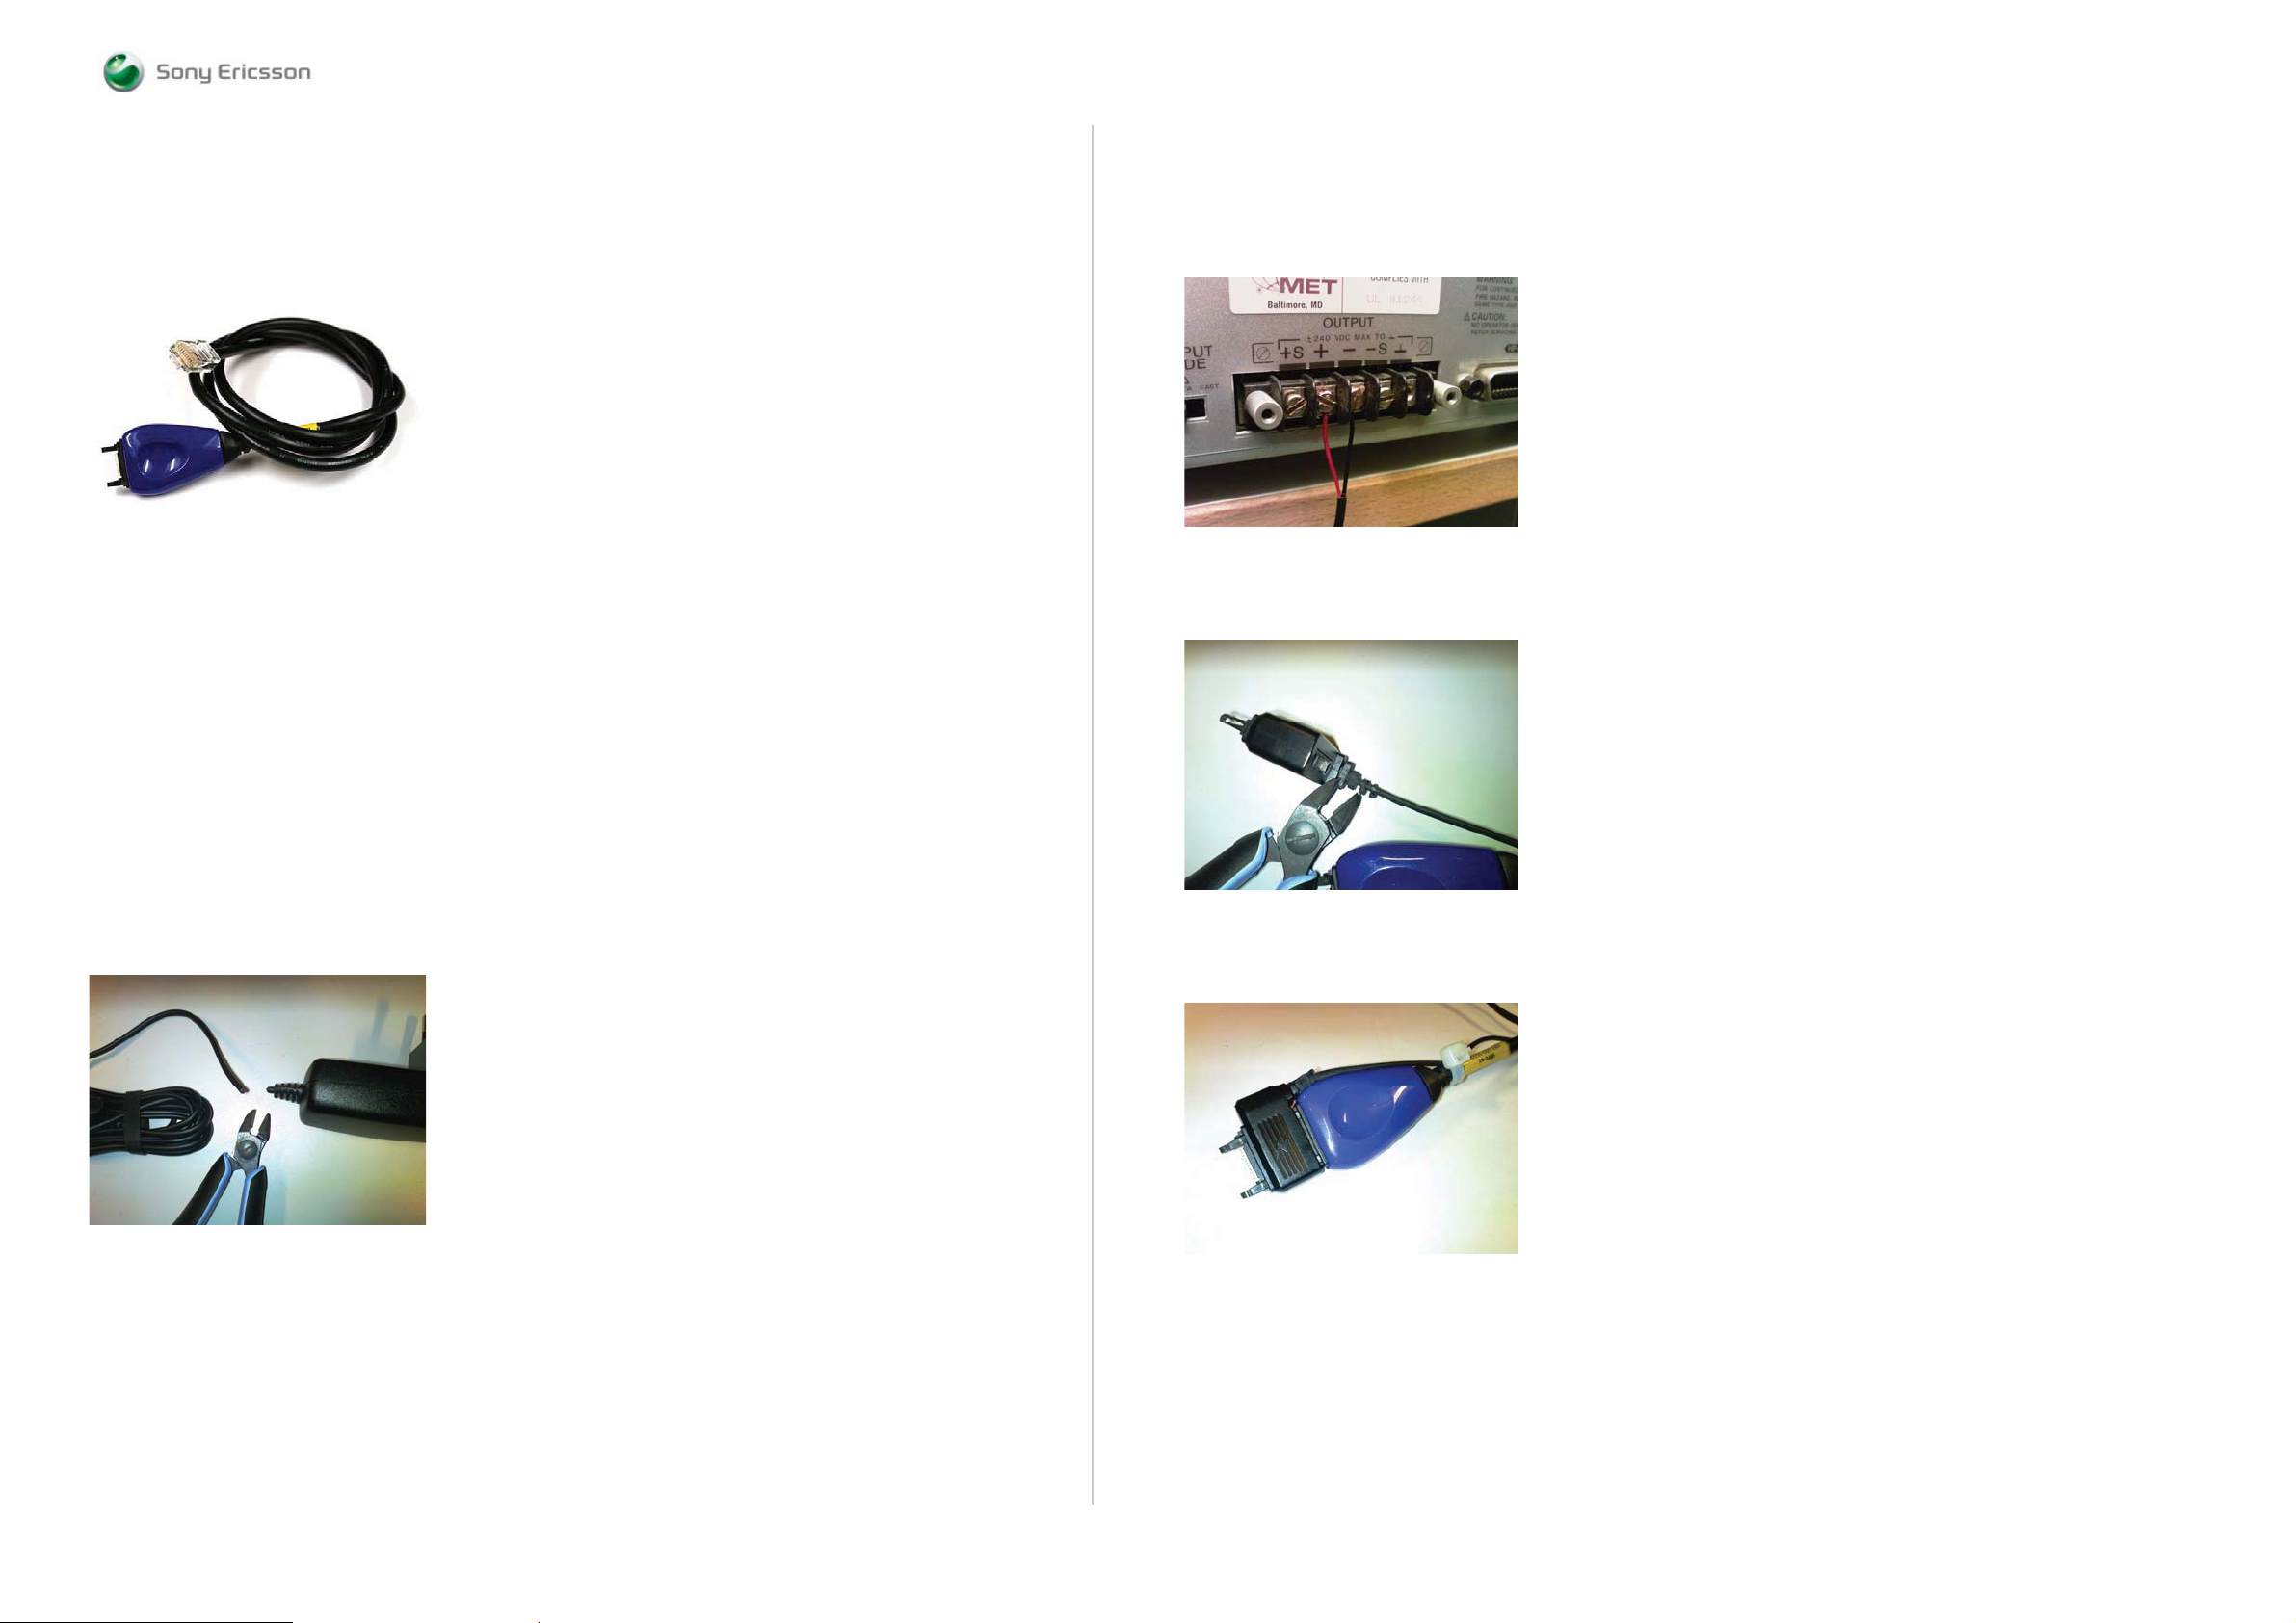
Step 2:
Connect the CST-75 charger Red or White wire to the Plus Output and the Black wire to the Minus
(GND) Output at backside of the Power Supply Channel 2 (DCIO/SEPI) according to Picture 8.
Picture 8
Step 3:
Cut off insulating material from the inside of the charger plug according to Picture 9.
Picture 9
ABOUT
Customized Power Supply Channel 2 Cable (DCIO/SEPI)
Customize the cable according to following instructions below:
(Step 1, Step 2, Step 3 and Step 4)
Step 1:
Take the CST-75 battery charger and cut off the charger according to Picture 7.
Picture 7
Note! The Cable length must be exactly 1.3m.
Step 4:
Connect DCIO Cable and SEPI Interface Cable – A1 according to Picture 10.
Picture 10
1225-4035 rev. 1
5 (122)
Page 6
ABOUT
Equipment List
SEMC Troubleshooting Manual
G705 - W705 - W715
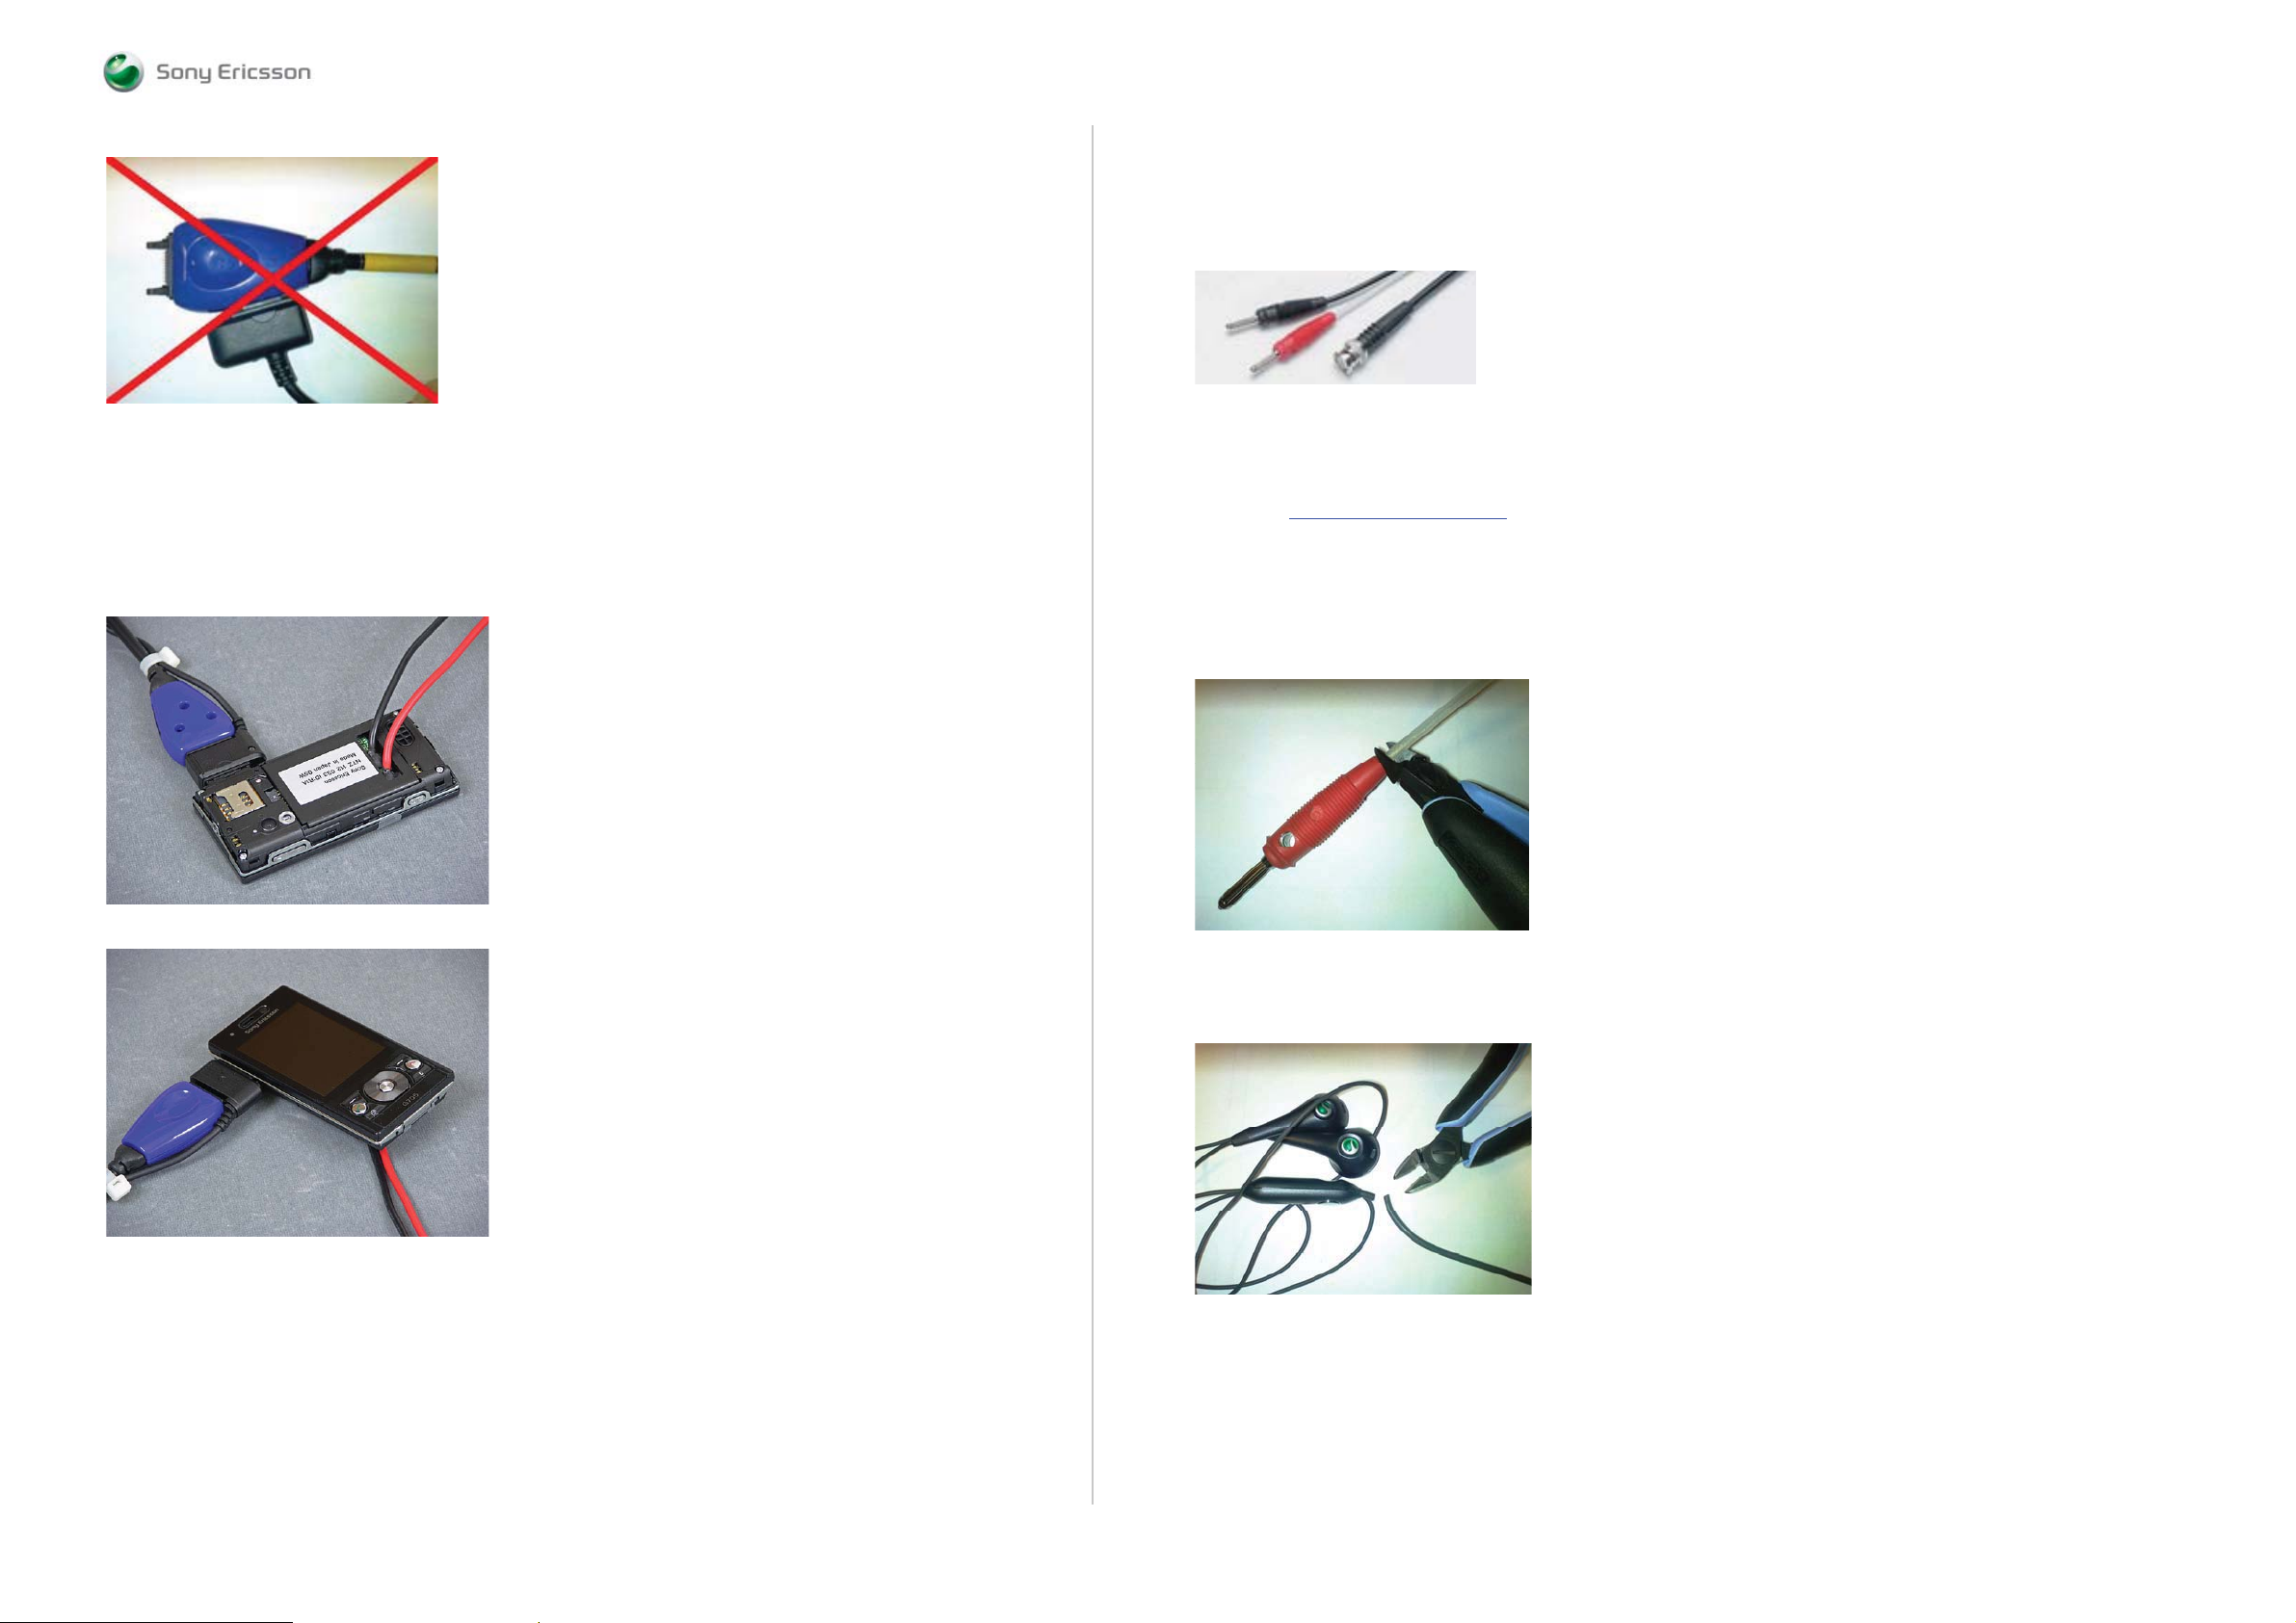
Picture 11
Note! This setup is wrong.
Connection Instructions for the Dummy Battery
This is the correct setup when a Dummy Battery is in use.
See Pictures 12 and 13.
Picture 12
Customized FM Radio Cable
Step 1:
Use the Test lead BNC-4mm 1,5m Cable, see Picture 14.
Picture 14
Product Name: Test lead BNC-4mm 1,5m
Product Description: Test lead with 4 mm lab plugs at one end and a BNC plug at the other.
Manufacturer: PMK Germany
Location: http://www.elfa.se/en/
or other supplier.
Part number: 46-310-40
Note! This is the ELFA part number.
Step 2:
Cut the Red Lab Plug connector according to Picture 15.
Picture 15
ABOUT
Picture 13
Step 3:
Use any Hands-Free (PHF) Cable and cut it according to Picture 16.
Picture 16
Note! Cable length should be at least 40cm.
1225-4035 rev. 1
6 (122)
Page 7
ABOUT
Equipment List
SEMC Troubleshooting Manual
G705 - W705 - W715
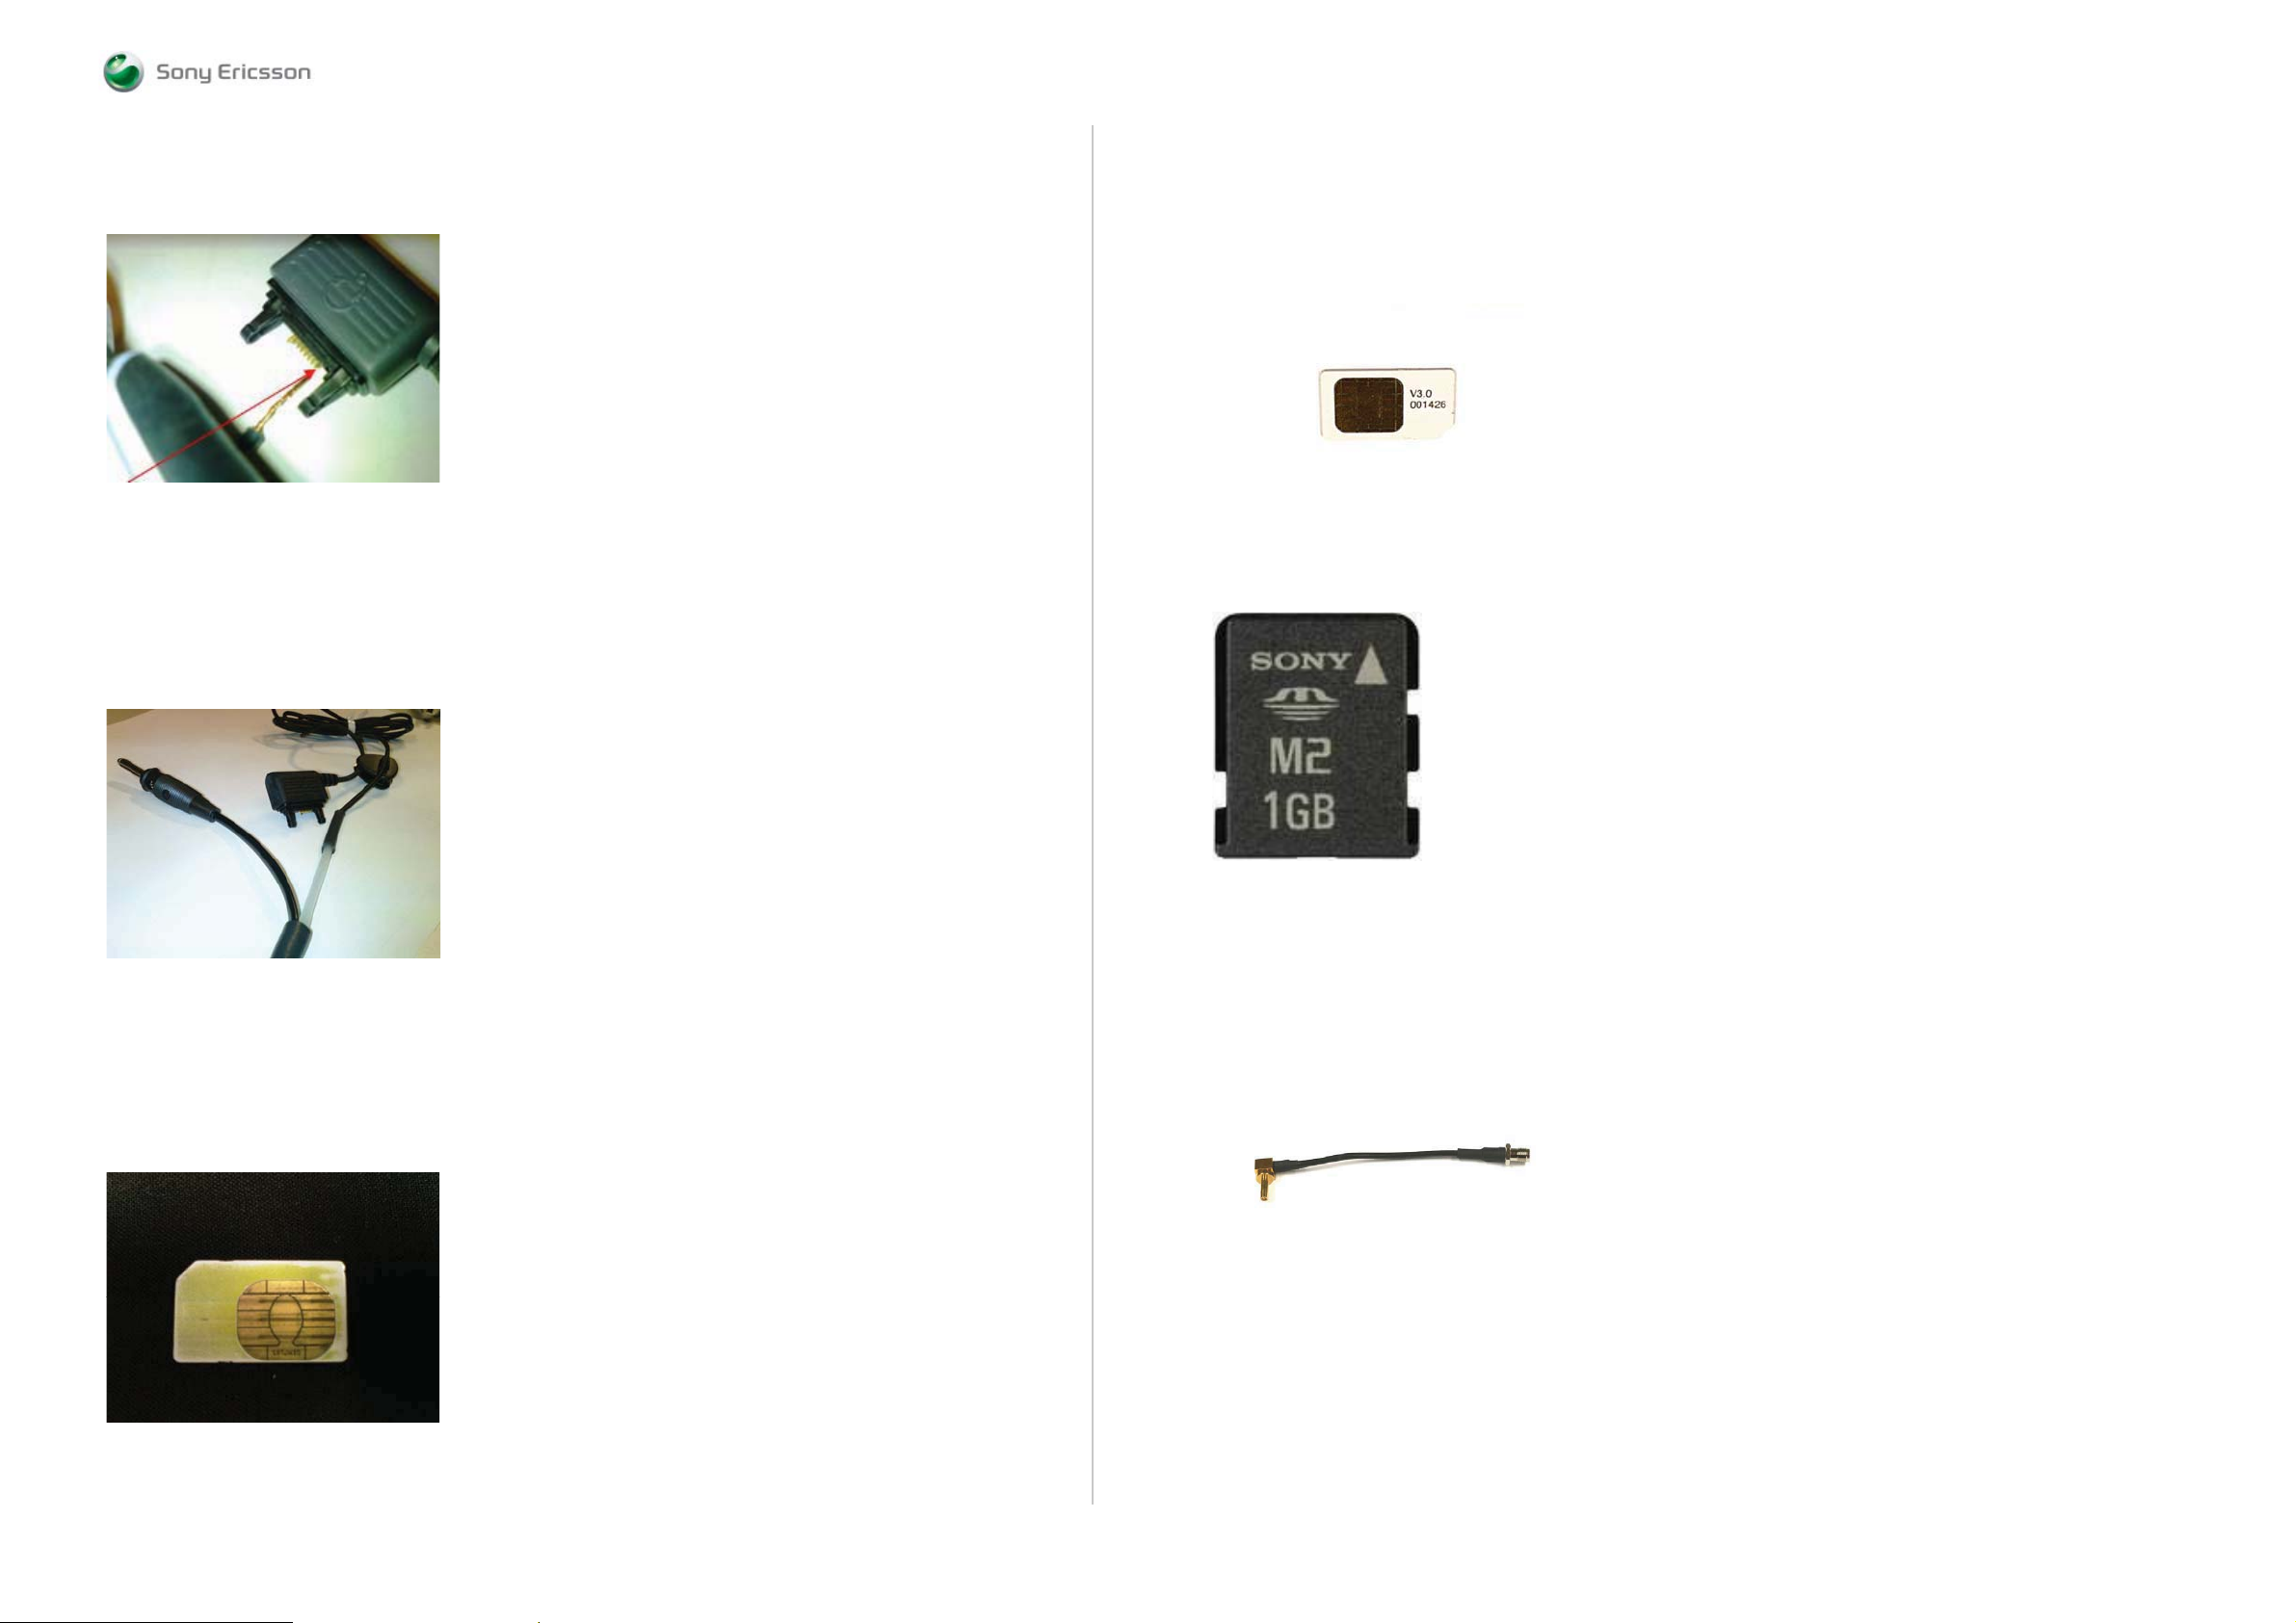
Step 4:
Use only the Wire that is connected to PIN2 and cut out all the others according to Picture 17.
Picture 17
Note! Use DMM instrument to ensure which of the wires are connected to PIN2 at Hands-Free
(PHF) system connector plug.
Step 5:
Connect the Cable from the Picture 15 and Cable from the Picture 17 according to Picture 18.
Note! Use a soldering iron for this action and after that use insulating material to protect the
contact point.
Picture 18
Test SIM GSM/UMTS
One Test SIM GSM/UMTS is needed to perform Current Consumption Test, see Picture 20.
Location: CSPN – Repair Instructions – Mechanical – Tool Catalogue – RepairToolsCatalogue.pdf
Note! To buy a Test SIM GSM/UMTS, please contact your supplier of test equipment.
Picture 20
Sony Memory Stick M2
Any functional Memory Stick Micro M2 Card
See Picture 21.
Picture 21
ABOUT
Test Cards
Local SIM
Any functional Local SIM Card
See Picture 19.
Picture 19
SMK RF Probe
Location: CSPN – Repair Instructions – Mechanical – Tool Catalogue – RepairToolsCatalogue.pdf
Part number: SXA 109 6356
See Picture 22.
Picture 22
1225-4035 rev. 1
7 (122)
Page 8
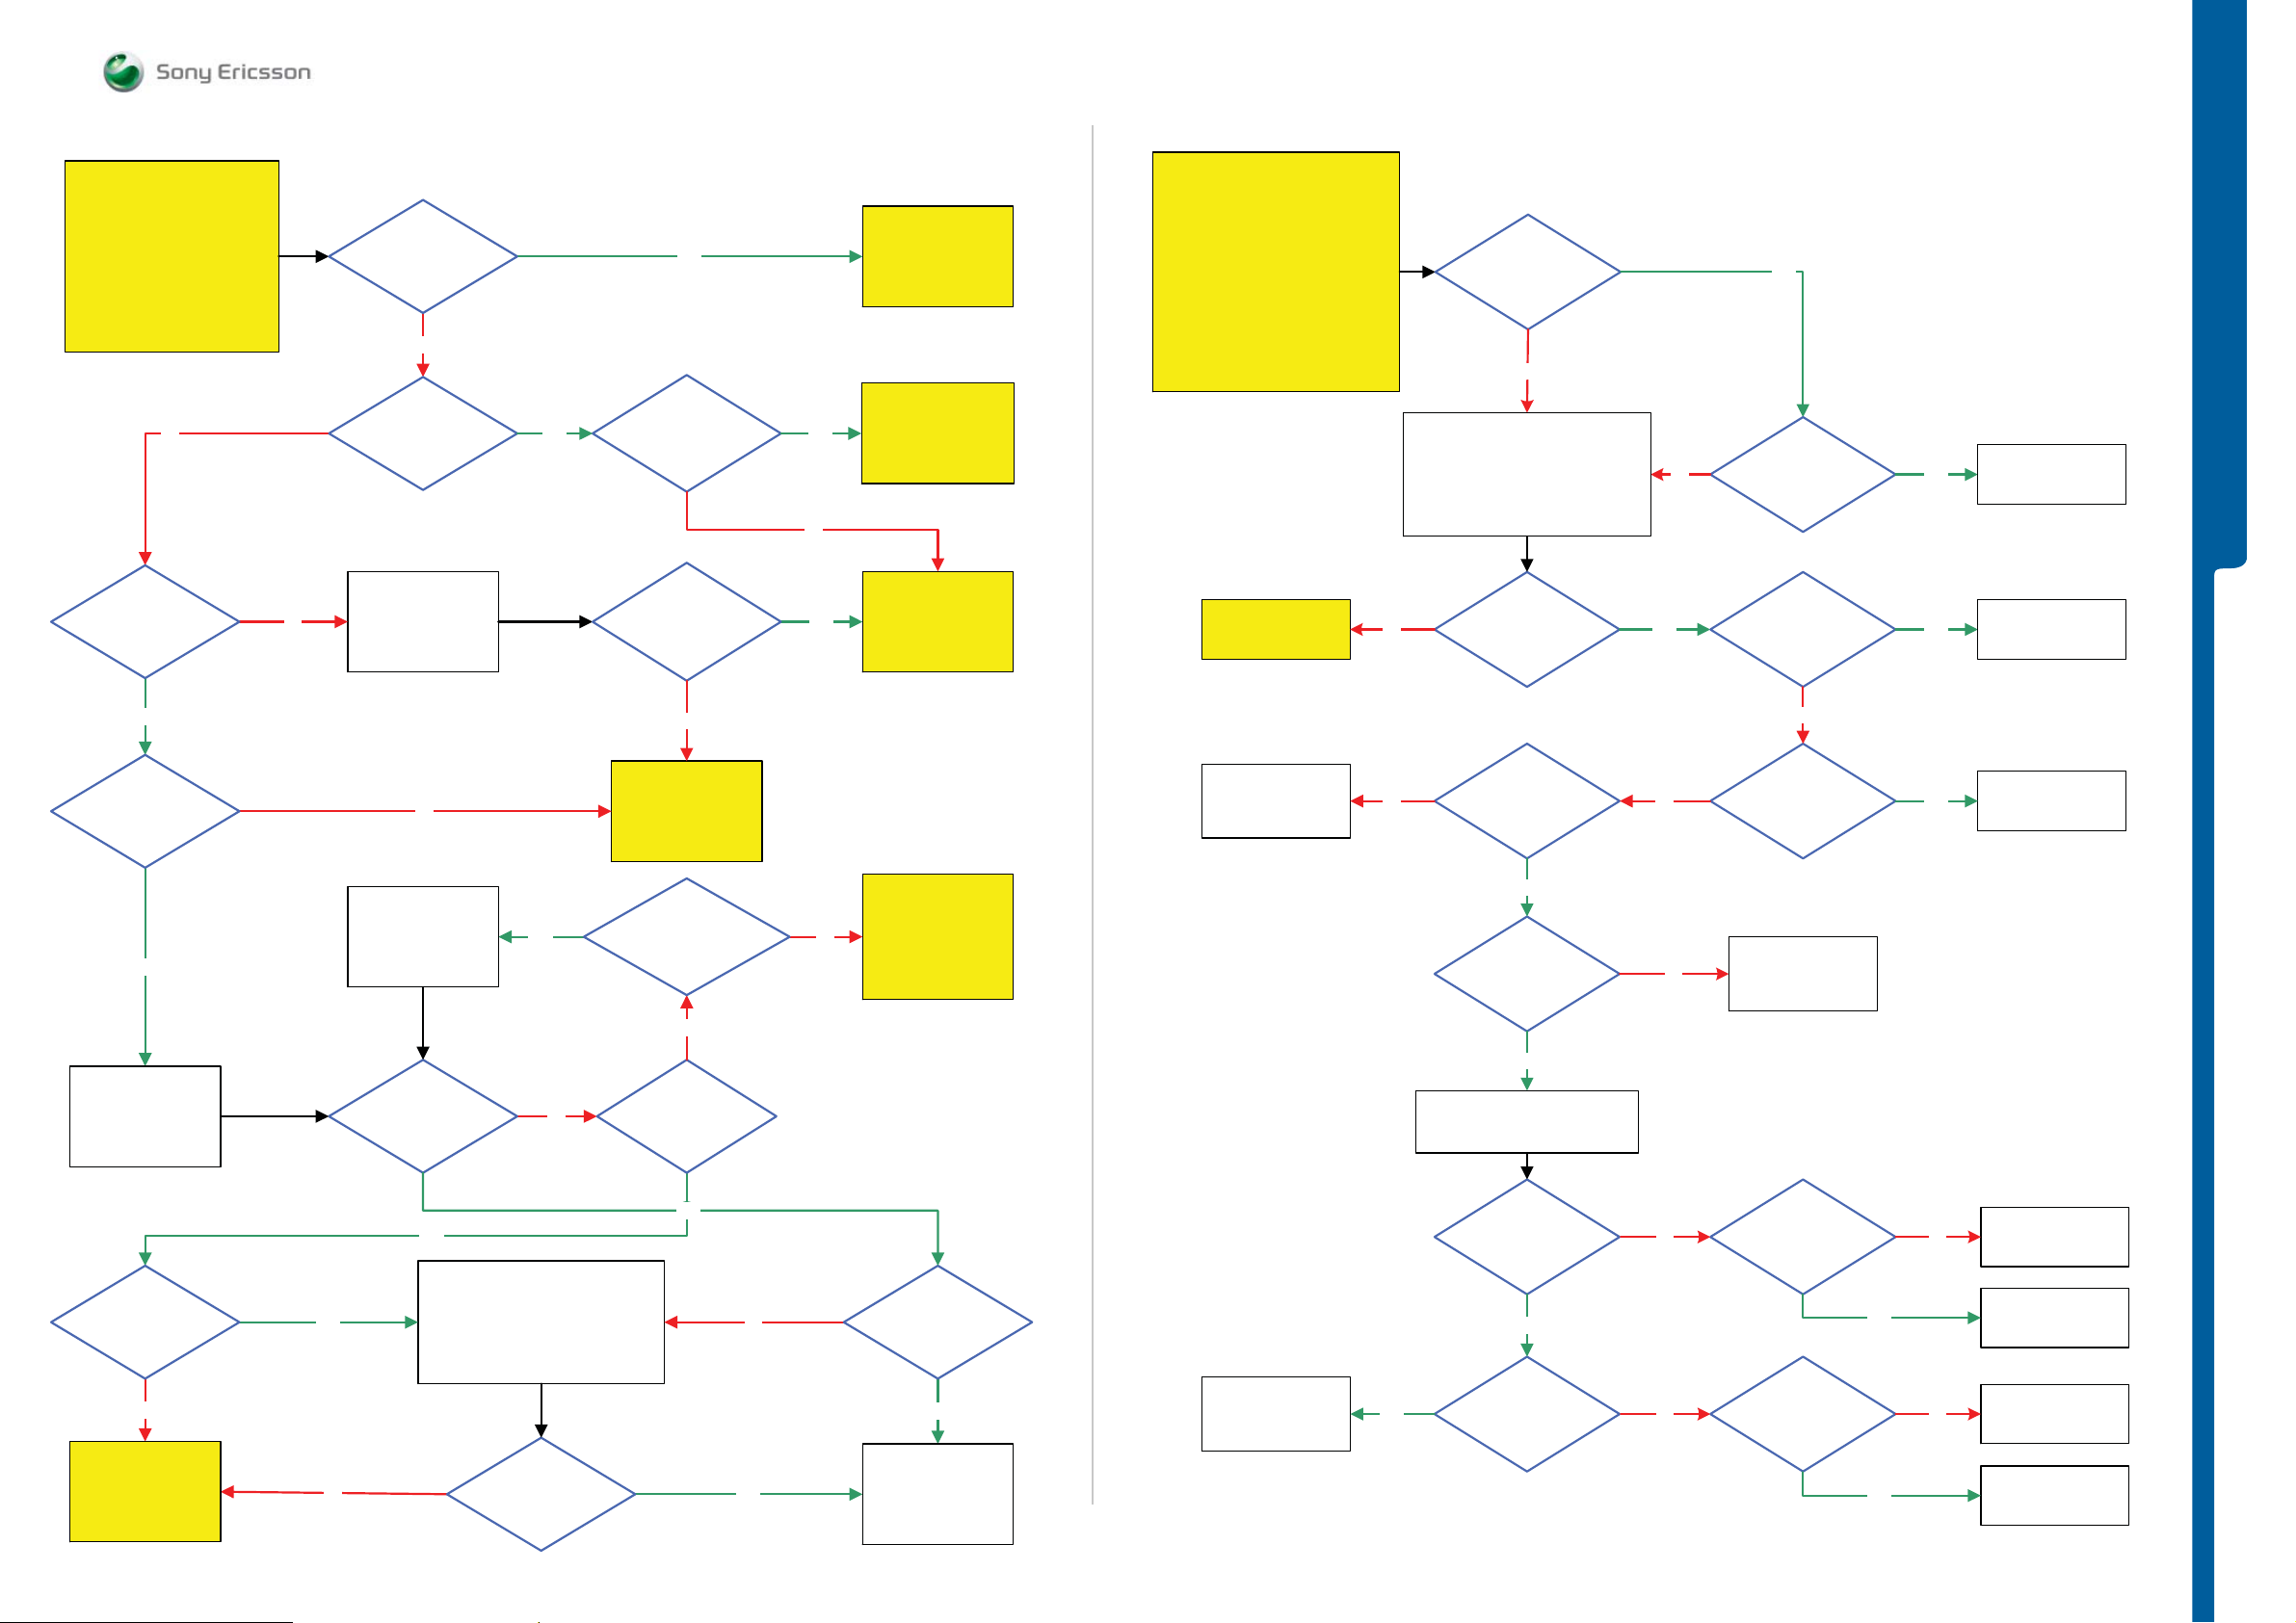
TROUBLESHOOTING Power On/Off Prob lems
- USB and Sof tware Flash Problem s
SEMC Troubleshooting Manual
G705 - W705 - W715
START
Use the
Dummy Battery Connected to
Power Supply Channel 1
(VBATT)
No
Is the
phone consuming
any current when
powering on the
phone
Power On/Off Problems
Is the phone
consuming more than
1mA when the phone
is powered off
No
Is it possible to
power on the phone
Connect a chargerNo
Yes
Yes
Is it possible to power
off the phone
Is the phones
behavior as normal
Optimized
charging
Yes
No
Yes
Go to
Dead phone
Problems part 1
TRS guide
Go to
Current
Consumption Test
After this go to
Charging Test
Go to
On-Off Key Problems
TRS guide
START
Step 1:
Perform
System Connector Protection Test
If successful go to step 2.
Step 2:
Dowload ITP SW into the Phone
Go to
USB/VBUS
Charging Problems
USB and Software Flash Problems
Does the
Flash process
Start-up when using
EMMA SW
No
Use TRS Fixture
1: Connect: VBATT and DCIO/SEPI
2: Remove: DCIO/SEPI
3: Connect: USB Cable from the PC
Does
the Phone
Indicate charging
on the display
Yes
TROUBLESHOOTING
No
YesNo
Is the
ITP SW Flash
Successful
Is MP 11
(X2405_Pin 10)
Short circuit to GND
(Shield Can
Fence)
Yes
Yes
SL 5 Replace
N2020
SL 4 Escalate
Replace
V2416
Yes
Is the current
consumption between
10mA to 70mA
Yes
Flash
the phone with
correct CDA
software
Flash
The phone with
ITP software.
Is the ITP Flash
Successful
No
Go to
USB and Software
Flash Problems
TRS guide
No
No
Flash
the phone with
correct CDA
Yes
software
CDA Software
Flash
Successful
Yes
1. Customize the phone into DPY/Z
2. Startup the phone and wait for
the configuration to take place
(takes less than a minute)
3. Customize with correct CDA
4. Activate the phone
Is the Problem
solved
No
No
Go to
Dead Phone
Problems part 1
TRS guide
Press ”C”
Connect USB from PC.
Update SEMC BOOT if
necessary. Run EMMA
SUCR SW. Is Phone
Flash Ok
No
Is the
Flash process
started
Yes
Yes
No
Is MP 12
(X2405_Pin 11)
Short circuit to GND
(Shield Can
Fence)
Yes
Replace
V2415
Go to
System Connector
SL 4 Replace
N2420
SL 5 Replace
R2442
No
5 Volt DC at
MP 62 (C2433)
Yes
No
Protection Test
No
NoYes
After this go to
USB and Software
Flash Problems TRS
guide
Is the Problem
solved
Yes
Claim for a
SW Upgrade
SL 4 Replace
N2420
SL 5 Replace
N2010
Yes
2.7V – 3.3V DC
at MP 65 (C2437) and
1.8V DC at MP 61
(C2435)
Yes
Remove the PBA from the
TRS Fixture
Max
2 Ohm between
MP 11 (X2405_Pin 10)
and MP 71
(Z2400_Pin 3)
Yes
Max
2 Ohm between
MP 12 (X2405_Pin 11)
and MP 73
(Z2400_Pin 4)
No
No
No
SL 4 Replace
N2420
SL 5 Replace
N2010
Max
0.5 Ohm between
MP 11 (X2405_Pin 10)
and MP 70
(Z2400_Pin 2)
Max
0.5 Ohm between
MP 12 (X2405_Pin 11)
and MP 72
(Z2400_Pin 1)
Yes
Yes
No
No
Replace
X2405
Replace
Z2400
Replace
X2405
Replace
Z2400
1225-4035 rev. 1
8 (122)
Page 9
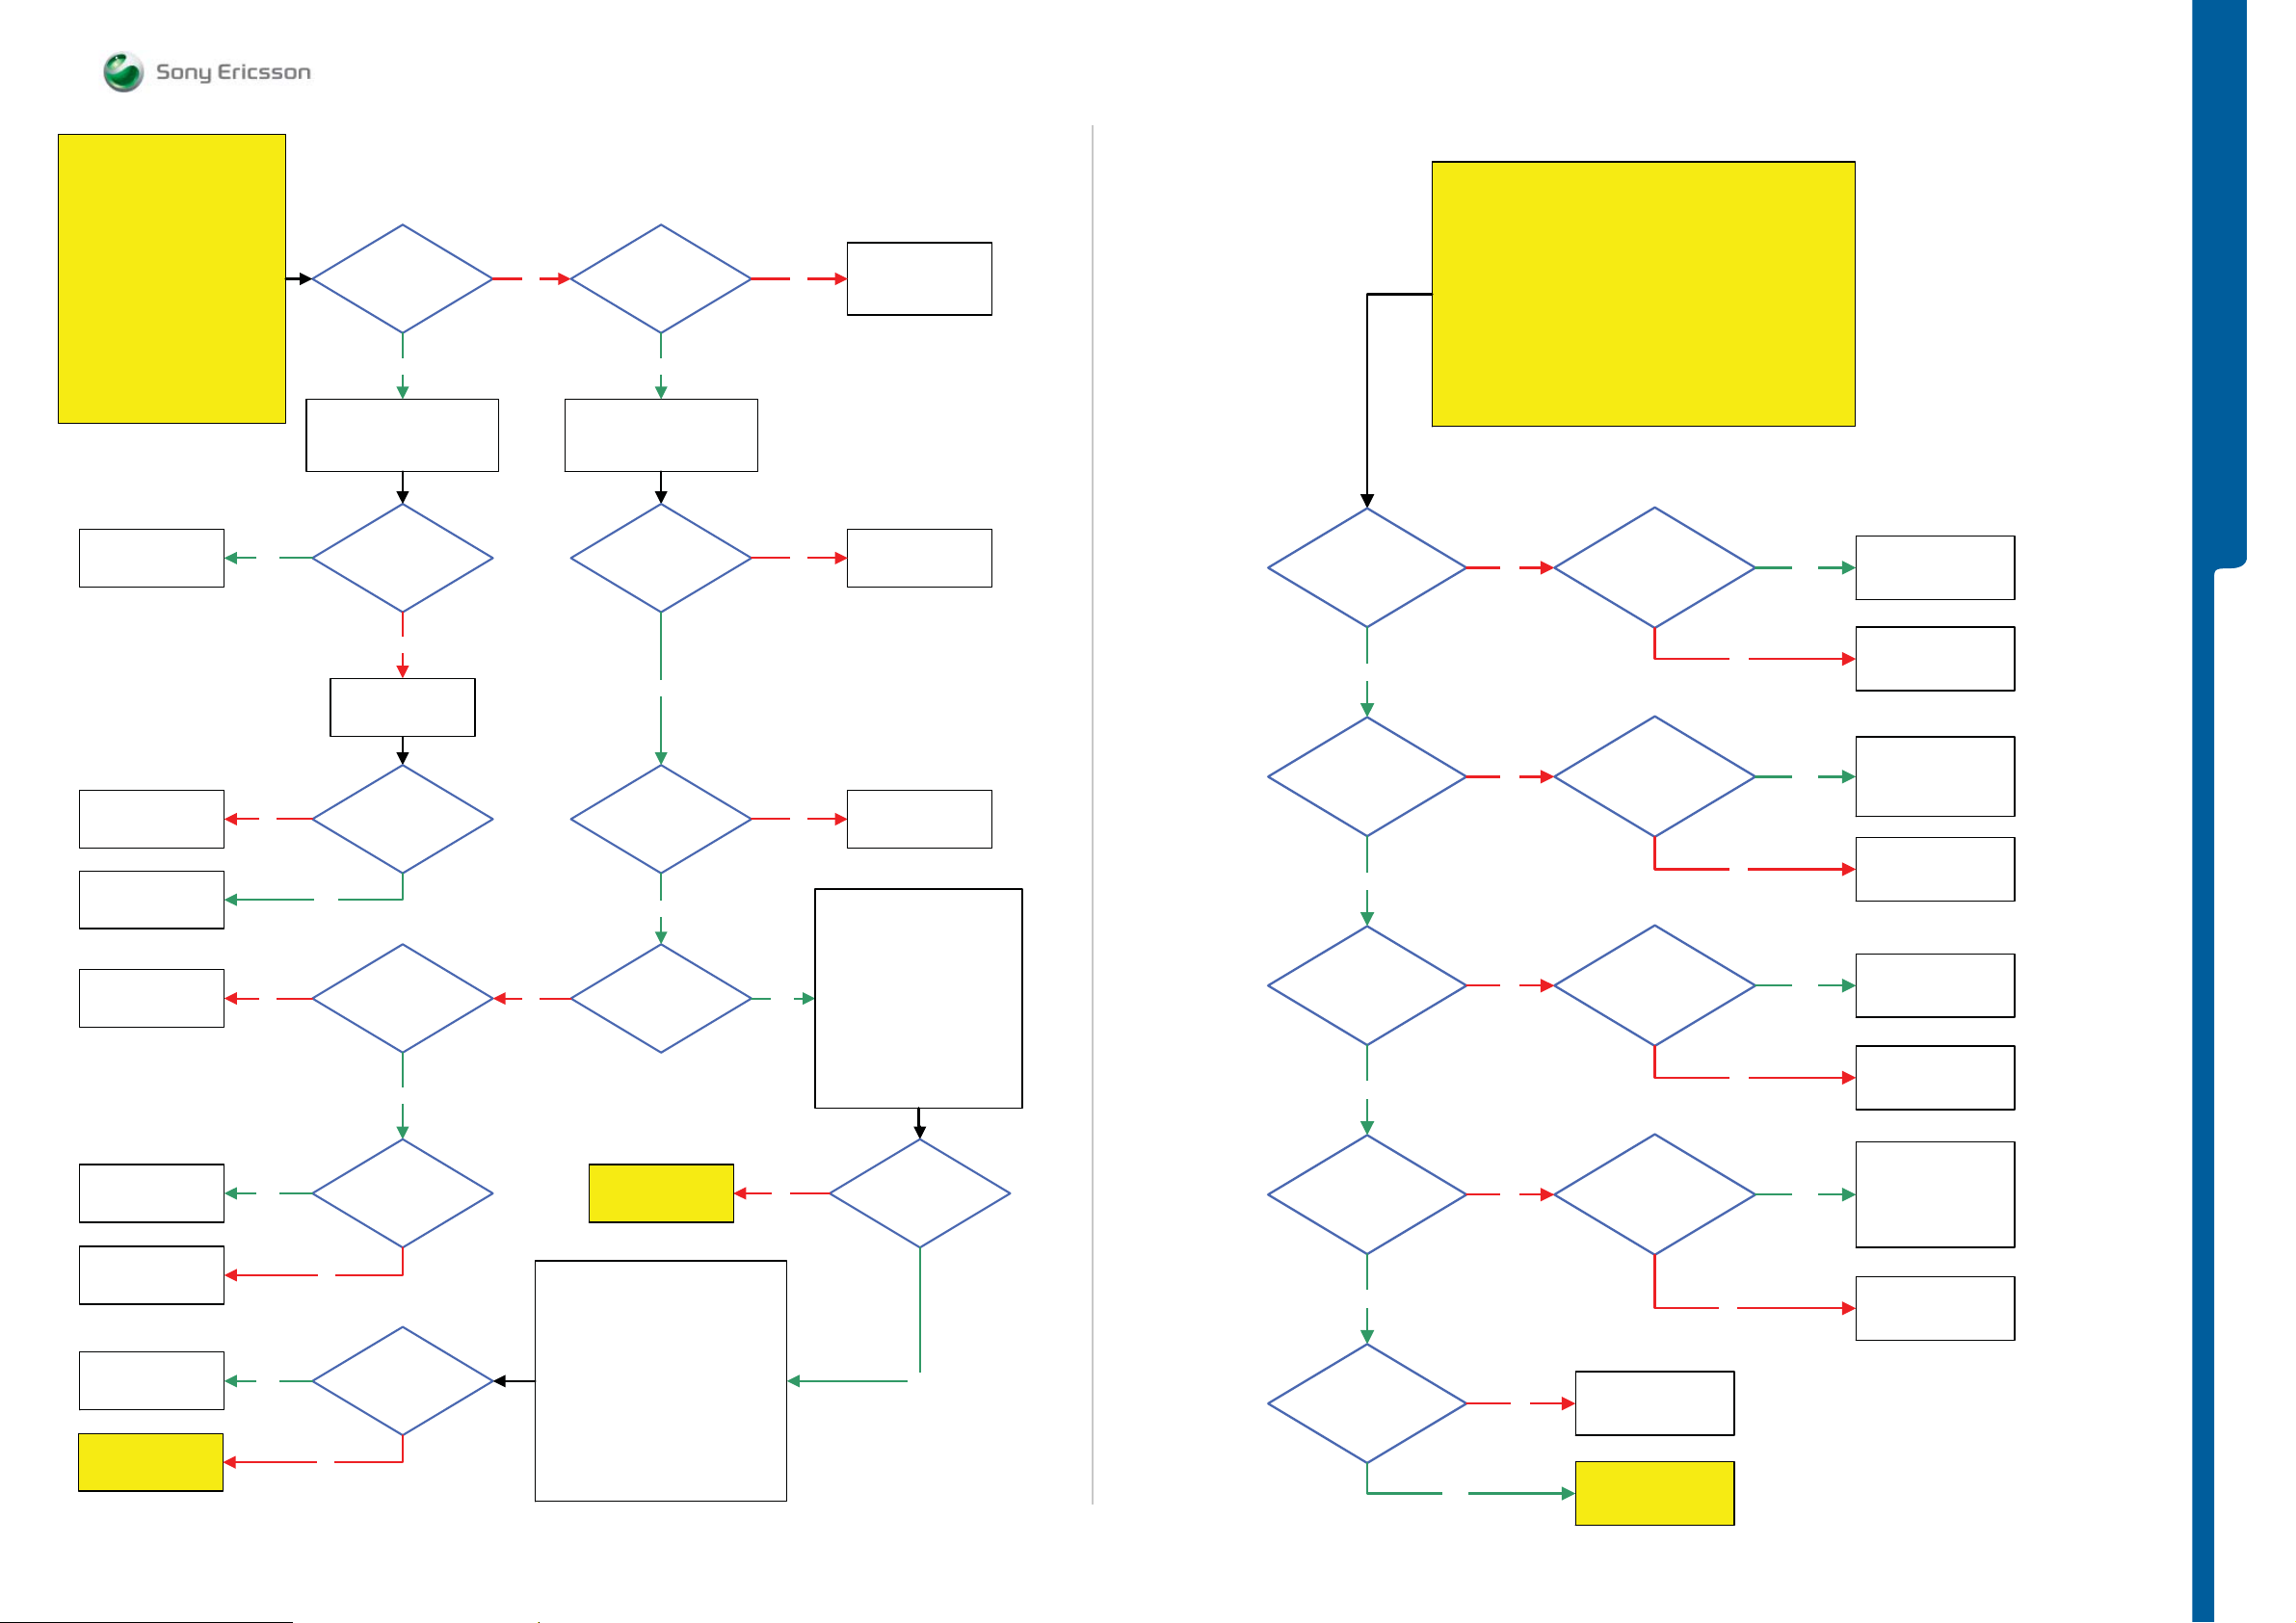
TROUBLESHOOTING Dead Phone Proble m s
SEMC Troubleshooting Manual
G705 - W705 - W715
START
Try to recover the Phone by using
Connect USB Cable to the Phone
and update SEMCBOOT after this
If successful claim SW Flash
If not continue with the step 2.
Try to trace Faulty
Component by using
Step 1:
EMMA SW
Press key 2 and 5
Run EMMA SUCR SW
and retest the Phone
Step 2:
Use TRS Fixture
Connect: VBATT Only
Replace
N1200
SL 5 Replace
N2000
SL 4 Escalate
Freezing Spray
SL 5 Replace
N2000
SL 4 Escalate
Yes
No
Dead Phone Problems part 1
Is the
current consupmtion
more than 1mA
Yes
Try to trace
the Faulty Component
by using Freezing Spray
Is
N1200
(Tiger Radio Module)
getting hot
No
SL 5 Remove
N2000
SL 4 Escalate
Is the
current consumption
still more than
1mA
Yes
1.8V DC at
MP 60 (R2303 VDDE18)
and 2.8V DC at MP 64
(C1218 LDOA_OUT)
Yes
No
NoNo
Is the
connection between
MP 23 (X2201_Pin 3)
and PBA GND
DCIO/SEPI to the Phone
MP 118 (C2100)
and MP 119 (C2101)
RTCCLK at
MP 121 (R2103)
MP 97 (R2102)
Can Fence)
Ok
Yes
Connect:
32 kHz at
Yes
32 kHz
Yes
26 MHz
MCLK at
(Shield
SL 4 Replace
No
No
No
2.6V MP 67 (R2301 VAUDIO26)
2.5V MP 57 (R2302 VANA25)
Yes
2.7V MP 113 (C2210 VBT27)
2.7V MP 63 (R2305 VDIG)
2.6V MP 66 (R2306 VBEAR26)
1.2V MP 114 (C2220 VCORE12)
1.8V MP 59 (R2310 VCORE18)
X2201
SL 5 Replace
R2200
Replace
B2100
SL 5 Replace
N2000
SL 4 Escalate
Check the following
Voltages:
Is the
VAUDIO26
Voltage
Ok
Yes
Is the
VANA25
Voltage
Ok
Yes
Is the
VBT27
Voltage
Ok
Yes
Dead Phone Problems part 2
START
NOTE !
Dead Phone Problems part 1 TRS guide
No
No Yes
No
Before this the
must be done
Is N2422
getting hot
Is any of
N2200 or N2010
getting hot
Is N1300
getting hot
Yes
No
No
Yes
No
TROUBLESHOOTING
Replace
N2422
SL 5 Replace
N2000
SL 4 Escalate
SL 4 Replace
N2200
SL 5 Replace
N2010
SL 5 Replace
N2000
SL 4 Escalate
Replace
N1300
SL 5 Replace
N2000
SL 4 Escalate
Replace
N1200
Replace
N1211
SL 5 Replace
N2020
SL 4 Escalate
Go to USB and
Software Flash
Problems TRS guide
Yes
Yes
2.8V DC
at MP 99 (C1207)
No
ITP SW Flash
Successful
No
Is the
Go to
Dead Phone
Problems part 2
Step 1:
Disconnect:
VBATT and DCIO/SEPI
Step 2:
Connect:
PBA Key Navi and Slider Flex Module
to the PBA
Connect: VBATT Only
Step 3:
Use EMMA SW
Press the ”C” key and Connect
USB Cable from the PC to the PBA
Flash the Phone with the ITP SW
No
Are
all Voltages
Ok
Yes
Is the
VDIG
Voltage
Ok
Yes
Is the
VBEAR26
Voltage
Ok
Yes
No
No
Is any
of N2411, N1300
N1500 or N1510
getting hot
SL 5 Replace
N2000
SL 4 Escalate
Go to
Dead Phone
Problems part 3
No
Yes
SL 4 Replace
N2411, N1300
or N1510
SL 5 Replace
N1500
SL 5 Replace
N2000
SL 4 Escalate
1225-4035 rev. 1
9 (122)
Page 10
TROUBLESHOOTING
Dead Phone Proble m s - D is p l ay Proble m s
SEMC Troubleshooting Manual
G705 - W705 - W715
Is the
VCORE12
Voltage
Ok
No
Dead Phone Problems part 3
START
NOTE !
Dead Phone Problems part 2 TRS guide
1.1V – 1.2V DC
at MP 117
(V2201_Cathode)
Yes
Before this the
must be done
No
3.8 Volt DC at
MP 116 (L2201)
Yes
No
Replace
L2201
SL 5 Replace
V2201 or N2000
SL 4 Escalate
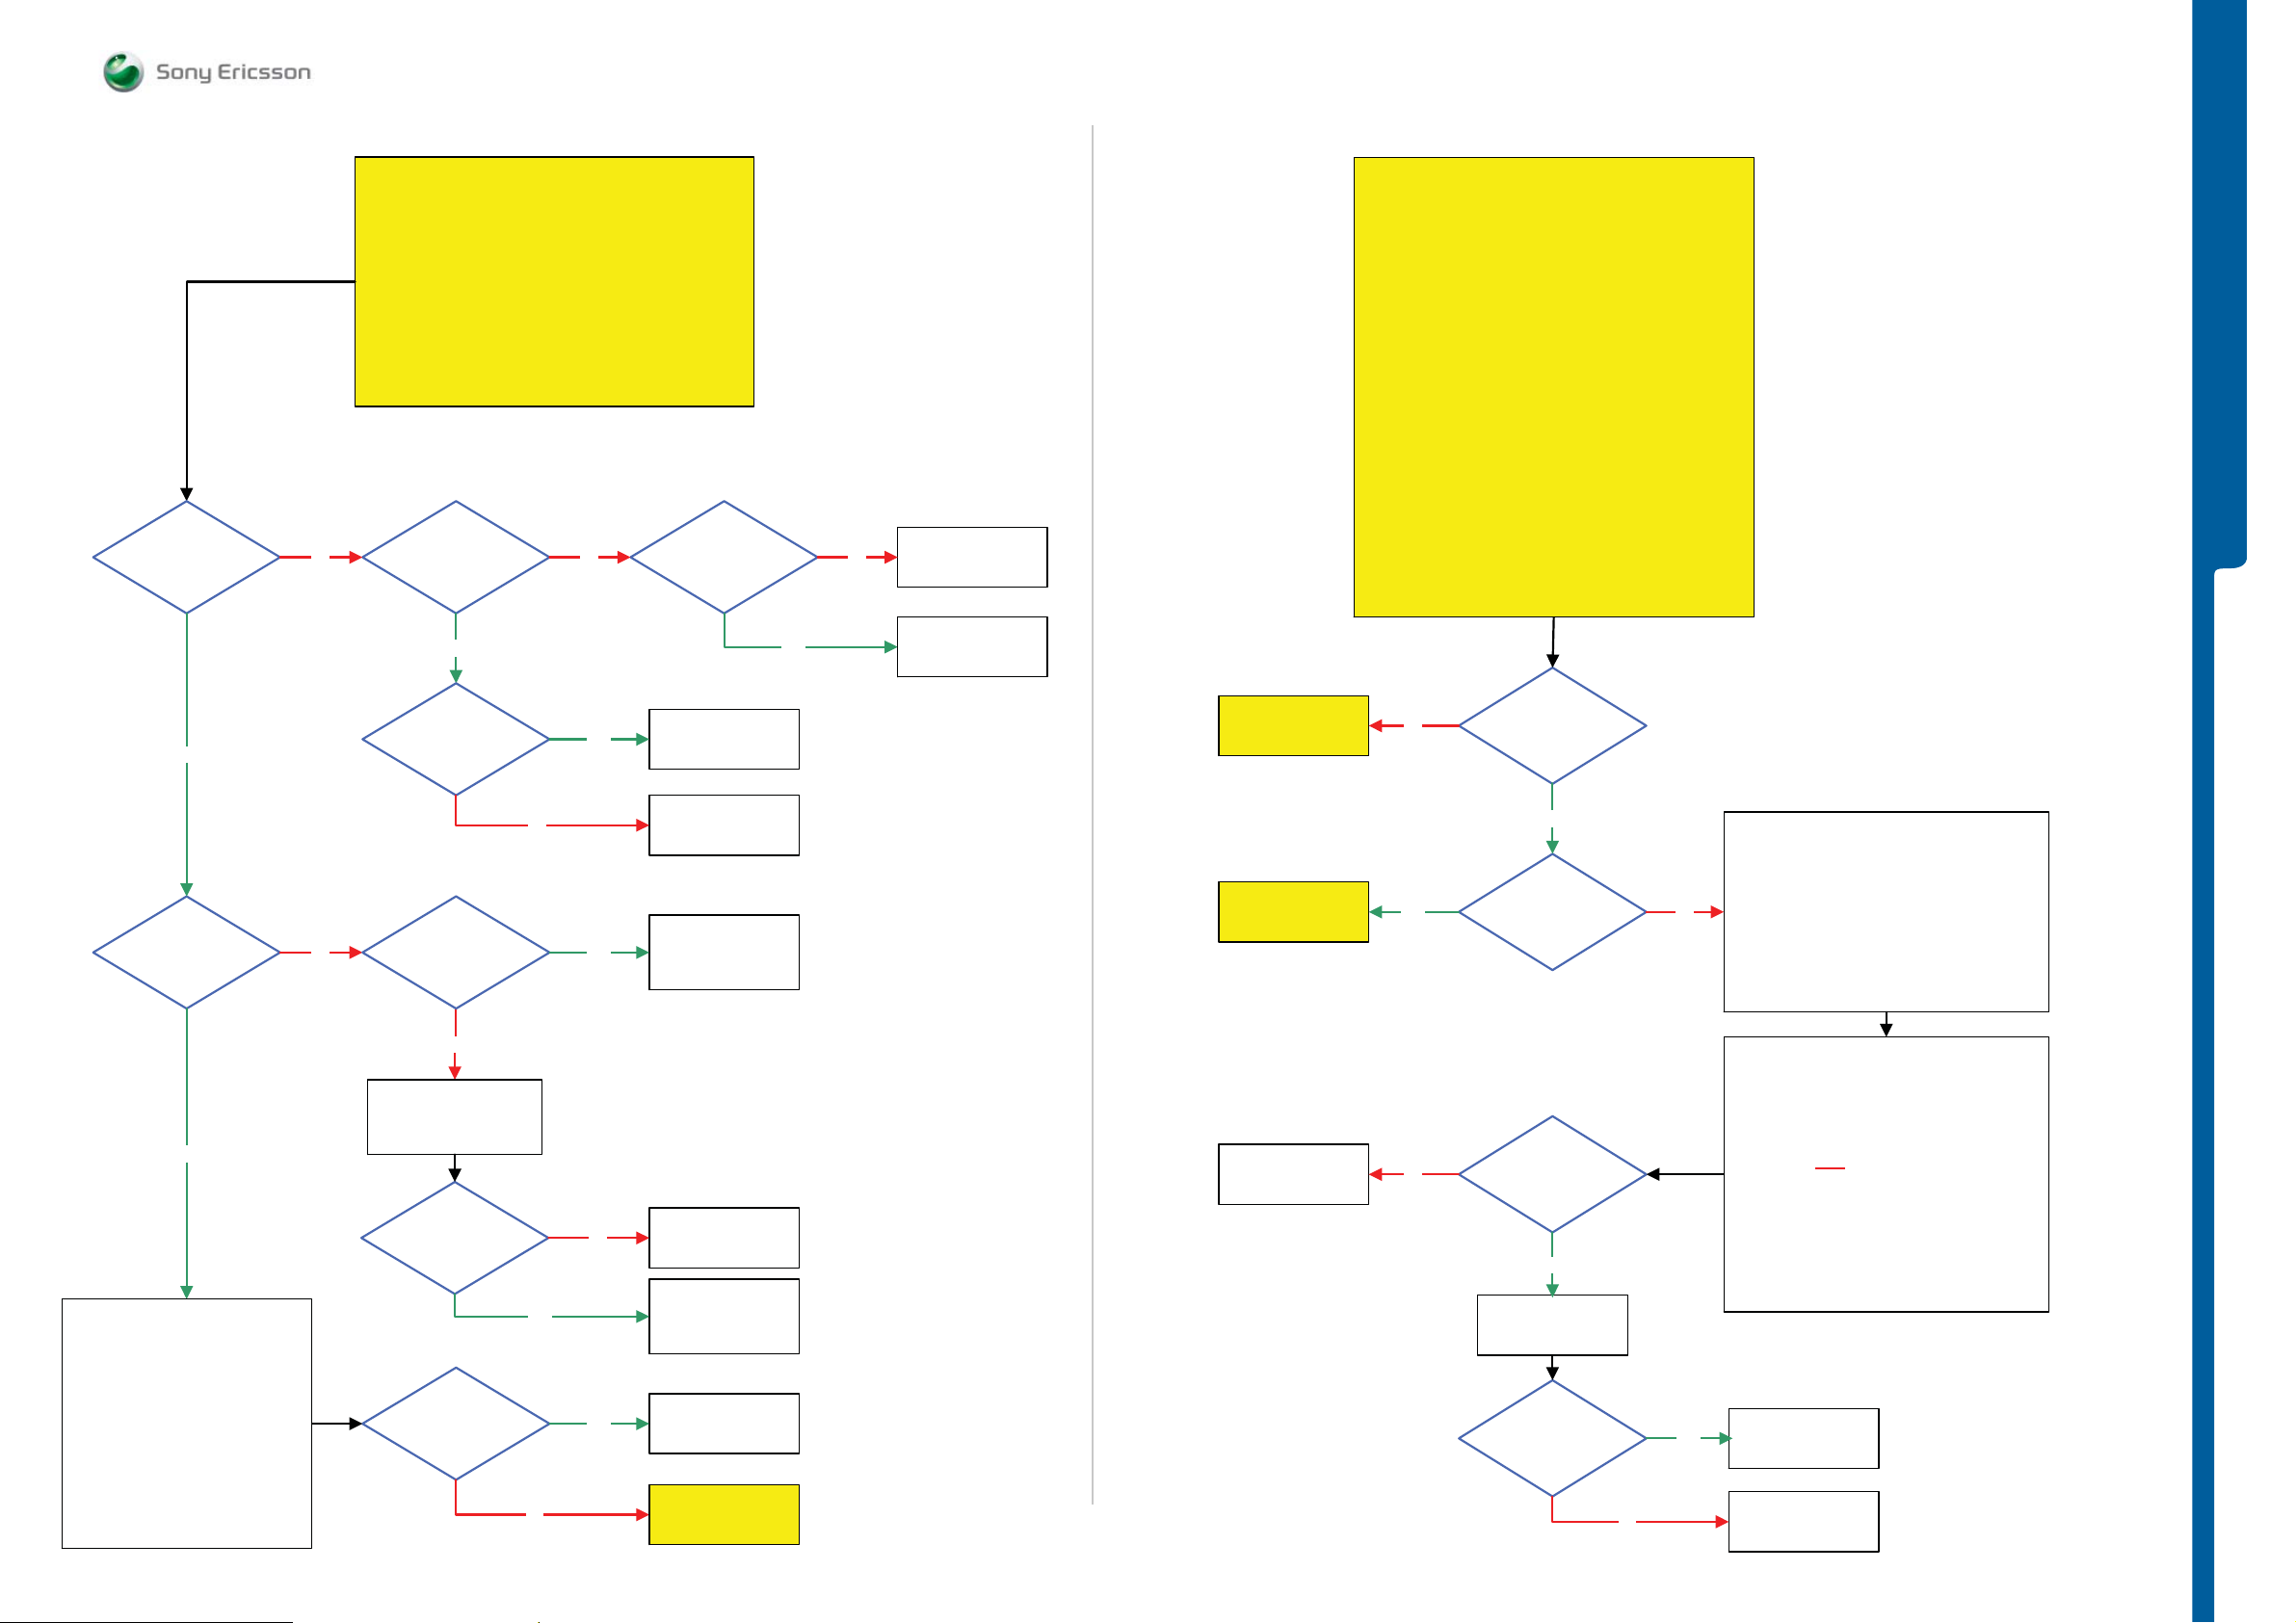
Display Problems
START
Step 1:
Flash the Phone with EMMA SUCR SW
If successful claim SW Flash
If not go to step 2.
Step 2:
Load ITP SW into the Phone
Use TRS Fixture
Connect:
Slider Flex Module, PBA Key Navi and Display
to the PBA
Connect: VBATT and DCIO/SEPI
Use Fault Trace SW and go to:
MMI
Misc
Init Screen Testing
Display Pattern
Activate:
TV Test Pattern
If Display is working on the TRS Fixture
then Replace
Display, Slider Flex Module or PBA Key Navi
If not then continue with
Display Problems TRS guide
TROUBLESHOOTING
Yes
Is the
VCORE18
Voltage
Ok
Yes
Step 1:
Disconnect:
VBATT and DCIO/SEPI
Step 2:
Connect:
Key Flex Assy and Slider FPC Assy
to the PBA
Connect: VBATT Only
Step 3:
Use EMMA SW
Press the ”C” key and Connect
USB Cable from the PC to the PBA
Flash the Phone with ITP SW
No
Is
MP 114 (C2220)
Short circuit to
PBA GND
MP 59 (R2310)
Short circuit to
PBA GND
VBATT and DCIO/SEPI
L2202 = Max 0.5 Ohm
ITP SW Flash
(Shield
Can Fence)
Is
(Shield
Can Fence)
No
Disconnect:
Is
Is the
Successful
No
Yes
No
Yes
Yes
No
Yes
SL 5 Replace
N2000 or N2010
SL 4 Escalate
Replace
L2200
SL 4 Replace
N2200
SL 5 Replace
C2231 or N2010
SL 5 Replace
L2202
SL 4 Escalate
SL 4 Replace
N2200
SL 5 Replace
N2010
SL 5 Replace
N2020
SL 4 Escalate
Go to USB and
Software Flash
Problems TRS guide
Go to
Display illumination
Problems TRS guide
Go to
Opto Sensor
Problems TRS guide
Replace
Z4200, Z4201 or
Z4202
No
Yes
No
Is
Display Backlights
Ok
Yes
Is the picture
too dark or
too light
Are all
Display Filters
Ok
Yes
Replace
X4200
Is the Display
Problem solved
No
Disconnect: VBATT and DCIO/SEPI and
Remove PBA from the TRS Fixture
Use Digital Multimeter instrument (DMM)
No
Yes
Display Filter Test 1 and 2 (see below)
Be very careful when cutting the
Shield Can Fence to avoid component damage
It is recommended to use a microscope when
Check that Pins: 1,2,3,4,5,6,7,8
Max 2 Ohm between the following pins:
Test 1 and 2 must be made on all filters
Claim Component
X4200
SL 5 Replace
N2010
SL 4 Escalate
and perform:
Z4200, Z4201 and Z4202
NOTE !
making these measurements
Z4200, Z4201 and Z4202
Display Filter Test
Test 1:
short circuit to GND
are NOT
Test 2:
Pin 1 and 5
Pin 2 and 6
Pin 3 and 7
Pin 4 and 8
NOTE !
1225-4035 rev. 1
10 (122)
Page 11
TROUBLESHOOTING Display Illumin at io n Prob lems
- Opto Sensor Prob le m s
SEMC Troubleshooting Manual
G705 - W705 - W715
Replace
L4200
Yes
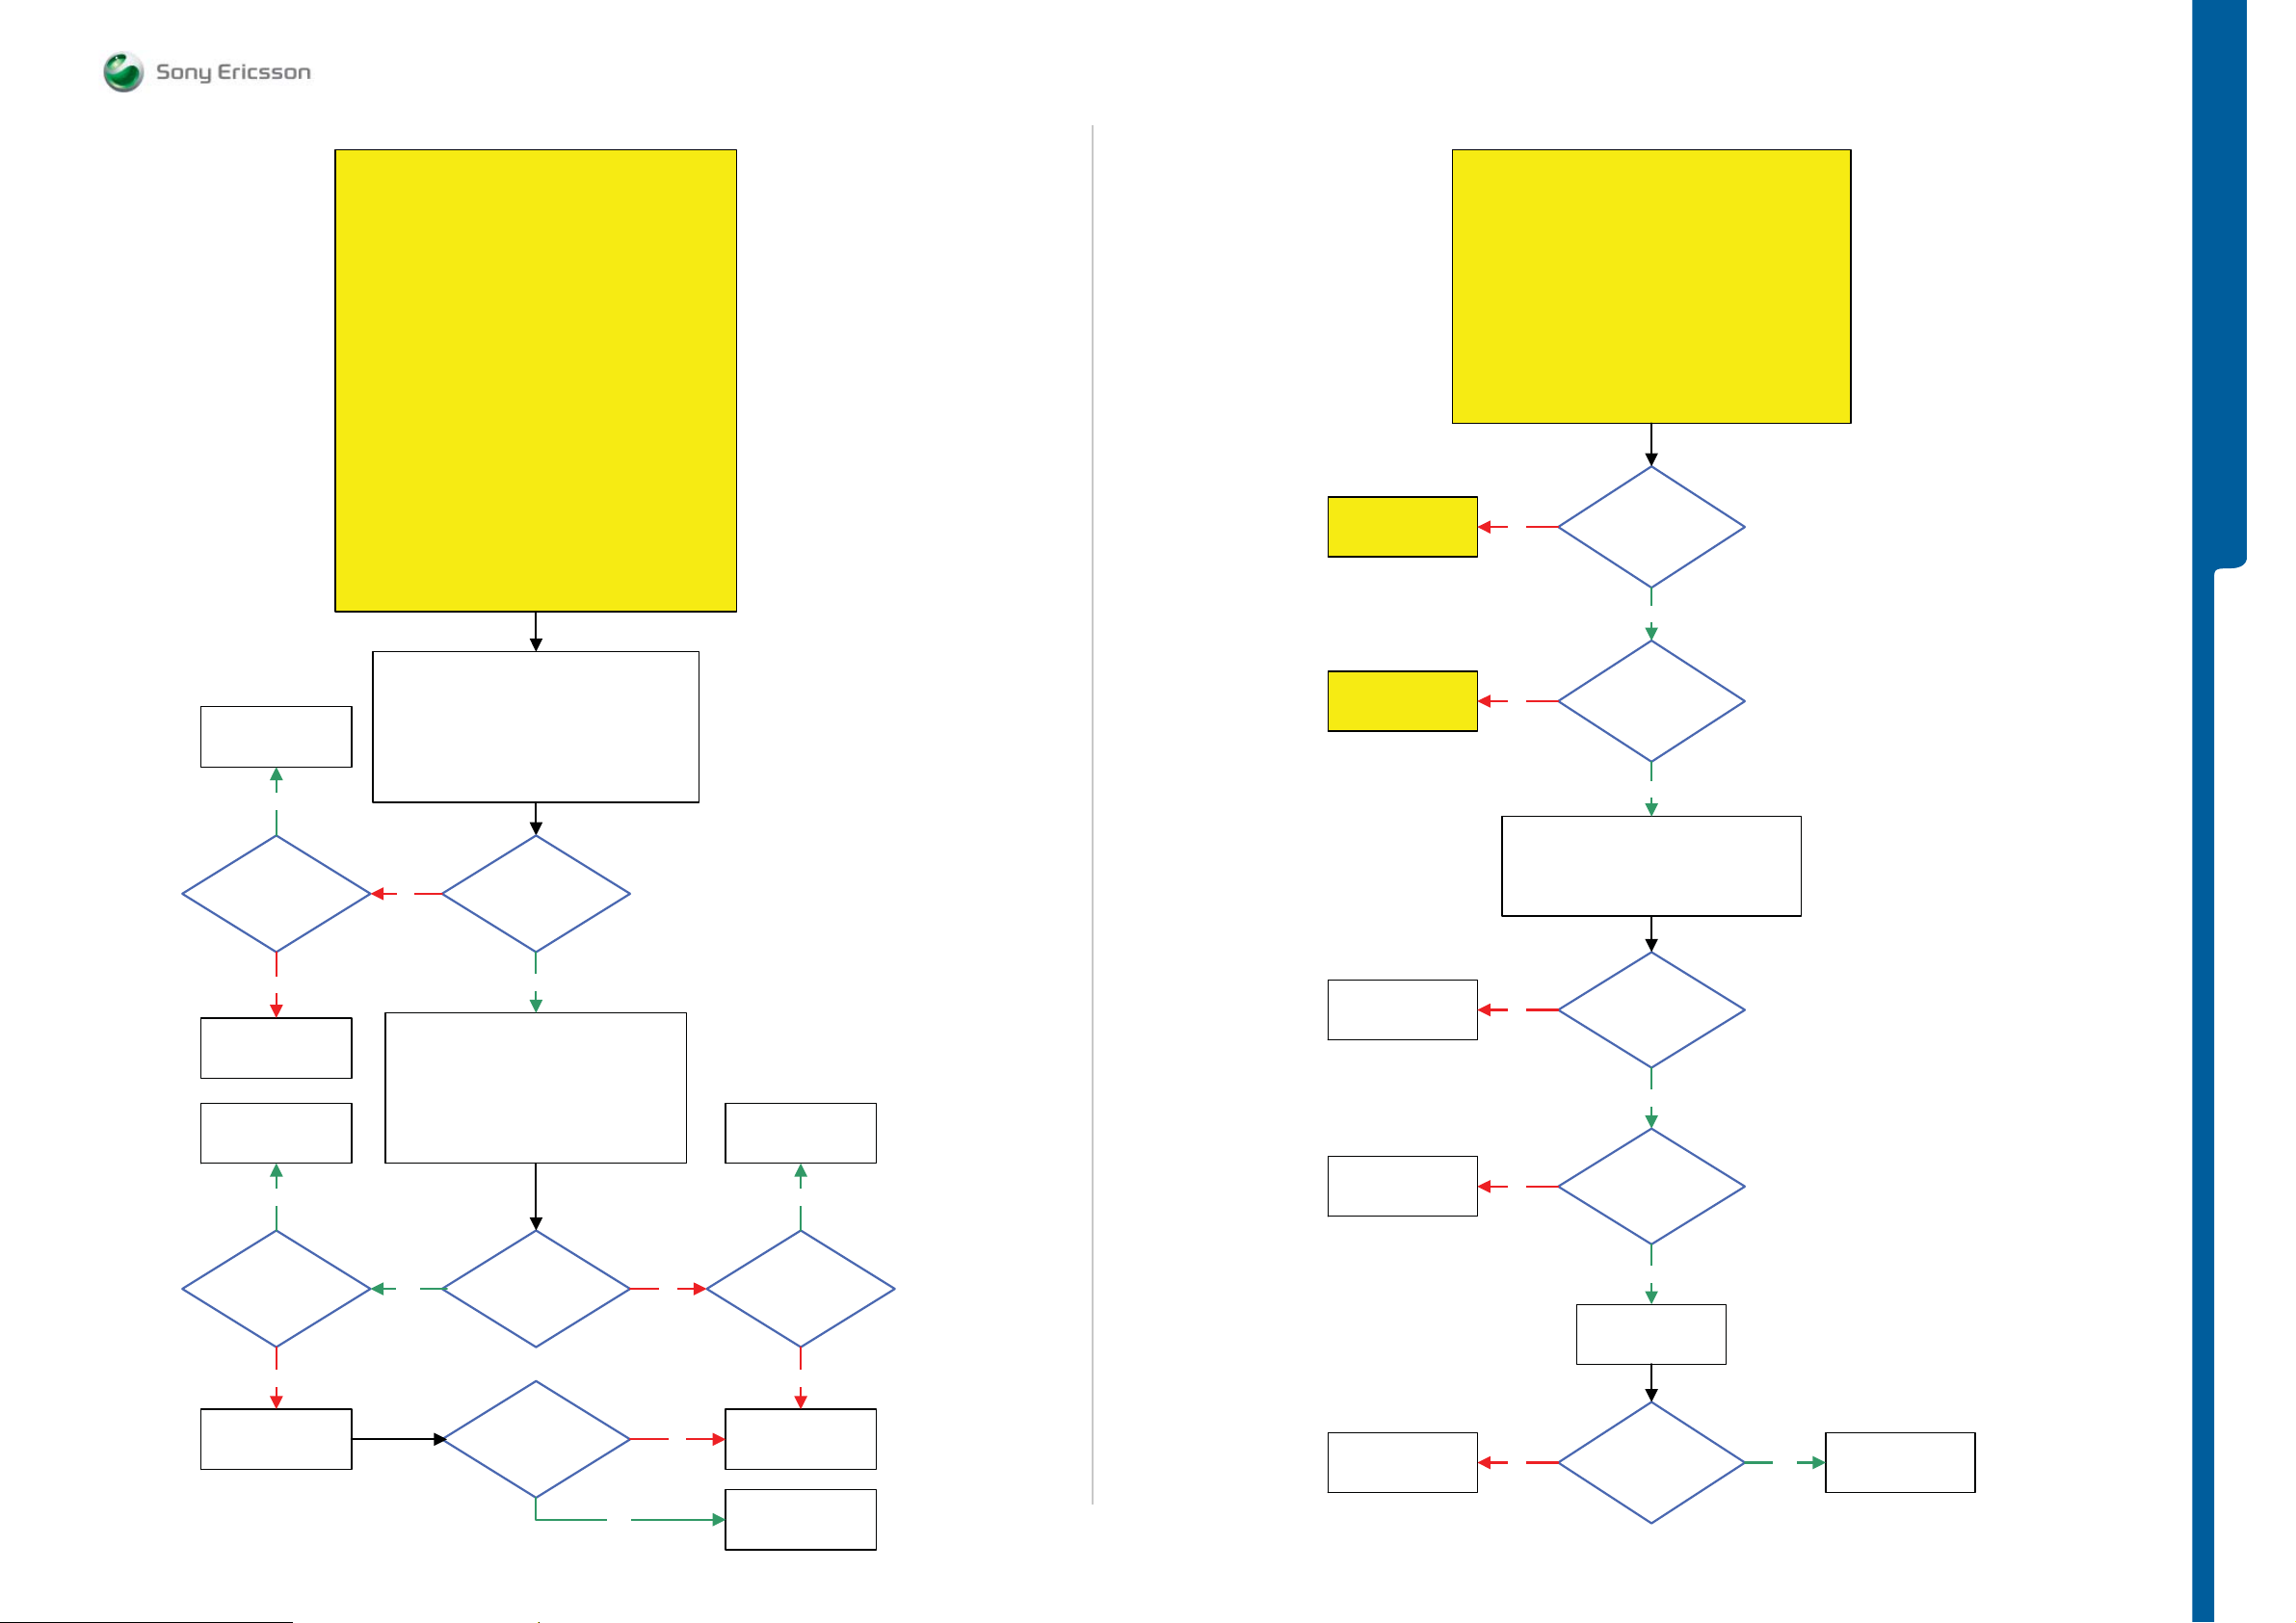
Display Illumination Problems
START
Step 1:
Flash the Phone with EMMA SUCR SW
If successful claim SW Flash
If not go to step 2.
Step 2:
Load ITP SW into the Phone
Use TRS Fixture
Connect:
Slider Flex Module, PBA Key Navi and Display to the PBA
Connect: VBATT and DCIO/SEPI
Use Fault Trace SW and go to:
MMI
Misc
Init Screen Testing
Led and Backlight
Activate:
Display Backlight
If Display Backlight is working on the TRS Fixture
then Replace
Display, Slider Flex Module or PBA Key Navi
If not then continue with the
Display illumination Problems TRS guide
1: Use Fault trace SW and go to:
MMI
Misc
Init Screen Testing
Led and Backlight
Deactivate:
Display Backlight
2: Disconnect Slider Flex Module from the PBA
Go to
Display illumination
Problems TRS guide
Go to
Display Problems
TRS guide
Opto Sensor Problems
START
Replace PBA Key Flex Flip
If successful claim PBA Key Flex Flip
Replace Slider FPC Assy
If successful claim Slider FPC Assy
Opto Sensor Problems TRS guide
No
No
Step 1:
and retest the Phone
if not go to step 2.
Step 2:
and retest the Phone
if not continue with the
Is the
Display Illumination
(LEDs) Ok
Yes
Can you see
any picture on
Display
Yes
TROUBLESHOOTING
3.7V - 3.8V DC
at MP 115 (L4222)
No
SL 5 Replace
L4222
SL 4 Escalate
Replace
X4200
Yes
0 Volt DC
at MP 37 (TP4201)
No
Replace
V4203
No
Yes
3.7V - 3.8V DC
at MP 36 (TP4200)
Yes
Fault trace SW
MMI
Misc
Init Screen Testing
Led and Backlight
Activate:
Display Backlight
17V-20V
Pk-Pk Pulses
at MP 36 (TP4200)
Shortly after the Display
Backlight has been
Activated
Is the
Display illumination
Problem solved
Yes
No
No
Replace
N2401
Yes
More than
5 Volt Pk-Pk
Pulses at MP 112 (R4200)
Shortly after the Display
Backlight has been
Activated
No
SL 5 Replace
N2000
SL 4 Escalate
Claim Component
V4203
SL 5 Replace
N2000
SL 4 Escalate
Replace
N2201
SL 5 Replace
N2000
SL 4 Escalate
Use TRS Fixture
Connect: VBATT and DCIO/SEPI
1.8 Volt DC
No
No
No Yes
at MP 48 (R2217
OPTO_EN) Shortly after
phone Power On
Yes
3 Volt
Pk-Pk Pulses
At MP 43 (TP2203
VOPTO30) Shortly after
phone Power On
Yes
Replace
X4200
Is the
Opto Sensor Problem
solved
Claim Component
X4200
1225-4035 rev. 1
11 (122)
Page 12
TROUBLESHOOTING On-Off Key
- Numeri c Keypad Proble m s
SEMC Troubleshooting Manual
G705 - W705 - W715
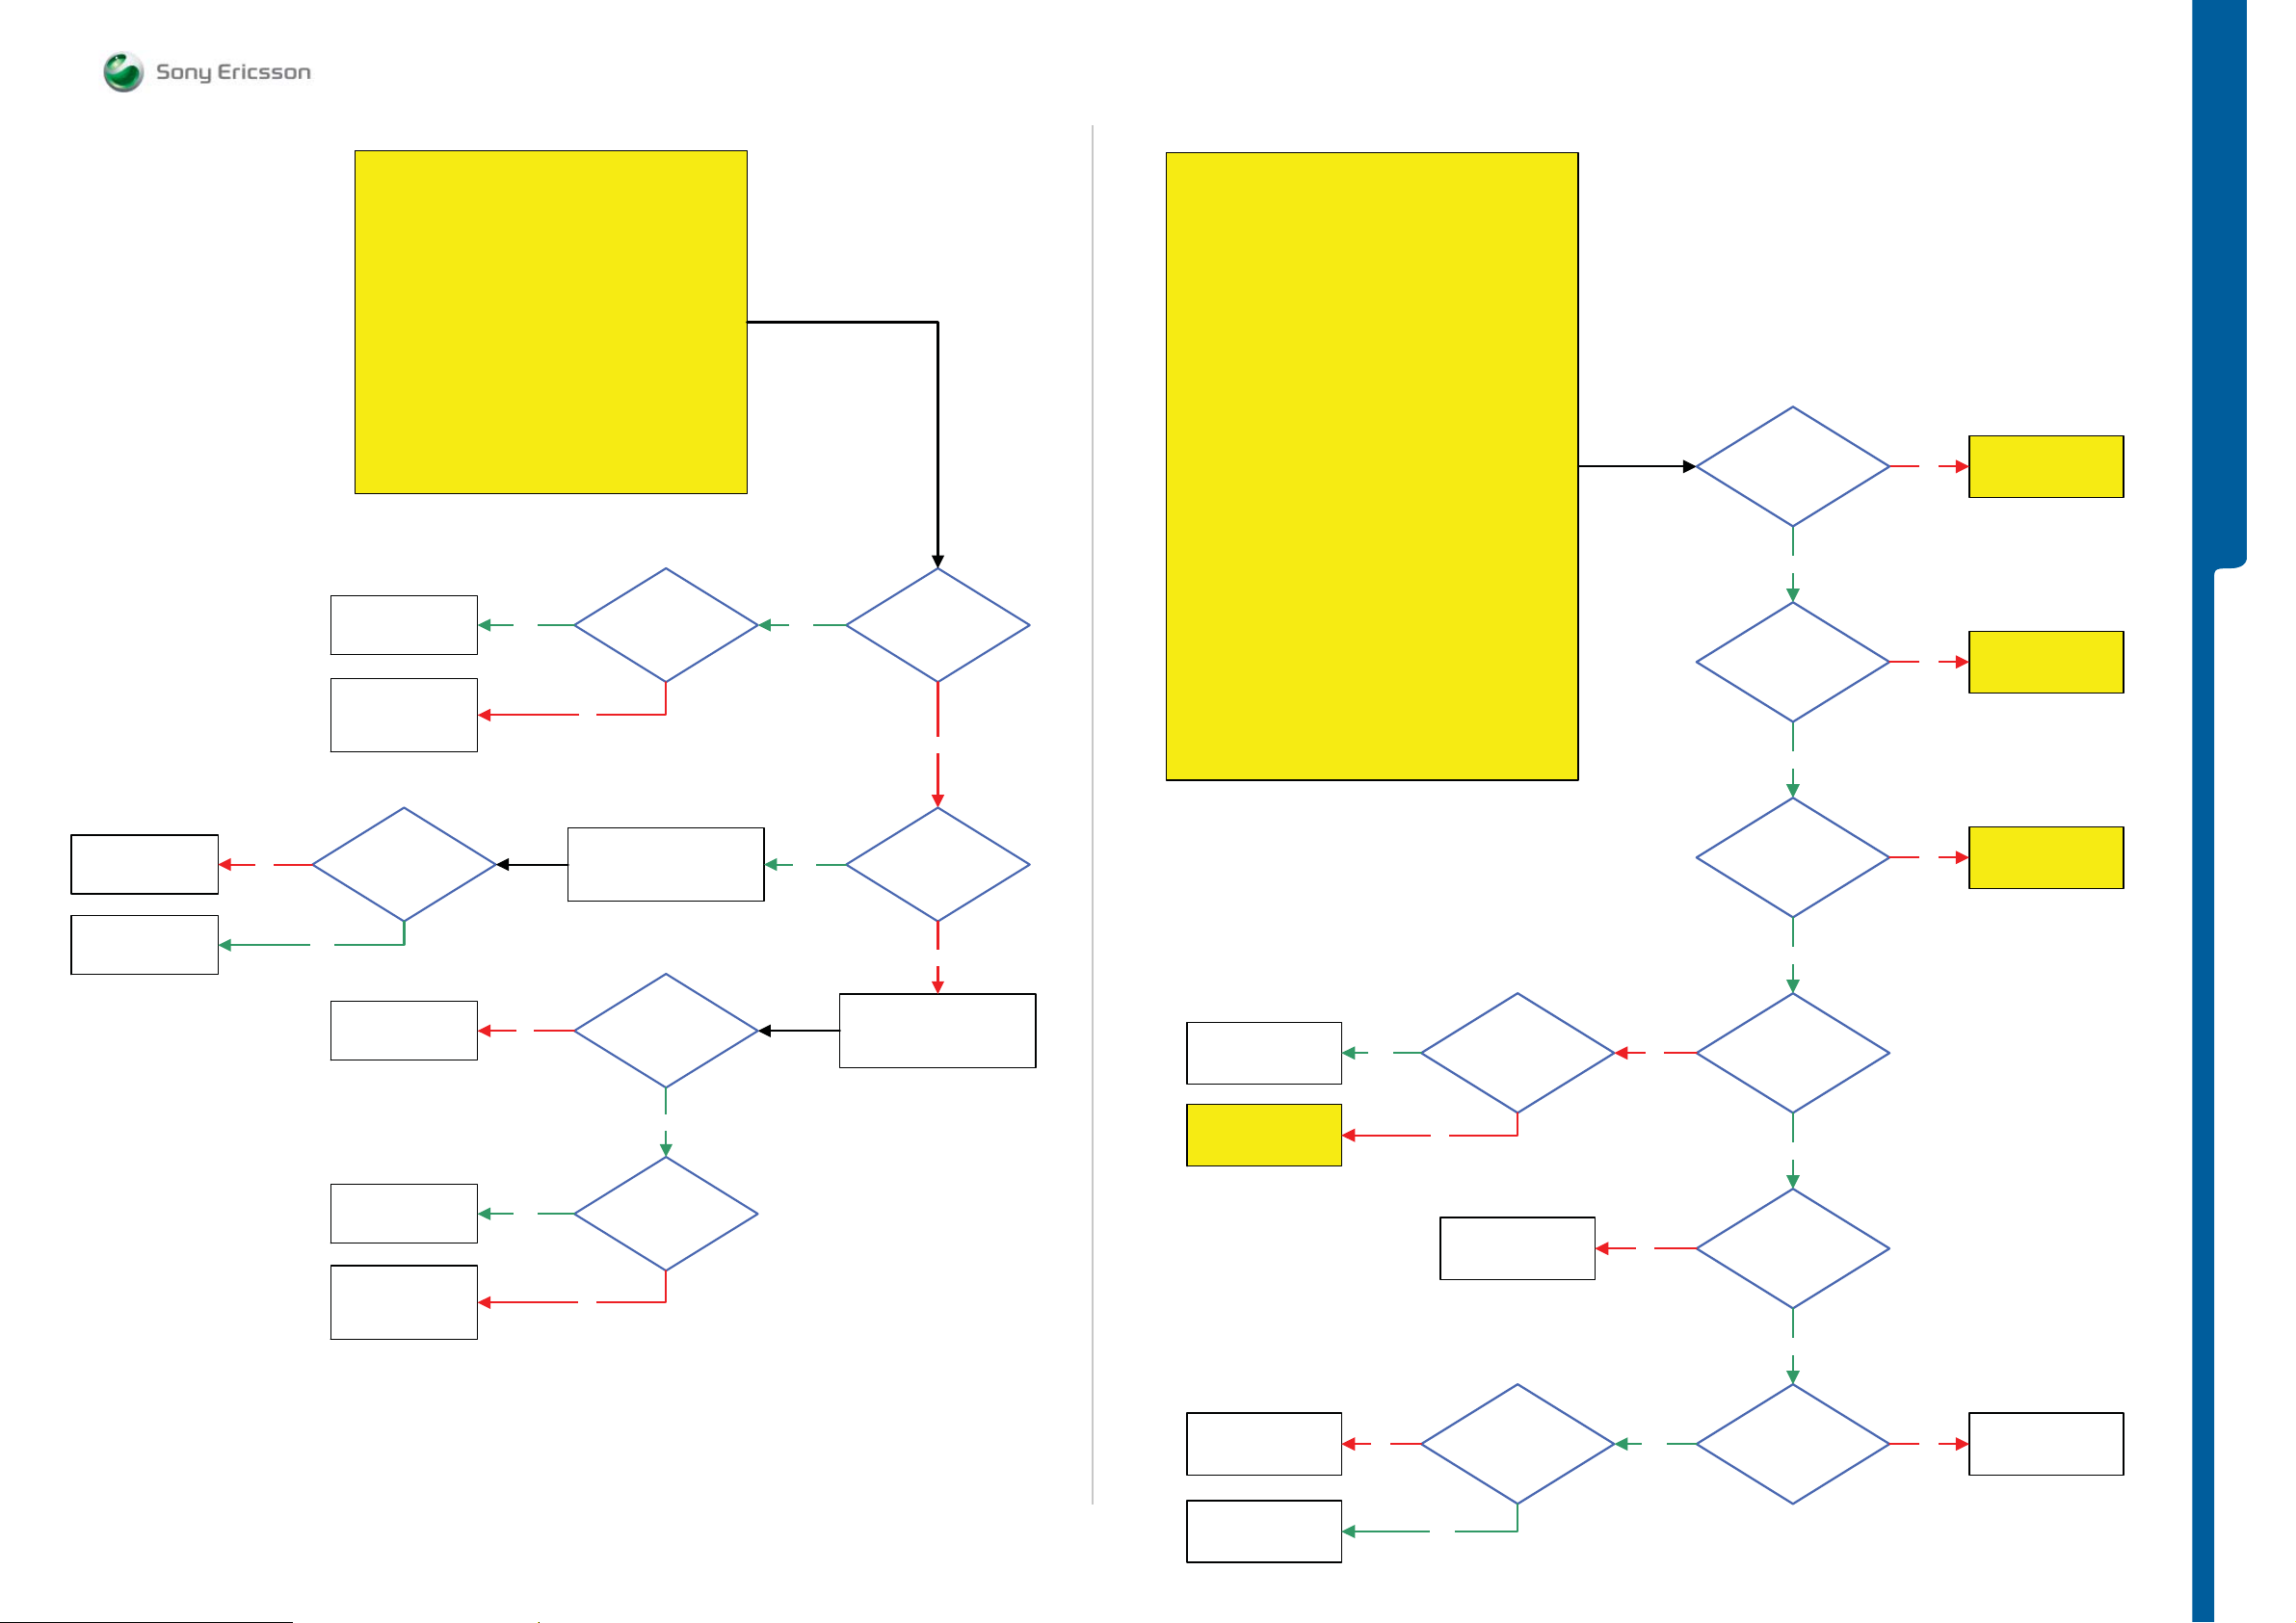
On-Off Key Problems
START
Replace PBA Key Navi and retest the Phone
If successful claim PBA Key Navi
Replace Slider Flex Module and retest the Phone
If successful claim Slider Flex Module
PBA Key Nav and Slider Flex Module to the PBA
Connect: VBATT and DCIO/SEPI
Replace
V2470
SL 5 Replace
V2475, R2470 or
N2010
SL 4 Escalate
Step 1:
if not go to step 2.
Step 2:
if not go to step 3.
Step 3:
Use TRS Fixture
Connect:
Yes
(V2470_Anode)
No
1.8 Volt DC
At MP 82
Yes
Is it a
Power Off
problem
No
Numeric Keypad Problems
START
Step 1:
If there are Problems with both Numeric and Navigation
Keypads then go to step 3, if not go to step 2.
Step 2:
Use TRS Fixture
Connect:
Numeric Key Flex Module to the PBA
Connect: VBATT and DCIO/SEPI
Use Fault Trace SW and go to:
MMI
Misc
Init Screen Testing
Activate
Keypad Scan Test
Perform Keypad Scan Test by pressing all
Keypads on the Key Flex Module
If successful then
Replace
Key Flex Module
If not go to step 3.
Step 3:
Use TRS Fixture
Connect:
Key Flex Module to the PBA
Connect: VBATT and DCIO/SEPI
and continue with the
Numeric Keypad Problems TRS guide
1.8 Volt DC at
MP 27 (S2404_Pin C)
Yes
1.8 Volt DC at
MP 103 (S2405_Pin C)
and MP 104
(S2406_Pin C)
Yes
No
No
Walkman Button
Problems TRS guide
Up and Down Button
Problems TRS guide
TROUBLESHOOTING
Go to
Go to Volume
Replace
X4200
SL 5 Replace
N2000
SL 4 Escalate
No
0 Volt DC
(V2470_Cathode)
Yes
SL 5 Replace
R2470 or N2010
SL 4 Escalate
SL 4 Replace
SL 5 Replace
At MP 83
Replace
X4200
V2470
N2000
No
Yes
Press the
On/Off Key
1.8 Volt DC at
MP 54 (R2470)
3.7 Volt DC
At MP 83
(V2470_Cathode)
No
Yes
Yes
3.7 Volt DC
At MP 83
(V2470_Cathode)
No
Disconnect:
Slider Flex Module
from the PBA
Replace
X2401
Go to
Navigation Keypad
Problems TRS guide
Yes
the problem with
Numeric Keypad
No
SL 5 Replace
R2471 or R2472
SL 4 Escalate
Is
No
No
1.8 Volt DC at
MP 80 (S2403_Pin A)
Yes
Are
there problems
with both Numeric
and Navigation
Keypads
Yes
1.8 Volt DC at
MP 52 (V2474_Pin 1)
and MP 53
(V2474_Pin 2)
Yes
No
Problems TRS guide
Go to
Camera Button
SL 5 Replace
N2010
SL 4 Escalate
Flash the Phone with
EMMA SUCR SW
No
0 Volt DC at
MP 53 (V2474_Pin 2)
when press the
Key ”1"
Yes
Yes
0 Volt DC at
MP 52 (V2474_Pin 1)
when press the
Key ”6"
No
SL 5 Replace
SL 4 Escalate
1225-4035 rev. 1
N2010
12 (122)
Page 13
TROUBLESHOOTING
Nav igation Keypad Problems - Volume Up an d D own Bu t to n Prob lems
SEMC Troubleshooting Manual
G705 - W705 - W715
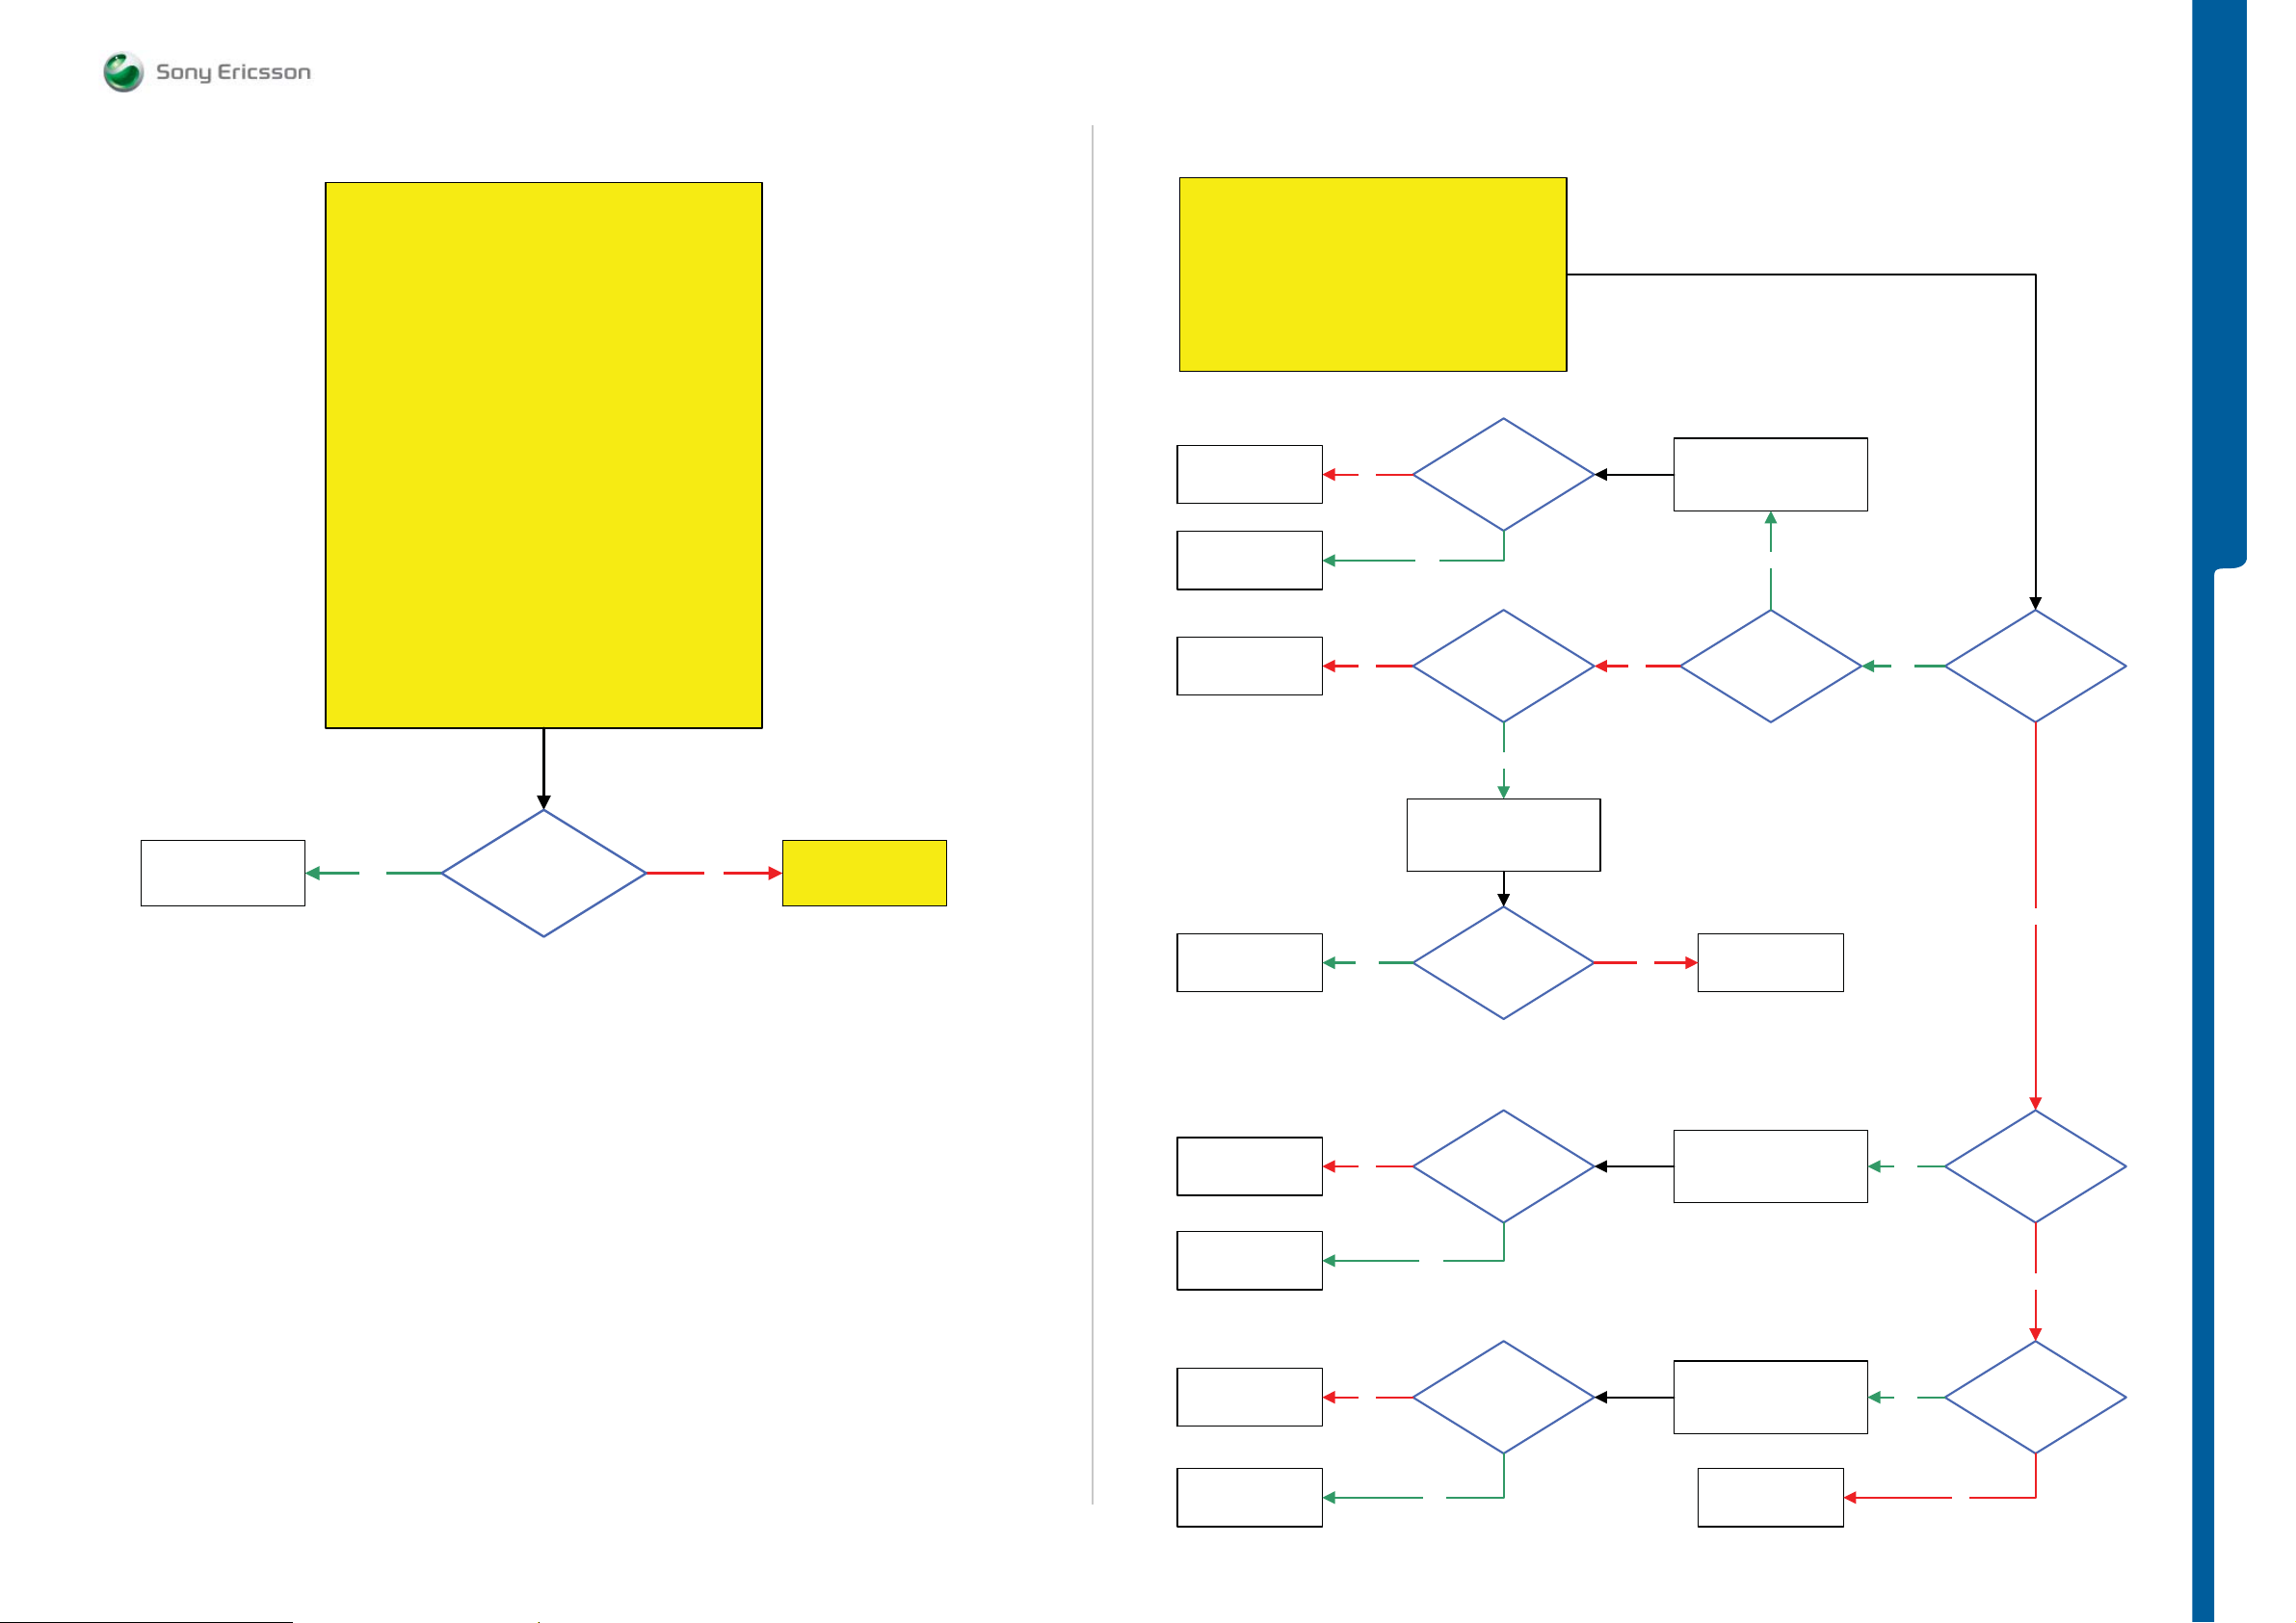
Navigation Keypad Problems
START
Step 1:
Use TRS Fixture
Connect:
PBA Key Navi and Slider Flex Module to the PBA
Connect: VBATT and DCIO/SEPI
Use Fault Trace SW and go to:
MMI
Misc
Init Screen Testing
Activate
Keypad Scan Test
Perform Keypad Scan Test by pressing all Keypads on the
Key PBA Navi
If successful then Replace
Key PBA Navi or Slider Flex Module
If not go to step 2.
Step 2:
Continue with the
Navigation Keypad Problems TRS guide
Connect: VBATT and DCIO/SEPI
Replace
S2406
SL 5 Replace
N2010
SL 4 Escalate
SL 5 Replace
R2473 or N2010
SL 4 Escalate
Volume Up and Down Button Problems
START
Use TRS Fixture
0 Volt DC
No
No No
At MP 104
(S2406_Pin C)
Yes
Is MP 104
(S2406_Pin C)
short circuit to GND
(Shield Can
Fence)
Press the
S2406 Volume Up
Button
Yes
1.8 Volt DC
at MP 104
(S2406_Pin C)
Yes
TROUBLESHOOTING
Is the
problem
with S2406
Volume Up Button
Replace
X4200
Is the
Numeric Keypad
Ok
Yes
Remove the
S2406 Volume Up
Go to
NoYes
Numeric Keypad
Button
Problems TRS guide
No
1.8 Volt DC
at MP 103
(S2405_Pin C
No
SL 5 Replace
V2473 or N2010
SL 4 Escalate
Replace
S2405
SL 5 Replace
N2010
SL 4 Escalate
Yes
No
Is MP 104
(S2406_Pin C)
still short circuit to
GND
(Shield
Can Fence)
0 Volt DC
at MP 103
(S2405_Pin C)
Yes
No
Replace
S2406
Press the
S2405 Volume Down
Button
Yes
Replace
S2405
SL 5 Replace
V2473 or N2010
SL 4 Escalate
No
Is MP 103
(S2405_Pin C)
still short circuit to
the GND (
Yes
Shield
Can Fence)
Remove the
S2405 Volume Down Button
SL 5 Replace
R2474 or N2010
SL 4 Escalate
Yes
No
1225-4035 rev. 1
Is MP 103
(S2405_Pin C)
short circuit to GND
(Shield Can
Fence)
13 (122)
Page 14
TROUBLESHOOTING Camera Butto n Prob l e m s
- Walkman/Play & Stop B u tt o n Probl e m s
SEMC Troubleshooting Manual
G705 - W705 - W715
SL 5 Replace
V2472
SL 4 Escalate
Camera Button Problems
START
Use TRS Fixture
Connect: VBATT and DCIO/SEPI
Is MP 81
Yes
(S2403_Pin C)
Short circuit to
(Shield Can
Fence)
GND
Yes
1.8 Volt DC at
MP 80 (S2403_Pin A)
Walkman/Play and Stop Button Problems
START
Use TRS Fixture
Connect: VBATT and DCIO/SEPI
SL 5 Replace
V2472
SL 4 Escalate
Yes
Is MP 28
(S2404_Pin A)
Short circuit to
(Shield Can
Fence)
GND
Yes
TROUBLESHOOTING
1.8 Volt DC at
MP 27 (S2404_Pin C)
SL 5 Replace
N2010
SL 4 Escalate
Replace
S2403
Yes
0 Volt DC at
MP 80 (S2403_Pin A)
No
No
Press the
S2403 Camera Button
Replace
S2403
Go to Volume
Up and Down Button
Problems TRS guide
No
(S2403_Pin A)
Short circuit to
Yes
No
Is MP 80
(Shield Can
Fence)
GND
SL 5 Replace
N2010
SL 4 Escalate
Replace
S2404
Yes
0 Volt DC at
MP 27 (S2404_Pin C)
No
SL 5 Replace
R2475 or N2010
SL 4 Escalate
SL 4 Replace
S2404
SL 5 Replace
L2409
No
No
Press the
S2404 Walkman Button
1.8 Volt DC at
MP 51 (V2475_Pin 1)
Yes
No
No
Is MP 27
(S2404_Pin C)
Short circuit to
(Shield Can
Fence)
Yes
SL 5 Replace
V2475 or V2480
SL 4 Escalate
GND
1225-4035 rev. 1
14 (122)
Page 15
TROUBLESHOOTING
N umeric Keypad LED Proble m s - N avig ation Keypad LED Problems
SEMC Troubleshooting Manual
G705 - W705 - W715
Numeric Keypad LED Problems
START
Load ITP SW into the Phone
Use TRS Fixture
Connect: Key Flex Module to the PBA
Connect: VBATT and DCIO/SEPI
Use Fault Trace SW and go to:
MMI
Misc
Init Screen Testing
Led and Backlight
Activate:
Numeric Keypad
If Numeric Keypad LED is working on the TRS Fixture
then Replace Key Flex Module
If not then continue with the
Numeric Keypad LED Problems TRS guide
1: Use Fault Trace SW and go to:
MMI
Misc
Init Screen Testing
Deactivate:
Numeric Keypad
2: Disconnect the Key Flex Module from the PBA
Navigation Keypad LED Problems
START
Load ITP SW into the Phone
Use TRS Fixture
Connect: Slider Flex Module and PBA Key Navi to the PBA
Connect: VBATT and DCIO/SEPI
Use Fault Trace SW and go to:
MMI
Misc
Init Screen Testing
Led and Backlight
Activate:
Navigation Keypad
If Navigation Keypad LED is working on the TRS Fixture
then Replace Slider Flex Module or PBA Key Navi
If not then continue with the
Navigation Keypad LED Problems TRS guide
1: Use Fault Trace SW and go to:
MMI
Misc
Init Screen Testing
Deactivate:
Navigation Keypad
TROUBLESHOOTING
SL 5 Replace
N2000
SL 4 Escalate
No
Yes
Fault Trace SW
Activate:
Numeric Keypad
0 Volt DC
At MP 46
(V4205_Cathode)
3.8 Volt DC
At MP 46
(V4205_Cathode)
No
Is MP 46
(V4205_Cathode)
Short circuit to
PBA GND
(V4204_Pin 2)
Short circuit to PBA
Can Fence)
No
Is MP 88
(Shield
GND
Can Fence)
(Shield
Yes
Yes
SL 5 Replace
V4205
SL 4 Escalate
SL 5 Replace
V4204
SL 4 Escalate
Replace
X4200
2: Disconnect the Slider Flex Module from the PBA
3.8 Volt DC
at MP 49
No
(V4207_Cathode)
Yes
Fault Trace SW
Activate:
Navigation Keypad
0 Volt DC
at MP 49
NoYes
(V4207_Cathode)
SL 5 Replace
N2000
SL 4 Escalate
SL 5 Replace
N2000
SL 4 Escalate
Replace
X2401
Yes
No
SL 5 Replace
N2000
SL 4 Escalate
1225-4035 rev. 1
15 (122)
Page 16
TROUBLESHOOTING Navigation Ora n g e LE D Prob le m s
- Web Shor tcu t LE D Prob le m s
SEMC Troubleshooting Manual
G705 - W705 - W715
Navigation Orange LED Problems
START
Load ITP SW into the Phone
Use TRS Fixture
Connect: Slider Flex Module and PBA Key Navi to the PBA
Connect: VBATT and DCIO/SEPI
Use Fault Trace SW and go to:
MMI
Misc
Init Screen Testing
Led and Backlight
Activate:
Navi Orange LED
If Navigation Orange LED is working on the TRS Fixture then
Replace Slider Flex Module or PBA Key Navi
If not then continue with the
Navigation Orange LED Problems TRS guide
1: Use Fault Trace SW and go to:
MMI
Misc
Init Screen Testing
Deactivate:
Navi Orange LED
2: Disconnect the Slider Flex Module from the PBA
Web Short Cut LED Problems
START
This TRS guide is valid ONLY
Load ITP SW into the Phone
Connect: Key Flex Module to the PBA
Connect: VBATT and DCIO/SEPI
Use Fault Trace SW and go to:
If Web Short Cut LED working on the TRS Fixture then
Replace Key Flex Module
If not then continue with the
Web Short Cut LED Problems TRS guide
1: Use Fault Trace SW and go to:
2: Disconnect the Key Flex Module from the PBA
NOTE !
for G705 Phones.
Use TRS Fixture
MMI
Misc
Init Screen Testing
Led and Backlight
Activate:
Numeric Keypad
MMI
Misc
Init Screen Testing
Deactivate:
Numeric Keypad
TROUBLESHOOTING
Replace
X4200
3.8 Volt DC
at MP 50
(V4206_Cathode)
Yes
Fault Trace SW
Activate:
Navi Orange LED
0 Volt DC
at MP 50
V4206_Cathode
No
NoYes
SL 5 Replace
N2000
SL 4 Escalate
SL 5 Replace
N2000
SL 4 Escalate
SL 5 Replace
N2000
SL 4 Escalate
Replace
X2401
No
Fault Trace SW
Activate:
Numeric Keypad
0 Volt DC
(V4204_Pin 1)
Yes
Yes
at MP 89
3.8 Volt DC at
MP 89 (V4204_Pin 1)
No
Is MP 89
(V4204_Pin 1)
Short circuit to
PBA GND
(V2408_Cathode)
Short circuit to
PBA GND
(Shield
Can Fence)
No
Is MP 94
(Shield
Can Fence)
No
Yes
Yes
SL 5 Replace
V4204
SL 4 Escalate
SL 5 Replace
V2408
SL 4 Escalate
SL 5 Replace
N2000
SL 4 Escalate
1225-4035 rev. 1
16 (122)
Page 17
TROUBLESHOOTING Tally LED Problems
- Flash LED Problems
SEMC Troubleshooting Manual
G705 - W705 - W715
Tally LED Problems
START
Load ITP SW into the Phone
Use TRS Fixture
Connect: SIM Flex Module to the PBA
Connect: VBATT and DCIO/SEPI
Use Fault Trace SW and go to:
MMI
Misc
Init Screen Testing
Led and Backlight
Activate:
Tally LED
If the Tally LED is working on the TRS Fixture
then Replace SIM Flex Module
If not continue with the
Tally LED Problems TRS guide
Fault Trace SW
Deactivate:
Tally LED
Flash LED Problems
START
Load ITP SW into the Phone
Use TRS Fixture
Connect: SIM Flex Module to the PBA
Connect: VBATT and DCIO/SEPI
Use Fault Trace SW and go to:
MMI
Misc
Init Screen Testing
Led and Backlight
Activate:
Flash LED
If the Flash LED is working on the TRS Fixture then
Replace SIM Flex Module
If not continue with the
Flash LED Problems TRS guide
1: Use Fault Trace SW and go to:
MMI
Misc
Init Screen Testing
Deactivate:
Flash LED
TROUBLESHOOTING
SL 5 Replace
V2402
SL 4 Escalate
Yes
1.4 Volt DC
at MP 18
(V2402_Pin 3)
Yes
Fault Trace SW
Activate:
Tally LED
1.8 Volt DC
at MP 15
(V2402_Pin 1)
No
No
Replace
X2402
SL 5 Replace
N2010
SL 4 Escalate
2: Disconnect the SIM Flex Module from the PBA
3.8 Volt DC
at MP 21
(V2483_Cathode)
Yes
Fault Trace SW
Activate:
Flash LED
0 Volt DC
at MP 21
(V2483_Cathode)
No
No
Is MP 21
(V2483_Cathode)
Short circuit to PBA
GND
(Shield
Can Fence)
SL 5 Replace
N2000
SL 4 Escalate
Yes
No
SL 5 Replace
N2000
SL 4 Escalate
SL 5 Replace
V2483
SL 4 Escalate
Yes
Replace
X2402
1225-4035 rev. 1
17 (122)
Page 18
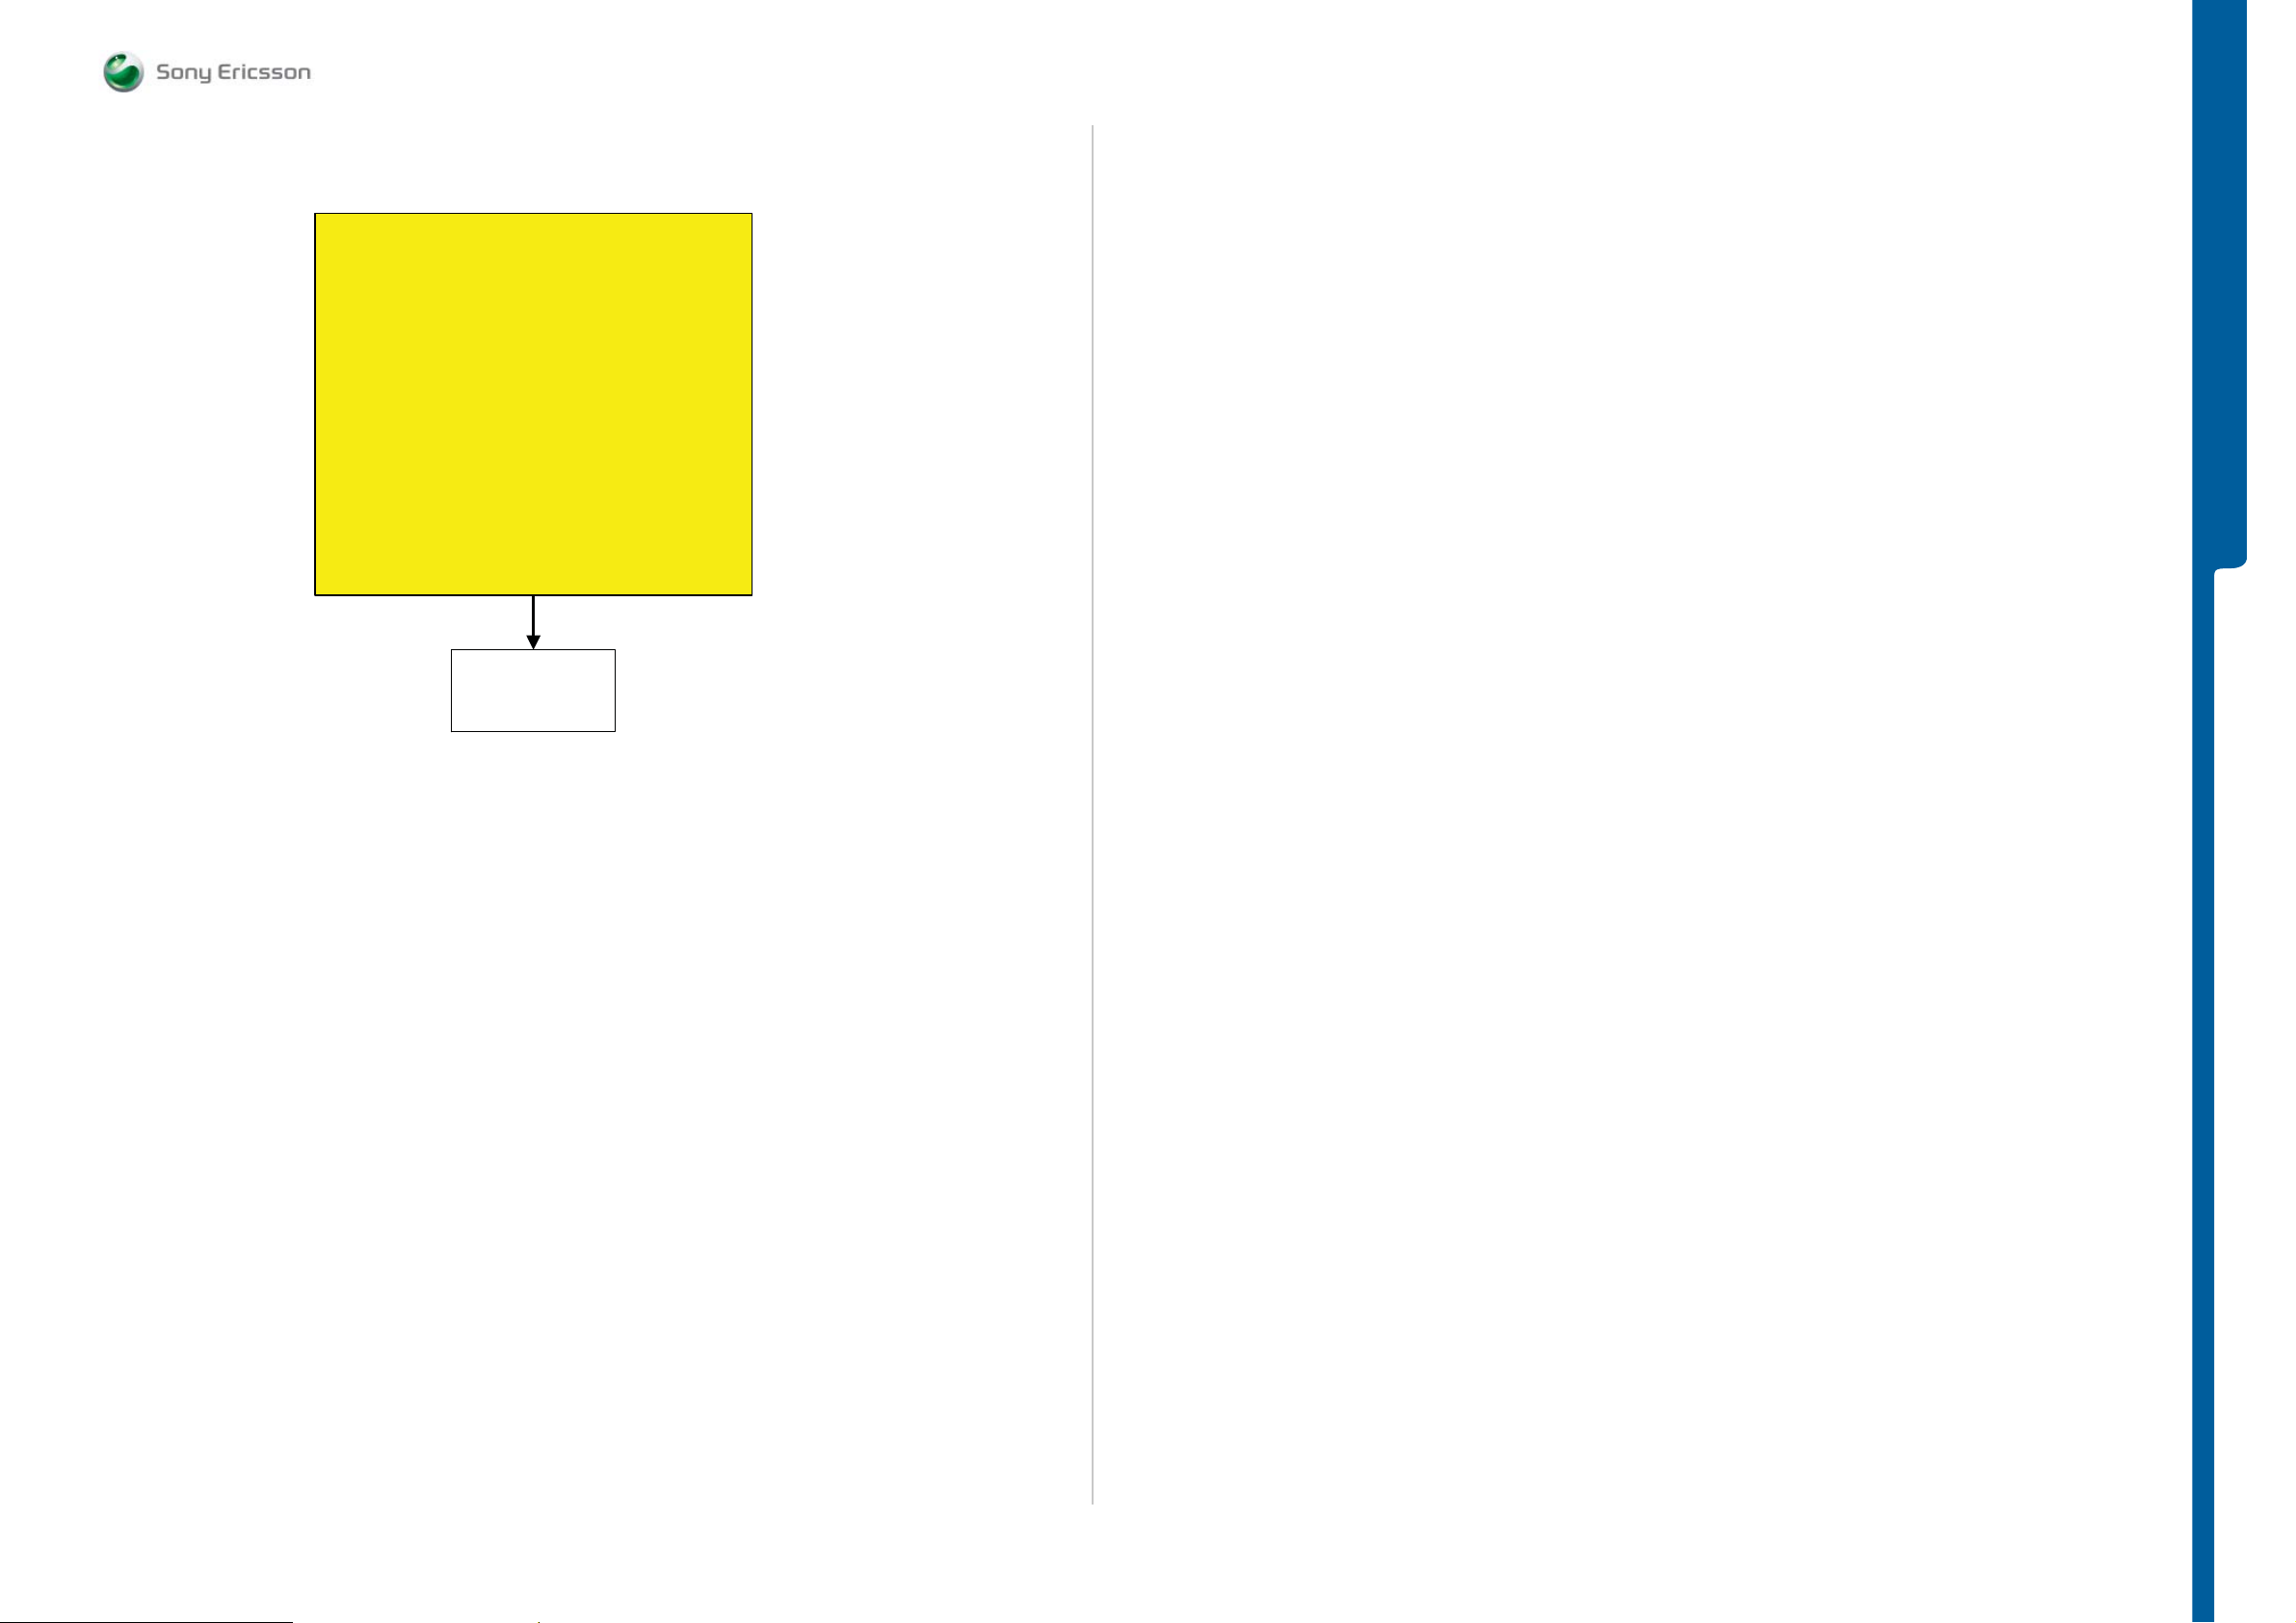
Trickle Charge LED Problems
START
Load ITP SW into the Phone
Use TRS Fixture
Connect: PBA Key Navi and Slider Flex Module
to the PBA
Connect: VBATT and DCIO/SEPI
Use Fault Trace SW and go to:
MMI
Misc
Init Screen Testing
Led and Backlight
Activate:
Charge LED
If the Trickle Charge LED is working on the TRS Fixture
then Replace PBA Key Navi or Slider Flex Module
If not continue with the
Trickle Charge LED Problems TRS guide
TROUBLESHOOTING Trickle Ch a rg e LED Problems
SEMC Troubleshooting Manual
G705 - W705 - W715
TROUBLESHOOTING
SL 4 Replace
X4200
SL 5 Replace
N2000
1225-4035 rev. 1
18 (122)
Page 19
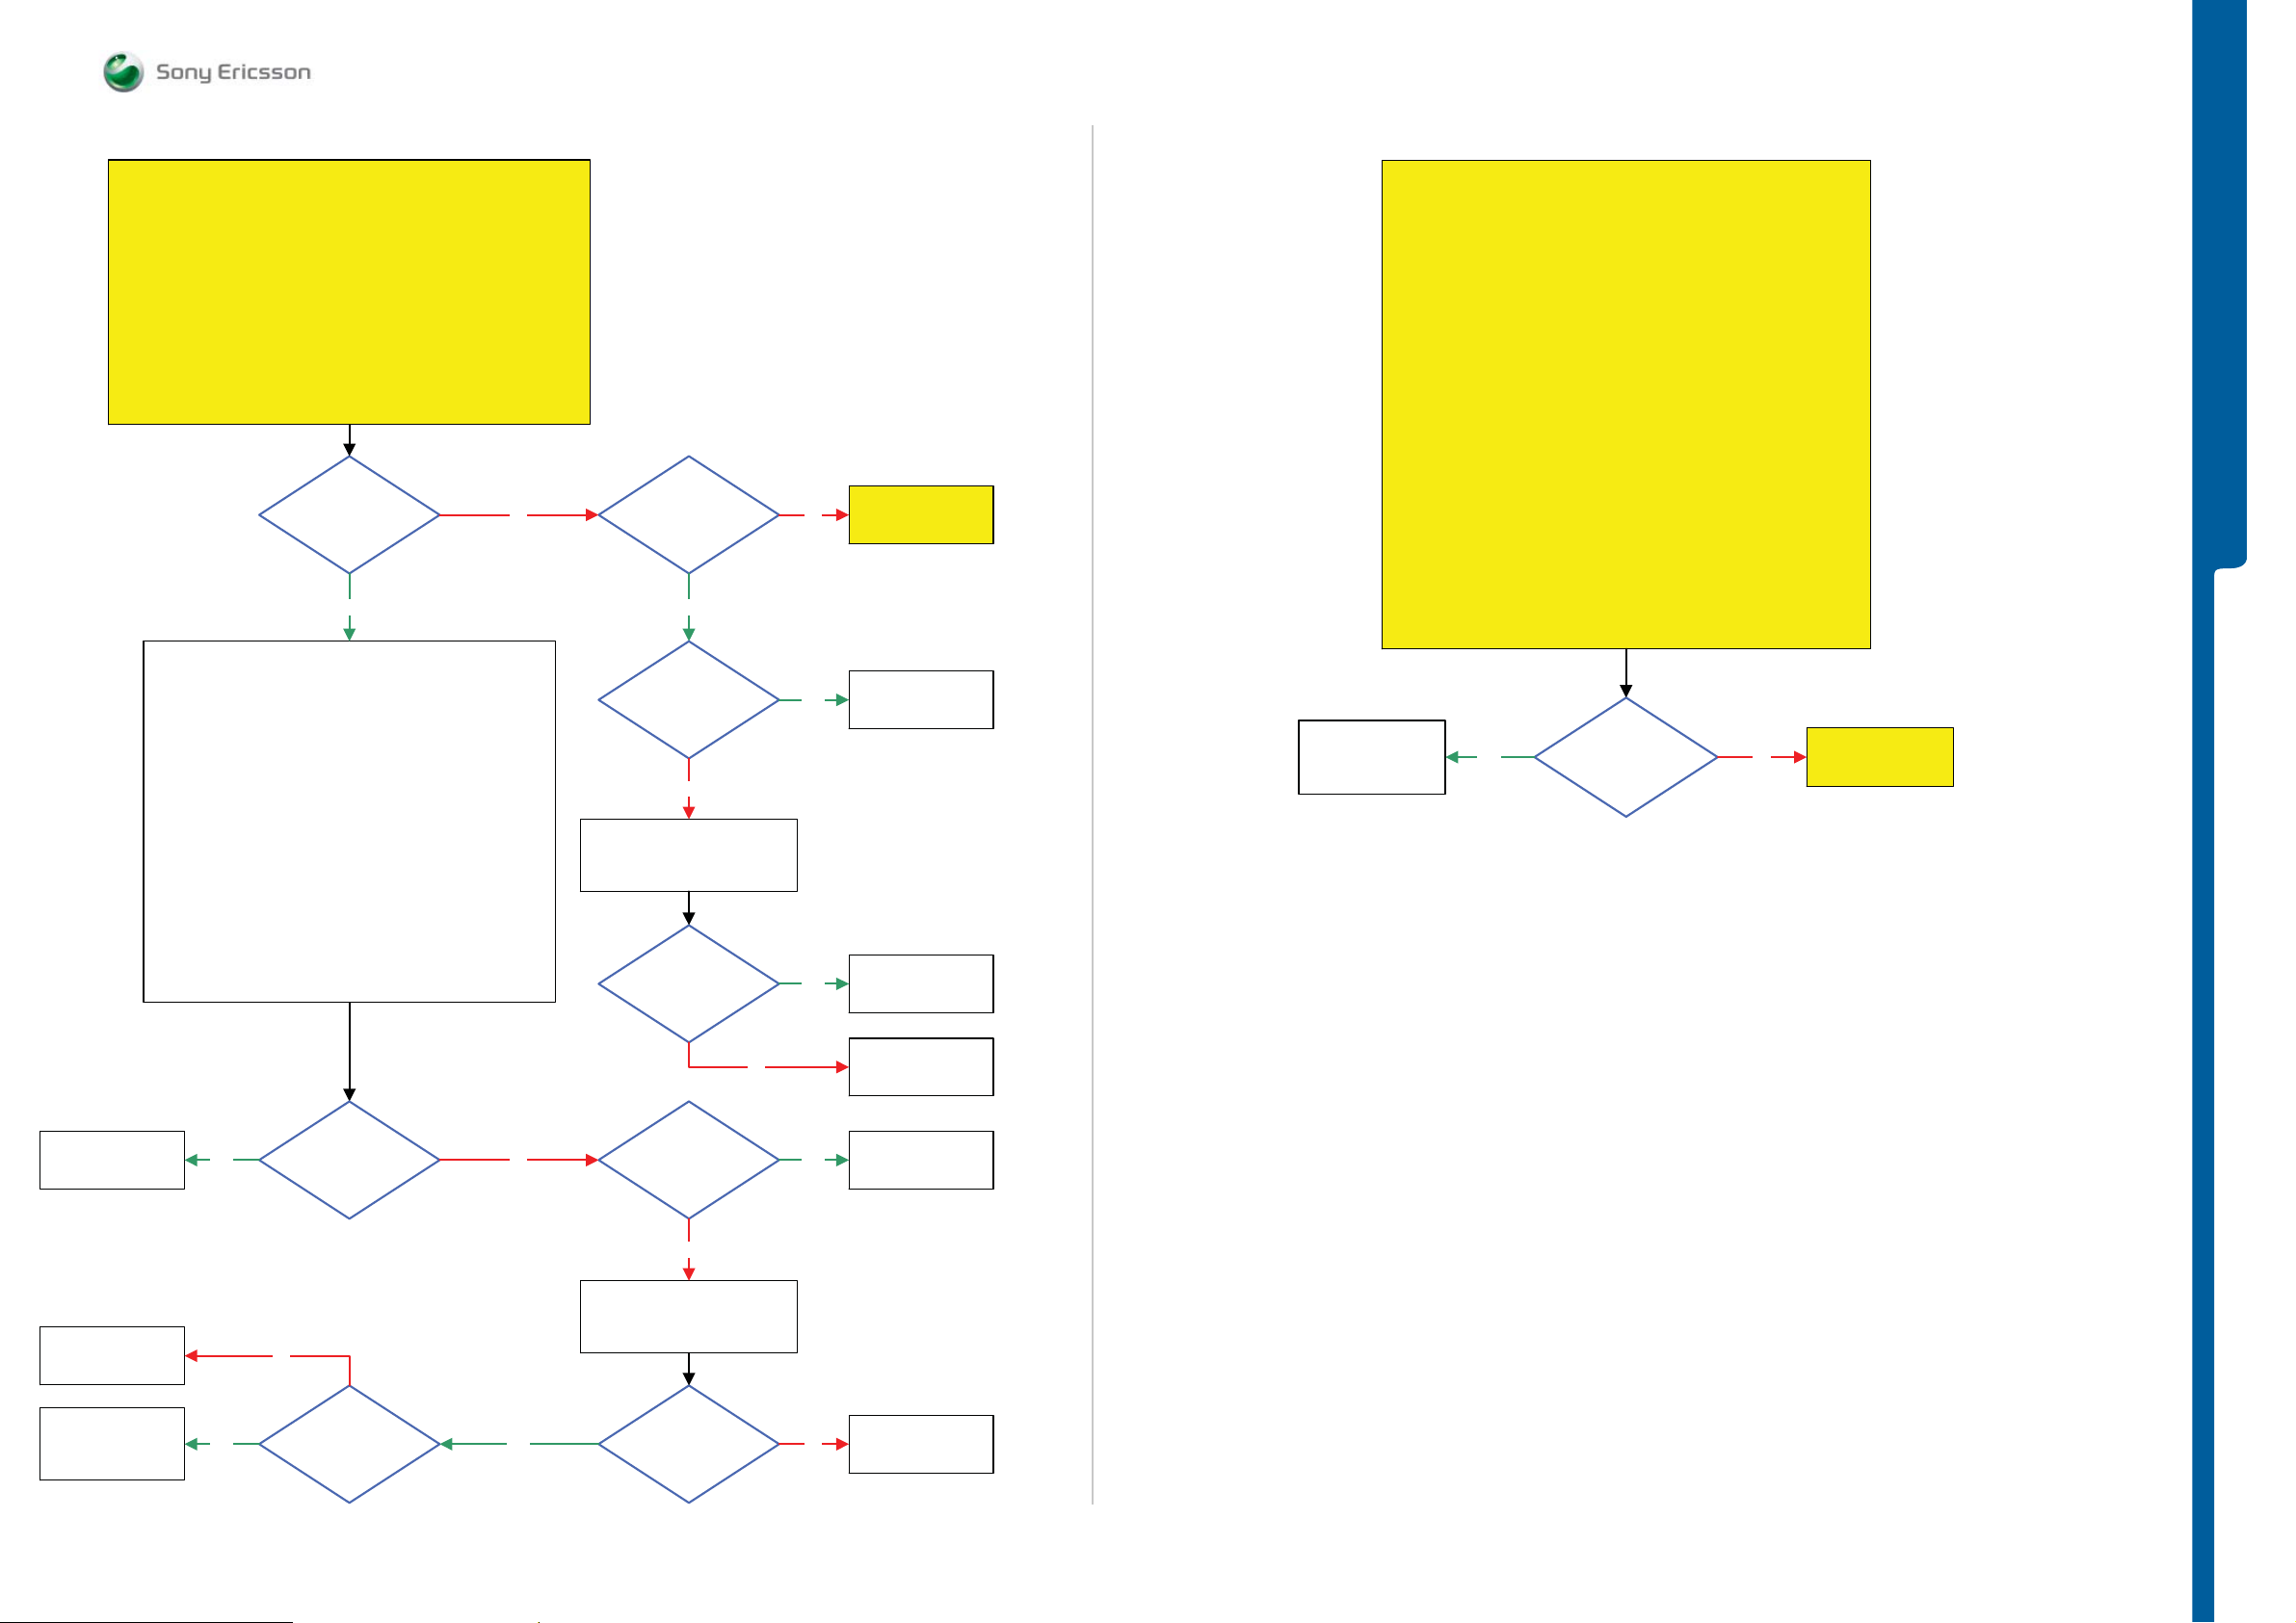
TROUBLESHOOTING Main Camera Proble m s
- VGA Camera Problems
SEMC Troubleshooting Manual
G705 - W705 - W715
Main Camera Problems
START
Flash the Phone with EMMA SUCR SW and go to
If both tests are successful then claim SW Flash
If not then continue with the Main Camera Problems TRS guide
The Main Camera is the same as Camera
The VGA Camera is the same as Video call camera
The Main Camera 3.2 Mpixel CMOS must be mounted inside
the X4300 when performing this TRS guide.
Ignore this messages if they appear
(In the right corner of the Fault Trace SW)
”
...timeout when reading” and
Service Tests Menu
Perform Main and VGA Camera Tests
Info:
Is the
Problem with both
Main and VGA
Camera
Yes
1: Load ITP SW into the Phone
2: Use TRS Fixture
Connect: VBATT and DCIO/SEPI
3: Use Fault Trace SW and go to:
MMI
Misc
Init Screen Testing
Activate:
Main Camera Test
NOTE !
NOTE !
in the Trace window
”Error_CommandFailed, ERR”
No
Is the
VGA Camera
Ok
Yes
Is X4300
Damaged /
Bad connection
No
Replace
Main Camera 3.2 Mpixel CMOS
Is the
Main Camera
Ok
No
Problems TRS guide
Yes
Yes
3.2 Mpixel CMOS
Go to
VGA Camera
Replace
X4300
Claim
Main Camera
Flash the Phone with EMMA SUCR SW and go to Service Tests Menu
Connect: Slider Flex Module, PBA Key Navi and Display to the PBA
SL 4 Replace
X4200
SL 5 Replace
N2600 or N2010
VGA Camera Problems
START
Step 1:
Perform the: Main and VGA Camera Tests
If the tests are successful then claim SW Flash
Load ITP SW into the Phone and go to step 3.
If the VGA Camera is working properly on the TRS Fixture then
If not then continue with the VGA Camera Problems TRS guide
(Info: The Main Camera is the same as Camera
The VGA Camera is the same as Video call camera)
Yes
if not go to step 2.
Step 2:
Step 3:
Use TRS Fixture
Connect: VBATT and DCIO/SEPI
Use Fault Trace SW and go to:
MMI
Misc
Init Screen Testing
Activate:
VGA Camera Test
Replace Slider Flex Module
Is the
Main Camera
Ok
No
Problems TRS guide
TROUBLESHOOTING
Go to
Main Camera
Replace
N2203
SL 5 Replace
L2100 or N2010
SL 4 Escalate
SL 4 Replace
N2203 or N2204
SL 5 Replace
N2010
Yes
Yes
1.8 Volt DC
at MP 40 (TP2214)
No
13 MHz
CAMSYSCLK at
MP 32 (R4303) Shortly
after the Main Camera
Test has been
activated
No
Yes
No
2.8 Volt DC
at MP 38 (TP2213)
And 1.8 Volt DC at
MP 26 (TP2215)
No
Use Fault Trace SW and
Repeat the Main Camera Test
More than
2 Volt Pk-Pk Pulses
at MP 31 (R2282) Shortly
after the Main Camera
Test has been
activated
Yes
No
Replace
N2203
Replace
N2204
SL 5 Replace
N2010
SL 4 Escalate
1225-4035 rev. 1
19 (122)
Page 20
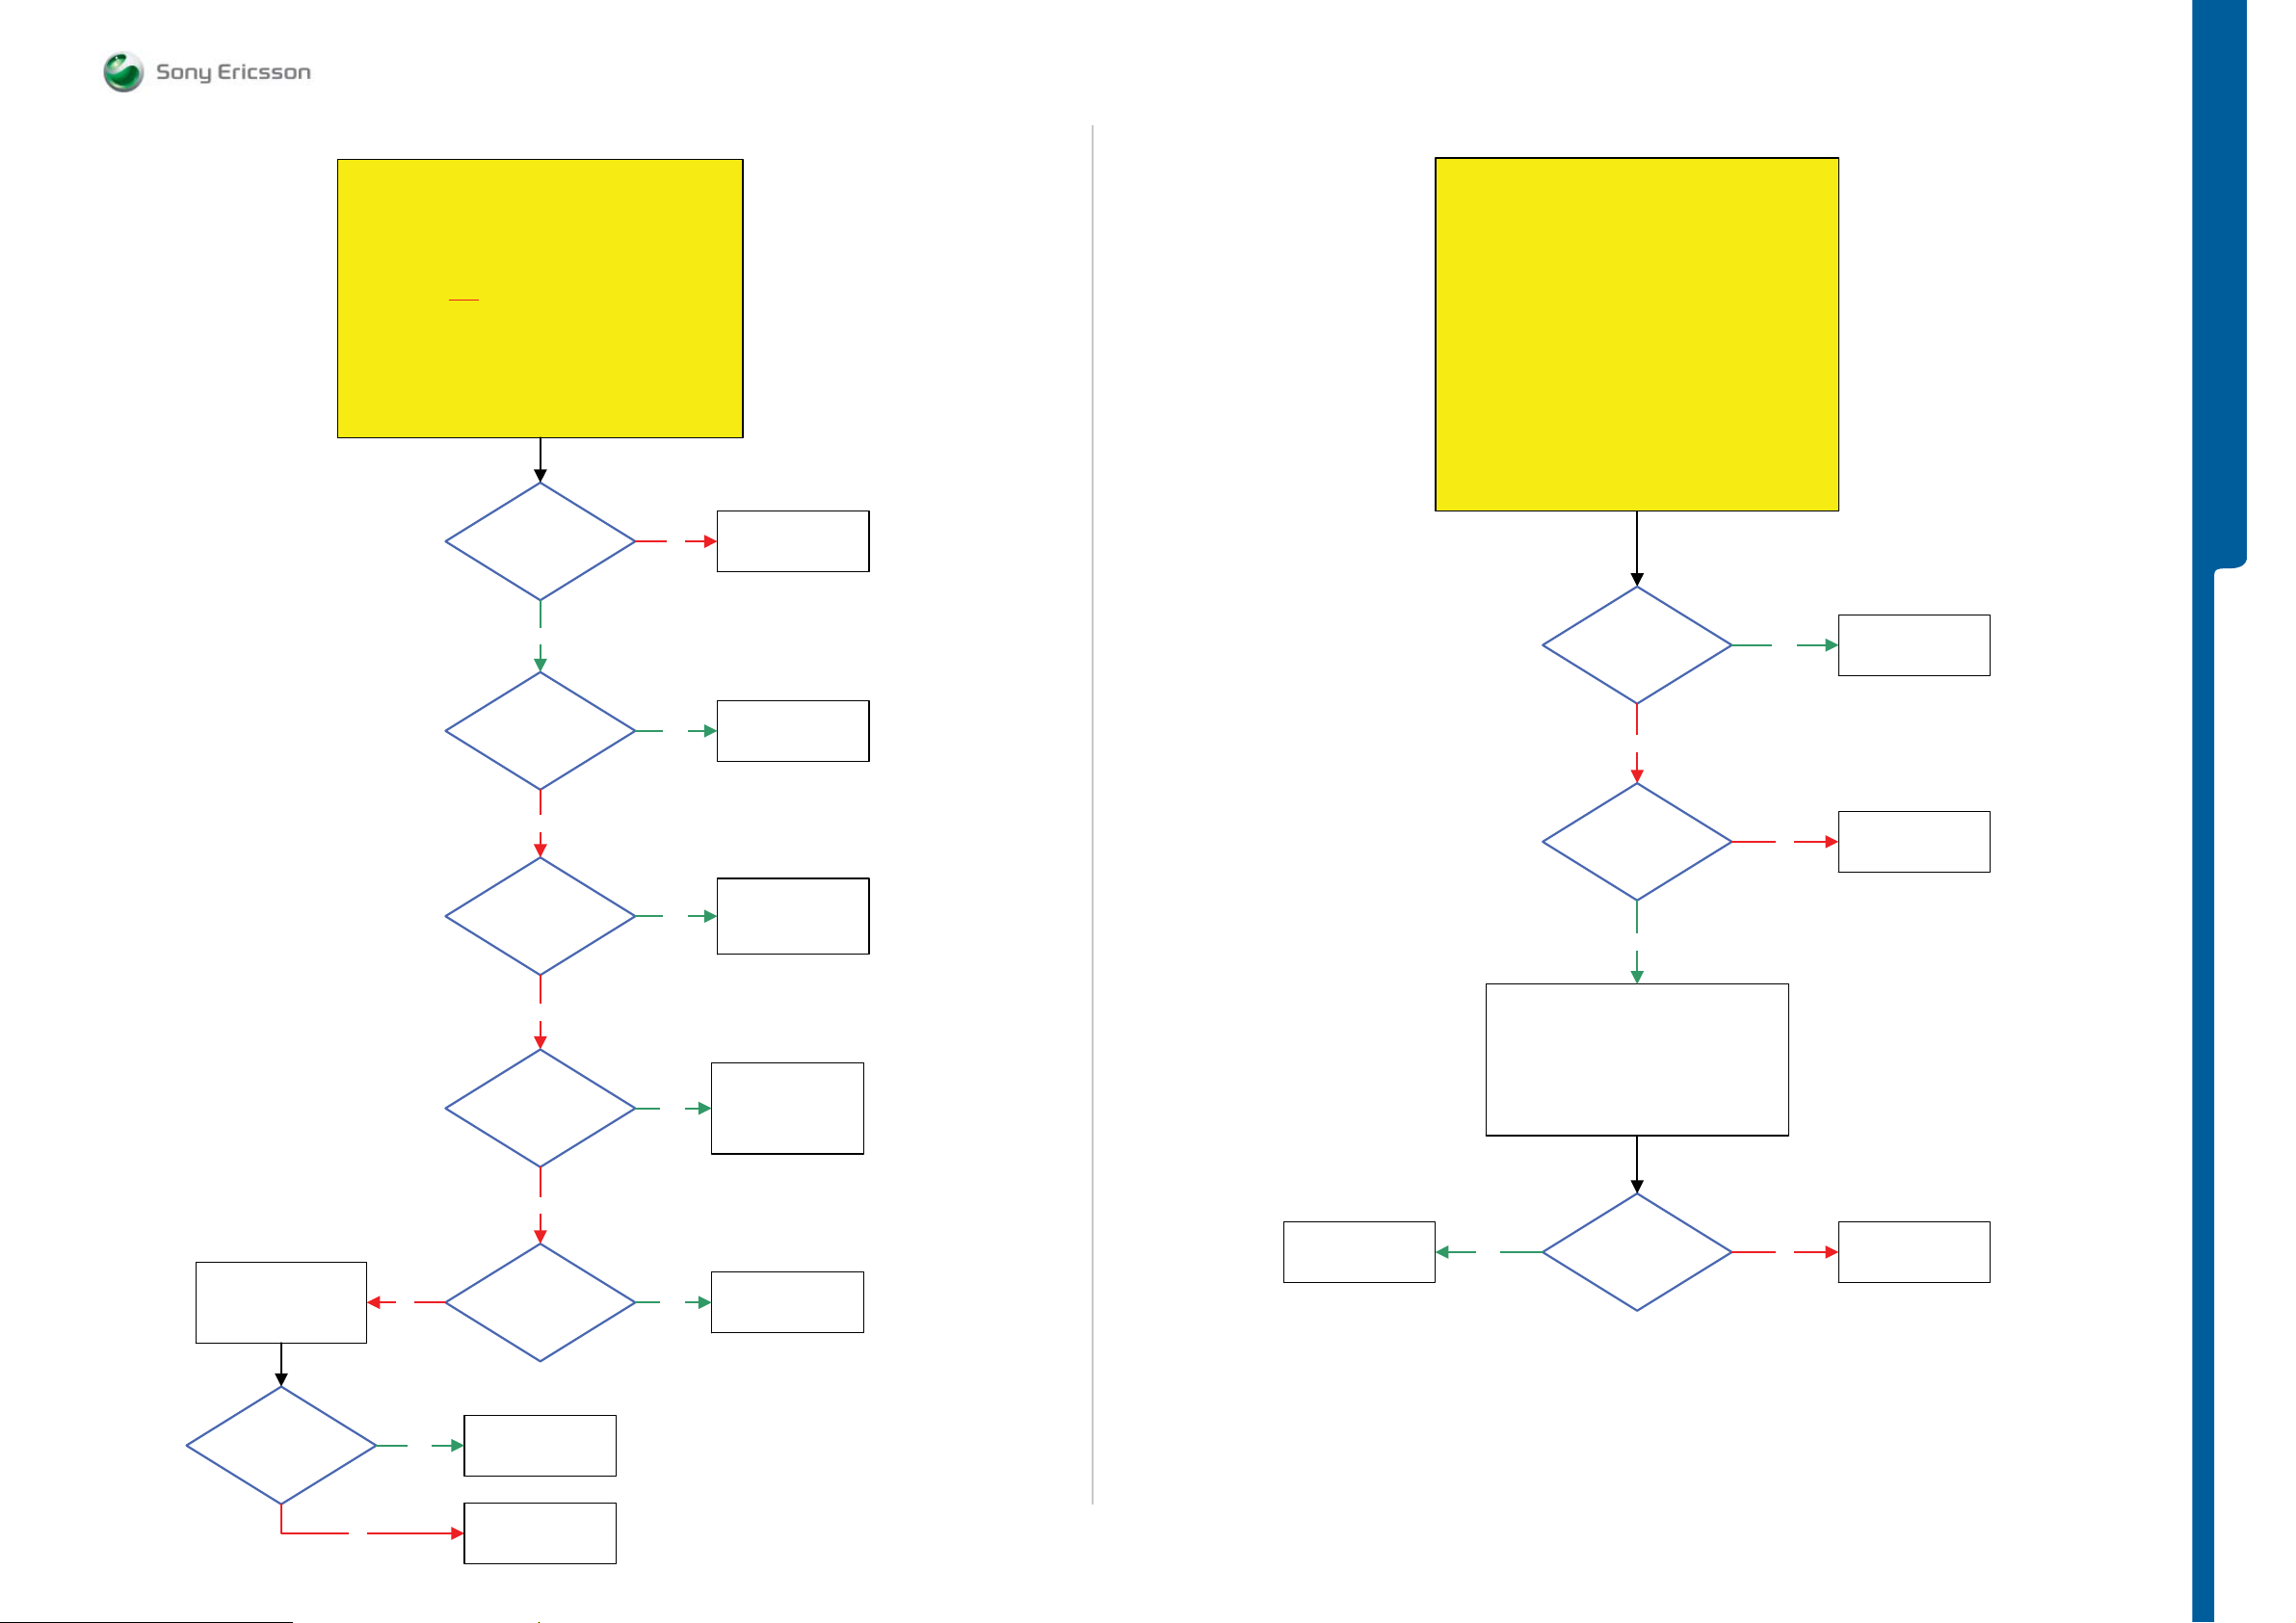
TROUBLESHOOTING Charging Problems
- USB/VBUS Charging Problems
SEMC Troubleshooting Manual
G705 - W705 - W715
Charging Problems
START
Step 1:
Perform Charging Test
If NOT
successful go to step 2.
Step 2:
Use TRS Fixture
Connect:
VBATT and DCIO/SEPI
3.8 Volt DC at
MP 34 (TP2201)
Yes
Is MP 33
(TP2202)
Short circuit to PBA
(Shield
GND
Can Fence)
No
Yes
Replace
X2201
Replace
V2200
USB/VBUS Charging Problems
START
Perform System Connector Protection Test
If successful go to step 2.
Use Phone with Normal SW (SSW)
Use TRS Fixture and connect: VBATT
Connect: USB Cable from the PC to the Phone
Step 1:
Step 2:
5V – 5.2V DC at
MP 62 (C2433)
No
Yes
TROUBLESHOOTING
SL 5 Replace
N2000
SL 4 Escalate
Disconnect:
VBATT and DCIO/SEPI
No
No
5 Volt DC at
MP 16 (C2440)
No
Is
MP 16
(C2440) and MP 17
(C2441) Short circuit to
GND (Shield Can
Fence)
No
5 Volt DC at
MP 13 (X2405_Pin 12)
Yes
Yes
Yes
SL 4 Replace
V2202
SL 5 Replace
N2000
SL 4 Replace
V2202
SL 5 Replace
C2440, C2441 or
N2000
Replace
R2490
Replace
N2421
Yes
5V – 5.2V DC at
MP 6 (X2405_Pin 1)
Yes
Disconnect:
VBATT and USB Cable
Is
L2452 = Max 1 Ohm
No
No
Replace
X2405
Replace
L2452
R2449 = Max 1 Ohm
Is
No
Yes
Replace
X2405
Replace
R2449
1225-4035 rev. 1
20 (122)
Page 21
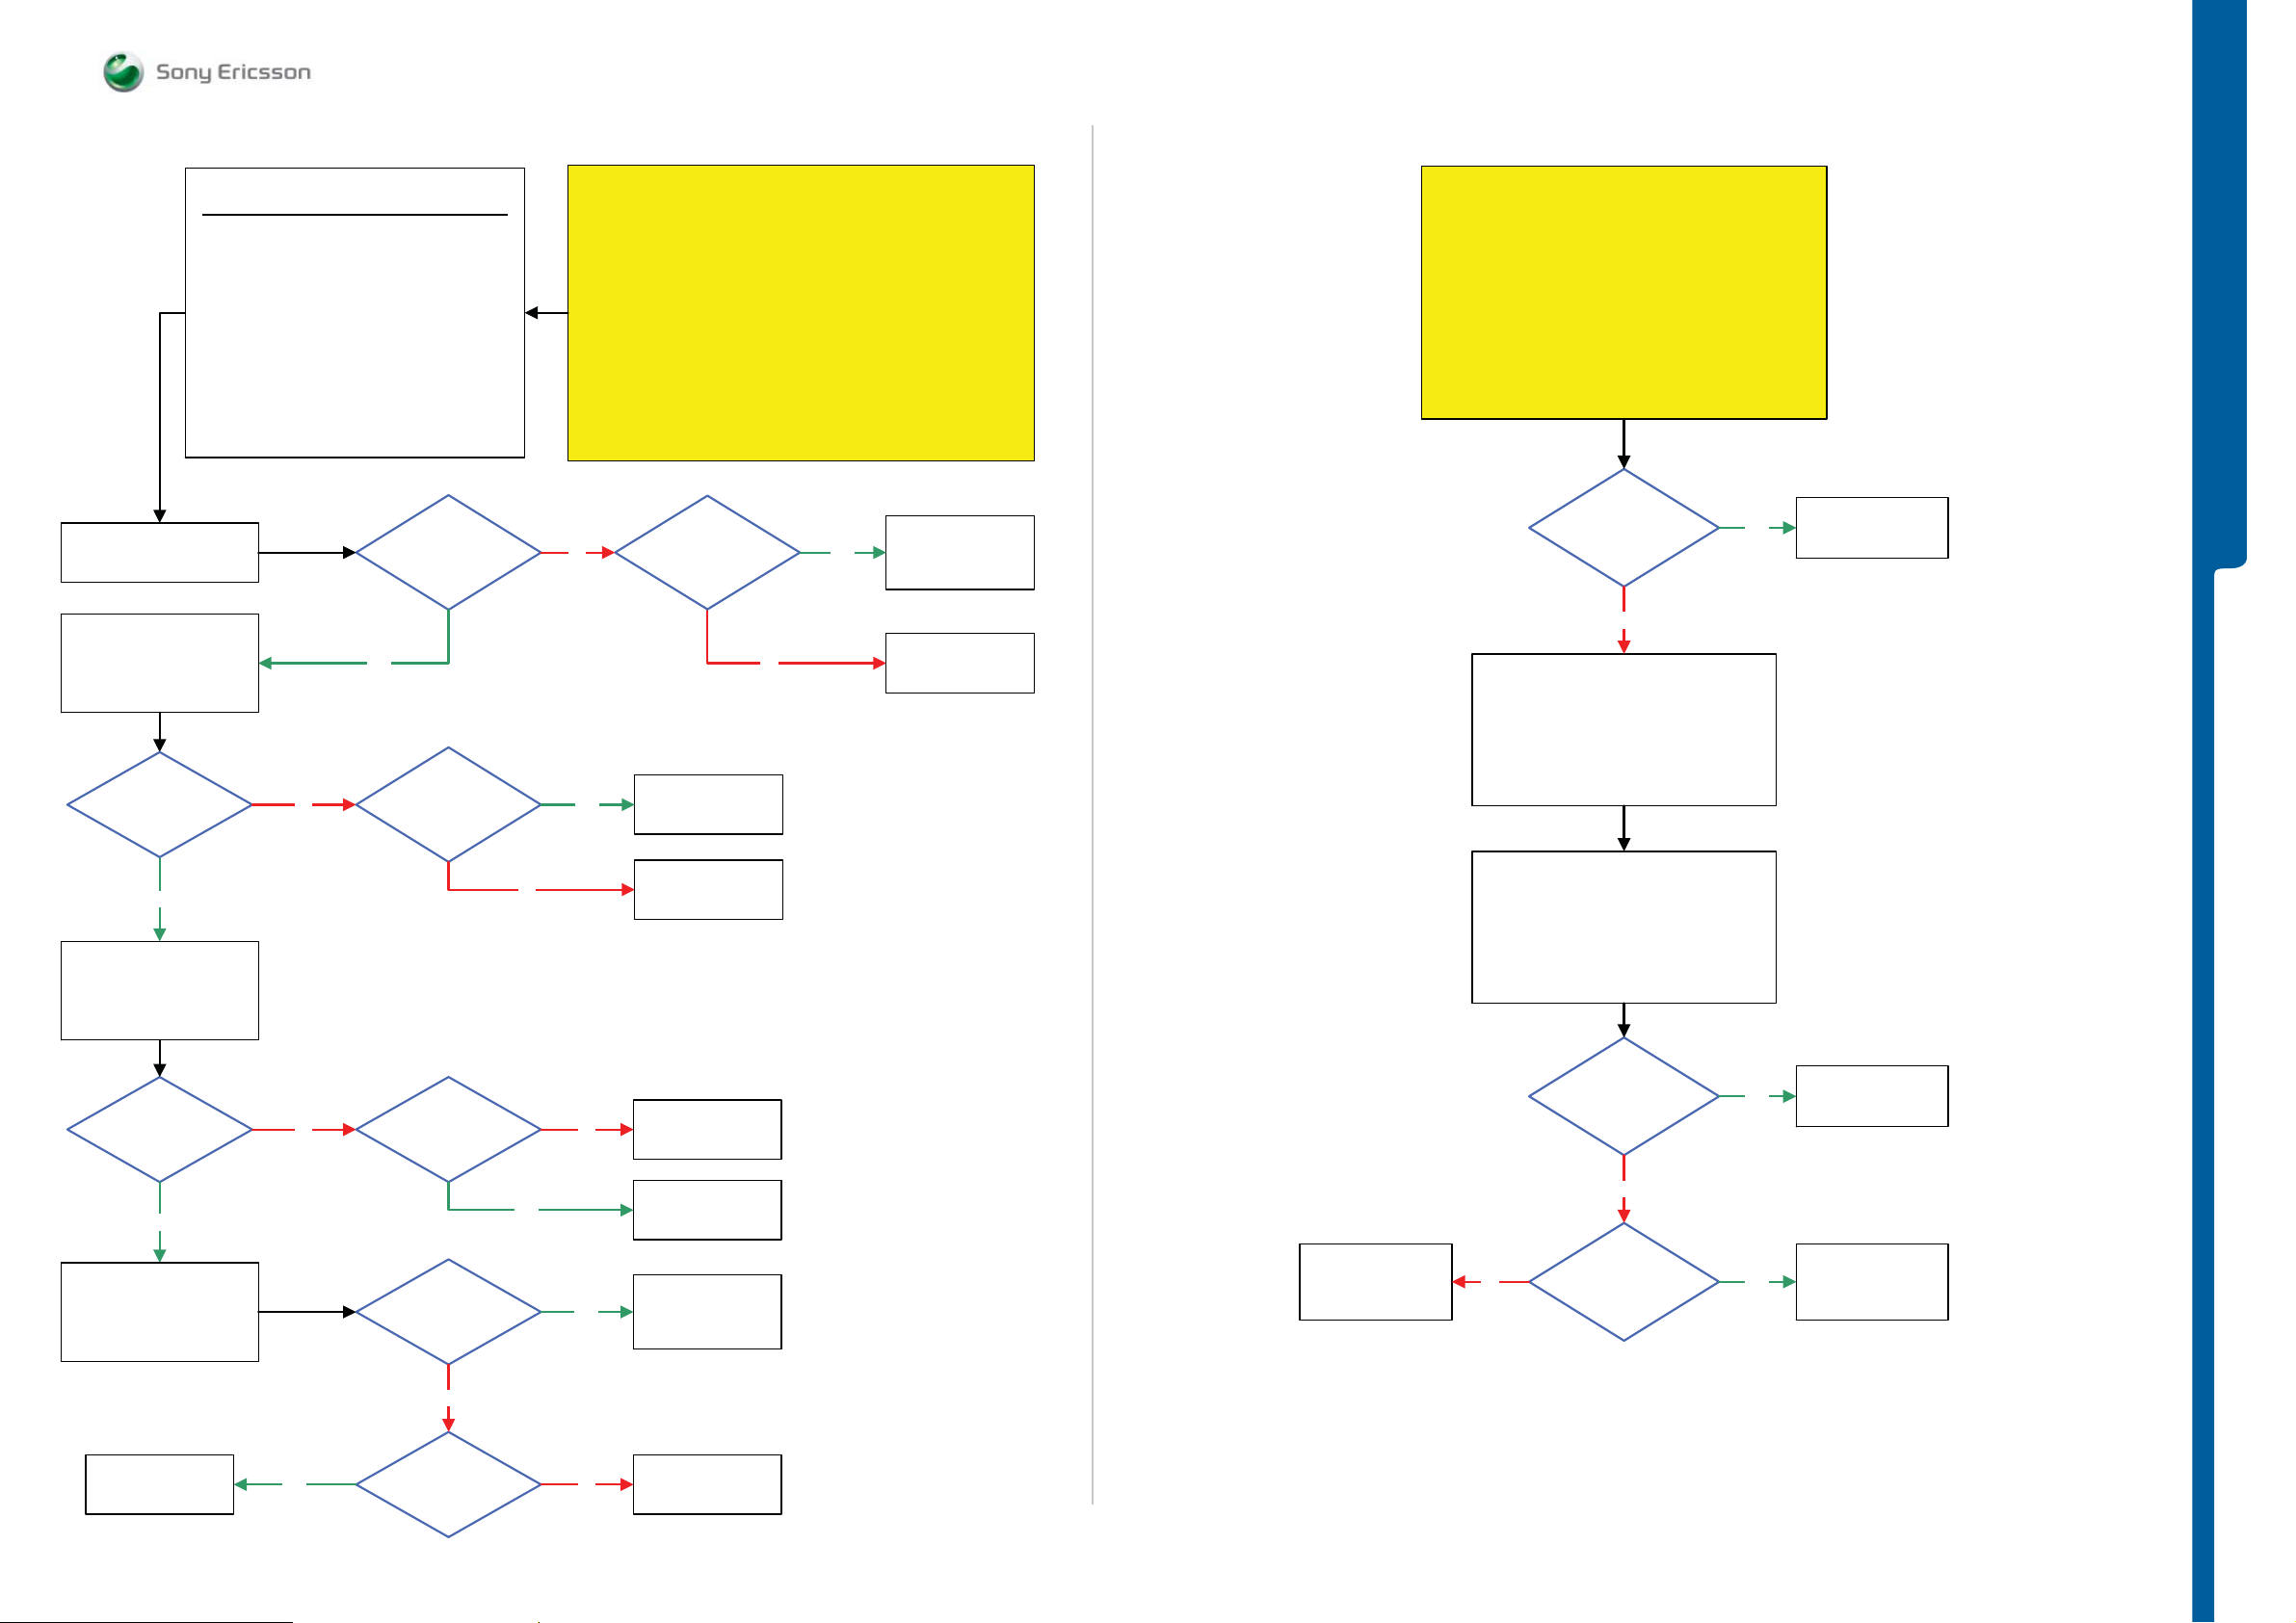
TROUBLESHOOTING SIM Problems
- Memory Stick Problem s
SEMC Troubleshooting Manual
G705 - W705 - W715
Activate:
SIMVCC
SIMVCC On
Activate:
SIMRSTn
1.8 Volt DC at
MP 20 (C2419)
SIM Problems
Please follow the instructions from 1 to 5
1: Disconnect: VBATT and DCIO/SEPI
2: Disconnect: SIM Flex Module from the PBA
3: Restart the Fault Trace SW
4: Connect: VBATT and DCIO/SEPI
5: Use Fault Trace Sw and go to:
Logic
SIM Card Control
Yes
No
1.8 Volt DC at
MP 14 (C2420)
Is C2419
Short circuit
START
Load ITP SW into the Phone
Connect: SIM Flex Module to the PBA and Insert the Test SIM
If the SIM Com Test is passed then Replace SIM Flex Module
If not then continue with the SIM Problems TRS guide
No Yes
Yes
V2477 or C2414 Short
Connect: VBATT and DCIO/SEPI
Use Fault Trace SW and go to:
and Flash the Phone with EMMA SUCR SW
Is any of C2420,
circuit
SL 5 Replace
C2419
SL 4 Escalate
Step 1:
Step 2:
Use TRS Fixture
Logic
SIM Card Control
Activate:
SIM Com Test
SL 5 Replace
C2420, V2477
SL 4 Escalate
SL 5 Replace
No
SL 4 Escalate
or C2414
N2000
Memory Stick Problems
START
Is X2403
damaged
No
Load ITP SW into the Phone
Insert Memory M2 Card
Use TRS Fixture
Connect:
VBATT and DCIO/SEPI
Use Fault Trace SW
Yes
TROUBLESHOOTING
Replace
X2403
Yes
SIMVCC On
SIMRSTn On
Activate:
SIMCLK
1MHz and
1.8V – 2V Pk-Pk at
MP 110 (R2410)
Yes
SIMVCC On
SIMRSTn On
SIMCLK On
Activate:
SIMDAT
No
1MHz and
1.8V-2.2V Pk-Pk at
MP 35 (SP2410)
1.8 Volt DC at
MP 111 (R2411)
No
No
Yes
No
Yes
SL 5 Replace
N2000 or N2010
SL 4 Escalate
SL 5 Replace
N2010
SL 4 Escalate
SL 5 Replace
N2000
SL 4 Escalate
SL 4 Replace
X2402
SL 5 Replace
R2416
SL 4 Replace
X2403
SL 5 Replace
N2000
No
Fault trace SW
Logic
SIM Card control
Activate:
Memory Stick Test
Is the
Memory Stick Test
Passed
No
1.8 Volt DC at
MP 47 (C2421
VMC18)
Flash the Phone with
Yes
Yes
EMMA SUCR SW
SL 4 Replace
X2403
SL 5 Replace
N2010
SL 5 Replace
N2000
SL 4 Escalate
Yes
1.8 Volt DC at
MP 108 (C2413)
No
SL 5 Replace
C2413 or N2010
SL 4 Escalate
1225-4035 rev. 1
21 (122)
Page 22
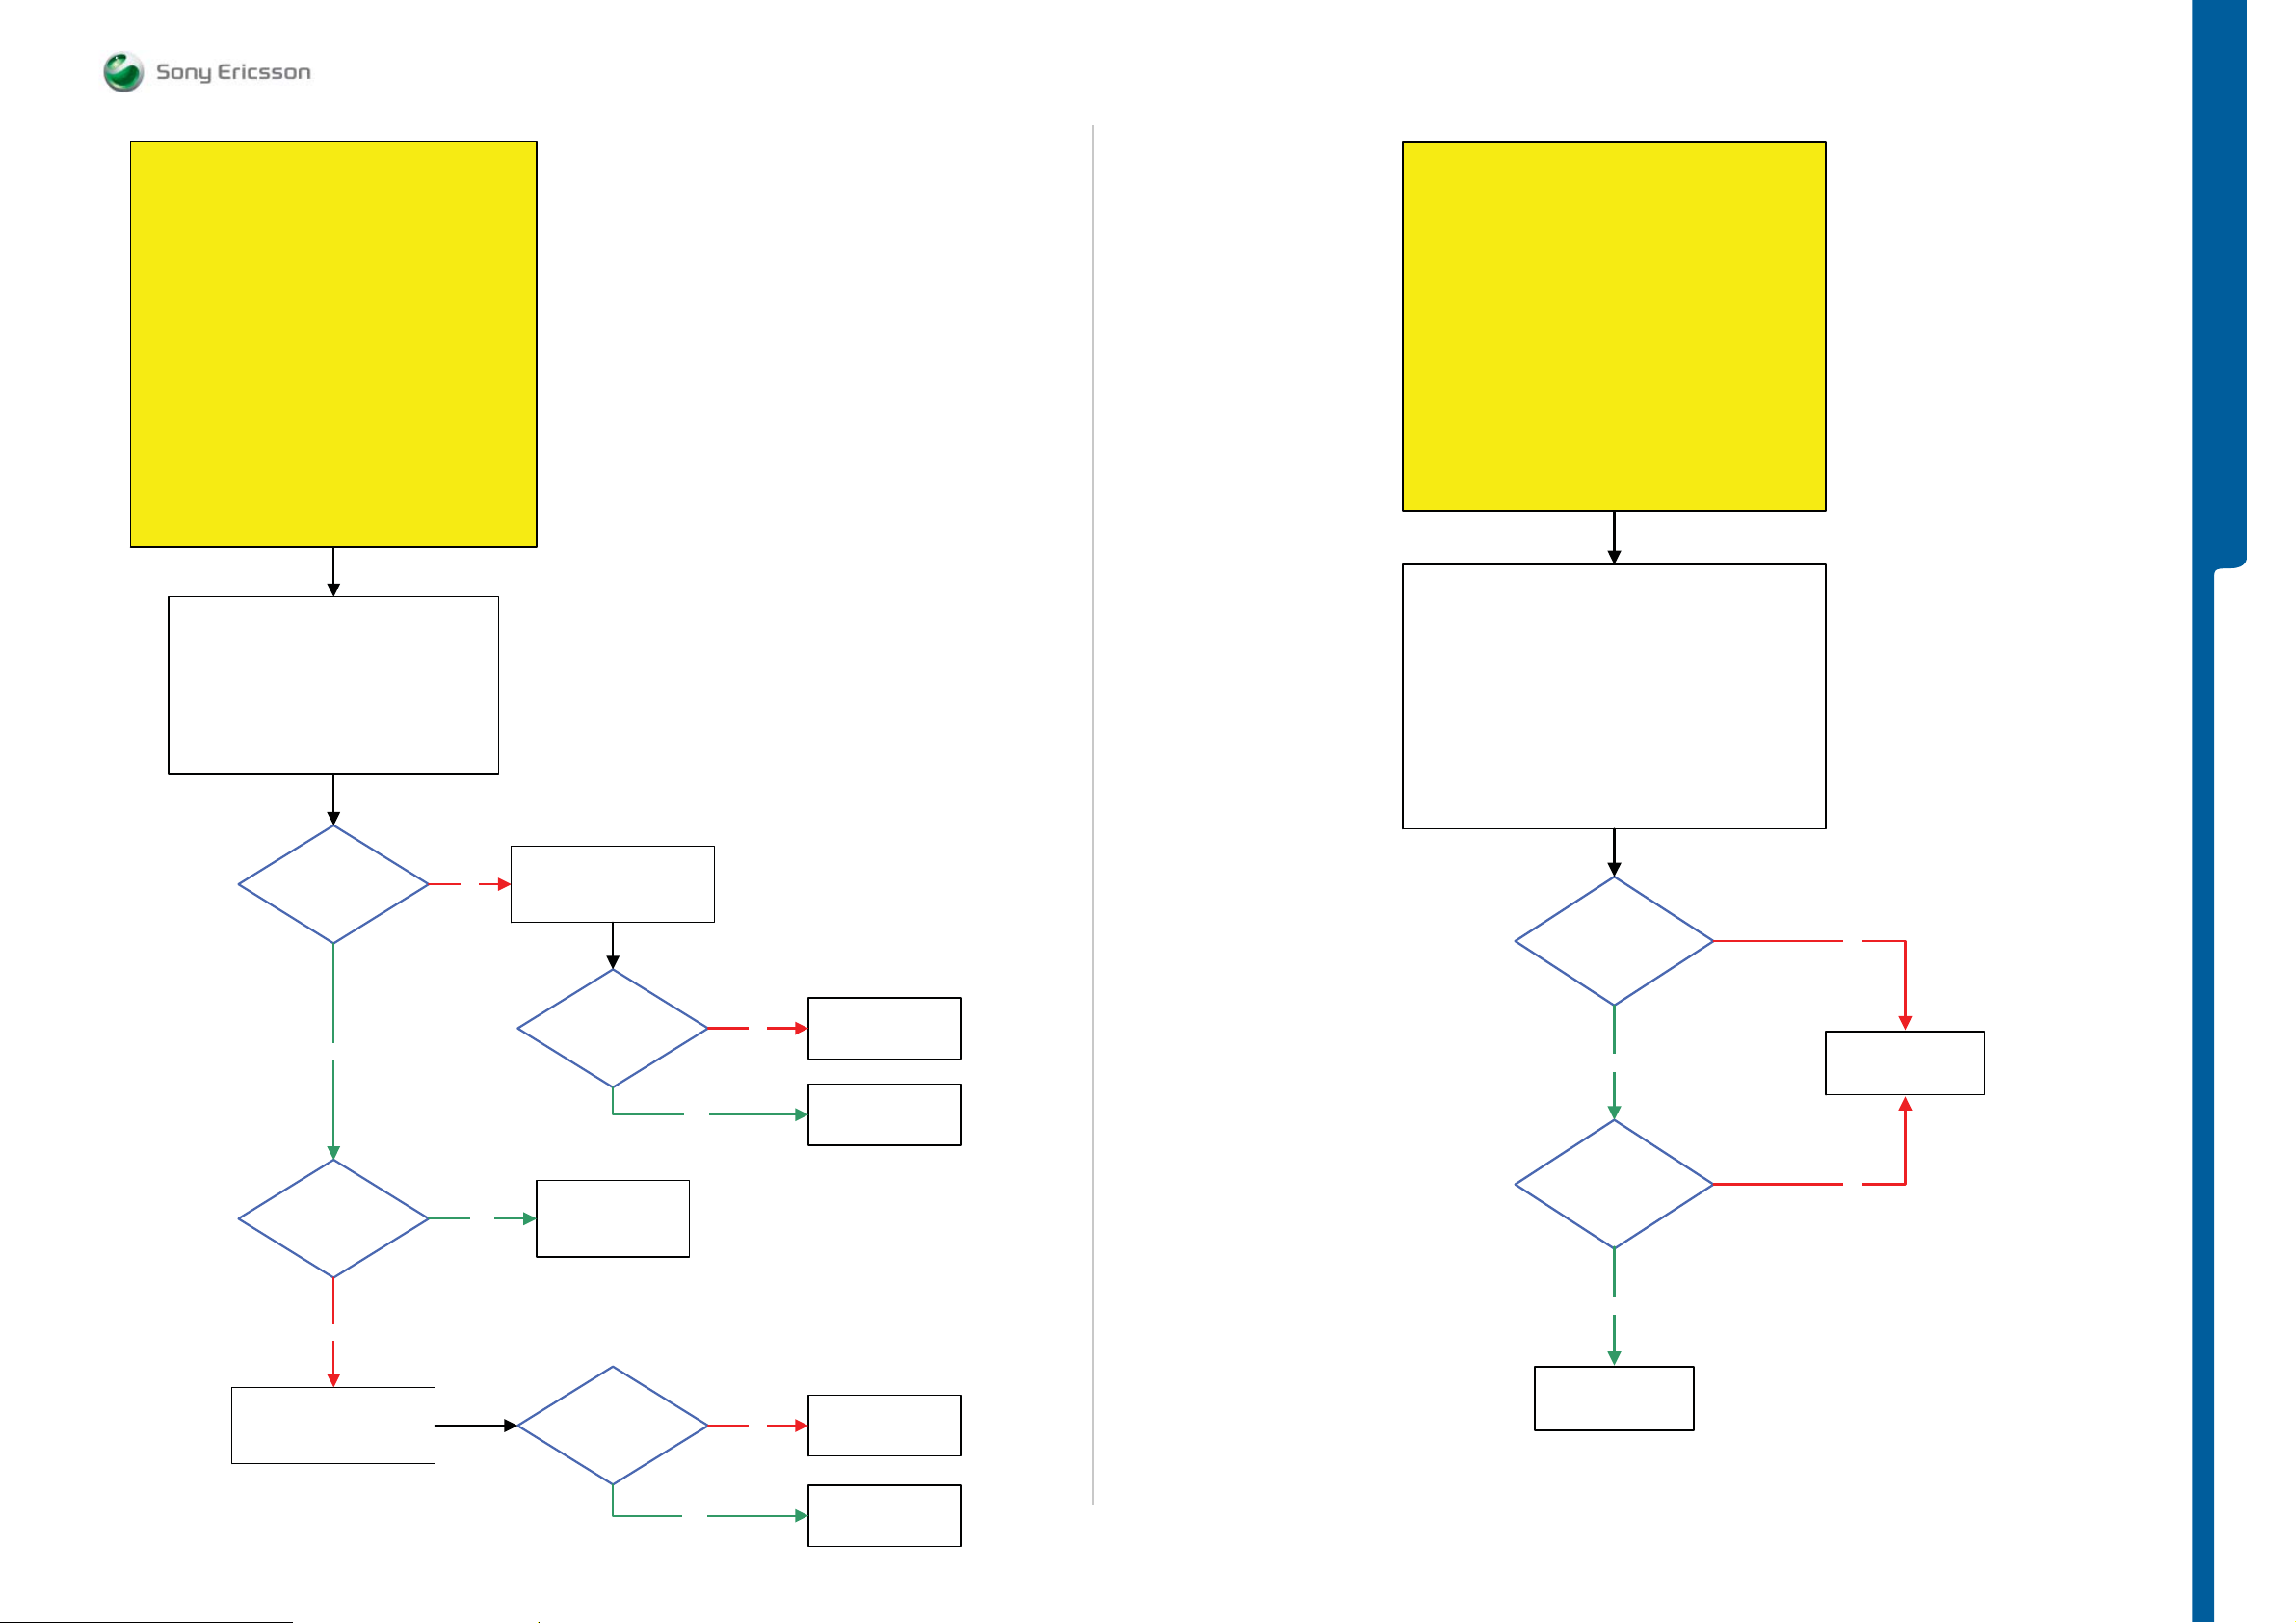
Microphone Problems
TROUBLESHOOTING Microphone Problems
- Earphone Problems
Earphone Problems
START
SEMC Troubleshooting Manual
G705 - W705 - W715
START
Step 1:
Use TRS Fixture
Connect: VBATT and DCIO/SEPI
Use Fault Trace SW
Step 2:
Continue with the
Microphone Problems TRS guide
Use Fault Trace SW and go to:
Audio and FM Radio
Audio Loop Test
Audio Input: Mic1
Loop Mode: Analog
Audio Output: Loudspeaker
Apply Audio Loop
Replace Slider Flex Module and retest the Phone
Step 1:
If successful claim Slider Flex Module
If not go to step 2.
Step 2:
Replace PBA Key Navi and retest the Phone
If successful claim PBA Key Navi
If not go to step 3.
Step 3:
Load ITP SW into the Phone
Use TRS Fixture
Connect: VBATT and DCIO/SEPI
Use Fault Trace SW
Use Hands-Free (PHF) and continue with the
Earphone Problems TRS guide
1: Use Fault Trace SW and go to:
Audio and FM Radio
Audio Loop Test
Audio Input: AUX1
Loop Mode: Analog
Audio Output: Earphone
Apply Audio Loop
2: Remove the DCIO/SEPI Cable from the PBA
and Insert the Hands-Free (PHF) set to the PBA
TROUBLESHOOTING
2.2 Volt DC at
MP 87 (L3122)
Yes
0.7V – 1V DC at
MP 86 (L3120)
No
Disconnect:
VBATT and DCIO/SEPI
No
Yes
Disconnect:
VBATT and DCIO/SEPI
Is
L3122 = Max 1.5 Ohm
SL 4 Replace
B3100
SL 5 Replace
N2000
Is
L3120 = Max 1.5 Ohm
L3101 = Max 1.5 Ohm
Yes
No
No
SL 5 Replace
L3122
SL 4 Escalate
SL 5 Replace
N2000
SL 4 Escalate
SL 5 Replace
L3122 or L3101
SL 4 Escalate
2.6 Volt DC
at MP 66 (R2306) and
MP 67 (R2301)
Yes
More than
100 mV AC Pk-Pk
at MP 39 (TP3104) and
MP 42 (TP3105) when
blowing into
PHF mic
Yes
Replace
X4200
No
SL 5 Replace
N2000
SL 4 Escalate
No
Yes
Replace
B3100
1225-4035 rev. 1
22 (122)
Page 23
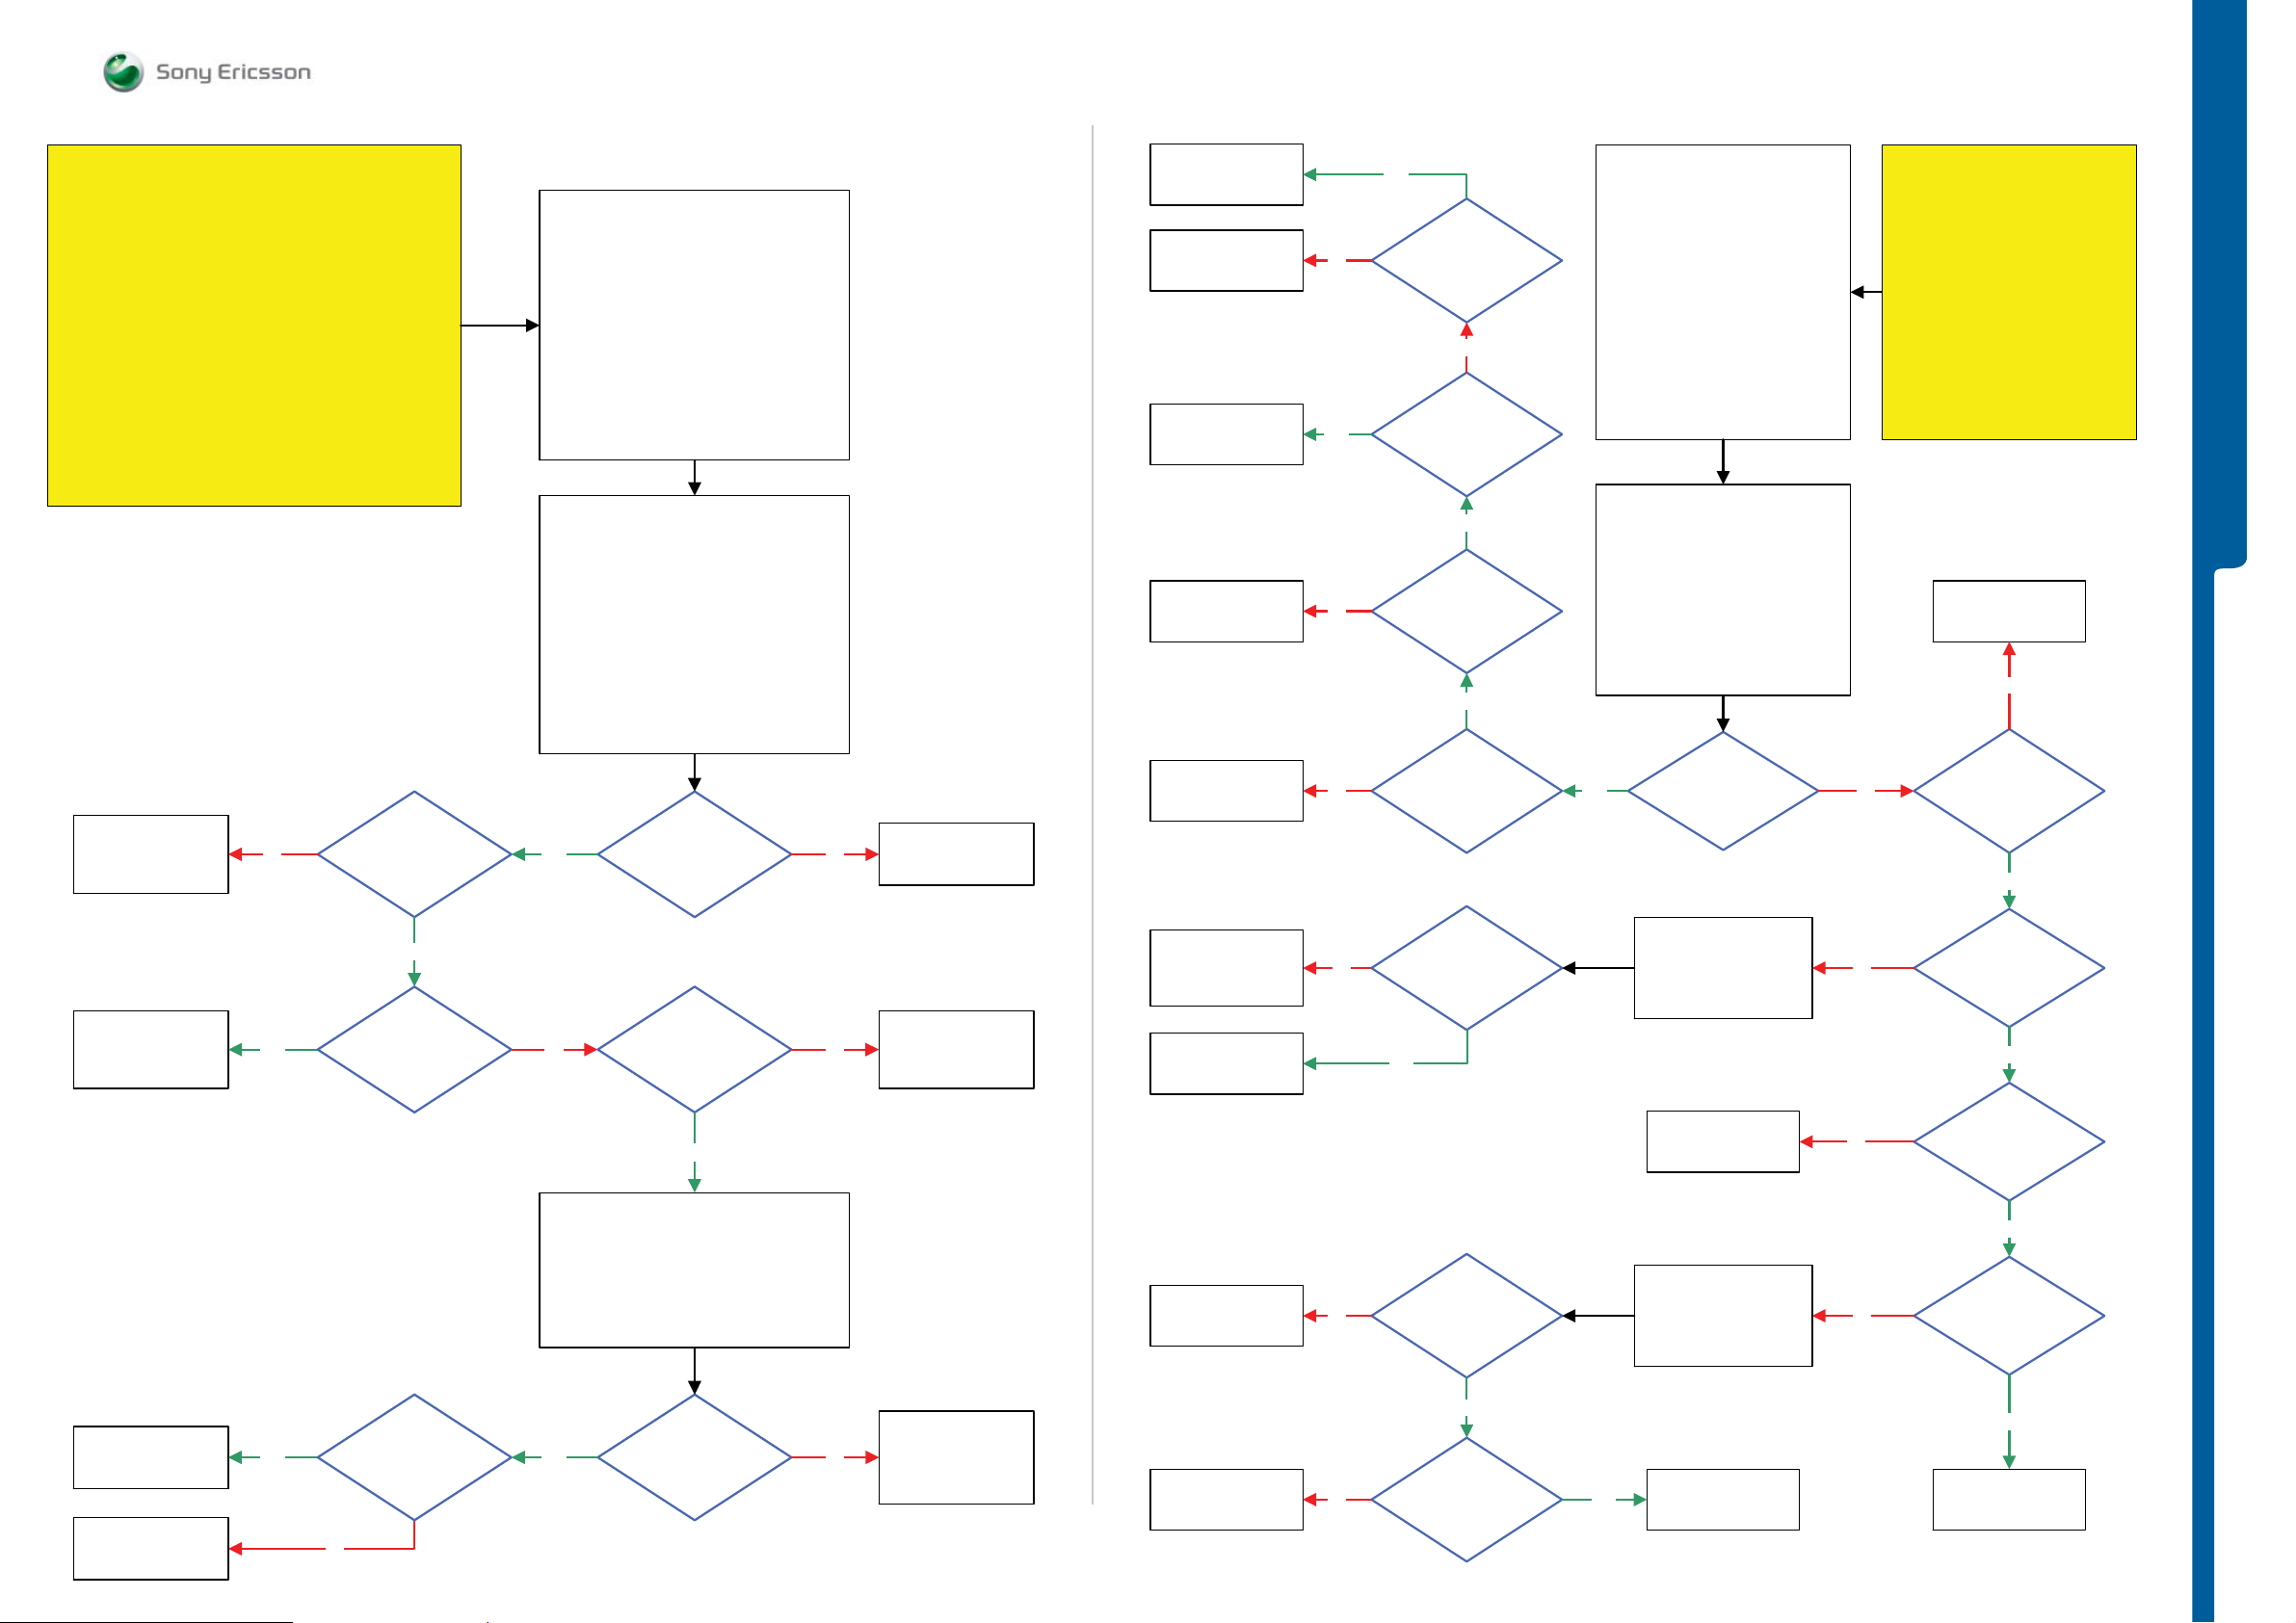
TROUBLESHOOTING Loudspe a ker Probl e m s
- Handsfree (PHF) Prob lems
SEMC Troubleshooting Manual
G705 - W705 - W715
START
Step 1:
Replace Loudspeaker and retest the Phone
If successful claim Loudspeaker
If not go to step 2.
Step 2:
Load ITP SW into the Phone
Use TRS Fixture
Connect: VBATT and DCIO/SEPI
Use Signal Generator Instrument
Use Fault Trace SW
Continue with the Loudspeaker Problems TRS guide
Loudspeaker Problems
Use Fault trace SW and go to:
1: Audio and FM Radio
Audio Output: Loudspeaker
Frequency: 103 MHz
Set Fm Radio
GPIO Manager
GPIO-Read: GPIO_06
(Info: Read Out GPIO_06 value)
Remove: DCIO/SEPI Cable
Connect: Customized FM Radio Cable
Black Lab Plug to TRS Fixture GND Input
and PHF Connector to the
Phone System Connector
Signal Generator
Instrument Settings:
Frequency: 103 MHz
Amplitude/Level: 50μV
FM Dev: +/-22.5 kHz
FM Rate: 1kHz
FM Radio
2: Logic
Application
Replace
N2422
SL 5 Replace
N2010
SL 4 Escalate
Flash the Phone with
EMMA SUCR SW
SL 5 Replace
R2437
SL 4 Escalate
No
Yes
No
Yes
1.8 Volt DC
at MP 41 (SP2432)
No
2.6 Volt DC
at MP 125 (R2434)
Yes
0 Volt DC
at MP 122 (R2437)
Yes
Hands-Free (PHF) Problems
Use Fault trace SW and go to:
Audio and FM Radio
Audio Loop Test
Audio Input: AUX1
Loop Mode: Analog
Audio Output: AUX Earphone
Apply Audio Loop
Remove the DCIO/SEPI cable
and Insert Hands-Free (PHF) set
Blow into the
Hands-Free (PHF) Mic
START
Step 1:
Perform
System Connector Protection Test
If successful go to step 2.
Step 2:
Load ITP SW into the Phone
Use TRS Fixture
Connect: VBATT and DCIO/SEPI
Use Fault Trace SW
SL 5 Replace
N2000
SL 4 Escalate
No
TROUBLESHOOTING
SL 4 Replace
N3100
SL 5 Replace
N2000
SL 4 Replace
V3101 or N3100
SL 5 Replace
C3109 or C3111
No
More than
40 mV AC Pk-PK
1 KHz signal at
MP 56 (C3137) and
MP 55 (C3148)
Yes
2.6 Volt DC
at MP 66 (R2306) and
MP 67 (R2301)
No
Yes
Is any of
MP 44 (X3102_Pin 1)
Yes No
or MP 45 (X3102_Pin 2)
Short circuit to the GND
(Shield Can
Fence)
No
Is the
Result
GPIO_06 = HIGH
Yes
1: Disconnect:
Customized FM Radio Cable and VBATT
2: Remove the PBA from the TRS Fixture
SL 5 Replace
N2000
SL 4 Escalate
SL 4 Replace
N3100
SL 5 Replace
N2010
Replace
V2417
SL 4 Replace
L2401 or L2402
SL 5 Replace
L2453 or L2455
Replace
X2405 or N3101
Replace
L2403, L2404
L2405 or L2408
No
No
No
0 Volt DC
at MP 10
(V2417_Cathode)
Are
L2401, L2402
L2453 and L2455
= Max 2 Ohm
Yes
Are
L2403, L2404
L2405 and L2408
= Max 2 Ohm
Yes
Can you
hear anything at
PHF earphone when
blowing into the
PHF Mic
Disconnect:
VBATT and DCIO/SEPI
Disconnect:
Hnds-Free (PHF) Set
SL 5 Replace
N2000
SL 4 Escalate
Disconnect:
VBATT and DCIO/SEPI
No
No
No
No
2V – 2.2V DC at
MP 68 (R3156)
Yes
More than
100 mV AC Pk-Pk
at MP 76 (C3124), MP 75
(C3125), MP 69 (C3155) and
MP 78 (C3156) when blowing
into the PHF mic
Yes
More than
100 mV AC Pk-Pk at
MP 74 (C3149) and MP 77
(C3150) when blowing
into the PHF mic
Yes
More than
100 mV AC Pk-Pk at
MP 8 (L2403) and MP 9
(L2404) when blowing
into the PHF mic
Replace
X3102
Replace
N3100
Yes
No
Is X3102
damaged
Is
L3103, L3104
L3110, L3111, L3113
and L3114
= Max 1 Ohm
SL 5 Replace
Yes
Yes
L3103, L3104
NoYes
L3110, L3111
L3113 or L3114
SL 4 Escalate
Replace
L2406
No Yes
L2406 = Max 0.5 Ohm
Is
Replace
X2405 or N3101
Replace
X2405
1225-4035 rev. 1
23 (122)
Page 24
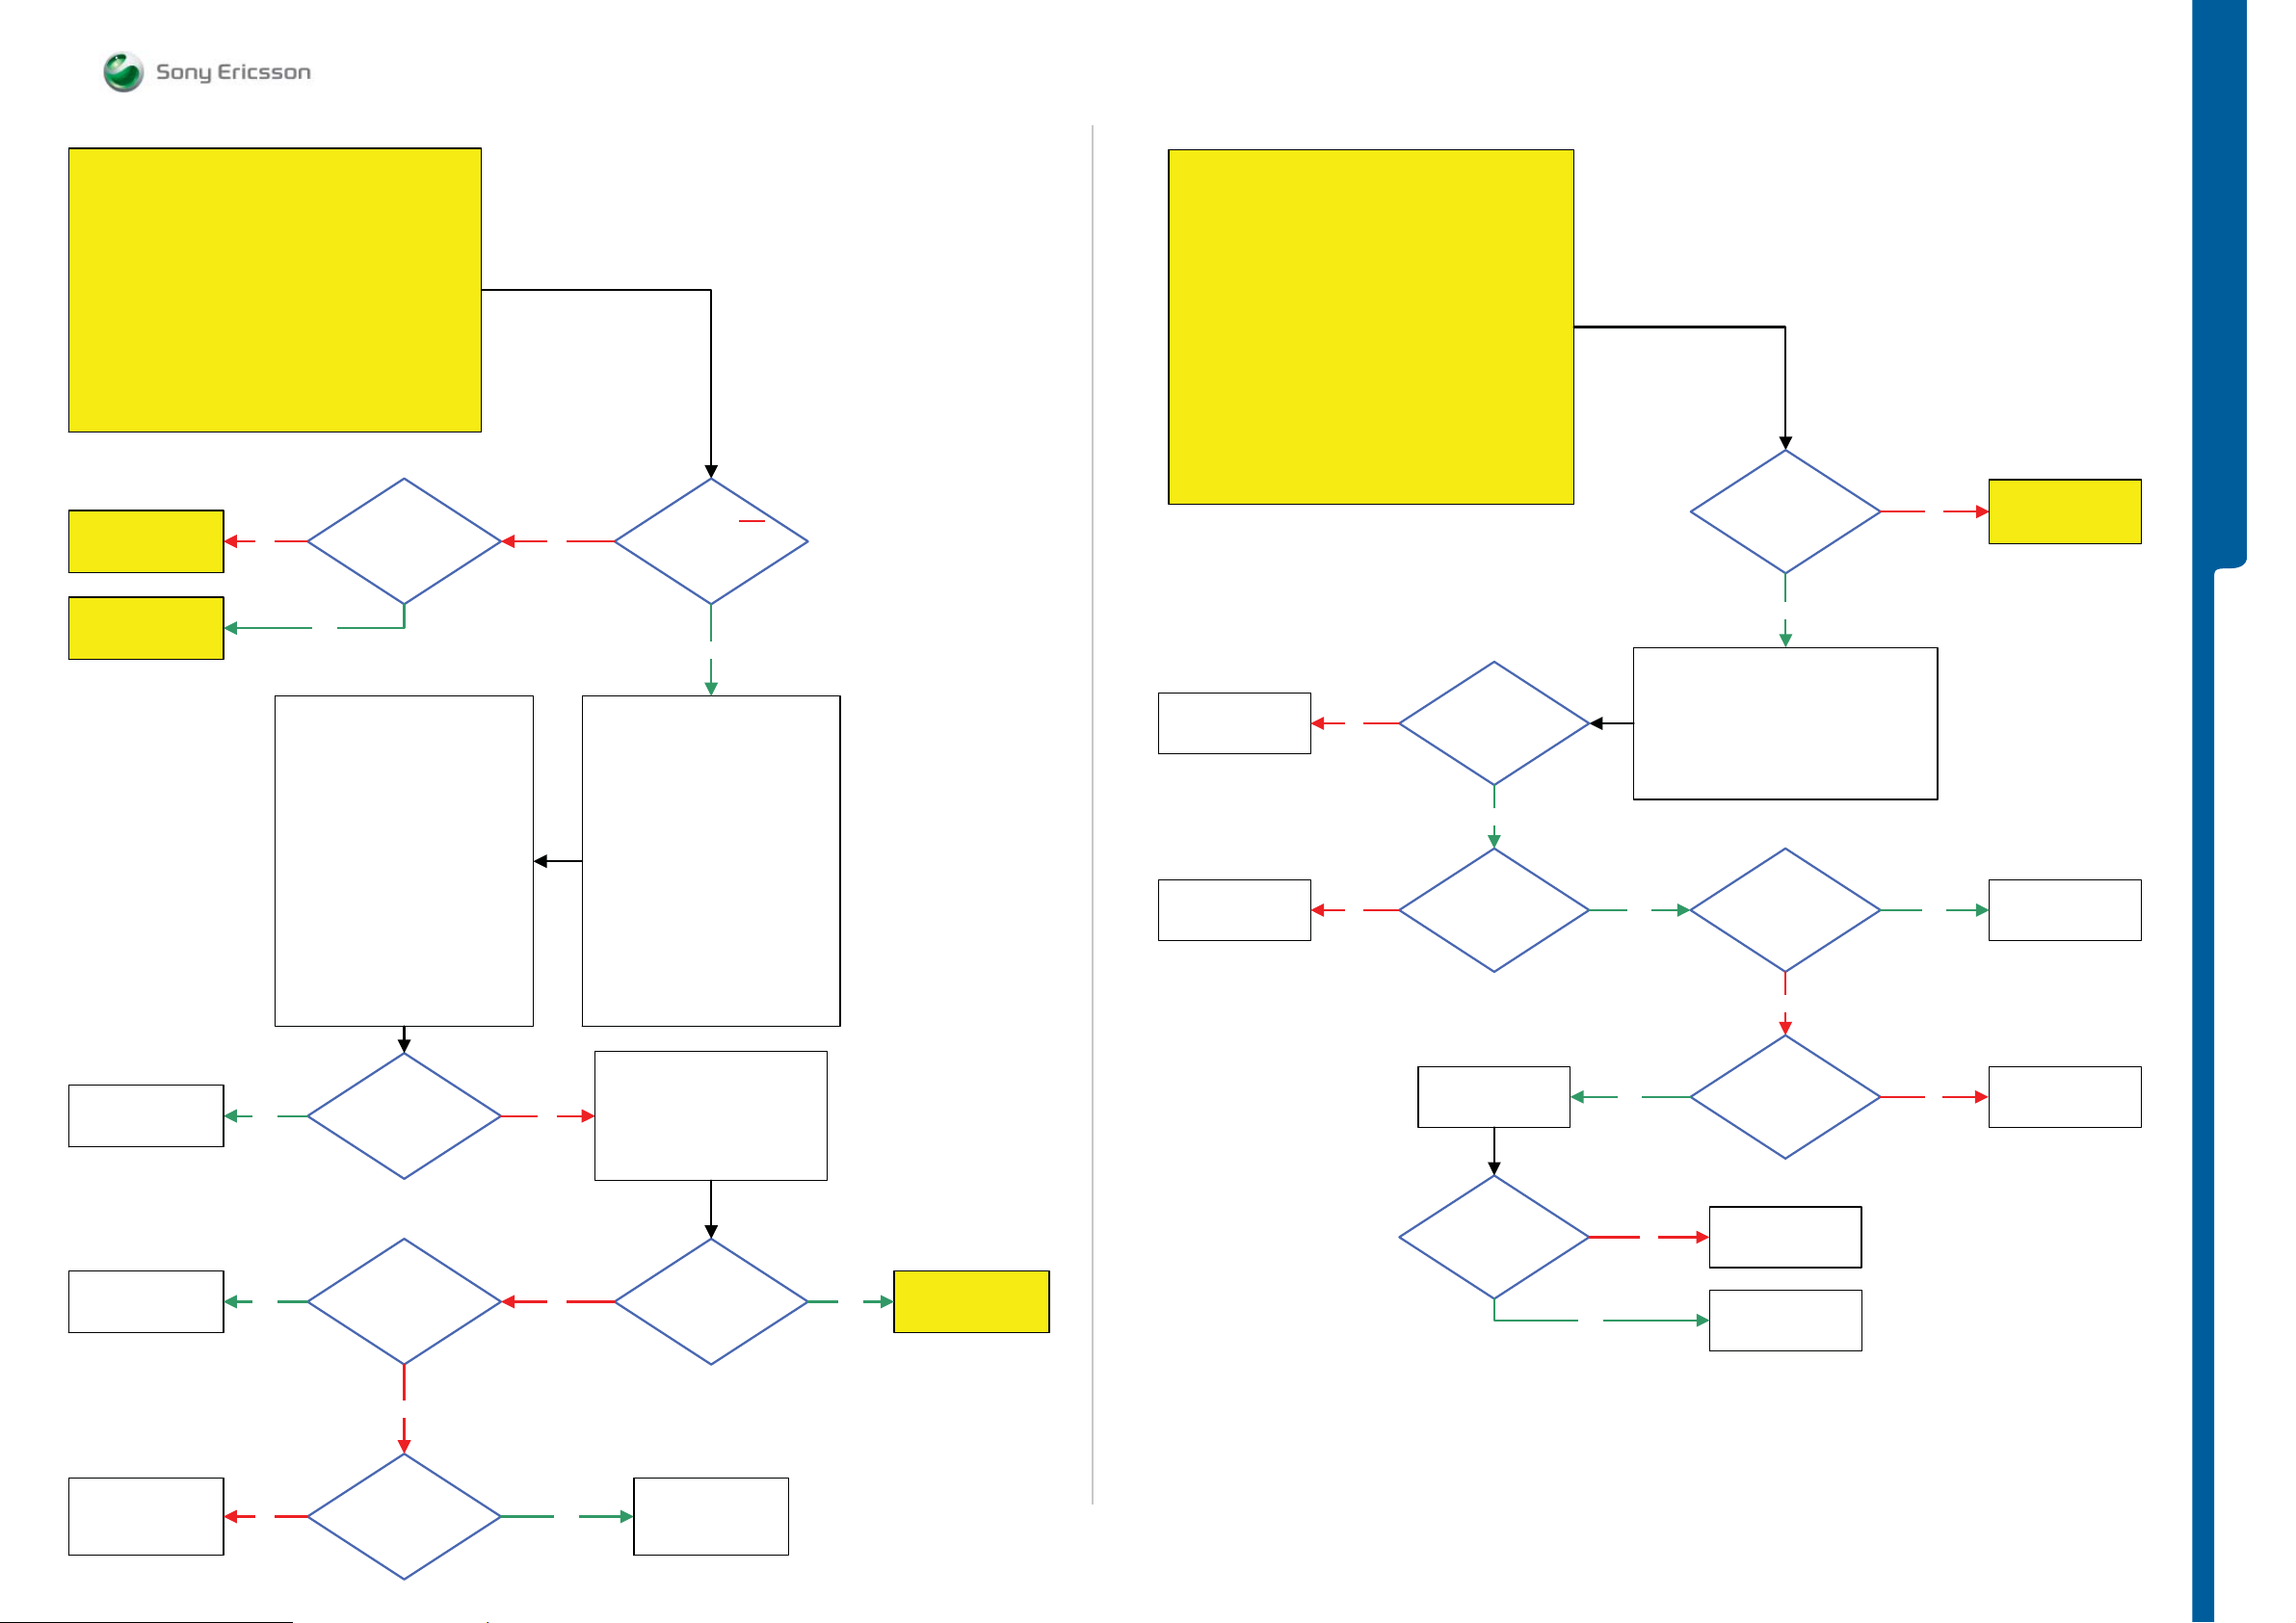
TROUBLESHOOTING FM Radio Problems
- FM Radio Anten na Prob l e m s
SEMC Troubleshooting Manual
G705 - W705 - W715
START
Be very careful when cutting the
Shield Can Fence to avoid component damage
Go to
Loudspeaker
Problems TRS guide
Go to
Hands-Free (PHF)
Problems TRS guide
NOTE !
No
Yes
Is the
Loudspeaker
Ok
FM Radio Problems
No
Loudspeaker nor with
FM Radio Is not
working neither with
PHF set
Yes
START
Perform System Connector Protection Test
If successful continue with the
FM Radio Antenna Problems TRS guide
FM Radio Antenna Problems
Is the
FM Radio Problems
TRS guide
finished?
Yes
No
TROUBLESHOOTING
Go to
FM Radio Problems
TRS guide
SL 5 Replace
N2000
SL 4 Escalate
SL 5 Replace
C3145 or C3146
SL 4 Escalate
1: Remove the DCIO/SEPI Cable
Frequency: 103 MHz
Amplitude/Level: 50 μV
FM Dev: +/-22.5 kHz
FM Rate: 1 kHz
Yes
2: Connect:
Customized FM Radio Cable
Black Lab Plug to
TRS Fixture GND Input and
PHF Connector to the
Phone System Connector
Signal Generator
Instrument Settings:
More than
40 mV AC Pk-Pk
1 KHz signal at MP 106
(C3145) and
MP 105 (C3146)
Is any of
C3145 or C3146
Short circuit
Replace
R2451
1: Load ITP SW into the Phone
2: Use TRS Fixture
Connect:
VBATT and DCIO/SEPI
3: Use Fault Trace SW and go to:
Audio and FM Radio
Audio Output: Loudspeaker
NoYes
No
Change Amplitude/Level to:
FM Radio
Frequency: 103 MHz
Set Fm Radio
Signal Generator
Instrument Settings:
800 μV
Is there
any signal on
MP 106 (C3145) and
MP 105 (C3146)
Yes
Go to
FM Radio Antenna
Problems TRS guide
SL 5 Replace
L3300
SL 4 Escalate
No
No
R2451 = Max 1 Ohm
L3300 = Max 1 Ohm
Is
Yes
Is
Replace
N1300
Is the
Signal
Ok
Digital Multimeter Instrument (DMM)
Yes
Yes
No
Yes
Use the
for these measurements
Is C3306
Short Circuit
No
Is MP 7
(X2405_Pin 2)
Connected to GND
(Shield Can
Fence)
SL 5 Replace
V2413
SL 4 Escalate
Claim Component
N1300
Yes
No
SL 5 Replace
C3306
SL 4 Escalate
Replace
X2405
SL 4 Replace
N1300
SL 5 Replace
N2010
No
1.8 Volt DC
No Yes
at MP 5 (R3302
FM_INT)
SL 4 Replace
N1300
SL 5 Replace
N2100
1225-4035 rev. 1
24 (122)
Page 25
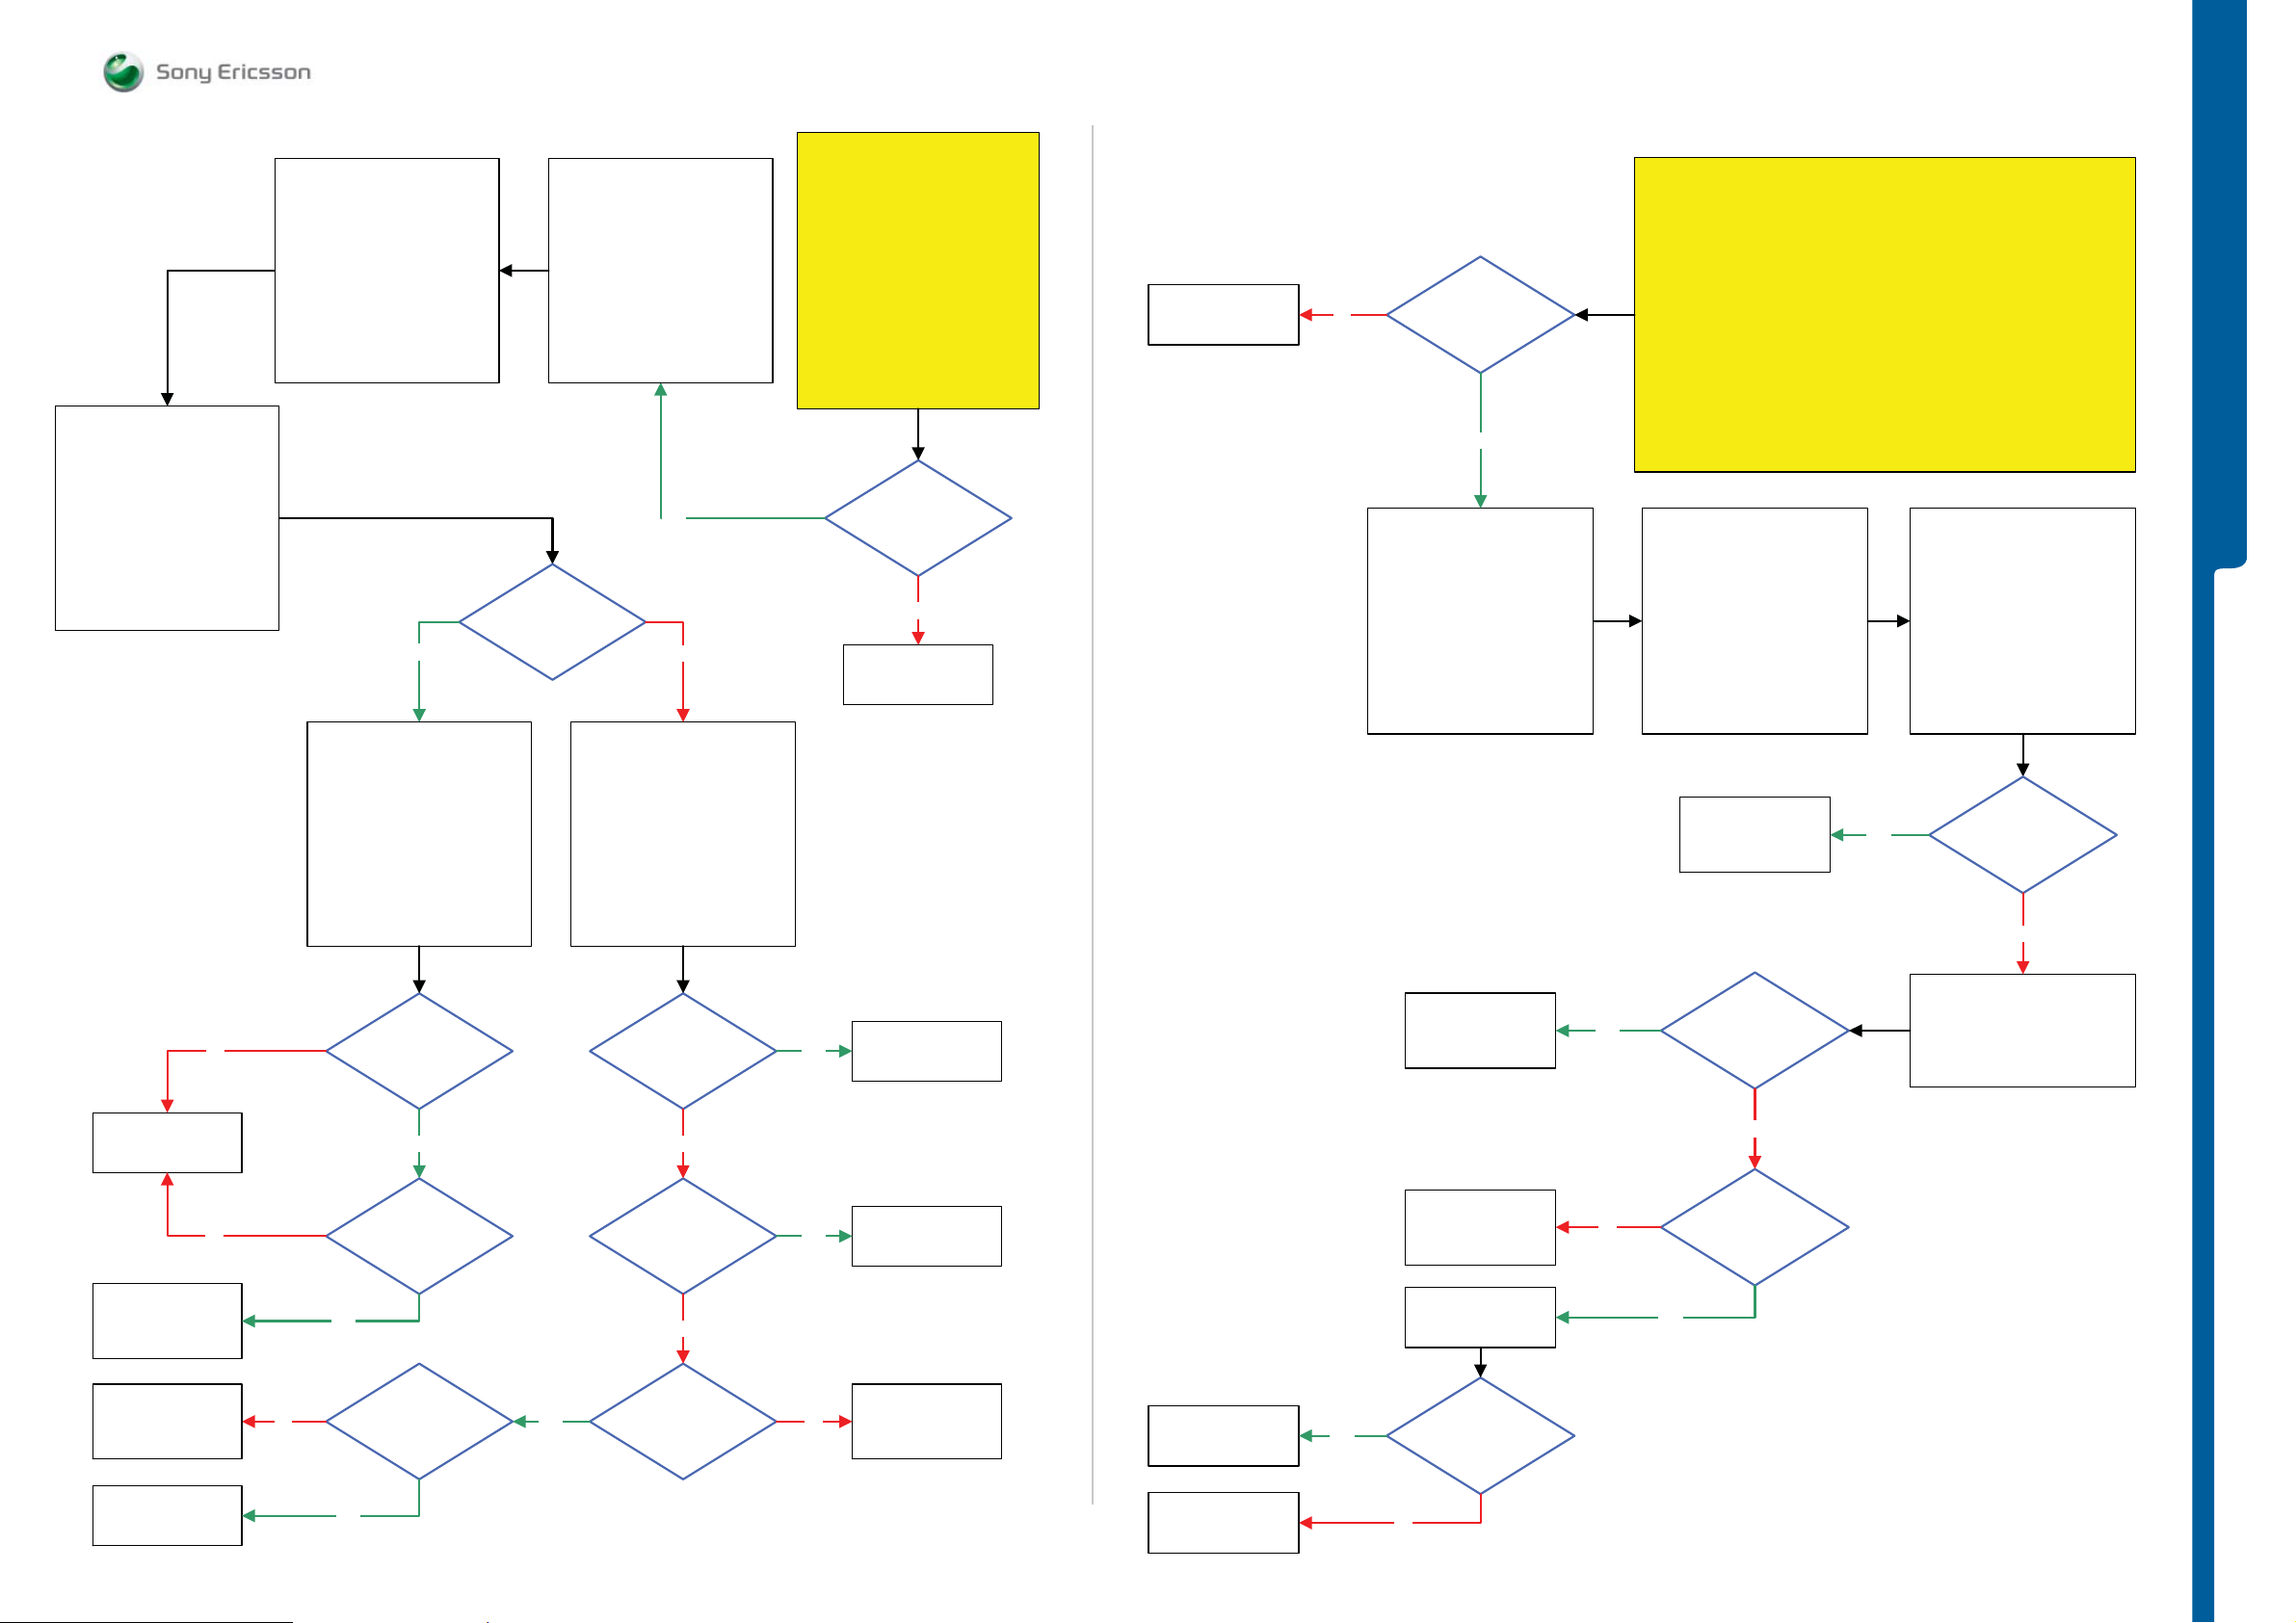
TROUBLESHOOTING Bluetooth Probl e m s
- WLA N Prob le m s
SEMC Troubleshooting Manual
G705 - W705 - W715
Fault trace SW Settings:
TX and RX
Bluetooth
Channel 0
Set MaxPwr MOD 0
NOTE!
MODE 0 Frequency is
2401.84 MHz
(±0.05 MHz)
Bluetooth Problems
Spectrum Analyzer
Instrument Settings:
Frequency: 2402 MHz
Span: 10 MHz
Amplitude: 10 dBm
Use Peak Search (MKR)
Connect SMK RF Probe to
X1500 RF Connector on PBA
Yes
Fault trace SW Settings:
TX and RX
Bluetooth
Channel 0
Turn Off
(This must be done before the
next step)
Set MaxPwr MOD 1
NOTE!
MODE 1 Frequency is
2402.14 MHZ
(±0.05 MHz)
1: Load ITP SW into the Phone
2: Use TRS Fixture
VBATT and DCIO/SEPI
3: Connect RF Cable Flexible
with SMK RF Probe to the
Spectrum Analyzer instrument
4: Use Fault Trace SW
Is the
Blt MaxPwr MOD 0
1 dBm
(±3 dBm)
Disconnect the SMK RF Probe
and connect RF Probe to the
Spectrum Analyzer instrument
NOTE! Do not use 10:1 Divider
Connect:
Yes
No
Frequency: 2402 MHz
Span: 10 MHz
Amplitude: 10 dBm
Use Peak Search (MKR)
START
Step 1:
Flash the Phone with
EMMA SUCR SW
and retest the Phone
If successful claim SW Flash
If not go to step 2.
Step 2:
Continue with the
Bluetooth Problems TRS guide
Max
0.5 Ohm between
MP 107 (X1500_Pin 1)
and MP 109
(X1500_Pin 2)
No
Replace
X1500
Replace
X1500
Max
0.5 Ohm between
No
MP 107 (X1500_Pin 1)
and MP 109
(X1500_Pin 2)
Yes
1: Load ITP SW into the Phone
2: Use TRS Fixture
Connect:
VBATT and DCIO/SEPI
3: Connect RF Cable Flexible
with SMK RF Probe to
Spectrum Analyzer instrument
4: Use Fault Trace SW
WLAN Problems
Spectrum Analyzer
Instrument Settings:
Frequency: 2442 MHz
Amplitude: 20 dBm
Use Peak Search (MKR)
SMK RF Probe to
X1500 RF Connector on PBA
Cover Lower Rear
Sub Assembly
(WLAN/BT Antenna)
Span: 10 MHz
Connect
Replace
START
Step 1:
Flash the Phone with
EMMA SUCR SW
and retest the Phone
If successful claim SW Flash
If not go to step 2.
Step 2:
Continue with the
WLAN Problems TRS guide
Fault trace SW Settings:
Yes
TX Output Power
TROUBLESHOOTING
TX and RX
WLAN
Wlan Settings
WLAN Turn On
Is the
WLAN
7 dBm
(±5 dBm)
No
No
Replace
N1300
No
Replace
Cover Lower Rear
Sub Assembly
or N1300
SL 4 Replace
N1300
SL 5 Replace
N2100
SL 5 Replace
N2010
SL 4 Escalate
Is the
Blt MaxPwr MOD 1
1 dBm
(±3 dBm)
Yes
MOD 1 Freq.
minimum 230 KHz
higher than
MOD 0 Freq.
Yes
26 MHz Signal
At MP 98 (R2121
BT_CLK)
Yes
Is
SL 4 Replace
3 dBm
at MP C1502
BT_ANT
(± 5 dBm)
No
-1 dBm at
MP 2 (W1300_Pin 3)
and MP 3
(W1300_Pin 4)
(±5 dBm)
No
2.7 Volt DC at
YesNo
MP 4 (C1302
VBT27)
Yes
Yes
No
Replace
N1510
SL 5 Replace
W1300
SL 4 Escalate
SL 4 Replace
N1300
SL 5 Replace
N2000
Claim Componenet
N1500
SL 5 Replace
V2100 or N2010
SL 4 Escalate
Yes
No
N1510
SL 5 Replace
N1500
SL 4 Replace
N2300
SL 5 Replace
N2010
SL 5 Replace
N1500
SL 4 Escalate
Is the
WLAN problem
solved
Yes
No
Yes
Are all
Voltages
Ok
No
1.8 Volt DC at
MP 58 (R2313
WLAN_PDn)
Check the Following Voltages:
3.3V – 3.4V DC at MP 1 (R1516)
1.8V DC at MP 120 (R1503)
3.0V DC at MP 19 (R1523)
1.9V DC at MP 22 (R1501)
1225-4035 rev. 1
25 (122)
Page 26
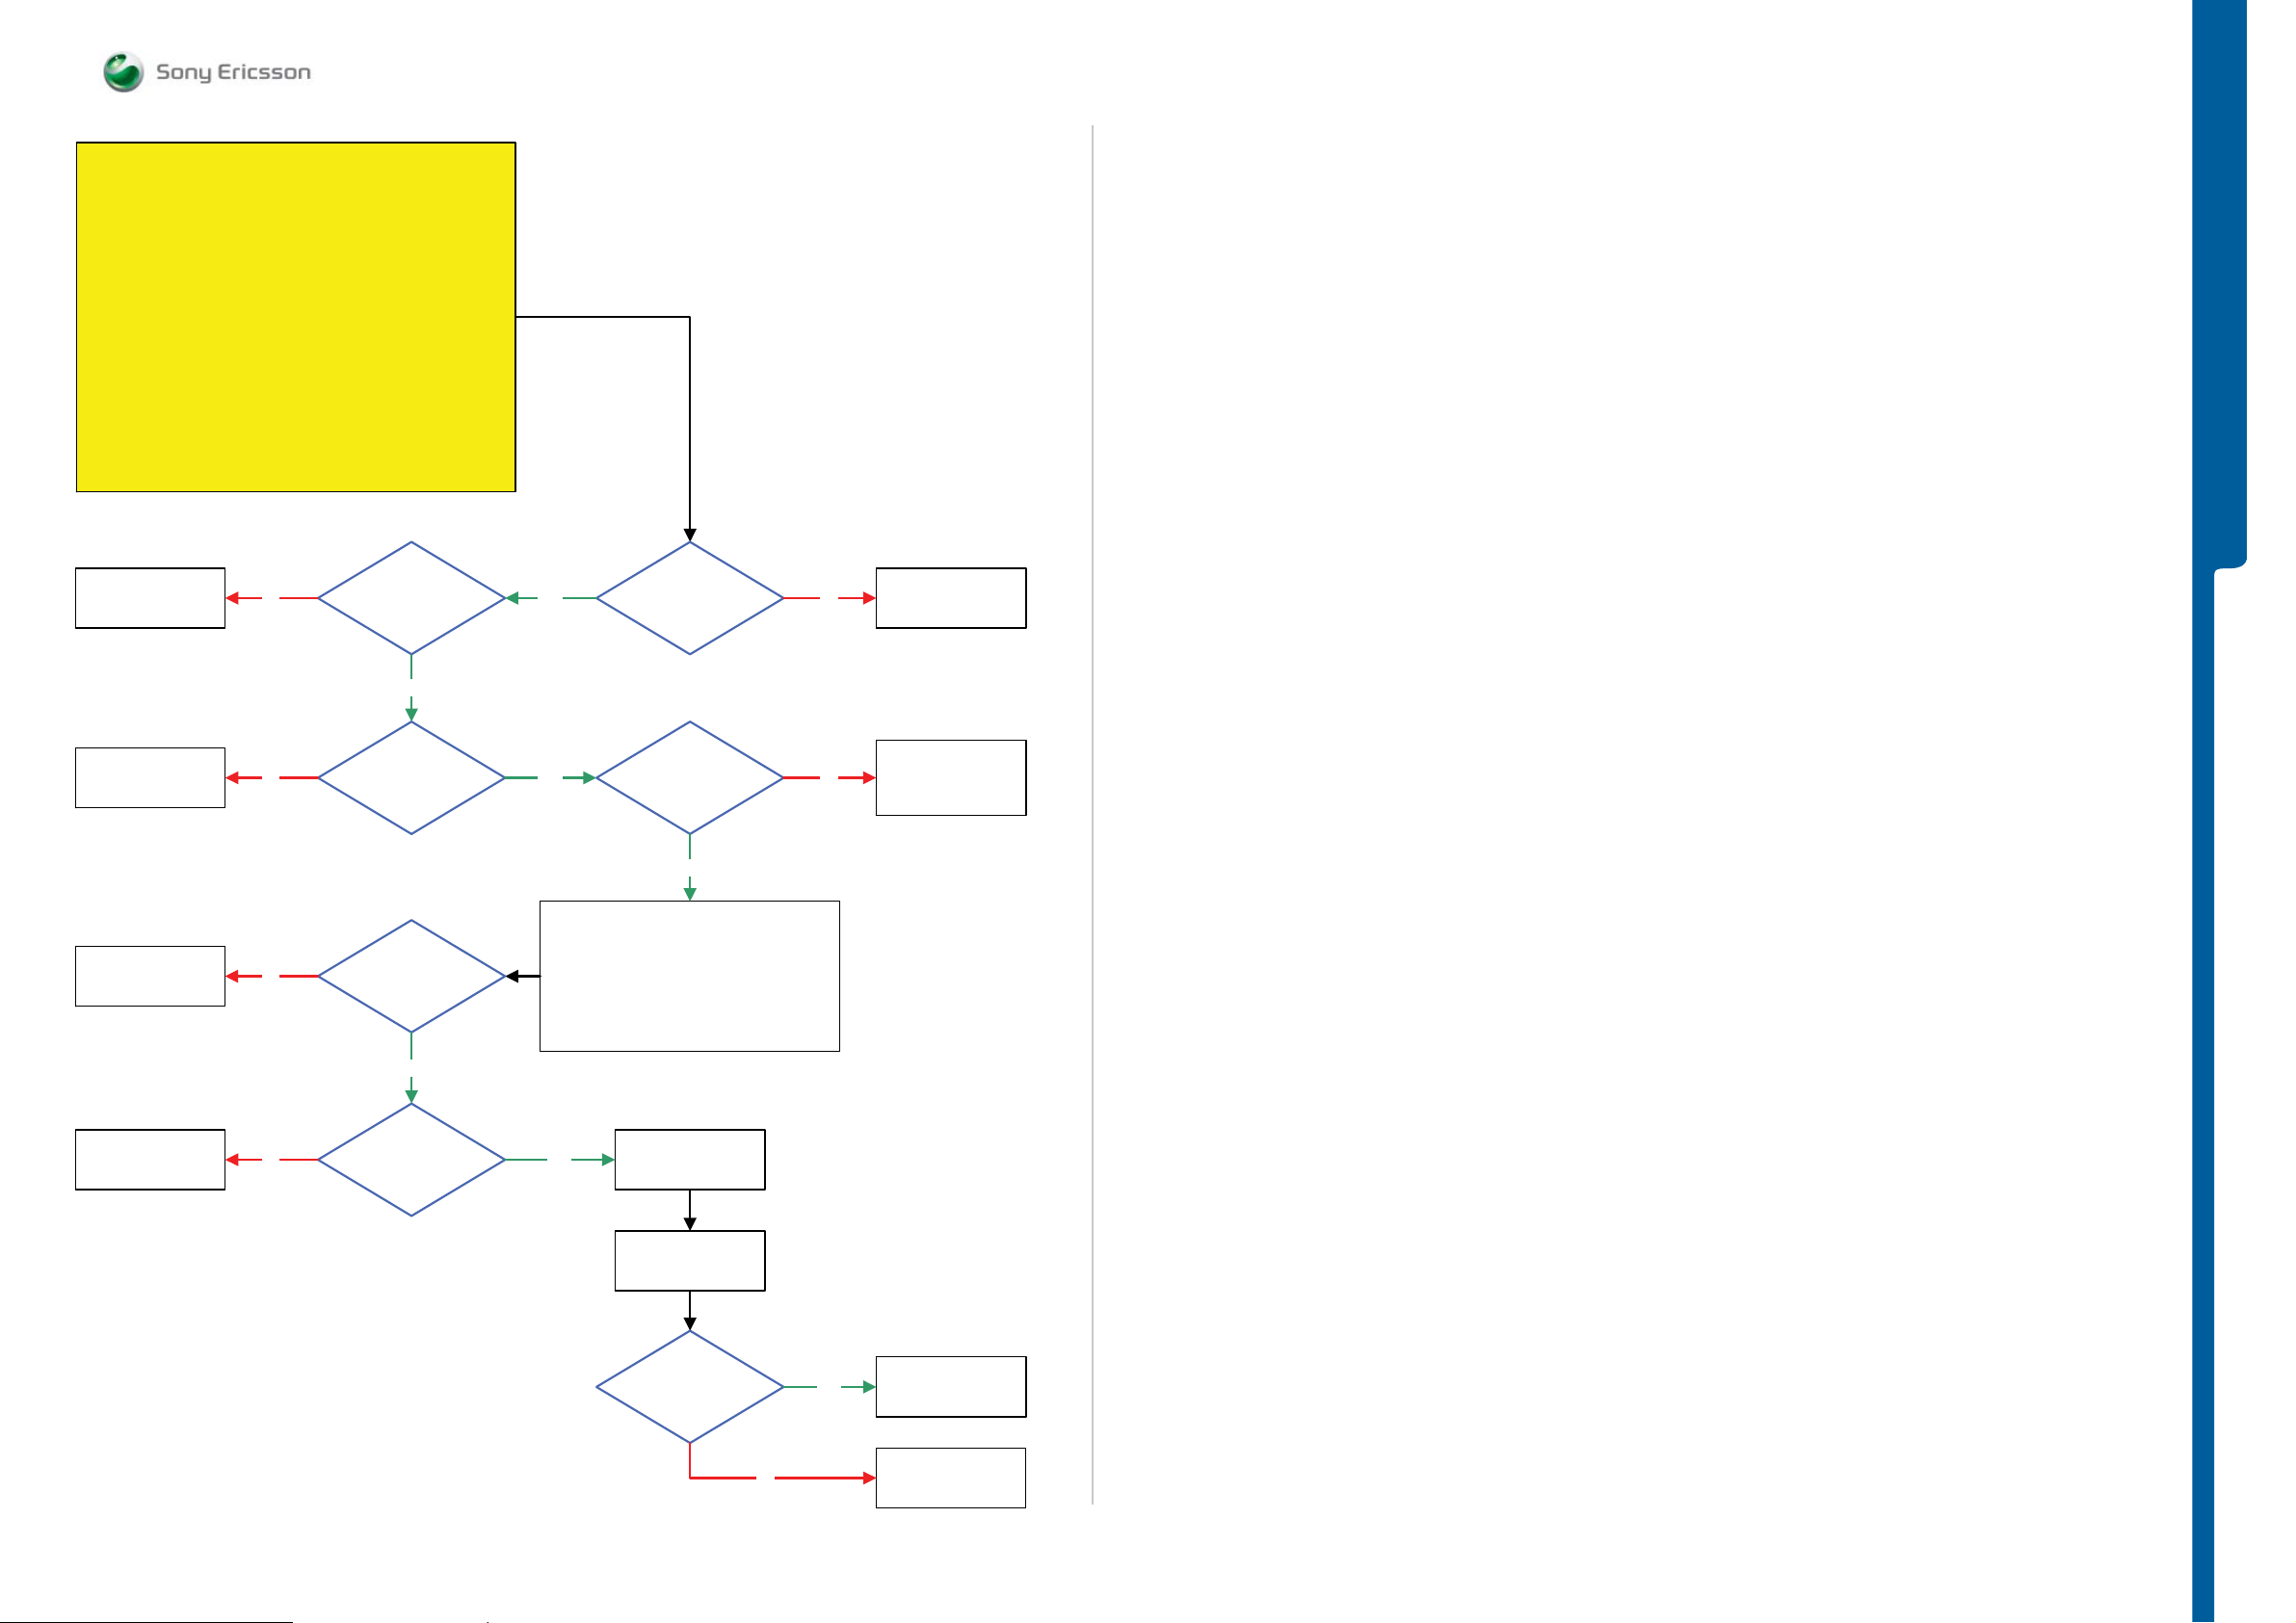
START
GSM Network Problems
TROUBLESHOOTING GSM Problems
SEMC Troubleshooting Manual
G705 - W705 - W715
Replace Cover Lower Rear Sub Assembly and retest the Phone
If successful claim Cover Lower Rear Sub Assembly
Load ITP SW into the Phone
Perform SERP Calibration and retest the Phone
If successful claim SERP Calibration
Disassembly the Phone and continue with the
GSM Network Problems TRS guide
Replace
Faulty Component
SL 5 Replace
L1207 or L1212
SL 4 Escalate
Step 1:
If not go to step 2.
Step 2:
If not go to step 3.
Step 3:
No
No
X1005 connected to GND
Are
X1000,X1001,
X1002,X1003,X1004 and
(Shield Can
Fence)
Yes
Are
L1207 and L1212
Max 0.5 Ohm
Yes
Yes
Max 0.5
Ohm between
MP 96 (X1200_Pin 1) and
MP 93 (X1200_Pin 2)
Max 0.5 Ohm
between MP 79 (R1206)
and MP 93
(X1200_Pin 2)
No
No
TROUBLESHOOTING
Replace
X1200
SL 5 Replace
R1220, L1205,
R1204 or R1206
SL 4 Escalate
SL 5 Replace
N2000
SL 4 Escalate
Replace
N1211
No
No
2.8 Volt DC at
MP 64 (C1218
LDOA_OUT)
Yes
2.8V DC
at MP 99 (C1207)
Yes
Yes
Use TRS Fixture
Connect:
VBATT and DCIO/SEPI
Replace
N1200
Go to
SERP Calibration
Is the
GSM Network
Problem
solved
Yes
Claim Component
N1200
No
SL 5 Replace
N2010 or N2000
SL 4 Escalate
1225-4035 rev. 1
26 (122)
Page 27
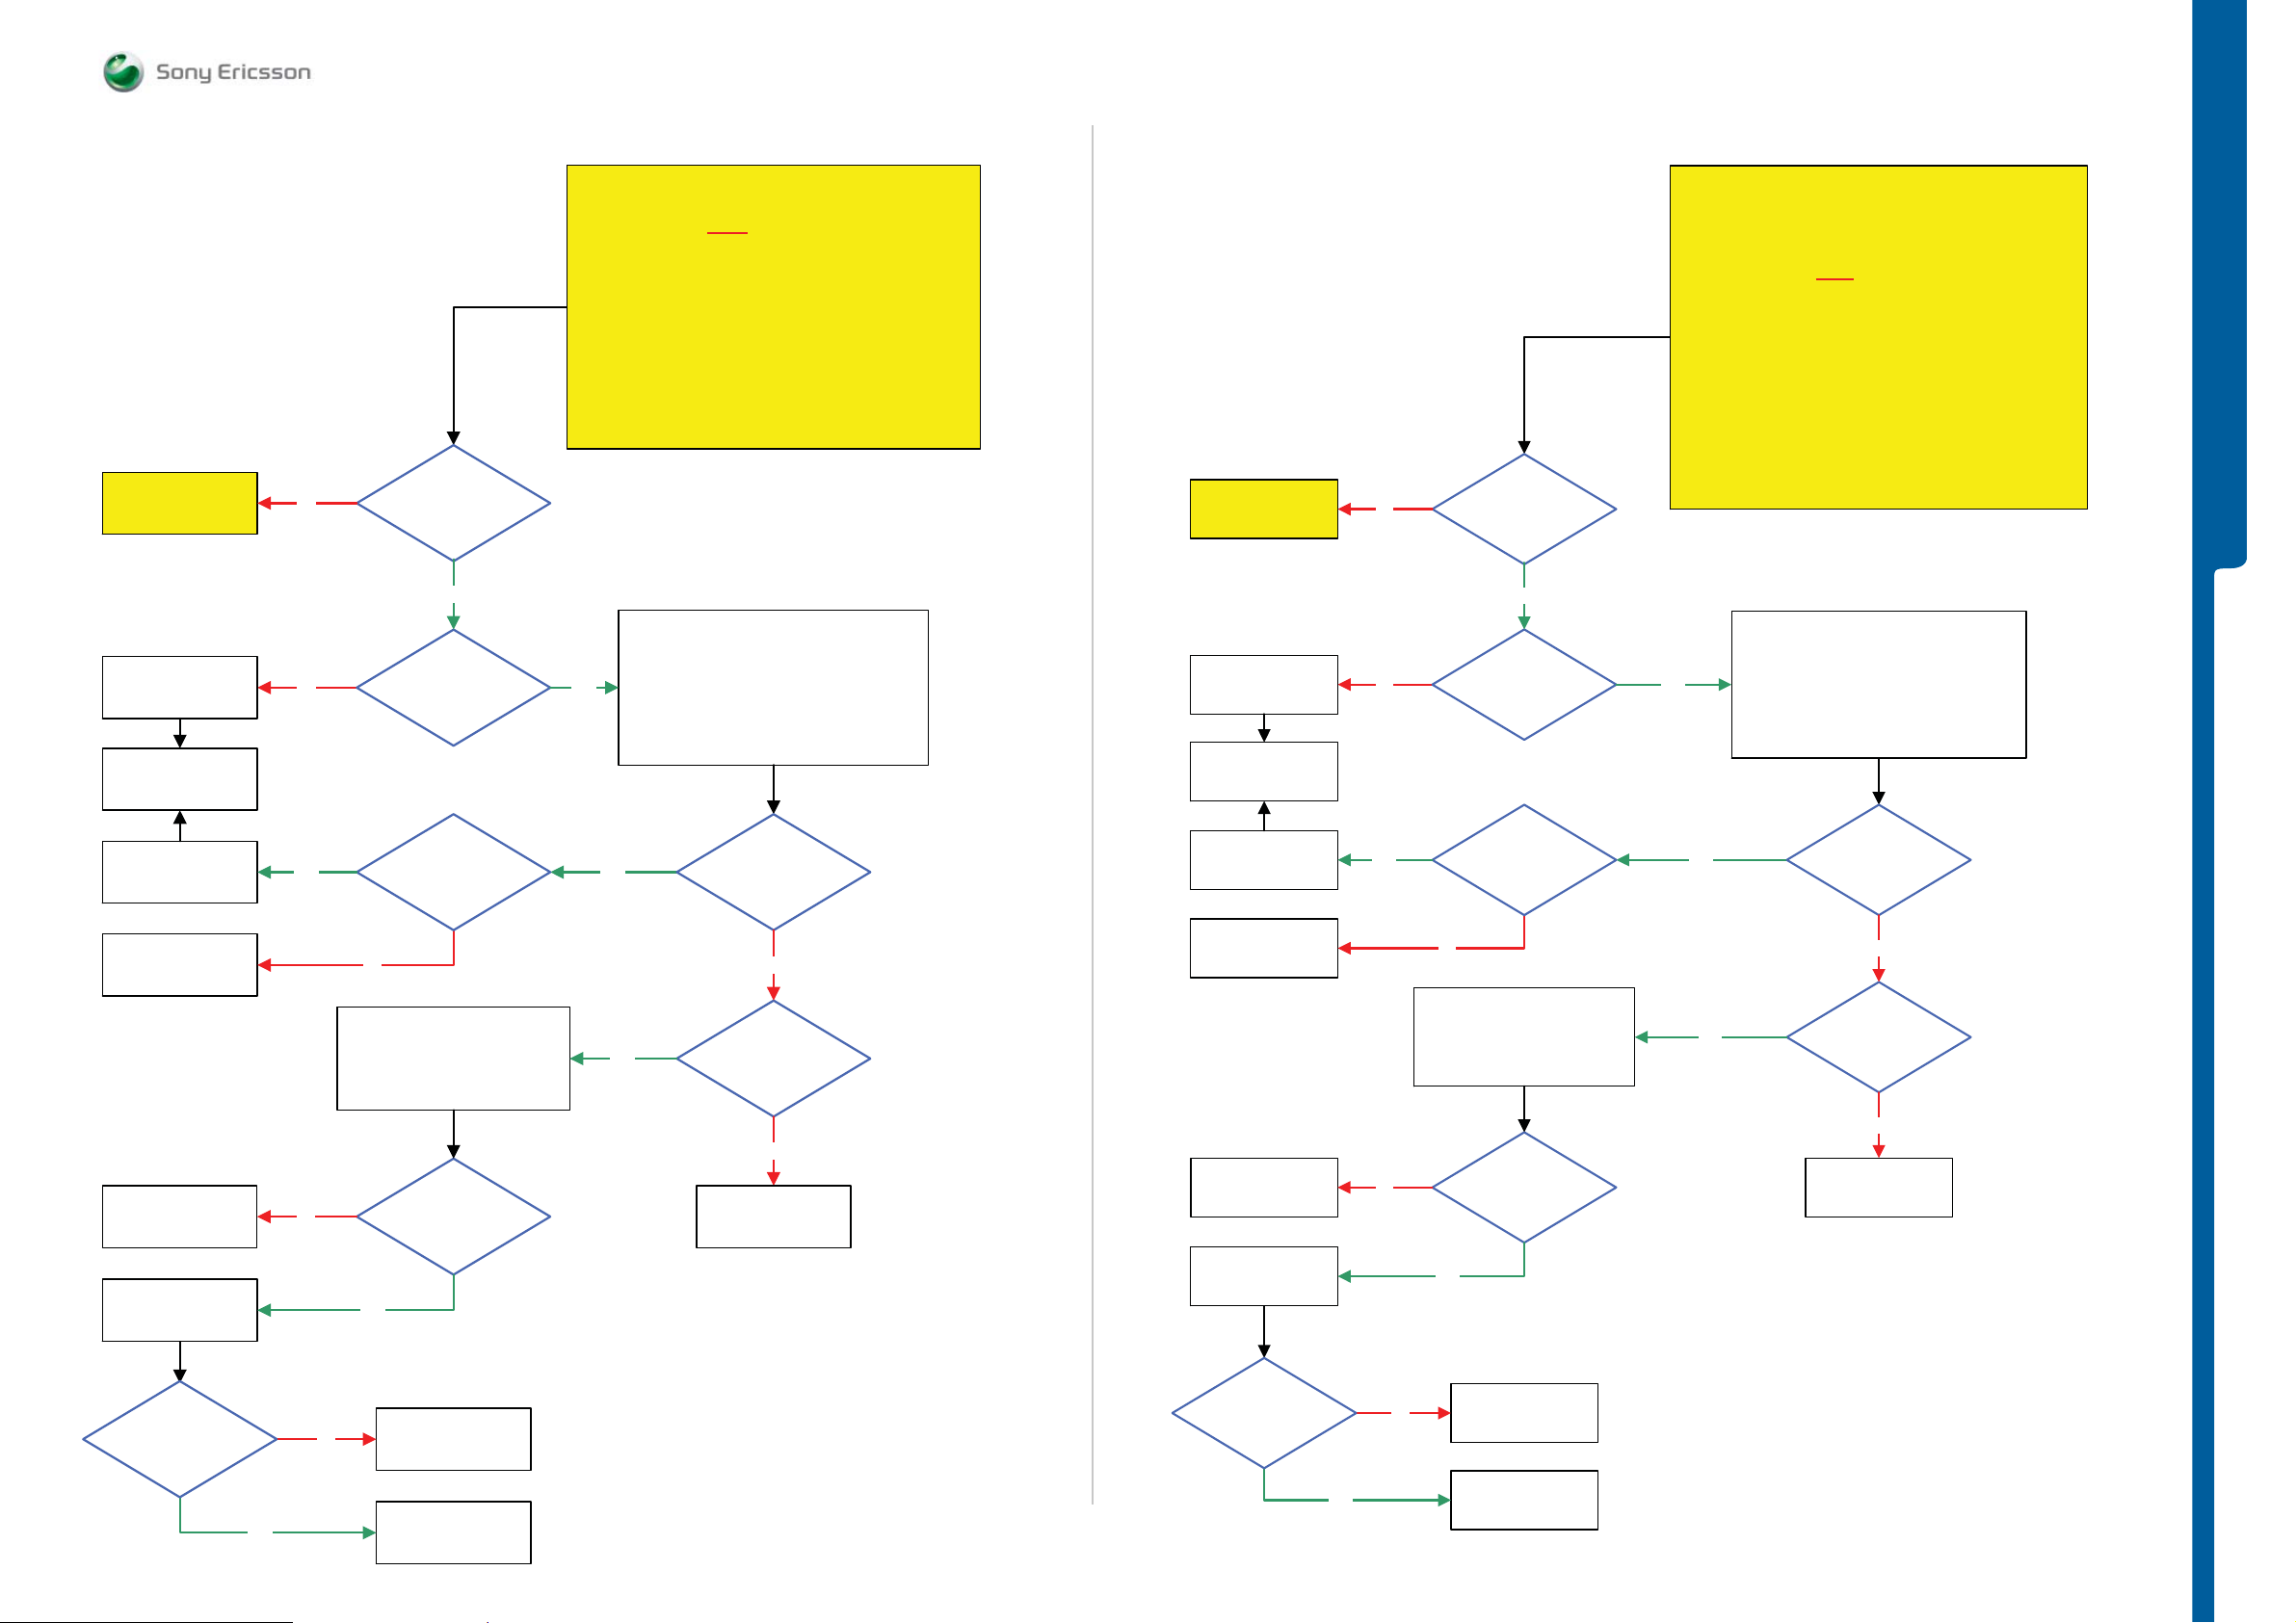
TROUBLESHOOTING WCDMA Problems
SEMC Troubleshooting Manual
G705 - W705 - W715
Go to
GSM Network
Problems TRS guide
Replace
N1200
Go to
SERP Calibration
WCDMA BAND I,II,V Network Problems
This TRS guide is ONLY
phones with support for WCDMA BAND I, II or V.
Perform SERP Calibration and retest the Phone
Is the
No
No
GSM Network
Ok
Yes
Is the
Problem with
WCDMA TX
Yes
START
NOTE !
valid for G705, W705 and W715
Step 1:
Load ITP SW into the Phone
If successful claim SERP Calibration
If not go to step 2.
Step 2:
Use TRS Fixture
Connect: VBATT and DCIO/SEPI
Use Fault Trace SW
Fault Trace SW
TX and RX WCDMA
Radio Settings:
Select Band: BAND I
Fast select channels:
Set Low Channel
Ch LOW
Modes: Max Pwr 23dBm
Go to
GSM Network
Problems TRS guide
Replace
N1200
Go to
SERP Calibration
No
No
WCDMA BAND VIII Network Problems
This TRS guide is ONLY
phones with support for WCDMA BAND VIII.
Load ITP SW into the Phone
If successful claim SERP Calibration
Connect: VBATT and DCIO/SEPI
Use Fault Trace SW
TX and RX WCDMA
Select Band: BAND VIII
Fast select channels:
Modes: Max Pwr 23dBm
Is the
GSM Network
Ok
Yes
Is the
Problem with
WCDMA TX
Perform SERP Calibration and retest the Phone
Yes
START
NOTE !
valid for G705, W705 and W715
Step 1:
TROUBLESHOOTING
If not go to step 2.
Step 2:
Use TRS Fixture
Fault Trace SW
Radio Settings:
Set Low Channel
Ch LOW
Replace
N1200
Replace
N1210
SL 5 Replace
L1200
SL 4 Escalate
Replace
N1210
Is the
WCDMA TX
Problem solved
Yes
No
No
2.5V – 3V DC at
MP 100 (C1215
WPA_A_EN)
No
Disconnect:
VBATT and DCIO/SEPI
Is
L1200 = Max 0.5 Ohm
Yes
SL 5 Replace
N2010 or N2000
SL 4 Escalate
Yes
Yes
3V – 3.8V DC at
MP 102 (C1206
VCC_WPA)
No
1.8 Volt DC at
MP 101 (R1210
WPA0_EN)
No
SL 5 Replace
N2010
SL 4 Escalate
Replace
N1200
Replace
N1210
SL 5 Replace
L1200
SL 4 Escalate
Replace
N1210
Is the
WCDMA TX
Problem solved
Yes
No
No
VBATT and DCIO/SEPI
L1200 = Max 0.5 Ohm
Yes
No
2.8V - 3V DC at
MP 127 (C1214
WPA_C_EN)
Disconnect:
Is
SL 5 Replace
N2010 or N2000
SL 4 Escalate
Yes
Yes
3V – 3.8V DC at
MP 102 (C1206
VCC_WPA)
No
1.8 Volt DC at
MP 126 (R1209
WPA2_EN)
No
SL 5 Replace
N2010
SL 4 Escalate
Yes
Claim Component
N1210
Yes
Claim Component
N1210
1225-4035 rev. 1
27 (122)
Page 28
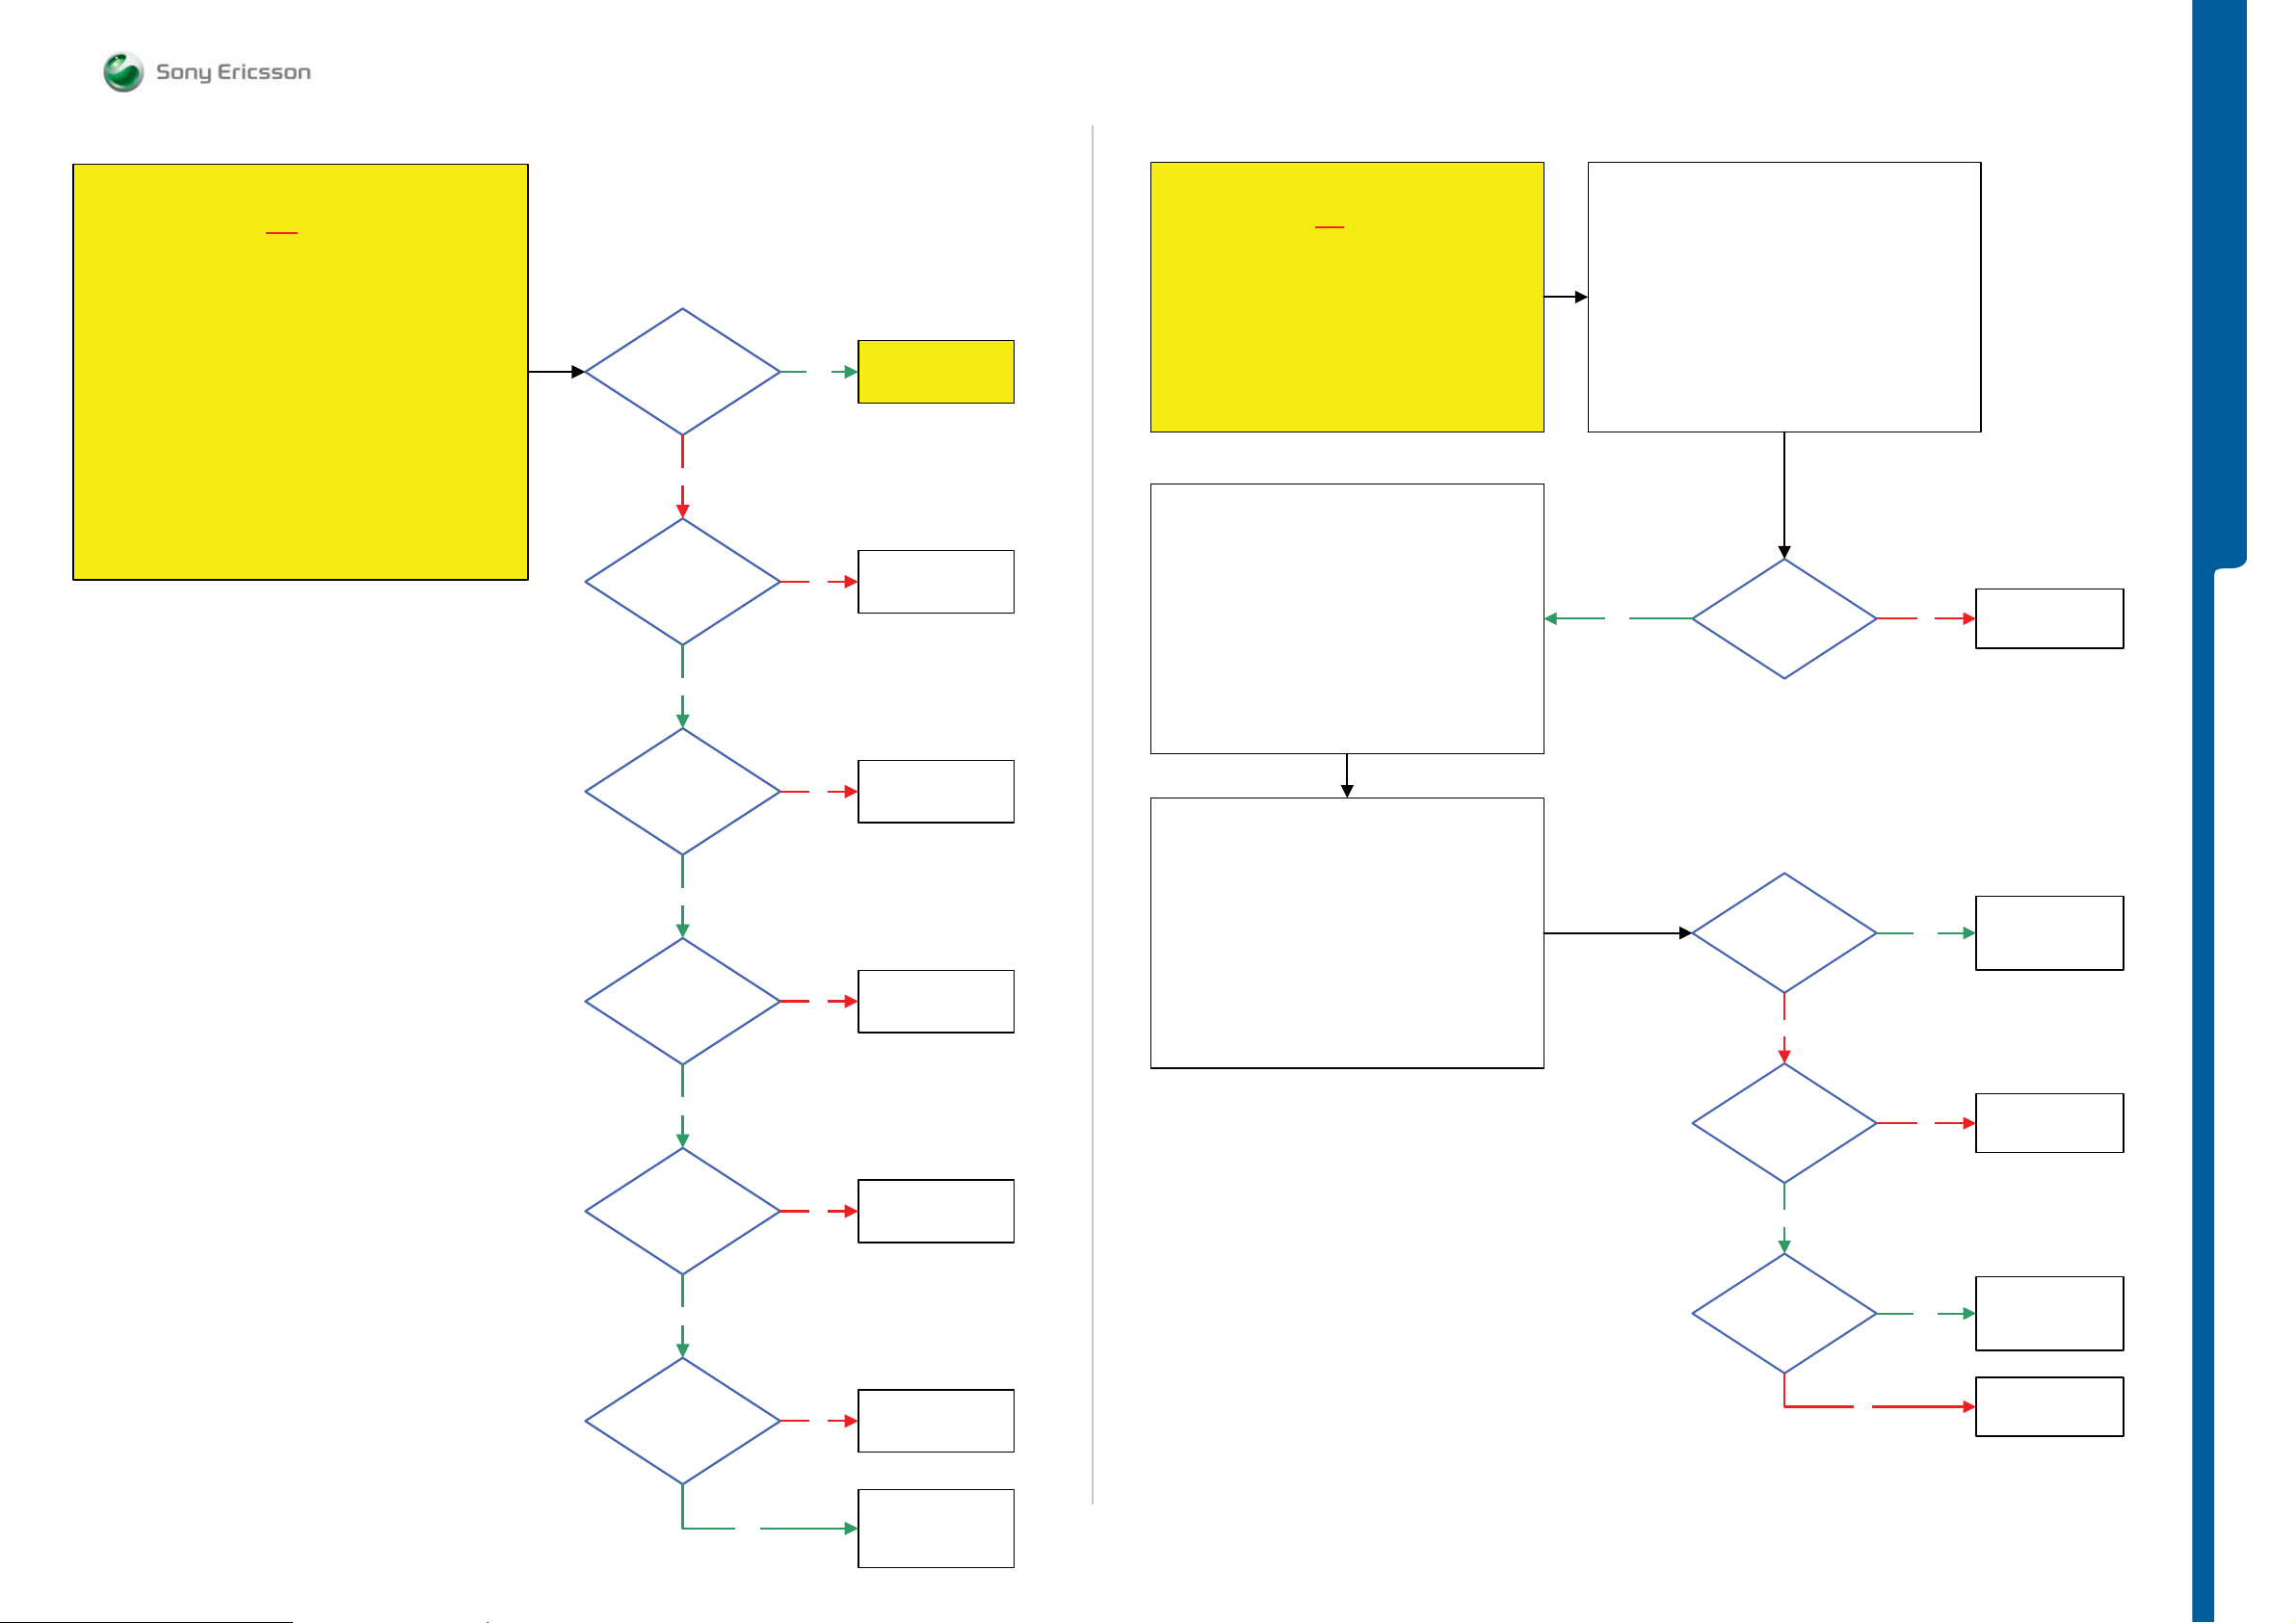
TROUBLESHOOTING A-GPS Problems
SEMC Troubleshooting Manual
G705 - W705 - W715
A-GPS Problems part 1
START
This TRS guide is NOT
Flash the Phone with EMMA SUCR SW and retest the Phone
If successful claim SW Flash
Replace Cover Lower Rear Sub Assembly and retest the Phone
If successful claim Cover Lower Rear Sub Assembly
Load ITP SW into the Phone
Connect: VBATT and DCIO/SEPI
Use Fault Trace SW and go to:
NOTE !
valid for W705 Phones.
Step 1:
if not go to step 2.
Step 2:
if not go to step 3.
Step 3:
Use TRS Fixture
General
Asic Revisions
Read All
Is the
A-GPS (N1400)
Asic Revision Test
Ok
No
1.8 Volt DC at
MP 92 (R2315
AGPS_LDO_EN)
Yes
Yes
No
Go to
A-GPS Problems
part 2
SL 5 Replace
N2010
SL 4 Escalate
START
This TRS guide is NOT
Before following this guide the A-GPS Problems part 1
TRS guide must be finished!
Use Fault Trace SW and go to:
1: Use Signal Generator Instrument
2: Connect RF Cable Flexible from the Signal Generator
GPS Antenna RF Switch on the TRS Fixture
Amplitude/Level: -70 dBm
NOTE !
valid for W705 Phones.
NOTE !
Tx and Rx
GPS
GPS Settings
Turn On GPS
Instrument to the
Signal Generator
Instrument Settings:
Frequency: 1574.2 MHz
A-GPS Problems part 2
Use Spectrum Analyzer Instrument
Spectrum Analyzer Instrument Settings:
Frequency: 1574.2 MHz
Amplitude: -20 dBm
Use Peak Search (MKR)
Do not use 10:1 Divider
Yes
Span: 10 MHz
NOTE !
1577.4 MHz
-67 dBm signal at
MP 90 (L1403)
(±0.2 MHz)
(±10 dBm)
No
TROUBLESHOOTING
Replace
N1400
2 Volt DC at
MP 91 (R1418
VAGPS20)
Yes
2.8 Volt DC at
MP 95 (R1419
VAGPS28)
Yes
26 MHz at
MP 84 (R1414
AGPS_CLK)
Yes
No
No
No
SL 5 Replace
N2310
SL 4 Escalate
SL 5 Replace
N2311
SL 4 Escalate
SL 5 Replace
N2101 or N2010
SL 4 Escalate
Use Spectrum Analyzer Instrument
Spectrum Analyzer Instrument Settings:
Frequency: 1574.2 MHz
Span: 10 MHz
Amplitude: -20 dBm
Use Peak Search (MKR)
NOTE !
Do not use 10:1 Divider
1574.2 MHz
-63 dBm signal at
MP 90 (L1403)
(±3 dBm)
No
1.6V – 1.8V DC
at MP 123 (C1407
POWER_ON_CONTROL)
Yes
1574.2 MHz
-70 dBm signal at
MP 124 (C1402)
(±3 dBm)
Yes
No
Yes
SL 4 Replace
N1400
SL 5 Replace
N2010
Replace
N1400
SL 4 Replace
N1410
SL 5 Replace
Z1401
27 MHz at
MP 85 (R1404)
Yes
No
Replace
B1400
SL 4 Replace
N1400
SL 5 Replace
N2010
No
SL 5 Replace
Z1400
SL 4 Escalate
1225-4035 rev. 1
28 (122)
Page 29
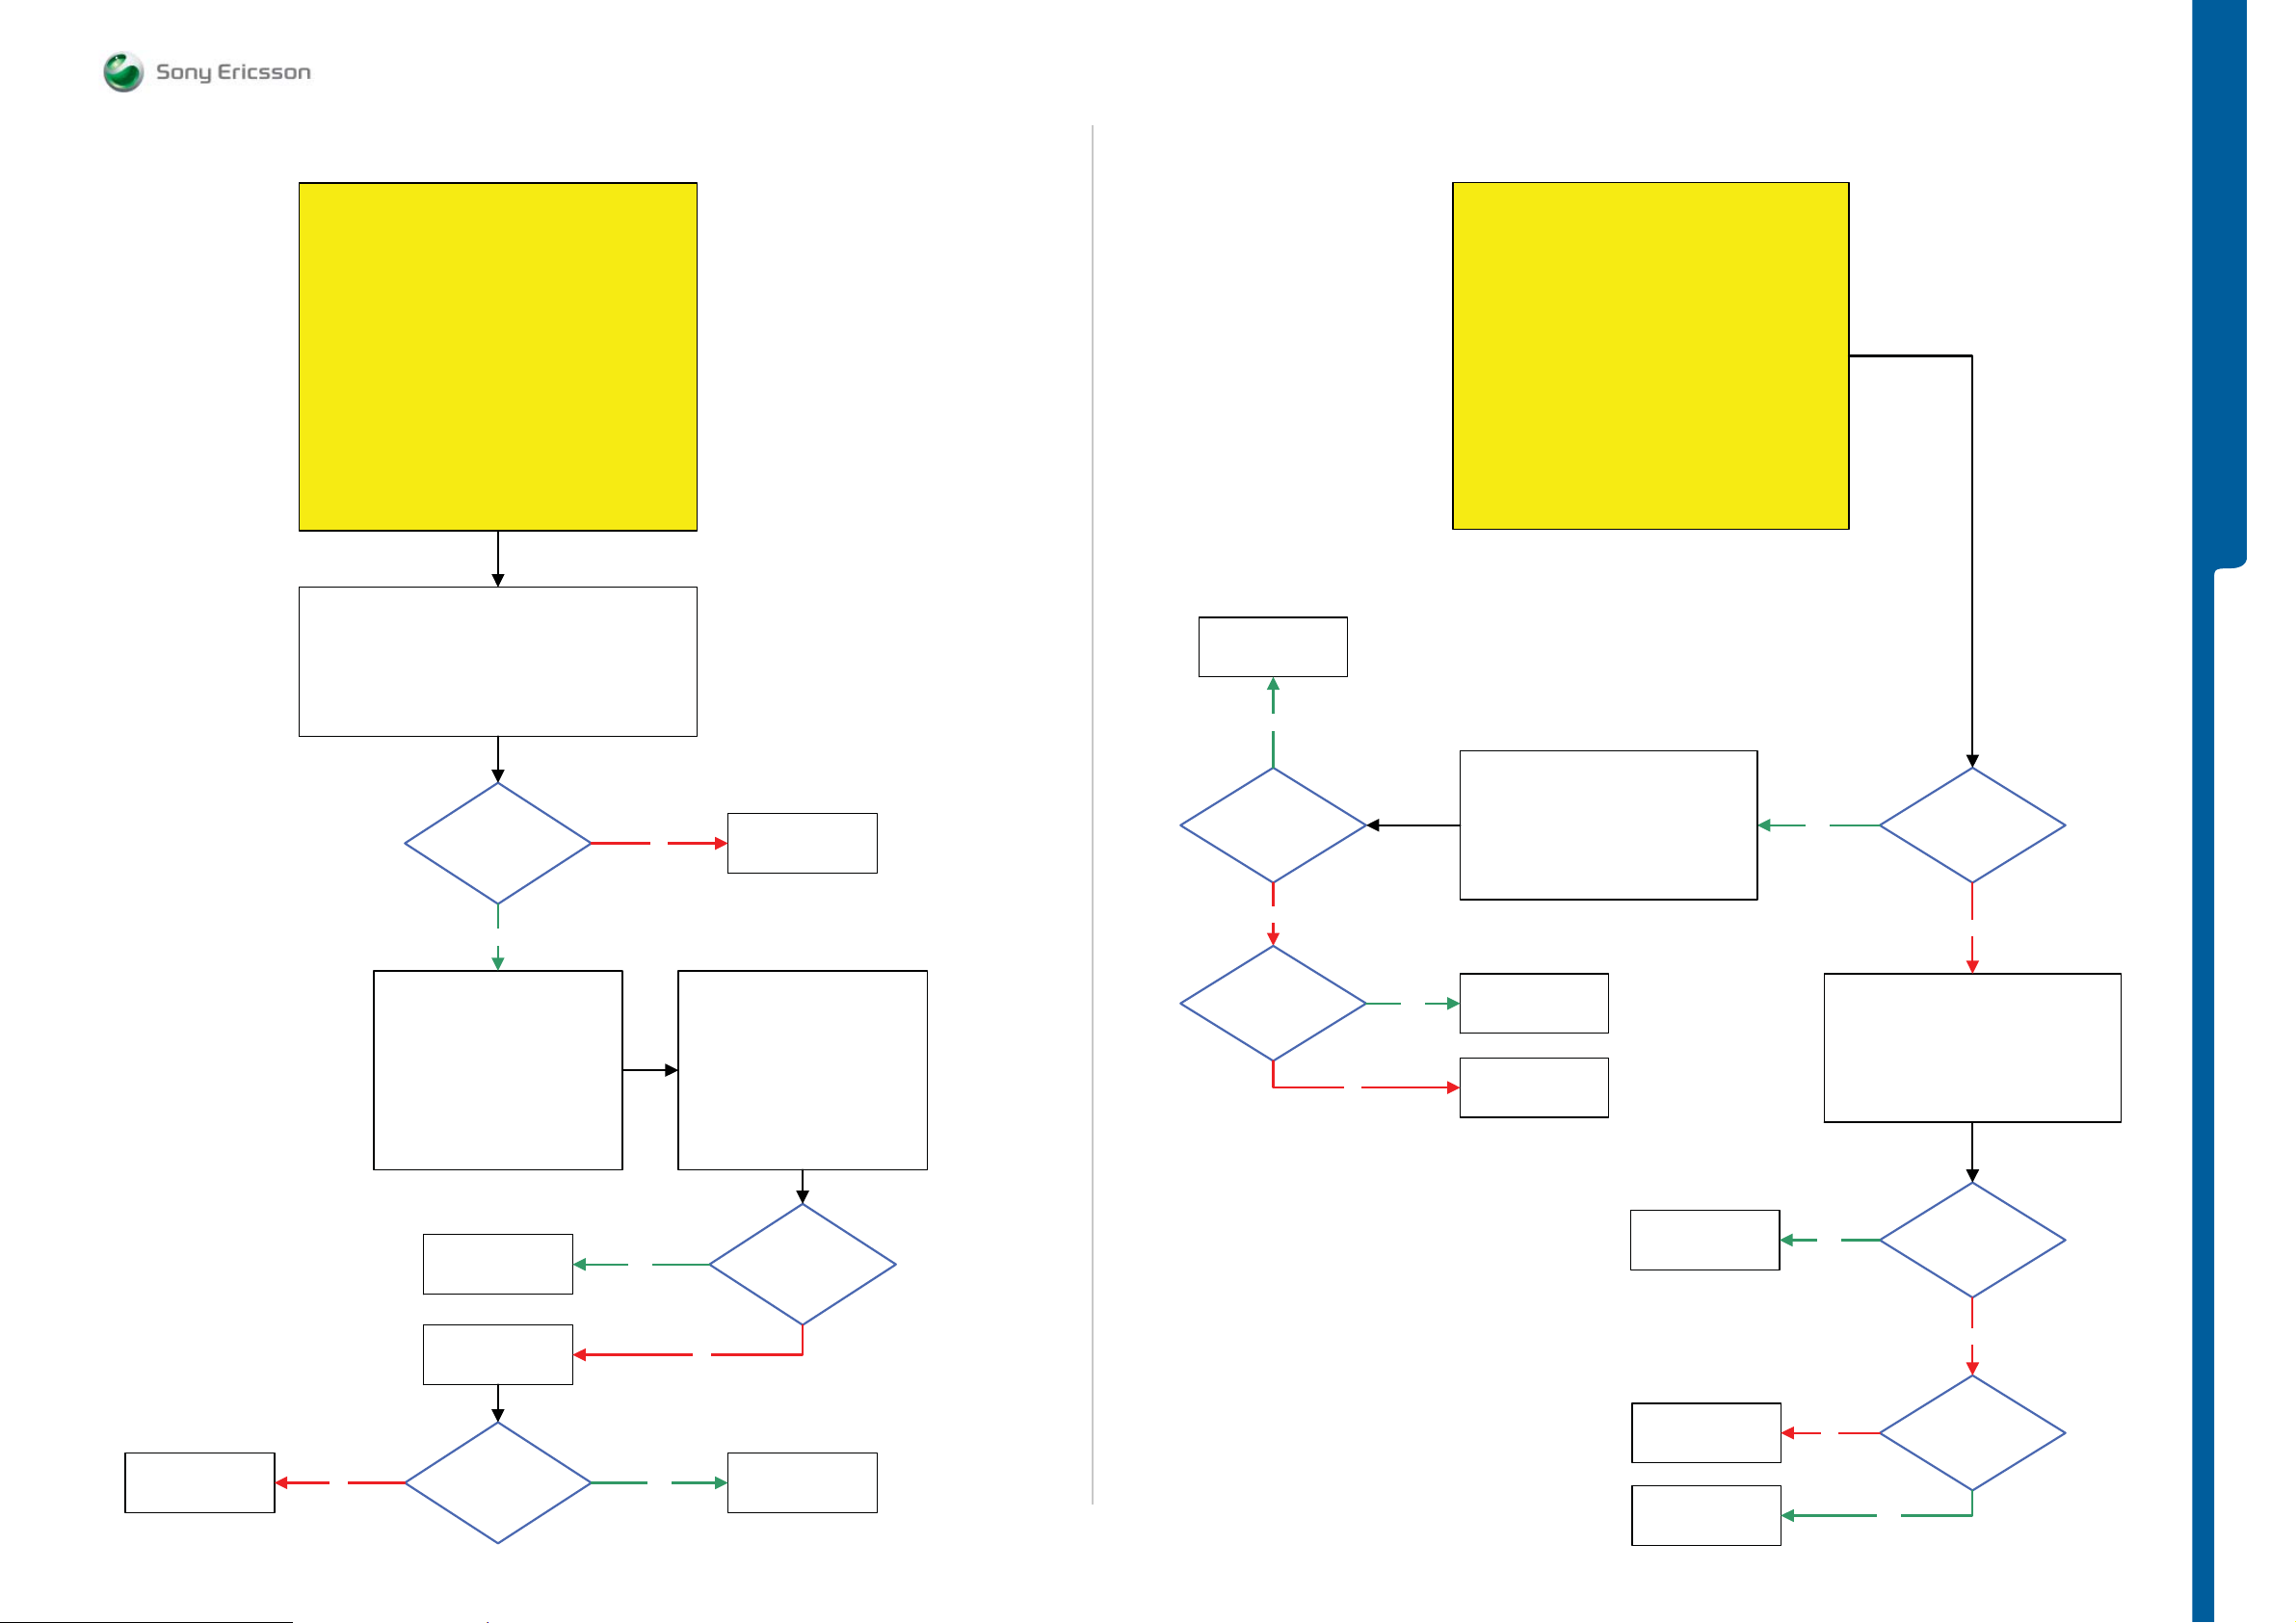
TROUBLESHOOTING Accelerometer Probl e ms
- Vibrator Proble ms
SEMC Troubleshooting Manual
G705 - W705 - W715
Accelerometer Problems
START
Step 1:
Got to Service Tests Menu and perform
the Accelerometer Test
If successful
Flash the Phone with EMMA SUCR SW
if not go to step 2.
Step 2:
Load ITP SW into the Phone
Use Dummy Battery connected to
Power Supply Channel 1 (VBATT)
Connect: DCIO/SEPI
Use Fault Trace SW
Fault Trace SW
General
Asic Revisions
Read All
Replace
B2000
Yes
Vibrator Problems
START
Step 1:
Load ITP SW into the Phone
Step 2:
Use TRS Fixture
Connect: VBATT and DCIO/SEPI
Use Fault Trace SW and go to:
MMI
Misc
Init Screen Testing
Activate:
Vibrator Test
TROUBLESHOOTING
Is
Accelerometer
(N2411)
Asic Revision
0x3b
Yes
Fault Trace SW
MMI
Misc
Init Screen Testing
Activate:
Accelerometer Test
NOTE! Read X, Y, Z information in
the Info Box.
Flash the Phone with
EMMA SUCR SW
Replace
N2411
No
NOTE! Read X, Y and Z information
NOTE! Repeat this Test Sequence
Yes
No
Replace
N2411
Move the Phone and
Activate
Accelerometer Test again
in the Info Box.
10 Times
Can
you see
that X, Y and Z
information are
changing in the
info box
Is MP 25, 29
(B2000_Pin 2 and 3)
Connected to PBA GND
(Shield Can Fence)
No
L4202 = Max 1.5 Ohm
Is
No
Yes
Remove the PBA
from the TRS Fixture
Scrap the
PBA
SL 5 Replace
L4202
SL 4 Escalate
SL 5 Replace
C4208 or C2003
SL 4 Escalate
Yes
Yes
2.7V – 3.5V
Pk-Pk Pulses DC at
MP 24 (TP4203)
No
Remove the PBA
from the TRS Fixture
Is any of
C4208 or C2003
Short circuit
No
SL 5 Replace
N2010
SL 4 Escalate
No
Is the
Accelerometer
Problem solved
Yes
Claim Component
N2411
SL 5 Replace
L4201
SL 4 Escalate
SL 5 Replace
N2000
SL 4 Escalate
No
L4201 = Max 1.5 Ohm
Is
Yes
1225-4035 rev. 1
29 (122)
Page 30
TROUBLESHOOTING Real Time Clock Problem s
- Slide Senso r Prob lems
SEMC Troubleshooting Manual
G705 - W705 - W715
START
Does
the Phone
Gain or Lose
Time
Real Time Clock Problems
Yes
Perform:
SERP Calibration
Slide Sensor Problems
START
Step 1:
Replace Magnet and retest the Phone
If successful claim Magnet
If not go to step 2.
Step 2:
Replace Hinge Slider Sub Assembly and retest the Phone
If successful claim Hinge Slider Sub Assembly
If not go to step 3.
Step 3:
Continue with the
Slide Sensor Problems TRS guide
SL 4 Replace
B4410
SL 5 Replace
N2010
TROUBLESHOOTING
No
Perform:
Backup Capacitor
Test
Is the
Test Passed
No
Yes
Is there
still problems with
Gaining or Losing
Time
Flash the Phone with
EMMA SUCR SW
SL 4 Replace
C2214
SL 5 Replace
N2000
Yes
No
Claim
SERP Calibration
Replace
B2100
1225-4035 rev. 1
30 (122)
Page 31
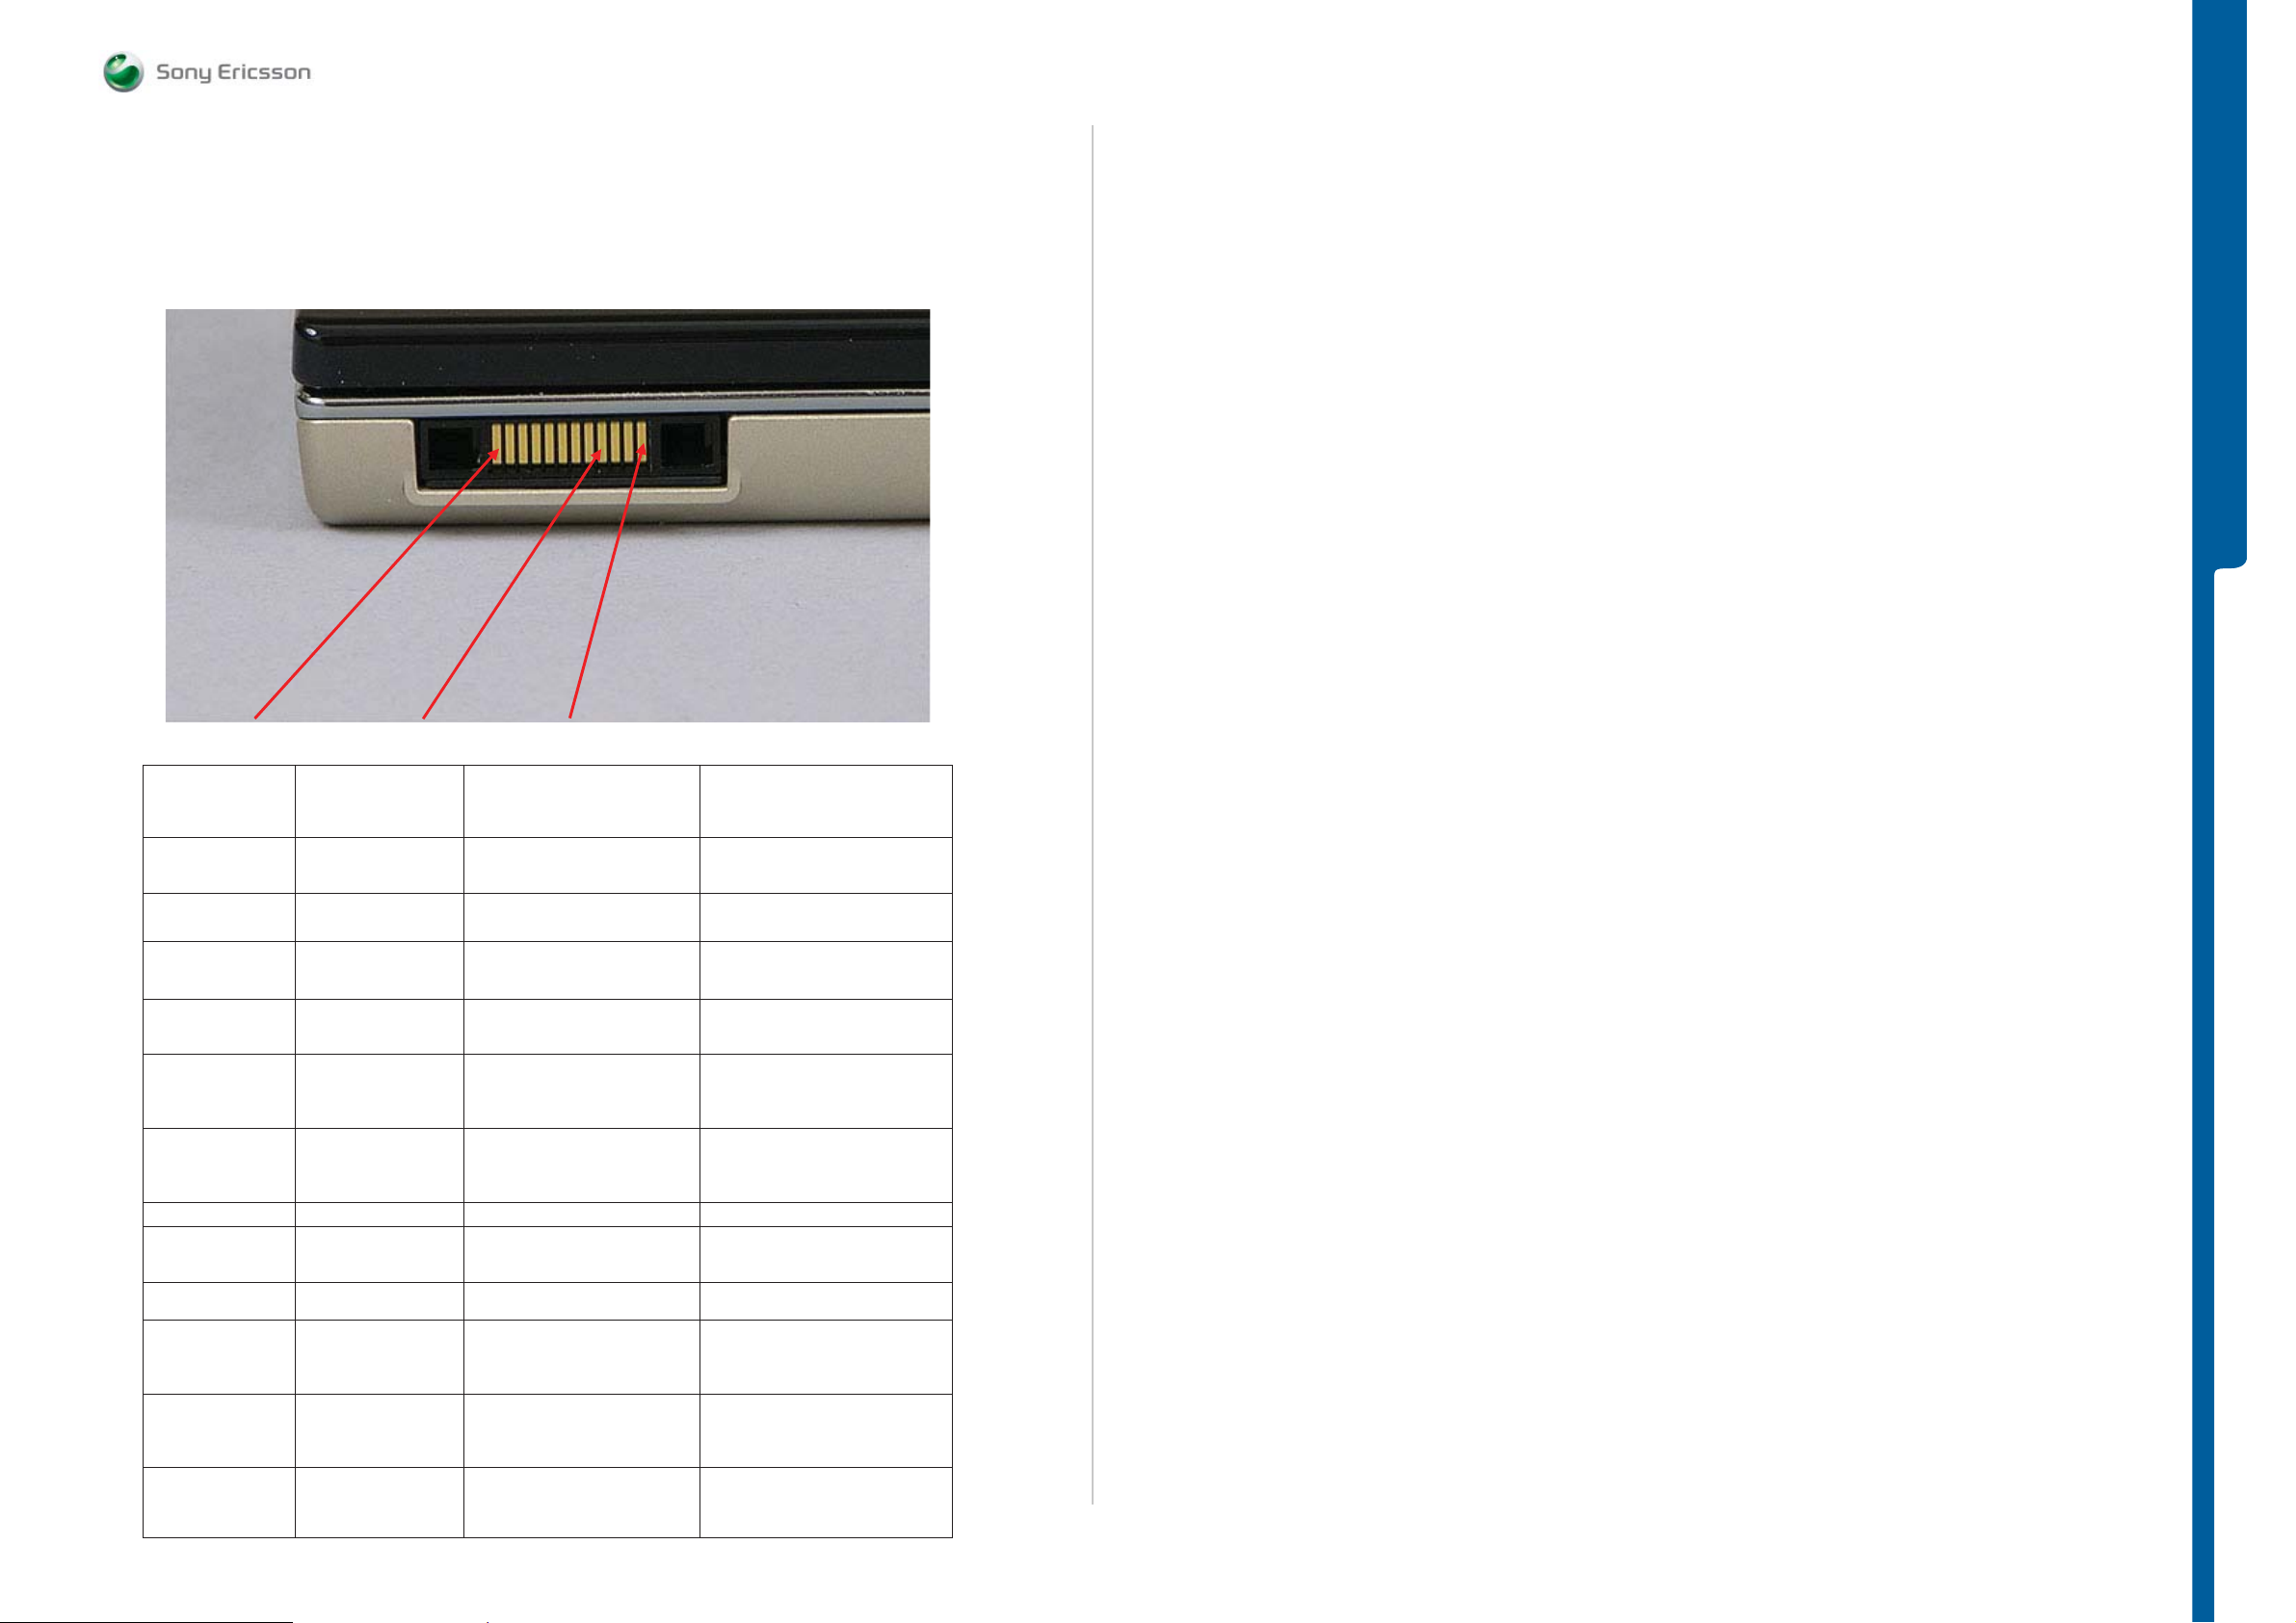
TROUBLESHOOTING System Conne ct or Prote ct i on Test
g
g
g
g
g
g
- Current Con su m pt io n Test
SEMC Troubleshooting Manual
G705 - W705 - W715
System Connector Protection Test
Perform the Ohm measurements by using the DMM instrument (Fluke).
Note!
Note! Connect the Black probe to the X2405_PIN 9 (GND).
The Battery must be removed from the Phone during this test.
Current Consumption Test
Step 1:
Insert a Local SIM Card and use the phone with the Normal SW (SSW).
Use Dummy Battery connected to Power Supply Channel 1 (VBATT).
Instrument settings: Voltage: 3.8 Volt, Limiter 3A.
Note! The Dummy Battery should have approximately 120K Ohm resistance between GND
and BDATA.
Measure the current consumption when Phone is turned off.
Take a note of the current consumption at Power Supply Channel 1 (VBATT).
The Current consumption in off mode should be less than 1mA.
If more than 1mA go to Dead Phone Problems part 1 TRS guide.
Step 2:
Turn the Phone On:
Measure the deep sleep current max 6mA typical between 0-3mA. Make sure that the
operator is running with deep sleep mode.
Note! This operation can be switched off by operator if network is busy or heavily loaded.
TROUBLESHOOTING
PIN_1 PIN_9 GND PIN_12
System Conn.
X2405
(PIN Position)
1 0L
2 0
3 10k - 12k
4 0.9k – 1.1k
5 0.9k – 1.1k
6 0.9k – 1.1k
7 0L
8 400k – 700k
9 GND
10 35k – 0L
11 250k – 360k
Ohm
Measurements
(Ohm)
SL 4
(Repair Action)
X2405
L2452
N2421 if lower
X2405 if higher
L2406 if higher
X2405 if higher
L2401 if higher
N3101 if lower or higher
X2405 if higher
L2402 if higher
N3101 if lower or hi
X2405 if higher
L2403 if higher
L2408 if higher
N3101 if lower or hi
X2405 if higher
L2404 if higher
L2405 if higher
N3101 if lower or hi
Not Connected Not Connected
X2405 if higher
V2417 if lower
N2422 if lower or hi
X2405 if higher
R2449 if hi
X2405
Z2400
V2416 if lower
N2420 if lower
X2405 if higher
Z2400 if higher
V2415 if lower
N2420 if lower or hi
her
her
her
her
her
her
SL 5
(Repair Action)
C2439 if lower
No Action
L2453 if higher
C2443 if lower
L2455 if higher
C2442 if lower
C2448 if lower
C2447 if lower
R2434 if higher
R2437 if higher
No Action
R2445
R2446 if higher
If the phone is using more than 6mA, then go to EMMA and run Software Update Contents
Refresh (SUCR SW).
Step 3 with Fault Trace SW application:
- Flash the phone with ITP SW
- Use Dummy Battery connected to the Power Supply Channel 1 (VBATT)
- Use Fault Trace SW
- Connect Dummy Battery connected to the Power Supply Channel 1 (VBATT):
Instrument settings: Voltage: 3.8 Volt, Limiter 3 A
- Connect DCIO/SEPI to the phone:
Instrument settings: Voltage: 5 Volt, Limiter 2 A
Perform the following tests:
- Max TX Power GSM 850 MHz
Fault Trace SW settings:
TX and RX GSM
GSM Mode Settings:
TX Switched
GSM Radio Settings:
Select Band: GSM 850
Channel: 128
Power Level: 5
Limits GSM 850 MHz
- Transmitter Current Limits: 200mA - 270mA
- Tolerance: ±20%
12 85k – 110k
R2490 if higher
V2202 if lower
C2440 if lower
C2441 if lower
1225-4035 rev. 1
31 (122)
Page 32

TROUBLESHOOTING Current Cons um pt io n Test
SEMC Troubleshooting Manual
G705 - W705 - W715
- Max TX Power GSM 900 MHz
Fault Trace SW settings:
TX and RX GSM
GSM Mode Settings:
TX Switched
GSM Radio Settings:
Select Band: GSM 900
Channel: 1
Power Level: 5
Limits GSM 900 MHz
- Transmitter Current Limits: 250mA - 330mA
- Tolerance: ±20%
- Max TX Power DCS 1800 MHz
Fault Trace SW settings:
TX and RX GSM
GSM Mode Settings:
TX Switched
GSM Radio Settings:
Select Band: DCS 1800
Channel: 512
Power Level: 0
Limits DCS 1800 MHz
- Transmitter Current Limits: 190mA – 240mA
- Tolerance: ±20%
- Max TX Power PCS 1900 MHz
Fault Trace SW settings:
TX and RX GSM
GSM Mode Settings:
TX Switched
GSM Radio Settings:
Select Band: PCS 1900
Channel: 512
Power Level: 0
Limits PCS 1900 MHz
- Transmitter Current Limits: 170mA – 240mA
- Tolerance: ±20%
- Max TX Power WCDMA BAND I
Note! Applies only for G705, W705 and W715 that has WCDMA BAND I support.
- Max TX Power WCDMA BAND II
Note! Applies only for G705, W705 and W715 that has WCDMA BAND I support.
Fault Trace SW settings:
TX and RX WCDMA
Radio Settings:
Select Band: BAND I
Fast Select Channels: Ch LOW
Modes: Max Pwr 23dBm
Limits WCDMA BAND I
- Transmitter Current Limits: 450mA – 500mA
- Tolerance: ±20%
- Max TX Power WCDMA BAND V
Note! Applies only for G705, W705 and W715 that has WCDMA BAND I support.
Fault Trace SW settings:
TX and RX WCDMA
Radio Settings:
Select Band: BAND I
Fast Select Channels: Ch LOW
Modes: Max Pwr 23dBm
Limits WCDMA BAND I
- Transmitter current: 500mA - 550mA
- Tolerance: ±20%
- Max TX Power WCDMA BAND VIII
Note! Applies only for G705, W705 and W715 that has WCDMA BAND I support.
Fault Trace SW settings:
TX and RX WCDMA
Radio Settings:
Select Band: BAND I
Fast Select Channels: Ch LOW
Modes: Max Pwr 23dBm
Limits WCDMA BAND I
- Transmitter current: 550mA – 1000mA
- Tolerance: ±20%
If the current consumption is out of the test limits then try to solve the problem by running
SERP Calibration.
If there are still problems with the current consumption then go to the following TRS guides:
TROUBLESHOOTING
Fault Trace SW settings:
TX and RX WCDMA
Radio Settings:
Select Band: BAND I
Fast Select Channels: Ch LOW
Modes: Max Pwr 23dBm
Limits WCDMA BAND I
- Transmitter Current Limits: 600mA – 700mA
- Tolerance: ±20%
GSM Network problems,
WCDMA I, II, V Network Problems or
WCDMA VIII Network Problems
If the current consumption is within the test limits then go to: Cha
rging Test.
1225-4035 rev. 1
32 (122)
Page 33
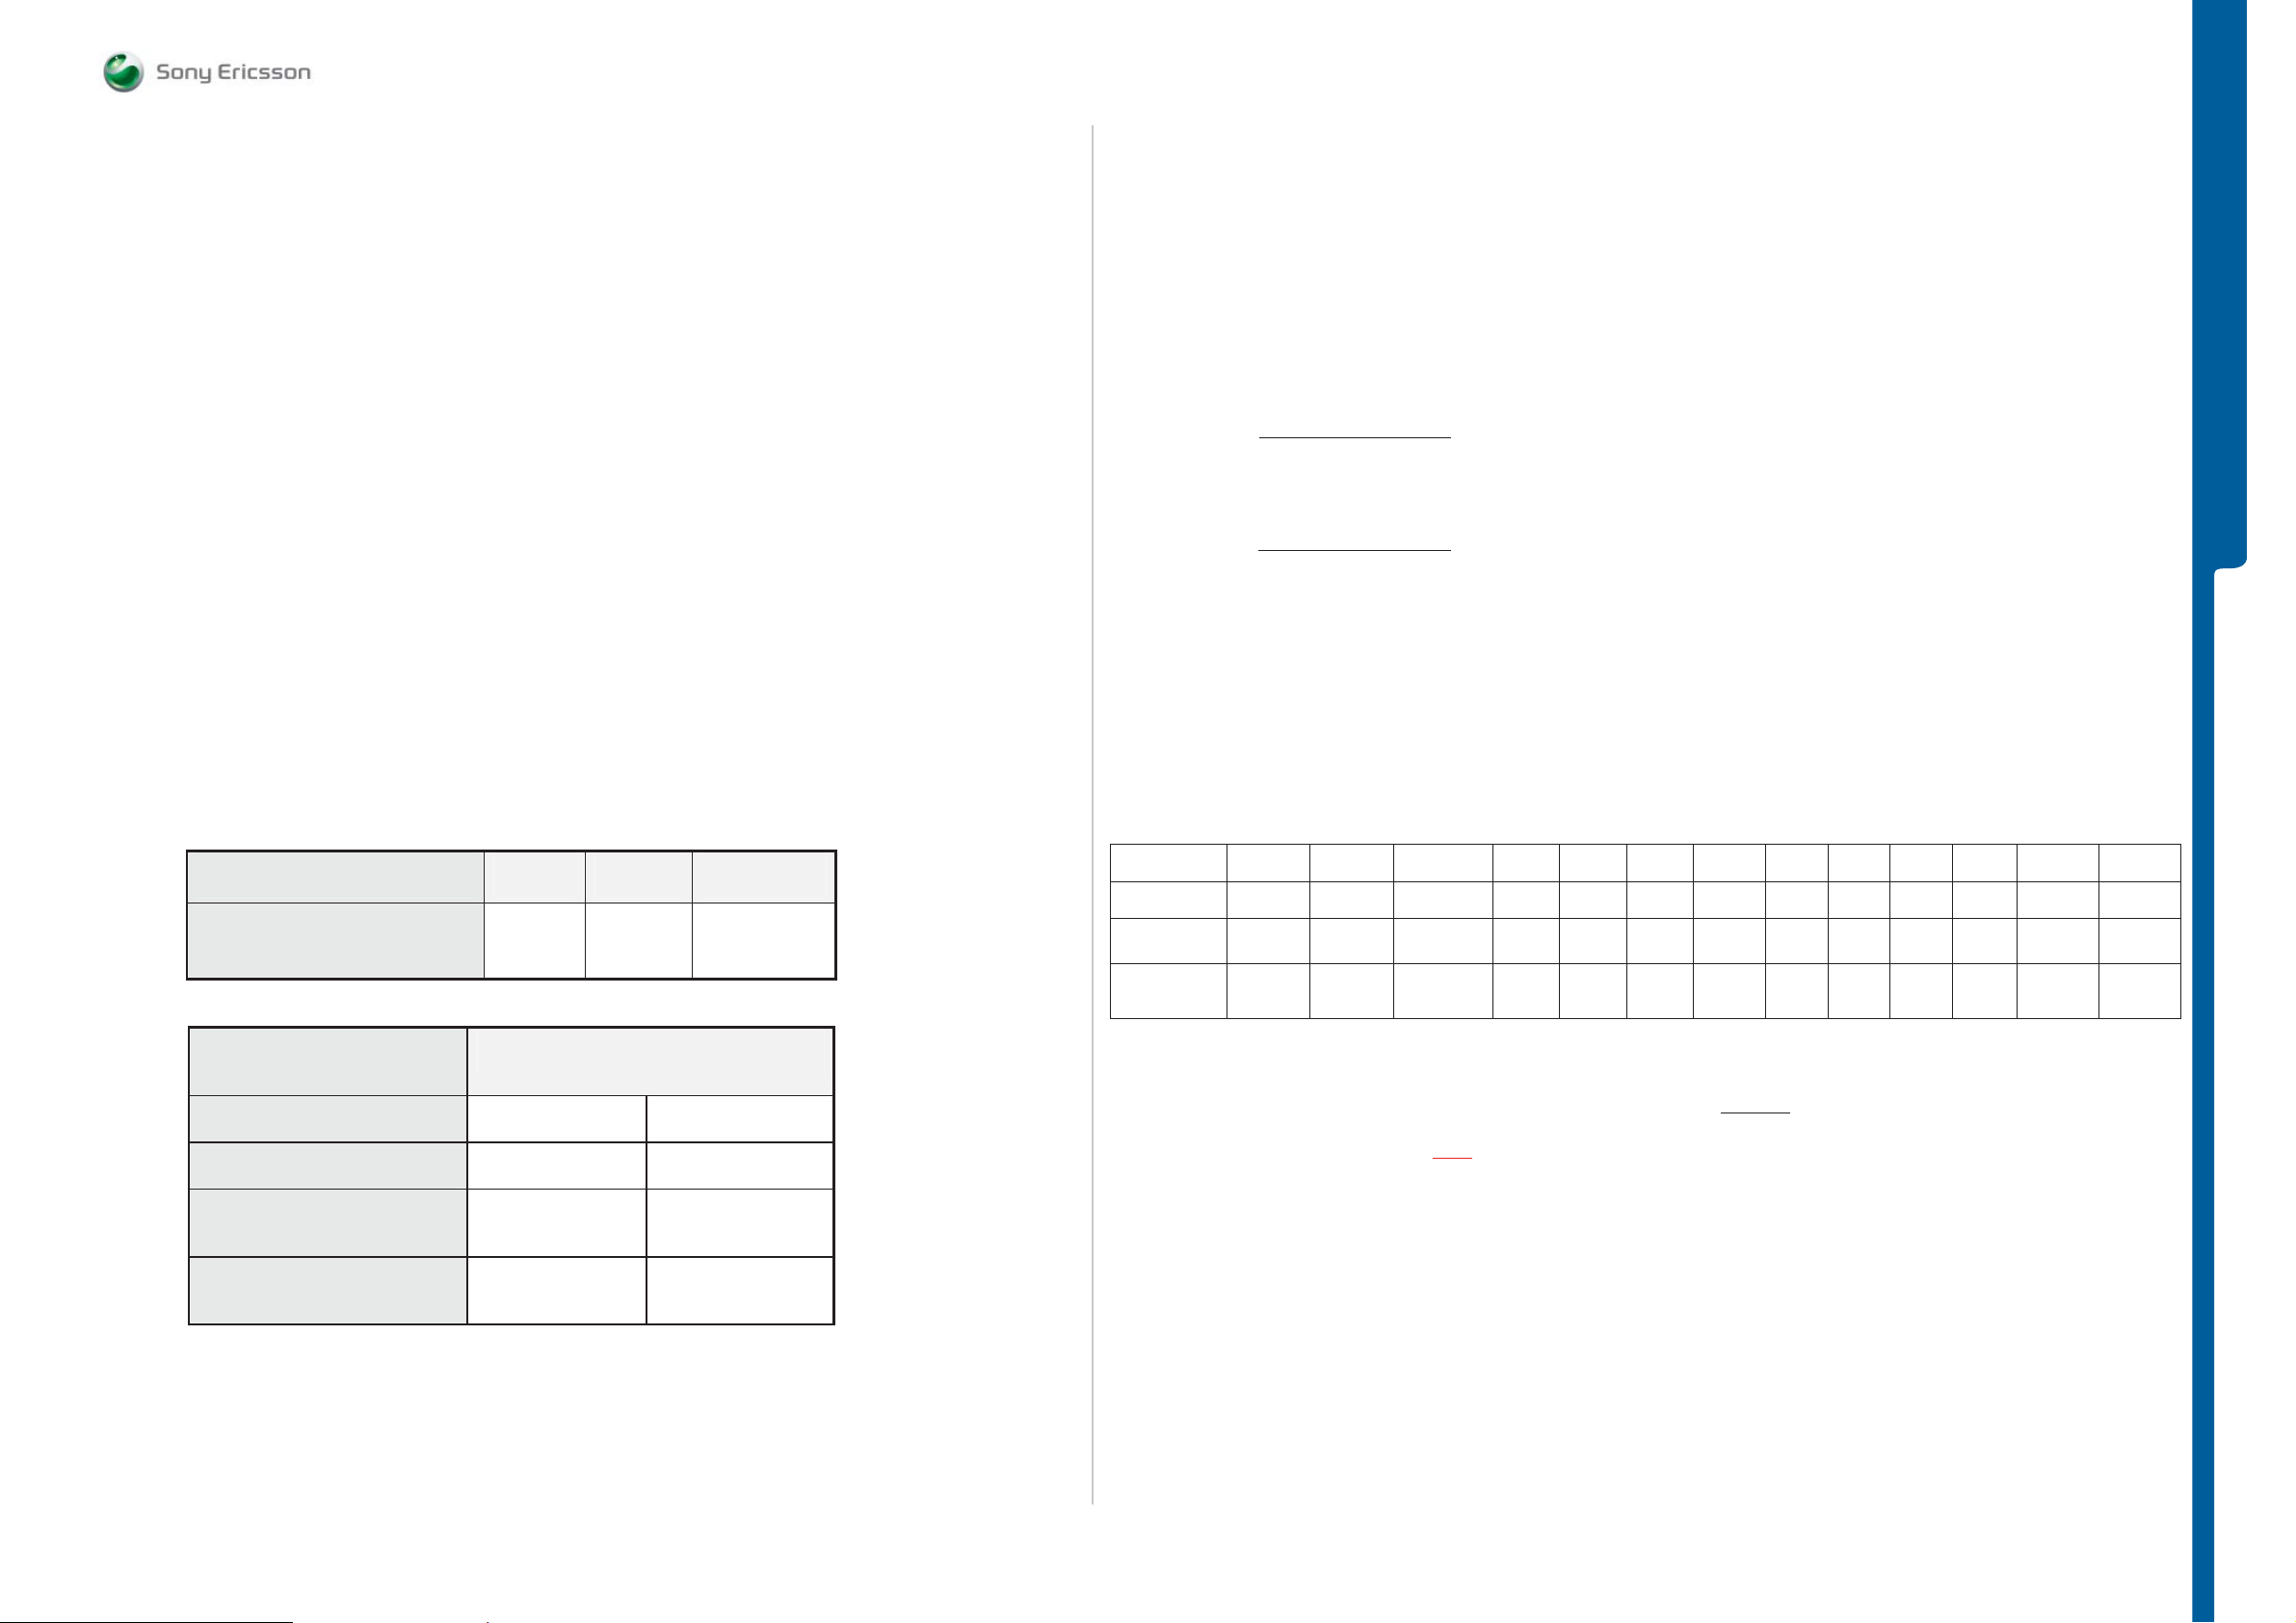
TROUBLESHOOTING Backup Capacitor Test
g
g
g
- Charging Test
SEMC Troubleshooting Manual
G705 - W705 - W715
Backup Capacitor Test
To perform this test use:
- Phone with the ITP SW
- Power Supply Channel 1 VBATT: Instrument settings: Voltage: 3.8V, Limiter: 2A
- Power Supply Channel 2 DCIO/SEPI: Instrument settings Voltage: 5V, Limiter: 2A
This test should be performed in 3 steps:
Step1:
Measure the voltage at the Backup capacitor by using Fault Trace SW - Logic - ADC Values – Read
ADC Value (Reading 1).
Step2:
This step should be made 30 seconds after Step 1. Measure the voltage at the Backup capacitor by
using Fault Trace SW - Logic – ADC Values - ADC Channels – Read ADC Value (Reading 2).
Step3:
Compare the difference between Reading 1 and Reading 2 with the reference table below. If the
Reading 1 value is between 50 and 680 go to Interval 1, if between 681 and 800 go to Interval 2, if
between 801 and 880 go to Interval 3 and compare with the Reading 2 – Reading 1 Min and Max
Limits.
Reference Table:
Min Max Unit
Absolute readout
Reading 1
Reading 1 (Dec) Reading 2 – Reading 1 (Dec)
50 880 Dec
Charging Test
To perform this test use:
- Phone with the Normal SW (SSW)
- Dummy Battery connected to Power Supply Channel 1 (VBATT)
Note! The Dummy Battery should have approximately 120K Ohm resistance between GND
and BDATA.
- Power Supply Channel 1 (VBATT)
Instrument settings:
Voltage: from 3.0 Volt to 4.2 Volt, according to the VBATT row in the Reference Table below.
Limiter: 2A
- Power Supply Channel 2 (DCIO/SEPI)
Instrument settings:
Voltage: 5V
Limiter: 2A
Test instr uctions:
- Disconnect the DCIO/SEPI Cable between each measurement and wait for phone shutdown
when changing VBATT voltage.
- Take a note of the Current measurements at Power Supply Channel 2 DCIO/SEPI and
Display charging indicator X seconds after DCIO/SEPI cable has been inserted according to
the Test Time row in the reference table below.
- Compare the test results with the reference table below, tolerance +/-20%.
Reference Table
VBATT x
Volt 3.0 3.1 3.2 3.3 3.4 3.5 3.6 3.7 3.8 3.9 4.0 4.1 4.2
Test Time x
sec. 15s 15s 25s 25s 30s 30s 30s 30s 30s 30s 30s 30s 25s-45s
DCIO/SEPI
Current mA 250 250 250-500 500 600
Display
indicate
chargin
NothingNothin
Yes or
Nothin
Yes Yes Yes Yes Yes Yes Yes Yes
600-
700
750-
1200
800-
1200
8001200
8001200
7001000
400-
900 0
Yes or
Fully
Charged
TROUBLESHOOTING
Fully
Charged
Min Max
Interval 1 (50 – 680) 20 210
Interval 2 (681 – 800) 5 30
Interval 3 (801 – 880) 0 10
Note! The upper table contains the absolute limits for the readouts. The lower table contains the
allowed delta between the first and the second readout, separated in time with 30 seconds.
Note! If the readings are out of limits then replace the C2214 (Backup Capacitor). If the problem is
not solved then SL 5 Replace N2000 SL 4 Escalate.
Note! The Power Supply Channel 1 (VBATT) must allow reverse current.
If the charging current is NOT
equal to the reference table then go to:
Charging Problems TRS Guide.
If the charging current is equal to reference table then insert the normal battery and test the
charging current to define if the phone battery is working properly.
Measure the voltage at the battery to define the current level.
If the battery is receiving the right current, then the phone and the battery are working properly.
1225-4035 rev. 1
33 (122)
Page 34
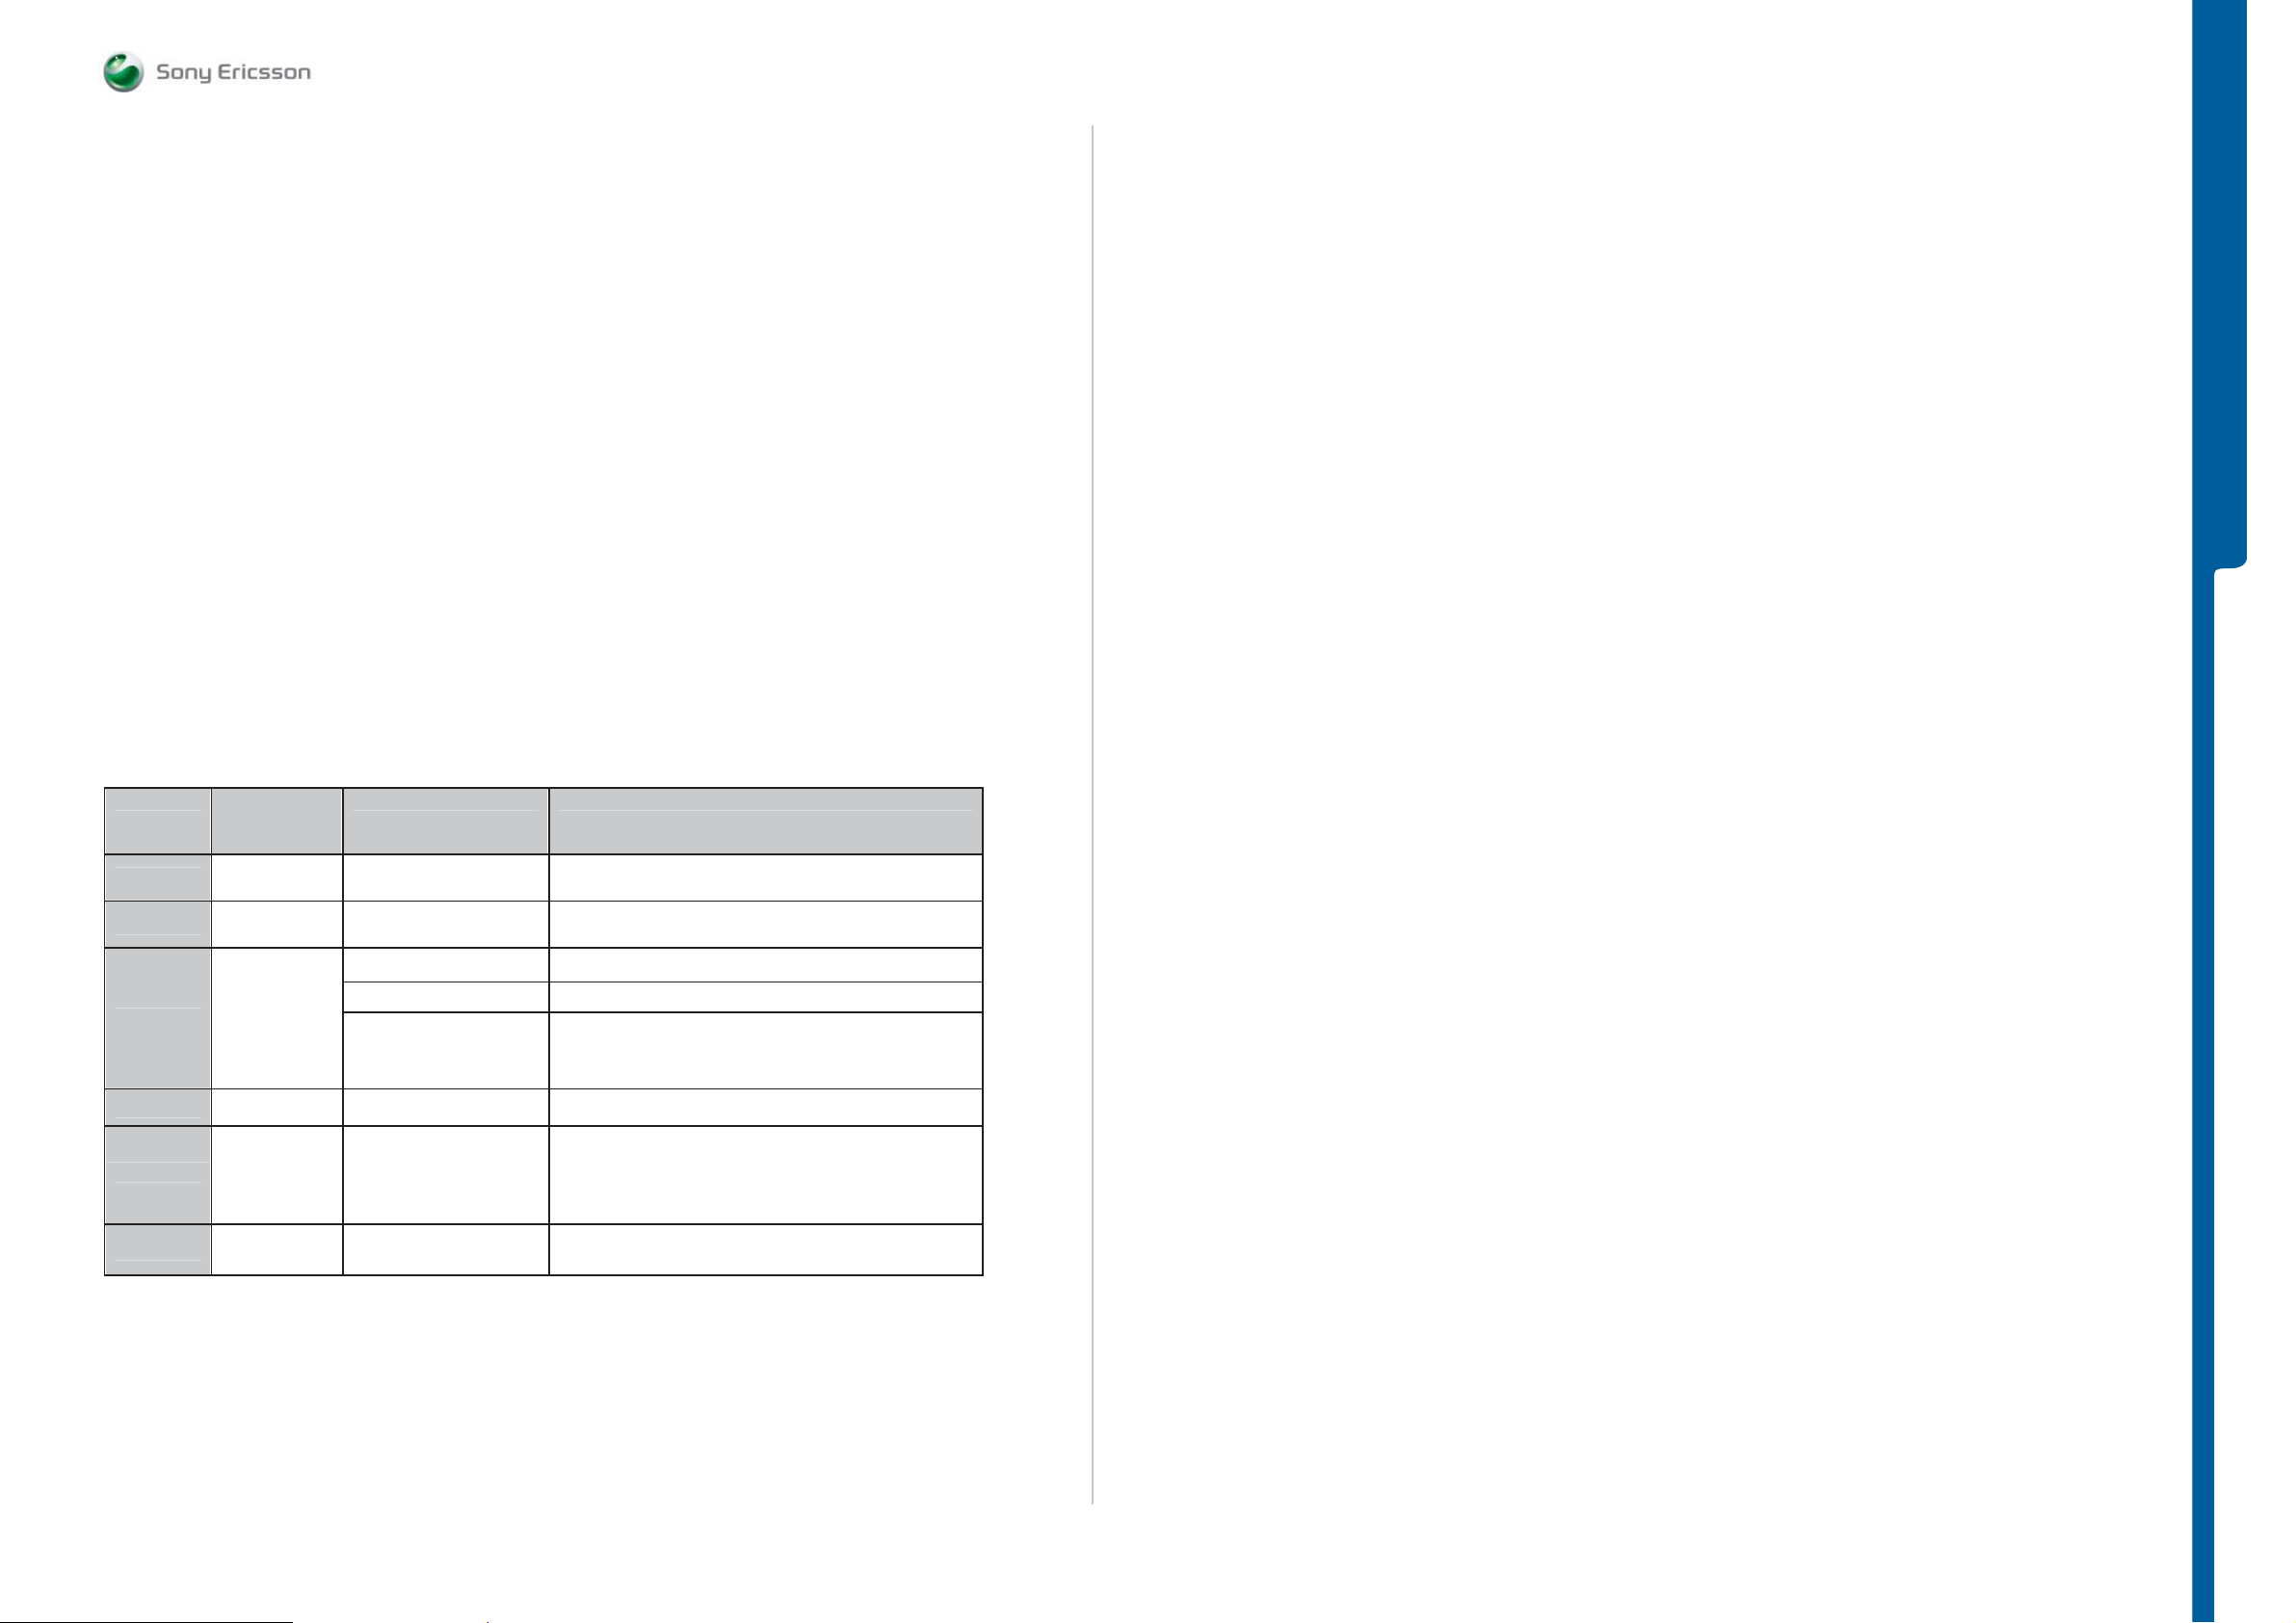
TROUBLESHOOTING ASIC Revision Test
ASIC Revision Test
Note! The Keypad Scan Test may not be activated when performing this test.
Purpose:
- Verify that the ASICs are correctly mounted, that the communication works
and that the revisions are correct.
The tested ASICs are:
- D2010 (Kajsa)
- N2000 (Vera)
- N1300 (Bluetooth and FM Radio ASIC)
- N2411 (Accelerometer)
- N1400 (A-GPS Module)
To perform this test use:
- Phone with the ITP SW
- TRS Fixture
- Power Supply Channel 1 VBATT (Voltage: 3.8V, Limiter: 2A)
- Power supply Channel 2 DCIO/SEPI (Voltage: 5V, Limiter: 2A)
- Fault Trace SW and go to: General – Asic Revisions – Read All
SEMC Troubleshooting Manual
G705 - W705 - W715
TROUBLESHOOTING
Reference Table:
ASIC
N2010 1208-3871 CPU (Kajsa) 0xE8
N2000 1202-0639
N1300 1200-6182
N2411 1202-1676 Accelerometer 0x3b
N1400 1200-0700
Part
number
Description Return value (hex)
Power Management
(Vera)
Bluetooth
Firmware Revi sion Ox5,0x3
Chip ID 0x0,0x0,0x0,0x0
0xC8
Will always return 0 on STLC because Chip ID is
not supported.
A-GPS Module 254,0,253,192,0,242,113,9,16,252
Note! This test is not valid for the W705 Phone.
N1300 1200-6182 FM Radio
When FM Radio is On: Ox1253
When FM Radio is Off: Ox1200
1225-4035 rev. 1
34 (122)
Page 35
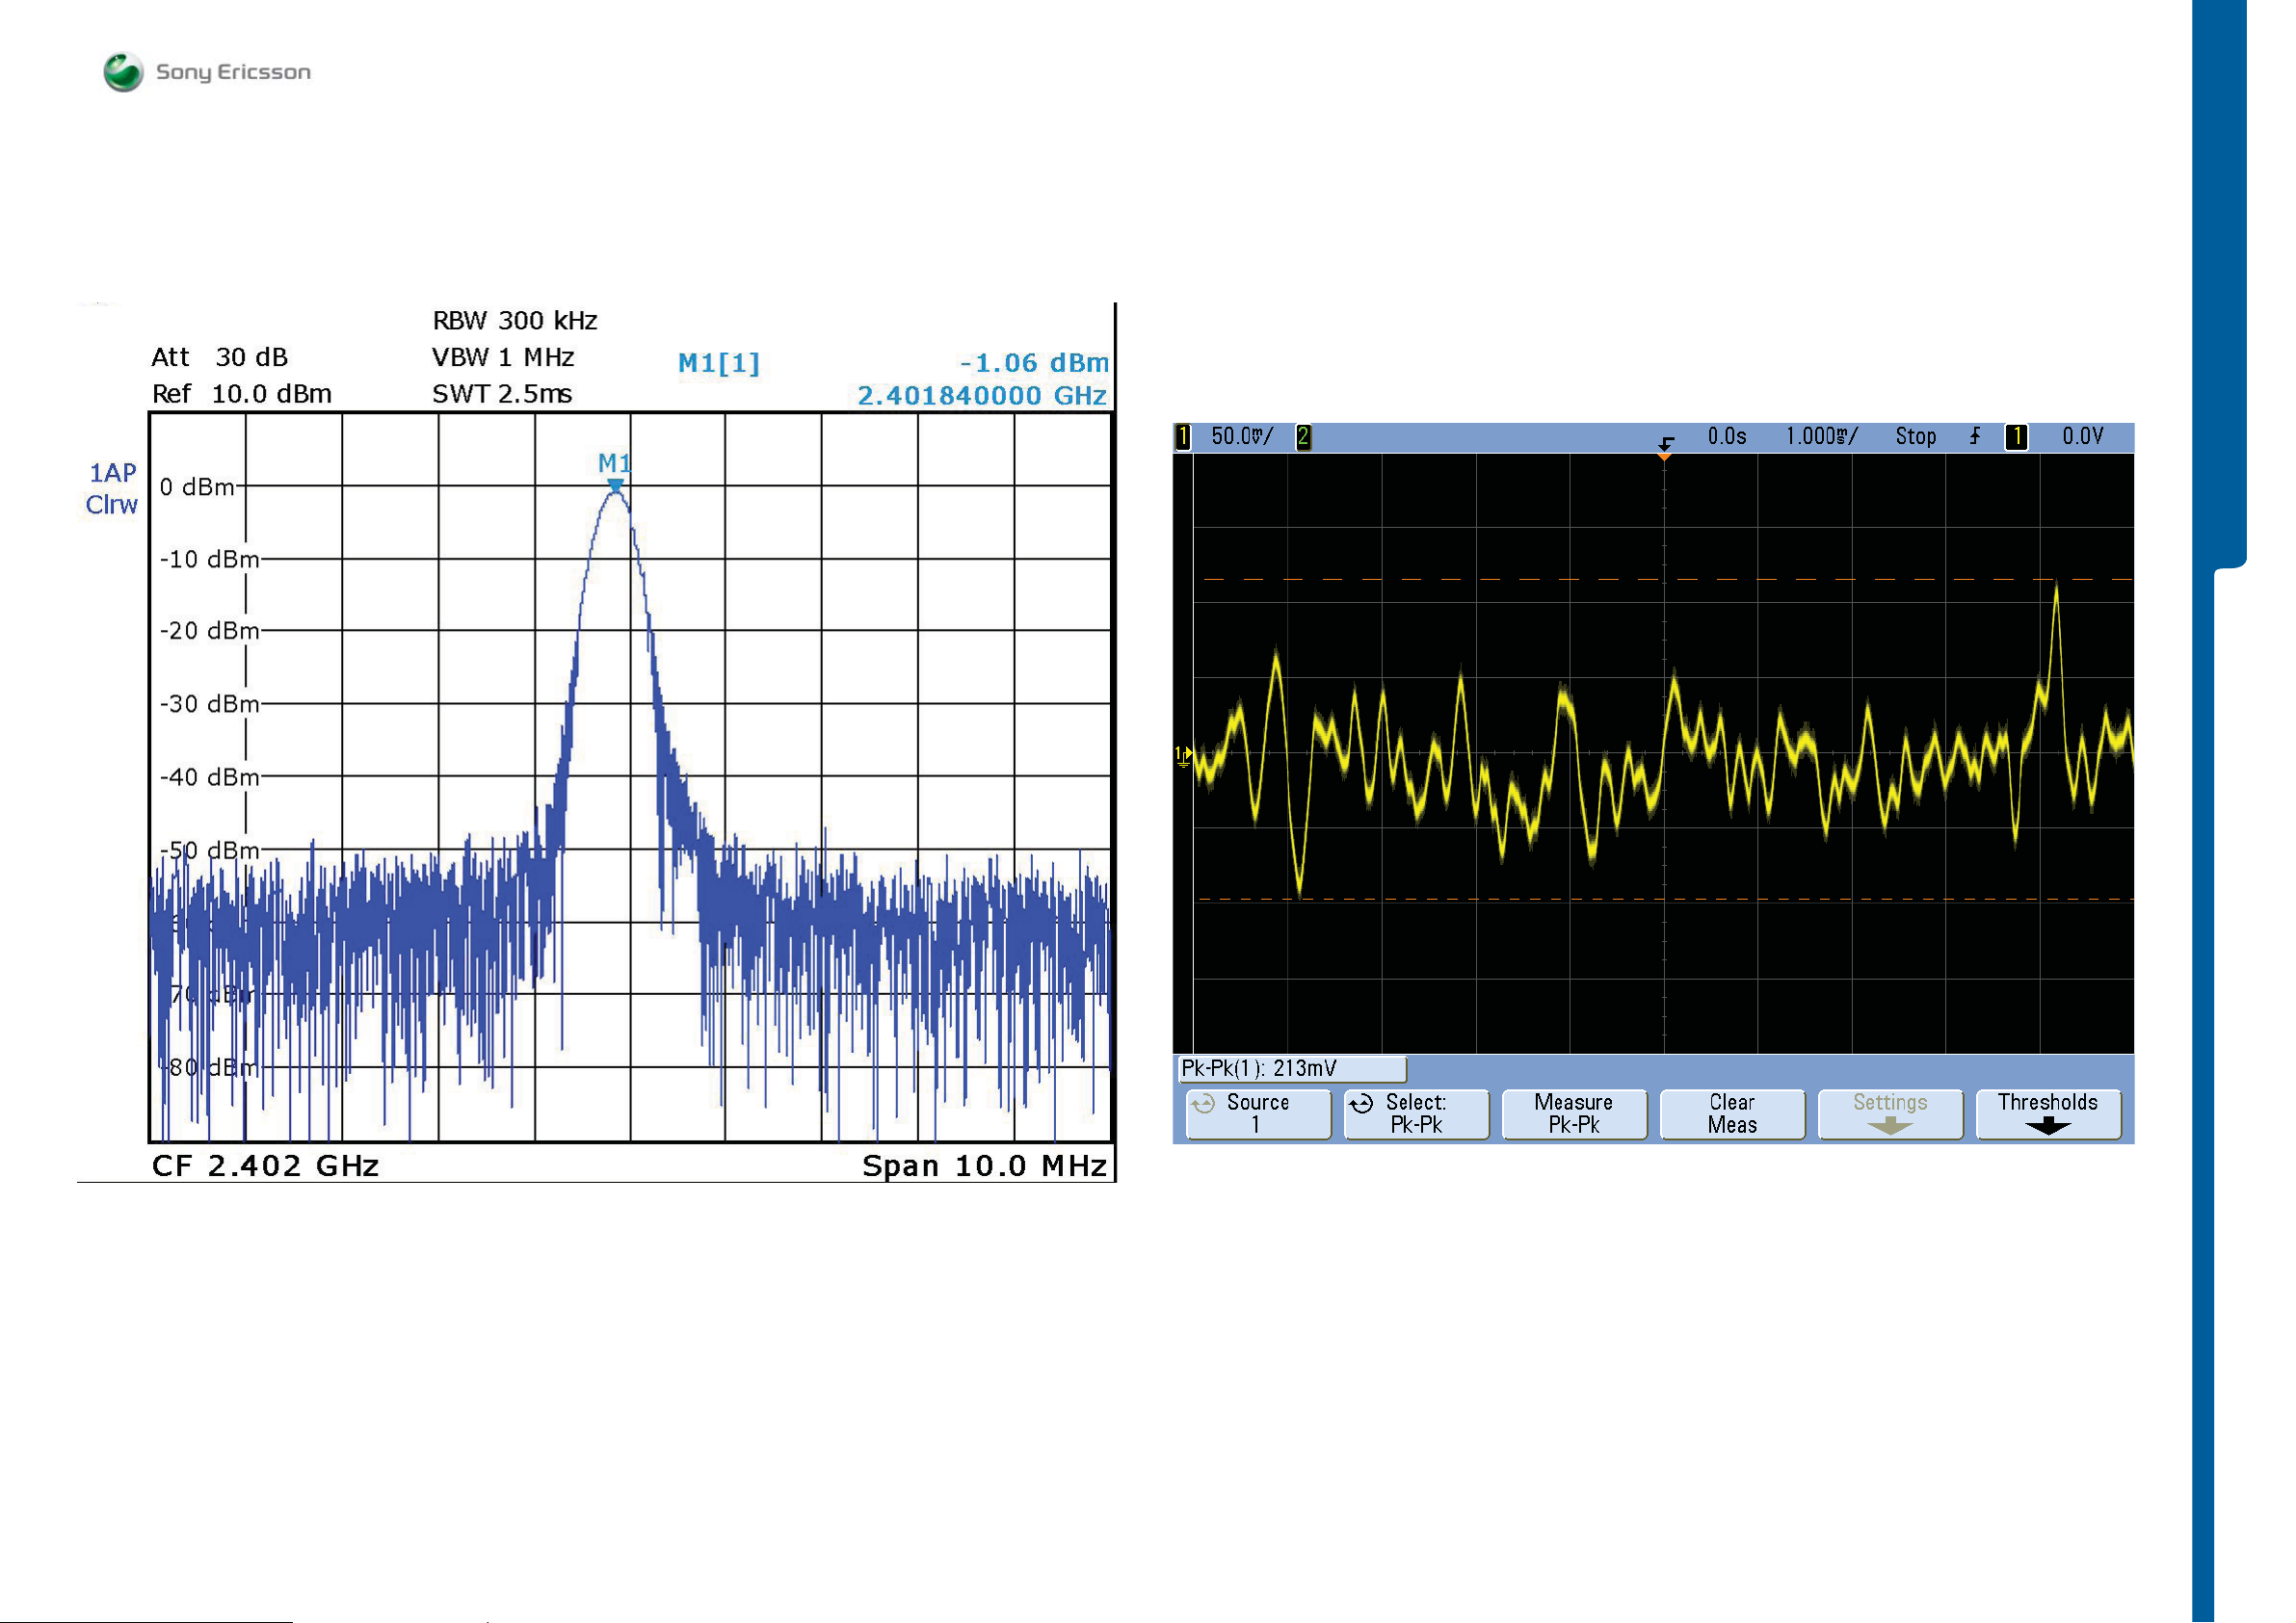
TROUBLESHOOTING Measurement Points Pictures
SEMC Troubleshooting Manual
G705 - W705 - W715
TROUBLESHOOTING
MP 2, 3 (W1300 Pind 3 and 4)
MP 8 (L2403), MP 9 (L2404), MP 69 (C3155), MP 74 (C3149), MP 75
(C3125), MP 76 (C3124), MP 77 (C3150) and MP 78 (C3156)
Note: This is an example! The shape of the signal can be different.
1225-4035 rev. 1
35 (122)
Page 36
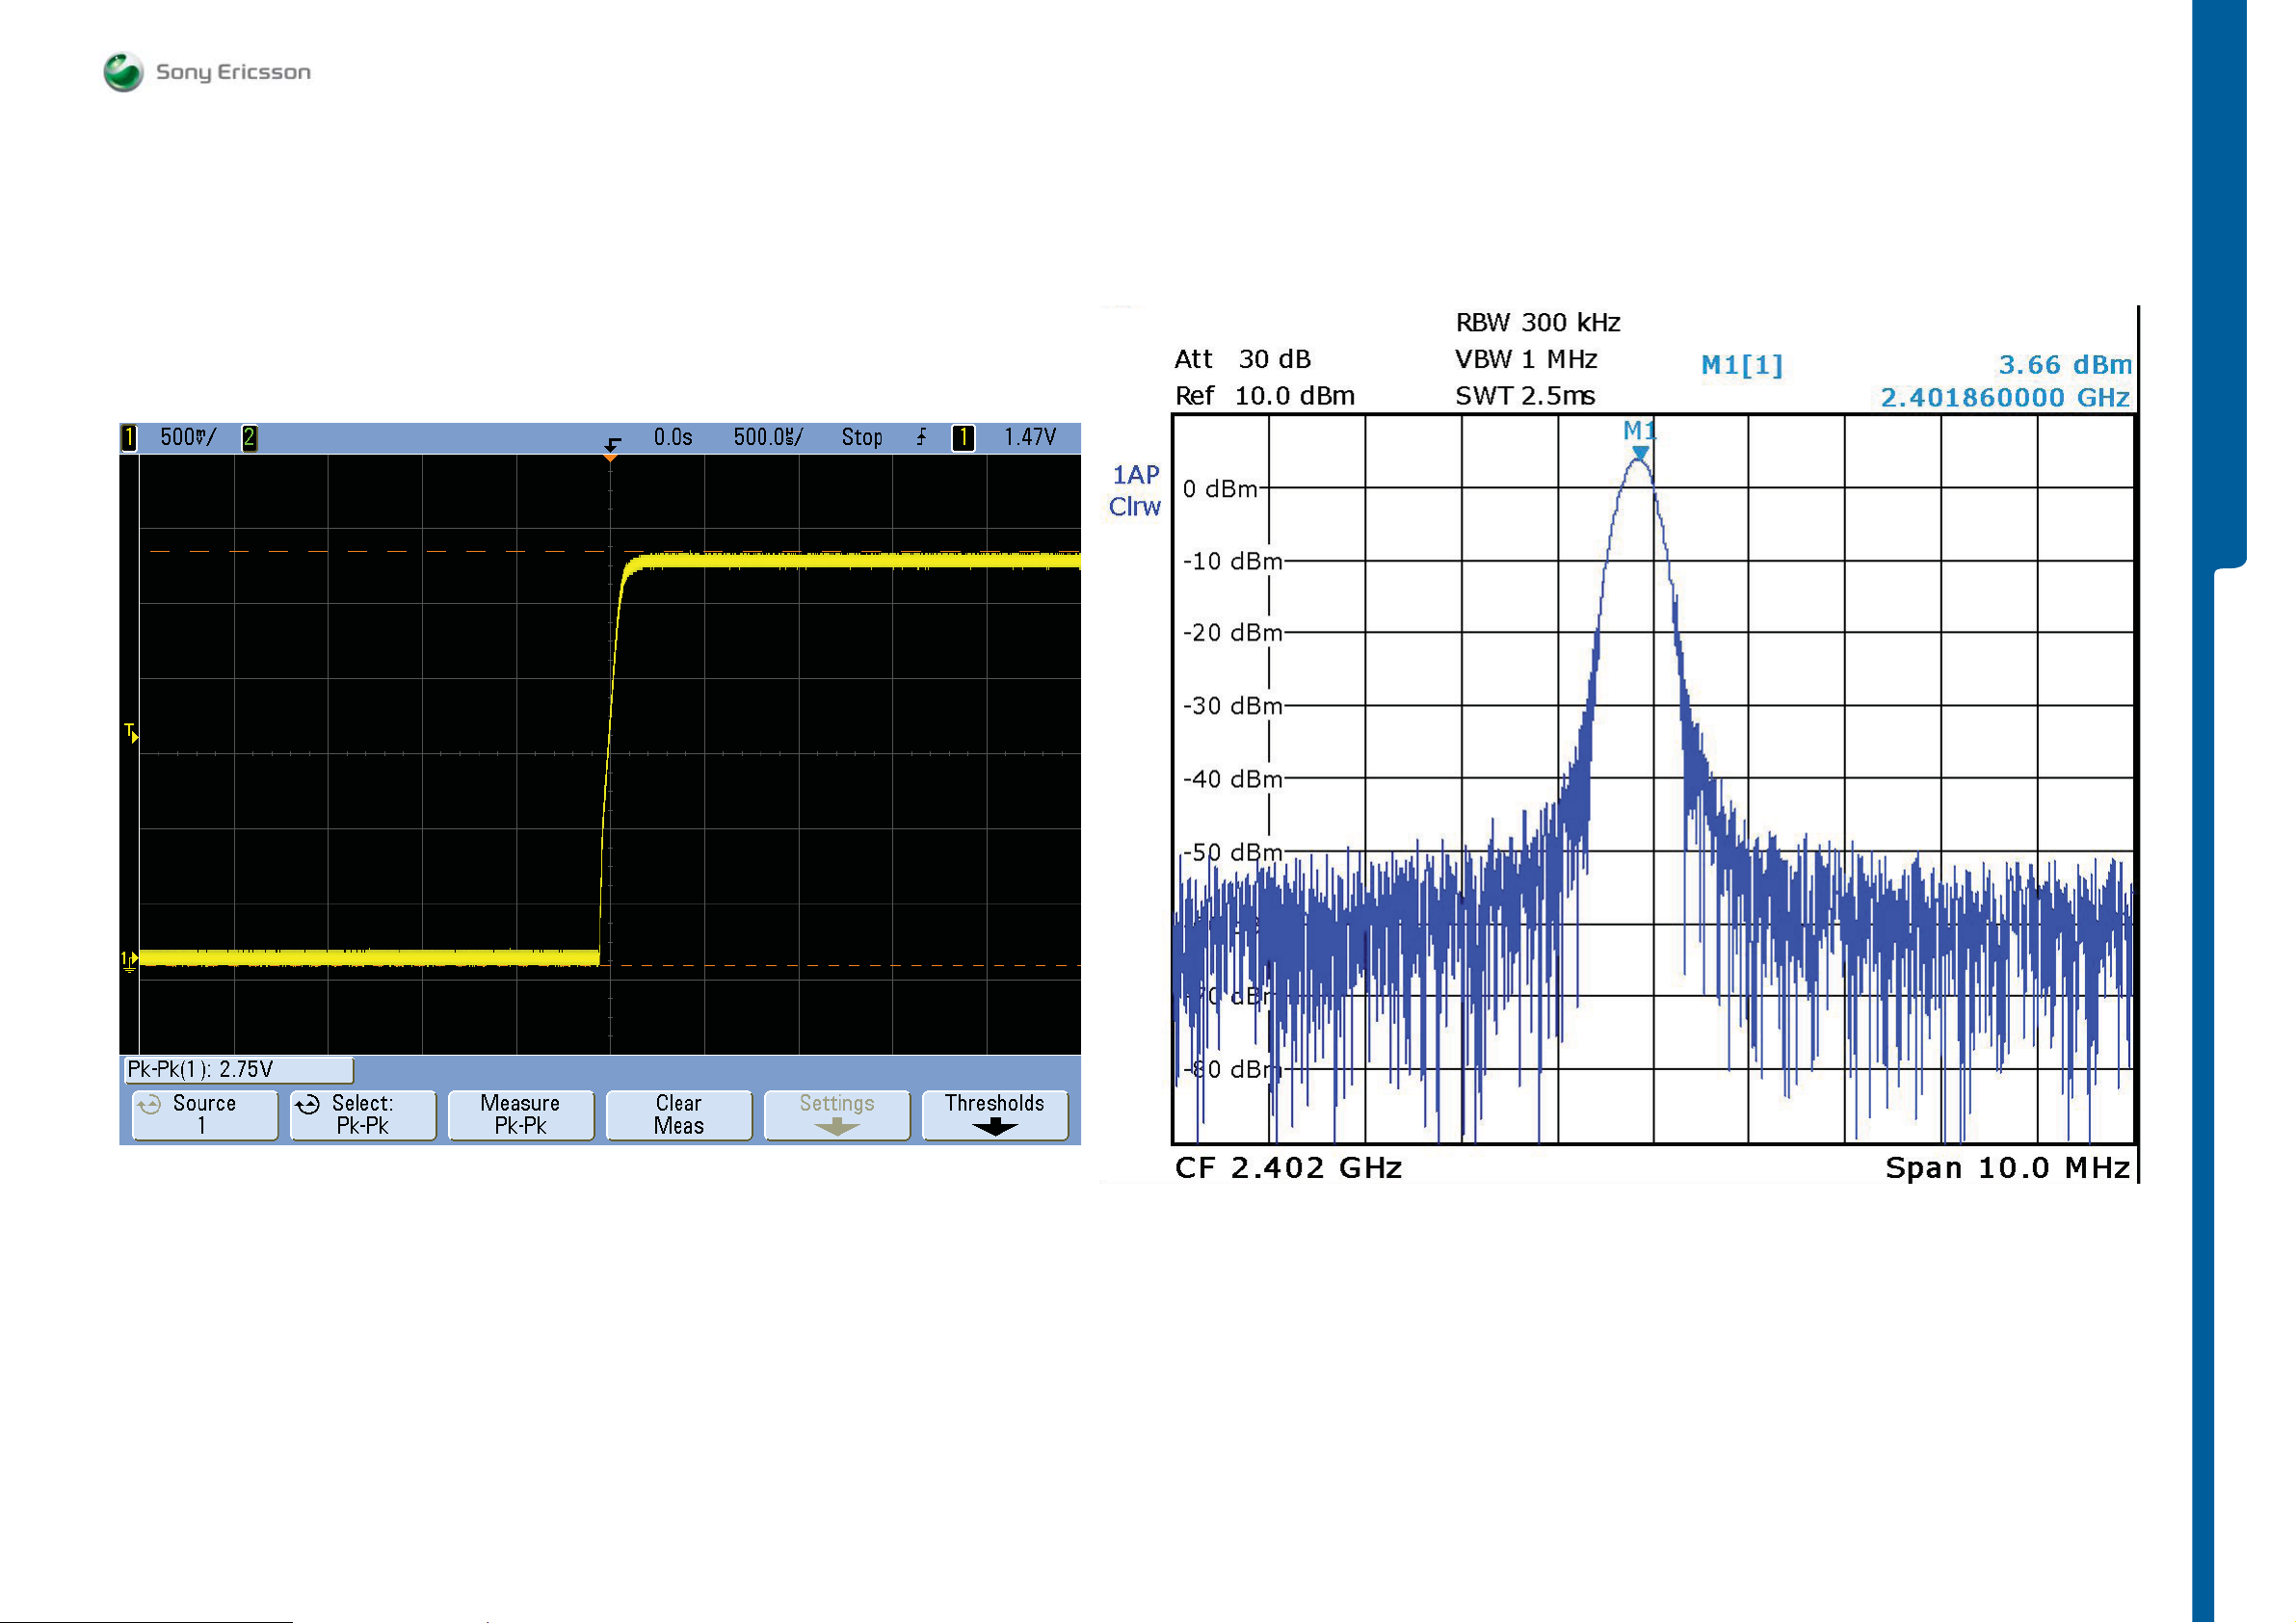
TROUBLESHOOTING
Measurement Points Pictures
SEMC Troubleshooting Manual
G705 - W705 - W715
TROUBLESHOOTING
MP 24 (TP4203)
MP 30 (C1502 BT_ANT)
1225-4035 rev. 1
36 (122)
Page 37
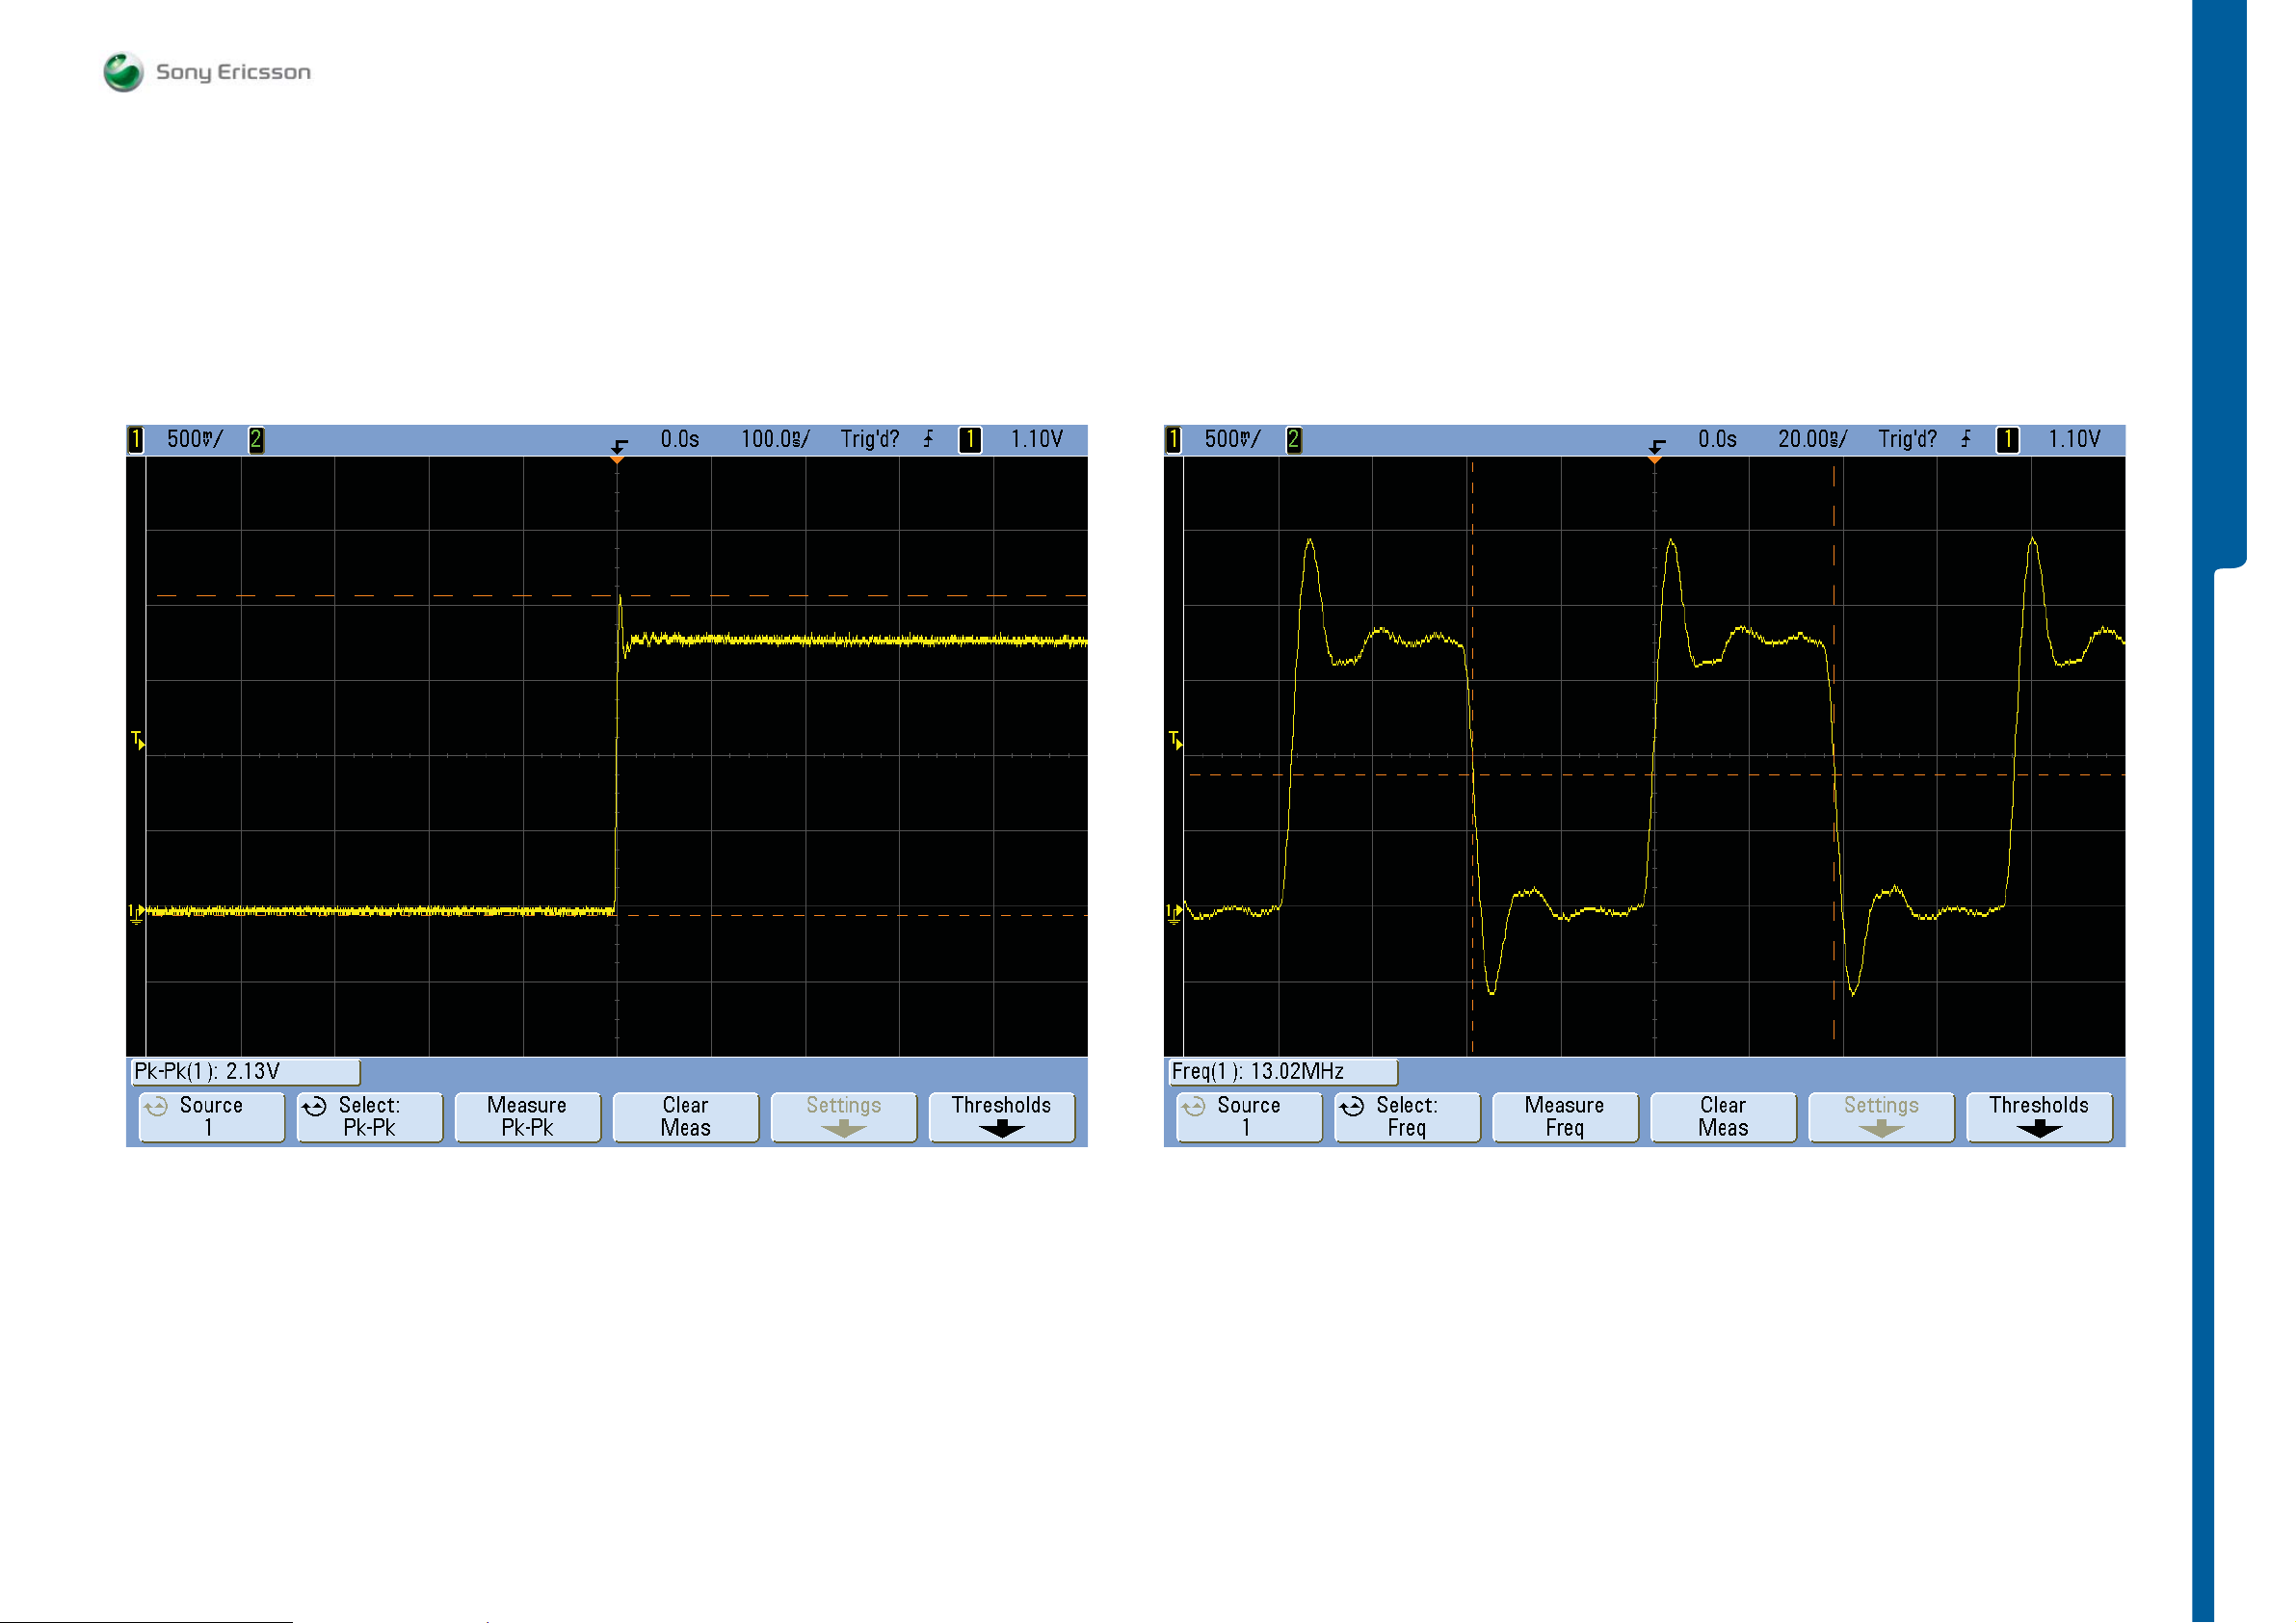
TROUBLESHOOTING
Measurement Points Pictures
SEMC Troubleshooting Manual
G705 - W705 - W715
TROUBLESHOOTING
MP 32 (R4303 CAMSYSCLK)MP 31 (R2282 CAM_LDO_EN)
1225-4035 rev. 1
37 (122)
Page 38
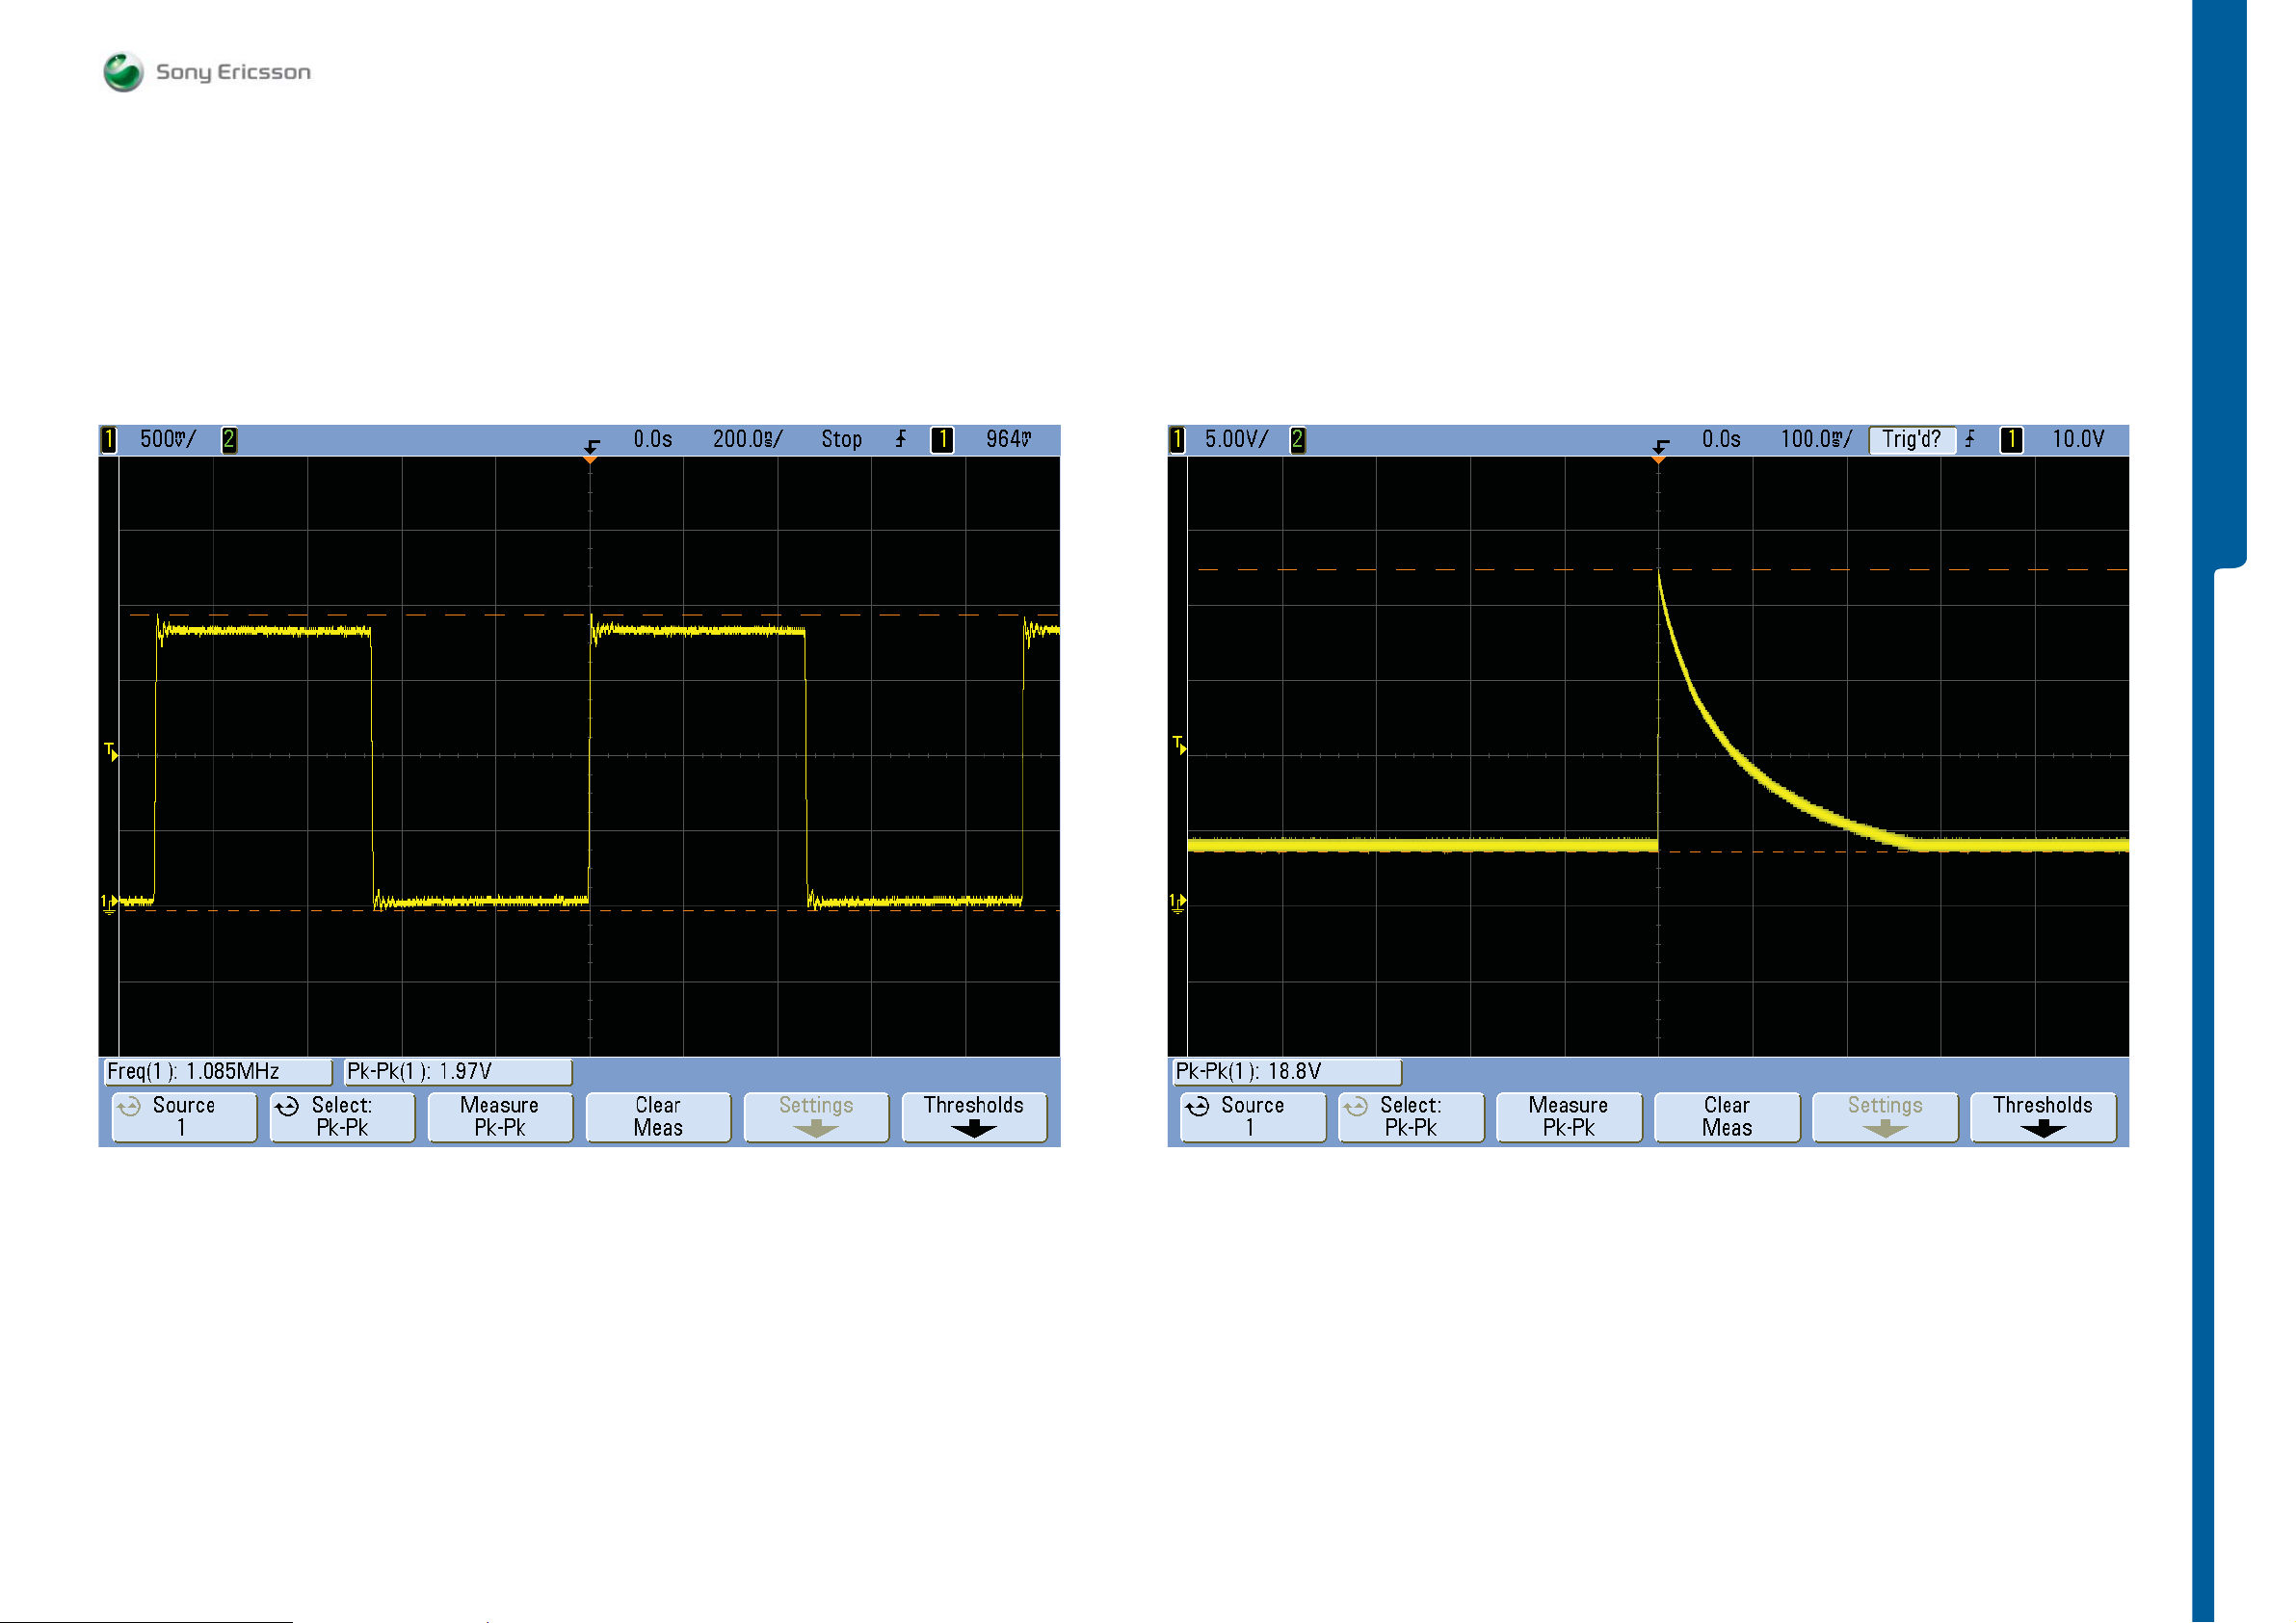
TROUBLESHOOTING
Measurement Points Pictures
SEMC Troubleshooting Manual
G705 - W705 - W715
TROUBLESHOOTING
MP 36 (TP4200)MP 35 (SP2410)
1225-4035 rev. 1
38 (122)
Page 39
TROUBLESHOOTING
Measurement Points Pictures
SEMC Troubleshooting Manual
G705 - W705 - W715
TROUBLESHOOTING
Note: This is an example! The shape of the signal can be different.
MP 43 (TP2203 VOPTO30)MP 39 (TP3104) and MP 42 (TP3105)
1225-4035 rev. 1
39 (122)
Page 40
TROUBLESHOOTING
Measurement Points Pictures
SEMC Troubleshooting Manual
G705 - W705 - W715
TROUBLESHOOTING
MP 55 (C3148) and MP 56 (C3137)
MP 84 (R1414 AGPS_CLK)
1225-4035 rev. 1
40 (122)
Page 41
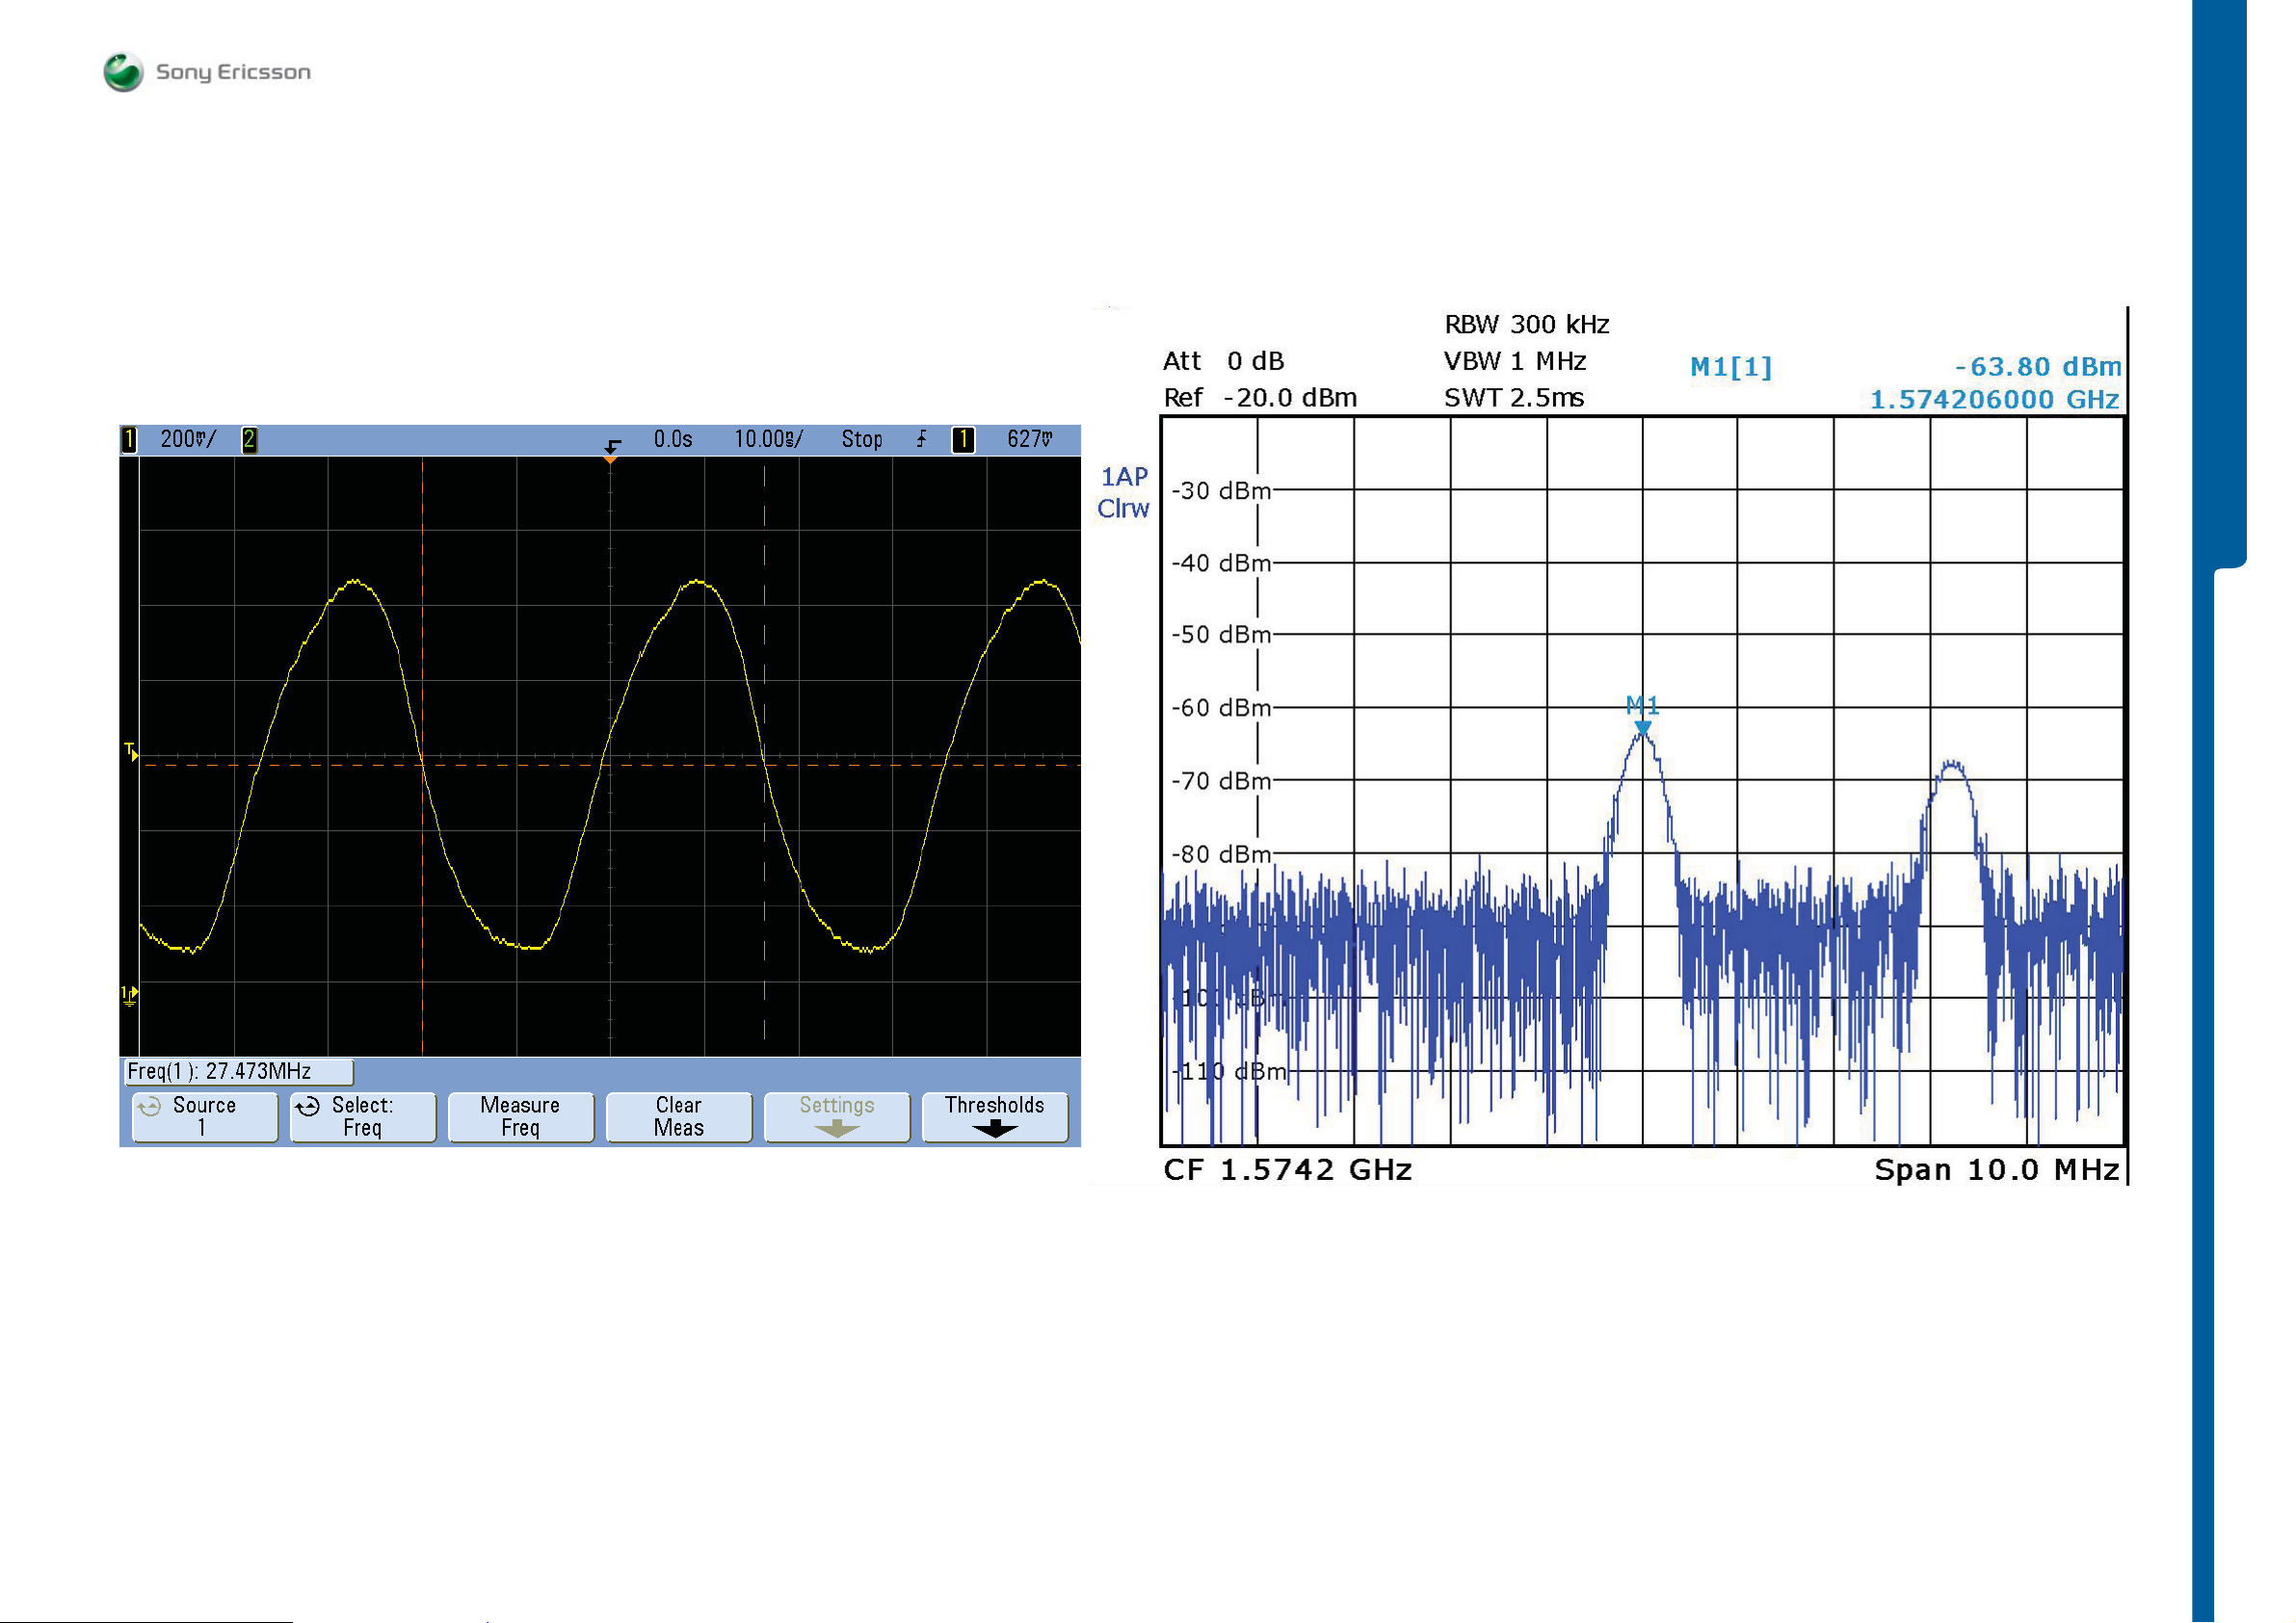
TROUBLESHOOTING
Measurement Points Pictures
SEMC Troubleshooting Manual
G705 - W705 - W715
TROUBLESHOOTING
MP 85 (R1404) 27 MHz
MP 90 (L1403) 1574.2 MHz, -63 dBm
1225-4035 rev. 1
41 (122)
Page 42
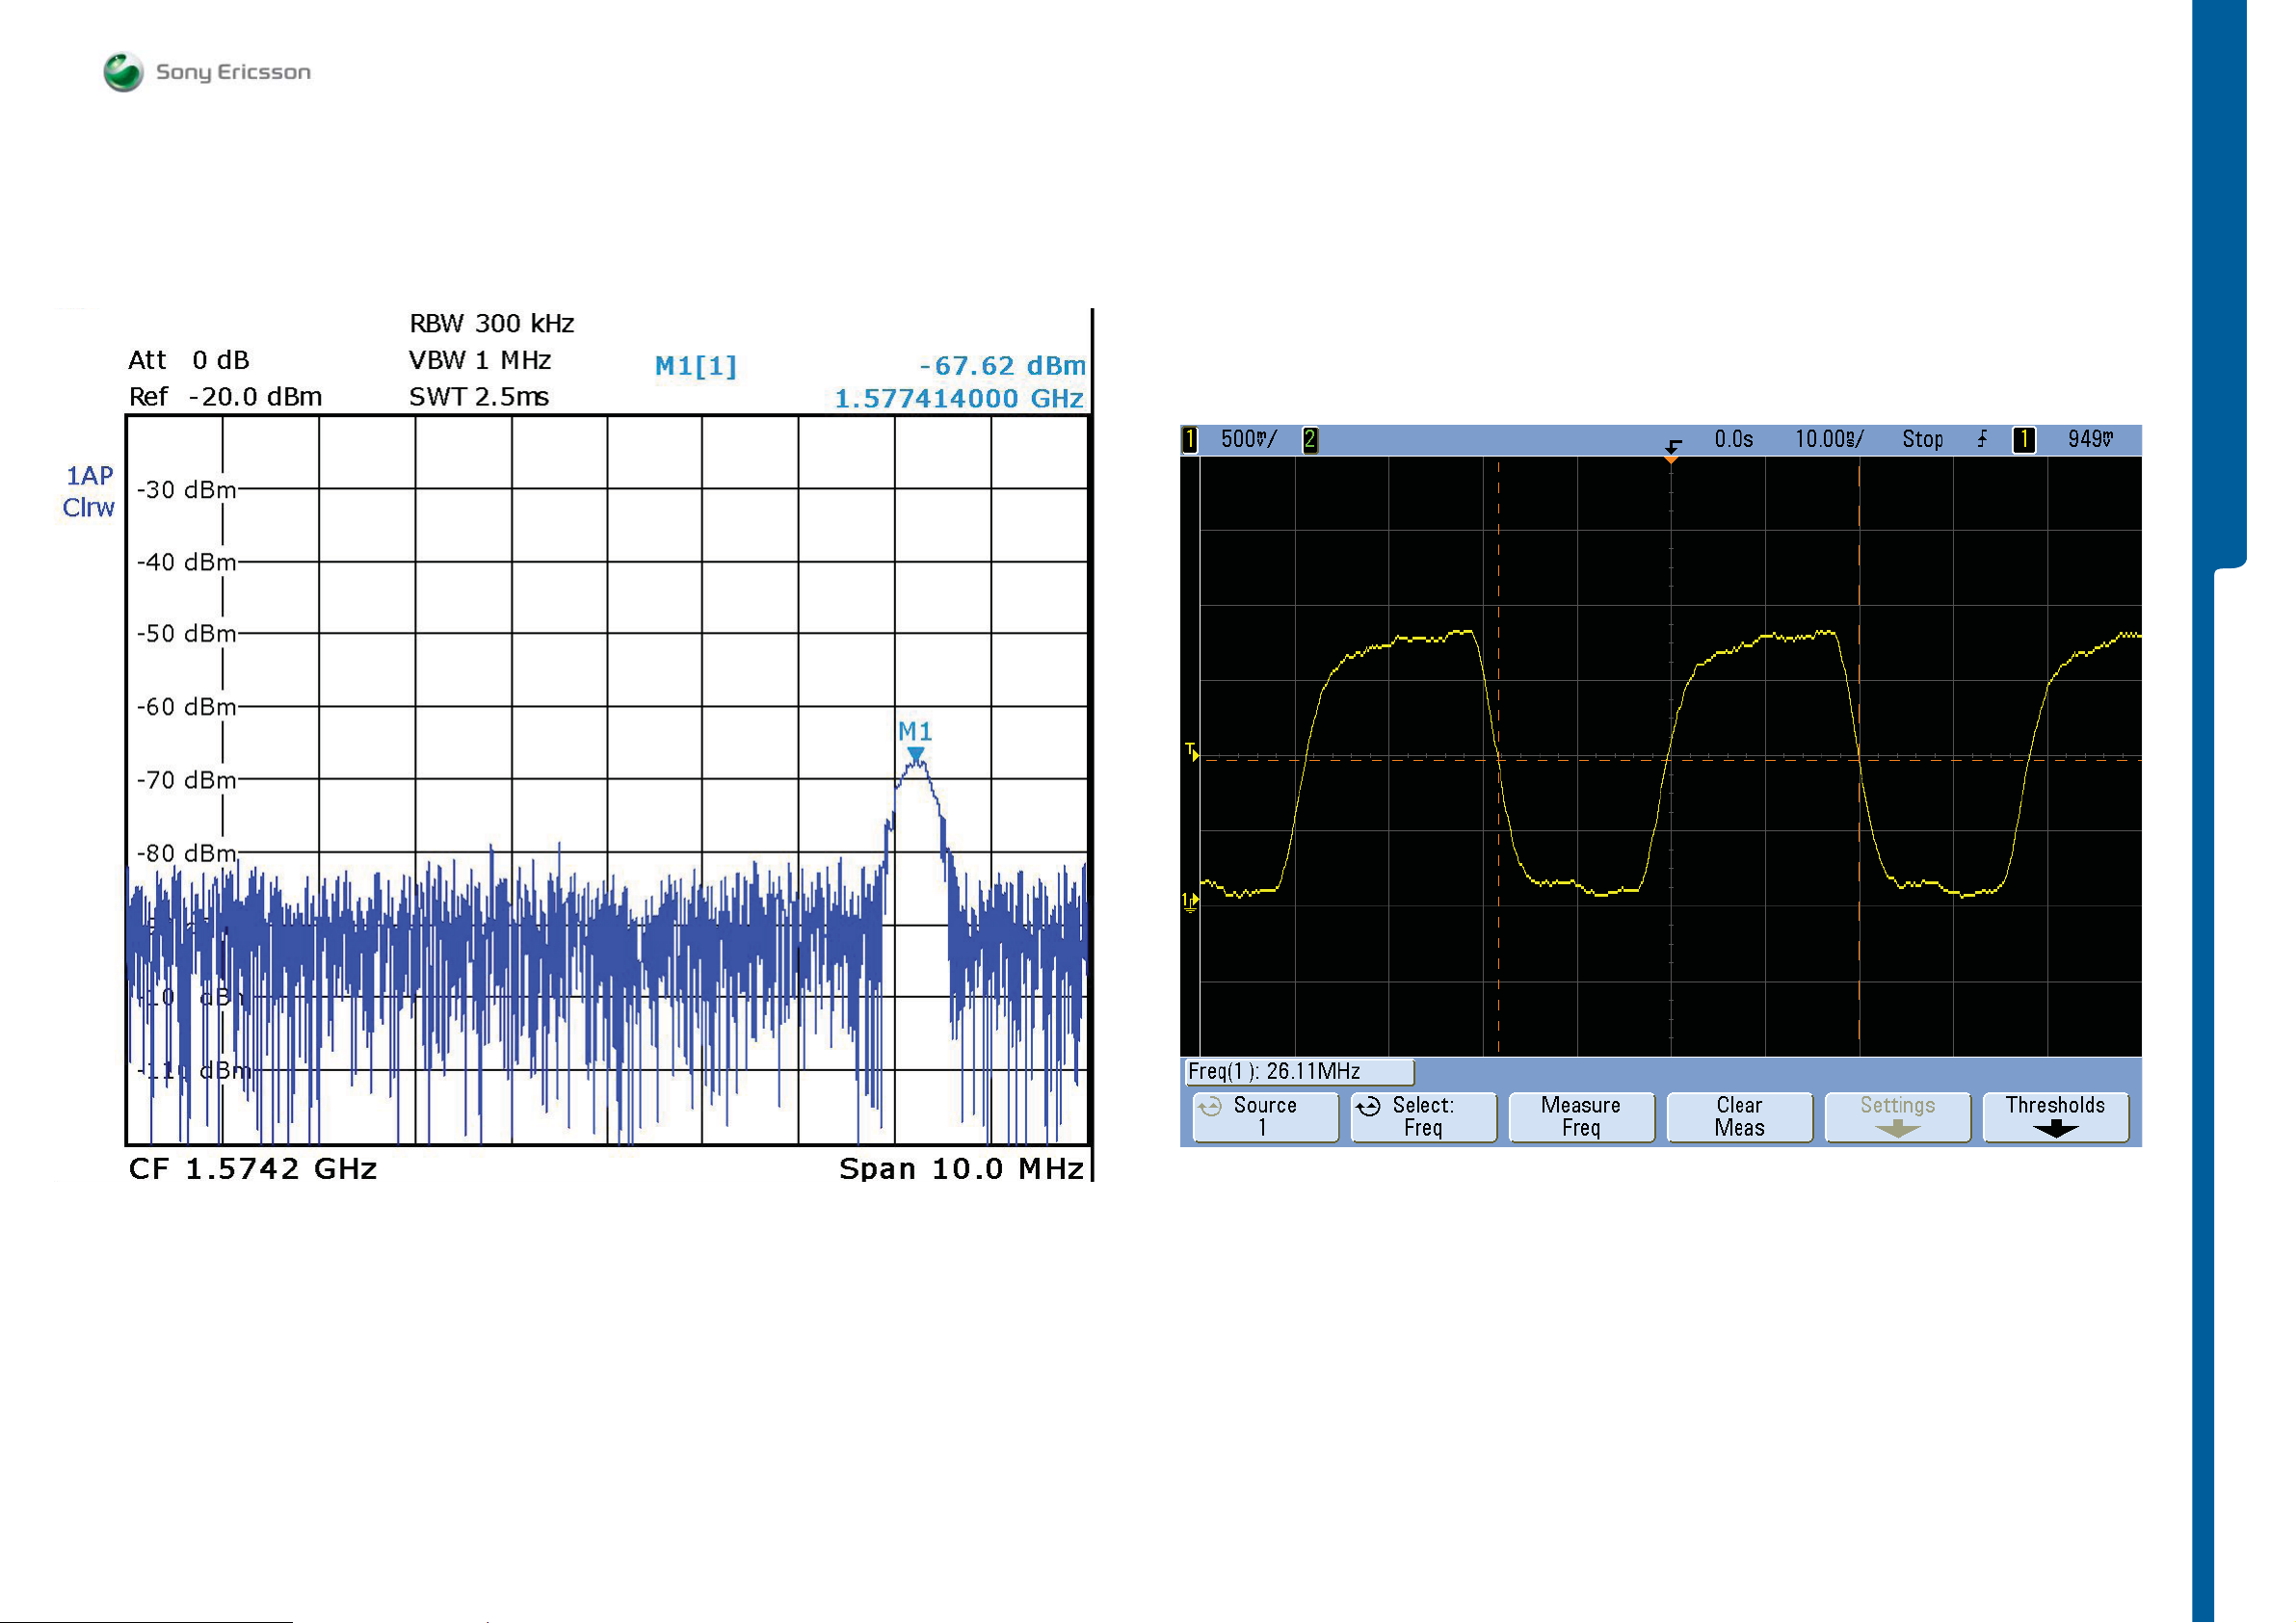
TROUBLESHOOTING
Measurement Points Pictures
SEMC Troubleshooting Manual
G705 - W705 - W715
TROUBLESHOOTING
MP 97 (R2102 MCLK)MP 90 (L1403) 1577.4 MHz, -67 dBm
1225-4035 rev. 1
42 (122)
Page 43
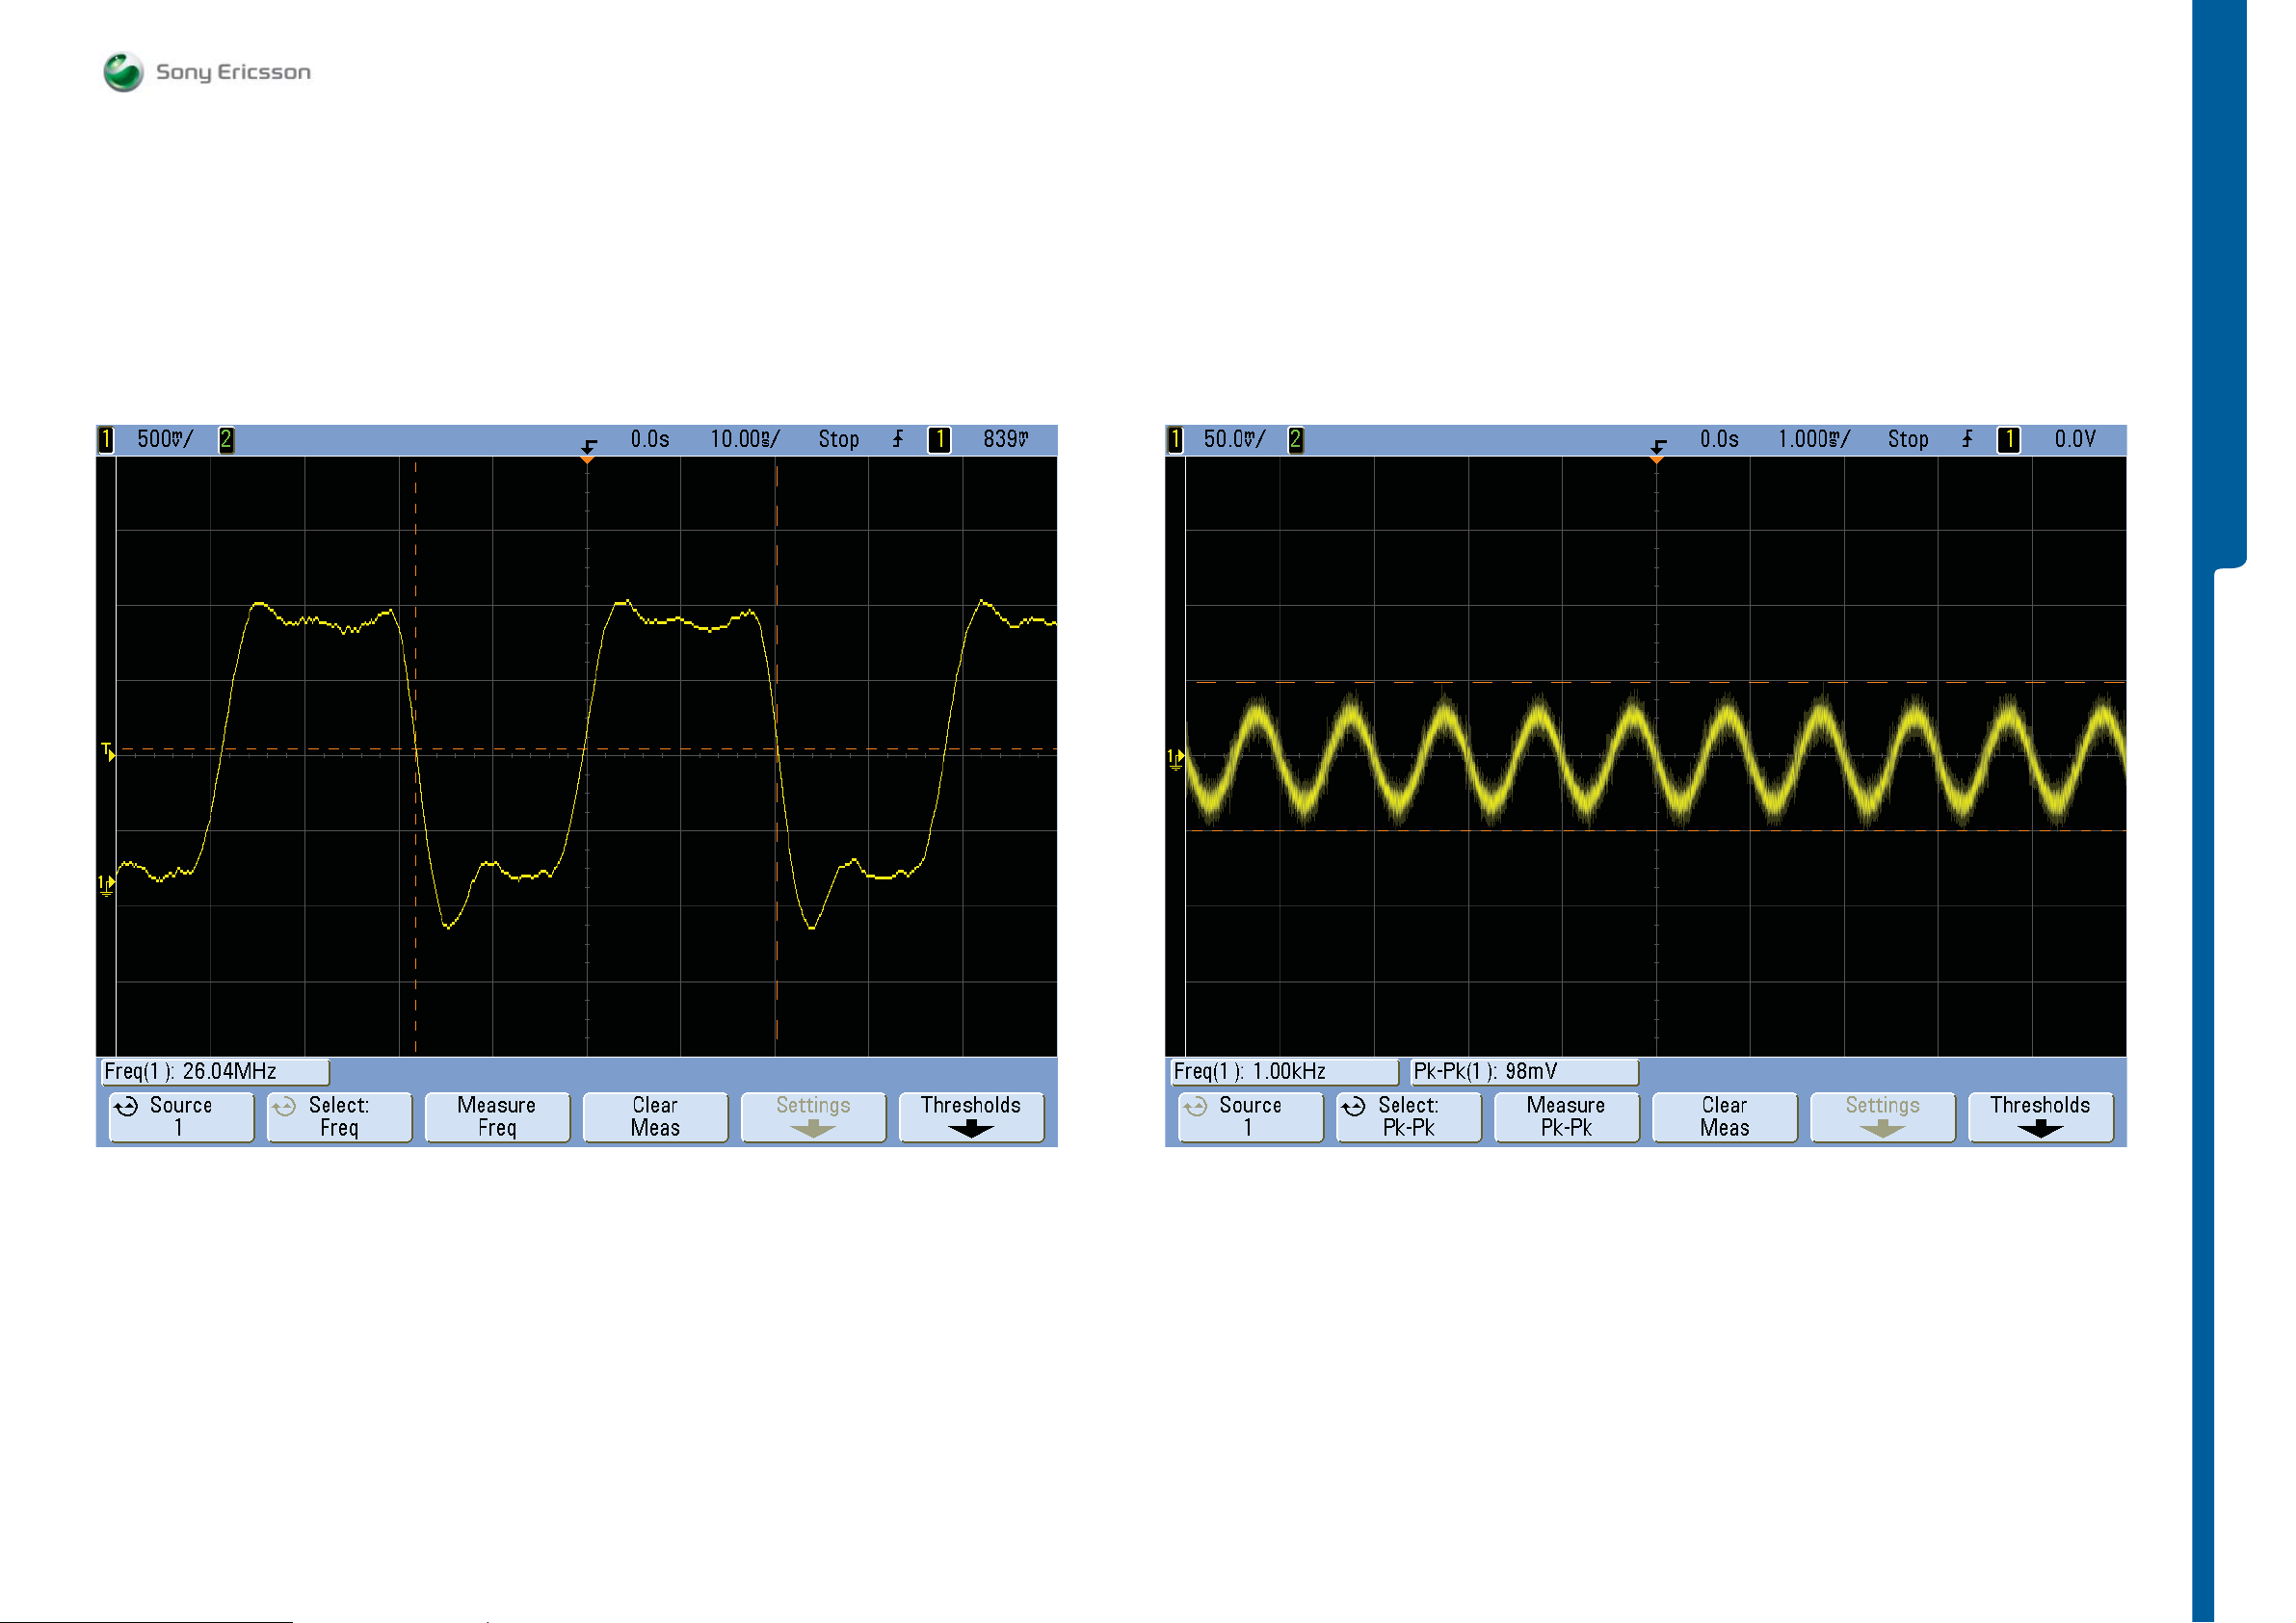
TROUBLESHOOTING
Measurement Points Pictures
SEMC Troubleshooting Manual
G705 - W705 - W715
TROUBLESHOOTING
MP 105 (C3146) and MP 106 (C3145)MP 98 (R2121 BT_CLK)
1225-4035 rev. 1
43 (122)
Page 44
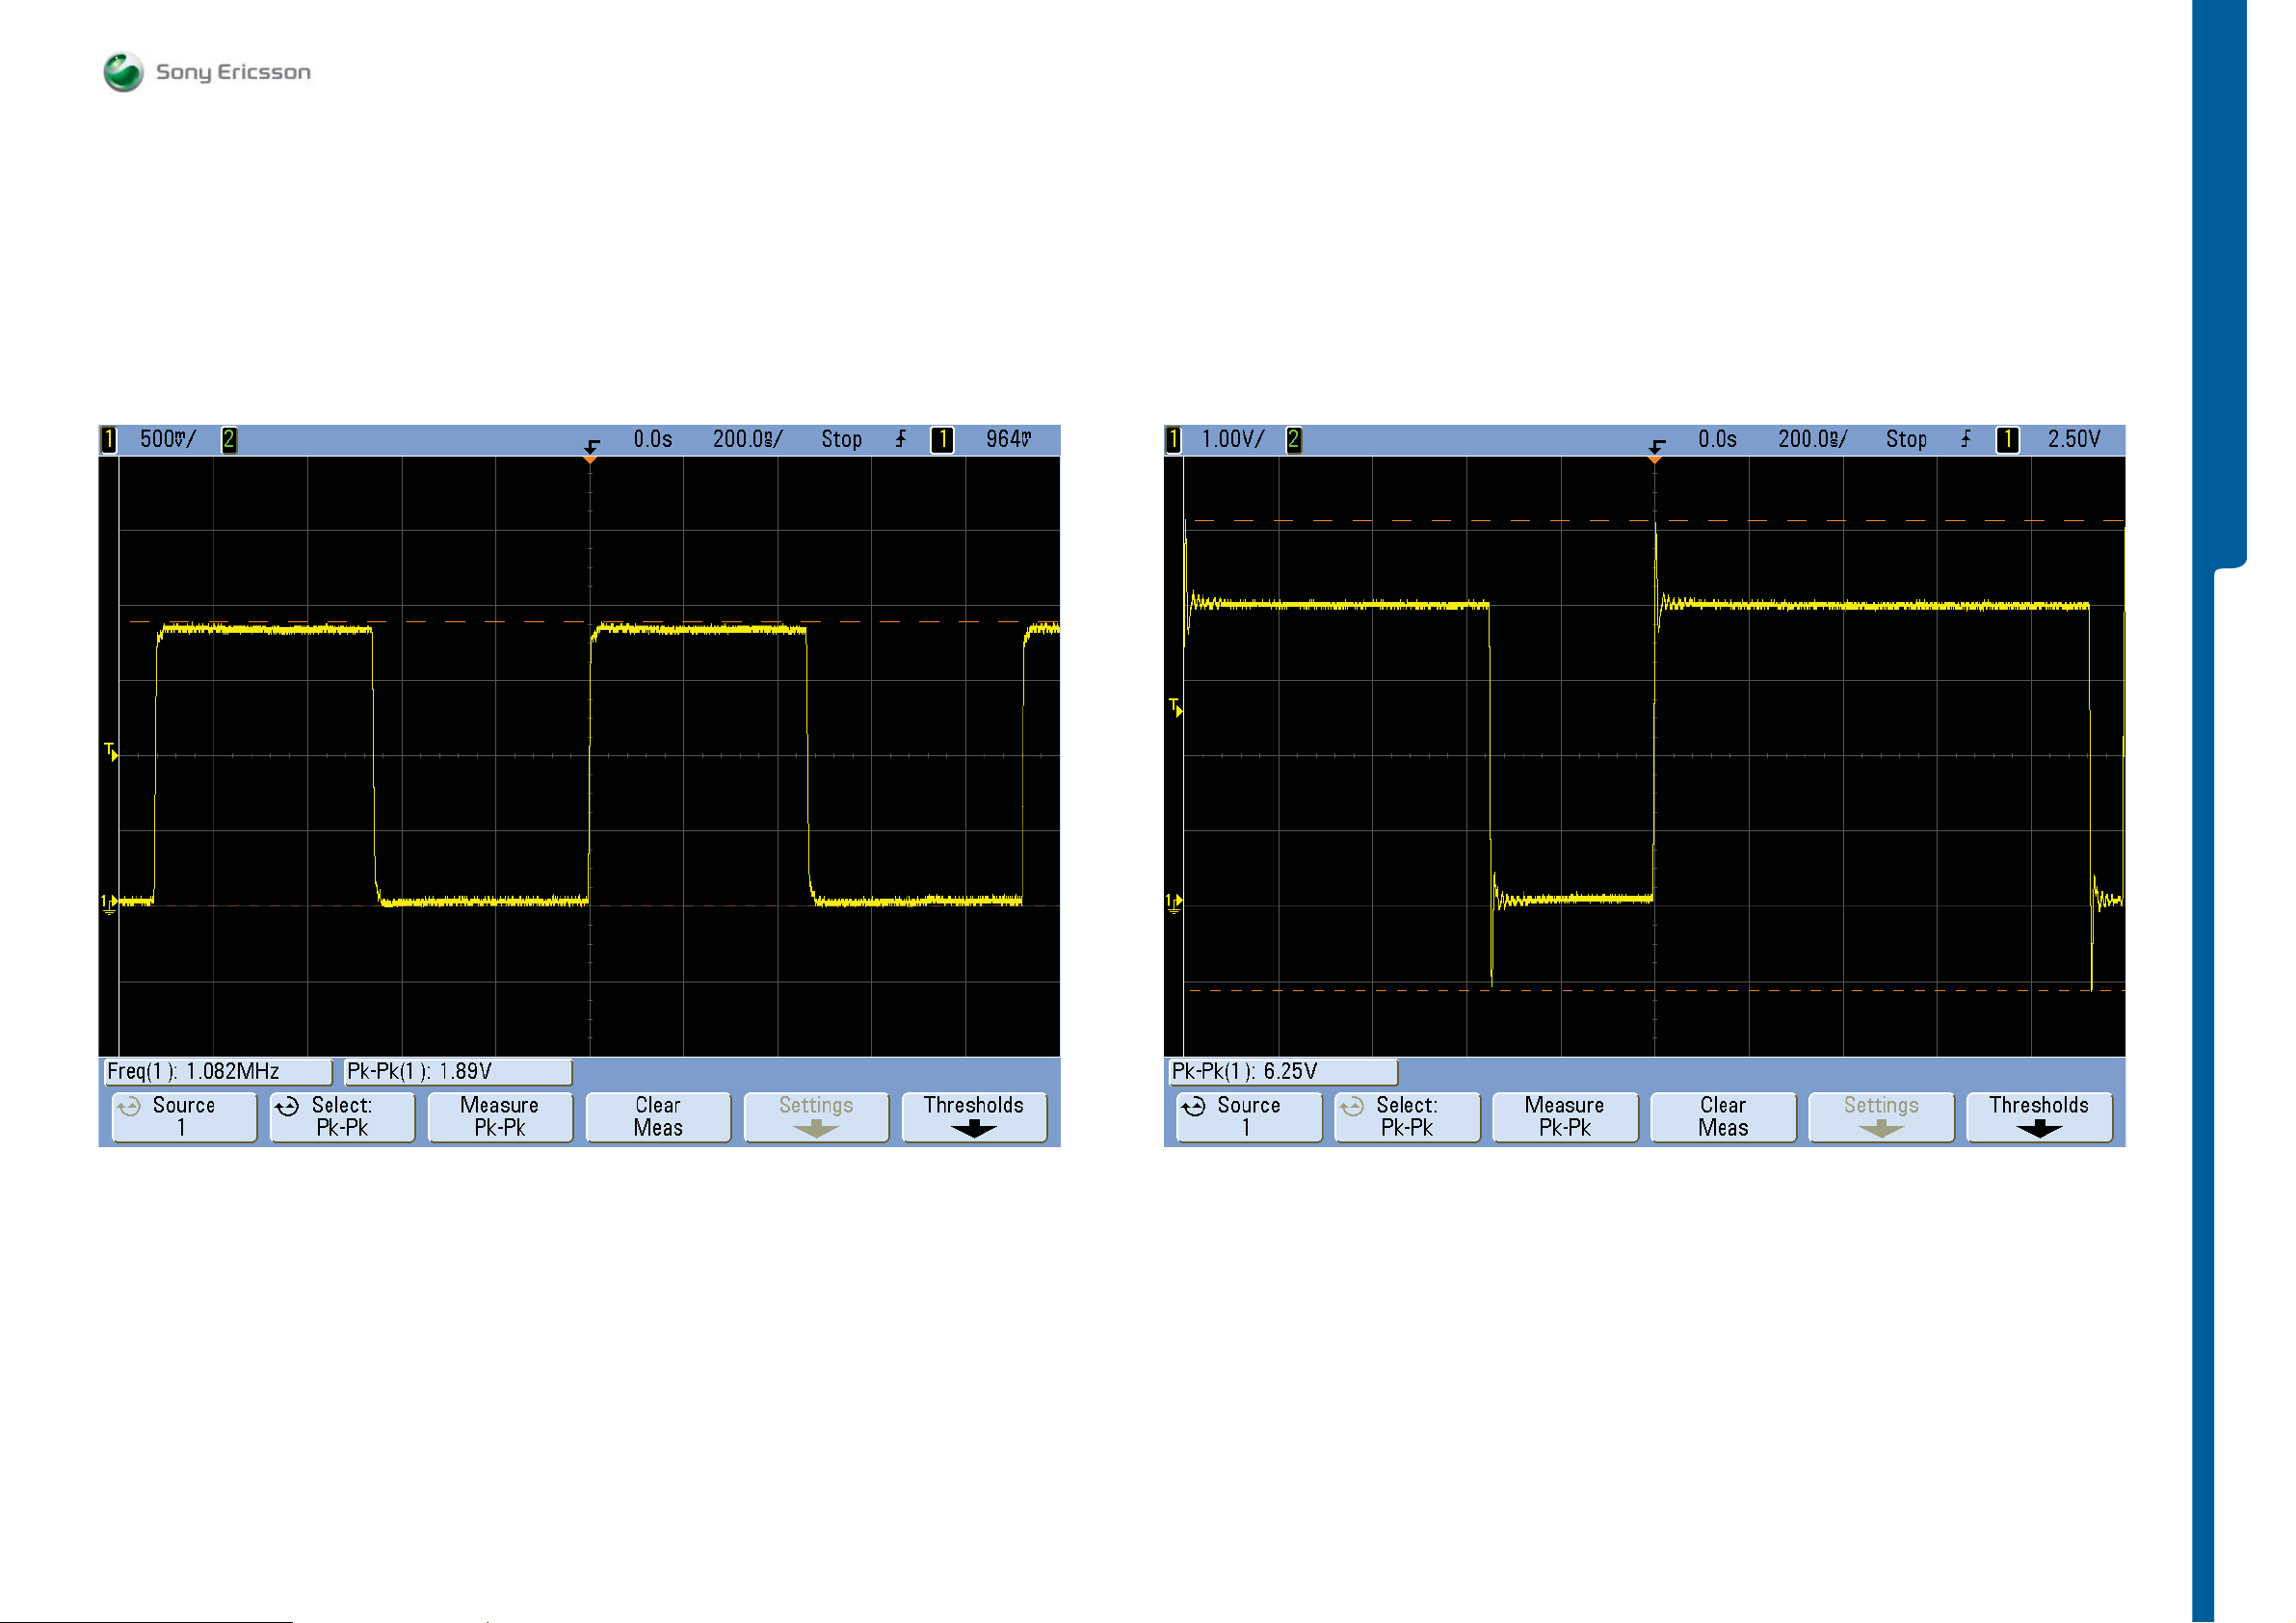
TROUBLESHOOTING
Measurement Points Pictures
SEMC Troubleshooting Manual
G705 - W705 - W715
TROUBLESHOOTING
MP 112 (R4200)MP 110 (R2410 SIMCLK)
1225-4035 rev. 1
44 (122)
Page 45
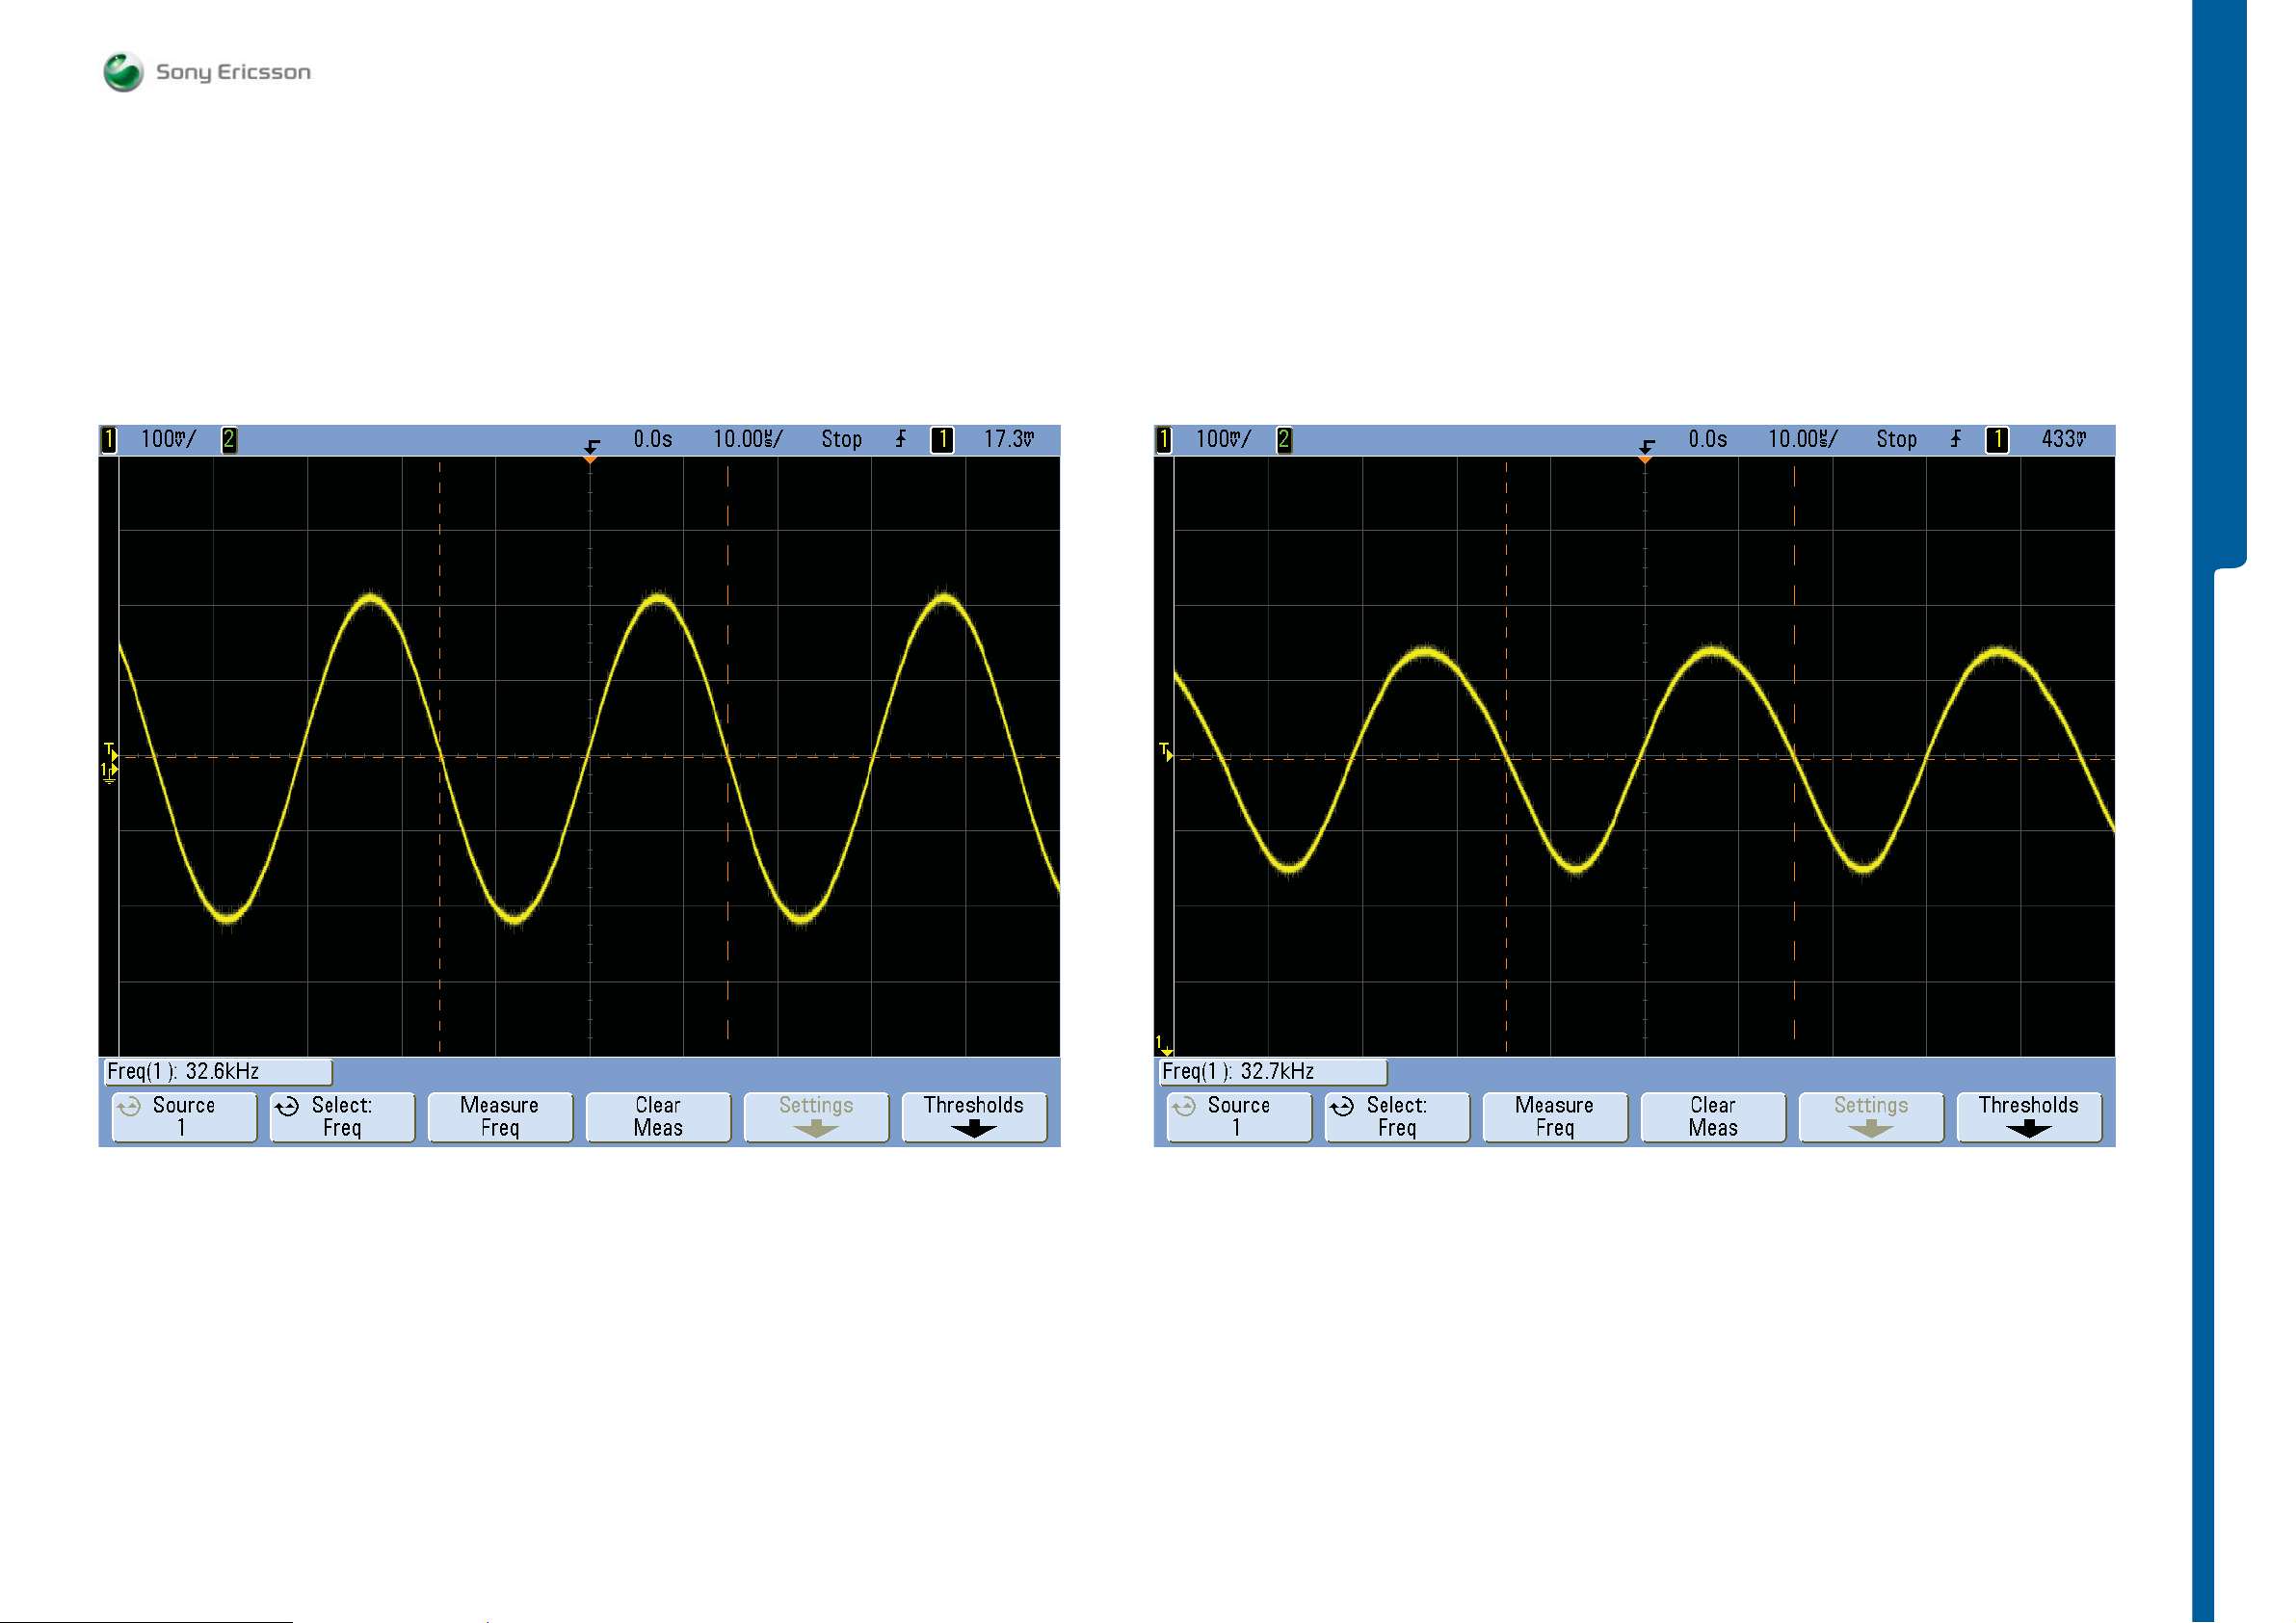
TROUBLESHOOTING
Measurement Points Pictures
SEMC Troubleshooting Manual
G705 - W705 - W715
TROUBLESHOOTING
MP 119 (C2101)MP 118 (C2100)
1225-4035 rev. 1
45 (122)
Page 46
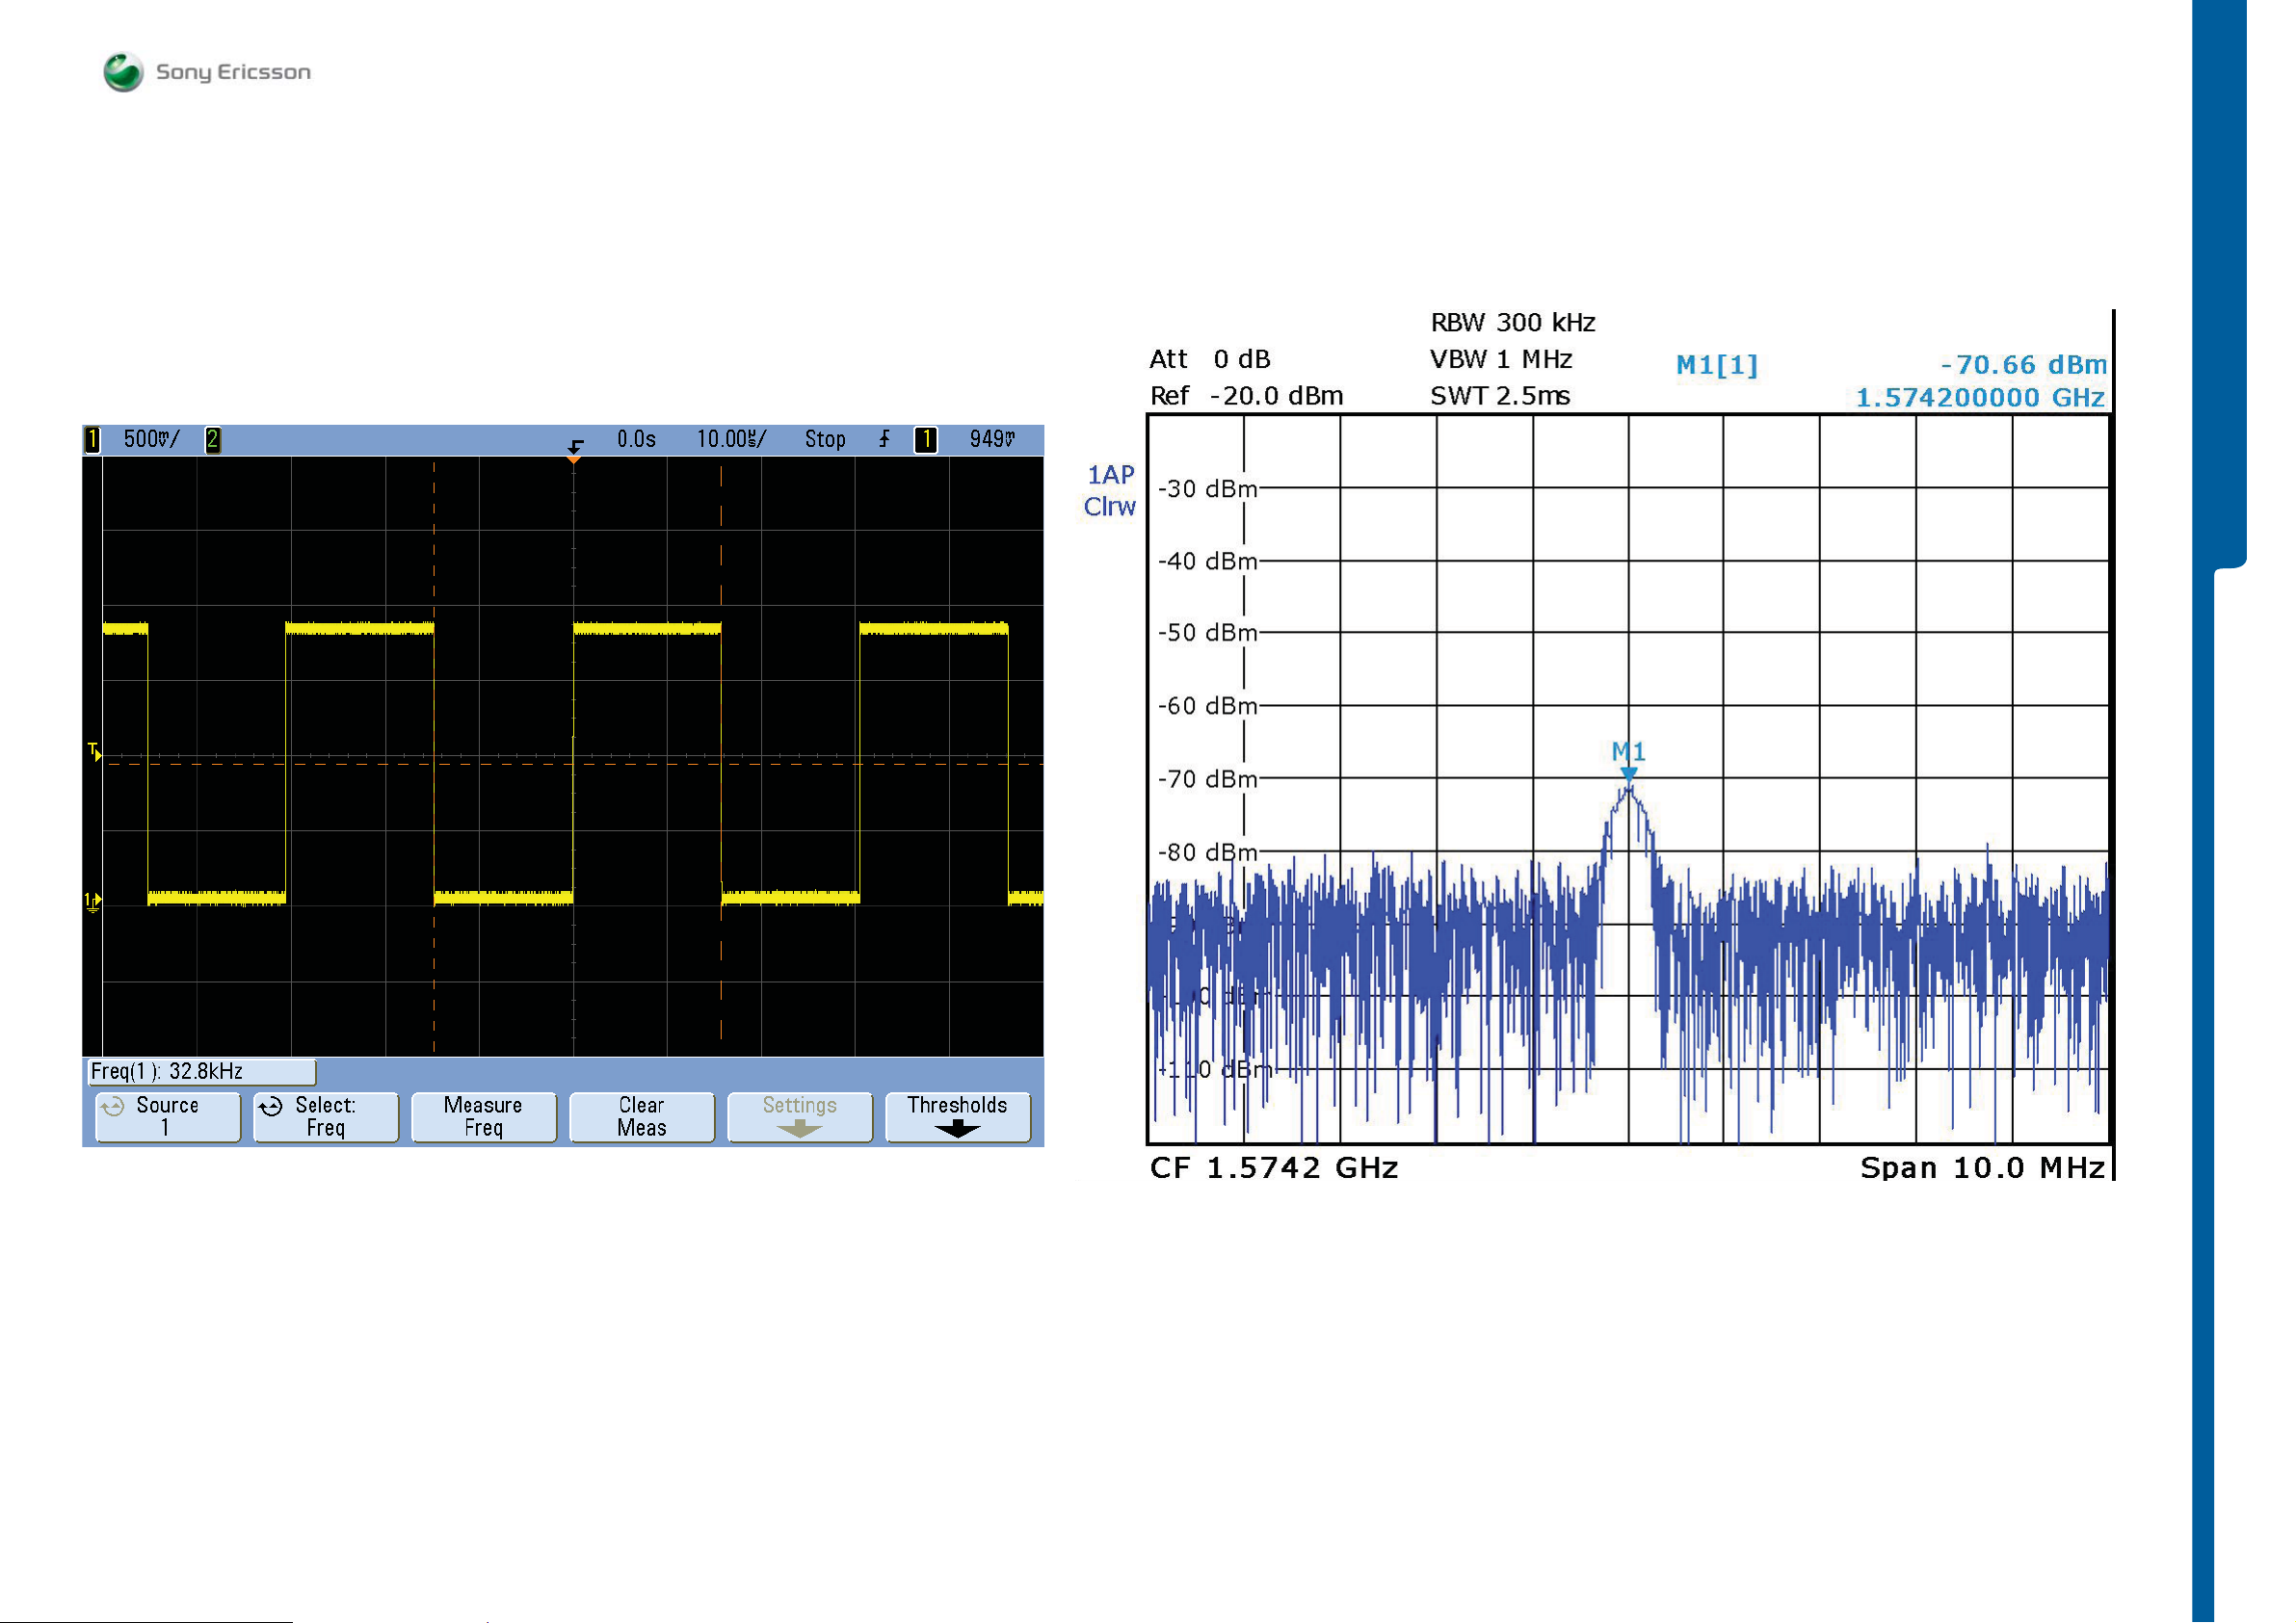
TROUBLESHOOTING
Measurement Points Pictures
SEMC Troubleshooting Manual
G705 - W705 - W715
TROUBLESHOOTING
MP 124 (C1402) 1574.2 MHz, -70 dBmMP 121 (R2103 RTCCLK)
1225-4035 rev. 1
46 (122)
Page 47
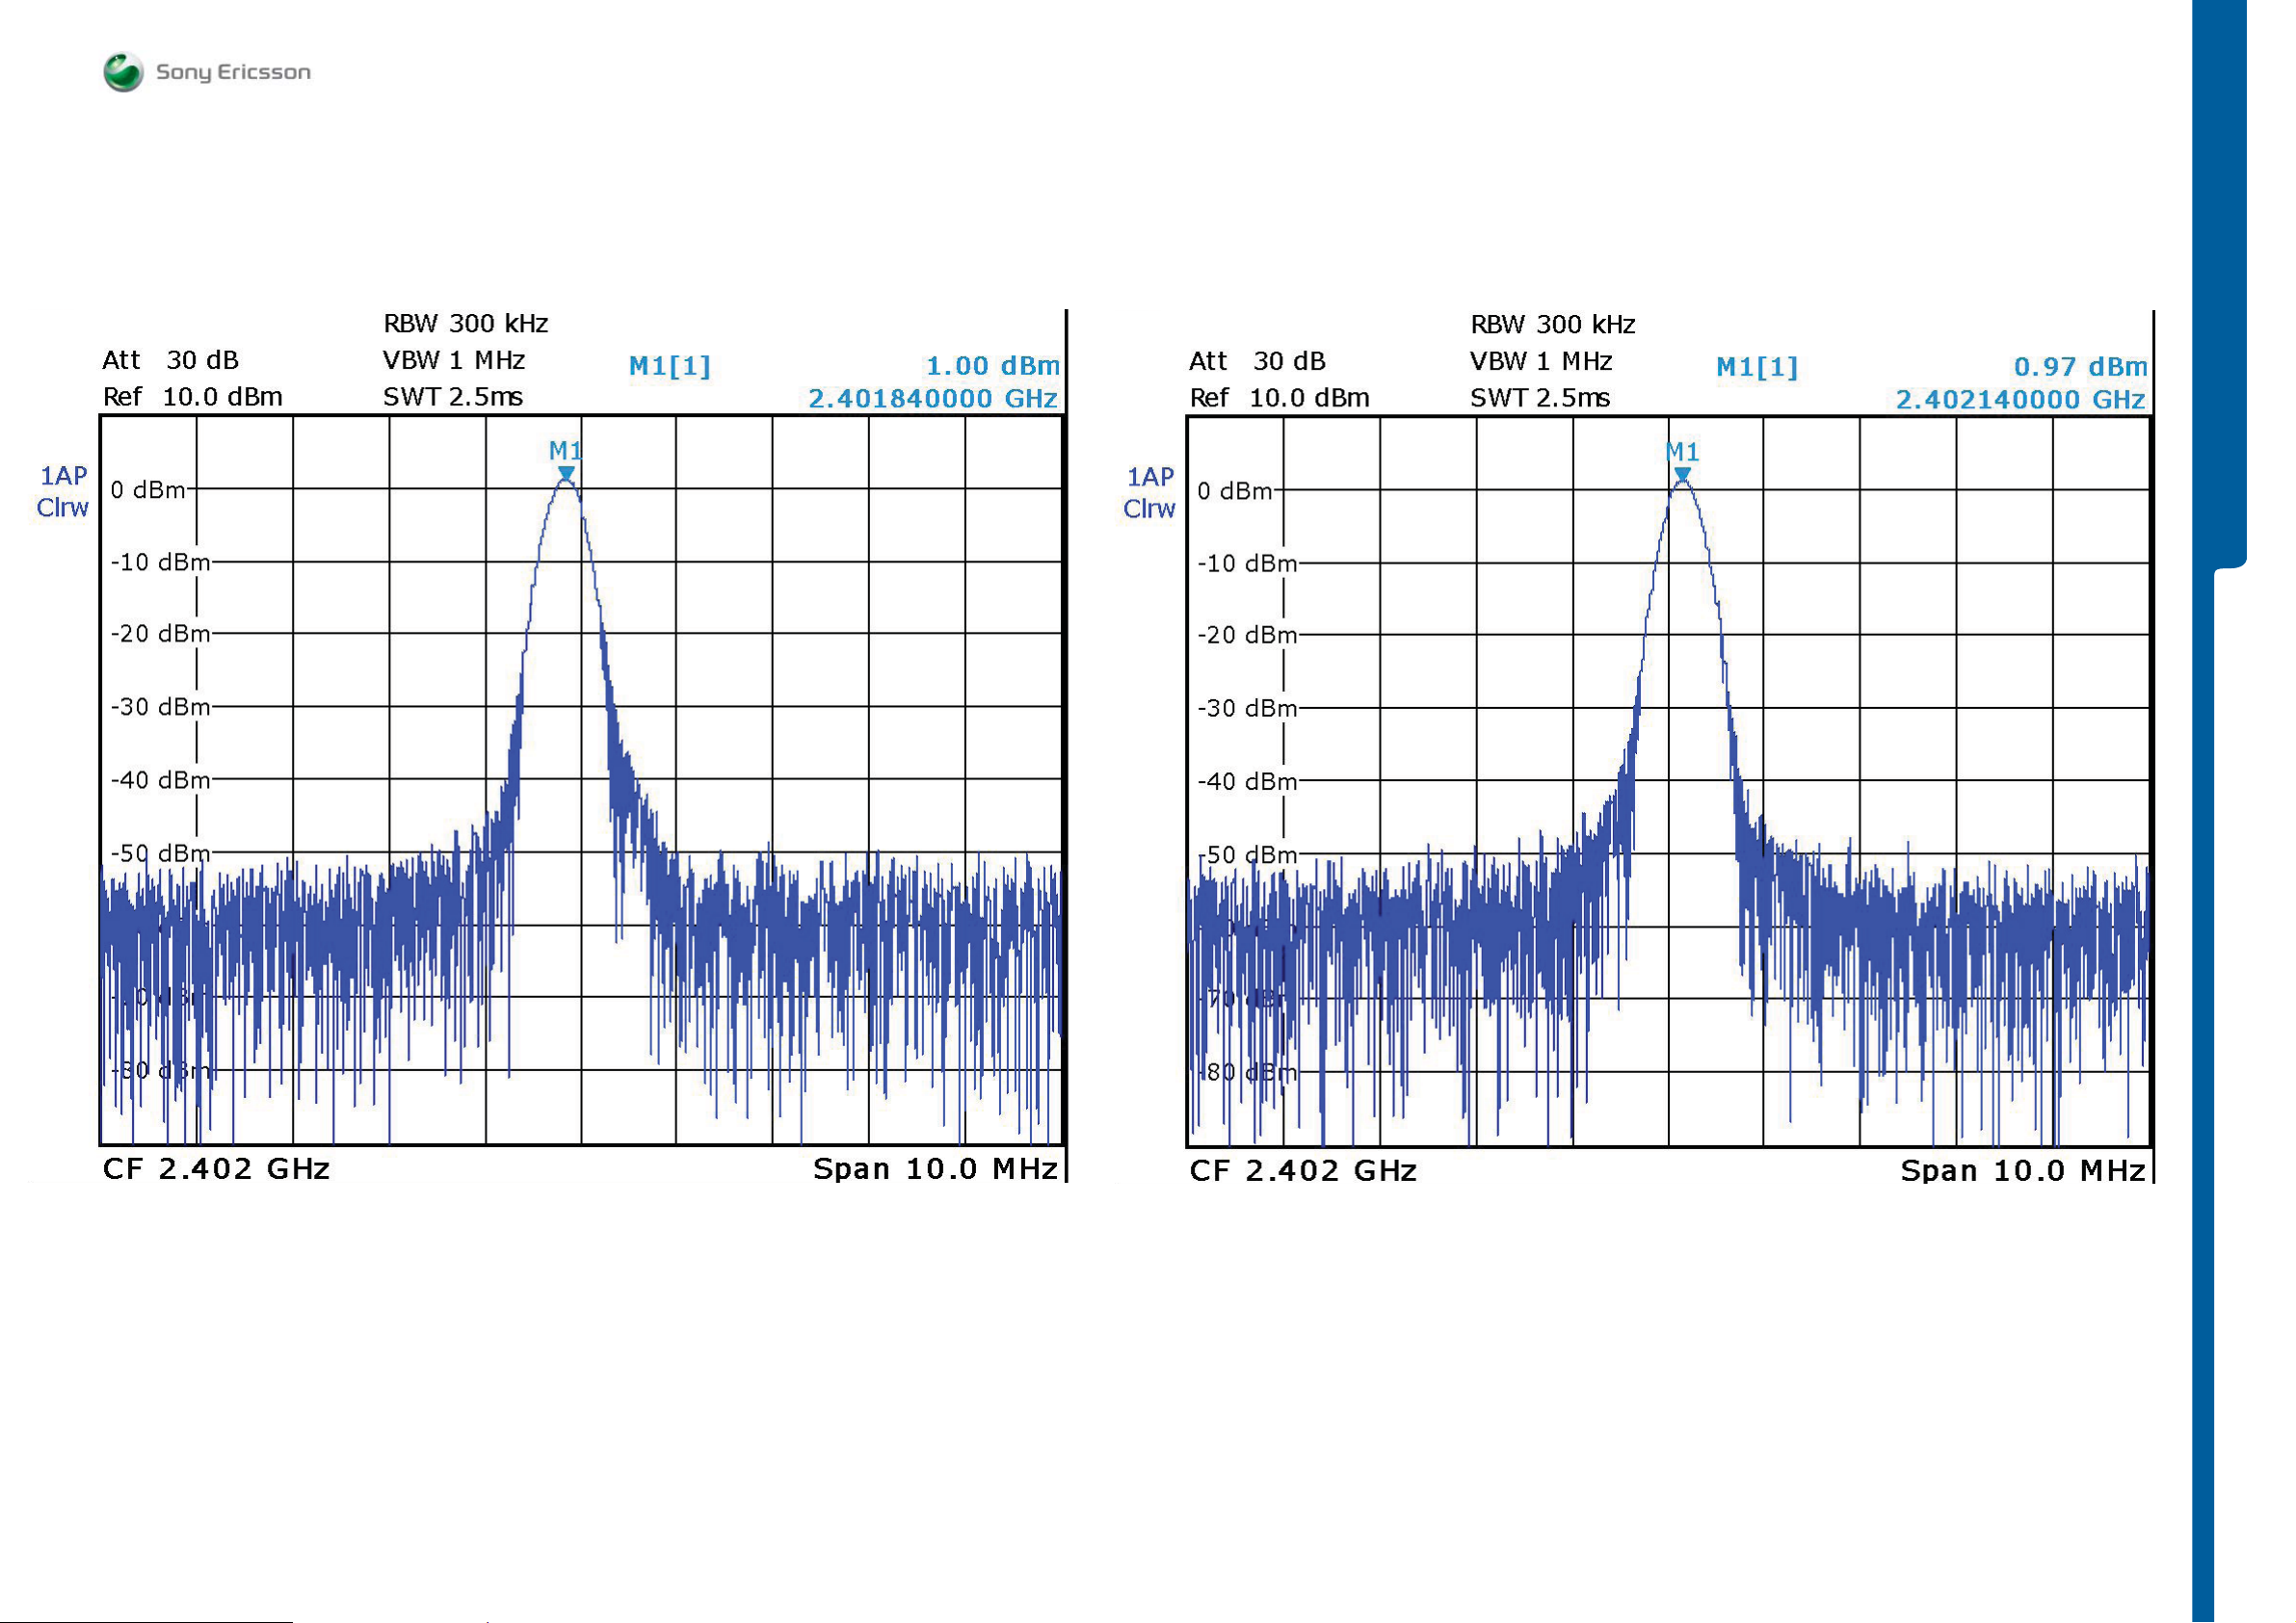
TROUBLESHOOTING
Measurement Points Pictures
SEMC Troubleshooting Manual
G705 - W705 - W715
TROUBLESHOOTING
Blt MaxPwr MOD 1Blt MaxPwr MOD 0
1225-4035 rev. 1
47 (122)
Page 48
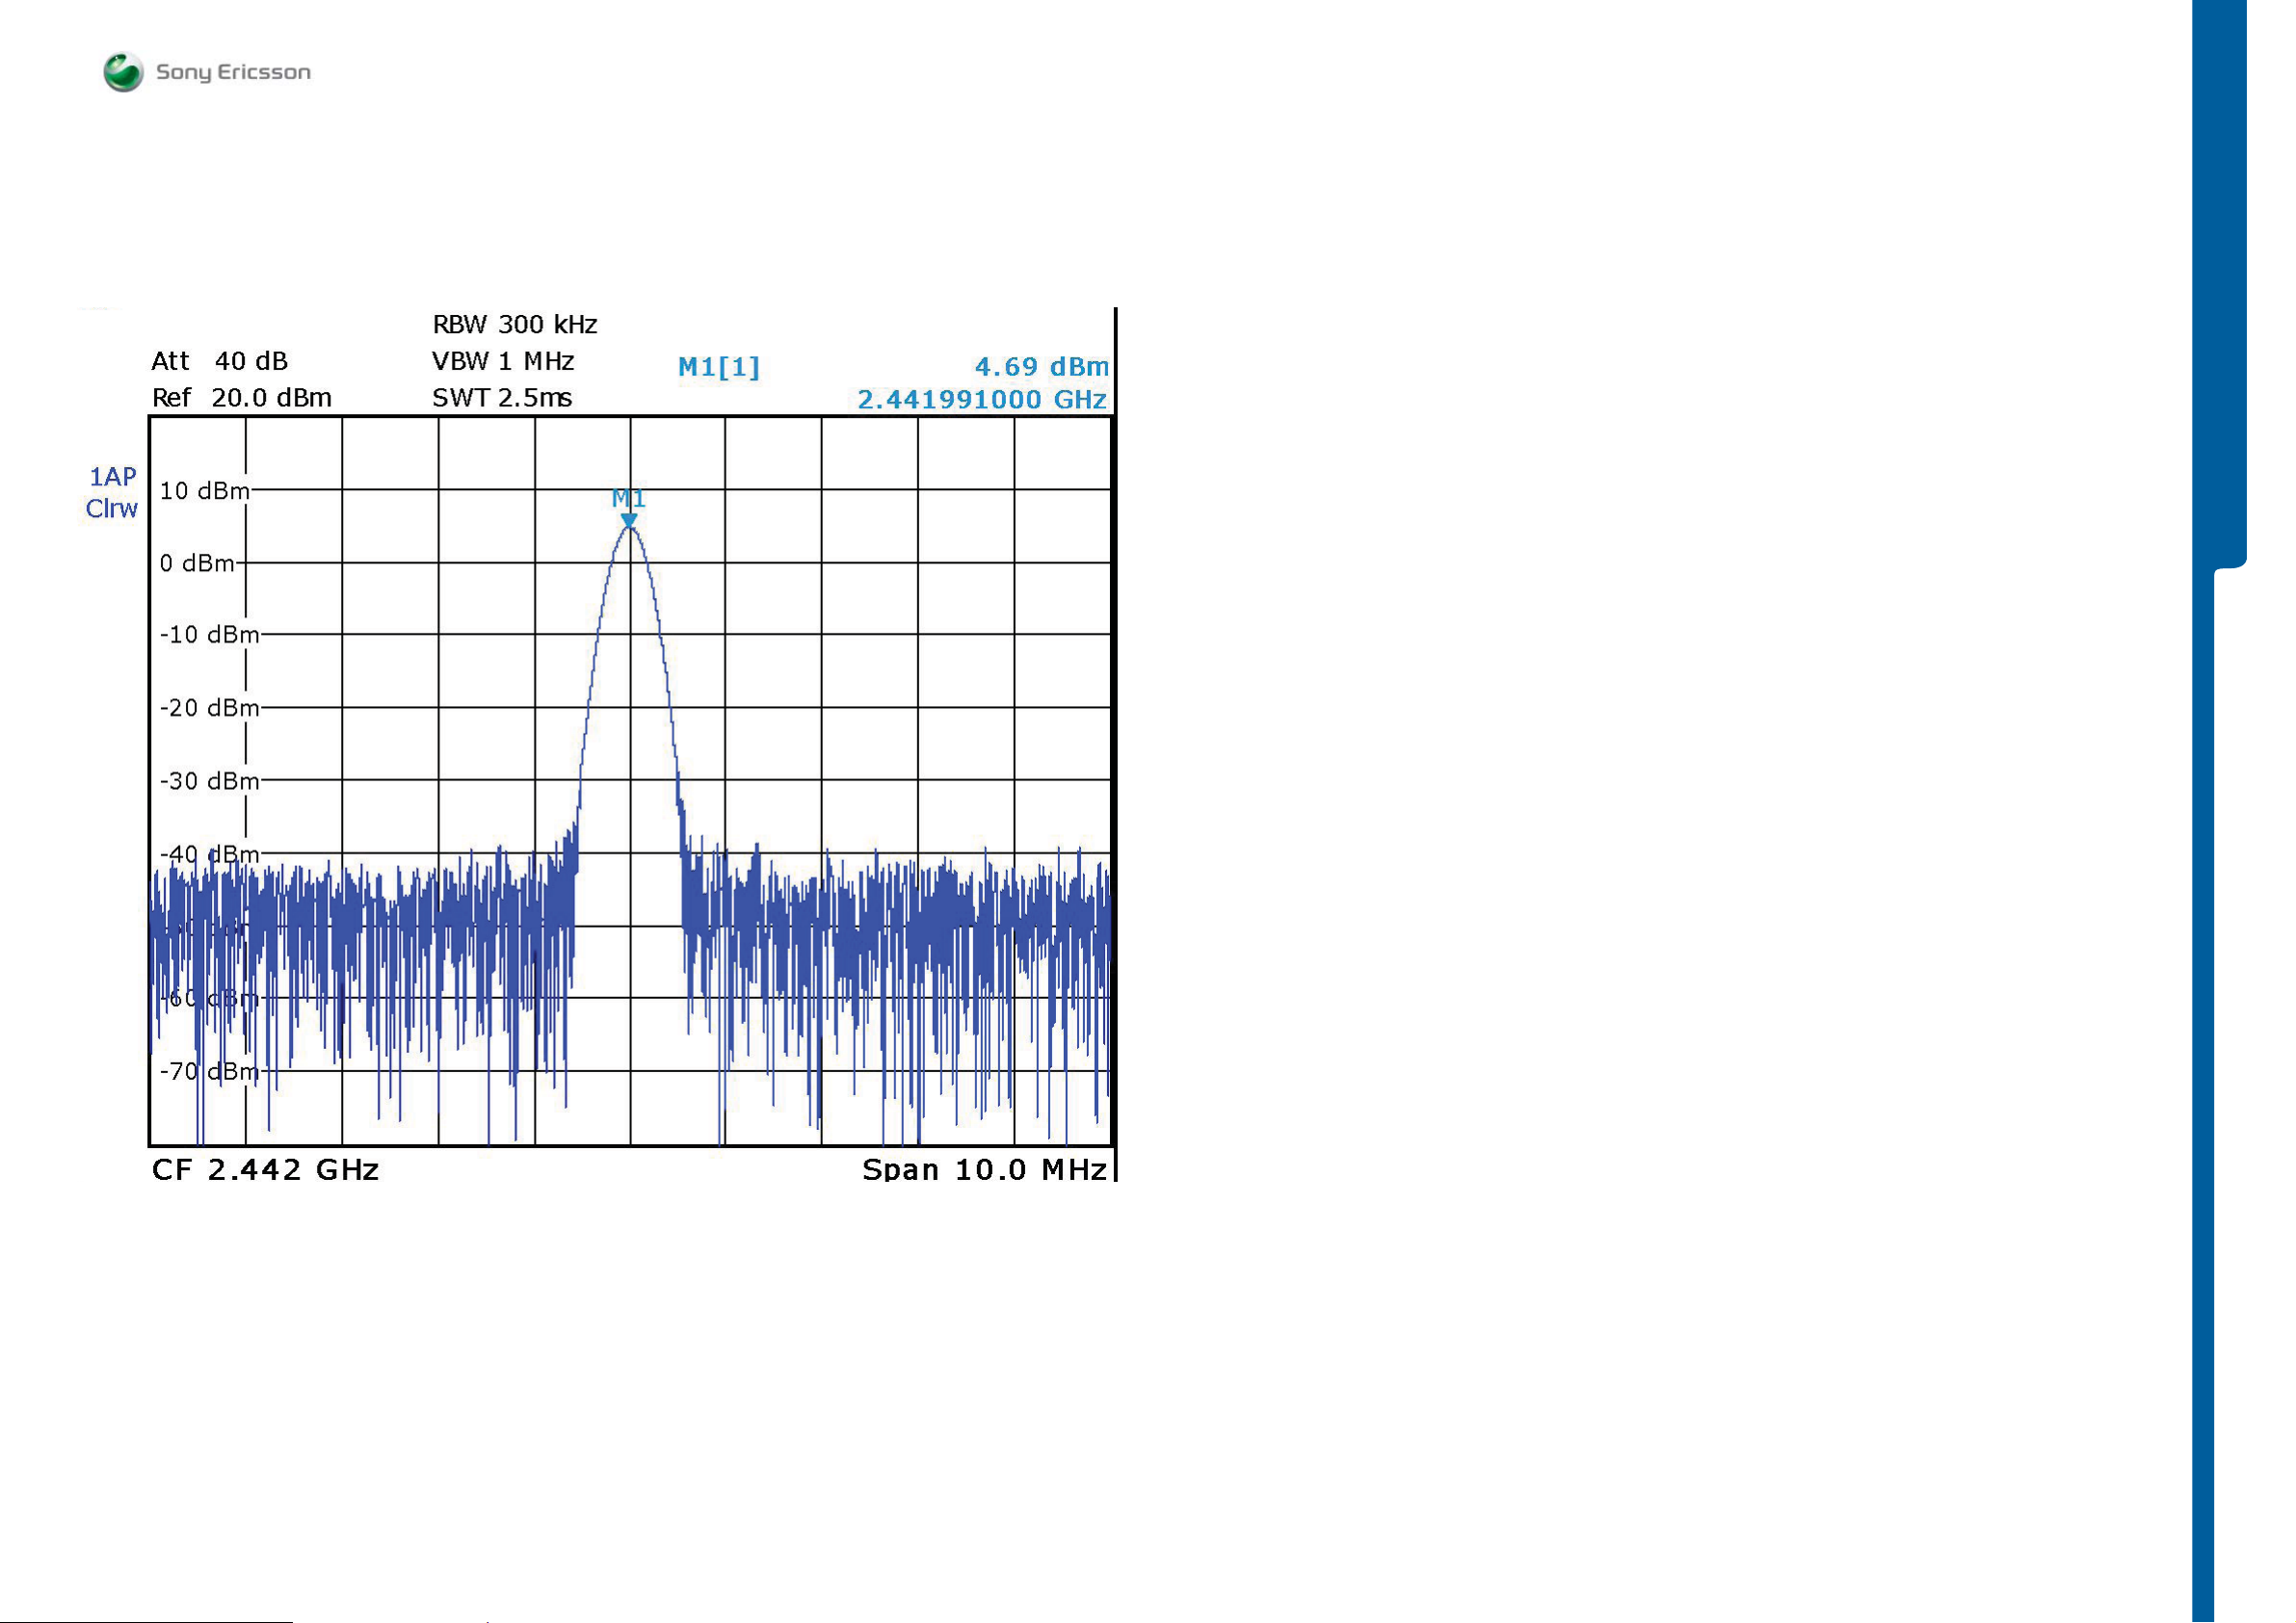
TROUBLESHOOTING
Measurement Points Pictures
SEMC Troubleshooting Manual
G705 - W705 - W715
TROUBLESHOOTING
WLAN TX Output Power
1225-4035 rev. 1
48 (122)
Page 49
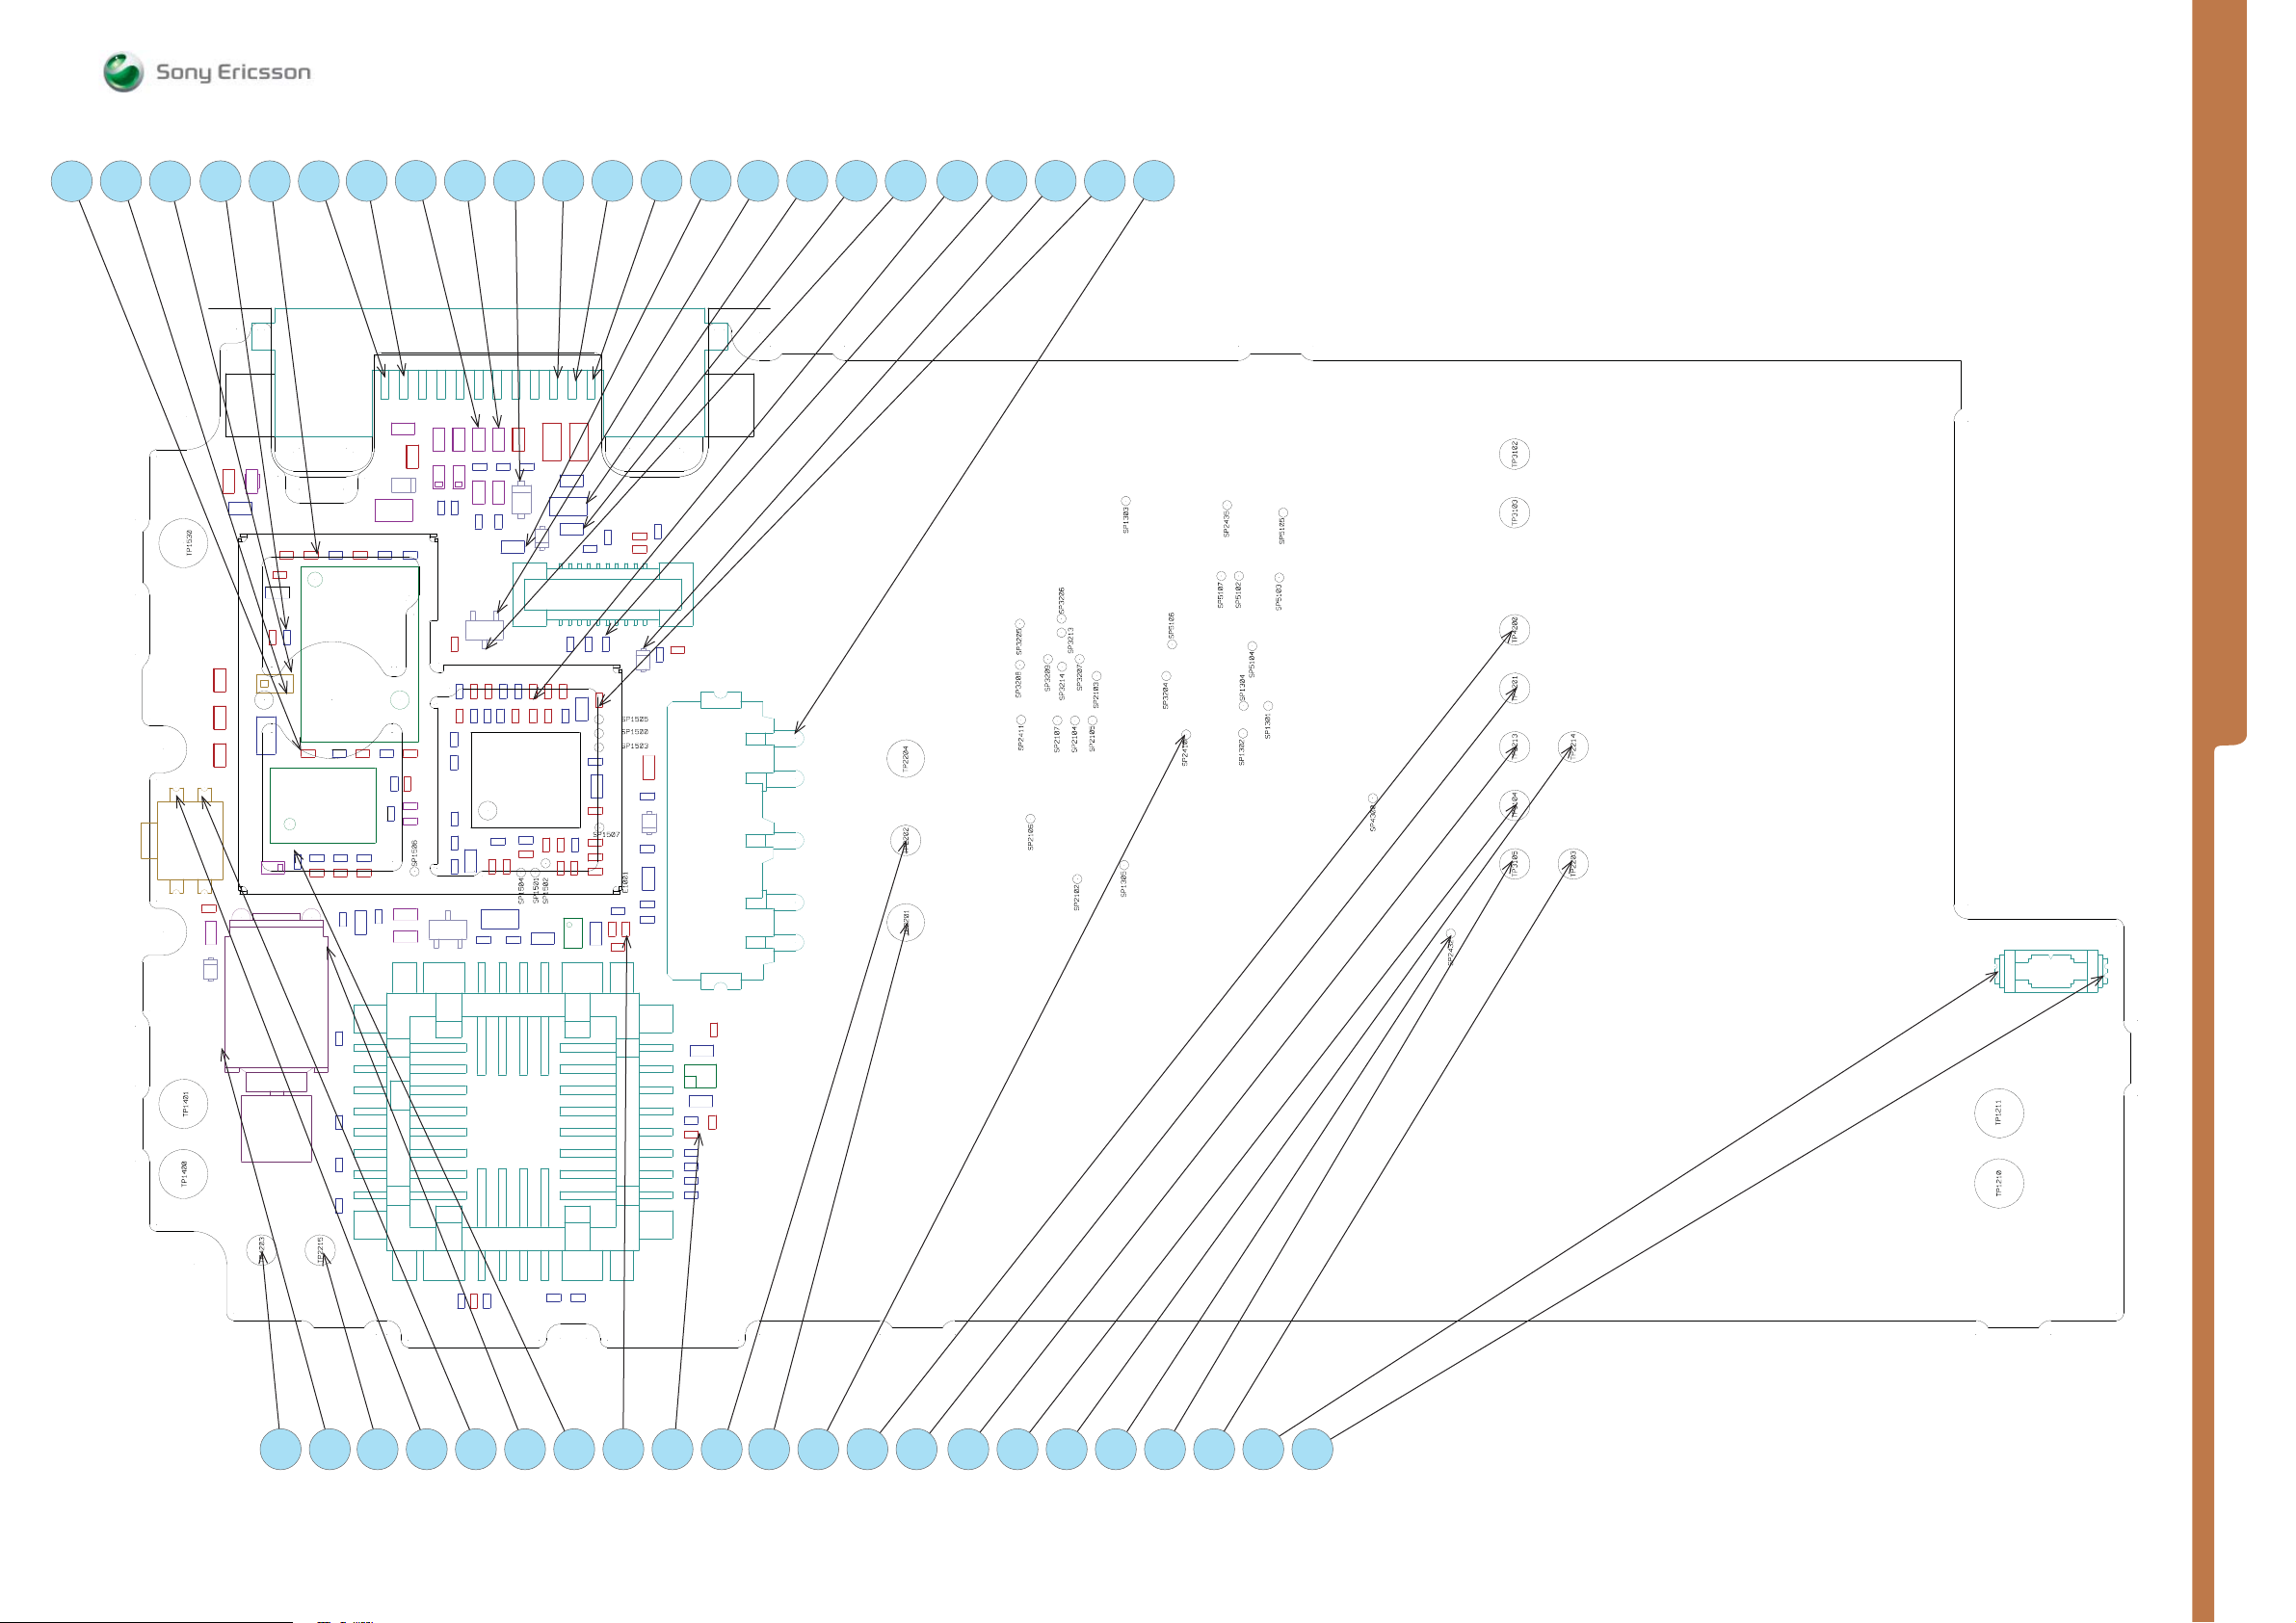
MEASUREMENT POINTS Primary Side
SEMC Troubleshooting Manual
G705 - W705 - W715
MP 3MP 2MP 1
TP1530
R2004
R1520
C1512
R1535
R1533
R1534
S2404
L2409
VV22448800
L1511
R3304
C3304
W1300
L1501
R330
R1300
R1312
C1302
C1510
R1516 RR11331100RR 11331111
NN11551100
C1508
C1502
R1513
MP 7 MP 14MP 13MP 12MP 11MP 10MP 9MP 8 MP 18MP 17MP 16MP 15 MP 19 MP 23MP 22MP 21MP 20
MP 6MP 5MP 4
XX22440055
L2406
R1313
2
C3305
N1300
CC11330011 CC113300 00
CC 11550077
CC 11550066
RR11551122
RR 11551111
CC22000011
CC22000022
V2413
L3300
C1303
L2401
R2451
L2453
C2443
C3306
RR11551144
CC11550099
LL11553311
CC11553322
LL 11553300
P1506
S
LL 44220011
VV44220022
LL 44 220022
CC22000033
L2455
C2442
R1301
CC11550055
RR11550022
CC11552211
CC11551166
CC11551144
L2402
C2452
V2402
RR11550066
CC11551188
CC11552222
CC11551155
C2448
CC11551133
L2403
L2408
RR11550055
CC11551199
CC11550000
RR11551188
L2404L2405
C2438
C2451
V2417
C2447
C2420
CC11550044
CC11552233
RR11550088
CC11552200
NN11550000
CC11551177
RR 11551177
RR11551199
CC22228833
CC44333311CC44333322
R2448
SP1504
RR11552233
RR11550099
CC 22 22 88 44
P1501
S
V2477
RR11550077
RR11551155
RR11550044
R2449
C2444
C2440
C2441
RR11551100
CC11552266
RR11552222
SP1502
R2490
C2415
XX22440022
CC22441166
CC22441188
CC11552244
CC11552255
RR11552255
RR11552211
NN22220033
CC22441199
CC11552288
CC11552277
RR 11552277
SP1507
RR11553366
RR115522 88
RR 11552299
CC22228822
C2417
RR11550011
CC22228811
RR22228811
RR22221122
RR 22 44 33 22
RR44223300
SP1505
SP15
SP150
E1001
RR22228822
0
CC 22 22 3344
VV22220000
CC 22 220011
CC 22 220033
CC 22 22 0022
CC22440033
RR22443355
CC22440077
VV22448833
0
3
RR22220000
CC22220000
XX22220011
TP3102
P1303
S
SP3206
SP3213
SP3205
SP3207
SP3209
SP3208
SP3214
SP2103
SP2411
TP2204
TP2202
TP2201
SP2106
SP2105
SP2104
SP2107
SP2102
SP3204
SP1305
SP2435
SP5105
SP5102
SP5107
SP5106
SP2410
SP5103
SP5104
SP1304
SP1301
SP1302
SP4300
SP2432
TP3103
P4200TP2213
T
TP4201
TP2214
TP3104
P3105
T
TP2203
XX33110022
MEASUREMENT POINTS
RR22221100
CC44333355
BB22000000
TP1401
XX44330000
TP1400
TP4203
CC44333344CC44330044
CC44332200
TP2215
CC 44 333366
CC44333388
CC44330011
CC44333300
RR44330022
CC 44 33 0088
RR44330033
CC44333399
CC 44 333377
CC 44333333
CC44334400
CC22228866
NN22220044
CC22228877
RR22221111
TP1211
P1210
T
MP 26 MP 33MP 32MP 31MP 30MP 29MP 28MP 27 MP 37MP 36MP 35MP 34 MP 38 MP 45MP 44MP 43MP 42MP 41MP 40MP 39MP 25MP 24
1225-4035 rev. 1
49 (122)
Page 50
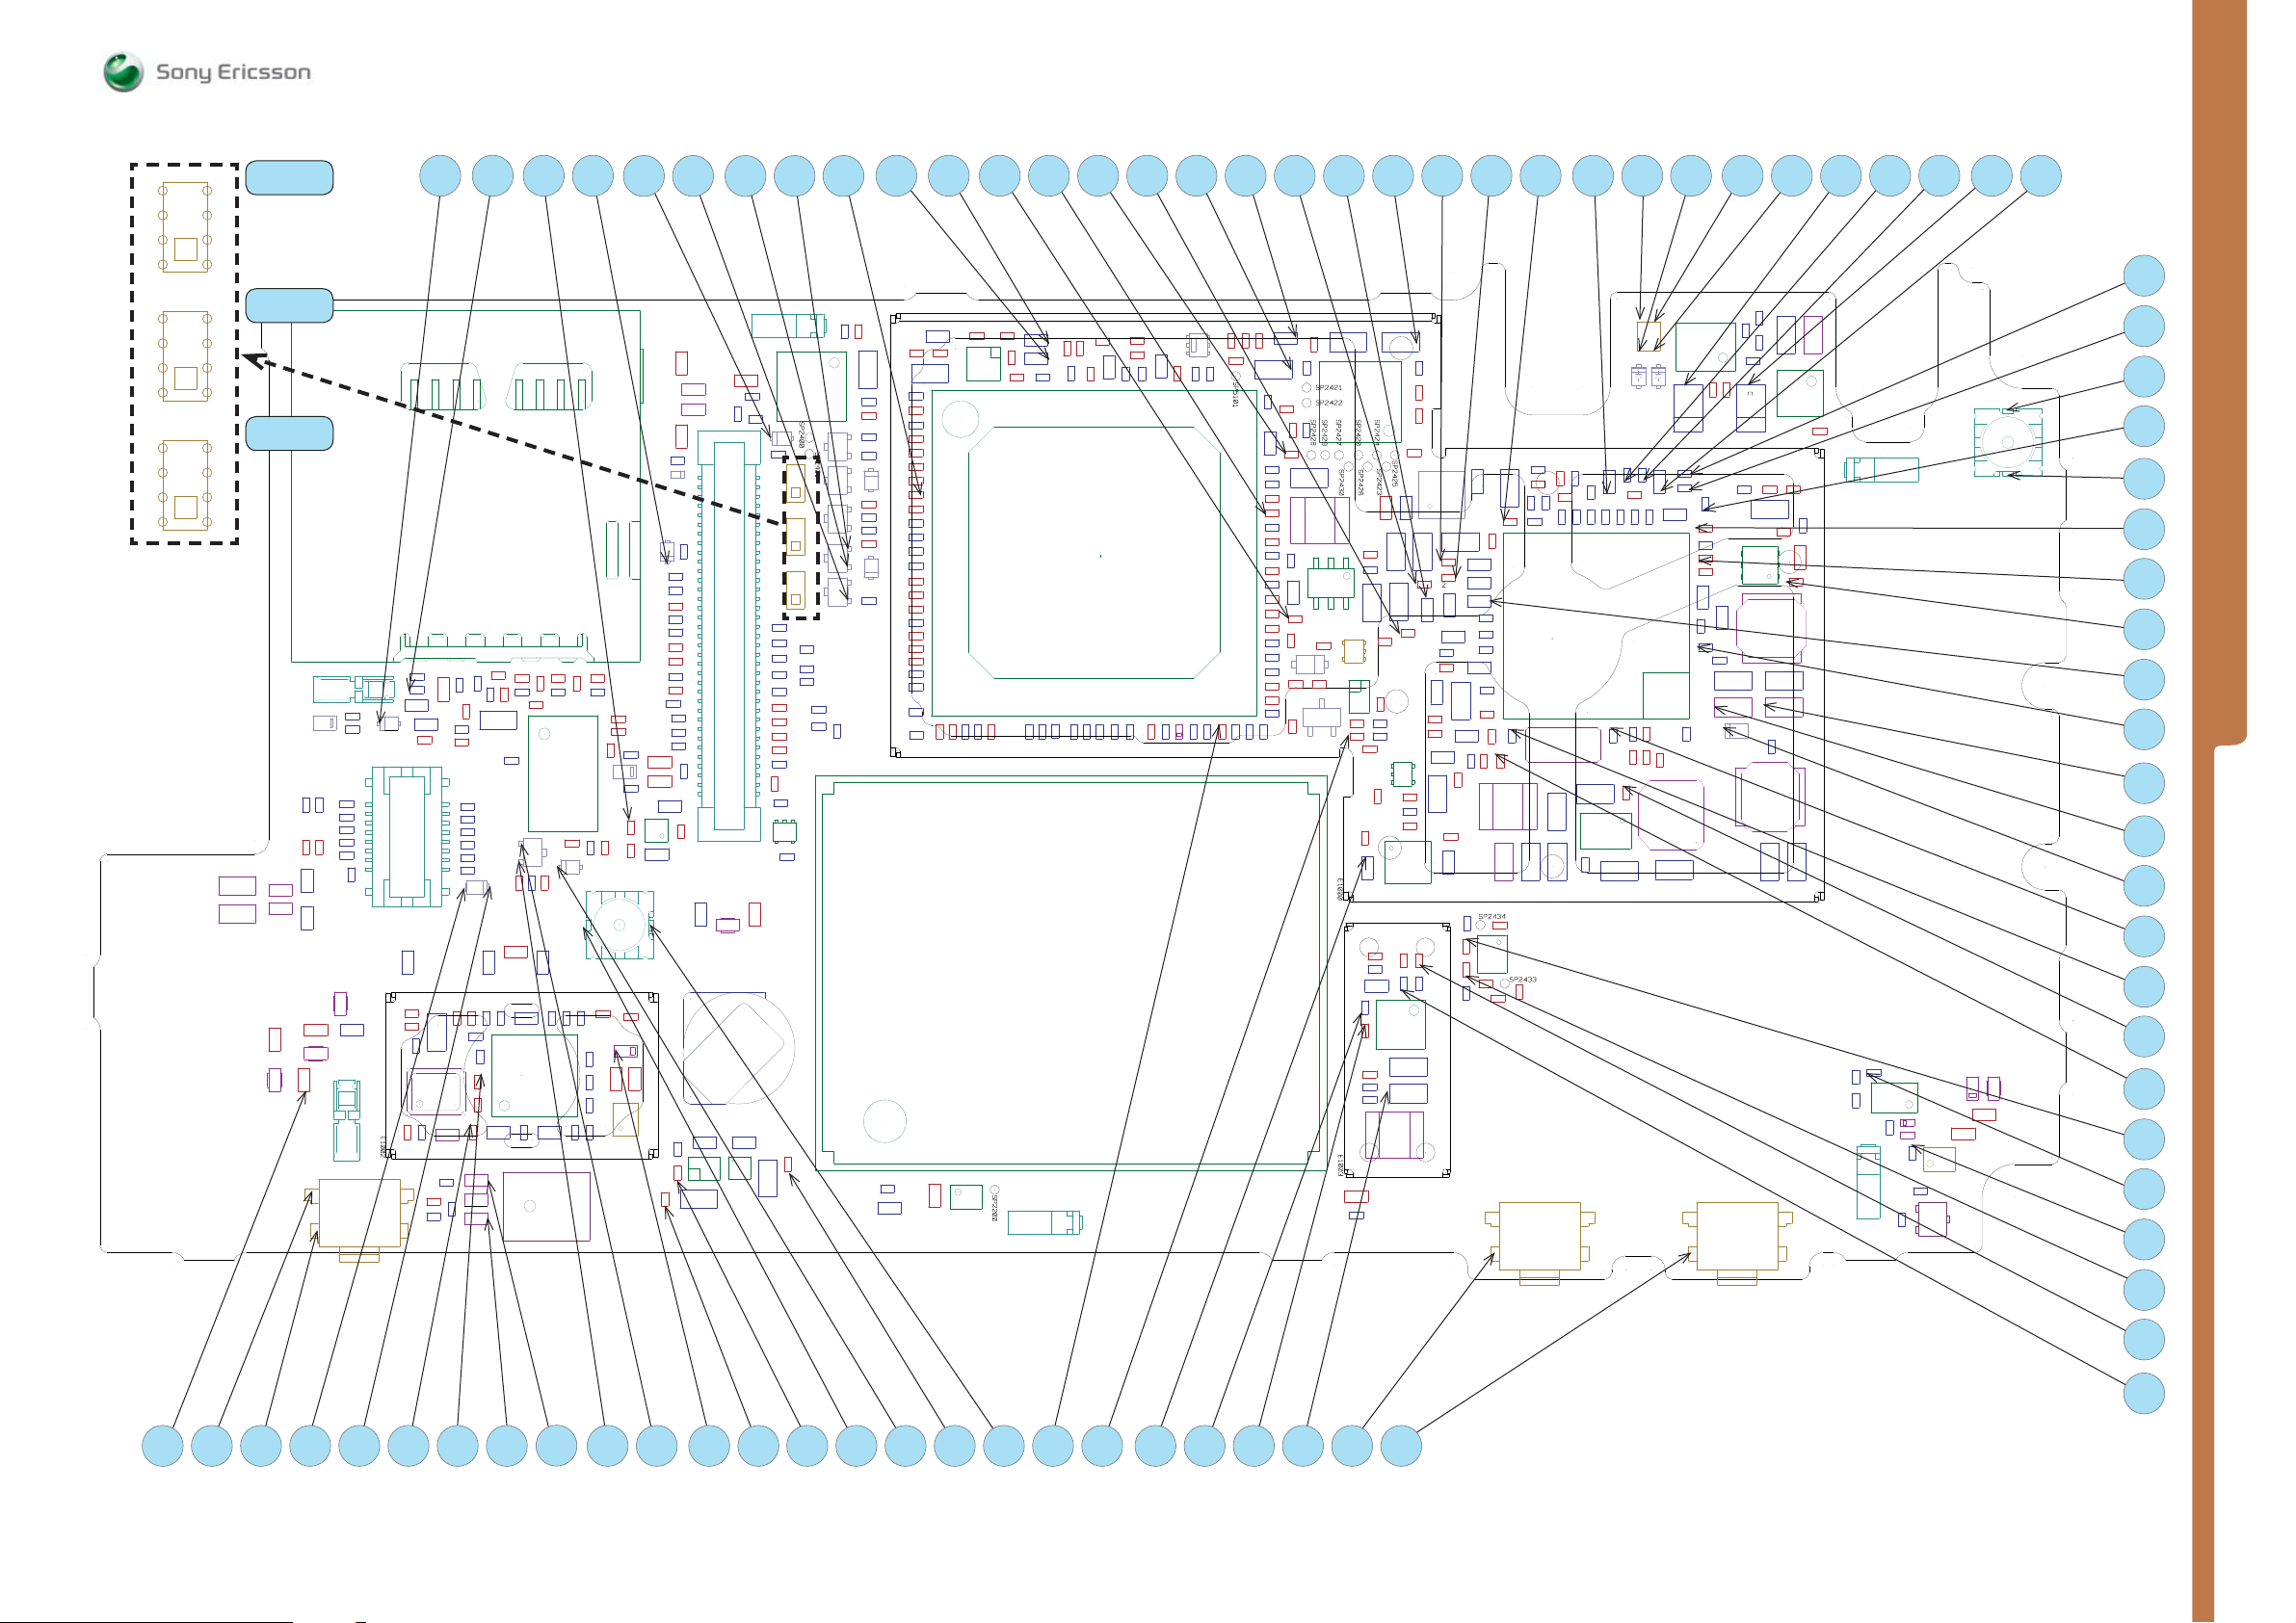
MEASUREMENT POINTS Secondary Side
SEMC Troubleshooting Manual
G705 - W705 - W715
4
3
2
1
4
3
2
1
4
3
2
1
LL33111100
LL33111111
MP Z4202 Pin 1-8
MP Z4200 Pin 1-8
MP Z4201 Pin 1-8
VV33110011
CC33111199
CC33111188
RR33110099
RR33110088
CC33111111
LL33111133
CC33110099
LL 33 111144
RR11220022
RR 11220044
LL11221111
RR11220066
LL11221122
XX22440033
RR 22442299
CC22441111
CC22442233
RR22442266
XX11000011
CC33110088
CC33110077
CC22449922
CC22448899
CC 22448800
CC22448811
CC22448822
LL11220055
CC11221122
XX11000044
SS22440033
CC 22442299
CC 22 44 22 11
CC 22 44 22 22
CC 22 44 1100
VV 44220055
RR22330000
XX22440011
CC22448833
CC11220099
RR11660000
RR 11440066
CC11441122
BB11440000
CC11441100
RR11441133
E1002
RR33119977
CC33330077
CC11441111
LL 11441100
CC33111177
CC22442288
RR22442211
CC22449911
CC22448888
CC22448877
CC22448866
CC22448855
CC22448844
RR11441166
CC 11442211
CC33111100
CC22442277
RR22443333
CC44441100
VV22447700
CC11221100
CC11441188
RR11440033
CC11442233
RR11440044
RR11440077
RR1144144
CC 11442244
LL33112222
LL33110011
LL33112200
RR22441188
RR22442200
CC 22 442255
CC44441111
RR22000011
RR11222200
CC11442255
CC 11442222
NN11440000
RR44441166
CC22449900
CC11441199
RR22442277
RR22441177
RR22441199
RR22442288
CC22442266
CC22442244
NN44441100
RR44441155
RR44441144
RR44441133
CC 33 114400
VV 33112200
CC33113399
RR22221177
VV44220044
RR44441122
RR22443366
VV22440088
CC11221111
CC11442288
CC11442200
RR22220022
CC44441122
RR44441177
XX11220000
CC11441177
CC11441166
RR11440022
CC11441144
LL11440033
RR11440088
CC11441155
CC11442266
CC11442277
CC11441133
BB33110000
ZZ44220022
8
7
6
5
ZZ44220000
8
7
6
5
ZZ44220011
8
7
6
5
MP 51MP 50 MP 54MP 52 MP 53
RR33111144
RR33111133
CC 22446600
VV 22 447766
CC22449933
VV44220077
CC442211 00
CC44221111
RR44222200
CC44221144
CC44221133
RR44222244
RR 44222211
CC44223355
RR22228833
CC44330066
CC44330055
CC 44 222299
CC 44 22 1199
CC33115599
RR33115588
RR33115577
CC22228899
NN22220011
RR22220055
CC22228888
RR 11660022
RR11440099
ZZ11440011
CC22338811
RR22331155
RR11441188
LL33110033
LL 33110044
CC11220022
CC22338800
NN22331100
CC22338822
XX44220000
LL11220077
RR22449999
CC22447722
CC22221144
CC22338833
NN22331111
CC 22449999
CC44223344
XX11000000
RR44330044
RR11221111
VV44220066
CC22449944
CC44334455
CC 44334477
CC44335511
CC44334488
CC44335522
RR44330000
RR44330011
RR44330055
RR22449911
CC 44 33 00 99
CC44334433
NN22660000
CC22338844
CC22660000
RR11441199
ZZ44220022
ZZ44220000
ZZ44220011
CC44334499
CC 44 334466
CC 44 33 5500
RR22440099
CC22440066
SP2401
CC44334422
CC44334411
CC22440044
RR 33 110000
CC22333311
CC 22440055
RR 55110000
RR22440011
CC22446611
CC22446633
VV22448811
RR22447766
CC22446699
CC 22 446688
RR 22447777
VV22448822
CC22447700
CC22334466
RR22447744
RR22447733
RR22447722
RR22447711
RR22447700
RR 22447755
CC22330022
CC22332222
CC 22334444
CC22330033
RR55110011
RR22442222
RR 11660044
CC22332244
RR11660055
RR11660066
RR 11660033
CC22332233
CC22330044
CC22334488
CC 11220000
VV22447722
VV22447711
VV22447733
VV22447744
VV22447755
CC44334444
NN22441111
SP2400
CC 33 110044
CC 33 110066
RR33115533
RR11110022
RR33112288
RR33110022
CC33113377
RR33110066
CC 33 114488
NN33110000
RR33112277
CC22330088
RR11110011
CC22330055
CC22333377
RR11110033
NN11220000
CC11222200
CC11221199
RR11222222
NN 11220022
SP2200
XX11000033
MP 59MP 58MP 57 MP 60 MP 68MP 67MP 66MP 65MP 64MP 63MP 62MP 61 MP 71MP 69 MP 70MP 55 MP 56MP 49MP 48MP 46 MP 47 MP 76MP 75MP 74MP 73MP 72 MP 77 MP 78
CC33111144
CC22443399
RR44220033
CC44220033
RR 44 220011
NN22440011
CC 44 220000
LL44222222
CC22221155
LL22220000
CC22221188
NN22442211
RR44220044
CC44220011
RR44220000
CC22221199
LL22445522
RR22444477
RR44220022
XX11000022
CC11440055
CC 11440077
CC11440066
NN11441100
CC11440033
LL11440022
LL 11440011
CC11440022
ZZ11440000
XX11000055
CC44440011
BB44441100
CC44440022
CC 22331133
CC22332255
RR22111133
CC22332211
NN22001100
CC22334411
CC22331144
NN33110011
RR33114488
CC33114499
CC22441133
RR 22441100
CC22441122
RR22441111
RR 22441166
CC22441144
CC22222233
CC22222200
CC 22 221166
SS22440066SS22440055
RR33114477
CC44220022
CC22222244
CC22221177
LL22220011
VV22220011
CC33111155
CC33111166
CC 33 115577
C
33115500
LL44220000
CC33112288
CC33115555
CC33110022
CC22110000
NN22330000
CC33115533
CC 22337799
RR11550033
CC33112255
RR 33111122
CC33113355
CC22440022
RR22440033
ZZ22440000
VV22441155
VV22441166
CC33112244
CC33115566
CC33114466
CC 33 114455
CC33115522
CC33115511
RR22440044
CC44220066
RR22440022
RR11110000
LL22331111
CC 22 337744
RR22111122
RR11552266
RR55110022
CC22330011
RR11552244
RR22111144
CC22331122
CC22331111
CC22333399
CC22334422
CC22335533
CC22335544
VV44220033
CC22332200
RR22339900
CC22333300
CC22331100
CC22330066
CC22332266
CC22110033
LL22110000
RR22111155
RR22110022
RR22443300
CC22111100
CC22443333
CC 22 44 3311
CC22443344
CC22443355
S
P5101
CC22334477
CC22332299
CC22330099
RR11440011
RR22331133
CC22332288
RR22441155
CC22335500
RR22440077
CC22335511
RR22440088
RR22440055
RR 22 44 00 66
CC 22 33 00 77
CC 22332277
CC 22 110044
RR 22112233
RR22112222
CC22110099
CC22334499
CC22335522
CC22334455
RR22444400
RR22331100
RR22442233
RR22330022
RR22110011
RR22110066
CC22443322
CC22223311
CC22223300
CC22333366
VV22110011
VV22110000
RR22113344
SP24
SP2422
SP2428
LL22220022
NN22220000
RR22110044
RR22110055
SP2429
21
S
P2427
E
1000
E1003
S
P2430
RR22112200
RR22112211
RR22440000
CC22440000
CC 22 44 3377
CC22443366
NN22442200
RR22444455
RR22444466
SP2420
SP2424
CC33113311
SP2425
RR22444411
S
SP2426
P2423
CC22222211
VV22220022
RR22220011
CC22223322
RR33111199
CC33112233
RR 22330066
33 0011
RR2
CC22220099
RR11221133
CC22221111
CC11221177
RR22111111
RR22443377
CC22444499
CC22220055
CC22222266
CC22222277
CC22443300
RR22443344
CC22221122
CC22220077
CC2222100
CC 11220088
CC22222255
CC33115544
CC 22 220088
RR22445500
CC44220099
RR22223300
RR22220033
RR22339944
SP2
RR 33 115566
RR22110033
434
RR22445577
NN22442222
RR 22445566
CC22222222
CC22220044
RR22220066
CC 22 22 22 99
CC22222288
CC22220066
RR22330055
CC11221188
DD22110022
RR22330033
RR 22001100
CC33113388
RR33115544
NN22110011
RR22111188
CC 22 110088
RR22111177
RR11220033
CC11221144
NN11221100
CC11220011
CC11220066
LL11220000
CC22221133
RR 22220044
RR22330077
CC 44220088
CC22110055
NN11221111
RR11220099
CC11221133
RR22111199
NN22110000
CC 22 110066
CC22110077
RR 22110088
RR22111166
RR11221144
CC11220077
RR11220000
CC11220044
CC11221166
CC11221155
RR11221100
RR11220011
CC11220033
CC11220055
RR33112233
CC 33112211
CC33115588
RR33119999
CC33112266
CC33112222
CC33113333
CC 33 113366
NN22000000
CC22110011
BB22110000
LL22331133
CC22337766
LL22331100
CC22337711
CC22337722
SP2433
RR22445544
RR33119988
CC33112277
CC33113322
CC22337777
CC22337733
RR22442244
RR22444422
RR22444444
RR22443311
RR 11444411
MP 105
MP 106
MP 107
XX11550000
MP 108
MP 109
MP 110
MEASUREMENT POINTS
MP 111
MP 112
MP 113
MP 114
MP 115
MP 116
MP 117
MP 118
MP 119
MP 120
LL11440000
LL11440044
RR11441100
MP 121
MP 122
MP 123
MP 124
MP 87
MP 125
MP 126
MP 127
MP 104MP 103MP 102MP 101MP 100MP 99MP 89MP 88 MP 97MP 96MP 95MP 94MP 93MP 92 MP 98MP 90 MP 91MP 86MP 85MP 84MP 83MP 82MP 81MP 80MP 79
1225-4035 rev. 1
50 (122)
Page 51
MEASUREMENT POINTS Top Schematic
SEMC Troubleshooting Manual
G705 - W705 - W715
Pages B1-B16
Pages B1-B16
WLAN_VO18
WLAN_VO33
WLAN_LDO18A
WLAN_LDO30
LED_MAINKEY
LED_WebShortcut
OPTOSENSE
MCLK
TX_ADSTR
OPTO_EN
TESTOUT
WLAN_CLKREQ
BT_CLKREQn
MCLKSEC
WLAN_SCLK
RF_ID
VAD
SPL
SPR
Application & Sys.Performance
Application & Sys.Performance
CAMSYSCLK
AGPS_RSTn
MICN/AUXinR
MICP/AUXinL
FM_ANTENNA
VBAT
VDDE18
VBT27
VAUDIO26
VBEAR26
VCAMSD18
VCAMSA28
VCAMIO18
VOPTO30
I2CCLK1
I2CDAT1
WLAN_CLK
AGPS_CLK
MCLKREQ
BT_CLK
RTCCLK
BTRESn
PWRRSTn
Access side GPIO mapping
USB_HSSTP
AccGPIO00
USB_HSDIR
AccGPIO01
CTMS B14
AccGPIO02
CFMS
OPTOSENSE
LED_WebShortcut
LED_KEY2
WLAN_VO33
VAUDIO26
WLAN_VO18
VOPTO30
VDIG
VBAT
VBT27
VDDE18
VDIG
VBAT
VDDE18
VBT27
VDIG
WLAN_VO18
WLAN_VO33
WLAN_LDO18A
WLAN_LDO30
WLAN_CLK
AGPS_CLK
MCLKREQ
BT_CLK
RTCCLK
BTRESn
AGPS_RSTn
Access
Access
VCAMSD18VCAMSA28
Pages R1-R5
VCAMIO18
MCLK
TX_ADSTR
OPTO_EN
TESTOUT
WLAN_CLKREQ
BT_CLKREQn
MCLKSEC
WLAN_SCLK
RF_ID
VDDE18
VBAT
VBAT
VDDE18
VCAMIO18
VCAMSD18
VCAMSA28
VOPTO30
VDIG
VAUDIO26
I2CCLK1
I2CDAT1
CAMSYSCLK
Imaging
Imaging
Pages I1-I3
Pages I1-I3
LED_WebShortcut
LED_MAINKEY
OPTOSENSE
WLAN_VO33
VBAT
VDDE18
VAUDIO26
VBEAR26
RTCCLK
I2CDAT1
I2CCLK1
MICN/AUXinR
MICP/AUXinL
PWRRSTn
FM_ANTENNA
Audio
WLAN_LDO18A
Pages A1-A4
WLAN_LDO30
VOPTO30
VAD
SPL
SPR
WLAN_LDO18A
WLAN_LDO30
VBAT
VDIG
VAUDIO26
VDDE18
VBT27
VDIG
VCAMSD18
VBEAR26
RTCCLK
I2CDAT1
I2CCLK1
MICN/AUXinR
MICP/AUXinL
PWRRSTn
FM_ANTENNA
SPR
SPL
VAD
VAUDIO26
I2CCLK1
I2CDAT1
CAMSYSCLK
WLAN_CLK
AGPS_CLK
MCLKREQ
BT_CLK
RTCCLK
BTRESn
AGPS_RSTn
VDDE18
VCAMIO18
82ASMACV62RAEBV
VBAT
WLAN_VO18
AccGPIO03
USB_HSINCLK
AccGPIO04
USB_HSNXT
AccGPIO05
AccGPIO06
USB_HSDATA5 B14
AccGPIO07
USB_HSDATA6 B14
AccGPIO08
AccGPIO09
USB_HSDATA7
AccGPIO10
UART3_RX R04
AccGPIO11
UART3_TX
AccGPIO12
AccGPIO13
UART3_RTS
CH_DET_DP
AccGPIO14
CH_DET_DM
AccGPIO15
USB_HSCHIP_SEL B14
AccGPIO16
AccGPIO17
USB_HSDATA3
AccGPIO18
AccGPIO19
ACC_SPI_DI
AccGPIO20
ACC_SPI_DO
AccGPIO21
ACC_SPI_CLK
AccGPIO22
OVP_FLAG B14
AccGPIO23
AccGPIO24
not used
AccGPIO25
WLAN_SPI_IRQ R05
PIO26
BT-chip GPIO mapping
BTGPIO0
WLAN_CONFIRMn R03
BTGPIO8
WLAN_BT_STATE R03
BTGPIO9
not used R03
BTGPIO10
not used
BTGPIO11
not used R03
BTGPIO16
Application side GPIO mapping
Port Usage Page
AppGPIO00
FM_INT A04
AppGPIO01
APP_LOG B14
AppGPIO02
AppGPIO03
AppGPIO04
SLIDE_SENSE B15
AppGPIO05
not used B16
AppGPIO06
AppGPIO07
AppGPIO08
AGPS_LDO_EN B16
AppGPIO09
AppGPIO10
AppGPIO11
AppGPIO12
MSDETECT B13
AppGPIO13
CAM_PWDN I02
AppGPIO14
CIF_STANDBY
AppGPIO15
DCON xxx
AppGPIO16
CAM_LDO_EN
AppGPIO17
AppGPIO18
AppGPIO19
not used
PageUsagePort
B14
B14
B14
B14
B14
B14USB_HSDATA4
B14
R04
R04UART3_CTS
R04
B14
B14
R04AGPS_SYNC
B14
R05WLAN_SPI_CSn
R03
R03
R03
T01
R03BT_SPI_CSnAccG
R03BT_SPI_INTAccGPIO27
PageUsagePort
R03
R03WLAN_BT_PRIORITY
I03Tally_LED_C
I03not used
B08AMPCTRL
B16AGPS_PWRON
B16AGPS_CLK_REQn
B03AGPS_CLK_EN
I04not used
I02
B16
A02WLAN_PDn
B16WLAN_RSTn_PDn
I04
MEASUREMENT POINTS
X1000
1201-4841
1
Frame Contact
X1001
1
1202-1053
X1002
1201-4841
RF_ID
WLAN_SCLK
MCLKSEC
BT_CLKREQn
WLAN_CLKREQ
TESTOUT
OPTO_EN
TX_ADSTR
MCLK
VDDE18
E1000
Clamp
Page T1
X1004
1202-1053
X1005
1
1
1201-4841
X1003
1
1
1201-4841
Page T1
VDDE18
Test
1
GND
Will be connected
to GND in PCB
SHIELD_CAN_FENCE_BB
1206-8591
1
E1001
Clamp
1
GND
Will be connected
to GND in PCB
SHIELD_CAN_FENCE_W-LAN
1206-8592
E1002
Clamp
1
GND
Will be connected
to GND in PCB
SHIELD_CAN_FENCE_AGPS
1
1206-8593
1
E1003
Clamp
1
GND
Will be connec ted
to GND in PCB
SHIELD_CAN_FENCE_CLOSED_PA
1206-8594
1
Made for
Top Schematic
Document Nr Revision
1207-2092 Page 1 3
1225-4035 rev. 1
51 (122)
Page 52
MICN/AUXinR
MICP/AUXinL
MEASUREMENT POINTS Audio Top
VBATVAUDIO26VBEAR26
Page 2
Page 2
VBAT
VAUDIO26
VBEAR26
MICN/AUXinR
MICP/AUXinL VAD
VBATVDDE18
VBAT
VDDE18
Page 4
Page 4
FMR
FML
FMR
FML
MICN/AUXinR
MICP/AUXinL
FMR
FML
VAD
SPL
SPR
SPL
SPR
SEMC Troubleshooting Manual
G705 - W705 - W715
VAD
SPL
SPR
MEASUREMENT POINTS
FM_ANTENNA
PWRRSTn
RTCCLK
I2CDAT1
I2CCLK1
FM_ANTENNA
PWRRSTn
RTCCLK
I2CDAT1
I2CCLK1
FM_ANTENNA
PWRRSTn
RTCCLK
I2CDAT1
I2CCLK1
FM Radio
FM Radio
Audio DigitalAudio Digital
Page 3
Page 3
Audio Analog
VBAT
VDDE18
VAUDIO26
VBEAR26
VBAT VDDE18 VAUDIO26 VBEAR26
Made for
Audio
Audio T
op
Document Nr Revision
1207-2092 Page A1 3
1225-4035 rev. 1
52 (122)
Page 53
N2010
APPLICATION GPIO_06
DB3210ADT/7POPHF
1208-3871
1
MEASUREMENT POINTS Audio Analog
VBAT
0ohms
R3106
4.7Kohms
C3104
0.47uF
N3100
A1
INM
INP
C1
Bypass
C3
SHDN
NCP2990FCT2G
1200-9978
AUDIO_PA
OUTA
OUTB
VM_P
R3102 2.2Kohms
R3127
2.2Kohms
<NM>
R3128
R3153
100Kohms
AMPCTRL
N17
<NM>
0ohms
R3100
TP3102
TP3103
B3
VP
VM
L3103
C3106
10uF
L3104
100MHz
100MHz
R3113NMR3114
NM
C3107
33pF
<NM>
C3108
33pF
<NM>
V3101
ESDALC6V1M3
1001-0796
C3118
33pF
<NM>
C3119
33pF
<NM>
2A3A
C2
B1
B2
SEMC Troubleshooting Manual
G705 - W705 - W715
Radio Components
R3108
0ohms
R3109
<NM>
0ohms
<NM>
C3109
33pF
L3113
1000-0132
L3114
1000-0132
C3111
33pF
100MHz
600
100MHz
600
1000-1875
1000-1875
L3110
0.047uH
L3111
0.047uH
X3102
SPEAKER
SPEAKER_P
SPEAKER_N
1206-4855
MP 44
1
MP 45
2
1
C3307
33pF
NM
MP 86 MP 87
L31201k
100MHz
1000-2618
BLM15HG102SN
C3110
33pF
R3197
NM
0ohms
FMR
FML
MICP/AUXinL
MICN/AUXinR
MIC
B3100
OUT VCC
GND GND
1210-7410
SPUL409HE5H-PB
BLM15HG102SN
C3121
100nF
1000-2618
R3199
0ohms
14
23
BLM15HG102SN
1
L3101
C3122
33pF
C3114
33pF
<NM>
<NM>
R3123
0ohms
100MHz1kL3122
1000-2618
C3116
33pF
<NM>
C3131
100nF
C3115
33pF
<NM>
0ohms
C3146
0.22uF
C3145
0.22uF
R3198
C3117
33pF
<NM>
MP 105
MP 106
C3126
33pF
NC
NC
NC
FM_R
FM_L
N3101
TJATTE3
A5
V_MIC
B3
INTMICint
B5
INTMIC
MICP
MICN
SPL
SPR
TJATTE3 Leadfree
1000-0198
SP_ref
MICP_int
MICN_int
SPL_int
SPR_int
R3119 100ohms
C3123
10uF
VBEAR26
C3155
0.47uF
C3132
LINEIN1
LINEIN2
0.1uF
C3133
0.1uF
C3151
1uF
VAD
SPR
SPL
VAUDIO26
C3135
0.1uF
C3128
C3127
33pF
33pF
<NM>
R3112
100Kohms
C3124
100nF
C3125
0.1uF
<NM>
PHFMICP
PHFMICN
C3156
0.47uF
MP 69MP 78MP 75MP 76
MIC1P
MIC1N
MP 68
C3157
33pF
C3158
10uF
R3156 100ohms
B2
COO
D1
NC
1A2D
2A3D
3A4D
4A5D
B1
VAD
C1
GND
C2
GND
C3
GND
C4
GND
C5
GND
B4
GND
C3136
33pF
C3152
0.1uF
N10
M10
N9
P9
N8
P8
N11
P10
P12
P11
P7
P13
P6
P3
N2000
Ericsson AB 3100
MIC1P
MIC1N
MIC2P
MIC2N
MIC3P
MIC3N
MIC4P
MIC4N
LINEIN1
LINEIN2
VDD_SPKR
VDD_AUDIO
VDD_BEAR
VDD_AUXO
AB3100
1202-0639
R3147
1Kohms
MMI
AUDIO IF
CCO1
CCO2
SPKRP_OUT
SPKRN_OUT
BEARP_OUT
BEARN_OUT
AUXO1_OUT
AUXO2_OUT
MIDR_OUT
PLL_DEC3
PLL_DEC4
VSS_SPKR
VSS_BEAR
R3148
1Kohms
C3150
220uF
N13
P14
N7
N6
P5
M5
M4
P4
N4
H14
J12
M7
N5
2
MP 77
+
C3149
220uF
MP 55MP 56
C3148
C3137
0.22uF
0.22uF
<NM>
C3102
C3153
33pF
33pF
<NM>
<NM>
BEARP
BEARN
AUXO1
AUXO2
NC
R3154
24Kohms
C3154
0.0033uF
C3138
0.047uF
+
V3120
1001-0796
ESDALC6V1M3
NM
C3139
33pF
<NM>
1005
<NM>
R3157 0ohms
R3158
<NM>
1005
C3140
33pF
<NM>
0ohms
C3159
33pF
<NM>
MP 42MP 39
TP3105TP3104
BEARP
BEARN
X4200
SLIDER FLEX
CONNECTOR
A33
A32
1206-2940
(#6/7)
1
MP 74
VAD
SPR
SPL
MEASUREMENT POINTS
VAUDIO26
VBEAR26
VBAT
VBAT
VAUDIO26 VBEAR26
Made for
Audio
Audio Analog
Document Nr Revision
1207-2092 Page
A2 3
1225-4035 rev. 1
53 (122)
Page 54
N2010
KAJSA_BOTTOM_APP
I2S_PCM_A_10_24
KAJSA_BOTTOM_APP_I2S_PCM
KAJSA_BOTTOM_AUDIO
T23
I2S0ULD/PCM0ULD
U23
I2S1ULD/PCM1ULD
DB3210ADT/7POPHF
1208-3871 1
I2S0CLK/PCM0CLK
I2S0WS/PCM0SYN
I2S0DLD/PCM0DLD
I2S1CLK/PCM1CLK
I2S1WS/PCM1SYN
I2S1DLD/PCM1DLD
U15
V22
V23
T24
T22
W24
MEASUREMENT POINTS Audio Digital
SP3213
APP_I2S0_DATA_B
APP_I2S0_CLK
APP_I2S0_WS
APP_I2S0_DATA_A
APP_I2S1_CLK
APP_I2S1_WS
APP_I2S1_DATA_B
SP3207
SEMC Troubleshooting Manual
G705 - W705 - W715
MEASUREMENT POINTS
K3
J3
J1
L3
K1
K4
N2000
Ericsson AB 3100
SCK1
WS1
SDI1
SCK2
WS2
SDI2
AB3100
1202-0639
MMI
CODEC IF
SDO1
SDO2
K2
L2
2
SP3204 SP3205
SP3206
SP3208SP3209
APP_I2S1_DATA_A
SP3214
Made for
Audio
Audio Digital
Document Nr Revision
1207-2092 Page
A3 3
1225-4035 rev. 1
54 (122)
Page 55
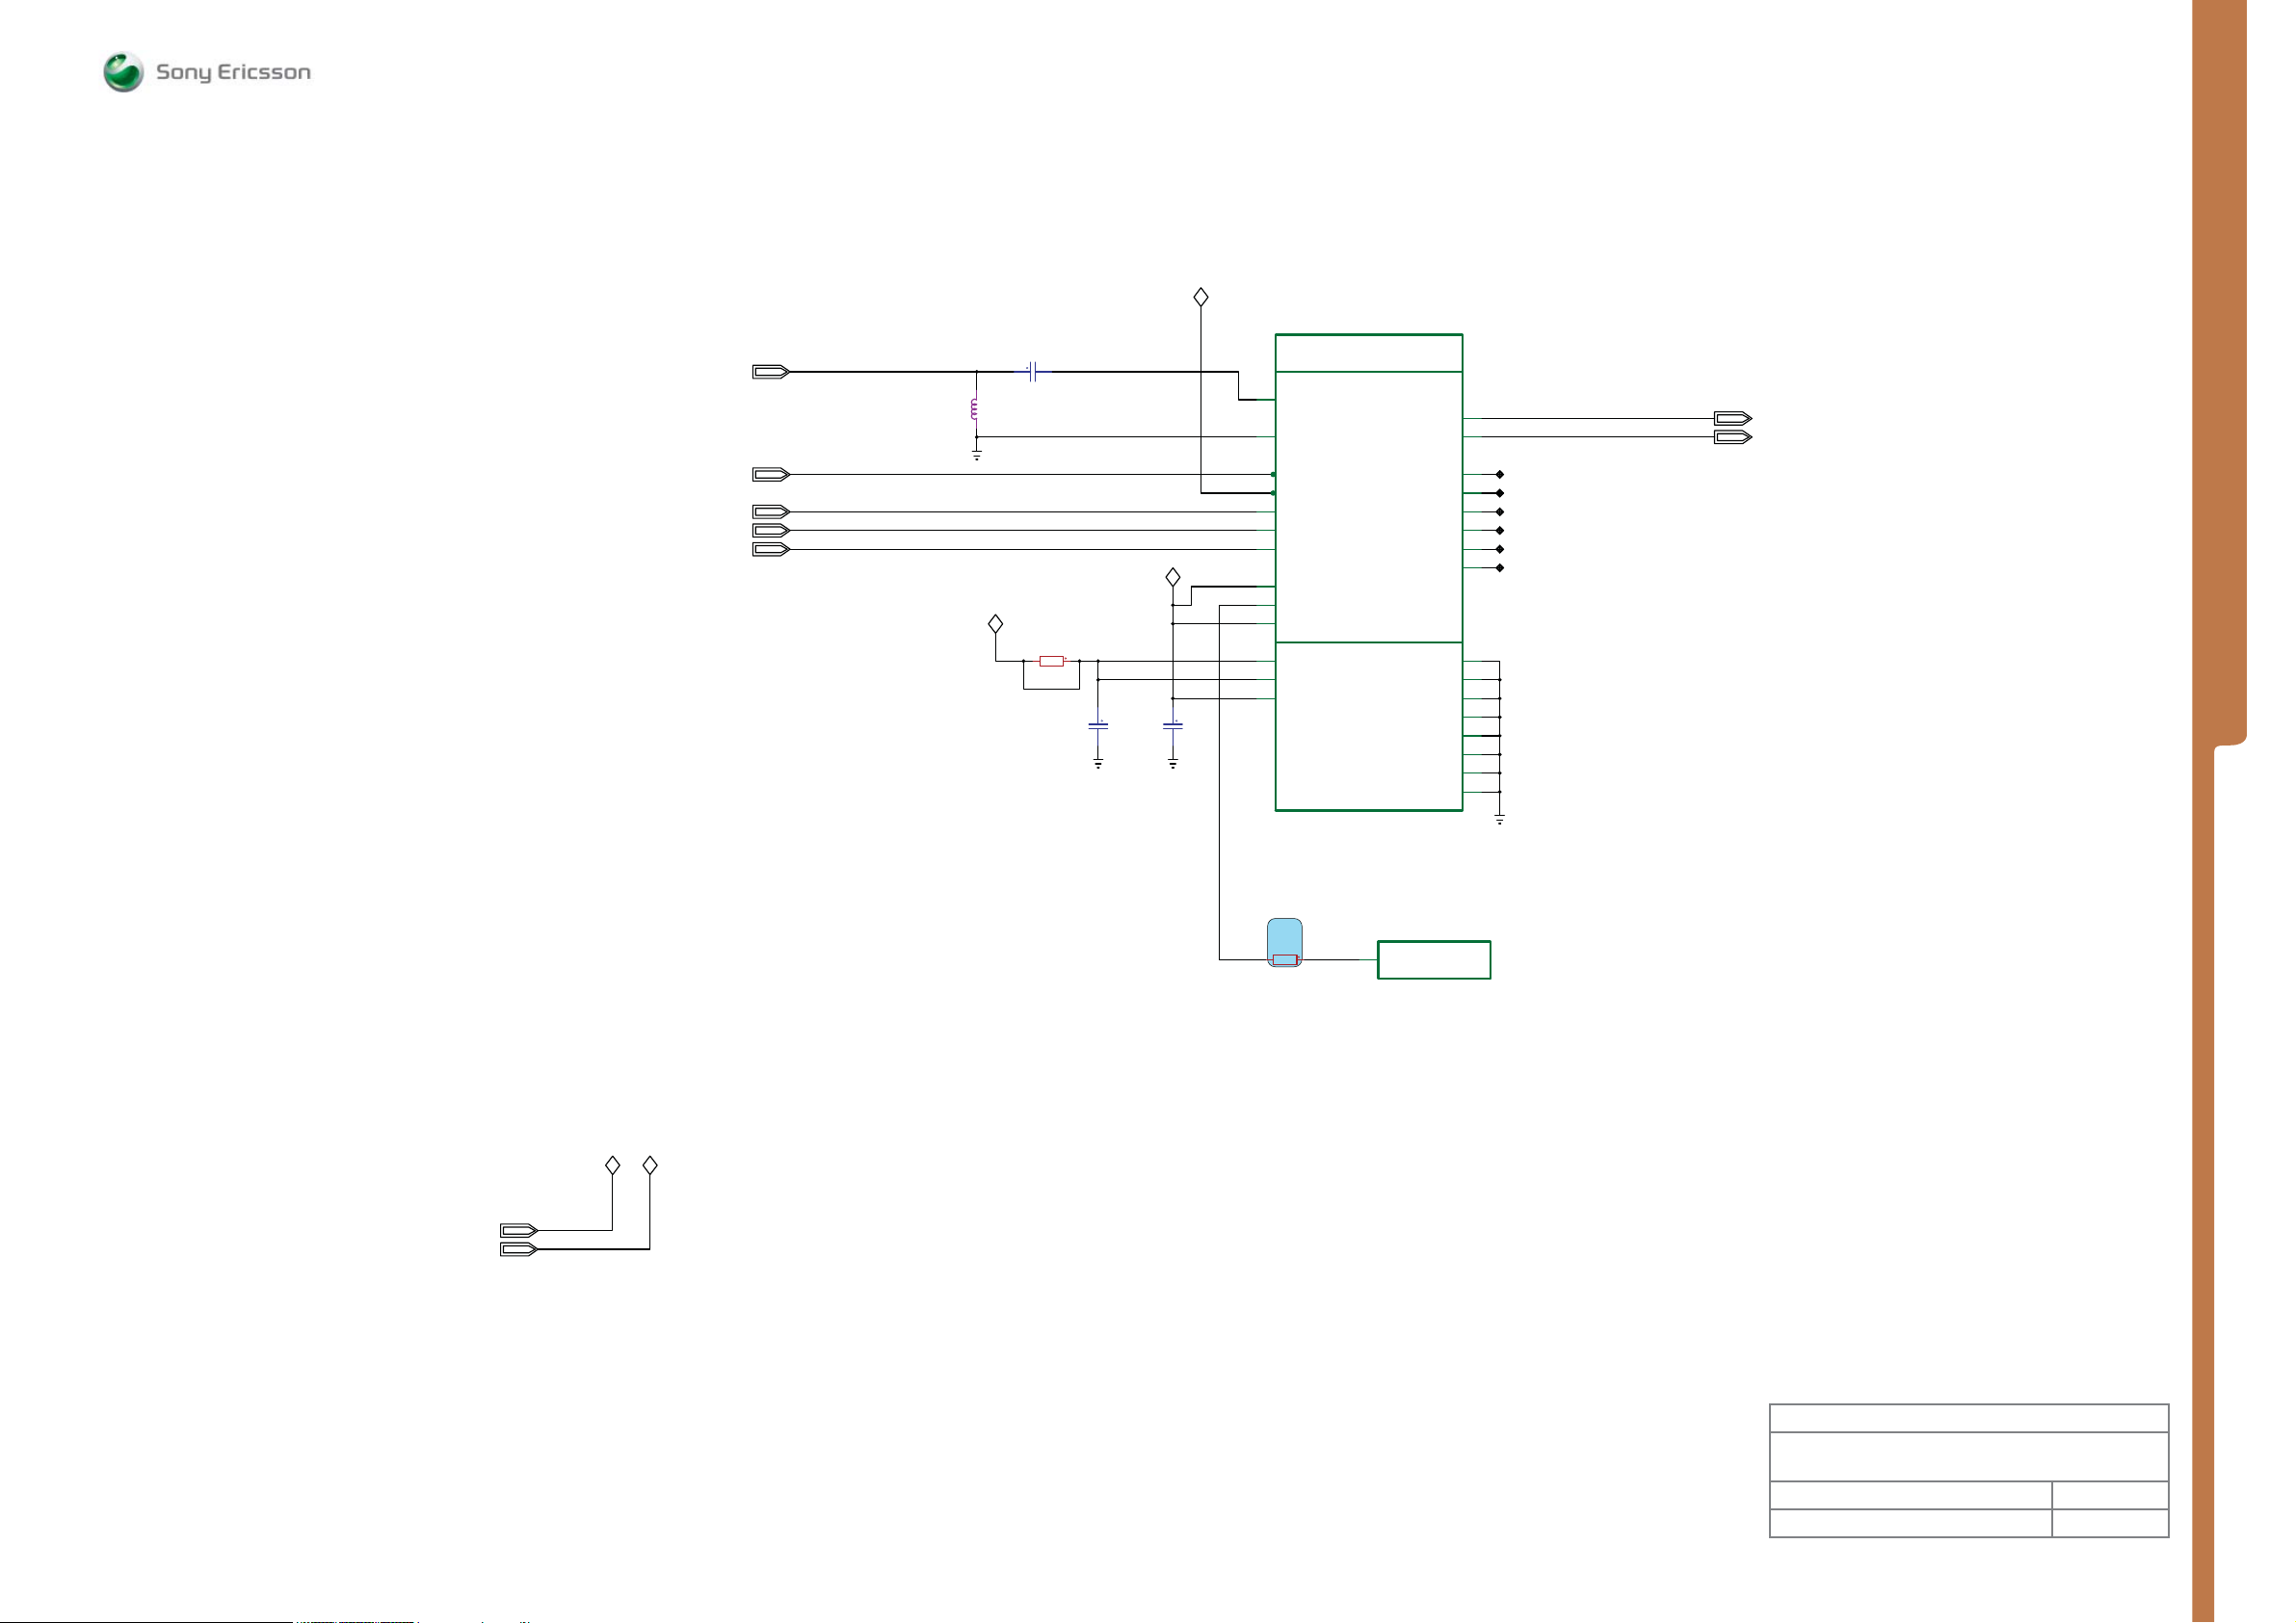
FM_ANTENNA
PWRRSTn
I2CCLK1
I2CDAT1
RTCCLK
MEASUREMENT POINTS Audio FM Radio
VDDE18
L3300
0.27uH
VBAT
C3306
100pF
PWRRSTn
I2CCLK1
I2CDAT1
RTCCLK
R3304 0ohms
<NM>
C3304
0.022uF
VDDE18
C3305
0.1uF
B8
C9
D9
E9
D8
D7
A7
A6
A5
A4
B3
D6
N1300
STLC2593
1200-9840
FM_FMIP
FM_RFGND
FM_RST
FM_SENB
FM_SCL
FM_SDA
FM_RTCCLK
FM_GPIO1
FM_GPIO2
FM_GPIO3
FM_VA
FM_VD
FM_VIO
BLUETOOTH-FM_FM
FM_RADIO_IO
FM_PWR_GND
FM_ROUT
FM_LOUT
FM_GND
FM_GND
FM_GND
FM_GND
FM_GND
FM_GND
FM_GND
FM_GND
SEMC Troubleshooting Manual
G705 - W705 - W715
C5
5B8C
D4
NC
NC
NC
NC
NC
NC
NC
F7
NC
F8
NC
L4
NC
L5
NC
L6
NC
A3
B4
B6
B7
C4
C6
C7
D5
1
FMR
FML
FMR
FML
MEASUREMENT POINTS
VBAT
VDDE18
VBAT
VDDE18
FM_INT
MP 5
R3302
3.3Kohms
N2010
R17
APPLICATION GPIO_00
DB3210ADT/7POPHF
1208-3871 1
Made for
Audio FM Radio
Document Nr Revision
1207-2092 Page
A4 3
1225-4035 rev. 1
55 (122)
Page 56
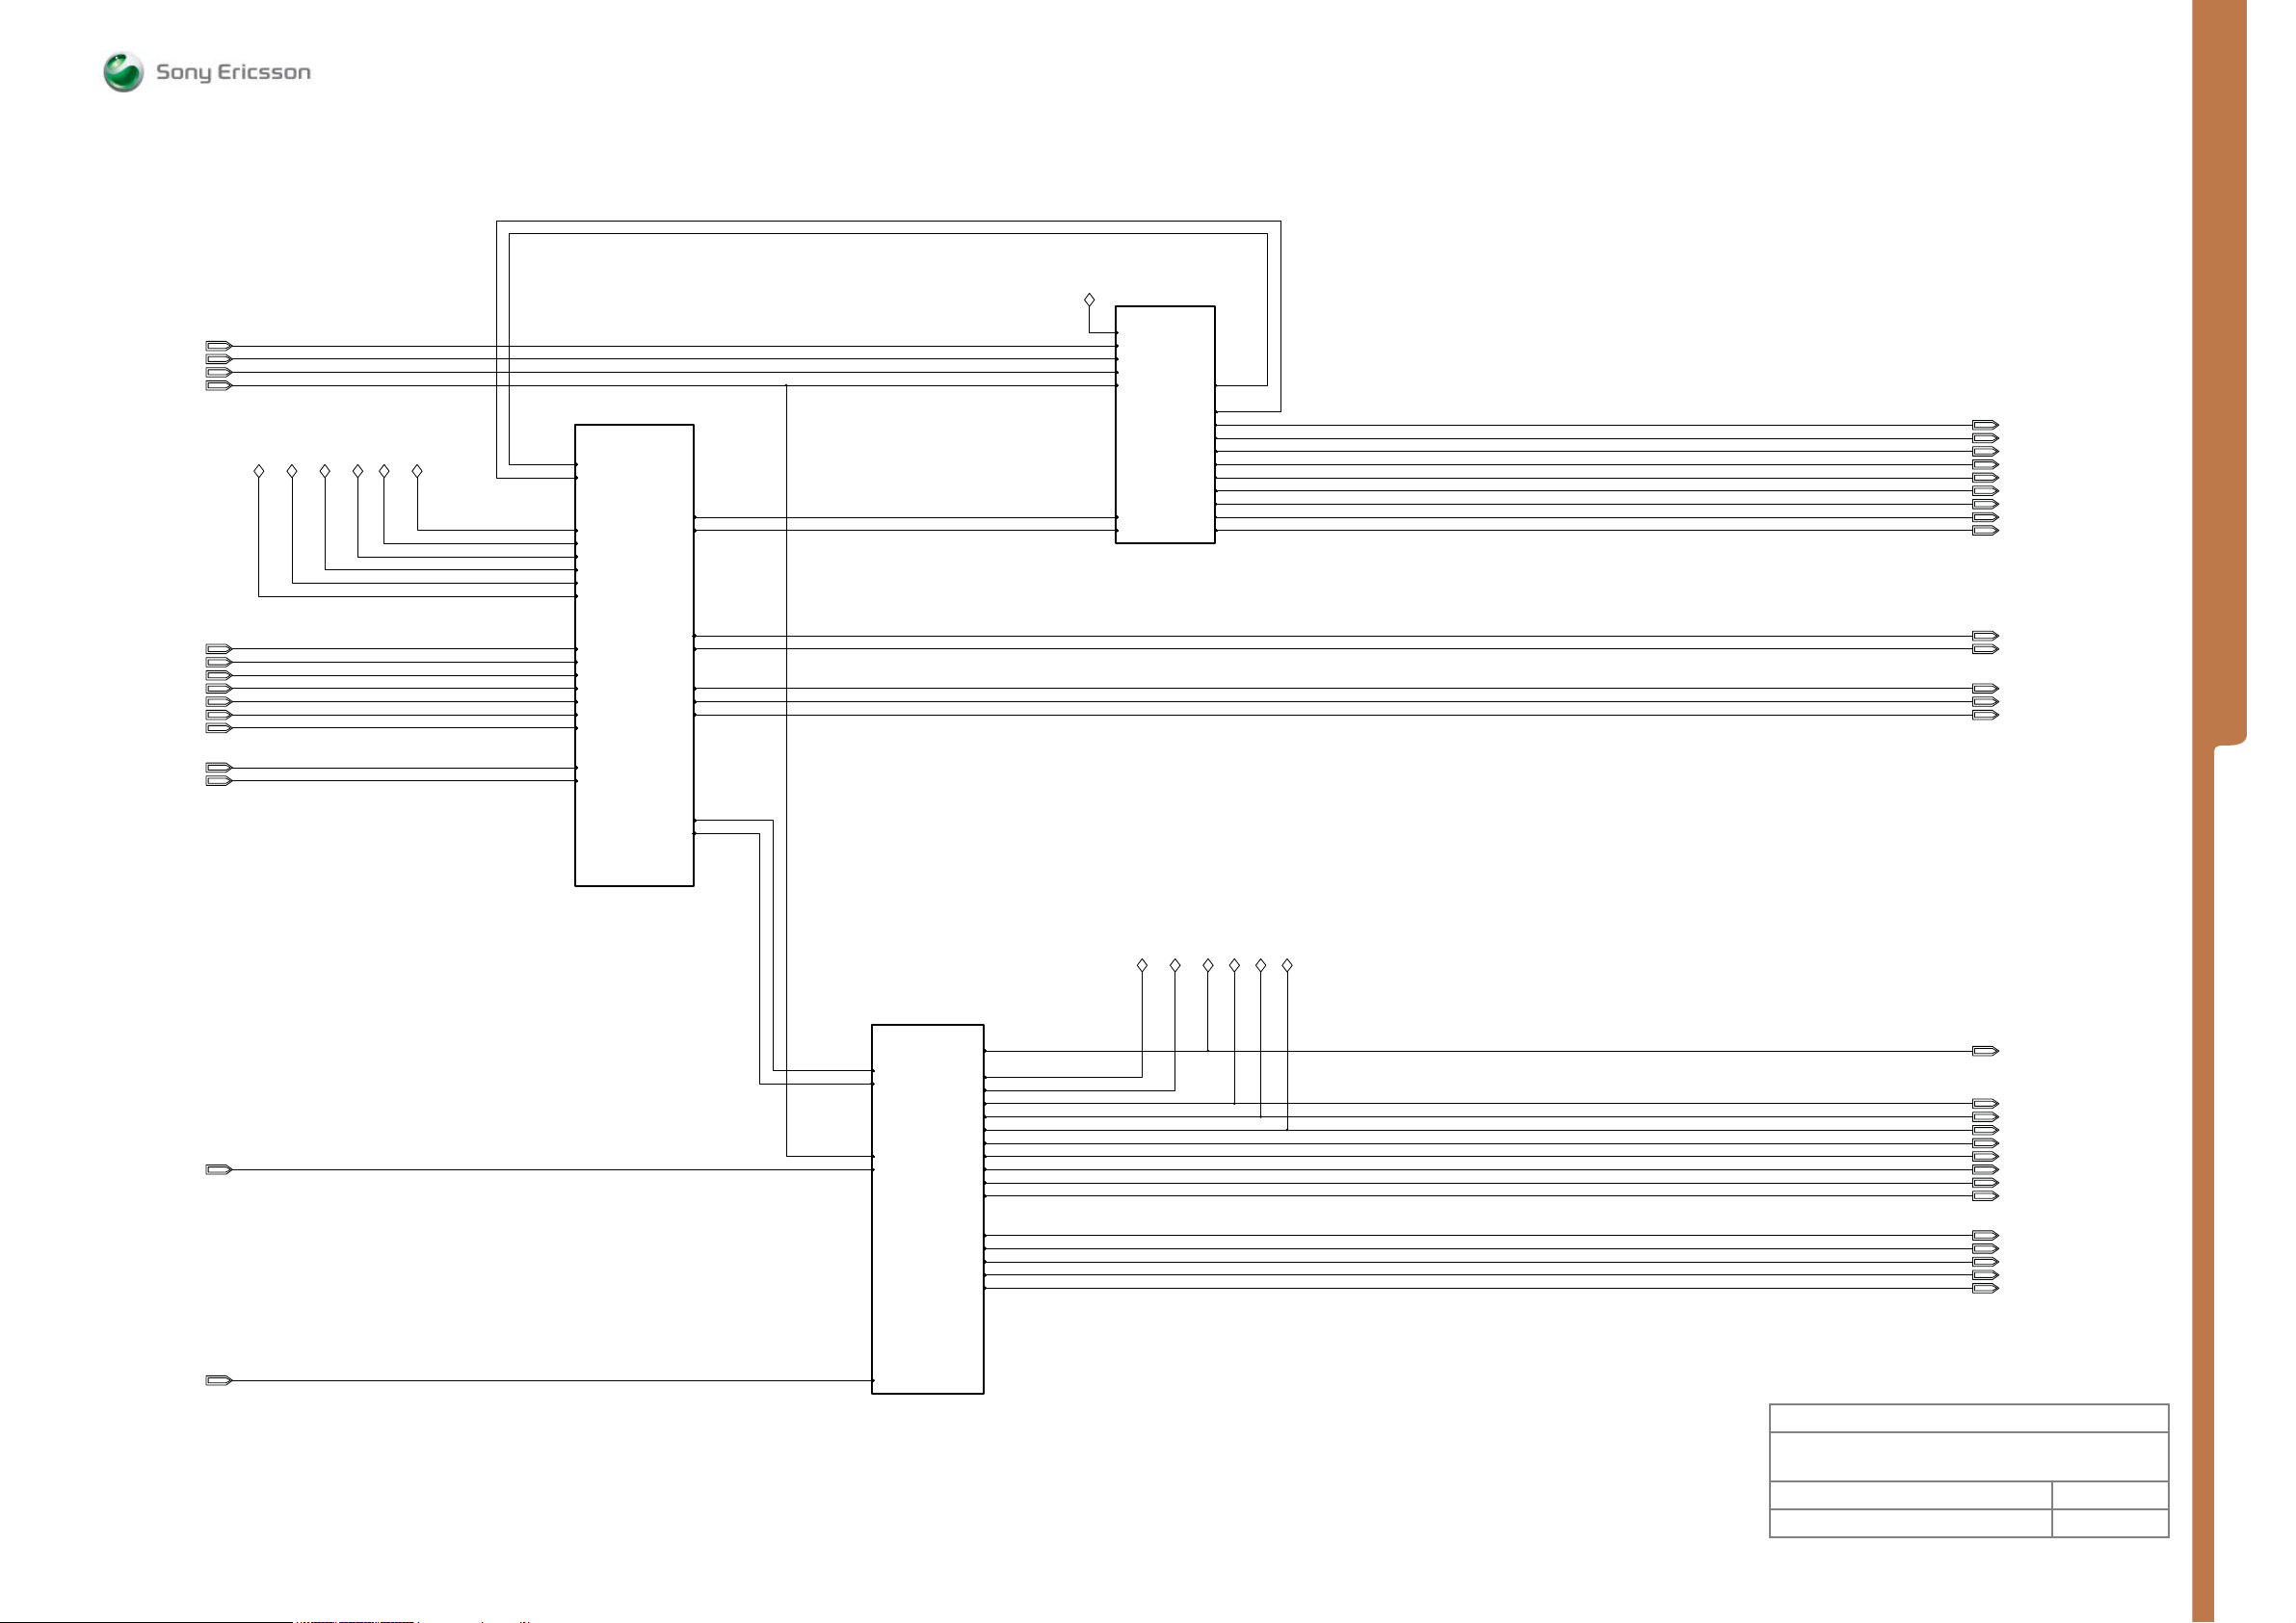
MCLK
MCLKSEC
BT_CLKREQn
WLAN_CLKREQ
MEASUREMENT POINTS Application & S yst e m Perform a n ce Top
USB_HS_CLK
DCON
VDDE18
Pages 2-4
MCLK
MCLKSEC
BT_CLKREQn
WLAN_CLKREQ
Pages 11-16
Pages 11-16
VBACKUPVBATVDIGVDDE18VMC18VAUDIO26
DCON
USB_HS_CLK
VBAT
VDIG
VDDE18
VMC18
VAUDIO26
SERVICEn
ONSWAnVBACKUP
SERVICEn
ONSWAn
VDDE18
MCLK
MCLKSEC
BT_CLKREQn
WLAN_CLKREQ
SERVICEn
ONSWAn
System Control
System Control
DCON
USB_HS_CLK
RTCCLK
BT_CLK
CAMSYSCLK
MCLKREQ
BTRESn
AGPS_RSTn
AGPS_CLK
WLAN_CLK
PWRRSTn
RTCCLK
BT_CLK
CAMSYSCLK
MCLKREQ
BTRESn
AGPS_RSTn
AGPS_CLK
WLAN_CLK
PWRRSTn
SEMC Troubleshooting Manual
G705 - W705 - W715
RTCCLK
BT_CLK
CAMSYSCLK
MCLKREQ
BTRESn
AGPS_RSTn
AGPS_CLK
WLAN_CLK
PWRRSTn
MEASUREMENT POINTS
OPTOSENSE
TESTOUT
TX_ADSTR
LED_MAINKEY
LED_WebShort cut
WLAN_SCLK
RF_ID
OPTOSENSE
TESTOUT
VAD
SPL
SPR
VAD
TX_ADSTR
RF_ID
SPL
SPR
LED_WebShortcut
LED_MAINKEY
WLAN_SCLK
OPTOSENSE
TESTOUT
VAD
TX_ADSTR
RF_ID
SPL
SPR
LED_MAINKEY
LED_WebShortcut
Connectivity
Connectivity
I2CDAT1
I2CCLK1
MICN/AUXinR
MICP/AUXinL
FM_ANTENNA
VBUS
DCIO
VDDE18
VDIG
VBUS
DCIO
WLAN_CLKREQ
VBUS
DCIO
WLAN_CLKREQ
WLAN_SCLK
Pages 5-10
Pages 5-10
VBAT
VBACKUP
VMC18
VDDE18
VAUDIO26
VBEAR26
WLAN_VO18
WLAN_VO33
WLAN_LDO18A
WLAN_LDO30
VMC18
VBAT
VBACKUP
VDIG
VAUDIO26
VBAT
VDDE18
VDIG
VAUDIO26
VBEAR26
WLAN_VO18
WLAN_VO33
WLAN_LDO18A
WLAN_LDO30
I2CDAT1
I2CCLK1
MICN/AUXinR
MICP/AUXinL
FM_ANTENNA
I2CDAT1
I2CCLK1
MICN/AUXinR
MICP/AUXinL
FM_ANTENNA
VBAT
VDDE18
VDIG
VAUDIO26
VBEAR26
WLAN_VO18
WLAN_VO33
WLAN_LDO18A
WLAN_LDO30
OPTO_EN
OPTO_EN
OPTO_EN
Power
Power
VCAMSA28
VCAMIO18
VCAMSD18
VBT27
VOPTO30
VCAMSA28
VCAMIO18
VCAMSD18
VBT27
VOPTO30
VCAMSA28
VCAMIO18
VCAMSD18
VBT27
VOPTO30
Made for
Application & System Performance
p
To
Document Nr Revision
1207-2092 Page B1 3
1225-4035 rev. 1
56 (122)
Page 57
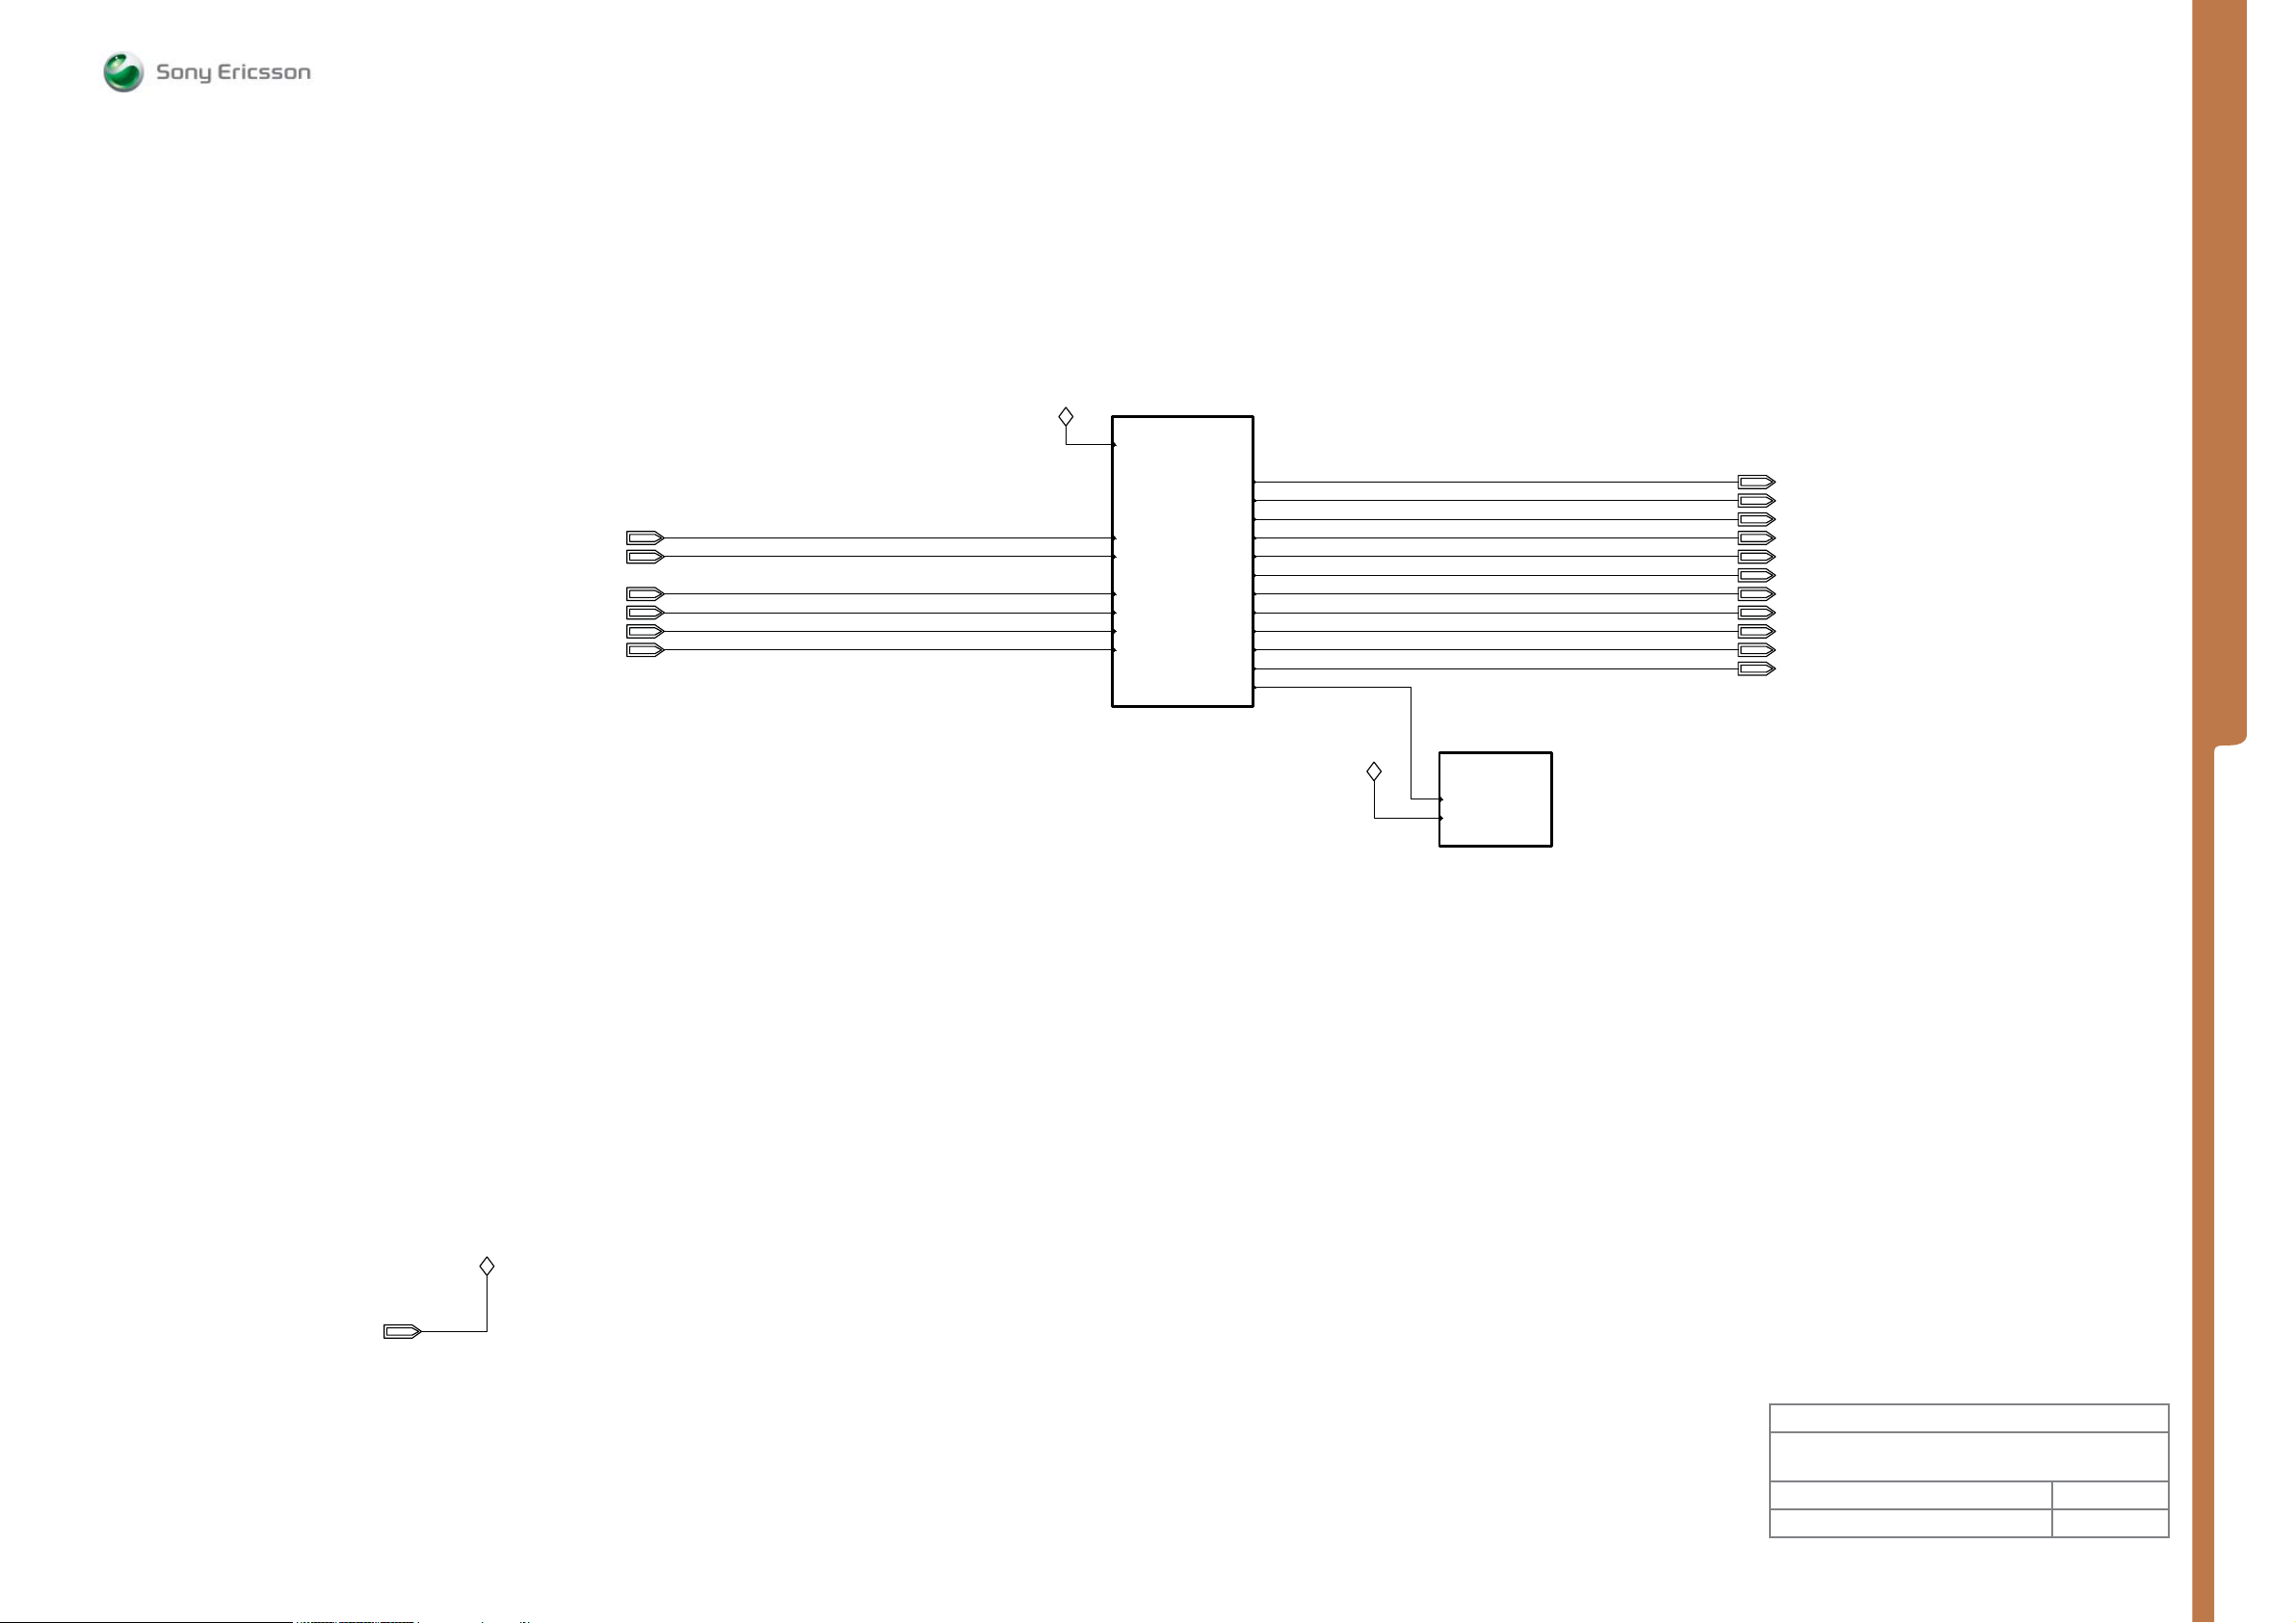
WLAN_CLKREQ
BT_CLKREQn
MCLKSEC
MCLK
SERVICEn
ONSWAn
MEASUREMENT POINTS System Top
VDDE18
Page 3
VDDE18
BT_CLK
AGPS_CLK
WLAN_CLKREQ
BT_CLKREQn
MCLKSEC
MCLK
SERVICEn
ONSWAn
WLAN_CLKREQ
BT_CLKREQn
MCLKSEC
MCLK
SERVICEn
Clocks & ResetsClocks & Resets
WLAN_CLK
CAMSYSCLK
RTCCLK
MCLKREQ
DCON
BTRESn
AGPS_RSTn
USB_HS_CLKONSWAn
PWRRSTn
MEMRESn
MEMRESn
BT_CLK
AGPS_CLK
WLAN_CLK
CAMSYSCLK
RTCCLK
MCLKREQ
DCON
BTRESn
AGPS_RSTn
USB_HS_CLK
PWRRSTn
BT_CLK
AGPS_CLK
WLAN_CLK
CAMSYSCLK
RTCCLK
MCLKREQ
DCON
BTRESn
AGPS_RSTn
USB_HS_CLK
PWRRSTn
SEMC Troubleshooting Manual
G705 - W705 - W715
MEASUREMENT POINTS
VDDE18
VDDE18
Page 4
MEMRESn
VDDE18
System Memories
VDDE18
Made for
Application & System Performance
System T
op
Document Nr Revision
1207-2092 Page B2 3
1225-4035 rev. 1
57 (122)
Page 58
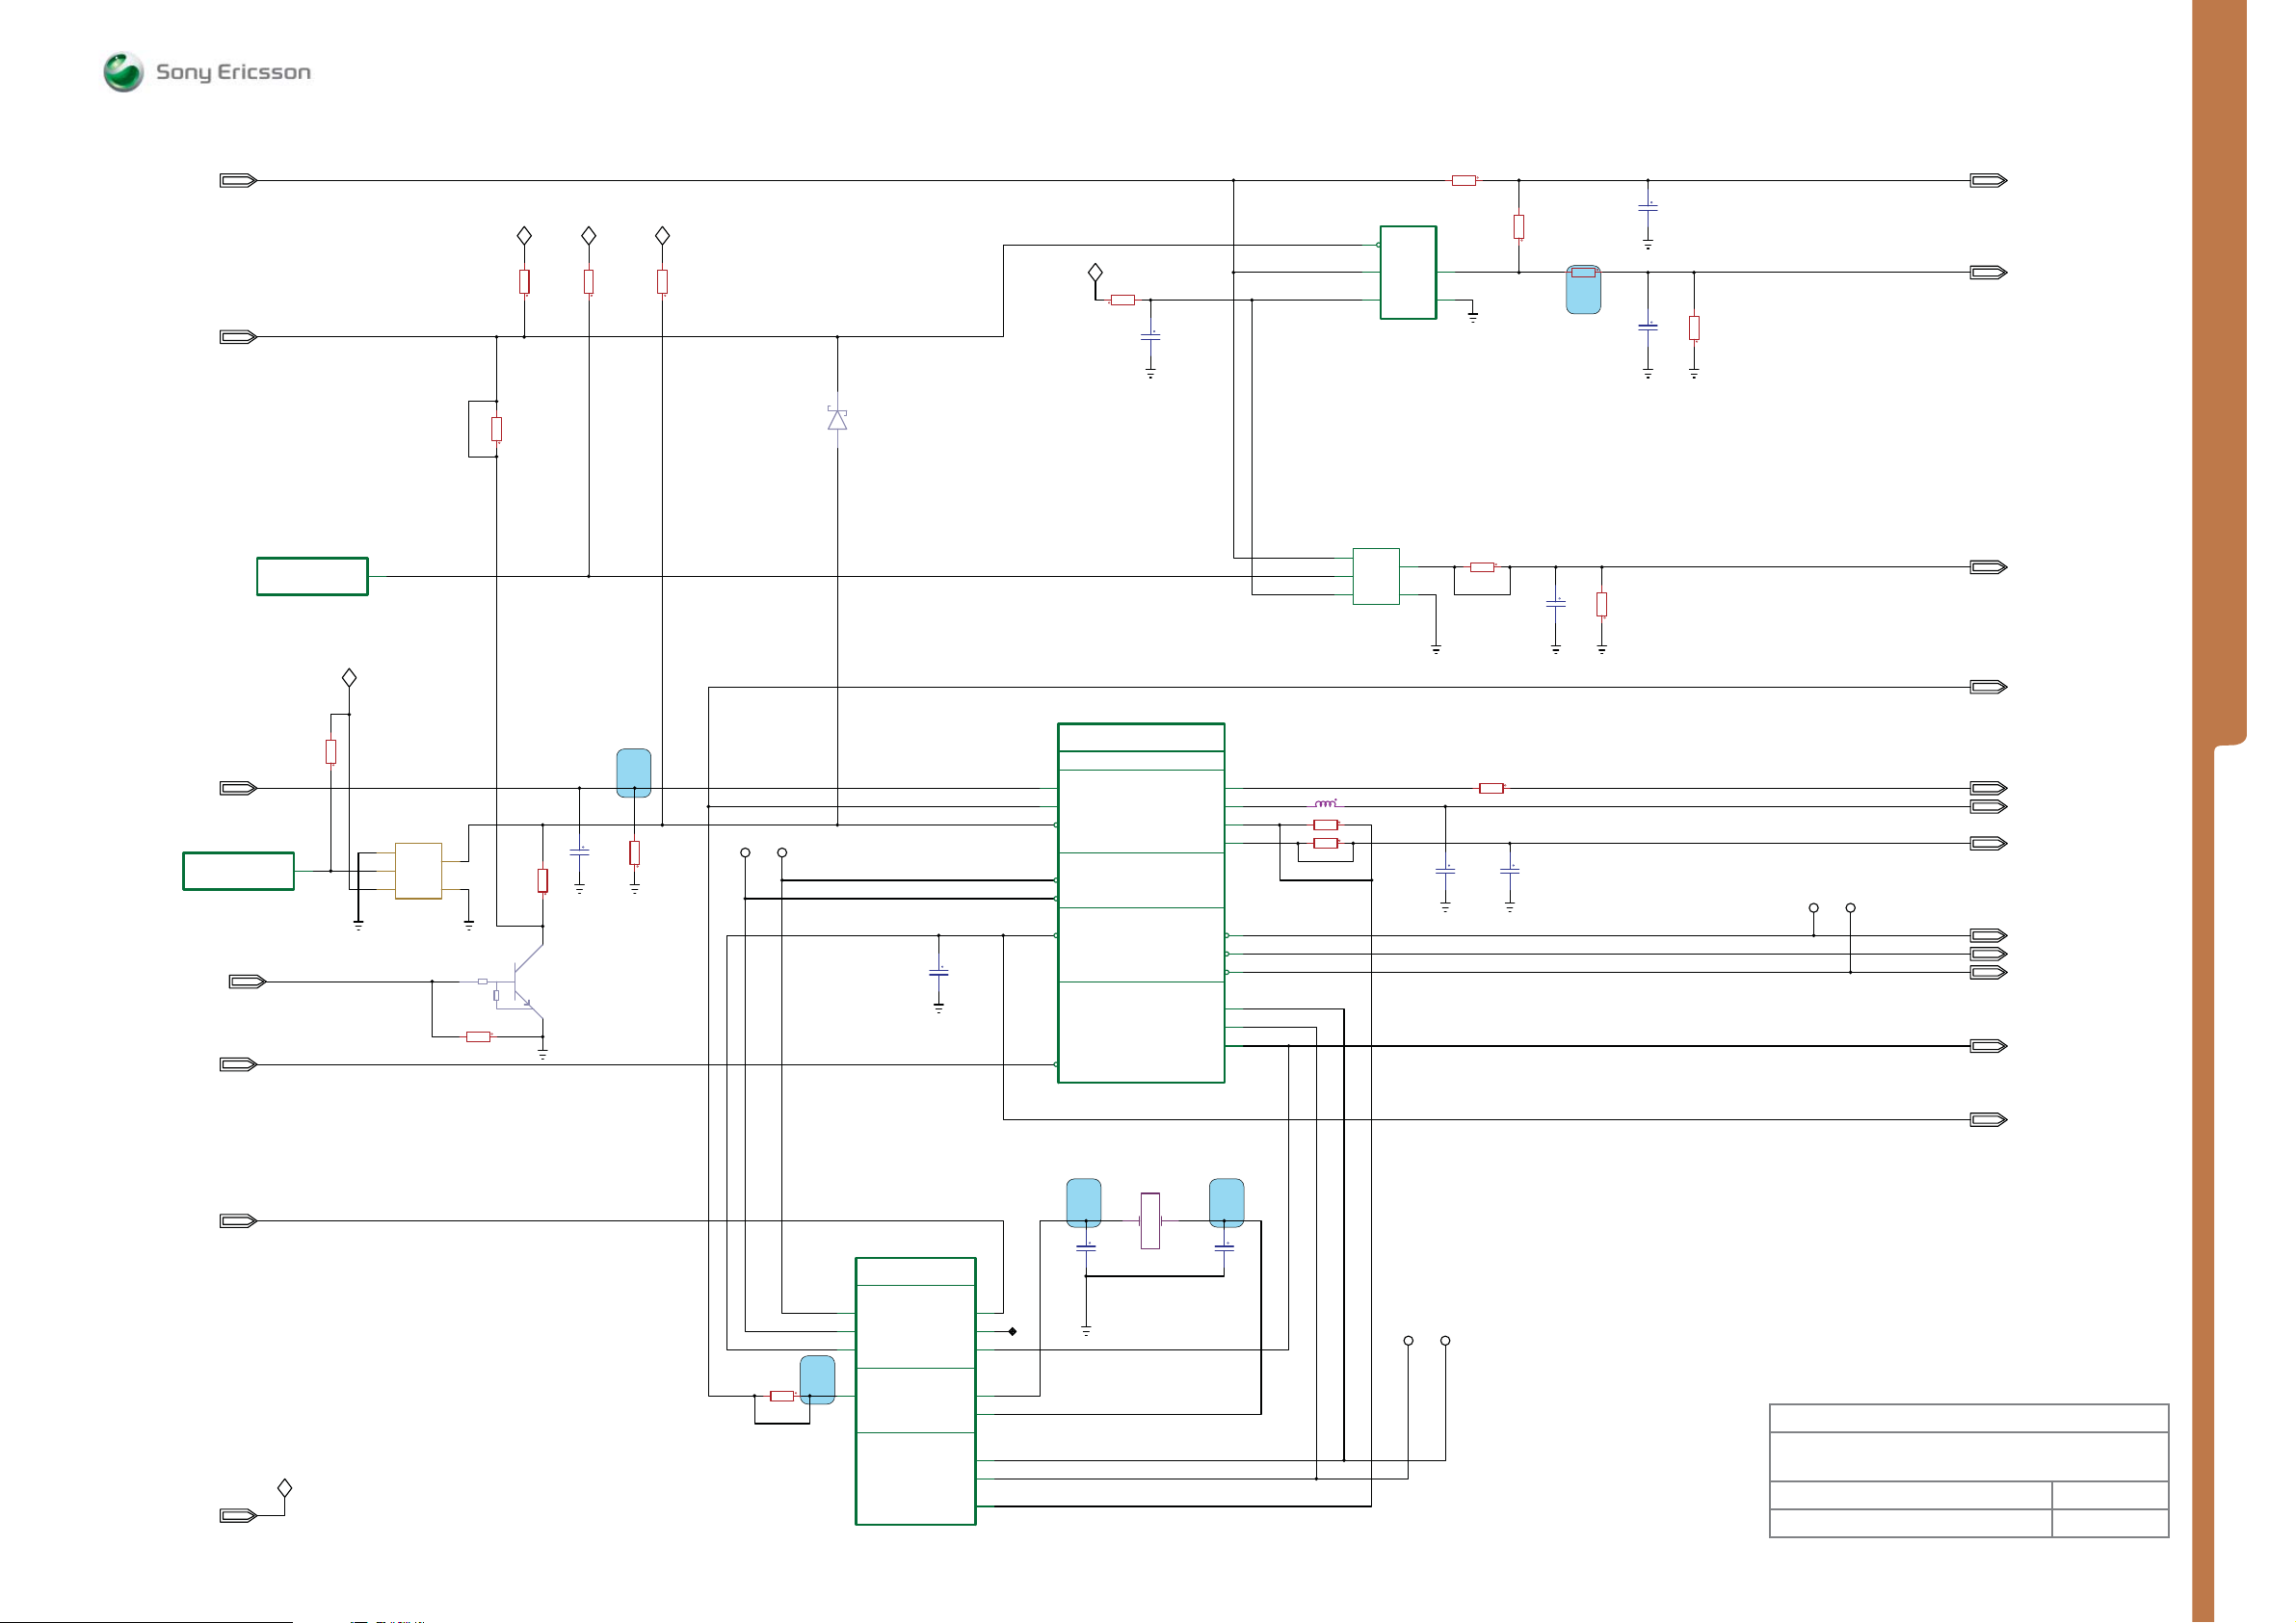
MCLKSEC
BT_CLKREQn
N2010
APPLICATION GPIO_10
DB3210ADT/7POPHF
11208-3871
K12
VDDE18
R2105
0ohms
<NM>
R2104
100Kohms
VDDE18
R2116
100Kohms
VDDE18
R2101
100Kohms
MEASUREMENT POINTS System Control - Cloc ks & Resets
0ohms
R2119
<NM>
N2100
OE
4
Y
A
35
VCC
GND
SN74LVC1G125YZPR
1200-0425
4
Y
1
R2118
0ohms
<NM>
BT_CLKREQn
V2101
1000-0391
LEADFREE
AGPS_CLK_EN
VDDE18
R2111
10ohms
C2105
4.7uF
MCLKSEC
1
2
N2101
1
A
3
&
OE
52
VCC GND
TC7SG125AFS
1202-0076
R2120
0ohms
SEMC Troubleshooting Manual
G705 - W705 - W715
WLAN_CLK
C2106
NMNM
33pF
R2121
0ohms
BT_CLK
MP 98
C2107
R2108
33pF
100Kohms
AGPS_CLK
C2108
33pF
R2117
100Kohms
NM
WLAN_CLK
BT_CLK
MEASUREMENT POINTS
AGPS_CLK
MCLK
N2010
APPLICATION GPIO_09
DB3210ADT/7POPHF
1208-3871
AGPS_CLKREQn
WLAN_CLKREQ
SERVICEn
ONSWAn
VDDE18
1
R2010
100Kohms
M23
WLAN_CLKREQ
VDDE18
VDDE18
D2102
1
A
3
&
OE
VCC GND
TC7SG125AFS
1202-0076
RTCCLK
N2010
KAJSA_BOTTOM
SYSTEM_CONTROL_A_23_24
MP 97
SP2105
C2110
4
Y
1
25
R2134
R2106
0ohms
<NM>
1
0ohms
NM
3
V2100
RN1108
1000-8463
2
NM
33pF
R2102
100Kohms
NM
SP2104
R2103
0ohms
<NM>
MP 121
MCLK
RTCCLK
SYSCLKREQn
PWRRSTn
SERVICEn
ONSWAn
N2000
E13
E14
IRQB_N
PWRRST_N
XTAL_OUT
AB3100
1202-0639
Ericsson AB 3100
SYSTEM CONTROL
SYSTEM POR
ONSWA_NIRQA_N
ONSWB_N
ONSWC
RTC
CLOCK
SLEEP_A
SLEEP_B
XTAL1
XTAL2
MCLK
C2104
0.001uF
<NM>
2
F13
F12
F11E12
01A11B
D11
E11
D14
H13
KAJSA_BOTTOM_SYSTEM_LEVEL
MCLK
V14
RTCCLKIN
V16
SYSCLKREQn
AA24
MSACCIRQn
V17
MSAPPIRQn
PWRRSTn
AD23
SERVICEn
DB3210ADT/7POPHF
C2100
18pF
NC
CLOCKS
INTERRUPTS
RESETS
POWER CONTROL
11208-3871
B2100
XTAL1
1000-8271
32768k
DCON
PWRREQn
MCLK_VERA
C2C1
MCLKREQ
SYSCLK0
SYSCLK1
SYSCLK2
RESOUT0n
RESOUT1n
RESOUT2n
ACCSLEEP
APPSLEEP
DCON
XTAL2
C2101
22pF
C2103
33pF
<NM>
1KohmsR2115
C2109
NM
33pF
MCLKREQ
CAMSYSCLK
USB_HS_CLK
MEMRESn
AGPS_RSTn
BTRESn
SP2103
SP2102
AD22
AB20
AC21
AB18
AB23
AB17
AD21
Y22
02DA32EA
L2100
100nH
0ohmsR2123
<NM>
0ohms
<NM>
R2122
22CA91BA
MP 119MP 118
SP2107SP2106
Made for
Application & System Performance
System Control - Clocks & Resets
Document Nr Revision
1207-2092 Page B3
1225-4035 rev. 1
RTCCLK
MCLKREQ
CAMSYSCLK
USB_HS_CLK
MEMRESn
AGPS_RSTn
BTRESn
DCON
PWRRSTn
3
58 (122)
Page 59
MEMRESn
MEASUREMENT POINTS System Memories
N2010
KAJSA_BOTTOM_SH_EMIF_A_8_24
KAJSA_BOTTOM_SYSTEM_LEVEL
KAJSA_BOTTOM
N2010
KAJSA_BOTTOM
DIRECT_MEMORY_A_22_24
KAJSA_BOTTOM_SYSTEM_LEVEL
DIRECT MEMORY ACCESS
DB3210ADT/7POPHF
11208-3871
MEMRESn
NAND_WPN
SDTEMP
SHARED_MEMORY_IF(EMIF1)
E4
SH_D00
NC
F4
SH_D01
NC
G4
SH_D02
NC
G5
SH_D03
NC
H5
SH_D04
NC
K5
SH_D05
NC
J4
SH_D06
NC
J5
SH_D07
NC
F5
SH_D08
J16
J17
NC
NC
NC
NC
NC
NC
NC
NC
NC
L4
SH_D09
K4
SH_D10
L9
SH_D11
L5
SH_D12
K9
SH_D13
M5
SH_D14
N5
SH_D15
DB3210ADT/7POPHF
SH_A13/SH_SDBS0
SH_A14/SH_SDBS01
SH_A15/SH_SDBS1
11208-3871
SH_A01
SH_A02
SH_A03
SH_A04
SH_A05
SH_A06
SH_A07
SH_A08
SH_A09
SH_A10
SH_A11
SH_A12
SH_SDCSn
SH_SDCASn
SH_WEn
SH_SDCLK
SH_SDCKE
SH_SDRASn
SH_BE0n
SH_BE1n
F3
NC
H3
NC
J3
NC
J2
NC
G3
NC
K2
NC
K3
NC
L2
NC
L3
NC
M3
NC
M4
NC
N4
NC
P3
NC
N3
NC
P4
NC
C5
NC
C4
NC
D4
NC
H4
NC
C3
NC
D3
NC
E3
NC
E2
NC
VDDE18
R2112
100Kohms
<NM>
NC
NC
NC
NC
NC
NC
NC
NC
NC
NC
NC
NC
NC
NC
NC
R2113
2.2Kohms
E14
E13
J14
J15
E15
D15
E16
D17
E17
D18
E18
D19
E21
E19
D20
E20
D10
N2010
KAJSA_BOTTOM_APP_EMIF_A_9_24
KAJSA_BOTTOM_SYSTEM_LEVEL
KAJSA_BOTTOM_APPLICATION
MEMORY_IF(EMIF2)
AP_D00
AP_D01
AP_D02
AP_D03
AP_D04
AP_D05
AP_D06
AP_D07
AP_D08
AP_D09
AP_D10
AP_D11
AP_A13/AP_SDBS0
AP_D12
AP_A14/AP_SDBS01
AP_D13
AP_A15/AP_SDBS1
AP_D14
AP_D15
AP_NFIF_READY
AP_WAITn
DB3210ADT/7POPHF
AP_A17/AP_CLE
AP_A18/AP_ALE
AP_A26/AP_CRE
AP_SDCKEN0
AP_SDCKEN1
/AP_SDRAS
ADVn
AP_OEn/RE/AP_SDCAS
11208-3871
AP_SDCLK
AP_FBCLK
AP_A01
AP_A02
AP_A03
AP_A04
AP_A05
AP_A06
AP_A07
AP_A08
AP_A09
AP_A10
AP_A11
AP_A12
AP_A16
AP_A19
AP_A20
AP_A21
AP_A22
AP_A23
AP_A24
AP_A25
AP_CLK
AP_CS0n
AP_CS1n
AP_CS2n
AP_CS3n
AP_BE0n
AP_BE1n
AP_WEn
SEMC Troubleshooting Manual
G705 - W705 - W715
C13
NC
J12
NCNC
C14
NC
C15
NC
D16
NC
B15
NC
C16
NC
B17
NC
C17
NC
B18
NC
C18
NC
C19
NC
B20
NC
C20
NC
C21
NC
C22
NC
C23
NC
D21
NC
D23
NC
D22
NC
E23
NC
C24
NC
D24
NC
C25
NC
E24
NC
D25
NC
E12
NC
R2114 0ohms
D11
D12
D14
E5
C12
B11
J10
C10
E11
D7
D13
J11
B12C11
<NM>
NC
NC
NC
NC
NC
NC
NC
NC
NC
NC
NC
MEASUREMENT POINTS
VDDE18
VDDE18
Made for
Application & System Performance
System Memories
Document Nr Revision
1207-2092 Page B4 3
1225-4035 rev. 1
59 (122)
Page 60
TOP_SH_D00
TOP_SH_D01
TOP_SH_D02
TOP_SH_D03
TOP_SH_D04
TOP_SH_D05
TOP_SH_D06
TOP_SH_D07
TOP_SH_D08
TOP_SH_D09
TOP_SH_D10
TOP_SH_D11
TOP_SH_D12
TOP_SH_D13
TOP_SH_D14
TOP_SH_D15
TOP_VDD_MEM_00
TOP_VDD_MEM_01
TOP_VDD_MEM_02
TOP_VDD_MEM_03
TOP_VDD_MEM_04
TOP_VDD_MEM_05
TOP_VDD_MEM_06
TOP_VDD_MEM_07
TOP_VDD_MEM_08
TOP_VDD_MEM_09
TOP_VDD_MEM_10
TOP_VDD_MEM_11
TOP_VDD_MEM_12
TOP_VDD_MEM_13
TOP_VDD_MEM_14
TOP_VDD_MEM_15
TOP_VDD_MEM_16
TOP_VDD_MEM_17
N2010
KAJSA_TOP_SH_EMIF_B_1_5
Kajsa-PoP_top-SYSTEM-LEVEL
KAJSA_SHARED_MEMORY_IF(EMIF1)
T_B7
SH_D00
T_A6
SH_D01
T_B6
SH_D02
T_A5
SH_D03
T_B5
SH_D04
T_B4
SH_D05
T_A4
SH_D06
T_A3
SH_D07
T_C1
SH_D08
T_F2
SH_D09
T_F1
SH_D10
T_G2
SH_D11
T_H1
SH_D12
T_J2
SH_D13
T_J1
SH_D14
T_K2
SH_D15
DB3210ADT/7POPHF_TOP
1208-3871_TOP
T_A7
T_A10
T_A20
T_B1
T_B2
T_B3
T_B19
T_H2
T_L1
T_L2
T_N2
T_P21
T_W2
T_Y13
T_Y19
T_AA2
T_AA8
T_AA20
SH_A14/SH_SDBS01
SH_A15/SH_SDBS1
_
1
N2010
KAJSA_TOP_POWER_B_4_5
Kajsa-PoP_top-POWER
POWER
VDD_Q
VDD_Q
F_VDD
F_VDD
F_VDD
VDD_Q
VCC_N
VDD_Q
VDD_Q
F_VDD
VDD_Q
F_VDD
F_VDD
F_VDD
F_VDD
F_VDD
VCC_N
F_VDD
DB3210ADT/7POPHF_TOP
1208-3871_TOP
N2010
KAJSA_TOP_UNUSED_B_5_5
Kajsa-PoP_top-NOT_USED
UNUSED
DB3210ADT/7POPHF_TOP
1208-3871_TOP
1
1
SH_A01
SH_A02
SH_A03
SH_A04
SH_A05
SH_A06
SH_A07
SH_A08
SH_A09
SH_A10
SH_A11
SH_A12
SH_A13
SH_SDCSn
SH_SDCASn
SH_WEn
SH_SDCLK
SH_SDCKE
SH_SDRASn
SH_BE0n
SH_BE1n
GND_MEM
GND_MEM
GND_MEM
GND_MEM
GND_MEM
GND_MEM
GND_MEM
GND_MEM
GND_MEM
GND_MEM
GND_MEM
GND_MEM
GND_MEM
GND_MEM
GND_MEM
GND_MEM
GND_MEM
GND_MEM
MEASUREMENT POINTS System PoP IF
TOP_SH_DATA_BUS TOP_APPLICATION_DATA_BUS
N2020
KAL00900MX-AJ55_MCP_POP_SDRAM_EMIF1
2GbitNANDx8+128Mbitx16+512MbitSDRAMx16
T_T20
T_U21
T_U20
T_V21
T_V20
T_W21
T_Y18
T_AA19
T_Y17
T_AA18
T_Y16
T_AA17
T_Y15
T_D1
T_E1
T_N21
T_R21
T_R20
T_T21
T_M21
T_P20
T_D2
T_E2
T_A2
T_A9
T_B21
T_C2
T_C20
T_G1
T_K1
T_N1
T_W1
T_W20
T_Y1
T_Y2
T_Y3
T_Y8
T_Y10
T_Y14
T_Y20
T_Y21
T_A1
NC
T_A21
NC
T_M1
NC
T_AA1
NC
T_AA4
NC
T_AA21
NC
T_AA16
NC
T_AA5
NC
TOP_SH_A01
TOP_SH_A02
TOP_SH_A03
TOP_SH_A04
TOP_SH_A05
TOP_SH_A06
TOP_SH_A07
TOP_SH_A08
TOP_SH_A09
TOP_SH_A10
TOP_SH_A11
TOP_SH_A12
TOP_SH_A13
TOP_SH_BA0
TOP_SH_BA1
TOP_SDRAM_CS_N
TOP_SDRAM_CAS_N
TOP_SDRAM_WE_N
TOP_SDRAM_CLK
TOP_SDRAM_CKE
TOP_SDRAM_RAS_N
TOP_SDRAM_BE0_N
TOP_SDRAM_BE1_N
TOP_VDD
TOP_GND_MEM_00
TOP_GND_MEM_01
TOP_GND_MEM_02
TOP_GND_MEM_03
TOP_GND_MEM_04
TOP_GND_MEM_05
TOP_GND_MEM_06
TOP_GND_MEM_07
TOP_GND_MEM_08
TOP_GND_MEM_09
TOP_GND_MEM_10
TOP_GND_MEM_11
TOP_GND_MEM_12
TOP_GND_MEM_13
TOP_GND_MEM_14
TOP_GND_MEM_15
TOP_GND_MEM_16
TOP_GND_MEM_17
TOP_NC_1
TOP_NC_2
TOP_NC_3
TOP_NC_4
TOP_NC_5
TOP_NC_6
TOP_NC_7
TOP_NC_8
T20
U21
U20
V21
V20
W21
Y18
AA19
Y17
AA18
Y16
AA17
Y15
D1
E1
N21
R21
R20
T21
M21
P20
D2
E2
N2020
A1
A21
M1
AA1
AA4
AA21
AA16
AA5
KAL00900MM-AJ55
1205-5912_POP
SHAREDMEMORYIF(EMIF1)
SDRAM_128_A0
SDRAM_128_A1
SDRAM_128_A2
SDRAM_128_A3
SDRAM_128_A4
SDRAM_128_A5
SDRAM_128_A6
SDRAM_128_A7
SDRAM_128_A8
SDRAM_128_A9
SDRAM_128_A10
SDRAM_128_A11
NC_1
SDRAM_128_BA0
SDRAM_128_BA1
SDRAM_128_CSn
SDRAM_128_CASn
SDRAM_128_WEn
SDRAM_128_CLK
SDRAM_128_CKE
SDRAM_128_RASn
SDRAM_128_LDQM
SDRAM_128_UDQM
KAL00900MM-AJ55
1205-5912_POP
N2020
KAL00900MX-AJ55_MCP_POP_VMEM_POWER
2GbitNANDx8+128MbitSDRAMx16+512MbitSDRAMx16
A2
VSS_1
A9
VSSQ_1
B21
VSS_2
C2
VSSQ_2
C20
VSS_N_1
G1
VSSQ_3
K1
VSSQ_4
N1
VSSQ_5
W1
VSS_3
W20
VSS_4
Y1
VSS_5
Y2
VSS_6
Y3
VSS_7
Y8
VSS_N_2
Y10
VSS_8
Y14
VSS_9
Y20
VSS_10
Y21
VSS_11
KAL00900MM-AJ55
1205-5912_POP
KAL00900MX-AJ55_MCP_POP_UNUSED
2GbitNANDx8+128Mbitx16+512MbitSDRAMx16
NC_13
NC_14
NC_15
NC_16
NC_17
NC_18
NC_19
NC_20
UNUSED
-
1
SDRAM_128_DQ0
SDRAM_128_DQ1
SDRAM_128_DQ2
SDRAM_128_DQ3
SDRAM_128_DQ4
SDRAM_128_DQ5
SDRAM_128_DQ6
SDRAM_128_DQ7
SDRAM_128_DQ8
SDRAM_128_DQ9
SDRAM_128_DQ10
SDRAM_128_DQ11
SDRAM_128_DQ12
SDRAM_128_DQ13
SDRAM_128_DQ14
SDRAM_128_DQ15
1
VDDMEMORIES
1
B7
A6
B6
A5
B5
B4
A4
A3
C1
F2
F1
G2
H1
J2
J1
K2
VDDQ_1
VDDQ_2
VDD_1
VDD_2
VDD_3
VDDQ_3
VCC_N_1
VDDQ_4
VDDQ_5
VDD_4
VDDQ_6
VDD_5
VDD_6
VDD_7
VDD_8
VDD_9
VCC_N_2
VDD_10
TOP_SH_D00
TOP_SH_D01
TOP_SH_D02
TOP_SH_D03
TOP_SH_D04
TOP_SH_D05
TOP_SH_D06
TOP_SH_D07
TOP_SH_D08
TOP_SH_D09
TOP_SH_D10
TOP_SH_D11
TOP_SH_D12
TOP_SH_D13
TOP_SH_D14
TOP_SH_D15
Kajsa PoP MCP Memory
N2020
A7
A10
A20
B1
B2
B3
B19
H2
L1
L2
N2
P21
W2
Y13
Y19
AA2
AA8
AA20
POP Symbol
POP_symbol
KAL00900MM-AJ55_POP
1205-5912 1
TOP_VDD_MEM_00
TOP_VDD_MEM_01
TOP_VDD_MEM_02
TOP_VDD_MEM_03
TOP_VDD_MEM_04
TOP_VDD_MEM_05
TOP_VDD_MEM_06
TOP_VDD_MEM_07
TOP_VDD_MEM_08
TOP_VDD_MEM_09
TOP_VDD_MEM_10
TOP_VDD_MEM_11
TOP_VDD_MEM_12
TOP_VDD_MEM_13
TOP_VDD_MEM_14
TOP_VDD_MEM_15
TOP_VDD_MEM_16
TOP_VDD_MEM_17
N2010
KAJSA_TOP_DIRECT_MEMORY_SIGNALS_B_3_5
Kajsa-PoP_top-SYSTEM-LEVEL
DIRECT_MEMORY_SIGNALS
DB3210ADT/7POPHF_TOP
1208-3871_TOP
1
1
This symbol is placed here to include MCP memory in BOM
NC
NAND_WPn
SDTEMP
Electrical inferface can be seen on page B05
T_A8
T_B9
T_B8
TOP_DMS_1
TOP_DMS_2
TOP_DMS_3
TOP_NAND_WP_N
TOP_DMS_5
NC_12
NC_13
NC_14
T_B10
T_B20
A8
B9
B10
B8
B20
TOP_AP_D00
TOP_AP_D01
TOP_AP_D02
TOP_AP_D03
TOP_AP_D04
TOP_AP_D05
TOP_AP_D06
TOP_AP_D07
TOP_AP_D08
TOP_AP_D09
TOP_AP_D10
TOP_AP_D11
TOP_AP_D12
TOP_AP_D13
TOP_AP_D14
TOP_AP_D15
N2020
KAL00900MM-AJ55
1205-5912_POP
KAL00900MX-AJ55
MCP_POP_DIRECT_MEMORY_SIGNALS
2GbitNANDx8+128Mbitx16+512MbitSDRAMx16
DirectMemorySignals
NC_21
NC_22
NC_23
NAND_WPn
NC_24
N2010
KAJSA_TOP_AP_EMIF_B_2_5
Kajsa-PoP_top-SYSTEM-LEVEL
KAJSA_APPLICATION_MEMORY_IF(EMIF2)
T_P1
AP_D00
T_P2
AP_D01
T_R1
AP_D02
T_R2
AP_D03
T_T1
AP_D04
T_T2
AP_D05
T_U1
AP_D06
T_U2
AP_D07
T_Y5
AP_D08
T_AA6
AP_D09
T_Y6
AP_D10
T_AA7
AP_D11
T_Y7
AP_D12
T_AA9
AP_D13
T_Y9
AP_D14
T_AA10
AP_D15
T_B14
AP_NFIF_READY
DB3210ADT/7POPHF_TOP
1208-3871_TOP
1
AP_SDCAS/AP_RE/AP_OEn
A14/AP_SDBS01
AP_
AP_A15/AP_SDBS1
AP_A18/AP_ALE
AP_A17/AP_CLE
AP_A26/AP_CRE
AP_SDRAS/ADVn
1
AP_A01
AP_A02
AP_A03
AP_A04
AP_A05
AP_A06
AP_A07
AP_A08
AP_A09
AP_A10
AP_A11
AP_A12
AP_A13
NC_1
NC_2
NC_3
NC_4
AP_A16
AP_A19
AP_A20
AP_A21
AP_A22
AP_A23
AP_A24
AP_A25
NC_5
AP_SDCLK
AP_SDCKE0
NC_6
NC_7
NC_8
AP_CS0n
NC_9
AP_CS2n
AP_BE0n
AP_BE1n
NC_10
AP_WEn
NC_11
AP_WAITn
T_A14
T_B15
T_A15
T_B16
T_A16
T_B17
T_A17
T_B18
T_A18
T_A19
T_C21
T_D20
T_D21
T_E20
T_L21
T_E21
T_L20
T_F20
T_A12
T_F21
T_B12
T_G20
T_G21
T_H20
T_H21
T_J20
T_J21
T_K20
T_K21
T_M20
T_B13
T_M2
T_V2
T_AA14
T_Y11
T_A11
T_Y12
T_AA15
T_AA12
T_AA11
T_N20
T_Y4
T_AA3
T_A13
T_V1
T_B11
T_AA13
TOP_AP_A01
TOP_AP_A02
TOP_AP_A03
TOP_AP_A04
TOP_AP_A05
TOP_AP_A06
TOP_AP_A07
TOP_AP_A08
TOP_AP_A09
TOP_AP_A10
TOP_AP_A11
TOP_AP_A12
TOP_AP_A13
TOP_AP_A14
TOP_AP_A15
TOP_AP_A16
TOP_AP_A17
TOP_NAND_ALE
TOP_NAND_CLE
TOP_AP_A18
TOP_AP_A19
TOP_NAND_IO0
TOP_NAND_IO1
TOP_NAND_IO2
TOP_NAND_IO3
TOP_NAND_IO4
TOP_NAND_IO5
TOP_NAND_IO6
TOP_NAND_IO7
TOP_NAND_RE_N
TOP_AP_CLK
TOP_AP_SDCLK
TOP_AP_SDCKE
TOP_SDRAS_N_1
TOP_SDRAS_N_2
TOP_SDCAS_N_1
TOP_SDCAS_N_2
TOP_SDCAS_N_3
TOP_NAND_CE_N
TOP_AP_CS1_N
TOP_AP_CS2_N
TOP_AP_BE0_N
TOP_AP_BE1_N
TOP_AP_WE_N
TOP_AP_WE2_N
TOP_DMS_4
TOP_NAND_WE_N
OP_NAND_Ry_By_N
T
N2020
KAL00900MX-AJ55_MCP_POP_NAND_EMIF2
2GbitNANDx8+128Mbitx16+512MbitSDRAMx16
A14
B15
A15
B16
A16
B17
A17
B18
A18
A19
C21
D20
D21
E20
L21
E21
L20
F20
A12
F21
B12
G20
G21
H20
H21
J20
J21
K20
K21
M20
B13
M2
V2
AA14
Y11
A11
Y12
AA15
AA12
AA11
N20
Y4
AA3
A13
V1
B11
AA13
APPLICATIONMEMORYIF(EMIF2)
SDRAM_512_A0d
SDRAM_512_A1d
SDRAM_512_A2d
SDRAM_512_A3d
SDRAM_512_A4d
SDRAM_512_A5d
SDRAM_512_A6d
SDRAM_512_A7d
SDRAM_512_A8d
SDRAM_512_A9d
SDRAM_512_A10d
SDRAM_512_A11d
SDRAM_512_A12d
NC_2
BA0d
NC_3
d
BA1
NAND_ALE
NAND_CLE
NC_4
NC_5
NAND_IO0
NAND_IO1
NAND_IO2
NAND_IO3
NAND_IO4
NAND_IO5
NAND_IO6
NAND_IO7
NAND_REn
NC_6
SDRAM_512_CLK
SDRAM_512_CKE
SDRAM_512_RASn
NC_7
NC_8
NC_9
SDRAM_512_CASn
NAND_CEn
NC_10
SDRAM_512_CSn
SDRAM_512_LDQM
SDRAM_512_UDQM
NC_11
SDRAM_512_WEn
NC_12
NAND_WEn
KAL00900MM-AJ55
1205-5912_POP
Made for
Application & System Performance
System PoP
Document Nr Revision
1207-2092 Page B5 3
SEMC Troubleshooting Manual
G705 - W705 - W715
TOP_AP_D00
SDRAM_512_DQ0
SDRAM_512_DQ1
SDRAM_512_DQ2
SDRAM_512_DQ3
SDRAM_512_DQ4
SDRAM_512_DQ5
SDRAM_512_DQ6
SDRAM_512_DQ7
SDRAM_512_DQ8
SDRAM_512_DQ9
SDRAM_512_DQ10
SDRAM_512_DQ11
SDRAM_512_DQ12
SDRAM_512_DQ13
SDRAM_512_DQ14
SDRAM_512_DQ15
NAND_Ry/By_N
1
P1
P2
R1
R2
T1
T2
U1
U2
Y5
AA6
Y6
AA7
Y7
AA9
Y9
AA10
B14
TOP_AP_D01
TOP_AP_D02
TOP_AP_D03
TOP_AP_D04
TOP_AP_D05
TOP_AP_D06
TOP_AP_D07
TOP_AP_D08
TOP_AP_D09
TOP_AP_D10
TOP_AP_D11
TOP_AP_D12
TOP_AP_D13
TOP_AP_D14
TOP_AP_D15
IF
1225-4035 rev. 1
MEASUREMENT POINTS
60 (122)
Page 61
WLAN_SCLK
WLAN_CLKREQ
OPTO_EN
OPTO_EN
WLAN_SCLK
WLAN_CLKREQ
MEASUREMENT POINTS Power Top
VBAT
VBAT
WLAN_SCLK
WLAN_CLKREQ
Power WLAN
VBAT
OPTO_EN
Page 10
WLAN_LDO18A
Page 8
Page 8
WLAN_VO18
WLAN_VO33
WLAN_LDO30
VCAMSD18
VCAMSA28
VCAMIO18
VOPTO30
WLAN_VO18
WLAN_VO33
WLAN_LDO18A
WLAN_LDO30
VCAMSD18
VCAMSA28
VCAMIO18
VOPTO30
WLAN_VO18
WLAN_VO33
WLAN_LDO18A
WLAN_LDO30
VCAMSD18
VCAMSA28
VCAMIO18
VOPTO30
SEMC Troubleshooting Manual
G705 - W705 - W715
MEASUREMENT POINTS
VBUS
DCIO
VBUS
DCIO
Page 7
VBUS
DCIO
Regulators & Charging
Regulators & Charging
VBAT
VDDE18
VANA25
VCORE18
VCORE12
VMC18
VAUDIO26
VBT27
VDIG
VBEAR26
VBACKUP
Power Imaging
Power Imaging
VCORE18
VDDE18
VANA25
VCORE12
VBAT
VDDE18 VDDE18
VANA25
VCORE18
VCORE12
VDDE18
VANA25
VCORE12
Power Asics
Power Asics
VBAT
VDDE18
VMC18
VAUDIO26
VBT27
VDIG
VBEAR26
VBACKUP
VCORE18
Page 9
Page 9
VBAT
VDDE18
VMC18
VAUDIO26
VBT27
VDIG
VBEAR26
VBACKUP
Made for
Application & System Performance
Power T
op
Document Nr Revision
1207-2092 Page B6 3
1225-4035 rev. 1
61 (122)
Page 62
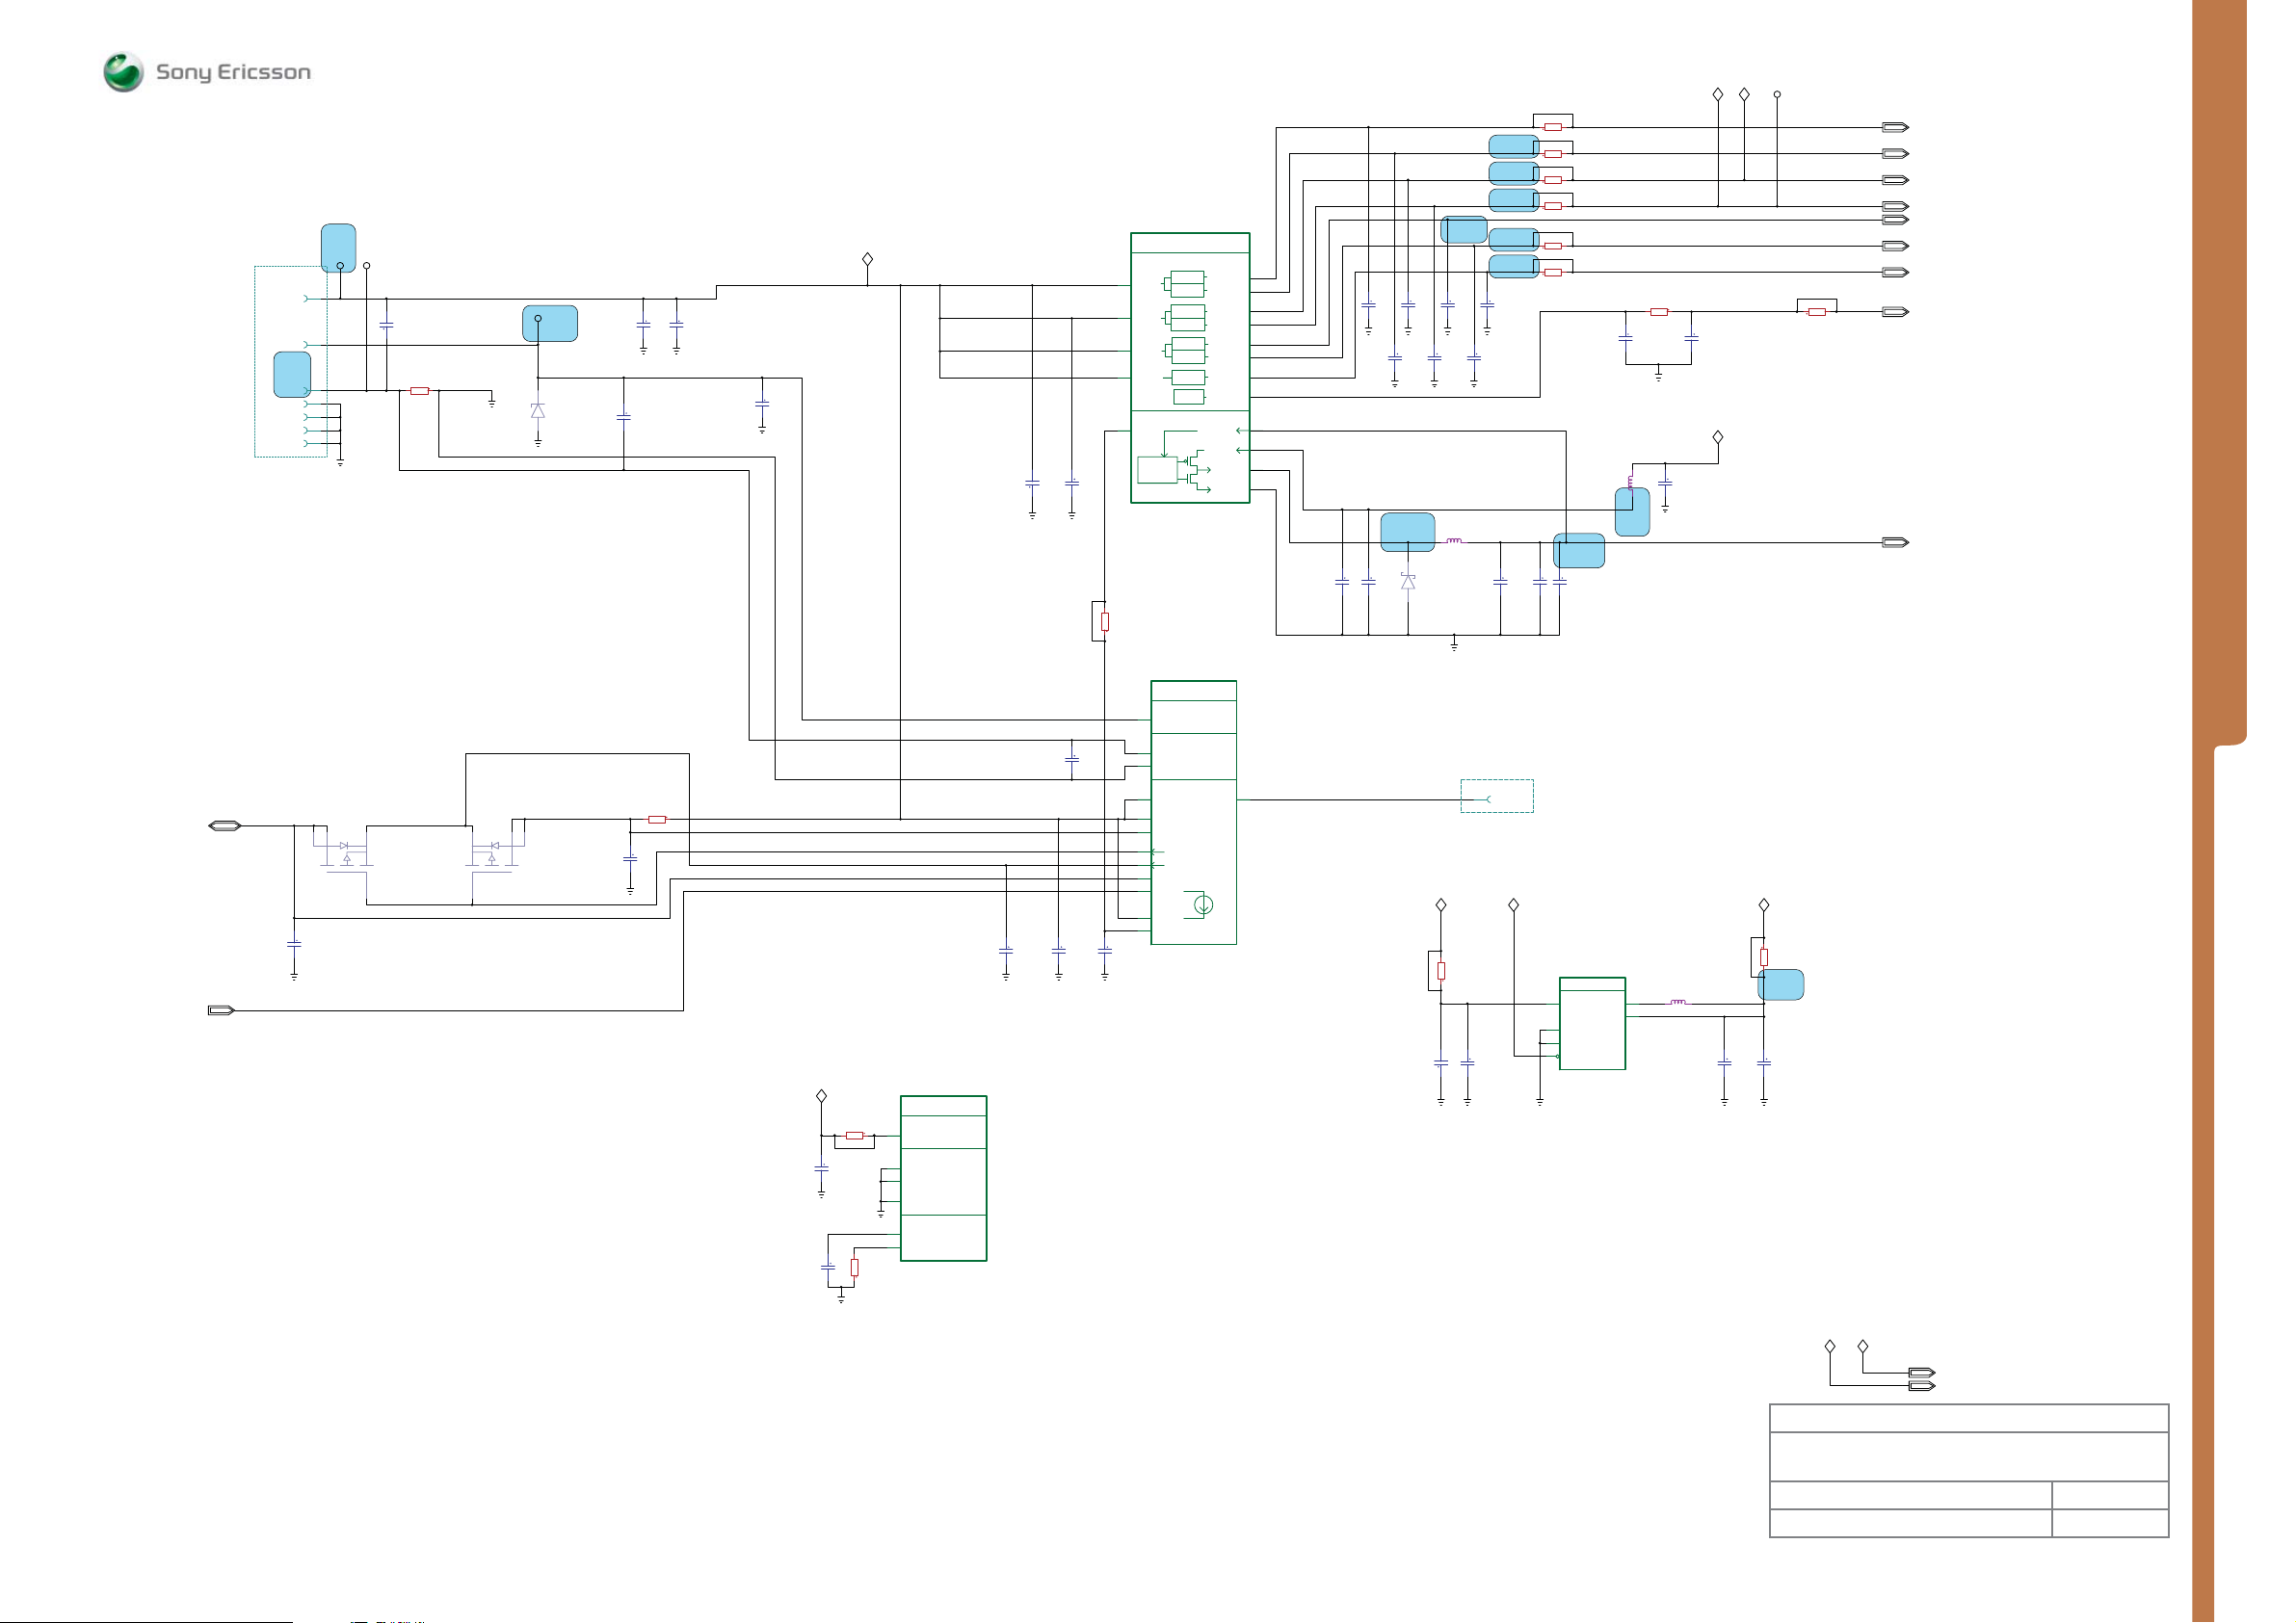
X2201
BATTERY
CONNECTOR
1206-2937
MP 23
MP 34
TP2201 TP2204
1
2
3
Z1
Z2
Z3
Z4
1
C2200
33pF
<NM>
R2200
25mohms
TP2202
MP 33
12
V2200
DF2S6.8FS
AC
BDATA
C2201
0.1uF
<NM>
C2202
22pF
C2203
3.3pF
MEASUREMENT POINTS Power - Regulators & Chargi n g
N2000
Ericsson AB 3100
VBAT_B
VBAT_E
VBAT_F
VBAT_G
MOD1
0.9 - 1.8V
AB3100
1202-0639
POWER
LDO REGULATORS
LDOG
1.5 - 2.85V
LDOD
2.65V
LDOF
1.05 - 2.5V
LDOE
0.9 - 2.8V
LDOH
1.2 - 2.75V
LDOK
1.8 - 2.75V
LDOC
2.65V
LPREG
BUCK REGULATOR
Buck
5%
L13
LDOG_OUT
L12
LDOD_OUT
G13
LDOF_OUT
G14
LDOE_OUT
L14
LDOH_OUT
M14
LDOK_OUT
N12
LDOC_OUT
D13
LDOLP_OUT
2V
E1
BUCK_FB
D1
VBAT_C
C1
VBUCK
B1
VSS_BUCK
2
C2206
4.7uF
C2207
2.2uF
C2208
1uF
MP 117
C2216
0.1uF
C2217
10uF
VBAT
K14
F14
M13
N14
C2234
NM
4.7pF
C2204
10uF
C2205
10uF
B12
R2230
NM
0ohms
V2201
1001-0073
Leadfree
C2209
2.2uF
MP 113
C2210
2.2uF
L2200
4.7uH
C2218
10uF
C2211
2.2uF
MP 67
MP 57
MP 60
MP 63
MP 66
C2212
2.2uF
R2300
R2301
R2302
R2303
R2305
R2306
C2219
10uF
<NM>
<NM>
<NM>
<NM>
<NM>
<NM>
0ohms
0ohms
0ohms
0ohms
0ohms
0ohms
L2201
BLM18PG121SN1
1000-0118
MP 114
C2220
0.1uF
C2213
1uF
MP 116
R2204
4.7Kohms
VMC18
VAUDIO26
VANA25
VDDE18
VBT27
VDIG
VBEAR26
C2215
0.1uF
C2214
50mF
VDDE18
VBAT
VCORE12
VANA25
SP2200
R2307
<NM>
0ohms
SEMC Troubleshooting Manual
G705 - W705 - W715
VMC18
VAUDIO26
VANA25
VDDE18
VBT27
VDIG
VBEAR26
VBACKUP
VCORE12
MEASUREMENT POINTS
DCIO
VBUS
C2221
0.1uF
16V
<NM>
N2000
Ericsson AB 3100
POWER
BATTERY UART
A11
C2224
1uF
J14
J13
H2
H1
H3
J2
F1
E2
F3
G1
BDATA
FGSENSEP
FGSENSEN
VBAT_D
CHSENSEN
CHSENSEP
DCIO
VBUS
VBAT_H
VDD_REF
AB3100
1202-0639
FUEL GAUGE
CHARGER CONTROL
TRICKLE
CHREG
DCIO_INT
X4200
C2228
10uF
VBAT
Slider Flex Connector
A13
1206-2940
R2206
0ohms
<NM>
C2229
1
C2230
0.001uF
<NM>
VCORE18
R2310
0ohms
<NM>
MP 59
C2231
10uF
VANA25
N2200
MAX8640
IN
6
2
5
1nF
4
GND2
GND5
SHDN
MAX8640YEXT18
1200-6420
1.8V
4MHz
LX
OUT
2.2uH
L2202
1
2MHz
3
2F2G
2
Bat_GND
C2225
47pF
C2223
0.1uF
16V
GND
R2201
DCIO
V2202
D
D
3
8
1200-0145
FDMA1027P
S
4
5
G
V2202
D
D
6
1
S
7
1200-0145
1
FDMA1027P
2
G
100mohms
C2232
NM
0.1uF
C2226
1uF
VDDE18
R2394 0ohms
<NM>
C2227
0.1uF
R2203
100Kohms
A12
B10
A2
D12
A13
A14
N2000
Ericsson AB 3100
VDD_IO
SPARE1
SPARE2
TEST
VREF
IREF
AB3100
1202-0639
POWER
IO LEVELS
TEST
REF
VBUS
C2222
1uF
25V
2
VCORE18
VBAT
VBAT
VCORE18
Made for
Application & System Performance
Power - Regulators & Charging
Document Nr Revision
1207-2092 Page B7 3
1225-4035 rev. 1
62 (122)
Page 63
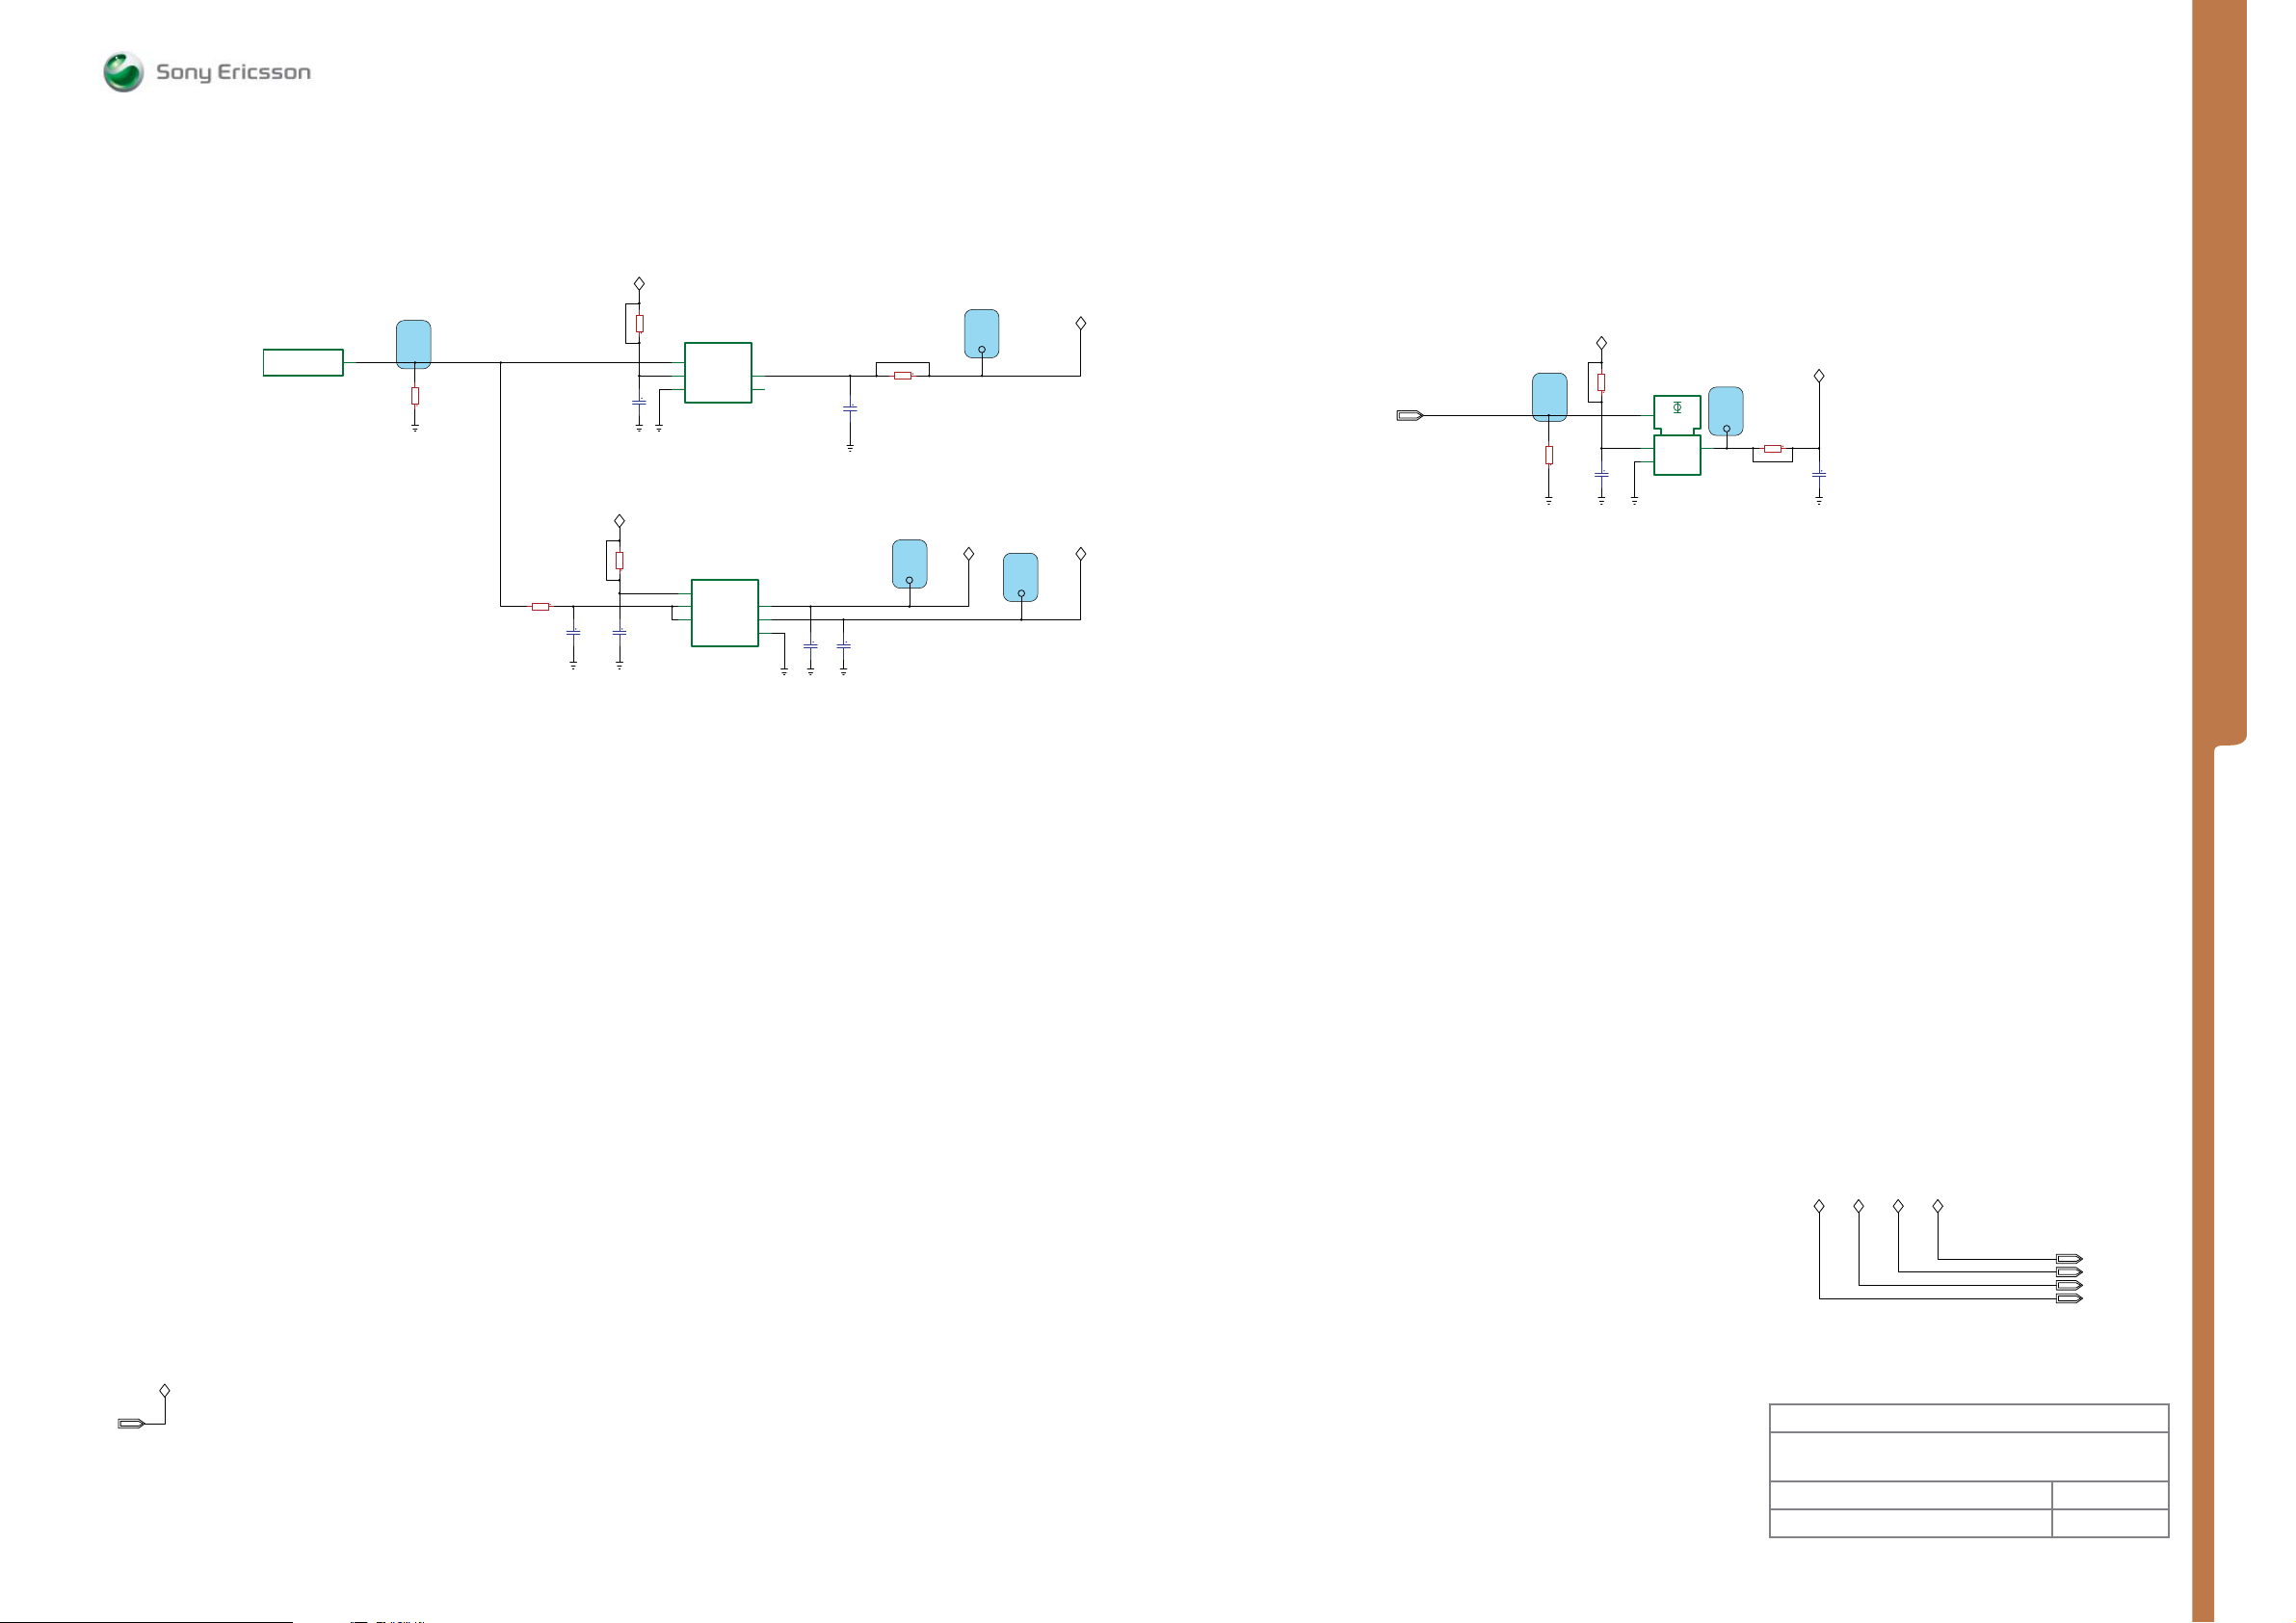
VBAT
MEASUREMENT POINTS Power - Imaging
SEMC Troubleshooting Manual
G705 - W705 - W715
N2010
APPLICATION GPIO_16
DB3210ADT/7POPHF
1208-3871
1
TP2215
VCAMSD18
VCAMIO18VCAMSA28
OPTO_EN
OPTO_EN
MP 48
R2217
100Kohms
VBAT
R2202
0ohms
<NM>
3
41
2
C2288
0.47uF
N2201
CE
OUT
IN
GND
RP103K301D-TR
1201-6465
MP 43
TP2203
R2205 0ohms
<NM>
VOPTO30
C2289
0.47uF
MEASUREMENT POINTS
R2210
0ohms
<NM>
MP 31
P22
R2282
100Kohms
CAM_LDO_EN
47KohmsR2281
C2281
0.047uF
C2282
C2286
1uF
VBAT
R2212
0ohms
<NM>
1uF
N2204
LDO REGULATOR
A1
EN
B2
TPS79918YZU
1001-0625
N2203
2
VDD
6
CE1 VOUT1
4
CE2 VOUT2
R5323Z022B_TR_FD
1.5STEP4.0
1000-8638
C2287
2.2uF
R2211 0ohms
<NM>
1C3C
OUTIN
A3
NRGND
1.8
MP 38
TP2213
1
3
5
GND
C2283
2.2uF
C2284
2.2uF
MP 40
TP2214
MP 26
VBAT
VBAT
VOPTO30
VCAMSA28VCAMSD18 VCAMIO18
VCAMIO18
VCAMSA28
VCAMSD18
VOPTO30
Made for
Application & System Performance
Power - Imaging
Document Nr Revision
1207-2092 Page B8 3
1225-4035 rev. 1
63 (122)
Page 64
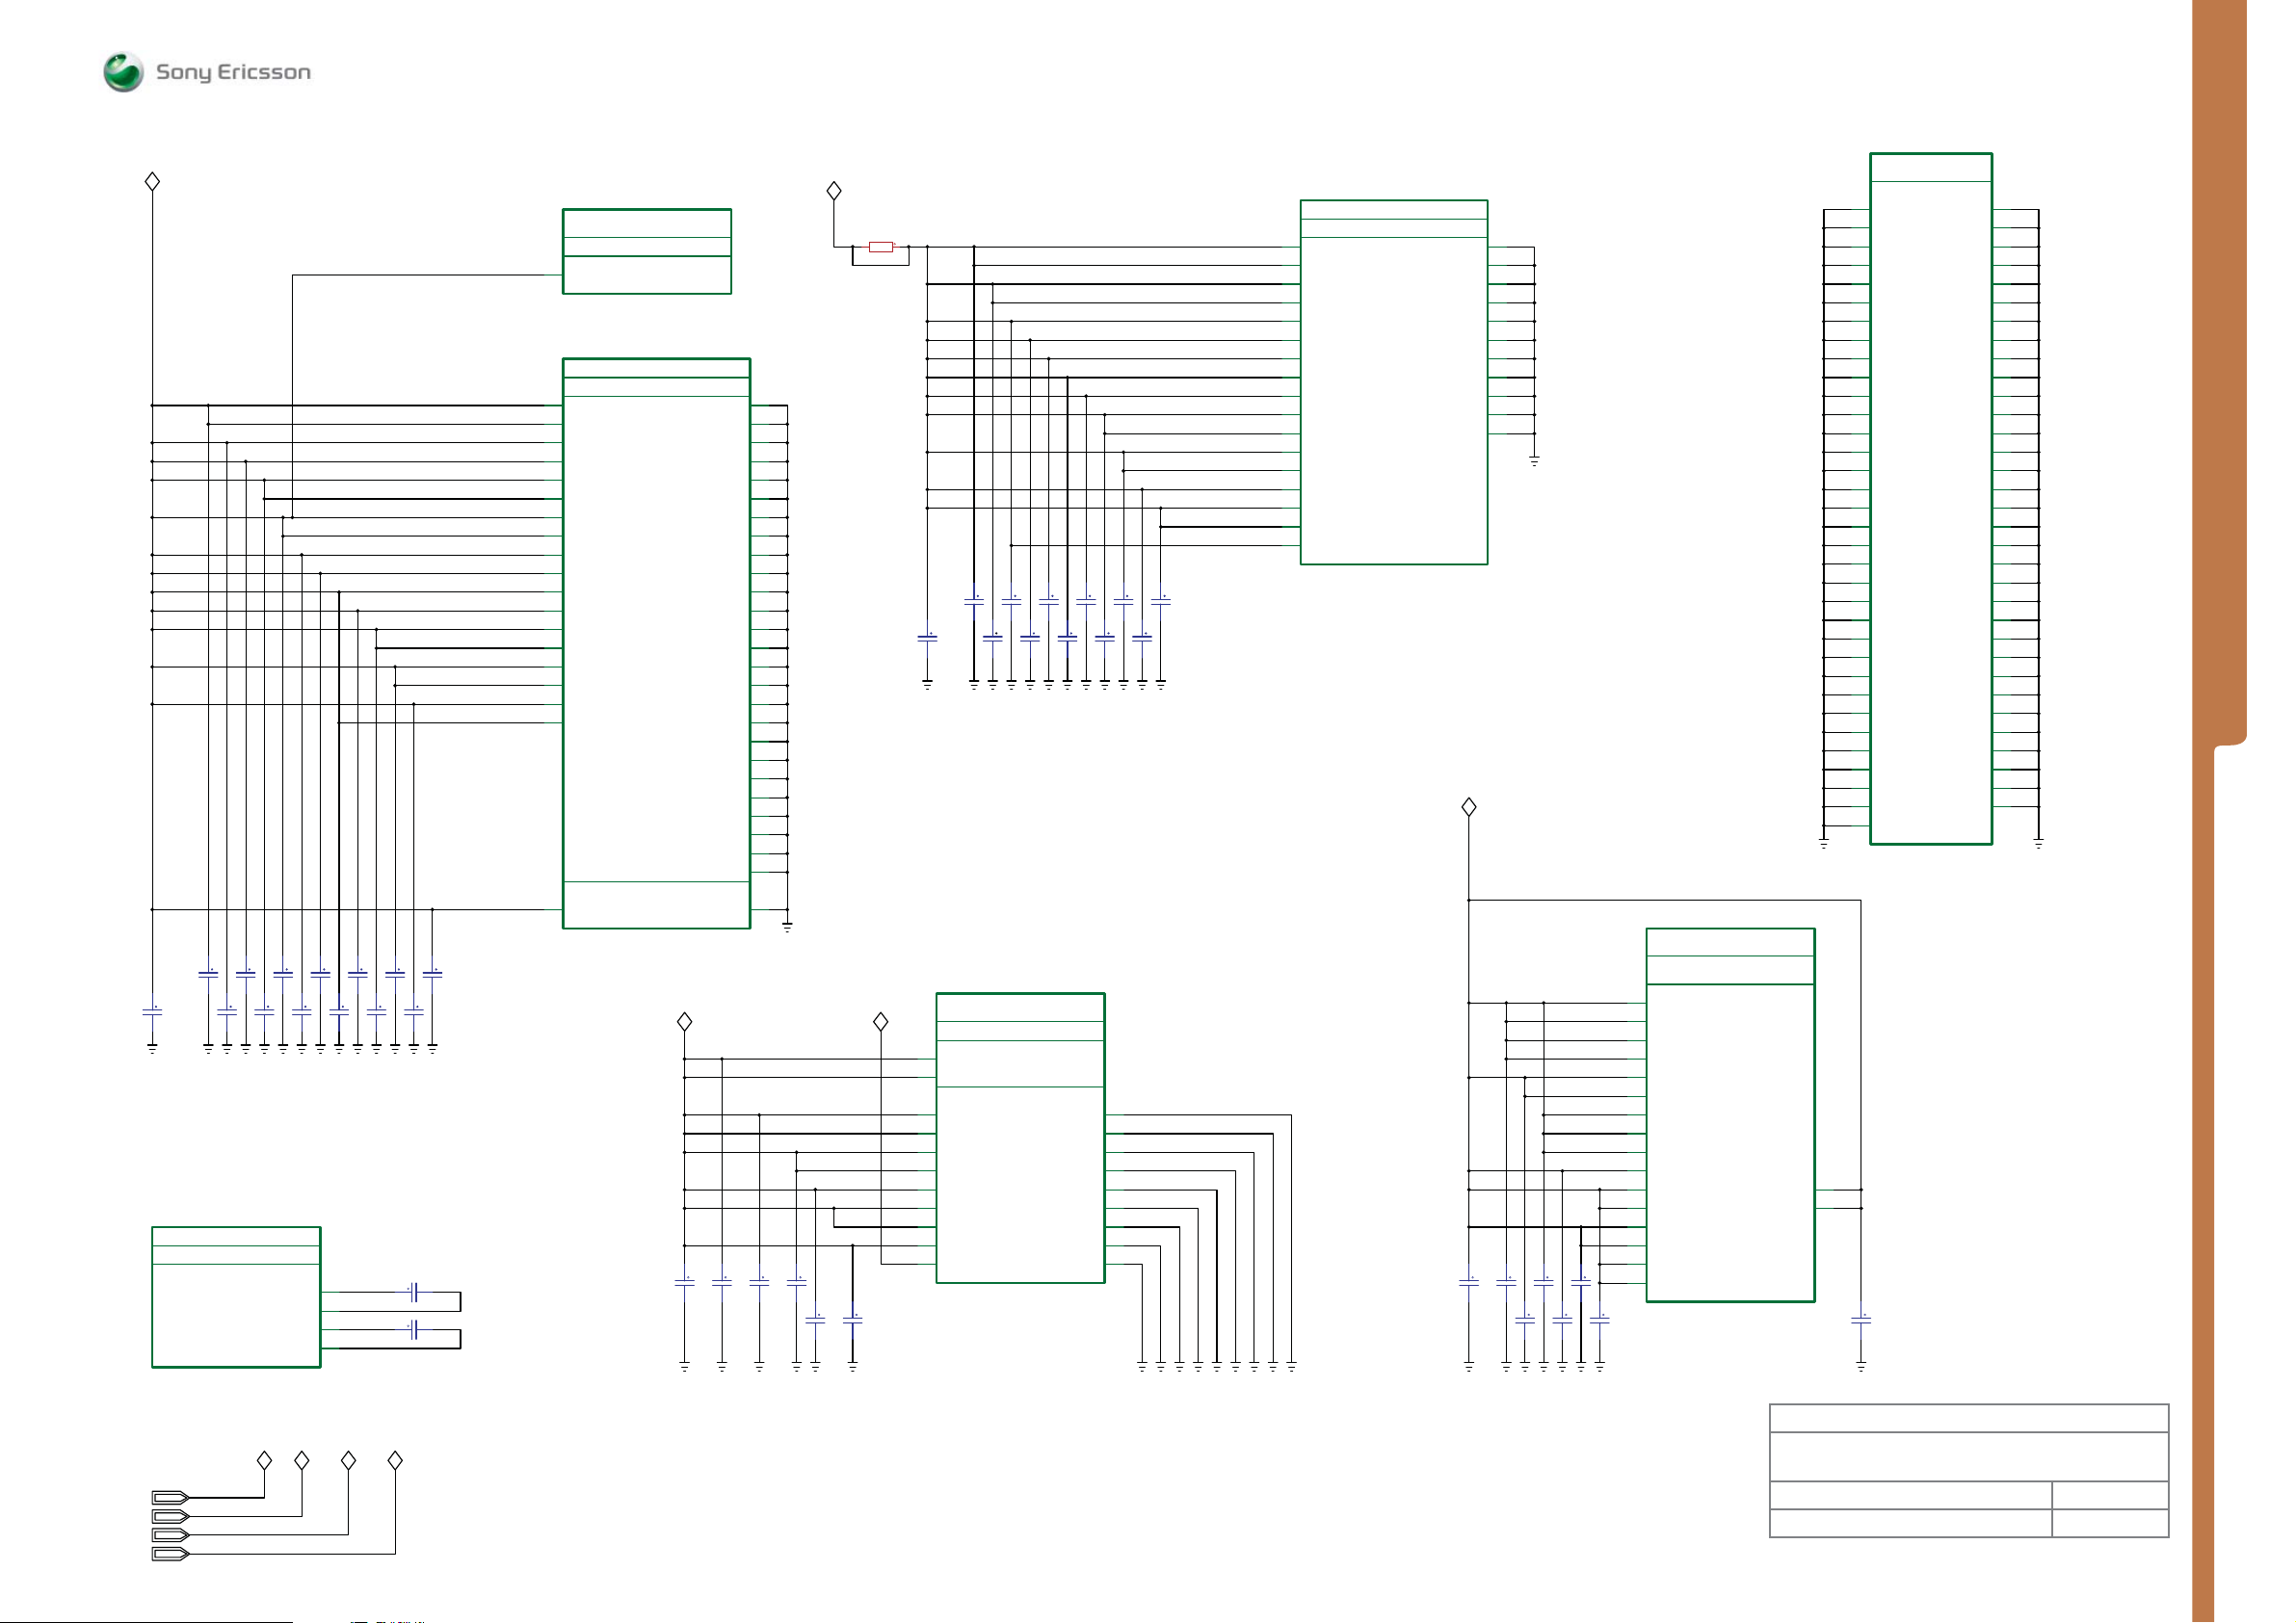
VCORE12
C23020.1uF
C23011uF
N2010
KAJSA_BOTTOM_PLL_A_15_24
KAJSA_BOTTOM_PLL
PLL_FILTER
DB3210ADT/7POPHF
1208-3871 1
C2304
C2306
0.1uF
0.1uF
C23050.1uF
C2303
0.1uF
PLL_PG_416_VCONT
PLL_PG_416_FILTVDD
C2307
0.1uF
PLL_26_VCONT
PLL_26_FILTVDD
C2308
0.1uF
AE17
AE18
AE20
AE19
MEASUREMENT POINTS Power - ASICs
VDDE18
N2010
KAJSA_BOTTOM_1_2V
POWER_A_1_24
KAJSA_BOTTOM_POWER
AC20
H2
M2
T2
AB2
AE5
AE9
AE22
AA25
Y25
T25
M25
B23
B21
B19
B16
B14
B7
K25
W25
C2311
0.1uF
C2353
C2354
C2312
0.1uF
C2313
0.1uF
C2314
0.1uF
0.033uF
0.033uF
C2310
0.1uF
C2309
0.1uF
VDDCORE(logic)
VDD_1v2
DB3210ADT/7POPHF
1208-3871 1
N2010
KAJSA_BOTTOM_VDD_IO_POWER_A_4_24
DB3210ADT/7POPHF
1208-3871 1
VDD
VDD
VDD
VDD
VDD
VDD
VDD
VDD
VDD
VDD
VDD
VDD
VDD
VDD
VDD
VDD
VDD
VDD
VDD_DIG_PLL
KAJSA_POWER
VDD_IO
_
VANA25
GND_DIG_PLL
C2336
1uF
GND
GND
GND
GND
GND
GND
GND
GND
GND
GND
GND
GND
GND
GND
GND
GND
GND
GND
GND
GND
GND
GND
GND
GND
GND
GND
C2337
0.1uF
AB21
AB6
K10
P10
P11
R11
T11
T12
K13
T13
U13
V13
T14
T15
C23390.1uF
E6
F22
J9
P9
V9
L11
L12
J13
L13
L14
L15
L16
U10
C23410.1uF
C23420.1uF
R2390 0ohms
<NM>
VCORE12
C2344
0.1uF
C23210.1uF
C2320
1uF
N2010
KAJSA_BOTTOM_ANALOG
KAJSA_BOTTOM_2.5V_POWER
AB7
VDDIO_2v5
AD19
VDDIO_2v5_PLL
AC19
VDDCO_PLL_1_2
AC18
VDDCO_PLL_3_4
AE16
VCC_AD1
AE14
VCC_AD2
AB15
VDDAD
AC11
VCCDA
AC12
VCCGPAD
R2
VDDCO_AF
AE12
VDD_ANA
DB3210ADT/7POPHF
1208-3871 1
C2323
0.1uF
C23240.1uF
C2322
0.1uF
POWER_A_3_24
VDDIO
VDD_ANALOG
VSSCO_PLL_1_2
VSSCO_PLL_3_4
C2327
C2325
0.1uF
0.1uF
C2326
0.1uF
VSS_AD1
VSS_AD2
VSSDA
GNDAD
VSSGPAD
VSSCOMMON
GNDE_ANA
C2328
0.1uF
AD18
AD17
AD16
AE15
AB10
AB14
AB12
AE13
AC17
C2329
C2331
0.1uF
0.1uF
C2330
0.1uF
N2010
KAJSA_BOTTOM_1_8V_POWER_A_2_24
VDD_1v8
VDD_1v8
VDD_1v8
VDD_1v8
VDD_1v8
VDD_1v8
VDD_1v8
VDD_1v8
VDD_1v8
VDD_1v8
VDD_1v8
VDD_1v8
VDD_1v8
VDD_1v8
VDD_1v8
VDD_1v8
VDD_1v8
KAJSA_POWER
VDD_1V8
B2
B4
N2
P2
AA2
AE4
AE10
AE21
AB25
R25
N25
J25
G25
B22
B13
B10
W2
DB3210ADT/7POPHF
1208-3871 1
GNDE
GNDE
GNDE
GNDE
GNDE
GNDE
GNDE
GNDE
GNDE
GNDE
GNDE
VCORE18
C23452.2uF
M16
N16
P16
R16
T16
K17
P17
U17
P18
V18
J18
N2010
KAJSA_BOTTOM
VMEM_POWER_A_24_24
KAJSA_BOTTOM_VMEM_POWER
D2
C2
F2
G2
E25
B25
AD2
AE2
AE3
AD25
V25
U25
P24
P25
C23460.1uF
C23480.1uF
C23470.1uF
C23490.1uF
U24
C23500.1uF
V24
C23510.1uF
MEMORY POWER
VDDQ
VDDQ
VDDQ
VDDQ
VDDQ
VDDQ
FVDD
FVDD
FVDD
FVDD
FVDD
FVDD
FVDD
FVDD
FVDD
FVDD
DB3210ADT/7POPHF
1208-3871 1
VCCN
VCCN
AE24
AE25
SEMC Troubleshooting Manual
G705 - W705 - W715
N2000
Ericsson AB 3100
POWER
D4
D5
D6
D7
D9
D10
E4
E5
E6
E7
E8
E9
E10
F4
F5
F6
F7
F8
F9
F10
G3
G4
G5
G6
G7
G8
G9
G10
G11
G12
H4
H5
H6
H7
GROUND
VSS1
VSS2
VSS3
VSS4
VSS5 VSS39
VSS6
VSS7
VSS8
VSS9
VSS11
VSS12
VSS13
VSS14
VSS16
VSS17
VSS18
VSS19
VSS21
VSS22
VSS23
VSS24
VSS26
VSS27
VSS28
VSS29
VSS31
VSS32
VSS33
VSS34
AB3100
1202-0639
C2352
0.1uF
VSS35
VSS36
VSS37
VSS38
VSS40
VSS41
VSS42
VSS43
VSS44VSS10
VSS45
VSS46
VSS47
VSS48
VSS49VSS15
VSS50
VSS51
VSS5
VSS53
VSS54VSS20
VSS55
VSS56
VSS57
VSS58
VSS59VSS25
VSS60
VSS61
VSS62
VSS63
VSS64VSS30
VSS65
VSS66
VSS67
H8
H9
H10
H11
H12
J4
J5
J6
J7
J8
J9
J10
J11
K5
K6
K7
K8
K9
2
K10
K11
L4
L5
L6
L7
L8
L9
L10
L11
M6
M8
M9
M11
M12
2
MEASUREMENT POINTS
VDDE18
VANA25
VCORE12
VCORE18
VDDE18 VANA25 VCORE12
VCORE18
Made for
Application & System Performance
Power ASICs
Document Nr Revision
1207-2092 Page B9 3
1225-4035 rev. 1
64 (122)
Page 65
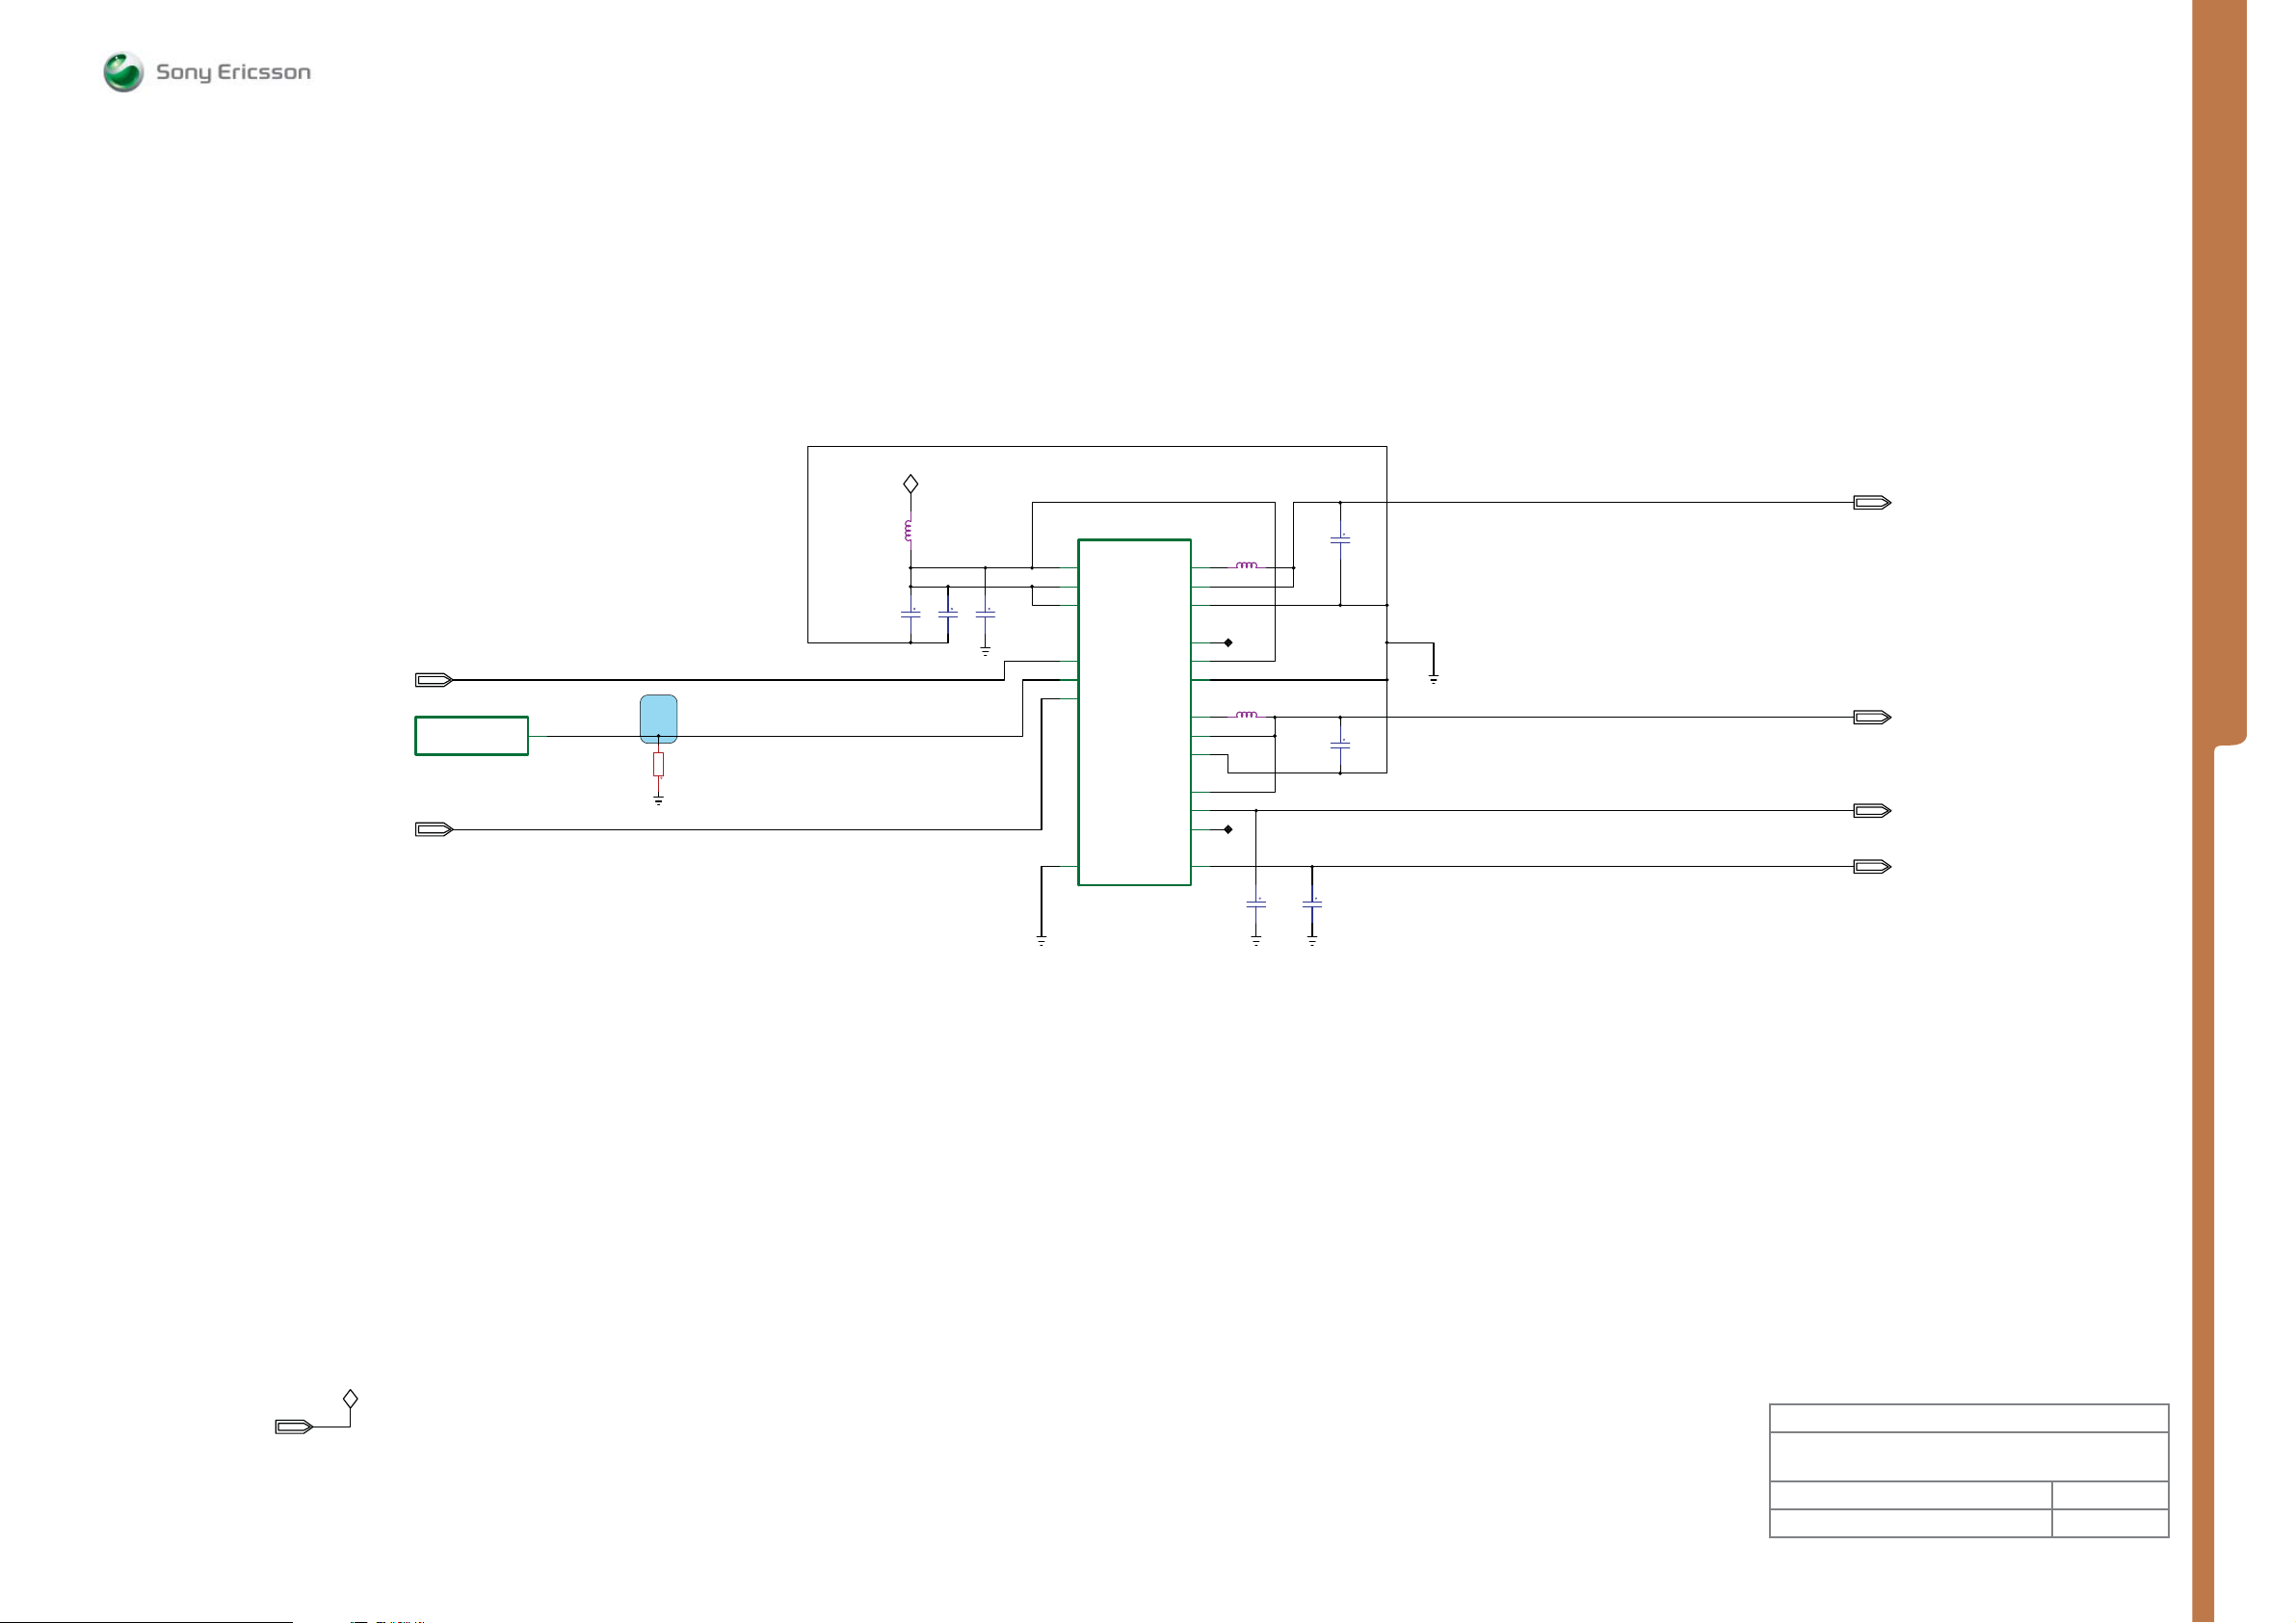
WLAN_CLKREQ
WLAN_SCLK
N2010
APPLICATION GPIO_17
DB3210ADT/7POPHF
1208-3871
1
R22
WLAN_CLKREQ
WLAN_PDn
WLAN_SCLK
MP 58
R2313
100Kohms
MEASUREMENT POINTS Power - WLAN
VBAT
L2310
BLM18PG121SN1
1000-0118
C2371
10uF
C2372
10uF
C2373
0.1uF
N2300
MARVELL_88PW886_2
16
SVIN
20
PVIN
6
PVIN
10
SLEEPn
11
PDn
13
SDI
8
GND
88PW886-B3-CBD1C000-T
1203-2790
L2311
4.7uH
3
SW3
7
VO3
4
PGND
2
SW1
VO1
PGND
SW2
FB2
PGND
VO2
VL2X
VL2Y
VL3
2
NC
5
1
2.2uH
L2313
19
2MHz
15
18
14
9
12
NC
17
C2377
10uF
C2379
10uF
C2374
10uF
C2376
10uF
WLAN_VO33
WLAN_VO18
WLAN_LDO18A
WLAN_LDO30
SEMC Troubleshooting Manual
G705 - W705 - W715
WLAN_VO33
WLAN_VO18
WLAN_LDO18A
WLAN_LDO30
MEASUREMENT POINTS
VBAT
VBAT
Made for
Application & System Performance
Power - WLAN
Document Nr Revision
1207-2092 Page B10 3
1225-4035 rev. 1
65 (122)
Page 66
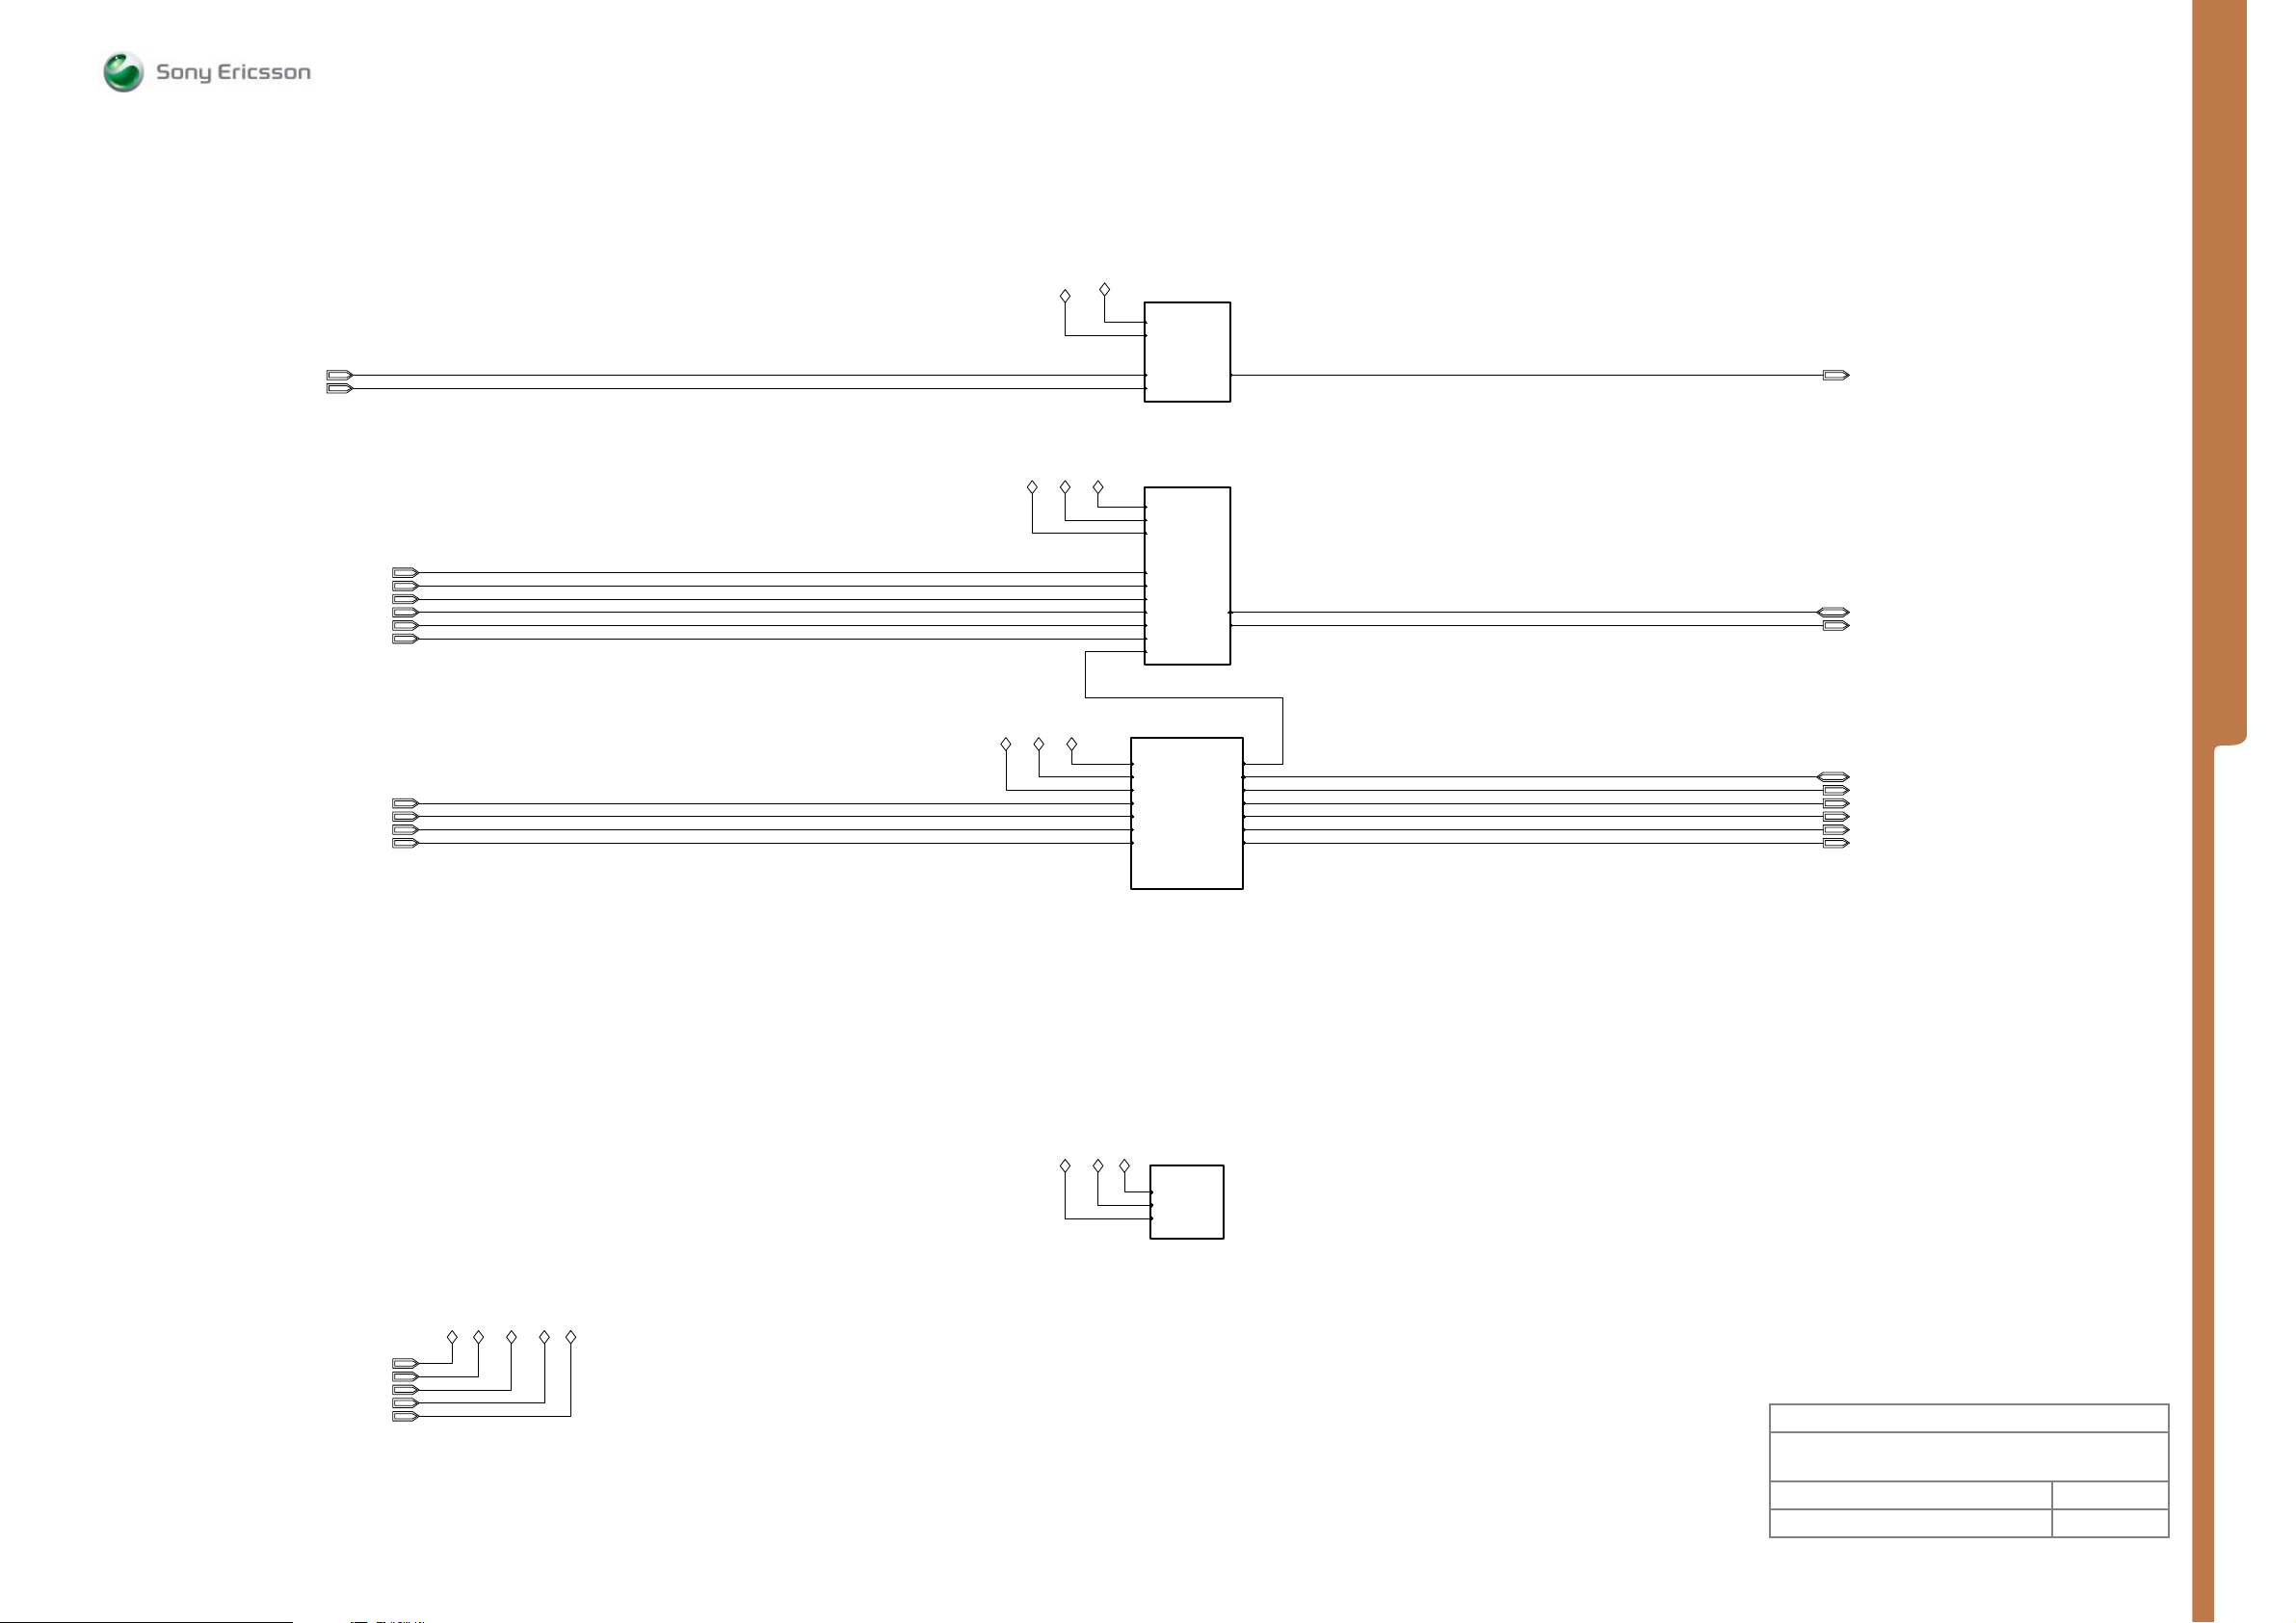
MEASUREMENT POINTS Connectivity Top
VDDE18
VBAT
Page 15
Page 15
VDDE18
VBAT
SEMC Troubleshooting Manual
G705 - W705 - W715
LED_MAINKEY LED_MAINKEY
LED_WebShortcut
OPTOSENSE
TESTOUT
VAD
TX_ADSTR
VBACKUP
RF_ID
DCON
SPL
SPR
USB_HS_CLK
LED_MAINKEY
LED_WebShortcut
OPTOSENSE
TESTOUT
VAD
TX_ADSTR
VBACKUP
RF_ID
DCON
SPL
SPR
USB_HS_CLK
VAUDIO26
VDDE18
VDDE18
VAUDIO26 VBAT
LED_WebShortcut
Keypad
Keypad
VDIG
VDIG
VDDE18
VAUDIO26
OPTOSENSE
TESTOUT
VAD
TX_ADSTR
VBACKUP
RF_ID
AID_AD
AID_AD
ADC & DAC
VBAT
VDDE18
VAUDIO26
DCON
SPL
SPR
USB_HS_CLK
Connectivity
Connectivity
Page 12
Page 12
Page 14
ONSWAn
I2CDAT1
I2CCLK1
AID_AD
DCIO
MICN/AUXinR
MICP/AUXinL
FM_ANTENNA
SERVICEn
VBUS
ONSWAn
I2CDAT1
I2CCLK1
DCIO
MICN/AUXinR
MICP/AUXinL
FM_ANTENNA
VBUS
SERVICEn
ONSWAn
I2CDAT1
I2CCLK1
DCIO
MICN/AUXinR
MICP/AUXinL
FM_ANTENNA
VBUS
SERVICEn
MEASUREMENT POINTS
VDDE18
VAUDIO26
VMC18
VDIG
VBAT
VDIG VDDE18
VAUDIO26
VMC18
VBAT
VDDE18
VMC18
VBAT
Cards
Cards
VBAT
VMC18
VDDE18
Page 13
Page 13
Made for
Application & System Performance
Connectivity T
op
Document Nr Revision
1207-2092 Page B11 3
1225-4035 rev. 1
66 (122)
Page 67
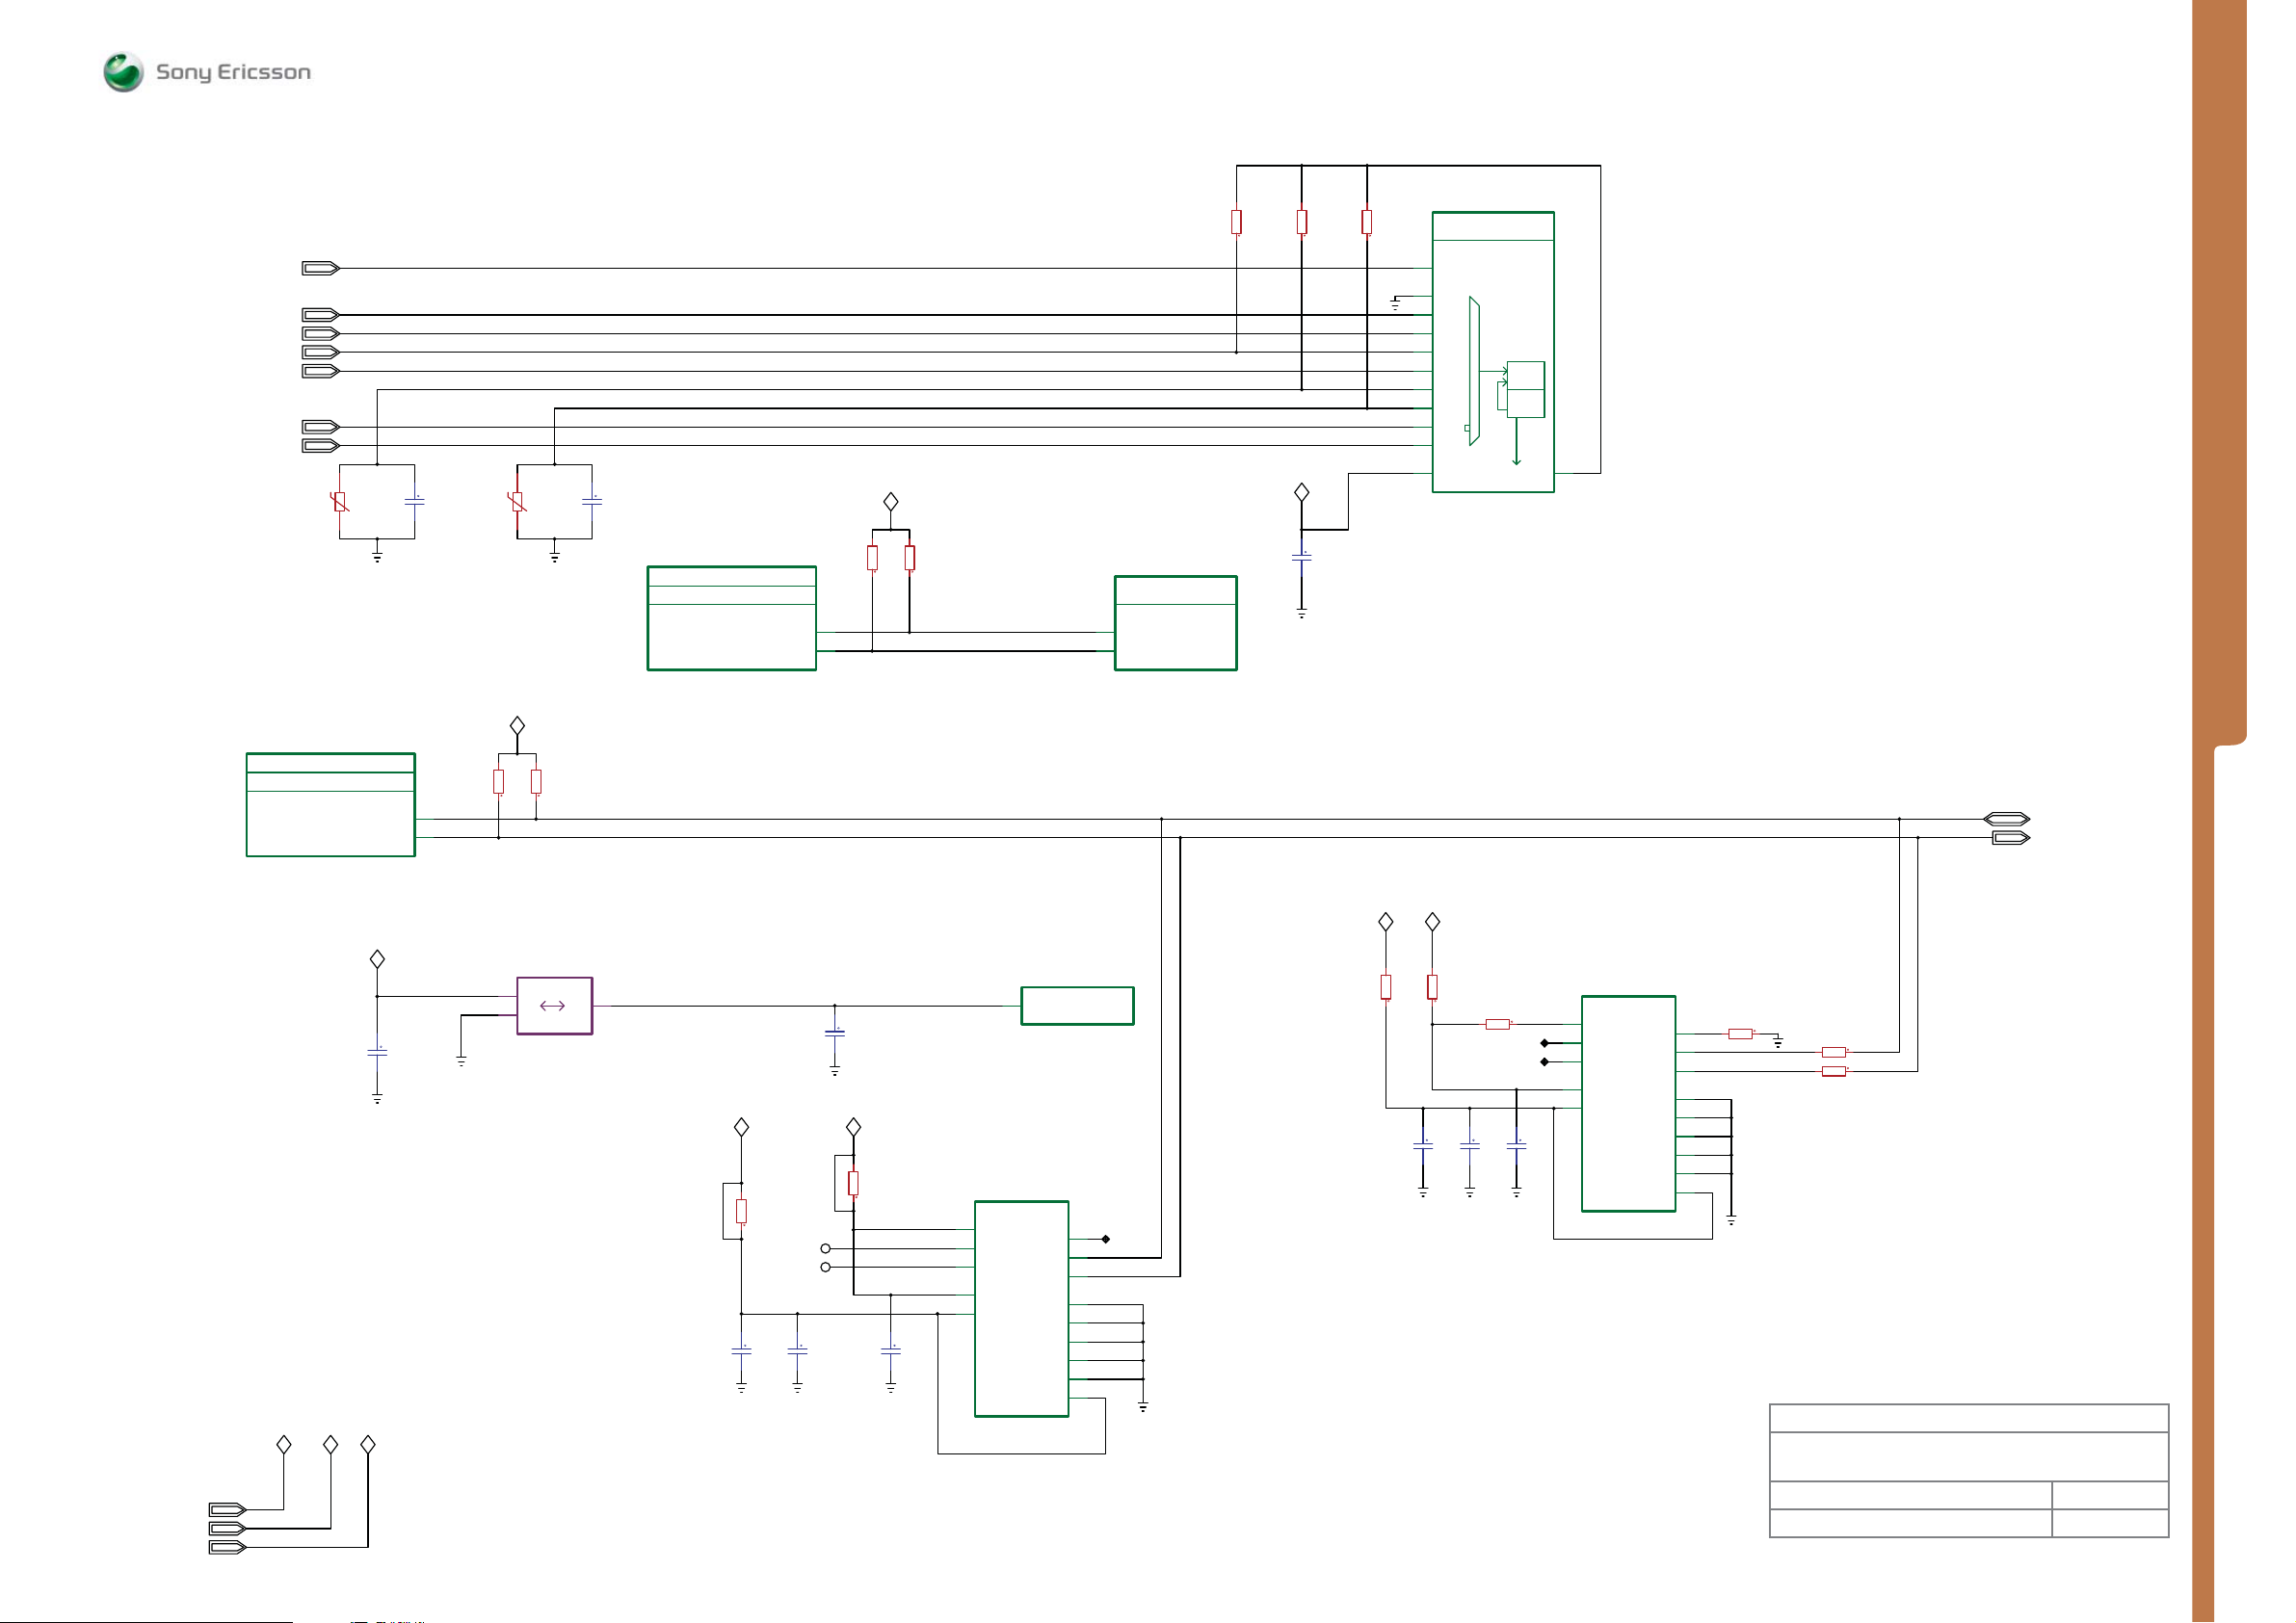
MEASUREMENT POINTS Connectiv ity - I2C & ADC
SEMC Troubleshooting Manual
G705 - W705 - W715
TX_ADSTR
AID_AD
VAD
RF_ID
TESTOUT
VBACKUP
OPTOSENSE
R2400
4.7Kohms
N2010
KAJSA_BOTTOM_APP_I2C_A_7_24
KAJSA_BOTTOM_CONNECTIVITY
APPLICATION_I2C_IF(APP#1)
DB3210ADT/7POPHF
1208-3871 1
I2CSDA2
I2CSCL2
W23
T17
C2400
33pF
<NM>
4.7Kohms
R2407
2.2Kohms
R2499
VDDE18
R2408
2.2Kohms
C2499
22pF
<NM>
N2010
KAJSA_BOTTOM_SH_I2C_A_6_24
KAJSA_BOTTOM_CONNECTIVITY
SHARED_I2C_IF(ACC+APP#0)
DB3210ADT/7POPHF
1208-3871 1
I2CDAT1
I2CCLK1
I2CSDA
I2CSCL
R2405
3.3Kohms
Y23
U18
TX_ADSTR
AID_AD
VAD
RF_ID
TESTOUT
RTEMP
OPTOTEMP
VBACKUP
OPTOSENSE
VDDE18
R2406
3.3Kohms
I2CDAT0
I2CCLK0
B13
C13
N2000
AB3100
1202-0639
Ericsson AB 3100
OP AND SERVICES
I2C IF
SDA
SCL
R2402
4.7Kohms
R2403
4.7Kohms
2
VAUDIO26
R2404
4.7Kohms
C2402
0.1uF
N2000
Ericsson AB 3100
OP AND SERVICES
GPADC AND AUTOADC
A5
TXON
A9
GPA0
B9
GPA1
C9
GPA2
B8
GPA3
A8
GPA4
C8
GPA5
D8
GPA6
B7
GPA7
C7
GPA12
C10
VDD_ADC
AB3100
1202-0639
LDOD
ADC
10bit
AUTO
CTL
AD_OUT
C11
2
MEASUREMENT POINTS
I2CDAT1
I2CCLK1
VDDE18
VAUDIO26
VDIG
VDDE18
VAUDIO26
VDDE18
VDIG
C4401
0.01uF
1
3
B4410
VCC
GND
MRUS51S
1000-8451
OUT
VDDE18VDIG
N2010
2
C4402
NM
0.01uF
VDIG
R2401
0ohms
<NM>
C2404
10uF
SP2400
SP2401
C2405
100nF
VDDE18
R2409
0ohms
<NM>
AX_INT1
AX_INT2
C2406
100nF
N24
N2411
ACCELEROMETER
8
CS
11
INT_1
9
INT_2
1
VDD_IO
14
VDD
LIS331DL
1202-1676
APPLICATION GPIO_04
DB3210ADT/7POPHF
1208-3871
SDO
SDA/SDI/SDO
SCL/SPC
GND
GND
GND
GND
GND_RES_10
VDD_RES_15
1
1
7
NC
6
4
5
12
13
16
10
15
0ohms
NM
0ohms
NM
R4416
R4417
10uF
NM
C4410
0ohmsR4412
NM
0.1uF
NM
NM
C4411
NC
NC
0.1uF
C4412
N4410 NM
ACCELEROMETER
7
CS
8
INT_1
SDA/SDI/SDO
9
INT_2
1
VDD_IO
6
VDD
GND_RES_11
VDD_RES_3
LIS302DL
1200-1223
SDO
SCL/SPC
GND
GND
GND
GND
12
13
14
10
11
0ohmsR4413
NM
2
4
5
3
NM
R4414 0ohms
R4415 0ohms
NM
Made for
Application & System Performance
Connectivity - I2C &
ADC
Document Nr Revision
1207-2092 Page B12 3
1225-4035 rev. 1
67 (122)
Page 68
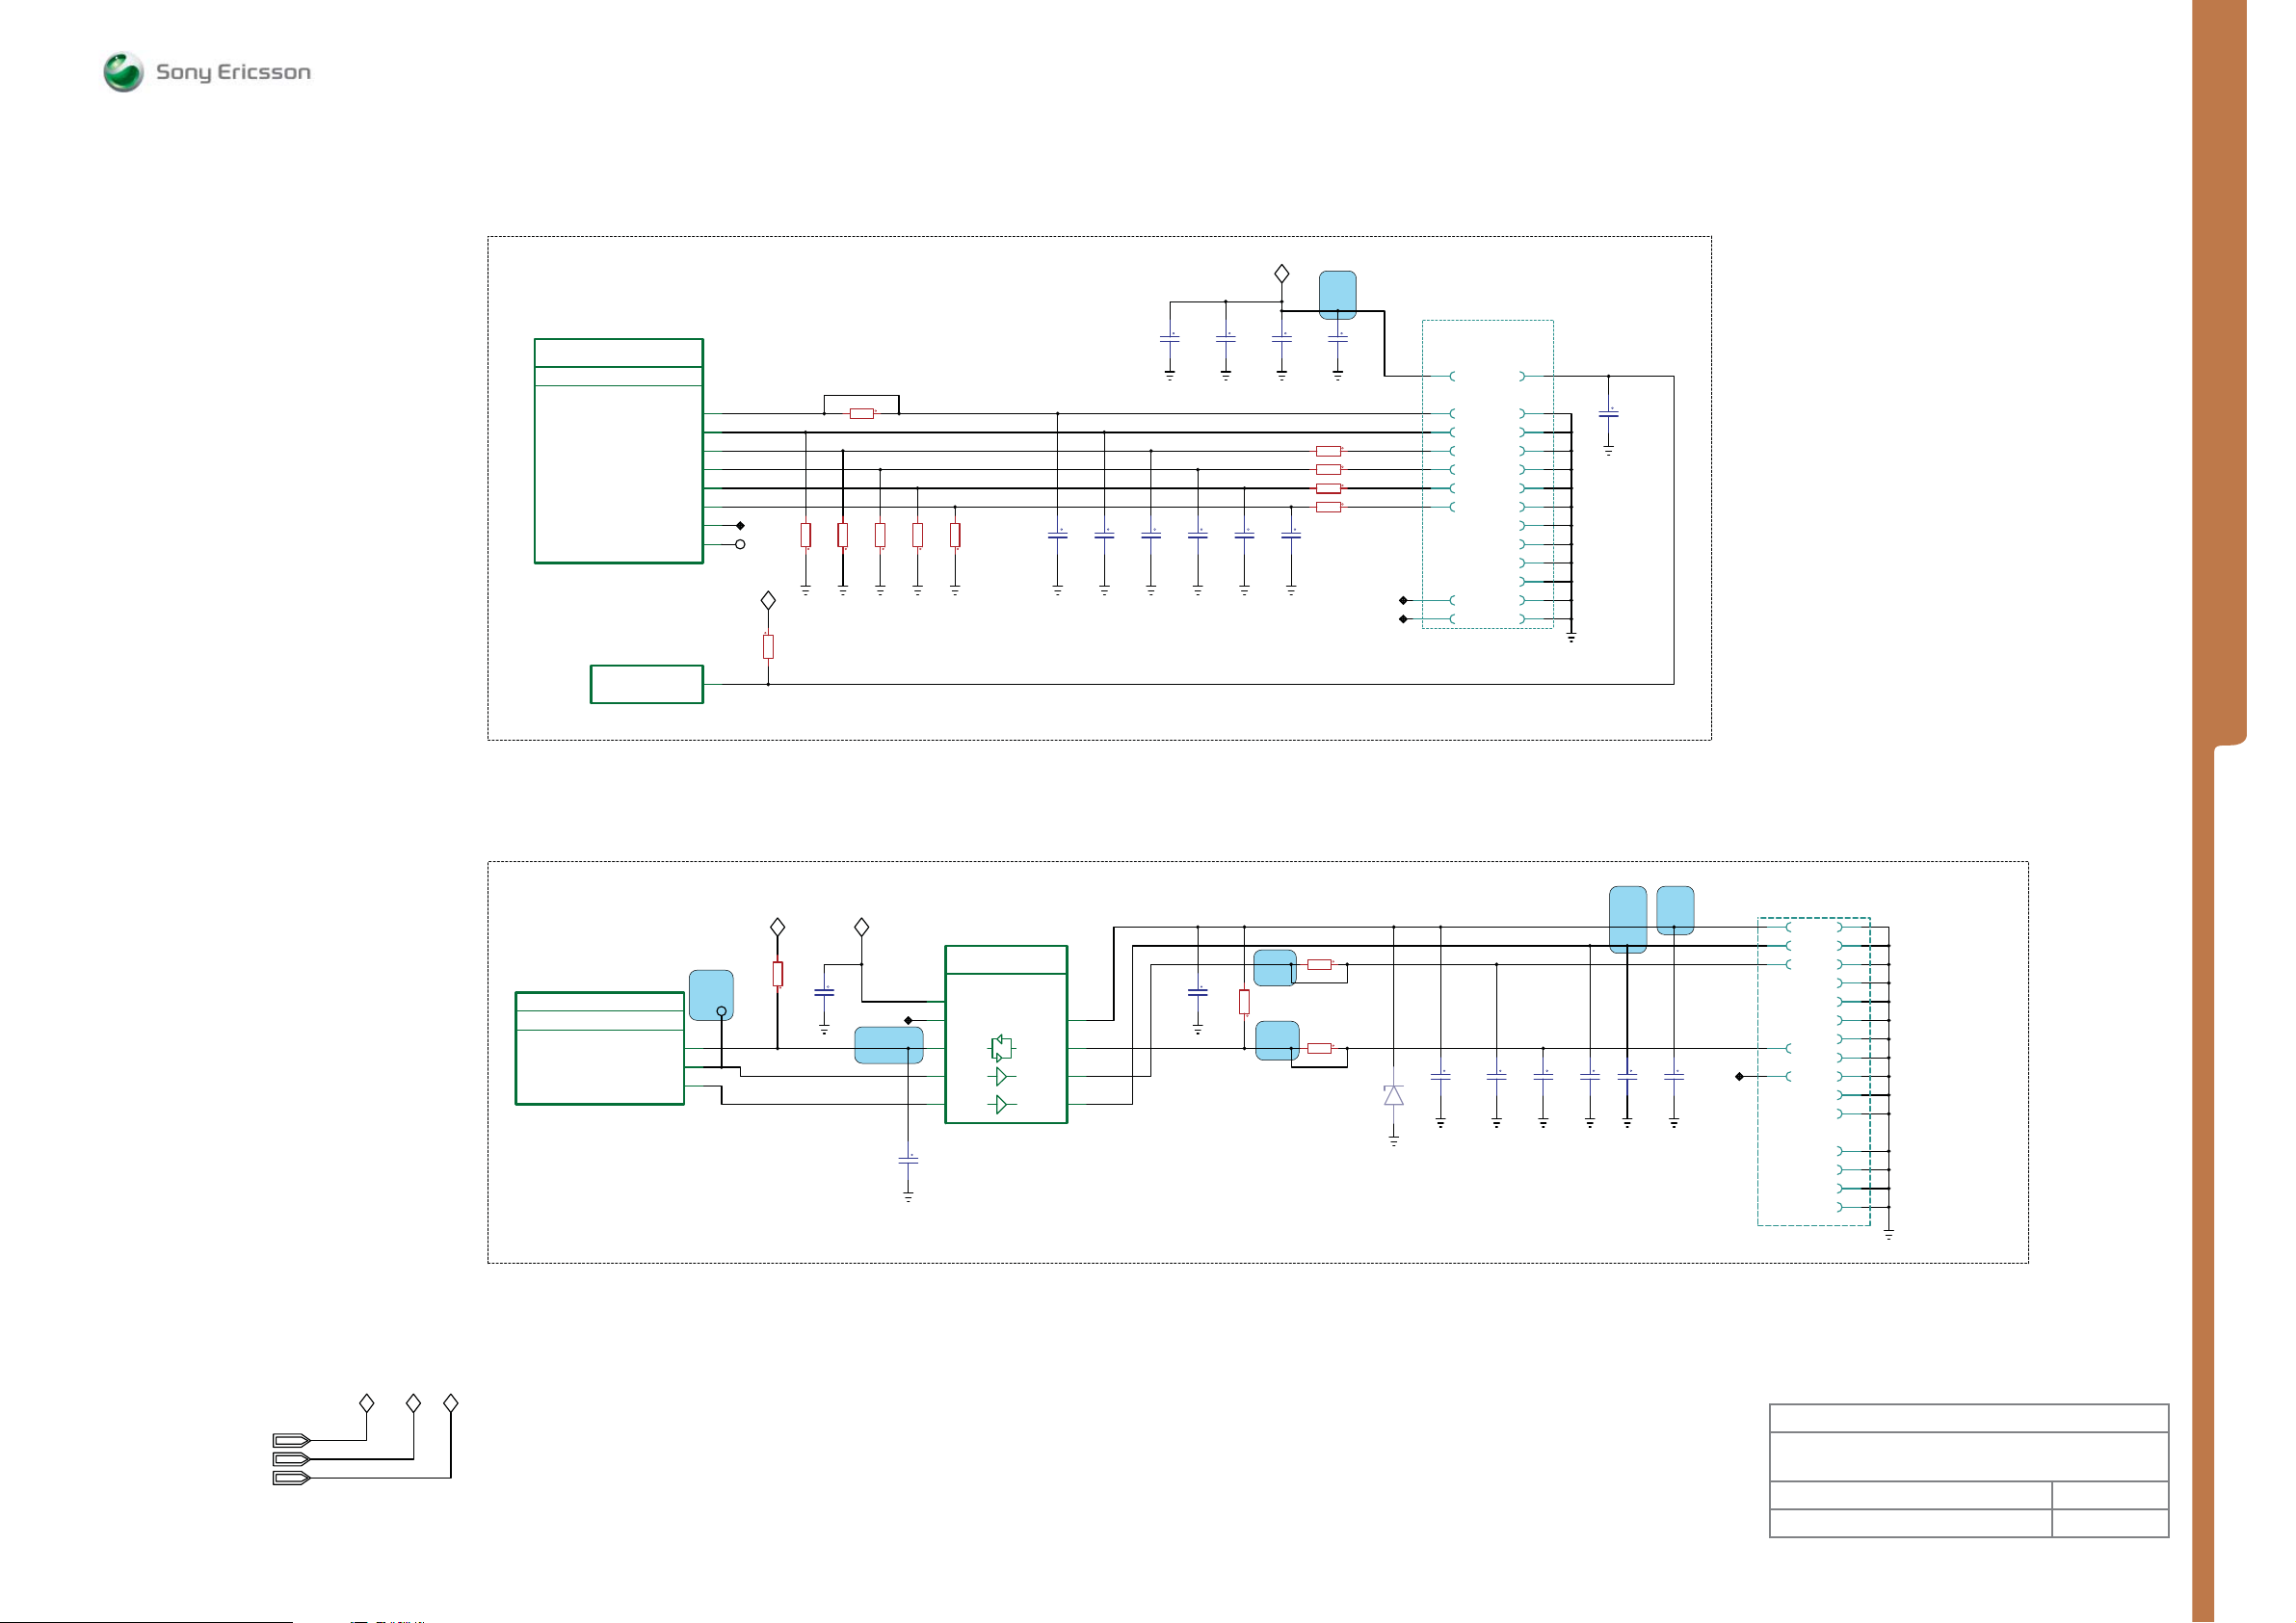
MEASUREMENT POINTS Connectivity - Cards
SEMC Troubleshooting Manual
G705 - W705 - W715
M2 IF
N2010
KAJSA_BOTTOM
MEMORY_CARD_A_19_24
KAJSA_BOTTOM_CONNECTIVITY
MMC/SD/MSPRO_IF
DB3210ADT/7POPHF
11208-3871
MCDAT0
MCDAT1
MCDAT2
MCDAT3
MCCMDDIR
MCDATADIR
N2010
APPLICATION GPIO_12
DB3210ADT/7POPHF
11208-3871
MCCLK
MCCMD
AA23
AB24
AA22
AC24
AD24
AC23
AC25
AB22
U16
MCCLK
MCCMD
MCDAT0
MCDAT1
MCDAT2
MCDAT3
NC
SP2411
VDDE18
R2417
R2422
470Kohms
M1005
R2426 0ohms
<NM>
R2418
100Kohms
R2419
100Kohms
R2420
100Kohms
R2421
100Kohms
100Kohms
33pF
C2423
VMC18
MP 47
X2403
1000-7708
M2
CONNECTOR
8
7
22
1
21
3
20
2
19
4
18
6
17
16
15
14
13
10
12
9
11
5
C2411
33pF
<NM>
MEASUREMENT POINTS
C2410
2.2uF
33pF
C2428
C2421
0.1uF
33ohmsR2427
33ohmsR2428
33ohmsR2429
33ohmsR2433
NC
NC
NM
33pF
NM
33pF
NM
C2424
C2425
39pF
NM
33pF
C2426
NM
2.2uF
33pF
NM
C2427
MSDETECT
C2422
C2429
VMC18
VDDE18
VBAT
VMC18
VDDE18
VBAT
SIM IF
N2010
KAJSA_BOTTOM_SIM_A_20_24
KAJSA_BOTTOM_CONNECTIVITY
SIM_INTERFACE
DB3210ADT/7POPHF
11208-3871
SDAT
SCLK
SRSTn
V11
AE7
V12
MP 35
SP2410
R2415
10Kohms
VDDE18
C2412
0.1uF
VBAT
MP 108
C2413
100pF
MP 14MP 20
N2000
ERICSSON AB 3100
OP AND SERVICES
VBAT_I
SIMOFF_N
SDAT
SCLK
SRST_N
AB3100
1202-0639
SIM IF
SIMLDO_OUT
SIMRST_N
SIMDAT
SIMCLK
C2414
1L2P
P1
N2
1N2M
2
1uF
M3
NC
N3
M1
MP 110
R2416
10Kohms
MP 111
R2410 0ohms
<NM>
R2411 0ohms
<NM>
CA
21
V2477
5.6V
1001-1864
DF2S5.6FS
C2415
33pF
<NM>
C2416
33pF
<NM>
C2417
33pF
<NM>
C2418
33pF
<NM>
C2419
0.01uF
C2420
1uF
SIMVCC
SIMRSTn
SIMCLK
SIMDAT
NC
X2402
A7
B7
B9
A6
A8
1200-9864
A10
B10
A9
B8
B6
A3
B3
A2
B2
A1
B1
Z1
Z2
Z3
Z4
1
Made for
Application & System Performance
Connectivity - Cards
Document Nr Revision
1207-2092 Page B13 3
1225-4035 rev. 1
68 (122)
Page 69
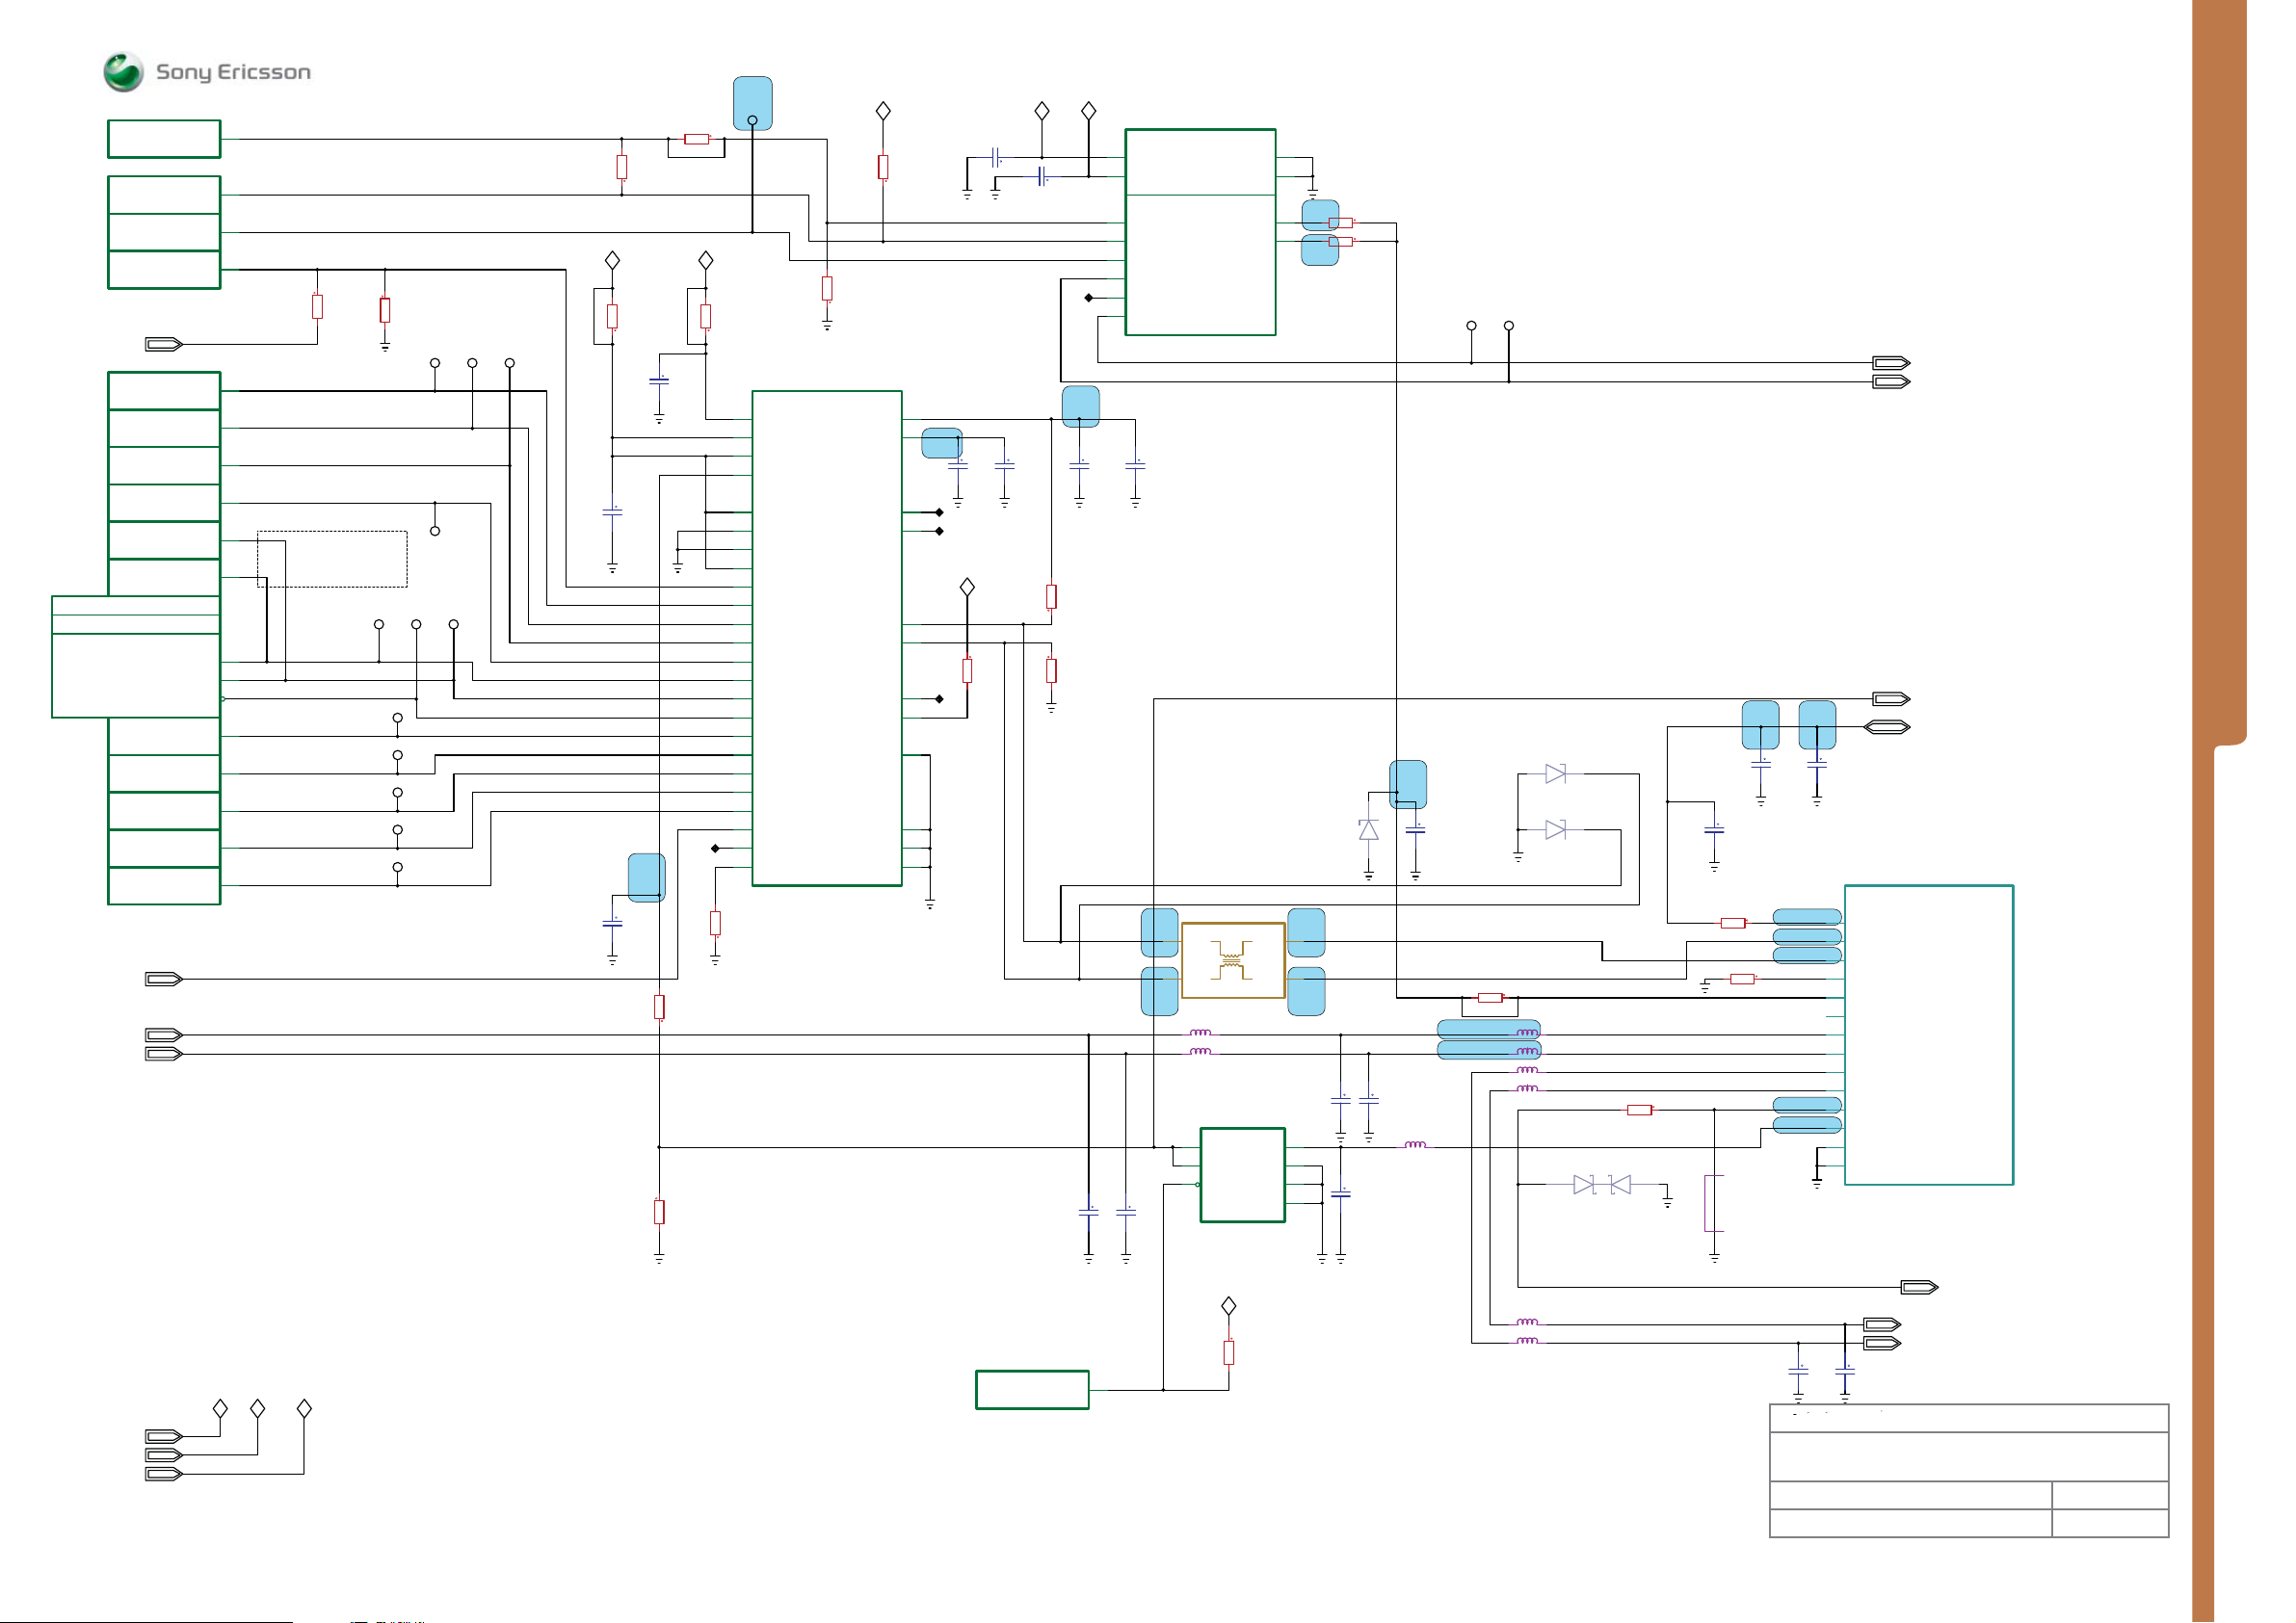
N2010
APPLICATION GPIO_01
APPLICATION GPIO_01
1208-3871
1
N2010
ACCESS GPIO_03
ACCESS GPIO_02
ACCESS GPIO_16
DB3210ADT/7POPHF
1208-3871 1
DCON
N2010
ACCESS GPIO_04
ACCESS GPIO_01
ACCESS GPIO_00
ACCESS GPIO_05
ACCESS GPIO_14
ACCESS GPIO_15
KAJSA_BOTTOM_USB_A_21_24
KAJSA_BOTTOM_CONNECTIVITY
USB TRANSCEIVER IF
USB_HS_CLK
USB_SE0_VM
USB_DAT_VP
USB_OE
ACCESS GPIO_18
ACCESS GPIO_06
ACCESS GPIO_07
ACCESS GPIO_08
ACCESS GPIO_09
DB3210ADT/7POPHF
1208-3871 1
SPR
SPL
MEASUREMENT POINTS Connectivity
MP 41
SP2432
N22
R4
U3
V10
DCON
V2
T9
R9
U12
W4
Y3
M9
N9
U9
AC6
V3
U5
T4
U4
USB_HSCHIP_SEL
R2430
0ohms
<NM>
USB_HSINCLK
USB_HSDIR
USB_HSSTP
USB_HSNXT
Chinese Charger
Detect
SP2423 SP2424
USB_HSDATA0
USB_HSDATA1
USB_HSDATA2
USB_HSDATA3
USB_HSDATA4
USB_HSDATA5
USB_HSDATA6
USB_HSDATA7
SP2426
SP2427
SP2428
SP2429
SP2430
R2431
100Kohms
SP2420 SP2422
SP2435
SP2425
SP2421
APP_LOG
CFMS
CTMS
VDDE18
<NM>
R2456
0ohms
0ohms
R2423
C2432
0.1uF
MP 62
C2433
1uF
NM
<NM>
VBAT
C2431
10uF
R2442
470ohms
R2444
100Kohms
0ohmsR2454
0ohms
<NM>
R2424
N2420
USB_OTG_TRANSIVER
VCC
B2
VCCIO_1
B5
VCCIO_2
F4
VBUS
C4
TEST
E1
CFG0
B4
CFG1
B3
CFG2
C3
CHIP_SEL
A4
CLOCK
E5
DIR
D6
STP
D5
NXT
B1
DATA0
A1
DATA1
A2
DATA2
A3
DATA3
A5
DATA4
A6
DATA5
B6
DATA6
C6
DATA7
F5
XTAL1
F6
C2
R2441
12Kohms
1%
XTAL2
RREF
ISP1508
1200-1694
NC
R2457
0ohms
NM
VDDE18
REG3V3
REG1V8
NC_1
NC_2
PSW_N
FAULT
GND_1
GND_2
GND_3
R2450
100Kohms
DP
DM
ID
3E3F
E6
MP 61
F1
F2
D1
C1
R2440
100Kohms
<NM>
D3
D4
E2
E4
C5
D2
SPR
SPL
VBUS
REG3_3V
REG1_8V
NC
NC
VDDE18
NC
C2430
C2434
0.1uF
0.1uF
VAUDIO26
C2449
C2435
4.7uF
0.1uF
VDDE18
NC
MP 65
R2445
120Kohms
R2446
360Kohms
DPext/DTMS
DMext/DFMS
C2447
2.2nF
C2436
0.1uF
A3
D3
A1
B1
C1
D1
D2
A2
N2422
VDD
VDIG
ACB/RID
APP_LOG
CFMS/ID_SOURCE
CTMS
SERVICE_N
SERVICE
ADC
IP4826CX12/LF
1201-4120
2
C2437
4.7uF
Z2400
MP 71
4
MP 73
TCM1210-900-2P
1201-6833
L2405
L2408
C2448
2.2nF
ELINA
100MHz
100MHz
N2421
4
OUT
5
OUT
6
FLAG GND
NCP360
1200-6309
GND
GND
RID_OUT
ACB/RID_IN
NCP360
GND_SLUG
B2
C2
R2434
1Kohms
MP 125
MP 122
1%
R2437
100ohms
1%
AID_AD
SERVICEn
SP2434
SP2433
C3
B3
MP 17MP 16
C2440
V2415
21
MP 10
12
CA
V2417
BZX585-C12
1200-5130
MP 70
23
P2P3
1
P1P4
MP 72
C2451
1nF
NM
3
IN
1
EN
7
C2439
2
1uF
25V
C2438
33pF
<NM>
C2452
1nF
NM
220
L2452
BLM18EG221SN1
1001-1896
DPext/DTMS_1
DMext/DFMS_1
<NM>
1005
MP 9
MP 8
0ohmsR2448
L2404
L2403
L2402
L2401
ESD9L5.0ST5G
1201-8440
V2416
ESD9L5.0ST5G
1201-8440
100MHz
100MHz
100MHz
100MHz
CA
12
CA
V2413
1201-2253
R2451 0ohms
2A1A
21
L2406
C2444
10pF
<NM>
0ohmsR2490
0ohmsR2449
1200-6898
BLM15EG221SN1
1uF
25V
MP 13
MP 12
MP 11
MP 7
MP 6
C2441
0.01uF
25V
X2405
12
11
10
9
8
7
6
5
4
3
2
1
Z1
Z2
8195-3512-LN80
1205-9723
SEMC Troubleshooting Manual
G705 - W705 - W715
AID_AD
SERVICEn
MEASUREMENT POINTS
VBUS
DCIO
SYSTEM CONNECTOR
DCIO
D-/DFMS
D+/DTMS
GND
AID/ACB/Vppflash
VIDEO/STROBE
SPEAKER_R_Debug-RX
SPEAKER_L_Debug-TX
MICN/AUXinR
MICP/AUXinL
SPEAKER_REF/Line_Ref/FM_Antenna
VBUS
MEC PIN
MEC PIN
1
VBAT
VDDE18
VAUDIO26
VBAT VDDE18
VAUDIO26
N2010
ACCESS GPIO_23
DB3210ADT/7POPHF
1208-3871 1
R23
OVP_FLAG
VDDE18
R2447
100Kohms
L2453
L2455
100nH
100nH
M1005
M1005
MICP/AUXinL
MICN/AUXinR
FM_ANTENNA
MICP/AUXinL
MICN/AUXinR
C2442
C2443
0.01uF
0.01uF
Made for
Application & System Performance
Connectivity
Document Nr Revision
1207-2092 Page B14 3
1225-4035 rev. 1
69 (122)
Page 70
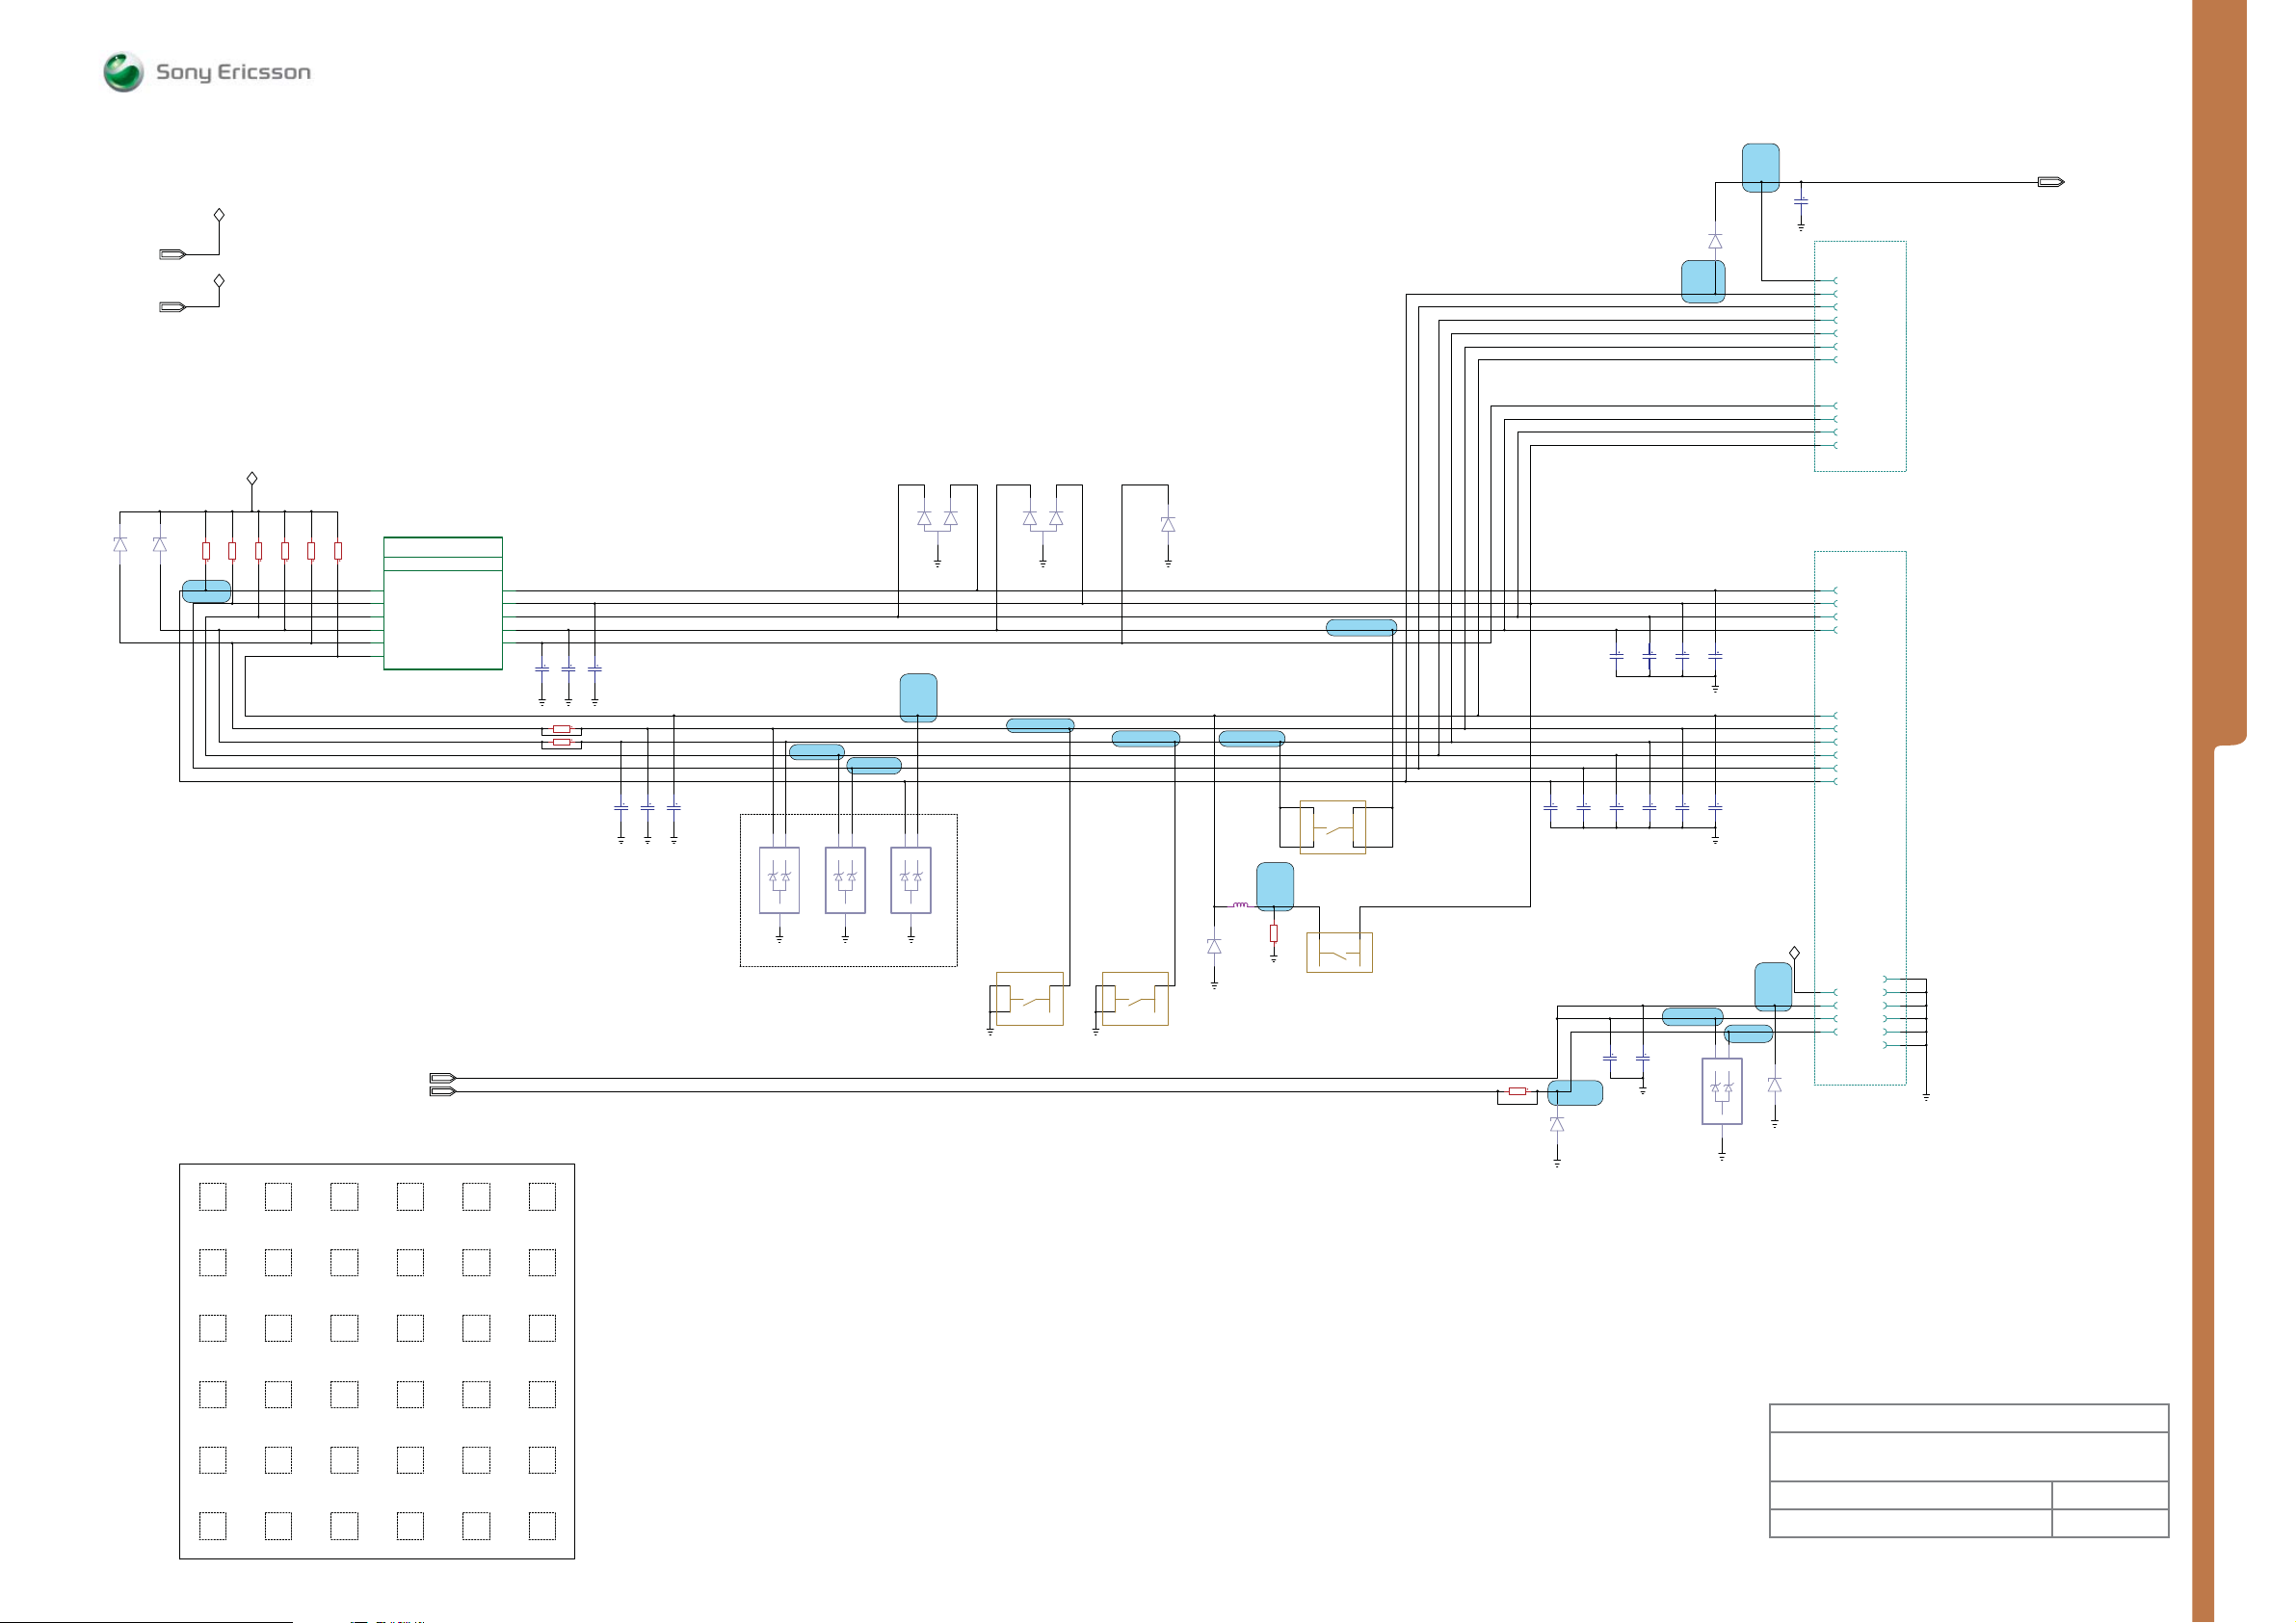
MEASUREMENT POINTS Connectiv ity - Keypad
SEMC Troubleshooting Manual
G705 - W705 - W715
VDDE18
VBAT
21
1001-1864
DF2S5.6FS
V2481CAV248212DF2S5.6FS
5.6V
KEYOUT0
VDDE18
VBAT
VDDE18
CA
R2470
R2471
R2472
R2473
10Kohms
10Kohms
R2474
10Kohms
10Kohms
10Kohms
1001-1864
5.6V
MP 54
R2475
10Kohms
N2010
KAJSA_BOTTOM
KEYPAD_IF_A_18_24
KAJSA_BOTTOM_CONNECTIVITY
KEYPAD_INTERFACE
L10
KEYIN0
M10
KEYIN1
V15
KEYIN2
U14
KEYIN3
U22
KEYIN4
N10
KEYIN5
DB3210ADT/7POPHF
1208-3871 1
LED_MAINKEY
LED_WebShortcut
Y24
KEYOUT0
W22
KEYOUT1
M11
KEYOUT2
K11
KEYOUT3
N11
KEYOUT4
KEYIN5 KEYIN5
KEYIN2
KEYIN1
KEYIN0 KEYIN1 KEYIN2 KEYIN3 KEYIN4 KEYIN5
361
Num Num Num
--
-
R2476
R2477
C2460
470pF
NM
C2461
470pF
NM
0ohms
0ohms
C2463
470pF
NM
<NM>
<NM>
C2468
33pF
<NM>
C2469
33pF
<NM>
C2470
33pF
<NM>
MP 53
MP 52
2
1
C1
C2
1200-9617
A
V2473
DFA3A5.6FV
3
DIODE V;ZENER_ESD_PROTECTION_DIODE
ESD protection for keypad
1
2
C1
C2
1200-9617
A
V2474
DFA3A5.6FV
3
NM
DIODE V;ZENER_ESD_PROTECTION_DIODE
V2471
NM
DF3A3FV
1000-7497
MP 51
1
2
C1
C2
1200-9617
A
V2475
DFA3A5.6FV
3
DIODE V;ZENER_ESD_PROTECTION_DIODE
GND
LED_WebShort cut
S2405
b
a
EVQ9P301
1001-0060
MP 103
VOL -
DF3A3FV
1000-7497
d
c
V2472
MP 83
NM
CA
V2470
1001-0075
MP 82
12
CA
V2476
GDZT2R3.9
1201-8626
NM
S2403
b
a
EVQ9P301
1001-0060
d
c
JPM1990-4901F
1206-9606
S2404
MP 81
d
c
b
a
NM
NM
NM
C2484
33pF
C2485
33pF
NM
NM
1
C2480
33pF
C2486
33pF
NM
C2481
C2482
33pF
33pF
GND
NM
NM
C2487
C2488
33pF
33pF
GND
LED_MAINKEY
MP 88
NM
NM
C2491
C2492
33pF
33pF
1200-9617
DFA3A5.6FV
DIODE V;ZENER_ESD_PROTECTION_DIODE
<NM>
0ohmsR2436
MP 94
12
CA
V2408
DF2S5.6FS
5.6V
1001-1864
KEYOUT4
KEYIN4KEYIN4
MP 104
100MHz
CA
21
S2406
VOL +
b
a
EVQ9P301
1001-0060
GND
V2480
d
c
5.6V
KEYIN3KEYIN3
MP 80
KEYIN2 KEYIN2
KEYIN1 KEYIN1
KEYIN0 KEYIN0KEYIN0
MP 27
L2409
1.8k
0ohms
NM
R2004
1001-1864
DF2S5.6FS
KEYIN0
KEYIN1
KEYIN2
KEYOUT4
Navigation Keypad
KEYOUT0
KEYOUT1
KEYOUT2
KEYOUT3
NM
C2483
33pF
NM
C2489
33pF
VBAT
MP 46
MP 89
1
2
V4204
C1
C2
3
GND
CA
21
V4205
1001-1864
DF2S5.6FS
5.6V
A
GND
ONSWAn
C2472
33pF
X4200
SLIDER FLEX
CONNECTOR
B2
A10
A9
A8
A7
A6
A5
A1
A2
A3
A4
(#4/7)1206-2940
1
70-pin
X2401
KEYFLEX
CONNECTOR
B2
B3
B4
B5
B6
A6
A5
A4
A3
A2
A1
B8
B1
B7
Z1
A7
Z2
A8
Z3
Z4
1214-7370
16pin
Numeric Keypad
ONSWAn
MEASUREMENT POINTS
KEYOUT1
KEYOUT2
KEYOUT3
KEYOUT4
GND
Green
Num
Active
Menu
Nav
Rock
Down
Nav Nav Nav Nav Nav Nav
Red
ON/OFF
Nav
-
Num
47 #
Num Num
Rock
Left
Soft
Left
Nav
Rock
Up
-
-
vaNvaN
CLR
Num
Cam
Snap
Main
Rock
Push
Rock
Right
Vol+ Vol-
Main Main
9
Num
-
Num Num
Walk
man
Num
Soft
Right
8502
*
*
Made for
Application & System Performance
Connectivity - Keypad
Document Nr Revision
--
1207-2092 Page B15 3
1225-4035 rev. 1
70 (122)
Page 71
MEASUREMENT POINTS Imaging Top
VDDE18 VCAMSD18 VCAMIO18 VCAMSA28
VCAMSA28
VCAMIO18
VCAMSD18
VDDE18
Page 3
Page 3
SEMC Troubleshooting Manual
G705 - W705 - W715
I2CCLK1
I2CDAT1
CAMSYSCLK
I2CCLK1
I2CDAT1
CAMSYSCLK
VAUDIO26
VOPTO30
VDIG
VBATVDDE18
I2CCLK1
I2CDAT1
CAMSYSCLK
Camera
Camera
VBAT
VDDE18
VDIG
VOPTO30
VAUDIO26
Display
Display
Page 2
Page 2
LED_MAINKEY
LED_WebShortcut
OPTOSENSE
LED_MAINKEY
LED_WebShortcut
OPTOSENSE
MEASUREMENT POINTS
LED_MAINKEY
LED_WebShortcut
OPTOSENSE
VBAT
VDDE18
VOPTO30
VCAMSA28
VCAMIO18
VCAMSD18
VDIG
VAUDIO26
VBAT VDDE18 VOPTO30 VCAMSA28
VCAMIO18 VCAMSD18
VDIG
VAUDIO26
Made for
Imaging
p
To
Document Nr Revision
1207-2092 Page I1 3
1225-4035 rev. 1
71 (122)
Page 72
VBAT
C4206
0.1uF
A1
N2000
VDD_BOOST
AB3100
1202-0639
Ericsson AB 3100
MMI
BOOST LED DRIVER
SW_BOOST
BOOST_ISP
BOOST_ISN
VBOOST
2
MP 112
E3
C2
D2
B2
N2010
KAJSA_BOTTOM_DISPLAY_A_13_24
DB3210ADT/7POPHF
VBAT
L4222
MP 115
R4200
0ohms
<NM>
KAJSA_BOTTOM_IMAGING
KAJSA_BOTTOM
DISPLAY_INTERFACE
11208-3871
L4200
22uH
C4200
2.2uF
PDI_RESn
PDI_D0
PDI_D1
PDI_D2
PDI_D3
PDI_D4
PDI_D5
PDI_D6
PDI_D7
PDI_C0
PDI_C1
PDI_C2
PDI_C3
PDI_C4
PDI_C5
N2401
MEASUREMENT POINTS Imaging - Display
VAUDIO26
VDDE18
VDIG
R4221
R4220
LCD_RESn
LCD_RD
LCD_DAT4
LCD_DAT3
LCD_DAT2
LCD_DAT1
L17
K24
K22
J23
M18
H23
J24
M17
H24
L23
M22
L24
K23
N18
L22
VBOOST
MP 36
TP4200
1DG
D2
S
R4202
150mohms
CA
C4202
330pF
R4203
910Kohms
1%
R4204
62Kohms
1%
25V
VBAT
1001-0077
SCH2819
R4201
0ohms
<NM>
C4201
33pF
<NM>
C4203
1uF
25V
LCD_VSYNC
LCD_DAT7
LCD_DAT6
LCD_DAT5
LCD_DAT0
LCD_RS
LCD_CS
LCD_WR
Z4200
MP Z4200 Pin 1-8
EMI-FILTER
1
2
I2-1
3
I3-1
4
I4-1
GND_1 GND_2
KNA16400 1200-1824
Z4201
MP Z4201 Pin 1-8
EMI-FILTER
1
2
I2-1
3
I3-1
4
I4-1
GND_1 GND_2
Z4202
MP Z4200 Pin 1-8
EMI-FILTER
1
2
I2-1
3
I3-1
4
I4-1
GND_1 GND_2
5
O1-2I1-1
6
O2-2
7
O3-2
8
O4-2
109
5
O1-2I1-1
6
O2-2
7
O3-2
8
O4-2
019
1200-1824KNA16400
5
O1-2I1-1
6
O2-2
7
O3-2
8
O4-2
019
1200-1824KNA16400
MP 37
TP4201
33pF
C2493
C4234
33pF
NM
33pF
C2494
<NM>
<NM>
0ohms
0ohms
C4235
33pF
LED_NAV1
C4213
0.1uF
LCD_D4
LCD_D3
LCD_D2
LCD_D1
LCD_VSYNC_1
LCD_D7
LCD_D6
LCD_D5
LCD_D0
LCD_RS_1
LCD_CS_1
LCD_WR_1
VBOOST
C4210
33pF
25V
<NM>
NM
0ohms
NM
R4224
C4214
0.1uF
C4211
33pF
25V
<NM>
MP 50
NMCANM
21
V4206
1001-1864
DF2S5.6FS
5.6V
MP 49
V420712DF2S5.6FS
LED_LCD
CA
5.6V
X4200
SLIDER FLEX
CONNECTOR
A17
A16
A18
B5
B12
B11
B10
B9
A19
B15
B14
B13
B8
B7
B6
B4
A14
A15
VBAT
A11
A12
1206-2940 (#1/7)
70-pin
1001-1864
1
A28
A29
B34
A34
B35
A35
Z1
Z2
Z3
Z4
B1
B16
A20
A21
B25
B28
B30
A31
B32
A30
B33
B3
LED_Walkman
SEMC Troubleshooting Manual
G705 - W705 - W715
VOPTO30
C4229
0.1uF
C4219
33pF
<NM>
OPTOSENSE
OPTOSENSE
MEASUREMENT POINTS
VBAT
VDDE18
VDIG
VOPTO30
VAUDIO26
VBAT
VDDE18
C2407
33pF
MP 15
b
1
B
2
LEADFREE
C
E
6
V4203
RN1910AFS
1211-3641
0.1uF
C2403
1
c
e
1
VDIG
180ohms
X2402
R2432
1200-9864
3
V2402
RN1107_LEADFREE
1000-8367
2
MP 21
A5
B5
12
V2483
MP 18
VBAT
Picture_Light_LED
CA
DF2S5.6FS
1001-1864
5.6V
R4230
<NM>
0ohms
X2402
A4
B4
1200-9864
R2001 0ohms
<NM>
LED_MAINKEY
LED_WebShort cut
C2490
NM
33pF
LED_MAINKEY
LED_WebShortcut
3
N2000
Ericsson AB 3100
MMI
INDICATOR LED CONTROL
MP 24
C2003
TP4203
100MHz
L4201
1k
33pF
L4202
1k
Radio components
A2
100MHz
B2000
VIBRATOR
1
A
2
MP 25
B
3
GND
BSY-3242
2
1202-9271
VAUDIO26
VOPTO30
VDIG
MP 29
C2001
4.7pF
NM
C2002
NM
1uF
1SS361
K1/K2
NM
V4202
1000-0402
Vibrator
A1
C4208
2.2uF
VIBRATOR CONTROL
VIBR_OUT
AB3100
1202-0639
N2010
APPLICATION GPIO_02APPLICATION GPIO_02
DB3210ADT/7POPHF
1208-3871
LED1_N
LED2_N
LED3_N
LED4_N
LED5_N
LED6_N
VDD_VIBR
1
B4
A4
D3
C3
A3
B3
VBAT
41B41C
2
C4209
0.1uF
R18
C
B
5
E
R2435 0ohms
<NM>
V4203
RN1910AFS
1211-3641
4
Tally_LED_C
1
NM
Made for
Imaging
Display
Document Nr Revision
1207-2092 Page I2 3
1225-4035 rev. 1
72 (122)
Page 73
MEASUREMENT POINTS Imaging - Camera
SEMC Troubleshooting Manual
G705 - W705 - W715
CAMSYSCLK
I2CDAT1
I2CCLK1
N2010
APPLICATION GPIO_13
DB3210ADT/7POPHF
1208-3871
1
I2CDAT1
C4320
0.1uF
VCAMIO18
C4301
0.1uF
VCAMSA28
MP 32
R4303
0ohms
<NM>
X4300
MAIN CAMERA
SOCKET
8
7
21
17
10
22
12
20
2
19
9
5
15
14
I2CCLK1
CAMSYSCLK
13
23
3
24
4
1
6
11
16
18
Z1
Z2
Z3
Z4
Z5
Z6
Z7
Z8
1
C4304
0.1uF
C4308
22pF
NM
I2CCLK1I2CCLK1
24-pin
1206-5418
R4304
<NM>
VCAMSA28
0ohms
C4305
0.1uF
0ohmsR4302
<NM>
VCAMSD18
C4306
0.1uF
C4309
22pF
CIHSYNC
CIVSYNC
CIVSYNC
CIHSYNC
33pF
33pF
33pF
C4336
C4338
C4340 33pF
X4200
SLIDER FLEX
CONNECTOR
A27
A25
A26
A23
A22
B17
B21
B18
B22
B19
B23
B20
B26
B24
B27
B31
NM
33pF
33pF
33pF
C4335
C4337
C4339
CI_RSTn CI_RSTn
33pF
C4352
33pF
33pF
C4334
C4330
C4332
33pF
33pF
C4333
C4331
CIHSYNC
CIVSYNC
CID0
CID1
CID2
CID3
CID4
CID5
CID6
CID7
33pF
33pF
33pF
NM
NM
NM
33pF
C4350
NM
C4351
33pF
C4349
33pF
C4348
NM
C4347
33pF
NM
NM
33pF
33pF
C4346
C4342
NM
NM
NM
C4345
C4341
C4344
100nF
K18
F23
H22
G24
F24
G23
G22
J22
H25
E22
SP4300
N2010
KAJSA_BOTTOM_CAMERA_A_12_24
KAJSA_BOTTOM_IMAGING
KAJSA_BOTTOM
CAMERA_INTERFACE
CI_PCLK
CI_HSYNC
CI_VSYNC
CI_D0
CI_D1
CI_D2
CI_D3
CI_D4
CI_D5
CI_D6
CI_D7
DB3210ADT/7POPHF
11208-3871
CI_RESn
81L52F
MEASUREMENT POINTS
VCAMSD18
CAM_PWDN
R24
0ohms
R4301
<NM>
R4300
0ohms
<NM>
VCAMSA28
VCAMIO18
VCAMSD18
VDDE18
N2010
APPLICATION GPIO_14
DB3210ADT/7POPHF
1208-3871
1
K16
VCAMIO18VCAMSA28 VCAMSD18
VDDE18
70-pin
R2283
A24
1
100Kohms
VDDE18
C2600
0.1uF
N2600
1
A
4
Y
3
&
OE
52
VCC GND
TC7SG125AFS
1202-0076
1
0ohms
B29
(#2/7)1206-2940
R4305
<NM>
33pF
C4343
CIPCLK
<NM>
R2491
1Mohms
Made for
Imaging
Camera
Document Nr Revision
1207-2092 Page I3 3
1225-4035 rev. 1
73 (122)
Page 74
MEASUREMENT POINTS Access Top
SEMC Troubleshooting Manual
G705 - W705 - W715
MCLKREQ
AGPS_RSTn
AGPS_CLK
N2000
Ericsson AB 3100
OP AND SERVICES
DAC
C4
DAC_CLK
B5
DAC_STR
C5
DAC_DAT
AB3100
1202-0639
N2010
KAJSA_BOTTOM_ACCESS_A_14_24
KAJSA_BOTTOM_ACCESS
RADIO_CTRL_IF
EGG_RADIO_IF
WCDMA/GSM_RADIO_IF
GSM_PA_ENABLE
WCDMA_RADIO_IF
AB16
ADC_I1_NEG
AC16
ADC_I1_POS
AC15
ADC_Q1_NEG
AD15
ADC_Q1_POS
AD14
ADC_I2_NEG
AC14
ADC_I2_POS
AC13
ADC_Q2_NEG
AB13
ADC_Q2_POS
AB11
TX_POW
DB3210ADT/7POPHF
1208-3871 1
AGPS_RSTn AGPS_RSTn
AGPS_CLK AGPS_CLK
RF_CTRL_DATA
RF_CTRL_CLK
RF_CTRL_STRB0
RF_CTRL_STRB1
RF_CTRL_STRB2
ANT_SW0
ANT_SW1
ANT_SW2
ANT_SW3
TX_ADC_STRB
RF_DATA_A
RF_DATA_B
RF_DATA_C
RF_DATA_STRB
RF_WCDMA_EN0
RF_WCDMA_EN1
RF_WCDMA_EN2
RF_WCDMA_EN3
RF_WCDMA_EN4
RF_WCDMA_EN5
DAC_I_NEG
DAC_I_POS
DAC_Q_NEG
DAC_Q_POS
AE6
AC8
AC7
AD7
NC
AB5
NC
AB8
AC9
AD8
AE8
AC2
AD5
AC5
AD3
AC3
AE11
AD10
AB9
AD9
AB4
NC
AC4
NC
AA5
NC
AD12
AD13
AD11
AC10
R1103
100Kohms
R1101
100Kohms
DACO_0
DACO_1
DACO_2
DACO_3
R1102
100Kohms
A7
B6
A6
C6
2
DC_DC_REF1
BIAS_CTRL
MCLKREQ
RADDAT
RADCLK
RADSTR
ANTSW0
ANTSW1
ANTSW2
ANTSW3
QDATA_AMP_MSB
IDATA_FREQ_MSB
AMP_LSB_FREQ_LSB
DCLK_DATSTR
WPA0_EN
WPA1_EN
WPA2_EN
WDETON
WTX_IB
WTX_IA
WTX_QB
WTX_QA
WTXPOWDET
WRX_QA
WRX_QB
WRX_IA
WRX_IB
TX_ADSTR
TX_ADSTR
RTCCLK
VBAT
VDDE18
VBATVDDE18
VDDE18
VBAT
TX_ADSTR
AGPS_RSTn
AGPS_CLK
RTCCLK
AGPS
AGPS
QDATA_AMP_MSB
IDATA_FREQ_MSB
AMP_LSB_FREQ_LSB
DCLK_DATSTR
WPA0_EN
WPA1_EN
WPA2_EN
WDETON
GSM & UMTS
R1100
4.7Kohms
<NM>
Page 2
VBAT
VDDE18
DC_DC_REF1
BIAS_CTRL
MCLKREQ
RADDAT TESTOUT
RADCLK MCLK
RADSTR MCLKSEC
ANTSW0
ANTSW1
ANTSW2
ANTSW3
Page 4
WTXPOWDETWTX_QA
RF_ID
OPTO_EN
WRX_IB
WRX_IAWTX_IB
WRX_QBWTX_IA
WRX_QAWTX_QB
RF_ID
OPTO_EN
TESTOUT
MCLK
MCLKSEC
RF_ID
OPTO_EN
TESTOUT
MCLK
MCLKSEC
TX_ADSTR
MEASUREMENT POINTS
BT_CLK
RTCCLK
BTRESn
WLAN_CLK
VDDE18
VBT27
WLAN_VO18
WLAN_VO33
WLAN_LDO18A
WLAN_LDO30
VBAT
VDDE18VDIGVBT27
BT_CLK
RTCCLK
BTRESn
WLAN_CLK WLAN_CLK
VBAT VDDE18 VDIG VBT27 WLAN_VO33 WLAN_LDO18A WLAN_LDO30
VDIG
WLAN_VO18
VDDE18
VDIG
VBT27
BT_CLK
RTCCLK
BTRESn
WLAN_BT_PRIORITY
WLAN_BT_STATE
WLAN_CLKREQ
ACC_SPI_DI
WLAN_CONFIRMn
Bluetooth
Page 3
Page 3
BT_CLKREQn
ACC_SPI_DO
ACC_SPI_CLK
BT_ANT
ACC_SPI_DO
ACC_SPI_CLK
BT_ANT
WLAN_BT_STATE
WLAN_BT_PRIORITY
RTCCLK
WLAN_CONFIRMn
ACC_SPI_DI
VDIG
WLAN_LDO30
WLAN_LDO18A
WLAN_VO33
WLAN_VO18
WLAN_VO18
WLAN_VO33
WLAN_LDO18A
WLAN_LDO30
VDIG
WLAN_CLK
ACC_SPI_DO
ACC_SPI_CLK
BT_ANT
WLAN_BT_STATE
WLAN_BT_PRIOR ITY
RTCCLK
WLAN
WLAN
BT_CLKREQn
Page 5
WLAN_SCLK
WLAN_CLKREQ
ACC_SPI_DI
WLAN_CONFIRMn
BT_CLKREQn
WLAN_SCLK
WLAN_CLKREQ
WLAN_SCLK
WLAN_CLKREQ
Made for
Access
p
To
Document Nr Revision
1207-2092 Page R1 3
1225-4035 rev. 1
74 (122)
Page 75
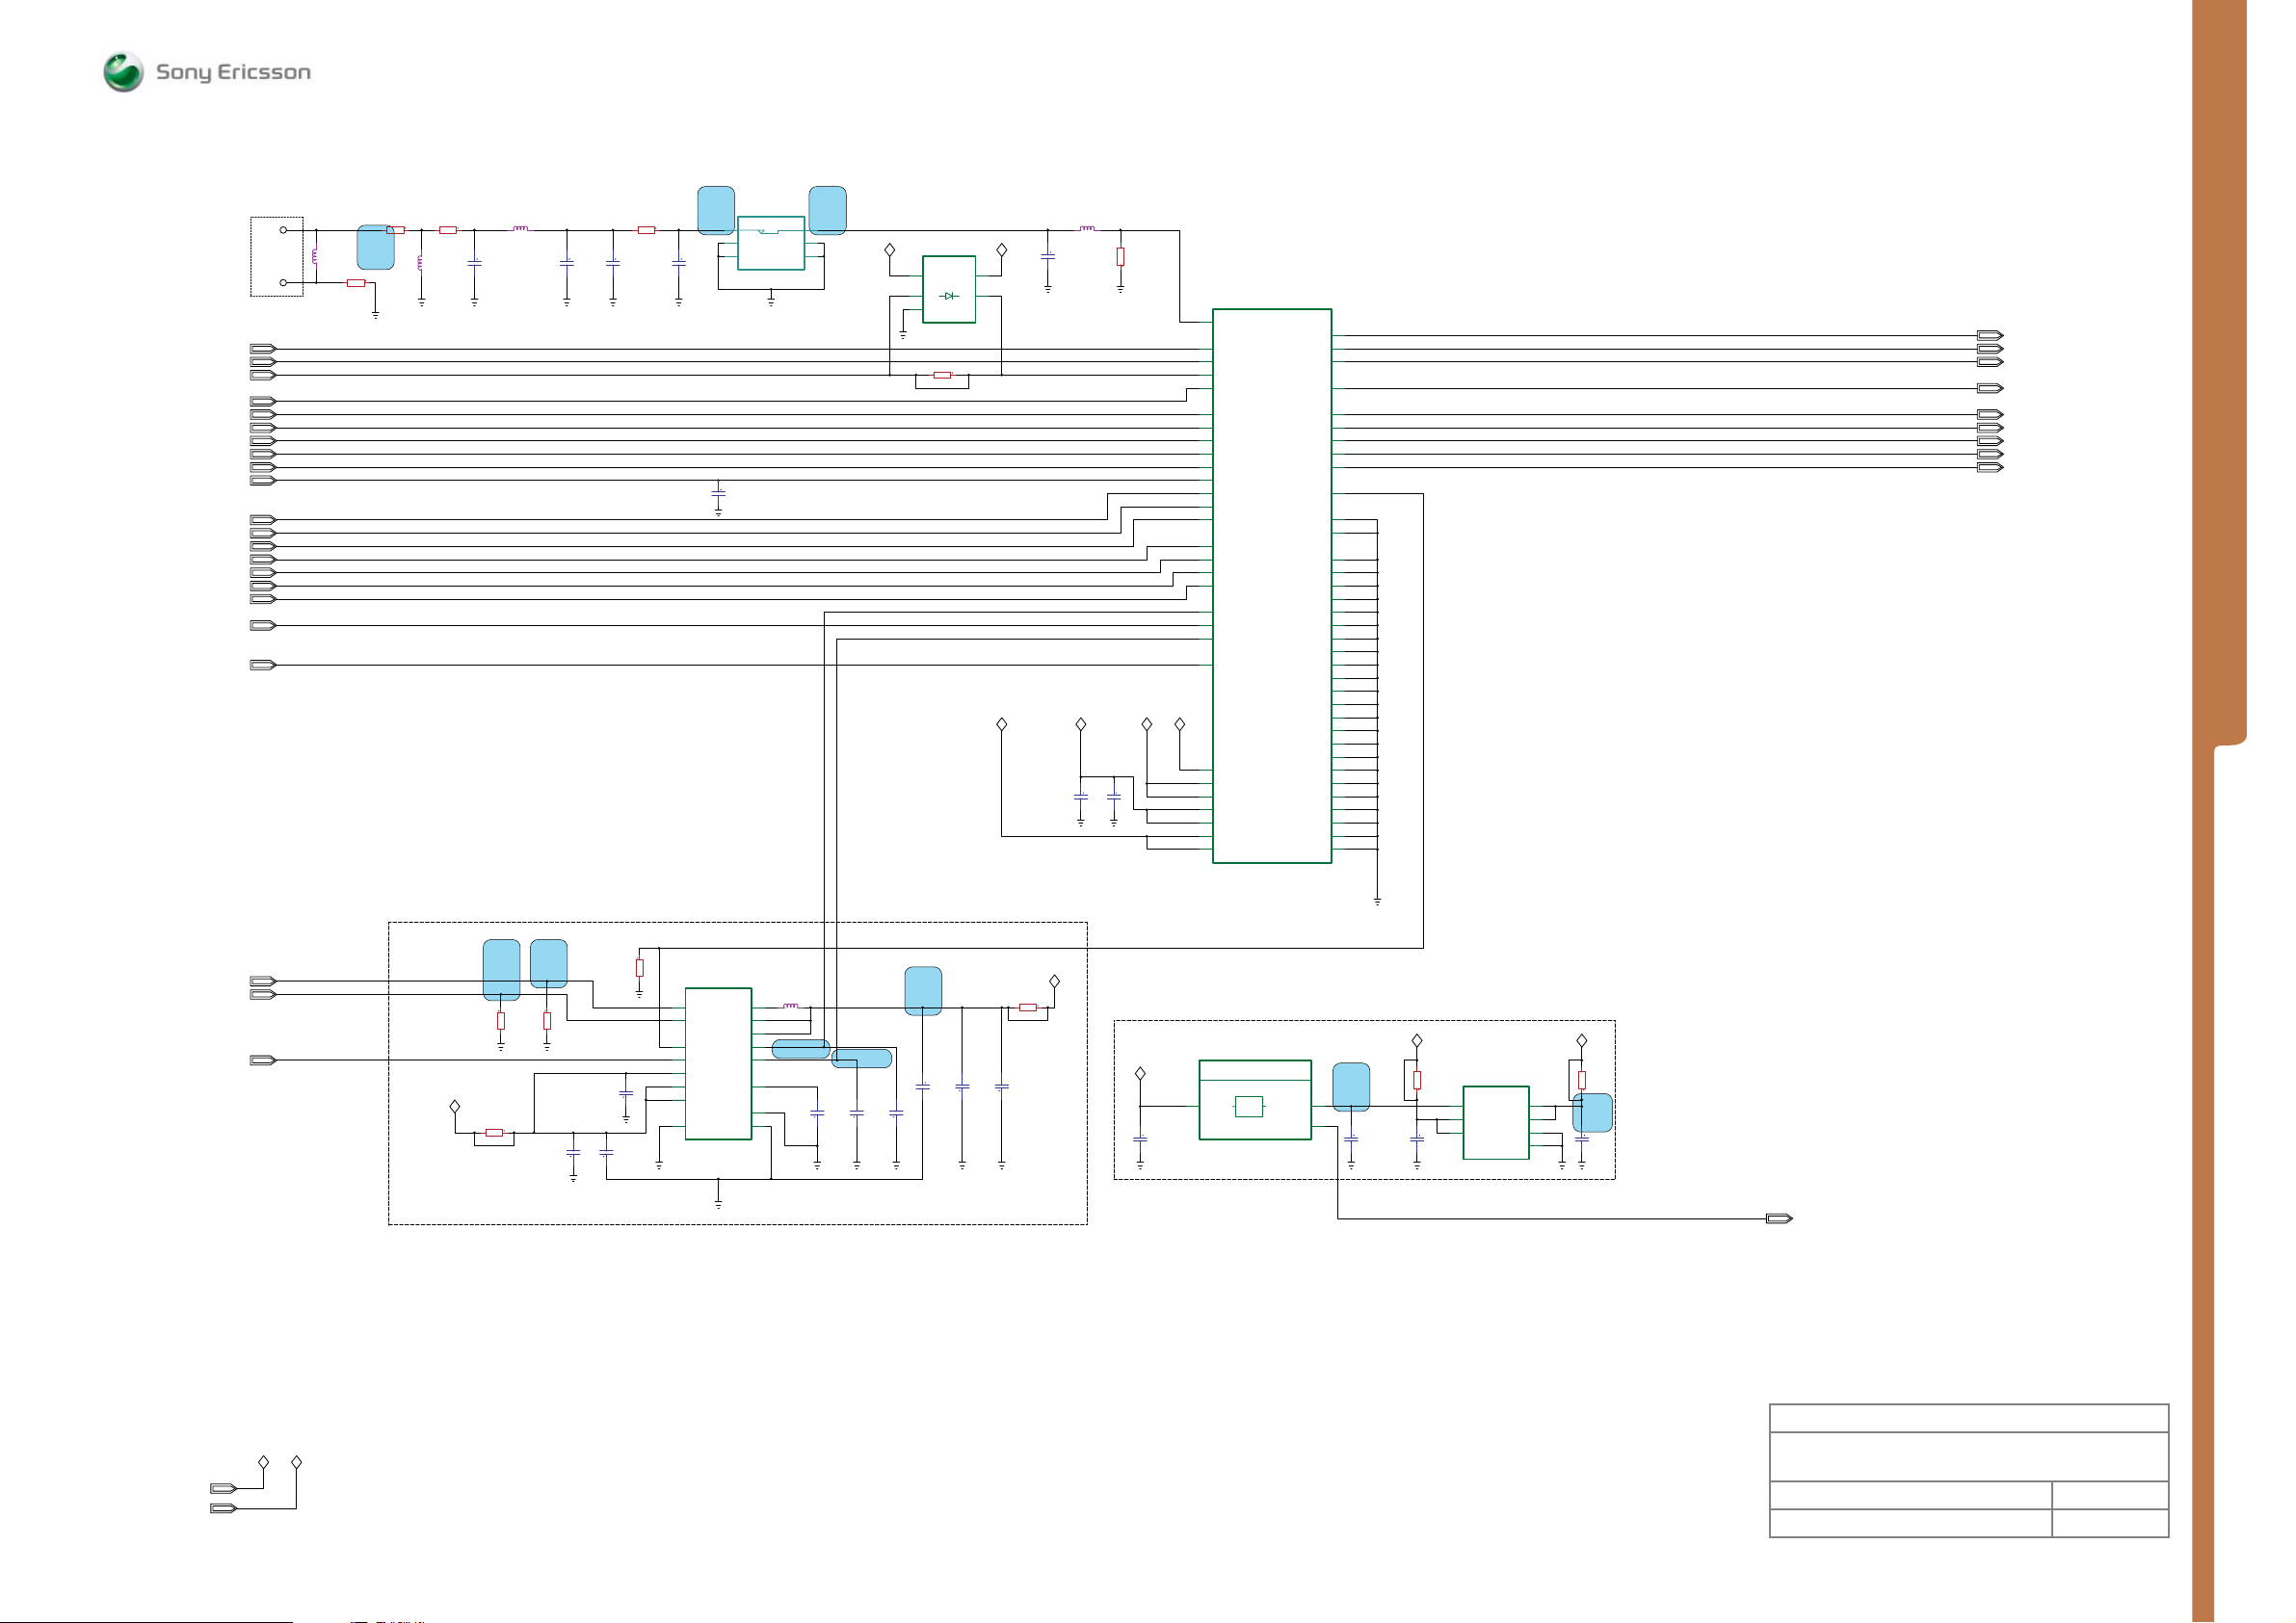
ANTSW0
ANTSW1
ANTSW2
ANTSW3
WTX_IA
WTX_IB
WTX_QA
WTX_QB
BIAS_CTRL
WDETON
RADCLK
RADDAT
RADSTR
QDATA_AMP_MSB
IDATA_FREQ_MSB
AMP_LSB_FREQ_LSB
DCLK_DATSTR
WPA1_EN
MCLKREQ
GSM/UMTS
ANTENNA
TP1210
TP1211
L1212
3.9nH
NM
MP 79
0ohmsR1202
R1206 0ohms
R1204 0ohms
L1211
0.0058uH
C1212
1.5pF
L1205
3.9nH
C1209
0.75pF
C1210
1pF
<NM>
MEASUREMENT POINTS Access - GSM & UMTS
MP 96MP 93
12
C_TERMR_TERM
34
GND
56
GND
1
N1202
VCCB
C1 A1
B1
B2
GND
ST1G3234BBJR
1206-0331
R1222 0ohms
NM
VCCA
81EDDV81EDDV
NM
A3C3
A1
1A
VCC_WPA
L1207
2.2nH
1201-7614
C1202
0.5pF
1201-6533
ANTSW0
ANTSW1
ANTSW2
ANTSW3
WTX_IA
WTX_IB
WTX_QA
WTX_QB
BIAS_CTRL
WDETON
RADCLK
RADDAT
RADSTR
QDATA_AMP_MSB
IDATA_FREQ_MSB
AMP_LSB_FREQ_LSB
DCLK_DATSTR
WPA_A_EN
WPA1_EN
WPA_C_EN
MCLKREQ
VBAT
C1219
C1220
2.2uF
68pF
<NM>
<NM>
R1211
0ohms
NM
TIGER RF-Module
GSM / UMTS
N1200
A5
VRAD28
VDDE18
ANT
C2
ANTSW0
C1
ANTSW1
B2
ANTSW2
D2
ANTSW3
L4
WTX_IA
K4
WTX_IB
L5
WTX_QA
K5
WTX_QB
L7
BIAS_CTRL
A8
PASENSE_EN
J2
RADCLK
J1
RADDAT
H1
RADSTR
H2
EDATAA
G1
EDATAB
G2
EDATAC
F1
EDATASTR
K6
WPA_A_EN
G8
WPA_B_EN
K7
WPA_C_EN
K2
CLKREQ
L3
VDIGRAD_1V8
B8
VRADB_2V75
L6
VRADA_2V75
A3
VBAT1
B3
VBAT2
J8
VCC_PA1
H8
VCC_PA2
TIGER_1_8_REV2
1210-9905
MCLKSEC
MODULE_SENSE
WTXPOWERSENSE
1
MCLK
TESTOUT
WRX_IA
WRX_IB
WRX_QA
WRX_QB
RFCTRL1
GND1
GND2
GND4
GND5
GND6
GND7
GND8
GND9
G
ND10
GND11
GND12
GND13
GND14
GND15
GND16
GND17
GND18
GND19
GND20
GND21
GND22
GND23
GND24
GND25
SLUG
D1
E1
F2
E2
A7
SLUG
L2
K3
K1
K9
RF_CONT1
L1
D8
E9
C9
D9
F9
G9
E8
A9
K8
B1
A4
B9
B5
L9
A2
L8
B4
B6
C8
A6
H9
J9
F8
B7
MCLK
MCLKSEC
TESTOUT
RF_ID
WRX_IA
WRX_IB
WRX_QA
WRX_QB
WTXPOWDET
C1211
1pF
<NM>
X1200
GND
GND
CRS5001-4202E
1203-9688
C1200
33pF
<NM>
0ohmsR1220
SEMC Troubleshooting Manual
G705 - W705 - W715
MCLK
MCLKSEC
TESTOUT
RF_ID
WRX_IA
WRX_IB
WRX_QA
WRX_QB
WTXPOWDET
MEASUREMENT POINTS
VBAT
VDDE18
WPA0_EN
WPA2_EN
DC_DC_REF1
VBAT
VDDE18
PA Power Supply
WPA0_EN
WPA2_EN
R1209
100Kohms
<NM>
DC_DC_REF1
VBAT
0ohmsR1200
<NM>
R1210
100Kohms
<NM>
LDO1
LDO2
REFBP
AGND
PGND
RF_CONT1
C1203
22pF
<NM>
<NM>
VCC_WPA
0ohmsR1201
Radio Power Supply
C1208
0.1uF
N2000
VBAT_A
AB3100
1202-0639
Ericsson AB 3100
VBAT
LDOA
2.8V
POWER
RADIO
LDOA_OUT
EXT_LDO
VBAT
R1213
MP 64
K13K12
C12
C1218
C1217
2.2uF
2
2.2uF
0ohms
<NM>
N1211
RP102K281D-TR-FD
6
VDD_1
5
VDD_2CEGND
RP102K281D-TR
1204-5903
2.8V
VOUT_1
VOUT_2
SLUG
OPTO_EN
VRAD28
R1214
0ohms
<NM>
14
MP 99
2
3
C1207
7
2.2uF
1
OPTO_EN
C1215
0.1uF
MP 102
C1206
4.7uF
C1205
0.1uF
2.2uH
L1200
B4
LX
2MHz
D3
PAB
D4
PAA
D1
MP 100
B1
A1
A2
A4
1
C1213
0.22uF
C1214
0.1uF
MP 127
MP 101MP 126
C1204
0.1uF
R1203
100Kohms
C1216
1uF
<NM>
C1201
10uF
N1210
MAX8805
D2
EN1
B3
EN2
B2
PA_EN
A3
REFIN
C1
IN2
C3
IN1B
C4
IN1A
C2
HP
MAX8805WEWEEE+T
1203-5870
Made for
Access
GSM & UMTS
Document Nr Revision
1207-2092 Page R2 3
1225-4035 rev. 1
75 (122)
Page 76
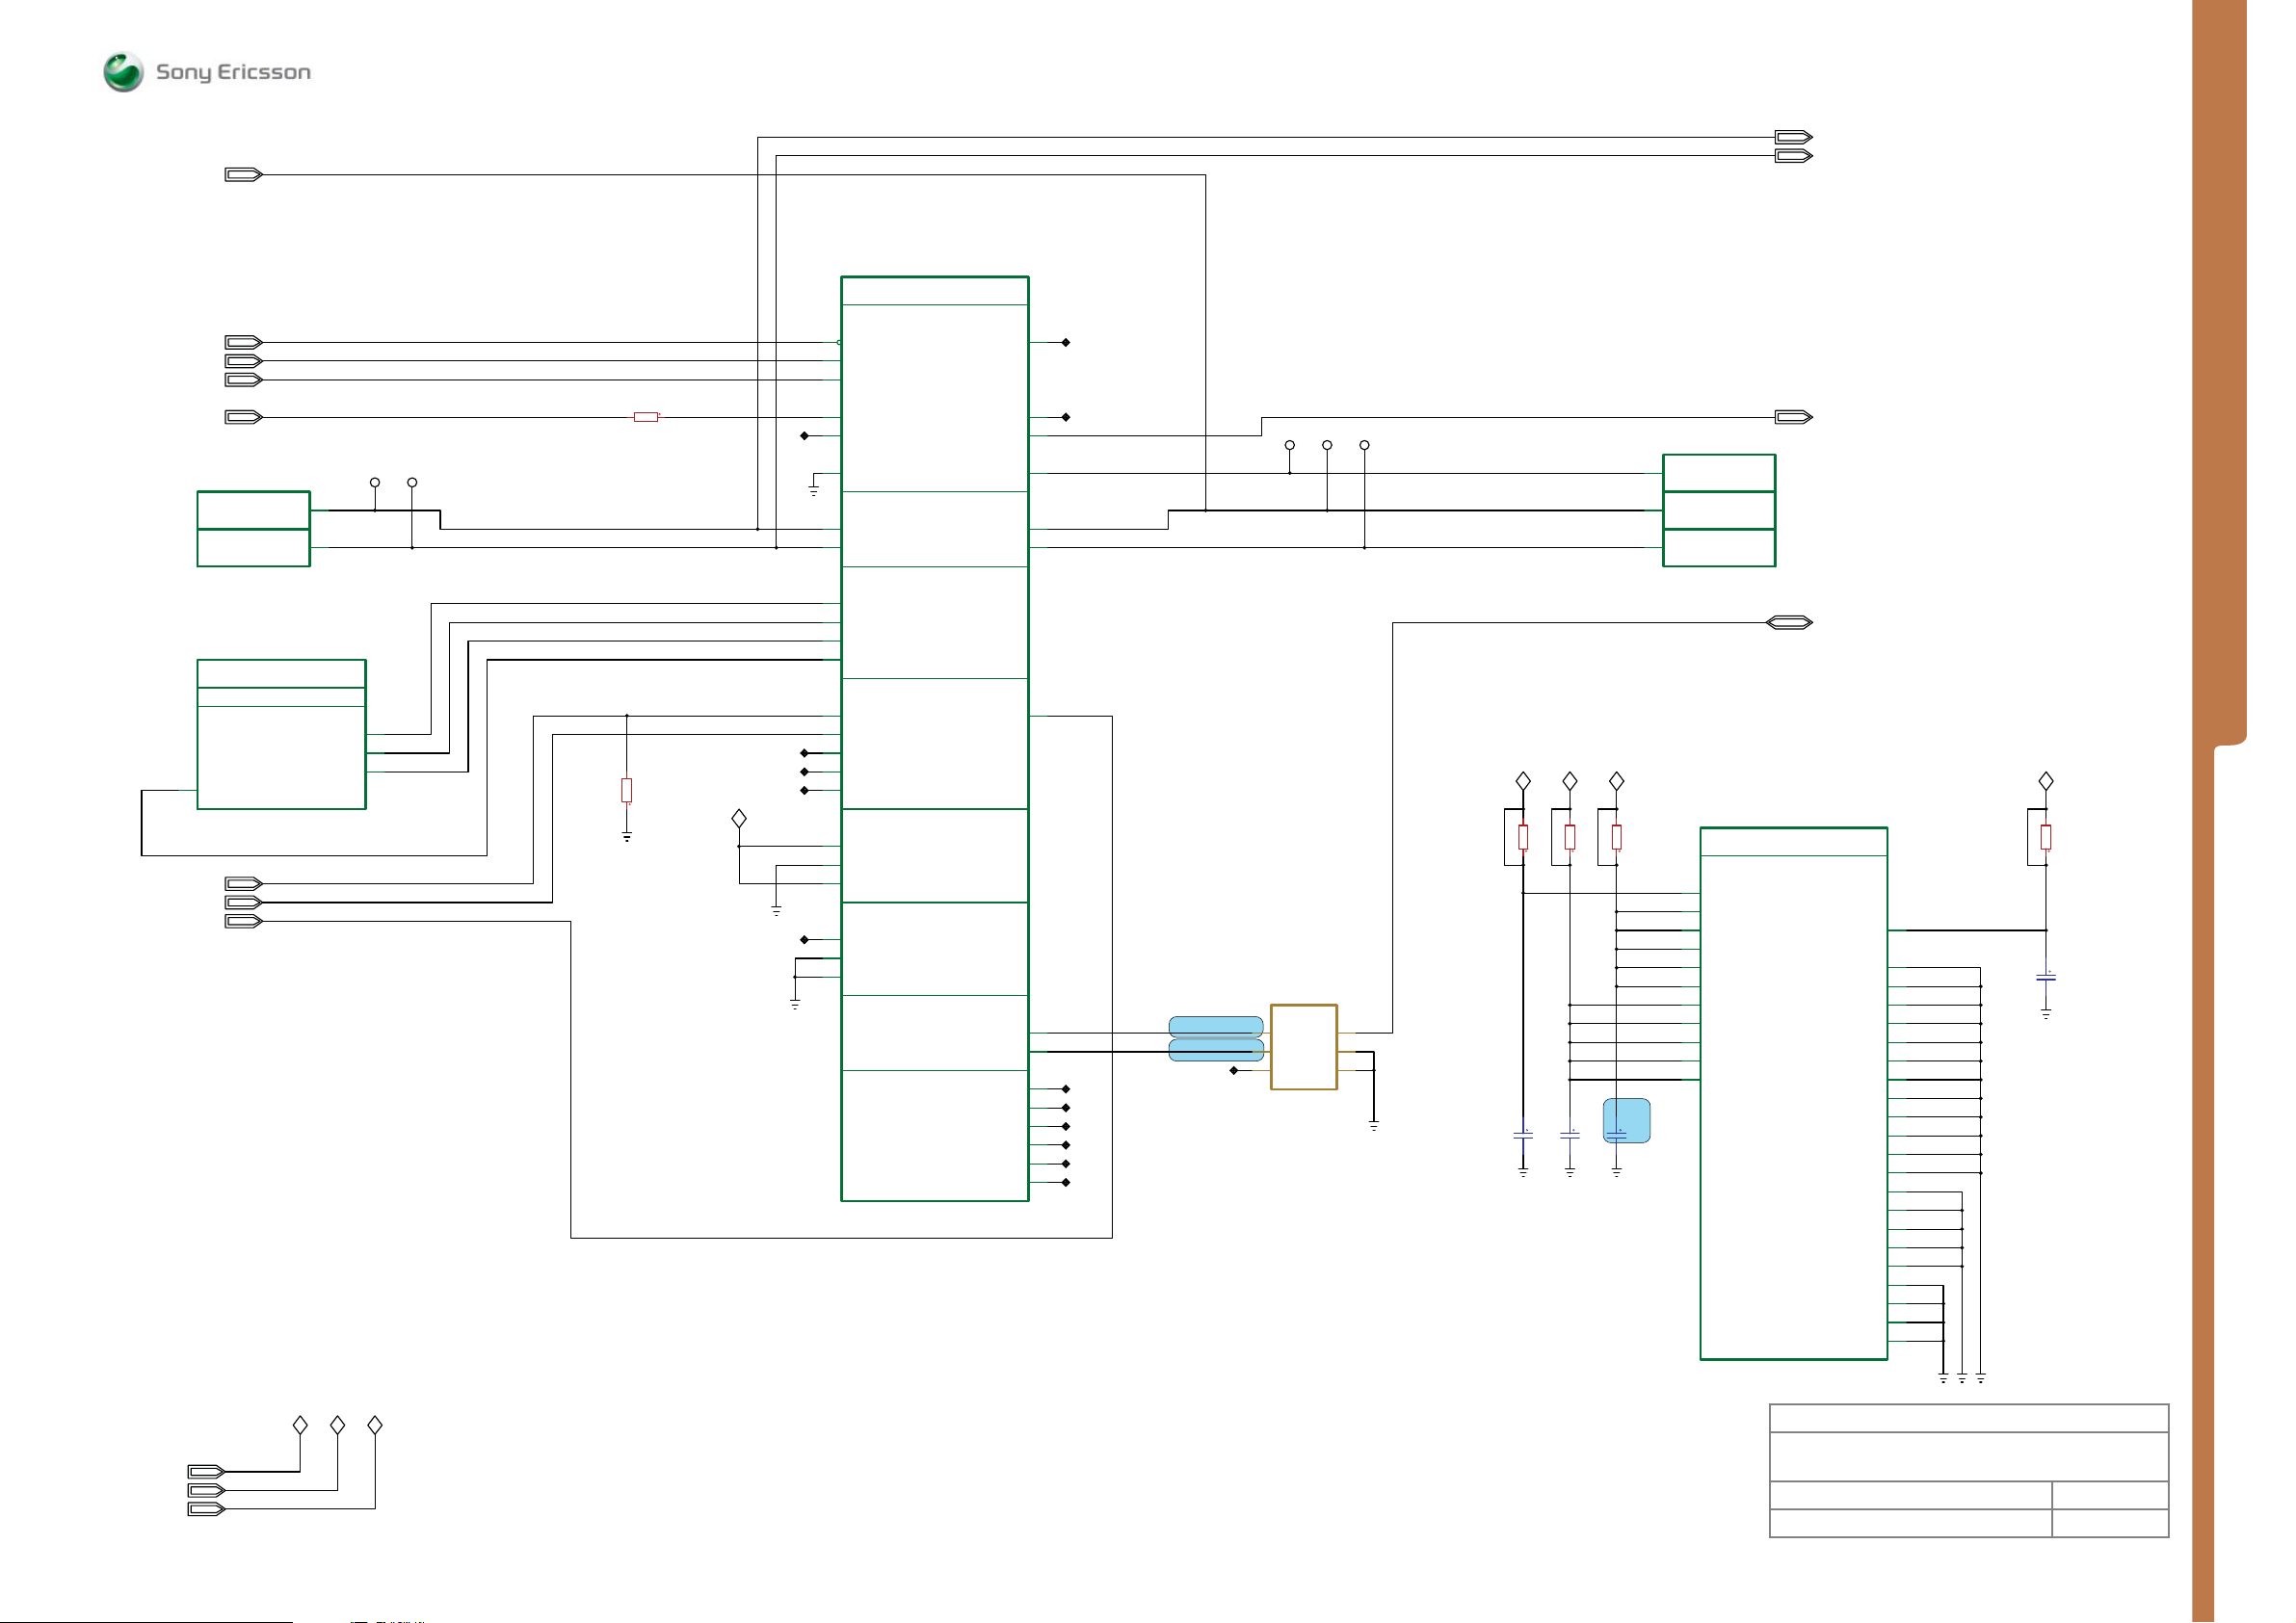
ACC_SPI_DI
MEASUREMENT POINTS Access - Bluetooth
SEMC Troubleshooting Manual
G705 - W705 - W715
ACC_SPI_DO
ACC_SPI_CLK
BTRESn
BT_CLK
RTCCLK
WLAN_CLKREQ
N2010
DB3210ADT/7POPHF
N2010
AD6
DB3210ADT/7POPHF
WLAN_CONFIRMn
WLAN_BT_STATE
WLAN_BT_PRIORITY
ACCESS GPIO_21
ACCESS GPIO_22
11208-3871
KAJSA_BOTTOM
BLUETOOTH_A_11_24
KAJSA_BOTTOM_BLUETOOTH
BLUETOOTH_PCM_I2S(ACCESS)
PCMULD/I2SULD
11208-3871
AA3
AB3
PCMCLK/I2SCLK
PCMSYN/I2SWS
PCMDLD/I2SDLD
SP1301 SP1302
Y5
AD4
U11
WLAN_BT_PRIORITY
WLAN_CLKREQ
ACC_SPI_DO
ACC_SPI_CLK
PCMCLK
PCMSYN
PCM_DLD_TO_KAJSA
PCM_ULD_FROM_KAJSA
R1300
NM
0ohms
<NM>
100Kohms
R1301
WLAN_CONFIRMn
WLAN_BT_STATE
VDDE18
N1300
K7
BT_RSTn
F6
BT_REF_CLK_IN
K9
BT_RTCCLK
E7
BT_CLKREQ_IN1
F9
NC
NC
NC
NC
NC
BT_CLKREQ_IN2
UART_RXD/SPI_DI
UART_CTS/SPI_CLK
M4
BT_PCM_CLK
N4
BT_PCM_SYNC
K5
BT_PCM_A
M5
BT_PCM_B
G9
BT_GPIO_0
L3
BT_GPIO_8
M3
BT_GPIO_9
K4
BT_GPIO_10
J3
BT_GPIO_16
L7
BT_CONFIG_1
M7
BT_CONFIG_2
N6
BT_CONFIG_3
G6
BT_AF_PRG
H2
BT_TEST1
G2
BT_TEST2
STLC2593
1200-9840 1
OOTH-FM_IO
BLUET
BT_SYSCON
BT_REG_CTRL
BT_CLKREQ_OUT1
BT_CLKREQ_OUT2
HOST_WAKEUP/SPI_INTBT_WAKEUP
UART_&_SPI-INTERFACE
UART_TXD/SPI_DO
UART_RTS/SPI_CSn
PCM_INTERFACE
GPIO
BT_GPIO_11
CONFIG-PINS
TESTPINS
RF
DO-NOT-USE
BT_RSRV_D
BT_RSRV_RF
BT_RSRV_CL
BT_RSRV_DSM
BT_RSRV_N
BT_RSRV_CL
BT_RFP
BT_RFN
J4
NC
J7
NC
J8
E8L9
G7H9
J6K6
K3
K1
J1
M8
NC
M2
NC
B2
NC
C1
NC
C2
NC
C3
NC
MP 2
MP 3
NC
W1300
3
4
6
HHM1798A1
1200-5169
SP1303
BALUN
Bal
Bal
NC
SP1304
Unbal
GND
GND
SP1305
1
2
5
1
BT_CLKREQn
BT_SPI_INT
ACC_SPI_DI
BT_SPI_CSn
BT_ANT
VDIG VDDE18
0ohms
<NM>
<NM>
R1310
C1301
C1300
0.1uF
0.1uF
0ohms
R1311
VBT27
<NM>
0ohms
R1312
MP 4
C1302
0.1uF
E10
Y4
C9
N2010
ACCESS GPIO_27
ACCESS GPIO_20
ACCESS GPIO_26
DB3210ADT/7POPHF
11208-3871
N1300
N7
BT_HVD
L2
BT_HVA1
D3
BT_HVA2
E1
BT_HVA2
E2
BT_HVA2
E4
BT_HVA2
M6
BT_VIO_A
J9
BT_VIO_B
N3
BT_VIO_C
N5
BT_VIO_D
G8
BT_VIO_E
STLC2593
BT_CLKREQn
BT_ANT
BLUETOOTH-FM_POWER
BTPOWER&GND
BT_VDD_CLD
BT_VSS_ANA
BT_VSS_ANA
BT_VSS_ANA
BT_VSS_ANA
BT_VSS_ANA
BT_VSS_ANA
BT_VSS_ANA
BT_VSS_ANA
BT_VSS_ANA
BT_VSS_ANA
BT_VSS_ANA
BT_VSS_ANA
BT_VSS_DIG
BT_VSS_DIG
BT_VSS_DIG
BT_VSS_DIG
BT_VSS_DIG
11200-9840
BT_VSS_RF
BT_VSS_RF
BT_VSS_RF
BT_VSS_RF
MEASUREMENT POINTS
VDDE18
0ohms
<NM>
R1313
E6
D1
D2
E3
F1
F2
F3
F4
G3
G4
H3
H4
G1
H6
H7
H8
K8
L8
H1
J2
K2
L1
C1303
0.1uF
VDDE18
VDIG
VBT27
VDDE18 VDIG
VBT27
Made for
Access
Bluetotth
Document Nr Revision
1207-2092 Page R3 3
1225-4035 rev. 1
76 (122)
Page 77
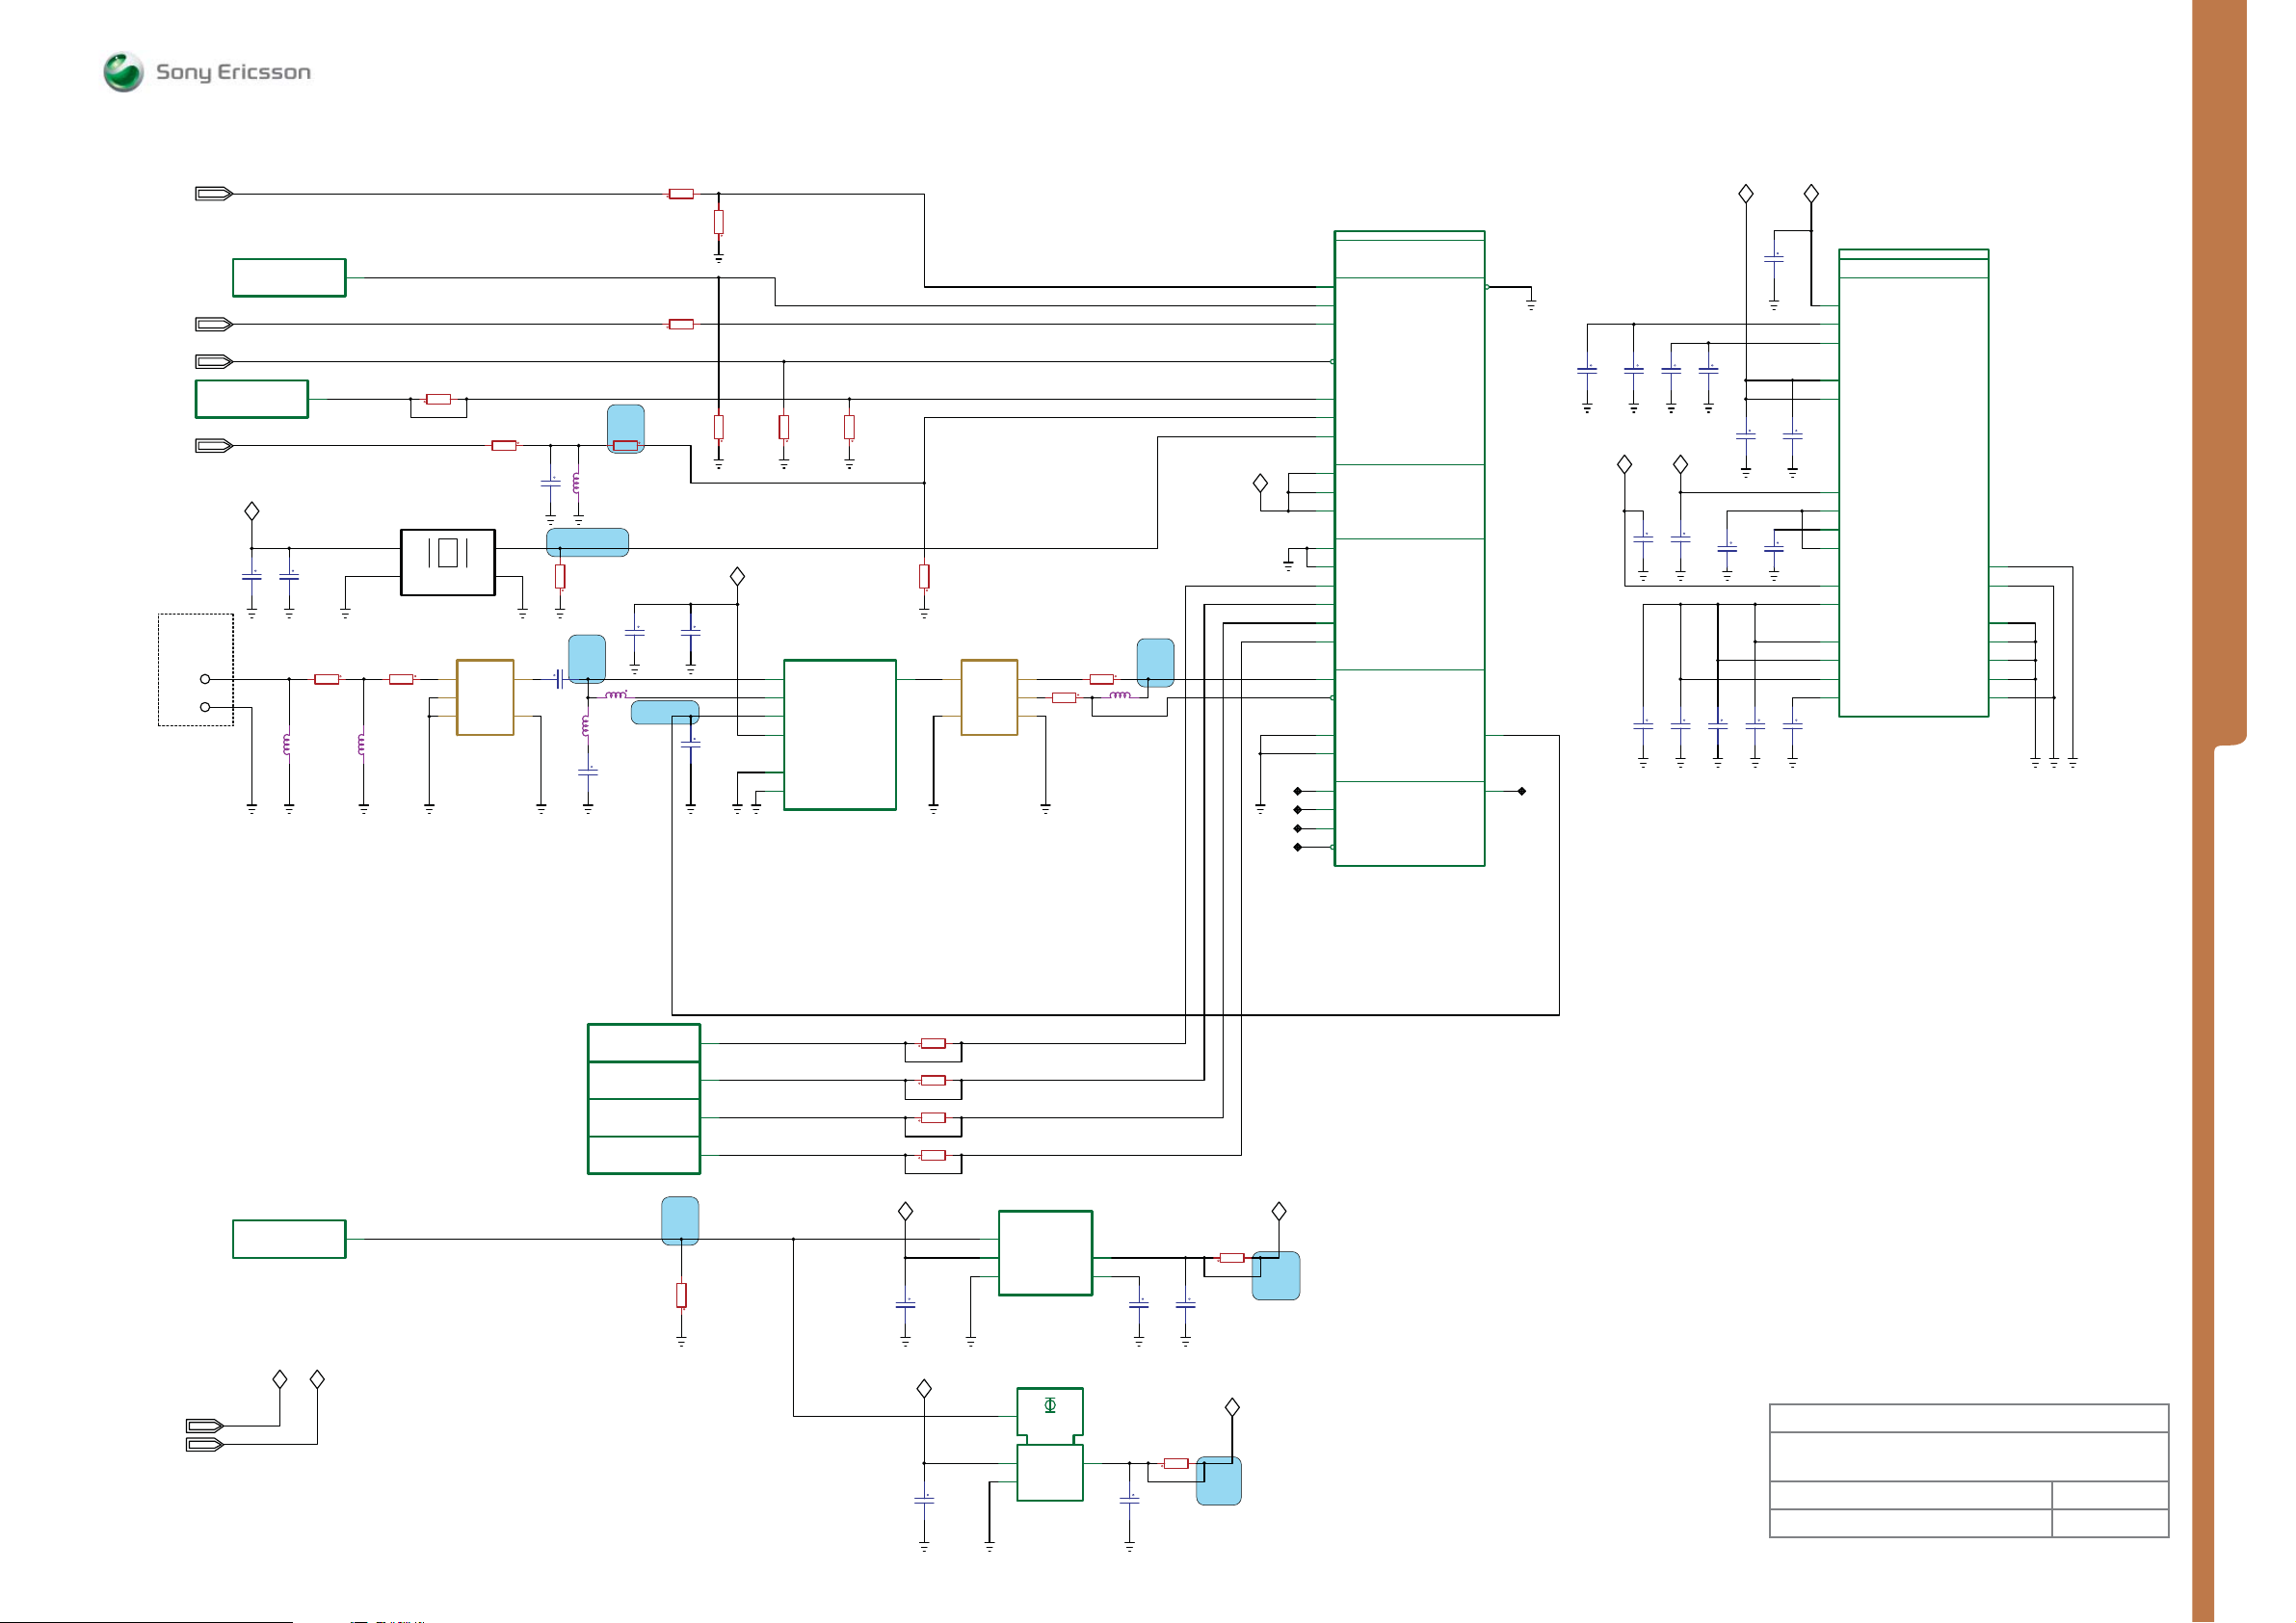
MEASUREMENT POINTS Access AGPS
SEMC Troubleshooting Manual
G705 - W705 - W715
RTCCLK
TX_ADSTR
AGPS_RSTn
AGPS_CLK
ANTENNA
N2010
DB3210ADT/7POPHF
1208-3871
N2010
ACCESS GPIO_17
DB3210ADT/7POPHF
1208-3871
VAGPS28
AGPS
TP1400
TP1401
APPLICATION GPIO_07
APPLICATION GPIO_07
1
W5
1
AGPS_CLK
C1412
C1411
0.1uF
4.7uF
R1410
0ohms
L1404
0.0068uH
L25
NM
L1400
0.0068uH
RTCCLK
TX_ADSTR
AGPS_RSTn
0ohms
R1416
<NM>
B1400
VCC OUT
ERC3135A
27.456MHz
1200-7847
R1441
0ohms
3
5
SAFEB1G57KB0F00R14
R1413
GNDVCONT
Z1400
GND
GNDGND
1575.42MHz
1211-5714
AGPS_SYNC
0ohms
C1410
120pF
NM
34
21
14
IOIO
2
AGPS_PWRON
L1410
NM
MP 85
R1404
10Kohms
<NM>
MP 124
C1402
4.7pF
L1401
0.0033uH
0.22uH
L1402
100nH
C1403
0.01uF
MP 84
R1414
0ohms
R1600
R1602
C1405
0.0022uF
MP 123
0ohms
0ohms
C1406
100pF
C1407
10pF
<NM>
R1406
10Kohms
<NM>
R1401
100Kohms
VAGPS28
R1402
100Kohms
NM
N1410
2
DC_BIAS
4
POWER_ON_CONTROL
5
VCC
3
RF_GND
7
GND_DC
BGA615L7
1200-2407
R1403
100Kohms
LNA_OUTLNA_IN
R1407
10Kohms
<NM>
Z1401
61
1
IN
25
GND GND
LP09A
1575.42MHz
1200-0660
OUT
OUT
C1418
0.1uF
C1427
0.1uF
C1413
0.1uF
C1423
0.1uF
VAGPS28
C1419
0.1uF
C1428
0.1uF
N1400
PMB2525HammerheadPower
GPSPowerandGround
F4
VDD_RFREG_IN
G5
VDD_RF
F7
VDD_VCO
C2
VDD_IO_1
A7
VDD_IO_2
A6
VDD_LP_PLLREG_IN
B4
VDD_LPREG_OUT
A5
VDD_PLL
B6
VDD_LP
D1
VDD_COREREG_IN
C1
VDD_COREREG_OUT
G1
VDD_CORE_1
G3
VDD_CORE_2
B7
VDD_CORE_3
E7
VDD_CAP
PMB2525
1200-0700
VSS_RF_1
VSS_RF_2
VSS_DIG_1
VSS_DIG_2
VSS_DIG_3
VSS_DIG_4
VSS_LNA
MEASUREMENT POINTS
G4
E5
D7
D5
D2
B1
E4
1
VDDE18
N1400
PMB2525_Hammerhead
_Power_distribution
E1
E2
F2
F3
D4
A3
A4
VDDE18
0ohms
MP 90
L1403
0.0068uH
R1409
31
R1408
4
0ohms
1
E3
D3
G2
C3
C4
B2
A1
A2
B3
E6
F6
G7
G6
NC
D6
NC
C6
NC
C7
NC
RTCCLK
POWERON
RX_HOLD
nRESET
SYNC
CNTIN
CLK
ConfigHostIFI2C,SPI,UART
OMS0
OMS1
OMS2
HIF0
HIF1
HIF2
HIF3
HIF4
HIF5
MIX_IN_PLUS
MIX_IN_MINUS
LNA_OUT
LNA_IN
TDI
TMS
TCK
nTRST
PMB2525
1200-0700
SYSCON
HostIF
RF
JTAG
nINTR
EXT_LNA
TDO
F1
C1416
0.1uF
VDDE18
C1421
C1425
0.1uF
0.1uF
C1417
22pF
C1426
C1422
0.1uF
1uF
C1415
C1414
22pF
0.1uF
VAGPS20
C1420
1uF
F5
5C5B
NC
1
C1424
0.22uF
VDDE18
VBAT
N2010
APPLICATION GPIO_08
DB3210ADT/7POPHF
1208-3871
1
VDDE18
VBAT
M24
N2010
ACCESS GPIO_10
ACCESS GPIO_11
ACCESS GPIO_12
ACCESS GPIO_13
DB3210ADT/7POPHF
1208-3871
1
AGPS_LDO_EN
MP 92
R2315
100Kohms
0ohms
VBAT
R1603
R1604
R1605
R1606
<NM>
<NM>
<NM>
<NM>
C2380
1uF
VBAT
0ohms
0ohms
0ohms
C2383
1uF
N2310
LDO REGULATOR
A1
EN
B2
TPS79920YZUR
1200-3994
2V
N2311
2
CE
14
IN
3
GND
R1115Z-281B-TR
1000-8818
OUT
C1C3
OUTIN
A3
NRGND
C2381
R1419
C2384
10uF
0.01uF
<NM>
0ohms
R1418
C2382
10uF
MP 95
0ohms
<NM>
VAGPS28
VAGPS20
MP 91
Made for
Access AGPS
Document Nr Revision
1207-2092 Page R4 3
1225-4035 rev. 1
77 (122)
V5
W3
V4
Y2
UART3_RX
UART3_TX
UART3_CTX
UART3_RTX
Page 78
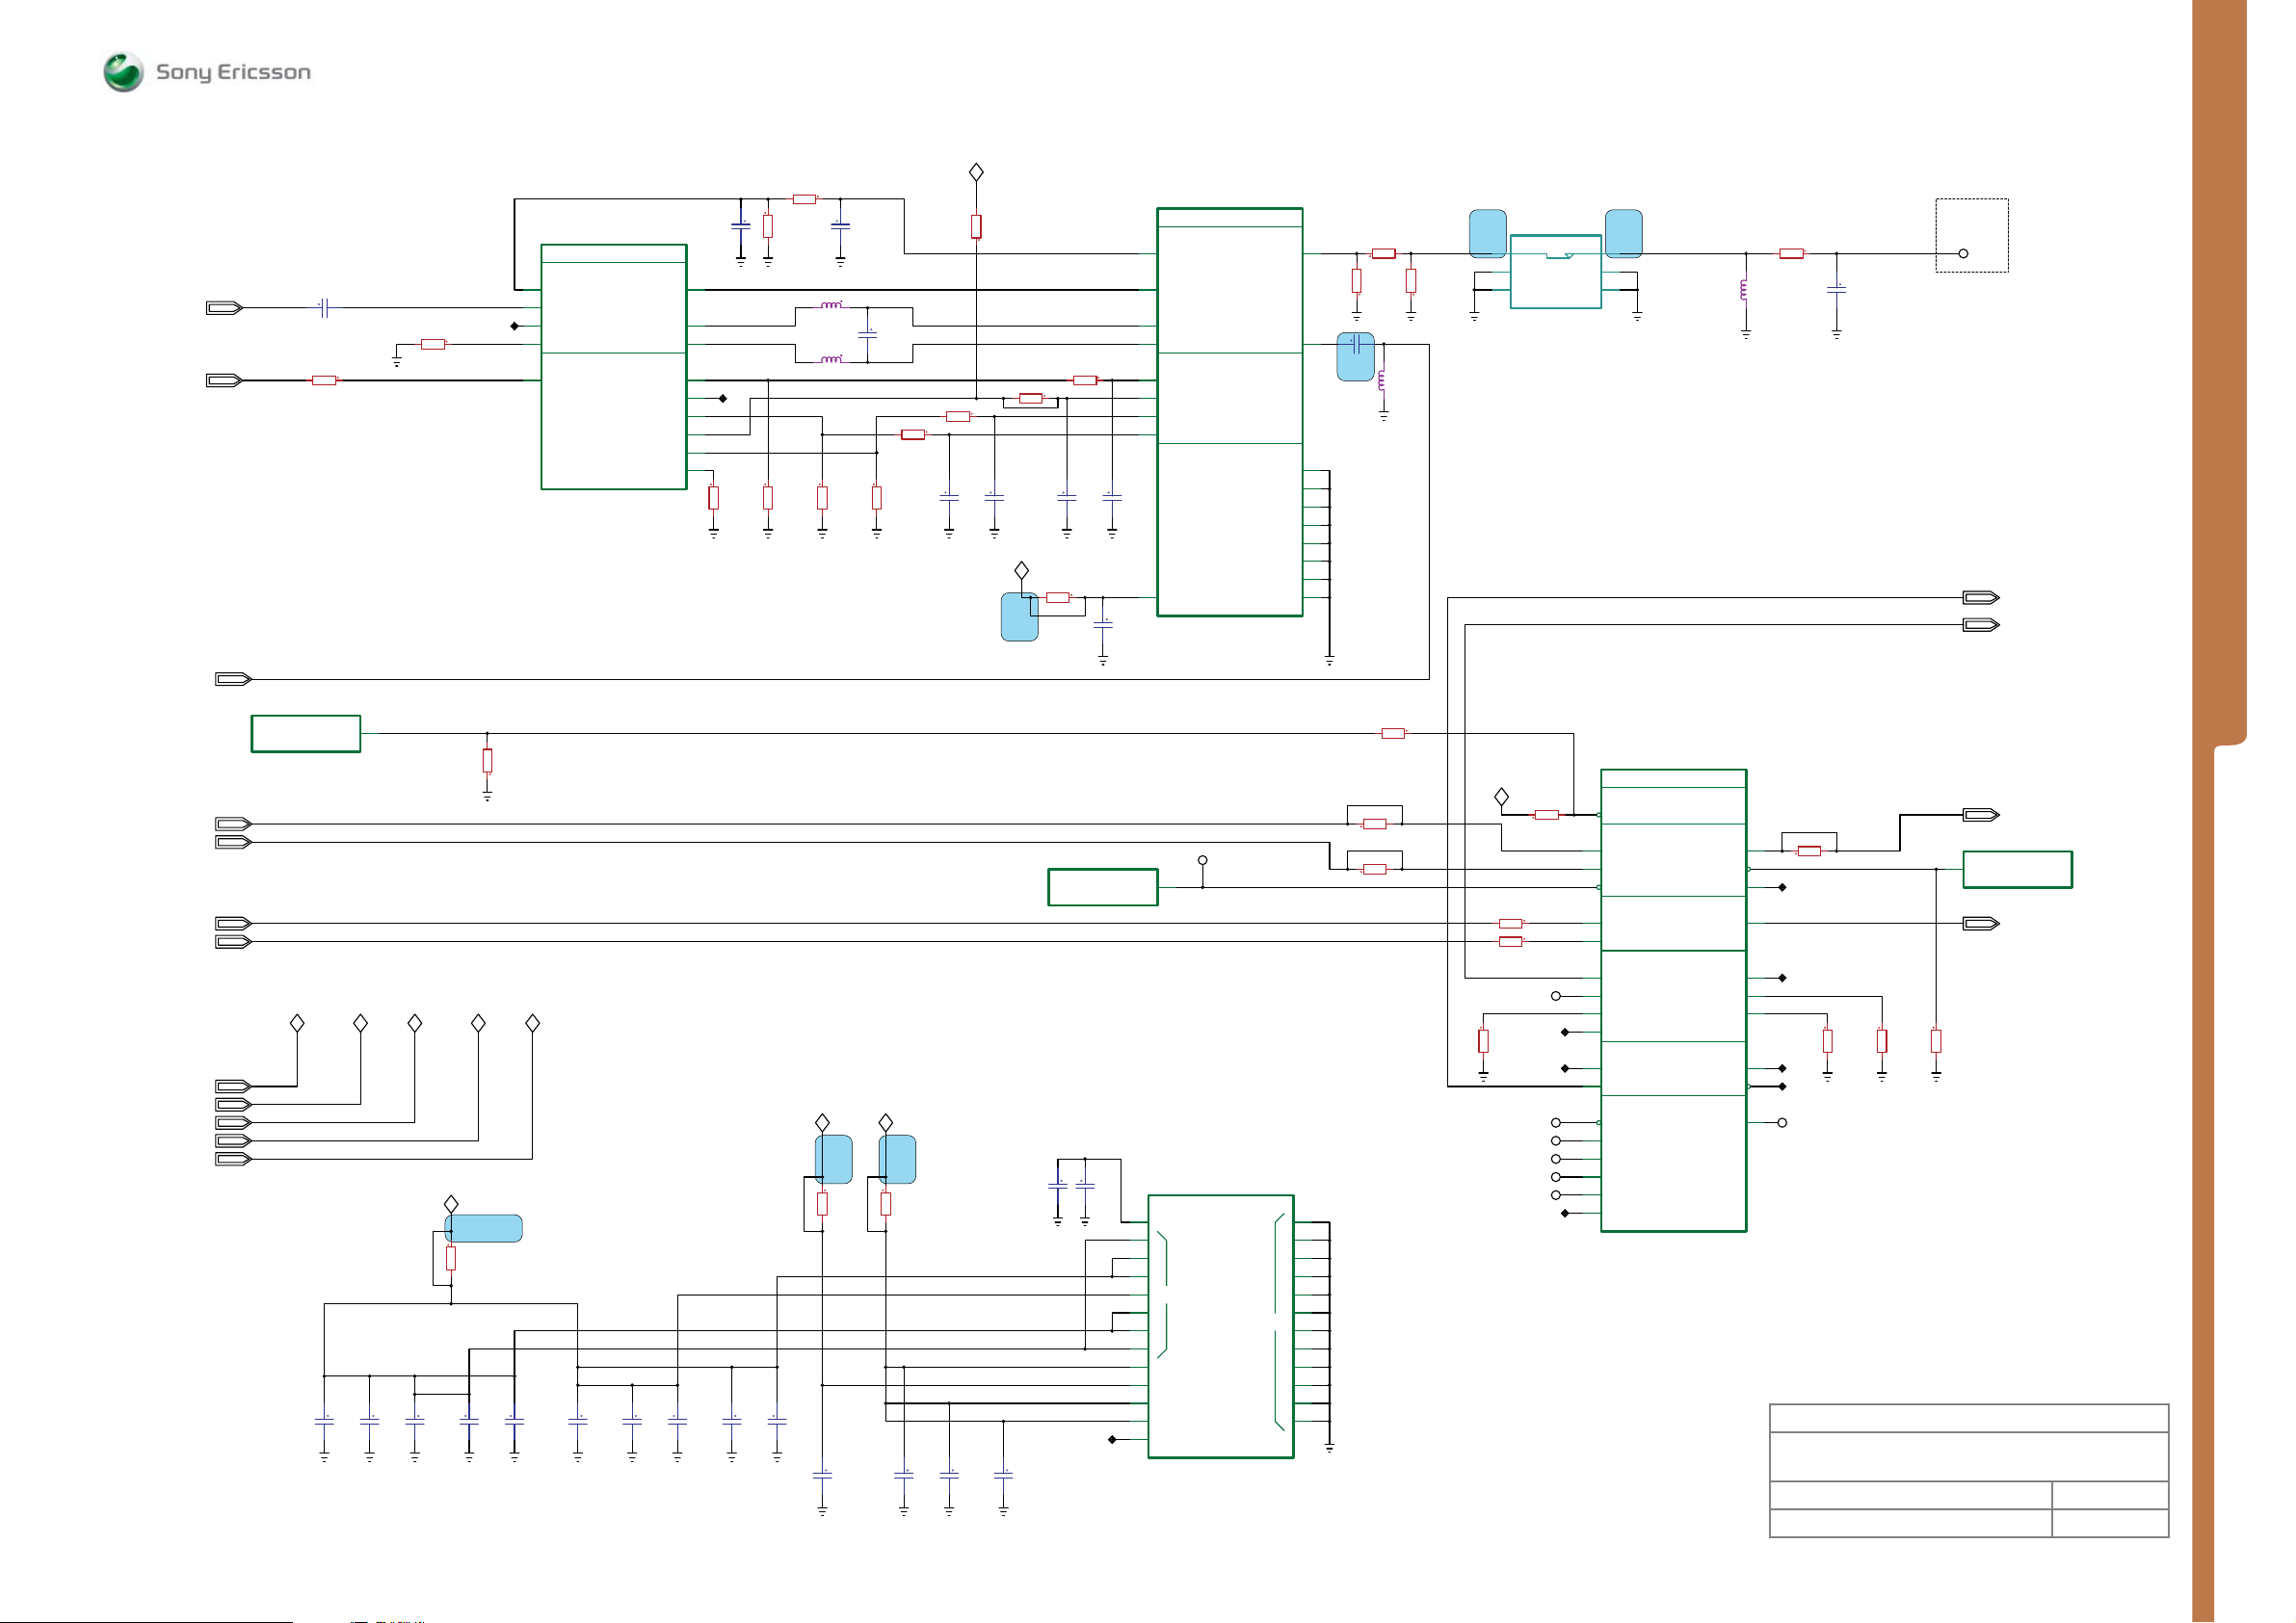
WLAN_CLK
RTCCLK
C1500
R1504
0ohms
0.001uF
R1502 6.04Kohms
N1500
XPWDET2
A6
XTAL_I_XO
A7
XTAL_O
NC
REXT
A3
SLEEP_CLK/CLK_OUT PA_PE_G
88W8686
1200-0932 2
MARVELL_RF_IF
ANALOG
DIG_IF
ANT_SEL_P
ANT_SEL_N
TX2_OUT
RX2_IN_P
RX2_IN_N
TR_P
TR_N
TR3_N
C10
E10P9
M4
M5
M3
P5
P4
K5
C1504
10pF
01J6P
WLAN_RX_P
WLAN_RX_N
NC
R1507
100Kohms
<NM>
MEASUREMENT POINTS Access - WLAN
VDIG
R1506
51Kohms
R1505
100Kohms
R1508
100Kohms
L1530
3.3nH
L1531
3.3nH
R1509
100Kohms
C1505
10pF
WLAN_TX
C1532
0.5pF
R1511 1Kohms
R1510
100Kohms
R1515
3.3Kohms
R1512 1Kohms
C1506
10pF
R1513 0ohms
NM
C1507
10pF
WLAN_VO33
R1516 0ohms
MP 1
R1514 68ohms
C1508
10pF
<NM>
C1509
10pF
C1510
10uF
N1510
6
PD
11
WLAN_TX
7
WLAN_RXb
8
9
VREF_PA
3
VC1
4
VC2
5
VC3
VCC_PA
R041B
1200-6173 1
EPCOS_FEM_R041B
RF_IF
CONT_IF
PWR
BT_ANTWLAN_Rxa
GND_1
GND_2
GND_3
GND_4
GND_5
GND_6
GND_7
GND_8
ANT
17
C1502 33pF
2
1
10
12
13
14
15
18
1916
MP 30
R1534
0ohms
<NM>
0ohmsR1533
L1501
4.7nH
R1535
0ohms
<NM>
X1500
C_TERM R_TERM
GND
GND
CRS5001-4202E
1203-9688
GND
GND
SEMC Troubleshooting Manual
G705 - W705 - W715
WLAN / BT
MP 109MP 107
21
43
65
1
WLAN_SCLK
WLAN_CLKREQ
NM
R1520 0ohms
L1511
0.0047uH
C1512
2.2pF
ANTENNA
TP1530
MEASUREMENT POINTS
WLAN_SCLK
WLAN_CLKREQ
BT_ANT
ACC_SPI_DO
ACC_SPI_CLK
WLAN_BT_PRIORITY
WLAN_BT_STATE
WLAN_VO18
WLAN_VO33
WLAN_LDO30
WLAN_LDO18A
VDIG
N2010
APPLICATION GPIO_18
DB3210ADT/7POPHF
1208-3871
1
WLAN_VO18
WLAN_VO33
C1513
1uF
K15
WLAN_LDO30
C1514
0.1uF
WLAN_LDO18A
WLAN_LDO18A
R1503
0ohms
<NM>
C1515
0.001uF
MP 120
C1516
10pF
R1524
100Kohms
<NM>
BT_ANT
WLAN_RSTn_PDn
VDIG
C1517
10pF
C1518
0.1uF
C1519
0.001uF
C1520
10pF
C1521
0.001uF
WLAN_LDO30
C1522
10pF
R1523
0ohms
<NM>
C1523
0.1uF
WLAN_VO18
MP 22MP 19
R1501
0ohms
<NM>
C1524
1uF
C1525
0.1uF
C1526
0.1uF
C1527
1uF
N2010
ACCESS GPIO_19
DB3210ADT/7POPHF
1208-3871 1
C1528
0.1uF
NC
SP1507
AA4
N1500
MARVELL POWER_SUPPLY
K3
VDD12
B9
L9
K7
P7
VDD18A
E6
D5
A8
K4
VDD18_LDO
K6
VDD30
A1
VIO_X1
P1
VIO_X2
M6
NC
88W8686
1200-0932
WLAN_SPI_CSn
ACC_SPI_DO
ACC_SPI_CLK
N10
A10
E8
J8
C8
M7
VSS
H7
E7
C7
C6
H4
H3
R1526 0ohms
<NM>
NM
0ohms
R1528
NM
0ohms
R1527
WLAN_BT_STATE
WLAN_VO18
R1517
100Kohms
R1518 2.7Kohms
R1519 2.7Kohms
SP1503
NC
R1525
100Kohms
NC
SP1504
SP1505
SP1500
SP1506
SP1501
NC
A4
F1
D1
A5
B4
F4
H1
F3
D3
M2
P3
H6
M1
K1
F5
D4
G8
N1500
88W8686
1200-0932
MARVELL_HOST_IF
PWDWN_CTRL
RESETn_PDn
CSP_HOST_IF
SPI_SDI
SPI_CLK
SPI_SCSn
BT_PRIORITY
BT_STATE
GPIO0
GPIO1
GPIO2
GPIO3
EEPROM_CTRL
SRWB
SCLK
TRSTn
TCK
TDI
TMS1
TMS2
SCAN_EN
BT_COEX
GPIO
JTAG
SPI_SDO
SPI_SINTn
SD_DAT_3
WL_ACTIVEn
GPIO4
GPIO5
GPIO6
SDA
ECSn
TDO
ACC_SPI_DI
NM
NC
NC
NC
NC
SP1502
0ohms
ACC_SPI_DI
WLAN_SPI_IRQ
WLAN_CONFIRMnWLAN_BT_PRIORITY
R1521
100Kohms
R1522
100Kohms
D2F2
R1529
B1
B2
B5
H2
A2
B3
P2
K2
H5
N2010
R10
ACCESS GPIO_25
DB3210ADT/7POPHF
1208-3871 1
R1536
100Kohms
WLAN_CONFIRMn
Made for
Access
WLAN
Document Nr Revision
1207-2092 Page R5 3
1225-4035 rev. 1
78 (122)
Page 79
Unused GPIO
N2010
ACCESS GPIO_24
DB3210ADT/7POPHF
11208-3871
MEASUREMENT POINTS Test
N2010
D8
NC
APPLICATION GPIO_05
DB3210ADT/7POPHF
1208-3871
1
N2010
APPLICATION GPIO_11
DB3210ADT/7POPHF
1208-3871
1
N2010
APPLICATION GPIO_19
DB3210ADT/7POPHF
1208-3871
1
N23
K14
P23
NC
NC
VDDE18
NC
SP5101 SP5102 SP5103 SP5104 SP5105 SP5107SP5106
R5101
100Kohms
R5100
10Kohms
N2010
KAJSA_BOTTOM_JTAG_A_16_24
KAJSA_BOTTOM_TEST
JTAG_EMULATION_IF
TDI
R3
TMS
T3
TRSTn
U2
TCK
B24
TEMU0n
B3
TEMU1n
DB3210ADT/7POPHF
11208-3871
TDO
RTCK
01T5P
T5
R5102
10Kohms
SEMC Troubleshooting Manual
G705 - W705 - W715
MEASUREMENT POINTS
N2010
KAJSA_BOTTOM_ETM_A_17_24
KAJSA_BOTTOM_ETM
KAJSA_BOTTOM
TEST_EMBEDDED_TRACE_IF
DB3210ADT/7POPHF
11208-3871
ETM_TCLK
ETM_TSYNC
ETM_TPKT0
ETM_TPKT1
ETM_TPKT2
ETM_TPKT3
ETM_TPKT4
ETM_TPKT5
ETM_TPKT6
ETM_TPKT7
ETM_PSTAT0
ETM_PSTAT1
ETM_PSTAT2
N2010
KAJSA_BOTTOM_UNUSED_A_5_24
KAJSA_BOTTOM_UNUSED
KAJSA_BOTTOM_NOT_USED
R5
NC
D6
NC
D5
NC
C8
NC
D9
NC
B6
NC
E9
NC
B9
NC
C6
NC
B8
NC
C7
NC
E8
NC
B5
NC
E7
NC
EFUSE_HV5
DB3210ADT/7POPHF
11208-3871
UNUSED
UNUSED
UNUSED
UNUSED
UNUSED
UNUSED
UNUSED
UNUSED
UNUSED
UNUSED
UNUSED
UNUSED
UNUSED
UNUSED
UNUSED
UNUSED
UNUSED
UNUSED
UNUSED
UNUSED
A1
A2
A3
B1
C1
AD1
AE1
AF1
AF2
AF3
AF24
AF25
AF26
AE26
AD26
A26
B26
C26
A25
A24
NC
NC
NC
NC
NC
NC
NC
NC
NC
NC
NC
NC
NC
NC
NC
NC
NC
NC
NC
NC
VDDE18
VDDE18
Made for
Test
Document Nr Revision
1207-2092 Page T1 3
1225-4035 rev. 1
79 (122)
Page 80
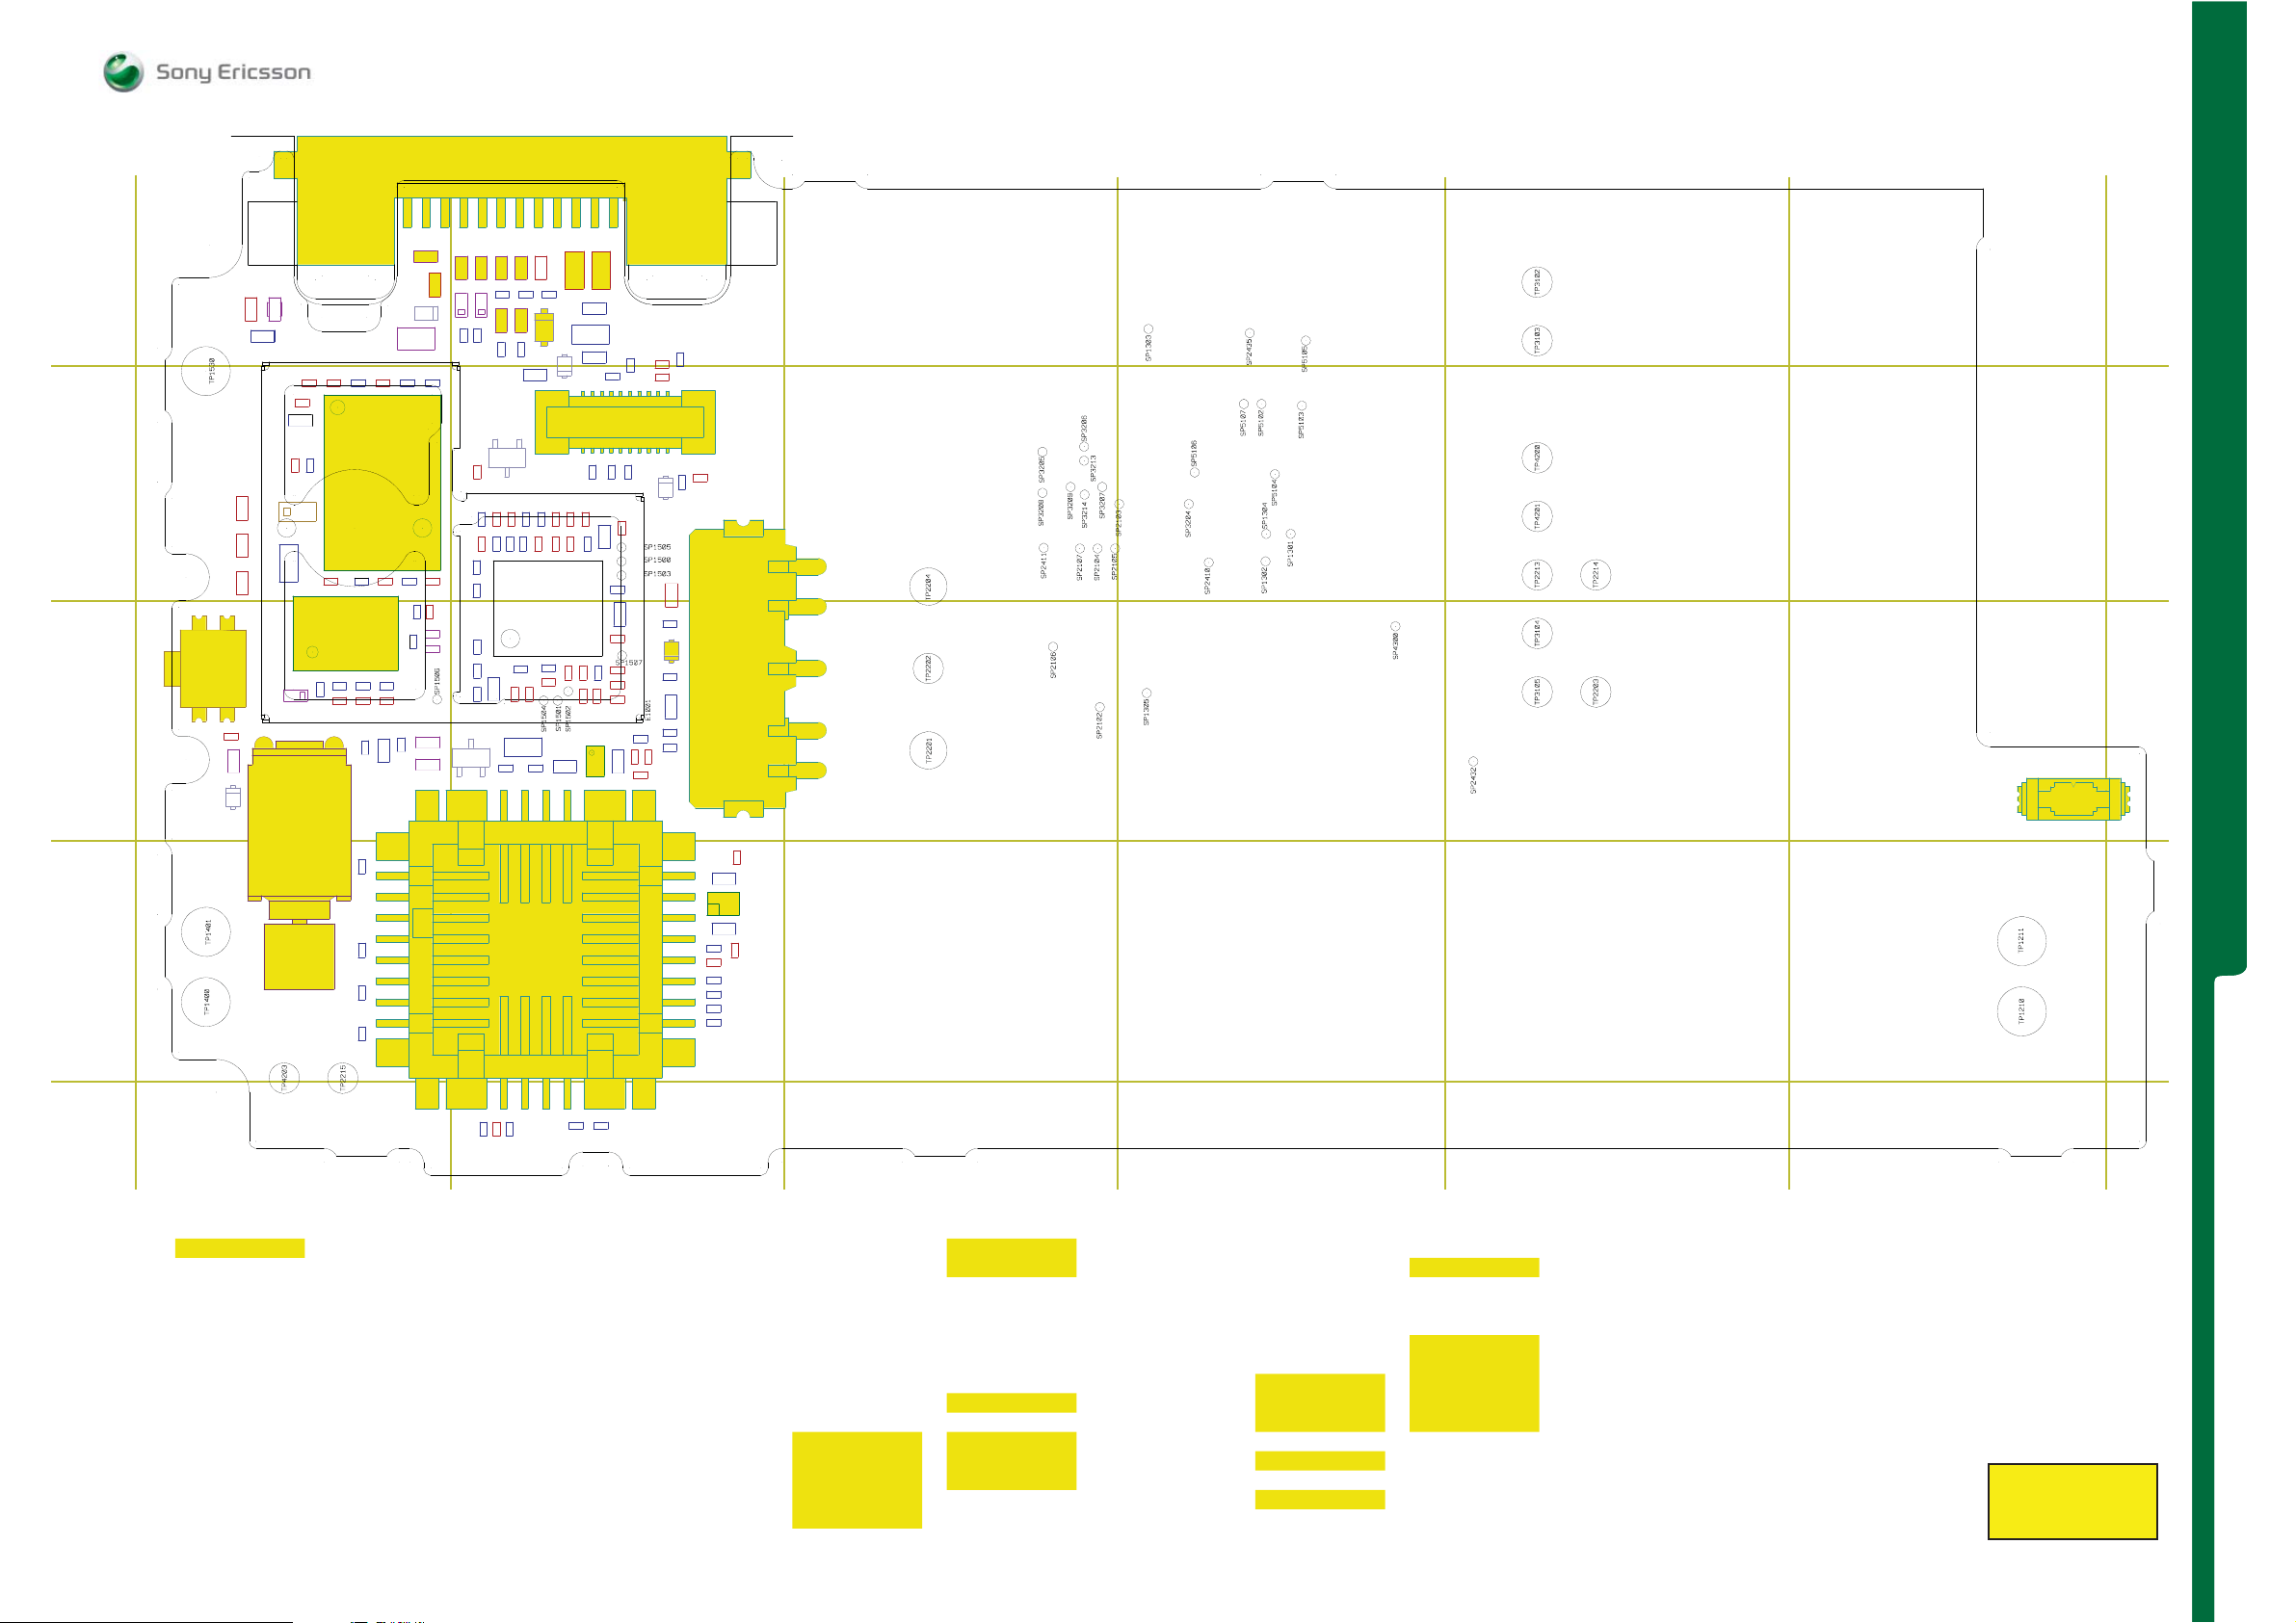
COMCOMPPONONEENNT OT OVVEERRVIEVIEWW Primary Side
SEMC T
roubleshooting Manual
G705 - W705 - W715
W890
SEMC Troubleshooting Manual
XX22440055
123456
A
B
C
TP1530
S2404
R2004
L2406
L2401
R2451
V2413
R1313
C3305
C1303
N1300
CC11330011CC11330000
R1535
R1533
R1534
R1520
C1512
L1511
R3304
C3304
W1300
C1510
R3302
R1300
R1312
C1302
R1516 RR11331100RR11331111
NN11551100
CC11550077
C1508
R1513
RR11551122
CC11550066
RR11551111
CC22000022
CC22000011
C1502
L1501
L2409
VV22448800
L3300
CC11550099
CC11553322
LL44220011
LL44220022
CC22000033
C3306
LL11553311
LL11553300
L2453
C2443
RR11551144
P1506
S
VV44220022
L2455
C2442
R1301
CC11550055
RR11550022
CC11552211
CC11551166
CC11551144
L2402
C2452
V2402
RR11550066
CC11551188
CC11552222
CC11551155
L2403
L2408
C2448
RR11550055
CC11551199
CC11550000
CC11551133
L2404L2405
C2438
C2451
V2417
C2447
C2420
CC11550044
CC11552233
RR11550088
CC11552200
NN11550000
CC11551177
RR11551177
RR11551188
RR11551199
CC22228833
CC44333311CC44333322
R2448
SP1504
RR11552233
RR11550099
CC22228844
P1501
S
V2477
RR11550077
RR11551155
RR11550044
R2449
C2440
RR11551100
RR11552222
SP1502
R2490
C2444
C2441
C2415
XX22440022
CC22441166
CC22441188
CC11552244
CC11552266
CC11552255
RR11552255
RR11552211
NN22220033
CC22441199
CC11552288
CC11552277
RR11552277
SP1507
RR11553366
RR11552288
RR11552299
CC22228822
C2417
RR11550011
CC22228811
RR22228811
RR22221122
RR22443322
RR44223300
SP1505
SP150
SP150
1001
E
RR22228822
CC22223344
VV22220000
CC22220011
CC22220033
CC22220022
TP3102
CC22440033
SP3206
RR22443355
CC22440077
VV22448833
0
3
RR22220000
CC22220000
XX22220011
TP2204
TP2202
TP2201
SP3205
SP3209
SP3208
SP3214
SP2411
SP2107
SP2106
P1303
S
SP3213
SP3207
SP2103
SP2105
SP2104
SP2102
SP3204
SP1305
SP2435
SP5105
SP5102
SP5107
SP5103
SP5106
SP5104
SP1304
SP1301
SP1302
SP2410
SP4300
SP2432
TP3103
P4200TP2213
T
TP4201
TP2214
TP3104
P3105
T
TP2203
XX33110022
A
B
C
COMPONENT OVERVIEW
COMPONENT OVERVIEW
D
TP1401
TP1400
B2000 1202-9271 C1
C1300 1000-0048 B1
C1301 1000-0048 B1
C1302 1000-0048 B1
C1303 1000-0048 B1
C1500 1000-0050 C2
C1502 1000-0056 C1
C1504 1000-0066 B2
C1505 1000-0066 B2
C1506 1000-0066 C1
C1507 1000-0066 C1
C1508 1000-0066 C1
C1509 1000-0066 C1
C1510 1000-0061 B1
C1512 1000-5949 A1
RR22221100
CC44333355
BB22000000
XX44330000
CC44333344CC44330044
CC44332200
TP4203
TP2215
CC44333366
CC44333388
CC44330011
CC44333300
RR44330022
CC44330088
RR44330033
CC44333399
CC44333377
CC44333333
CC44334400
CC22228866
NN22220044
CC22228877
RR22221111
TP1211
P1210
T
D
123456
C1513 1000-0051 C2
C1514 1000-0048 C2
C1515 1000-0053 C2
C1516 1000-0066 C2
C1517 1000-0066 C2
C1518 1000-0048 B2
C1519 1000-0053 B2
C1520 1000-0066 B2
C1521 1000-0053 B2
C1522 1000-0066 B2
C1523 1000-0048 B2
C1524 1000-0051 B2
C1525 1000-0048 C2
C1526 1000-0048 B2
C1527 1000-0051 C2
C1528 1000-0048 B2
C1532 1200-4295 C1
C2003 1000-0056 C1
C2202 1000-0049 C2
C2203 1000-0064 C2
C2281 1000-0069 C2
C2282 1000-0062 C2
C2283 1000-0059 C2
C2284 1000-6901 C2
C2286 1000-0062 D2
C2287 1000-6901 D2
C2403 1000-0048 A2
C2419 1000-0045 B2
C2420 1000-0051 B2
C2440 1000-0076 A2
C2441 1000-0057 A 2
C2442 1000-0045 A2
C2443 1000-0045 A2
C2447 1000-6838 A2
C2448 1000-6838 A2
C3304 1000-0075 B1
C3305 1000-0048 B1
C3306 1000-0338 B1
C4301 1000-0048 E2
C4304 1000-0048 D1
C4320 1000-0048 D1
C4330 1000-0056 E2
C4331 1000-0056 C2
C4332 1000-0056 C2
C4333 1000-0056 D2
C4334 1000-0056 D1
C4335 1000-0056 D1
C4336 1000-0056 E2
C4337 1000-0056 D2
C4338 1000-0056 E2
C4339 1000-0056 D2
C4340 1000-0056 D2
L1501 1000-0113 C1
L1530 1200-0741 C1
L1531 1200-0741 C1
L2401 1200-0317 A2
L2402 1200-0317 A2
L2403 1200-0317 A2
L2404 1200-0317 A2
L2405 1200-0317 A2
L2406 1200-6898 A1
L2408 1200-0317 A2
L2409 1200-0317 C1
L2453 1000-3633 A2
L2455 1000-3633 A2
L3300 1000-1899 A1
L4201 1200-7732 C1
L4202 1200-7732 C1
N1300 1200-9840 B1
N1500 1200-0932 C2
N1510 1200-6173 C1
N2203 1000-8638 C2
N2204 1001-0 625 D2
R1502 1201-1031 B2
R1504 1000-0181 C2
R1505 1000-0376 B2
R1506 1000-4158 B2
R1508 1000-0376 B2
R1509 1000-0376 B2
R1510 1000-0376 B2
R1511 1000-0230 C1
R1512 1000-0230 C1
R1514 1000-0241 C1
R1515 1000-4134 B2
R1517 1000-0376 C2
R1518 1000-4133 C2
R1519 1000-4133 C2
R1520 1000-0179 A1
R1521 1000-0376 C2
R1522 1000-0376 C2
R1525 1000-0376 C2
R1533 1000-0179 B1
R1536 1000-0376 C2
R2200 1000-4380 B2
R2281 1000-0239 C2
R2282 1000-0231 C2
R2432 1000-0235 B2
R2449 1000-0257 A2
R2451 1000-0179 A1
R2490 1000-0257 A2
R3302 1000-0243 B1
S2404 1206-9606 C1
W1300 1200-5169 B1
V2200 1000-0282 C2
V2402 1000-8367 B2
V2413 1201-2253 A1
V2417 1200-5130 A2
V2477 1001-1864 B2
V2480 1001-1864 C1
V2483 1001-1864 B2
X2201 1206-2937 C2
X2402 1200-9864 B2
X2405 1205-9723 A2
X3102 1206-485 5 C6
X4300 1206-5418 D2
R - Replaceable
See Appendix for
more information.
1225-4035 rev. 1
80 (122)
Page 81
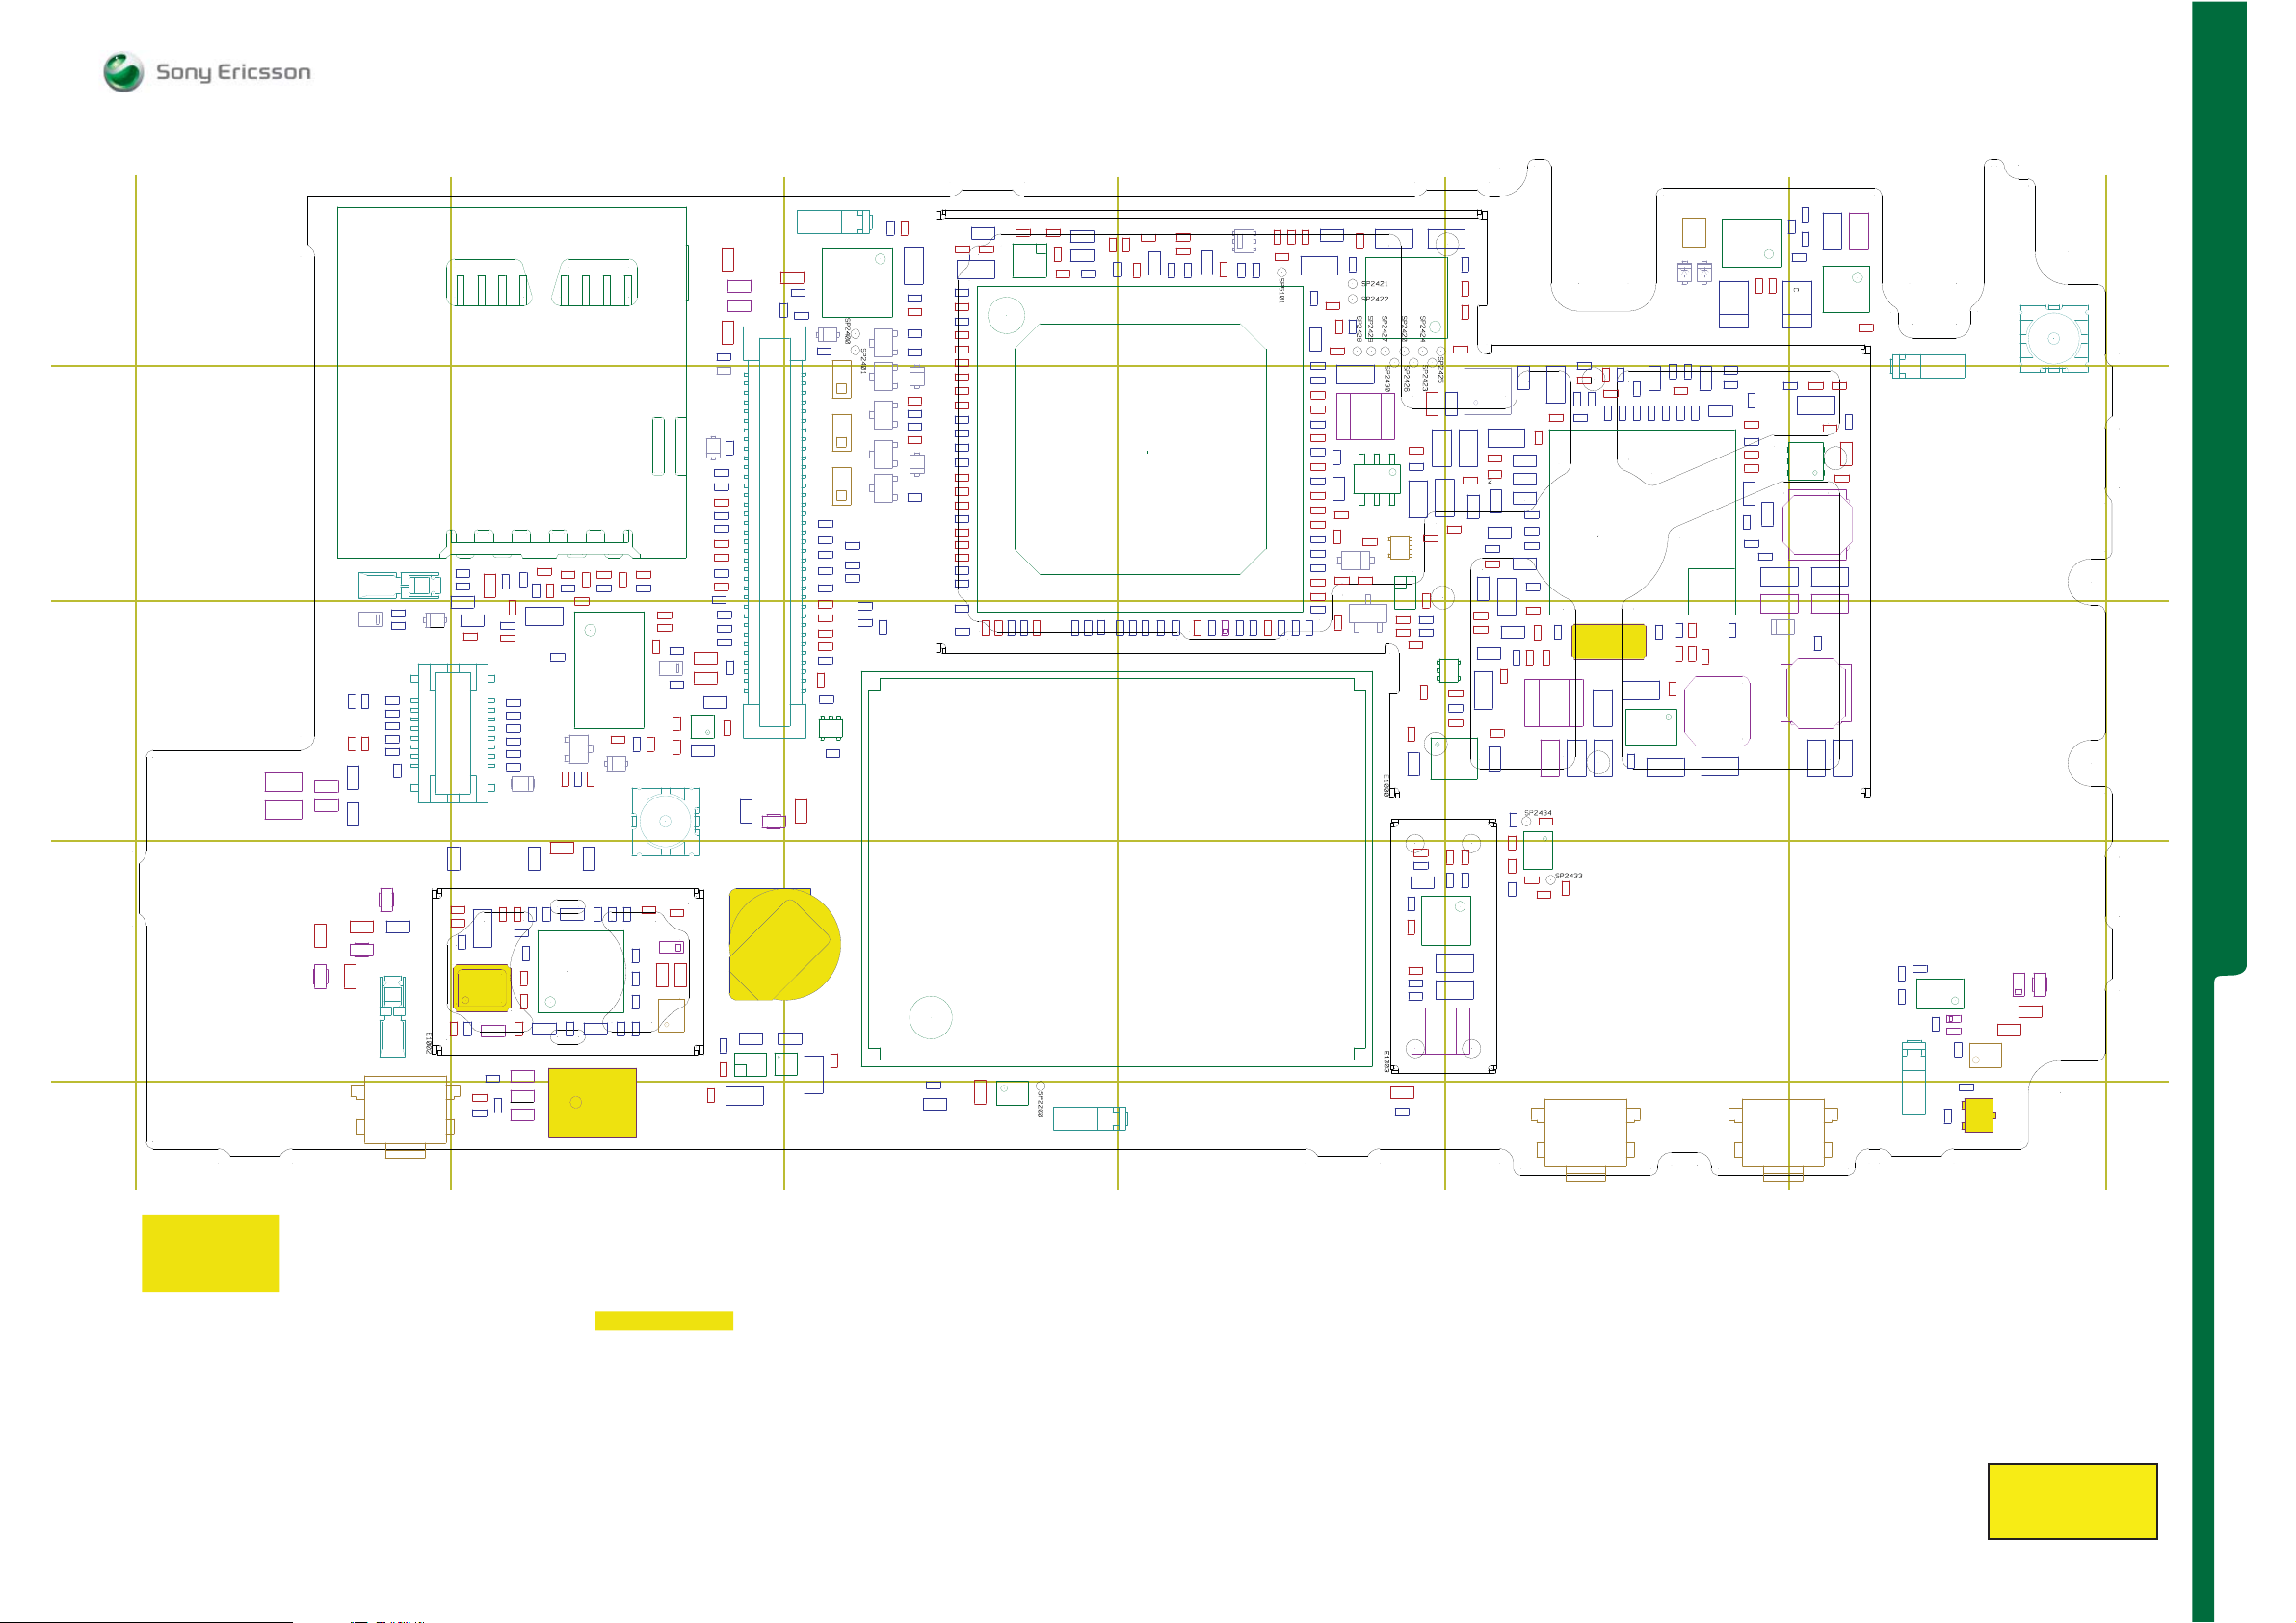
COMPONENT OVERVIEW Secondary Side B - C
SEMC Troubleshooting Manual
G705 - W705 - W715
A
B
C
D
CC22441133
RR22441100
RR22441111
RR22441166
CC22222200
RR33114488
CC22441122
CC22441144
CC22221166
SS22440066SS22440055
RR33114477
CC44220022
CC22222244
CC22221177
LL22220011
VV22220011
CC33111144
CC33111155
CC33111166
CC33115577
C
33115500
CC44220033
RR44220011
NN22440011
LL44220000
RR44220033
CC22221155
LL22220000
CC44220000
LL44222222
CC22221188
CC22443399
NN22442211
RR44220044
CC44220011
RR44220000
LL22445522
A
RR22444477
XX11000022
RR44220022
XX11550000
B
CC22221199
CC11440055
CC11440077
CC11440066
NN11441100
CC11440033
CC11440022
XX11000055
CC44440022
LL11440022
LL11440011
CC44440011
ZZ11440000
BB44441100
RR11444411
LL11440000
LL11440044
RR11441100
C
D
123456
XX11000000
RR33111144
RR22449999
LL33110033
CC22447722
CC22449999
CC44223344
VV44220066
CC22449944
CC22446600
VV22447766
LL33110044
RR33111133
XX22440033
CC22449933
VV44220077
CC44221100
CC44221111
RR44222200
XX44220000
LL33111100
LL33111111
LL33111133
LL33111144
RR11220022
LL11221122
CC33111199
RR33110088
RR11220066
VV33110011
CC33111188
RR33110099
CC33111111
CC33110099
RR11220044
LL11221111
XX11000011
CC33110088
CC33110077
CC22449922
CC22448899
CC22448800
CC22448811
CC22448822
LL11220055
CC11221122
XX11000044
SS22440033
CC44221144
CC44221133
RR44441155
RR44441144
CC33114400
VV33112200
CC33113399
LL11440033
RR11440088
RR22221177
RR22220022
RR11660022
RR44222244
RR44222211
CC44223355
RR22228833
CC44330066
CC44330055
CC44222299
CC44221199
CC33115599
RR33115588
RR33115577
CC22228899
NN22220011
RR22220055
CC22228888
CC11220022
RR11440099
ZZ11440011
CC22338811
CC22338800
RR22331155
NN22331100
RR11441188
CC22338822
RR22441188
RR22442299
CC22442277
CC44441100
CC11441188
CC11442233
RR11440077
RR22442200
CC22442255
CC44441111
CC11221100
RR11222200
CC11442255
NN11440000
CC 11442244
RR22000011
CC 11442222
RR22442277
RR44441166
VV44220044
CC22449900
CC11441199
RR22443366
CC11221111
CC11442200
RR22441199
CC22442266
CC11442288
NN44441100
BB33110000
RR44441122
VV22440088
RR22441177
RR22442288
CC22442244
RR44441133
CC44441122
RR44441177
XX11220000
CC11441177
CC11441166
RR11440022
CC11441144
CC11441155
CC11442266
CC11442277
CC11441133
CC22441111
CC22442233
RR22442266
CC22442299
CC22442211
RR22443333
CC 22 44 22 22
CC 22 44 1100
VV44220055
RR22330000
CC22442288
RR22442211
XX22440011
CC22449911
CC22448888
CC22448877
CC22448866
CC22448855
RR11660000
RR11440066
RR11441133
CC11220099
CC11441122
BB11440000
CC11441100
RR33119977
CC33330077
CC11441111
LL 11441100
CC33111177
CC22448844
RR11441166
CC11442211
CC33111100
VV22447700
RR11440033
RR11440044
RR1144144
LL33112222
LL33110011
LL33112200
CC22448833
E1002
LL11220077
CC22221144
CC22338833
NN22331111
CC44334455
CC44334477
CC44335511
CC44334488
CC44335522
RR44330000
RR44330011
RR44330055
RR22449911
RR44330044
CC44330099
CC44334433
NN22660000
CC22660000
RR11221111
RR11441199
CC22338844
ZZ44220022
ZZ44220000
ZZ44220011
CC44334499
CC44334466
CC44335500
RR22440099
CC22440066
SP2401
CC44334411
CC22440044
RR33110000
CC22333311
CC22440055
RR55110000
RR22440011
CC22334466
VV22447722
CC22446611
RR22447744
RR22447733
CC22446633
VV22447711
VV22448811
RR22447722
RR22447711
RR22447700
VV22447733
RR22447766
RR22447755
CC22446699
CC22330022
CC22446688
CC22332222
VV22447744
RR22447777
VV22448822
CC22334444
CC22330033
VV22447755
RR55110011
RR22442222
CC22447700
RR11660044
CC22332244
RR11660055
RR11660066
RR11660033
CC22332233
CC22330044
CC44334444
CC22334488
CC11220000
NN22441111
SP2400
CC44334422
CC33110066
CC33110044
RR33115533
RR11110022
RR33112288
NN33110000
RR33110022
RR33110066
RR33112277
CC33113377
CC33114488
CC22331133
RR22111122
RR22111133
CC22332211
RR11552266
RR55110022
RR22111144
CC22332200
CC22330011
RR22339900
RR11552244
CC22331122
CC22331111
NN22001100
CC22332266
LL22110000
RR22111155
CC22333399
CC22334422
CC22330088
CC22333377
RR11110011
CC22332255
CC22330055
RR11110033
CC22331144
CC22335533
CC22334411
CC22335544
RR22444444
RR22443311
VV44220033
CC22333300
CC22331100
RR22443300
S
P5101
CC22111100
CC22330066
CC22110033
RR22110022
CC22335522
NN11220000
CC11222200
CC11221199
RR11222222
NN11220022
SP2200
XX11000033
RR22444422
CC22443355
CC22334477
CC22332299
CC22330099
RR11440011
RR22331133
CC22332288
RR22441155
CC22335500
RR22440077
CC22335511
RR22440088
RR22440055
RR 22 44 00 66
CC 22 33 00 77
CC22332277
CC22110044
RR22112233
RR22112222
CC22110099
CC22334499
CC22334455
CC22443333
RR22444400
RR22331100
RR22110011
RR22442233
CC22223311
CC22333366
RR22330022
RR22110066
RR22113344
CC22443344
CC22443322
CC22223300
VV22110011
RR22442244
SP24
SP2422
SP2428
SP2429
LL22220022
NN22220000
RR22110044
RR22110055
VV22110000
CC22443311
21
S
P2427
S
P2430
E
1000
E1003
RR22112200
RR22112211
CC11221155
RR22440000
CC22440000
DD22110022
SP2420
SP2426
RR22220066
CC22222299
RR22110088
RR11221144
RR11221100
RR11220011
CC11220033
CC11220055
NN22110000
CC11220077
RR11220000
CC11220044
CC11221166
CC22222288
RR22111199
CC22110066
CC22110077
RR22111166
SP2424
RR22220011
S
P2423
RR22001100
CC22443377
NN22442200
SP2425
CC22223322
CC22220044
NN11221100
CC11220011
CC11220066
LL11220000
CC22220066
RR11220033
CC11221144
RR22330033
NN22110011
RR22111188
CC22110088
RR22111177
CC22443366
RR22444466
RR22444411
RR22330055
NN11221111
RR11220099
CC11221133
RR22444455
VV22220022
CC22222222
CC11221188
RR22220044
RR22330077
RR22330066
RR2
CC33113388
RR33115544
CC22221133
CC44220088
CC22110055
CC33112233
330011
CC22221111
CC22220099
RR22111111
RR11221133
CC11221177
CC22220055
CC22222266
CC22443300
RR22443377
RR22443344
CC22444499
CC22222277
CC22222211
CC22221122
CC22220077
CC2222100
CC22220088
CC11220088
CC22222255
CC33115544
CC44220099
RR22223300
RR22339944
SP2
RR22445500
RR33111199
RR22220033
RR22445566
RR33115566
RR22110033
434
RR22445577
NN22442222
CC33115588
CC22110011
LL22331133
LL22331100
CC33112222
SP2433
RR22445544
CC33112211
RR33119999
CC33113366
CC33113311
RR33112233
RR33119988
CC33112266
CC33112277
CC33113322
CC33113333
NN22000000
BB22110000
CC22337766
CC22337777
CC22337711
CC22337733
CC22337722
CC33112288
CC33115555
CC33110022
CC22110000
NN22330000
CC22337799
ZZ22440000
NN33110011
VV22441155
VV22441166
CC33114499
CC33112255
CC33112244
CC33115566
CC33114466
CC33114455
RR33111122
CC33115522
CC33115533
CC33113355
CC33115511
CC22222233
CC22440022
RR22440044
CC44220066
RR22440022
RR22440033
RR11110000
RR11550033
LL22331111
CC22337744
COMPONENT OVERVIEW
B1400 1200-7847 D2
B2100 1000-8271 C5
B3100 1210-7410 E2
B4410 1000-8451 E6
C1201 1000-0061 D5
C1202 1201-6533 C2
C1204 1000-0048 D4
C1205 1000-0048 D4
C1206 1000-0039 D5
C1207 1000-6901 C4
C1208 1000-0048 B5
C1209 1000-6086 D2
C1212 1000-6095 D1
C1213 1000-6900 D5
C1214 1000-0048 D5
C1215 1000-0048 D4
123456
C1217 1000-6901 C5
C1218 1000-6901 B5
C1402 1000-6073 D6
C1403 1000-0045 D6
C1405 1000-6838 D6
C1406 1000-0338 D6
C1411 1000-0039 D2
C1412 1000-0048 D2
C1413 1000-0048 D2
C1414 1000-0048 D2
C1415 1000-0049 D2
C1416 1000-0048 D2
C1417 1000-0049 D2
C1418 1000-0048 D2
C1419 1000-0048 D2
C1420 1000-0051 D2
C1421 1000-0048 D2
C1422 1000-0051 D2
C1423 1000-0048 D2
C1424 1000-0052 D2
C1425 1000-0048 D2
C1426 1000-0048 D2
C1427 1000-0048 D2
C1428 1000-0048 D2
C2100 1000-6078 C5
C2101 1000-0049 C5
C2105 1000-0039 C5
C2204 1000-0061 B4
C2205 1000-0061 B5
C2206 1000-0039 B4
C2207 1000-6901 B5
C2208 1000-0051 B5
C2209 1000-6901 B5
C2210 1000-6901 B5
C2211 1000-6901 B5
C2212 1000-6901 B5
C2213 1000-0051 B5
C2214 1203-3900 D3
C2215 1000-0048 C6
C2216 1000-0048 B5
C2217 1000-0061 B5
C2218 1000-0061 C6
C2219 1000-0061 C6
C2220 1000-0048 B5
C2222 1000-0076 B5
C2223 1000-0048 B5
C2224 1000-0051 B5
C2225 1000-00 67 B5
C2226 1000-0051 C5
C2227 1000-0048 C5
C2228 1000-00 61 B4
C2229 1000-0050 B4
C2231 1000-0061 B4
C2288 1000-0340 C2
C2289 1000-0340 C2
C2301 1000-0051 A4
C2302 1000-0048 B3
C2303 1000-0048 B3
C2304 1000-0048 B3
C2305 1000-0048 C3
C2306 1000-0048 C4
C2307 1000-0048 B4
C2308 1000-0048 C3
C2309 1000-0048 B4
C2310 1000-0048 A4
C2311 1000-0048 A4
C2312 1000-0048 A4
C2313 1000-0048 A3
C2314 1000-0048 C3
C2320 1000-0051 A4
C2321 1000-0048 A3
C2322 1000-0048 B3
C2323 1000-0048 B3
C2324 1000-0048 B3
C2325 1000-0048 C3
C2326 1000-0048 C4
C2327 1000-0048 B4
C2328 1000-0048 B4
C2329 1000-0048 B4
C2330 1000-0048 A4
C2331 1000-0048 A3
C2336 1000-0051 B4
C2337 1000-0048 C3
C2339 1000- 0 048 C4
C2341 1000-0048 C4
C2342 1000-0048 C4
C2344 1000-0048 B3
C2345 1000-6901 A4
C2346 1000-0048 A3
C2347 1000-0048 A4
C2348 1000-0048 C3
C2349 1000-0048 C4
C2350 1000-0048 B4
C2351 1000-0048 B4
C2352 1000-0048 C4
C2353 1000-0068 C4
C2354 1000-0068 C4
C2371 1000-0061 C5
C2372 1000-0061 C5
C2373 1000-0048 C5
C2374 1000-0061 C5
C2376 1000-0061 C5
C2377 1000-0061 C5
C2379 1000-0061 C5
C2380 1000-0051 D2
C2381 1000-0045 D2
C2382 1000-0061 E2
C2383 1000-0051 D3
C2384 1000-0061 D3
C2402 1000-0048 C5
C2404 1000-0061 A3
C2405 1000-0048 A3
C2406 1000-0048 A3
C2410 1000-6901 C2
C2412 1000-0048 B5
C2413 1000-0338 B5
C2414 1000-0051 B5
C2421 1000-0048 B2
C2422 1000-6901 C2
C2423 1000-0056 B2
C2430 1000-0048 C5
C2431 1000-0061 A4
C2432 1000-0048 A4
C2433 1000-0051 A4
C2434 1000-0048 A4
C2435 1000-0039 A4
C2436 1000-0048 A5
C2437 1000-0039 A4
C2439 1000-0076 A6
C2449 1000-0048 D5
C2600 1000-0048 C3
C3104 1000-0340 A3
C3106 1000-0061 A3
C3109 1000-0078 C1
C3110 1000-0056 E2
C3111 1000-0078 C1
C3117 1000-0056 E2
C3121 1000-0048 B5
C3122 1000-0056 B5
C3123 1000-0061 B5
C3124 1000-0048 B5
C3125 1000-0048 B5
C3131 1000-0048 B5
C3132 1000-0048 B5
C3133 1000-0048 B5
C3135 1000-0048 B5
C3136 1000-0056 B5
C3137 1000-0052 A3
C3138 1000-0069 B5
C3145 1000-6900 B5
C3146 1000-6900 B5
C3149 1213-2060 A5
C3150 1213-2060 A6
C3151 1000-0051 B5
C3152 1000-0048 B5
C3154 1000-6840 B5
C3155 1000-0340 B5
C3156 1000-0340 B5
C3157 1000-0056 A6
C3158 1000-0061 B5
C4200 1000-0059 B6
C4202 1200-0286 B5
C4203 1000-0076 B6
C4206 1000-0048 C5
C4208 1000-6901 C5
C4209 1000-0048 B5
C4213 1000-0048 B2
C4214 1000-0048 B2
C4229 1000-0048 C2
C4234 1000-0056 A3
C4235 1000-0056 B2
C4305 1000-0048 C2
C4306 1000-0048 C2
C4344 1000-0048 C3
C4401 1000-0045 E6
R - Replaceable
See Appendix for
more information.
1225-4035 rev. 1
81 (122)
Page 82
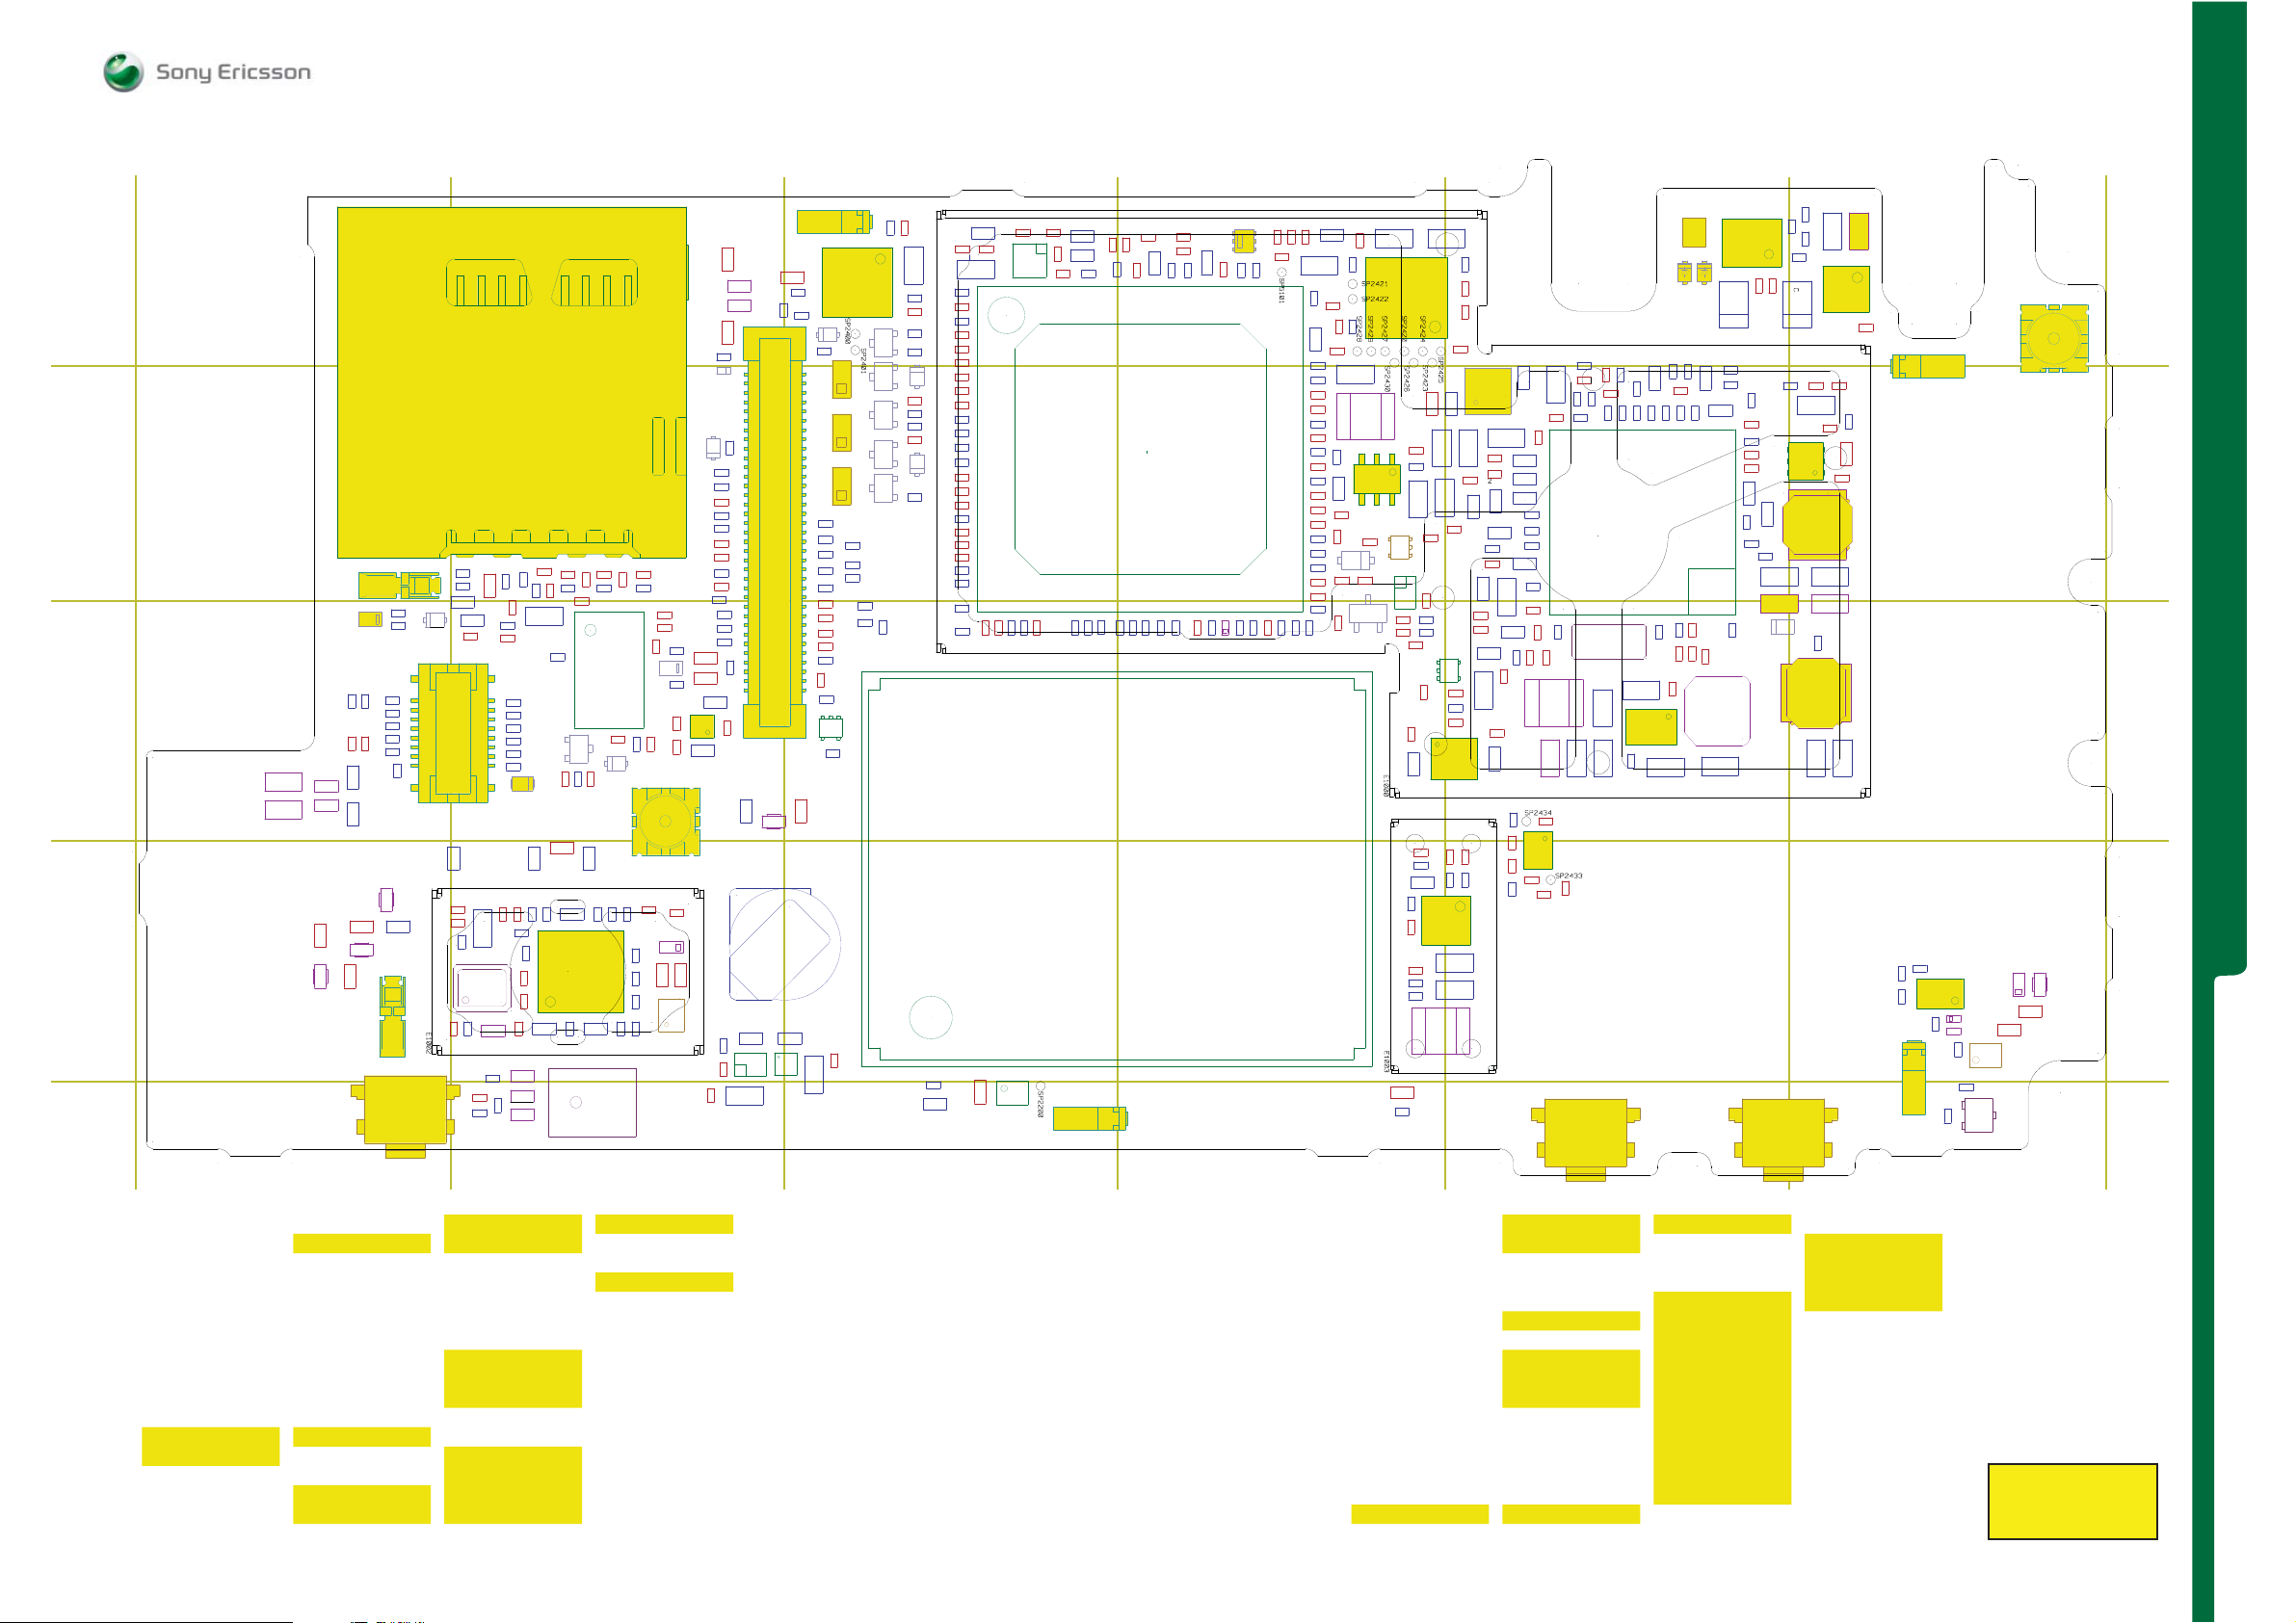
COMPONENT OVERVIEW Secondary Side D - Z
SEMC Troubleshooting Manual
G705 - W705 - W715
A
B
C
D
CC22441133
RR22441100
RR22441111
RR22441166
CC22222200
RR33114488
CC22441122
CC22441144
CC22221166
SS22440066SS22440055
RR33114477
CC44220022
CC22222244
CC22221177
LL22220011
VV22220011
CC33111144
CC33111155
CC33111166
CC33115577
C
33115500
CC44220033
RR44220011
NN22440011
LL44220000
RR44220033
CC22221155
LL22220000
CC44220000
LL44222222
CC22221188
CC22443399
NN22442211
RR44220044
CC44220011
RR44220000
LL22445522
A
RR22444477
XX11000022
RR44220022
XX11550000
B
CC22221199
CC11440055
CC11440077
CC11440066
NN11441100
CC11440033
CC11440022
XX11000055
CC44440022
LL11440022
LL11440011
CC44440011
ZZ11440000
BB44441100
RR11444411
LL11440000
LL11440044
RR11441100
C
D
123456
XX11000000
RR33111144
RR22449999
LL33110033
CC22447722
CC22449999
CC44223344
VV44220066
CC22449944
CC22446600
VV22447766
LL33110044
RR33111133
XX22440033
CC22449933
VV44220077
CC44221100
CC44221111
RR44222200
XX44220000
LL33111100
LL33111111
LL33111133
LL33111144
RR11220022
LL11221122
CC33111199
RR33110088
RR11220066
VV33110011
CC33111188
RR33110099
CC33111111
CC33110099
RR11220044
LL11221111
XX11000011
CC33110088
CC33110077
CC22449922
CC22448899
CC22448800
CC22448811
CC22448822
LL11220055
CC11221122
XX11000044
SS22440033
CC44221144
CC44221133
RR44441155
RR44441144
CC33114400
VV33112200
CC33113399
LL11440033
RR11440088
RR22221177
RR22220022
RR11660022
RR44222244
RR44222211
CC44223355
RR22228833
CC44330066
CC44330055
CC44222299
CC44221199
CC33115599
RR33115588
RR33115577
CC22228899
NN22220011
RR22220055
CC22228888
CC11220022
RR11440099
ZZ11440011
CC22338811
CC22338800
RR22331155
NN22331100
RR11441188
CC22338822
RR22441188
RR22442299
CC22442277
CC44441100
CC11441188
CC11442233
RR11440077
RR22442200
CC22442255
CC44441111
CC11221100
RR11222200
CC11442255
NN11440000
CC 11442244
RR22000011
CC 11442222
RR22442277
RR44441166
VV44220044
CC22449900
CC11441199
RR22443366
CC11221111
CC11442200
RR22441199
CC22442266
CC11442288
NN44441100
BB33110000
RR44441122
VV22440088
RR22441177
RR22442288
CC22442244
RR44441133
CC44441122
RR44441177
XX11220000
CC11441177
CC11441166
RR11440022
CC11441144
CC11441155
CC11442266
CC11442277
CC11441133
CC22441111
CC22442233
RR22442266
CC22442299
CC22442211
RR22443333
CC 22 44 22 22
CC 22 44 1100
VV44220055
RR22330000
CC22442288
RR22442211
XX22440011
CC22449911
CC22448888
CC22448877
CC22448866
CC22448855
RR11660000
RR11440066
RR11441133
CC11220099
CC11441122
BB11440000
CC11441100
RR33119977
CC33330077
CC11441111
LL 11441100
CC33111177
CC22448844
RR11441166
CC11442211
CC33111100
VV22447700
RR11440033
RR11440044
RR1144144
LL33112222
LL33110011
LL33112200
CC22448833
E1002
LL11220077
CC22221144
CC22338833
NN22331111
CC44334455
CC44334477
CC44335511
CC44334488
CC44335522
RR44330000
RR44330011
RR44330055
RR22449911
RR44330044
CC44330099
CC44334433
NN22660000
CC22660000
RR11221111
RR11441199
CC22338844
ZZ44220022
ZZ44220000
ZZ44220011
CC44334499
CC44334466
CC44335500
RR22440099
CC22440066
SP2401
CC44334411
CC22440044
RR33110000
CC22333311
CC22440055
RR55110000
RR22440011
CC22334466
VV22447722
CC22446611
RR22447744
RR22447733
CC22446633
VV22447711
VV22448811
RR22447722
RR22447711
RR22447700
VV22447733
RR22447766
RR22447755
CC22446699
CC22330022
CC22446688
CC22332222
VV22447744
RR22447777
VV22448822
CC22334444
CC22330033
VV22447755
RR55110011
RR22442222
CC22447700
RR11660044
CC22332244
RR11660055
RR11660066
RR11660033
CC22332233
CC22330044
CC44334444
CC22334488
CC11220000
NN22441111
SP2400
CC44334422
CC33110066
CC33110044
RR33115533
RR11110022
RR33112288
NN33110000
RR33110022
RR33110066
RR33112277
CC33113377
CC33114488
CC22331133
RR22111122
RR22111133
CC22332211
RR11552266
RR55110022
RR22111144
CC22332200
CC22330011
RR22339900
RR11552244
CC22331122
CC22331111
NN22001100
CC22332266
LL22110000
RR22111155
CC22333399
CC22334422
CC22330088
CC22333377
RR11110011
CC22332255
CC22330055
RR11110033
CC22331144
CC22335533
CC22334411
CC22335544
RR22444444
RR22443311
VV44220033
CC22333300
CC22331100
RR22443300
S
P5101
CC22111100
CC22330066
CC22110033
RR22110022
CC22335522
NN11220000
CC11222200
CC11221199
RR11222222
NN11220022
SP2200
XX11000033
RR22444422
CC22443355
CC22334477
CC22332299
CC22330099
RR11440011
RR22331133
CC22332288
RR22441155
CC22335500
RR22440077
CC22335511
RR22440088
RR22440055
RR 22 44 00 66
CC 22 33 00 77
CC22332277
CC22110044
RR22112233
RR22112222
CC22110099
CC22334499
CC22334455
CC22443333
RR22444400
RR22331100
RR22110011
RR22442233
CC22223311
CC22333366
RR22330022
RR22110066
RR22113344
CC22443344
CC22443322
CC22223300
VV22110011
RR22442244
SP24
SP2422
SP2428
SP2429
LL22220022
NN22220000
RR22110044
RR22110055
VV22110000
CC22443311
21
S
P2427
S
P2430
E
1000
E1003
RR22112200
RR22112211
CC11221155
RR22440000
CC22440000
DD22110022
SP2420
SP2426
RR22220066
CC22222299
RR22110088
RR11221144
RR11221100
RR11220011
CC11220033
CC11220055
NN22110000
CC11220077
RR11220000
CC11220044
CC11221166
CC22222288
RR22111199
CC22110066
CC22110077
RR22111166
SP2424
RR22220011
S
P2423
RR22001100
CC22443377
NN22442200
SP2425
CC22223322
CC22220044
NN11221100
CC11220011
CC11220066
LL11220000
CC22220066
RR11220033
CC11221144
RR22330033
NN22110011
RR22111188
CC22110088
RR22111177
CC22443366
RR22444466
RR22444411
RR22330055
NN11221111
RR11220099
CC11221133
RR22444455
VV22220022
CC22222222
CC11221188
RR22220044
RR22330077
RR22330066
RR2
CC33113388
RR33115544
CC22221133
CC44220088
CC22110055
CC33112233
330011
CC22221111
CC22220099
RR22111111
RR11221133
CC11221177
CC22220055
CC22222266
CC22443300
RR22443377
RR22443344
CC22444499
CC22222277
CC22222211
CC22221122
CC22220077
CC2222100
CC22220088
CC11220088
CC22222255
CC33115544
CC44220099
RR22223300
RR22339944
SP2
RR22445500
RR33111199
RR22220033
RR22445566
RR33115566
RR22110033
434
RR22445577
NN22442222
CC33115588
CC22110011
LL22331133
LL22331100
CC33112222
SP2433
RR22445544
CC33112211
RR33119999
CC33113366
CC33113311
RR33112233
RR33119988
CC33112266
CC33112277
CC33113322
CC33113333
NN22000000
BB22110000
CC22337766
CC22337777
CC22337711
CC22337733
CC22337722
CC33112288
CC33115555
CC33110022
CC22110000
NN22330000
CC22337799
ZZ22440000
NN33110011
VV22441155
VV22441166
CC33114499
CC33112255
CC33112244
CC33115566
CC33114466
CC33114455
RR33111122
CC33115522
CC33115533
CC33113355
CC33115511
CC22222233
CC22440022
RR22440044
CC44220066
RR22440022
RR22440033
RR11110000
RR11550033
LL22331111
CC22337744
COMPONENT OVERVIEW
D2102 1202-0076 B4
L1200 1200-2913 D4
L1205 1211-1435 D1
L1207 1201-7614 C2
L1211 1206-5992 D1
L1212 1211-1435 D1
L1401 1200-2414 D6
L1402 1001-5311 D6
L1403 1000-3612 D2
L1404 1205-6617 D6
L2100 1001-5311 C4
L2200 1200-2214 C6
L2201 1000-0118 C5
L2202 1200-2913 B4
L2310 1000-0118 C5
L2311 1200-0119 C5
123456
L2313 1200-2913 C5
L2452 1001-1896 A6
L3101 1000-2618 E2
L3103 1000-2603 A2
L3104 1000-2603 A2
L3110 1000-1875 C1
L3111 1000-1875 C1
L3113 1000-0132 C1
L3114 1000-0132 C1
L3120 1000-2618 E2
L3122 1000-2618 D2
L4200 1000-3334 B6
L4222 1000-0118 C6
N1200 1210-9905 D3
N1210 1203-5870 D4
N1211 1204-5903 C5
N1400 1200-0700 D2
N1410 1200-2407 D6
N2000 1202-0639 B5
N2010 1208-3 871 B4
N2020 1205- 5912 B4
N2100 1200-0425 B4
N2101 1202-0076 C5
N2200 1200-6420 B4
N2201 1201-6465 C2
N2300 1203-2790 C5
N2310 1200 -3 99 4 D2
N2311 1000-8818 D3
N2401 1001-0077 B6
N2411 1202-1676 A3
N2420 1200-1694 A4
N2421 1200 - 6 30 9 A6
N2422 1201-4120 D5
N2600 1202-0076 C3
N3100 1200-9 978 A3
N3101 1000-0198 A5
R1101 1000-0231 C3
R1102 1000-0231 C3
R1103 1000-0231 C3
R1203 1000 -0231 D5
R1204 1000-0179 D1
R1206 1000-0179 D1
R1220 1000-0179 D2
R1401 1000-0231 B4
R1403 1000-0231 D2
R1408 1000-0179 D2
R1409 1000-0179 D2
R1410 1000-0179 D6
R1413 1000-0181 D2
R1414 1000-0181 D2
R1441 1000-0179 D6
R1600 1000-0181 D2
R1602 1000-0181 D2
R2010 1000-0231 B4
R2101 1000-0231 B4
R2104 1000-0231 B4
R2108 1000-0231 C4
R2111 1000-0378 C5
R2113 1000-0388 A3
R2115 1000-0230 C4
R2116 1000-0231 C4
R2117 1000-0231 C5
R2120 1000-0181 C4
R2121 1000-0181 C4
R2201 1000-4376 B4
R2203 1000-0376 C5
R2204 1000-0249 C5
R2217 1000-0231 C2
R2283 1000-0231 B2
R2313 1000-0231 B4
R2315 1000-0231 D2
R2400 1000-5865 E4
R2402 1000-0226 C5
R2403 1000-0226 C5
R2404 1000-0226 C5
R2405 1000-0243 B4
R2406 1000-0243 B4
R2407 1000-0388 B4
R2408 1000-0388 B4
R2415 1000-0175 B4
R2416 1000-0175 B5
R2417 1000-0231 B2
R2418 1000-0231 B2
R2419 1000-0231 B2
R2420 1000-0231 B2
R2421 1000-0231 C2
R2422 1000-4063 B3
R2427 1000-4035 B2
R2428 1000-4035 B2
R2429 1000-4035 B2
R2431 1000-0231 A4
R2433 1000-4035 C2
R2434 1000-0230 D5
R2437 1000-0377 D5
R2441 1000-4147 A5
R2442 1000-0240 A4
R2444 1000-0231 A4
R2445 1000-0234 A5
R2446 1203-6621 A5
R2447 1000-0231 A6
R2450 1000-0231 D5
R2470 1000-0175 B3
R2471 1000-0175 B3
R2472 1000-0175 B3
R2473 1000-0175 A3
R2474 1000-0175 A3
R2475 1000-0175 B3
R2491 1000-0265 C3
R2499 1000-5865 A3
R3100 1000-0181 A3
R3102 1000-0388 A3
R3106 1000-0249 A3
R3112 1000-0231 B5
R3119 1000-0377 B5
R3147 1000-0172 A5
R3148 1000-0172 A5
R3153 1000-0231 A3
R3154 1000-4152 B5
R3156 1000-0254 B5
R3198 1000-0181 B5
R3199 1000-0181 B5
R4202 1000-0264 B6
R4203 1200-1061 B6
R4204 1000-4160 B6
R5100 1000-0175 A3
R5101 1000-0231 B3
R5102 1000-0175 A4
S2403 1001-0060 E1
S2405 1001-0060 E5
S2406 1001-0060 E5
V2100 1000-8463 C4
V2101 1000-0391 B4
V2201 1001-0073 C5
V2202 1200-0145 B5
V2408 1001-1864 C2
V2415 1201-8440 A5
V2416 1201-8440 A5
V2470 1001-0075 C2
V2472 1000-7497 A3
V2473 1200-9617 B3
V2475 1200-9617 B3
V2481 1001-1864 B3
V2482 1001-1864 B3
V3101 1001-0796 C1
V4203 1211-3641 A4
V4204 1200-9617 C2
V4205 1001-1864 C1
V4206 0000-0000 A3
X1000 1201-4841 A3
X1001 1202-1053 B1
X1002 1201-4841 B6
X1003 1201-4841 E3
X1004 1202-1053 D1
X1005 1201-4841 E6
X1200 1203-9688 C2
X1500 1203-9688 A6
X2401 1214-7370 C2
X2403 1000-7708 B2
X4200 1206-2940 B2
Z1400 1211-5714 D6
Z1401 1200-0660 D2
Z2400 1201-6833 A5
Z4200 1200-1824 B3
Z4201 1200-1824 B3
Z4202 1200-1824 B3
R - Replaceable
See Appendix for
more information.
1225-4035 rev. 1
82 (122)
Page 83
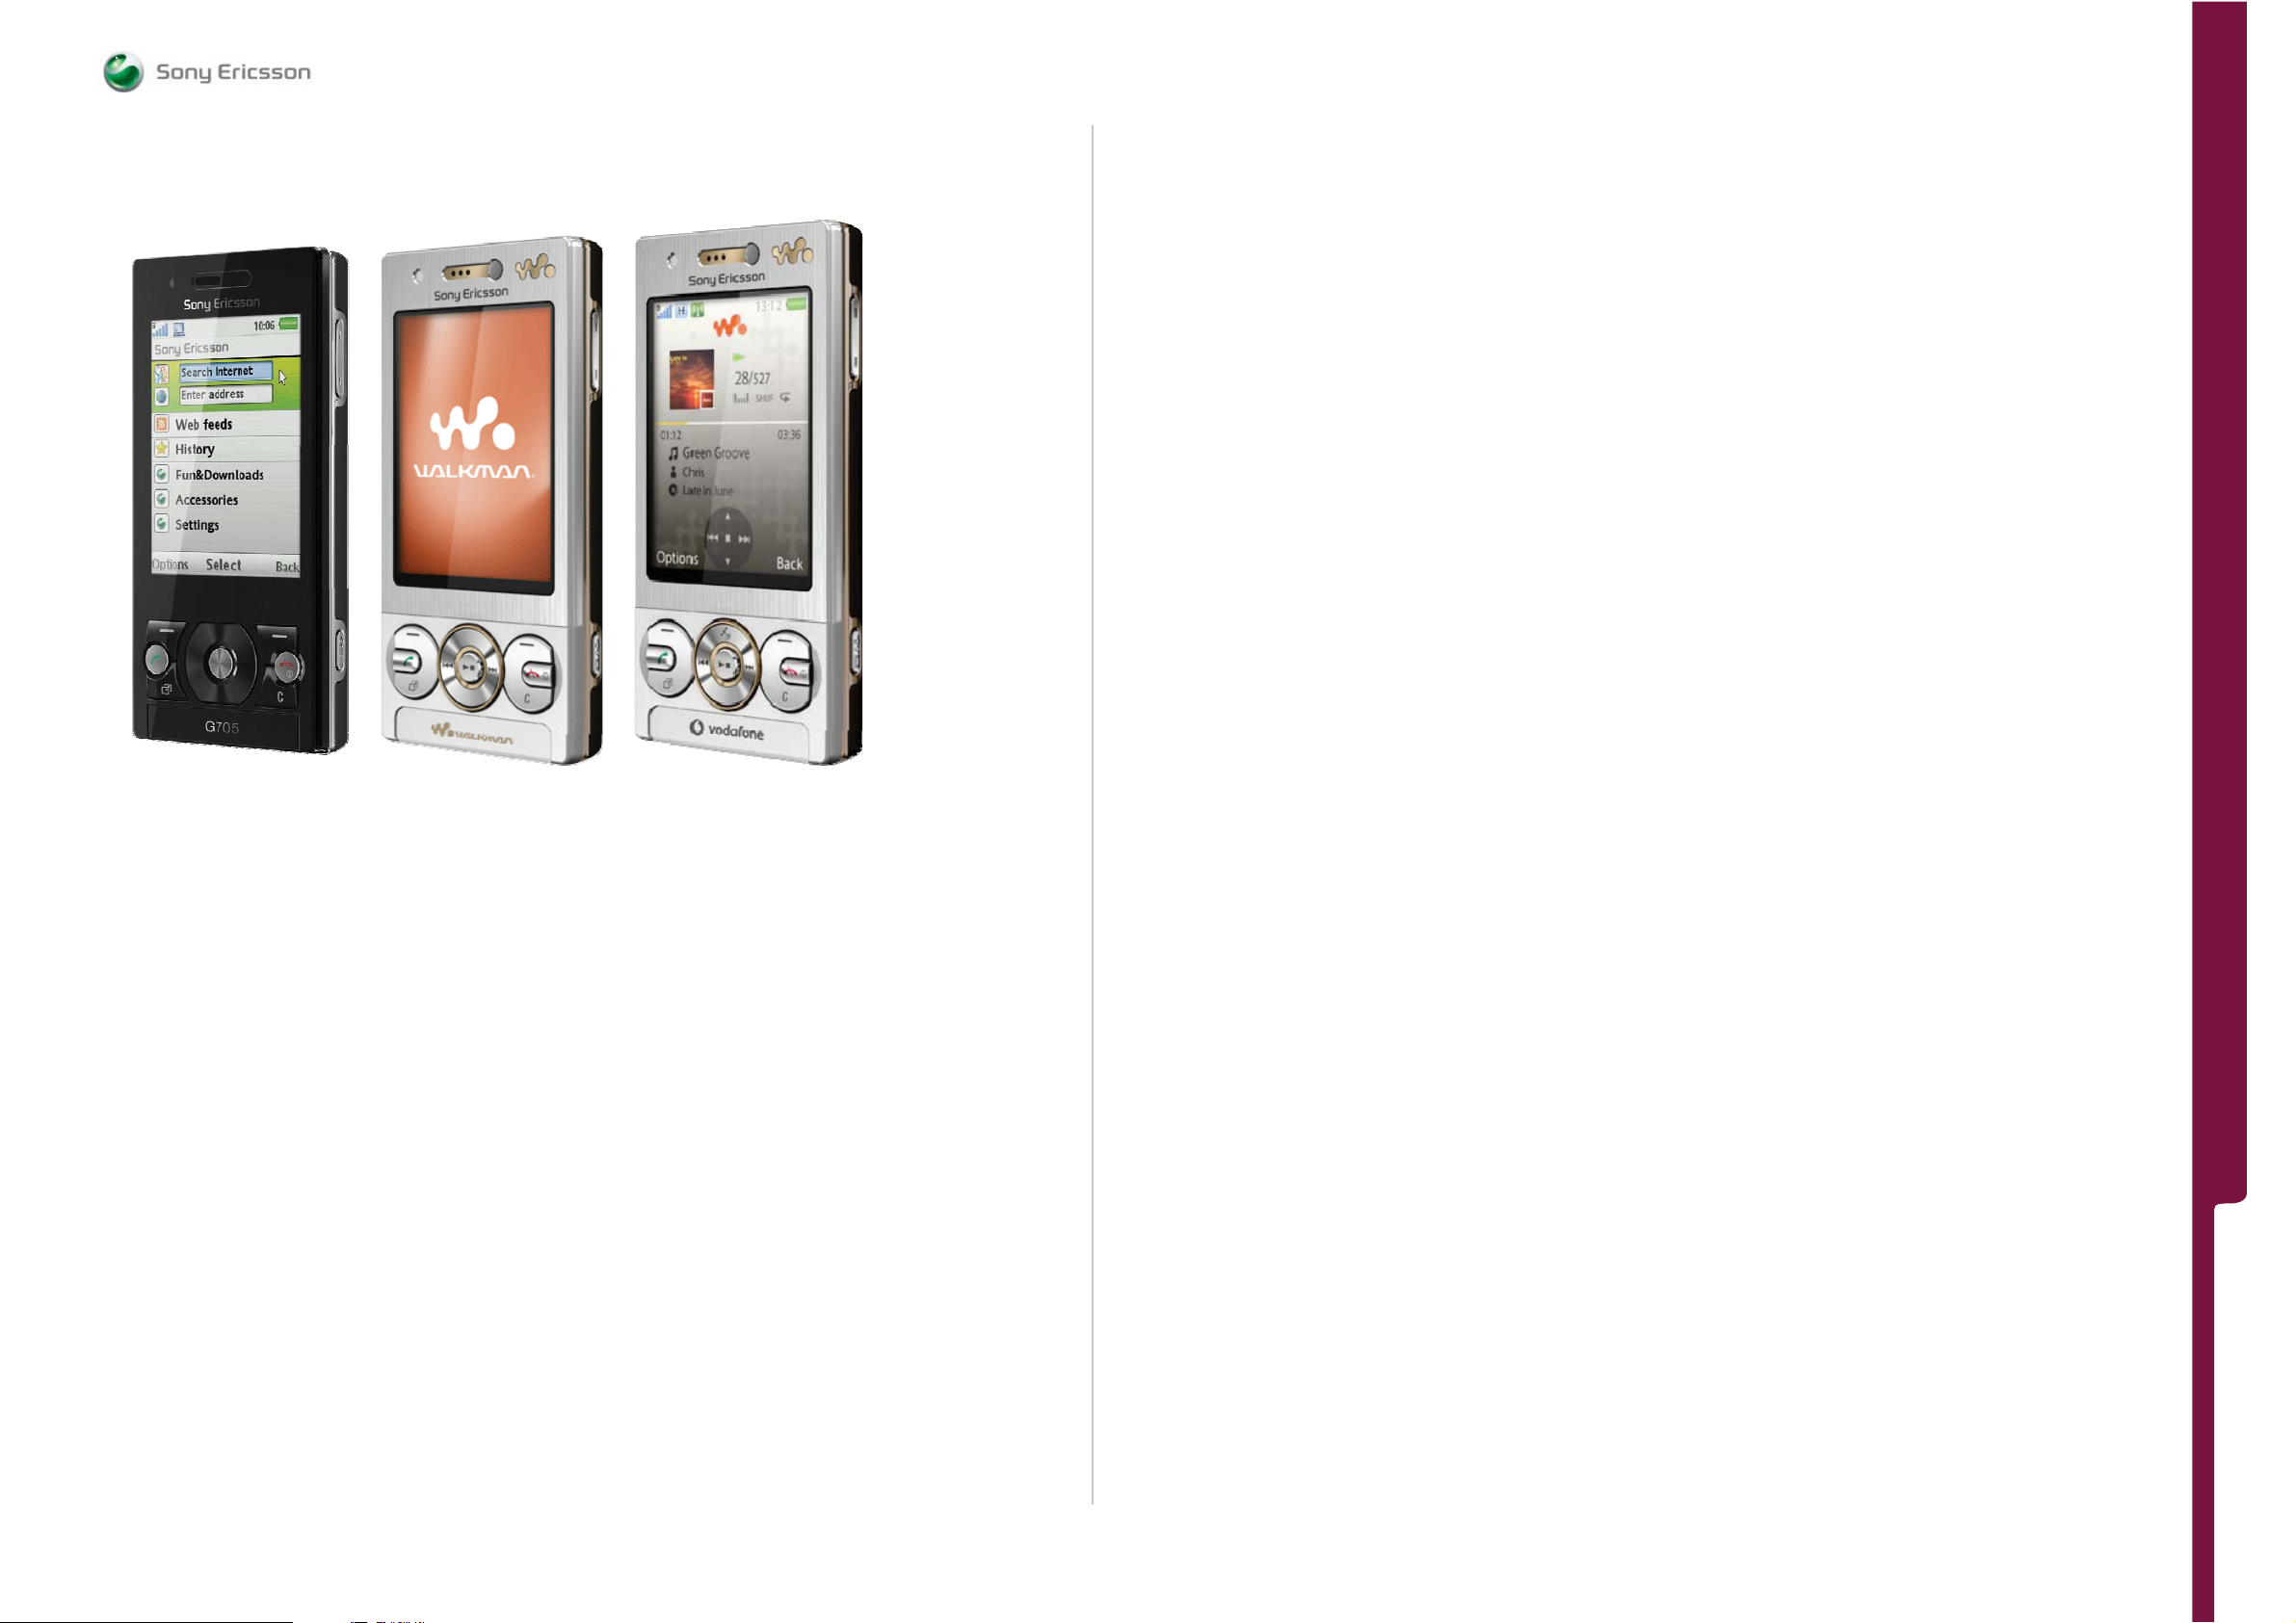
FUNCTIONAL OV ERVIE W Technical Description
SEMC Troubleshooting Manual
G705 - W705 - W715
G705, W705, W715 Function Overview
General Information
Size
98 x 47.5 x 14.3 mm
Weight
98 grams
Colors
G705: Silky Gold, Majestic Black
W705: Luxury Silver, Passionate Red
W715: Galactic Black, Luxury Silver
Screen
262,144 color TFT, Resolution 240 x 320 pixels, Size: 2.4 inches
Phone memory
Up to 120 MB
Memory Stick Micro™ (M2™) support
Talk time
GSM/GPRS: Up to 10 hrs
UMTS: Up to 4 hrs
Standby time
GSM/GPRS: Up to 400 hrs
UMTS: Up to 350 hrs
Video call time:
Up to 3 hrs
Music listening time:
Up to 20 hrs
Networks
G705:
GSM/GPRS/EDGE 850/900/1800/1900
UMTS/HSDPA 850/1900/2100
W705:
GSM/GPRS/EDGE 850/900/1800/1900
UMTS/HSDPA 850/900/1900/2100
W715:
GSM/GPRS/EDGE 850/900/1800/1900
UMTS/HSDPA 900/2100
Note! Network support depends on variant and market.
Features
Camera
3.2 megapixel camera
Up to 3.2x digital zoom
Photo fix
Photo light
Video light
Picture blogging
Video blogging
Video recording
Music
G705
Media player, Mega Bass™, Album art, PlayNow™, TrackID™, Bluetooth™ stereo (A2DP)
Music tones (MP3/AAC)
W705
Walkman™ player, Clear Stereo, Clear Bass, Album art, PlayNow™, TrackID™, Bluetooth™
stereo (A2DP), Music tones (MP3/AAC), Shake control, SensMe™
W715
Walkman™, Vodafone Music, Clear Stereo, Clear Bass, Album art, TrackID™,
Stereo Bluetooth™ (A2DP), Music tones (MP3/AAC), Shake Control, SensMe™
Internet/Web
G705
Access NetFront™ Web browser, Web feeds, Photo feeds, Web shortcut keys
W705 and W715
Access NetFront™ Web browser, Web feeds, Photo feeds
Communication
Video calling, Speaker phone, Polyphonic ringtones, Vibrating alert
Messaging
Email, Text messaging (SMS), Chat view (W705 and W715 Only), Picture messaging
(MMS), Exchange ActiveSync®, Microsoft® Exchange (W715 Only), Instant messaging,
Predictive text input, Sound recorder
Design
Navigation key, Auto rotate, Picture wallpaper, Wallpaper animation
Entertainment
G705
YouTube™, 3D games, Java, FM radio, Video streaming, Video viewing
1225-4035 rev. 1
FUNCTIONAL OVERVI EW
83 (122)
Page 84
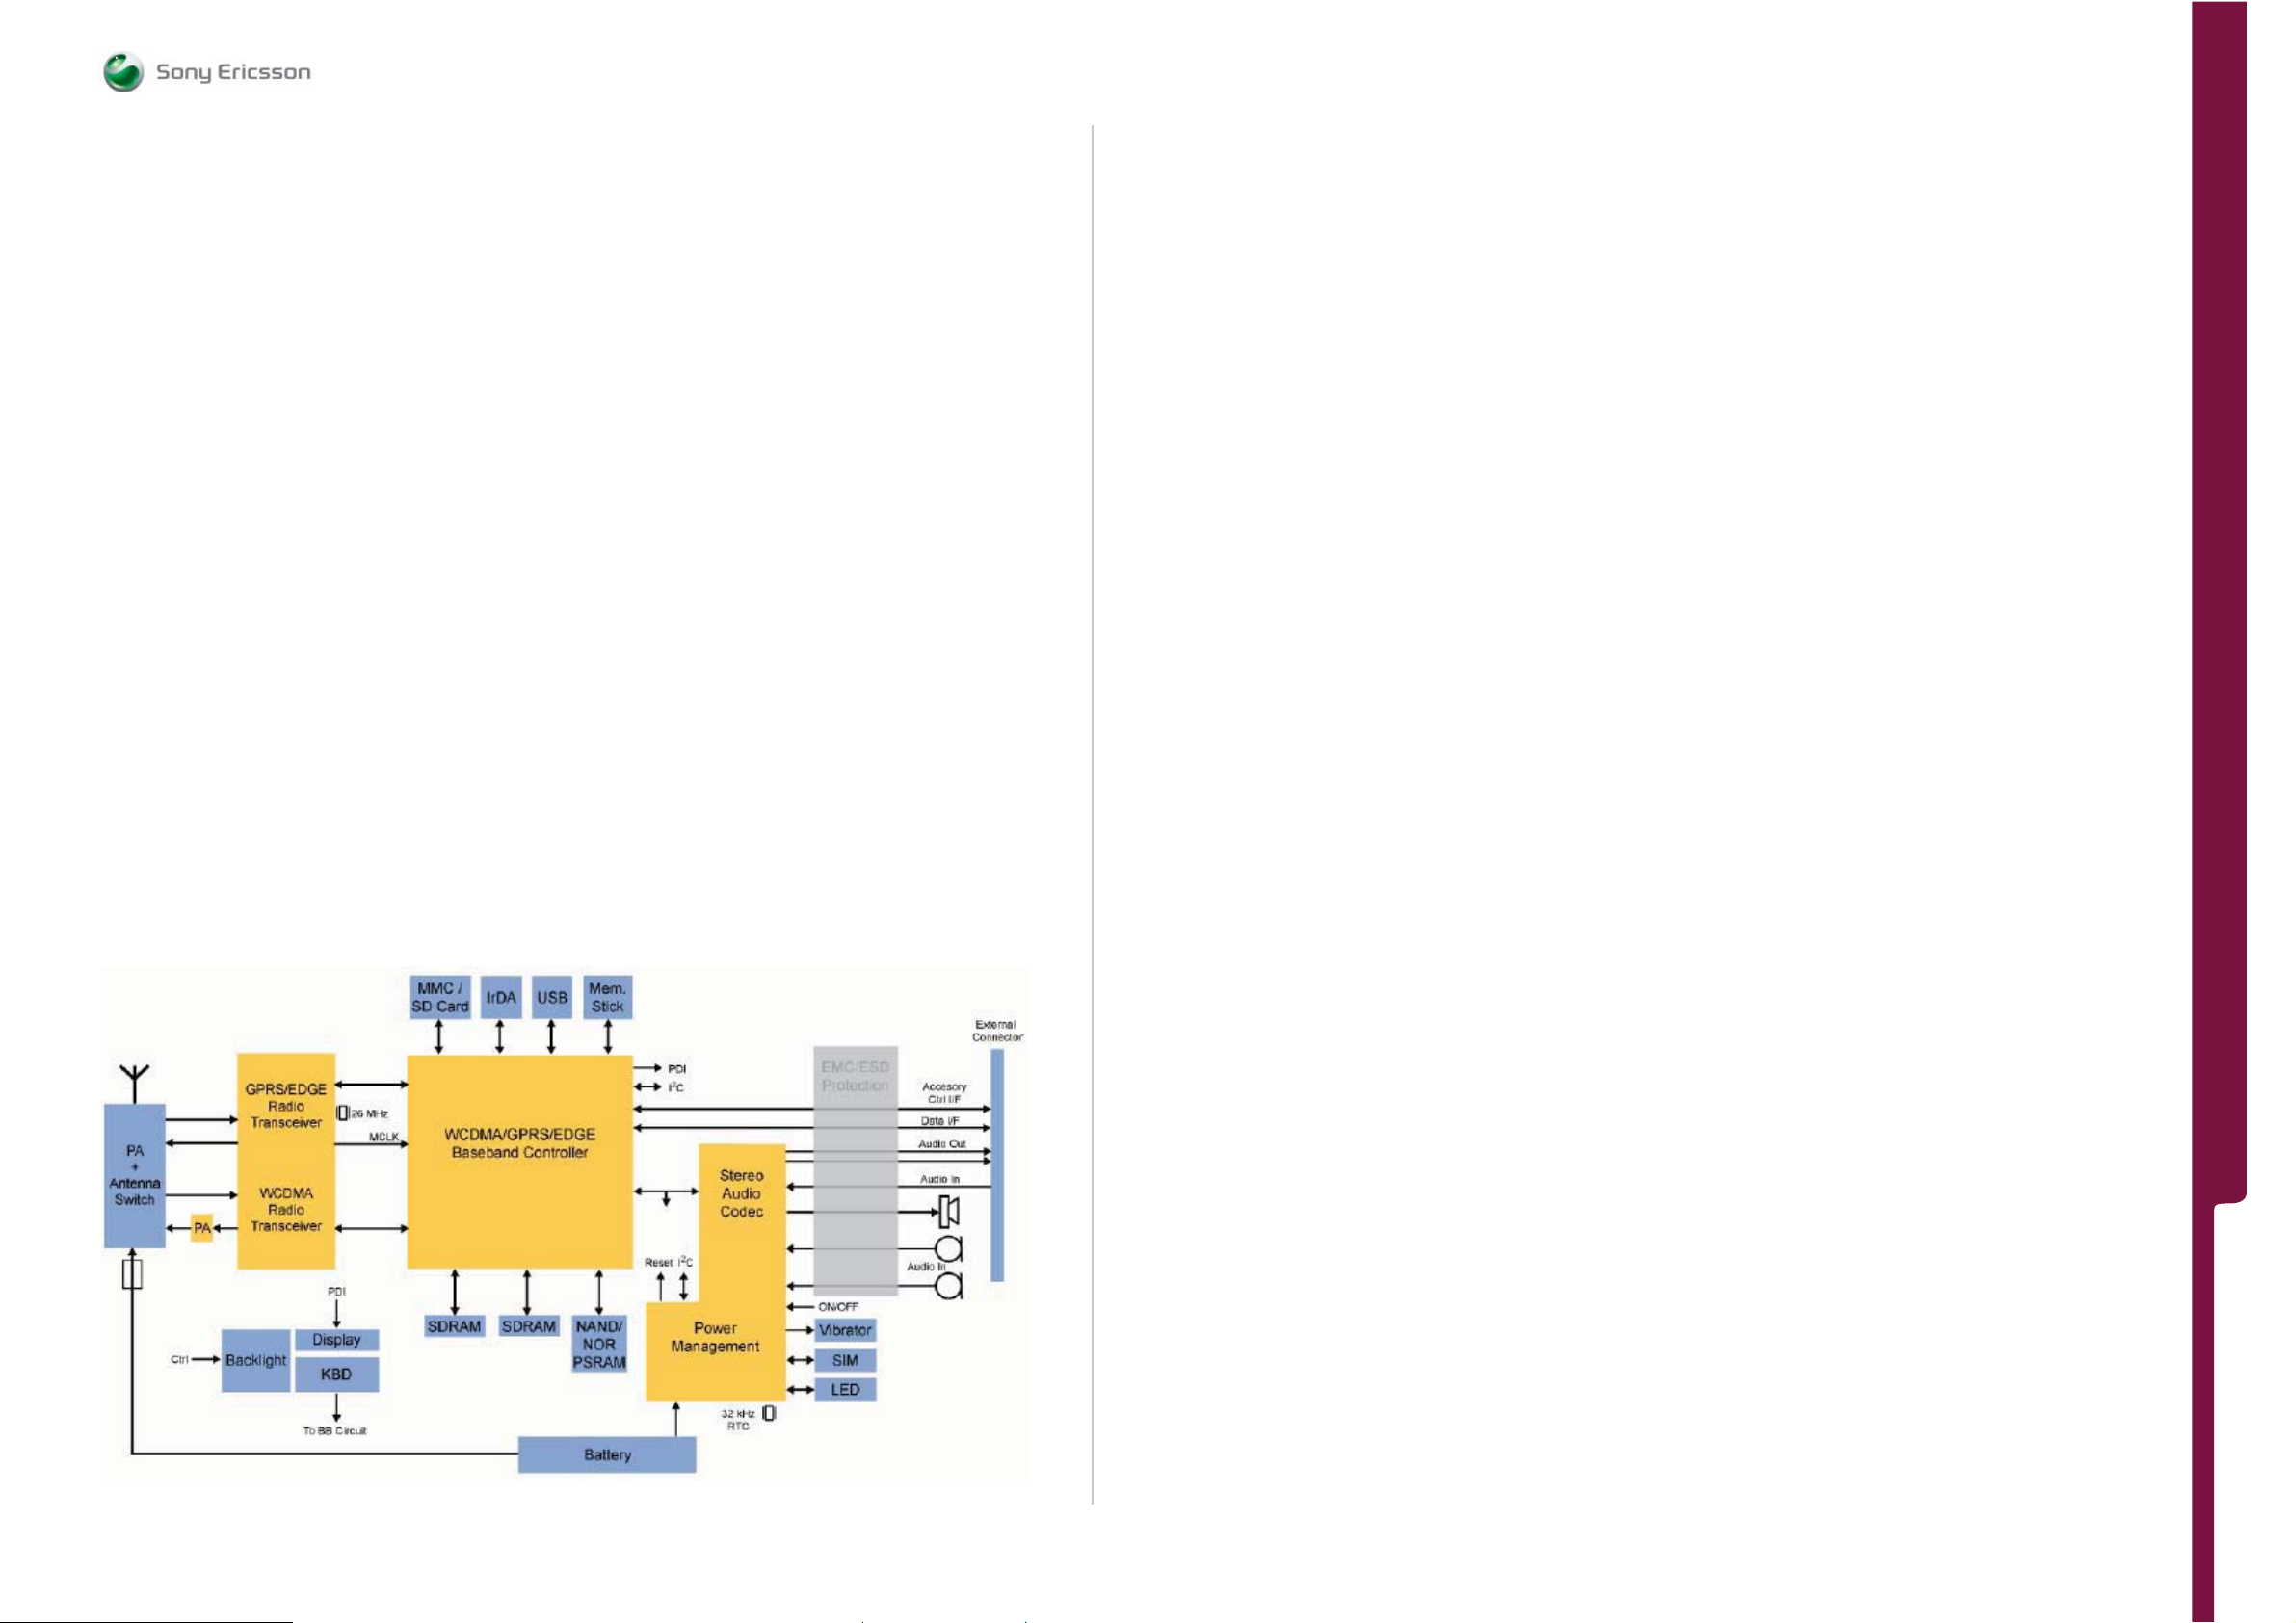
FUNCTIONAL OV ERVIE W
Technical Description
SEMC Troubleshooting Manual
G705 - W705 - W715
W705 and W715
Media, YouTube™, 3D games, Motion gaming, Java, FM radio with RDS, Video streaming
Video viewing
Organizer
Alarm clock, Calculator,Calendar, Flight mode, Notes, Phone book, Stopwatch, Tasks
Timer
Location-based services
G705
AGPS, Geo-tagging of photos, Google Maps™, Wayfinder Navigator™ (3 month trial
version)
W705
Geo-tagging of photos (cell-id), Google Maps™
W715
AGPS, Vodafone Find&Go, Geotagging of photos, Google Maps™
Connectivity
DLNA Certified™, Bluetooth™ technology, Modem, Synchronization, USB mass storage
USB support, Wi-Fi™, PictBridge printing
Hardware Overview
Platform Information
The G705, W705 and W715 are using the U365 platform provided by Ericsson Mobile
Platform (EMP).
The U365 Platform Block Diagram Overview:
Baseband Part
Analog Baseband Controller N2000 (Vera)
This component is not replaceable on SL 4 because Baseband calibration is required. The
analog baseband controller is the main power management circuit. It has converters and
regulators that generate a number of supply voltages, each optimized for its load.
The analog baseband controller is a mixed digital and analog device that supports the
following circuitry:
• Power management circuitry
• Voltage regulation circuitry
• Eight Low Dropout (LDO) regulators and low power regulator
• 600 mA integrated Buck regulator
• Boost step-up DC/DC converter for White Light Emitting Diode (WLED) driving
• Battery charging and communication circuitry
• Battery fuel gauging circuitry
• Analog-to-Digital Converter (ADC)
• Digital-to-Analog Converter (DAC)
• SIM interfac e
• Six programmable LED drivers
• Accurate band gap reference
• Vibrator driver
• Real Time Clock (RTC)
• 8-byte One-Time Programmable (OTP) memory
• Pulse Code Modulation (PCM) voice coder/decoder
• PCM audio coder/decoder
• Microphone interface
• Stereo line input
• Earphone driver
• Earpiece driver
• 8-ƻ speaker driver / Stereo line output
The analog baseband controller is controlled by an I2C™ interface. It also comprises the
main power management circuits, equipped with a number of converters and regulators
for generating the required supply voltages.
The analog baseband controller supports the following features:
• Lithium batte ry
• Full audio CODEC functionality
• Supports stereo audio sampling rates of 8/16 kHz voice coding/decoding and 44.1/48
kHz for high quality audio recording/playback (for example MIDI and MP3 applications)
• Double CODEC I2S/PCM interfaces
• Flexible microphone interface
• Integrated headphone amplifiers
• Integrated earpiece amplifiers
• Integrated speaker amplifier
• Integrated flexible audio mixing functionality
• Boost driver capable of driving up to four WLEDs in series, supplying 50 mA
• Designed to meet power management demands of GSM and WCDMA
• Automated power management ADC to relieve CPU
• Battery identification and communication
• Single-terminal charger and accessory power interface for compact connector design
• Integrated USB charging
• OTP memory
• Integrated hardware fuel gauge to accurately monitor battery capacity
• Reduced number of external components as a result of integrated programmable LED
and vibrator drivers
• 32 kHz real time clock with alarm wake up capability
• Designed to support two host controllers.
FUNCTIONAL OVERVI EW
1225-4035 rev. 1
84 (122)
Page 85
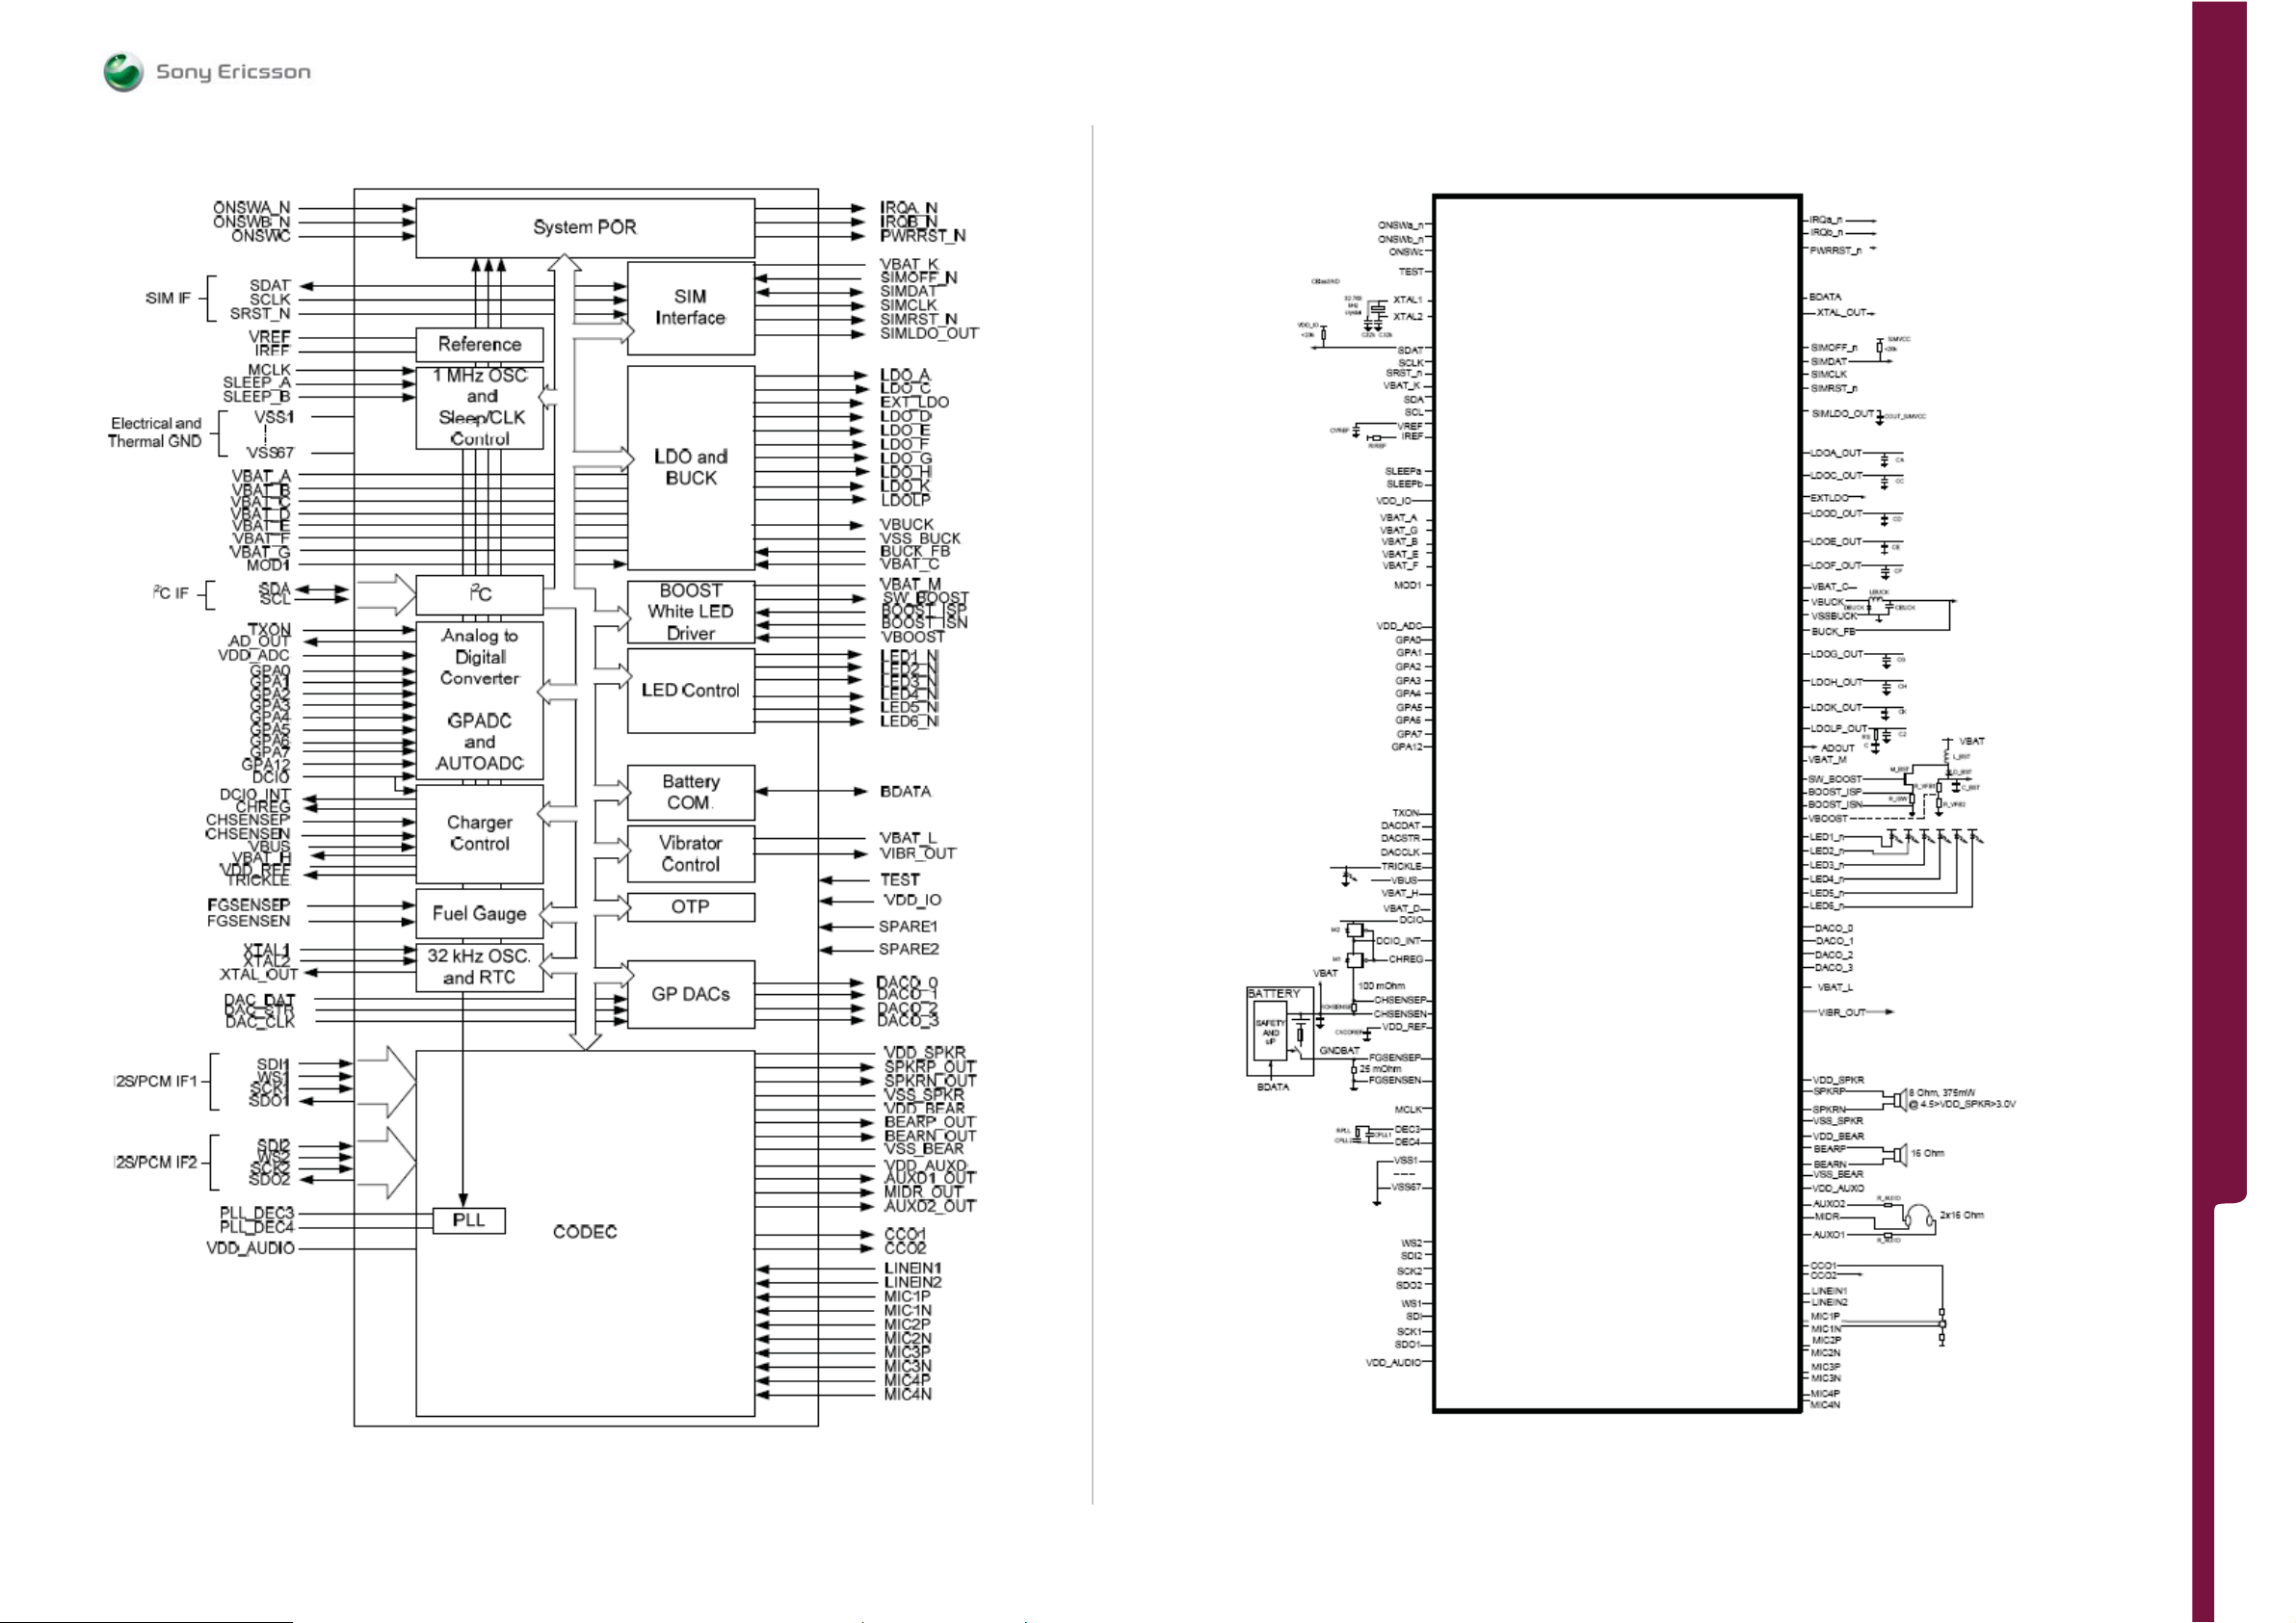
FUNCTIONAL OV ERVIE W
Technical Description
SEMC Troubleshooting Manual
G705 - W705 - W715
Functional Blocks of the Analog Baseband Controller:
Connection Diagram of the Analog Baseband Controller:
FUNCTIONAL OVERVI EW
1225-4035 rev. 1
85 (122)
Page 86
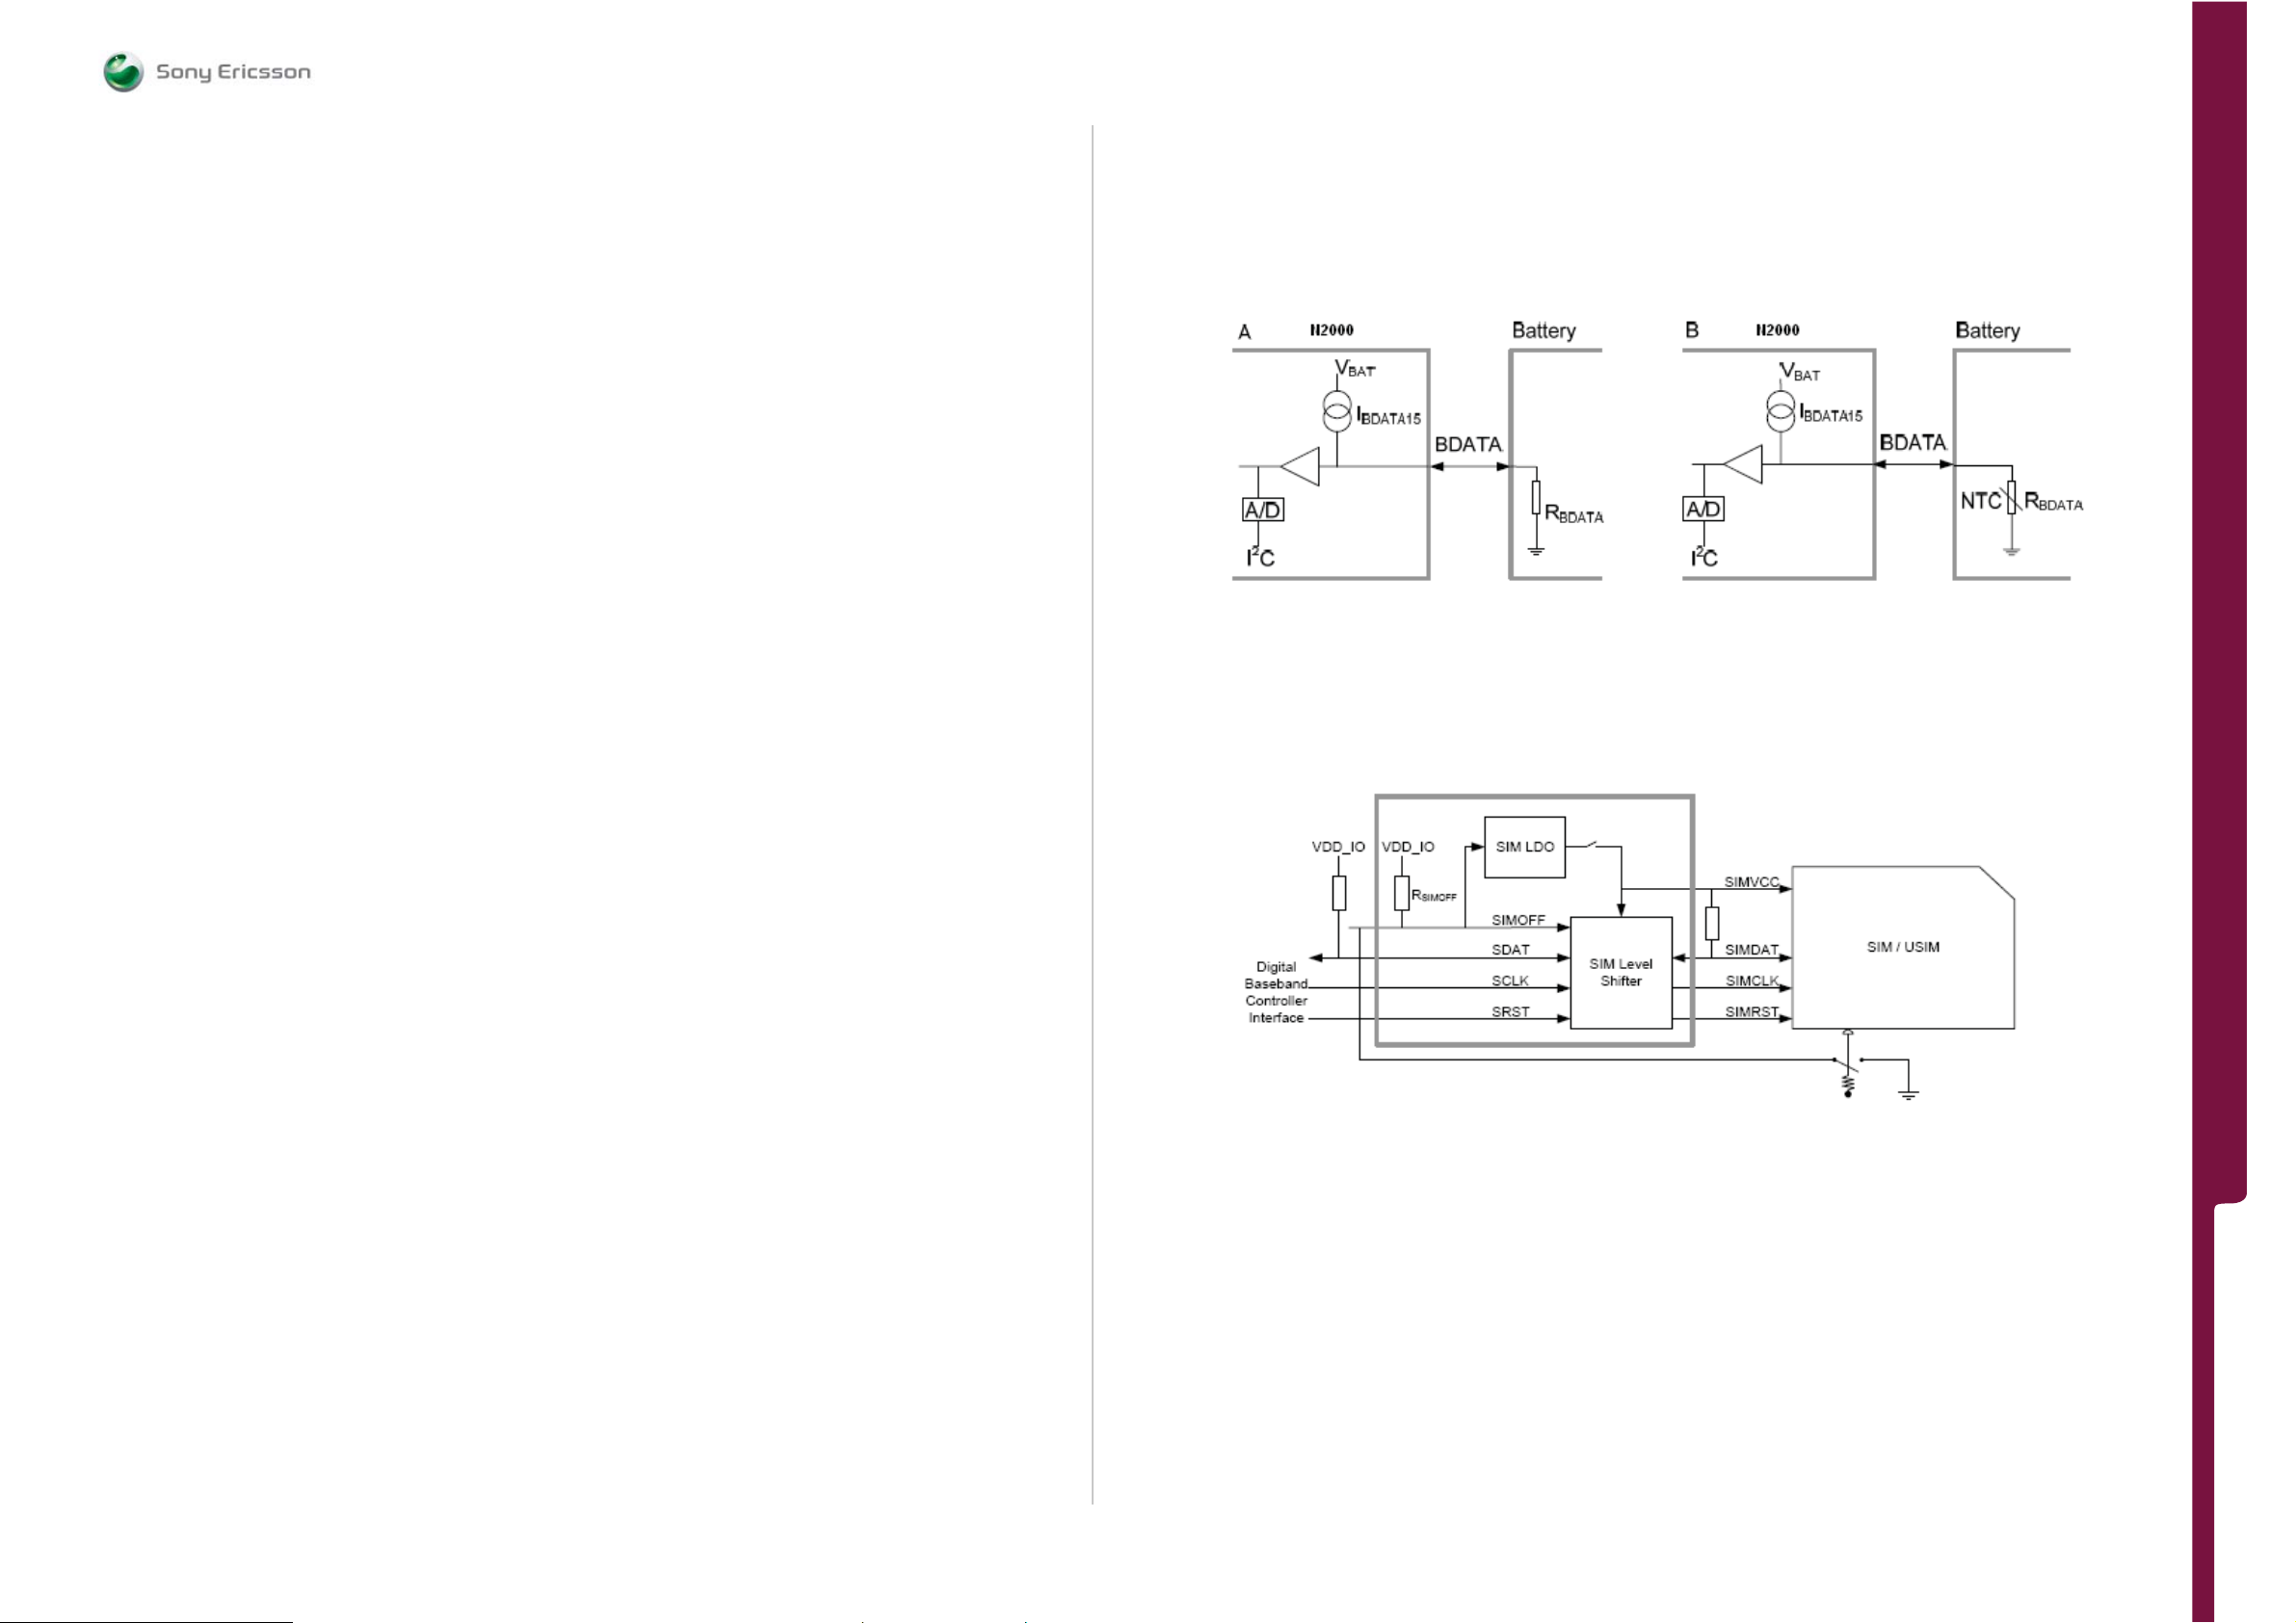
FUNCTIONAL OV ERVIE W
Technical Description
SEMC Troubleshooting Manual
G705 - W705 - W715
Charger Control
A programmable charger is used for battery charging. Limits can be set for the output
voltage at CHSENSE- and the output current from DCIO through the sense resistor to
CHSENSE-. The programmable charger is enabled or disabled by the assertion/negation of
the external signal DCIO. Parts of the programmable charger are activated and
deactivated depending on the level of VBAT. The rest of the programmable charger is
activated and deactivated through I2C.
The programmable charger supports the following functions:
• Constant current charging
• Constant voltage charging
• Trickle ch a r ging
• PWM controlled charging
• Over-voltage and over current detection
• Watchdog termination
• DCIO assertion/removal detection
• Voltage and cur r ent measure function s
• Low resistive path (reverse mode)
The programmable charger is able to control the voltage and limit the current to a load
seen at CHSENSE-. The programmable charger can also be run in PWM mode to turn the
charging on and off in accordance with the particular period and duty cycle. When the
charging is on, it is set to the current and voltage selected by I2C.
A low resistive path from VBAT to DCIO can be formed when DCIO is not detected. When
this setting is done in the appropriate registers, a lowering of CHREG to 0 V turns on the
external pass device. The pass device is automatically turned off whe n an external source
is detected on DCIO, or when the watchdog termination block times out. The watchdog
termination block must be active when the external switch is enabled, both in normal
charging mode and in the low resistive path mode. The watchdog is set through the serial
interface, and if it has not been set again before timeout, the watchdog turns off the
external switch. The watchdog is disregarded during trickle charging. When no battery is
present, the system can be booted and supplied from DCIO by
applying the correct voltage on DCIO.
USB Charger
The analog baseband controller contains a standalone USB charger.
The USB charger has a separate input and incorporates full functionality during low VBAT.
The programmable charger supports the following functions:
• Trickle ch a r ging
• Constant current charging
• Watchdog termination
• Trickle LED indication
• VBUS assertion/removal detection
Resistance Identification and Temperature Measurement
The resistance identification mode utilizes the constant current source to feed the battery
data output while monitoring the voltage at the battery data node with general purpose
ADC the conversion is started through I2C.
Resistance Identification (A) and Temperature Measurement (B):
SIM Interface
The SIM interface supplies level is shifting between the digital baseband controller and the
SIM/USIM card. Moreover, hard-wired SIM deactivation functionality manages removal of
a SIM card that has not been powered down.
Block Diagram of the SIM Interface:
FUNCTIONAL OVERVI EW
1225-4035 rev. 1
86 (122)
Page 87
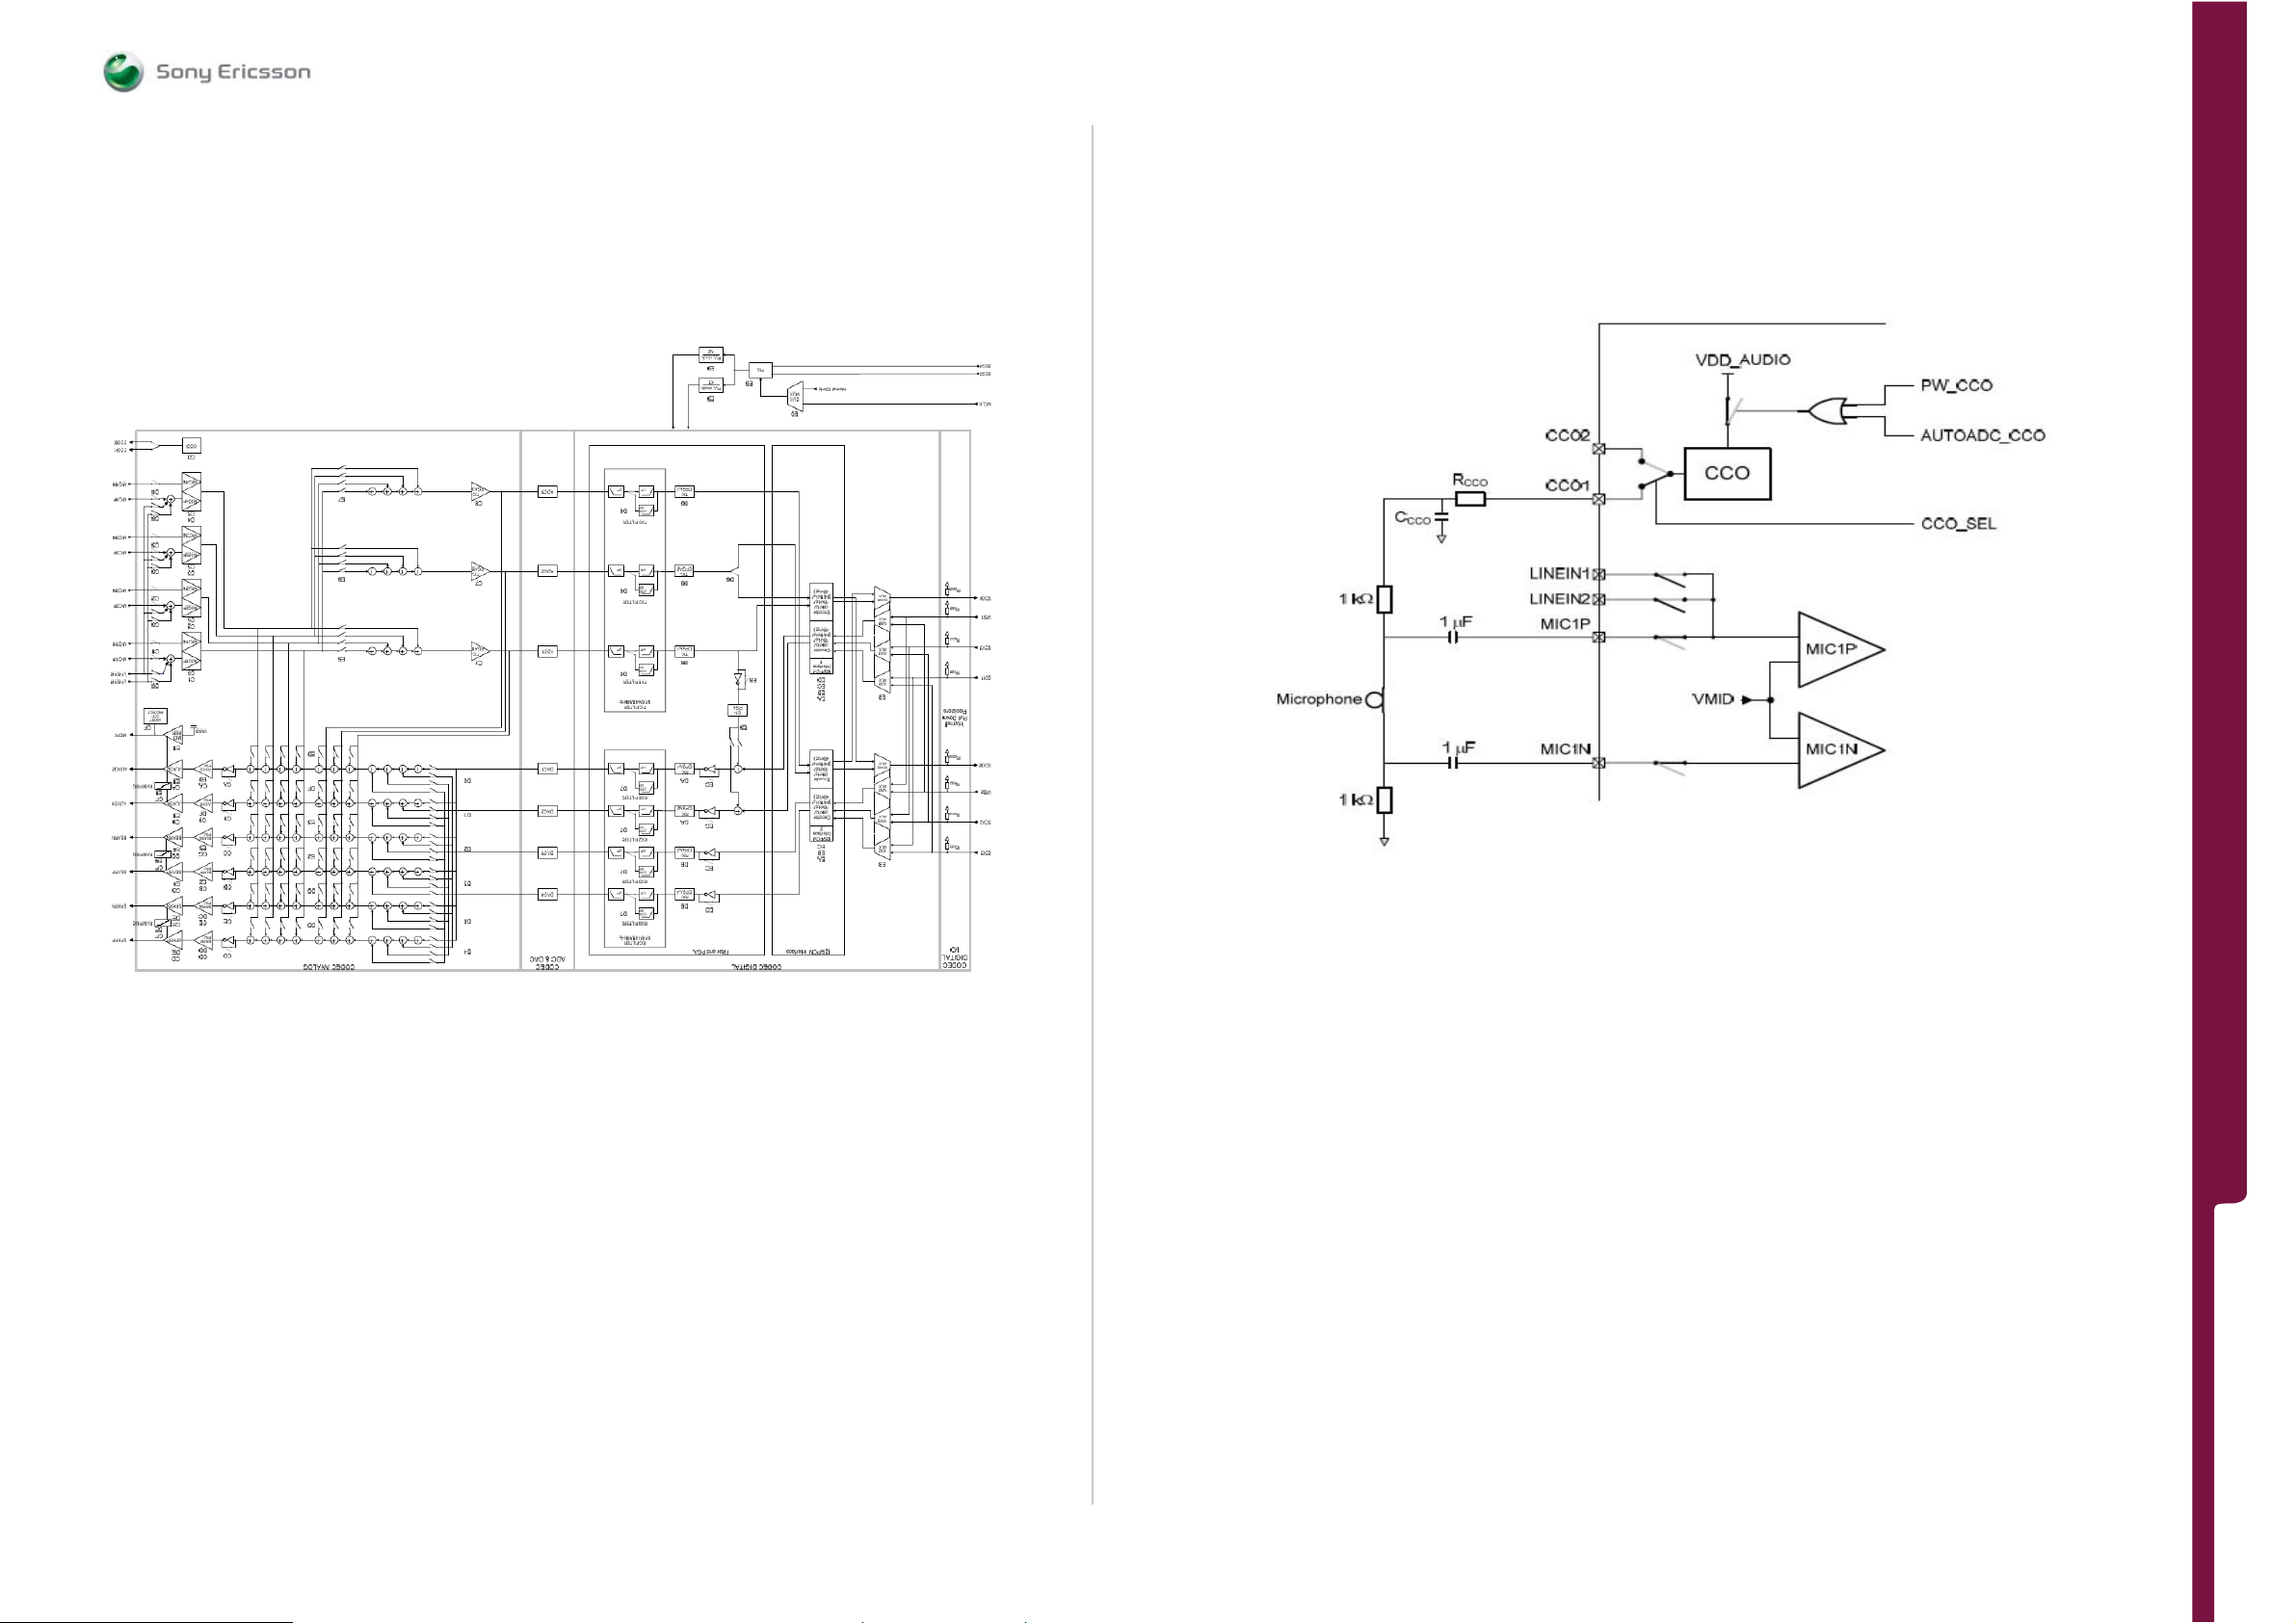
FUNCTIONAL OV ERVIE W
Technical Description
SEMC Troubleshooting Manual
G705 - W705 - W715
CODEC Overview
The CODEC is encoding analog audio signals and analog voice signals into digital signals
using Analog to Digital converters (ADCs). This is done in the coder section of the CODEC,
also named the TX path (transfer section). The CODEC is also decoding digital audio
signals and digital voice signals into analog signals using DACs. This is done in the
decoder section of the CODEC, also named the RX path (receiver section).
CODEC Block Schematic:
CODEC CCO Voltage Source
There is an internal voltage source CCO that provides the necessary drive current for
electret microphones. The voltage source is I²C programmable to 2.2 V or 2.4 V. The
source can be disabled during standby. A typical use case with a microphone connected to
MIC1 and the CCO is shown in picture below.
Earphone Amplifier
The earphone amplifiers (BEARP and BEARN) are mainly intended to be differentially
configured and drive a low impedance dynamic transducer (earpiece) but they can also be
single ended configured. The BEARP and BEARN amplifiers can be powered down by the
I2C. The amplifiers can exhibit high impedance to 1.4V or low impedance to ground when
powered-down. Fifty-one gains are available for BEARP and BEARN: from +15dB down to
–60dB in 1.5dB steps. When the BEARP and BEARN outputs are operating in differential
mode, an I²C selectable bit must invert one of the inputs.
FUNCTIONAL OVERVI EW
Speaker Amplifier
The speaker amplifiers, SPKRP and SPKRN, are intended to drive a low impedance (8ƻ)
speaker in a differential mode or to be used as a stereo configured line output amplifier
supporting external high power amplifiers. The output buffer shall exhibit low impedance
to ground when powered-down and the current consumption shall be minimal. When the
SPKRP and SPKRN outputs are operating in differential mode, an I²C selectable bit must
invert one of the inputs.
1225-4035 rev. 1
87 (122)
Page 88
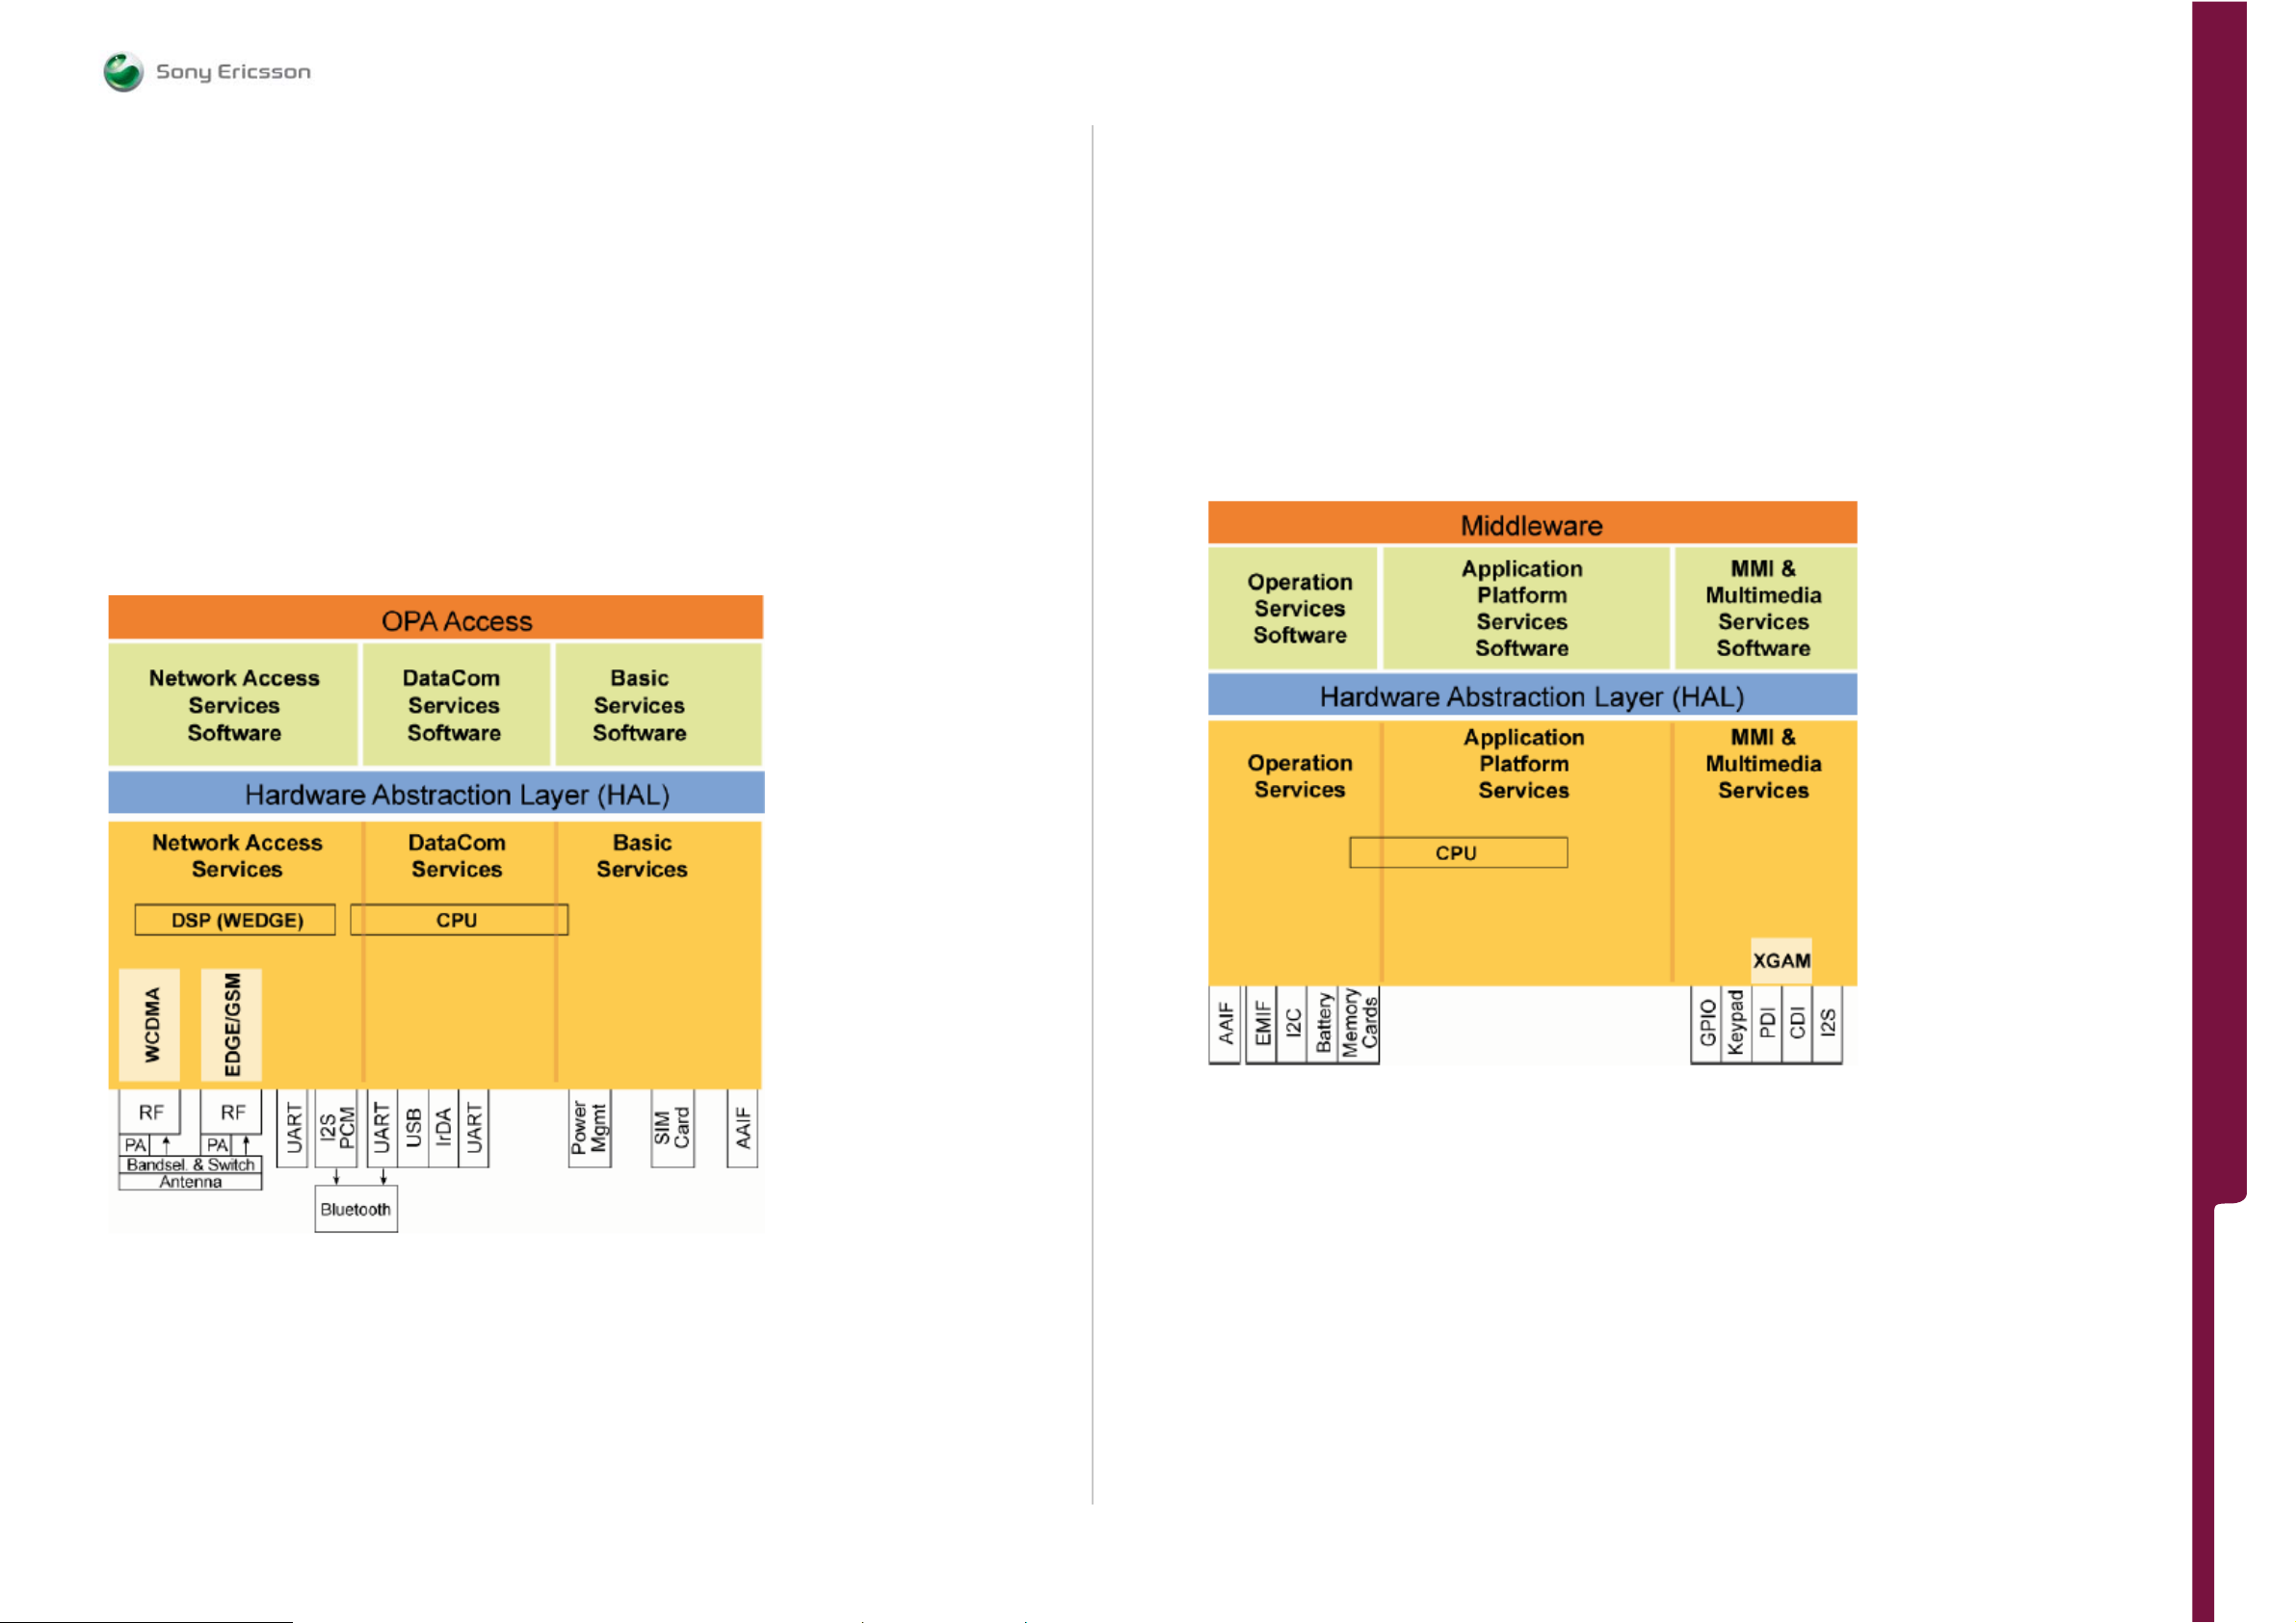
FUNCTIONAL OV ERVIE W
Technical Description
SEMC Troubleshooting Manual
G705 - W705 - W715
Digital Baseband Controller (CPU)
N2010 (Kajsa)
This component is not replaceable on SL 4 because Baseband calibration is required.
The Digital Baseband Controller is divided in two subsystems: Access and Application
Access Subsystem
All modem functionality in the digital baseband controll er resid es in the Access subsystem.
This includes EDGE/GPRS/GSM interface, WCDMA interface, USB, IrDA, and other
peripheral modules. The control CPU is an ARM926 and a DSP is used for signal processing
and layer one control code.
The main communication between the blocks in the Acce ss subsystem is done through the
Advanced High-performance Bus (AHB) matrix, which is a set of control buses connecting
the different parts together. A block called Syscon is responsible f or distri buting clocks and
resets to all parts of the Access subsystem. This block is under SW control. The Access
subsystem is connected to the Shared EMIF, an interface for communication with an
external SDRAM. The Shared EMIF is shared between the Access subsystem and the
Application subsystem.
Access Subsystem of the Digital Baseband Controller:
Application Subsystem
The Application subsystem contains functionality related to functions such as MMI,
graphics, audio and memory media. The control CPU is an ARM926 with three external
memory interfaces, one shared with the Access subsystem and two dedicated for the
Application subsystem. The Application subsystem contains several blocks. The main
communication between the blocks is done through the Advanced High performance bus
(AHB) matrix, whi ch is a se t of cont rol bu ses con nectin g the di fferen t parts. A block called
Syscon is responsible for distributing clocks and resets to all parts of the Application
subsystem. This block is under SW control. The Application subsystem is connected to the
Shared EMIF that is used for code execution or data storage. In addition, a dedicated EMIF
that support SDRAM or static memory like NOR, PsRAM or NAND are also available. The
Application EMIF is a general interface for communication with, for example external
SDRAM, PSRAM, NOR flash, NAND flash and companion chips
Application Subsystem of the Digital Baseband Controller:
FUNCTIONAL OVERVI EW
1225-4035 rev. 1
88 (122)
Page 89
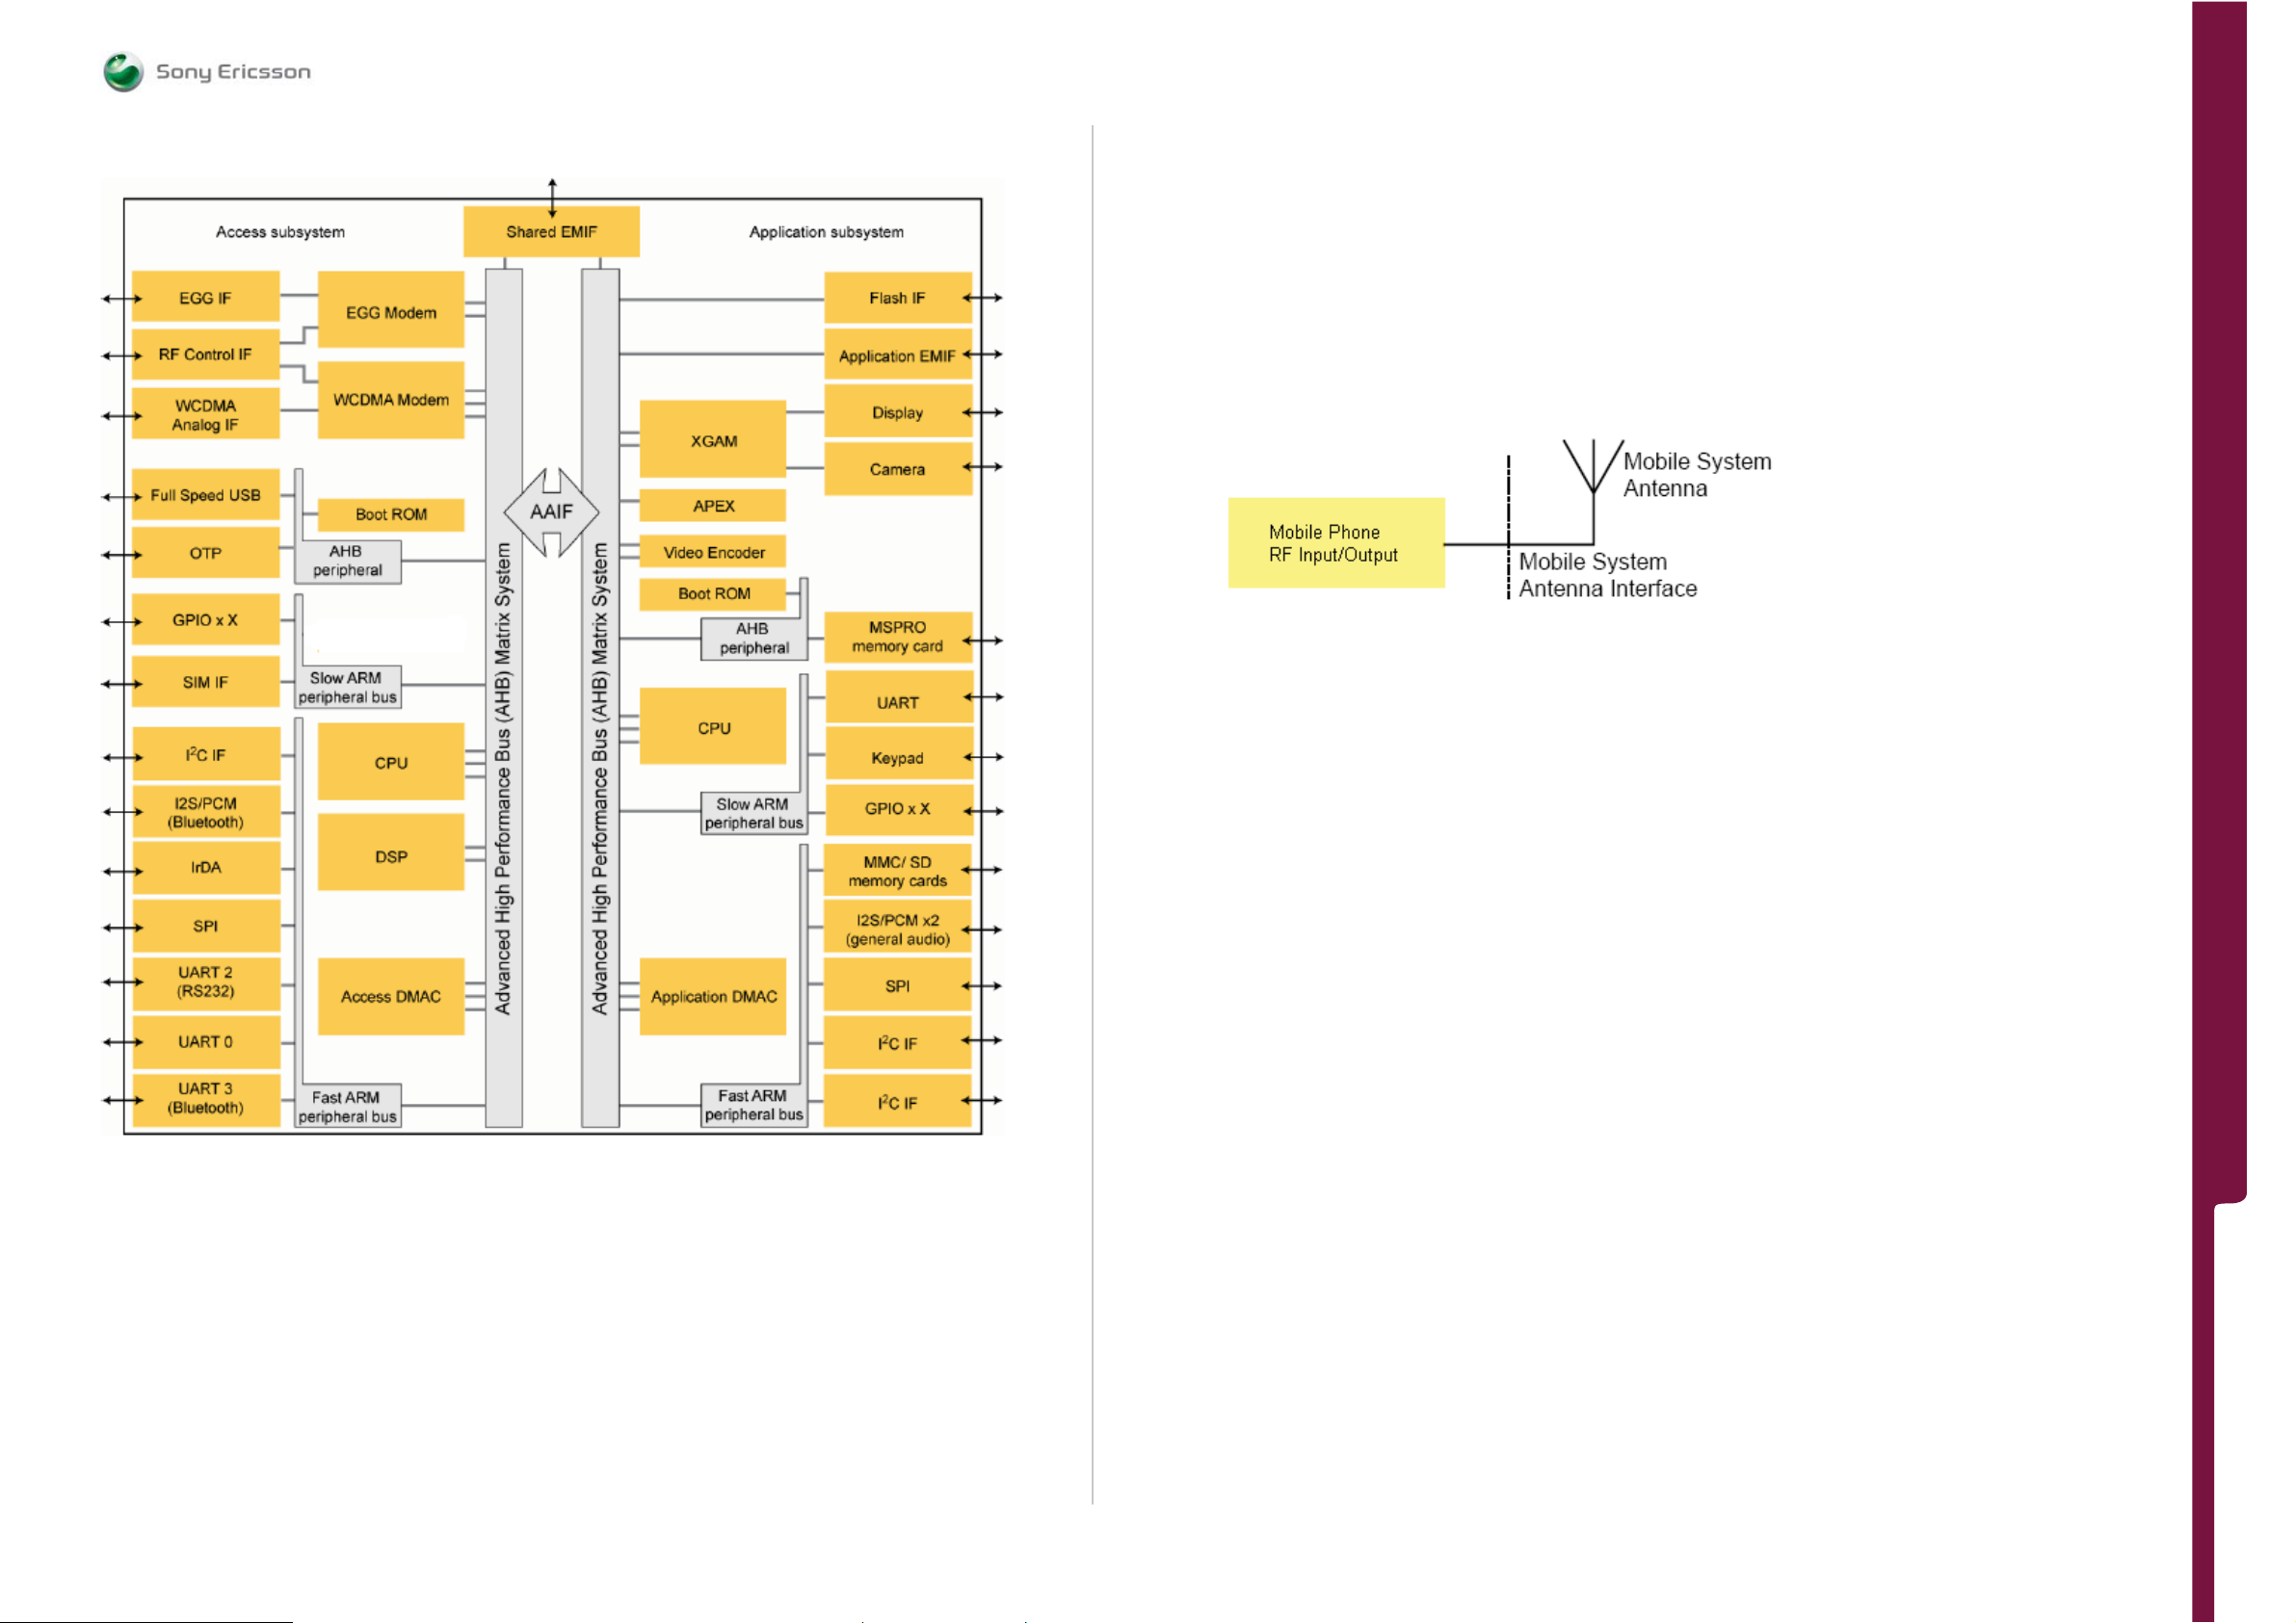
FUNCTIONAL OV ERVIE W
Technical Description
SEMC Troubleshooting Manual
G705 - W705 - W715
The functional blocks of the Digital Baseband Controller:
Keypad
The keypad interface block supports up to 30 keys with 65 columns and 6 rows and
operates in both scan and idle mode. The keypad scan is performed by software. Any
transition in the state of the column inputs is written directly to the register. The keypad
interface differentiates between single key presses, simultaneous presses of any keys with
a function key, and any key releases. The period between successive scans is
programmable over the range 5 ms to 80 ms, in 5 ms steps. During scan mode, the
keypad generates an interrupt whenever a valid keypad state change occurs (including a
release of any pressed keys). The scan function is disabled during system power-up. The
keypad is able to detect at least four simultaneous key presses. Not all combinations are
supported.
Radio Part
Antenna
The mobile system antenna interface connects the Wideband Code Division Multiple
Access (WCDMA) and Global System for Mobile Communication (GSM) input/output to
the antenna of the Mobile Phone. It is a bi-directional RF interface containing signals in the
range 800 MHz to 2.2 GHz. The mobile system antenna interface is the interface between
the Mobile Phone Radio Frequency (RF) input/output and the mobile system antenna. The
interface handles the GSM 850, EGSM 900, GSM 1800, GSM 1900 and WCDMA Band I, II
and V, RF inputs/outputs.
Mobile System Antenna Interface :
Radio Module N1200 (Tiger)
Front End
The Front End block connects the proper block in the radio system to the antenna. The
Front End has two inputs for EDGE/GSM/GPRS, one for low band (850/900 MHz) and one
for high band (1800/1900 MHz). The EDGE/GSM/GPRS power amplifier output is filtered
by the low pass filter in the Front End and then connected to the antenna through a switch.
In receive mod e, th e EDGE/GS M/GPR S sign al fr om the an tenna passe s thr ough the swit ch
to one of the four receive SAW filters. The SAW filter provides receive band selectivit y. In
GSM/GRPS/EDGE systems, transmit and receive operations are divided in time and the
switch connects the proper block in accordance with the mode of operation (that is,
transmit or receive; one at a time).
In WCDMA the transmit outputs from the WCDMA transceiver are filtered by an external
SAW filter that cleans up the spectrum. The SAW filter output is connected to the power
amplifier, one for each band. For power control, a sample of the transmit output is taken
by a directional coupler and converted to a DC level by the power detection circuit. This
signal is used to control the transmitter output power. The transmit sign al passes through
an isolator and then a duplexer. The duplexer output is selected by the switch in the Front
End for connection to the antenna. In WCDMA receive mode the signal from the antenna is
switched by the Front End to the correct duplexer. The output from the duplexer is
connected to the LNA input in the WCDMA receiver.
Transceiver
The transceiver is a multi-mode transceiver for WCDMA/EGDE/GPRS/GSM. The
EDGE/GPRS/GSM part of the transceiver use a digital baseband interface that is shared
between received and transmitted data. The receive interface is based on I and Q data
and the transmitter interface is based on envelope and frequency data. The WCDMA part
of the transceiver use differential analog in-phase and quadrature-phase interfaces, which
is an IQ-interface, in the receiver and the transmitter data paths.
FUNCTIONAL OVERVI EW
1225-4035 rev. 1
89 (122)
Page 90
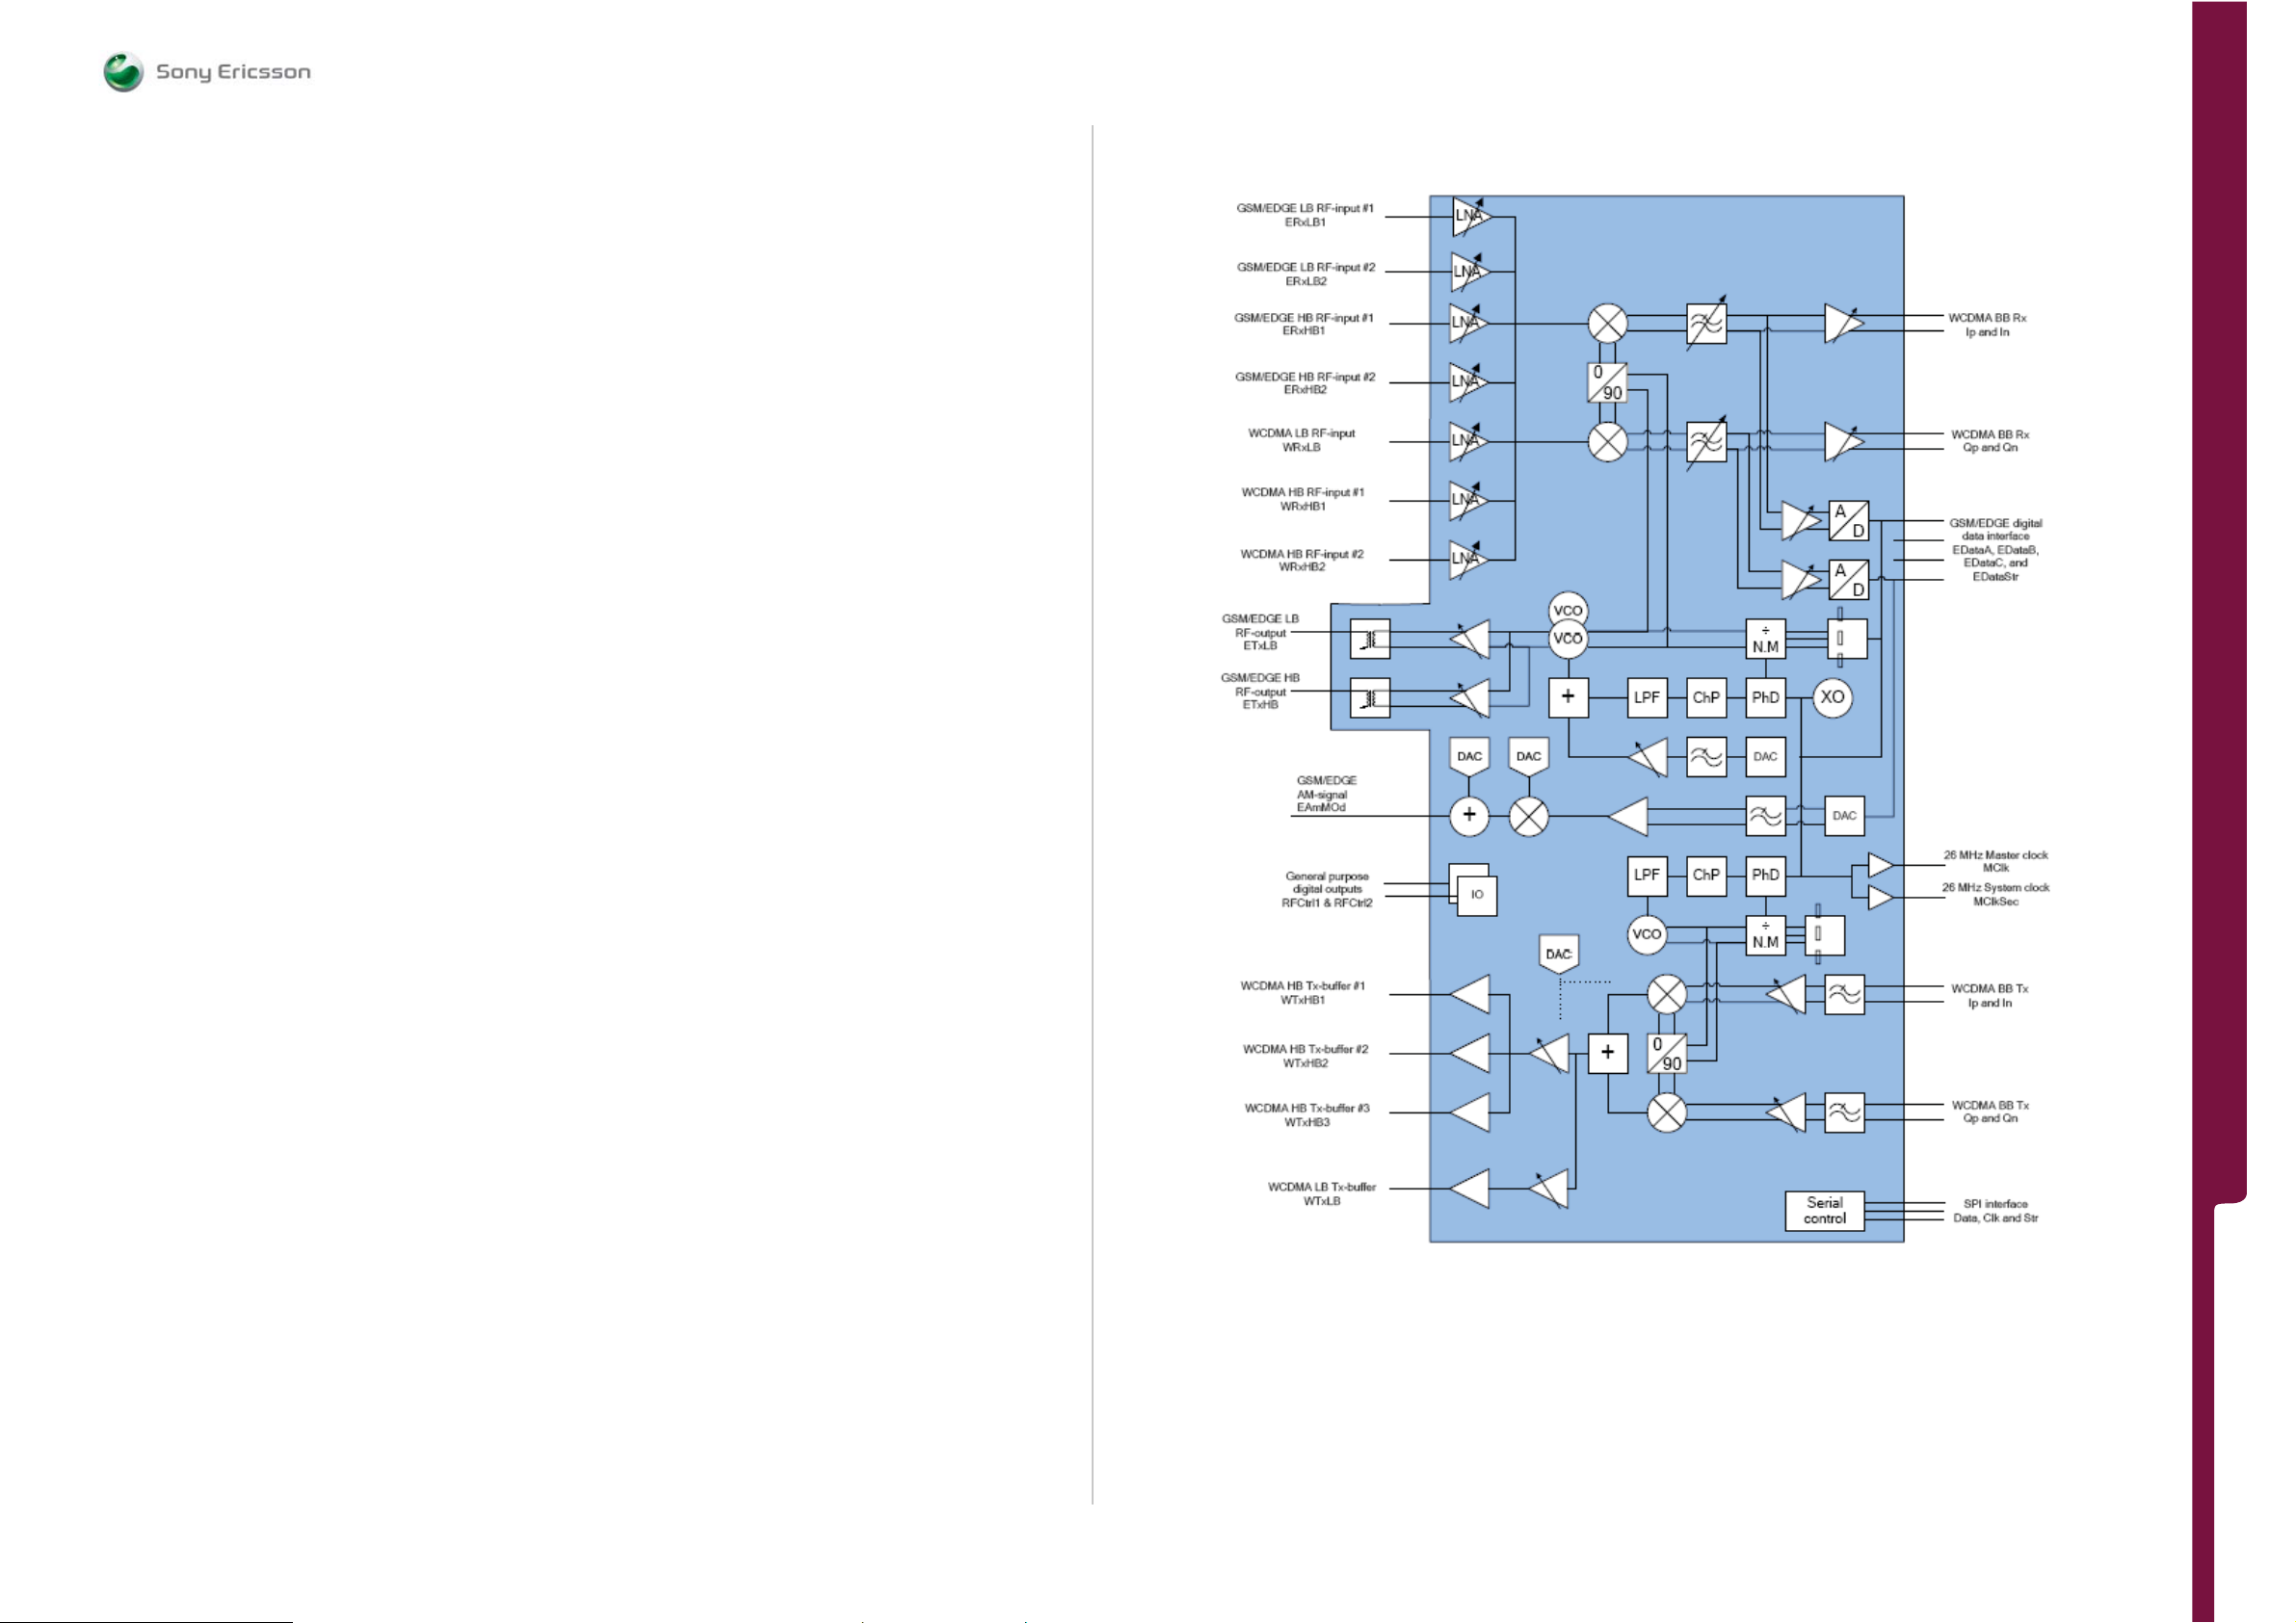
FUNCTIONAL OV ERVIE W
Technical Description
SEMC Troubleshooting Manual
G705 - W705 - W715
Frequency Generation
The 26 MHz reference signal is used as the reference for the on-chip synthesizers. To
cover the required frequency range, the integrated Voltage Controlled Oscillator (VCO)
operates at twice the frequency for band 1800/1900/2100, and at four times the desired
frequency for band 800/900. The two synthesizers are controlled through the serial bus
from the access side of the digital baseband controller.
EDGE/GPRS/GSM Transmitter Part
Polar modulation transmitter architecture based on the direct phase/frequency
modulation/synthesizer architecture is implemented for GSM, GPRS and EDGE. This
architecture has the capability of generating both the GSM/GPRS constant envelope GMSK
modulation and the linear EDGE 8-PSK modulation in a very cost efficient way. The
motivation for a polar modulation transmitter architecture compared to traditionally linear
architectures is to reduce the output noise (thus eliminating the need for off-chip filters)
reduce the power consumption by utilizing non-linear switching analog signal processing
blocks, and to eliminate the need for an RF isolator.
In brief, the phase/frequency modulator in this polar modulation architecture is a sigmadelta controlled fractional-N frequency synthesizer with an additional frequency insertion
point after the loop filter at the input of the VCO. The Phase-locked Loop (PLL) has two
information inputs: the divider ratio in the feedback path and a direct path to the VCO.
The phase locked loop generates the radio frequency carrier including the phase
modulation information at the desired channel frequency.
WCDMA Transmitter Part
The WCDMA transmitter architecture is an on frequency linear direct up-conversion IQmodulator. The in-phase and quadrature-phase reconstruction filters are fully integrated
and a programmable gain amplifier implements the gain control. An external SAW filter
between the WCDMA circuit and the power amplifier is used to improve noise performance.
After the power amplifier, the signal is sent through an isolator and through the duplex
filter, which directs the transmit signal to the antenna connector through the antenna
switch. The supply voltage and bias of the power amplifier are adapted depending on the
output power to achieve high efficiency at every transmitter power level. A high efficiency
DC/DC converter regulates the supply voltage and the bias operation point is controlled by
a D/A-converter in the WCDMA radio circuit.
Ericsson RF 3300 Block Diagram:
FUNCTIONAL OVERVI EW
Receiver Part
The receiver architecture is a direct down-conversion zero-IF receiver with integrated lowpass filters. The complete receiver with seven Low Noise Amplifiers (LNAs), one for each
supported band, is integrated on chip. After the down-conversion, the in-phase and
quadrature-phase components are low pass filtered and if the receiver is in
EDGE/GPRS/GSM mode the signals are fed to the integrated high dynamic range sigmadelta A/D-converters.
1225-4035 rev. 1
90 (122)
Page 91
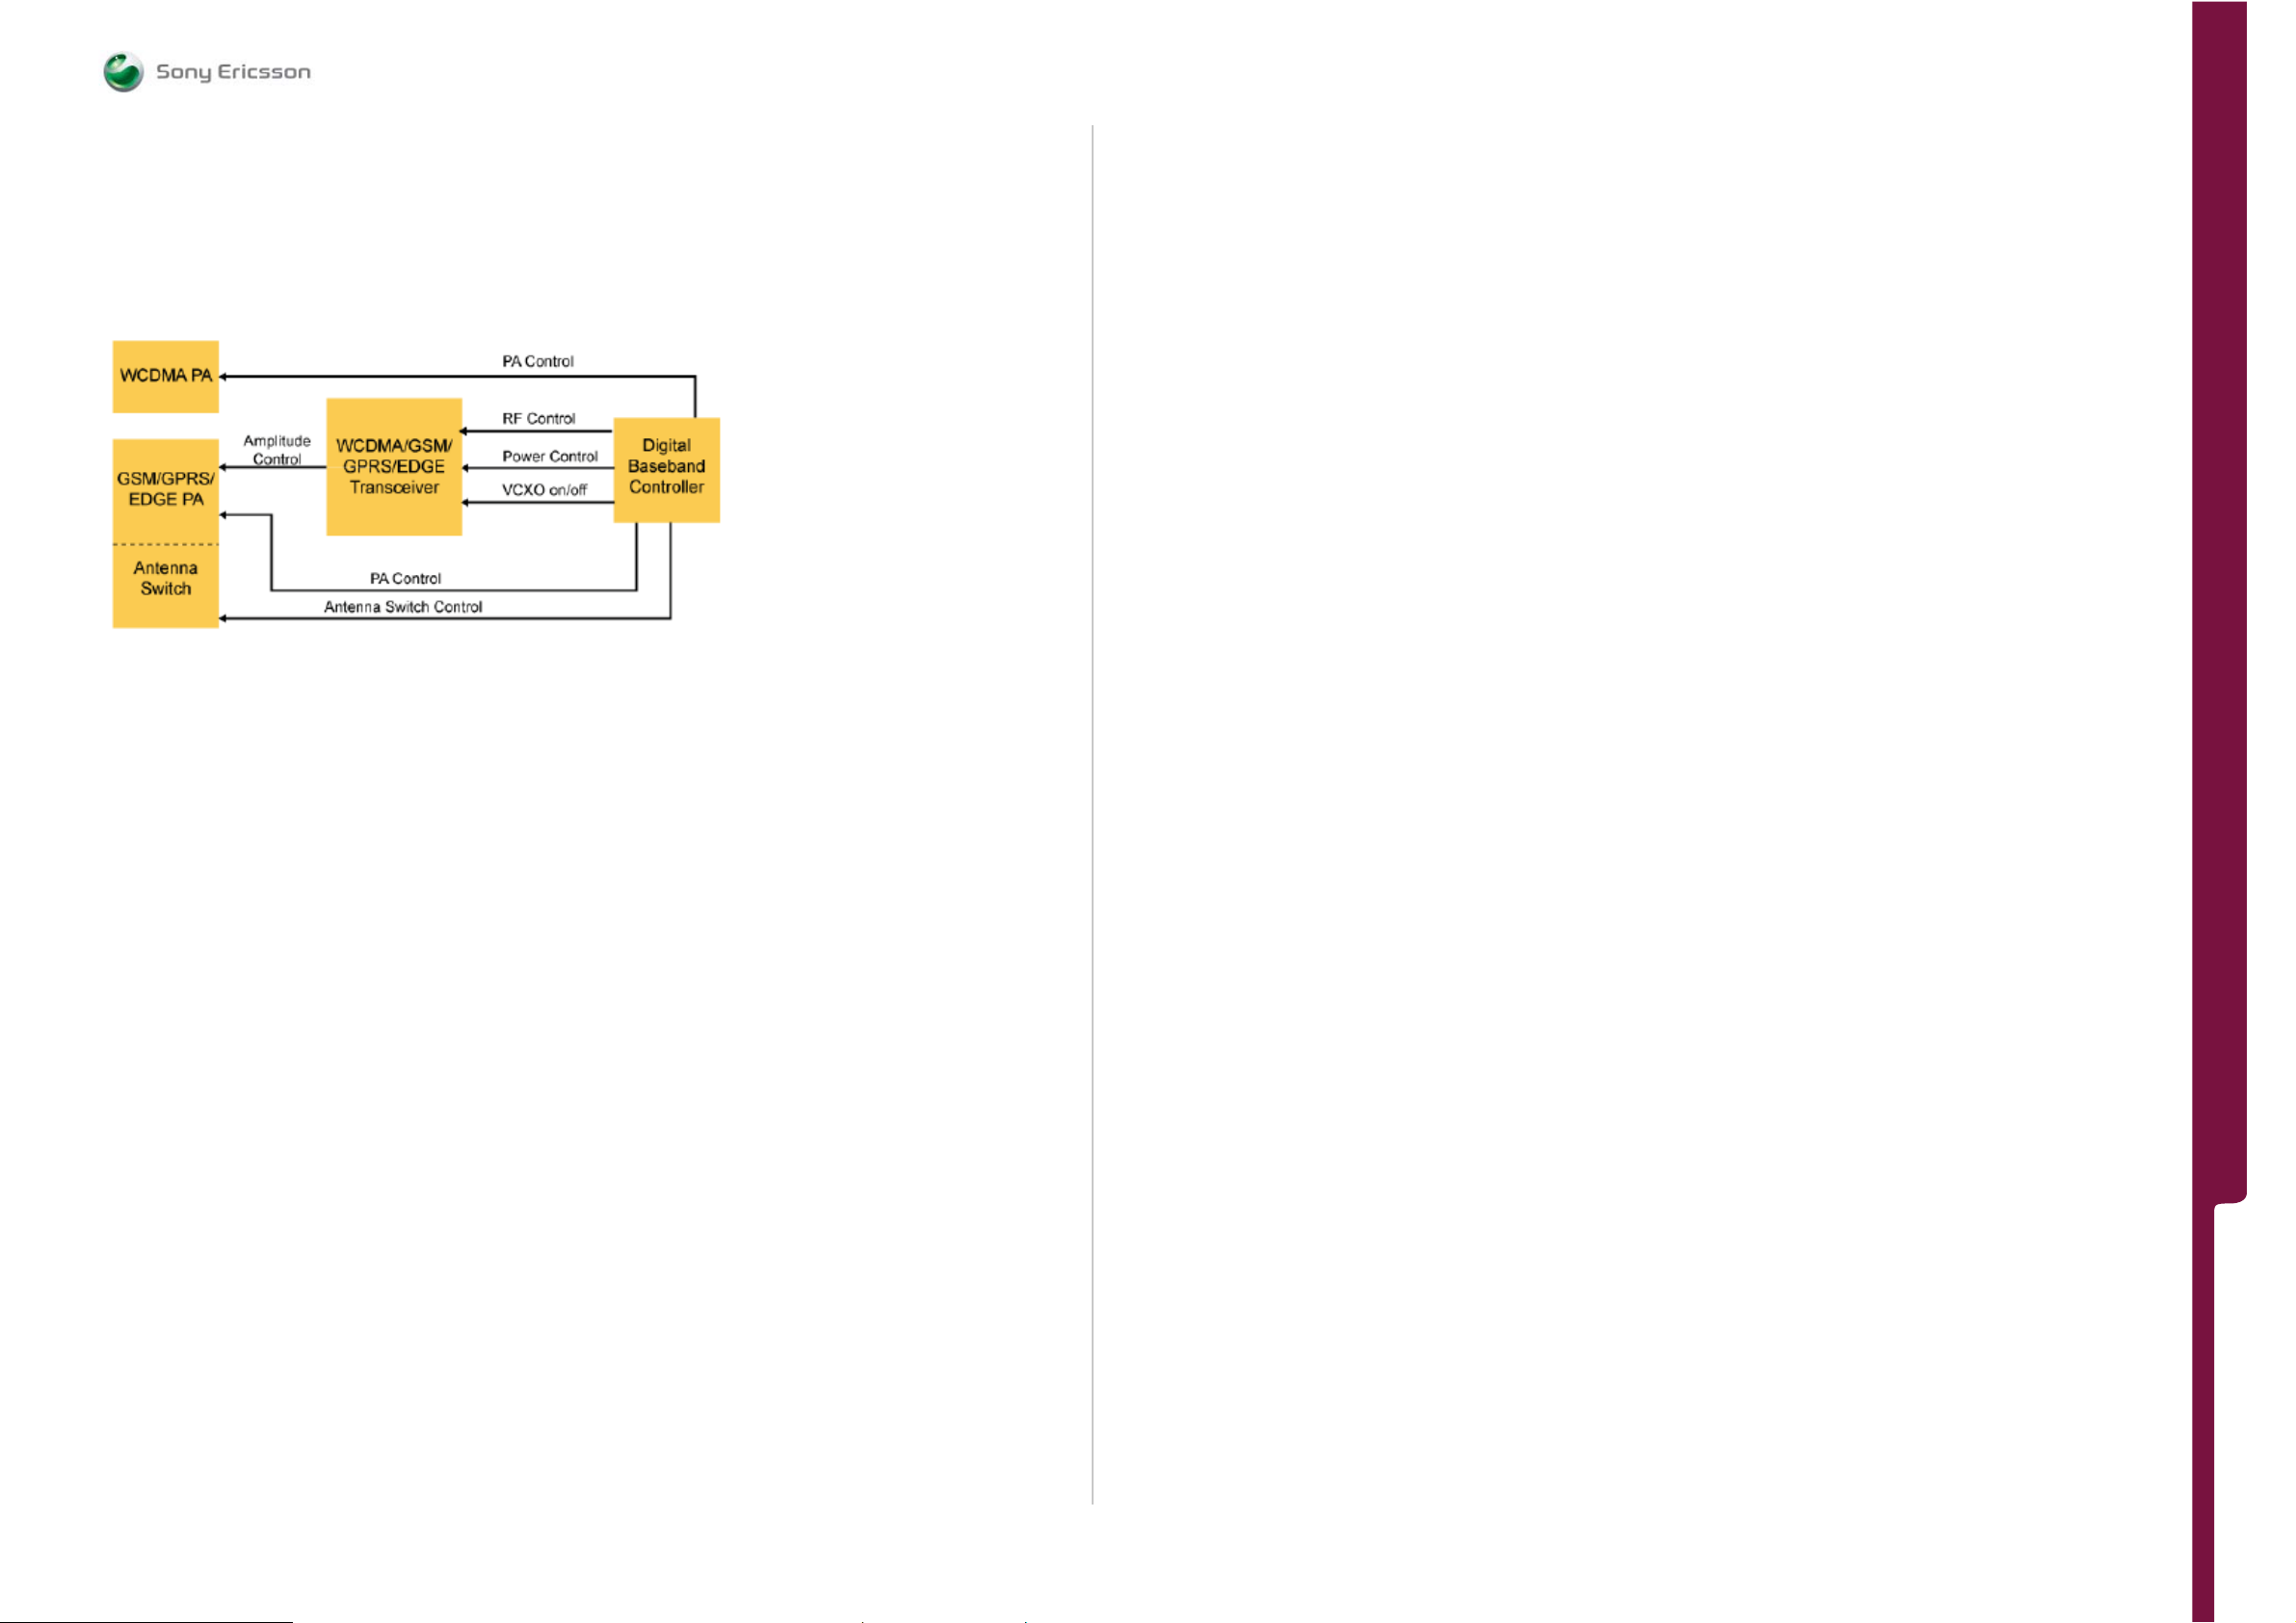
FUNCTIONAL OV ERVIE W
Technical Description
SEMC Troubleshooting Manual
G705 - W705 - W715
RF System Control
The access side of the digital baseband controller controls the overall radio system.
In both EDGE/GSM/GPRS and WCDMA air interface mode, the digital base band controller
controls the ra dio system th rough a three-wire serial bus. Th e digital base band controller
also manages PA band control and the antenna switch mechanism in the front end module.
The 26 MHz VCXO clock residing in the transceiver is turned on only when required and
initiated by the digital baseband controller.
The control flow for the RF system:
EDGE/GPRS/GSM
TX Frequency, Channel and Power Level Range:
GSM 850:
TX Frequency Range: 824,2 MHZ – 848,8 MHZ
Channel Range TX: 128 – 251
Power Level: Min 19 – Max 5
GSM 900:
TX Frequency Range: 890,2 MHZ – 914,8 MHZ
Channel Range TX: 1 - 124
Power Level: Min 19 – Max 5
EGSM 900:
TX Frequency Range: 880,2 MHZ – 889,8 MHZ
Channel Range TX: 975 - 1023
Power Level: Min 19 – Max 5
DCS 1800:
TX Frequency Range: 1710,2 MHZ – 1784,8 MHZ
Channel Range TX: 512 – 885
Power Level: Min 15 – Max 0
PCS 1900:
TX Frequency Range: 1850,2 MHZ – 1909,8 MHZ
Channel Range TX: 512 - 810
Power Level: Min 15 – Max 0
RX Frequency and Channel Range:
GSM 850:
RX Frequency Range: 869,2 MHZ – 893,8 MHZ
Channel Range RX: 128 – 251
GSM 900:
Frequency Range: 935,2 MHZ – 959,8 MHZ
Channel Range RX: 1 - 124
EGSM 900:
RX Frequency Range: 925,2 MHZ – 934,8 MHZ
Channel Range RX: 975 – 1023
DCS 1800:
RX Frequency Range: 1805,2 MHZ – 1879,8 MHZ
Channel Range RX: 512 – 885
PCS 1900:
RX Frequency Range: 1930,2 MHZ – 1989,8 MHZ
Channel Range RX: 512 - 810
WCDMA
Note! The WCDMA Network support depends on variant and market.
TX and RX Frequency and Channel Range
Band I:
Channel Range TX: 9612 - 9888
TX Frequency Range: 1920 – 1980 MHz
Channel Range RX: 10562 - 10838
RX Frequency Range: 2110 – 2170 MHz
Band II:
Channel Range TX: 9262 - 9538
TX Frequency Range: 1850 – 1910 MHz
Channel Range RX: 9662 - 9938
RX Frequency Range: 1930 – 1990 MHz
Band V:
Channel Range TX: 4132 – 4233
TX Frequency Range: 824 –849 MHz
Channel Range RX: 4357 – 4458
RX Frequency Range: 869 –894 MHz
Band VIII
Channel Range TX: 2712 – 2863
TX Frequency Range: 880 –915 MHz
Channel Range RX: 2937 – 3088
RX Frequency Range: 925 – 960 MHz
Bluetooth and FM Radio
The Blt/FM Radio circuit combines Bluetooth and FM tuner functionality into one.
Bluetooth
The Bluetooth implementation is compliant with Bluetooth specification 2.1 + EDR.
The Bluetooth
2480 MHz. The same band is used for both transmission and reception. This gives 79
frequency channels.
Receiver
The Bluetooth section implements a low-IF receiver for Bluetooth modulated inpu t signals.
The radio signal is taken from a balanced RF input and amplified by an LNA. The mixers
are driven by two quadrature LO signals, which are locally generated from a VCO signal
running at twice the frequency. The I and Q mixe r output signa ls are ban d pass filtere d by
a poly-phase filter for channel filtering and image rejection. The output of the band pass
filter is amplified by a VGA to the optimal input range for the A/D converter. Further
channel filtering is done in the digital part. The digital part demodulates the GFSK, Ⱥ/4-
DQPSK or 8-DPSK coded bit stream by evaluating the phase information. RSSI data is
extracted. Overall automatic gain amplification in the receive path is controlled digitally.
The RC time constants for the analog filters are automatically calibrated on chip.
TM
transceiver has frequency channels with 1 MHz separation from 2402 to
1225-4035 rev. 1
FUNCTIONAL OVERVI EW
91 (122)
Page 92
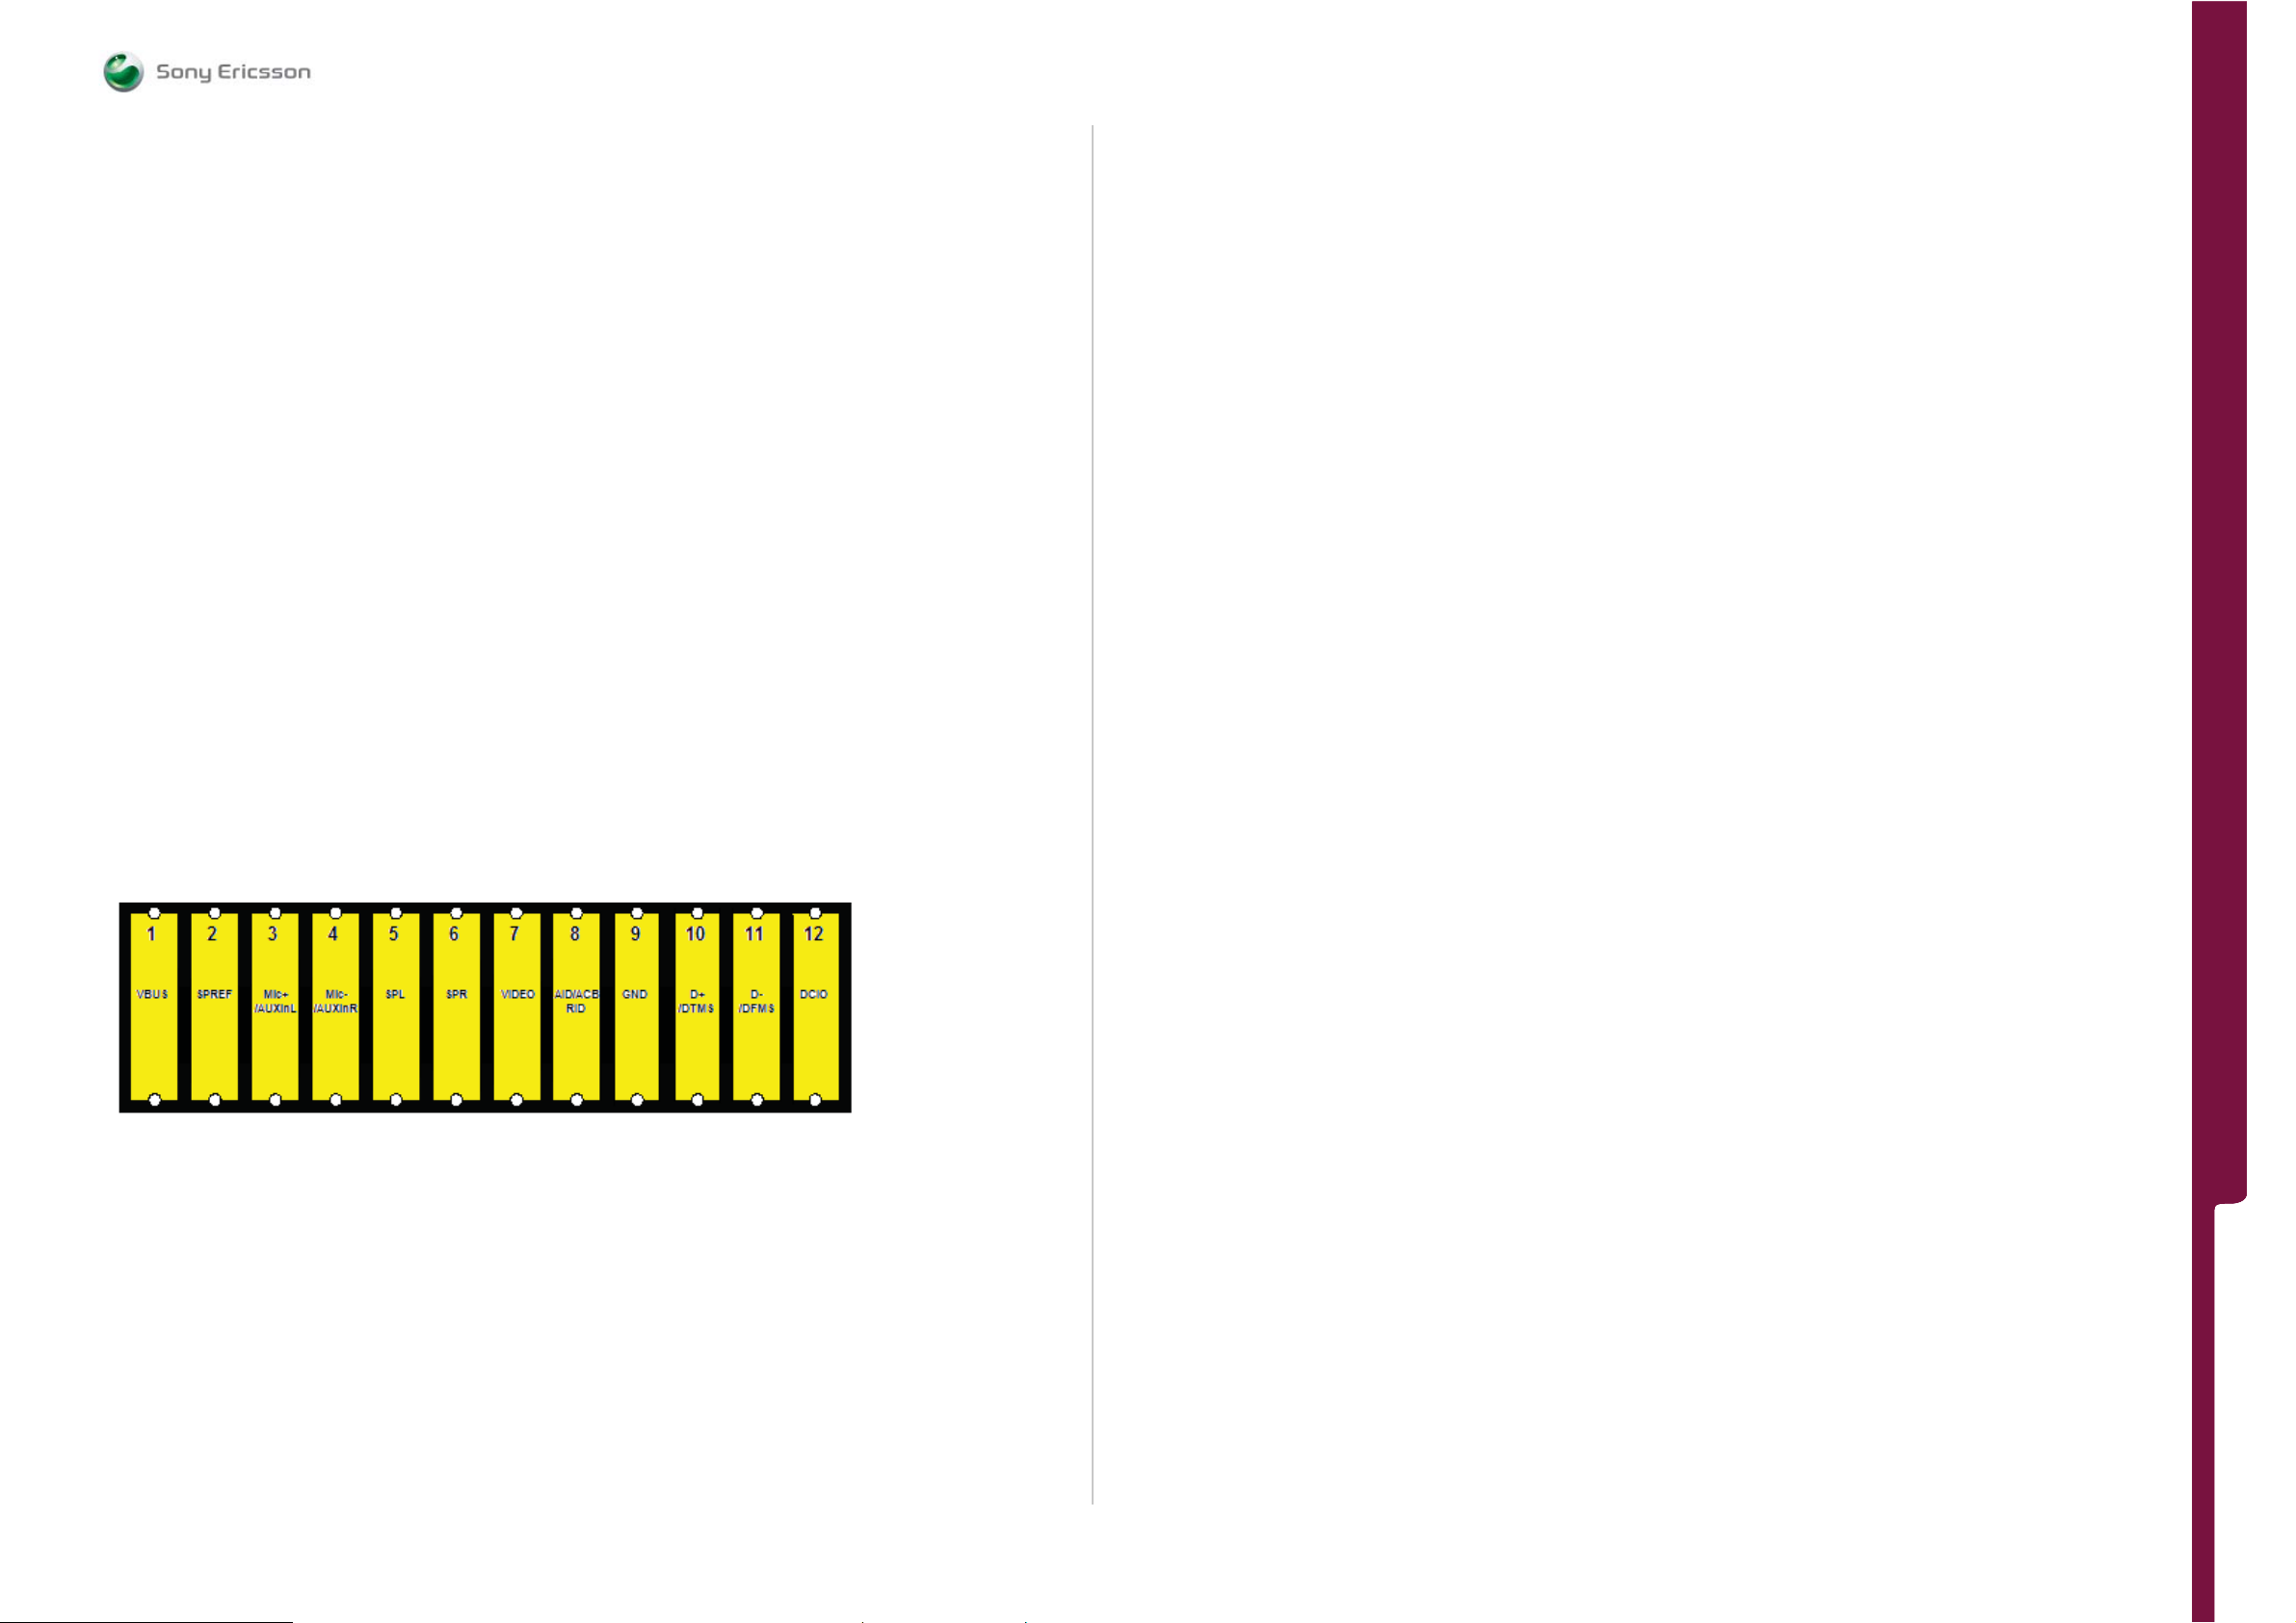
FUNCTIONAL OV ERVIE W
FUNCTIONAL OV ERVIE W
Technical DescriptionFUNCTIONAL OV ERVIE W
SEMC Troubleshooting Manual
G705 - W705 - W715
Transmitter
The transmitter uses the serial transmit data from the Bluetooth Controller. The
transmitter modulator converts this data into GFSK, Ⱥ/4-DQPSK or 8-DPSK modulated I
and Q digital signals for respectively 1, 2 and 3 Mbps transmission speed. These signals
are then converted to analog signals that are low pass filtered before up-conversion. The
carrier frequency drift is limited by a closed loop PLL.
FM Radio
FM Receiver
The receiver uses a digital low-IF architecture. The receive (RX) section integrates a low
noise amplifier (LNA) supporting the worldwide FM broadcast band (76 to 108 MHz). An
automatic gain control (AGC) circuit controls the gain of the LNA to optimize sensitivity
and rejection of strong interferers. An image-reject mixer down converts the RF signal to
low-IF. The quadrature mixer output is amplified, filtered and digitized with high resolution
analog-to-digital converters (ADCs). This advanced architecture allows the use of digital
signal processing (DSP) to perform channel selection, FM demodulation and stereo audio
processing.
Tuning
The receiver uses frequency synthesize r technolo gy inclu ding a completely in tegrate d VCO.
The frequency synthesizer generates the quadrature local oscillator signal used to
downconvert the RF input to a low intermediate frequency. The VCO frequency is locked to
the reference clock and adjusted with an automatic frequency control (AFC) servo loop
during reception. The tuning frequency is defined as: Freq (MHz) = Spacing (kHz) ×
Channel + Bottom of Band (MHz)
External Connectors
External units are connected to the transceiver by means of a 12-pin connector on the
phone.
System connector pin input/output overview:
Master Clock
(26 MHz)
The 26.00 MHz VCXO-based MCLK is distributed as a square wave signal from the
GSM/EDGE circuit. In order to have full control over the load on the MCLK, only the access
side of the digital baseband controller is allowed to request the MCLK. However, by
indirect means also the application side CPU can issue the request. A VCXO-based square
wave is also distributed to the WCDMA circuit, but is turned on only upon a command
from the digital baseband controller.
Real-time Clock
(32. 768 kHz)
A 32.768 kHz crystal oscillator provides a low frequency clock whenever the platform has
power. This clock is used to keep the Real-Time Clock (RTC) block functioning, so that the
platform can keep track of the time and date. The low frequency clock is generated in the
analog baseband controller and distributed to the digital baseband controller, and if
necessary to external devices like Bluetooth, FM radio and A-GPS.
A-GPS
The Assisted GPS functionality in the phone is realized with the Global Locate
Hammerhead GPS module. The Global Locate Hammerhead belongs to the Type 2 GPS
solutions. The PMB 2525 Hammerhead II GPS IC is a GPS single chip device containing a
complete radio frequency front-end as well as the signal processing functionality in a
single die. The device allows the usage of assistance data by supporting A-GPS (assisted
GPS) standards (RRLP, RRC, OMA SUPL). One of three serial interfaces, UART, I²C or SPI,
is used for communication with the host system.
Clock Reference Frequency
The platform provides two reference frequencies, a 32.768 kHz clock (RTCCLK) from the
Analog Baseband Controller, and a 26 MHz reference clock (SYSCLK) from the Digital
Baseband Controller. The RTCCLK is used by the phone real time clock function. The
RTCCLK is distributed to the A-GPS module as a logical square wave. SYSCLK is derived
from the reference modulation clock MCLK to the platform access system and is
distributed from the Digital Baseband Controller to the A-GPS module. This 26 MHz clock
is synchronized with the cellular network to an accuracy of ±0.1 ppm. Automatic
frequency updates can also cause large frequency corrections, with associated phase
discontinuities. In order to isolate the A-GPS module for the unstable effects of SYSCLK,
an external reference clock is required. This external reference frequency provided by a
TCXO is required to provide a clock with very high short term stability. The frequency of
the TCXO is calibrated against the cellular reference clock by the A-GPS module enabling
the use of a more economical less accurate TCXO.
FUNCTIONAL OVERVI EW FUNCTIONAL OVERVI EW
FUNCTIONAL OVERVI EW
FUNCTIONAL OVERVI EW
Clocks
Clock Distribution
The clocking for the access and application subsystems is separated. This means that the
subsystems can wake up or go to sleep mode independently. The access subsystem is
clocked by the 26 MHz Voltage Controlled Crystal Oscillator (VCXO) located in the
GSM/EDGE circuit. When the access subsystem has a job to do, the Master Clock (MCLK)
signal is requested from the RF part. Most other clocks needed within the access
subsystem are generated from the MCLK. Some minor parts like sleep timer and cable
detect use the 32 kHz real-time clock. The 32 kHz real-time clock clocks the application
subsystem, and all other internal clocks needed within the application subsystem are
generated from this clock. However, when audio is transferred between the application
and the access subsystems, the MCLK is used.
Interface and Control
The Interface and control consists of system timing and control. The control interface
includes a communication link where both data and control information are transferred
between platform and the A-GPS module. Data and command information is transferred
using a full-duplex Universal Asynchronous Receiver Transmitter (UART) interface.
Other control signals include the following:
• A GPIO or platform reset used as a reset signal (nRESET) to the GPS module.
• A Transmission On signal (TXON/ RX_HOLD), is used to indicate to the A-GPS module
when the ME is transmitting. The A-GPS modules receiver is disabled whilst the ME is
transmitting.
• A hardware timing pulse (GPSSTART/SYNC) providing the A-GPS module with a
highly accurate timing reference. The A-GPS is able to accurately synchronize its
GPS time to this reference pulse.
• A GPIO used as an enable (POWERON) signal to the GPS module.
• A GPIO used for power control for the GPS module.
1225-4035 rev. 1
92 (122)
Page 93
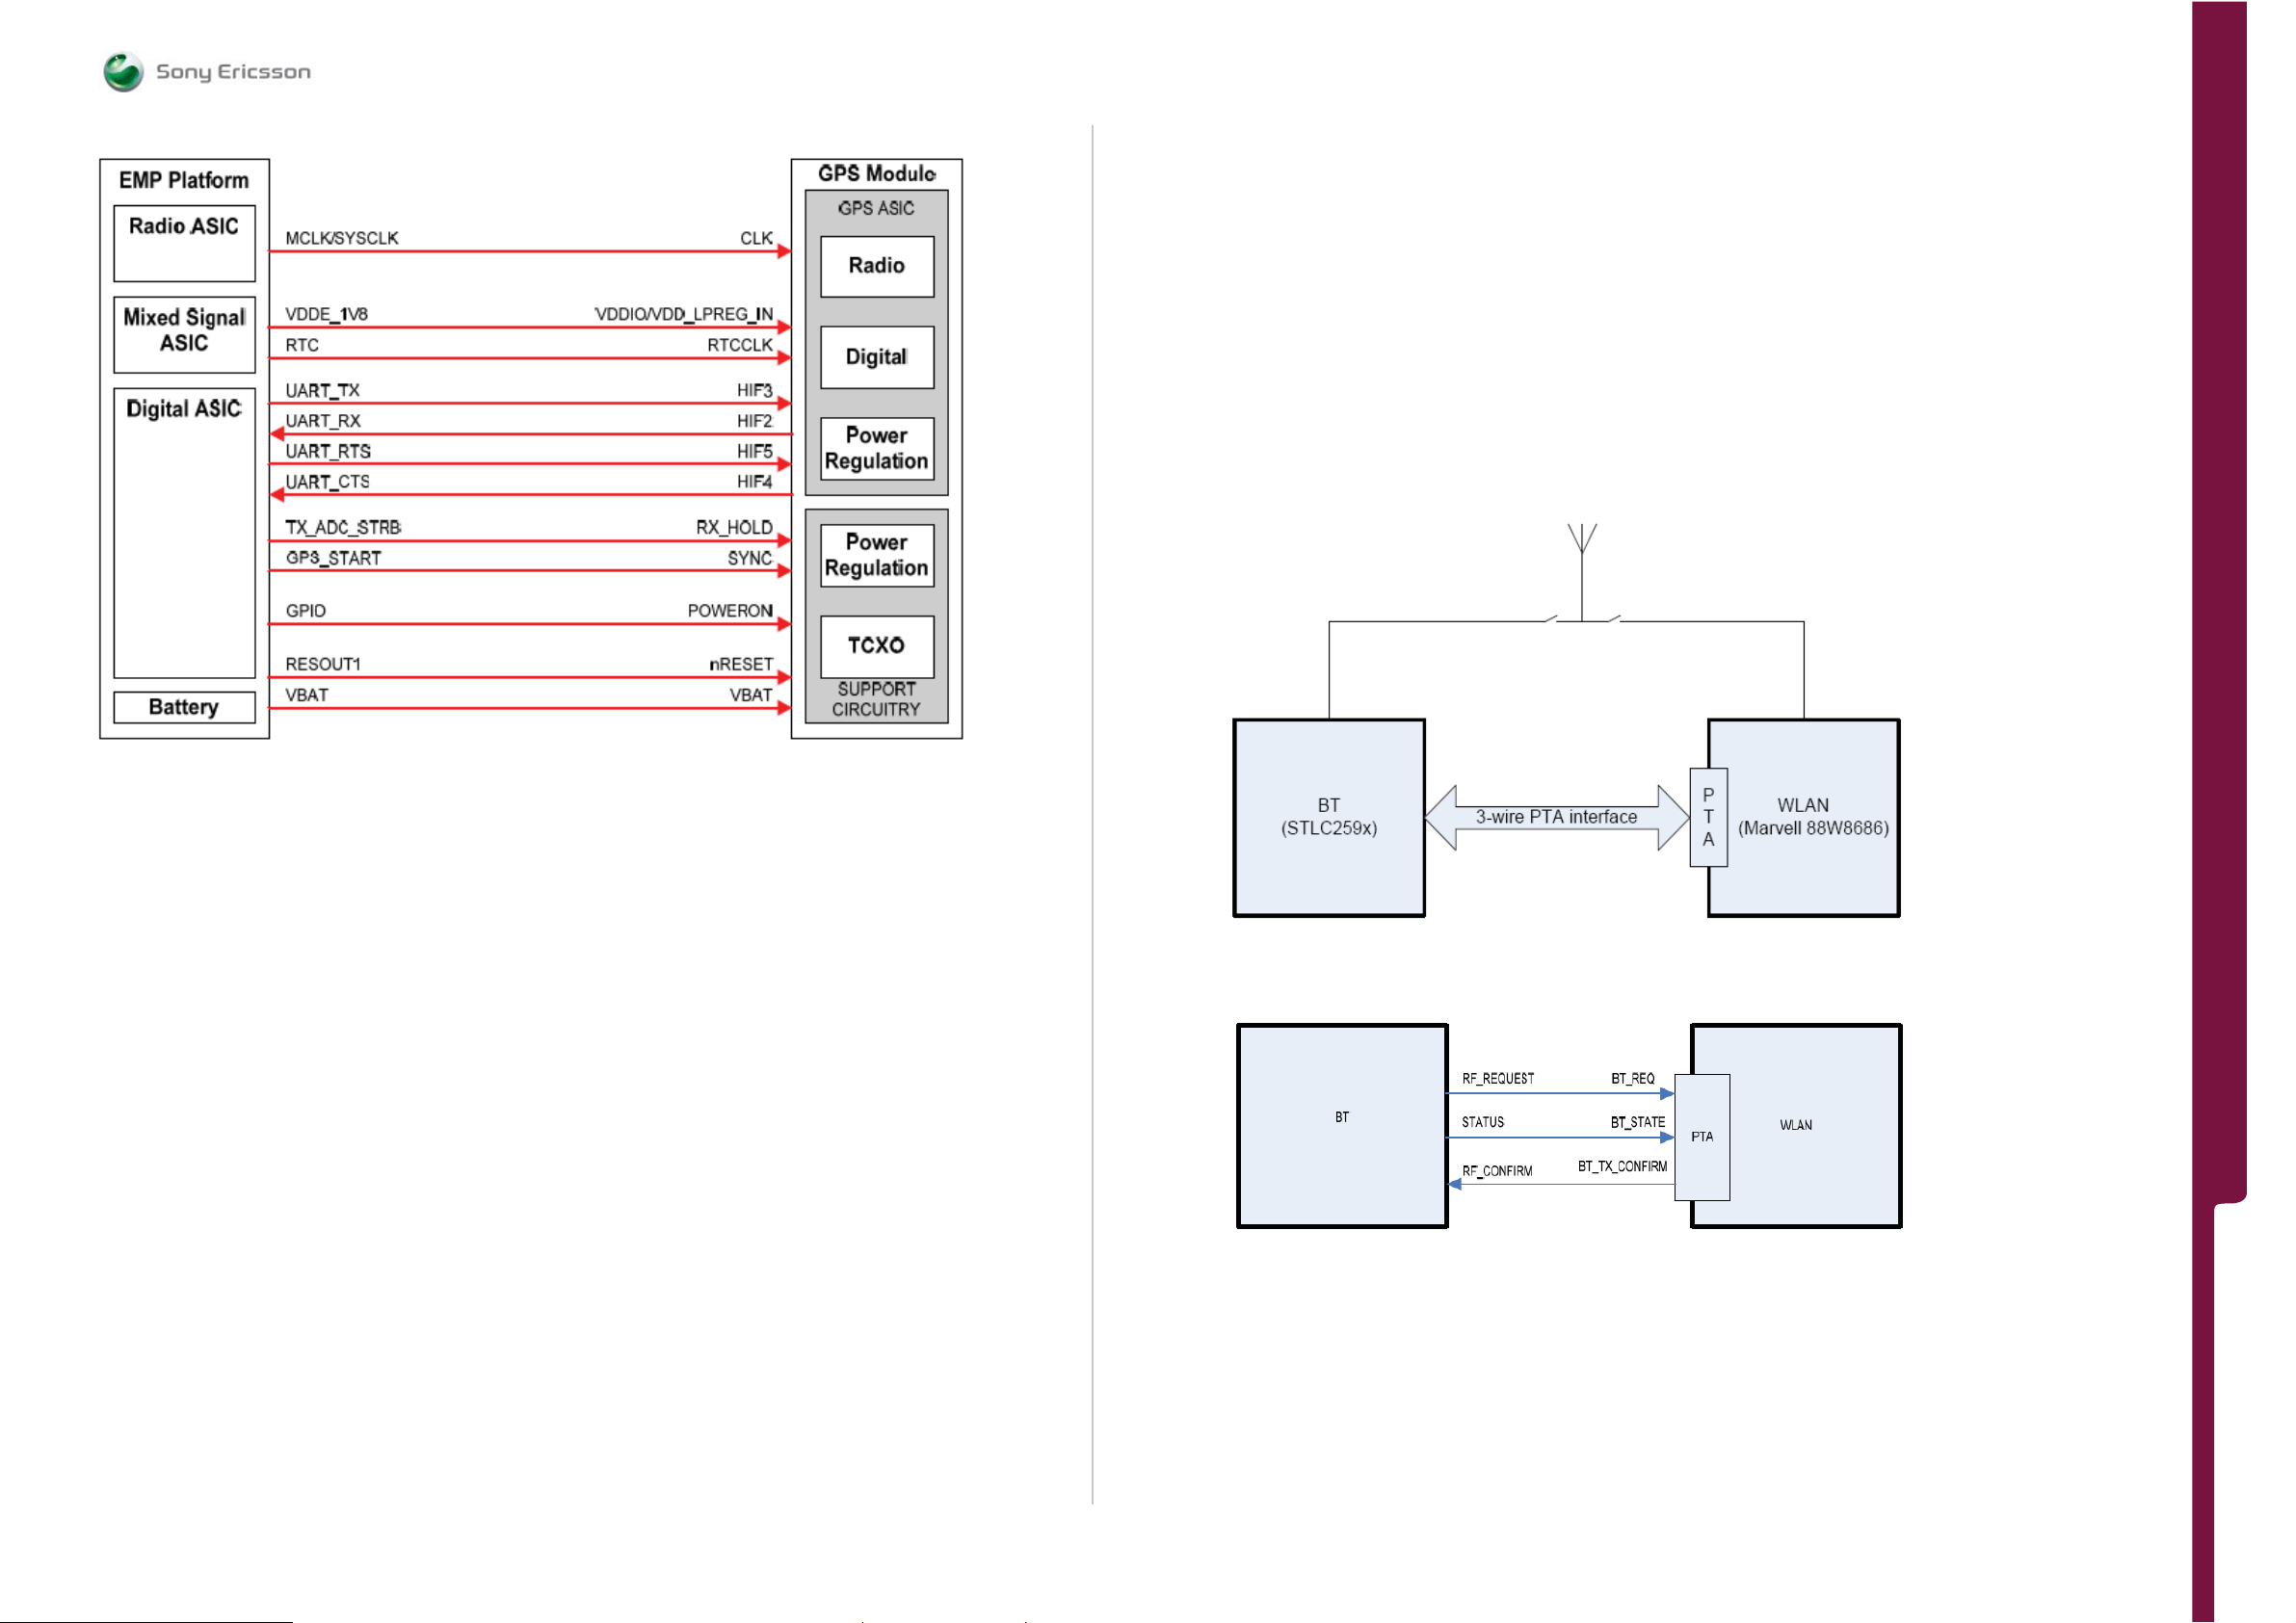
FUNCTIONAL OV ERVIE W
SEMC Troubleshooting Manual
G705 - W705 - W715
A-GPS Block Diagram:
WLAN device or BT device gets the antenna is Packet Traffic Arbitration (PTA). WLAN LD
configures the PTA during startup of the WLAN device. All PTA parameters are stored in
GDFS. The PTA is configured to prioritize BT traffic if it is a BT high request. All WLAN
traffic should have priority before any BT traffic that is categorized as BT low requests.
WLAN Driver sends status events to BT Driver to inform about:
• WLAN startup and shutdown
• WLAN association and disassociation
• The current WLAN channel in use
In the cases of WLAN startup and shutdown the BT Logical Driver configures the BT Device
to request the antenna from PTA or not. BT LD also monitors if WLAN have any connection
running. In that case, BT avoids the BT frequencies mapping to the WLAN channel. WLAN
monitors if BT has started any BT Inquiry or page. If this happens any link loss
mechanisms should be temporary turned off for the BT Inquiry or page period.
Bluetooth and WLAN PTA Mechanism:
WLAN (Wi-Fi)
This WLAN module is based on the new Marvell 88W8686 chipset. WLAN module is
designed to support IEEE 802.11a or 802.11g payload data rates of 6, 9, 12, 18, 24, 36,
48 and 54 Mbps, as well as 802.11b data rates of 1, 2, 5.5 and 11 Mbps. For security the
WLAN module supports the IEEE 802.11i security standard through implementation of the
Advanced Encryption Standard (AES)/Counter Mode CBC-MAC Protocol (CCMP), and Wired
Equivalent Privacy (WEP) with Temporal Key Integrity Protocol (TKIP) security mechanism.
For video, voice and multimedia applications the WLAN module supports 802.11e Quality
of Service (QoS). The 3-wire Bluetooth / Wi-Fi co-existence interface is also supported.
The WLAN module has a fully integrated RF to baseband transceiver that operates in both
the 2.4 GHz ISM radio band for 802.11g/b WLAN applications and 5 GHz UNII radio band
for 802.11a WLAN applications. It contains all the circuitry to support both transmit and
receive operations. The integrated LNA and AGC on the receive path is seamlessly
controlled by baseband functions. Integrated transmitters up-convert the quadrature
baseband signal and the deliver the RF signals to external power amplifiers for 2.4 GHz
and 5 GHz radio band transmission. Local o scillator frequencies are generated by a fully
integrated programmable frequency synthesizer. The loop bandwith is optimized for phase
noise and dynamic performance and quadrature signals are generated on-chip.
BT/WLAN Co-existence
Standards bodies did not fully anticipate the range of scenarios in which WLAN and
Bluetooth would compete for the same spectrum therefore IEEE 802.11 (WLAN) and
Bluetooth use the same 2.4 GHz ISM frequency band (although they use different access
mechanisms). They also did not include comprehensive, robust, and cooperative
mechanisms in their respective standards to mitigate interference. Since no mechanism
for exchanging signal status information has been built into the two standards, the task of
minimizing interference must be accomplished by other means. Co-location refers to the
situation where both Bluetooth and WLAN are in functional mode, that is, they are both
fully radio operational, performing either transmission or reception activities (or ready to
do so immediately). They also either share an antenna or each module has its own
antenna, on the same device. Because both Bluetooth and WLAN operate in the same
unlicensed ISM band (2.4GHz), steps are required to avoid disturbances and allow
coexistence. The HW solution is a single antenna controlled by an Antenna Switch with 3wired lines between WLAN Device and BT Device. The used algorithm to decision whether
Bluetooth and WLAN Chip 3-wire Interface:
1225-4035 rev. 1
FUNCTIONAL OVERVI EW
93 (122)
Page 94
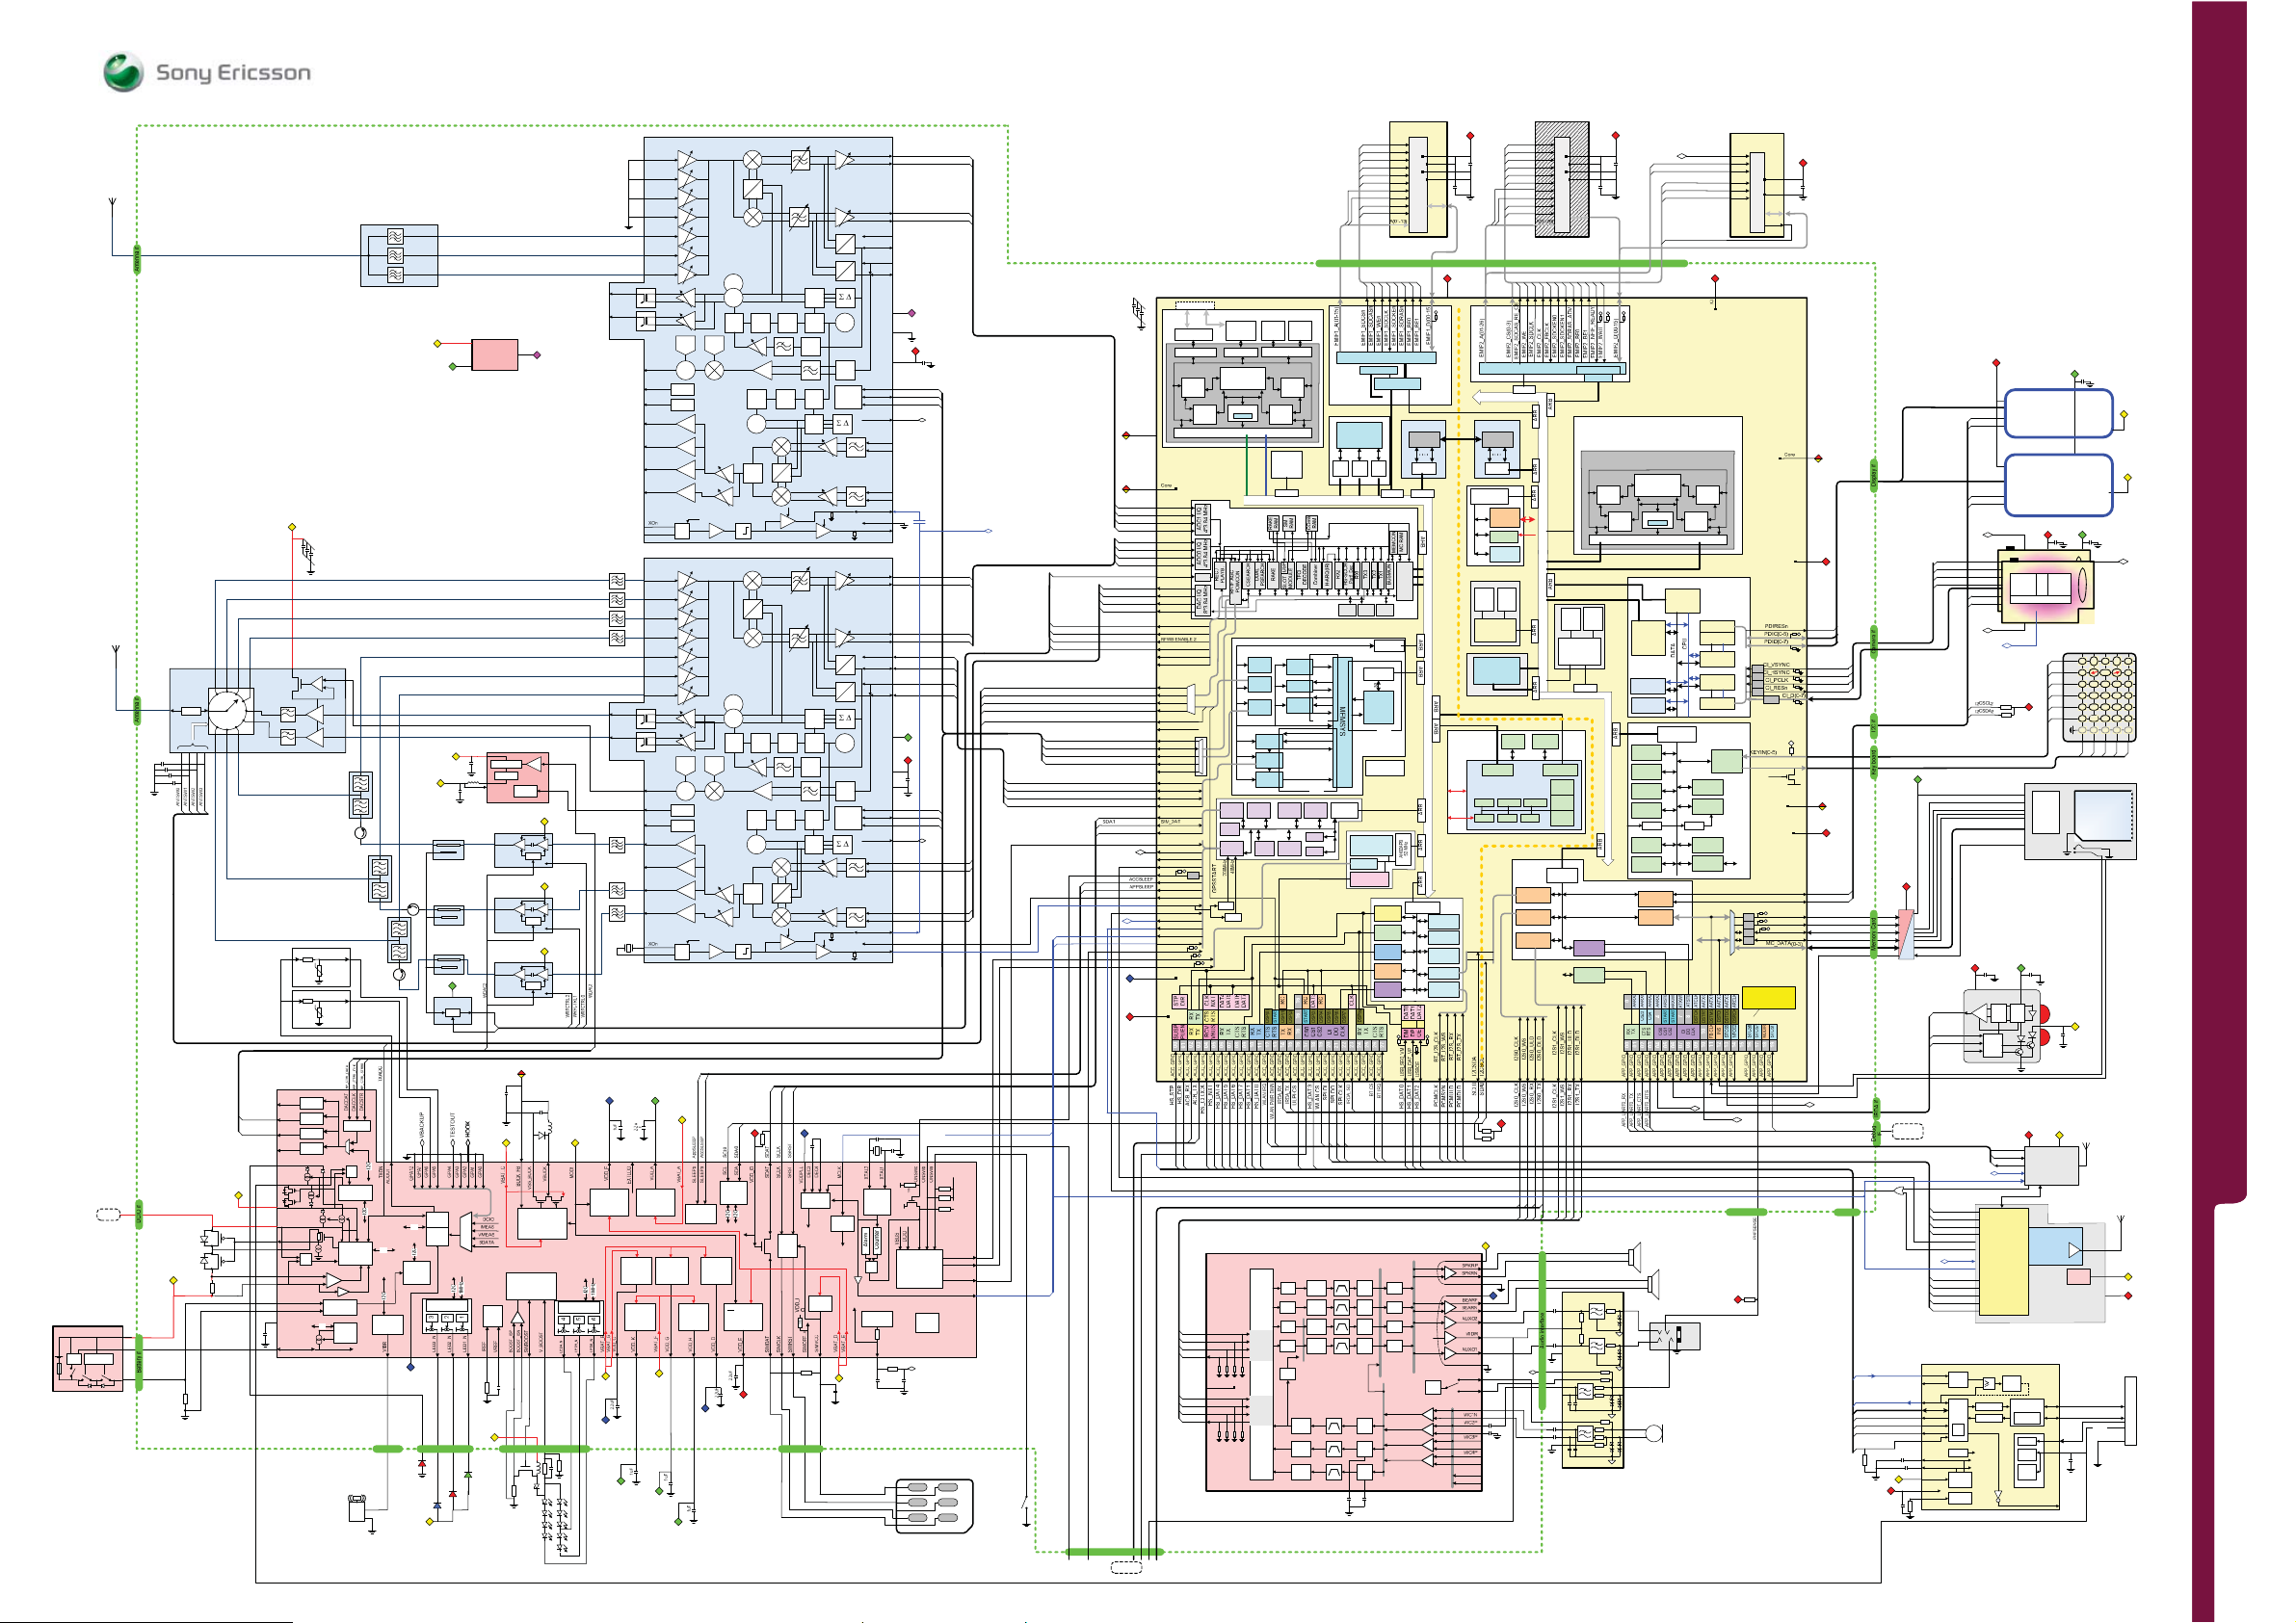
BATTERY
uP
SAFETY
DCIO
BDATA
VBAT
GND
RX Diversity for WCDMA
GSM/EDGE
PA +Ant Sw.
ESD
VBAT
100
mohm
25
mohm
FUNCTIONAL OV ERVIE W Plat fo rm Block Diagra m
FUNCTIONAL OV ERVIE W
D(0-15)
B Slav
AH
DMA
AHB IF
Video
Enc
RAM
Video
Encoder
AHB
ster
Ma
CEVAX1622
DRAM
128 kB
IRAM
64 kB
26
z
MH
EX1030 Filters
Hook
CCO
CCO
VDD
VDDQ
VSS
VSSQ
NAND Flash IF
e
ARM926
AHB
Master
Video
Enc
RAM1
0
ARB
SPI
UART 0
1.8 V
VIO
RESETOUT0
EMIF2_SDCAS_RE_OE
EMIF2_CLE_A17
EMIF2_ALE_A18
EMIF2_WE
EMIF2 CS0
DB 3210 POP
NAND Flash 1 Gbit
WP
CLE
ALE
RE
WE
CE
1.8 V
VIO
VDD
VSS
D(0-7)
R/B
EMIF2 NFIF READY
1.8 V
VIO
Digital Baseband
Controller DB 3210
ECC
ARM9 Subsystem
1.2/1.05 V
VCORE
ARM9EJ-S
I Mem
Control
I
Cache
32 kB
GRAM
64k byte
AHB
Slave
GAMEACC
MCiDCT
(Video)
WDOG
TIMER0
TIMER1
RTC
32kHz
BUS TR
Event H
DI/DO/CLK
CS0 -2
CTS/RTS
RX/TX
ATMS
MMU
TLB
AHB BUS IF
AHB
Slave
AHB
Ma
ster
(3D)
AHB
Slave
APLL
13M
I2C2
MMC/SD
GAMCON
AHB2APB
13 MHz
32
32
32
16
32
32
CAM 1 STBY
D Mem
Control
D
Cache
32 kB
AHB
Master
1.8 V
VIO
IO
XGAM
PAR/ SSI
PDI
PDICON
CDICON
CDI
16
KEYPAD
KEYOUT(0-4)
32
PPM
16
SYSCON
DPLL
208M
16
GPIO
32
UART 0
23
22
21
MS PRO
20
All 48 GPIOs here
have switchable
pullups.
CAM POW
GPIOif
VIO
1.8 V
PHF
Jack
26
27
25
24
28-35
MC_DATADIR
MC_CMDDIR
MC_CMD/BS
MMC CLK
CAM 2STBY
I2CSCL2
I2CSDA2
MC_CLK
CIVSYN
CIHSYN
CIPCLK
CIRES
1.2/1.05 V
VCORE
Core
IO
1.8 V
VIO
I2CSCL2
I2CSDA2
USB if
Microphone
AH
AAIF
AHB IF
AHB2APB
26 MHz
1.8 V
VIO
VDD
VDDQ
VSS
VSSQ
1.8 V
VIO
EMIF
e
B Slav
MSL
AHB2AHB
32
32
32
A
RAM
DSP
Sub System
JTAG
CRU
8
GPIO
WCDMA
Cipher 0,1
WCDMA
Integrity
SDA
GPRS
CRYPTO
I2C0
I2S/PCM
(BT)
H
VDD_SPKR
VSS_SPKR
VDDBEAR
VMID
VSSBEAR
CCO1
CCO
CCO2
MIC1P
MIC2N
MIC3N
MIC4N
LINE1
LINE2
DB 3210 POP
SDRAM 512 Mbit
CKE
Shared EMIF
52 MH
32+5
32+3
32+3
32+3
32+3
5
32+
MHz
26
Hist
CTS/RTS
RX
RX
RX
RX
ADC2REF ADC3REF
AHB
IF
AHB2APB
26 MHz
z
WTIM-
58 Channels
50 Requests
GEN
SDCKE
SDCLK
SDCS
WE
SDCAS
SDRAS
A14
A15
BE0
BE1
EMIF1
EMIF Control
AHB Slave
DMA
AHBIFAHB
IF
WINT-
WSYS-
COM
CON
IO Bridge
AHB IF
32
IRAM
7k x 32
32
bit
52 MHz
EGG
Sub System
Random noise
generator
Boot ROM
8k x 32 bit
INTCON
FS_USB/
HS_USB
UART0
UART2
UART3
IRDA
I2S BUS
DAC
4
DAC
3
DAC
2
DAC
1
ADC
1
ADC
2
ADC
3
CLK
CS
WE
CAS
RAS
BA0
BA1
LDQM D(0-15)
UDQM
EMIF Arbiter
IM
Bridge
AHB
Slave +
Sequ.
26 MHz
2
RS23
BT
SPI
TXRX
PGA
PGA
PGA
PGA
RF 3300 WCDMA RX (otherfunctions unused)
GSM/EDGE
HB
LNA
GSM/EDGE
HB
LNA
GSM/EDGE
LB
LNA
GSM/EDGE
LB
Band I
Band I
I
Band V
VBAT
2.8 V
VRAD
LDO
2.8 V
VRAD2
2.8 V
GSM/
EDGE LB
GSM/
EDGE HB
VBAT
1930 –199 0 MHz
1805 – 1880 MHz
925 – 960MHz
869 –894 MHz
VAPC
UL: 1920 – 1980 MHz
DL: 2110 – 2170 MHz
Band 1
GSM850/
put
900 In
PA
DCS/PCS
t
Inpu
PA
824 – 915 MHz
1710 – 1910 MHz
VccWPA
VBAT
PWM/PFM
WDCDCREF
Switch
Control
En
RFCtrl1
Logic
GSM/
EDGE LB
GSM/
EDGE HB
VccWPA
Power
I2C
FUEL
GAUGE
ADDER
2.65 V
VANA
2.75 V
VRAD
AUTO
CTL
ADC
10bit
LED Control
coupler
Power
coupler
Power
coupler
RF Powdet
Det
2.75 V
En
WRFCTRL3
M
U
X
UL: 1850 – 1910 MHz
DL: 1930 – 1990 MHz
Band 2
UL: 824 – 849 MHz
DL: 869 – 894 MHz
Band 5
TEMP_BIAS
V_TEMP
Placed
los
c
e to RF
TEMP_BIAS
LCDTEMP
Placed
close to
LCD
DAC0
DACO0
11 bits
DAC1
WDAC1
DACO1
11 bits
SERCON
DAC2
WDAC2
DACO2
11 bits
DAC3
DACO
3
11 bits
B
CHREG
CH
US
DET
USB CHRG
CONTROL
I2C
DCIO CHRG
CONTROL
DCIO
T
DE
IMEAS
SE-
SEN
VMEAS
S-D
ADC
VIBRATOR
I2C
CONTROL
UART
TRICKLE
VBAT
VBUS
VBAT_C
DCIO
DCIO_INT
CHSENSE+
FGSENSE+
FGSENSE-
VDD_REF
1uF
BDATA
LED interfaceVibrator if WLED interface SIM interface
Bias
En
VccWPA
Bias
En
26MHz X-
VccWPA
Bias
En
WTXPOW_DET
1.2/1.05 V
VBAT
BAND
GAP
VCORE
Internal BUCK
1.8 to 0.9 V
600 mA
BOOST
(Soft start)
6-22 V, 30 mA
5%
VBAT
LED Control
Analog
LDOf
30 mA
2.5~1.05V
2.5 V
VANA
VBAT
VBAT
2.65 V
VAUDIO
2.75 V
VIR
VBAT
LNA
WCDMA HB
LNA
WCDMA HB
LNA
WCDMA LB
LNA
DAC
GSM/EDGE
AM
+
RFCtrl1
RFCtrl1
RFCtrl2
RFCtrl2
WCDMA HB3
WCDMA HB2
WCDMA HB1
WCDMA LB
XOp
XO
RF 3300 WCDMA/GSM/GPRS/EDGE TRX
GSM/EDGE
HB
LNA
GSM/EDGE
HB
LNA
GSM/EDGE
LB
LNA
GSM/EDGE
LB
LNA
WCDMA HB
LNA
WCDMA HB
LNA
WCDMA LB
LNA
DAC
GSM/EDGE
AM
+
RFCtrl1
RFCtrl1
RFCtrl2
RFCtrl2
WCDMA HB3
WCDMA HB2
WCDMA HB1
WCDMA LB
tal
XOp
XO
2.8 V
VRAD
VBAT
RF LDO a
EGG/WBTX
150 mA ;
2.8 V
MemCard
LDOc
LDOg
200 mA
100 mA ;
2.65 V
2.85 V
Camera
IR LDOk
LDOh
200 mA
100 mA ;
2.75 V
2.75 V
VBAT
2.85 V
VCARD
2.75 V
VCAM+Display
SLEEP
CONTROL
DAC
DAC
LDO d
200 mA ;
2.65 V
2.65 V
VANA
0
90
VCO
VCO
LPF+ChP PhD
LPF ChP PhD
VCO
+
0
90
VCO
VCO
LPF
+
LPF ChP
VCO
+
VIO
I2C
I/O/Core
LDOe
200 mA
1.8~0.9V
1.8 V
VIO
0
90
ChP PhD
0
90
Level
shift
÷
N.M
DAC
÷
N.M
÷
N.M
DAC
PhD
÷
N.M
VANA
PLL
44/48
SIM
LDO
WRxIA
WRxIB
WRxQA
WRxQB
EDataStr
A
EDataB
D
ED
ataC
A
EDataA
D
XO
DAC
CLK
Serial
DATA
STROBE
Control
stOu
Te
t
WTxIA
WTxIB
WTxQA
WTxQB
MCLKsec
C
LKREQ
K
MCL
WRxIA
WRxIB
WRxQA
WRxQB
EDataStr
A
EDataB
D
EDataC
A
EDataA
D
XO
DAC
CLK
Serial
DATA
STROBE
Control
TestOut
WTxIA
WTxIB
WTxQA
WTxQB
MCLKsec
CLKREQ
MCLK
I2C BUS Internal Acc and App
Backup
Cap
32 kHz
osc
1MHz
OSC
G
LDO LP
2.2 V
VDDLP
VBAT
Backup
capacitor
2.8 V
VRAD2
1.8 V
VIO
RF_CTRL_CLK
RF_CTRL_DATA
RF_CTRL_STRB1
GPA4
MClkSec
BT +W LAN
RF_DATA_STRB
RF_DATA_B
RF_DATA_C
RF_DATA_A
2.8 V
VRAD
1.8 V
VIO
RF_CTRL_CLK
RF_CTRL_DATA
RF_CTRL_STRB0
GPA4
MClkSec
CLKREQ
MCLK
SYSCLK1
VBAT
10
0k
100k
100k
SYSTEM
POR
PWRRST
XTAL_OUT
OTP
64 bits
Power Management
AB 3100
VBACKUP
C1
GND
VCC
C2
RST
NC
C3
CLK
DAT
SIM card
External to Platform
Internal to Platform
To Mux
EICE
Digital
Baseband
Controller
JTAG DEBUG TCM I F
Decaps
ARM926
I Mem
Control
I
Cache
32 kB
AHB
Master
ADC2_I_NEG
ADC2_I_POS
ADC2_Q_NEG
2_Q_POS
ADC
ADC1_I_NEG
ADC1_I_POS
ADC1_Q_NEG
ADC1_Q_POS
TX_POW
ADC
DAC_I_NEG
DAC_I_POS
DAC_Q_NEG
DAC_Q_POS
RFWB ENABLE 0
RFWB ENABLE1
RFWB ENABLE 3
RFWB ENABLE 4
RFWB ENABLE5
ANT_SW0
ANT_SW1
O
ANT_SW2
R
ANT_SW3
TX ADC STRB
GSM PA ENABLE
RF CTRL CLK
RF CTRL DATA
RF
0
CTRL STRB
RF
RL STRB1
CT
CTRL STRB2
RF
RF_DATA_STRB
RF_DATAA0
RF_DATAB1
RF_DATAC2
SIM_CLK
SIM_RSTn
PWRRSTn
RESOUT0n
RESOUT1n
RESOUT2n
DCON
15
ACCSLEEP
APPSLEEP
MCLKREQ
MCLK
SYSCLK0REQ
SYSCLK0
SYSCLK2
SYSCLK1
32KHz
RTCCLKIN
SERVICEn
MSACCIRQn
MSAPPIRQn
APLL
IO
ANTSW0
ANTSW1
ANTSW2
ANTSW3
TXADC
RF_DATA_STRB
RF_DATA_A
RF_DATA_B
RF_DATA_C
WTXPOW_DET
WRFCTRL0
WRFCTRL1
WRFCTRL2
WRFCTRL3
RF_CTRL_CLK
RF_CTRL_DATA
RF_CTRL_STRB0
RF_CTRL_STRB1
WTX_In
WTX_Ip
WTX_Qn
WTX_Qp
SCLK
SRST
To NAND WP
1.2/1.05 V
VCORE
1.2/1.05 V
VCORE
WRX1_In
WRX1_Ip
WRX1_Qn
WRX1_Qp
WRX0_In
WRX0_Ip
WRX0_Qn
WRX0_Qp
PWRRST
CLKREQ
To Camera
IRQAcc
IRQApp
2.5 V
VANA
1.8 V
MCLK
SYSCLK1
VIO
VRTC
IRQa
IRQb
32KHZ
I2S_CLK1
I2S_WS1
I2S_TX1
I2S_RX1
I2S_
CLK0
I2S_WS0
I2S_TX0
I2S_RX0
C5
On/Off
C6
Switch
C7
Debug Interface
ACB/
Debug
ARM9 Sub system
ITCM
ETM9
26 kB
ETM IF
ARM9EJ-S
MMU
TLB
AHB BUS IF
Master
WCDMA SUB System
CLK
16
CON
TIM
16
GEN
16
SER
CON
16
TXIF
16
RFIF
16
RXIF
Bus
SIMIF
Tracer
Access
Timer
SYS
GPIO
CON
DPLL
APLL
Audio Part AB 3100
PCMCLK
PCM/
PCMSYN
I2S
PCMI
Inter-
PCMO
face 1
M
PC
DECODER
ENCODER
VDDDIG
LK
PCMC
PCM/
PCMSYN
I2S
PCM
I
Inter-
PCMO
face 2
DTCM
8 kB
D Mem
Control
D
Cache
32 kB
AHB
AHB
Default
slave
ARB ARB ARB
16
GSM
CRYPTO
16
VA
16
DFSE
32+3
32+3
32+5
32+5
26 MHz
Watch
Event
Dog
ETX
Cable
Detect
EDC
Vol
PGA2
Vol
PGA2
Vol
PGA2
Vol
PGA1
SIDE
TONE
TX
PGA1
TX
PGA2
TX
PGA3
Memory interface
AHBSlave
AAIF
MSL
AHB IF
52 MHz
MS
PRO
INTCON
Boot
ROM
APEX+
APEX
PEX
ROM
APEX
Sl
DMA
40 Channels
40 Requests
AHB
Slave
SRAM
332 kB
AHB Slave
XpertCEVA
Timer0
ICU PMU
SCL
1.8 V
VIO
VBAT
AHB
ave
SDCKE
CS(0-2)
OE/CAS
ADV/RAS
AHB
Slave
CLK
WE
BE0
BE1
ARB
AHB
Maste
2.65 V
VAUDIO
A13
A14
2
PCM0
PCM1
Timer1
I2C1
I2S/
I2S/
Mobile SDRAM
xxx Mbit
CKE
CLK
CS
WE
CAS
RAS
BA0
BA1
LDQM
UDQM
EMIF2
r
PDROM
464kB
AHB Master
AHB
Slave
AHB2APB
GPA4
SEMC Troubleshooting Manual
G705 - W705 - W715
1.8 V
VIO
I2CSDA2
S U B - L C D
I2CSCL2
I2CSDA2
L C D
I2CSCL2
CAM 1 STBY
I2CSDA2
I2CSCL2
CAM 2 STBY
Camera 1
Camera 2
Image
proc
Control
SYSCLK0
1.8 V
VIO
Resistors
A
D
C
1.8 V
VCARD
VIO
2.85 V
CIVSYN
CIHSYN
CIPCLK
CIRES
S
ULPI_CS
L
Debug
equipm.
HS-USB Transceiver with ULPI, ISP 1508
XI
SYSCLK2n
XO
CLOCK
HS_CLOCK
HS_DAT0-7
VIO 1.8V
HS_DIR
HS_STP
HS_NXT
D0-D7
DIR
STP
NXT
CSn
VDD3V3
VDD1V8
VBAT
VBAT
VIO
REF
IRDA_RX
IRDA_TX
IRDA_SD
BT SPI CS
BT SPI DI
BT SPI DO
BT SPI CLK
RESOUT2
SYSCLKREQ1
PCMCLK
PCMSYN
PCMULD
PCMDLD
BT SPIIRQ
MCLK SEC
OSC
ULPI
if logic
Reg
map
POR
Voltage
regulators
Int Ref
Voltage
I/O &
Supply
RXD
TXD
MODE
32KHz
VIO
1.8V
RC
SYSCLKREQ1
Serializer
Deserializer
Internal
power
IRDA
COM
P
Log &
Contr
MCLK SEC
Bluetooth
Baseband
1
AMP
SPI
Hz
32k
PLL
USB 2.0ATX
Termination
Resistors
VBUS
dischrg
resistors
ID det
Comp
Chrg/
Vcc
Power Down
INT
VIR
2.75V
VIO
1.8V
WLAN
Bluetooth
Radio
VBUS
PSW_N
1225-4035 rev. 1
1.8 V
VIO
Sensor
DM
DP
ID
2.75 V
VCAM
R5
R4
R3
R2
R1
R0
VBAT
REG
2.75V
2.75 V
VCAM
CAM POW
Y N
C
1
32
654
87
09#
*
C0 C1 C2 C3 C4
Data Card
MS Pro
MMC/SD
VBAT
D+
D-
VBUS
GND
94 (122)
VBAT
VBAT
FUNCTIONAL OVERVI EW
FUNCTIONAL OVERVI EW
VBAT
VIO
1.8V
C
O
N
Page 95
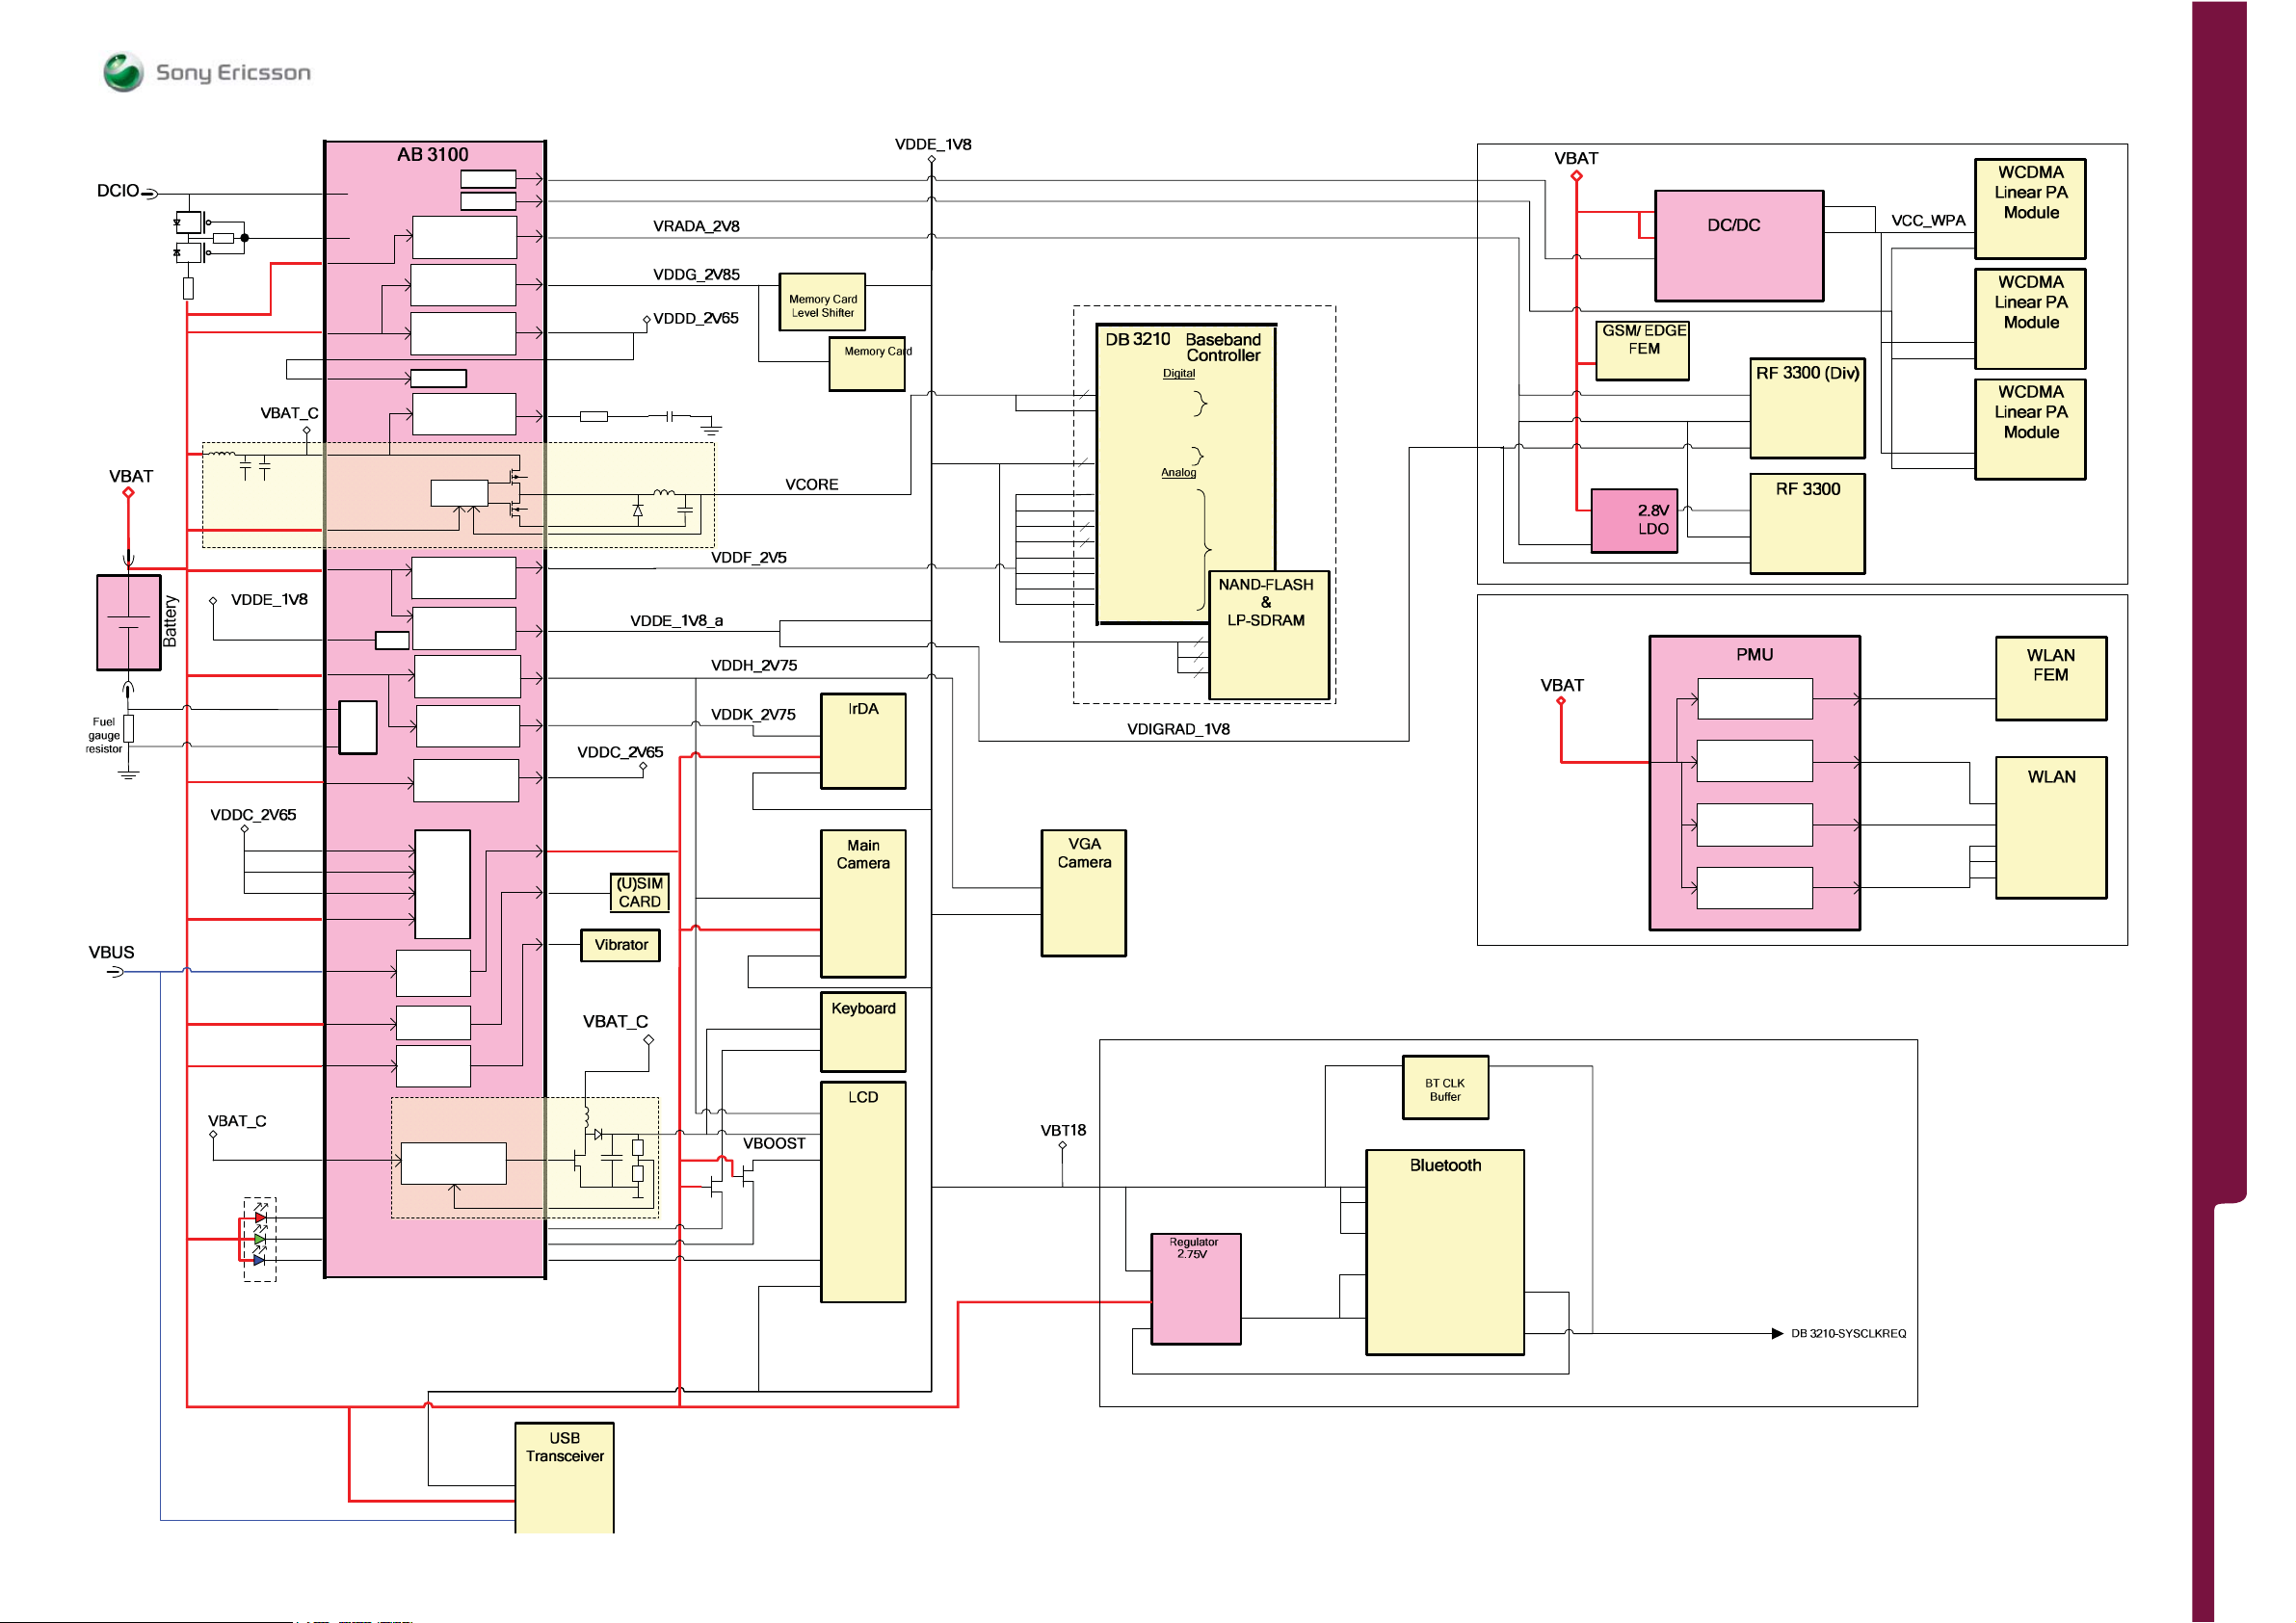
FUNCTIONAL OV ERVIE W Bl oc k D iag r am Power Dist ribution
SEMC Troubleshooting Manual
G705 - W705 - W715
Charge
resistor
VBAT
100 mOhm
DCIO
CHREG
VBAT_A
VBAT_B
VDD_ADC
VBAT_C
VBAT_D
VBAT_E
VDD_IO
VBAT_F
Fuel
gauge
Block
VBAT_G
VDD_AUDIO
VDD_BEAR
VDD_AUXO
VDD_SPKR
VBUS
VBAT_K
VBAT_L
VBAT_M
LED1n
LED2n
LED3n
2.8V/150mA
2.85V/100mA
2.65V/200mA
GPADC
2.2V/7mA
2.50V/30mA
1.80V/200mA
I/O
2.75V/100mA
2.75V/200mA
2.65V/200mA
CODEC
VBUS
Charger
SIM LDO
1.8/2.85V
Vibrator
driver
BOOST
W-LED driver
DAC1
DAC2
LDOa
LDOg
LDOd
Back-up
4.7k
LDO LP
capacitor
Buck
1.2V (1.05)/600mA
Control
LDOf
LDOe
LDOh
LDOk
LDOc
VBAT_H
LED5n
LED4n
TRICKLE TRICKLE
VccB
VccA
Vcc
VCC1
VLED
VCC_IO
VANA
VACT
VDIG
VBOOST
KEY_LED_C
ATHODE
VDD2V7
ANODE
CATHODE
VDD1V8
20
12
2
2
AVDD
DVDD
VBAT_ACT
VDDCO
VDDANA
VDDIO
VDDIO
VDDIO_PLL
VDDCO_PLL
VCCAD
VCCDA
VCCGPAD
VDDAD
VDDA_AF
PoP
Bluetooth
Subsystem
1.2 V
1.8 V
6
D-VDDQ
10
F-VDD
2
VCC_N
ON/OFF
IN
OUT
ECO/Low Pow
2.5 V
VCC OEn
VDD_IO_A
VDD_IO_B
VDD_CLD
VDD_HV_A
VDD_HV_D
CLK_REQ_OUT2
CLK_REQ_OUT1
VBAT
VBAT
EN
RF Subsystem
VDD
PVIN
REF
SW
FB
VccA1
VccA2
VccD
VccA1
VccA2
VccD
WLAN Subsystem
Switching Reg 3
3.3V/250mA
PVIN
LDO3
3V/300mA
LDO2
1.8V/300mA
LDO1
1.8V/300mA
V33A
V3A
V18A
V18D
VCC
VCONTROL
VCC
VCONTROL
VCC
VCONTROL
VCCPA
VDD30
VDD18A
VDD18_LDO
VIO_X1
VIO_X2
FUNCTIONAL OVERVI EW
VCC I/O
VBAT
VBUS
1225-4035 rev. 1
95 (122)
Page 96
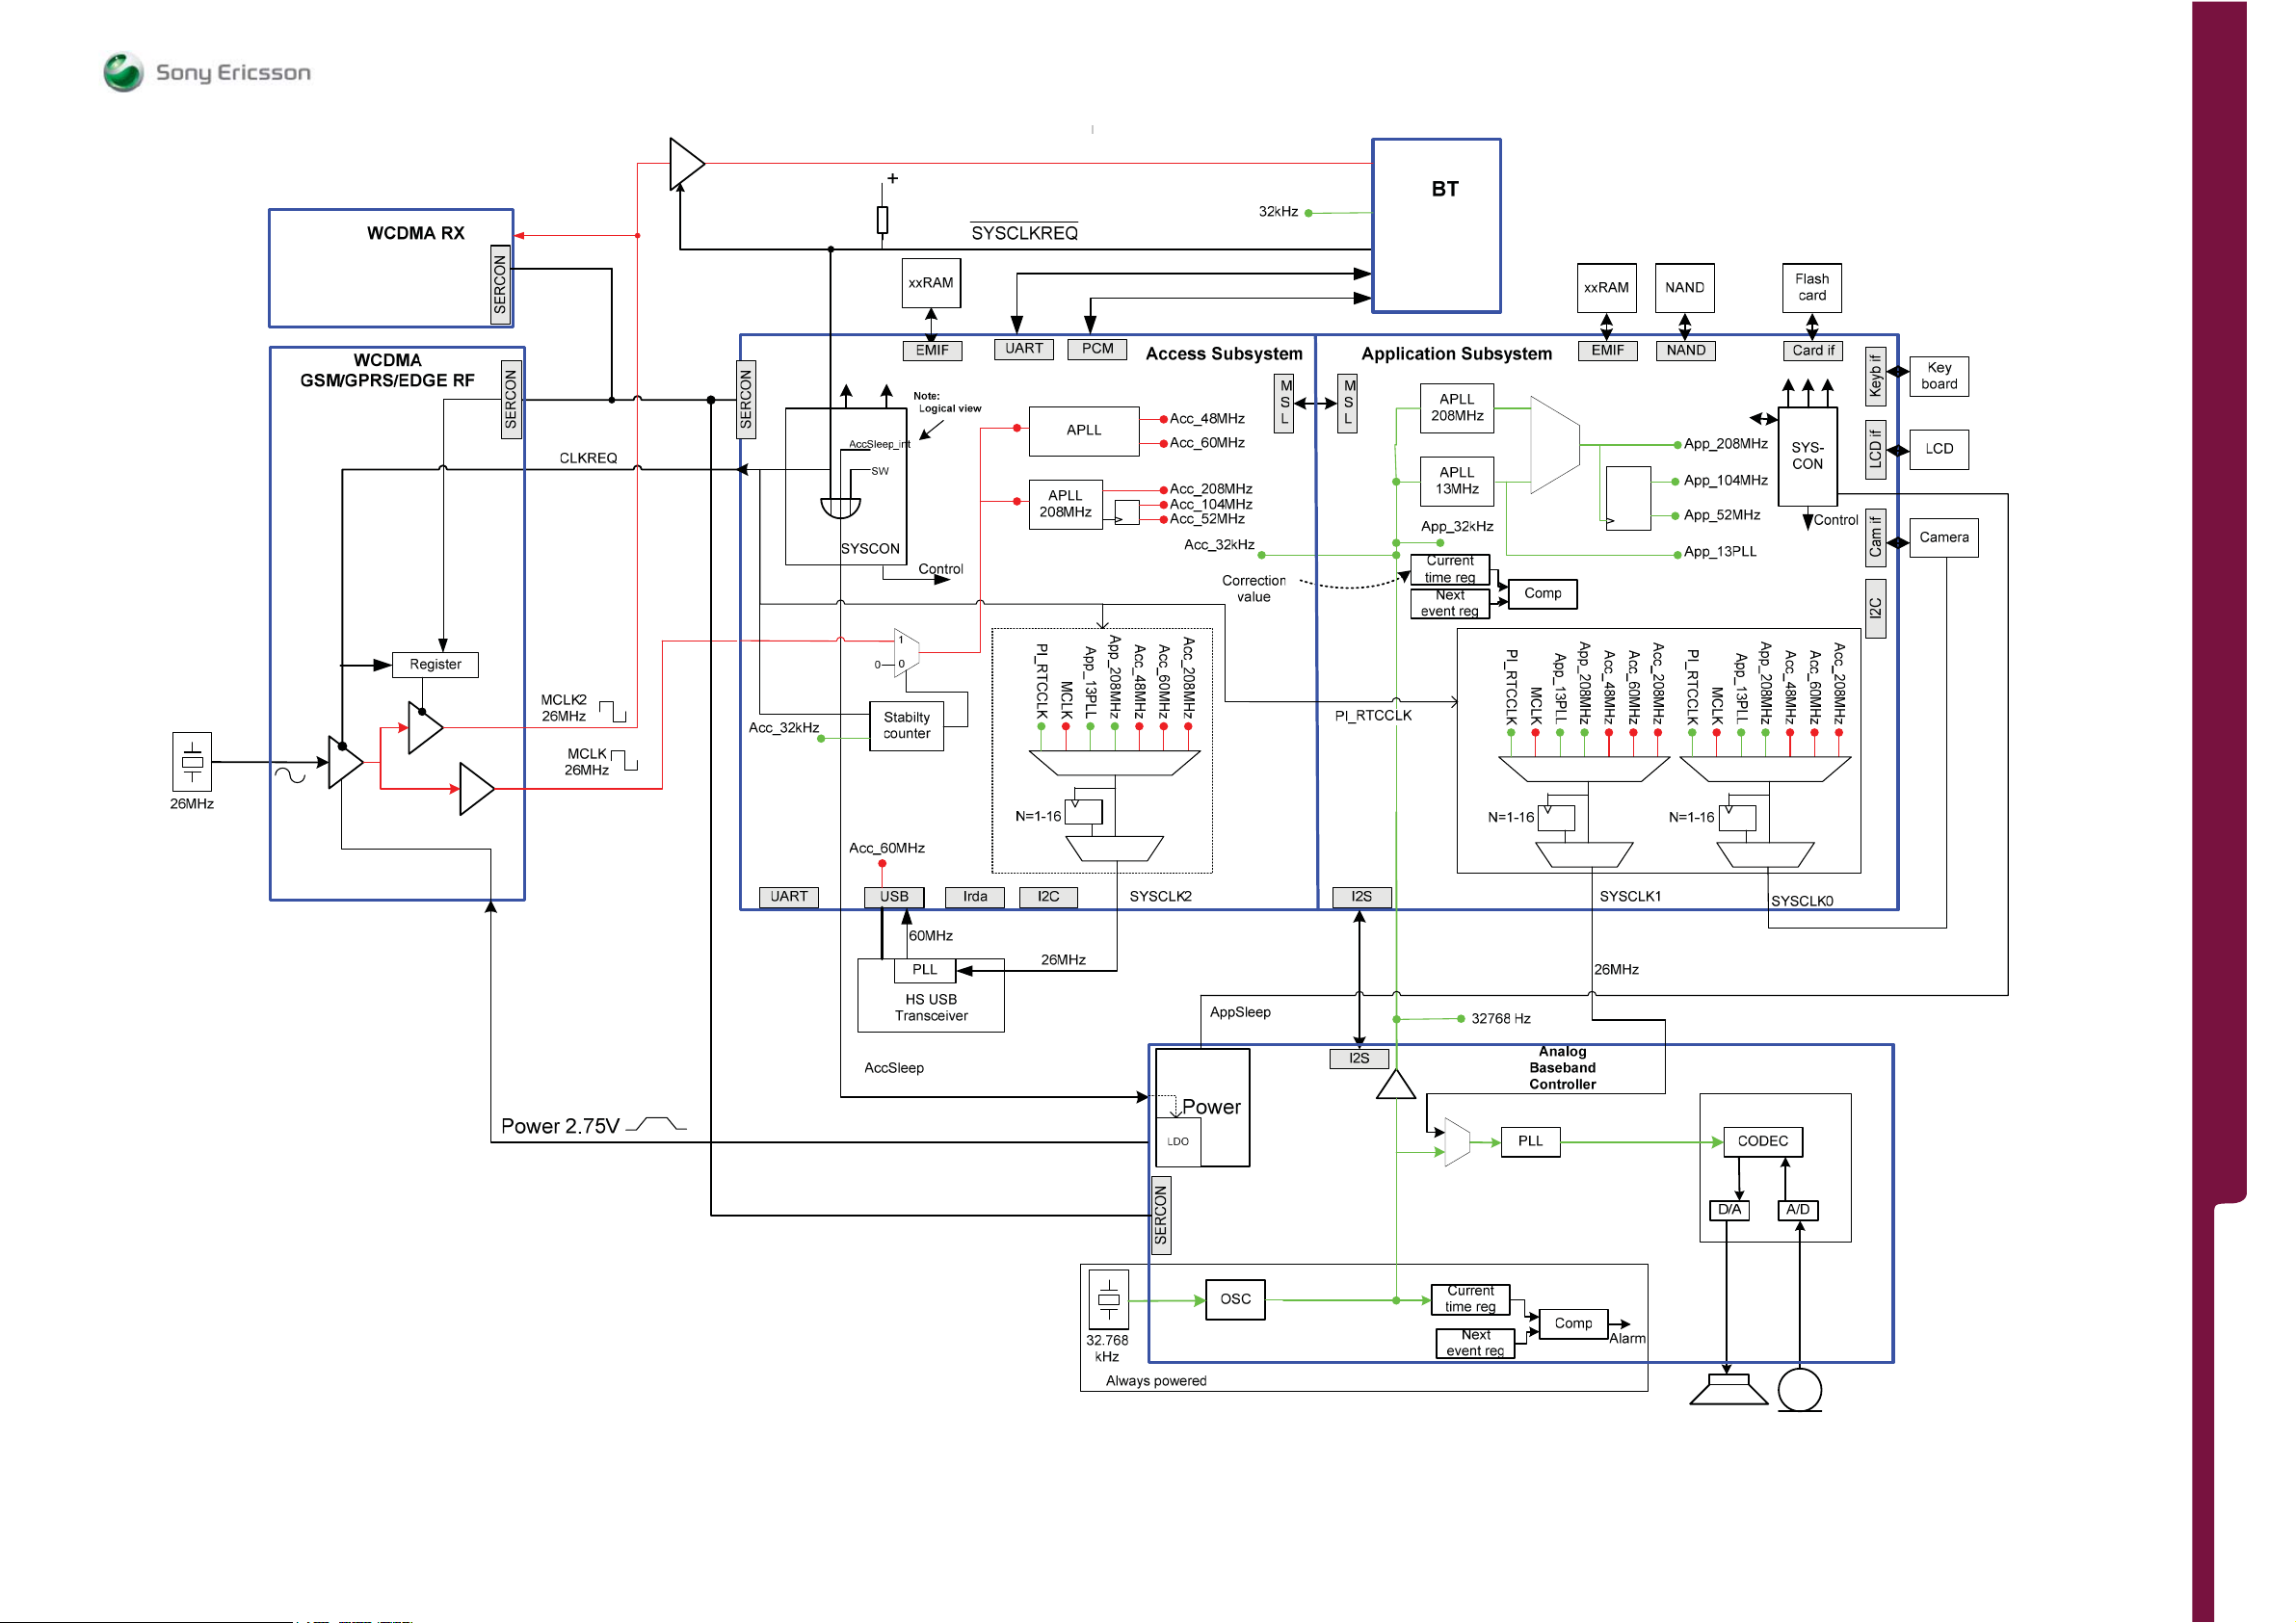
FUNCTIONAL OV ERVIE W Bl ock D i agr am Clo ck in g Co n ce pt
SEMC Troubleshooting Manual
G705 - W705 - W715
FUNCTIONAL OVERVI EW
1225-4035 rev. 1
96 (122)
Page 97
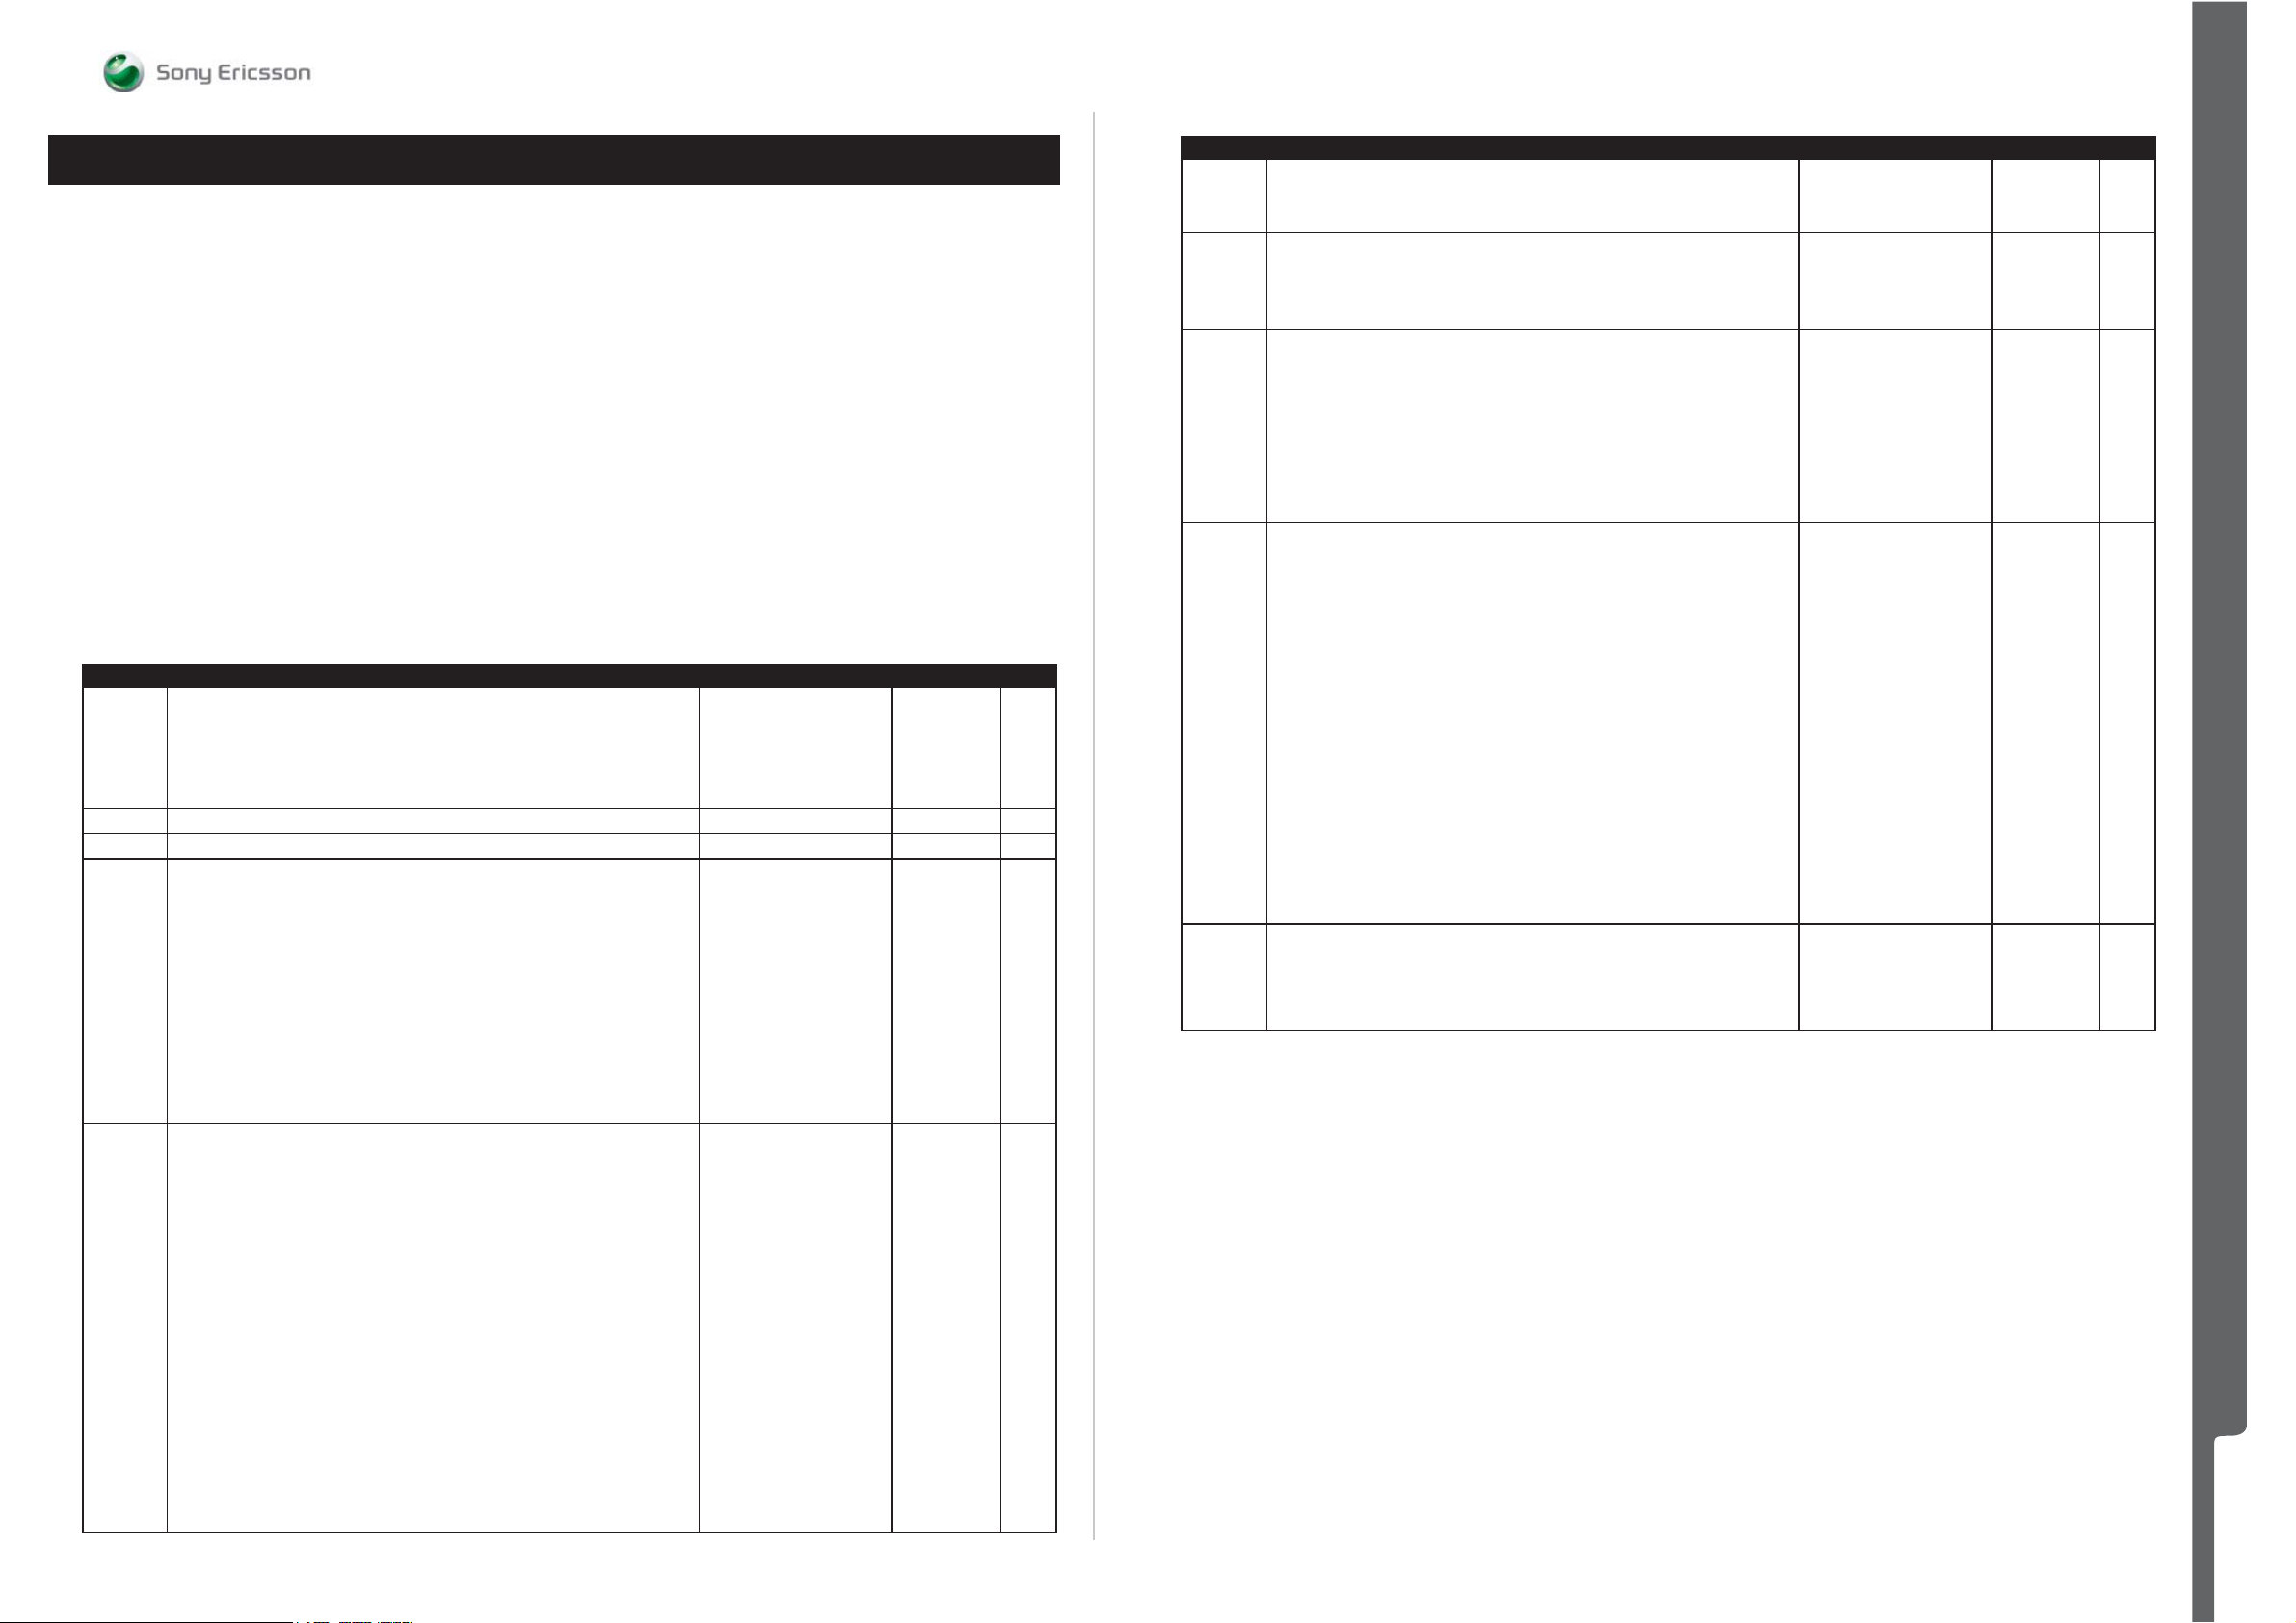
APPENDIX Replaceable Components
Replaceable Components
EXPLANATION OF ABBREVIATIONS USED IN THE COLUMN ‘COMMENTS’ BELOW
COMPONENT LOCATION
A = Side A
B = Side B
REPAIR METHOD
HA = Hot Air (removal & mounting)
HA/ST = Hot Air for removal - Soldering Tool for mounting
BGA = BGA Station
CALIBRATION
C = Calibration of the phone is required after replacing the component
Position Designation Part no. Comments Page
B1400
B2000
B2100
B3100
B4410
C2214 Capacitor Electrolytic 70.0 mF None 3.3 V 1203-3900 A HA 99
E1003 Shield Can Fence 1206-8594 A HA
L2200
L2201
L2401
L2402
L2403
L2404
L2405
L2406
L2408
L2452
L4200
N1210
N1211
N1300
N1400
N1410
N1510
N2200
N2201
N2203
N2204
N2300
N2401
N2411
N2420
N2421
N2422
N3101
Osc TCXO 27,456 MHz
Vibrator
Crystal 32,768 kHz
Microphone
IC
Ind WW 4.7 uH K3012
120ohm 0603 2A 50mohm Bead
Inductor 0.0 H ±25%
Inductor 0.0 H ±25%
Inductor 0.0 H ±25%
Inductor 0.0 H ±25%
Inductor 0.0 H ±25%
Ind Chip 0, H
Inductor 0.0 H ±25%
220ohm 0603 2A 0.05ohm Bead
22uH 20% 3x3x1.2mm 0.375A 0.63ohm
IC Lin WLP-16
IC Vreg PLP1820-6
Module Bluetooth + FM WFBGA100
A-GPS
IC Amp P-TSLP-1-1
Mod Radio WLAN R041
IC Vreg SC70
IC Vreg PLP1010-4
IC Vreg
IC
ASIC PM WLAN PMU
Trans N-ch FET
ASIC Accelerometer
IC IF 3.5X3.5X0.8
IC ESD Prot UDFN 6 2x2 mm
ASIC BB Elina
ASIC Tjatte3 CSP20
1200-7847
1202-9271
RTM501911/2R1A
1210-7410
RYN901920/1
1200-2214
REG70605/15
REG70618/20
REG70618/20
REG70618/20
REG70618/20
REG70618/20
1200-6898
REG70618/20
REG70605/24
REG7245512/22M
1203-5870
1204-5903
1200-9840
1200-0700
1200-2407
1200-6173
1200-6420
1201-6465
RYT113997/4
RYT1137816/4
1203-2790
RYN901936/1
1202-1676
1200-1694
1200-6309
1201-4120
ROP1013074/1R1A
A HA
B HA/ST
A HA C
A BGA
A HA
A HA
A HA
B HA
B HA
B HA
B HA
B HA
B HA
B HA
A HA
A HA
A HA
A HA
B BGA
A HA
A HA
B HA
A HA
A HA
B HA
B HA
A HA
A HA
A HA
A HA
A HA
A HA
A HA
98
98
98
98
99
99
99
99
99
99
99
99
99
100
100
100
100
101
101
102
102
102
102
102
102
103
103
103
104
104
104
104
SEMC Troubleshooting Manual
G705 - W705 - W715
Position Designation Part no. Comments Page
R2449
R2451
R2490
S2403
S2404
S2405
S2406
V2200
V2202
V2415
V2416
V2417
V2470
V3101
V4203
X1000
X1001
X1002
X1003
X1004
X1005
X1200
X1500
X2201
X2401
X2402
X2403
X2405
X3102
X4200
X4300
Z2400
Z4200
Z4201
Z4202
Resistor 0, Ohm +/-50m 63 mW K0603
Resistor 0.0 Ohm +/-5% NA mW K0402
Resistor 0, Ohm +/-50m 63 mW K0603
Input Switch side push
Input Switch Side Push
Input Switch side push
Input Switch side push
Diode Protection 0,
Trans P-ch FET
Diode Protection 5, V SOD-923
Diode Protection 5, V SOD-923
Diode Protection 12, V SOD523
Diode 0,
Zenner Diode, ESD protection, 6.1V
Trans NPN
Conn Leaf Spring
Conn Leaf Spring 1p
Conn Leaf Spring
Conn Leaf Spring
Conn Leaf Spring 1p
Conn Leaf Spring
Conn Coax Plug 6p RF-probe contact
Conn Coax Plug 6p RF-probe contact
Conn Pogopin 5p
Conn BtB Receptacle 16p
Conn BtB
Card Conn
System connector
Conn WtB Receptacle 2p
Conn BtB Receptacle 70p
Conn Camera Socket 0p
Filter 100, MHz K1210
Filter 400.0 MHz KNA16400 – W5 1608 (1.6x0.8x0.5mm)
Filter 400.0 MHz KNA16400 – W5 1608 (1.6x0.8x0.5mm)
Filter 400.0 MHz KNA16400 – W5 1608 (1.6x0.8x0.5mm)
REP623001/0
REP622001/0
REP623001/0
RMD10116/9R1A
1206-9606
RMD10116/9R1A
RMD10116/9R1A
RKZ223911/1
RYN122910/1
1201-8440
1201-8440
1200-5130
RKZ323916/1
RKZ223922/1
1211-3641
1201-4841
1202-1053
1201-4841
1201-4841
1202-1053
1201-4841
1203-9688
1203-9688
1206-2937
1214-7370
1200-9864
RNK87147/2
1205-9723
1206-4855
1206-2940
1206-5418
1201-6833
REV50146/1
REV50146/1
REV50146/1
B HA
B HA
B HA
A HA/ST
B HA/ST
A HA/ST
A HA/ST
B HA
A HA
A HA
A HA
B HA
A HA
A HA
A HA
A HA/ST
A HA/ST
A HA/ST
A HA/ST
A HA/ST
A HA/ST
A HA/ST
A HA/ST
B BGA
A HA
B HA
A BGA
B HA/ST
B HA
A BGA
B HA/SI
A HA
A HA
A HA
A HA
105
105
105
105
105
105
105
106
106
106
106
106
106
106
106
107
106
106
107
105
107
107
107
107
108
108
108
108
109
109
109
109
109
109
APPENDIX
1225-4035 rev. 1
97 (122)
Page 98
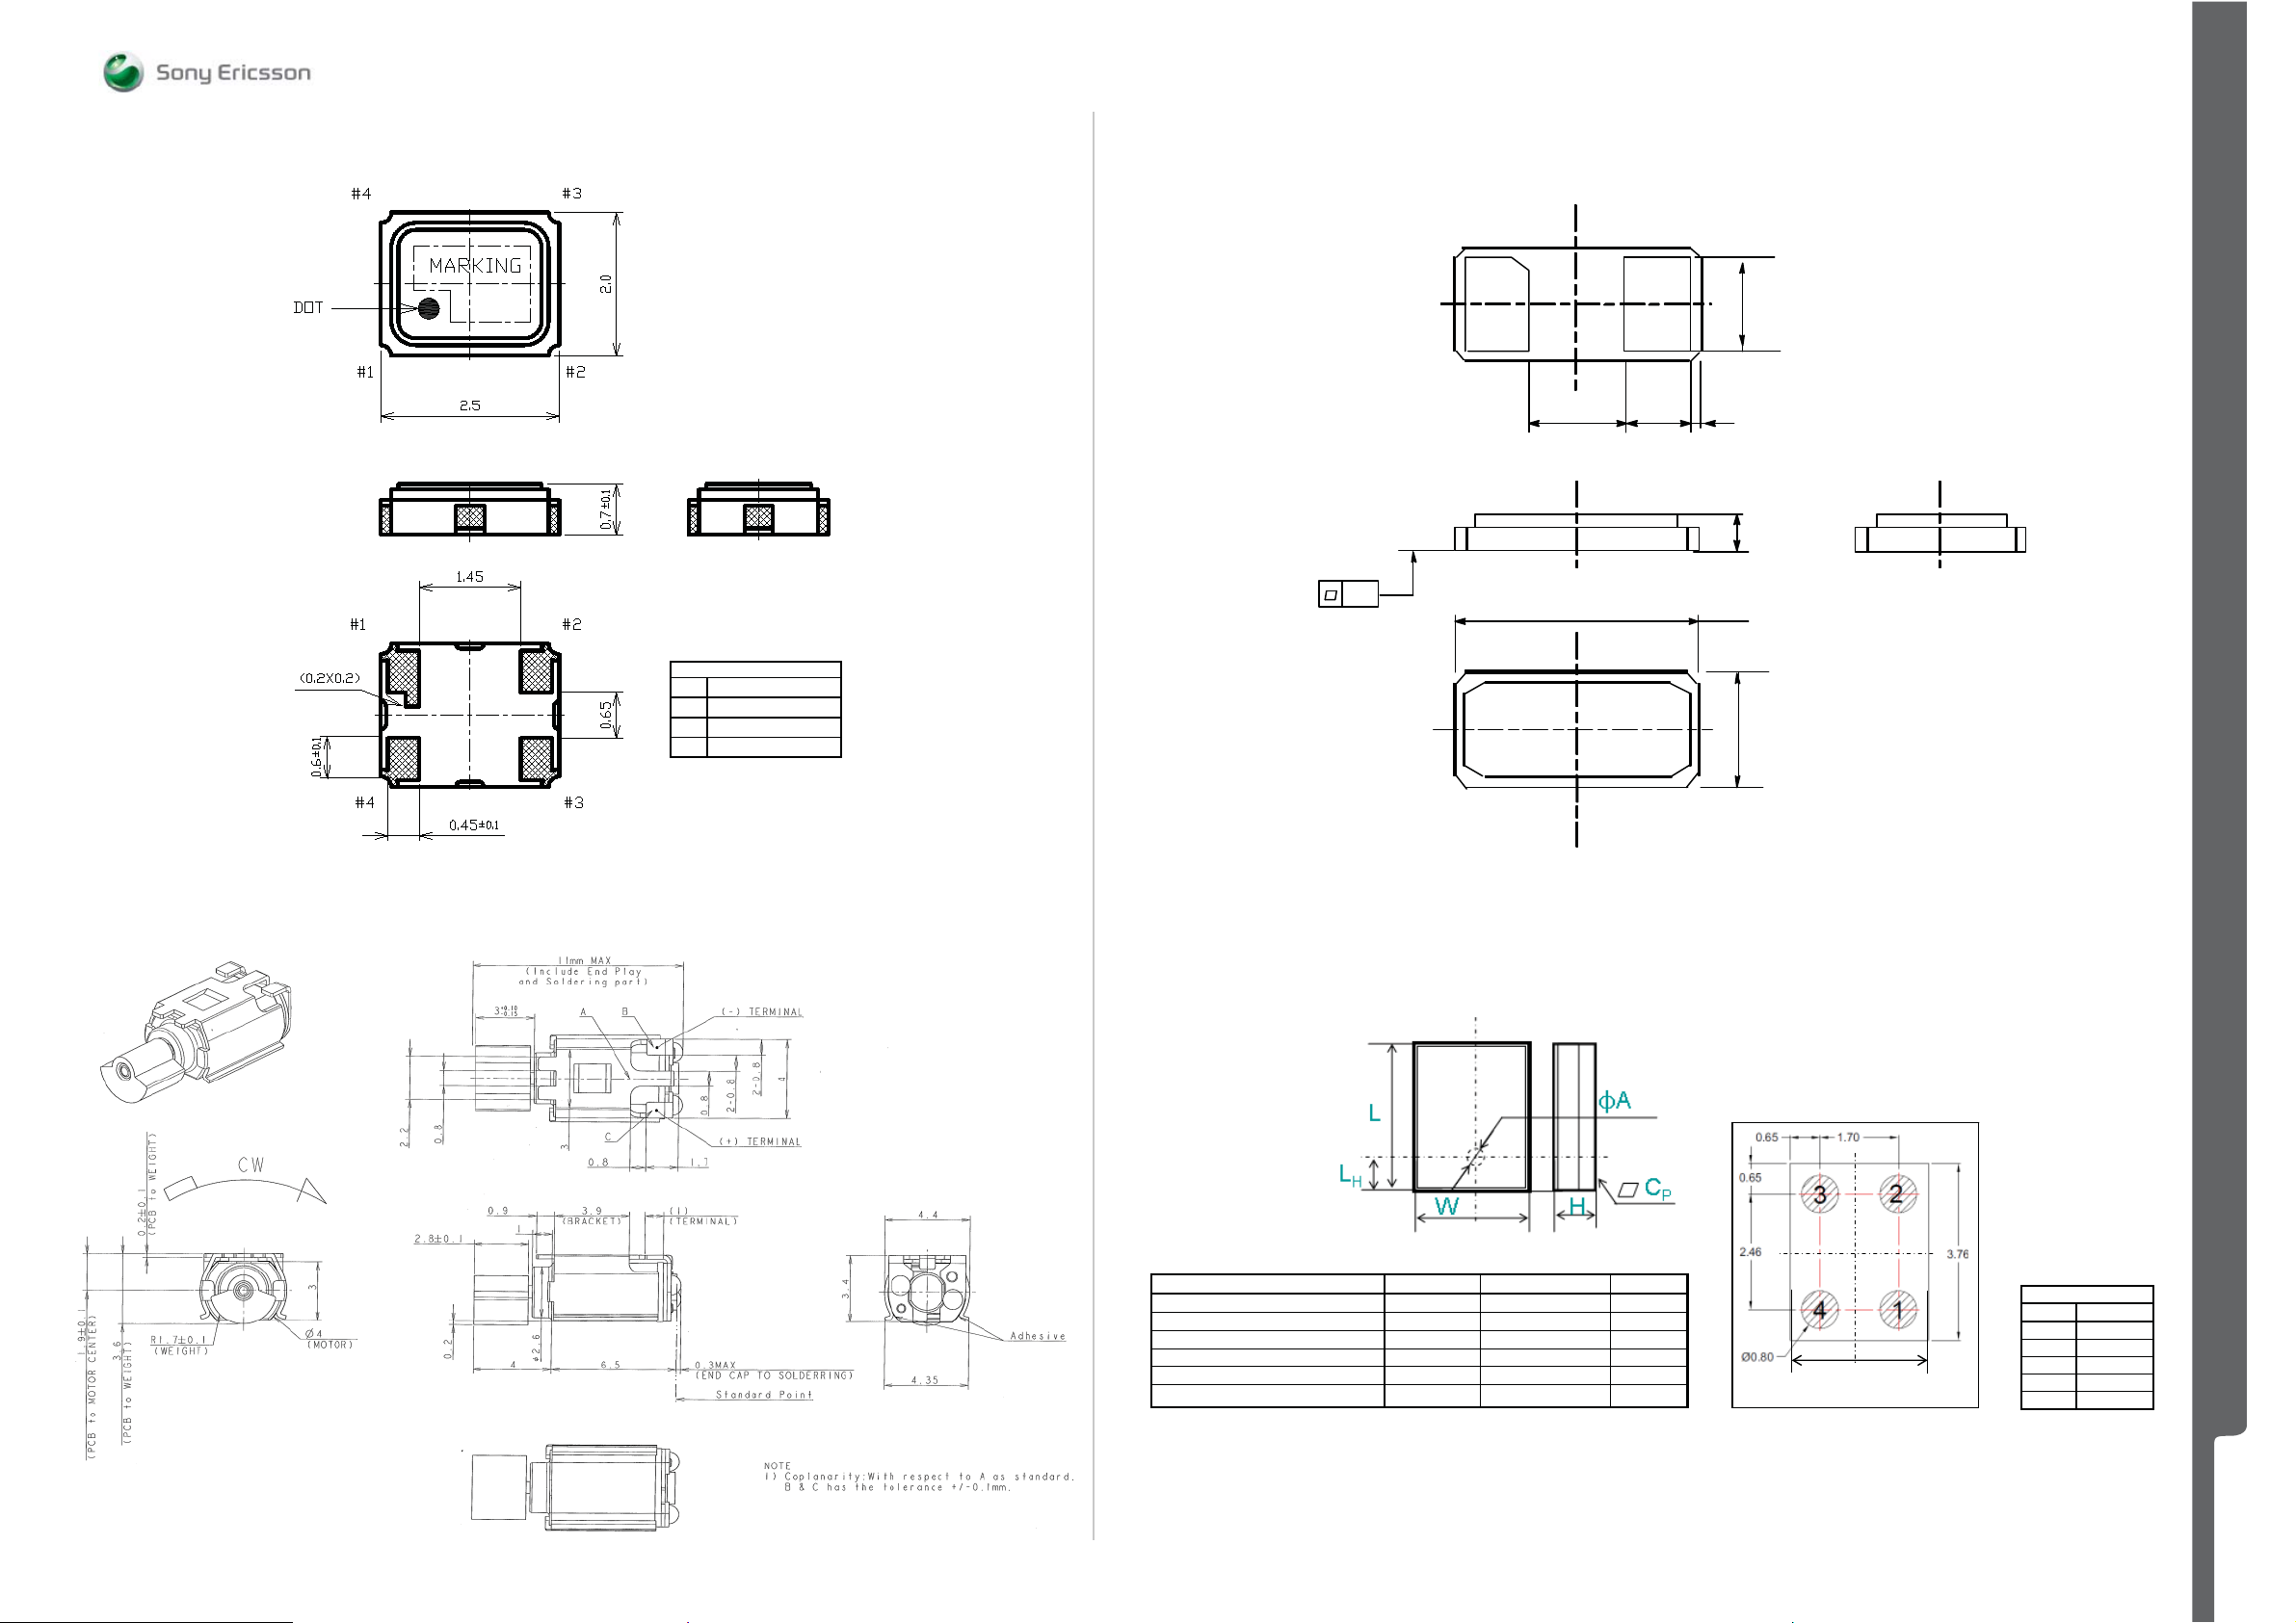
APPENDIX Comp o nents - B1400, B2000, B2100, B3100
#1 * VCONT
#2 GND
#3 O UTPU T
#4 V CC
PIN CONNECTION
SEMC Troubleshooting Manual
G705 - W705 - W715
B1400 Osc TCXO 27,456 MHz 1200-7847
B2100 Chrystal 32,768 kHz RTM501911/2R1A
1
1,7+-0,1
SEATING PLANE
0.1
3,2+-0,1
0,65 0,1
2
1,3
0,8+-0,1
B2000 Vibrator 1202-9271
B3100 Microphone 1210-7410
Package outline
Item Dimension Tolerance (+/-) Units
Length (L) 3.76 0.10 mm
Width (W) 2.95 0.10 mm
Height (H) 1.10 0.10 mm
Hole height (LH) 1.18 0.10 mm
Acoustic Port Diameter (φA) 0.50 0.10 mm
Co-planarity (Cp) <0.05 - mm
1,5+-0,1
Pad design
2.95
Top hole type (I)
PIN Designation
Pin # Function
1Power
2 Ground
3
Ground
4 Output
APPENDIX
1225-4035 rev. 1
98 (122)
Page 99
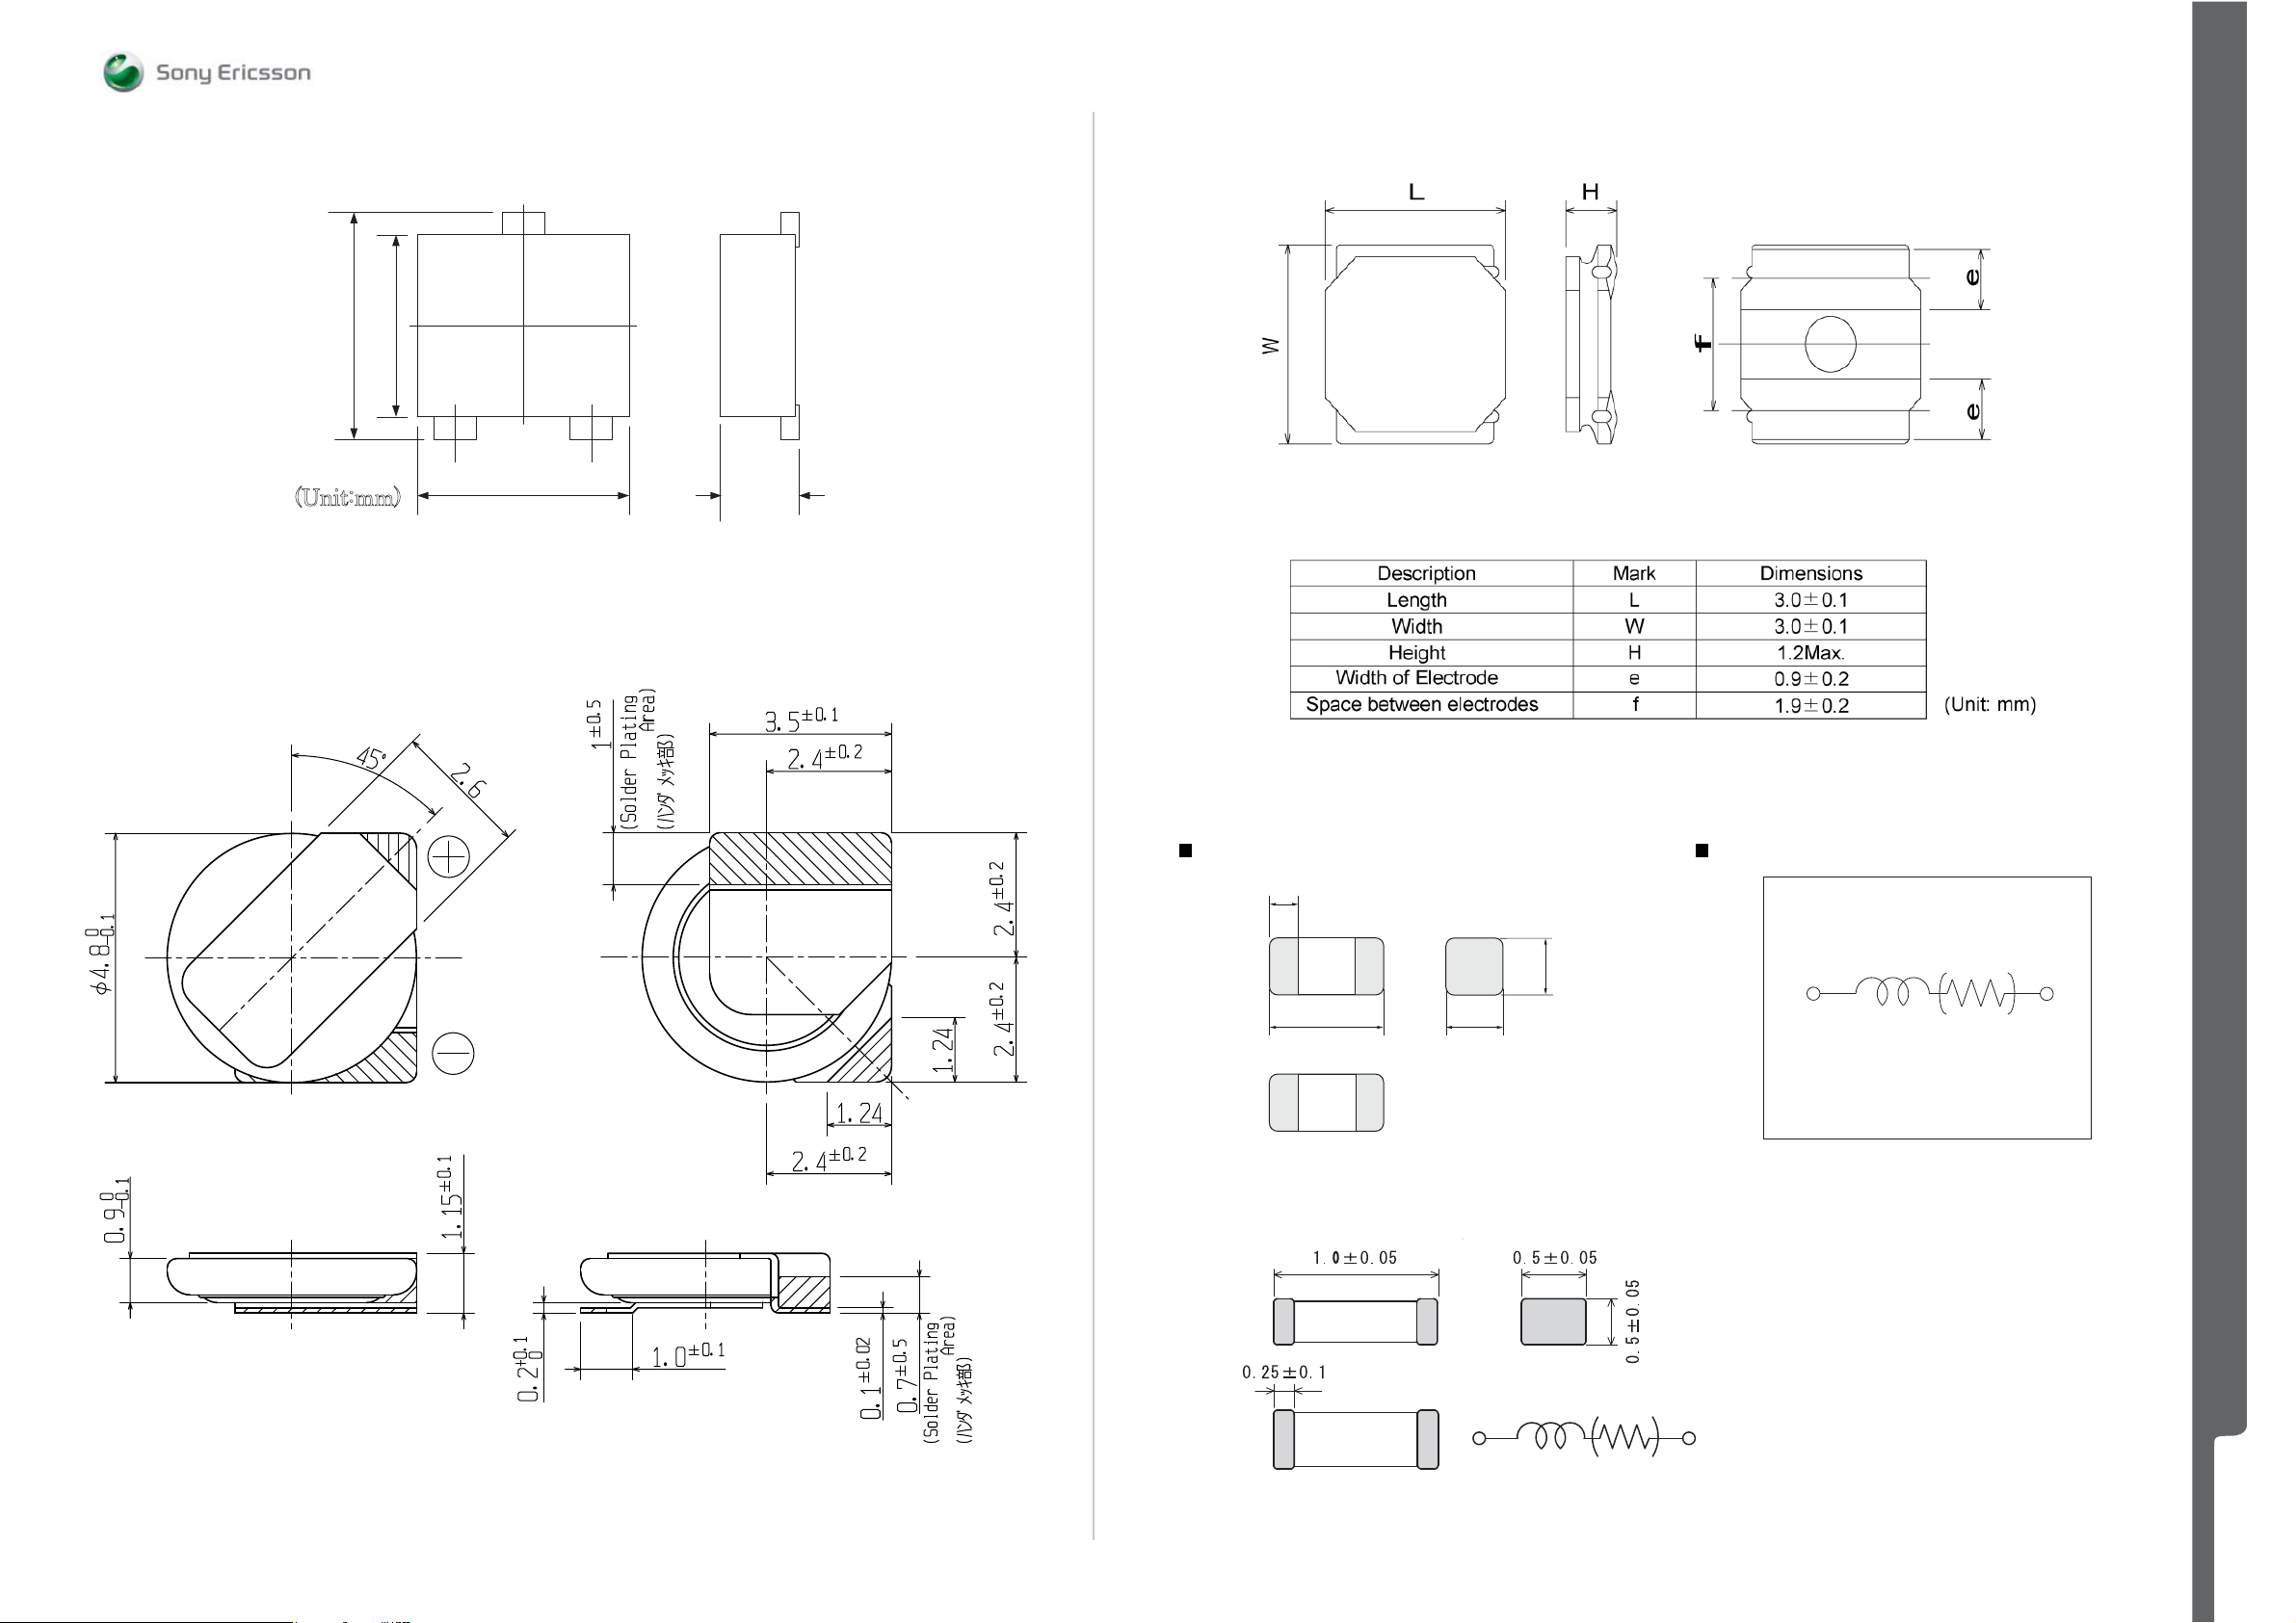
APPENDIX Compo n e nt s - B4410, C2214, L2200, L2401-05 , L240 6, L24 0 8
SEMC Troubleshooting Manual
G705 - W705 - W715
B4410 IC RYN901920/1
Gnd
1.2
1.45
Vcc
1.4
(Unit:mm)
Out
Max0.55
C2214 Capacitor Electrolytic 70.0 mF None 3.3 V 1203-3900
L2200 ind WW 4.7 uH K3012 1200-2214
L2401-05, L2408 Inductor 0.0 H +/-25% REG70618/20
Dimension Equivalent Circuit
0.25±0.1
0.5±0.05
1.0±0.05
0.5±0.05
(in mm)
(Resistance element becomes dominant
L2406 Ind Chip 0, H 1200-6898
at high frequencies.)
APPENDIX
1225-4035 rev. 1
99 (122)
Page 100
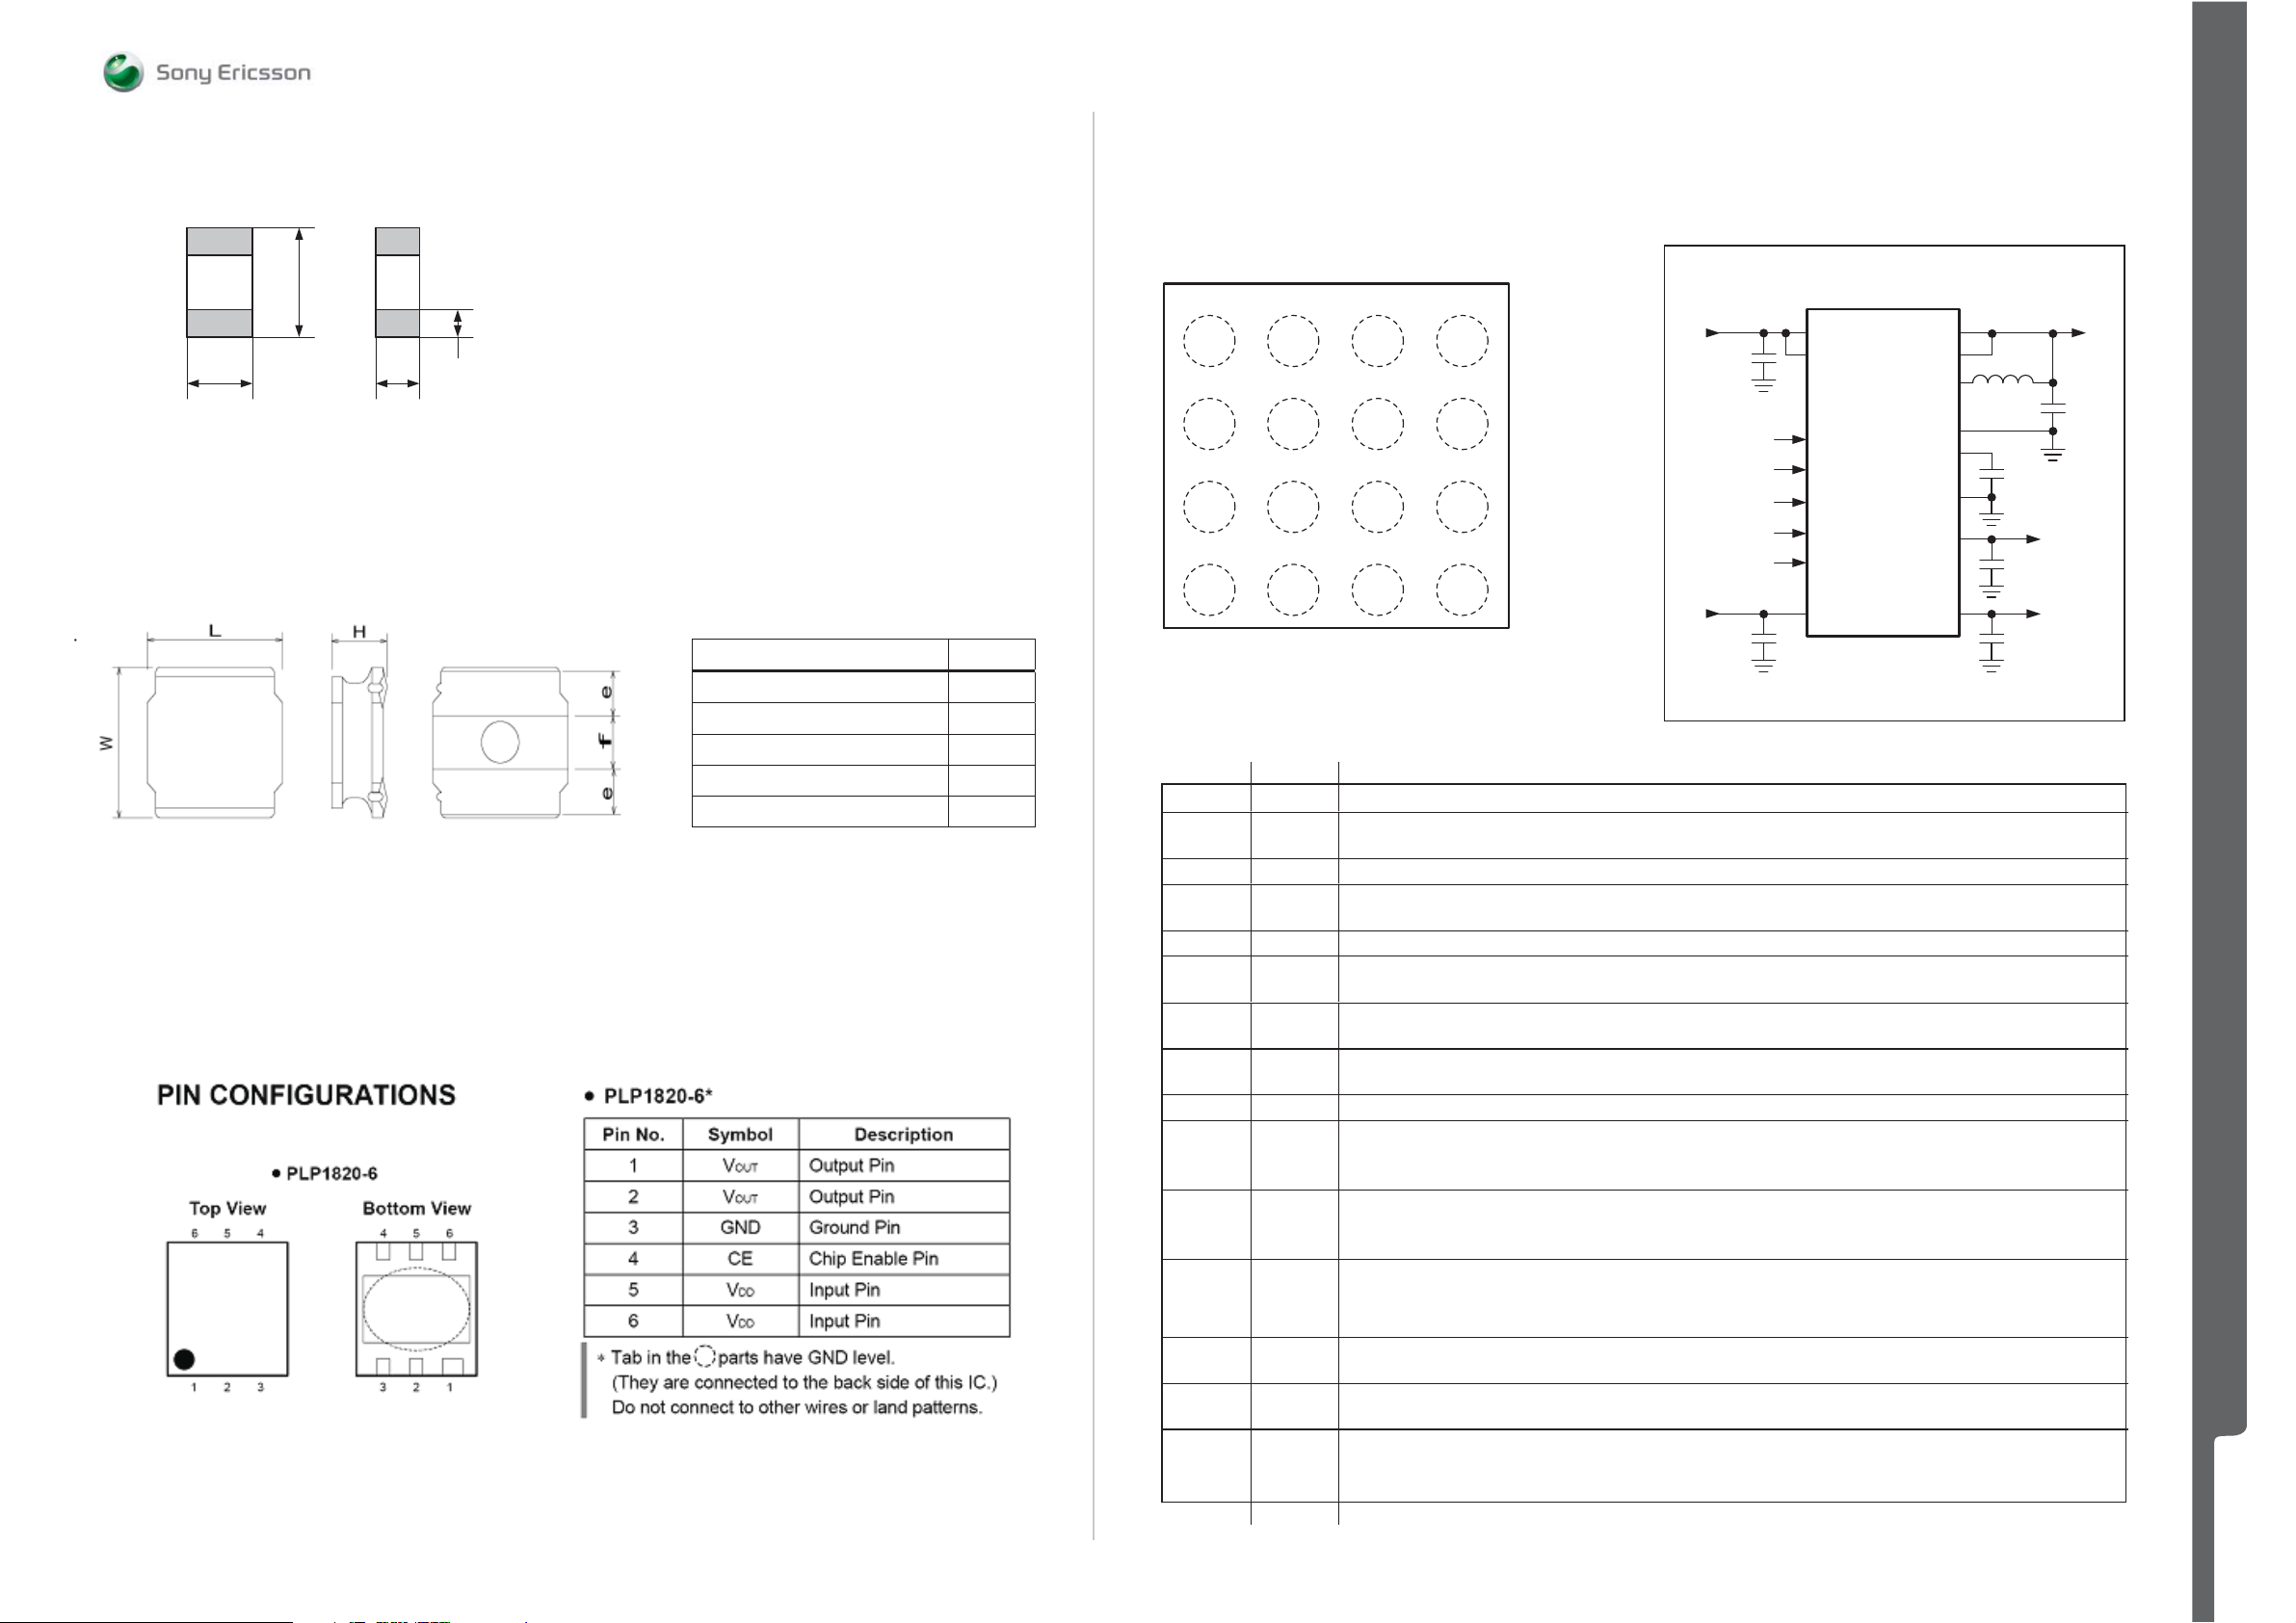
APPENDIX Comp o ne n t s - L2452, L42 00, N1210, N1211
SEMC Troubleshooting Manual
G705 - W705 - W715
L2452 220ohm 0603 2A 0.05ohm Bead REG70605/24
1.6 +/- 0.15
W
T
(mm)
0.4 +/- 0.2
L4200 22uH 20% 3x3x1.2mm 0.375A 0.63ohm REG7245512/22M
Size (mm)
L
W
H
e (width of electrode)
f (space between electrodes)
N1211 IC Vreg PLP1820-6 1204-5903
3012
3.0+/-0.1
3.0+/-0.1
1.2 max
0.9+/-0.2
1.0+/-0.2
N1210 IC Lin WLP-16 1203-5870
Pin Conguration
TOP VIEW
REFBP AGND
A1
LDO2
B1 B4B3B2
IN2
C1 C2 C3 C4
LDO1 PABEN1
D1 D4D3D2
A2 A3 A4
PA_EN
HP
REFIN
EN2
IN1B
PGND
LX
IN1A
PAA
(BUMP IN BOTTOM)
16-Bump, 2mm × 2mm WLP
Pin Description
PIN NAME FUNCTION
A1 REFBP
A2 AGND Low-Noise Analog Ground
A3 REFIN
A4 PGND Power Ground for PA Step-Down Converter
B1 LDO2
B2 PA_EN
B3 EN2
B4 LX Inductor Connection. Connect an inductor from LX to the output of the PA step-down converter.
C1 IN2
C2 HP
C3, C4
IN1B,
IN1A
D1 LDO1
D2 EN1
D3, D4 PAB, PAA
Reference Noise Bypass. Bypass REFBP to AGND with a 0.22μF ceramic capacitor to reduce noise on the
LDO outputs. REFBP is internally pulled down through a 1k Ω resistor during shutdown.
DAC-Controlled Input. The output of the PA step-down converter is regulated to 2 x V
reaches 0.465 x V
, bypass mode is enabled.
IN2
200mA LDO Regulator 2 Output. Bypass LDO2 with a 1μF ceramic capacitor as close as possible to LDO2
and AGND. LDO2 is internally pulled down through a 1k Ω resistor when this regulator is disabled.
PA Step-Down Converter Enable Input. Connect to IN_ or logic-high for normal operation. Connect to GND
or logic-low for shutdown mode.
LDO2 Enable Input. Connect to IN2 or logic-high for normal operation. Connect to AGND or logic-low for
shutdown mode.
Supply Voltage Input for LDO1, LDO2, and Internal Reference. Connect IN2 to a battery or supply voltage
from 2.7V to 5.5V. Bypass IN2 with a 2.2μF ceramic capacitor as close as possible to IN2 and AGND.
Connect IN2 to the same source as IN1A and IN1B.
High-Power Mode Set Input. Drive HP high to invoke forced bypass mode. Bypass mode connects the
input of the PA step-down converter directly to its output through the internal bypass MOSFET. Drive HP
low to disable the forced bypass mode.
Supply Voltage Input for PA Step-Down Converter. Connect IN1_ to a battery or supply voltage from 2.7V to
5.5V. Bypass the connection of IN1_ with a 2.2μF ceramic capacitor as close as possible to IN1_, and
PGND. IN1A and IN1B are internally connected together. Connect IN1_ to the same source as IN2.
200mA LDO Regulator 1 Output. Bypass LDO1 with a 1μF ceramic capacitor as close as possible to LDO1
and AGND. LDO1 is internally pulled down through a 1k Ω resistor when this regulator is disabled.
LDO1 Enable Input. Connect to IN2 or logic-high for normal operation. Connect to AGND or logic-low for
shutdown mode.
PA Connection for Bypass Mode. Internally connected to IN1_ using the internal bypass MOSFET during
bypass mode. PA_ is connected to the internal feedback network. Bypass PA_ with a 2.2 μF ceramic
capacitor as close as possible to PA_ and PGND.
T ypical Operating Circuit
BATT
2.7V TO 5.5V
2.2μF
PA ON/OFF
ANALOG CONTROL
FORCED BYPASS
LDO1 ON/OFF
LDO2 ON/OFF
BATT
2.7V TO 5.5V
IN1A
IN1B
PA_EN
REFIN
HP
EN1
EN2
IN2
PAA
PAB
LX
PGND
REFBP
AGND
LDO1
LDO2
REFIN
1μH
. When V
V
PA
0.4V TO V
2.2μF
V
UP
LDO1
TO 200mA
V
UP
LDO2
TO 200mA
REFIN
BATT
APPENDIX
1225-4035 rev. 1
100 (122)
 Loading...