

Page 1
DCU-10 Installation Guide for Windows® 2000
Important note:
To avoid loss of data, do not remove the USB data cable from the PC or the phone
during data transfer. Removing the cable during data transfer may cause unstable
operation of the Windows® Operating System.
NOTE: The phone does not have to be connected during installation.
1) Download the USB driver files from the Sony Ericsson Global Support Area to your
computer.
2) Attach the DCU-10 cable to an unused USB port on your computer.
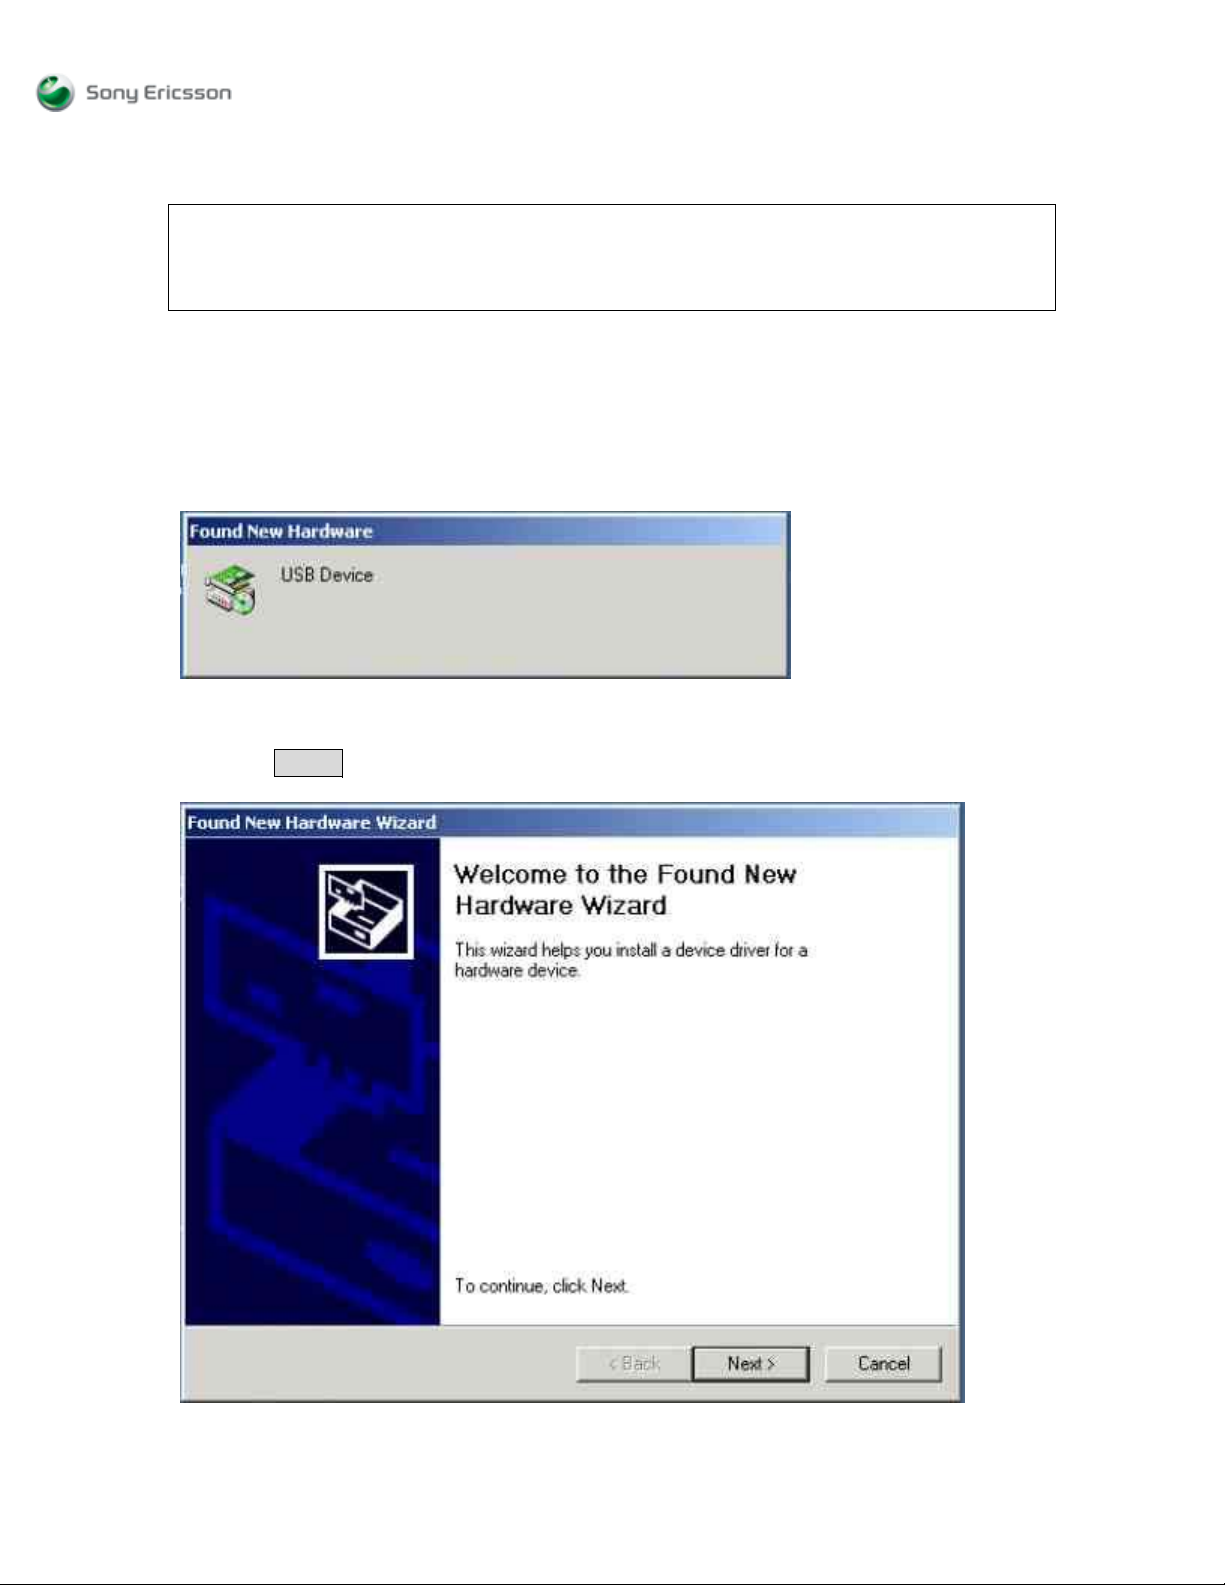
3) The pop up window in Figure 1 displays:
Figure 1
IMPORTANT: Make note of location!!!
4) Followed by the pop-up window in Figure 2:
5) Select Next > (Figure 2).
Figure 2
Page 2
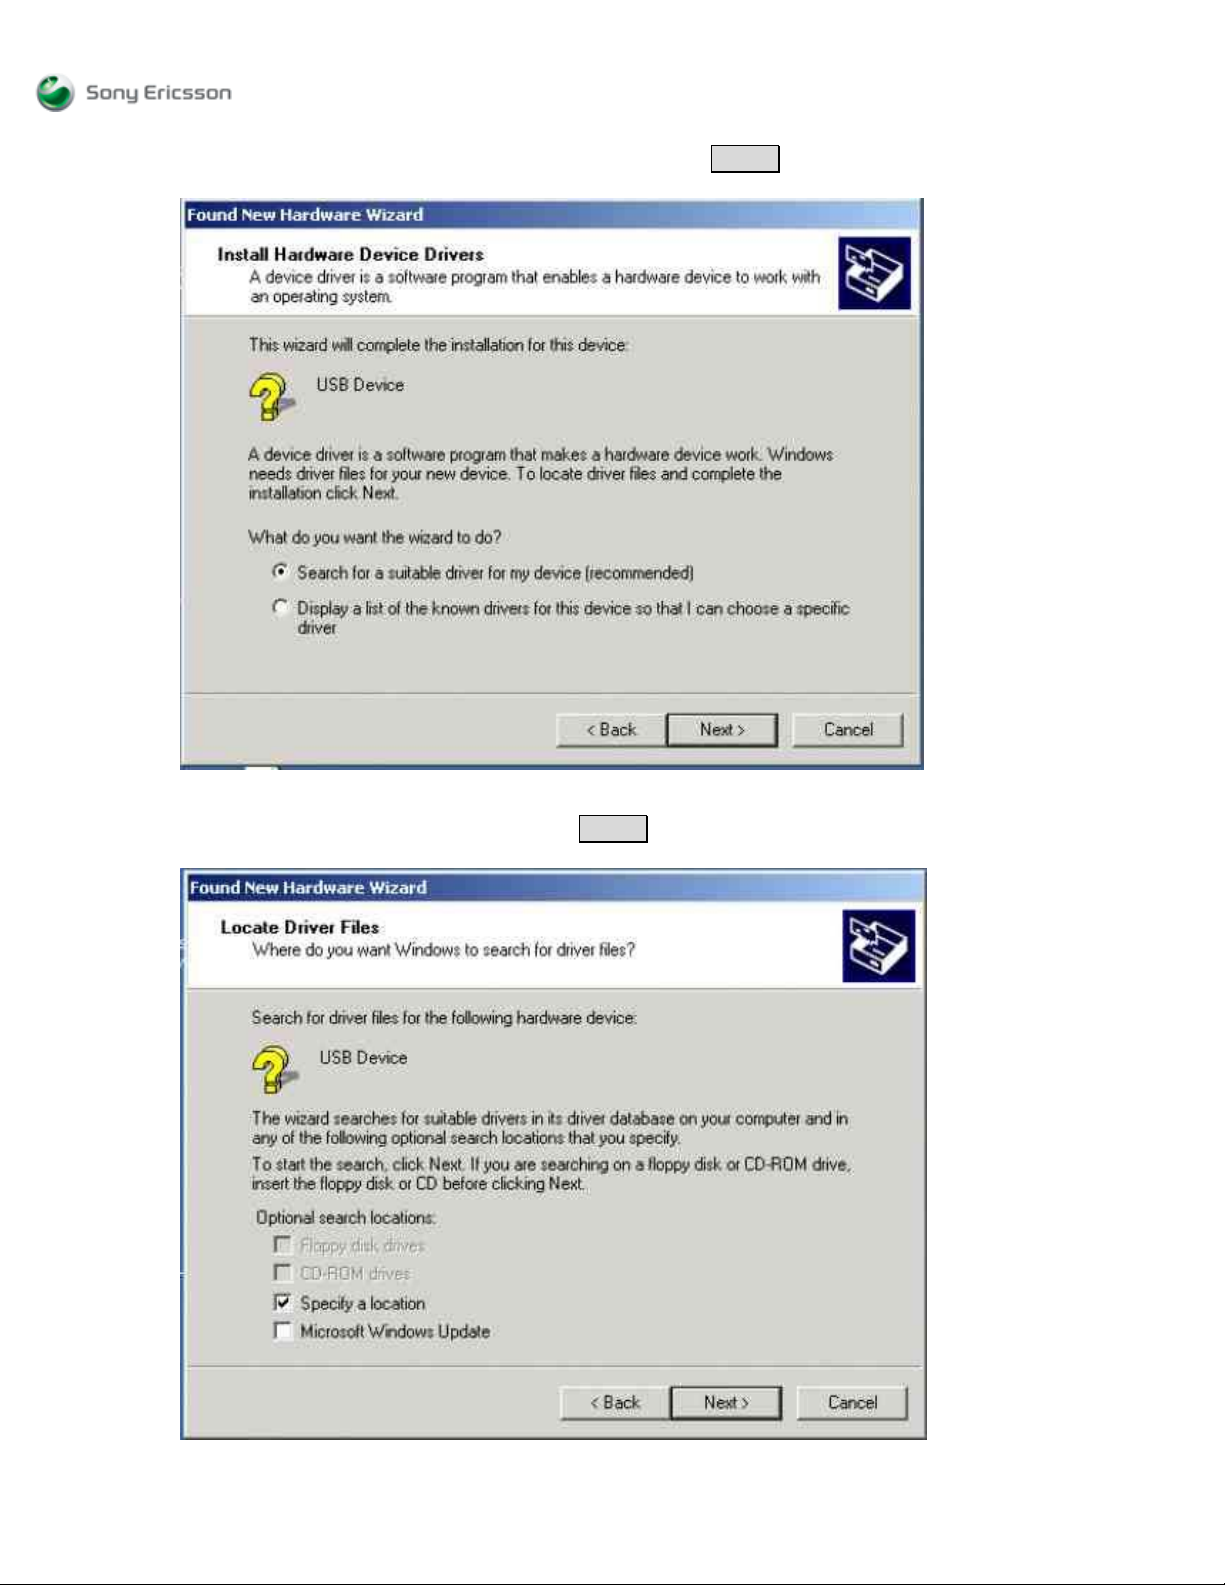
6) Choose Search for a suitable driver….and Select Next > (Figure 3).
Figure 3
7) Check Specify a location and Select Next > (Figure 4).
Figure 4
Page 3
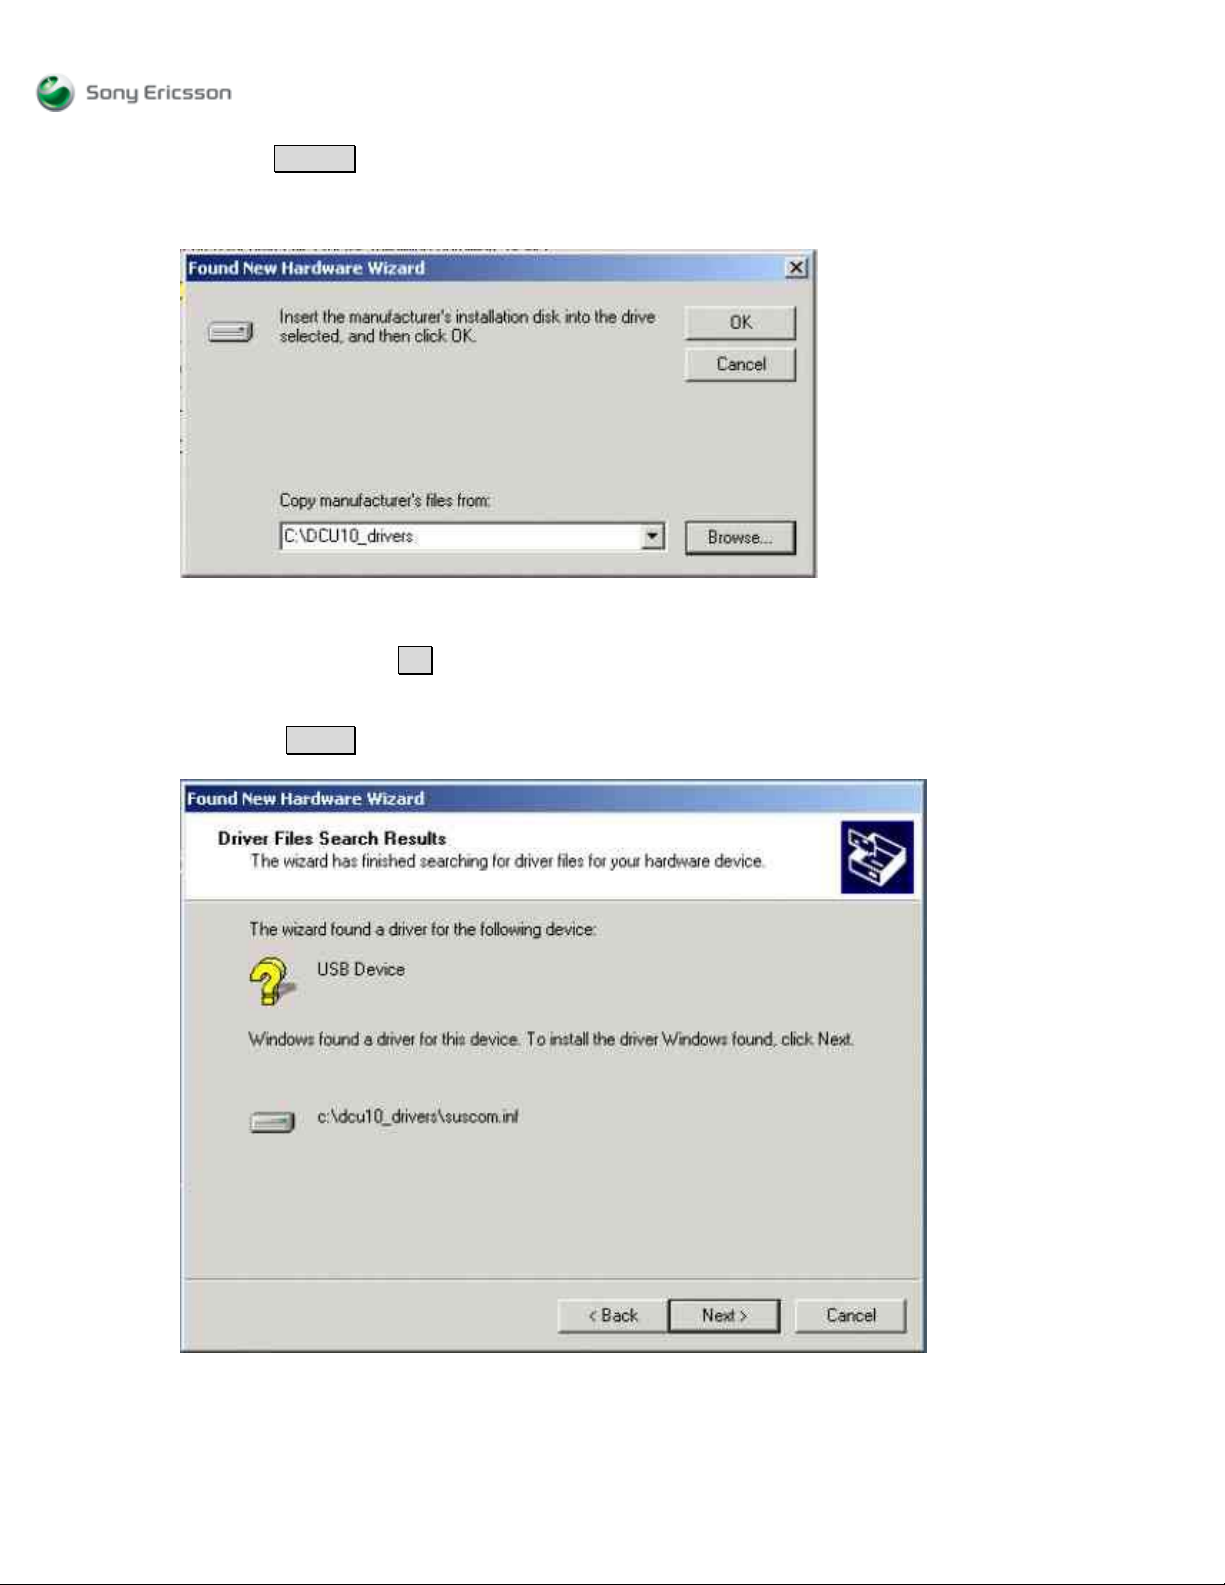
8) Select Browse (Figure 5) and point to the driver file location in step 1. For this
illustration, we made a folder called DCU10_drivers and put the driver files inside the
folder.
Figure 5
9) To continue, select OK (Figure 5).
10) Select Next > (Figure 6) to go ahead with the installation.
Figure 6
Page 4
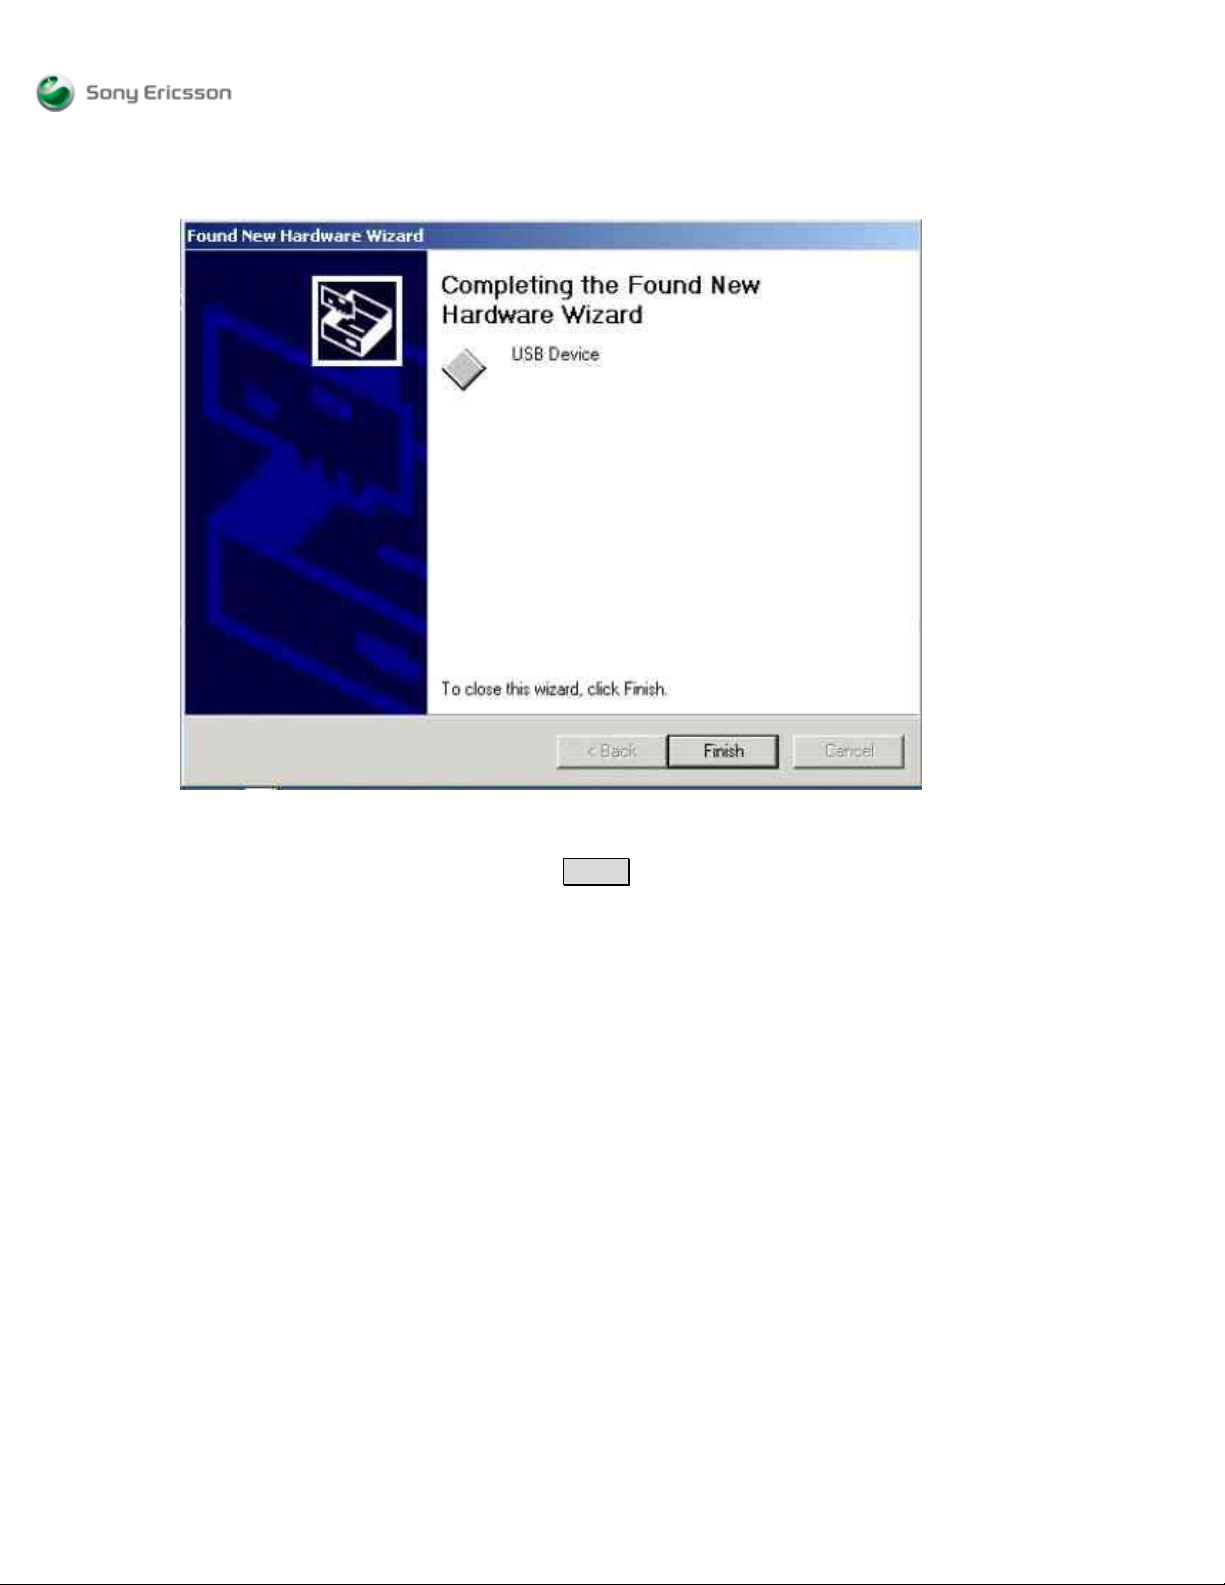
11) The driver files will load into the PC and the installation process is almost complete!
Figure 7
12) To complete the installation, select Finish (Figure 7). Restart your computer.
Verifying installation on Windows® 2000 systems:
1. From the Start Menu, select “Settings” then “Control Panel”, and then double click on
the “System” icon.
2. Select the “Hardware” tab and then “Device Manager”.
3. The USB Cable DCU-10 can be found under “Ports”, with the COM-port number
shown in parentheses.
Note the COM-port number. It may be necessary to enable this device in “Phone Monitor
Options”, found under “Control Panel”. (Do this after installing the Sony Ericsson PC
software applicable for your mobile phone from http://www.sonyericsson.com).
How to enable the device in “Phone Monitor Options” on Windows® 2000:
1. From the Start Menu, select “Settings” then “Control Panel”.
2. Double-click on the “Phone Monitor Options” icon.
3. Select the COM-port installed as an USB device.
4. Click “Enable”.
5. Click “OK”.
6. The COM-port installed as an USB device is now enabled.
 Loading...