

Sony XR-1947 Operating Instructions Manual
Actual total number: Sony XR-1947 (E) 3-858-377-11 (2)
1996 by Sony Corporation
3-858-377-11 (2)
Operating Instructions
XR-1947
EN
FM/AM
Cassette Car
Stereo
For installation and connections, see the supplied installation/connections
manual.

2
Actual total number: Sony XR-1947 (E) 3-858-377-11 (2)
EN

3
Actual total number: Sony XR-1947 (E) 3-858-377-11 (2)
EN
Table of contents
Getting Started
Setting the clock .................................................. 4
Cassette player
Listening to the tape ........................................... 4
Radio
Memorizing stations automatically
— Automatic Memory .................................. 5
Memorizing only the desired stations ............. 6
Receiving the memorized stations .................... 6
Other Functions
Adjusting the sound characteristics ................. 7
Changing the sound and display settings ....... 7
Additional Information
Precautions ........................................................... 7
Maintenance ......................................................... 8
Dismounting the unit ......................................... 9
Location of controls .......................................... 10
Specifications ..................................................... 11
Troubleshooting guide ...................... Back cover
Welcome!
Thank you for purchasing the Sony Cassette
Car Stereo. This unit lets you enjoy a variety of
features.
4
Actual total number: Sony XR-1947 (E) 3-858-377-11 (2)
EN
6666
3333
Cassette Player
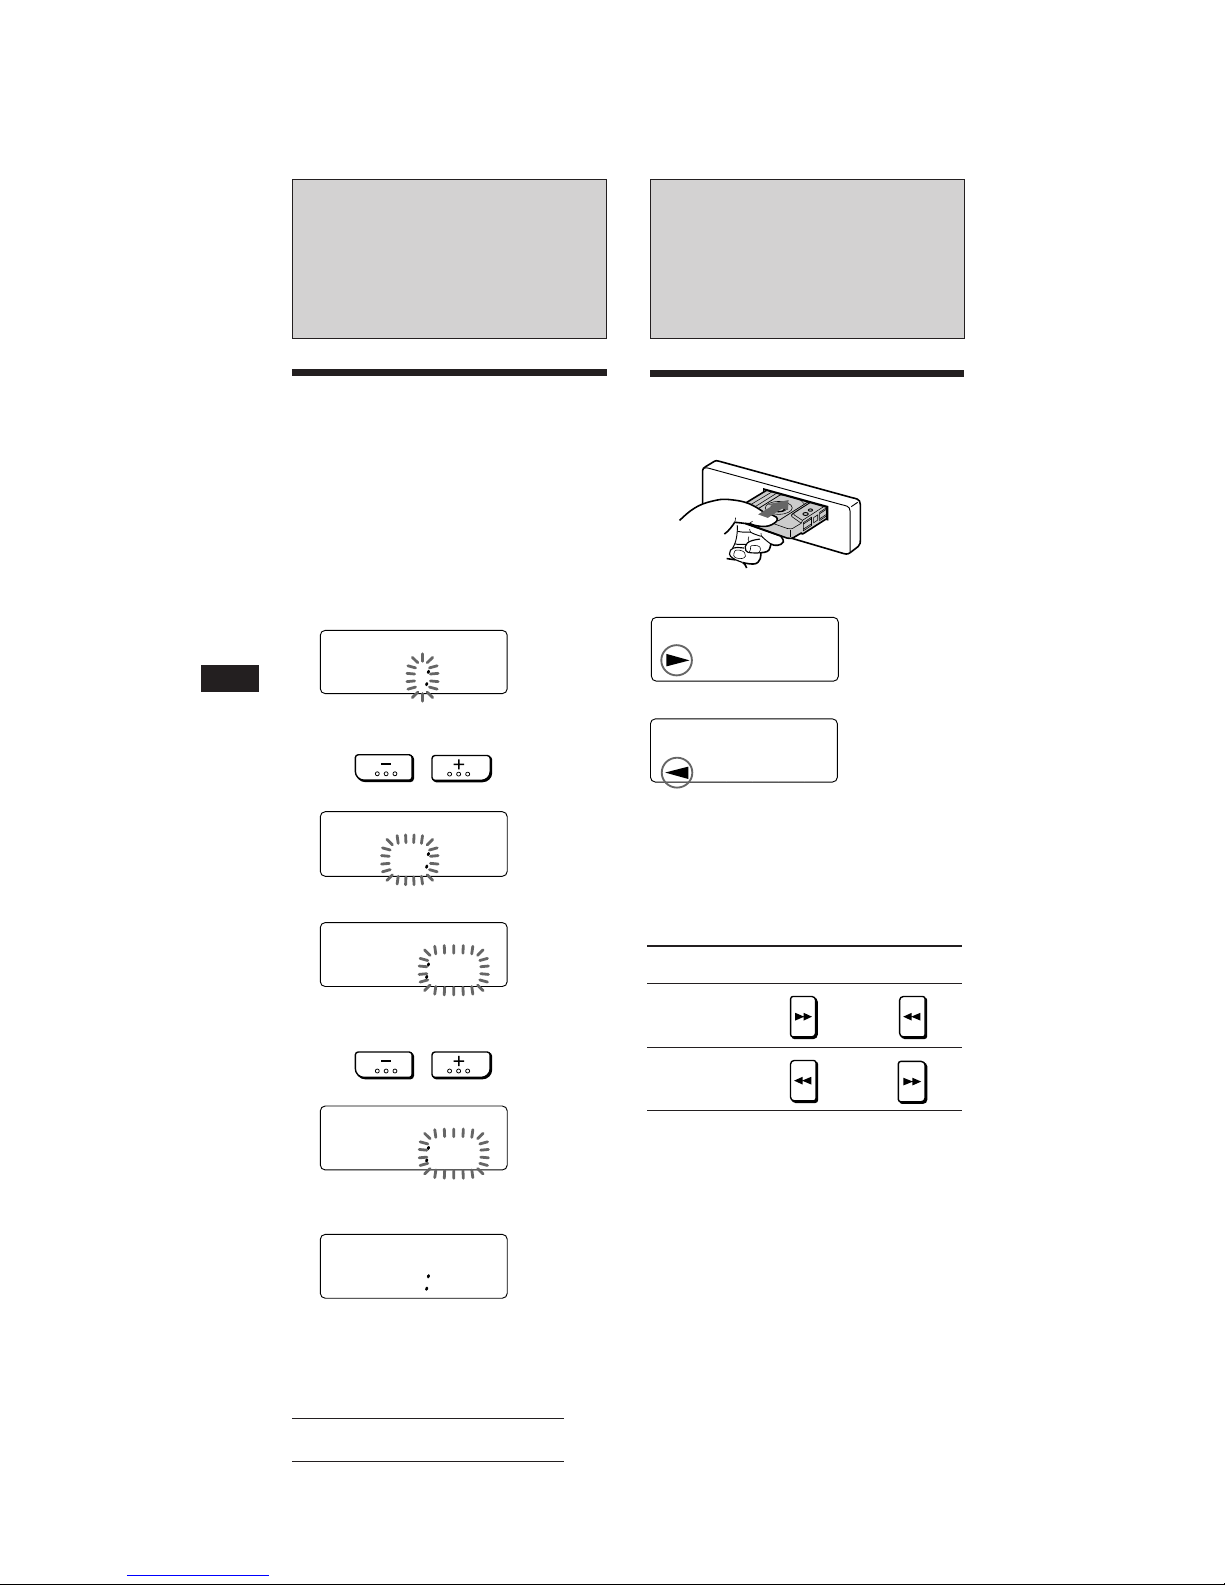
Listening to the tape
Insert the cassette.
Playback will start automatically.
The side facing up is being played.
The side facing down is being played.
Tip
To change the tape transport direction, press both 0 and
) at the same time.
To eject the cassette, press 6.
Fast-winding the tape
To resume playback, press the other fastwinding button partially until the locked
button is released.
Tip
9 and ( flashs while fast-winding the tape.
Direction
indicator
(
9
Fast-forward
Rewind
Getting Started
Setting the clock
The clock has a 12-hour digital indication.
Note
Turn the power on first, then set the clock.
To turn the power on, press (TUNER).
Example : Set the clock to 10:08
1 Display the time.
press (DSPL) during operation.
2 Press (DSPL) for two seconds.
1 Set the hour.
2 Press (SEL) momentarily.
3 Set the minute.
3 Press (DSPL) momentarily.
100
The hour digit flashes.
1000
to go back to go forward
1000
The minute digits flash.
to go back to go forward
1008
1008
The clock starts.
 Loading...