

Page 1
About the User Guide
Thank you for purchasing this product.
Ð
Before Using This Product
Ð
Descriptions in the User Guide
Ð
Screenshots & Key Labels
Ð
Other Notations
Before Using This Product
Read "Safety Precautions" and this guide thoroughly beforehand for proper usage.
Accessible services may be limited by subscription contract conditions.
Descriptions in the User Guide
In the User Guide, most operation descriptions are based on handset at time of purchase.
Unless noted otherwise, descriptions are for Home Screen. Some operation descriptions may be
simplified.
Screenshots & Key Labels
Screenshots in the User Guide may differ in appearance with actual Display. Key labels in the User
Guide are simplified for description purposes and differ with actual Display.
Other Notations
In the User Guide, the product is referred to as "handset."
microSDTM/microSDHCTM/microSDXCTMCard is referred to as "SD Card."
1
Page 2
Accessing Instructions on Handset
Use Guide application to learn touch operations or making settings.
Ð
Launching Guide
Ð
Showing Status Bar Indicator
Ð
Launching Guide from Notifications Window
Ð
Using Guide
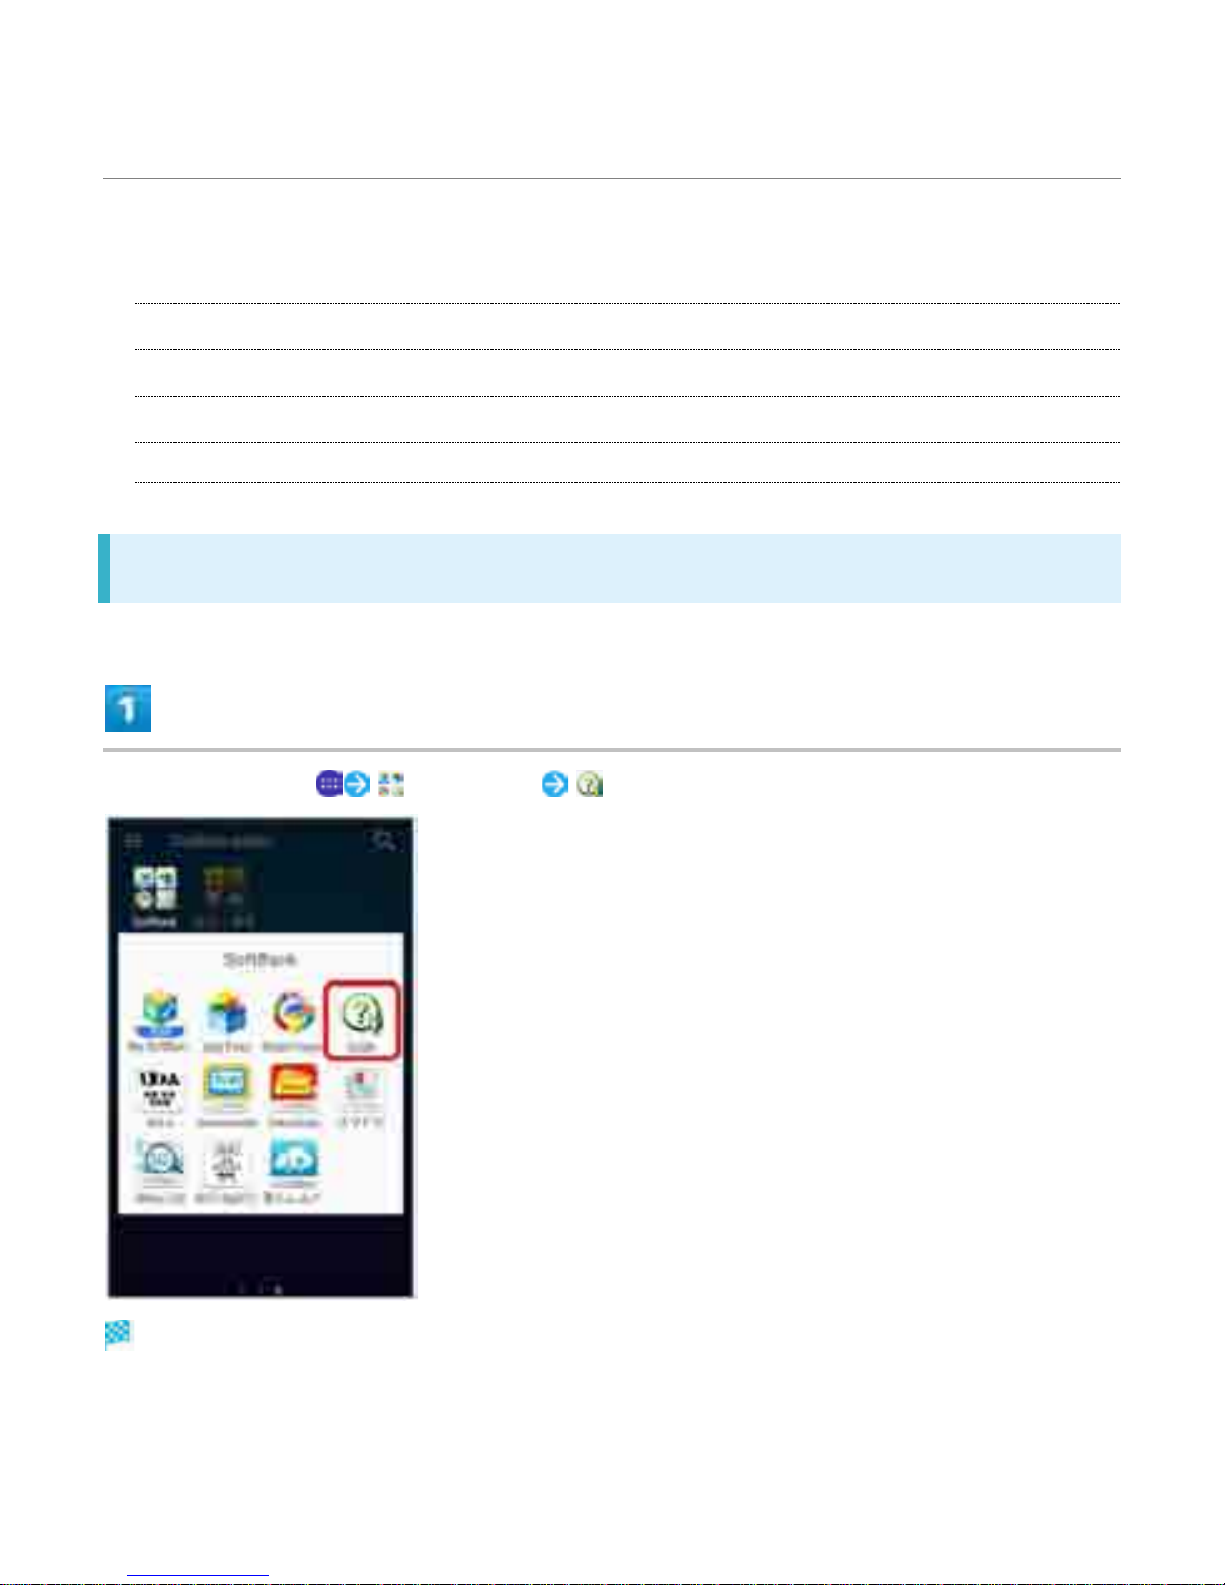
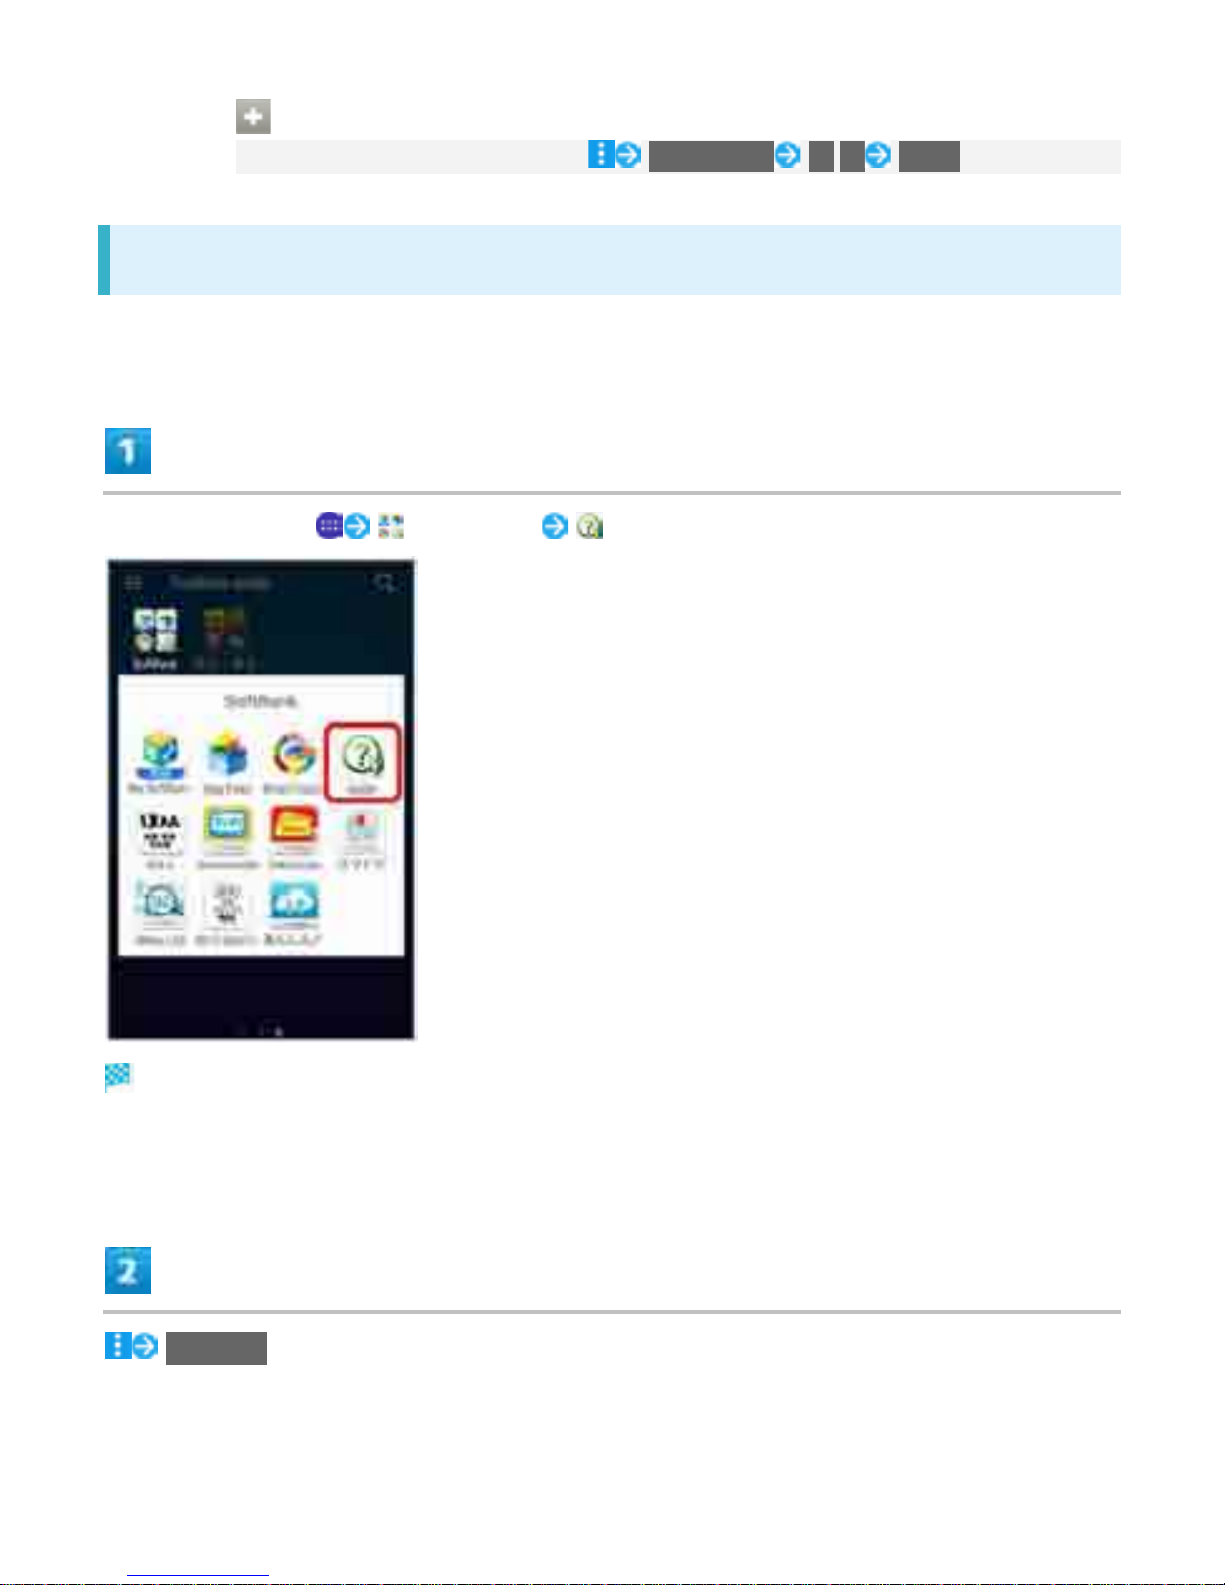
Launching Guide
In Home Screen, (SoftBank) (Guide)
Smartphone Guide top window opens.
If using Smartphone Guide for the first time, Usage notes and Auto Update confirmation appear.
Follow onscreen instructions.
2
Page 3
Setting Auto Update
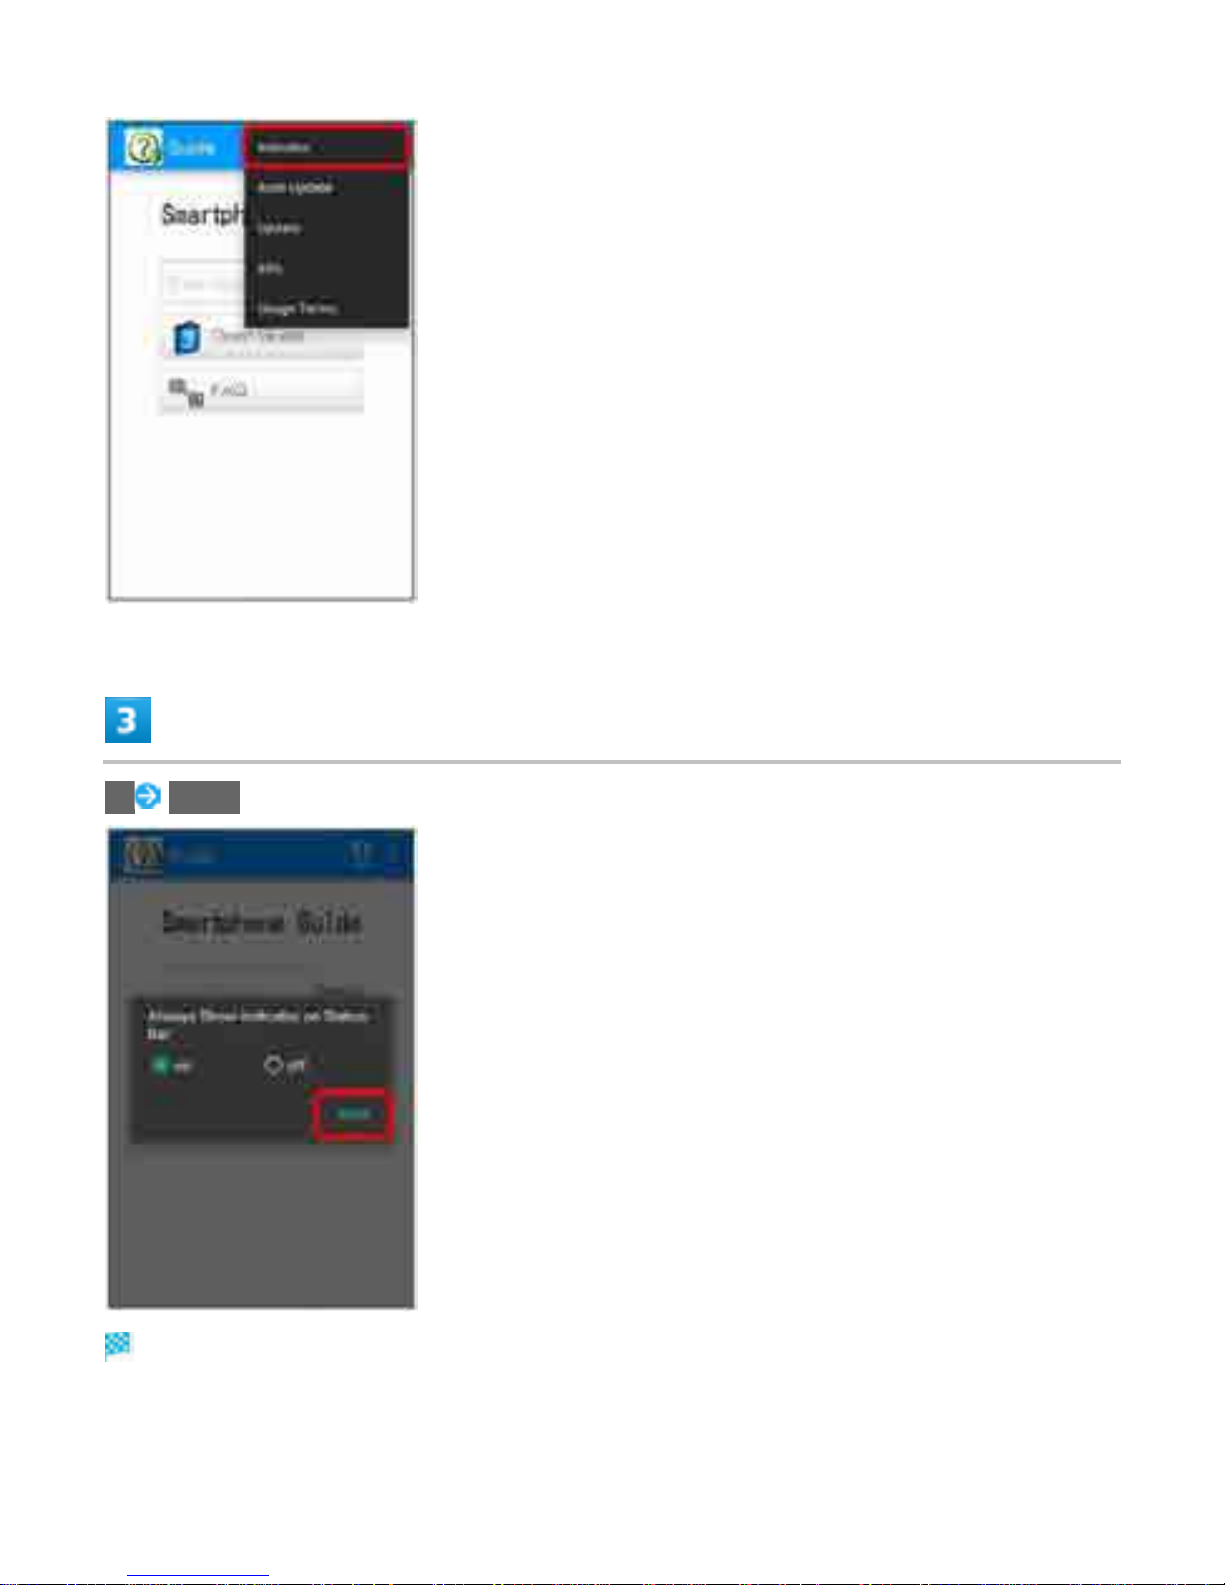
In Smartphone Guide top window, Auto Update on/off BACK
Showing Status Bar Indicator
Set to show the indicator on Notifications Window to launch Smartphone Guide.
In Home Screen, (SoftBank) (Guide)
Smartphone Guide top window opens.
If confirmation appears, follow onscreen instructions.
Indicator
3
Page 4
on BACK
Setting is complete.
4
Page 5
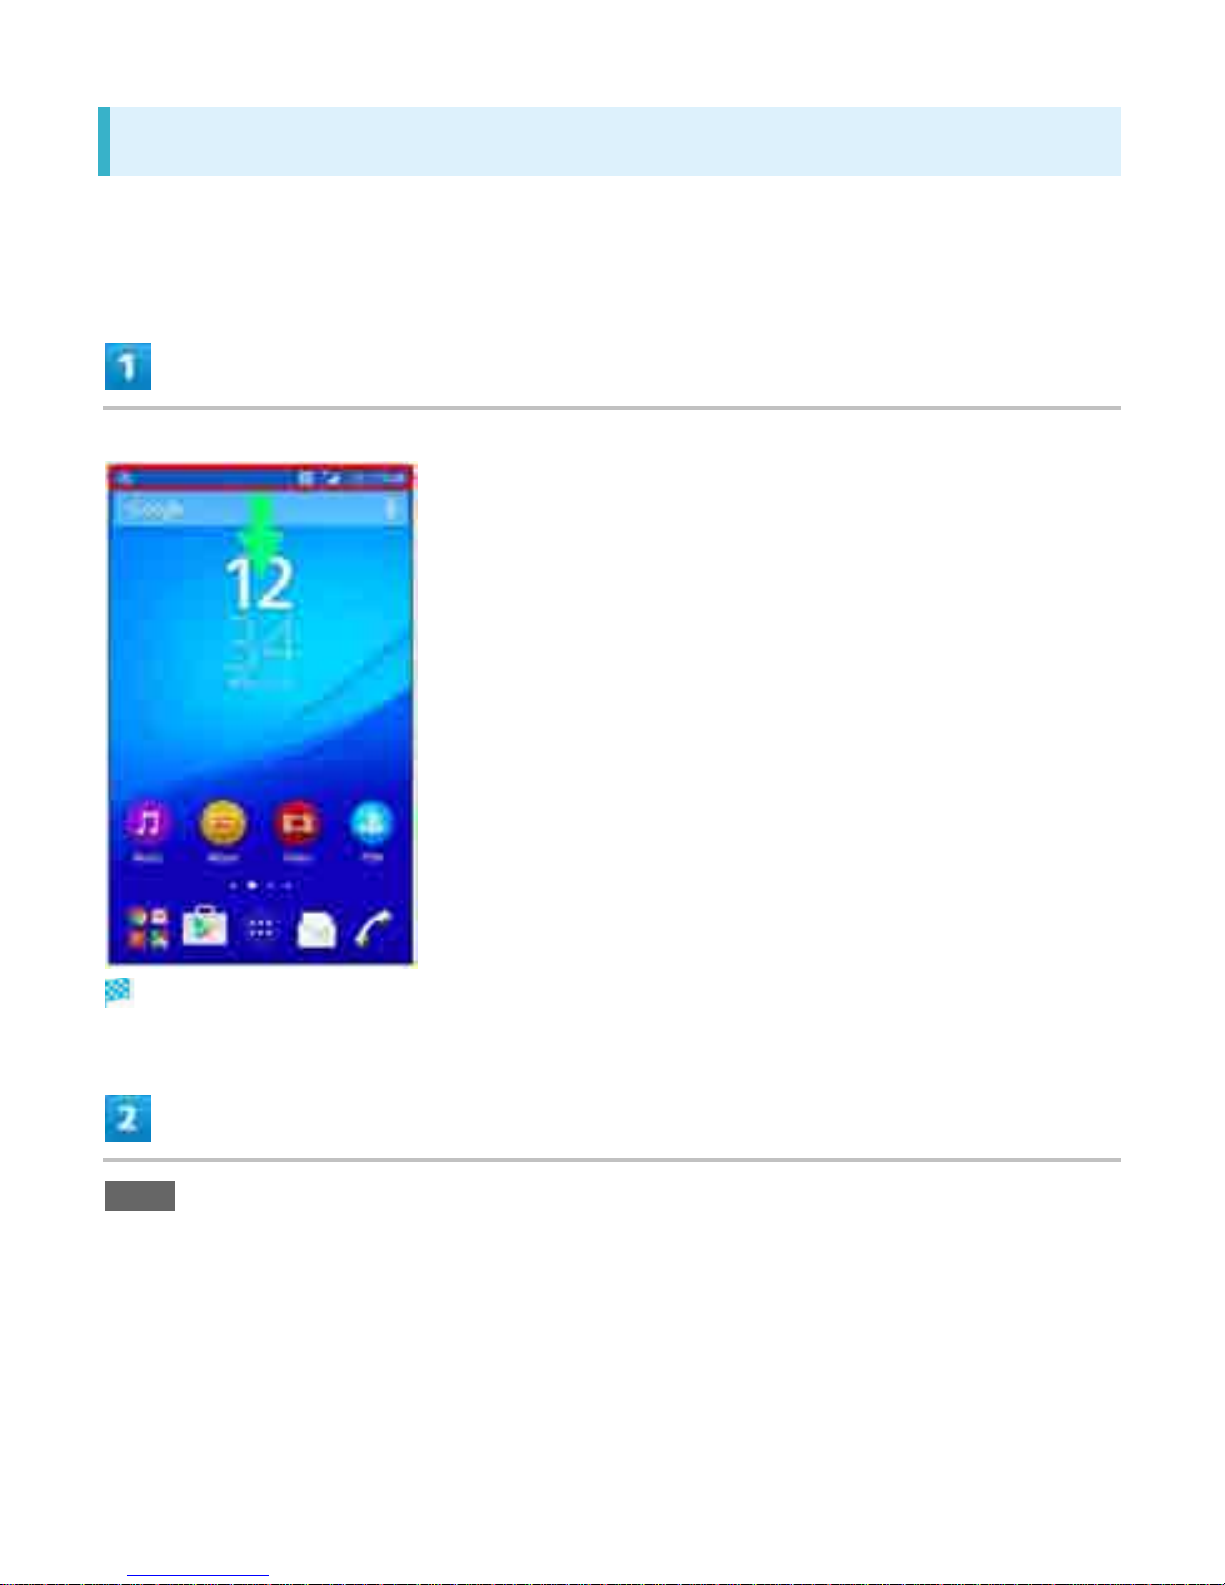
Launching Guide from Notifications Window
Show Smartphone Guide indicator on Status Bar to check functions quickly from Notifications
Window.
Drag Status Bar down to open Notifications Window
Notifications Window opens.
Guide
5
Page 6
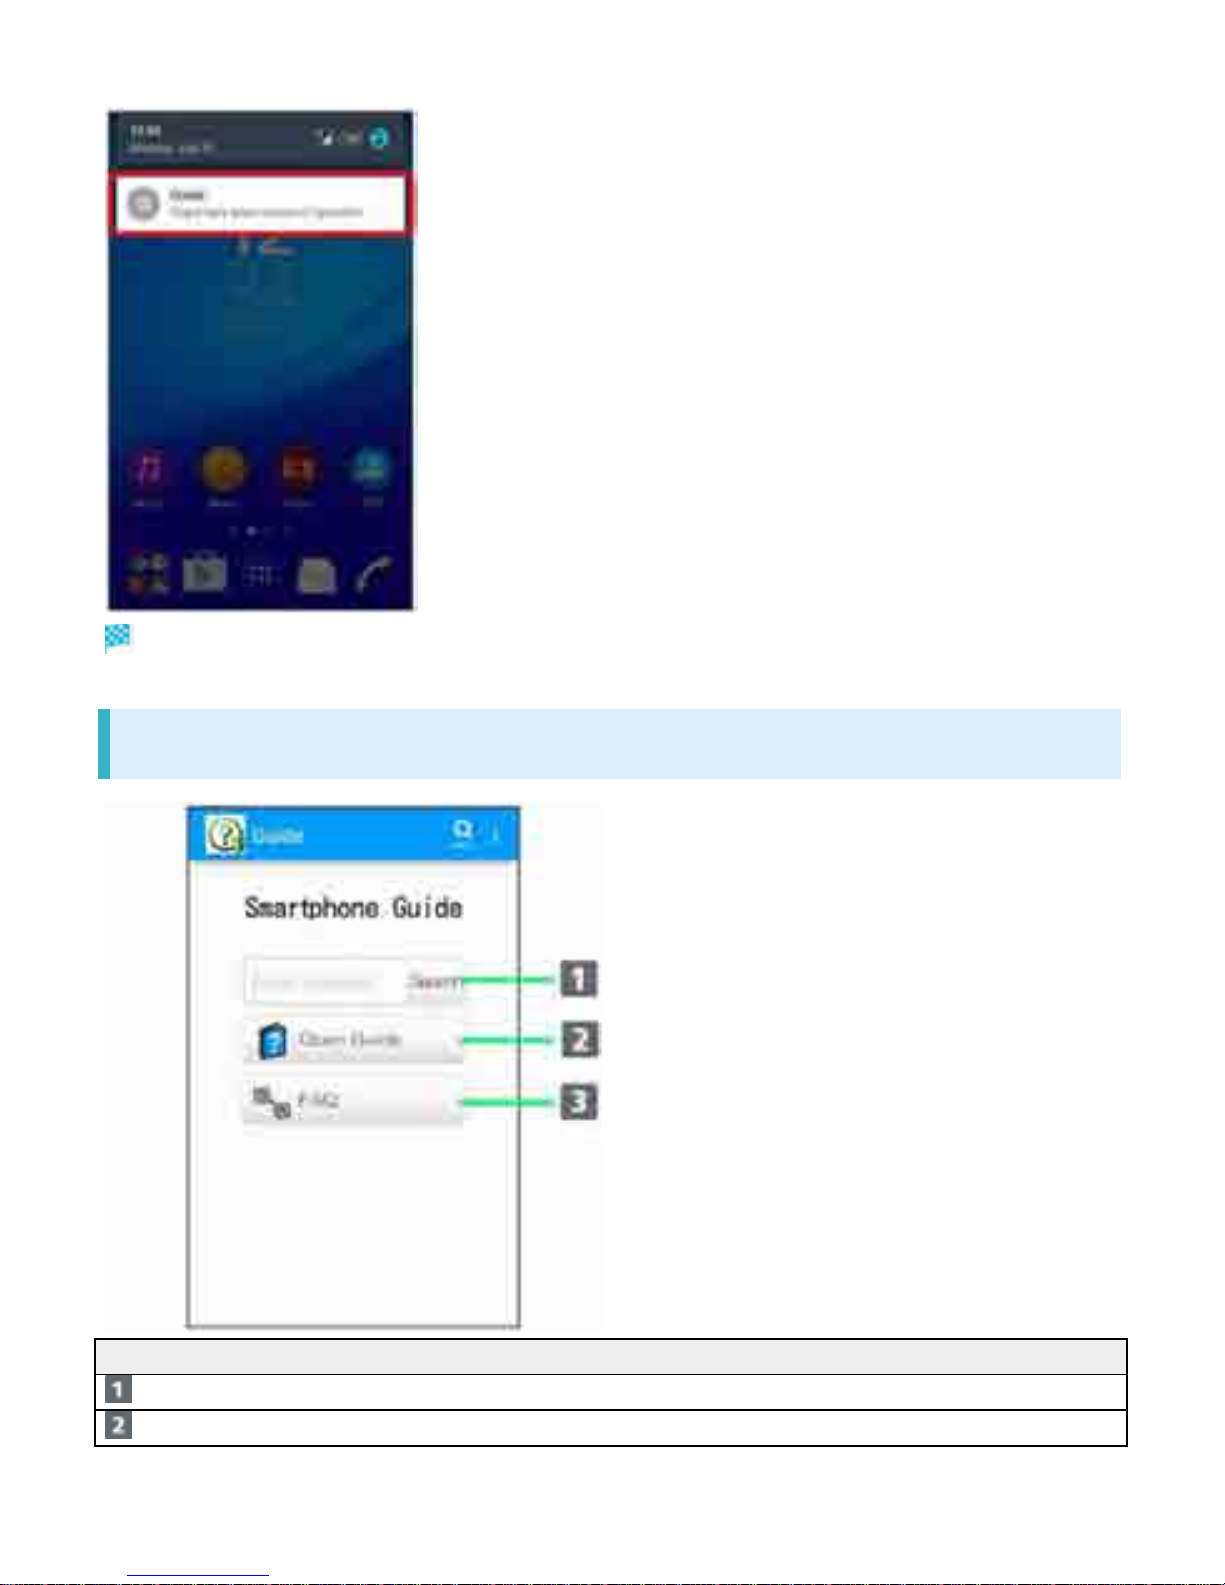
Smartphone Guide top window opens.
Using Guide
Item Description
Enter Keyword Search for Smartphone Guide.
Open Guide Check operations for usage purpose. Voice
6
Page 7

search is also available.
FAQ Check FAQ. Or access FAQ mobile web page.
7
Page 8
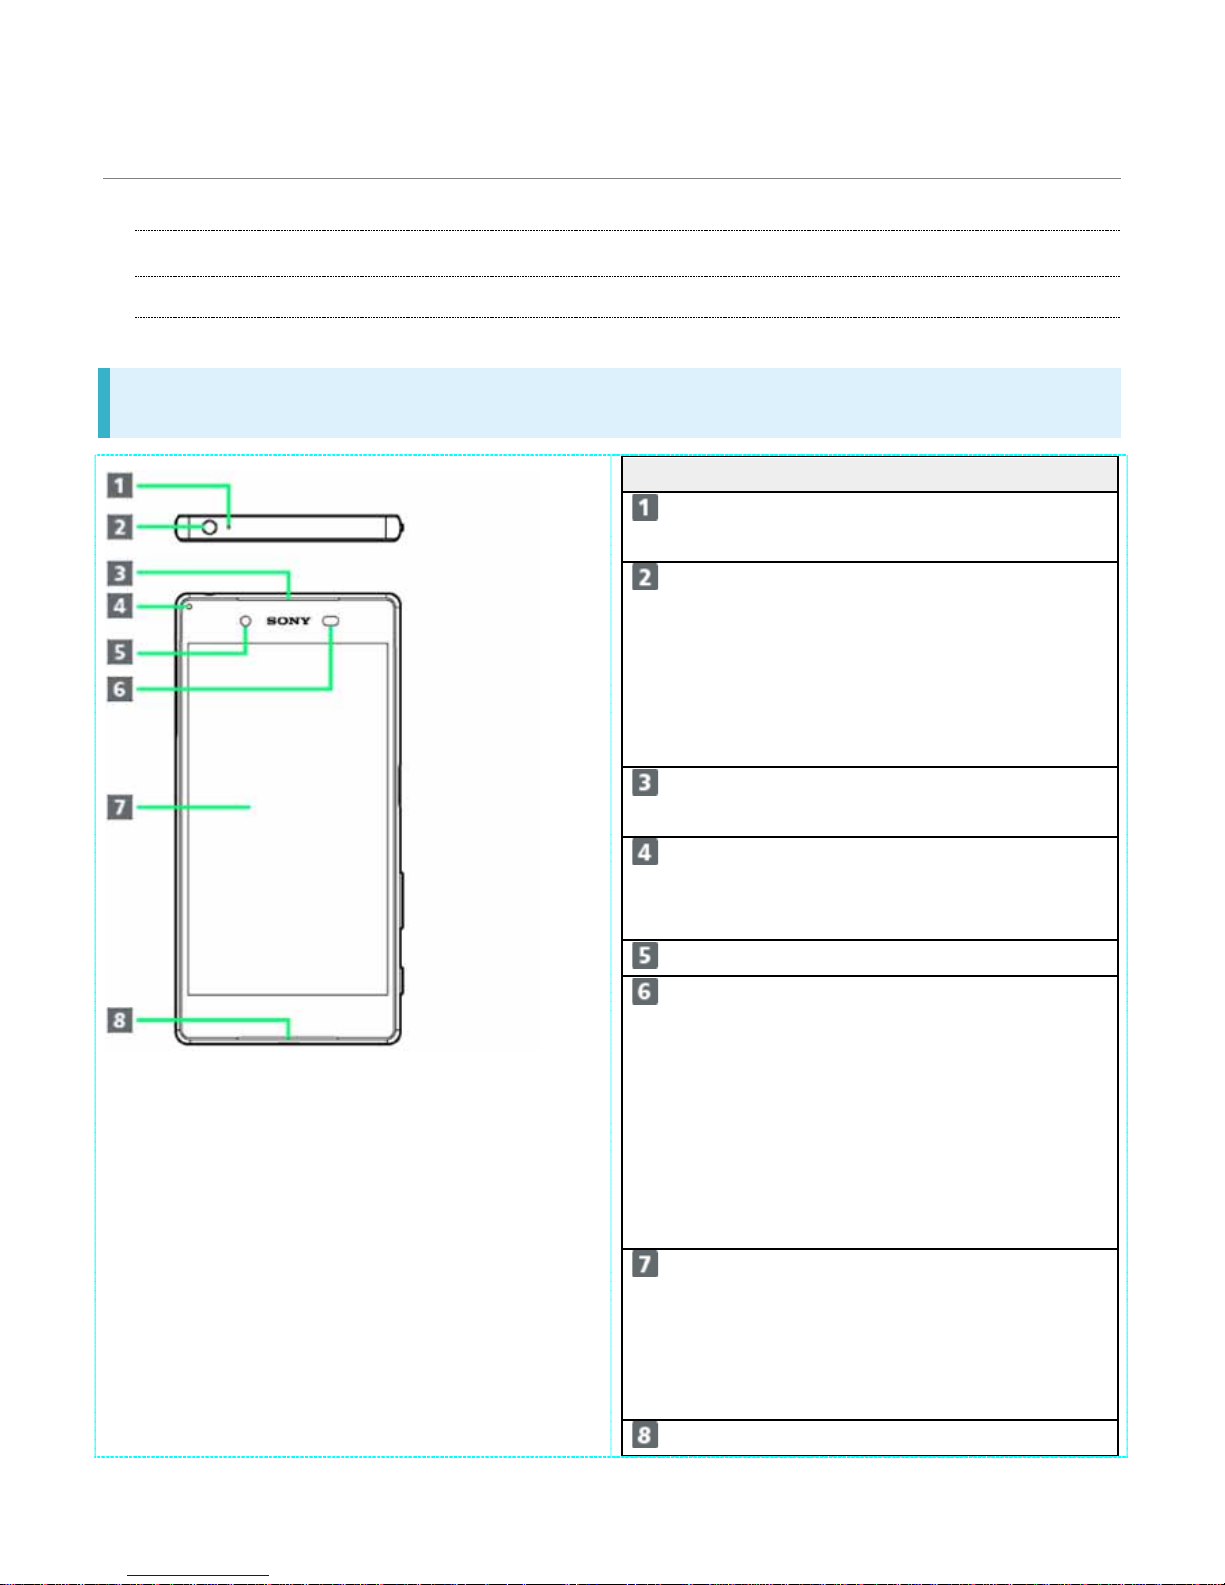
Parts & Functions
Ð
Handset
Ð
Keys
Handset
Part Description
Second Mic Reduces noise for
calling.
Headphone Port Connect commercially
available headphones.
This port supports
tetrapolar headset that
conform to the CTIA
standard.
Earpiece/Speaker Hear the other party's
voice here.
Notification Lamp Flashes for incoming
transmissions. Lights
while charging.
Front Camera Capture yourself.
Proximity Sensor Detects surrounding
brightness to
automatically adjust
Display or backlight
and prevent
Touchscreen
misoperation during a
call.
Display Handset uses a
touchscreen-type
Display. Operate with
your fingers on
Display.
Mic/Speaker Speak here.
1
Page 9
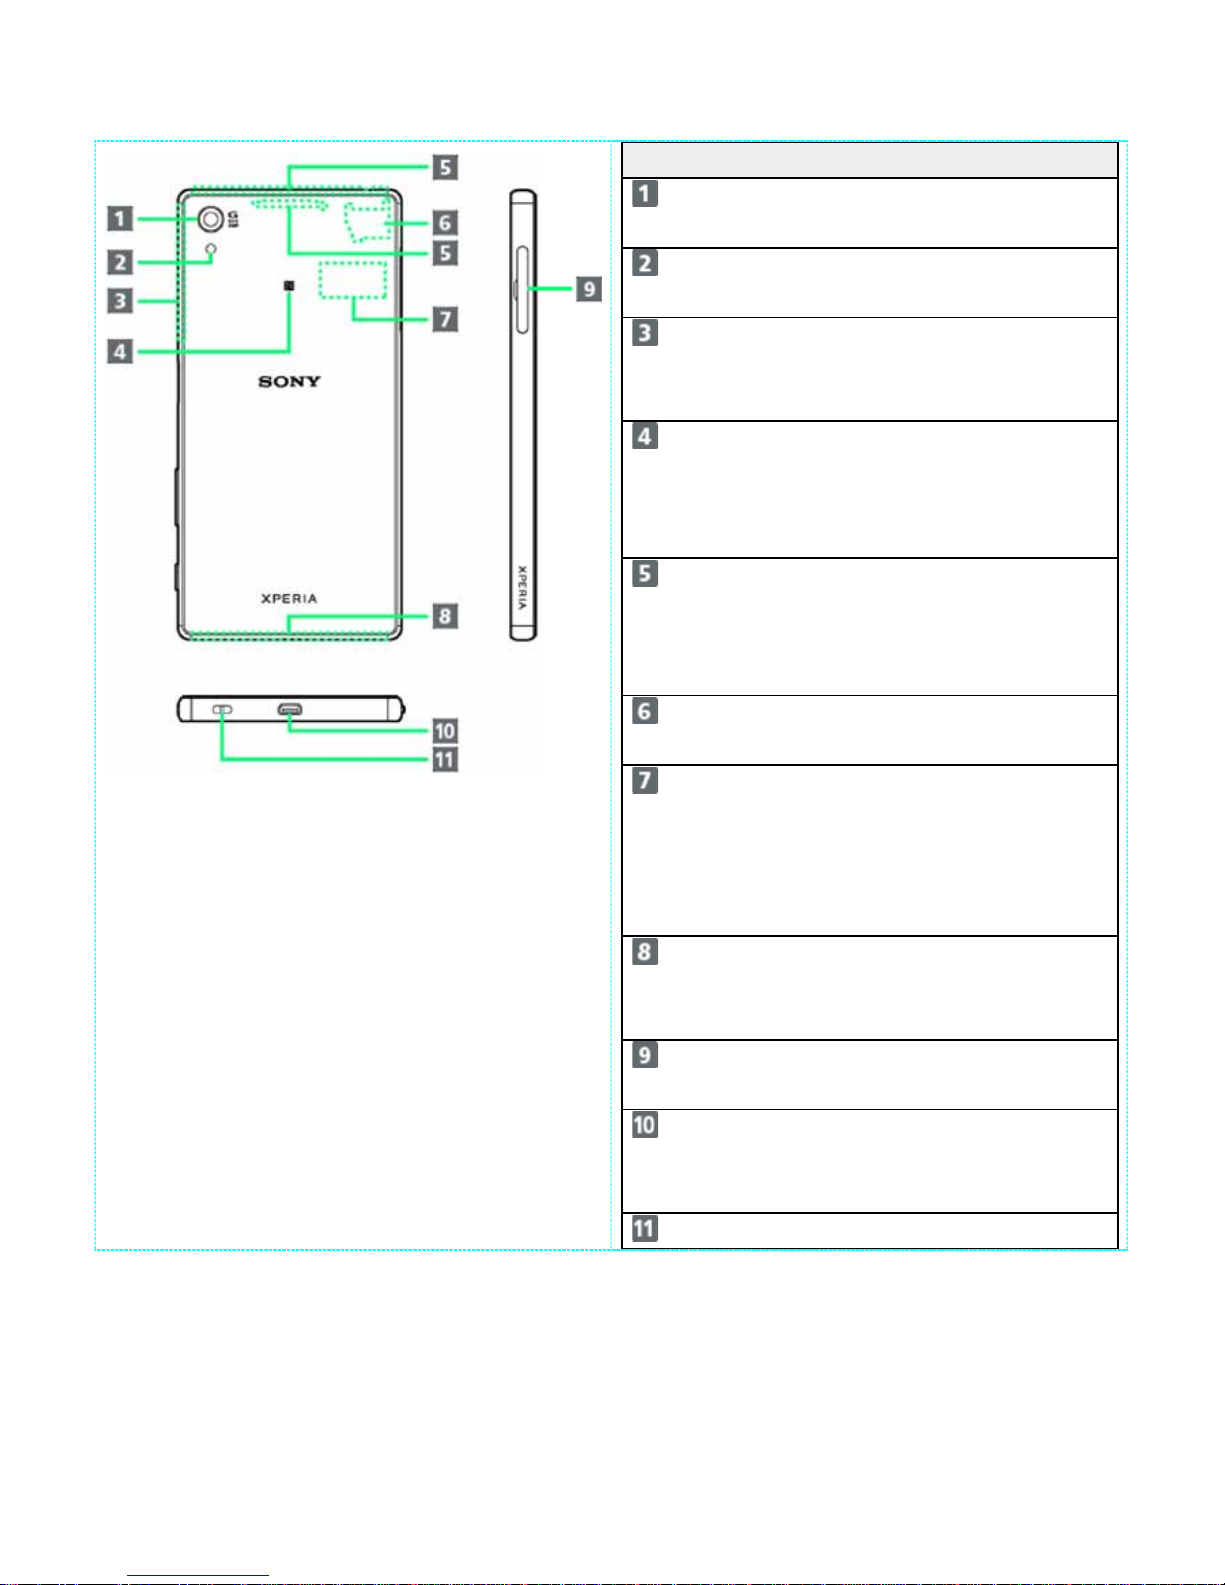
Item Description
Camera Capture still images
and videos.
Flash/Photo Light Use as camera flash in
a dark place.
Wi-Fi/Bluetooth
®
Antenna Area
Internal Antenna for
Wi-Fi and Bluetooth
®
feature.
NFC Mark Hold mark up to
reader/writer to use
NFC/Osaifu-Keitai
®
feature.
Internal
Antenna/GPS
Antenna Area
Internal Antenna for
calls, data
communication and
GPS.
Wi-Fi Antenna
Area
Internal Antenna for
Wi-Fi.
Nameplate CE mark, FCC ID,
IMEI information
printed sticker is
attached. Do not
remove nameplate.
Internal Antenna
Area
Internal Antenna for
call and data
communication.
SIM Card/SD Card
Slot
Insert SIM Card/SD
Card.
External Device
Port
Connect commercially
available Micro USB
Cable etc.
Strap Hole Attach strap.
2
Page 10
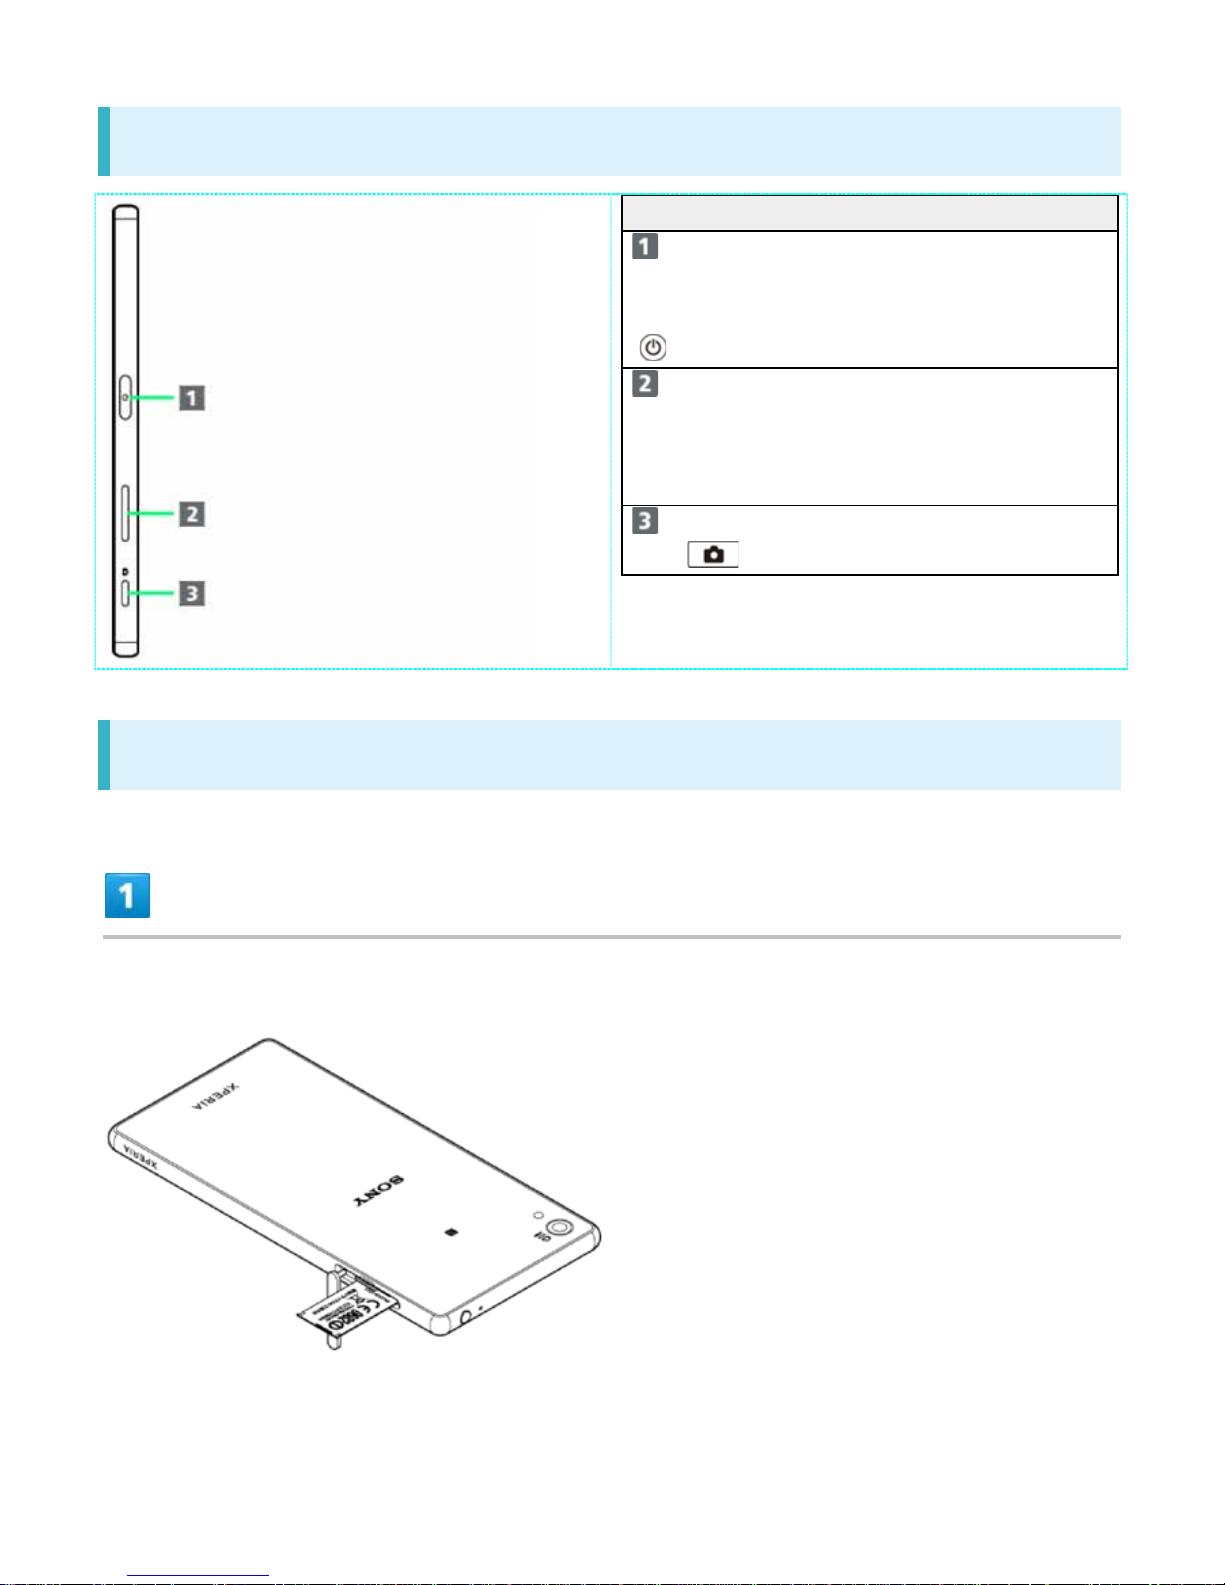
Keys
Part Description
Power
Key/Screen
Lock Key
( )
Long Press for power on/off.
Press for sleep mode on/off.
Volume/Zoo
m Up/Down
Key
Adjust Volu me.
Adjust Zoom while using
Camera.
Camera
Key ( )
Use as Camera shutter.
Long Press to launch Camera.
CE mark and FCC ID
Open the slot cover, and insert a f ingernail i nto the hook at the edge of the label tray,
then pull it out straight.
3
Page 11
SIM Card
SIM Card is an IC card containing phone number and other customer information.
Ð
Handling SIM Card
Ð
Inserting SIM Card
Ð
Removing SIM Card
Ð
Unlocking SIM Card
Handling SIM Card
Customer is responsible for any damage caused by inserting SIM Card in an IC card reader, etc.
of another brand.
SoftBank Corp. is not responsible in such case.
Always keep the IC chip clean.
Avoid applying labels. May damage SIM Card.
See instructions included with SIM Card for handling.
SIM Card is the property of SoftBank Corp.
SIM is replaceable (at cost) in case of loss/damage.
Return SIM Card to SoftBank Corp. when canceling subscription.
Returned SIM Cards are recycled for environmental purposes.
Note that SIM Card specifications and performance may change without notice.
It is recommended that you keep a separate copy of information that is stored on SIM Card.
SoftBank Corp. is not responsible for damages from stored information that is lost.
Always follow emergency procedures to suspend service if your SIM Card or handset (SIM Card
inserted) is lost/stolen. For details, contact Customer Service.
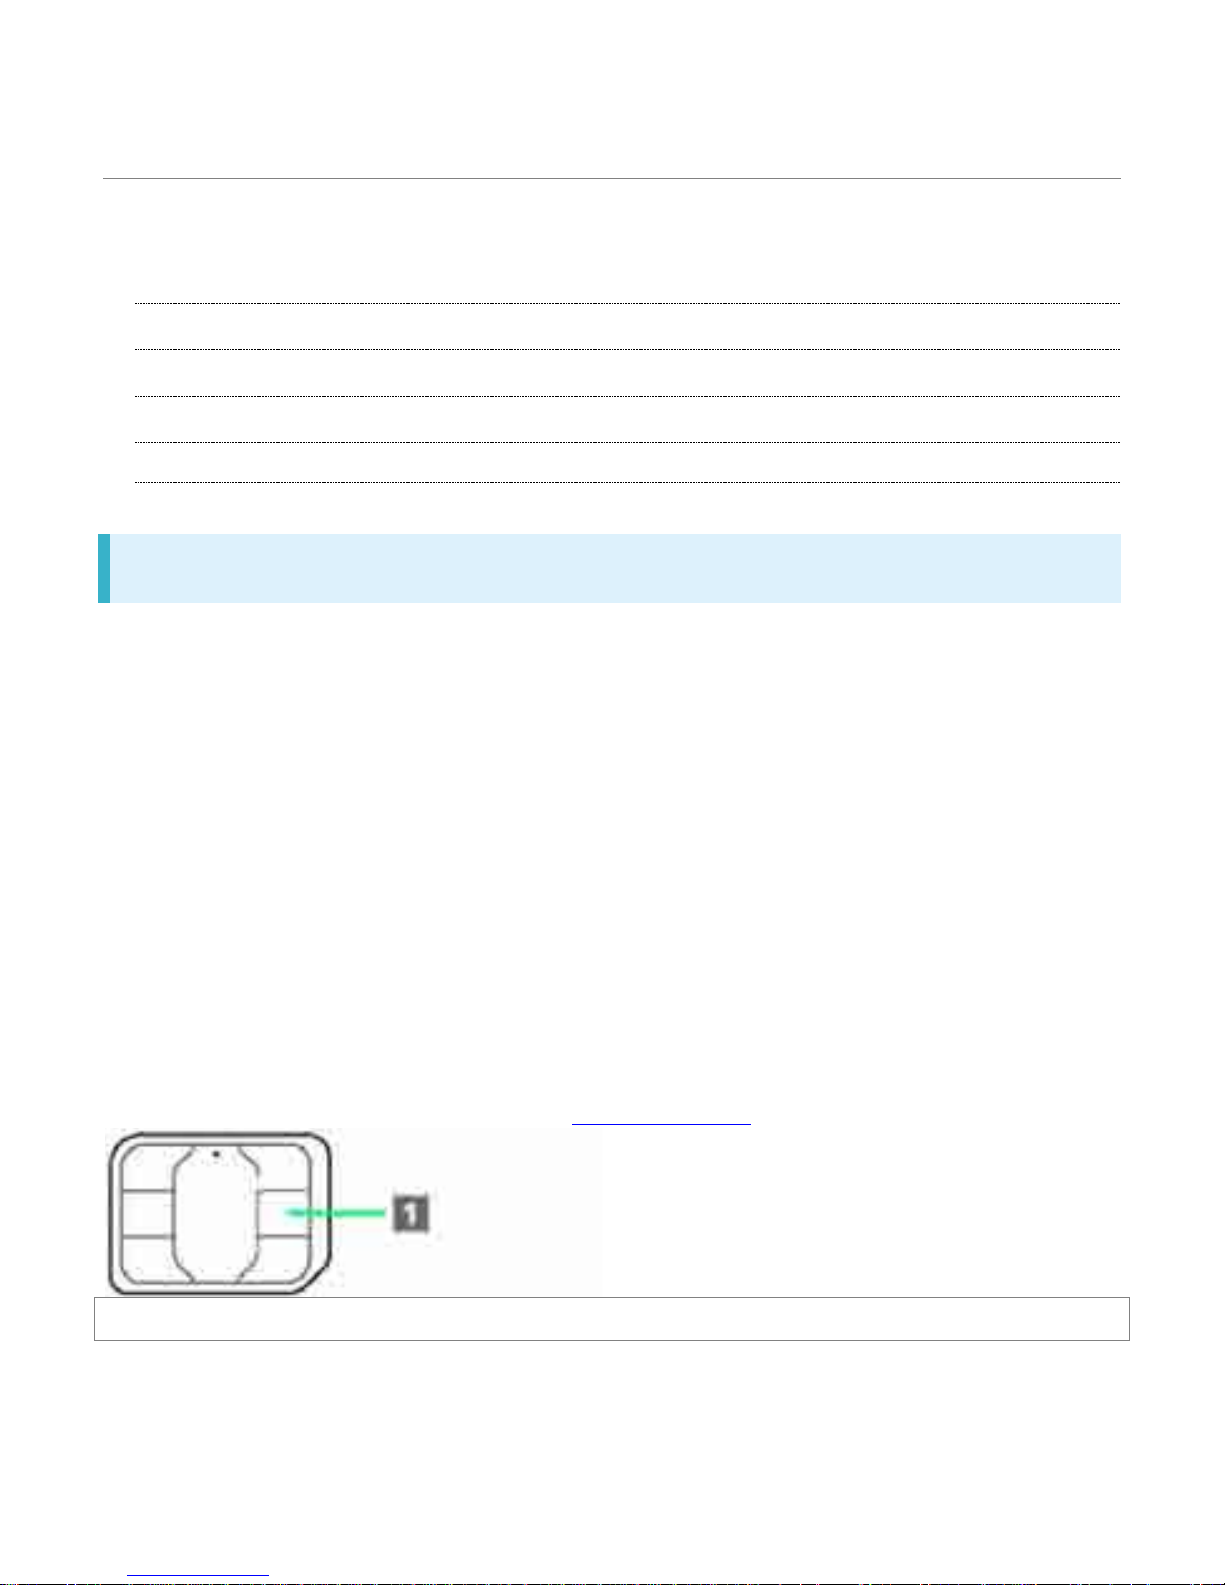
䐟
IC chip
4
Page 12
Inserting SIM Card
Always unmount SD Card beforehand. For details, see "Unmounting SD Card."
Open Slot Cover using groove
Draw Tray out using the tab
5
Page 13
Set SIM Card intoTray with IC chip facing up
Check SIM Card orientation by notch.
Insert Tray with SIM Card into handset
Pay attention to Tray orientation.
&ORVH6ORW&RYHUDQGSUHVVLWGRZQZKHUHLQGLFDWHGżDQGPDNHVXUHWKHUHDUHQR
gaps
6
Page 14
Removing SIM Card
Always unmount SD Card beforehand. For details, see "Unmounting SD Card."
Open Slot Cover using groove
Draw Tray out using the tab
7
Page 15
Remove SIM Card from Tray
Insert Tray into handset
8
Page 16
Pay attention to Tray orientation.
&ORVH6ORW&RYHUDQGSUHVVLWGRZQZKHUHLQGLFDWHGżDQGPDNHVXUHWKHUHDUHQR
gaps
Unlocking SIM Card
Handset can be SIM-unlocked to accommodate other-carrier SIM cards.
Some services or functions may be restricted when using another mobile's SIM Card. SoftBank
Corp. does not guarantee any operation of those services and functions.
For details on SIM unlocking, see the SoftBank Web page.
9
Page 17
Internal Memory and SD Card
Save data to handset memory or SD Card.
Handset supports SD Cards up to 128 GB. Some SD Cards may not operate properly.
Ð
Inserting SD Card
Ð
Unmounting SD Card
Ð
Removing SD Card
Ð
Formatting SD Card
SD Card Cautions
Data
Information stored on SD Card ca n b ecome lost or changed accidentally or as a result of damage. I t is
recommended that you keep a separate copy of important data. SoftBank Corp. is not responsible for
damages from data that is lost or changed.
Reading/Writing Data
Never power off while reading or writing data.
Battery Level
A low battery charge may prevent reading/writing to SD Card.
Handling SD Card
Use/store SD Cards away from the reach of infants. May cause choking if swallowed.
Inserting SD Card
Open Slot Cover using groove
10
Page 18
Draw Tray out using the tab
Set SD Card into Tray with metal terminals facing up
11
Page 19
Insert Tray with SD Card into handset
&ORVH6ORW&RYHUDQGSUHVVLWGRZQZKHUHLQGLFDWHGżDQGPDNHVXUHWKHUHDUHQR
gaps
12
Page 20
Unmounting SD Card
Always unmount SD Card before removing.
In Home Screen, (Settings)
13
Page 21
Storage
Unmount SD card OK
Item name changes from Unmount SD card to Mount SD card. SD Card is unmounted.
14
Page 22
Removing SD Card
Always unmount SD Card beforehand.
Open Slot Cover using groove
Draw Tray out using the tab
15
Page 23
Remove SD Card from Tr ay
Insert Tray into handset
Close Slot CoYHUDQGSUHVVLWGRZQZKHUHLQGLFDWHGżDQGPDNHVXUHWKHUHDUHQR
gaps
16
Page 24
Formatting SD Card
When using a new SD Card for the first time, always format it on handset.
Formatting erases all data on SD Card. Carefully check any SD Card that was used on another
device before formatting.
Charge Battery while formatting, or format with adequate battery charge.
In Home Screen, (Settings)
17
Page 25
Storage
Erase SD card
18
Page 26
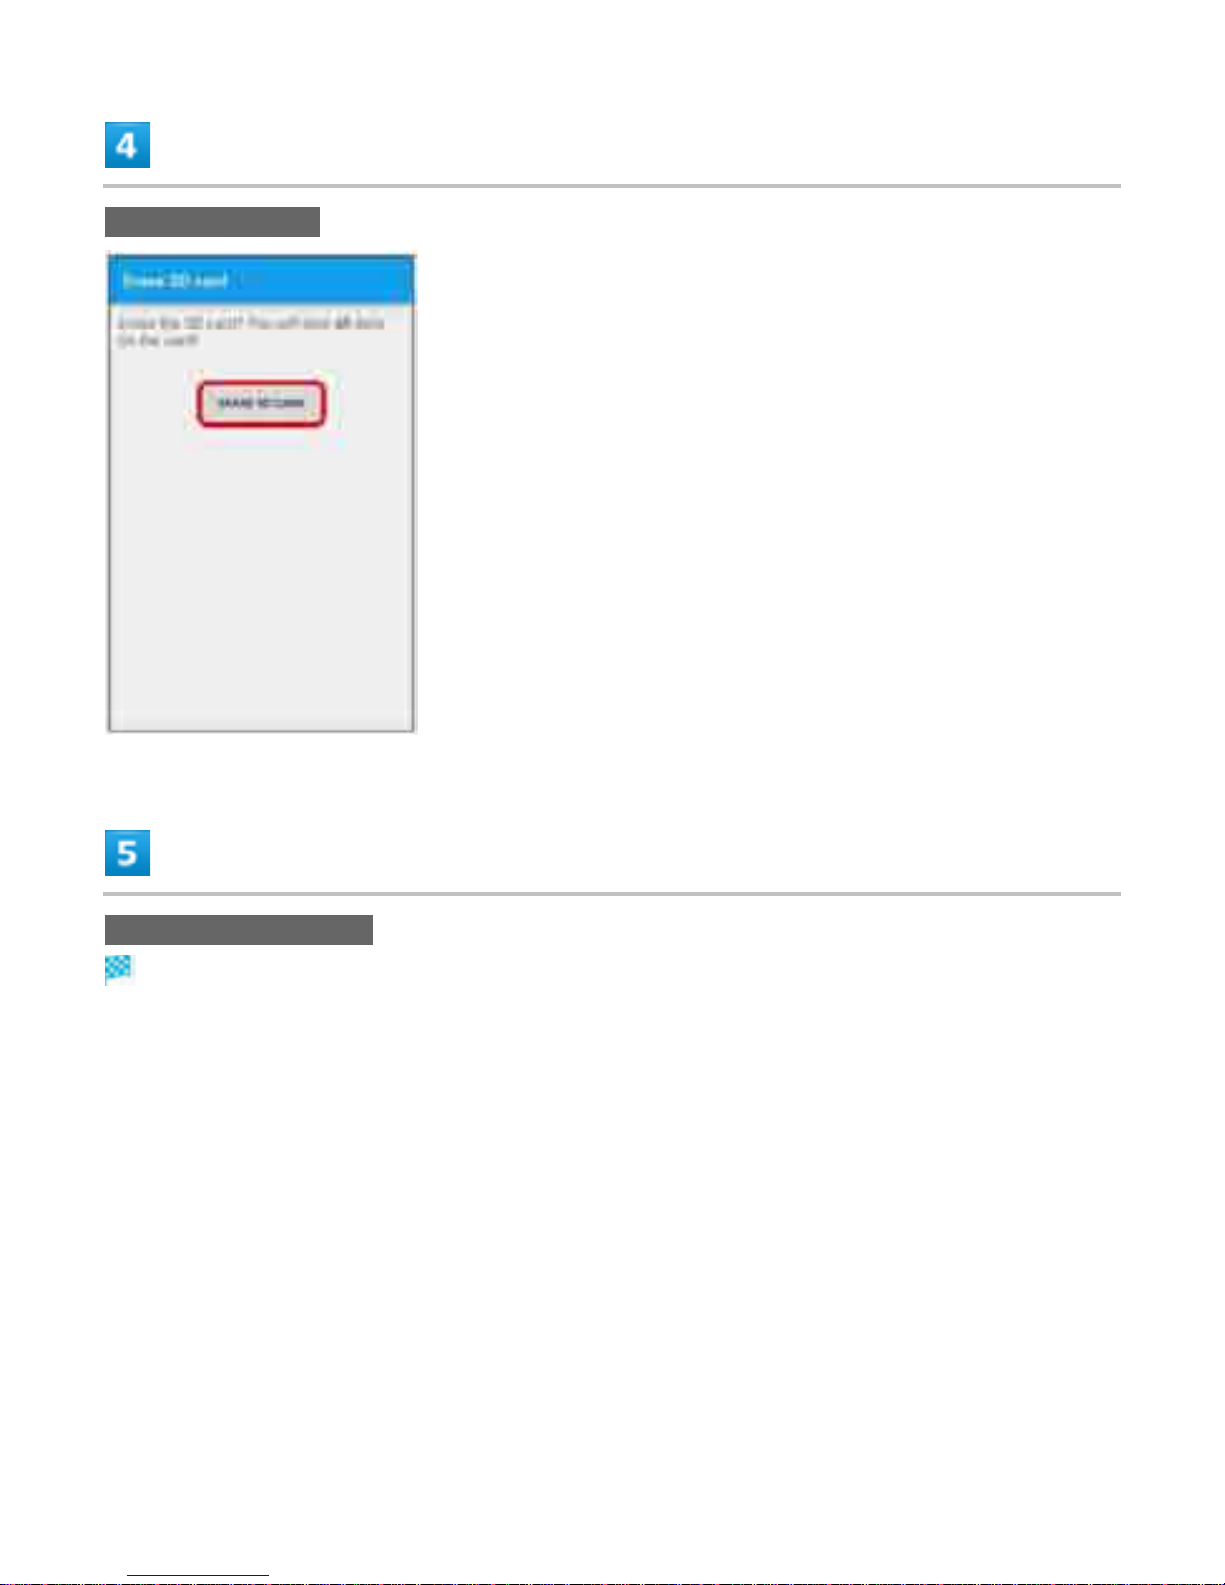
ERASE SD CARD
ERASE EVERYTHING
All data on SD Card is erased.
19
Page 27
Charging Battery
Ð
Charging with AC Charger
Charging with AC Charger
AC Charger is an optional accessory. Use specified AC Charger (SoftBank SELECTION Quick
Charge 2.0) (SB-AC12-HDQC) or AC Charger (Micro USB 1.8A) (ZTDAD1).
For other devices, see the SoftBank Web page.
Operation using AC Charger (Micro USB 1.8A) (ZTDAD1) is explained here.
See instructions included with AC Charger.
Insert Micro USB connector of AC Charger straight into External Device Port
Pay attention to connector orientation. Forcible connection may cause damage.
Raise power plug of AC Charger to plug into power outlet
20
Page 28
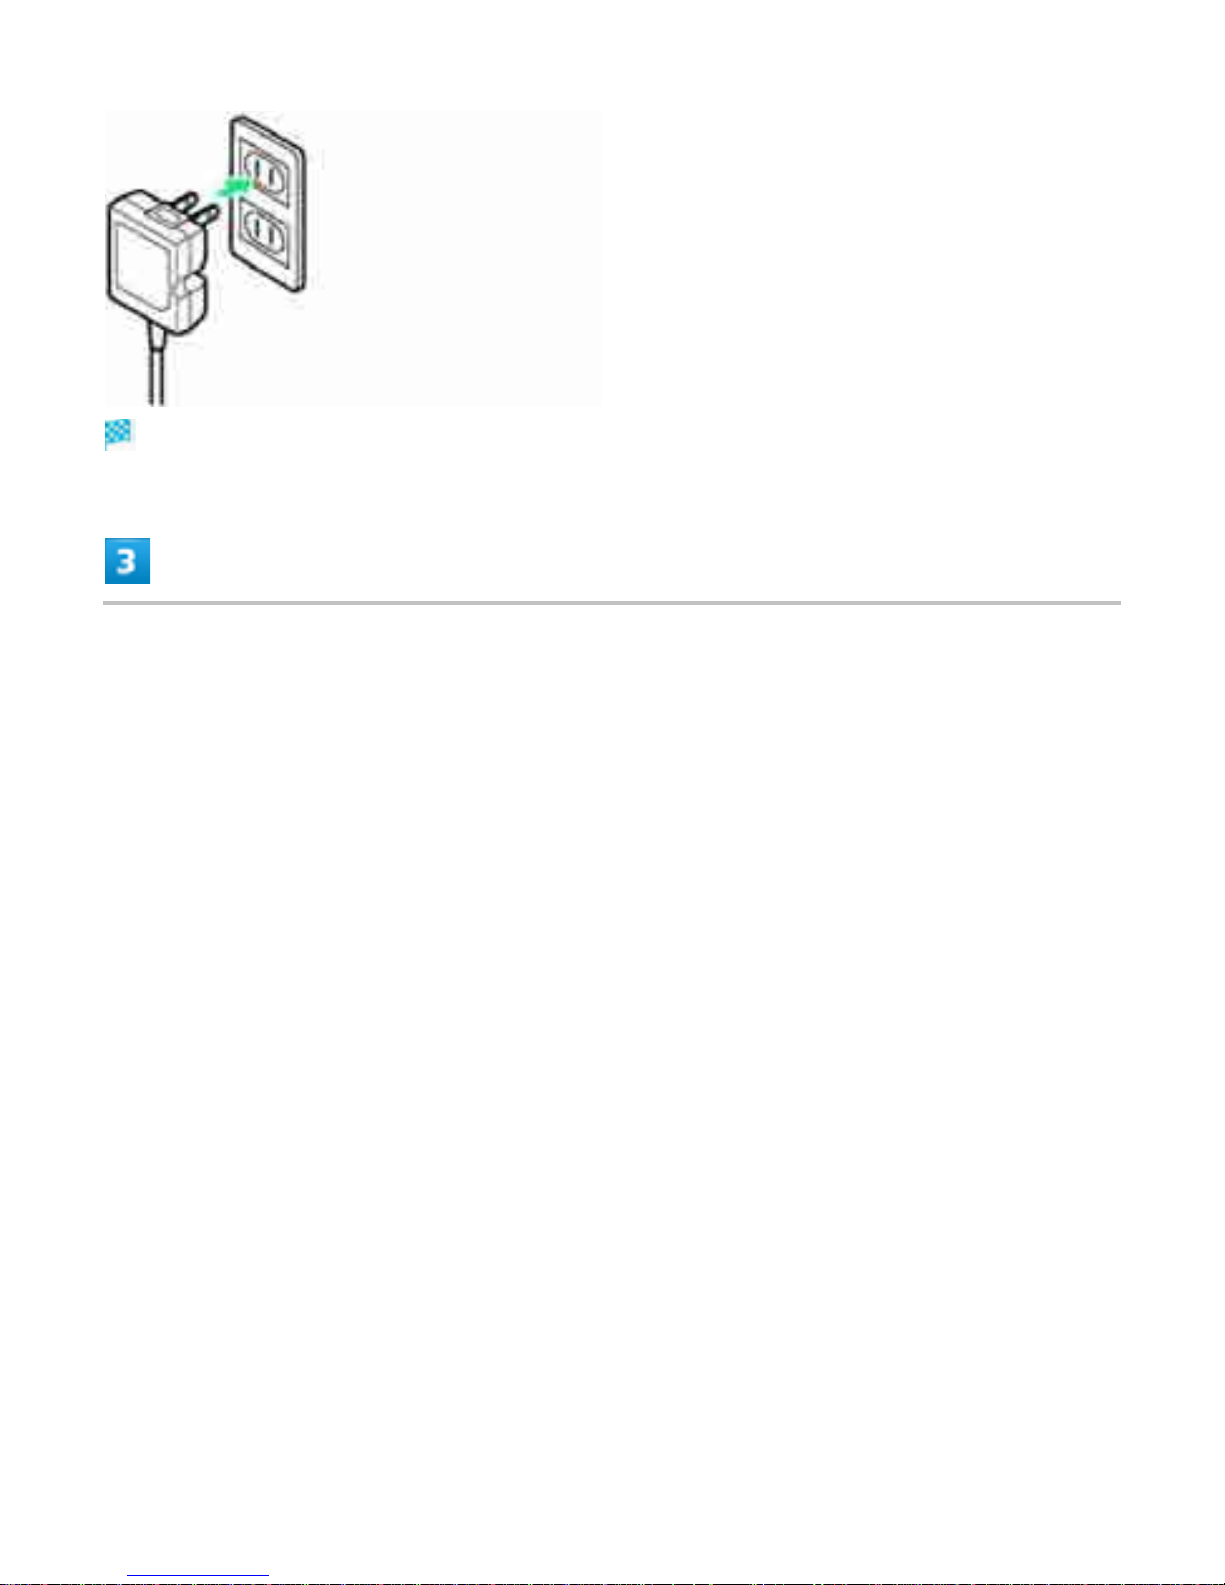
Notification Lamp on handset lights up when charging starts.
When charging is complete, unplug AC Charger and remove straight from handset
21
Page 29
Power On/Off
Ð
Powering On
Ð
Powering Off
Powering On
(Long Press)
Lock screen appears.
See “Unlocking Screen” to unlock the screen.
Startup wizard appears the first time handset is powered on. See "Making Initial Settings" to make
settings.
Powering Off
(Long Press)
22
Page 30
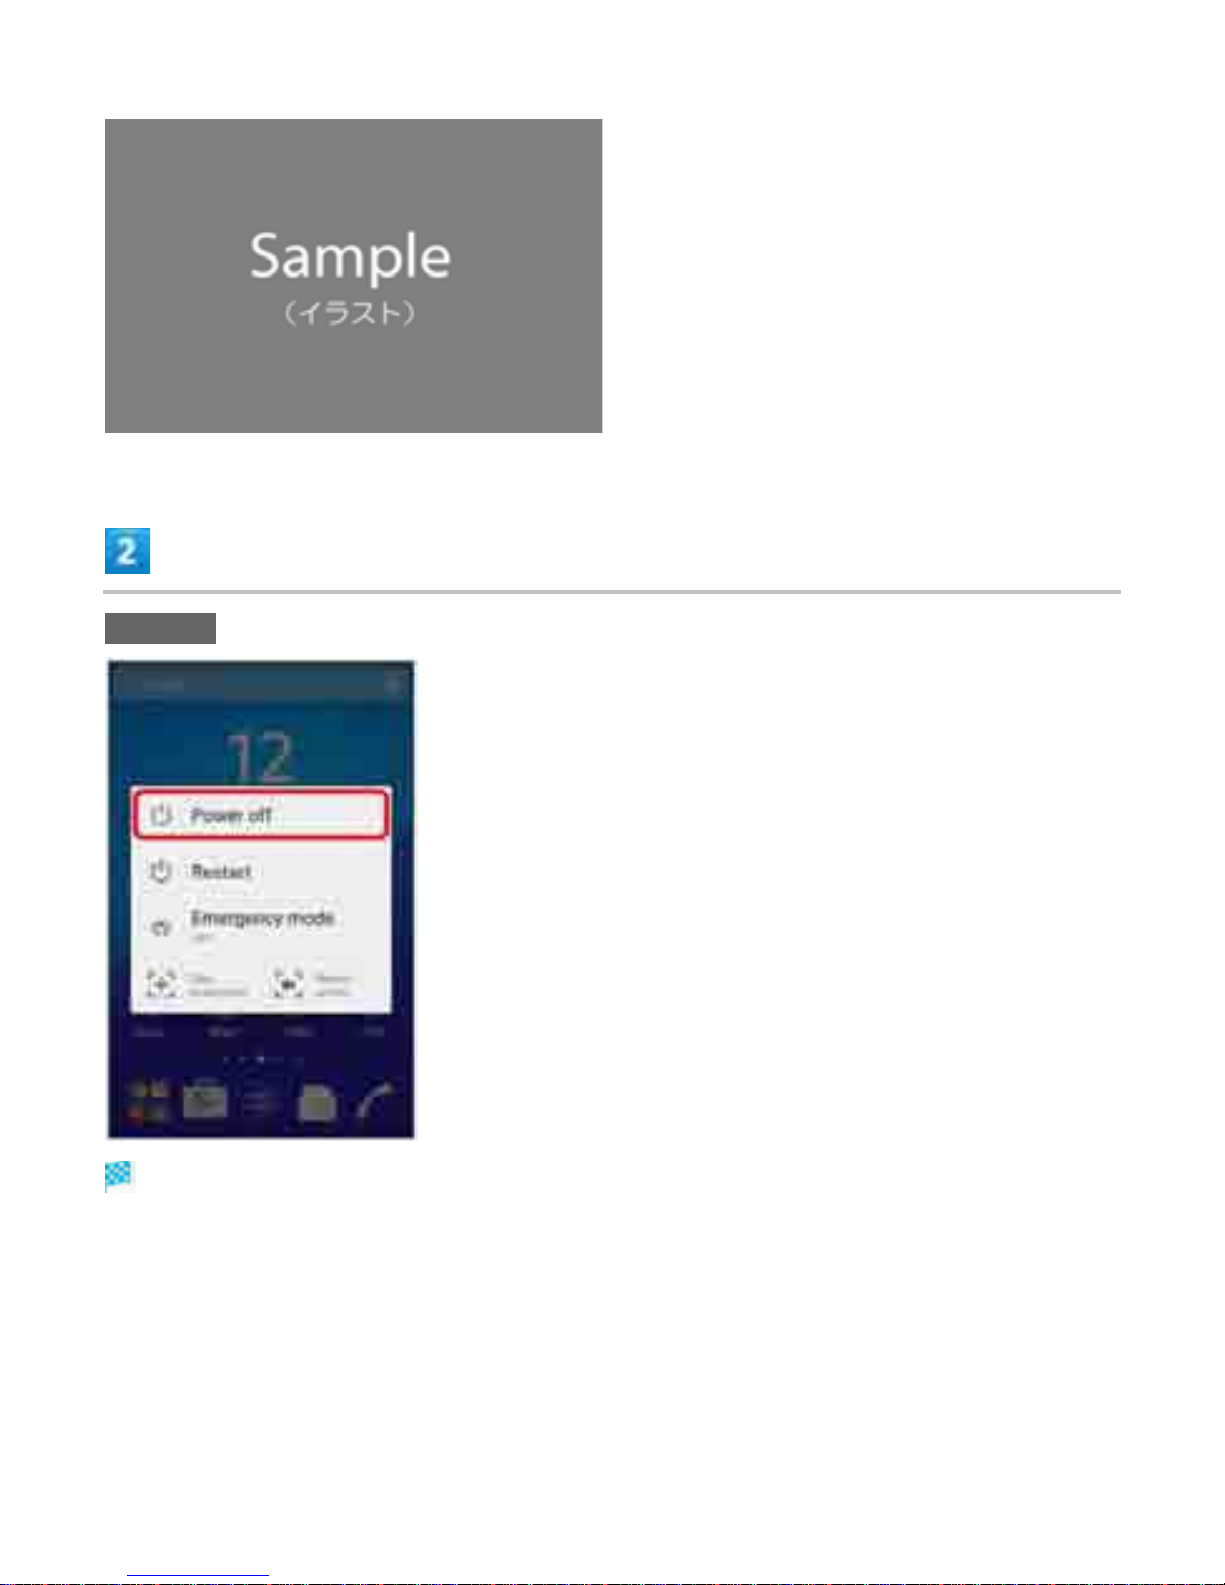
Power off
Handset powers off.
23
Page 31
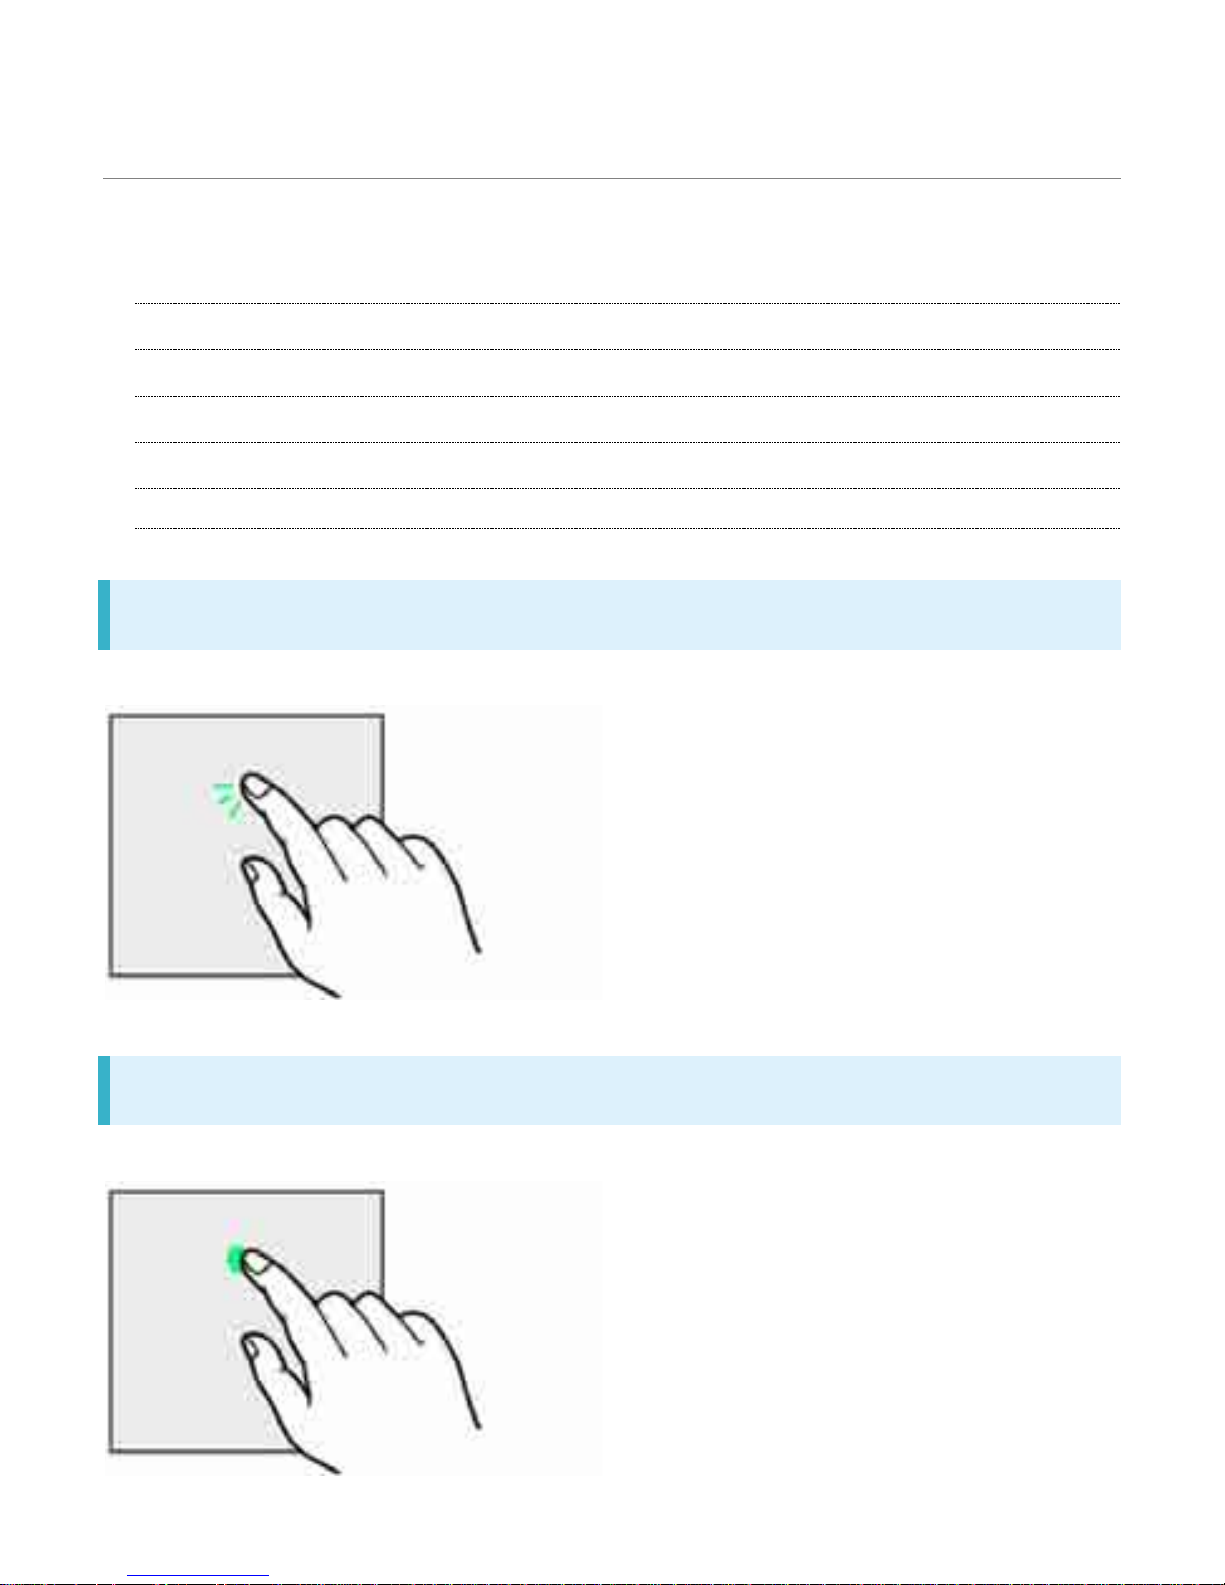
Using Touchscreen
Handset uses a touchscreen-type Display. Operate with your fingers on Display.
Ð
Tap
Ð
Touch & Hold
Ð
Drag
Ð
Swipe/Flick
Ð
Pinch/Spread
Tap
Contact Display lightly and briefly.
Touch & Hold
Touch screen lightly and hold it for a while. When the screen changes, release finger.
24
Page 32
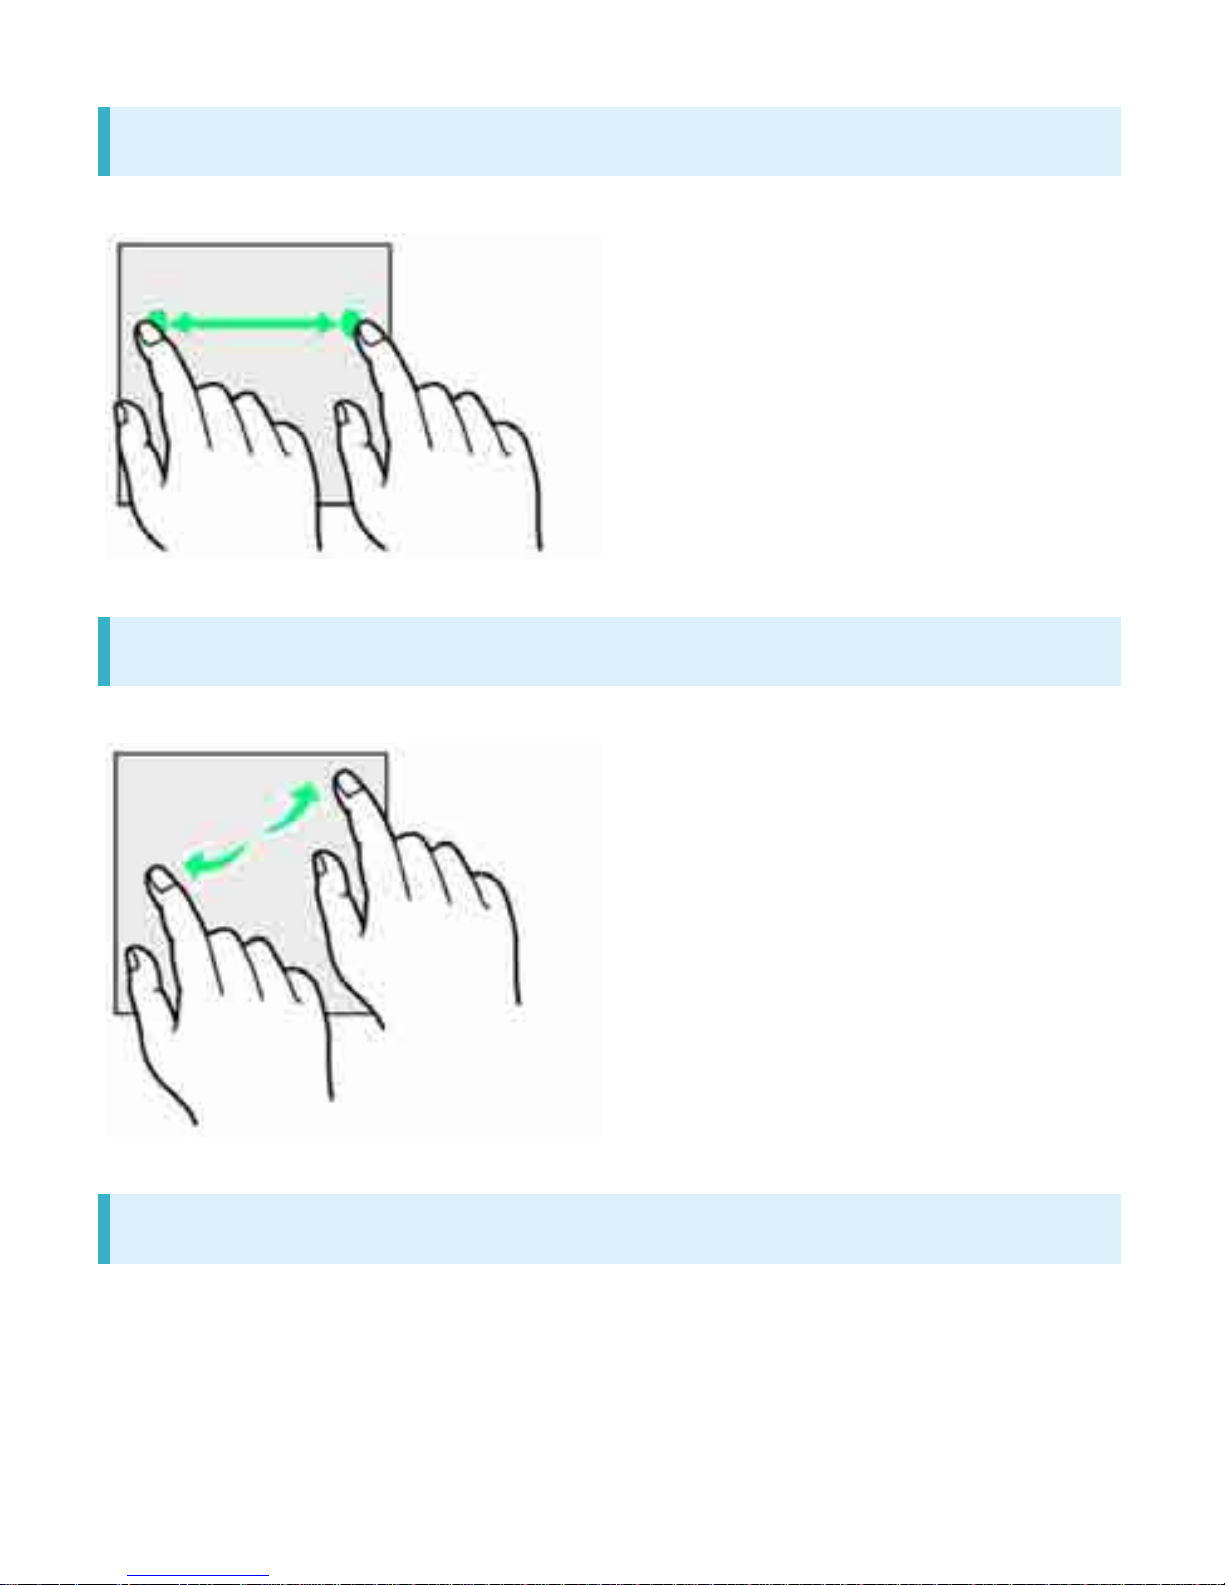
Drag
Touch icon or other item lightly, move it where desired, and release finger.
Swipe/Flick
Contact Display lightly, then brush screen up/down or left/right.
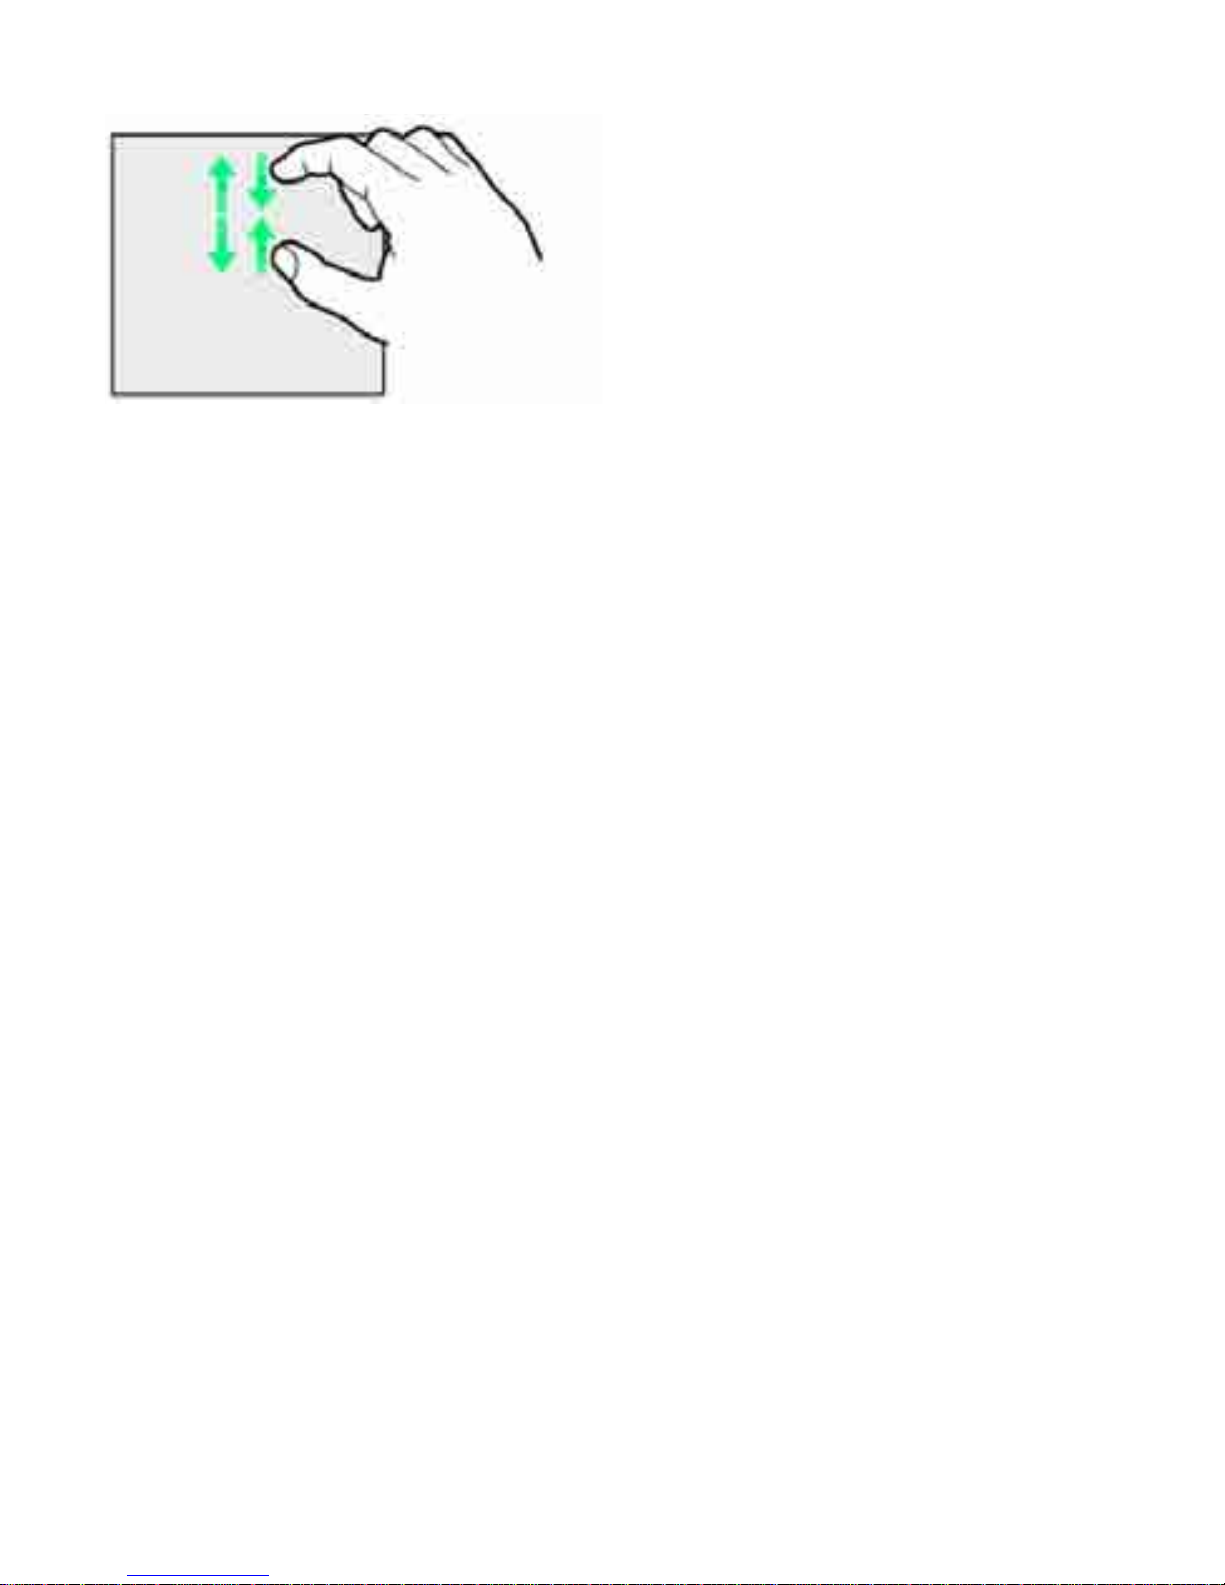
Pinch/Spread
Contact Display lightly, then close/widen fingers.
25
Page 33
26
Page 34
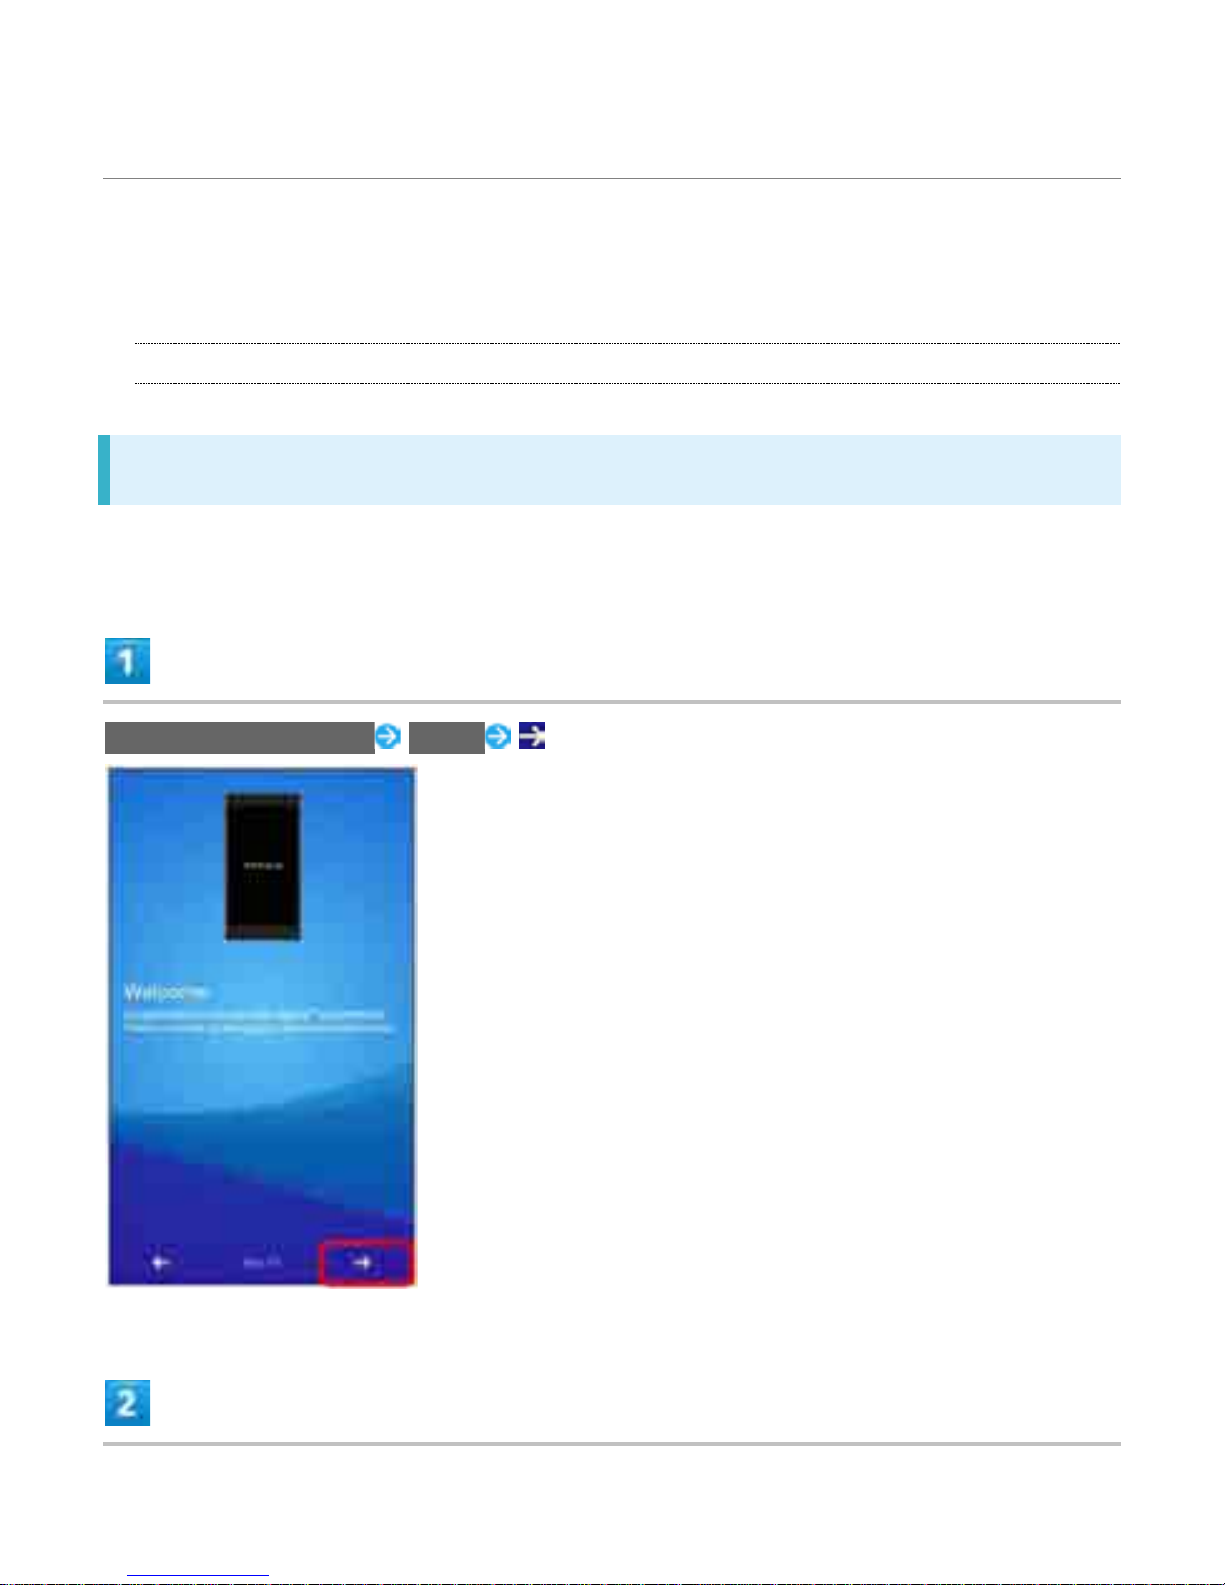
Initial Settings
Startup wizard appears the first time handset is powered on. Set a GoogleTMaccount
and Wi-Fi. Follow onscreen instructions.
Ð
Making Initial Settings
Making Initial Settings
Some steps are different in use environment. Follow onscreen instructions.
English (United States) DONE
27
Page 35
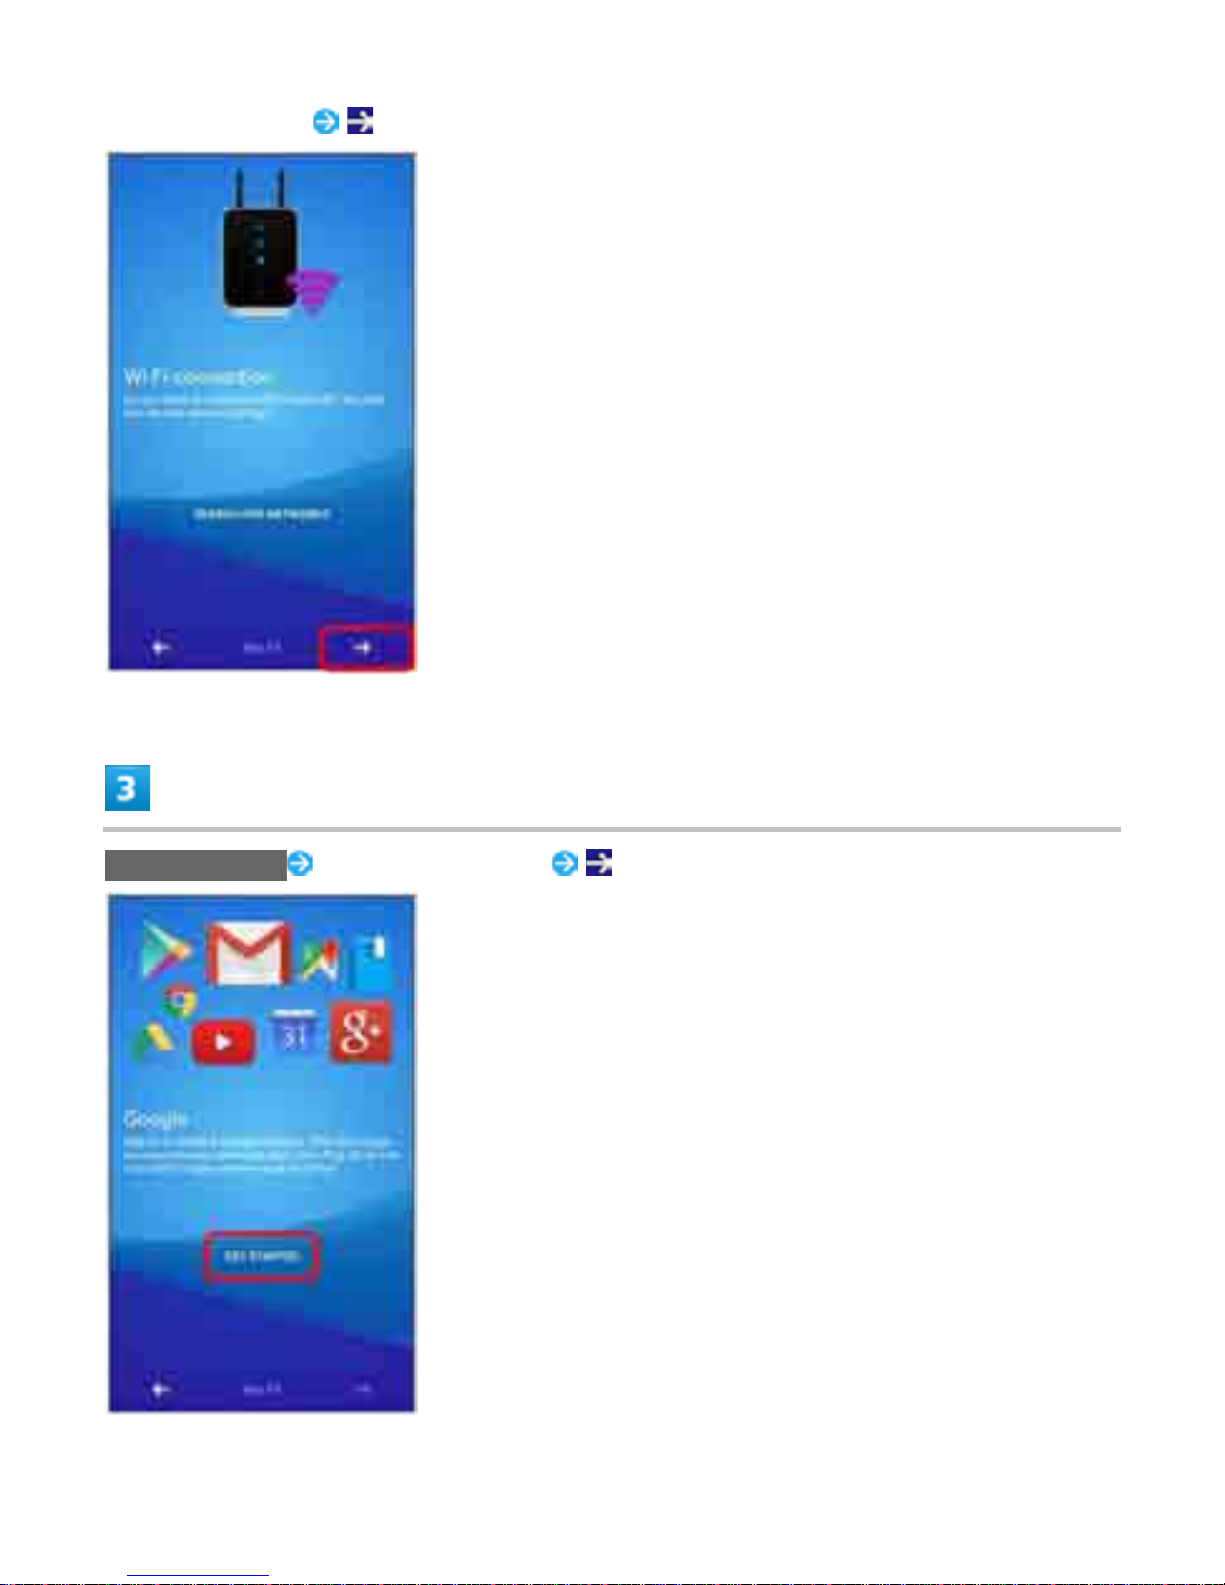
Set Wi-Fi network
GET STARTED Set Google account
28
Page 36
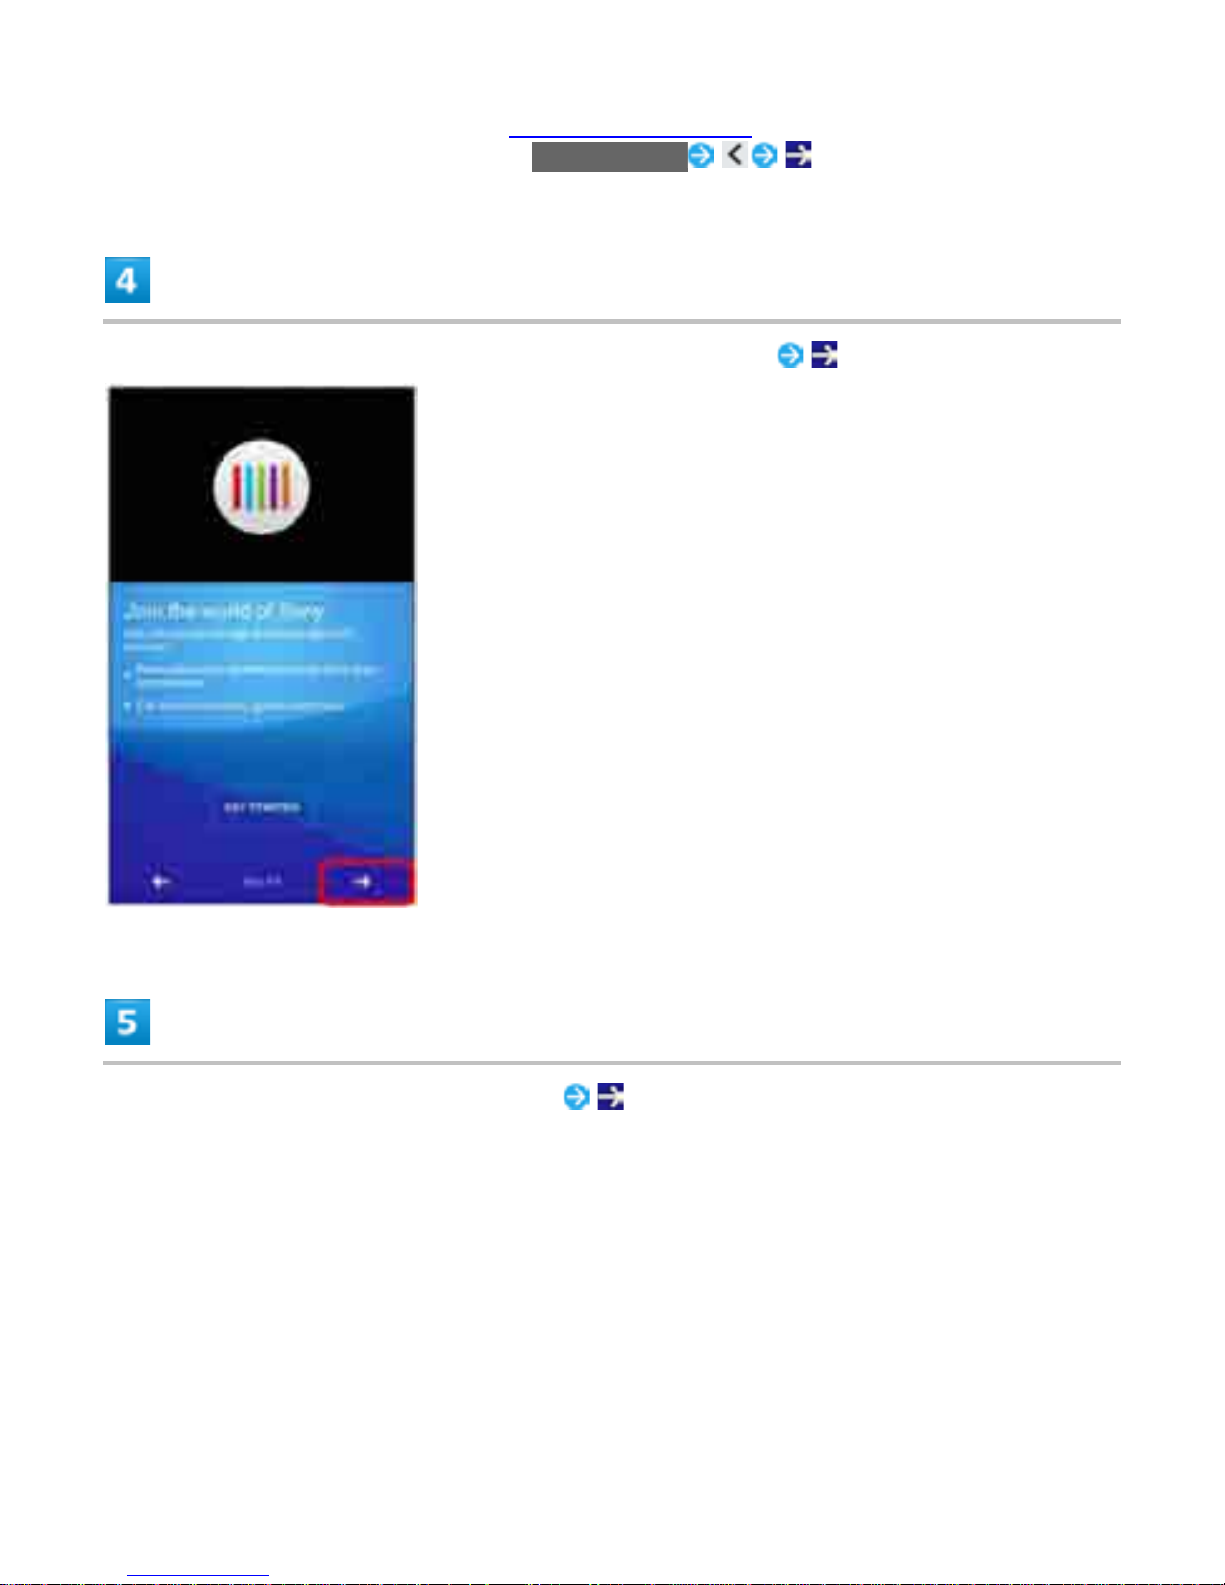
For details on Google account, see "Using a Google A ccount."
To cancel Google account setting, Tap GET STARTED .
Set world of Sony (Connect Sony Entertainment Network)
Set online service account or auto sync
29
Page 37
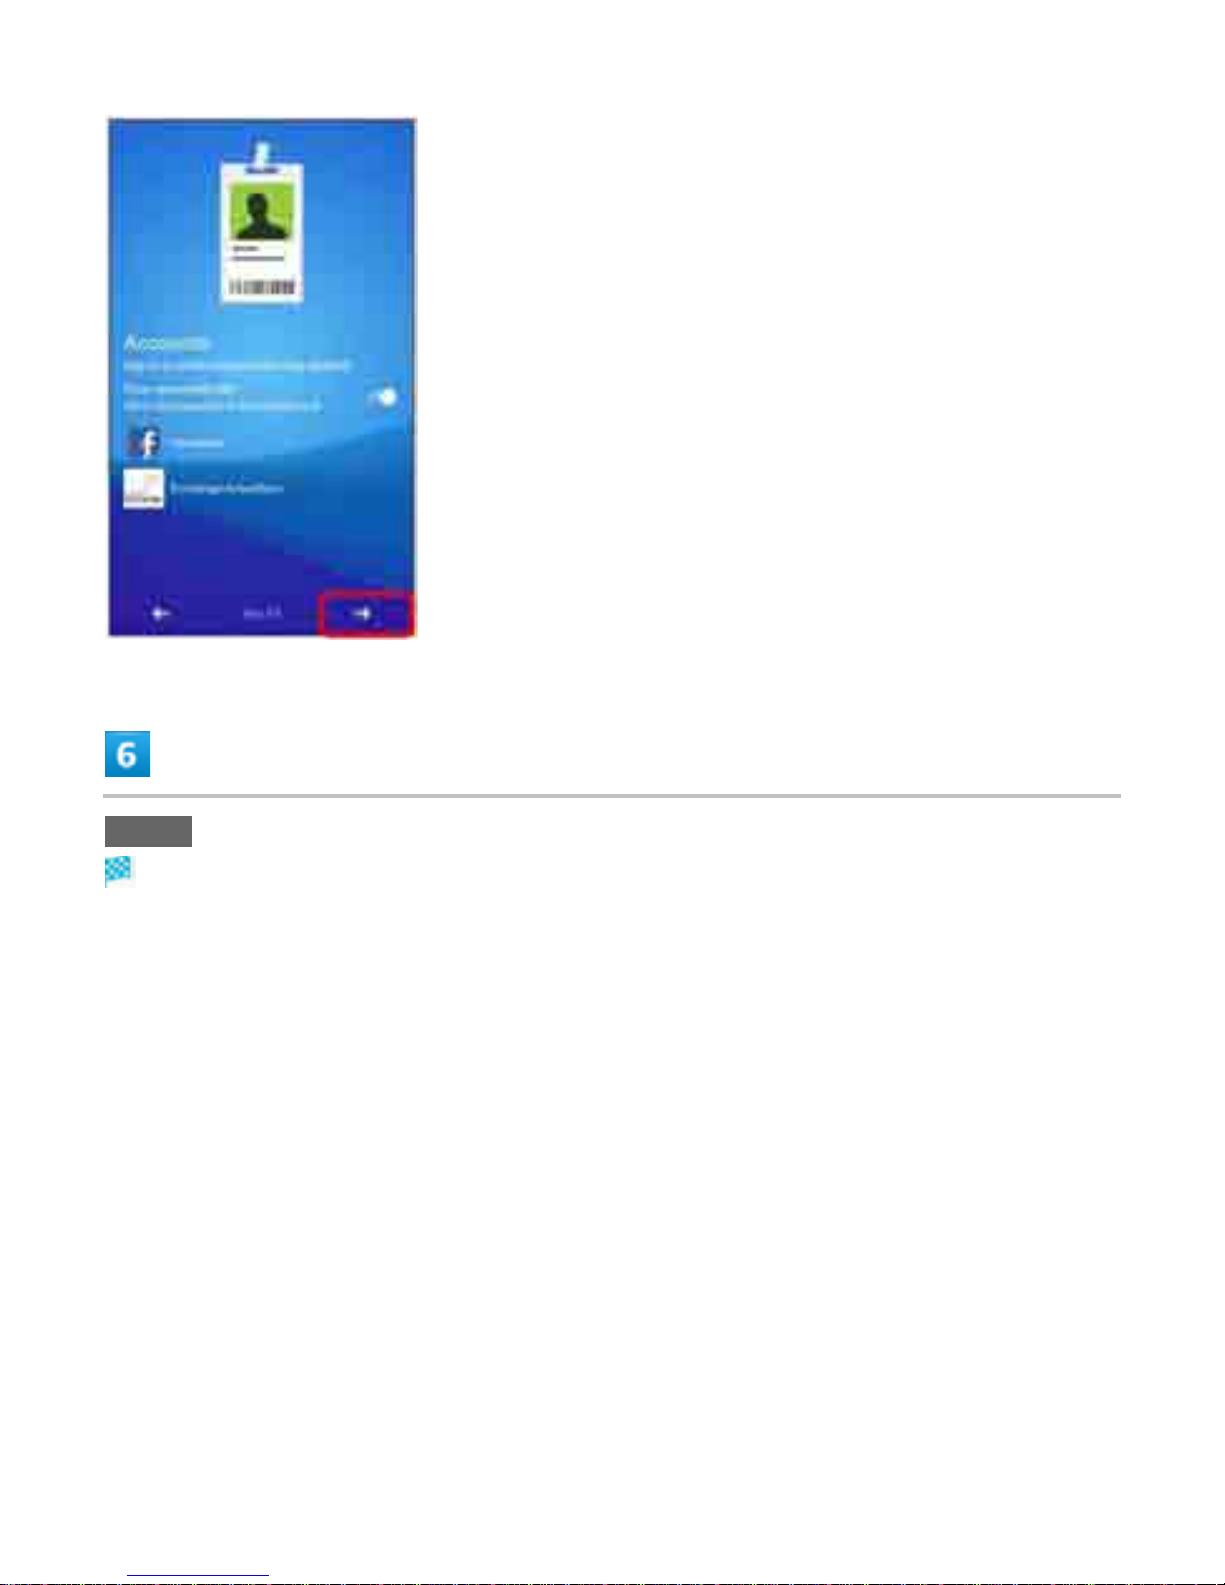
FINISH
Initial settings are made.
30
Page 38
Basic Operation
Ð
Home Screen & Applications List
Ð
Navigation Bar
Ð
Selecting Options and Navigating Screens
Ð
Menu Operations
Ð
Handset Settings and Making Settings
Ð
Portrait Orientation & Landscape Orientation
Ð
Capturing Screen shots
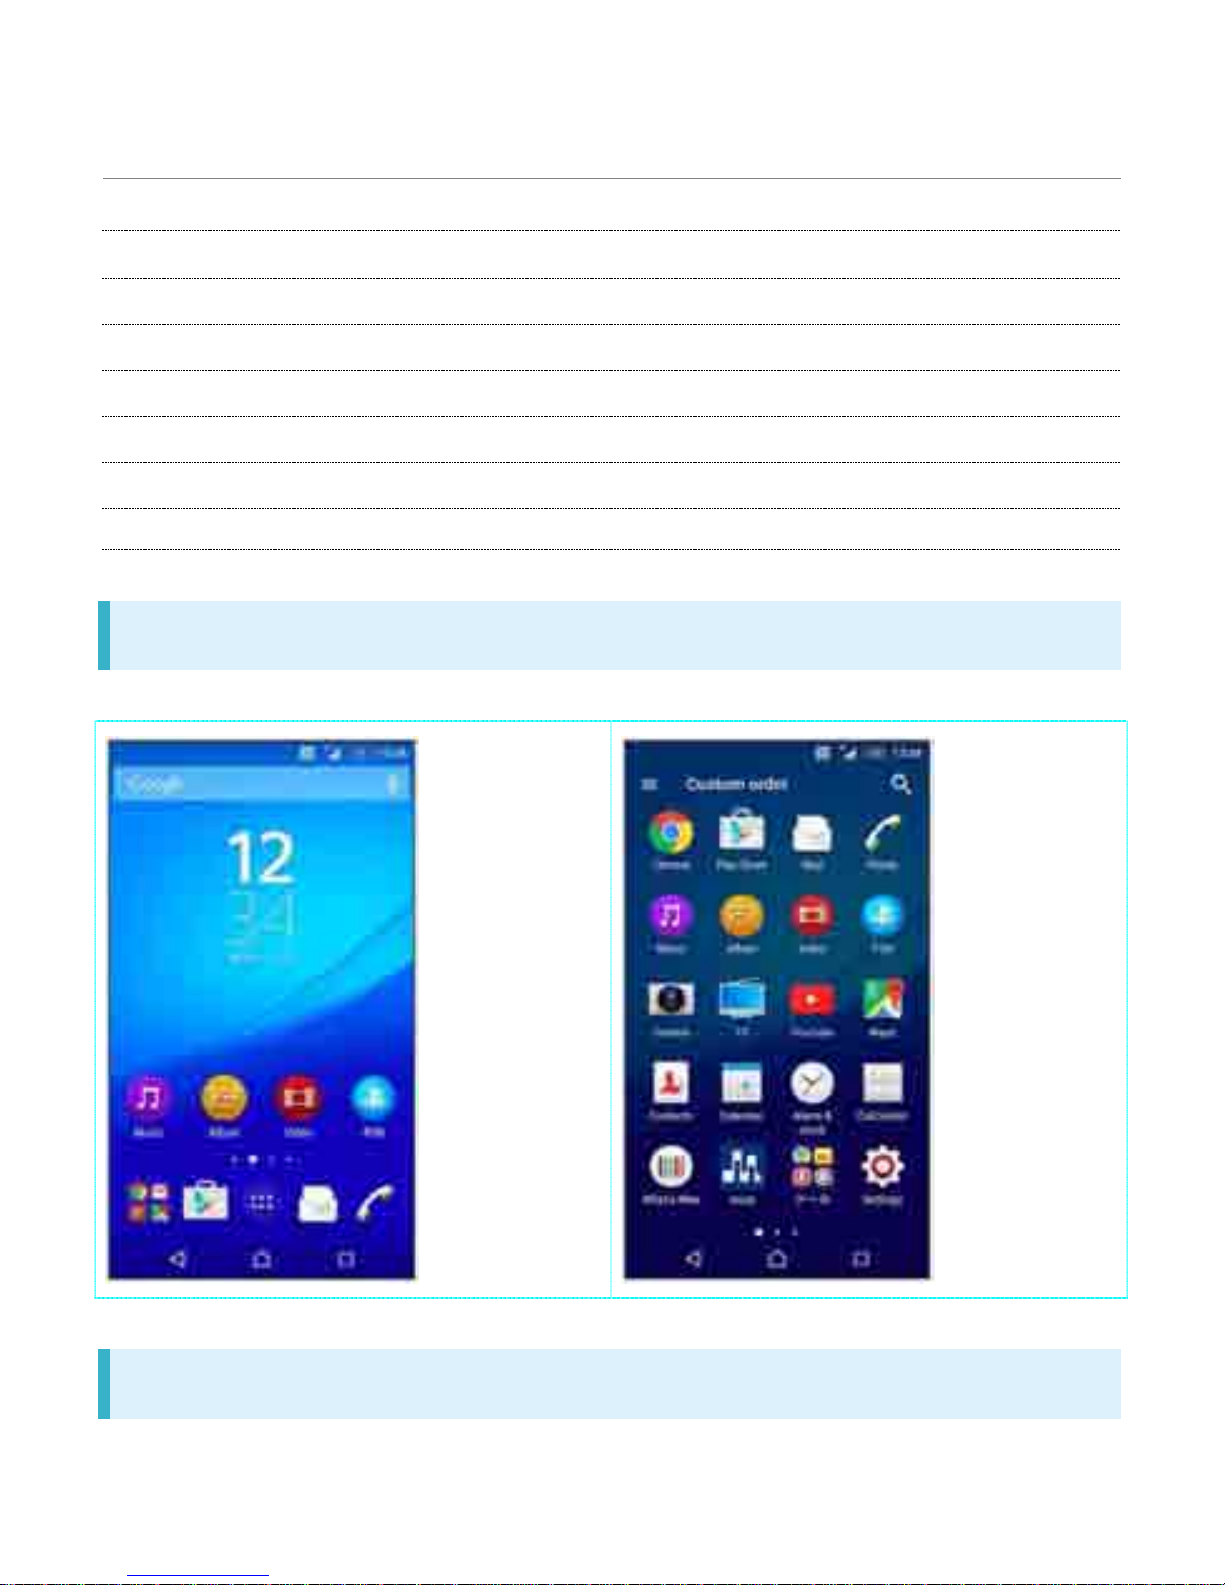
Home Screen & Applications List
Most handset operations start in Home Screen (appears at power on) or in Applications List.
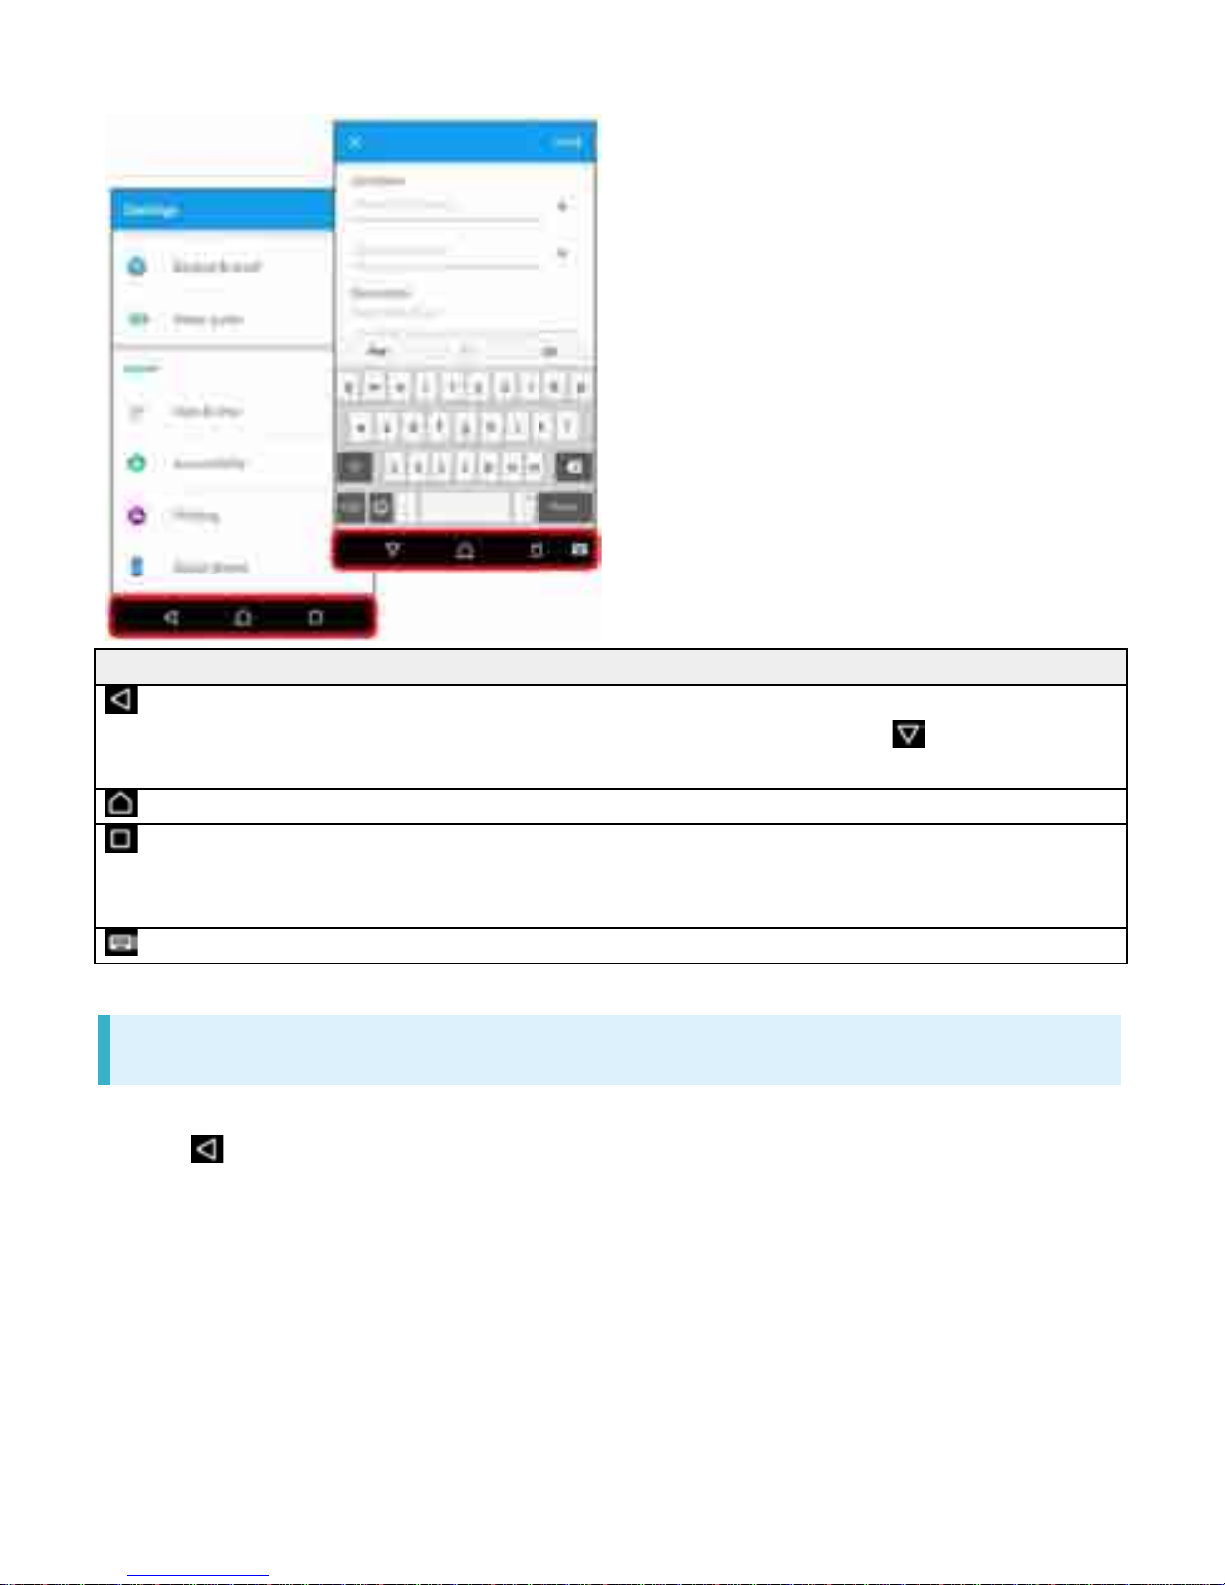
Navigation Bar
Key icons are shown in Navigation Bar at the bottom of window. Tap Key icon to operate.
1
Page 39
Item Description
(Back) Go back to previous screen. When keyboard is
displayed, this changes to . Tap it to close
keyboard.
(Home) Go to Home Screen.
(History) Open recently-used applications list to launch or
delete the applications from the list. Or use or set
small apps.
(Keyboard) Change keyboard.
Selecting Options and Navigating Screens
Tap items, icons, onscreen keys, etc. to open assigned items.
Tap to go back to previous screen.
2
Page 40
Menu Operations
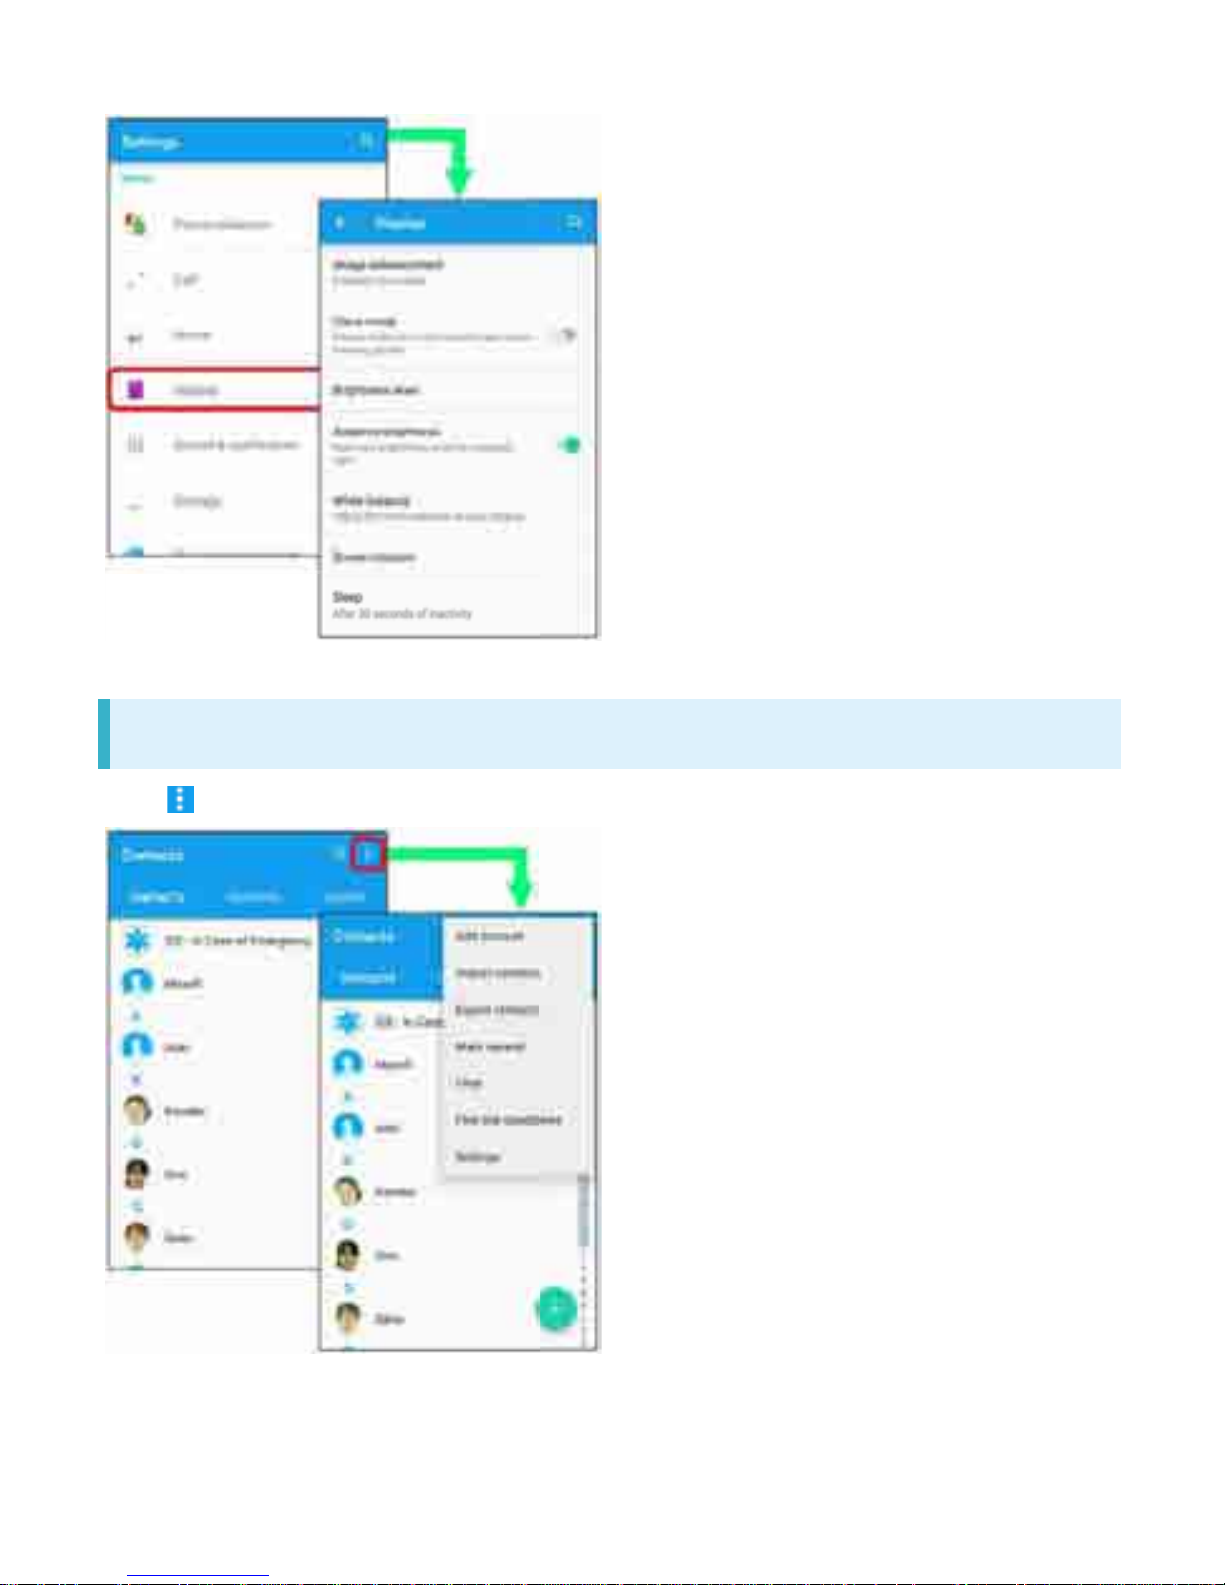
Tap for available settings and items.
Screens may also have settings and items that are available by Touching & Holding Display.
3
Page 41
Handset Settings and Making Settings
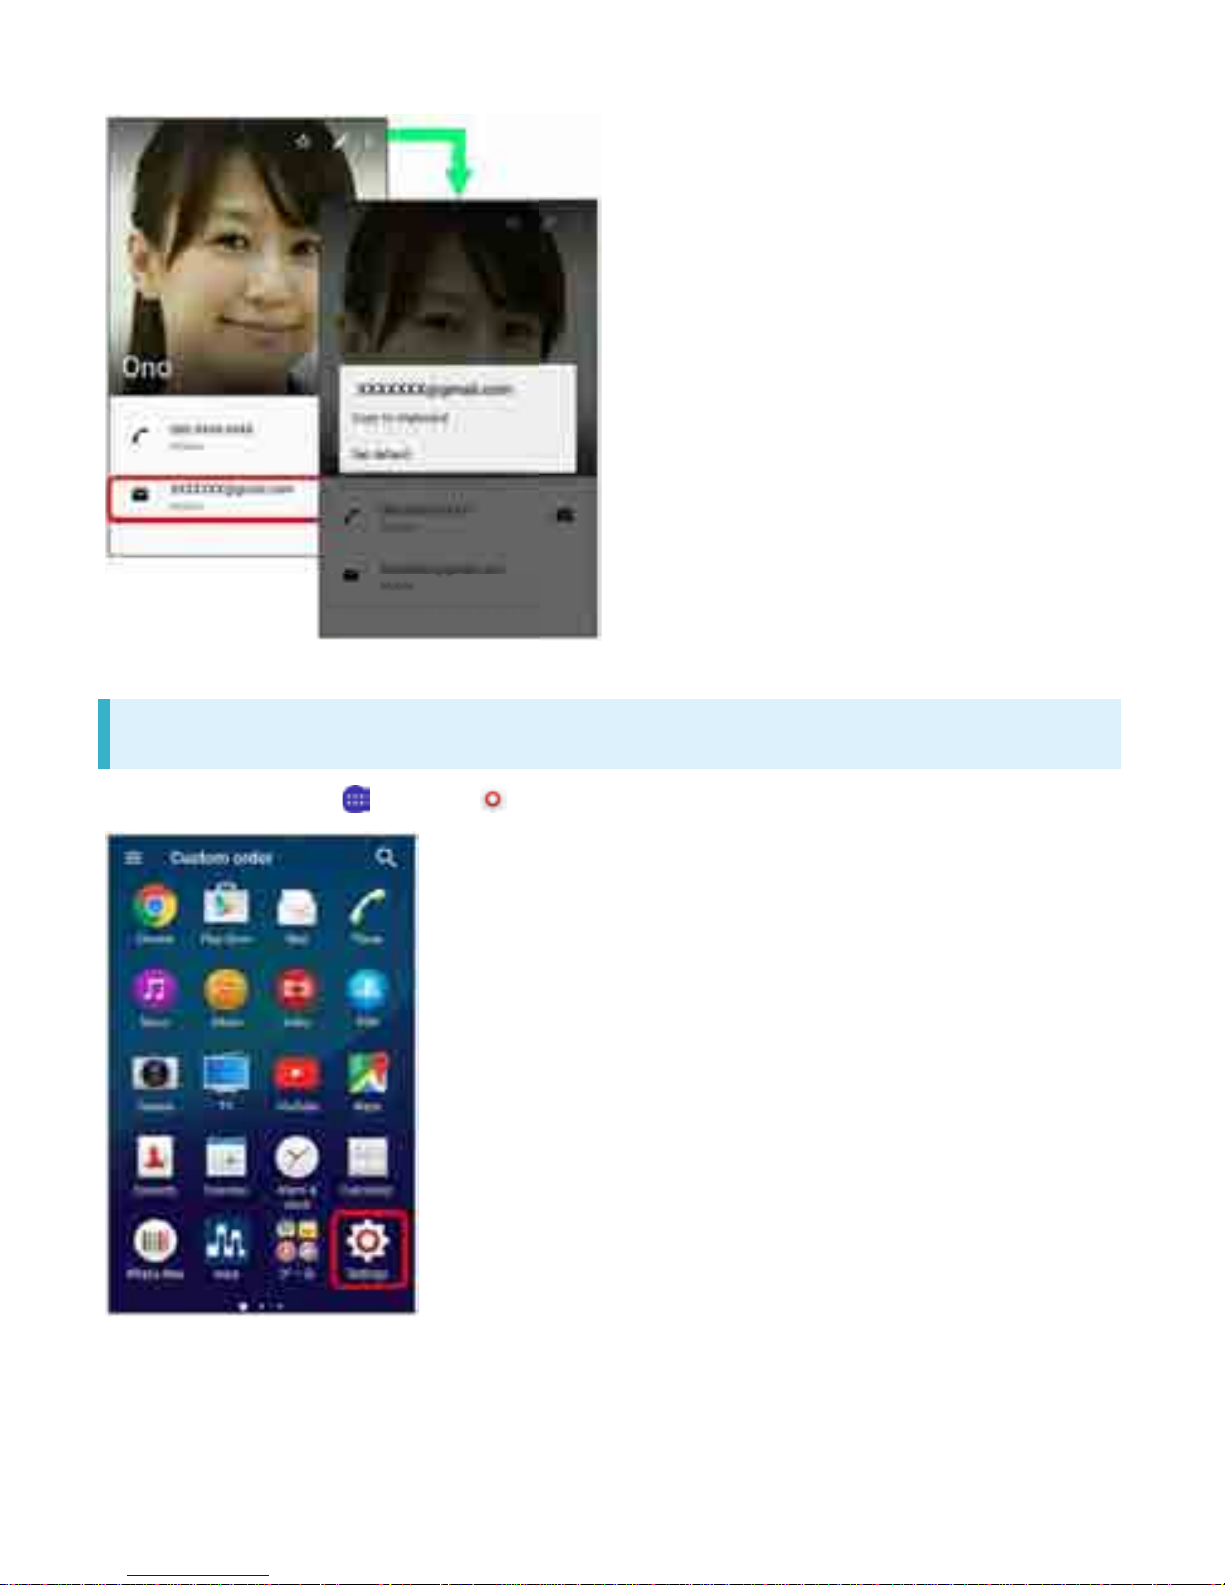
In Home Screen, Tap then Tap (Settings) to customize the operation of handset functions.
4
Page 42
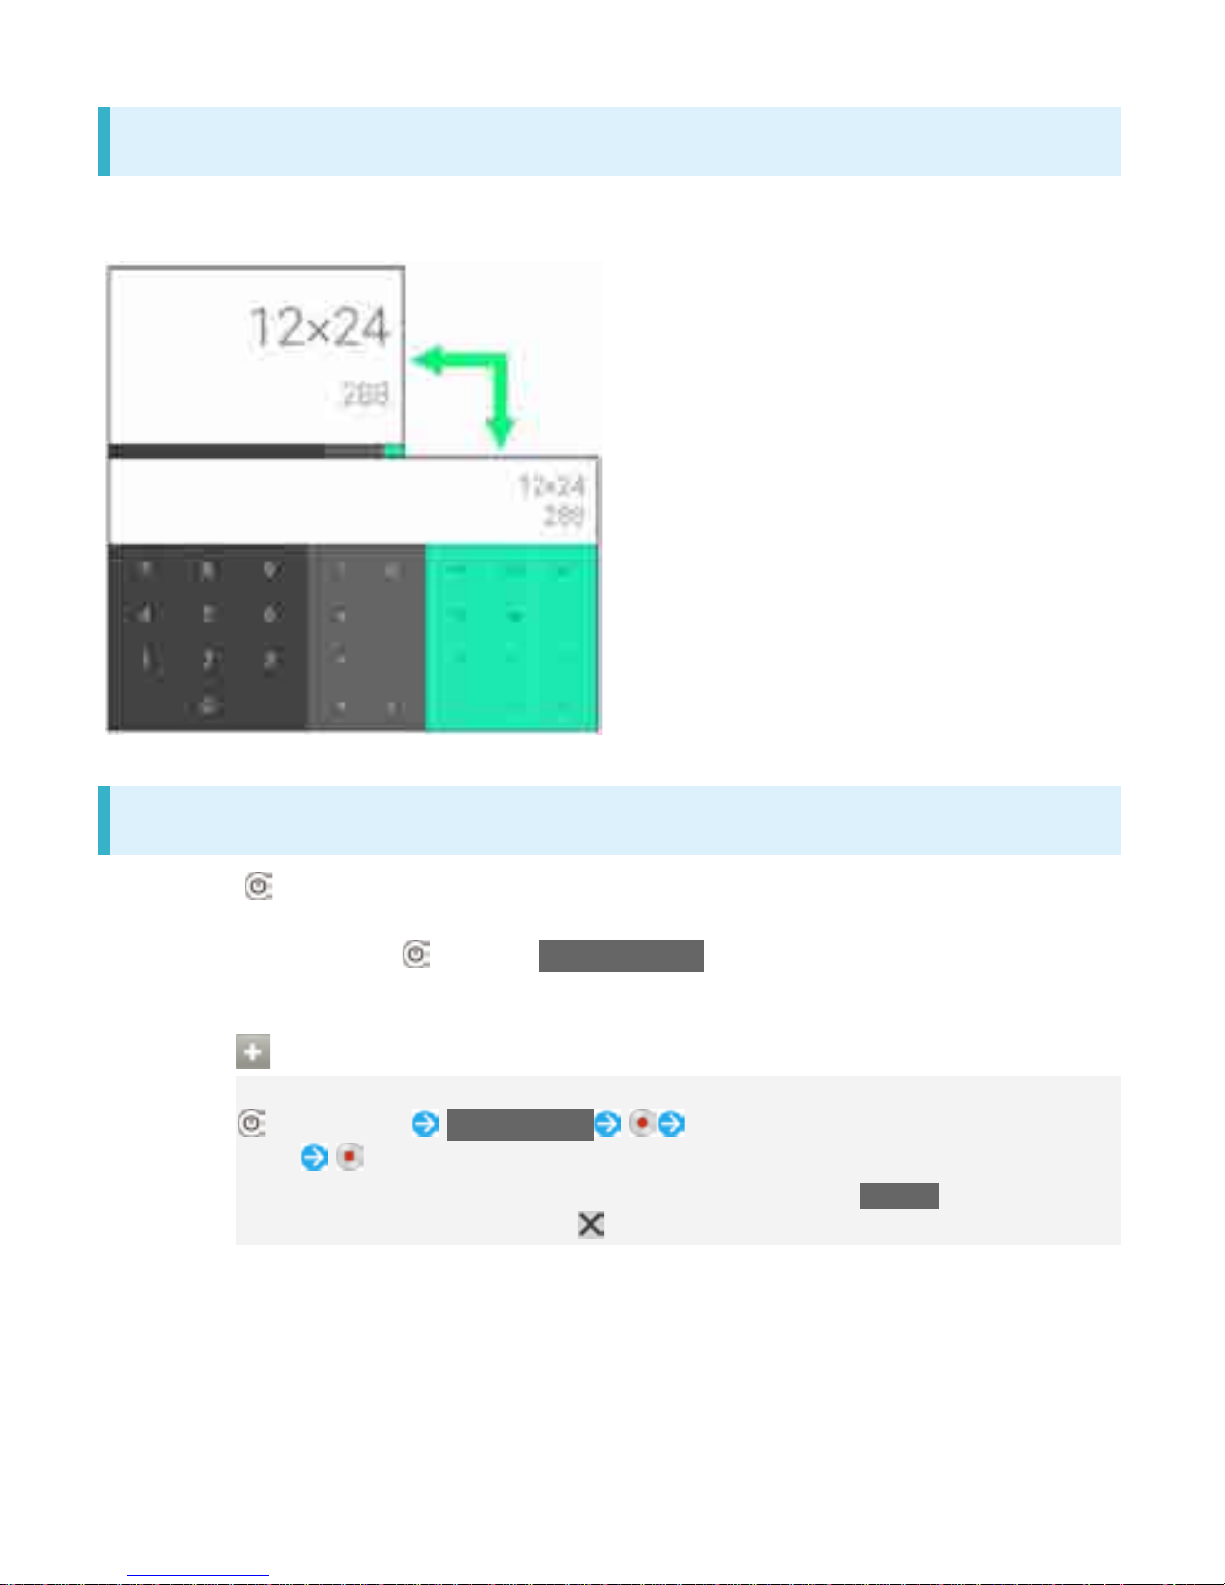
Portrait Orientation & Landscape Orientation
The screen changes to portrait orientation when handset is rotated sideways.
Depending on the current screen, the orientation may not change.
Capturing Screenshots
Long Press and Volume Down Key at the same time to capture a screenshot of the current
screen.
Alternatively, Long Press then T ap Take screenshot on the screen.
View captured screenshots in Screenshots folder in Album, etc.
Capturing Screen Video
Capture shown screen as a video.
(Long Press) Record screen To stop capturing, Tap the recording time
button
If terms of agreement appears, confirm the content and Tap AGREE.
To close the control panel, Tap .
5
Page 43
Applications
Ð
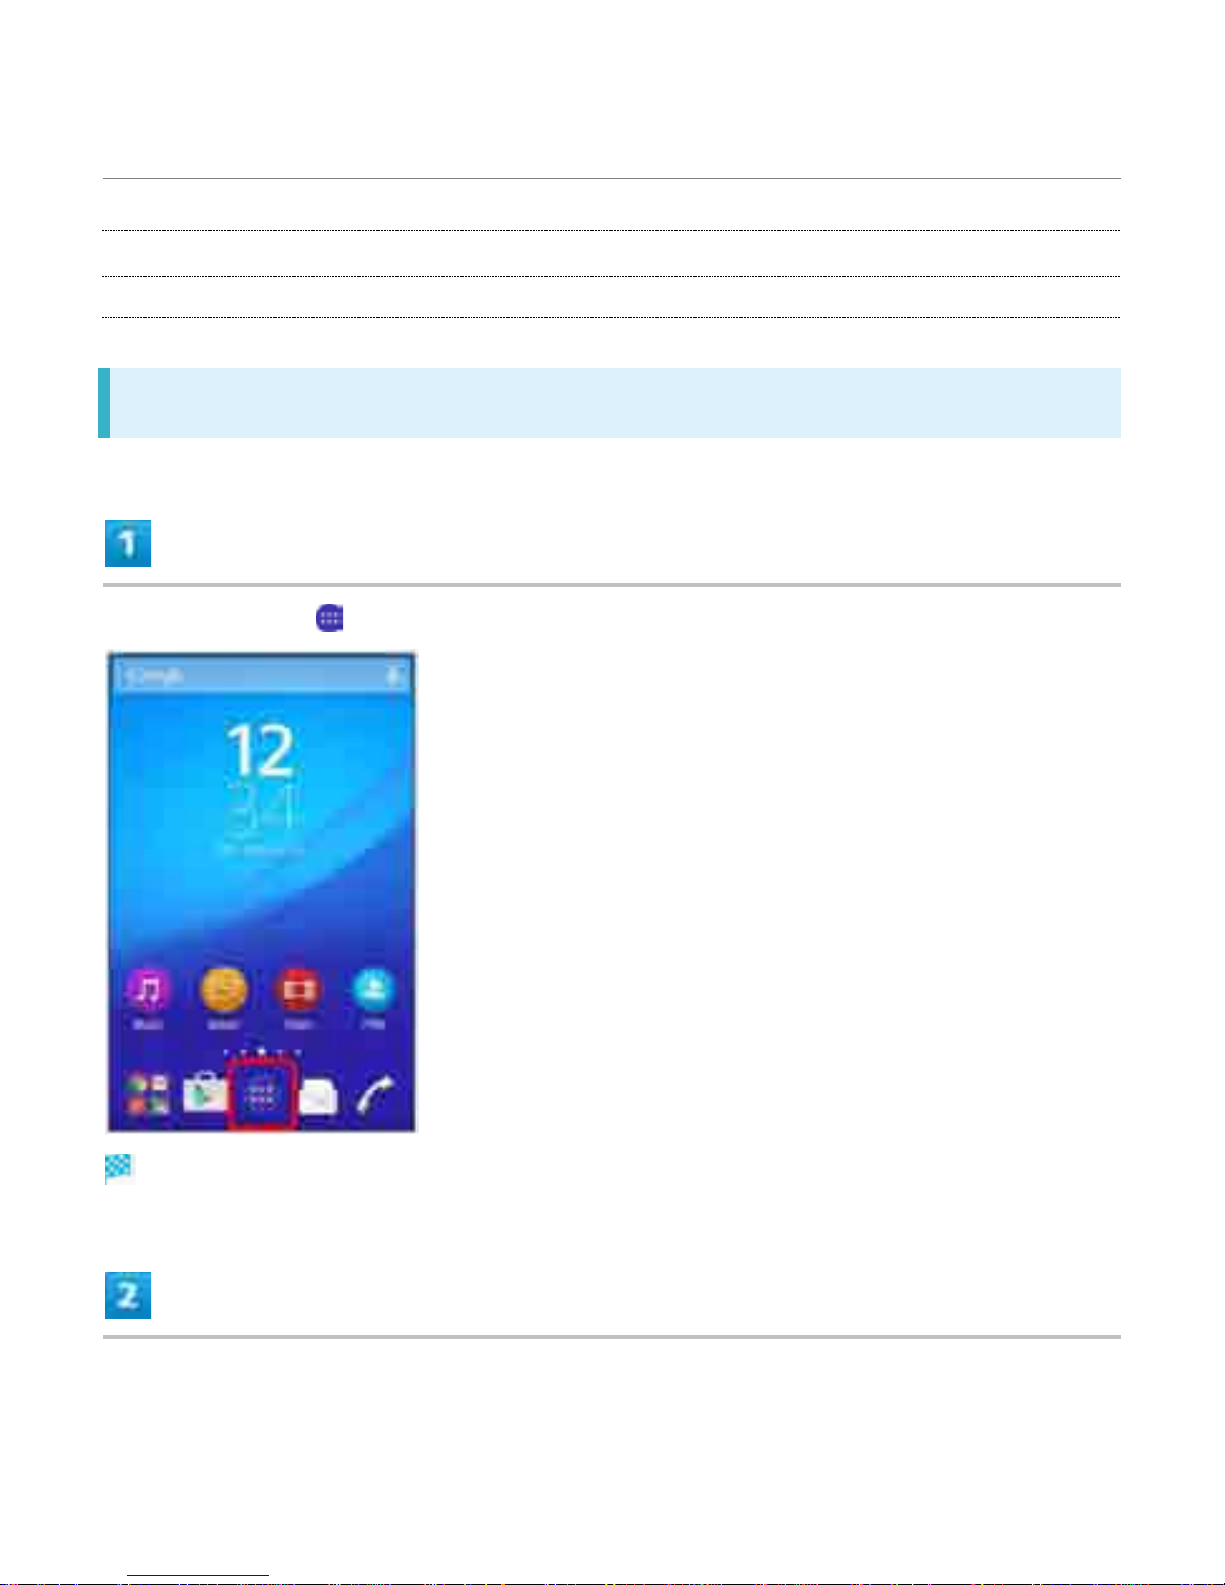
Launching Applications
Ð
Applications List
Launching Applications
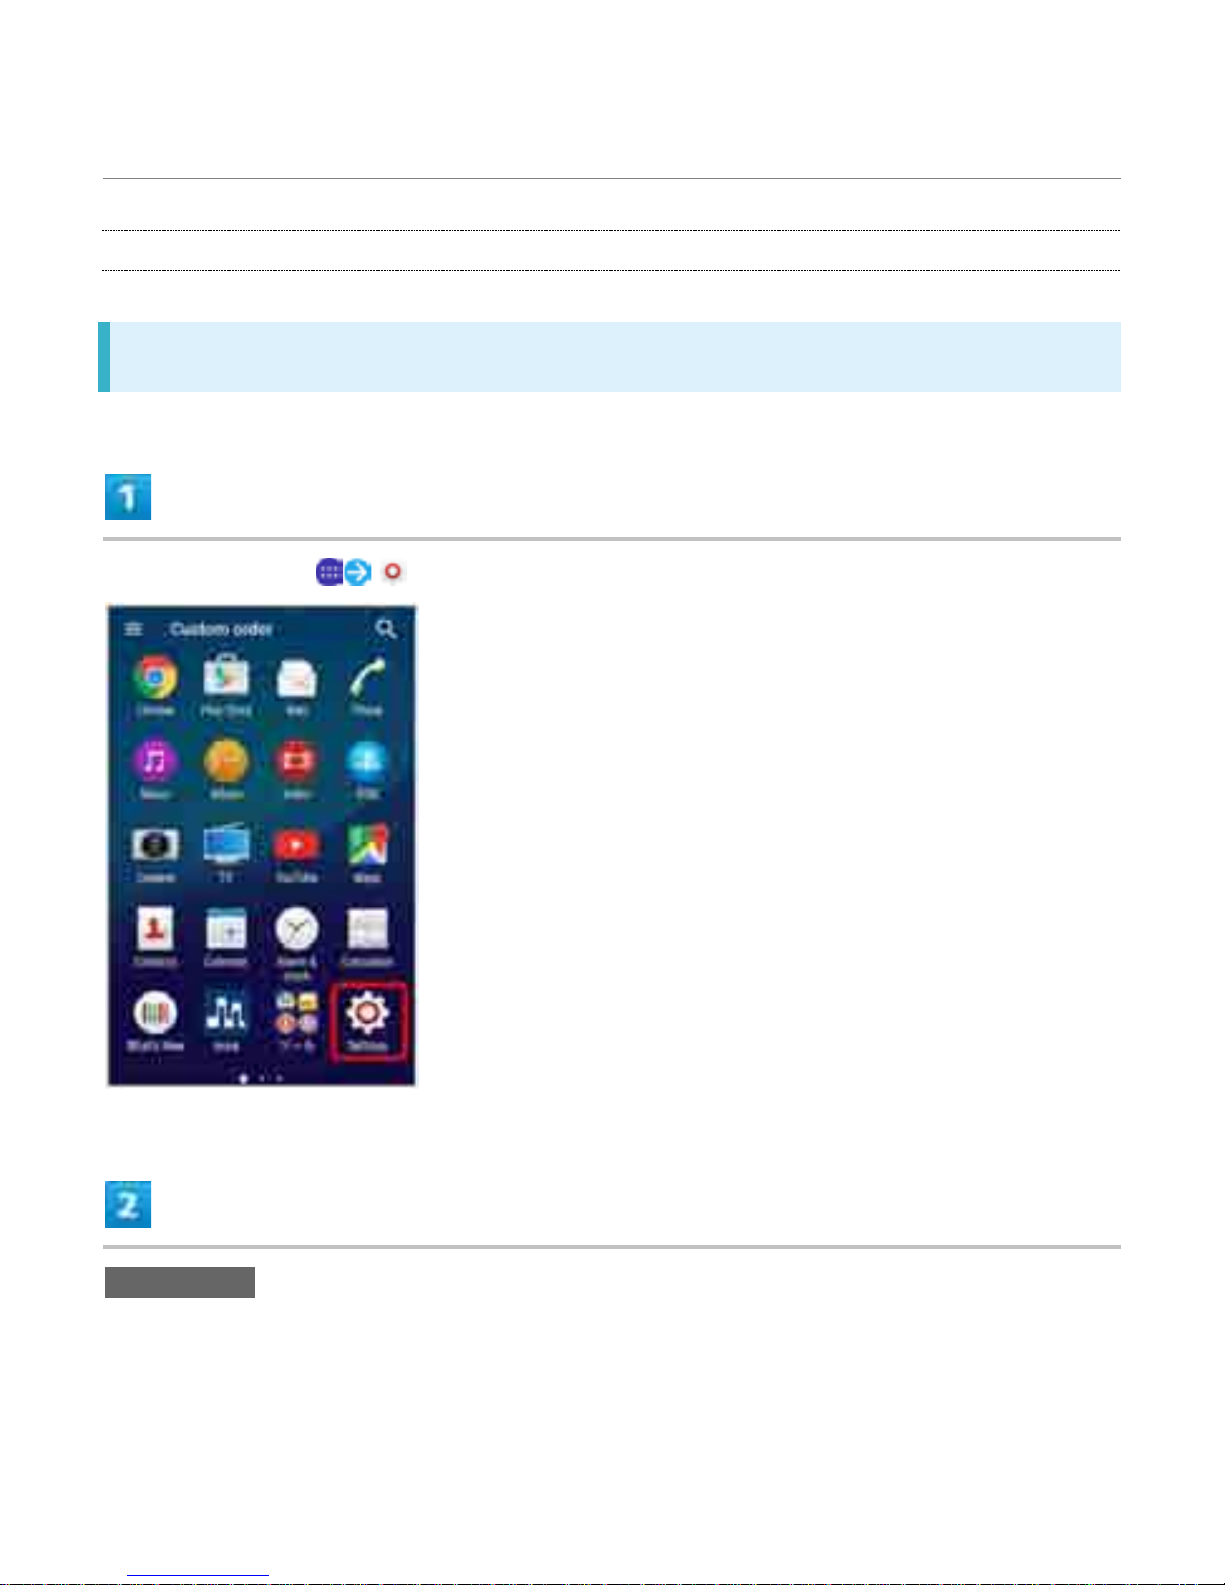
In Home Screen,
Applications list opens.
Tap the application
6
Page 44
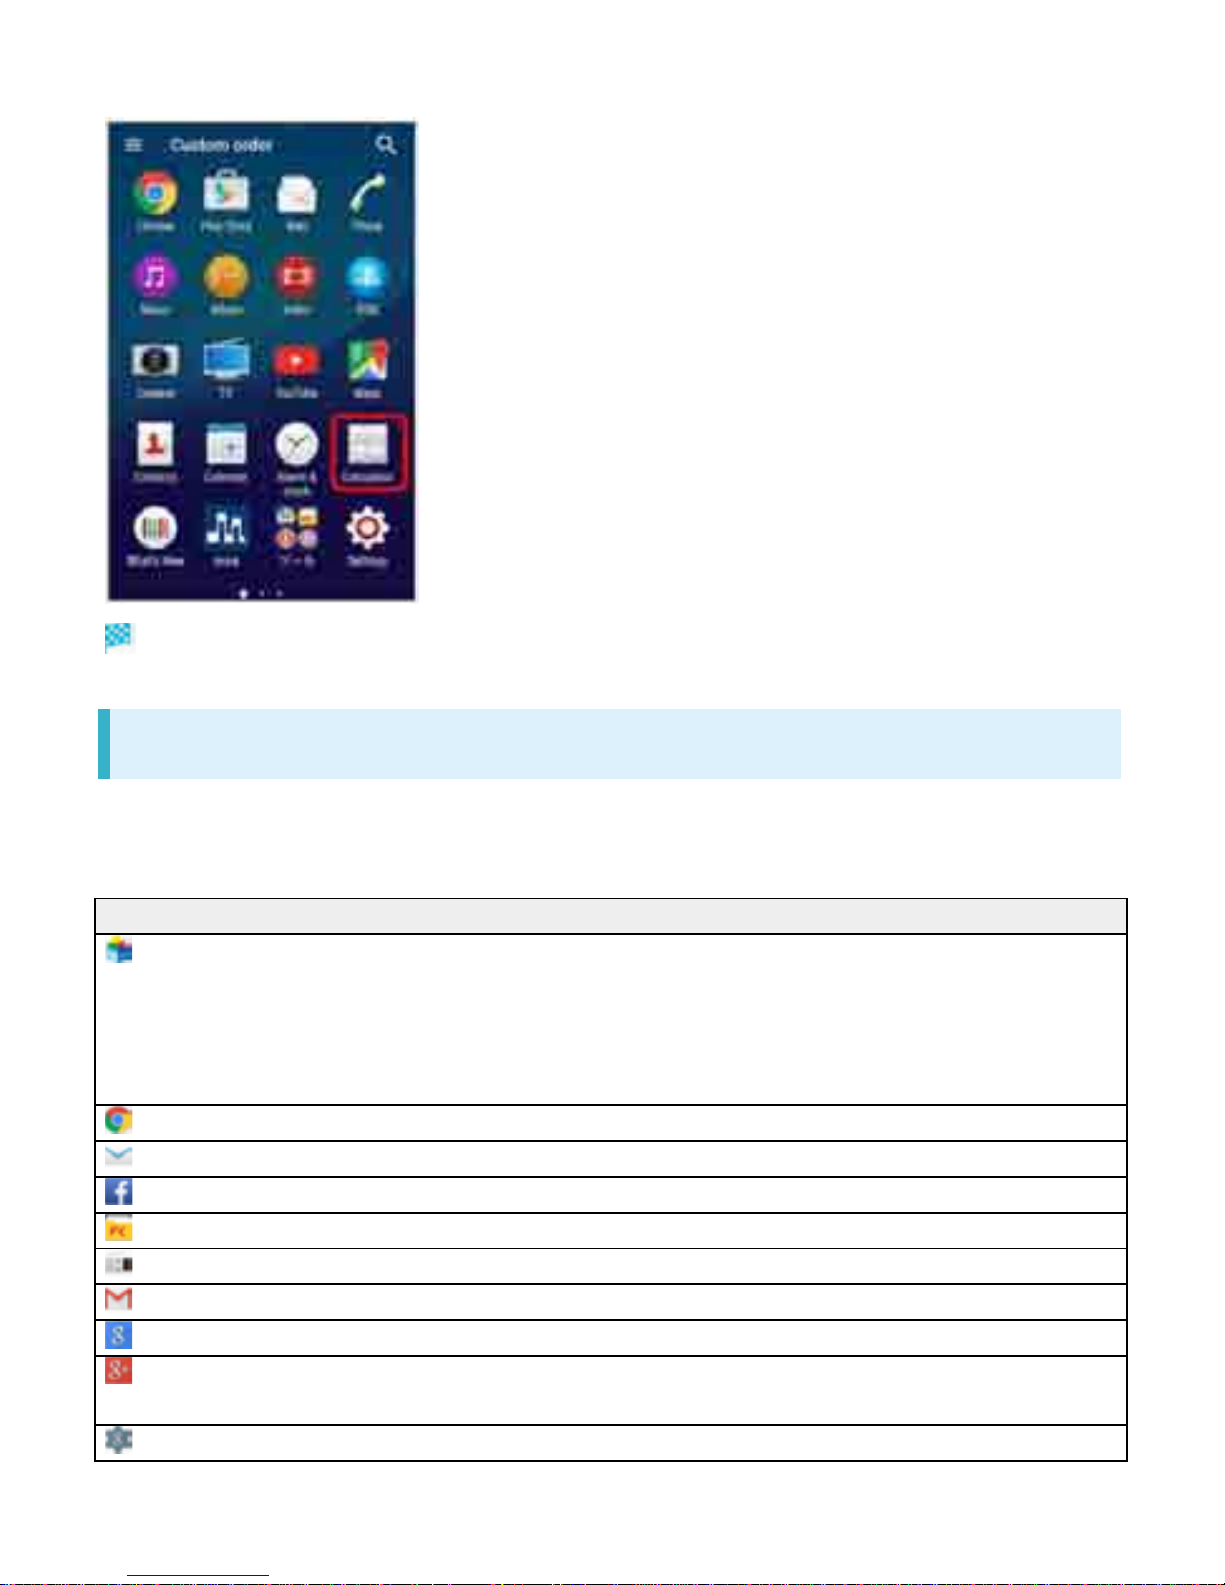
Application is activated.
Applications List
Applications pre-installed by default are as follows.
In Applications list, some applications are contained in "䝒䞊䝹," "Sony Service," "SoftBank" and "
Ᏻᚰ䞉Ᏻ" folders.
Icon Function/Service
(App Pass) All-you-can-download service application for top-rated and standard paid
applications in tool, entertainment, music, fortune-telling, game, lifestyle,
or business categories.
Receive perks such as free tickets for purchasing additional items every
month.
(Chrome) Access Internet via Google Chrome.
(Email) Send and receive emails. Multiple accounts can be set.
(Facebook) Launch Facebook client application.
(File Commander) Search for still images, videos, music, or downloaded files.
(FM radio) Use FM radio.
(Gmail) Send or receive mails for Google accounts.
(Google) Search on handset or web pages by keywords.
(Google+) Launch "Google+" social networking client application provided by
Google.
(Google Settings) Make settings for Google applications.
7
Page 45
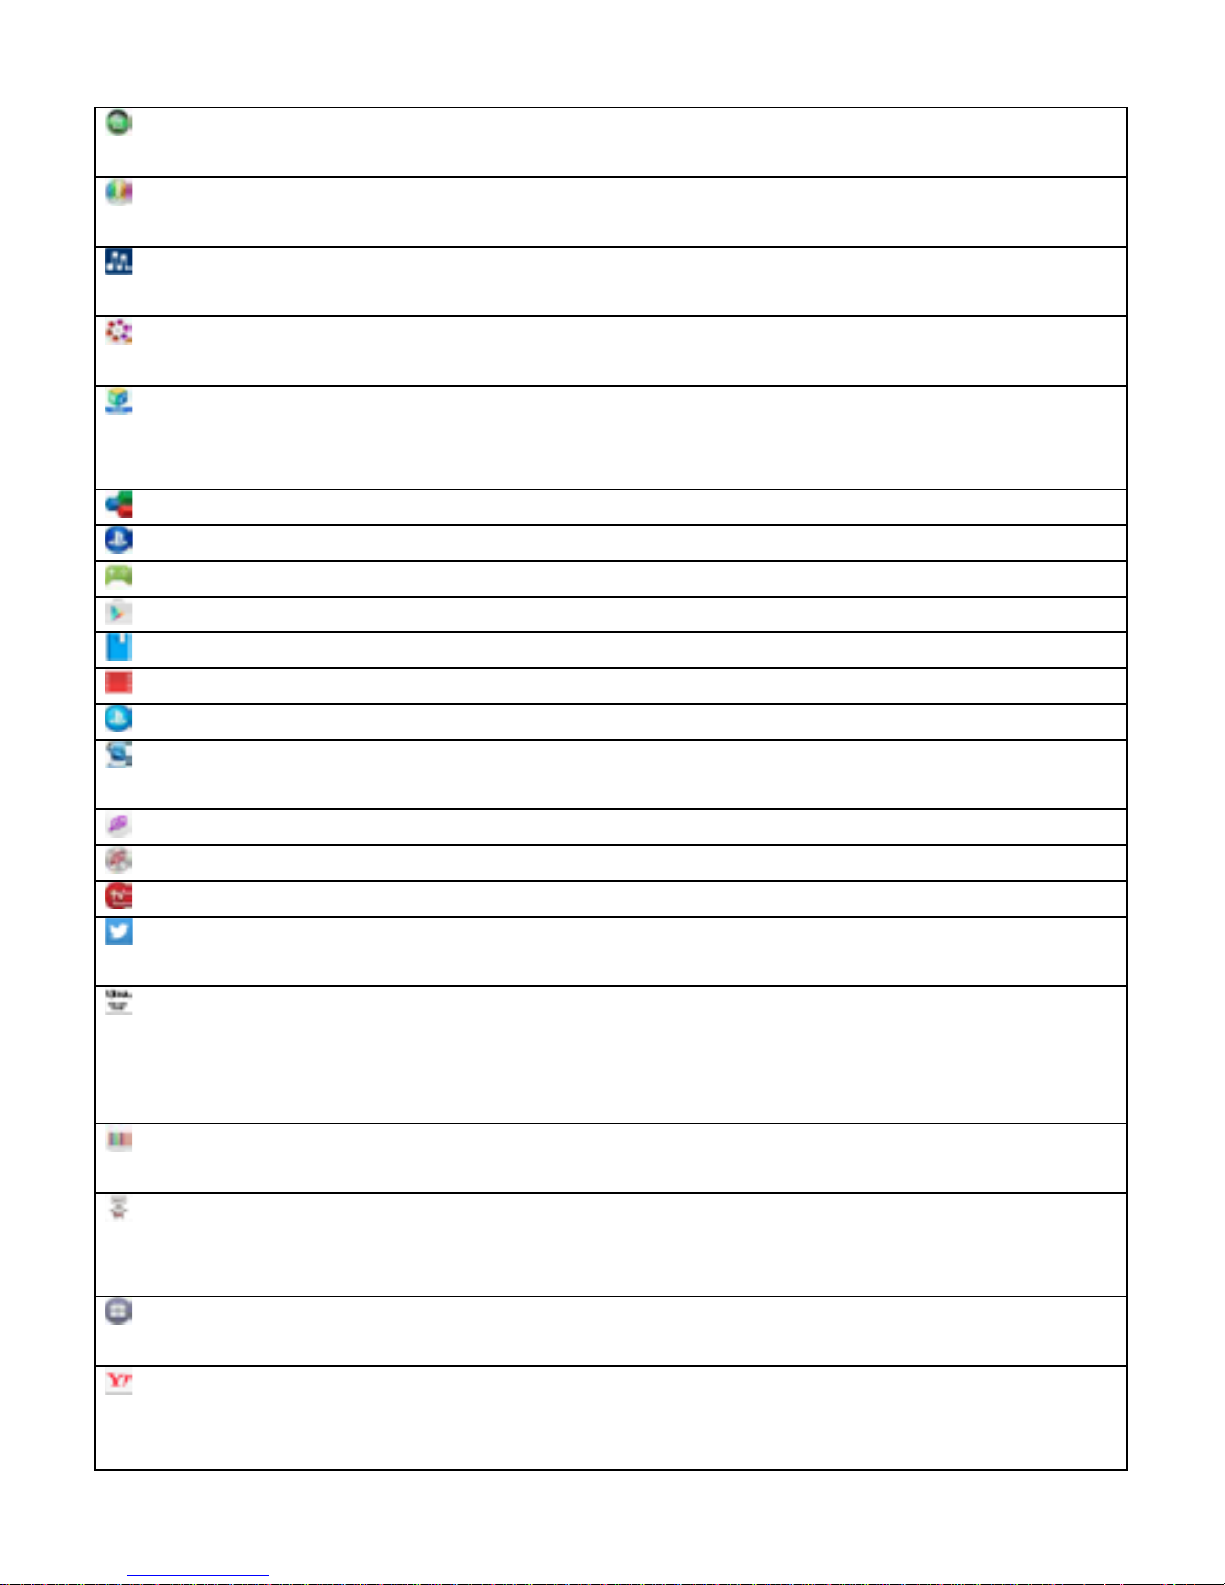
(Internet SagiWall) Protect handset from "one-click fraud" and other malicious web pages.
Alert window appears if dangerous web page is detected.
(Lifelog) Record user's daily activities such as number of steps, used calories,
shooting, and music listening with handset.
(mora) Purchase music and music videos from Sony's high sound quality
download web store.
(Movie Creator) Automatically create and edit photo movies from capture photos and
videos.
(My SoftBank䝥
䝥䝷䝇
) Guide application providing useful informatio n from So ftBa nk.
Check your charges, convenient handset features, and recommended
products/contents.
(OfficeSuite) View and edit Word, Excel, and other files.
(PlayStation) Connect to PlayStation and operate or enter text with PlayStation.
(Play Games) Download games from Google Play.
(Play Store) Download or purchase a variety of applications from Google Play.
(Play Books) Download books from Google Play.
(Play Movies & TV) Rent Google Play movies.
(PSN) Use PlayStation™ Network services.
(Smart Connect™) Set operations for connecting external device or activating/ending
applications.
(TrackID™) Recognize music played and search the title and artist name.
(TrackID™ TV) Check information for currently showing TV program.
(TV SideView) Use handset as remote controller for Sony TV.
(Twitter) Tw itter of ficial client application for publishing short messag es on
websites to share with others.
(UULA) All-you-can-view general entertainment application offering more than
100,000 contents in various categories such as popular movies, dramas,
animes, music videos, live performances, and karaoke; Original UULA
contents are also available.
(What's New) Check latest information for music, movies, or update information for
applications.
(Wi-Fi Spot
Settings)
Enable login to SoftBank Wi-Fi Spot automatically in SoftBank Wi-Fi Spot
area.
Subscription to SoftBank Wi-Fi Spot service is needed.
(Xperia™ Lounge
Japan)
Access web pages for Sony Mobile Communications products and
campaigns.
(Yahoo!) Activ ate Yahoo! JAPAN for sm artph ones. Various search menus such as "
䝸䜰䝹䝍䜲䝮᳨⣴" (real time search) for catching "tweets."
Also, check news, weather, disaster, or other information.
8
Page 46
(YouTube) Play videos on YouTube.
(AnimeHodai) All-you-can-view popular anime programs: old favorites, latest on the air,
and more.
(Alarm & clock) Set and use alarms, world clock, stopwatch and timer.
(Album) View still images and videos.
(䛒
䛒䜣䛧䜣䝞䝑䜽䜰䝑䝥
) Save handset data for Contacts/Bookmarks/Calendar/S! Mail to the cloud
server or SD Card, or load the server data to your handset.
Convenient when changing models.
(
⨨䝘䝡
Link) Let others find your handset location.
Requires subscription to optional ⨨䝘䝡 service.
(Osaifu-Keitai) Use Osaifu-Keitai®.
(Voice Search) Use Google Voice Search.
(Audio Recorder) Record voice or music in high sound quality.
(Camera) Capture photos or videos.
(Calendar) View calendar to manage events.
(Urgent News) Receive Earthquake Early Warning or Tsunami warning delivered by the
Meteorological Agency.
If the warning is r eceived w hen y ou are in th e tar get ar ea, h andset s oun ds
an alert, vibrates, and a message appears.
Disaster/evacuation information can also be received from the national
and local governments.
(Menu List) Comprehensive navigation site introducing official sites and applications
that SoftBank Corp. recommends. Easily search various contents such as
music, games, videos from special topics updated every day, "䜹䝔䝂䝸,"
"᪂╔," "䝷䞁䜻䞁䜾," etc.
(Disaster Message
Board)
Post, view, and delete whereabouts information in the event of a major
disaster, such as a "6ᙅ" (roku-jyaku, "6 Lower") or larger earthquake.
And saved whereabouts information is automatically sent to specified
email address set in advance.
(Sketch) Create illustration or load photo image and edit it.
(Smart Custom) Customizing applicatio n for Android devices that enables download of
applications, widgets, wallpapers, and ringtones as a package.
(Smart Security) "Smart Security powered by McAfee®" protects your handset from viruses
or leakage of personal information.
Eliminate virus via infected installed application, email attachment files, or
SD Card. Also, rate personal information that can be handled by
applications.
(
䝇䝬䝖䝢
) Free information service providing news and entertainment information.
More than 100 special contents every day available only here such as
9
Page 47
important news, sports, entertainment, and gossip.
(䝇
䝇䝬䝩Ᏻᚰ䝃䞊䝡䝇
) Protect young people from inappropriate sites or harmful applications for
more secure smartphone use. Use paid options to limit usage time or
check usage status/location.
(Settings) Make handset settings.
(Downloads) View downloaded file list.
Rearrange files listed in chronological order to in file size order, select,
and delete downloaded files.
(Guide) Check how to use SoftBank smartphone operations.
Also view User Guide for handset, and access FAQ web page.
(Tethering) Application for using 4G compatible smartphone as mobile Wi-Fi router.
To use the feature, subscription to Tethering option is needed.
(TV) View TV .
(
㟁Ꮚ᭩⡠
Reader
by Sony)
Purchase e-books from Sony eBook store "Reader Store."
(Calculator) Perform basic and other operations.
(Phone) Place calls or make call settings.
(TokuHodai) All-you-can-use premium discount shopping sites of food, leisure, travel,
merchandise exchange tickets, electronic gift code draws, and more than
500,000 coupons/complimentary tickets.
(Drive) View and edit files saved in Google Drive.
(News from
Socialife)
View and manage social networks or news websites altogether.
(Hangouts) Send and receive messages using photos or pictograms. Voice calls and
video calls are also available.
(Video) Play back videos downloaded or transferred etc. Play back videos from
other devices on handset using Wi-Fi featur e .
(Photos) View photos or videos. Sign in to Google+ to back up photos and videos.
(Maps) Use Google map services such as positioning current location or
searching other places or route.
(Music) Play back music data saved in handset memory or SD Card.
(Mail) Use SMS/S! Mail on SoftBank smartphones.
Use "@softbank.ne.jp" or "@x.vodafone.ne.jp" mail address. Sending or
receiving of decorated mail or pictograms is available.
(Remote Support) Application for subscribers of 䜿䞊䝍䜲䛺䜣䛷䜒䝃䝫䞊䝖.
Use this application to share your screen and receive support for
operations, settings, etc.
(Contacts) Manage contacts.
10
Page 48
Operations on Applications List
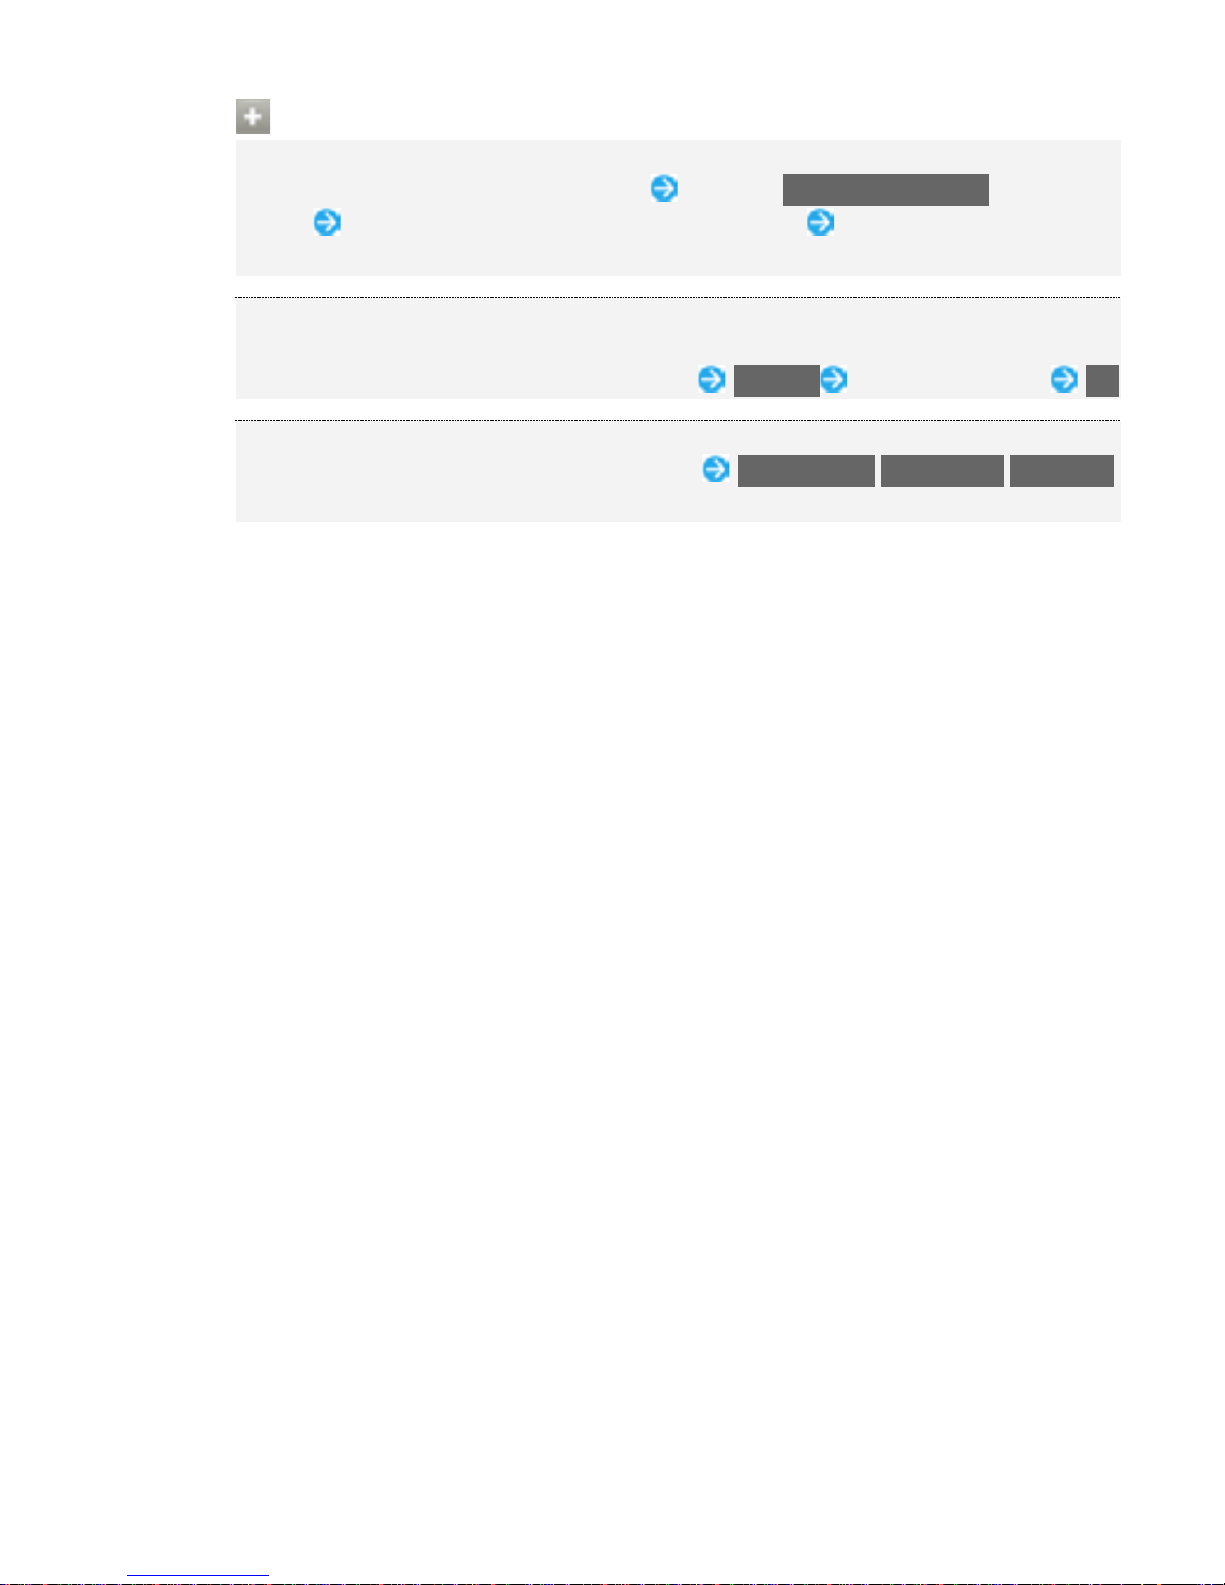
Adding Icon to Home Screen
In Applications List, Touch & Hold an icon Drag it to Add to Home screen at the top of
window Drag the icon anywhere in Home Screen area When Home Screen
appears, Drag it to desired position
Deleting Applications
Some application cannot be uninstalled.
Flick right from the left edge of Applications list Uninstall T ap an icon wi th "×" OK
Rearranging Icons
Flick right from the left edge of Applications list Custom or der/Alphabetical/Most used
With "Custom order" set, Touch & Hold an icon to rearrange to desired position.
11
Page 49
Phone Number
Ð
Checking Your Phone Number
Checking Your Phone Number
In Home Screen, (Settings)
About phone
12
Page 50
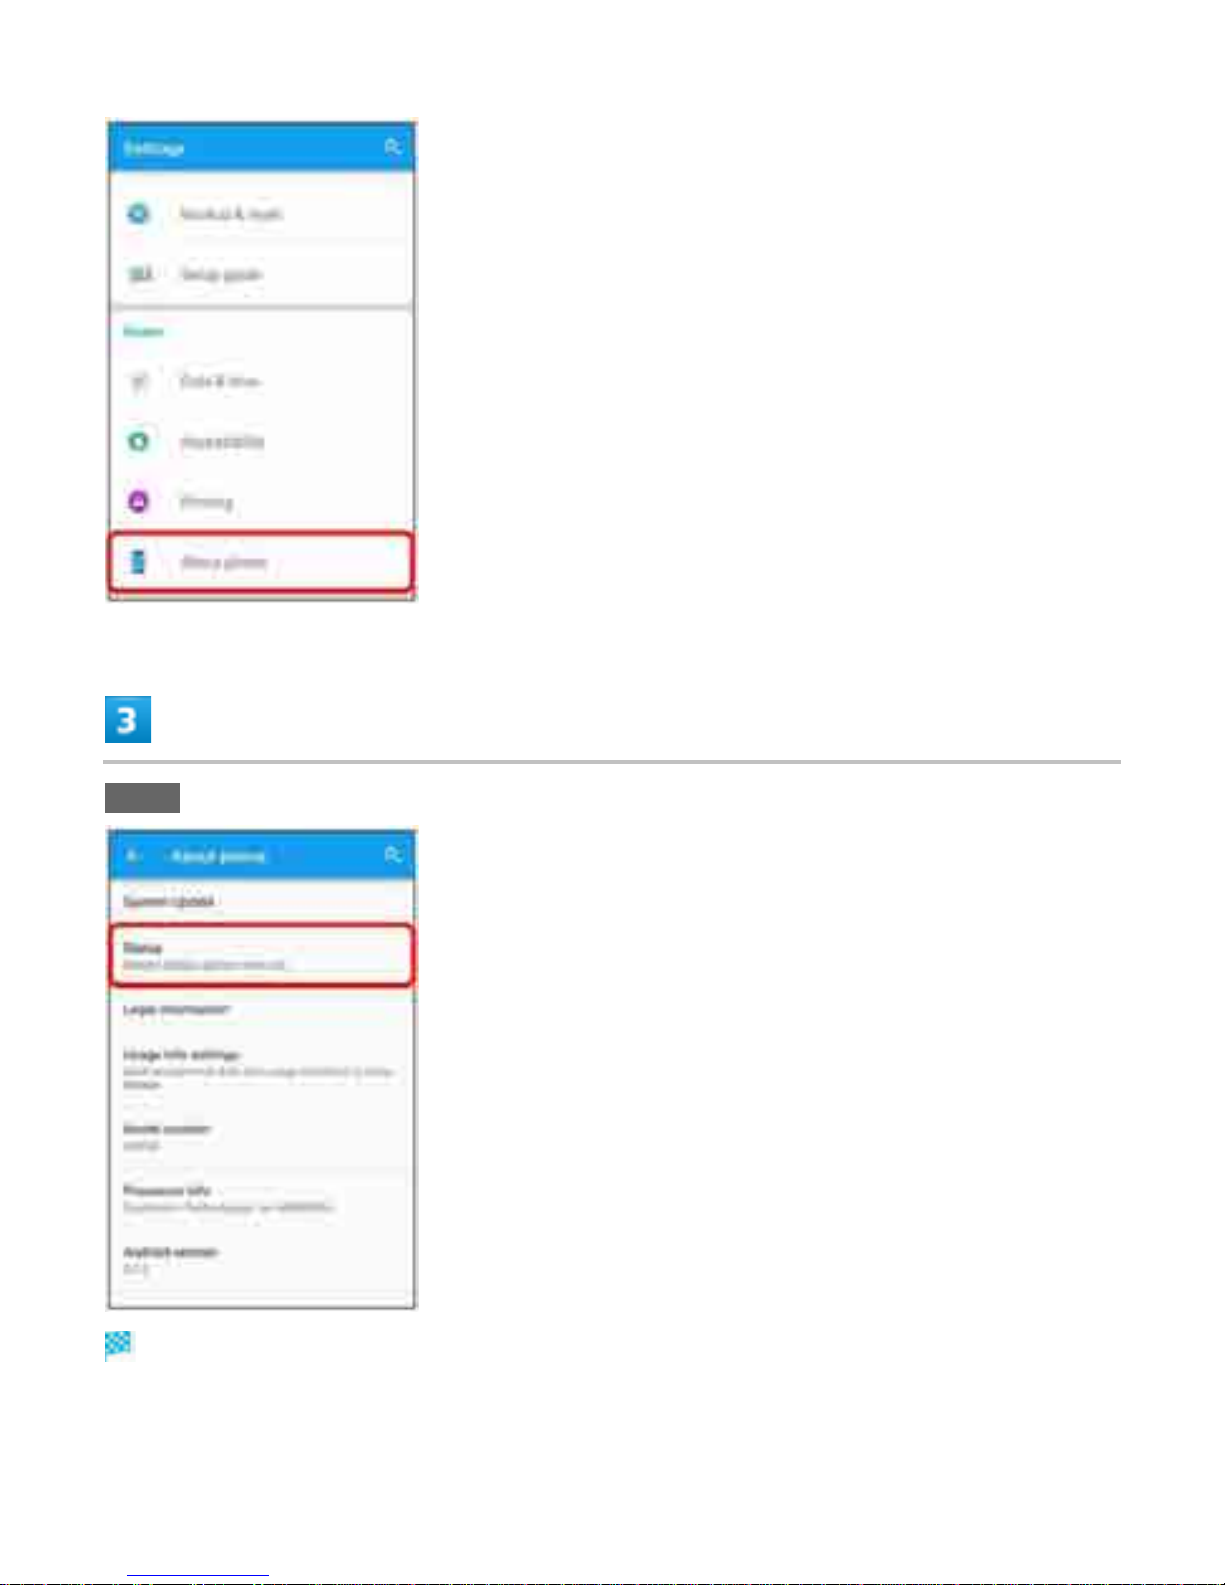
Status
Check phone number.
13
Page 51
Silent Mode
Ð
Using Silent Mode
Using Silent Mode
Set ringtone, operation sounds, etc. not to sound to avoid disturbing others around you.
Camera shutter, video start/stop tones, video and music sound even in Silent mode.
Touch & hold Volume Key down
Icon on sound volume adjustment bar turns to and Silent mode (without vibration) is set.
Press upper or lower side of Volume key Tap to change icon on the sound volume
adjustment bar to and set Silent mode (without vibration).
Press upper side of Volume key while in Silent mode to cancel.
14
Page 52
Airplane Mode
Ð
Using Airplane Mode
Using Airplane Mode
Disable all functions that emit signals. Handset remains powered on.
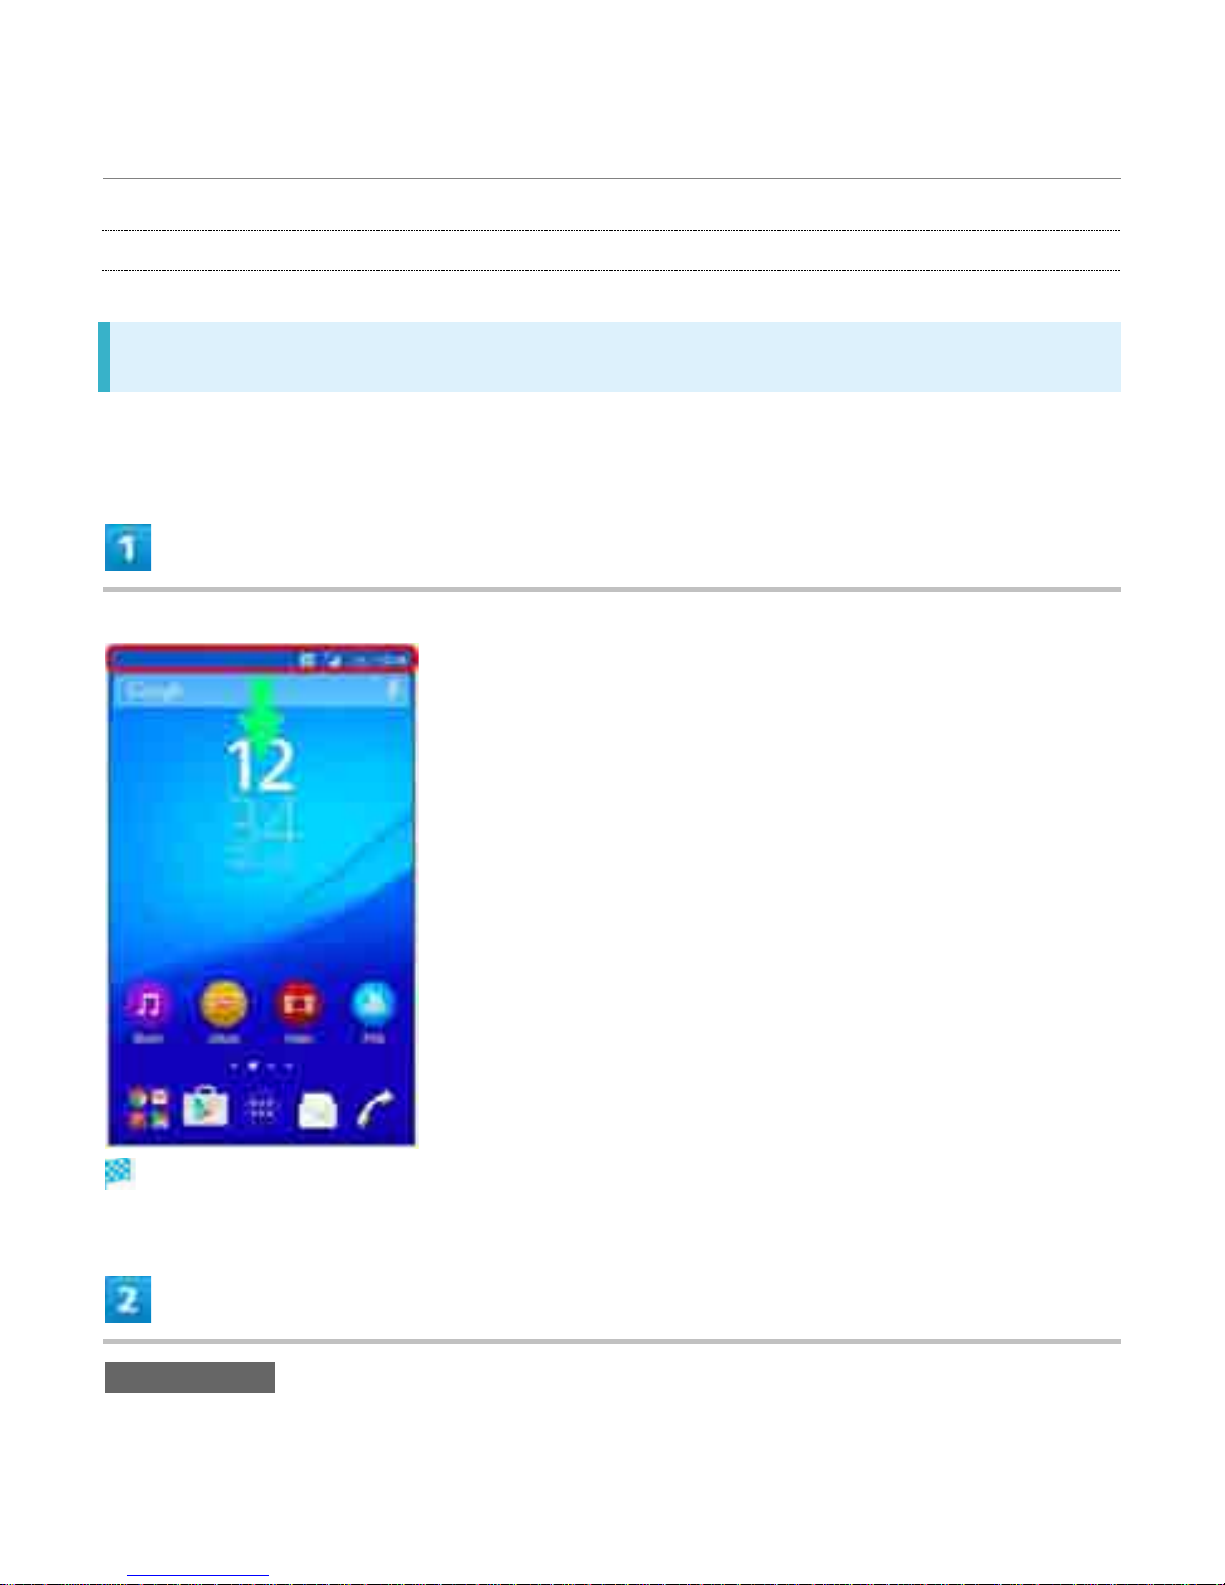
Drag Status Bar down with two fingers
Quick Settings opens.
Airplane mode
15
Page 53
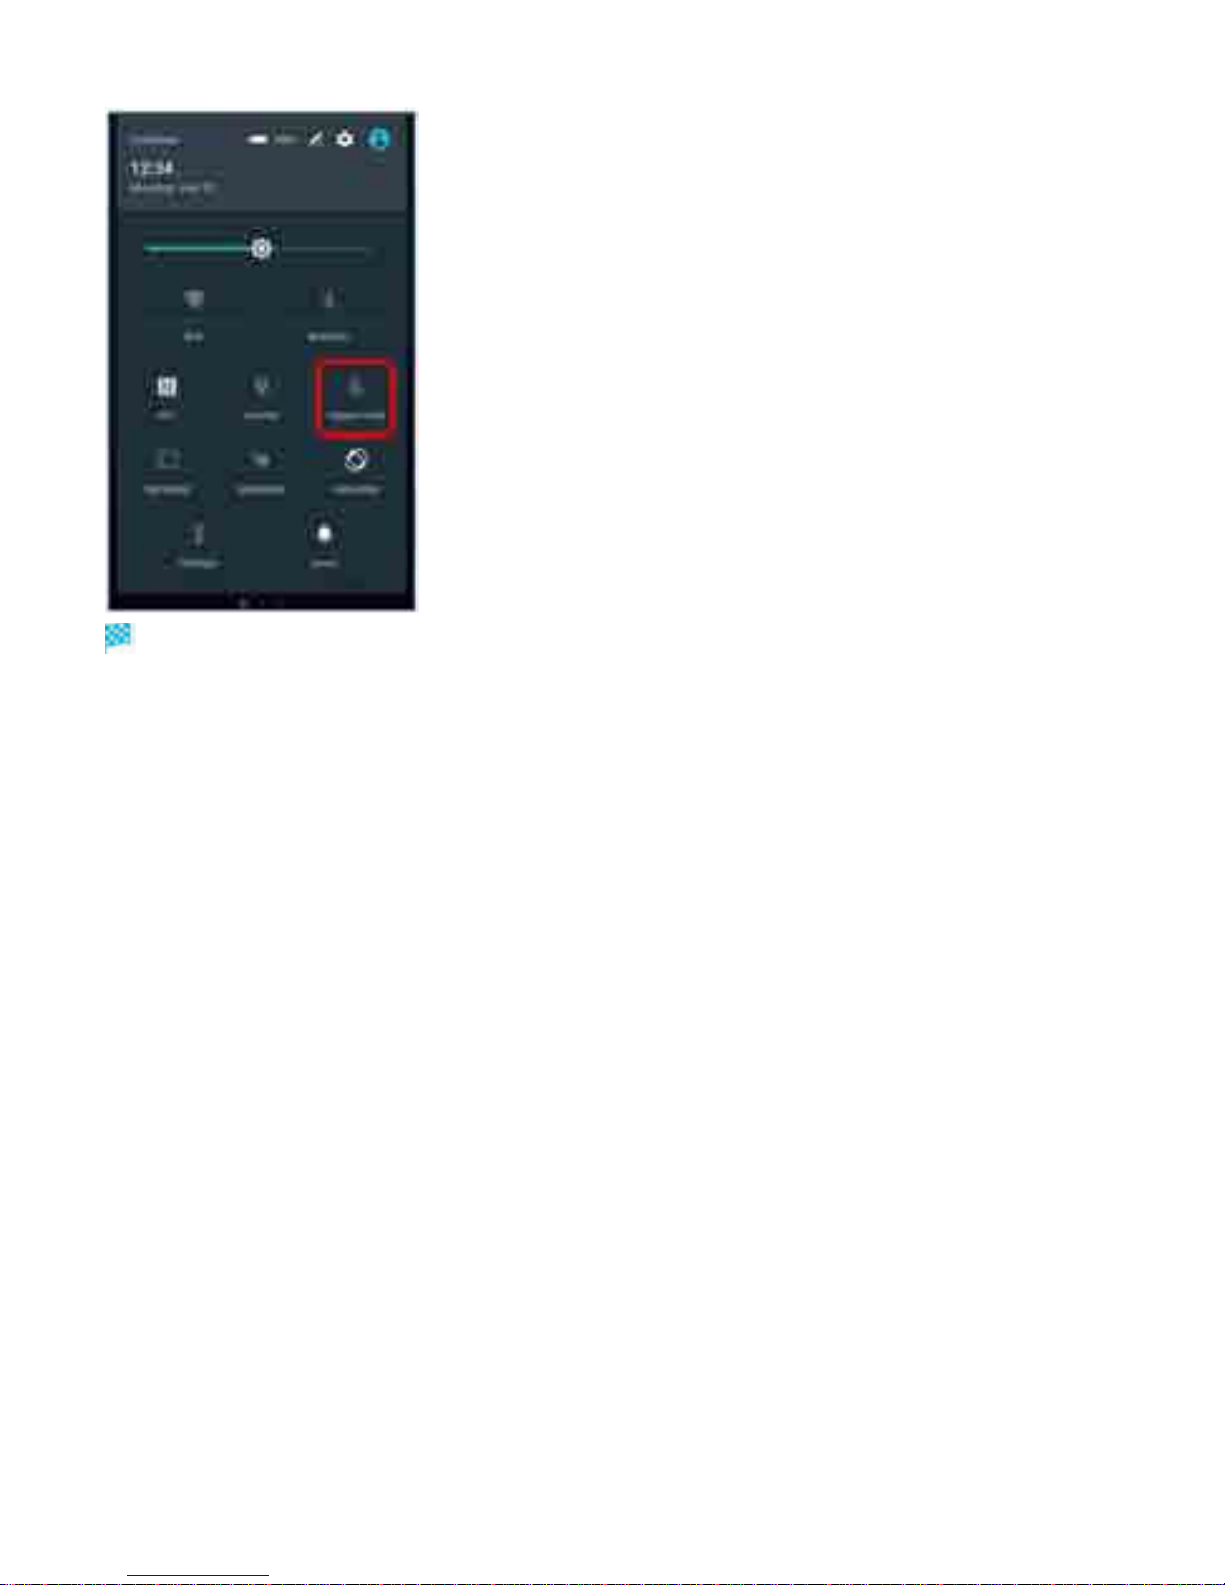
Handset is in Airplane mode.
Use same operation again while in Airplane mode to cancel.
16
Page 54

Text Entry
Ð
Keyboard
Ð
Keyboard Layout
Ð
Entering Alphabet
Ð
Entering Emoticons/Pictograms
Ð
Pasting Cut/Copied Text
Ð
Making Text Entry Settings
Keyboard
Enter text with on-scr een QWERTY key boar d by Tapping each character individually, or use Gesture
input feature and slide finger from character to character to form words.
Tap to hide keyboard.
Touch & Hold text in text entry window and magnified text appears in small balloon.
Input method is set to International keyboard (Xperia
TM
keyboard) by default. To input Japanese,
change default keyboard to XperiaTMJapanese keyboard. For settings, see "Language & input."
17
Page 55
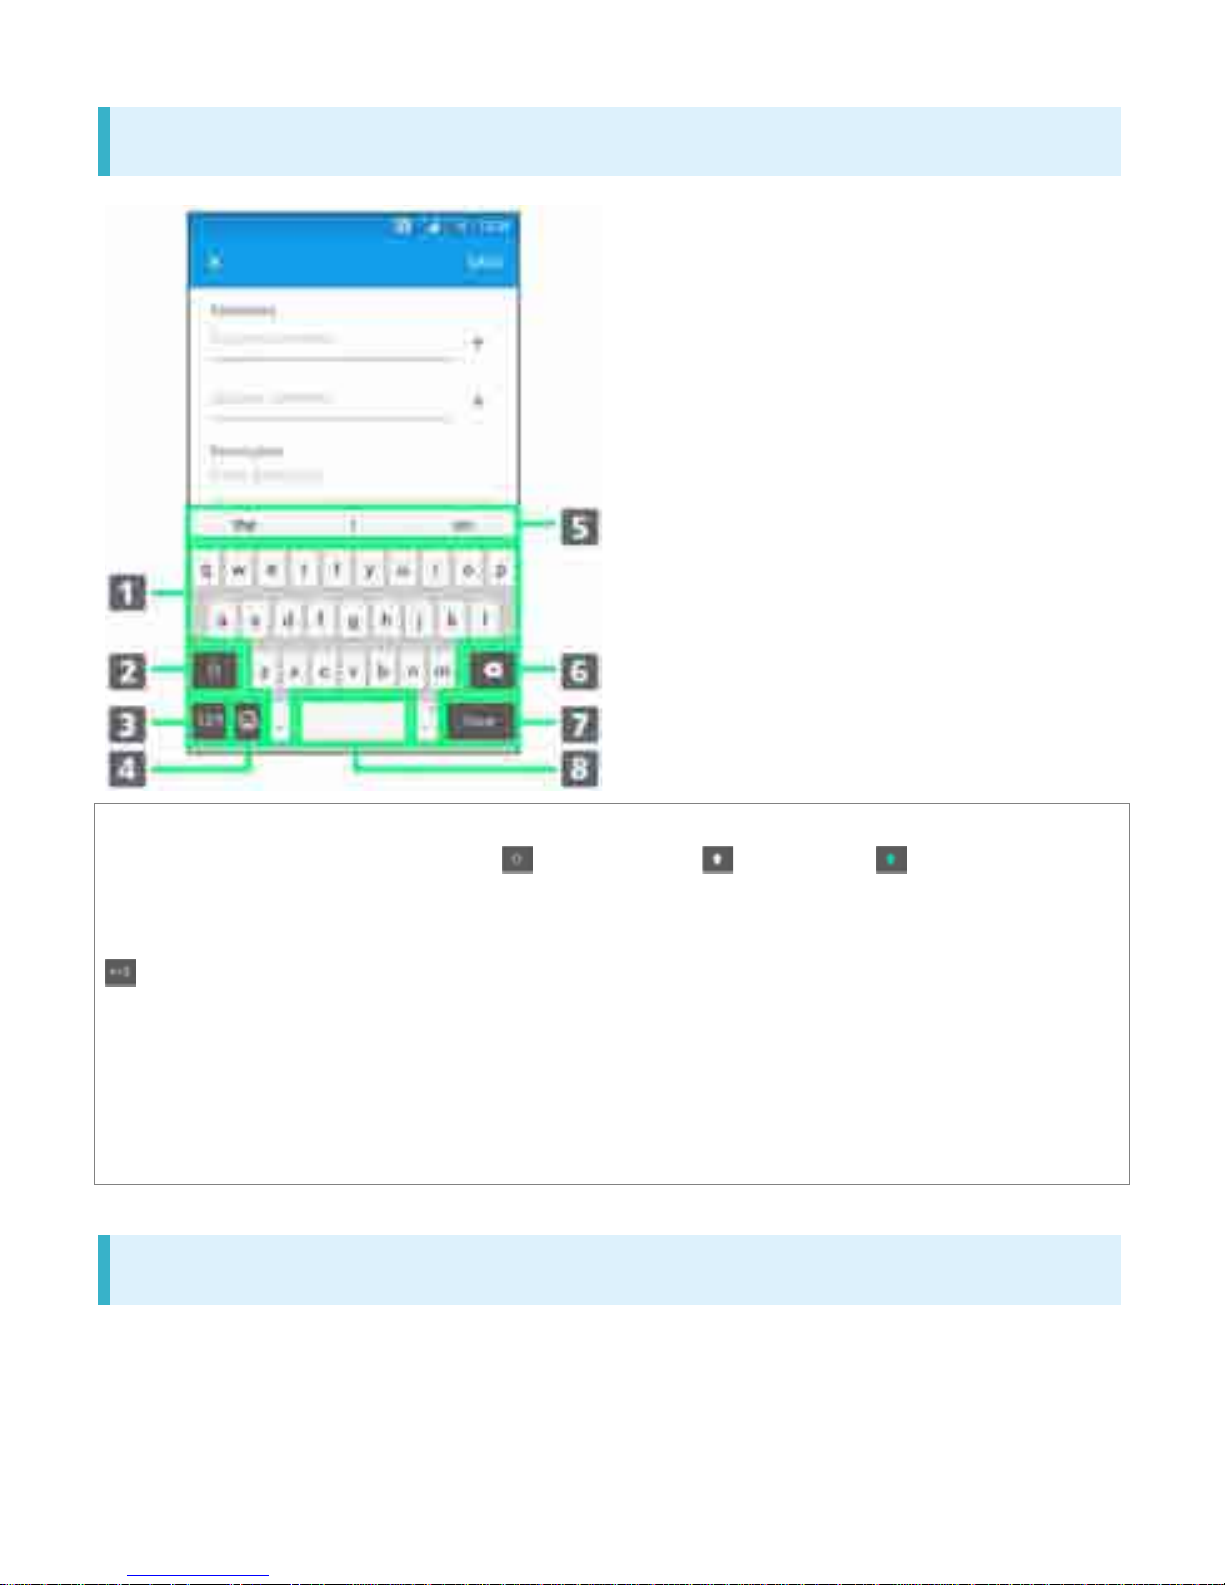
Keyboard Layout
䐟
䐟
Enter a character.
䐠
Switch between lower-case , upper-case , and caps . For some
languages, this key is used to access extra characters in the language.
䐡
Toggle w ith numbers and symbols keyboard. For even more symbols, Tap
.
䐢
Show Emoticon/Pictogram list.
䐣
Show entry candidates.
䐤
Delete a character before cu rsor.
䐥
Enter line break or confirm text input.
䐦
Enter a space.
Entering Alphabet
To enter character visible on keyboard, Tap the character.
To enter character variant, Touch & Hold keyboard character to show option list, then select from
the list.
To enter a period, Double-Tap the space bar.
18
Page 56
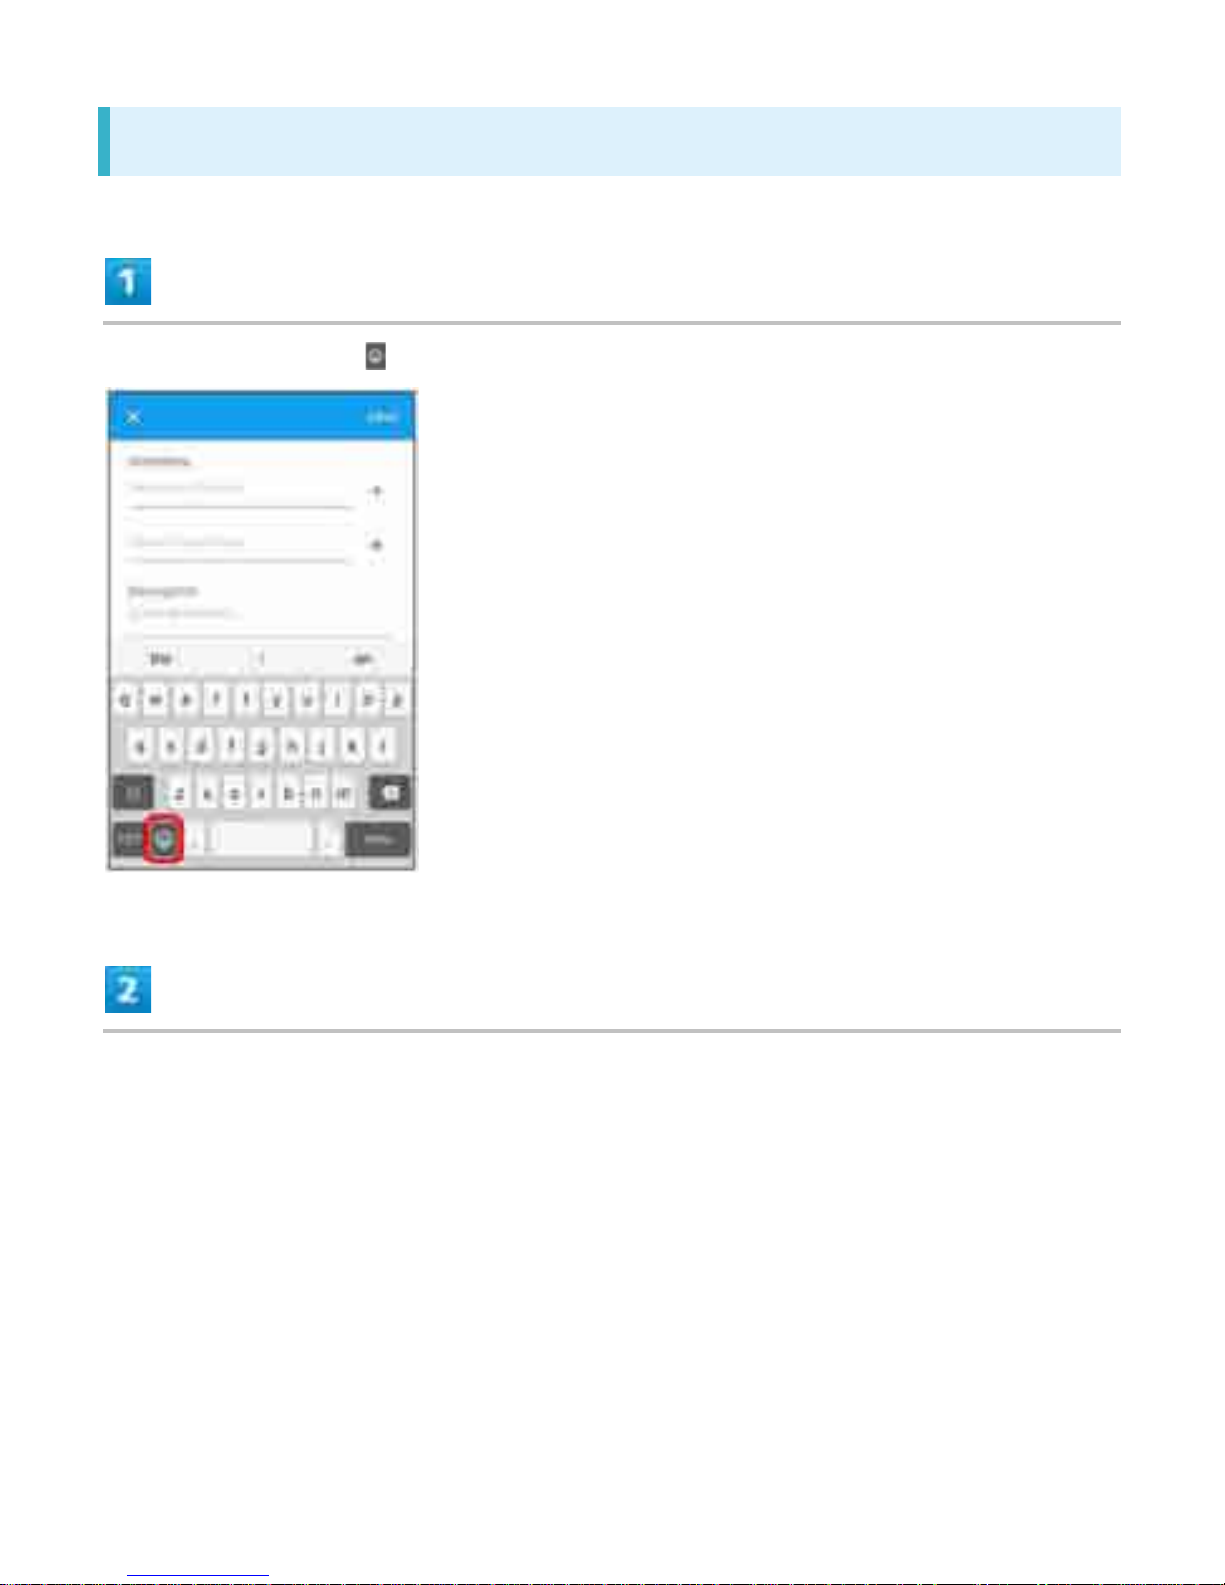
Entering Emoticons/Pictograms
In Text Entry window,
Toggle option tab above the keyboard
19
Page 57
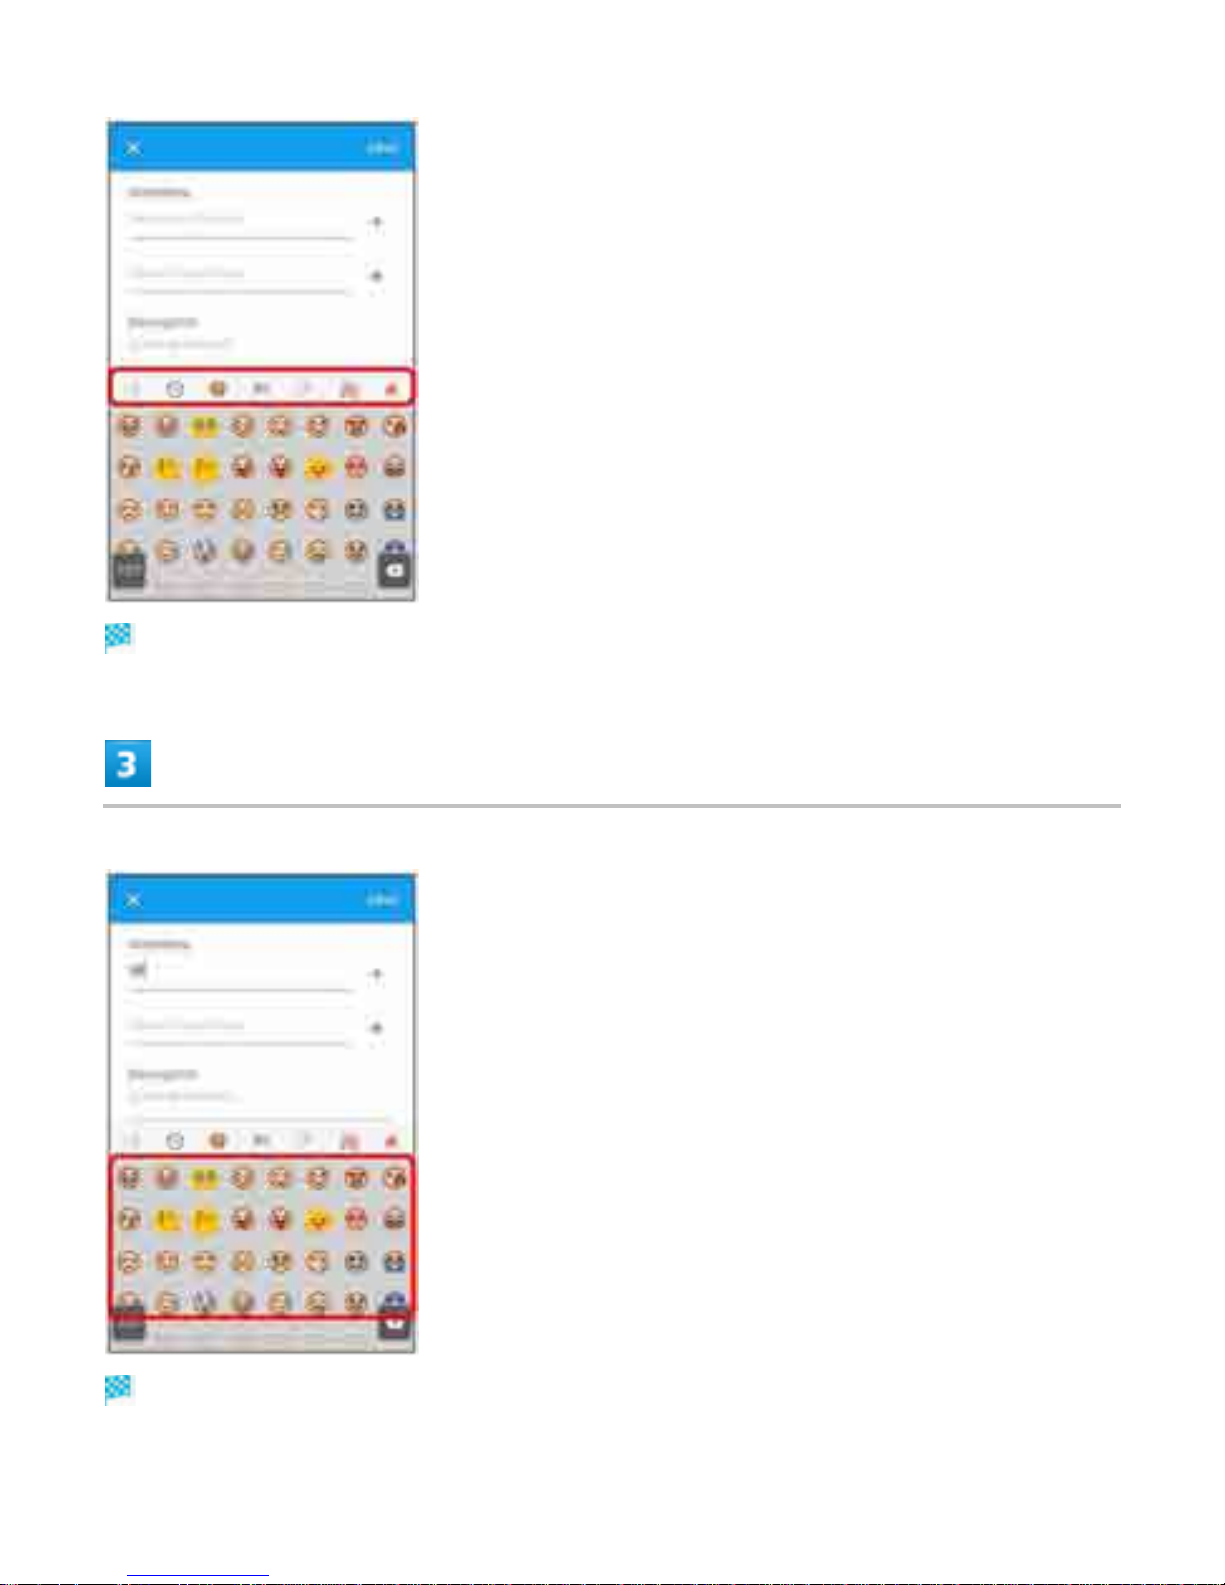
Scroll down to view more options on each list.
Tap emoticon or pictogram
Emoticon or pictogram is entered.
20
Page 58
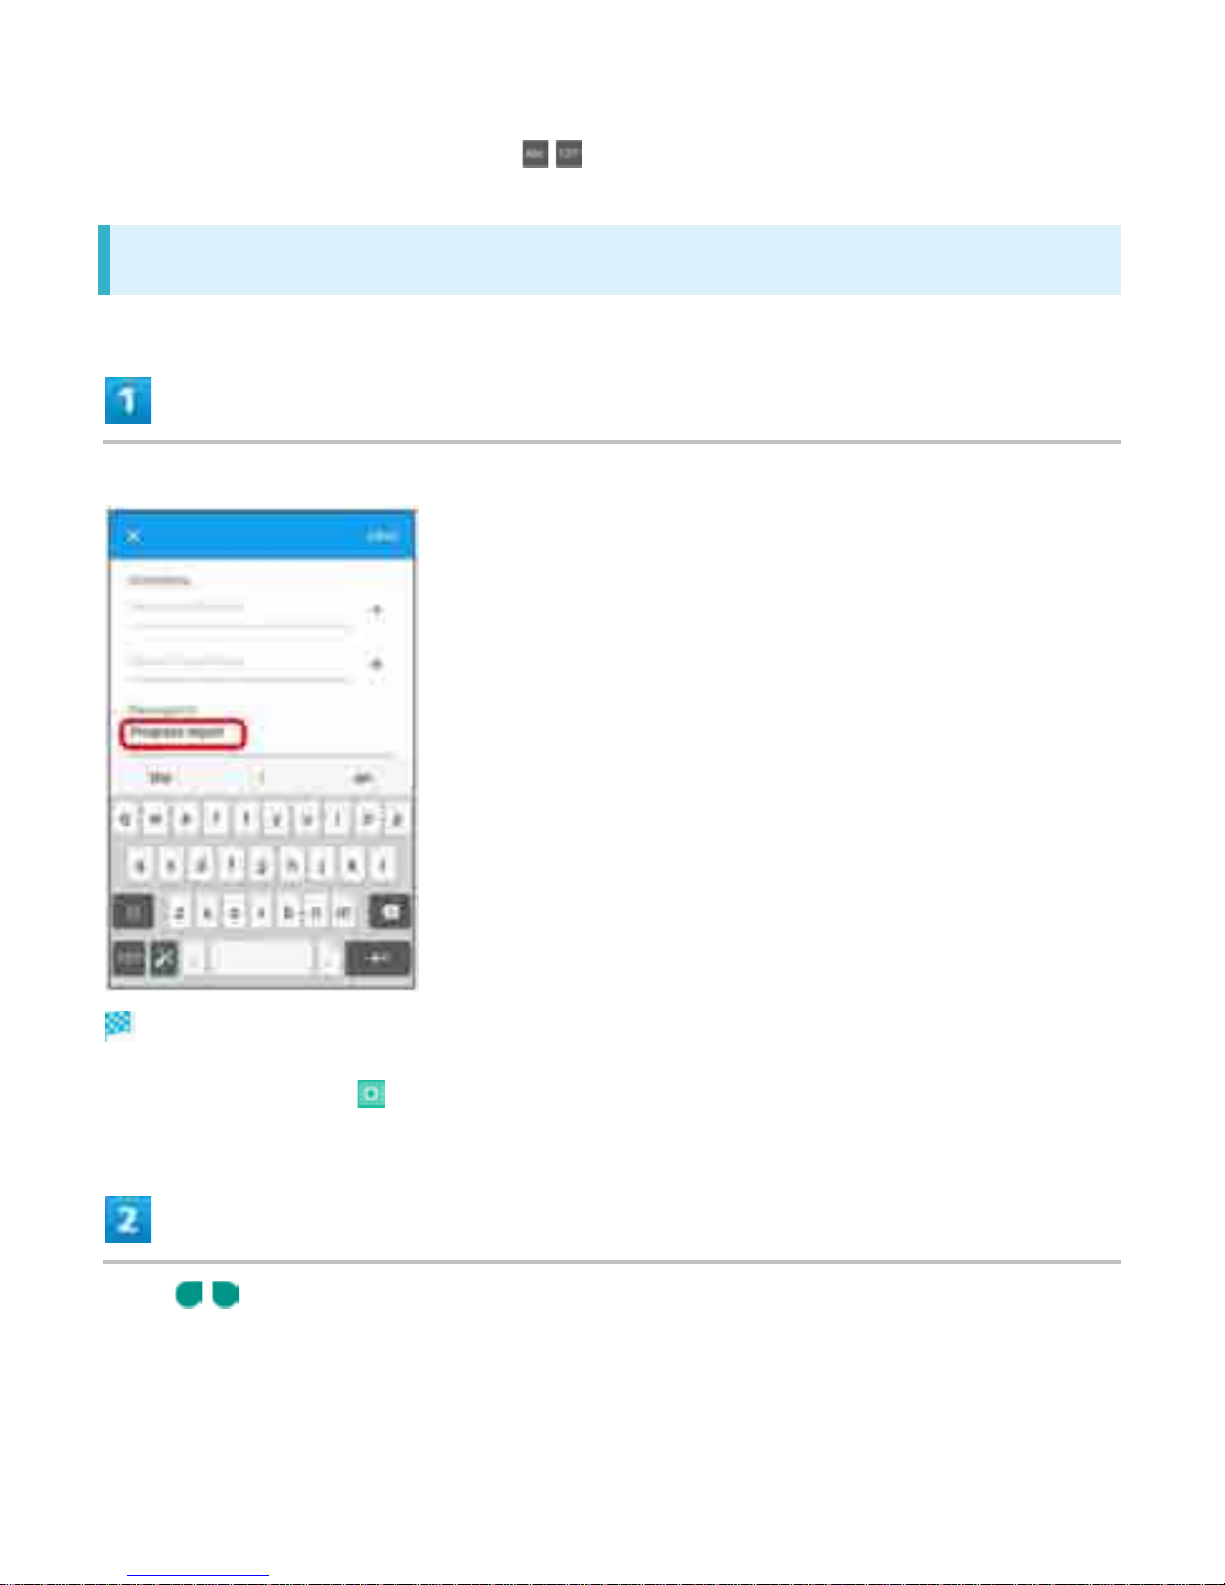
Pictograms can be entered consecutively.
To return to QWERTY keyboard, Tap / .
Pasting Cut/Copied Text
Double-Tap text
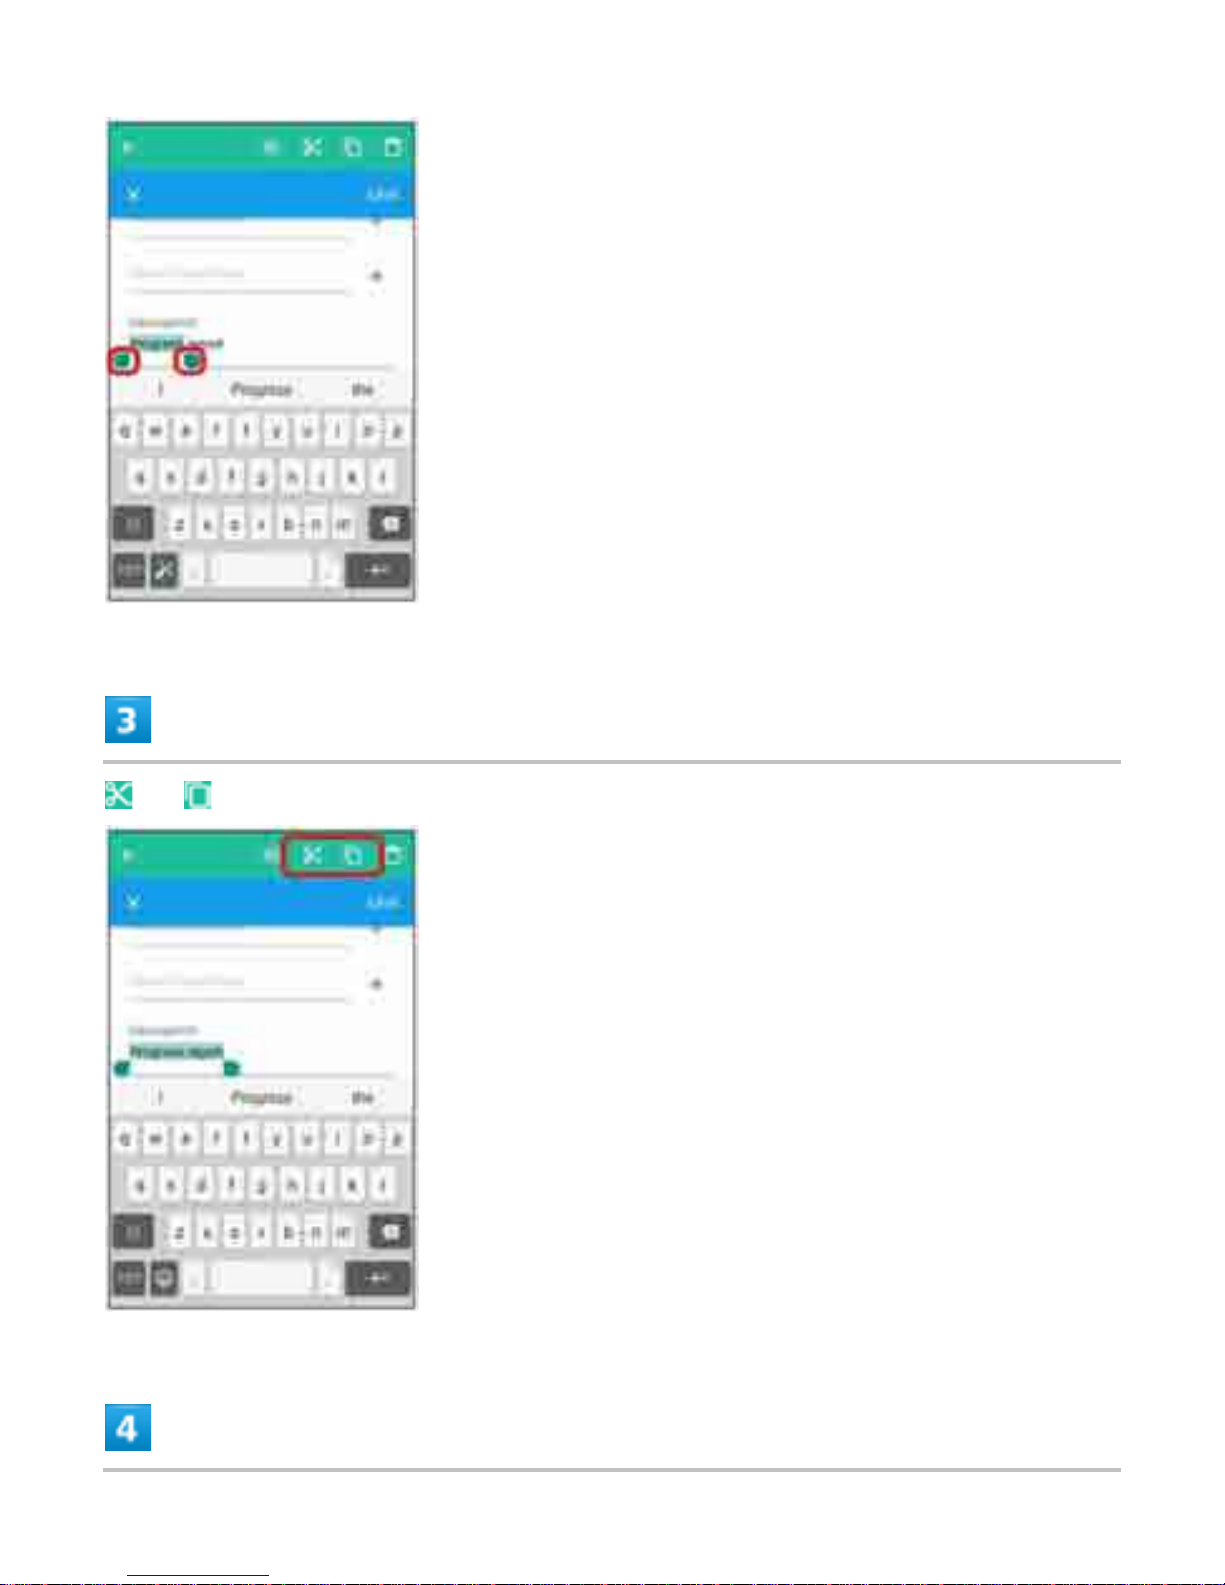
Text is highlighted by tabs on both sides and editing tool appears.
To enter all text, Tap .
Drag / to select range
21
Page 59
or
22
Page 60
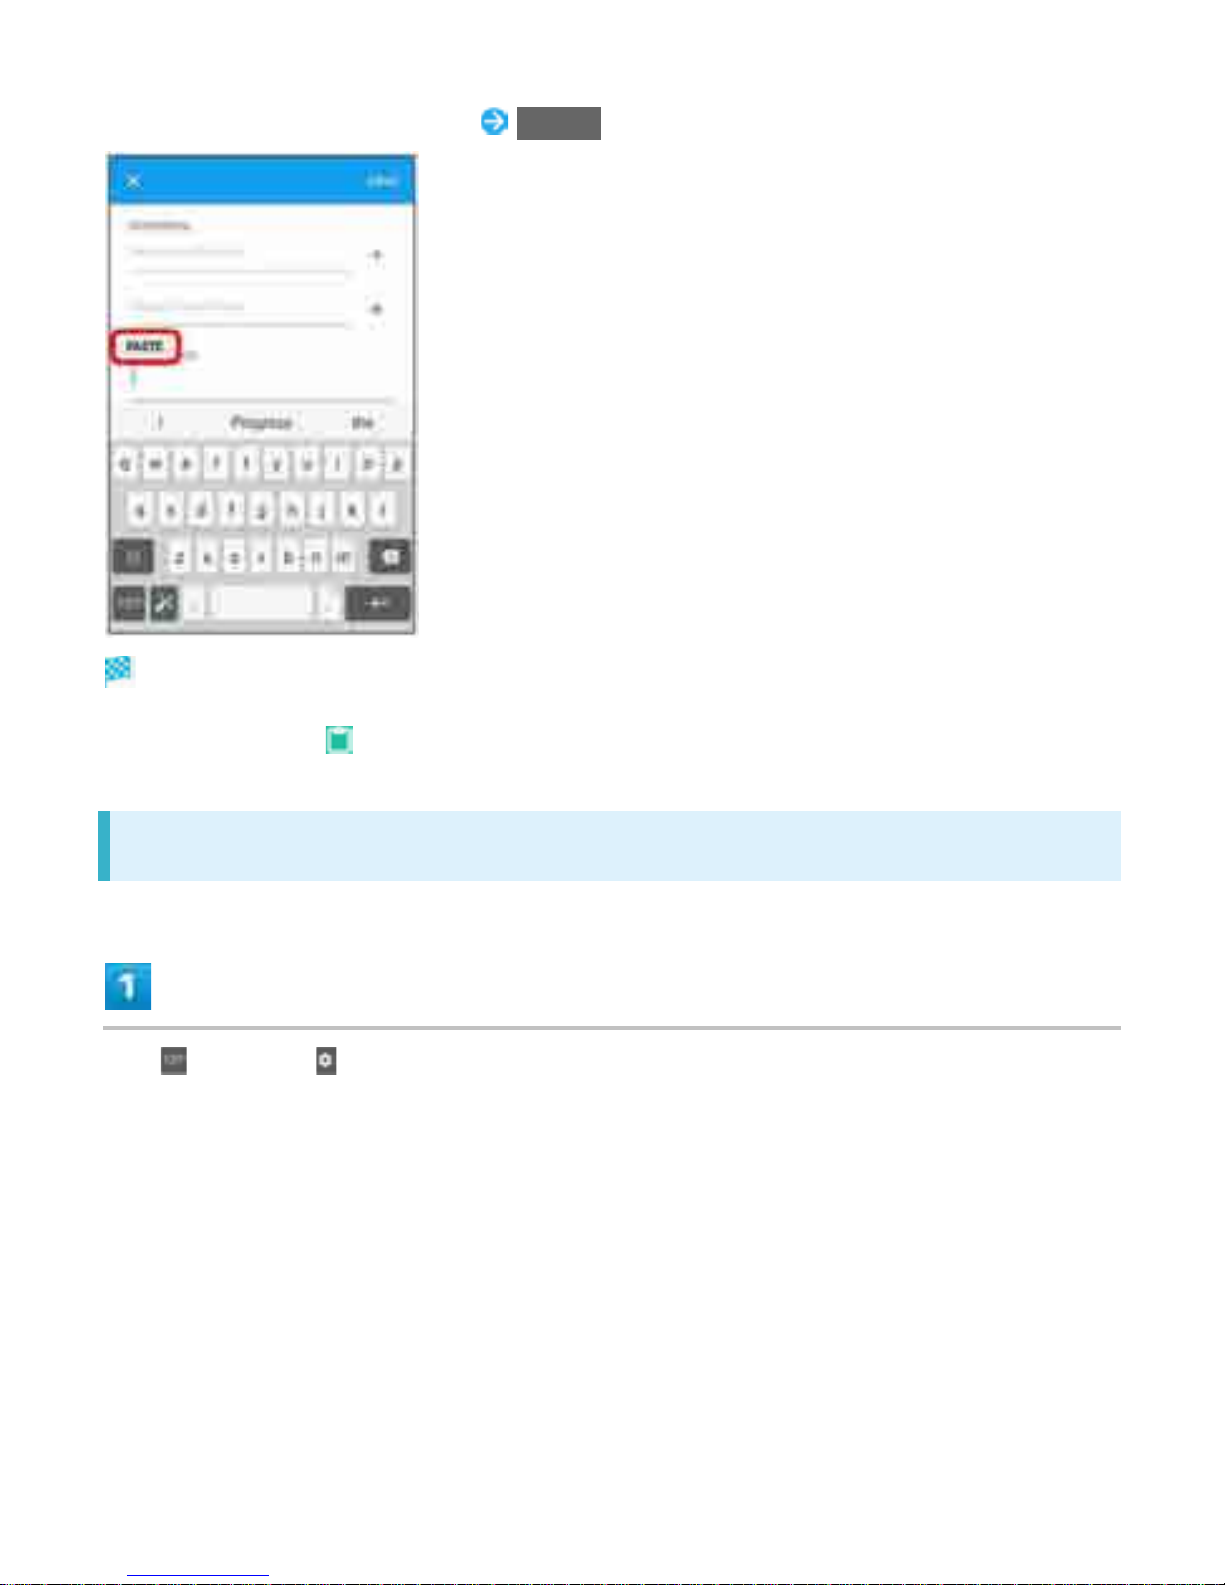
Touch & Hold Text Entry window PASTE
Cut/Copied text is pasted.
Alternatively, Tap (Paste) to paste text.
Making Text Entry Settings
Tap , then Tap
23
Page 61
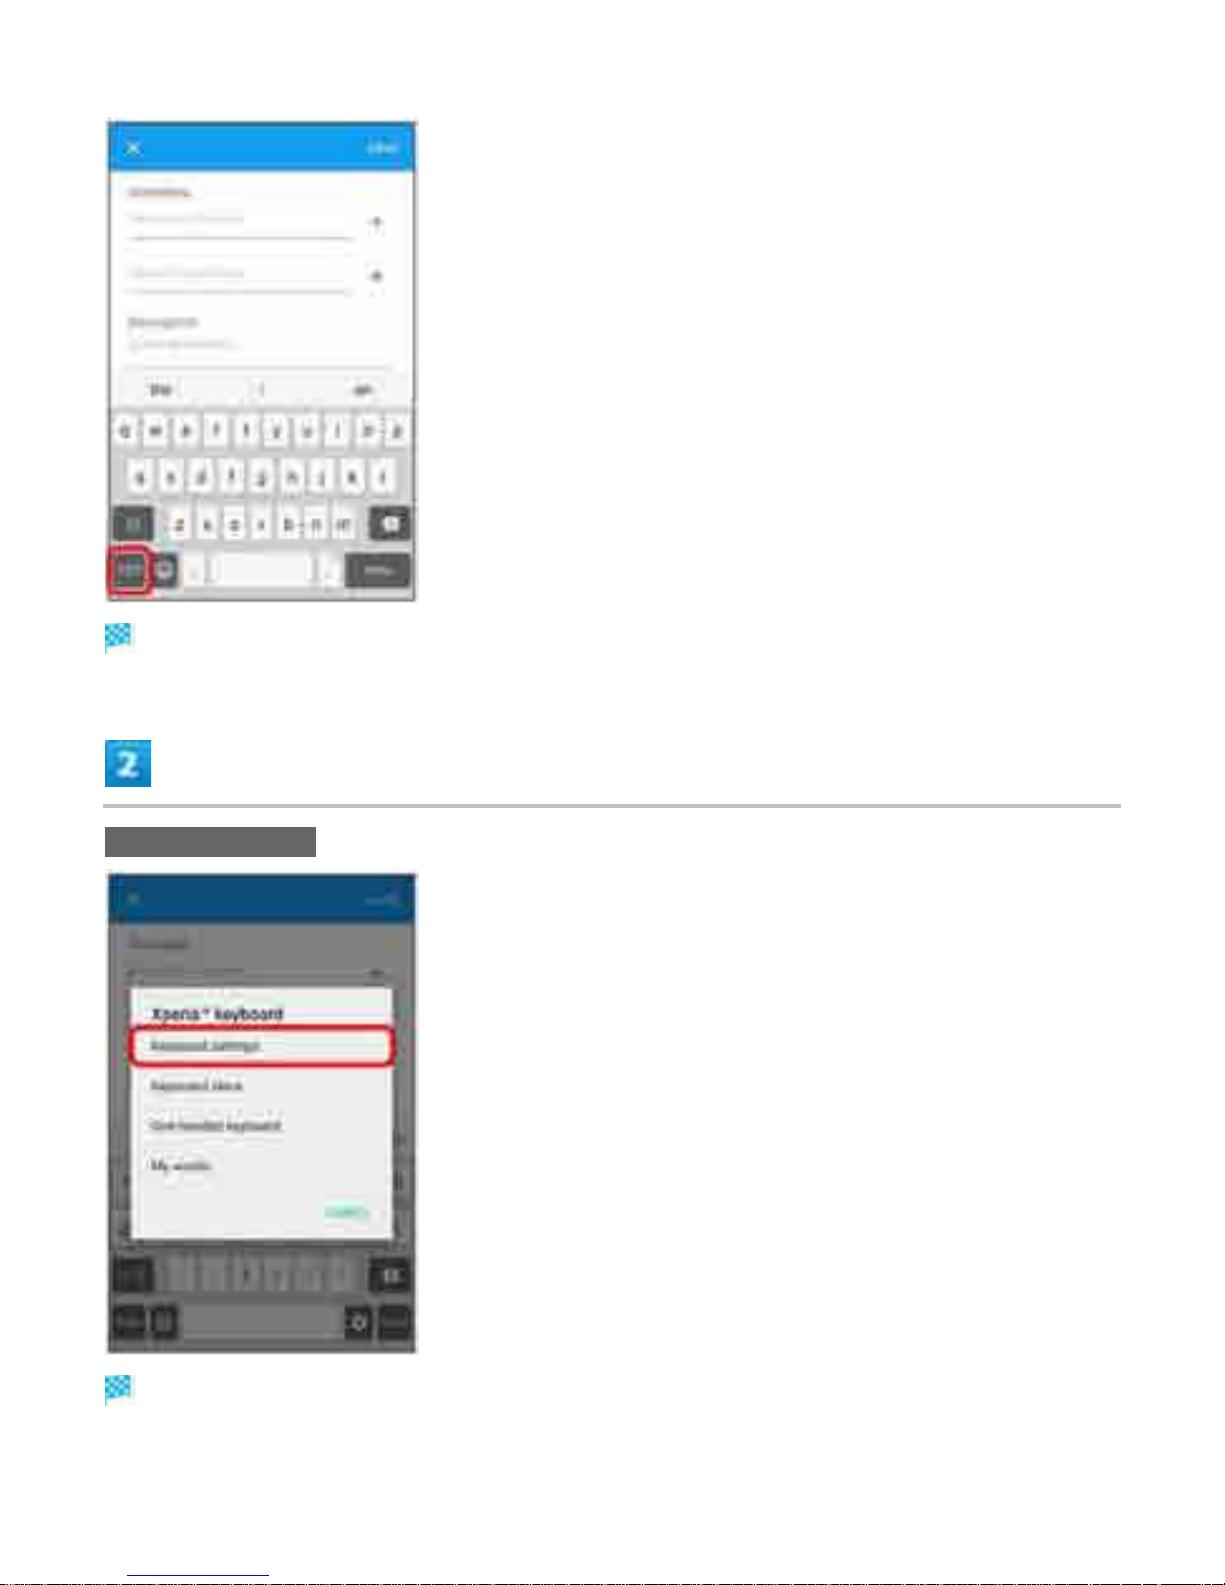
Option menu appears.
Keyboard settings
Settings menu opens.
24
Page 62
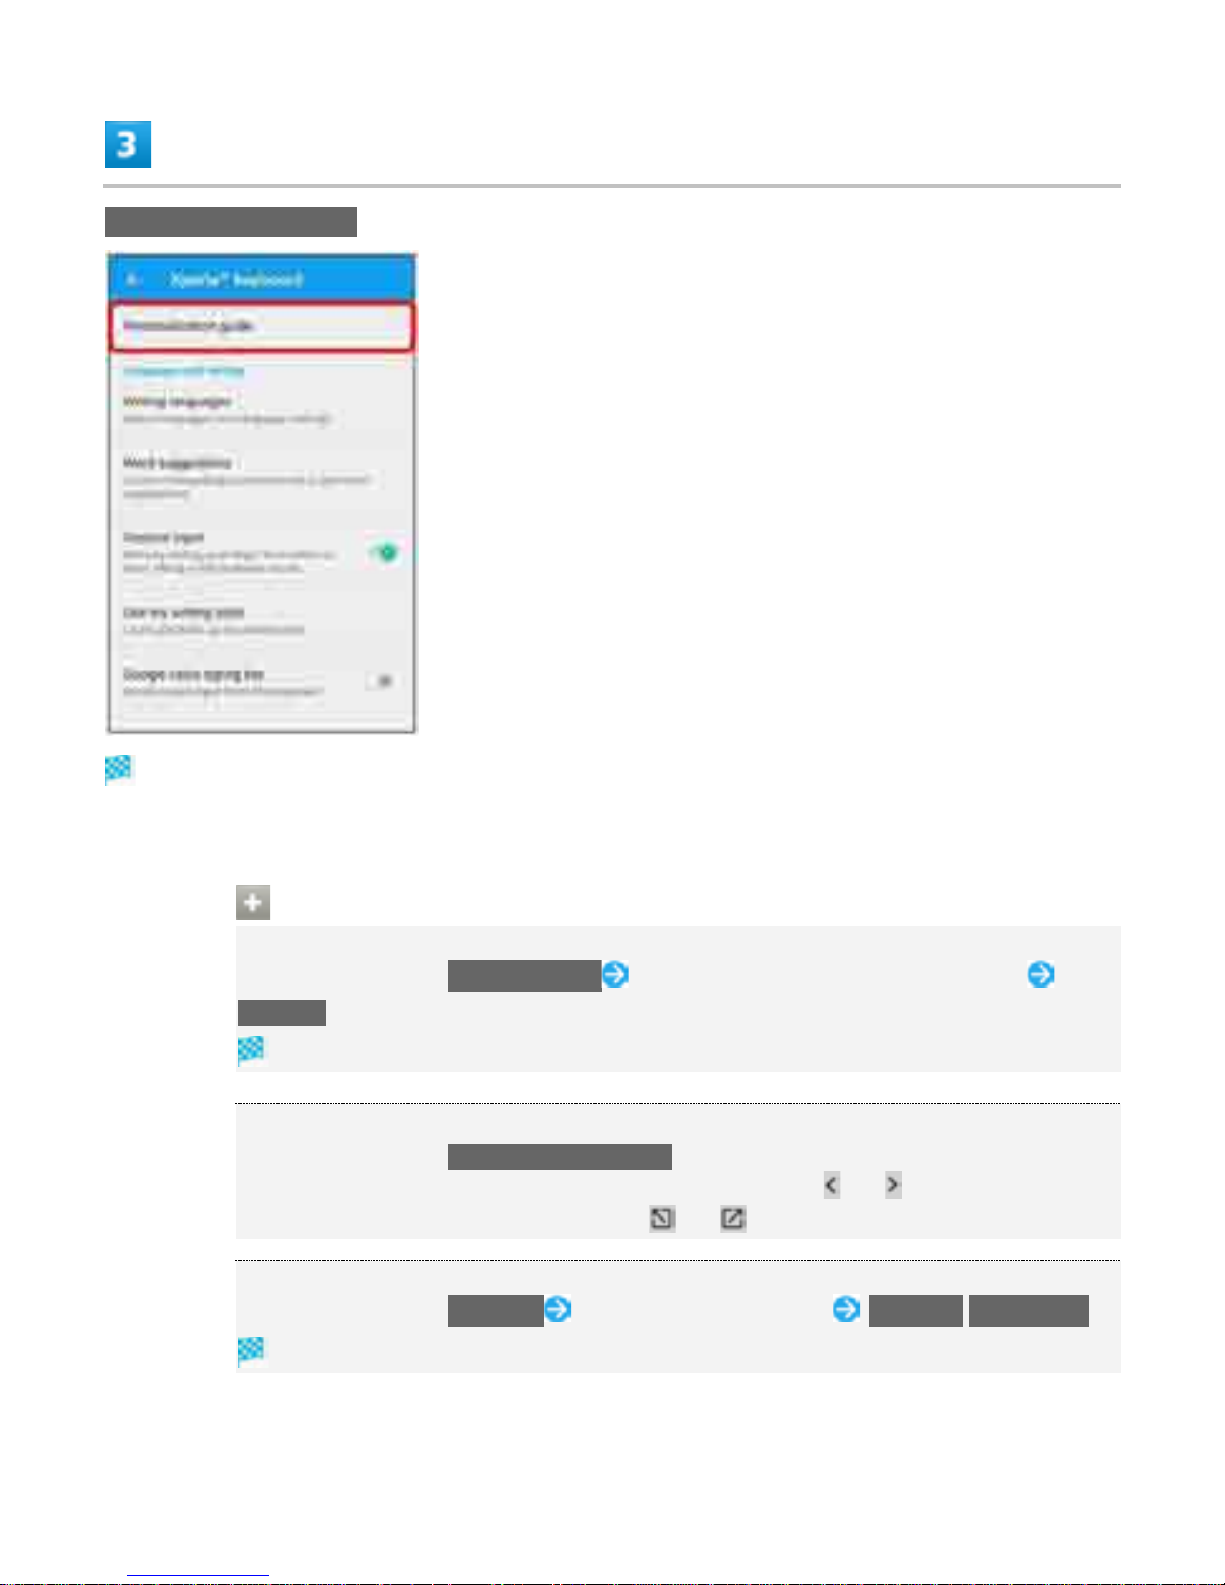
Personalizati o n guide
Setting guidance window opens.
Follow onscreen instructions to customize keyboard.
Other Options
Changing Keyboard Skin
In Option menu, Tap Keyboard skins Flick left or right to choose desired skin
SELECT
Keyboard skin is set.
Using One-handed Keyboard
In Option menu, Tap One-handed keyboard
To move One-handed keyboard to left or right side, Tap or accordingly.
To return to the regular keyboard, Tap or .
Editing/Deleting Words in User Dictionary
In Option menu, Tap My words Select word to edit/delete Edit word/Delete wor d
Word in User Dictionary is edited/deleted.
25
Page 63
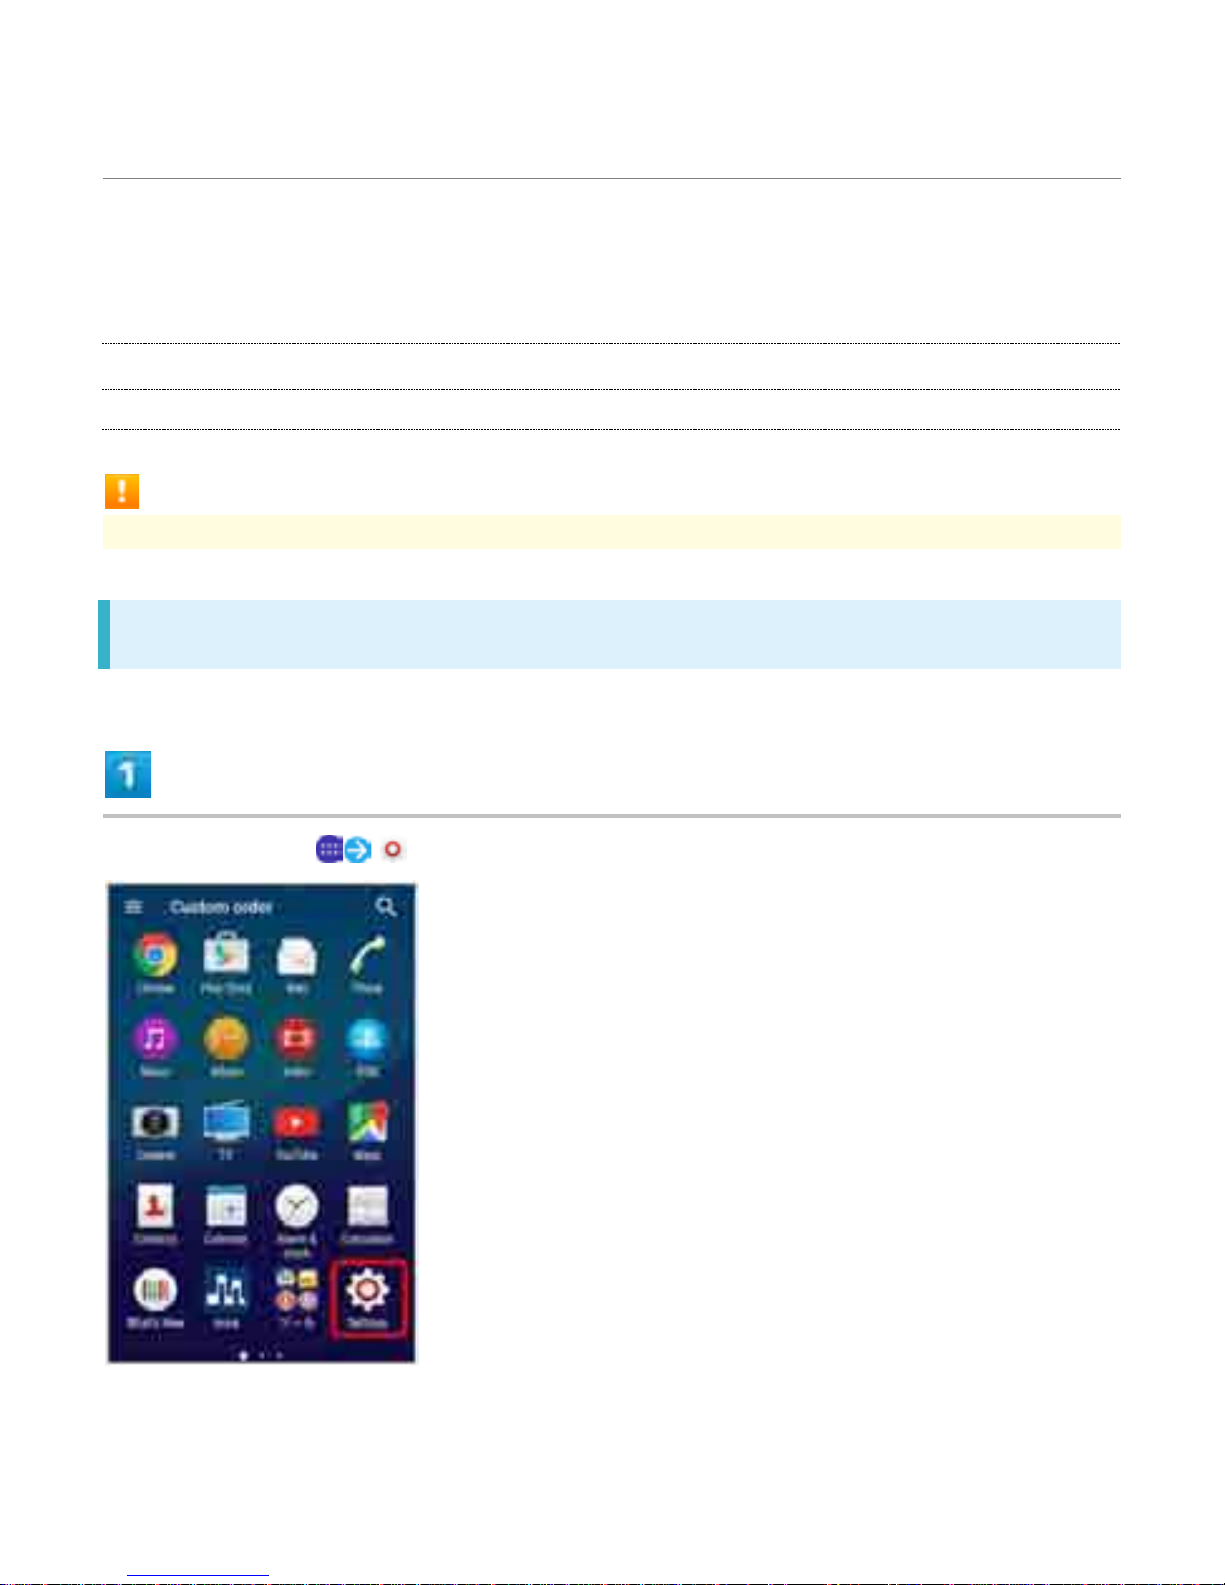
Using a Google Acc ount
Use a Google account and get more convenience with Google services. A Google
account is required to use some services or fully use some applications.
Ð
Obtaining a Google Account
Ð
Logging In with a Google Account
Google Account Cautions
Be careful not to forget your Google account ID or password.
Obtaining a Google Account
In Home Screen, (Settings)
26
Page 64
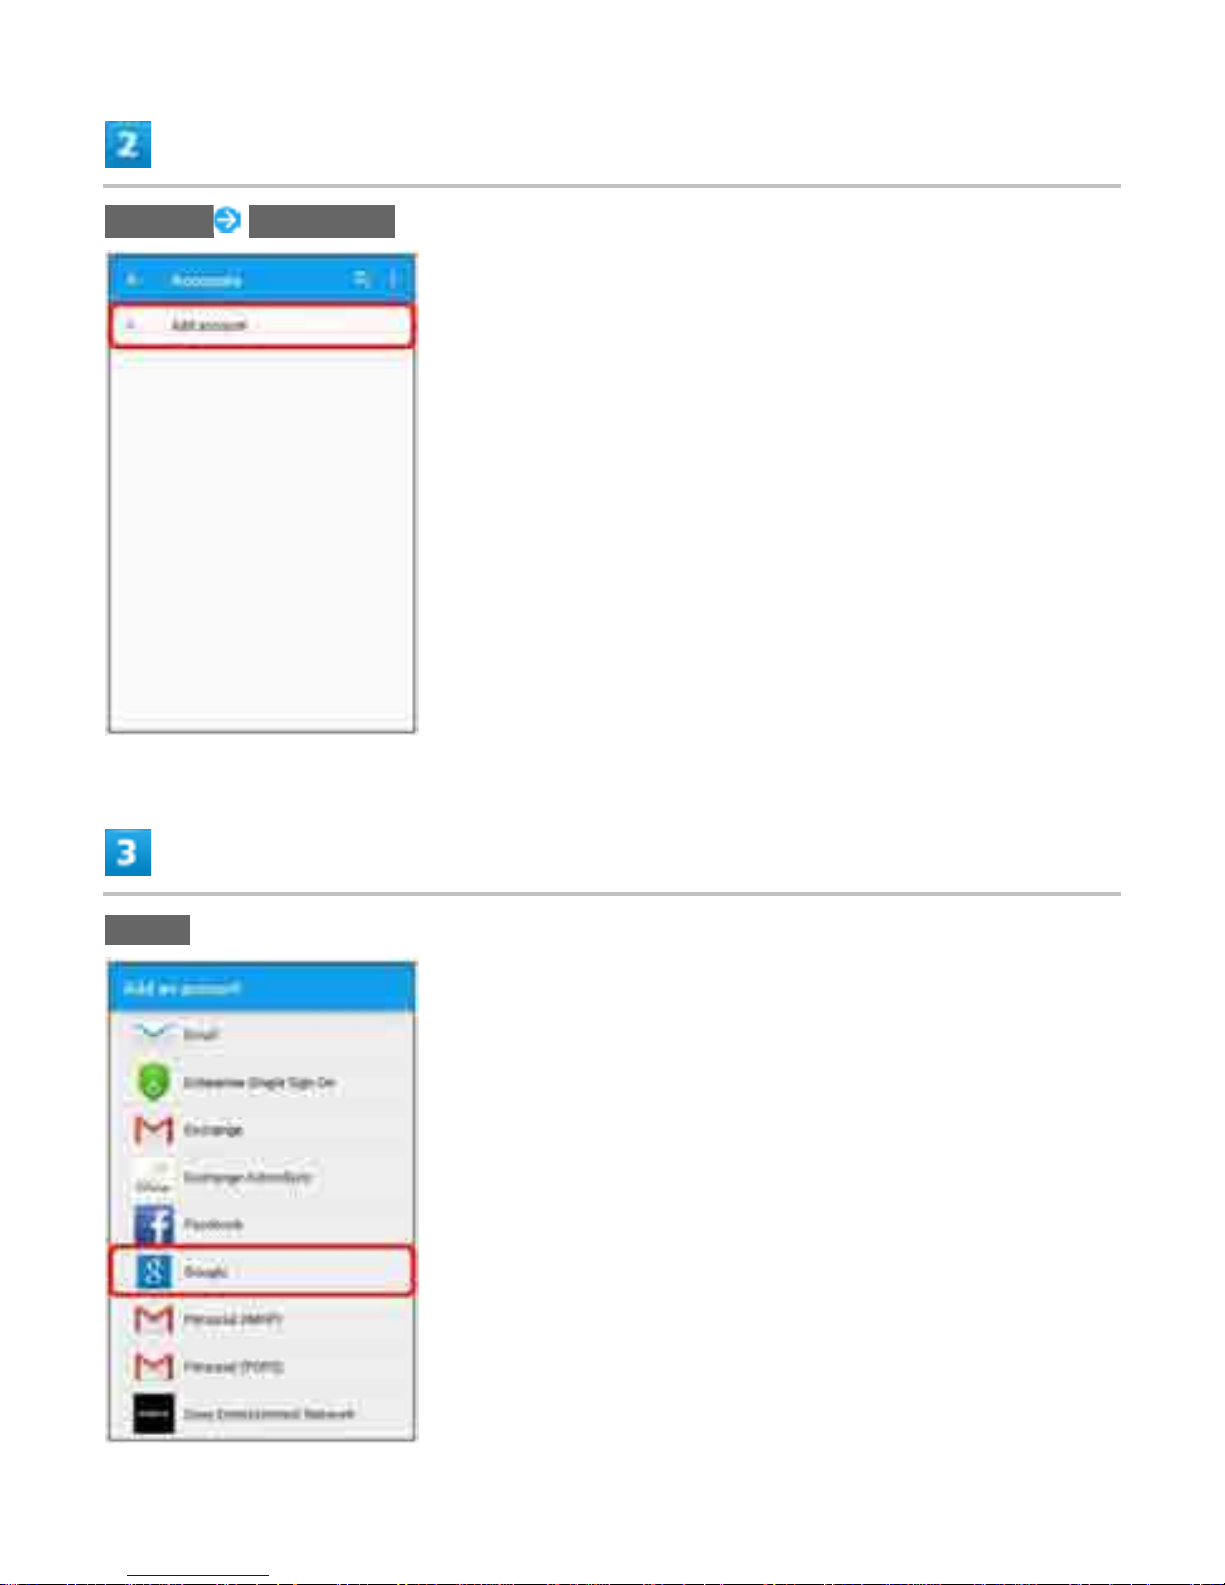
Accounts Add account
Google
27
Page 65
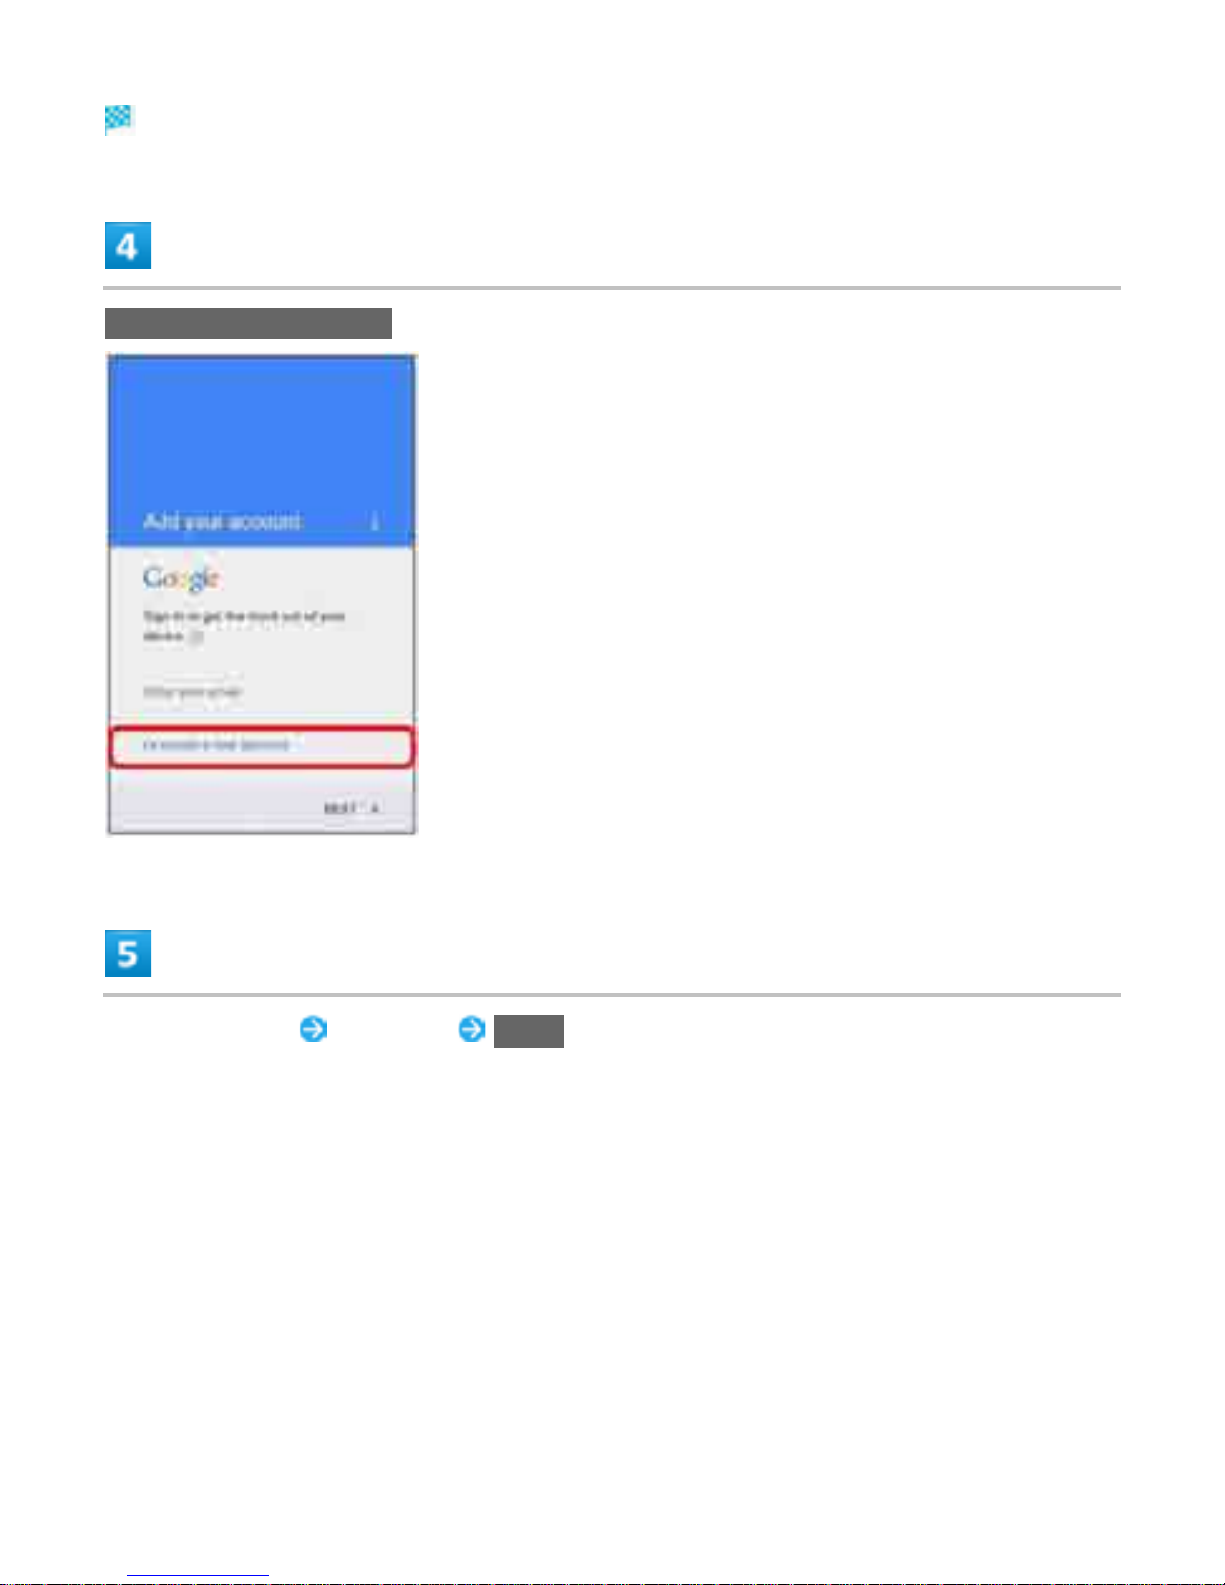
Add a Google Accou nt app ear s.
Or create a new account
Enter First name Last name NEXT
28
Page 66
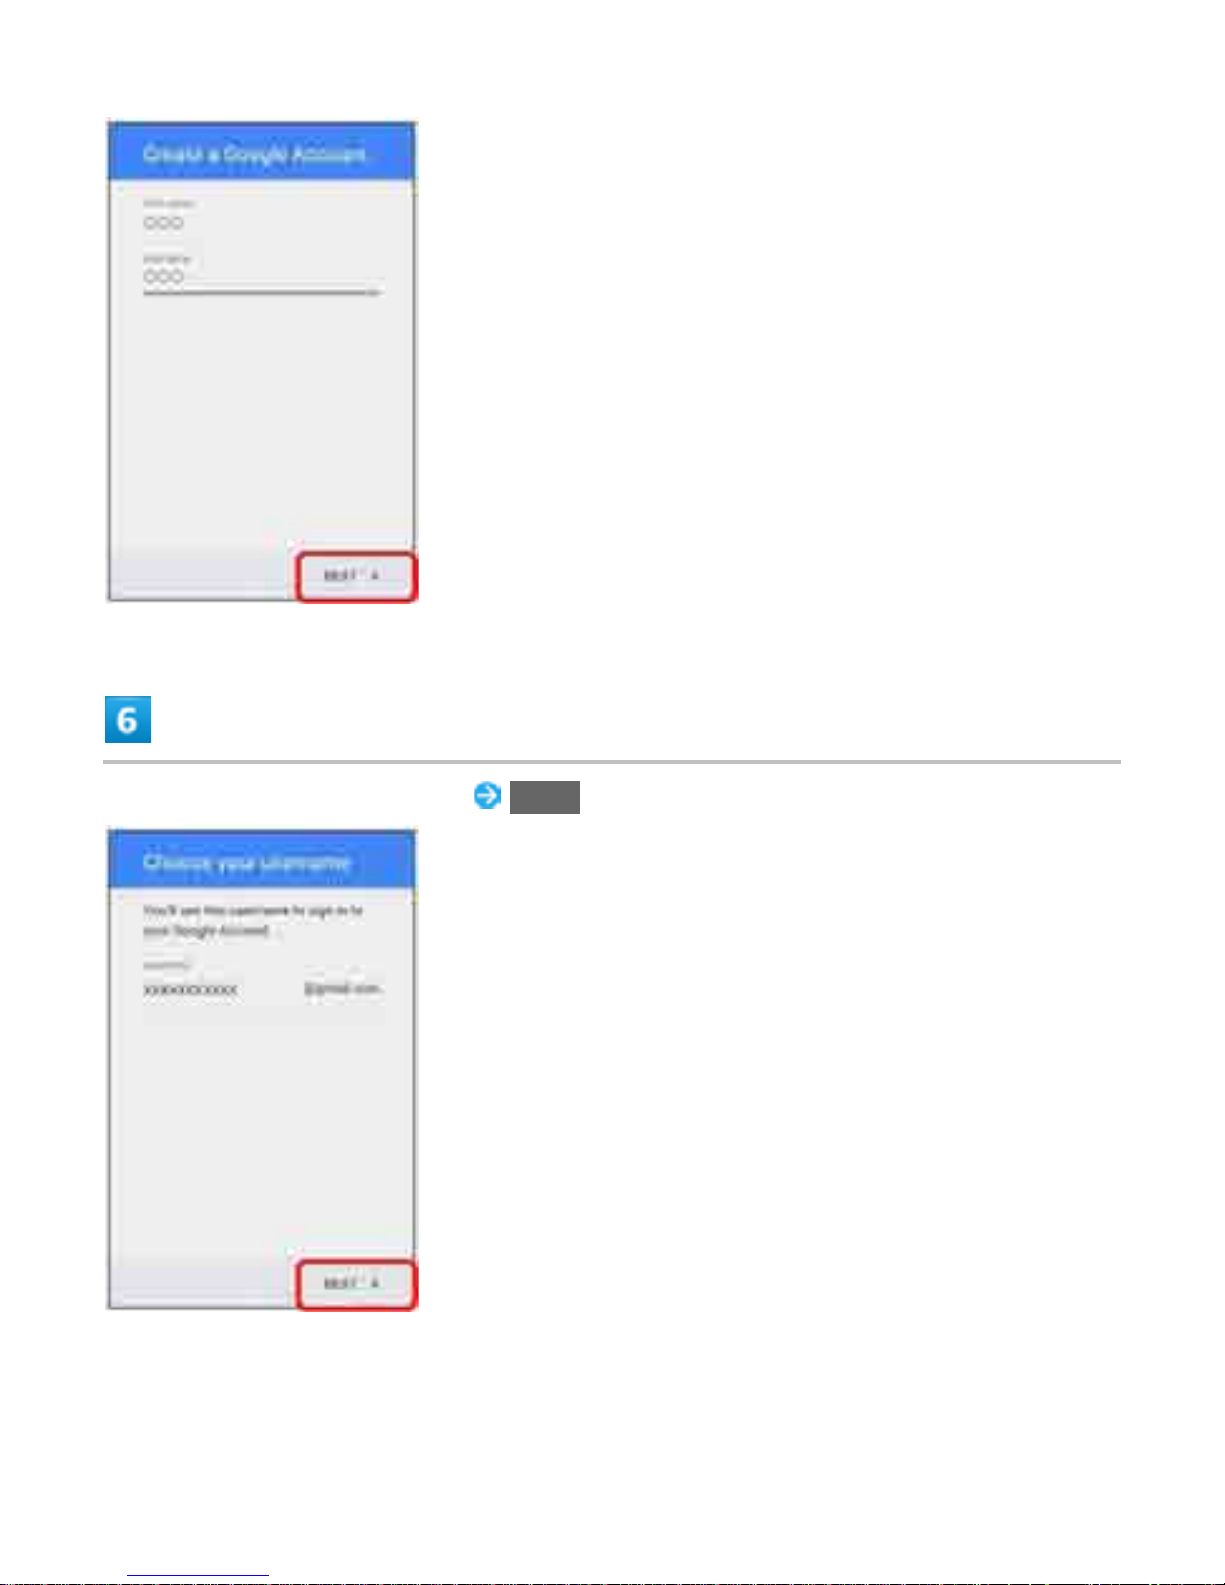
Enter user name (mail address) NEXT
If confirmation appears, follow onscreen instructions.
29
Page 67
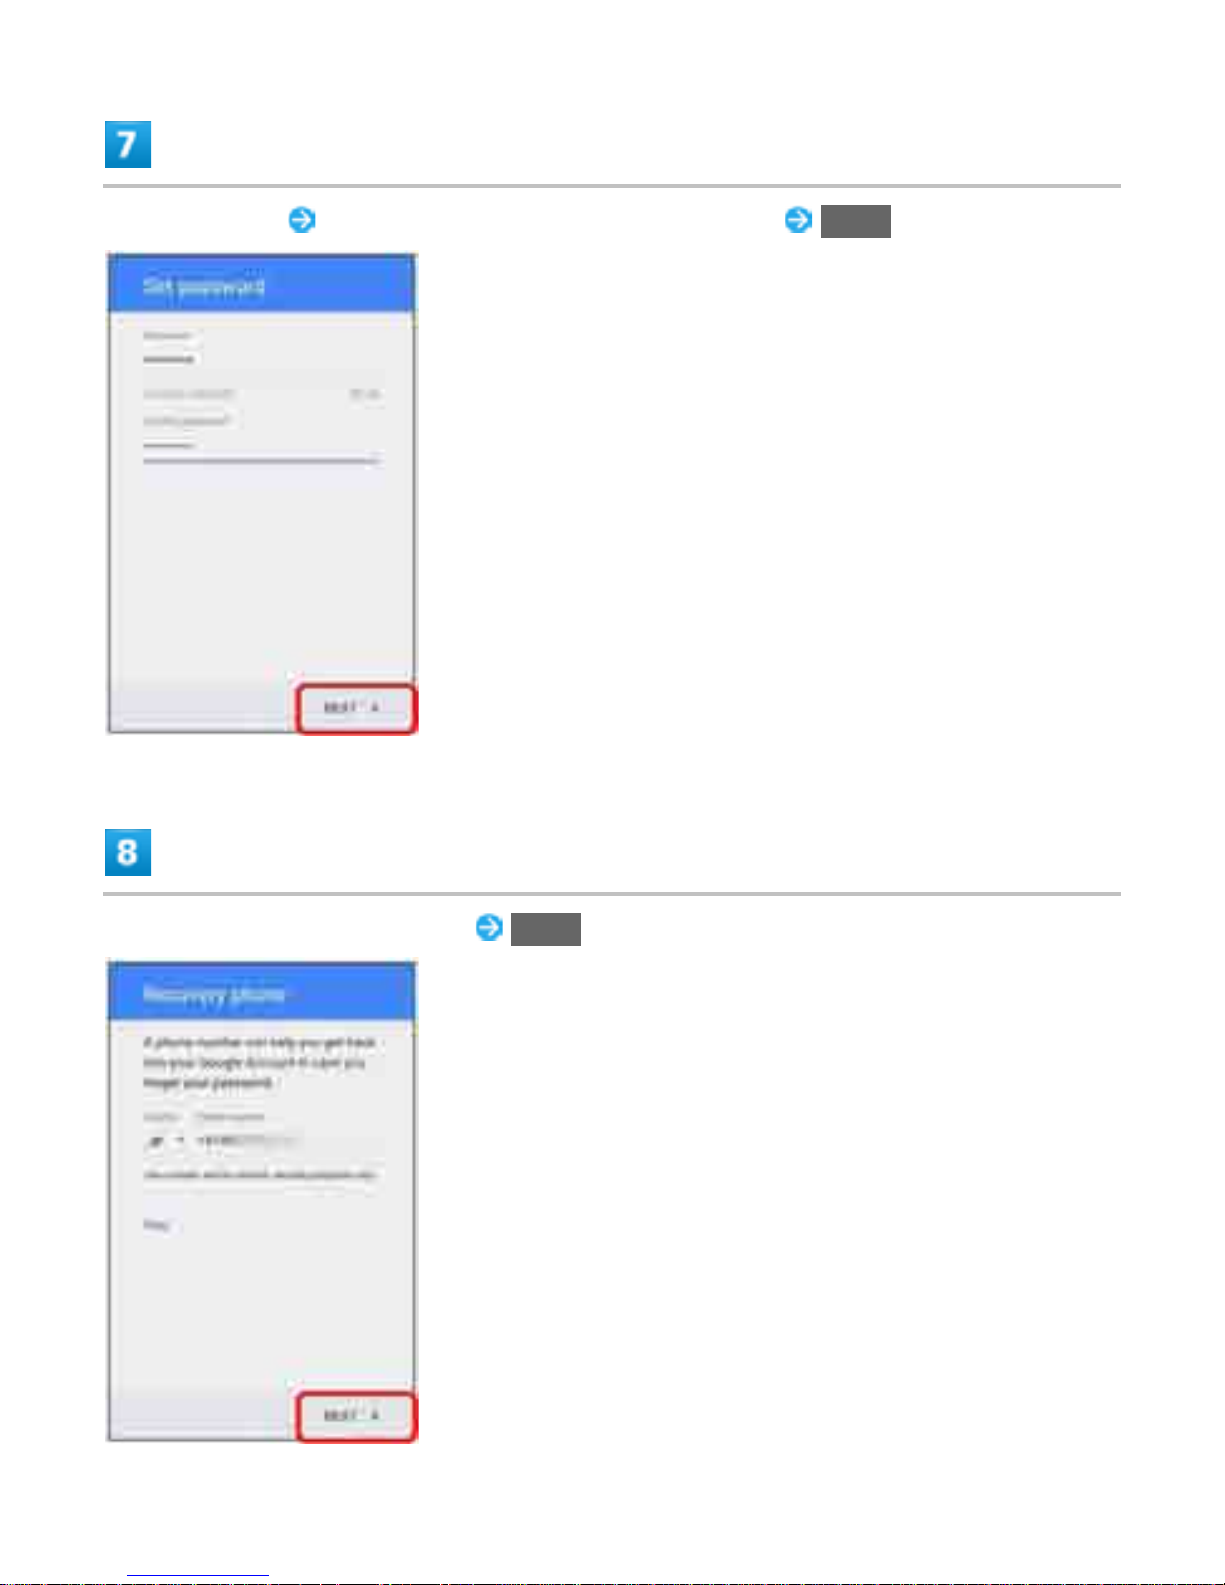
Enter password Enter password again (for confirmation) NEXT
Check Recovery phone number NEXT
30
Page 68
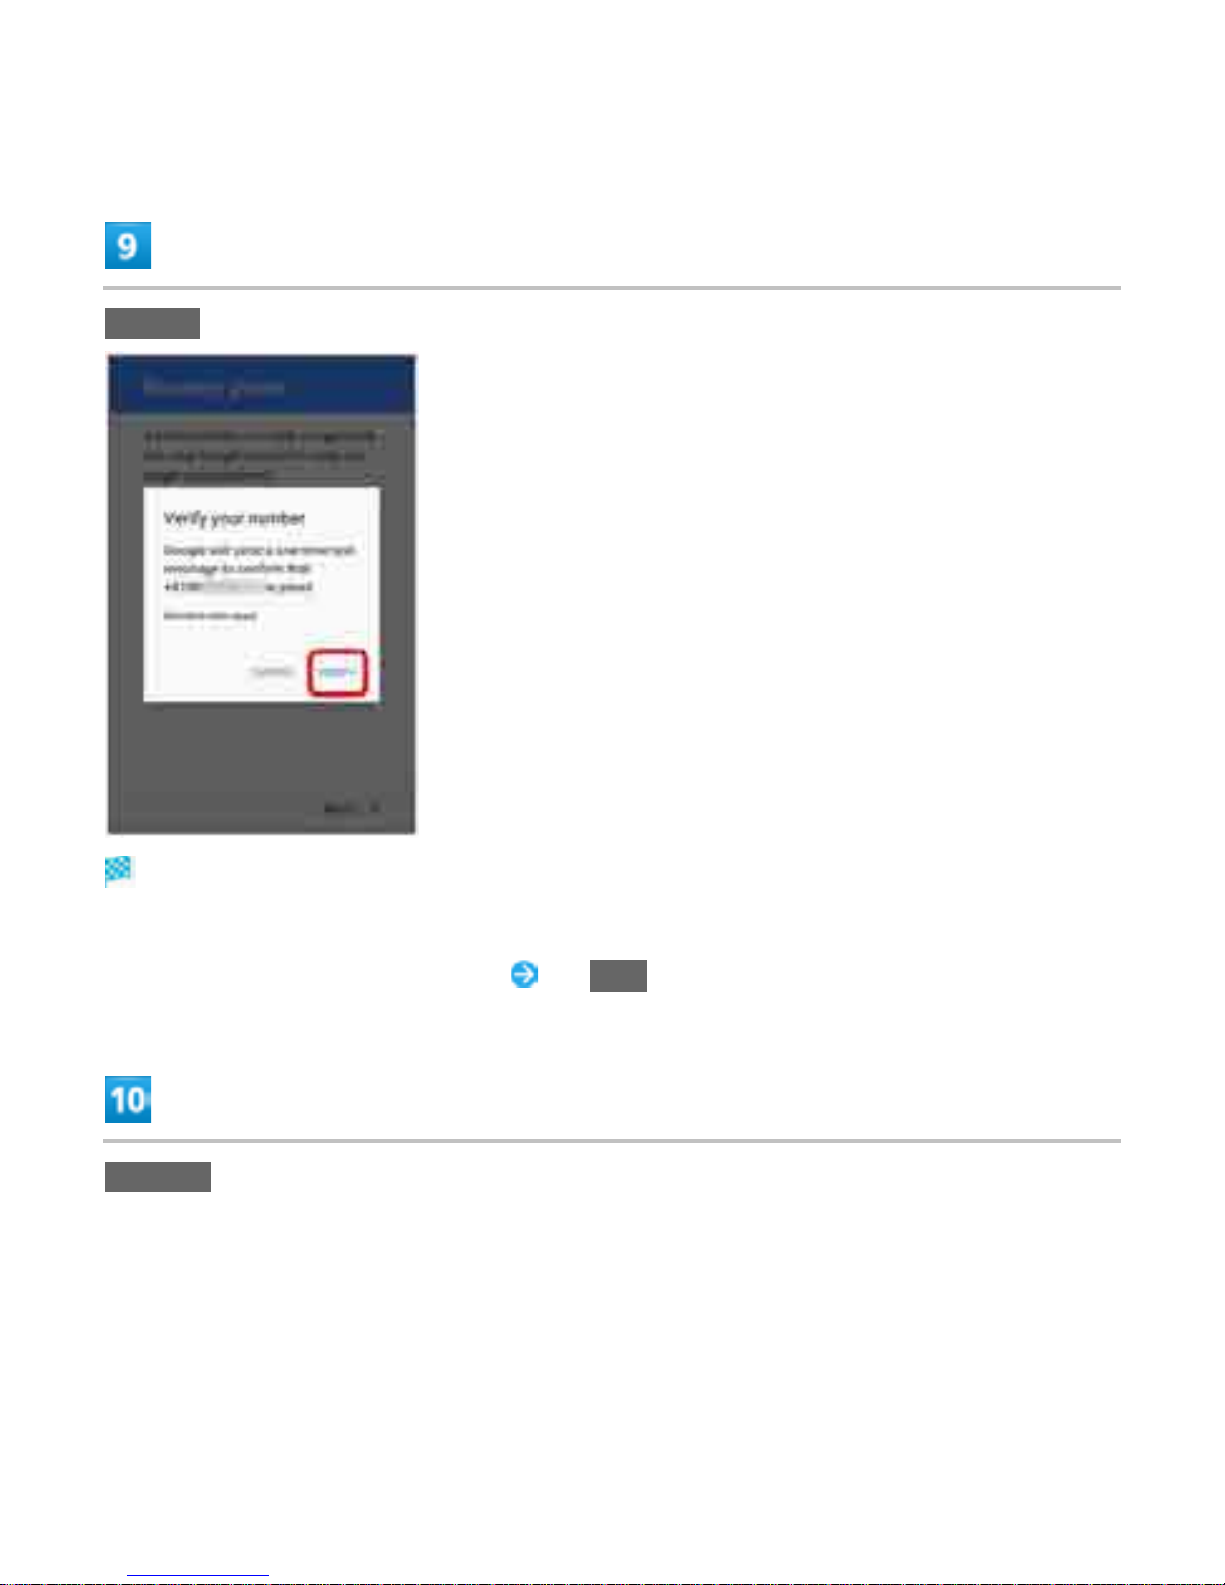
Telephone number of your SIM Card is entered automatically.
VERIFY
SMS is sent.
If a telephone number other than the one on your SIM Card is entered, confirmation screen
appears. Enter notified security code Tap NEXT.
I AGREE
31
Page 69
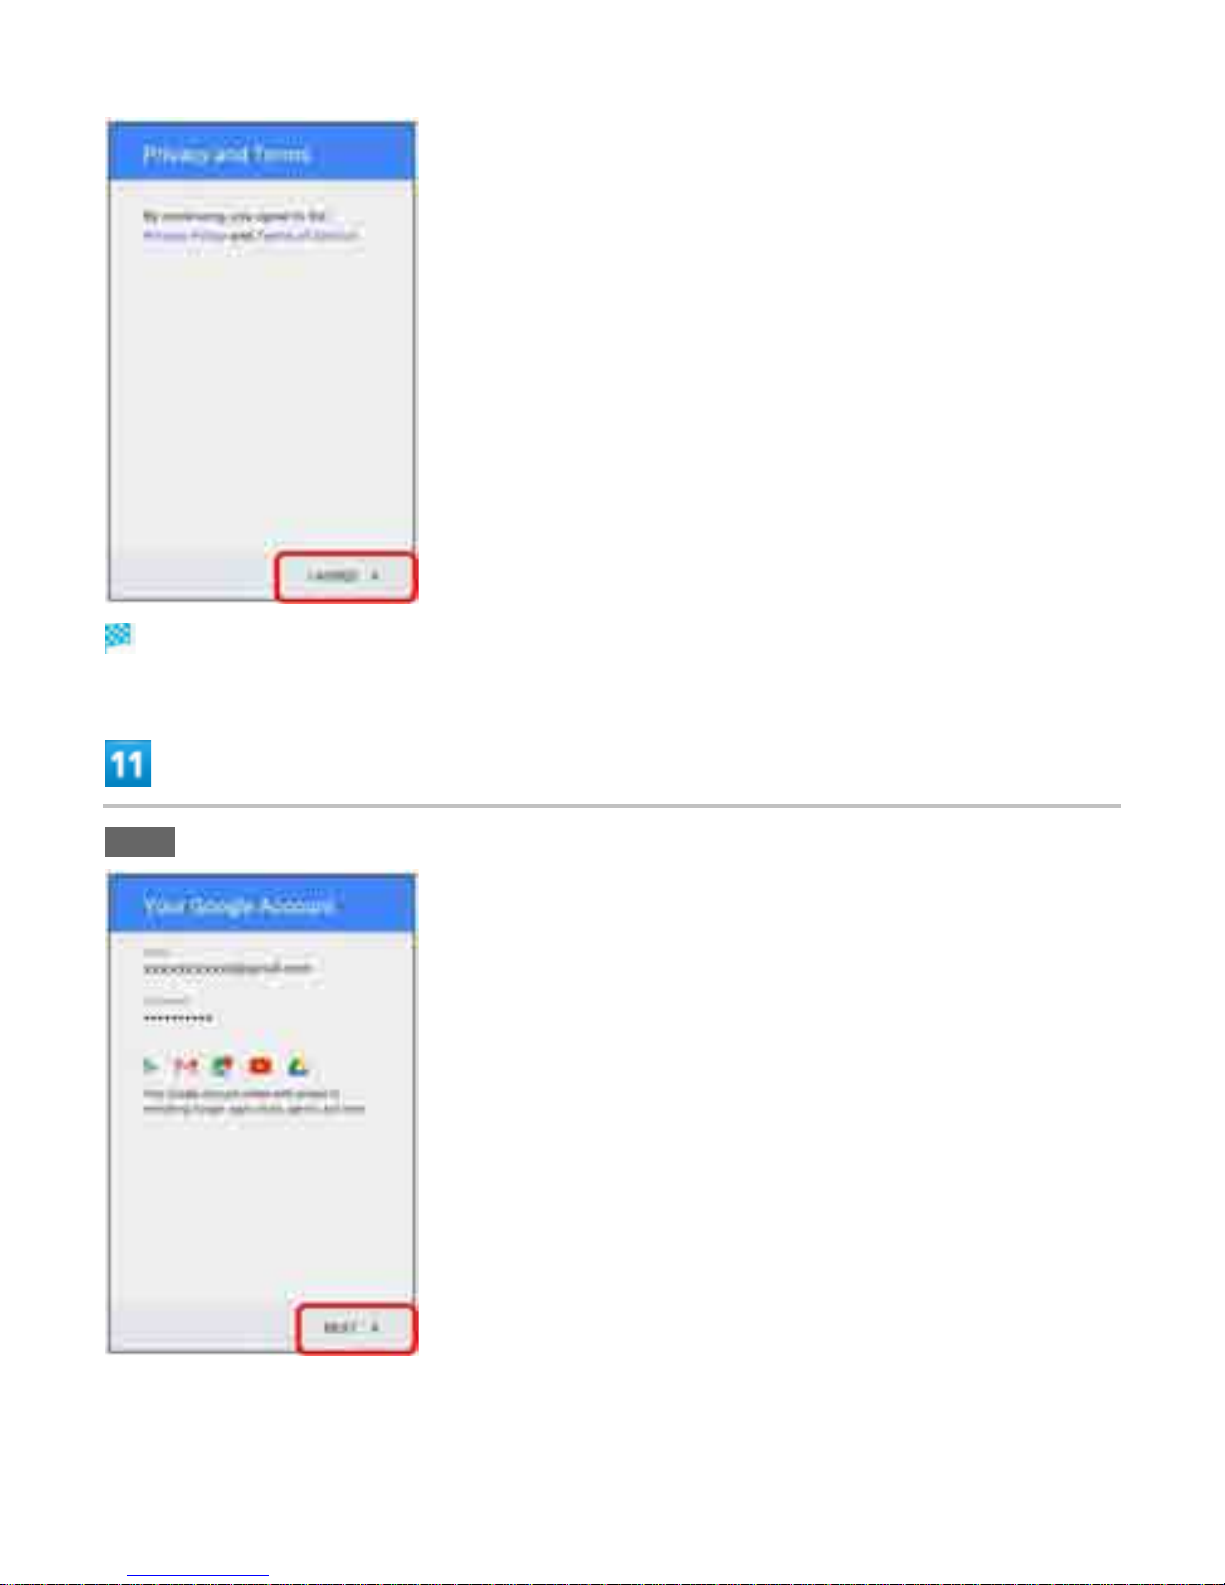
Your Google account is obtained.
NEXT
32
Page 70
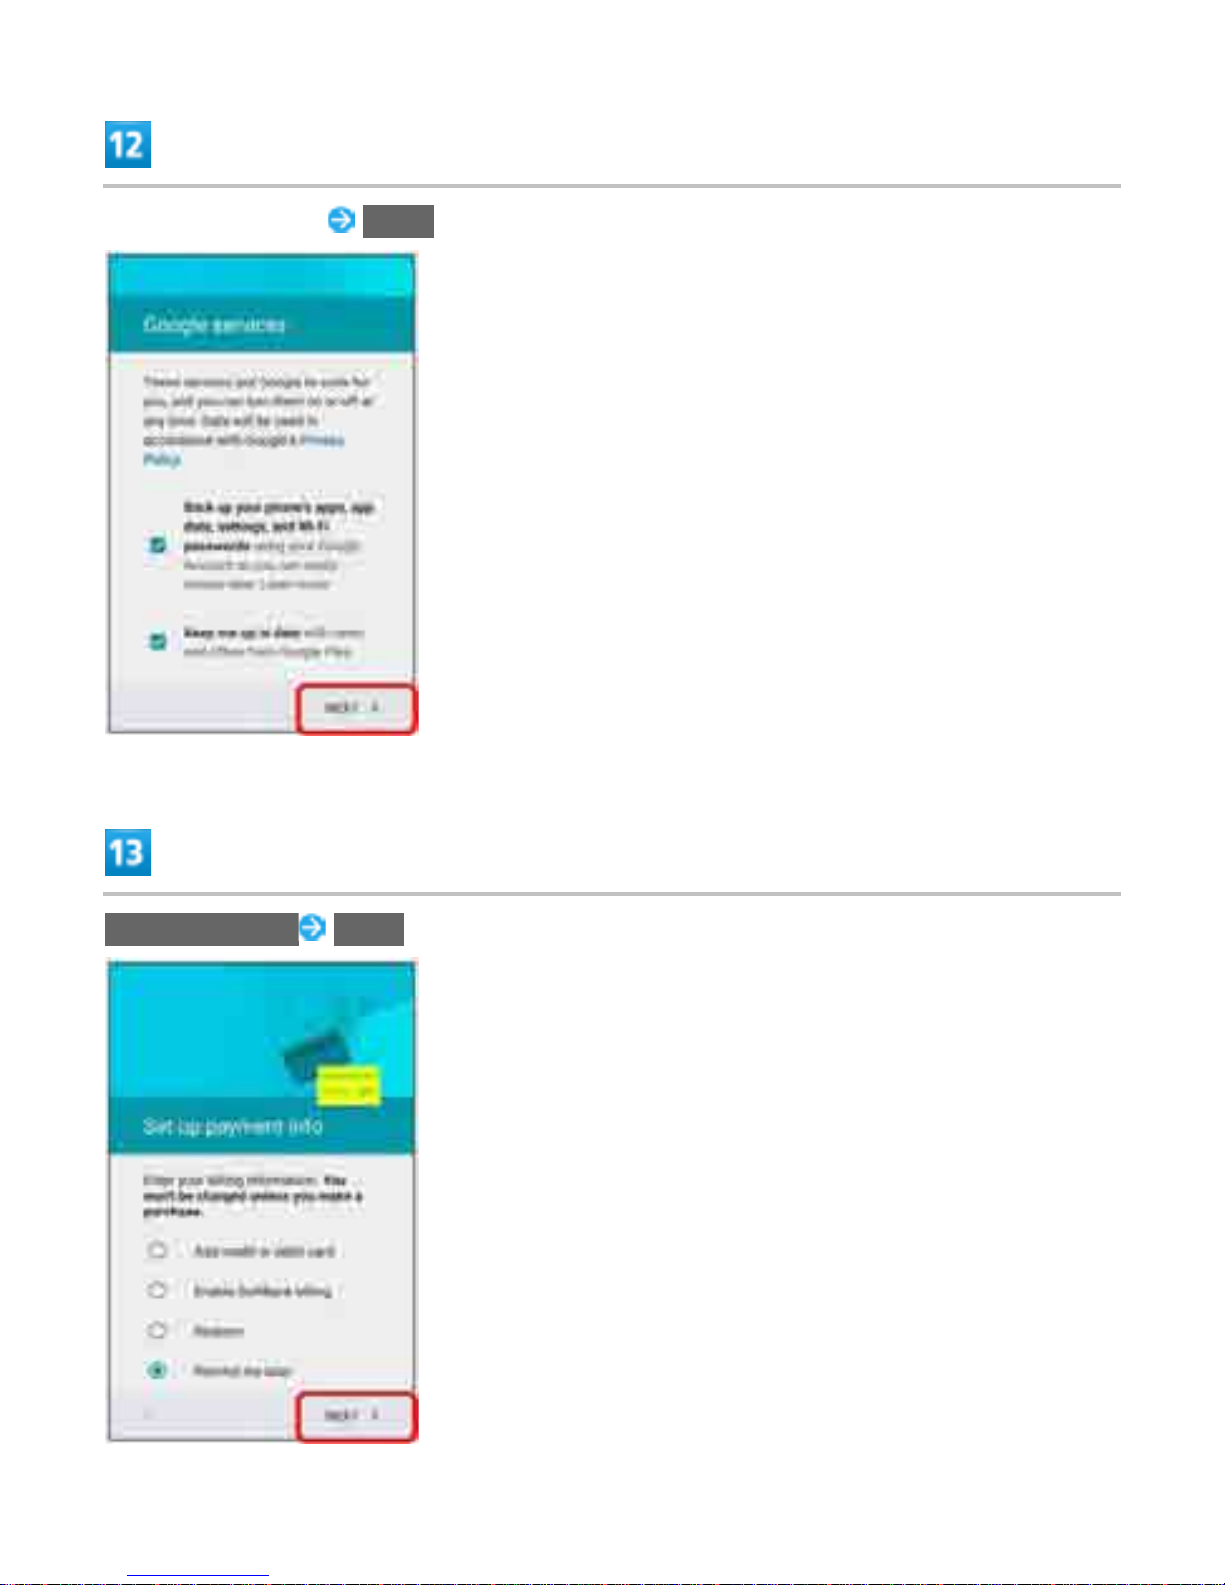
Set Google service NEXT
Remind me later NEXT
33
Page 71
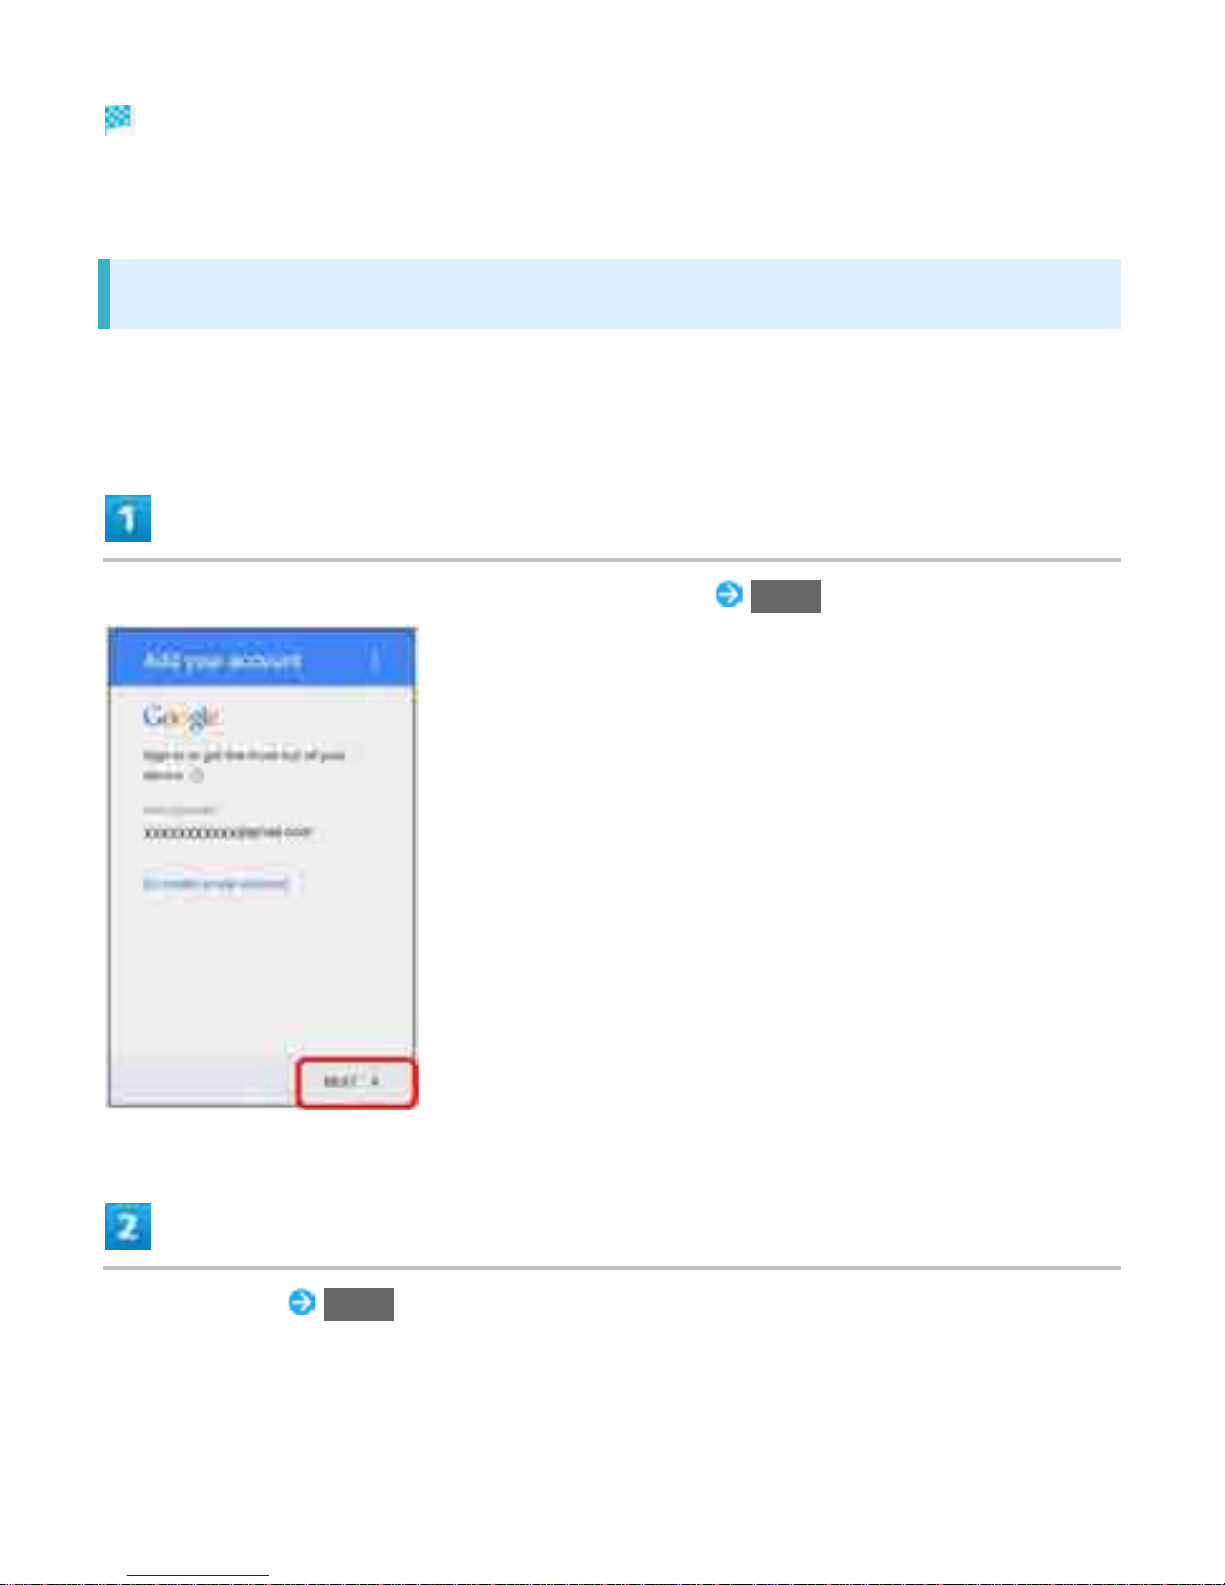
Google account creation is completed.
To create a second or subsequent Google account, Sync setting window appears next.
Logging In with a Google Account
If an application is activated that requires a Google account, Add a Google Account appears. Sign in
with the obtained Google account to use the application.
Enter mail address on Add a Google Account screen NEXT
Enter password NEXT
34
Page 72
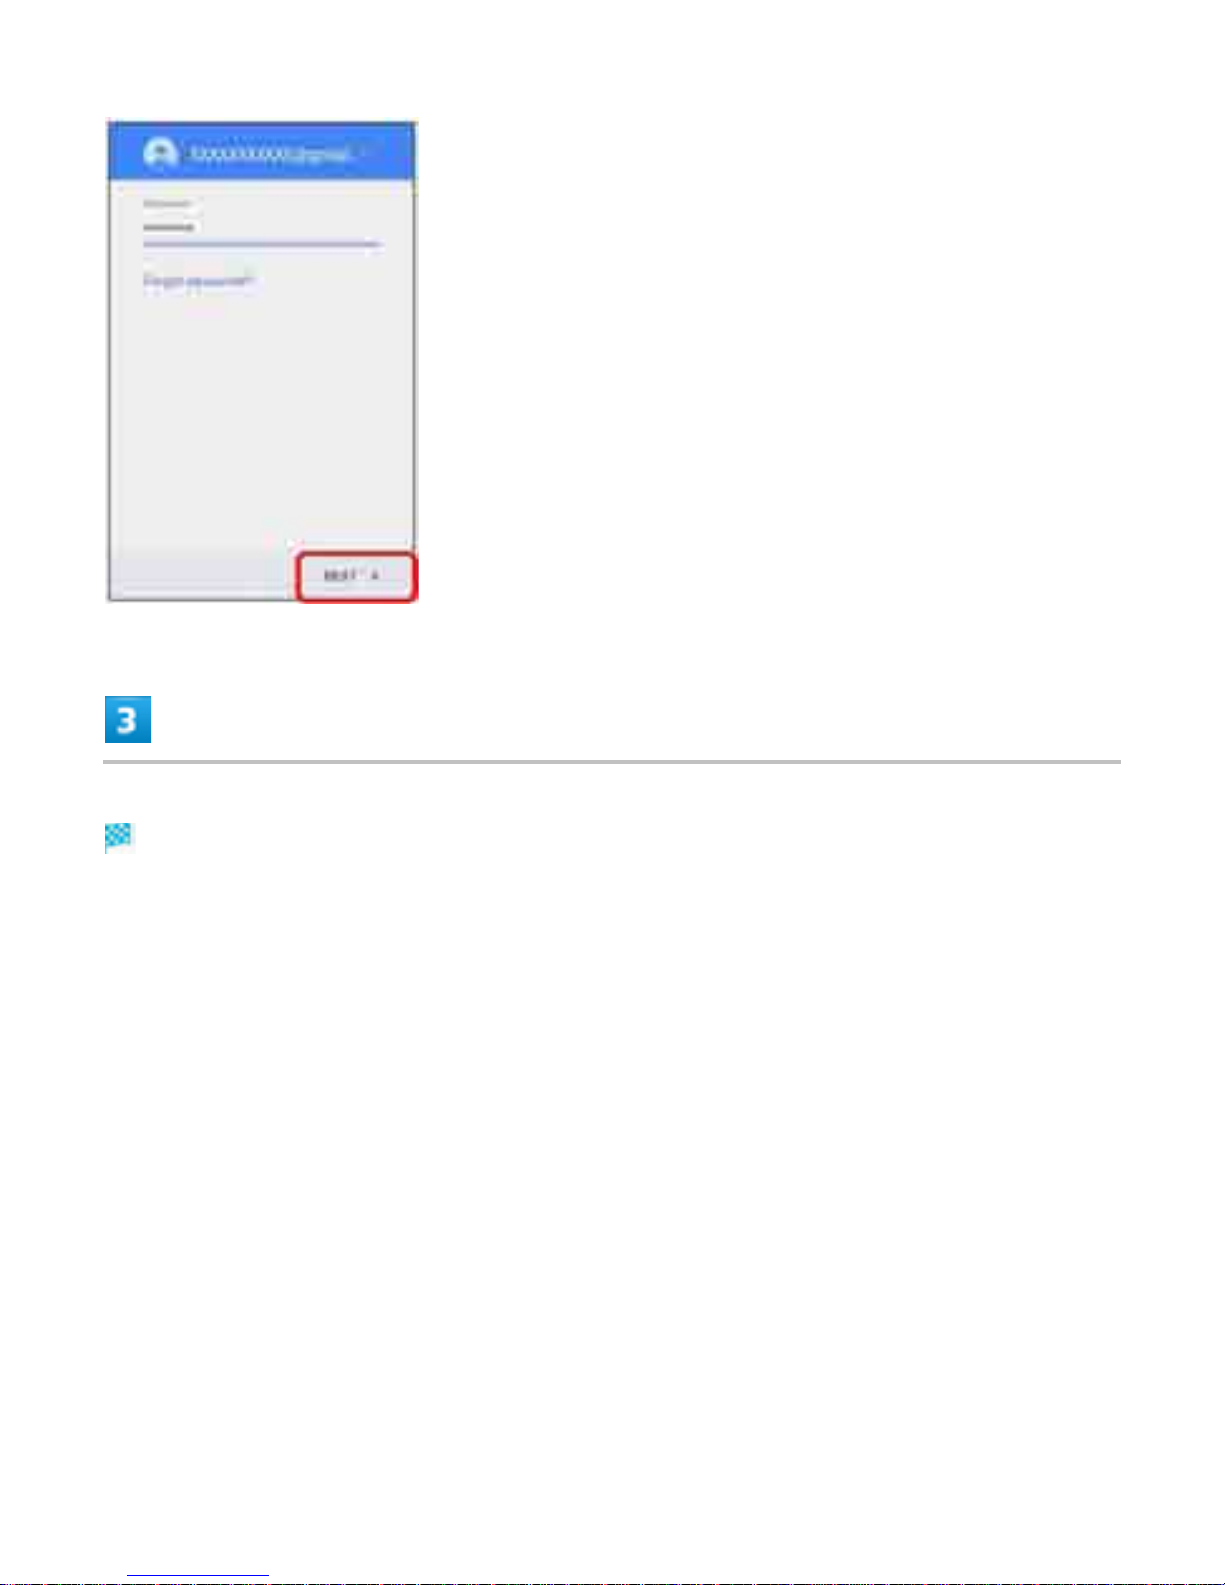
Follow onscreen instructions
You are signed in to your Google account.
35
Page 73
Google Play
Download a variety of applications (free/paid) from Google Play. Change the setting of downloaded
applications to enable manual or automatic updates. Log in to your Google account beforehand.
Ð
Installing Free Applications
Ð
Purchasing Paid Applications
Ð
Updating Applications
Ð
Uninstalling Applications
Ð
Getting Help with Google Play
Installing Applications
Many different kinds of applications can be installed on handset from Google Play (provided by
Google Inc.). SoftBank Corp. is not responsible in any way for user-installed applications (quality,
reliability, legality, fitness for a purpose, credibility, accuracy, etc.) or resulting malfunctions (viruses,
etc.).
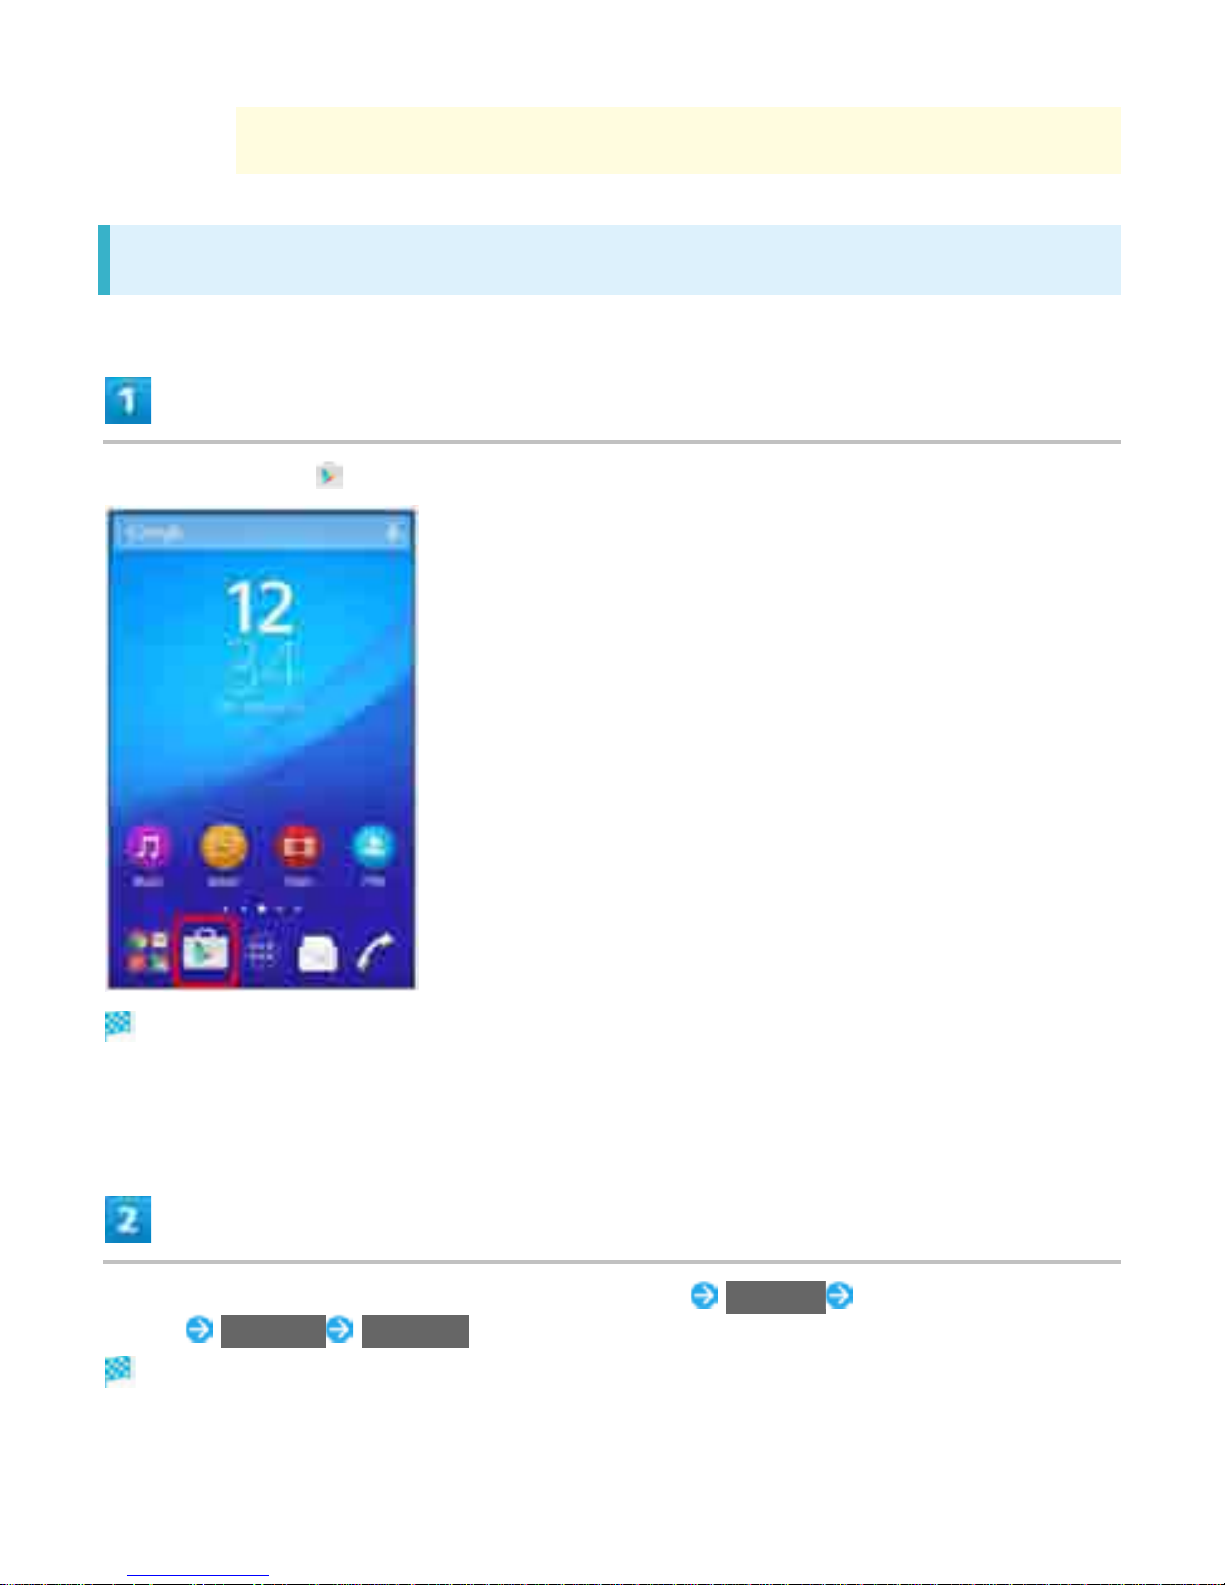
Installing Free Applications
In Home Screen, (Play Store)
36
Page 74
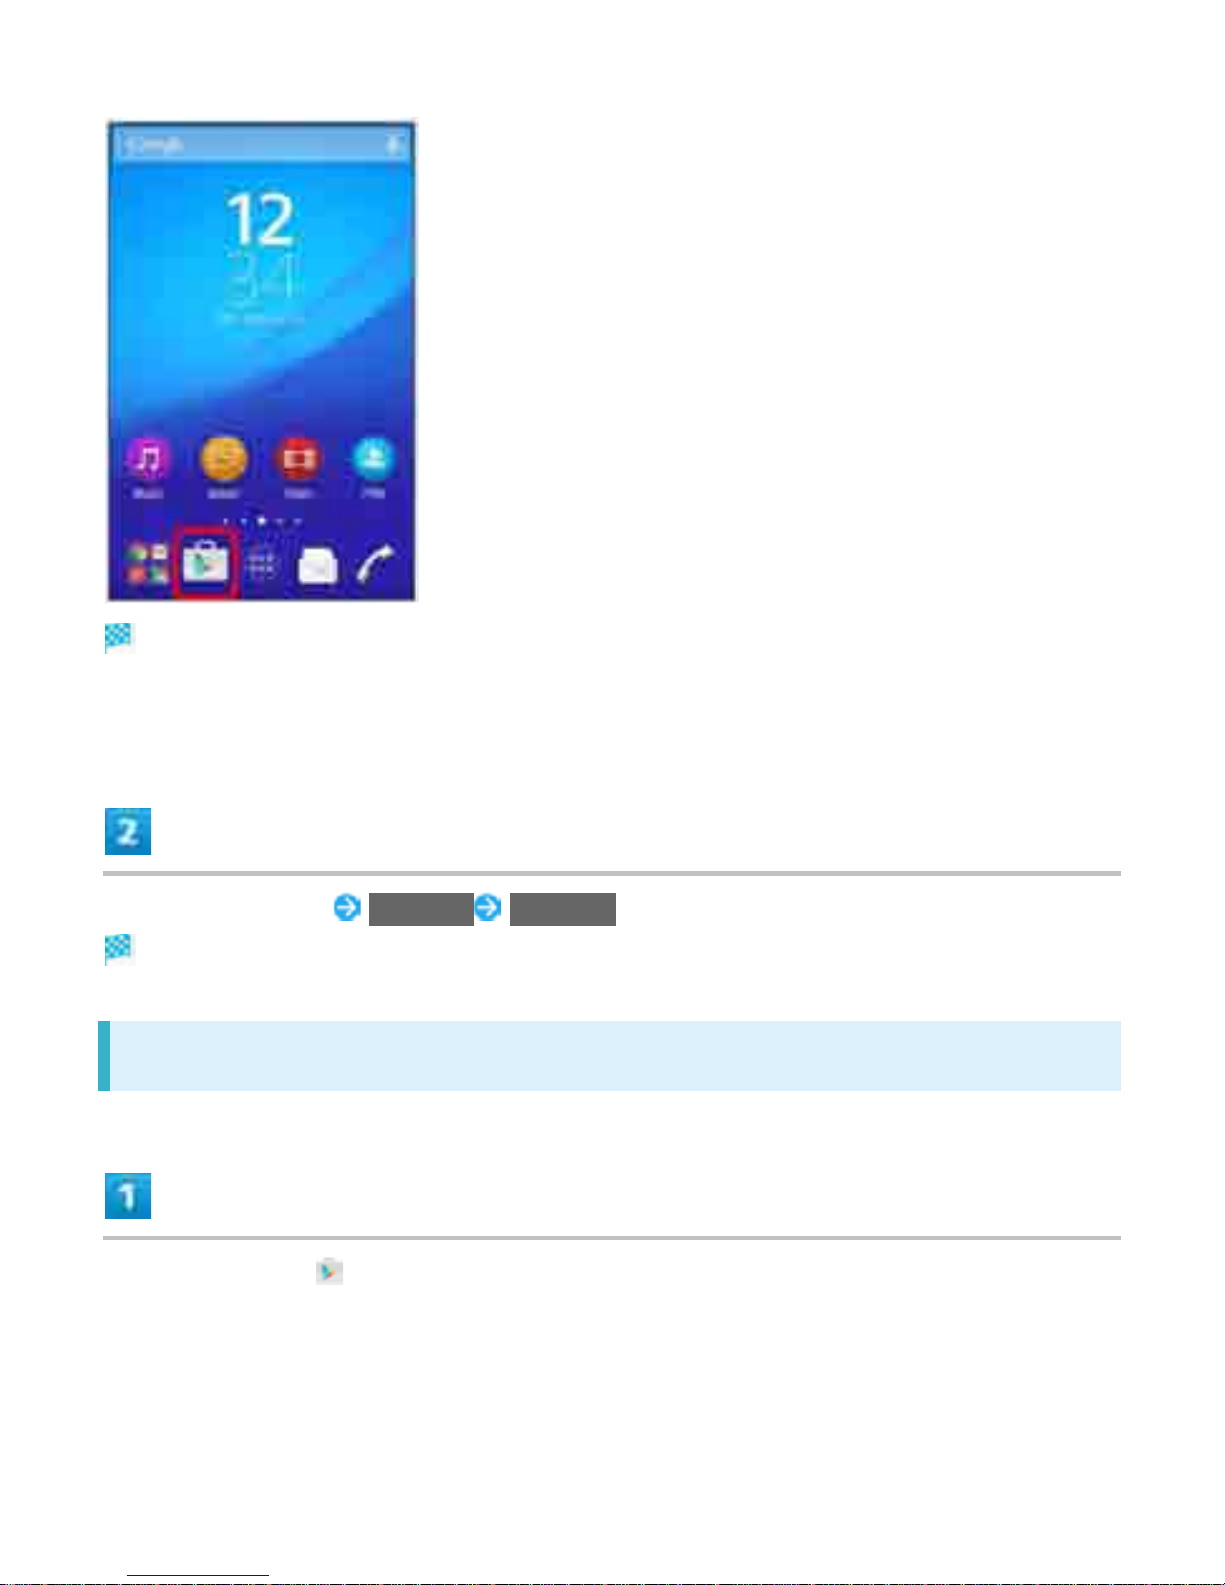
Google Play appears.
If confirmation appears, follow onscreen instructions.
Tap free application INSTALL ACCEPT
Application is downloaded and installed.
Purchasing Paid Applications
In Home Screen, (Play Store)
37
Page 75
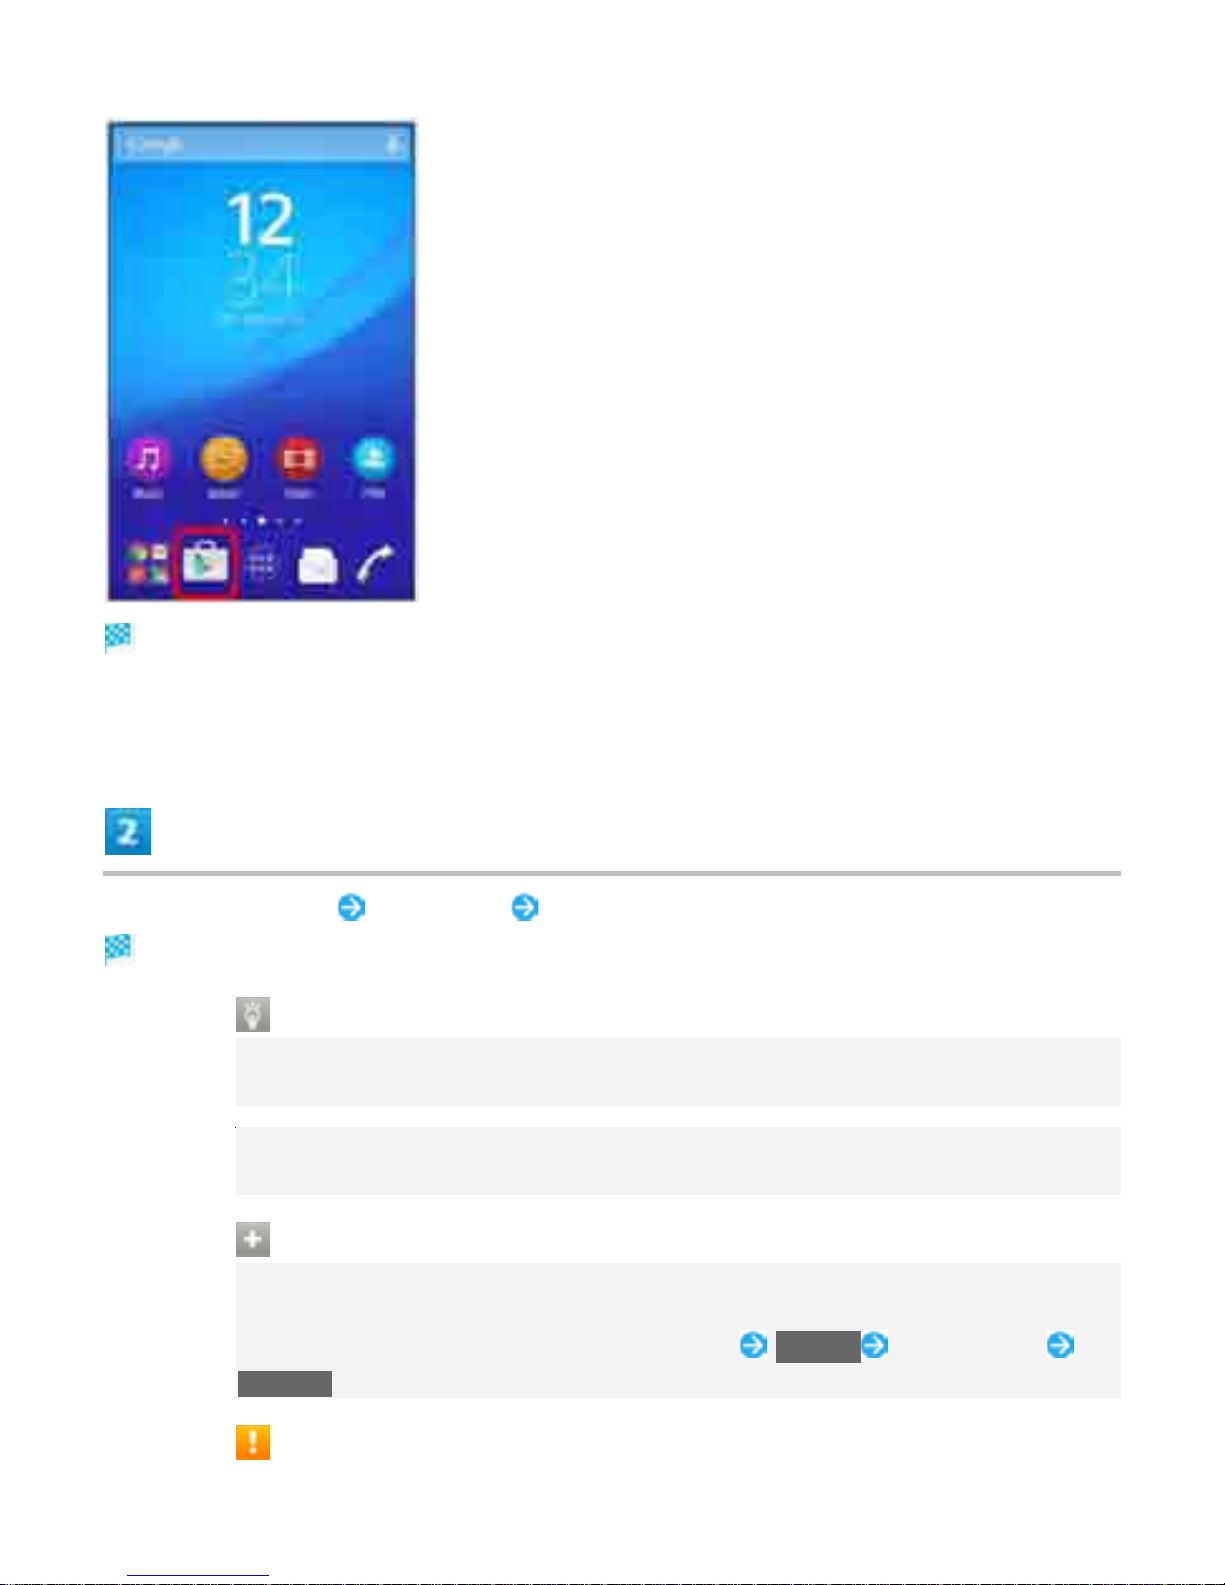
Google Play appears.
If confirmation appears, follow onscreen instructions.
Tap paid application Tap amount Follow onscreen instructions
Application is downloaded and installed.
Purchased Applications
Payment
Pay only once. Redownloads of uninstalled applications are free of charge.
On Other Android Devices
Install an application on any Android device under the same Google account for free.
Requesting Refunds
Refund is possible withi n a limited ti me. By r equesting a refund, the appl icatio n is delet ed
and the charge is cancelled. A refund request is valid only once per one application.
Flick right from the left end of Google Play window My apps Tap application
REFUND
Purchasing Applications
38
Page 76
Purchase applications at your own risk. SoftBank Corp. is not responsible for any
disadvantage resulting for user or third parties.
Updating Applications
In Home Screen, (Play Store)
Google Play appears.
If confirmation appears, follow onscreen instructions.
Flick right from the left end of Google Play window My apps Tap application to
update UPDATE ACCEPT
Application is downloaded and installed.
If confirmation appears, follow onscreen instructions.
39
Page 77
Application Updates
Setting Automatic Updates Application
Flick right from the left end of Google Play window Settings Auto-update apps
Set update method
Setting Automatic Updates Application
Flick right from the left end of Google Play window My apps Tap application
Auto-update ( )
Automatic updates are unavailable for some applications.
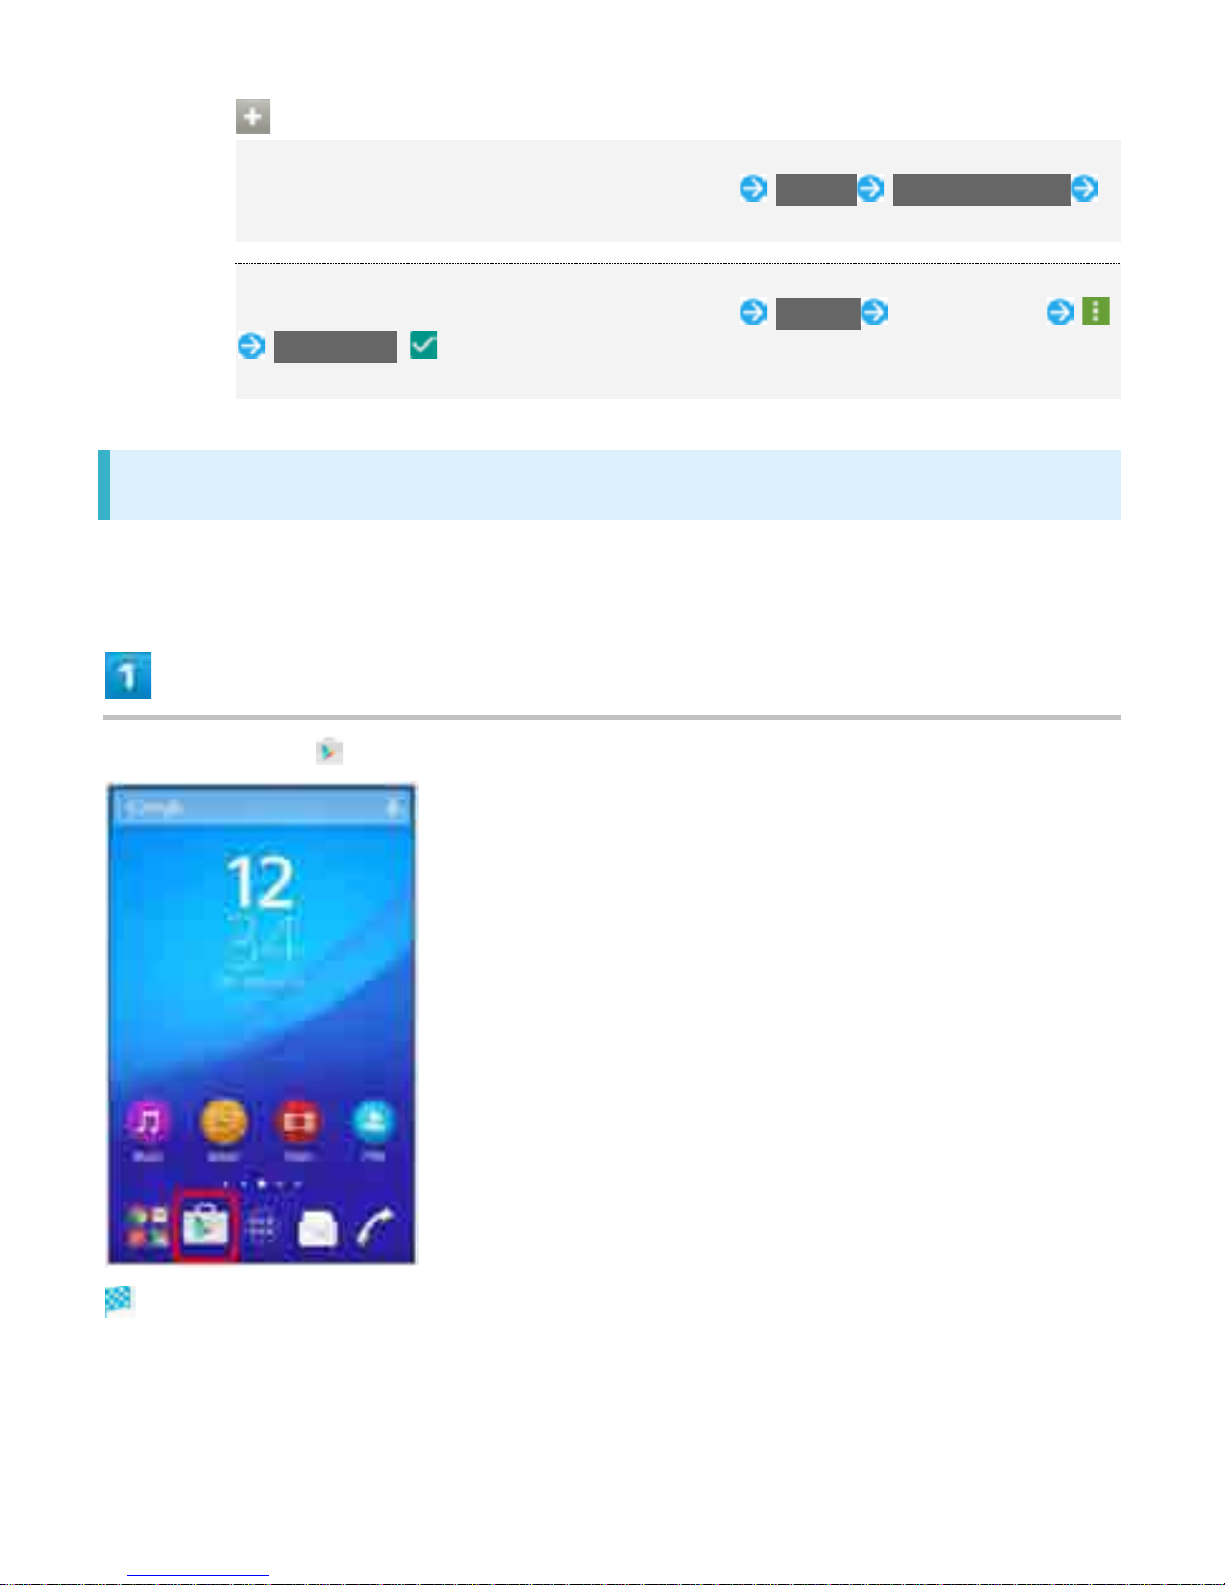
Uninstalling Applications
Applications installed from Google Play can also be uninstalled.
In Home Screen, (Play Store)
Google Play appears.
If confirmation appears, follow onscreen instructions.
40
Page 78
Flick right from the left end of Google Play window My apps Tap application to
uninstall UNINSTALL OK
Application is activated.
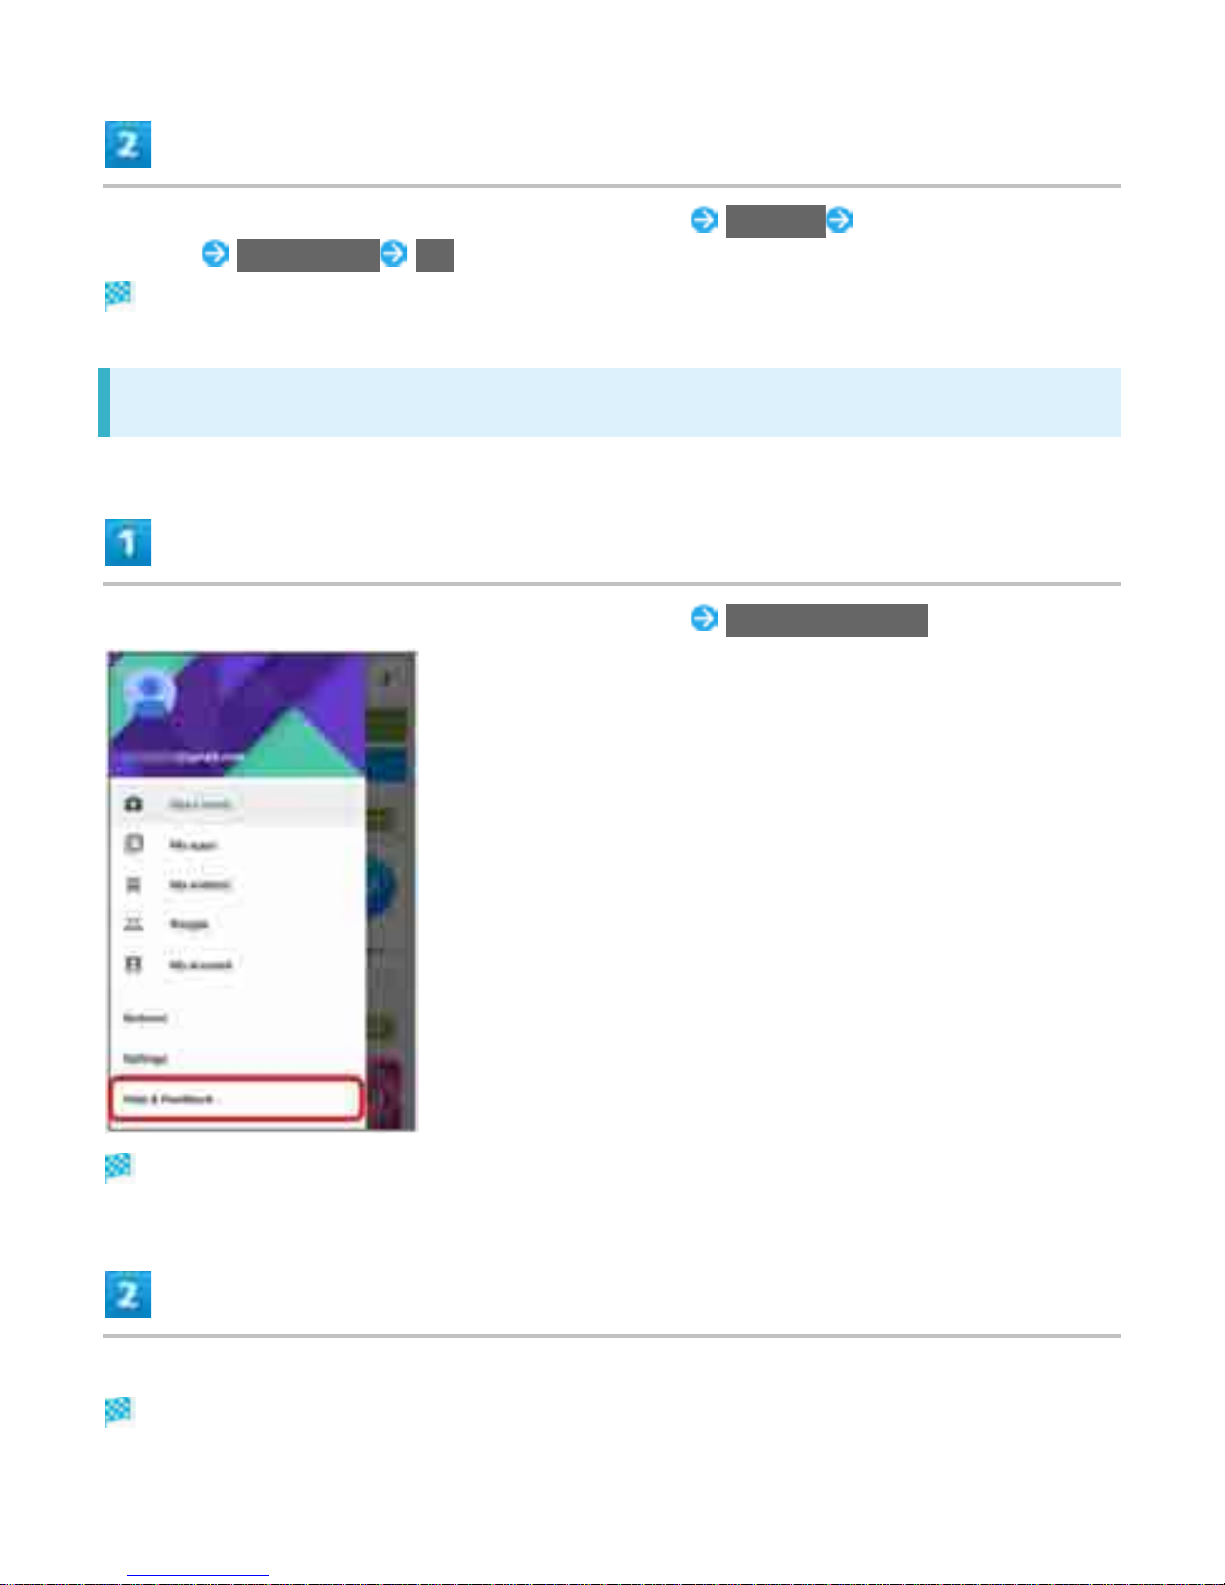
Getting Help with Google Play
Flick right from the left end of Google Play window Help & Feedback
The Web browser will take you to the Google Play Help Web page.
Follow onscreen instructions
A description for each item appears.
41
Page 79
Security Codes
Ð
Security Codes
Security Codes
An Operation Access Code or Center Access Code (Call Barring Password) is required for using
handset.
Operation Access Code: Security code to use each function. At time of purchase, no code is set.
Center Access Code (Call Barring Password): Four-digit security code at time of subscription. It is
required when using option services from a landline phone or subscribing to fee-based Web
information.
Be careful not to forget CenterAccess Code (Call Barring Password). If you forget your code, you
will require assistance. For details, contact Customer Service.
Be careful to keep Operation Access Code and CenterAccess Code (Call Barring Password)
secret. SoftBank Corp. is not responsible for damages resulting from misuse by other parties.
Resetting Operation Access Code
In Operation Access Code input screen, PASSWORD RESET OK
Follow onscreen instructions.
My SoftBank recognition is required to reset Operation Access Code. My SoftBank
recognition can be set with My SoftBank䝥䝷䝇.
42
Page 80
SIM PIN
PIN is the security code for your SIM Card. It prevents third parties from unauthorized
use of handset. At time of purchase, "9999" is set.
Ð
Enabling SIM PIN
Ð
Changing SIM PIN
Enabling SIM PIN
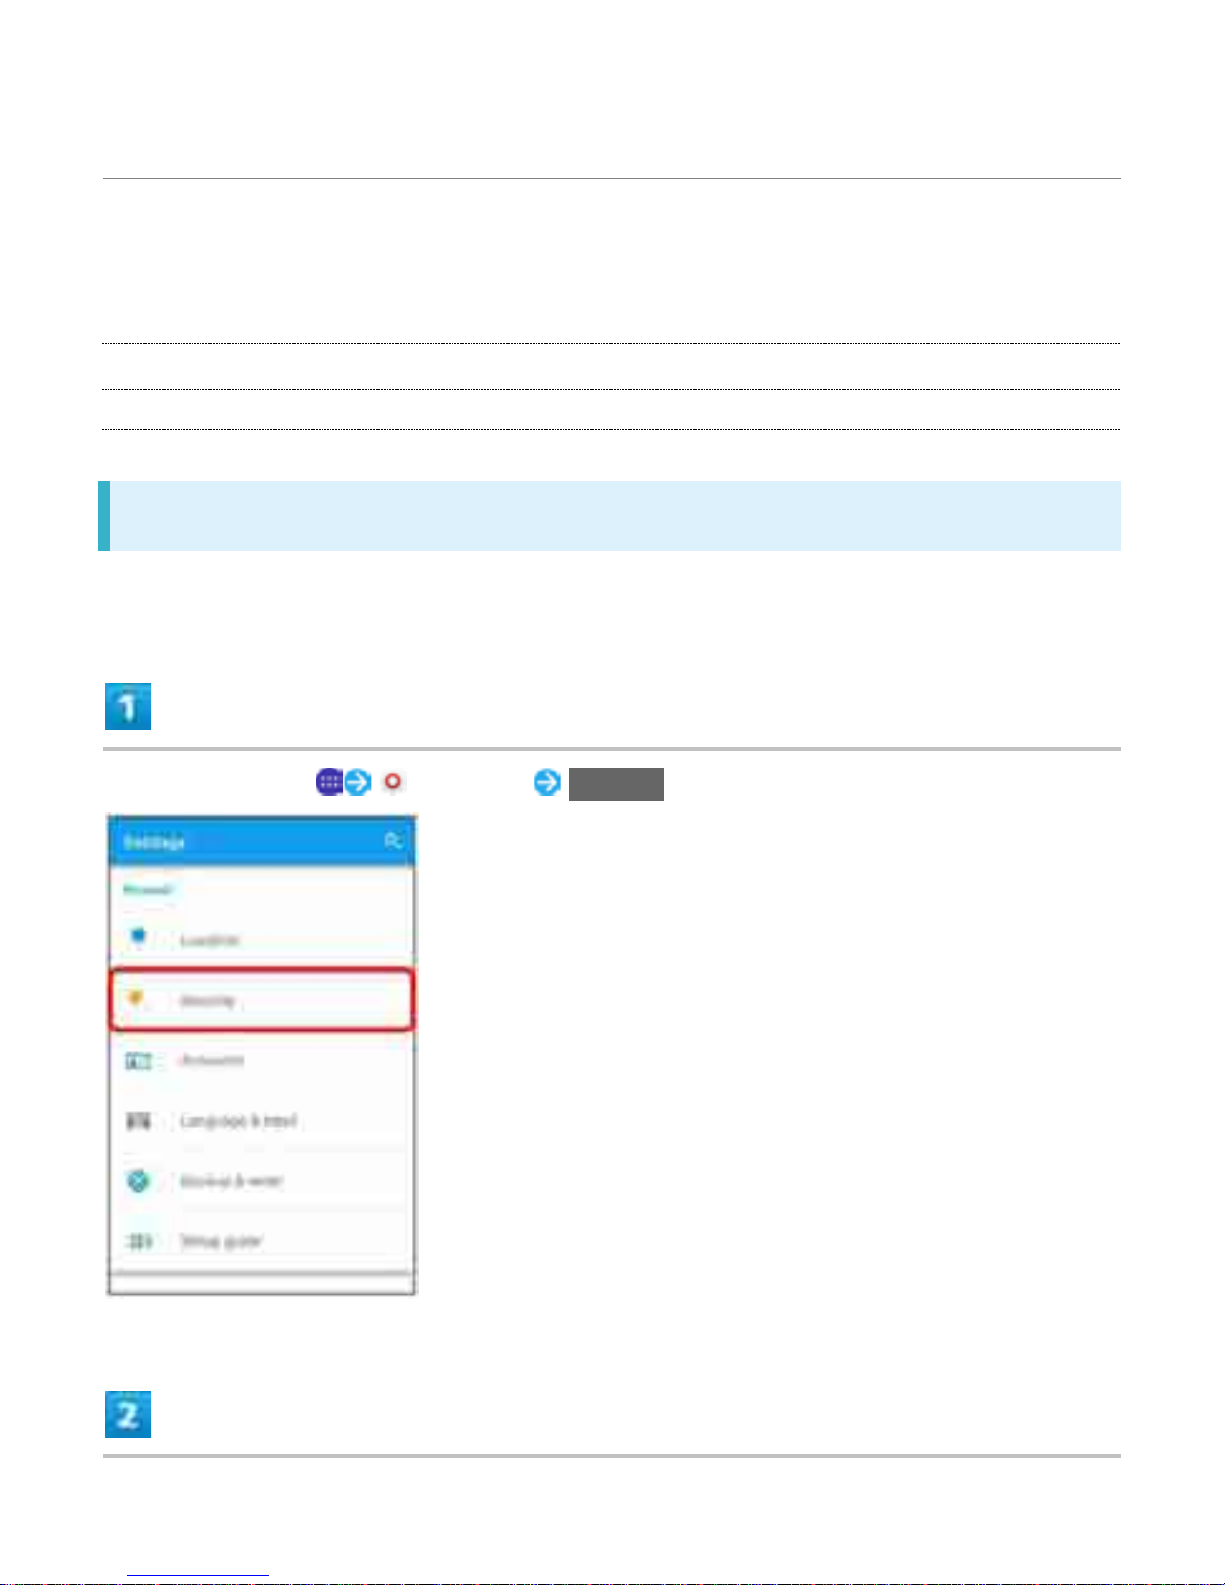
Enable SIM PIN to show PIN entry window when handset power is on with SIM Card inserted.
In Home Screen, (Settings) Security
43
Page 81
Set up SIM card lock Lock SIM card Enter PIN OK
PIN is enabled.
PIN Cautions
Entering incorrect PIN three times locks PIN. To release locked PIN, enter PUK
(Personal Unblocking Key). For details on PIN, contact Customer Service. Entering
incorrect PUK ten times consecutively locks SIM Card to disable handset operations. In
that case, reissue of SIM Card at a SoftBank Shop (paid service) is needed.
Changing SIM PIN
Operation can be performed only when PIN is enabled.
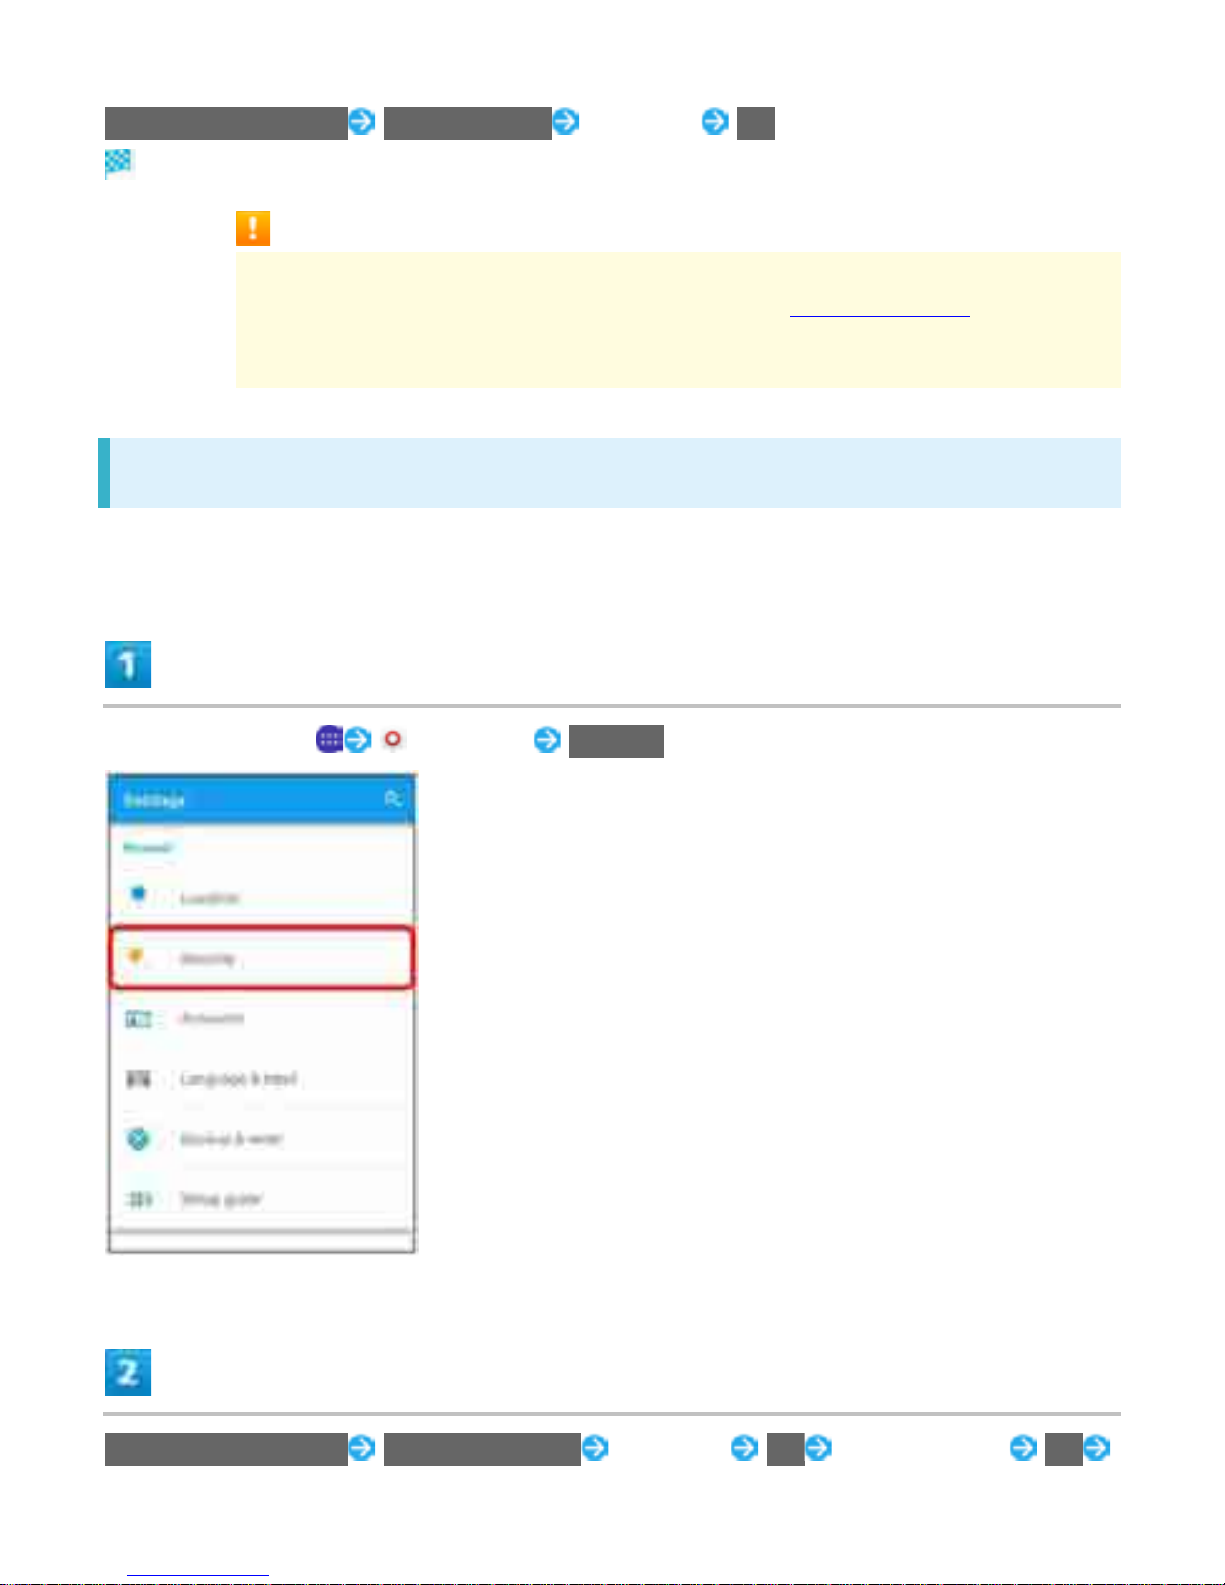
In Home Screen, (Settings) Security
Set up SIM card lock Change SIM PIN Enter PIN OK Enter new PIN OK
44
Page 82

Enter new PIN again (for confirmation) OK
PIN is changed.
45
Page 83
Locking Screen
Display is locked after a set period of inactivity. Alternatively, Press for manual
screen lock. This saves battery power and prevents accidental Touchscreen operation.
Ð
Unlocking Screen
Unlocking Screen
In sleep mode (Screen lock active),
Lock screen appears.
Flick screen upwards
46
Page 84
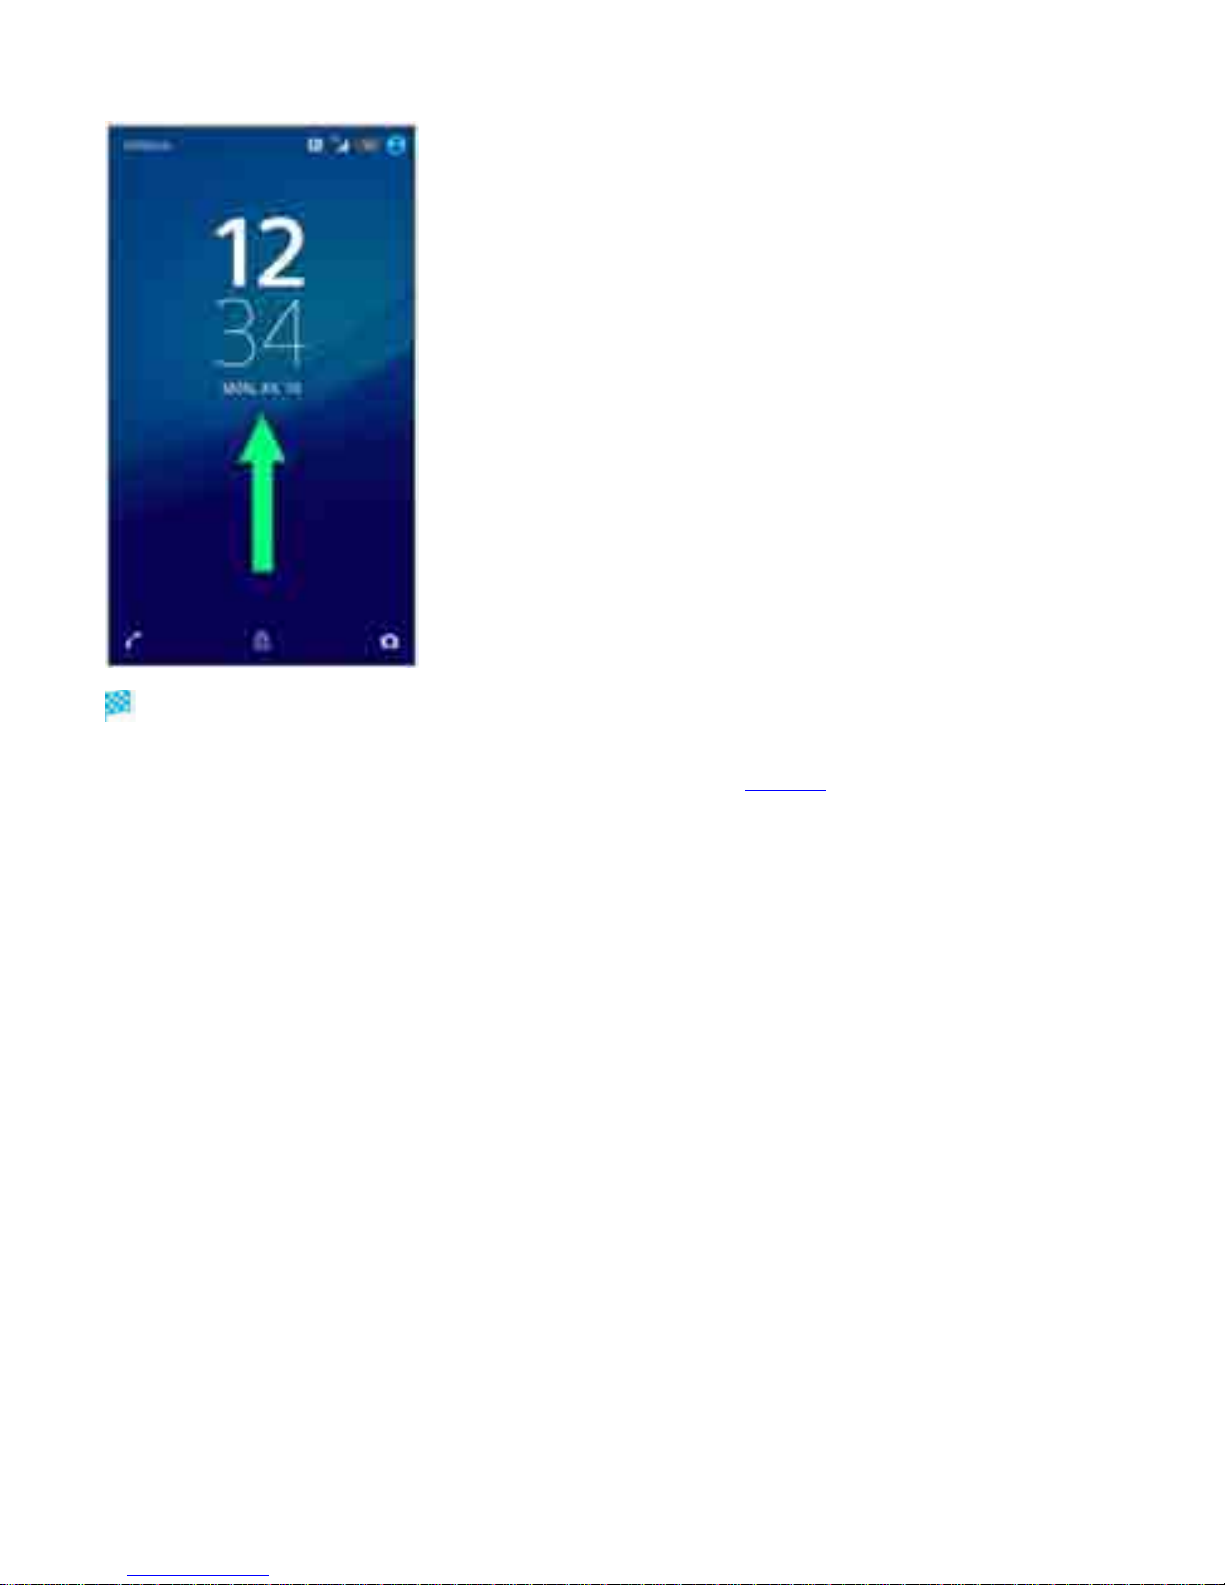
Screen is unlocked.
The method for unlocking the screen can be changed. See “Security” for the unlock method.
47
Page 85
Updating Software
Check whether updates are required via the Internet, and update as required.
Ð
Updating Software
Before Updating Software
Saved data may b e los t d ependi ng on con diti on of ha nds et ( malfunc tioni ng, damag ed, water seepag e ,
etc.). It is recommended that you back up important data before updating software. SoftBank Corp. is
not responsible for damages from loss of data.
Software Update makes a part of settings to the default.
Software Update Cautions
During Update
Handset cannot be used until software is updated. It may take time to update software.
Signal during Update
Operate handset where signal reception is good and without changing location. Also operate with
adequate battery charge. Signal becoming weak or Battery becoming low during an update may
cause an update failure. An update failure may disable handset.
If Using Other Functions
Other functions cannot be operated during a software update.
Updating Software
Automatic update is set by default. To update software manually, operate as follows.
In Home Screen, (Settings)
48
Page 86
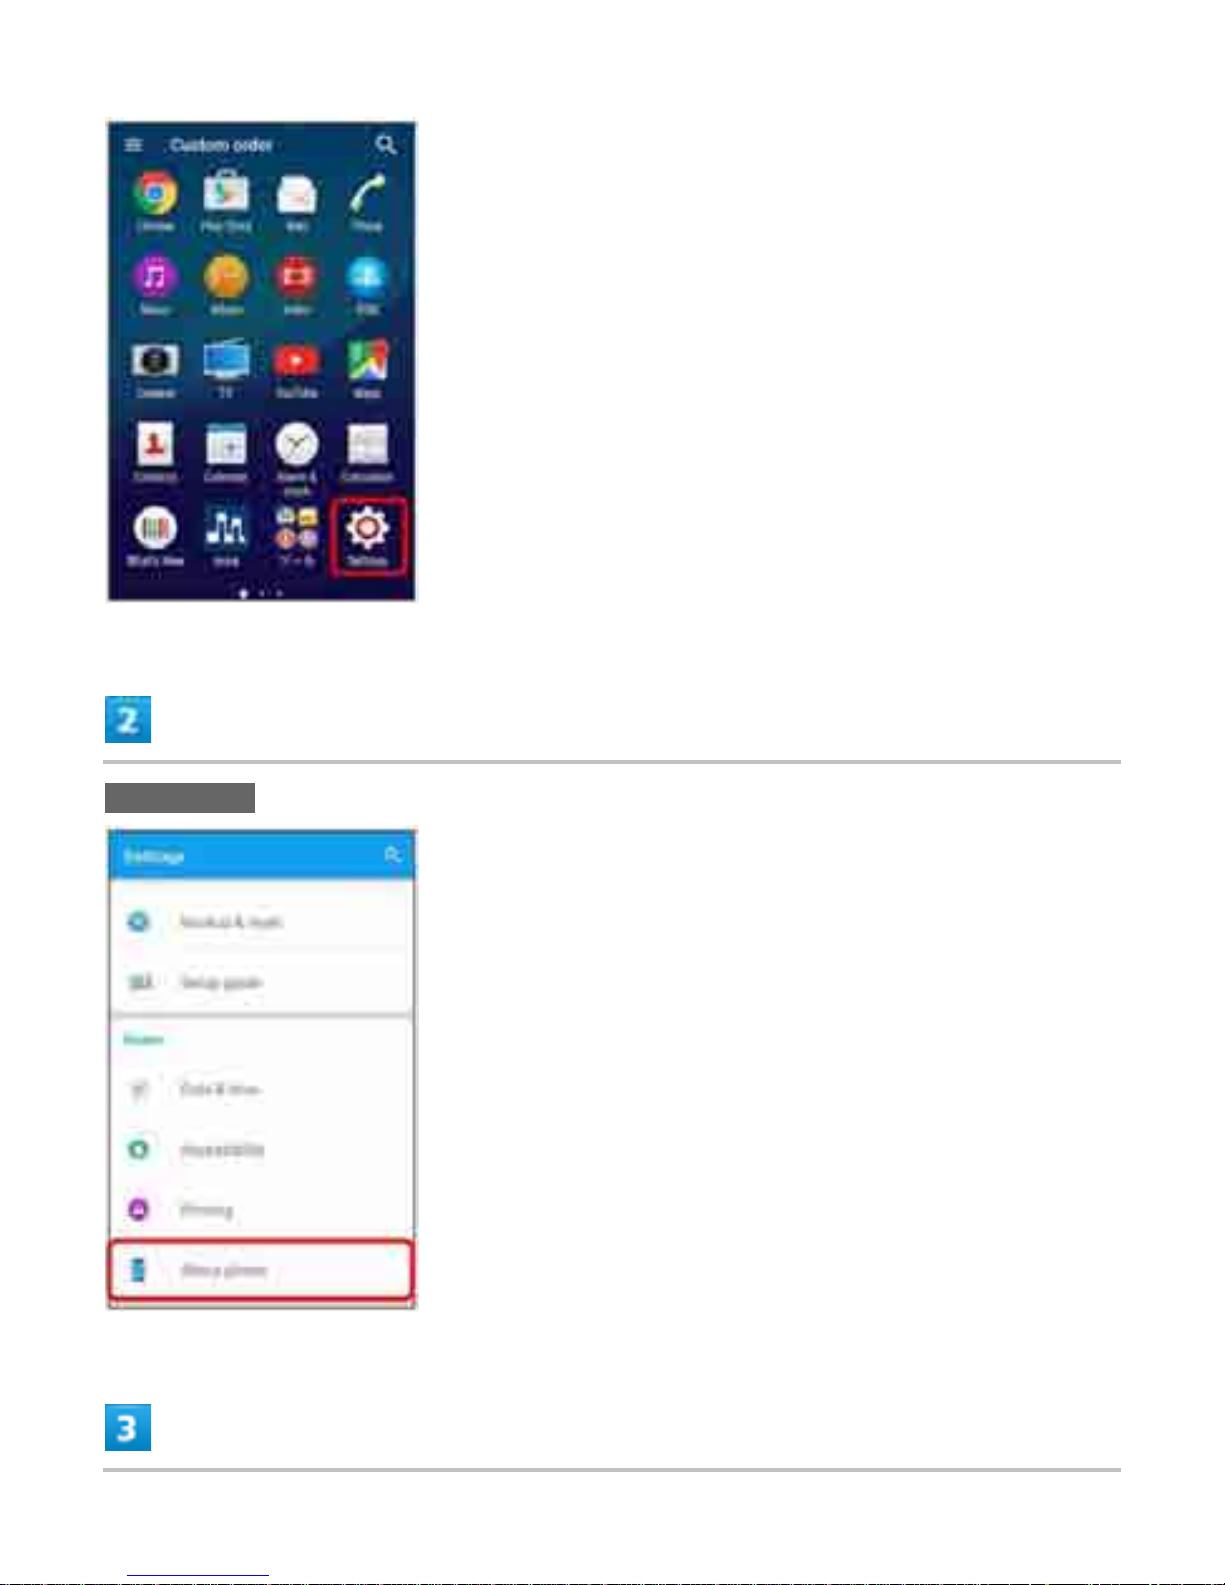
About phone
49
Page 87
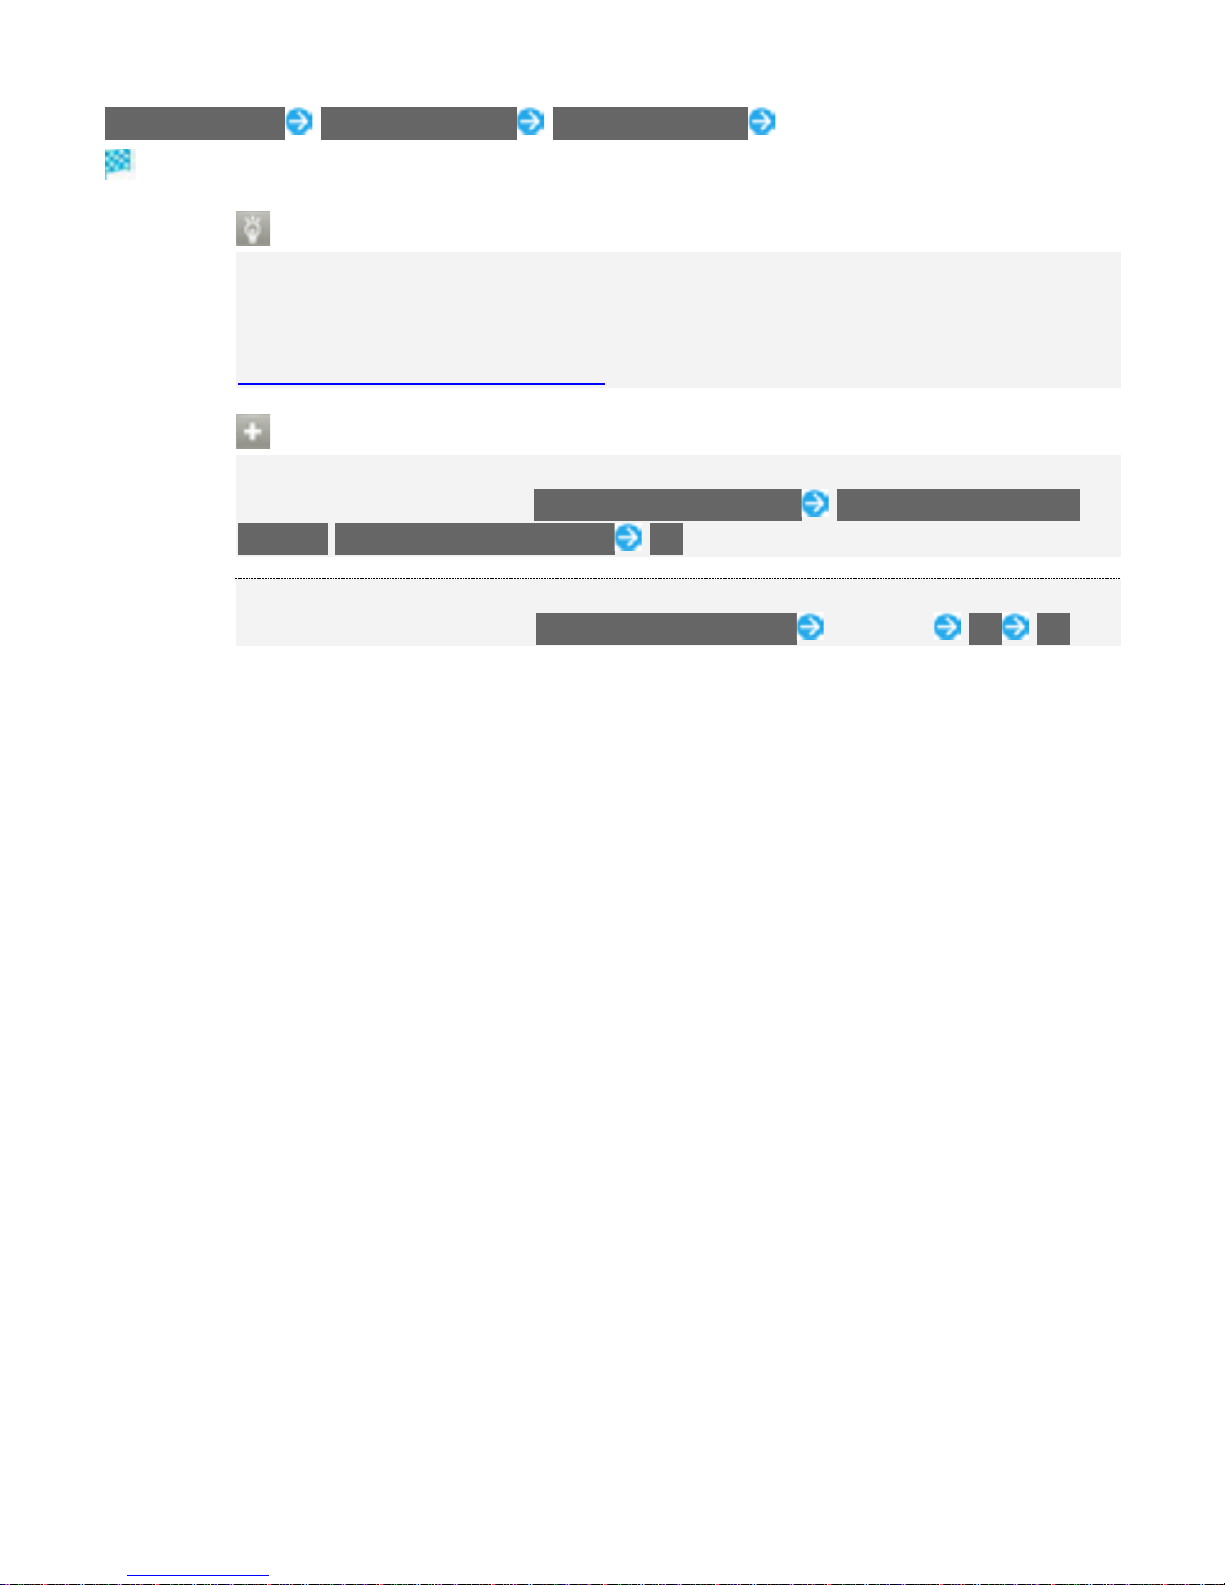
System Update Software Update Software Update Follow onscreen instructions
Software update starts.
Connecting to PC to Update Software
To update software connecting to a PC, install software for "Software Update" on the PC
beforehand.
For installation of the software, see the following web page.
http://www.sonymobile.co.jp/support/
Operations for Software Update Configuration
Setting whether to update Software Automatically
On Software Update window, Automatic Update Settings NOT AUTOMATICALL Y
UPDATE/AUTOMATICALLY UPDATE OK
Setting Scheduled Update
On Software Update window, Update Schedule Settings Set a time OK OK
50
Page 88
Home Screen Basics
Home Screen appears at power on; most handset operations start here. Customize
Home Screen with application shortcuts, widgets, and folders.
Ð
Home Screen Layout
Ð
Toggling Home Screen Sheets
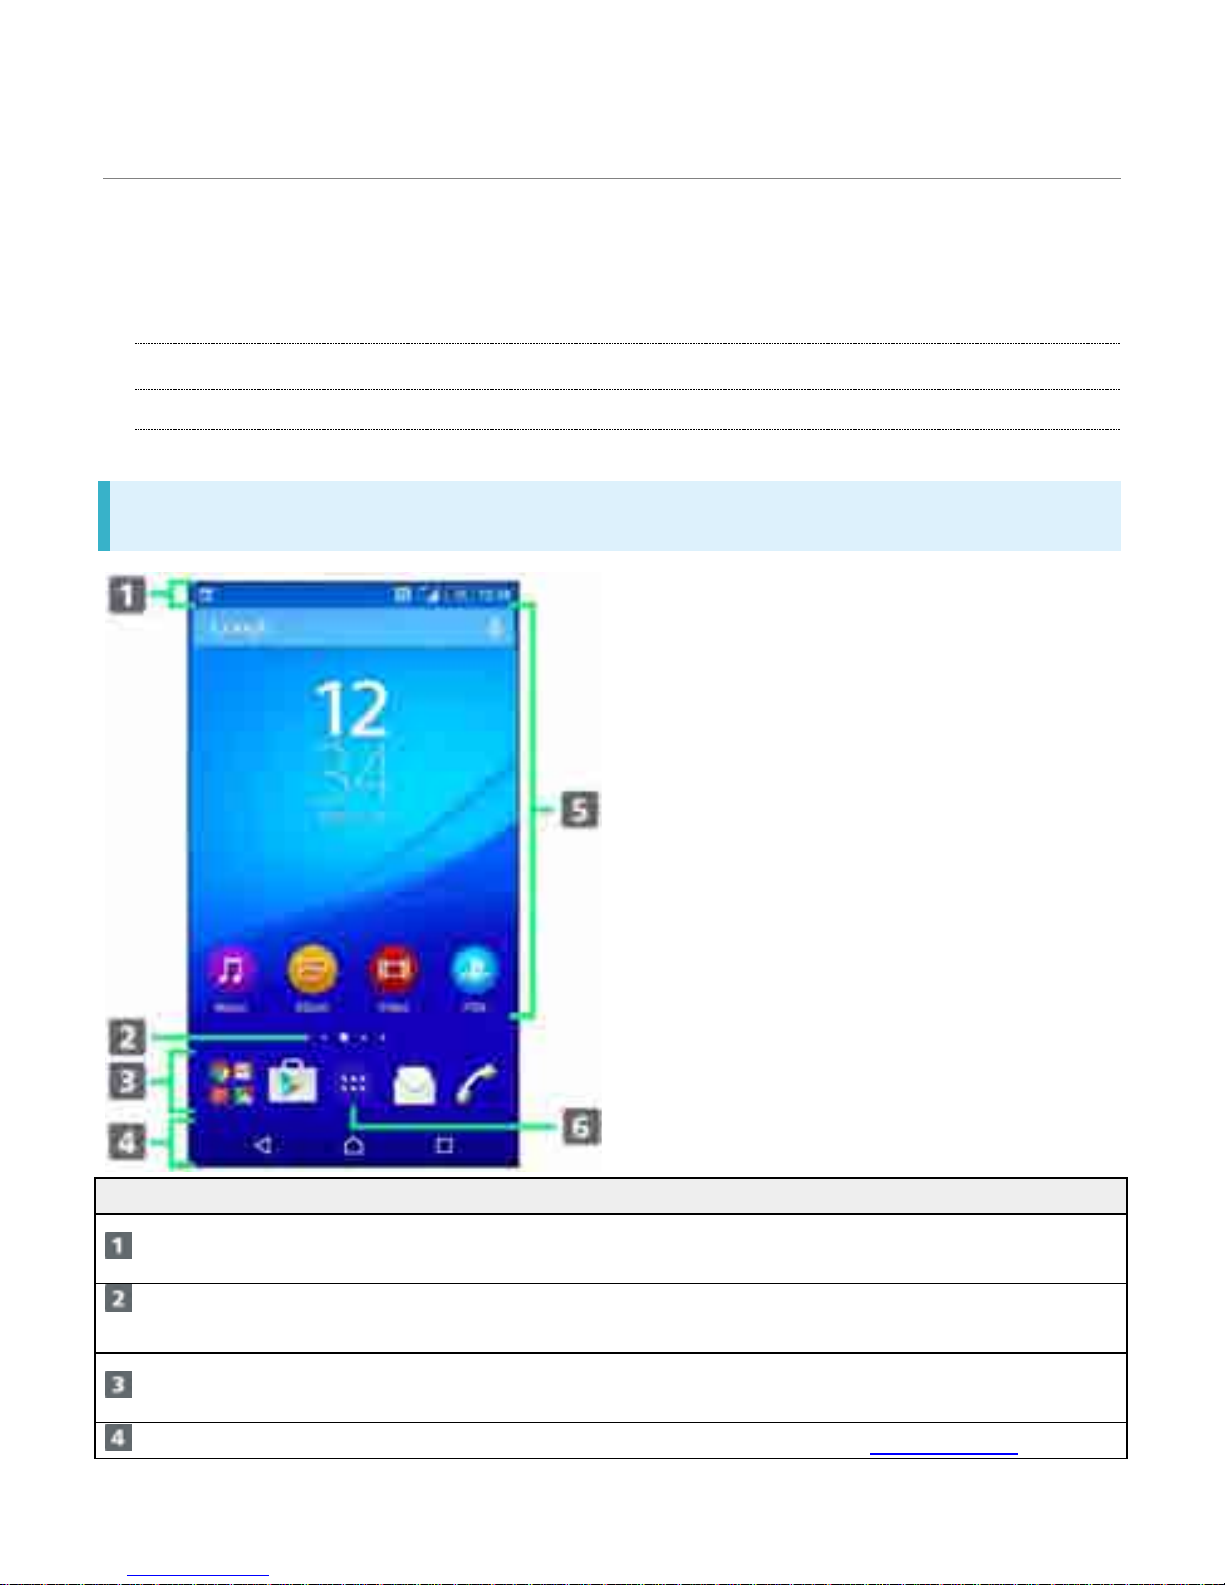
Home Screen Layout
Item Description
Status Bar
Drag down for Notifications Window. Drag down with two fingers for Quick
Settings.
Home Screen
Position
Current position among several Home Screen sheets.
Dock
Tap an icon to activate application or function. Customize with up to four
application shortcuts. Also, create folders.
Navigation Bar Tap Key icon to operate. For Navigation Bar, see "Navig ation Bar."
1
Page 89
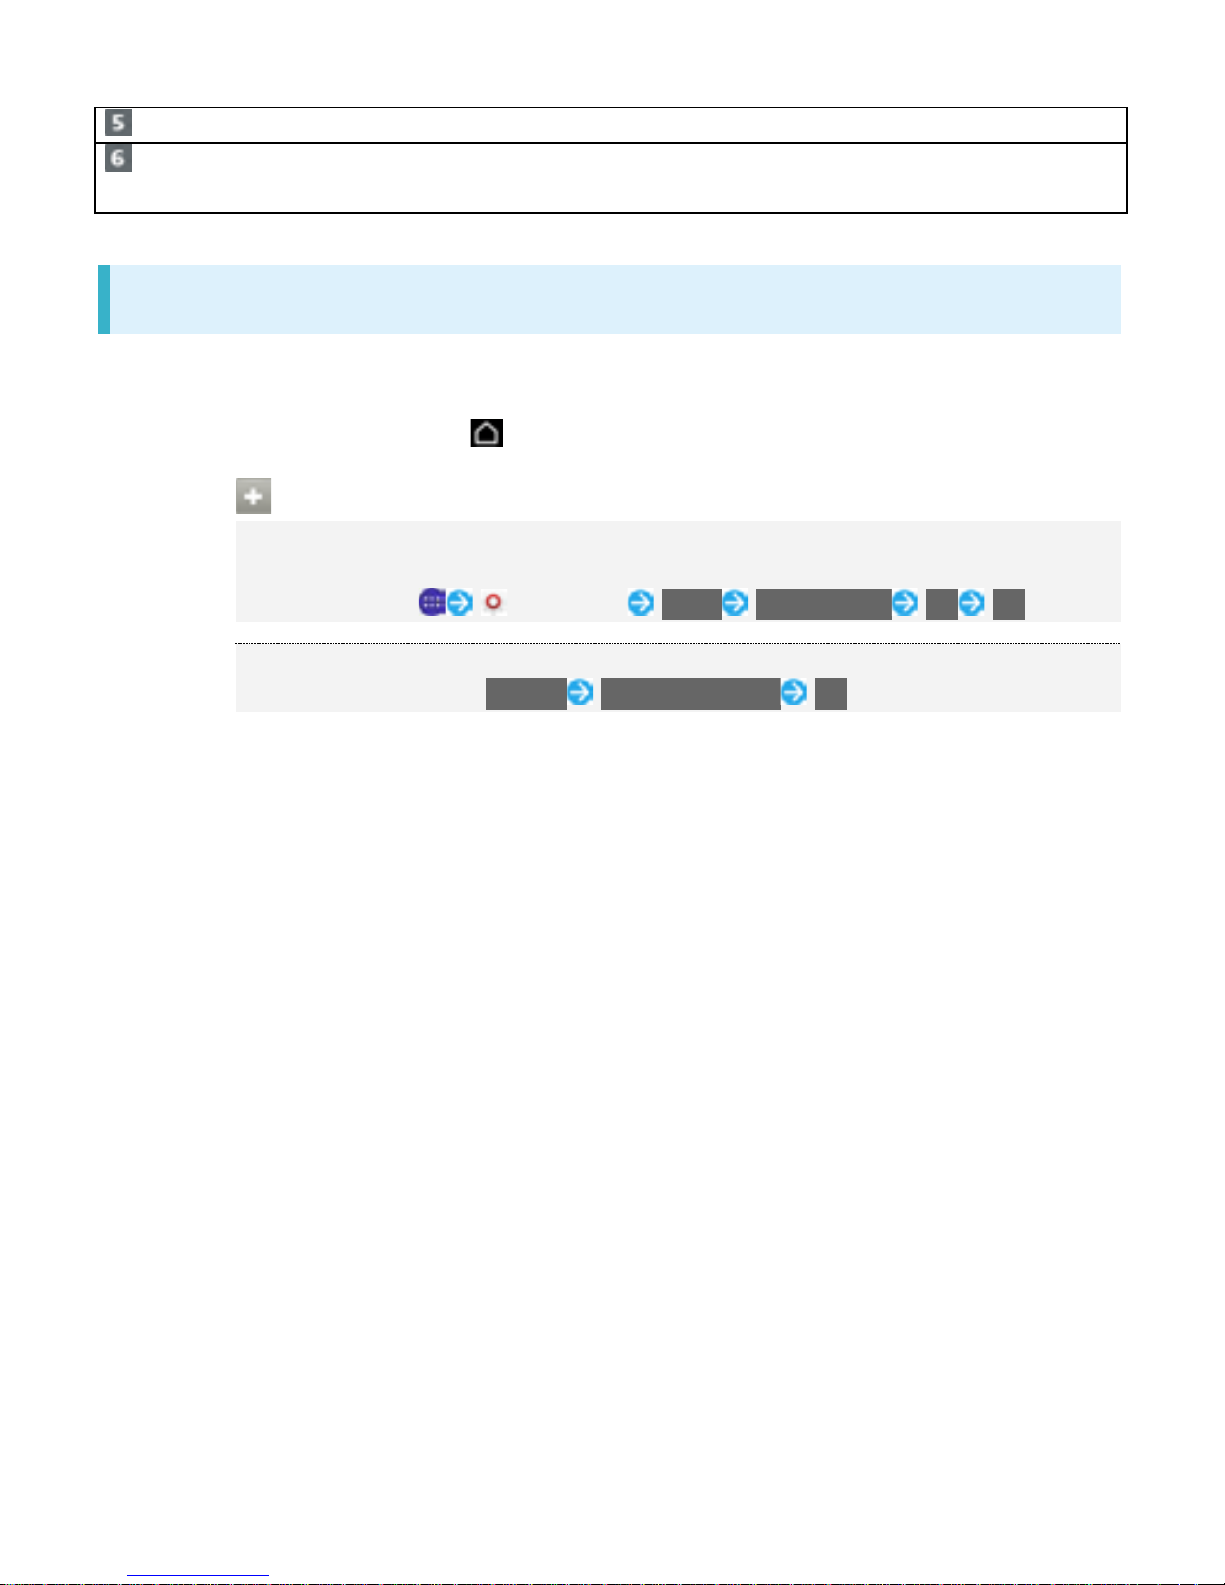
Customize Area Place application shortcuts, folders, widgets freely.
Applications List
Key
Open applications list.
Toggling Home Screen Sheets
Home Screen consists of 7 sheets. Customize each Home Screen sheet with application shortcuts,
widgets, etc. to make handset more convenient. Flick Home Screen left/right to toggle sheets.
In any Home Screen sheet, Tap to return to Home Screen top sheet.
Operations on Simple Home
Switching to Simple Home
Simple Home provides Home Screen with basic functions and main setting items.
In Home Screen, (Settings) Home Simple Home OK OK
Switching to Standard Home Screen
In Simple Home screen, Settings Exit Simple Home OK
2
Page 90
Status Bar
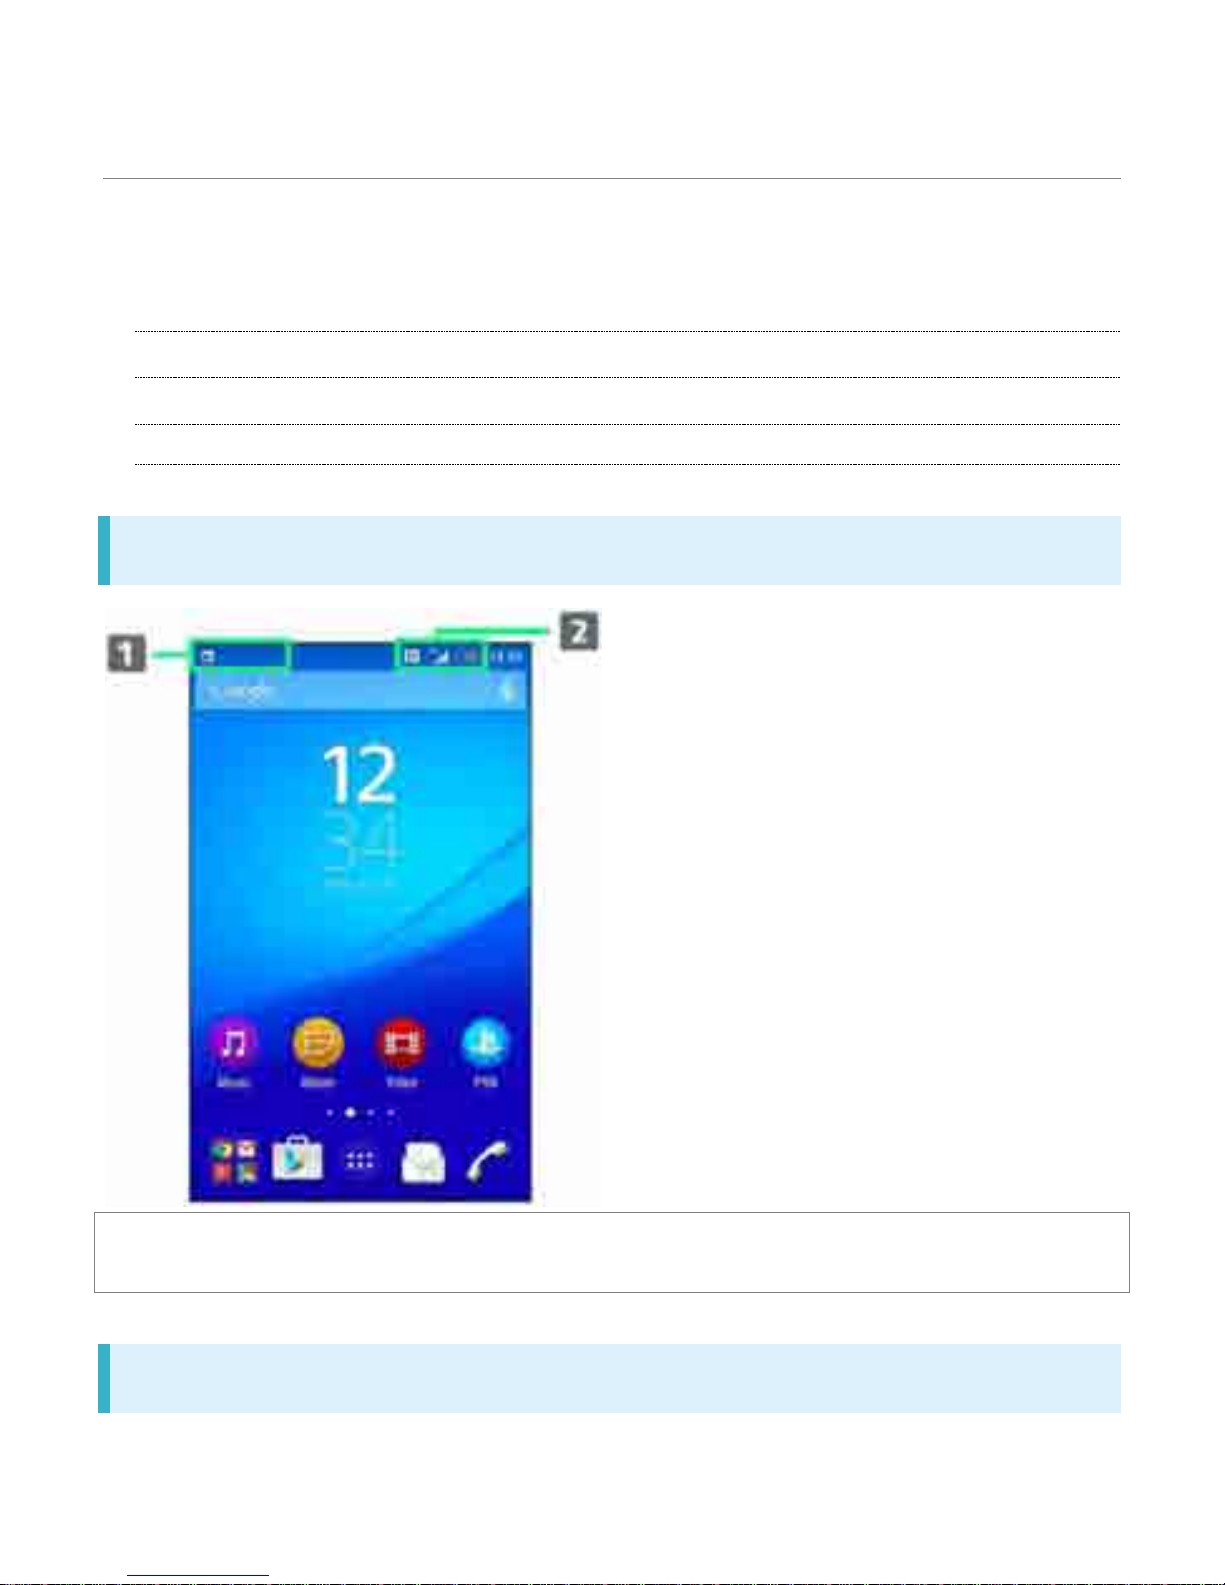
Status Bar appears at the top of Display. Notification Indicators for new mail, etc. and Status
Indicators for handset appear here.
Ð
Status Bar Layout
Ð
Main Notification Indicators
Ð
Main Status Indicators
Status Bar Layout
䐟
Notification Indicators
䐠
Status Indicators
Main Notification Indicators
Notification Indicators appear i ng in Status Bar include the fol lowing.
3
Page 91
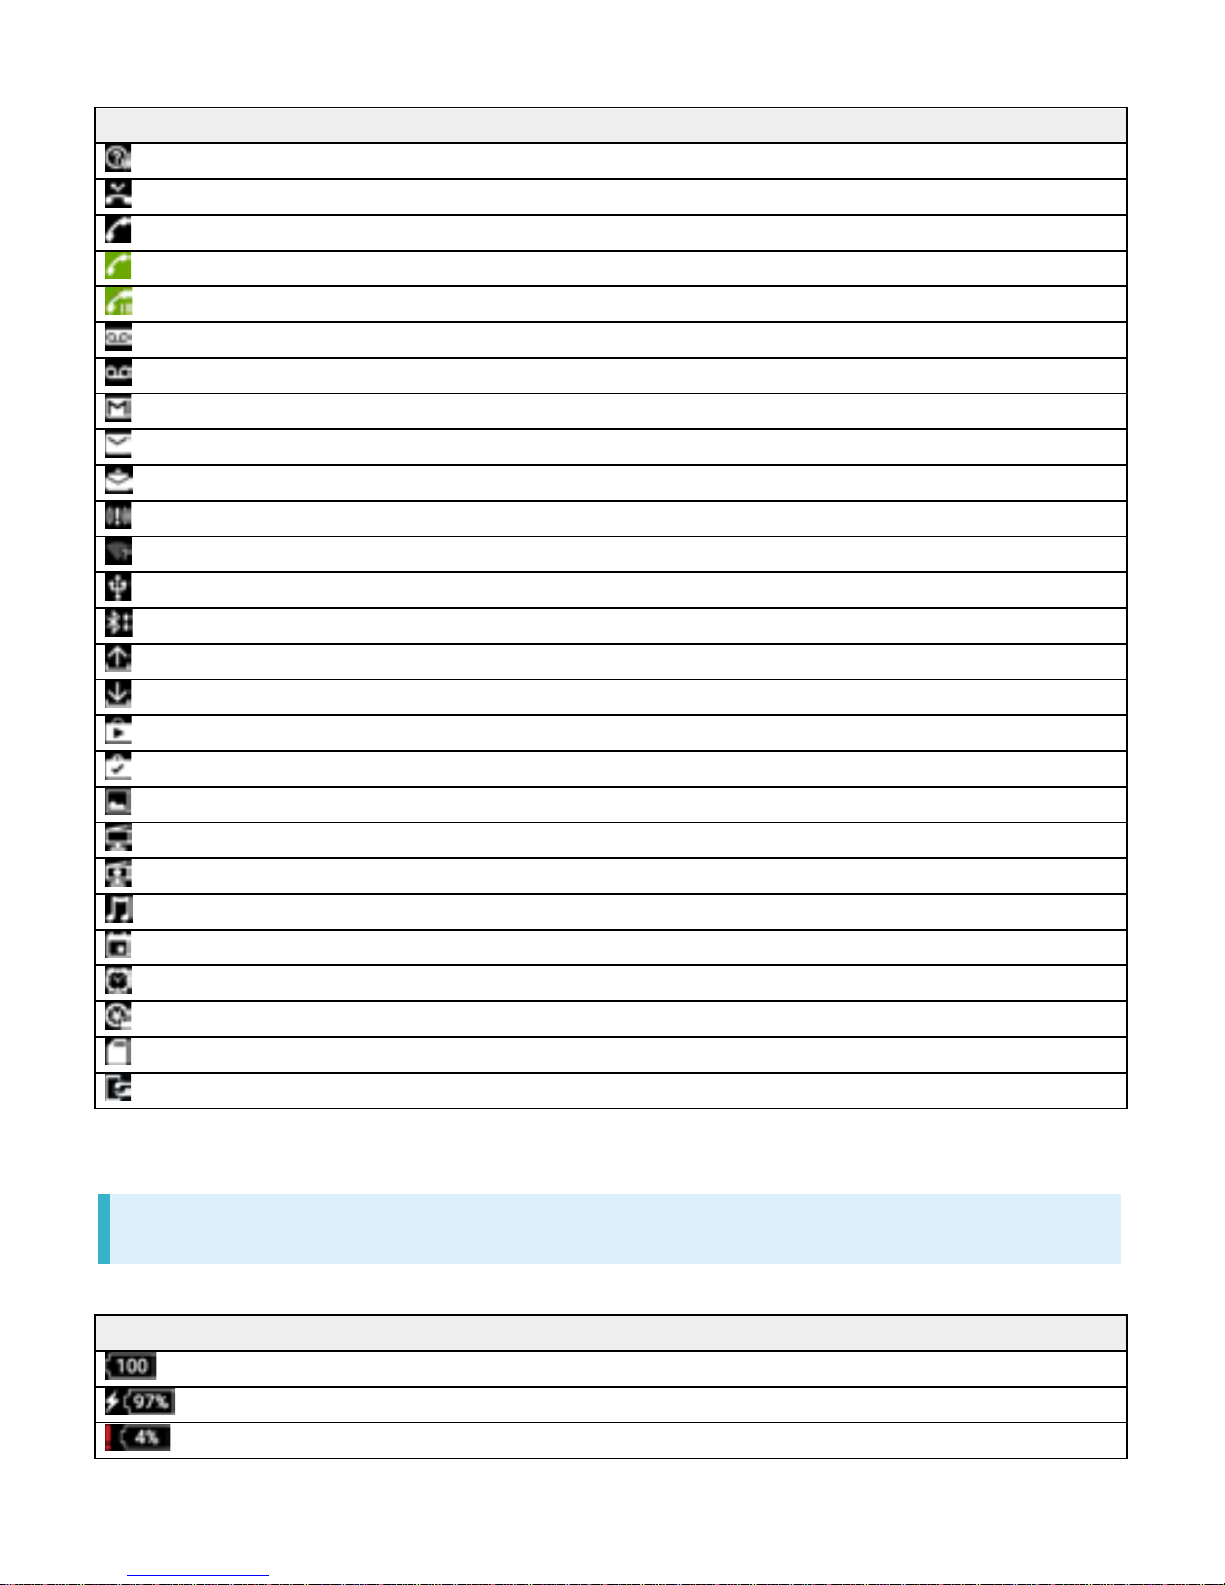
Indicator Description
Launch Guide (Drag Status Bar down and open from Notifications Window)
Missed Call
Call Arriving
Calling1/Dialing
1
Answer on Hold1/Call on Hold
1
New Recorded Message
New Voicemail
New Gmail
New Email
New Text Message (SMS)/S! Mail
Urgent News
Wi-Fi Open Network Available
USB Connected
Sharing File via Bluetooth
®
Data Uploading
Data Downloading
Application Update Available
Application Installation Complete
Screenshot/Screen Recording Saved
Viewing TV1/Scheduled Viewing Started
Recording TV1/Scheduled Recording Started
Playing Back Music
Calendar Event Reminder
Snoozing/Unchecked Alarm
NFC/Osaifu-Keitai®Locked
Unmount SD Card
Software Update Notice, Downloading Complete, Stopped
1 Appears when switching to other window such as Home Screen.
Main Status Indicators
Status Indicators appearing in Status Bar include the following.
Indicator Description
Battery Full (100%)
Battery Charging
Battery Low (4% or less)
4
Page 92
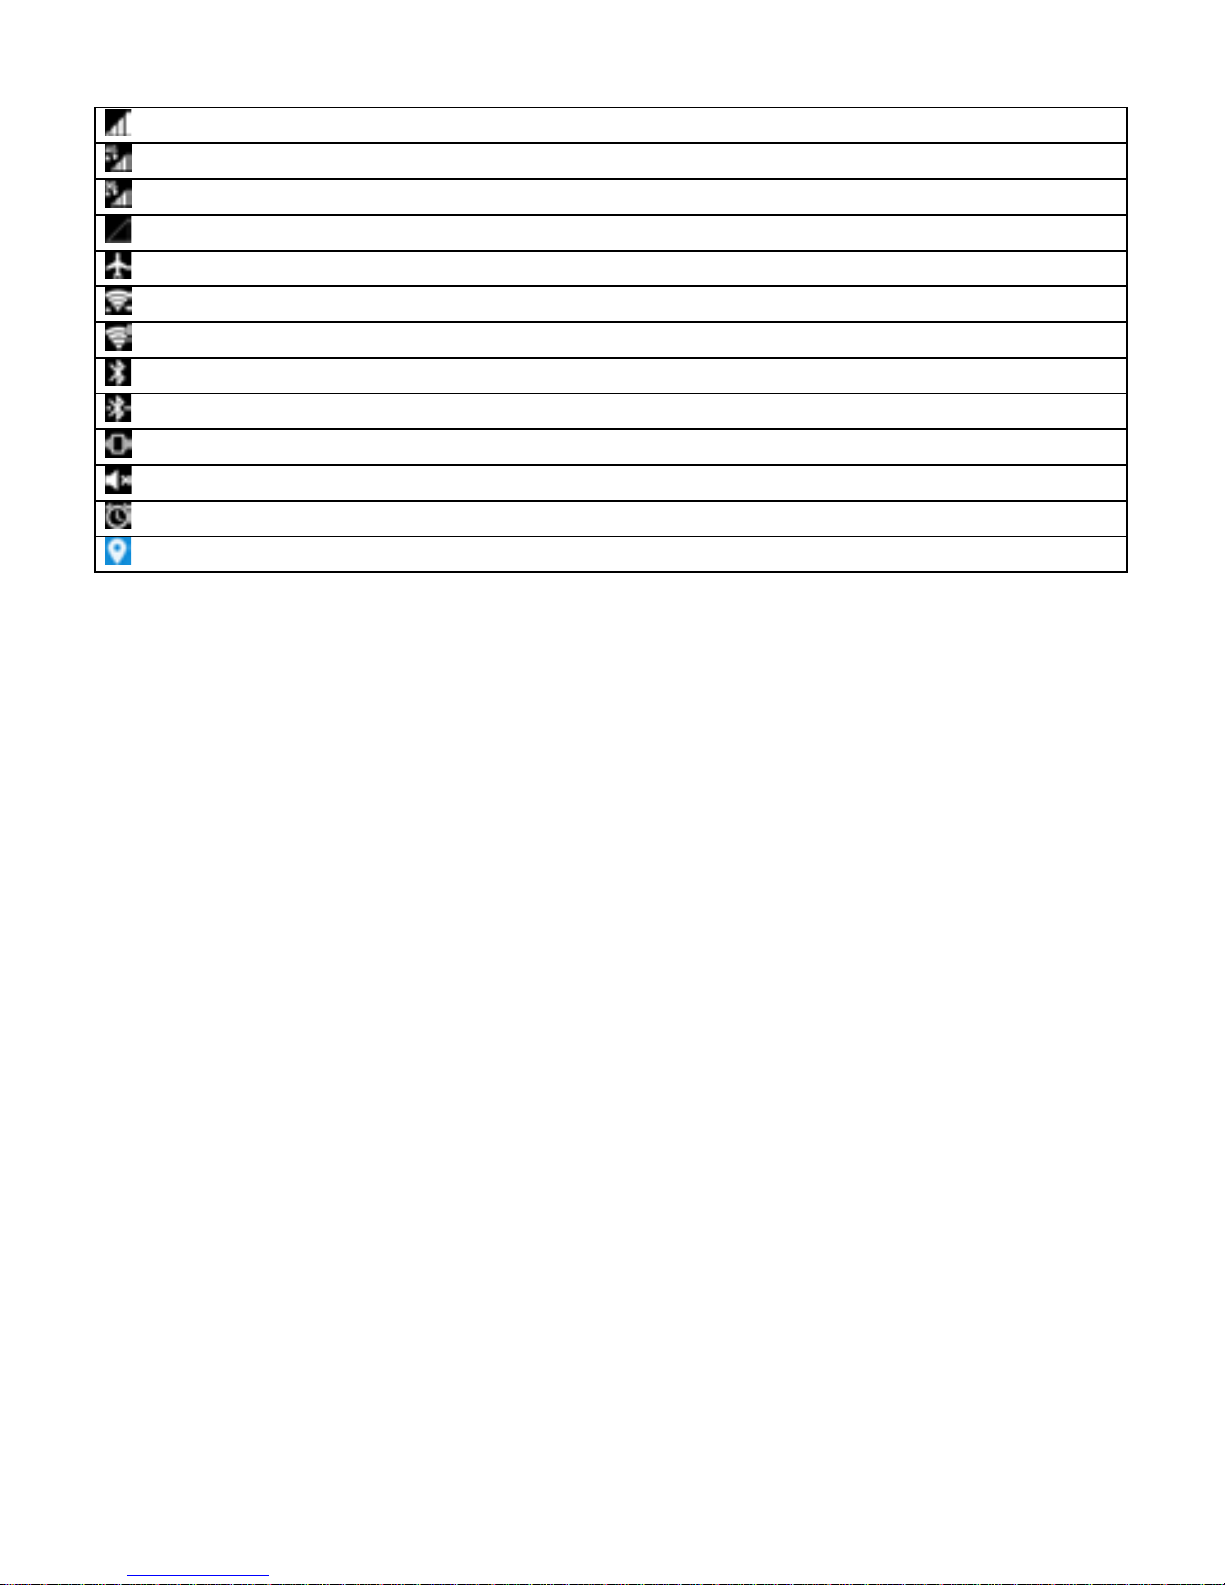
Signal Strength
4G LTE/4G Data in Use
1
3G Data in Use
No Signal
Airplane Mode
Wi-Fi Connected
Wi-Fi Connected without Internet accessibility, or unstable Wi-Fi signal
Bluetooth®ON
Bluetooth®Connected
Silent (with Vibration) Mode
Silent (without Vibration) Mode
Alarm Set
Obtaining Current Location
1 Handset supports FDD-LTE (SoftBank 4G LTE) and AXGP ( So ftBank 4G); indic ator appear s w hen
handset is connected to either. Handset connects to SoftBank 4G first.
5
Page 93
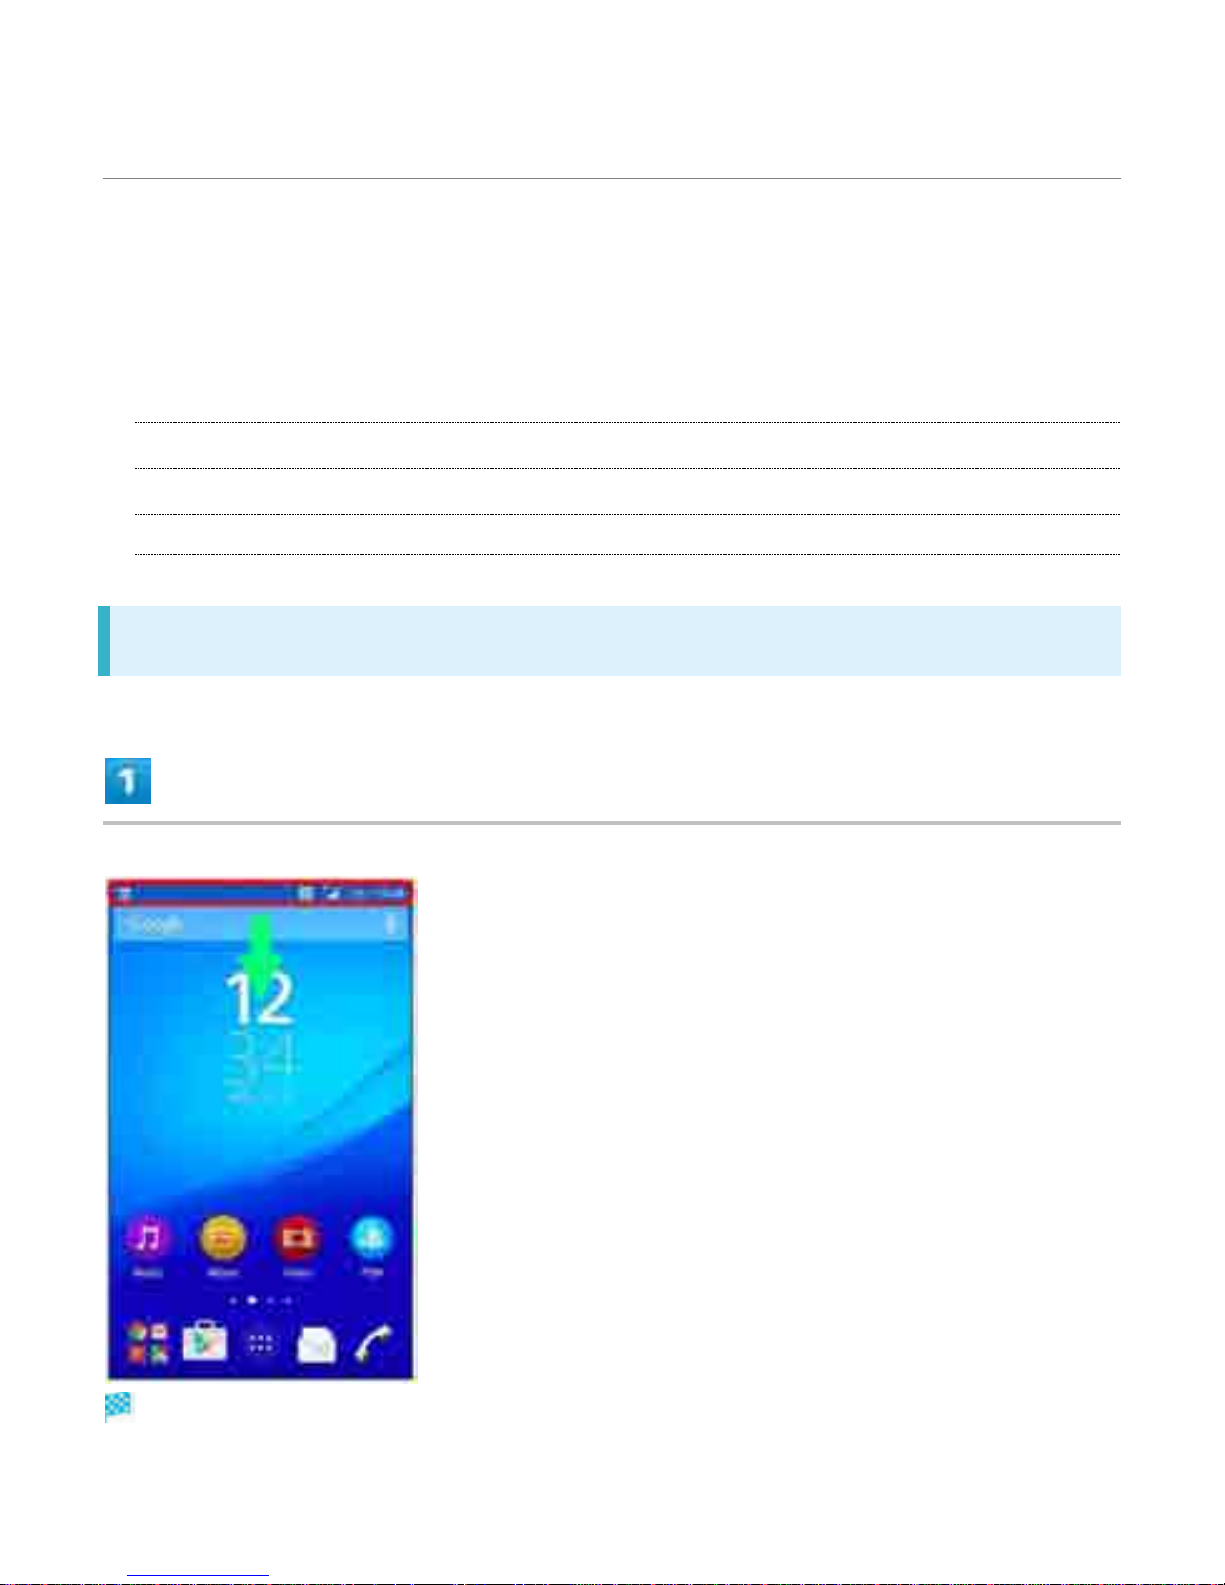
Using Notifications Window/Quick Settings
Drag Status Bar down to open Notifications Window. Open Notification Indicators to
check details.
Drag Notifications Window dow n to open Q uick Se ttings. Tap icon s on Quick Settings to
set each function On/Off.
Ð
Opening Notifications Window/Quick Settings
Ð
Notifications Window Layout
Ð
Quick Settings Layout
Opening Notifications Window/Quick Settings
Drag Status Bar down
Notifications Window opens.
6
Page 94
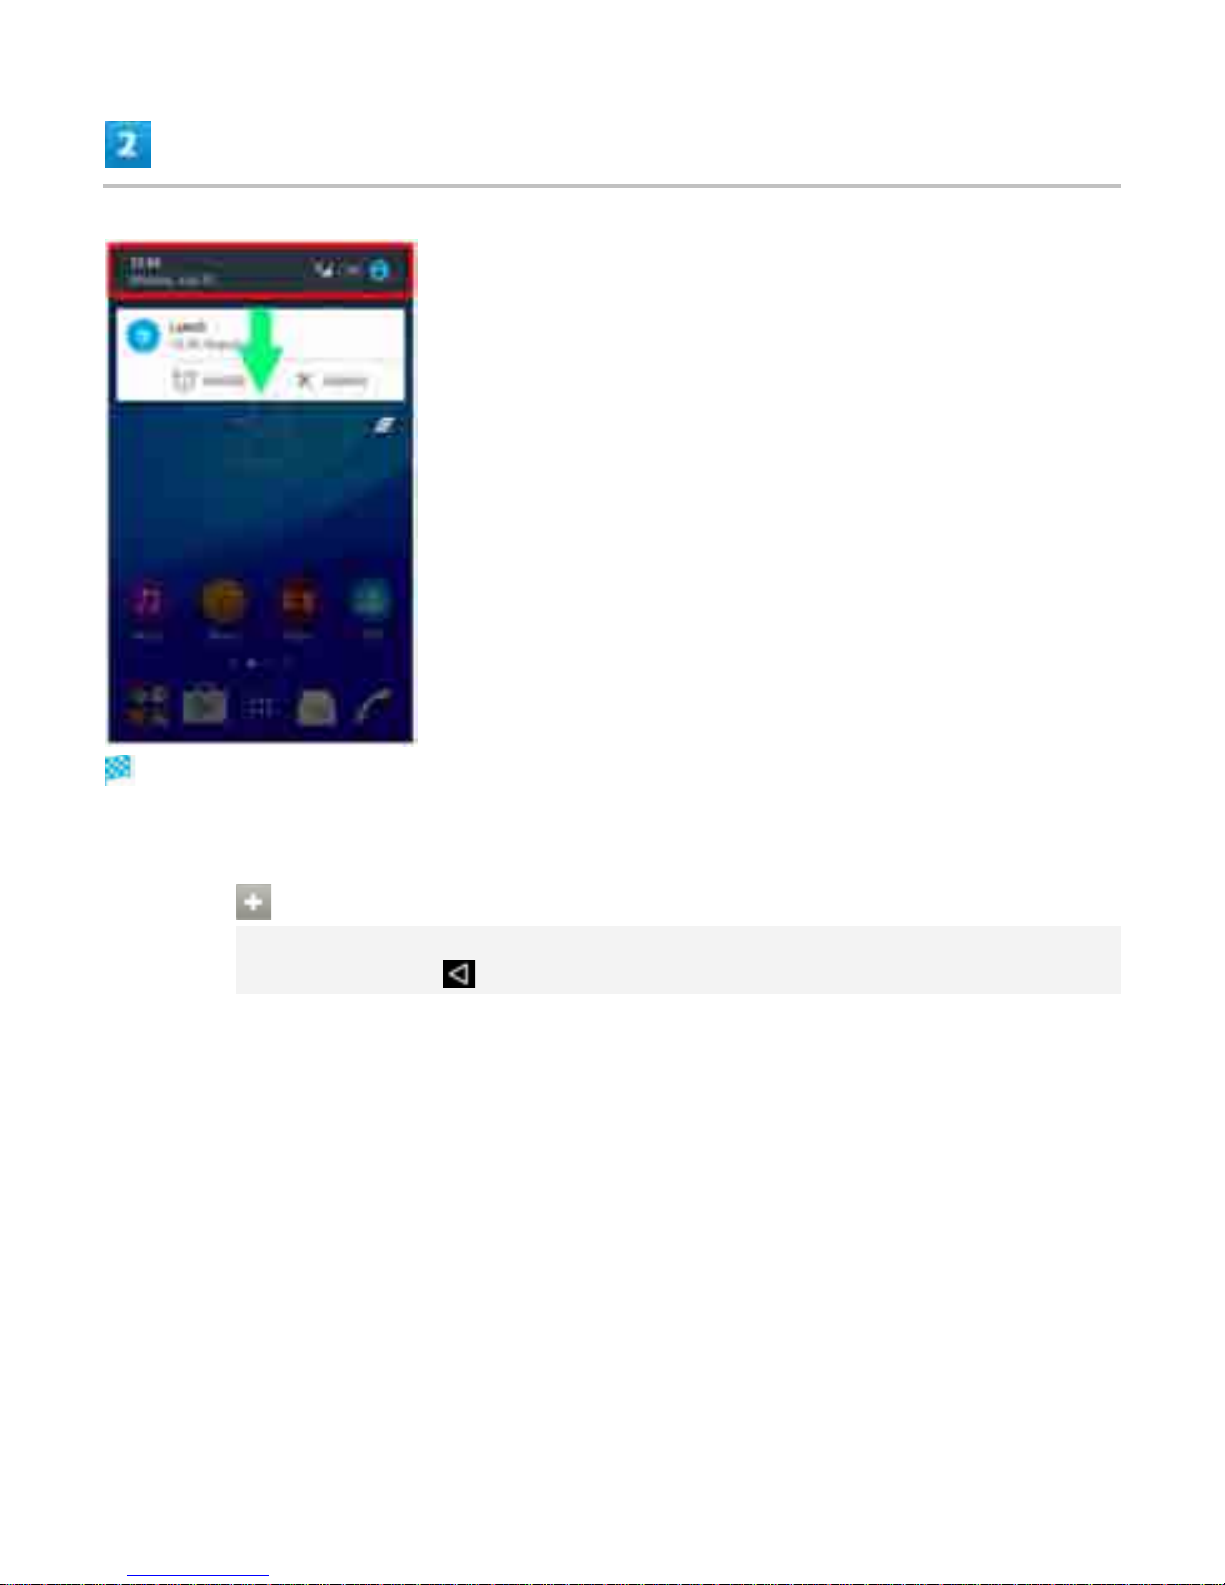
Drag Notifications Window down
Quick Settings opens.
Drag Status Bar down with two fingers for Quick Settings.
Closing Notifications Window/Quick Settings
Drag Notifications Window/Quick Settings up
Alter nativ ely, Tap to close Notifications Window/Quick Settings.
7
Page 95
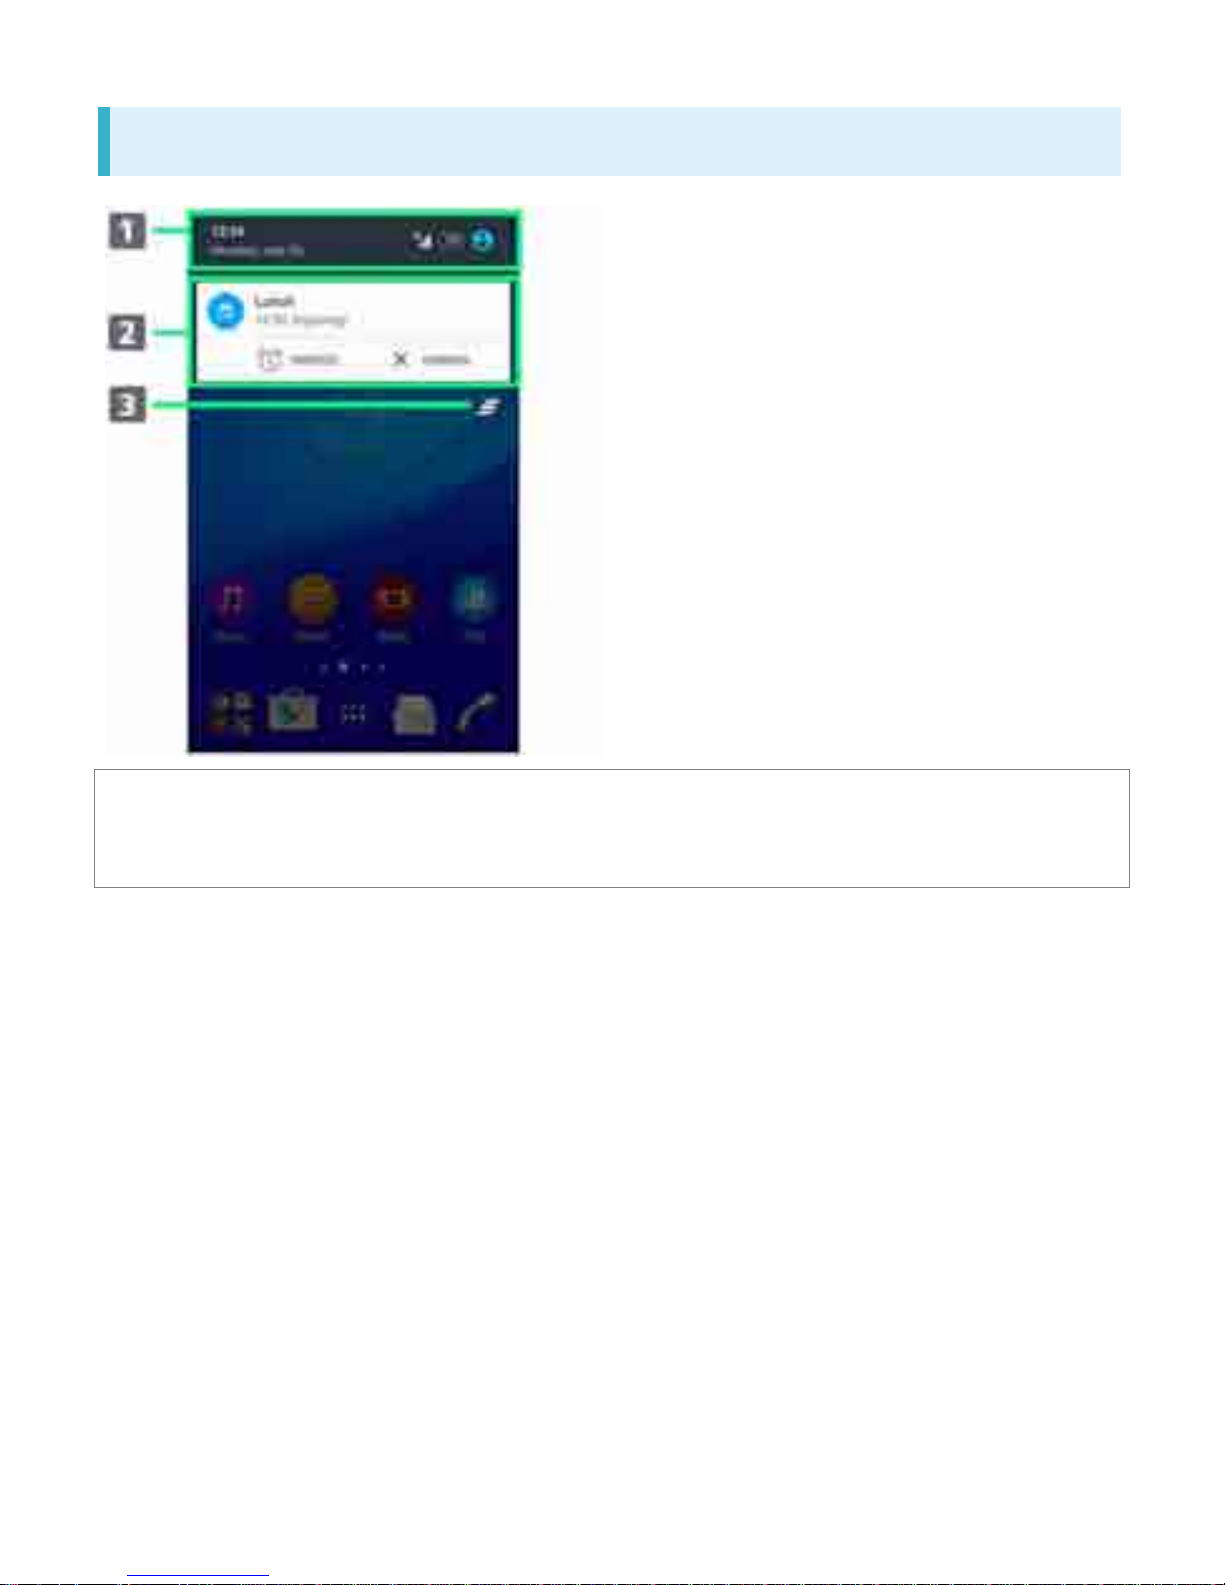
Notifications Windo w Layout
䐟
䐟
Open Quick Settings
䐠
Display notifications (incoming, functions being executed, etc.)
䐡
Clear all notifications. Some notifications are not clearable.
8
Page 96
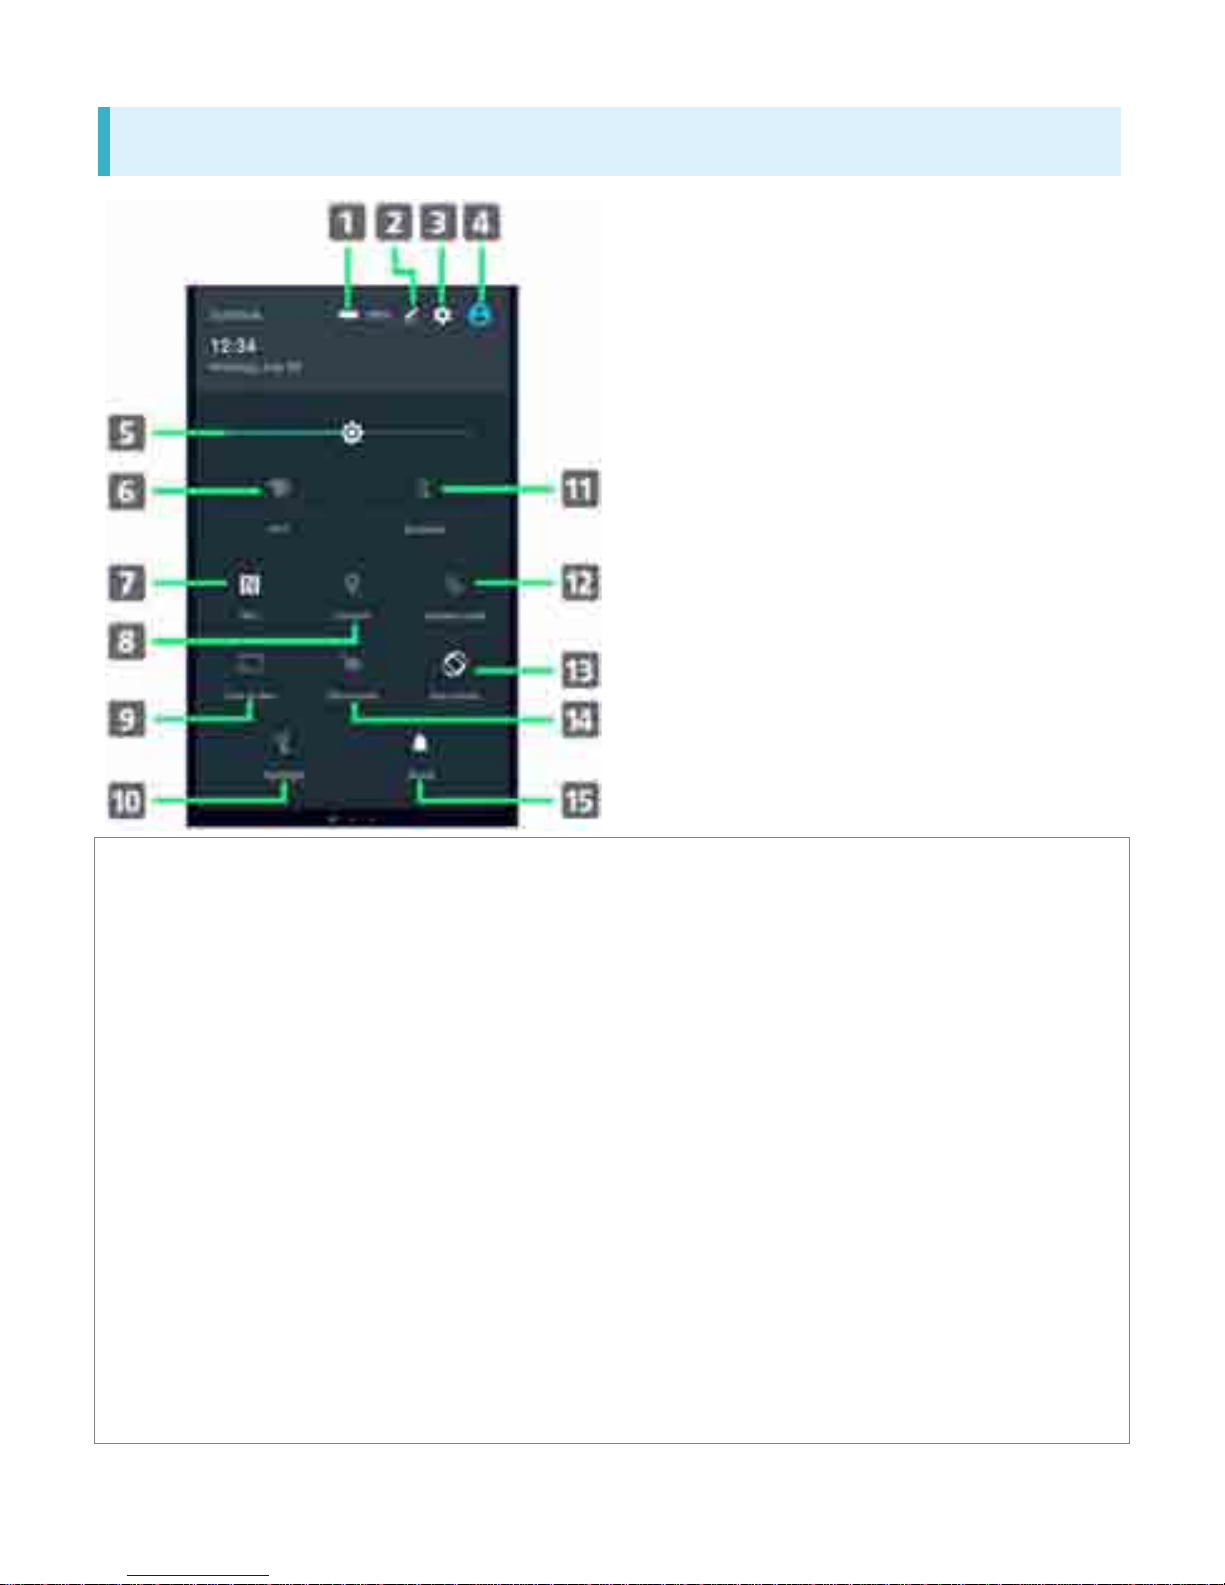
Quick Settings Layout
䐟
䐟
Display "Power management" of Handset Settings
䐠
Add/Delete, change order of Quick Settings
䐡
Display Handset Settings
䐢
Display your contact information
䐣
Adjust brightness of Display
䐤
On/Off of Wi-Fi
䐥
On/Off of NFC Reader/Writer and P2P function
䐦
Set On/Off of location information
䐧
Mirror the screen of handset on Google Cast devices
䐨
On/Off of Light
䐩
On/Off of Bluetooth
®
䐪
On/Off of Airplane mode
䐫
On/Off of Auto-rot ate screen
䐬
On/Off of Glove mode
䐭
Set Silent mode (with Vibration)/Silent mode (without Vibration)/Clear Silent
mode
9
Page 97
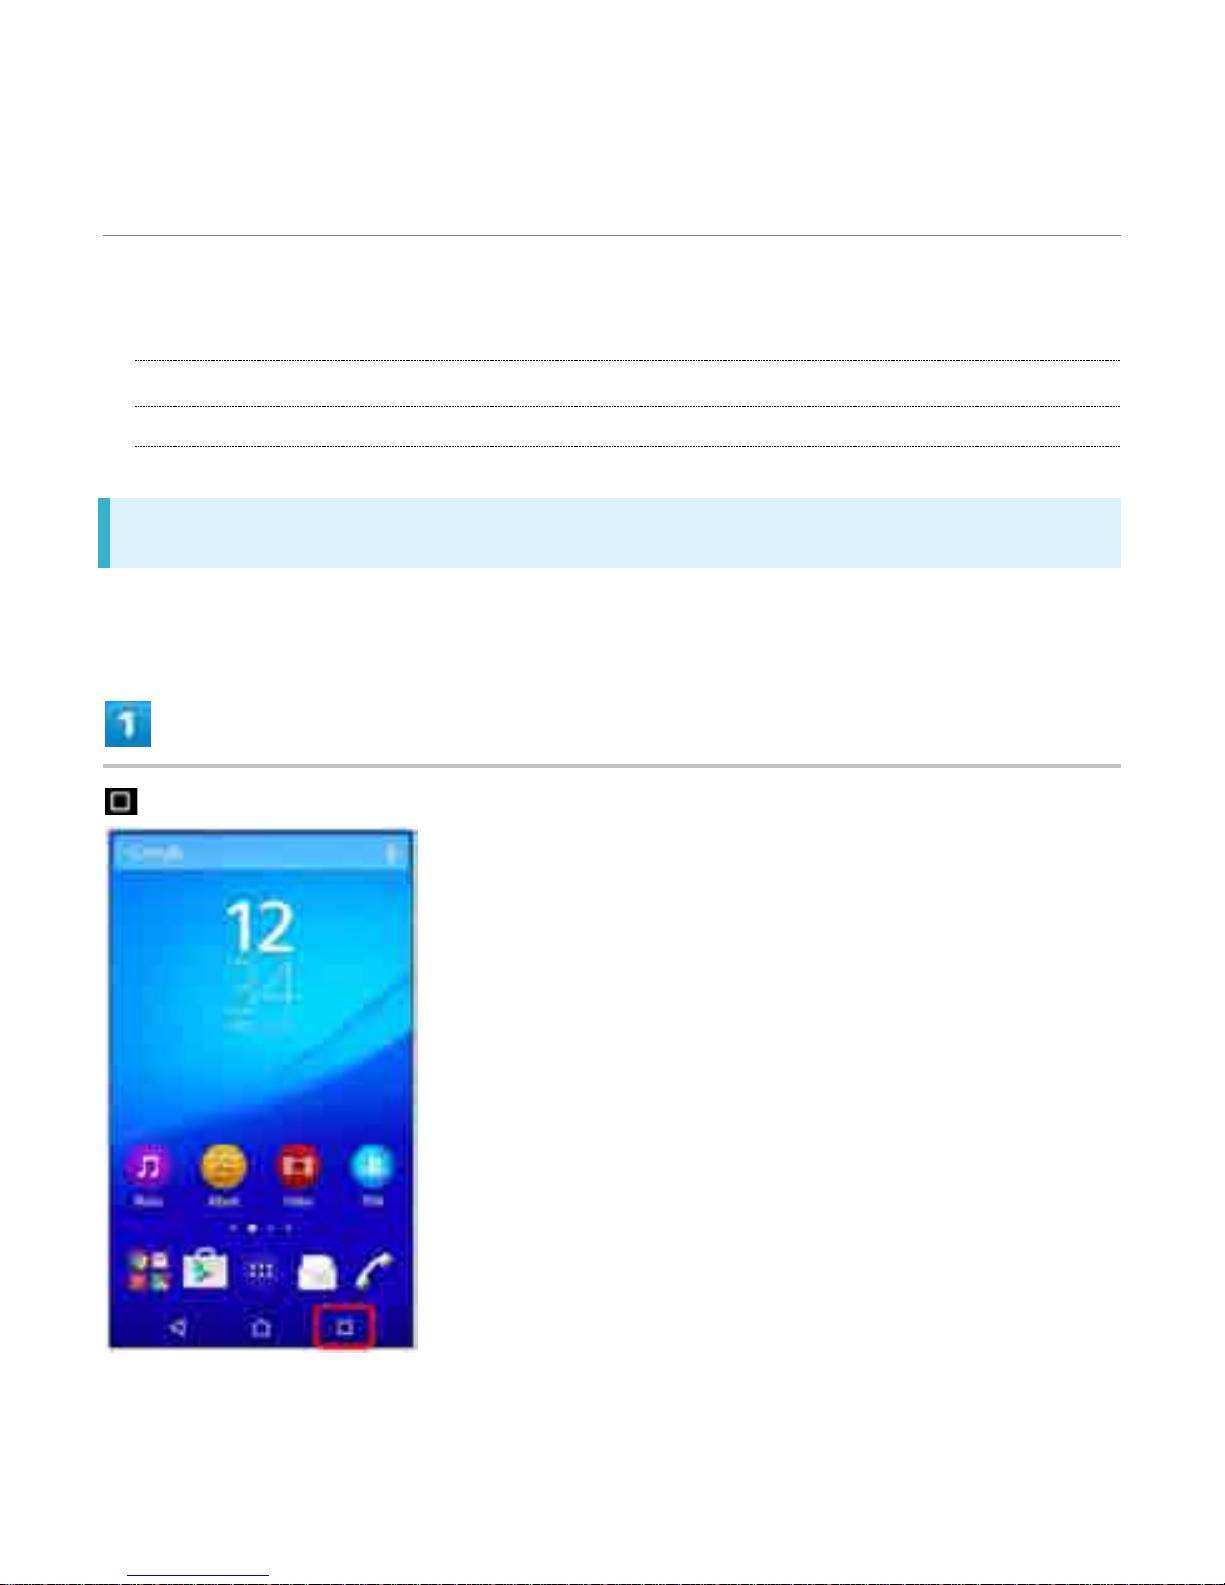
Activating/Canceling Recently-Used
Applications
Check recently-used applications and exit them.
Ð
Activating Recently-Used Applications
Ð
Canceling All Running Applications
Activating Recently -Used Applications
View recently-used applications in thumbnail list and launch application from the list.
10
Page 98
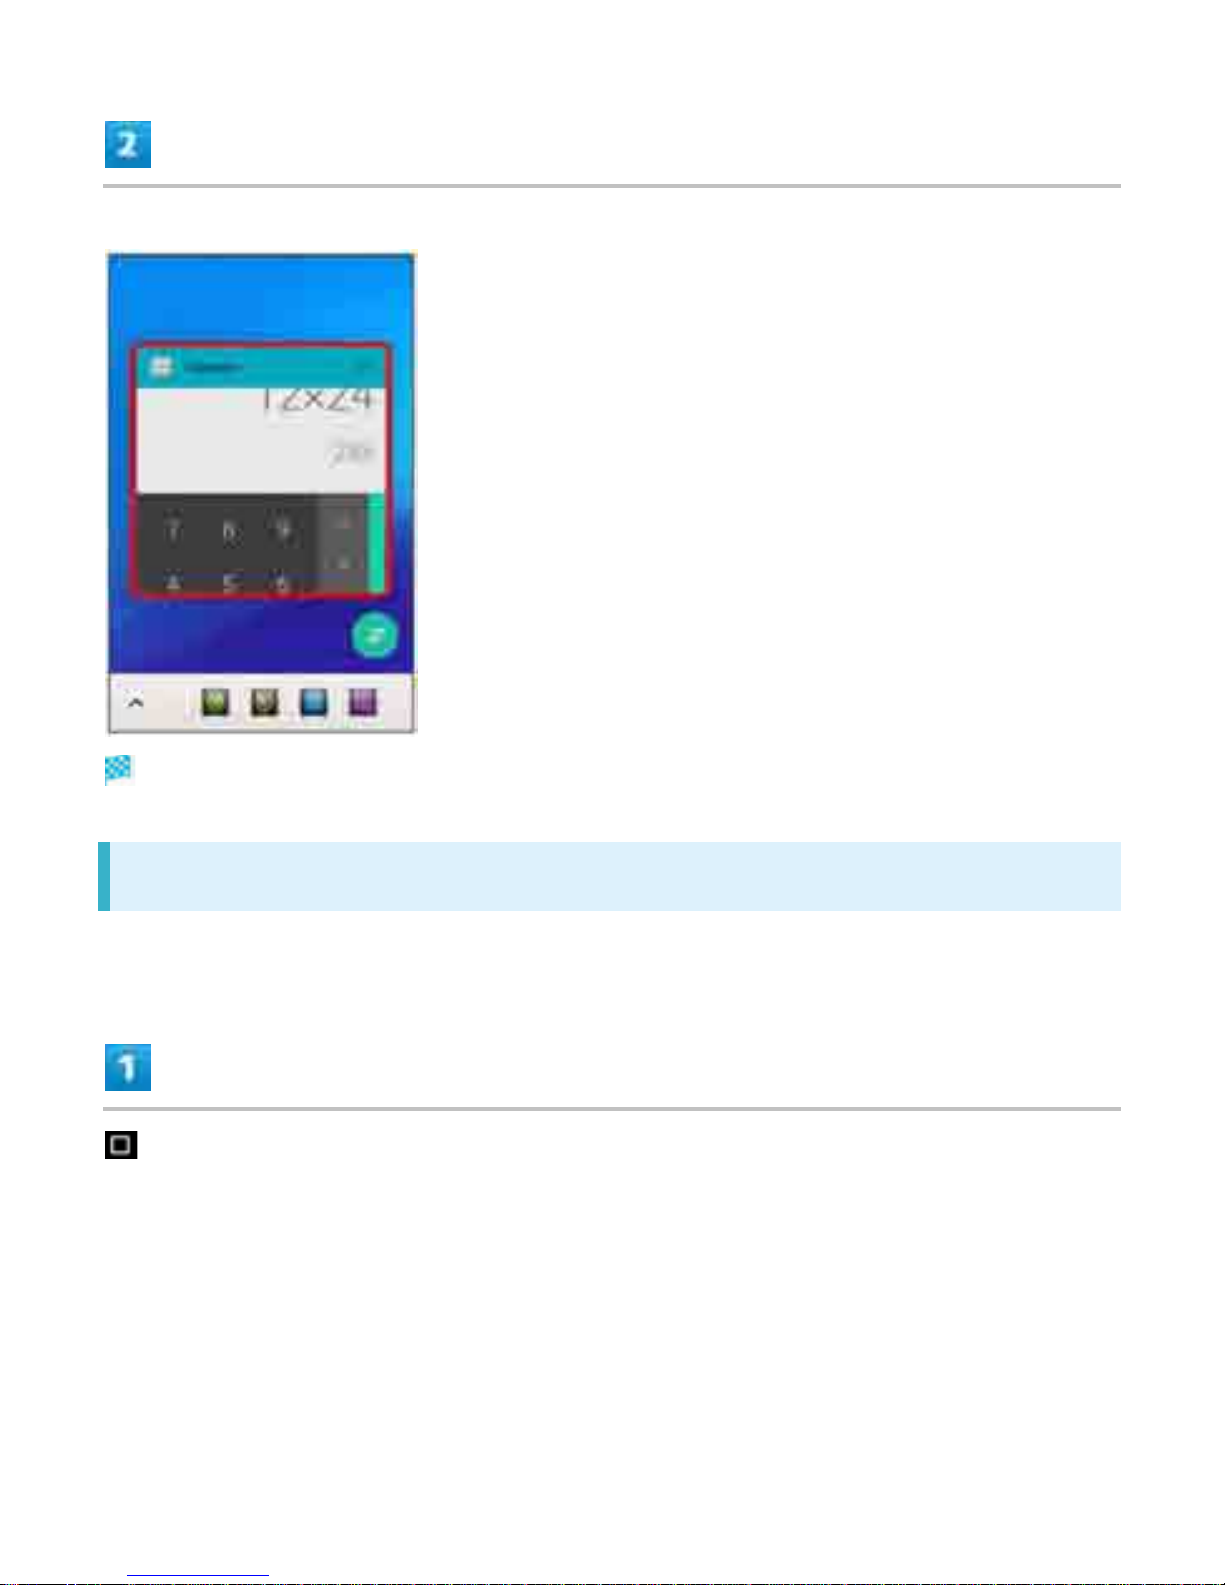
Tap application in thumbnail list
Application is activated.
Canceling All Running Applications
Cancel all running applications.
11
Page 99
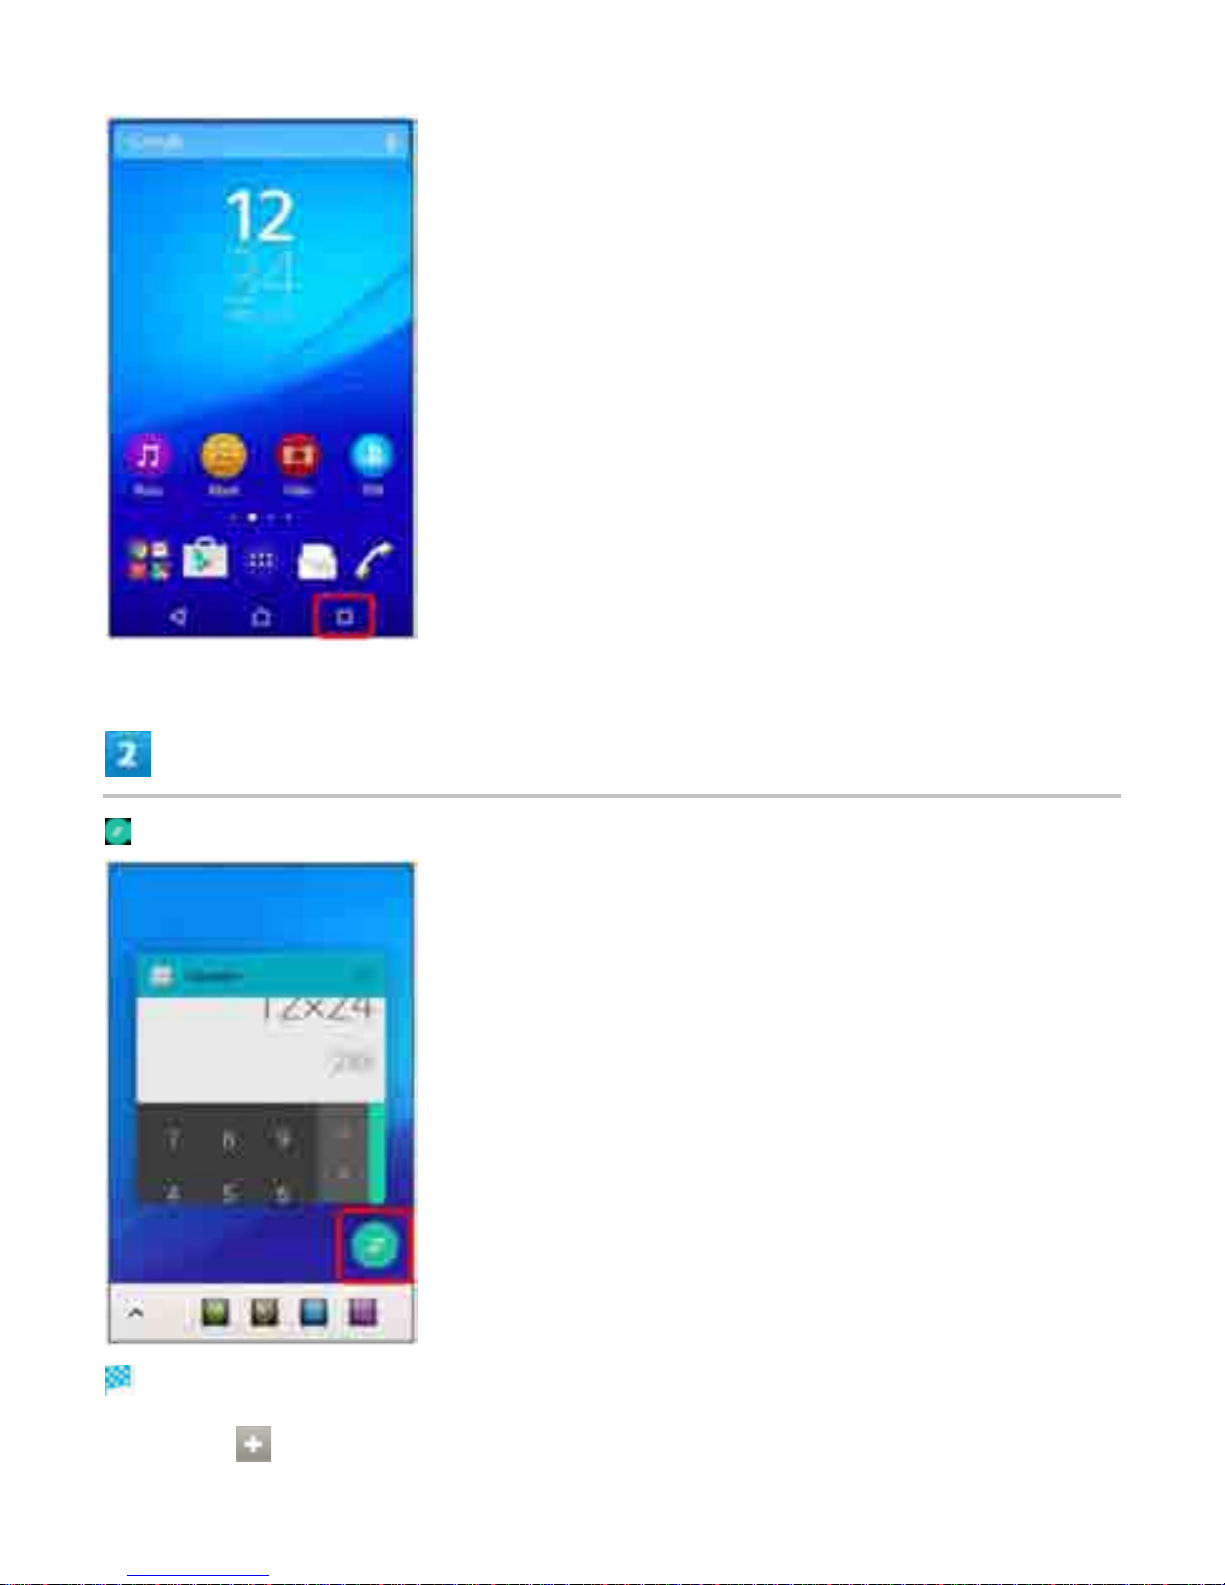
All running applications are canceled.
Deleting Recently-Used Application from List
12
Page 100

Flick left or right application in thumbnail list
13
 Loading...