

Page 1

4-476-910-51(1)
AV Center
Operating Instructions
GB
XAV-742/XAV-712BT/XAV-612BT/XAV-602BT
Page 2
Be sure to install this unit in the dashboard of the
car for safety.
For installation and connections, see the
supplied installation/connections manual.
About this manual
This manual contains instructions for XAV-742,
XAV-712BT, XAV-612BT and XAV-602BT.
XAV-602BT is the model representatively used
for illustration purposes.
BLUETOOTH functions and descriptions apply
to XAV-712BT, XAV-612BT and XAV-602BT.
Warning if your car’s ignition has no ACC
position
Be sure to set the Auto OFF function (page 24).
The unit will turn off automatically in the set time
when no source is selected, which prevents
battery drainage.
If you do not set the Auto OFF function, press
and hold OFF until the display disappears each
time you turn the ignition off.
To cancel the demonstration (Demo) display, see
page 24.
Warning
To prevent fire or shock hazard, do not
expose the unit to rain or moisture.
To avoid electrical shock, do not open the
cabinet. Refer servicing to qualified personnel
only.
CAUTION
The use of optical instruments with this product will
increase eye hazard. As the laser beam used in this
CD/DVD player is harmful to eyes, do not attempt
to disassemble the cabinet. Refer servicing to
qualified personnel only.
Laser Diode Properties
Emission Duration: Continuous
Laser Output: Less than 53.3 W
(This output is the value measurement at a distance
of 200 mm from the objective lens surface on the
Optical Pick-up Block with 7 mm aperture.)
Disposal of Old Electrical &
Electronic Equipment (Applicable
in the European Union and other
European countries with separate
collection systems)
Note on the lithium battery
Do not expose the battery to excessive heat such as
direct sunlight, fire or the like.
Notes on BLUETOOTH function (XAV712BT/612BT/602BT only)
Caution
IN NO EVENT SHALL SONY BE LIABLE FOR ANY
INCIDENTAL, INDIRECT OR CONSEQUENTIAL
DAMAGES OR OTH ER DAMAGES INCLUDING,
WITHOUT LIMITATION, LOSS OF PROFITS, LOSS OF
REVENUE, LOSS OF DATA, LOSS OF USE OF THE
PRODUCT OR ANY ASSOCIATED EQUIPMENT,
DOWNTIME, AND PURCHASER’S TIME RELATED TO
OR ARISING OUT OF THE USE OF THIS PRODUCT, ITS
HAR DWARE AND/OR ITS SOFTWARE.
IMPORTANT NOTICE!
Safe and efficient use
Changes or modifications to this unit not expressly
approved by Sony may void the user’s authority to
operate the equipment.
Please check for exceptions, due to national
requirement or limitations, in usage of BLUETOOTH
equipment before using this product.
Driving
Check the laws and regulations on the use of
cellular phones and handsfree equipment in the
areas where you drive.
Always give full attention to driving and pull off the
road and park before making or answering a call if
driving conditions so require.
Connecting to other devices
When connecting to any other device, please read
its user guide for detailed safety instructions.
Radio frequency exposure
RF signals may affect improperly installed or
inadequately shielded electronic systems in cars,
such as electronic fuel injection systems, electronic
antiskid (antilock) braking systems, electronic
speed control systems or air bag systems. For
installation or service of this device, please consult
with the manufacturer or its representative of your
car. Faulty installation or service may be dangerous
2GB
Page 3

and may invalidate any warranty that may apply to
this device.
Consult with the manufacturer of your car to ensure
that the use of your cellular phone in the car will not
affect its electronic system.
Check regularly that all wireless device equipment
in your car is mounted and operating properly.
Emergency calls
This BLUETOOTH car handsfree and the electronic
device connected to the handsfree operate using
radio signals, cellular, and landline networks as well
as user-programmed function, which cannot
guarantee connection under all conditions.
Therefore do not rely solely upon any electronic
device for essential communications (such as
medical emergencies).
Remember, in order to make or receive calls, the
handsfree and the electronic device connected to
the handsfree must be switched on in a service area
with adequate cellular signal strength.
Emergency calls may not be possible on all cellular
phone networks or when certain network services
and/or phone features are in use.
Check with your local service provider.
3GB
Page 4

Table of Contents
Warning . . . . . . . . . . . . . . . . . . . . . . . . . . . . . . . . . . . 2
Guide to Parts and Controls . . . . . . . . . . . . . . . . . . . 5
Getting Started
Resetting the Unit . . . . . . . . . . . . . . . . . . . . . . . . . . . 8
Performing Initial Settings . . . . . . . . . . . . . . . . . . . . 8
Setting the Clock . . . . . . . . . . . . . . . . . . . . . . . . . . . . 8
Preparing a BLUETOOTH Device
(XAV-712BT/612BT/602BT only) . . . . . . . . . . . . . 8
Detaching the front panel
(XAV-612BT/602BT only). . . . . . . . . . . . . . . . . . . 9
Listening to the Radio
Listening to the Radio. . . . . . . . . . . . . . . . . . . . . . . 10
Storing and Receiving Stations . . . . . . . . . . . . . . . 10
Using Radio Data System (RDS) . . . . . . . . . . . . . . . 11
Playback
Playing a Disc . . . . . . . . . . . . . . . . . . . . . . . . . . . . . 12
Playing an iPod/USB Device. . . . . . . . . . . . . . . . . . 13
Playing a BLUETOOTH Device
(XAV-712BT/612BT/602BT only) . . . . . . . . . . . . 13
Searching and Playing Tracks. . . . . . . . . . . . . . . . . 14
Enjoying Music According to Your Mood
(SensMe™). . . . . . . . . . . . . . . . . . . . . . . . . . . . . 15
Available Options . . . . . . . . . . . . . . . . . . . . . . . . . . 15
[DVD Audio Level] . . . . . . . . . . . . . . . . . . . . . . . 16
[CSO (Center Speaker Organizer)] . . . . . . . . . . 16
Enjoying high quality image
(XAV-712BT/612BT only) . . . . . . . . . . . . . . . . . . 21
Using Gesture Command. . . . . . . . . . . . . . . . . . . . 22
Settings
General Settings . . . . . . . . . . . . . . . . . . . . . . . . . . . 23
Touch Panel Adjust. . . . . . . . . . . . . . . . . . . . . . 24
Bluetooth Reset
(XAV-712BT/612BT/602BT only) . . . . . . . . . . . . 25
USB Battery Charge Mode . . . . . . . . . . . . . . . . 25
Sound Settings . . . . . . . . . . . . . . . . . . . . . . . . . . . . 25
EQ7 / Subwoofer Level Adjust . . . . . . . . . . . . . 25
Balance / Fader Level Adjust . . . . . . . . . . . . . . 25
RBE (Rear Bass Enhancer) . . . . . . . . . . . . . . . . 26
4.1ch Speaker Level . . . . . . . . . . . . . . . . . . . . . 26
Visual Settings . . . . . . . . . . . . . . . . . . . . . . . . . . . . 26
Picture EQ . . . . . . . . . . . . . . . . . . . . . . . . . . . . . 26
Aspect . . . . . . . . . . . . . . . . . . . . . . . . . . . . . . . . 27
Source Settings . . . . . . . . . . . . . . . . . . . . . . . . . . . . 27
Auto Input Change(MHL)
(XAV-712BT/612BT only) . . . . . . . . . . . . . . . . . . 28
Additional Information
Auxiliary Audio/Video Equipment . . . . . . . . . . . . 29
Rear View Camera . . . . . . . . . . . . . . . . . . . . . . . . . 29
Updating the Firmware . . . . . . . . . . . . . . . . . . . . . 29
Precautions . . . . . . . . . . . . . . . . . . . . . . . . . . . . . . . 29
Maintenance . . . . . . . . . . . . . . . . . . . . . . . . . . . . . . 35
Specifications . . . . . . . . . . . . . . . . . . . . . . . . . . . . . 35
Troubleshooting . . . . . . . . . . . . . . . . . . . . . . . . . . . 38
Language Code List . . . . . . . . . . . . . . . . . . . . . . . . 45
Listening to Pandora® (Australia and
New Zealand models only)
Preparing for Pandora®. . . . . . . . . . . . . . . . . . . . . . 17
Streaming Pandora® . . . . . . . . . . . . . . . . . . . . . . . . 17
Available Operations in Pandora® . . . . . . . . . . . . . 17
Handsfree Calling (XAV-712BT/612BT/
602BT only)
Receiving a Call . . . . . . . . . . . . . . . . . . . . . . . . . . . . 18
Making a Call . . . . . . . . . . . . . . . . . . . . . . . . . . . . . . 18
Available Operations During a Call . . . . . . . . . . . . 19
Phonebook Management . . . . . . . . . . . . . . . . . . . 19
Call Data Management . . . . . . . . . . . . . . . . . . . . . . 19
Phone Option Menu . . . . . . . . . . . . . . . . . . . . . . . . 20
Useful Functions
App Remote with iPhone/Android Phone . . . . . . 20
Duplicating the Smartphone’s Display
(MirrorLink™) . . . . . . . . . . . . . . . . . . . . . . . . . . . 21
Enjoying Different Sources in Front and Rear
(Zone × Zone) . . . . . . . . . . . . . . . . . . . . . . . . . . 21
4GB
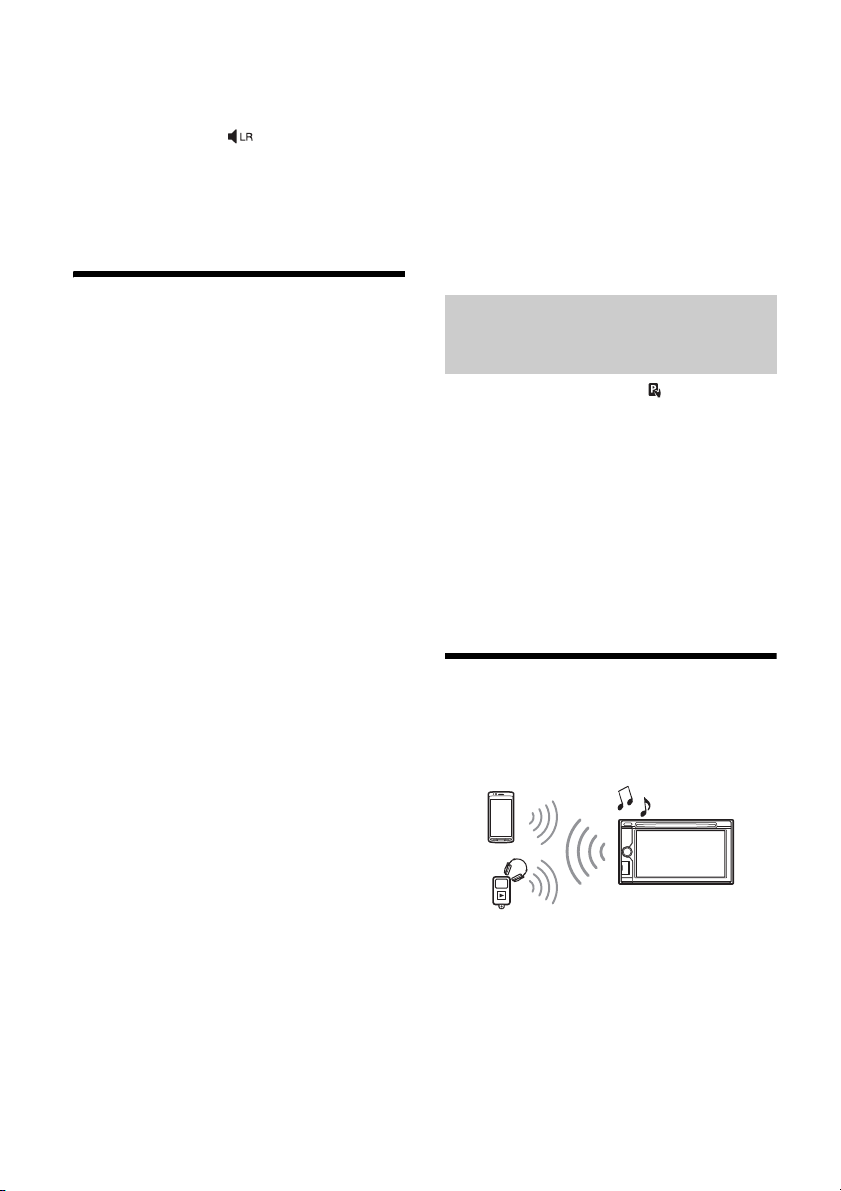
For details on smartphone connectivity and
battery charge capability, see “Summary of
Useful Functions for Smartphone” on the pages
at the end of these operating instructions.
Page 5
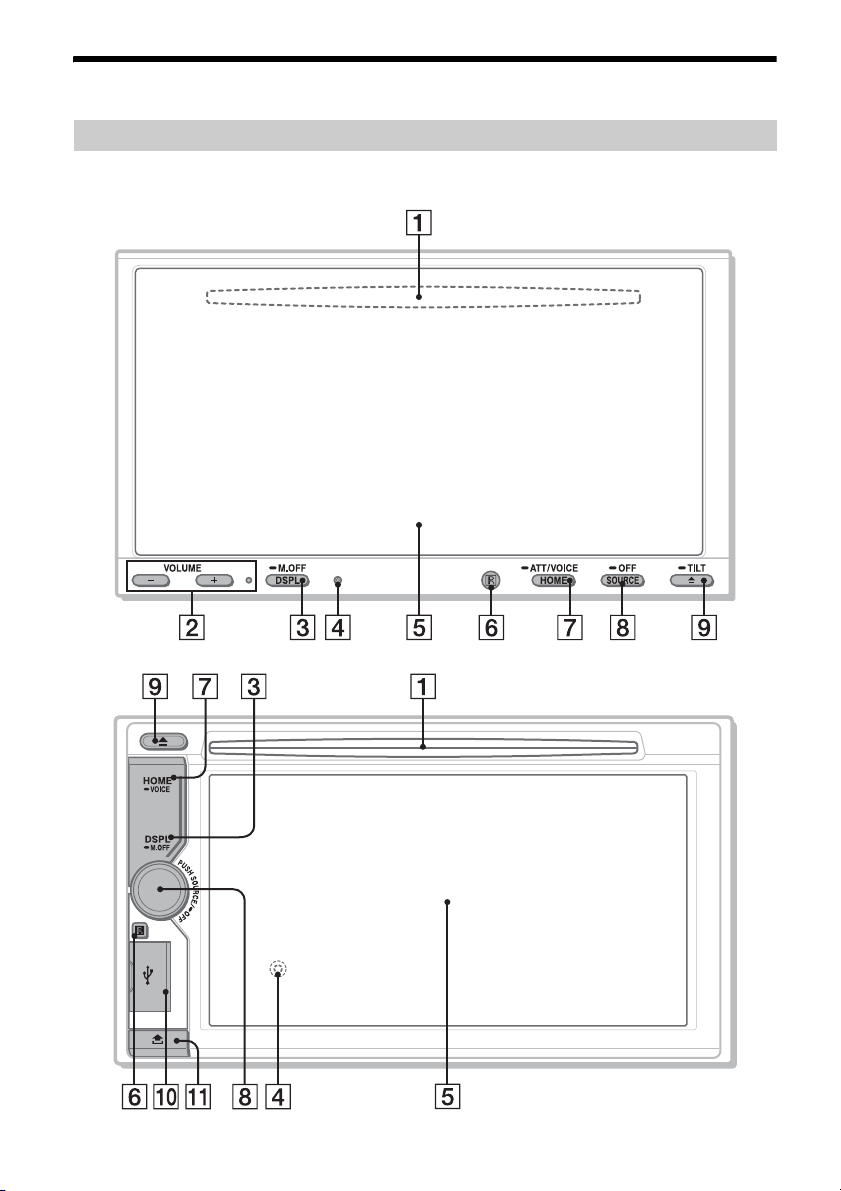
Guide to Parts and Controls
Main unit
XAV-742/712BT
There is a tactile dot to the right of the VOLUME + button.
XAV-612BT/602BT
5GB
Page 6
Disc slot
(XAV-742/712BT: located behind the front panel)
VOLUME –/+
DSPL (display)
Change the display items.
-M.OFF (monitor off)
Press and hold to turn off the monitor and the
button illumination. Touch anywhere on the
display to turn back on.
Reset button
(XAV-612BT/602BT: located behind the front
panel)
Display/touch panel
Receptor for the remote commander
HOME
Open the HOME menu.
-VOI CE ( XAV-71 2BT */612BT/60 2BT onl y)
Press and hold for more than 2 seconds to
activate the voice command function. When the
App Remote function is on, voice recognition
(Android phone only) and voice dial is activated.
When the App Remote function is off, only voice
dial is available.
-ATT (attenuate) (XAV-742/712BT* only)
Press and hold for more than 2 seconds to
attenuate the sound.
* You can assign the ATT function to the HOME
button by selecting [ATT ON/OFF] in [HOME Key
Function (hold 2sec push)] (page 23).
SOURCE
Turn on the power.
Change the source. Each press displays a
selectable source in a popup on the current
display.
-OFF
Press and hold for 1 second to exit the source.
Press and hold for more than 2 seconds to turn
off the unit. When the unit is turned off, remote
commander operation is not available.
Volume control dial (XAV-612BT/602BT only)
Rotate to adjust the volume.
(disc eject)
-TI LT (X AV-74 2/ 71 2B T o nl y)
Press and hold to adjust the monitor angle.
USB port (XAV-612BT/602BT only)
Open the cover to connect a USB device.
Front panel release button (XAV-612BT/602BT
only)
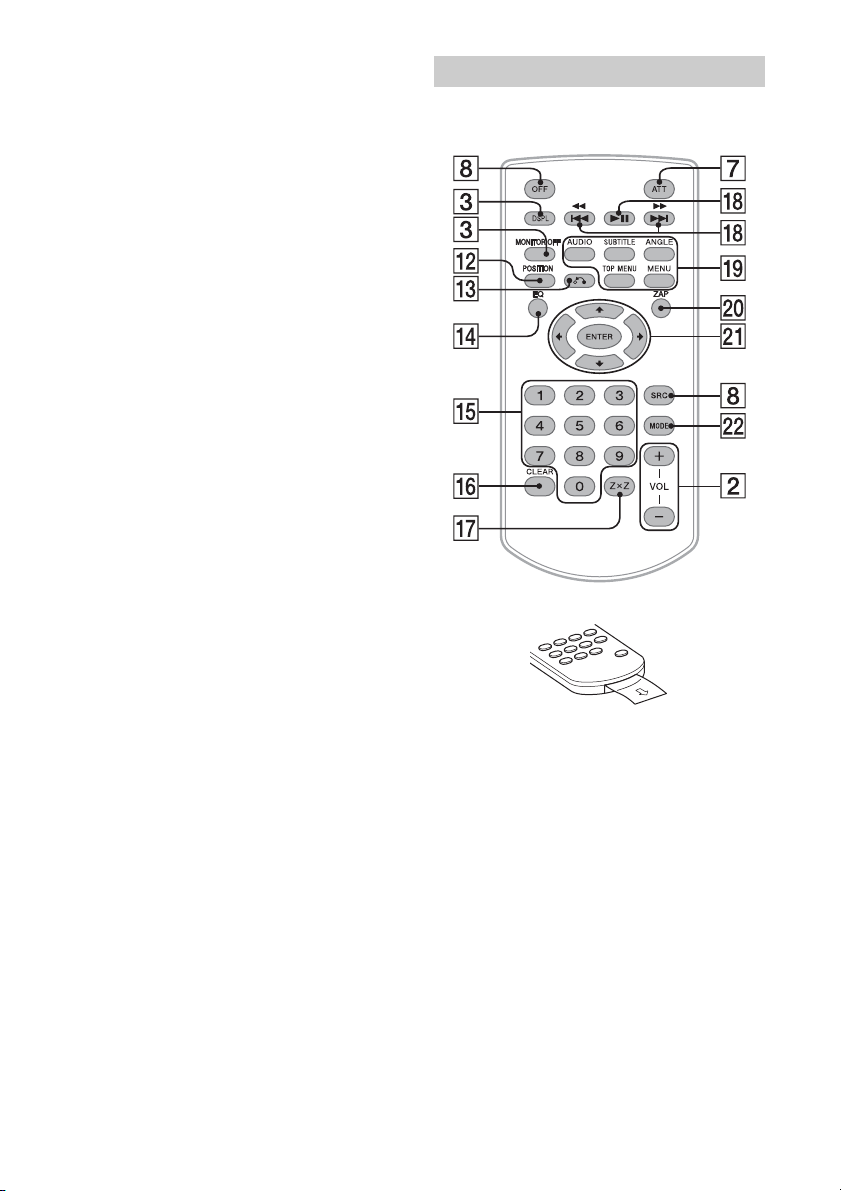
RM-X271 remote commander
The remote commander can be used to operate the
audio controls. For menu operations, use the touch
panel.
Remove the insulation film before use.
POSITION
Switch the listening position.
(return)
Return to the previous display/return to the
menu on a Video CD (VCD).
EQ (equalizer)
Select an equalizer curve.
Number buttons (0 - 9)
CLEAR
Z×Z (Zone × Zone) (page 21)
(play/pause)
/ (previous/next)
DVD playback setting buttons
ZAP (zappin) (page 14)
/// (cursor)/ENTER
MODE
Select the radio band/auxiliary device.
6GB
Page 7
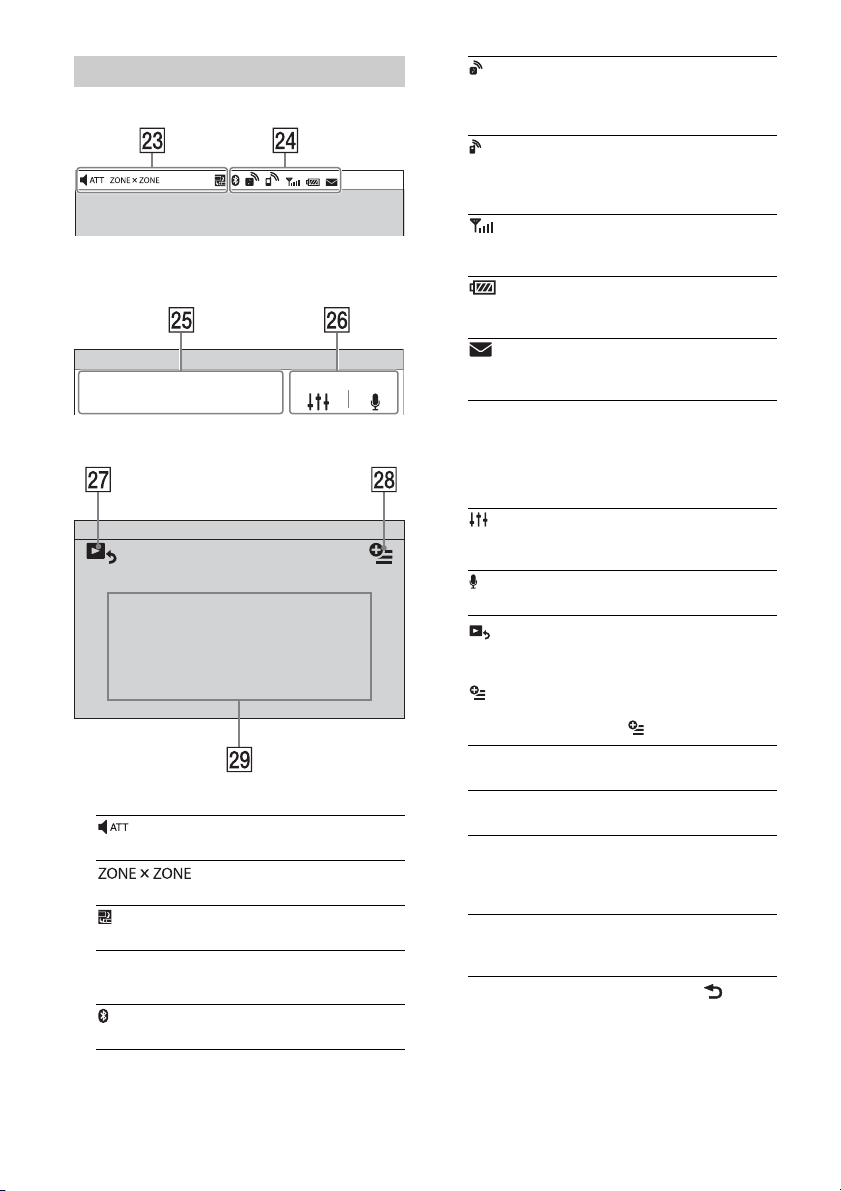
Screen displays
Status bar:
Notification panel:
Tap on the status bar to open the notification panel.
Home screen:
Indications
Lights up when the sound is attenuated.
Lights up when the Zone × Zone function is on.
Lights up when the App Remote function is on.
BLUETOOTH status indications (XAV-712BT/
612BT/602BT only)
Lights up when the BLUETOOTH signal is on.
Lights up when a device is connected to the unit
for audio streaming.
Flashes when the connection is in progress.
Lights up when a cellular phone is connected to
the unit for handsfree calling.
Flashes when the connection is in progress.
Indicates the signal strength status of the
connected cellular phone.
Indicates the remaining battery status of the
connected cellular phone.
Lights up when a connected cellular phone has
unread SMS message(s).
Application specific area
Display playback controls/indications or show
the unit’s status. Displayed items differ
depending on the source.
Common area
Accesses the EQ7/subwoofer settings menu
directly (page 25).
(XAV-712BT/612BT/602BT only)
Activates the voice command function.
Switch from the HOME screen to the playback
screen.
(option)
Open the HOME option menu.
Press HOME, then touch .
[Icon Priority]
Changes the order of icons.
[Background Theme]
Changes the wallpaper.
[Icon View]
Switches between 2D and 3D icon display.
You can also switch the icon view by touching
and holding anywhere on the display.
[Touch Effect]
Displays a light trail where you have touched
the display.
To return to the home screen, touch .
Source select keys
Change the source.
7GB
Page 8

Getting Started
Resetting the Unit
Before operating the unit for the first time, or after
replacing the car battery or changing connections,
you must reset the unit.
1 Press the reset button on the unit.
Use a pointed object, such as a ballpoint pen.
Note
Pressing the reset button will erase the clock setting
and some stored contents.
Performing Initial Settings
After resetting, the initial setting display appears.
1 Touch [No] on the demo setting display.
2 Touch [Language] to set the display
language.
Move the scrollbar up and down, then select the
desired language.
3 Touch [Subwoofer] to set the subwoofer
connection status.
Set to [ON] if a subwoofer is connected, or [OFF]
if not.
4 Touch [Listening Position] to set the
listening position.
Set to [Front L] if your listening position is front
left, or [Front R] if front right.
To return to the initial setting display, touch .
5 Touch [OK].
The setting is complete.
This setting can then be further configured in the
setting menu (page 23).
Setting the Clock
1 Press HOME, then touch [Settings].
2 Touch , then touch [Date & Time].
3 Touch [Select Time Zone].
The setting display appears.
To return to the [Date & Time] display, touch
.
4 Touch [Set Date], then set the year,
month and day.
5 Touch [Set Time], then set the hour and
minute.
6 Touch [AM] or [PM].
7 Touch [OK].
The setting is complete.
To delete an entered number, touch [Clear].
To activate/deactivate the CT function (page 11),
touch [CT] in step 4.
Preparing a BLUETOOTH Device
(XAV-712BT/612BT/602BT only)
You can enjoy music, or perform handsfree calling,
by connecting a suitable BLUETOOTH device
(cellular phone, audio device, etc.). For details on
connecting a BLUETOOTH d evice, refer to the
operating instructions supplied with the device.
Before connecting, turn down the volume of this
unit; other wise, loud sound may result.
Pairing and connecting with a
BLUETOOTH device
When connecting a BLUETOOTH device for the first
time, mutual registration (called “pairing”) is
required. Pairing enables this unit and other devices
to recognize each other.
1 Press HOME, then touch [Settings].
2 Touch , and move the scrollbar up and
down.
3 Touch [Bluetooth Connection], then set
the signal to [ON].
The BLUETOOTH signal of this unit is activated
and appears on the status bar.
4 Touch [Pairing >].
The unit enters pairing standby mode.
8GB
Page 9
5 Perform the pairing procedure on the
BLUETOOTH device to detect this unit.
6 Select [Sony Car Audio] shown in the
display of the BLUETOOTH device.
7 If passkey* input is required on the
BLUETOOTH device, input [0000].
* Passkey may be called “passcode,” “PIN code,”
“PIN number,” “password,” etc., depending on the
BLUETOOTH device.
8 Select this unit on the BLUETOOTH device
to establish the BLUETOOTH connection.
or lights up when the connection is made.
Note
While connecting to a BLUETOOTH device, this unit
cannot be detected by another device. To enable
detection, terminate the current connection.
Connecting with a paired BLUETOOTH
device
This chapter explains how to connect manually to
registered BLUETOOTH devices.
1 Make sure that the BLUETOOTH signals
both on this unit (page 25) and the
BLUETOOTH device are activated.
on the status bar indicates that the
BLUETOOTH signal on this unit is on.
2 Operate the BLUETOOTH device to
connect to this unit.
or appears.
When the ignition is turned to on with the
BLUETOOTH signal activated, this unit searches for
the last-connected BLUETOOTH device, and
connection is made automatically if possible.
Note
If this unit cannot detect the last-connected
BLUETOOTH device, touch [Reconnect] to search for the
last-paired device again.
If the problem is not solved, follow the pairing
procedure.
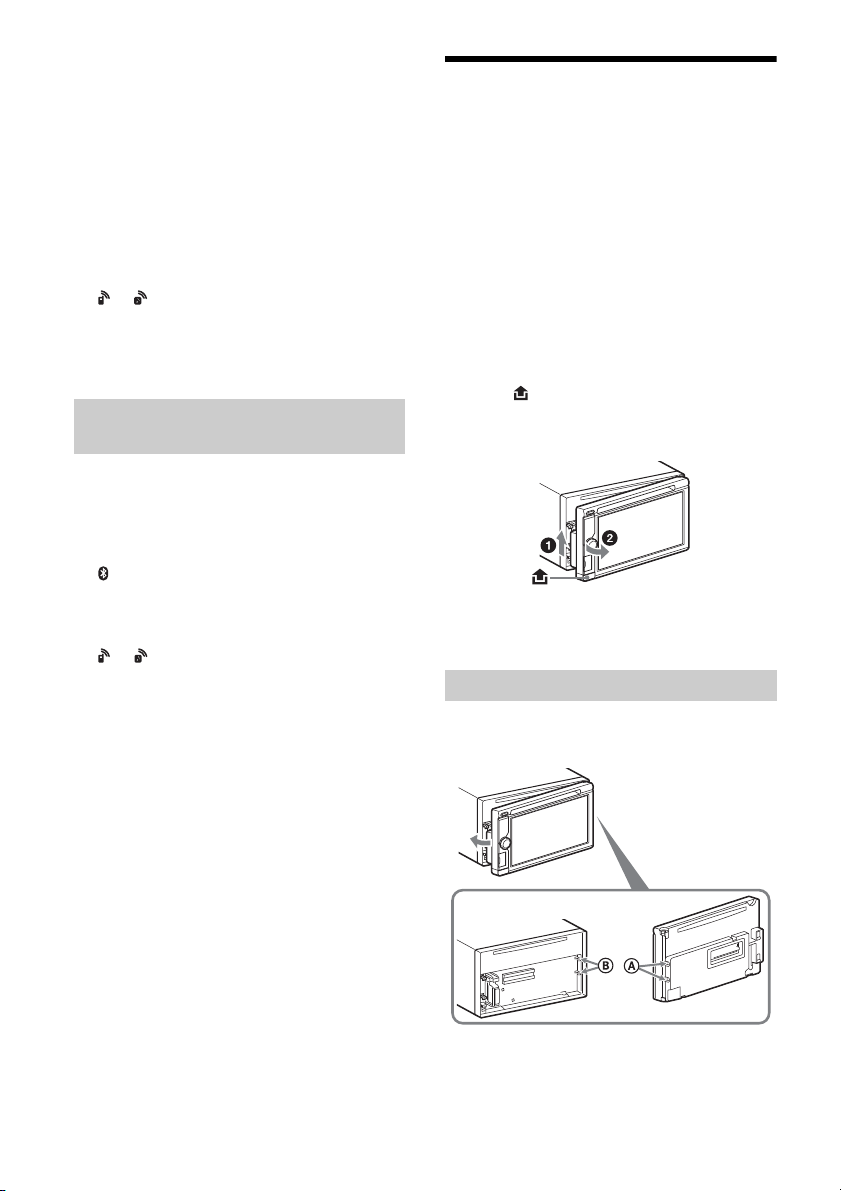
Detaching the front panel (XAV612BT/602BT only)
You can detach the front panel of this unit to
prevent theft.
Caution alarm
If you turn the ignition switch to the off position
without detaching the front panel, the caution
alarm will sound for a few seconds. The alarm will
only sound if the built-in amplifier is used.
To deactivate the caution alarm, set [Front
Panel Caution Alarm] to [OFF] (page 24).
1 Press and hold OFF for more than 2
seconds to turn off the unit.
2 Press .
3 Lift the left side of the front panel.
Pull it off towards you.
Note
Do not drop or put excessive pressure on the front
panel and display window.
Attaching the front panel
Engage part of the front panel with part of the
unit, as illustrated, and push the left side into
position until it clicks.
To install the microphone
To capture your voice during handsfree calling, you
need to install the microphone (supplied).
For details on how to connect the microphone, refer
to the supplied “Installation/Connections” guide.
Note
Do not put anything on the inner surface of the front
panel.
9GB
Page 10
Listening to the Radio
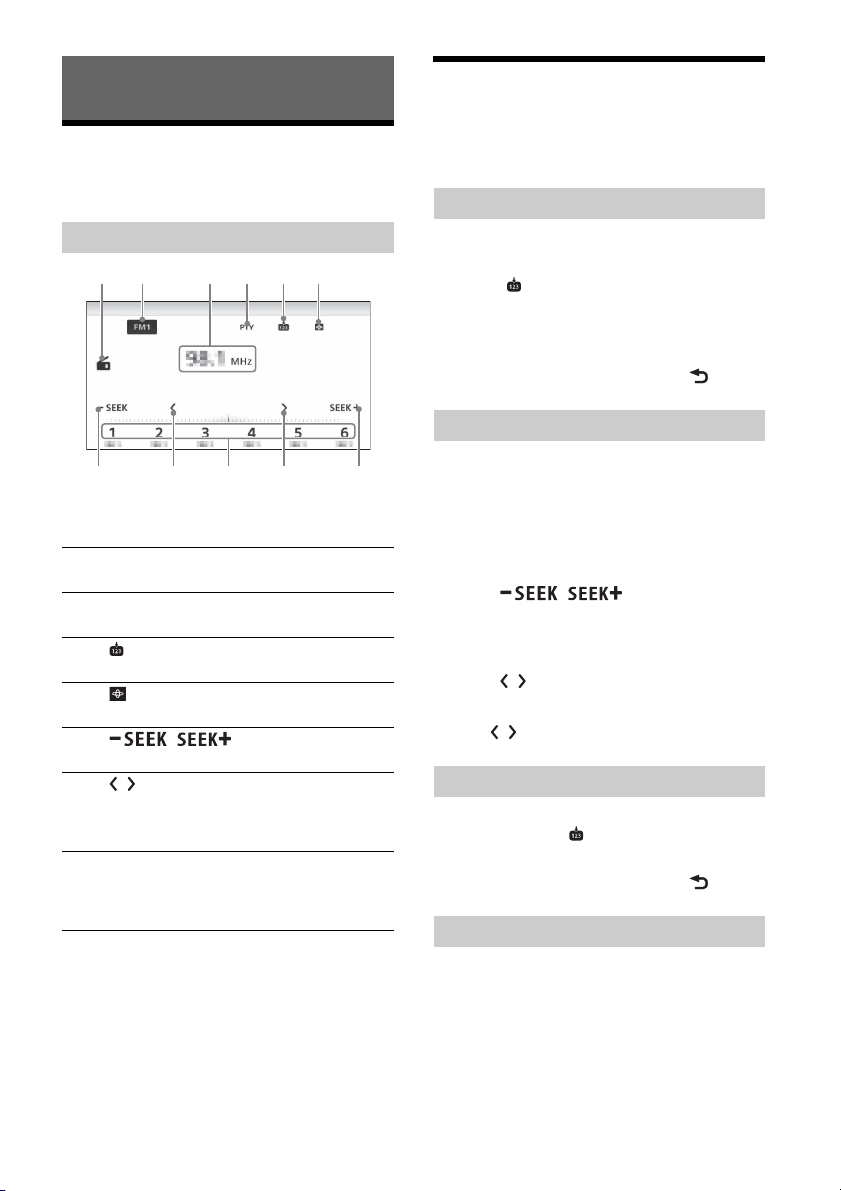
Listening to the Radio
To listen to the radio, press HOME then touch
[Tuner].
Reception controls/indications
Reception controls ( to )
Current band icon
Opens the band list.
[PTY] (Program Types) (FM only)
Opens the PTY list (page 11).
Registers the current band as a preset item.
Changes the pattern of the visualizer.
/
Tunes in automatically.
/
Tunes i n manuall y.
Touch and hold to continuously skip
frequencies.
[1] to [6]
Selects a preset station.
Touch and hold to store the currently
displayed frequency in that preset.
Reception indications ( and )
Current source icon
Frequency/status
Storing and Receiving Stations
Caution
When tuning to stations while driving, use Best
Tuning Memory (BTM) to prevent an accident.
Storing automatically (BTM)
1 Select the desired band ([FM1], [FM2],
[FM3], [AM1], or [AM2]).
2 Touch .
3 Touch [BTM].
The unit stores the first six available stations in
presets ([1] to [6]).
To return to the playback screen, touch .
Tuning
1 Touch the current band.
The band list appears.
2 Touch the desired band ([FM1], [FM2],
[FM3], [AM1], or [AM2]).
3 Perform tuning.
To tune automatically
Touch / .
Scanning stops when the unit receives a station.
Repeat this procedure until the desired station
is received.
To tune manually
Touch / repeatedly until the desired
frequency is received.
To skip frequencies continuously, touch and
hold / .
Storing manually
1 While receiving the station that you want
to store, touch , then touch the desired
preset number ([1] to [6]).
To return to the playback screen, touch .
Receiving stored stations
1 Select the band.
2 Touch the desired preset number ([1] to
[6]).
10GB
Page 11
Using Radio Data System (RDS)
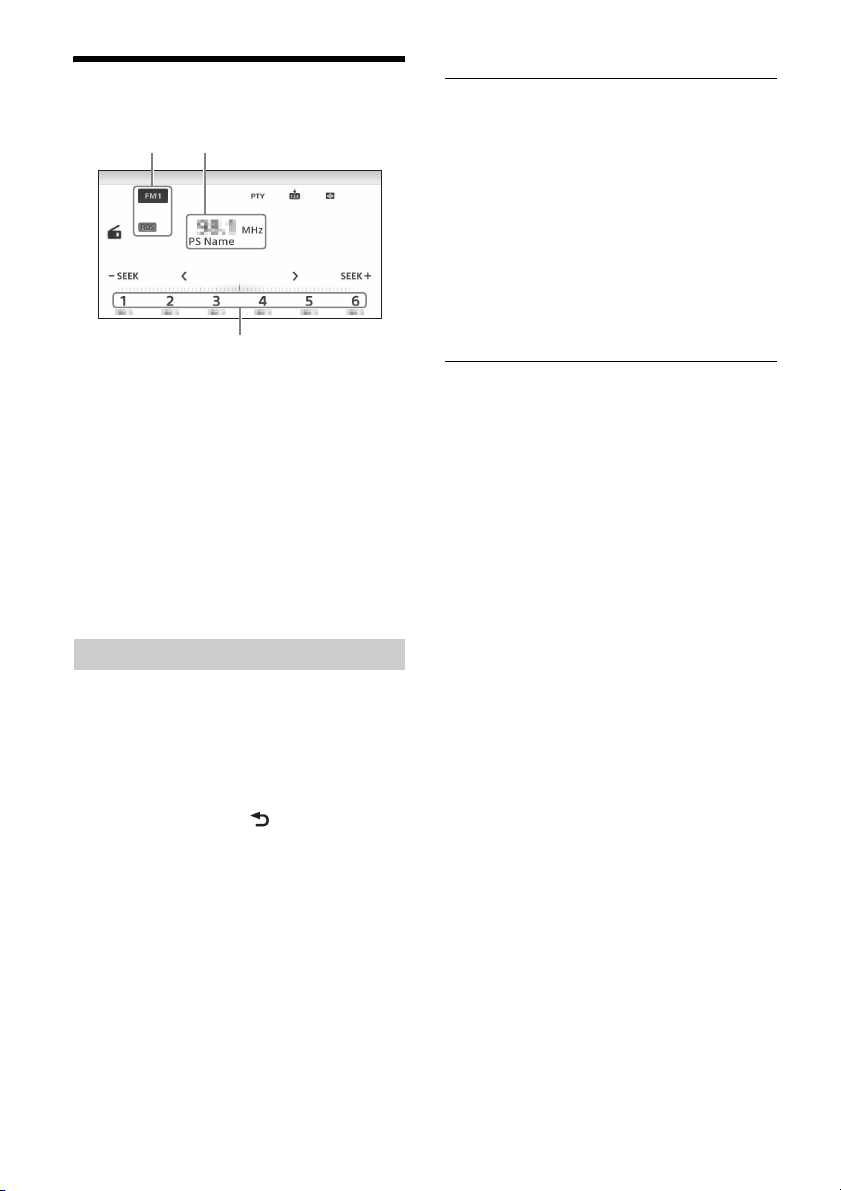
Display items
Band name, RDS*
Program service name, frequency
Preset number
* During RDS reception.
RDS services
This unit automatically provides RDS services as
follows:
PTY (Program Types)
Displays the currently received program type.
Also searches for a designated program type.
CT (Clock Time)
The CT data from the RDS transmission sets the
clock.
Type of programs
News (News), Current Affairs (Current Affairs),
Information (Information), Sport (Sports),
Education (Education), Drama (Drama), Cultures
(Culture), Science (Science), Varied Speech
(Varied), Pop Music (Pop Music), Rock Music (Rock
Music), Easy Listening (M.O.R. Music), Light
Classics M (Light classical), Serious Classics
(Serious classical), Other Music (Other Music),
Weather & Metr (Weather), Finance (Finance),
Children’s Progs (Children’s program), Social
Affairs (Social Affairs), Religion (Religion), Phone
In (Phone In), Travel & Tou ring (Travel), Leisure &
Hobby (Leisure), Jazz Music (Jazz Music), Country
Music (Country Music), National Music (National
Music), Oldies Music (Oldies Music), Folk Music
(Folk Music), Documentary (Documentary)
Note
You cannot use this function in countries/regions
where no PTY data is available.
Selecting program types (PTY)
1 During FM reception, touch [PTY].
To scroll the list, move the scrollbar up and
down.
2 Touch the desired program type.
The unit searches for a station broadcasting the
selected program type.
To close the PTY list, touch .
11GB
Page 12
Playback
Audio language
Audio format/
channel numbers*
To change the visualizer settings, touch
.
For playable discs or file types, see page 31.
Playing a Disc
Depending on the disc, some operations may be
different or restricted.
Refer to the operating instructions supplied with
the disc.
XAV-742/712BT
1 Press on the unit to open the front
panel.
2 Insert the disc (label side up), then
playback starts.
XAV-612BT/602BT
1 Insert the disc (label side up), then
playback starts.
If a DVD menu appears
Touch the desired item in the DVD menu.
You can also use the menu control panel, which can
be displayed by touching the screen anywhere
except the DVD menu items. Touch /// to
move the cursor, then touch [ENTER] to confirm.
If the menu control panel does not appear by
touching the display, use the remote commander.
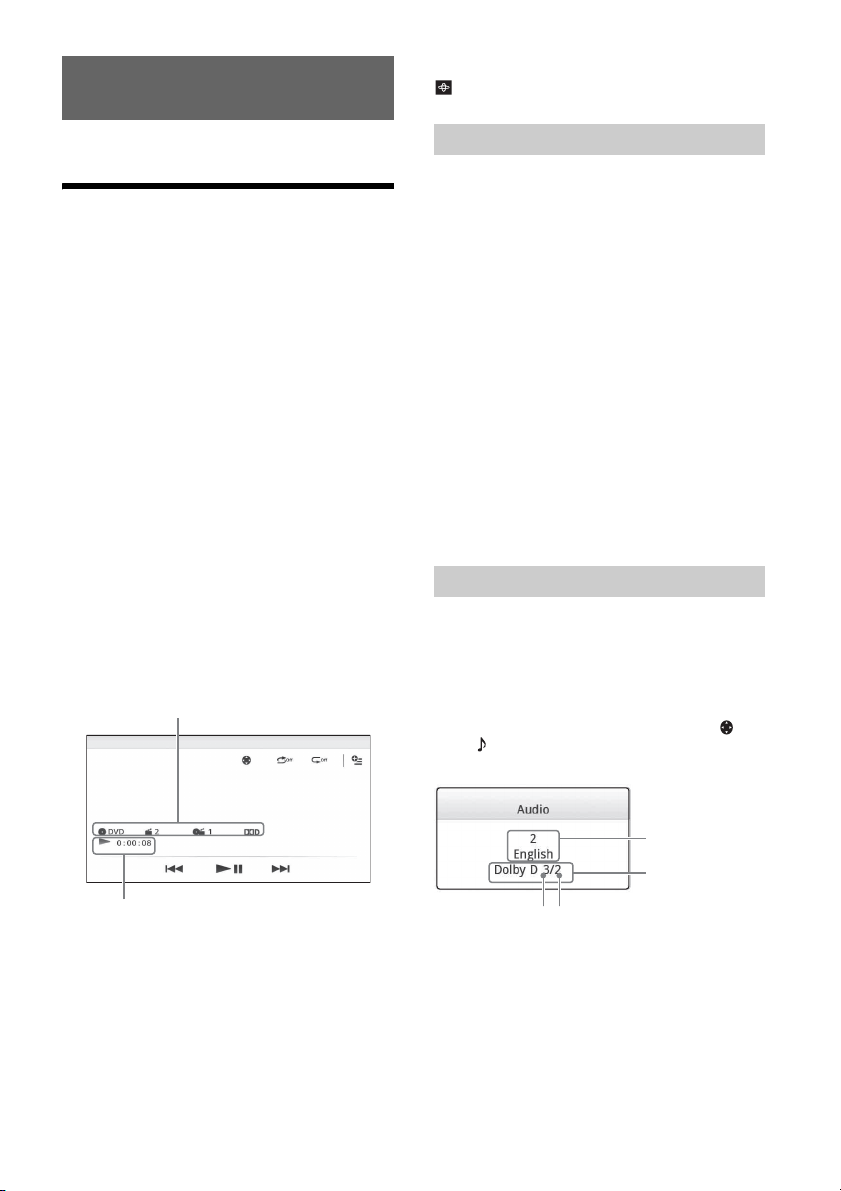
Example of playback indications (DVD)
Using PBC (playback control) functions
The PBC menu interactively assists with operations
while a PBC-compatible VCD is played.
1 Start playing a PBC-compatible VCD.
The PBC menu appears.
2 Press the number buttons on the remote
commander to select the desired item,
then press ENTER.
3 Follow the instructions in the menu for
interactive operations.
To return to the previous display, press on
the remote commander.
To deactivate PBC functions, set [Video
CD PBC] to [OFF] (page 28).
Notes
During PBC playback, the track number, playback
item, etc., do not appear on the playback display.
Resume playback is unavailable during playback with
PBC.
Configuring audio settings
To change the audio language/format
The audio language can be changed if the disc is
recorded with multilingual tracks. You can also
change the audio format when playing a disc
recorded in multiple audio formats (e.g., Dolby
Digital).
During playback, touch the screen and then .
Touch repeatedly until the desired audio
language/format appears.
Current source icon, format, chapter/title
number, audio format
Playback status, elapsed playback time
Touch the display if the indications are not
displayed.
For audio discs, some indications are always
displayed during playback.
12GB
* The format name and channel numbers appear as
follows:
Example: Dolby Digital 5.1 ch
Front channel × 2 + Center channel × 1
Rear channel × 2
If the same language is displayed two or more
times, the disc is recorded in multiple audio
formats.
Page 13
To change the audio channel
When playing a VCD, you can listen to both left and
right channels, right channel only or left channel
only, via both right and left speakers.
During playback, touch repeatedly until the
desired audio channel appears.
The options are indicated below.
[Stereo]: Standard stereo sound (default)
[1/Left]: Left channel sound (monaural)
[2/Right]: Right channel sound (monaural)
Caution for iPhone
When you connect an iPhone via USB, telephone
volume is controlled by the iPhone itself. In order to
avoid sudden loud sound after a call, do not
increase the volume on the unit during a call.
About resuming mode
When the iPod currently playing is connected to the
dock connector, the mode of this unit changes to
resuming mode and playback starts in the mode
set by the iPod.
In resuming mode, repeat/shuffle play are not
available.
Playing an iPod/USB Device
In these Operating Instructions, “iPod” is used as a
general reference for the iPod functions on the iPod
and iPhone, unless otherwise specified by the text
or illustrations.
For details on the compatibility of your iPod, see
“About iPod” (page 34) or visit the support site on
the back cover.
MSC (Mass Storage Class)-type USB devices (such as
a USB flash drive, digital media player, Android
phone) compliant with the USB standard can be
used.
Depending on the digital media player or Android
phone, setting the USB connection mode to MSC is
required.
1 Reduce the volume on this unit.
If the device is turned off, turn it on.
2 Connect the iPod or the USB device to
the USB port.
3 Press HOME, then touch [USB Music],
[USB Video], [USB Photo] or [iPod].
In the case of [USB Music], [USB Video] or [iPod],
playback starts.
In the case of [U SB Photo], touch [All pictures] or
[Folders], then select the picture or folder to
start photo file playback.
To stop playback
Press and hold OFF for 1 second.
Listen and watch contents with direct
operation of iPod (Passenger App
Control)
1 During playback, touch .
To deactivate Passenger App Control
During [Passenger App Control], touch screen and
then [Cancel].
The play mode changes to resuming mode.
Notes
App image and video can only be displayed on this
unit while the parking brake is applied.
Apps compatible with Passenger App Control are
limited.
The volume can be adjusted only by this unit.
The repeat and shuffle settings will be off if the
Passenger App Control mode is canceled.
Playing a BLUETOOTH Device
(XAV-712BT/612BT/602BT only)
You can play contents on a connected device that
supports BLUETOOTH A2DP (Advanced Audio
Distribution Profile).
To remove the device
Stop playback, then disconnect.
Do not disconnect during playback, as data in the
device may be damaged.
Notes
If you connect an iPod or MSC device to a USB port
while the same type of device is already connected to
the other USB port, the unit will not recognize the
latest device.
The signal of USB Video or USB Photo playback is not
output from the video output terminal (rear).
The signal of iPod video playback is not output from
the video output terminal (rear).
1 Make BLUETOOTH connection with the
audio device (page 9).
2 Reduce the volume on this unit.
3 Press HOME, then touch [BT Audio].
4 Operate the audio device to start
playback.
5 Adjust the volume on this unit.
13GB
Page 14
Playback controls
If the BLUETOOTH device supports AVRCP (Audio
Video Remote Control Profile), you can control
playback via this unit in the same way as disc
playback.
To match the volume level of the
BLUETOOTH device to other sources
You can reduce the volume level differences
between this unit and the BLUETOOTH device.
During playback, touch .
Select a level from –8 to +18.
Searching and Playing Tracks
The tracks in the iPod are played back from 1 minute
into each song.
1 During audio playback, touch [ZAP].
In the case of USB Music, ZAP mode starts from
the currently playing track.
In the case of iPod, ZAP mode starts from a
passage in the next track.
2 Touch [ZAP] when a track you want to
listen to is played.
In the case of USB Music, playback returns to
normal from the current position until the end
of the track.
In the case of iPod, the selected track plays from
the beginning.
To search for a track via the ZAPPIN mode again,
repeat steps 1 and 2.
Using repeat play and shuffle play
1 During playback, touch (repeat) or
(shuffle) repeatedly until the desired
option appears.
Repeat or shuffle play starts.
Available play modes differ depending on the
selected sound source.
Note
Shuffle play is not available for the following discs:
DVD-R/DVD-R DL/DVD-RW in VR mode.
version 2.0 VCD with PBC function.
Using direct search play
1 During playback, press the number
buttons on the remote commander to
enter an item (track, chapter, etc.)
number, then press ENTER.
Playback starts from the beginning of the
selected point.
Note
During VCD playback, this function is available only
when playing a VCD without PBC functions.
Searching for a track by the main chorus
part (ZAPPIN™)
ZAPPIN helps you to find desired song by playing
back only the main chorus part of that song in a
playlist of the iPod/USB device. The playback time
can be adjusted in the option menu (page 16).
This function is convenient, for example, when
searching for a track in shuffle or shuffle repeat
mode.
Notes
The tracks in the USB device need to be analyzed by
12 TONE ANALYSIS.
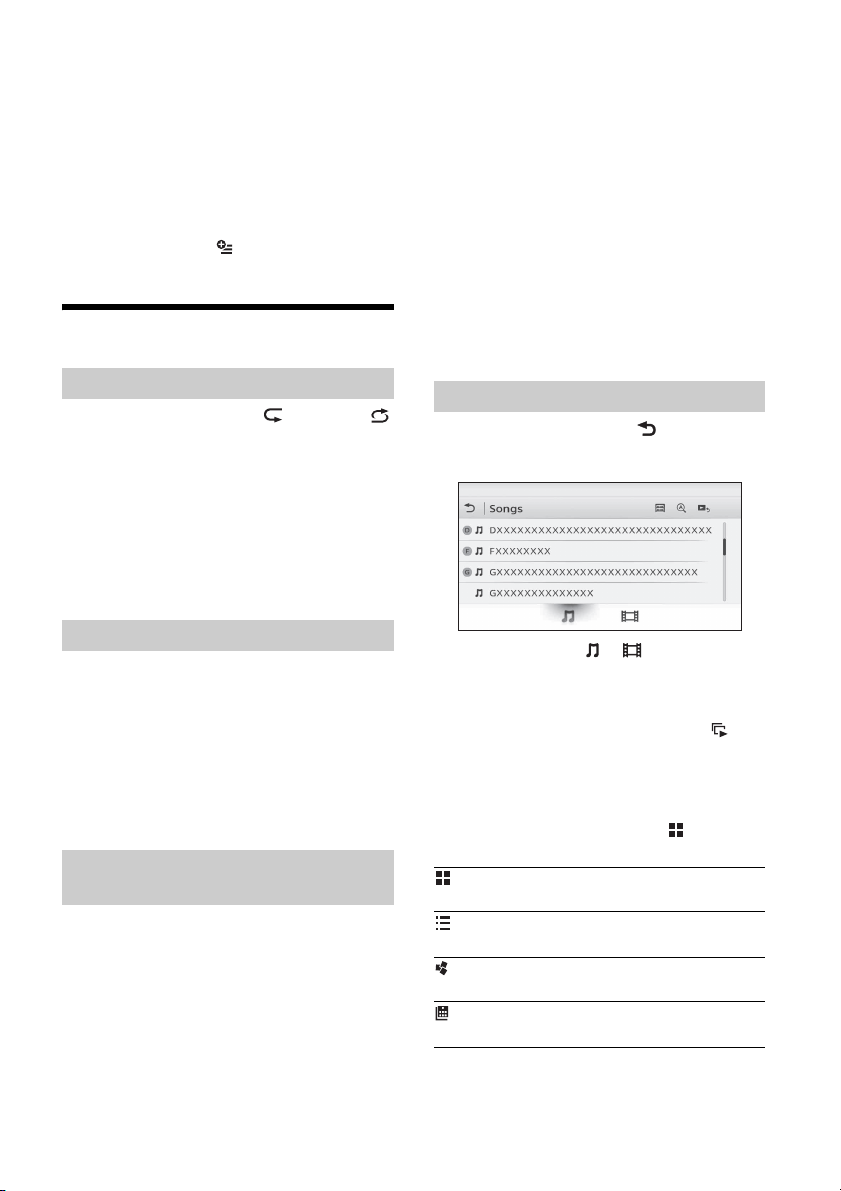
Searching for a file from the list screen
1 During playback, touch .
The list screen from the currently played item
appears.
Furthermore, touch or to list up by the
file type (audio/video).
2 Touch the desired item.
Playback starts.
In the case of the USB photo file, touch to
start the slideshow.
To change the display format for video/
photo files
While the list screen appears, touch then select
the desired option.
: Grid view
Displays the files as a grid.
: List view
Displays the files as a list.
: Cover art view
Displays the files as angled graphics.
: Date view (all pictures only)
Displays the photo files in order of date.
14GB
Page 15
: Expanded view (folders only)
Displays the photo folders, below which are
displayed subfolders, and any photo file images
that are contained.
Selecting songs from the library
1 While the list screen appears, touch .
The menu list appears.
2 Select the desired category.
The selected list appears.
3 Touch the desired track.
Playback starts.
If a message appears, follow the on-screen
instructions to proceed.
2 Drag and drop tracks from Windows
Explorer or iTunes, etc., to “Media Go.”
The analysis and transfer of tracks starts.
For details on operations, refer to the help of
“Media Go.”
Selecting an album by cover art
1 While the list screen appears, touch .
2 Touch the cover art of the album you
want to play.
Playback starts.
Enjoying Music According to
Your Mood (SensMe™)
Sony’s unique “SensMe™ channels” feature
automatically group tracks by channel or mood,
and allow you to enjoy music intuitively.
Installing “Media Go” on your computer
Software (“Media Go”) is required to enable the
SensMe™ function on this unit.
1 Download “Media Go” software from the
support site on the back cover.
2 Follow the on-screen instructions to
complete the installation.
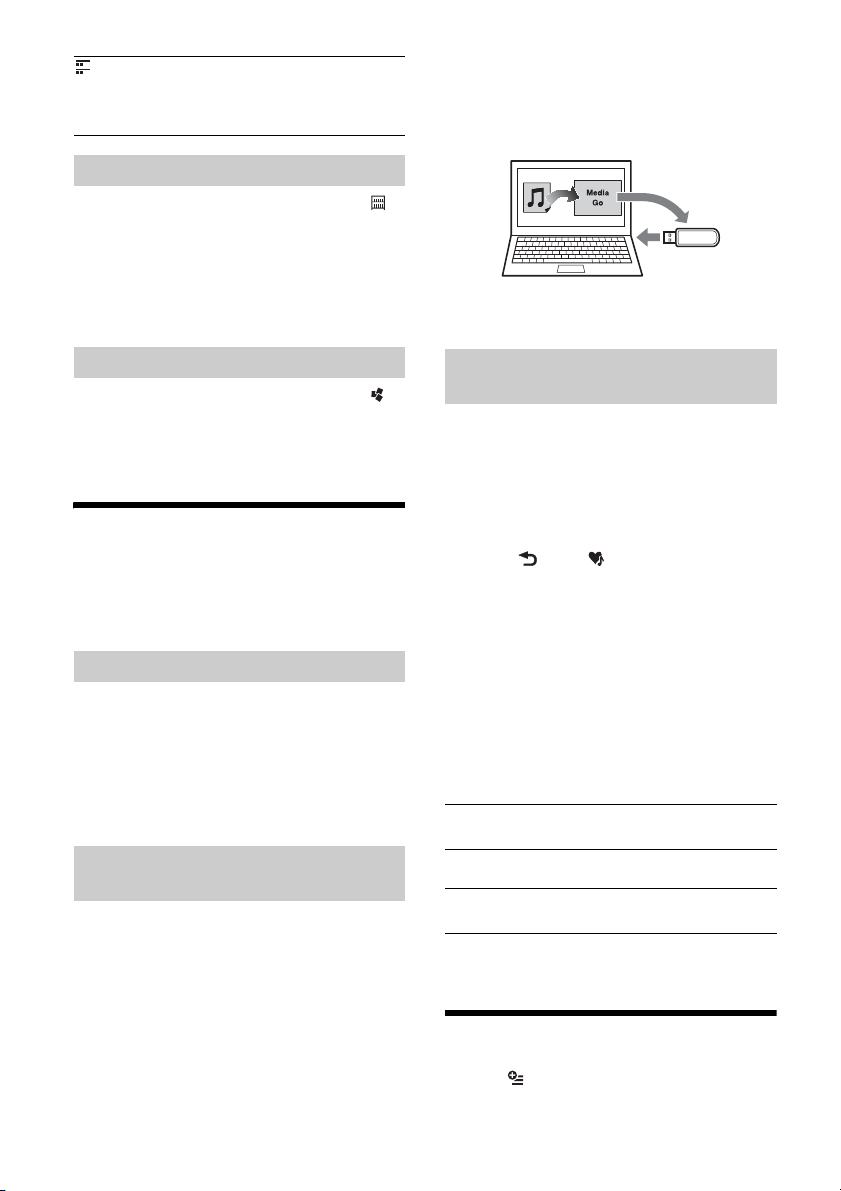
Transferring tracks to a USB device
using “Media Go”
To enable the Sens Me™ function on th is unit , tracks
need to be analyzed and transferred to a registered
USB device using “Media Go.”
1 Connect the registered USB device to
your computer.
For “WALKMAN,” connect via MTP mode.
For USB devices other than “WALKMAN,”
connect via MSC mode.
“Media Go” starts automatically.
Playing tracks in channels (SensMe™
channels)
“SensMe™ channels” automatically group tracks
into channels by their tunes. You can select and
play a channel that fits your mood, activity, etc.
1 Connect a USB device set up for the
SensMe™ function.
2 Press HOME, then touch [USB Music].
3 Touch , then .
4 Flick the channel list left or right.
Playback of the first track in the current channel
starts from the track’s most melodic or
rhythmical section*.
* May not be detected correctly.
5 Touch the desired channel.
Playback of tracks in the selected channel starts.
Channel list
Basic channels
Plays tracks according to the music type.
[Energetic], [Emotional], [Lounge], [Dance],
[Extreme], [Upbeat], [Relax], [Mellow]
Recommended
[Morning], [Daytime], [Evening], [Night],
[Midnight]
Shuffle All
Plays all analyzed tracks in random order.
Available Options
Various settings are available in each source by
touching . The available items differ depending
on the situation.
15GB
Page 16
iPod
Options Details
[ZAPPIN
Time]
- Selects the playback
time for the ZAPPIN
function: [6 sec], [15
sec], [30 sec]
USB Music
Options Details
[ZAPPIN Time] Selects the playback
[Update
database]
[About Music
player]
[List view],
[Grid view]
[Sort by album],
[Sort by artist]
[Gate], [Balloon],
[Glow], [Animal],
[Albums],
[Graffiti], [Ink],
[Random]
time for the ZAPPIN
function: [6 sec], [15
sec], [30 sec]
Searches for music
files and adds them
to the database.
Displays the
application version.
Changes the album
display format while
selecting [Albums]
in library.
Changes the cover
art sort order.
Changes the
visualizer settings.
[Oldest first],
[Newest first],
[A to Z], [Z to A]
Changes the video
list sort order.
USB Photo
Options Details
[Slideshow
interval settings]
[Play
continuously]
[Update
database]
[About Photo
viewer]
–Plays a slideshow.
– Sets a photo file as
– Displays detailed
– Deletes the file.
[Oldest first],
[Newest first],
[A to Z], [Z to A]
Adjusts the time
interval: [0.5 sec.] –
[20.0 sec.].
Sets continuous
playback
(slideshow).
Searches for picture
files and adds them
to the database.
Displays the
application version.
wallpaper.
information.
Changes the photo
list order.
Disc
USB Video
Options Details
[Zoom settings] Adjusts the video
[Update
database]
[About Video
player]
– Displays the audio
– Displays detailed
– Deletes the file.
16GB
display: [Normal
mode], [Full mode],
[Off]
Searches for video
files and adds them
to the database.
Displays the
application version.
option menus.
information.
Options Details
[DVD
Audio
Level]
[CSO
(Center
Speaker
Organizer)]
– Adjusts the audio
output level
between –10 and
+10 for a DVD
recorded in Dolby
Digital format, to
balance the volume
level between discs.
–Creates a virtual
center speaker even
though a real center
speaker is not
connected. Select
from [CSO1], [CSO2]
or [CSO3]. This
function is effective
only when [Multi
Channel Output] is
set to [Multi] in
Source Settings
(page 28).
Page 17
Listening to Pandora® (Australia and
New Zealand models only)
Thumbs Up
During playback, touch .
Thumbs Down
During playback, touch .
Pandora® is available to stream music through your
iPhone, Android™ and BlackBerry® phones. You can
control Pandora® on a USB-connected iPhone or
BLUETOOTH connected Android/BlackBerry phone
from this unit.
The Pandora® service is not available in some
countries/regions.
Preparing for Pandora®
1 Check the usable mobile device to visit
the support site on the back cover.
2 Download the latest version of the
Pandora® application to visit:
www.pandora.com
Streaming Pandora®
1 Reduce the volume on this unit.
2 Connect this unit with the mobile device.
In the case of an iPhone, connect via USB.
In the case of Android/BlackBerry phone,
connect via the BLUETOOTH function (page 8).
3 Press HOME, then touch [Pandora].
4 Launch the Pandora® application on the
mobile device.
5 Touch , then [USB connection for
iPhone] or [Bluetooth connection for
Android or Blackberry].
Playback starts.
If the device number appears
Make sure that the same numbers are displayed
(e.g., 123456) in this unit and the mobile device,
then touch [OK] on this unit and confirm on the
mobile device.
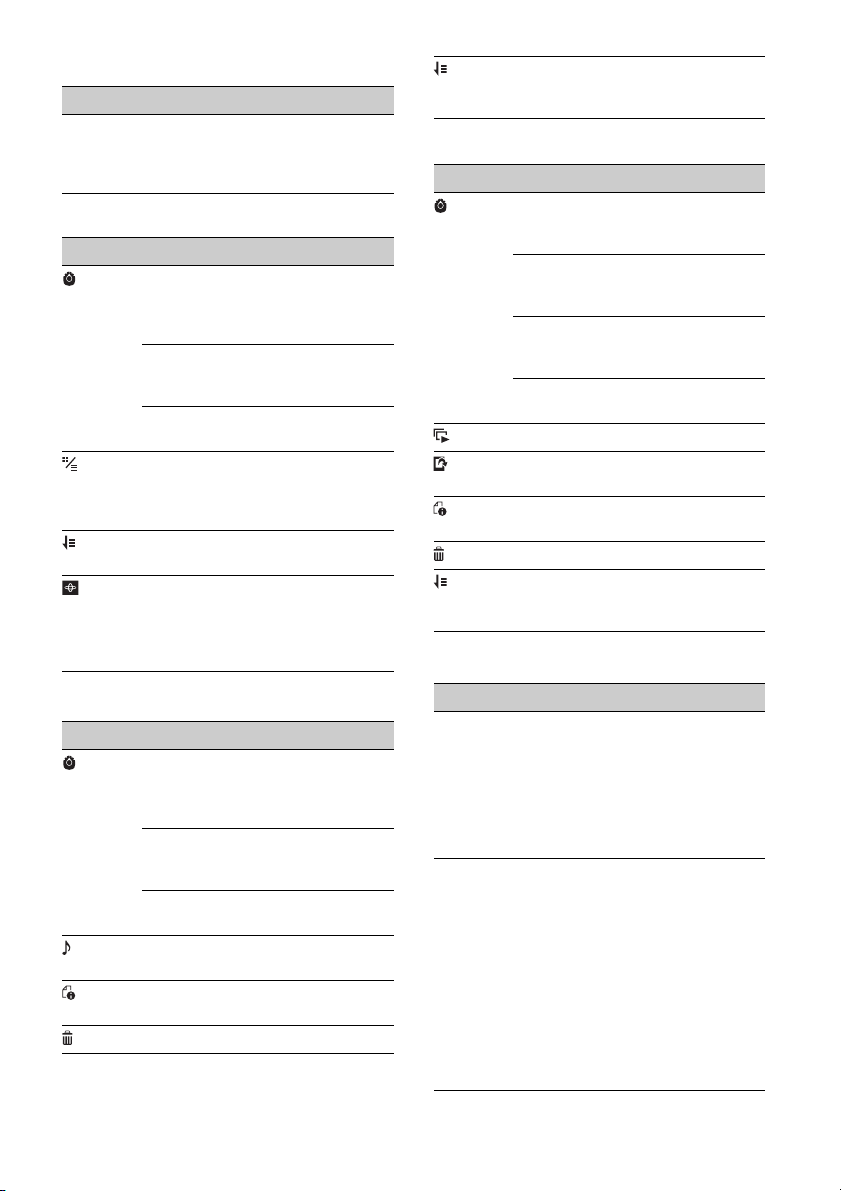
Available Operations in
Pandora®
Using the station list
The station list allows you to easily select a desired
station.
1 During playback, touch .
The station list appears.
2 Touch the desired station name.
Playback starts.
To change the sorting order, touch or .
To scroll the list, move the scrollbar up and down.
Bookmarking
The track or artist currently being played can be
bookmarked and stored in your Pandora® account.
1 During playback, touch , then or
in [Bookmark].
Creating a station
A new station can be created based on the track or
artist being played. It will be accessible from your
Pandora® account immediately.
1 During playback, touch , then or
in [Station].
Deleting a station
Stations can be deleted from the station list in order
to make room for new stations.
1 During playback, touch .
The station list appears.
2 In the station list, touch .
The delete mode will be activated and
checkboxes will be shown next to station
names.
3 Check the stations to be deleted and
press [Delete].
A confirmation box will show [OK] to confirm
deletion.
4 Touch [OK].
“Thumbs” feedback
“Thumbs Up” or “Thumbs Down” feedback allows
you to personalize stations.
17GB
Page 18

Handsfree Calling (XAV-712BT/612BT/
602BT only)
Before handsfree calling, make sure that and
are in the display. If the indications do not appear,
perform the BLUETOOTH connection procedure
(page 8).
Receiving a Call
1 Touch when a call is received.
The phone call starts.
Notes
You cannot receive a call when the un it enters the
MirrorLink™ mode.
The ringtone and talker’s voice are output only from
the front speakers.
To adjust the ringtone volume
The level of ringtone volume will be stored into
memory, independently from the regular volume
level.
XAV-712BT
Press VOLUME +/– while receiving a call.
XAV-612BT/602BT
Rotate the volume control dial while receiving a call.
To rejec t/end a call
Tou ch .
Making a Call
1 Press HOME, then touch [Phone].
2 Touch one of the icons on the
BLUETOOTH phone display.
(call history)*
Select a contact from the call history list.
The unit stores the last 20 calls.
(redial)
Make a call automatically to the last
contact you made.
(phonebook)*
Select a contact from the name list/
number list in the phonebook. To search
the desired contact by alphabetical order
in the name list, touch .
For details on how to manage the
phonebook data, see “Phonebook
Management” (page 19).
(voice dial)*
Say a voice tag stored on the cellular
phone.
(phone number input)
Enter the phone number.
Preset number
Touch a preset number ([1] to [6]).
The unit stores up to 6 contacts in the
list.
For details on how to store, see
“Presetting phone numbers” (page 19).
*1 The cellular phone needs to support PBAP
(Phone Book Access Profile).
*2 Do not use the voice dial function on the cellular
phone while it is connected to this unit.
*3 Voice dial may not work depending on the
recognition specification of the cellular phone.
For details, visit the support site on the back
cover.
1
1
2*3
3 Touch .
The call is made and the calling display appears
until the other party answers.
18GB
Page 19

Available Operations During a
Call
To adjust the talker’s voice volume
The level of the talker’s voice volume will be stored
into memory, independently from the regular
volume level.
XAV-712BT
Press VOLUME +/– during a call.
XAV-612BT/602BT
Rotate the volume control dial during a call.
To send DTMF (Dual Tone Multiple
Frequency) tones
Touch , then the required number keys.
To transfer the current call to the cellular
phone
Touch .
To transfer back to handsfree calling, touch
again.
Available options
During a handsfree call, press .
[Speech Quality] Reduces echo and noise during
a call. For normal use, set to
[Mode 1]. If the outgoing sound
quality is unsatisfactory, set to
[Mode 2].
[MIC Gain] Adjusts the microphone volume
for the other party: [Low],
[Middle], [High].
2 Touch , then [Phonebook Select].
3 Touch the desired item.
To store phonebook data (When
[Internal] has been selected from
[Phonebook Select])
You can send phonebook data from the connected
cellular phone to this unit.
Press HOME, then touch [Phone] [Receive
Phonebook]. The unit is ready to receive the
phonebook data.
Send the phonebook data by operating the
connected cellular phone.
If data is stored successfully, the BLUETOOTH device
name appears on the display of the unit.
Deleting phonebook data
1 Press HOME, then touch [Phone].
The BLUETOOTH phone display appears.
2 Touch .
The phonebook appears.
3 Touch .
The confirmation display appears.
4 Touch [OK].
All phonebook data on this unit is deleted.
To delete an individual contact from the
phonebook
Follow steps 1 to 2 above, then select the contact.
To search the desired contact by alphabetical order,
touch then select alphabet.
Tou ch [OK].
Phonebook Management
Note
Prior to disposal or changing ownership of your car with
this unit still installed, be sure to erase all the
phonebook data in this unit to prevent possible
unauthorized access, by doing any of the following:
Delete the phonebook data by initializing (page 25).
Press the reset button.
Disconnect the power supply lead.
Selecting phonebook data
You can access the phonebook data of a cellular
phone or this unit’s internal data to make a call.
1 Press HOME, then touch [Phone].
The BLUETOOTH phone display appears.
Call Data Management
Deleting call history
1 Press HOME, then touch [Phone].
The BLUETOOTH phone display appears.
2 Touch .
The call history list appears.
3 Touch .
The confirmation display appears.
4 Touch [OK].
All items in the call history are deleted.
Presetting phone numbers
1 Press HOME, then touch [Phone].
19GB
Page 20

The BLUETOOTH phone display appears.
2 Touch .
The phonebook appears.
3 Select the contact to store in the preset
dial.
In the name list, touch the name of
the contact.
To search the desired contact by
alphabetical order, touch , then select
alphabet.
In the number list, touch the phone
number.
The contact confirmation display appears.
4 Touch [Preset], then the desired preset
number ([1] to [6]).
The contact is stored to the selected preset
number.
To change the registration of the preset
dial
Follow the procedure above and overwrite a
registered preset dial.
Phone Option Menu
1 Press HOME, then touch [Phone].
2 Touch .
The phone option menu appears.
[Ringtone]
Uses the ringtone of this unit or the connected
cellular phone: [Internal], [Cellular].
[Auto Answer]
Answers an incoming call automatically.
[OFF]: to not answer automatically.
[3 sec]: to answer automatically after 3
seconds.
[10 sec]: to answer automatically after 10
seconds.
[Phonebook Select]
Browses the phonebook data on this unit or
cellular phone: [Internal], [Cellular].
[Receive Phonebook]
Receives phonebook data from the connected
cellular phone.
When receiving is complete, BLUETOOTH device
name appears.
[Background Visualizer]
Sets background visualizer: [ON], [OFF].
Useful Functions
For details on smartphone connectivity with the
following operations and battery charge capability,
see “Summary of Useful Functions for Smartphone”
on the pages at the end of these operating
instructions.
App Remote with iPhone/
Android Phone
Downloading the App Remote application is
required from App Store
Google Play for Android phone.
The App Remote function provides the following
features:
Operate the unit to launch and control
compatible applications on an iPhone/Android
phone.
Operate iPhone/Android phone with simple
finger gestures to control the source of the unit.
Read out incoming text messages/SMS/
reminders. (Android phone only)
Launch an application/audio source or search
the keyword on the web by saying a word or
phrase into the microphone (XAV-712BT/612BT/
602BT only). (Android phone only)
Adjust the sound settings (EQ7, Balance/Fader,
Listening Position) of the unit via a mobile
device.
Available operations differ depending on the
application. For details on available applications,
visit the support site on the back cover.
Notes
For your safety, follow your local traffic laws and
regulations, and do not operate the application while
driving.
The App Remote application on the smartphone
needs to be Version 2 or higher.
The App Remote function via USB is only available for
iPhones with iOS 5 installed.
The App Remote function via the BLUETOOTH
function is only available for Android phones with
Android 2.1, 2.2, 2.3 or 4.0 installed.
Android phone can be used with the App Remote
function on XAV-712BT/612BT/602BT.
Automatic reading of the SMS function is only
available for Android phones with TTS Engine
installed.
The following functions disable the App Remote
function.
BT Audio (Android phone only)
MirrorLink™
HDMI/MHL (XAV-712BT/612BT only)
Pandora on the unit (Australia and New Zealand
models only)
SM
for an iPhone, or from
20GB
Page 21

The App Remote function is not available when
[Receiver Audio Playback during MirrorLink™] is set to
[ON].
1 Connect the iPhone to the USB port, or
Android phone via the BLUETOOTH
function.
2 Launch the App Remote application.
3 Press HOME, then touch [App Remote].
Connection to the iPhone/Android phone starts.
For details on operation of the iPhone/Android
phone, see the help of the application.
If the device number appears
Make sure that the same numbers are displayed
(e.g., 123456) in this unit and the mobile device,
then press MENU on this unit and select Yes on the
mobile device.
To terminate connection
Touch in the upper right of the display.
Note
For your safety, when the parking brake is not engaged,
some smartphone screen content may not be displayed
on the unit.
Enjoying Different Sources in
Front and Rear (Zone × Zone)
You can simultaneously enjoy different sources in
the front and rear of the car.
Selectable sources for this unit (front) and the rear
monitor (rear) are indicated below.
Front: Any source.
Rear: Disc inserted in this unit.
1 Press HOME, then touch [Settings].
2 Touch , then touch [Zone × Zone].
3 Touch [ON].
To operate the source in the front, use the touch
panel and buttons on the unit.
To operate the source in the rear, use the
remote command er.
Duplicating the Smartphone’s
Display (MirrorLink™)
MirrorLink™ compatibility depends on
smartphones and its application.
For details on compatible models, refer to the
compatible list on the support site on the back
cover.
Notes on using the MirrorLink™ function
Your smartphone needs to support the MirrorLink™
function.
Depending on the smartphone, you may need to
download an application to use the MirrorLink™
function.
Available operations differ depending on the
smartphone. Refer to the manual supplied with the
smartphone, or consult the manufacturer of the
smartphone for details.
1 Connect your smartphone to the USB
port.
2 Press HOME, then touch [MirrorLink™].
The smartphone’s display appears on the
display of the unit.
Touch and control the applications in the same
way as you do on your smartphone.
Tip
Setting [Receiver Audio Playback during MirrorLink™] to
[ON] allow the unit to playback an audio source under
the MirrorLink™ function (page 23). This setting is
useful when you use a navigation application on your
smartphone via the MirrorLink™ function.
To deactivate Zone × Zone
Press OFF on the unit/remote commander or select
[OFF] in step 3 above.
Notes
The Zone × Zone functio n disables remote
commander operation of the source in the front.
The following buttons on the remote commander
become inactive under the Zone × Zone function:
SRC, MODE, ATT, VOL +/–, CLEAR, number buttons.
The following settings become inactive under the
Zone × Zone function:
EQ7 / Subwoofer Level Adjust (page 25)
Balance / Fader Level Adjust (page 25)
Listening Position (page 26)
CSO (page 16)
HPF, LPF (page 26)
Rear Bass Enhancer (page 26)
Enjoying high quality image
(XAV-712BT/612BT only)
The unit automatically selects the HDMI in/MHL in
as the source when the MHL device is connected to
the unit, and [Auto Input Change(MHL)] is set to
[ON] (page 28).
1 Connect a device via the supplied HDMI
or MHL connection cable.
Use the appropriate cable for your device.
Notes
Do not disconnect the device during playback.
The MHL connection cable can be used as a power
source for recharging the connected devi ce’s battery
when the ignition switch is turned to the accessory
position.
21GB
Page 22

To connect an iPod via the HDMI connection cable,
Apple Digital AV Adapter or Lightning Digital AV
Adapter is required.
An iPod is charged when it is conne cted to the unit via
the appropriate adaptor. In this case, USB connection
is also required.
The supplied remote commander works for some of
the operations on the unit and the connected MHL
compatible de vice.
For HDMI connection, the supplied remote
commander only works for this unit.
The image may show up differently on the unit’s
display compared to the one on the display of the
connected HDMI/MHL device.
This unit is compatible with 480p and VGA.
Using Gesture Command
You can perform frequently-used operations by
drawing the following command strokes on the
reception/playback display.
Do this To
Radio reception:
Draw a horizontal
line (left to right)
Draw a horizontal
line (right to left)
seek forward stations.
(The same as .)
DVD/VCD playback:
skip forward a chapter/track.
(The same as .)
Xvid/MPEG-4/audio
playback:
skip forward a file/track.
(The same as .)
Pandora® playback (Australia
and New Zealand models
only):
skip a track.
(The same as .)
Radio reception:
seek backward stations.
(The same as .)
DVD/VCD playback:
skip backward a chapter/track.
(The same as .)
Xvid/MPEG-4/audio
playback:
skip backward a file/track.
(The same as .)
Radio reception:
receive stored stations (go
forward).
Draw a vertical
line (upwards)
DVD/VCD/Xvid/MPEG-4
playback:
fast-forward the video.
Audio playback:
skip forward an album (folder).
Pandora® playback (Australia
and New Zealand models
only):
Thumbs up.
(The same as .)
Radio reception:
receive stored stations (go
backward).
Draw a vertical
line (downwards)
DVD/VCD/Xvid/MPEG-4
playback:
reverse the video.
Audio playback:
skip backward an album
(folder).
Pandora® playback (Australia
and New Zealand models
only):
Thumbs down.
(The same as .)
Tips
In the case of USB Video, you can change the playing
speed dynamically by dragging the screen of the
video file left or right.
In the case of USB Photo, you can reverse/fast-
forward a photo file by flicking the photo list left or
right.
22GB
Page 23

Settings
Select [Settings] in the HOME menu when you need
to change the settings of the unit.
“” in the table below indicates the default setting.
1 Press HOME, then touch [Settings].
2 Touch one of the setup category icons.
: General Settings (page 23)
: Sound Settings (page 25)
: Visual Settings (page 26)
: Source Settings (page 27)
3 Move the scrollbar up and down to
select the desired item.
To return to the previous display, touch .
To switch from the HOME screen to the playback
screen, touch .
General Settings
MirrorLink™ Full Screen
Unit status: Any status
Option Purpose
ON (), OFF To duplicate the smartphone’s
display on the display of the unit,
in full screen mode.
Receiver Audio Playback during MirrorLink™
Unit status: Any status
Option Purpose
ON, OFF () To enable playback of an audio
source under the MirrorLink™
function. In this mode,
[MirrorLink™] can be selected by
pressing the DSPL button.
The following sources are not
selectable when the function is
set to [ON].
-BT Audio
-Pandora (Australia and New
Zealand models only)
-App Remote
HOME Key Function (hold 2sec push)
(XAV-712BT only)
Unit status: Any status
Option Purpose
Voice
Command (),
ATT ON/ OFF
To assign the voice command
function or the ATT function to
the HOME button.
Zone × Zone
Unit status: Any status
Option Purpose
ON, OFF () To activate the Zone × Zone
function.
Date & Time
Unit status: Any status
Option Purpose
Select Time
Zone, Set Date,
Set Time
To set time zone, date and time.
Language
Unit status: Any status
Option Purpose
English (),
Français,
Español,
Português,
Русский,
Nederlands,
Deutsch,
Italiano,
To select the display language.
,
, ,
Name Characters
Unit status: Any status
Option Purpose
Latin
Characters (),
Russian
Characters,
Simplified
Chinese,
Traditional
Chinese,
Korean
Characters, Thai
Characters
To s el ec t charac ter enco di ng .
Some characters may not be
displayed correctly, depending
on the encoding method.
23GB
Page 24

Auto OFF
Shuts off automatically after a desired time when
no source is selected.
Unit status: Any status
Option Purpose
OFF (), 30 sec,
30 min, 60 min
To select the desired time to shut
off the unit or deactivate the
Auto OFF function.
Demo
Unit status: Any status
Option Purpose
ON (), OFF To activate the demonstration.
Beep
Unit status: Any status
Option Purpose
ON (), OFF To activate the operation sound.
Front Panel Caution Alarm
(XAV-612BT/602BT only)
Unit status: Any status
Option Purpose
ON (), OFF To activate the caution alarm.
Rotary Commander
Changes the operative direction of rotary
commander controls.
Unit status: Any status
Option Purpose
Default () To use in the factory-set
Reverse To use on the right side of the
position.
steering column.
Key Illumination
Unit status: Any status
Option Purpose
Rainbow ()
(12 preset
colors,
customized
color and 5
preset patterns)
To change the color of the
buttons on the unit to match the
car’s interior.
Touch Panel Adjust
Unit status: Any status
Option Purpose
– To a dju st the touc h pa ne l
calibration if the touching
position does not correspond
with the proper item.
Camera Input
Unit status: Any status
Option Purpose
OFF To deactivate the input.
Normal () To display the picture from the
rear view camera.
Reverse To flip the picture from the rear
view camera horizontally.
Rear View Camera Setting
Displays setting items on the picture from the rear
view camera to assist driving.
This setting is available only when:
[Camera Input] is set to [Normal] or [Reverse].
the parking brake is applied.
Unit status: Any status
Option Purpose
To display the marker lines.
Touch again to hide the marker
lines.
To adjust the length and/or
position of the marker lines.
Output Color System
Unit status: No source selected
Option Purpose
NTSC, PAL () To change the color system
according to the connected
monitor. (SECAM is not
supported.)
Bluetooth Connection
(XAV-712BT/612BT/602BT only)
Unit status: Any status
Option Purpose
ON, OFF () To activate the BLUETOOTH
signal.
24GB
Page 25

Bluetooth Reset
(XAV-712BT/612BT/602BT only)
Unit status: Any status
Option Purpose
– To initialize all BLUETOOTH-
related settings such as pairing
information, phonebook data,
call history, preset dial, history of
connected BLUETOOTH devices,
etc.
USB Battery Charge Mode
Unit status: Any status
Option Purpose
High (),
Standard
To switch the current (mA)
capacity of the USB rear cable
labeled “HIGH CHARGE”.
Set to [Standard] if the
connected device is not to be
recharged.
Firmware Version
Unit status: Any status
Option Purpose
– To update the Firmware version.
Open Source Licenses
Unit status: Any status
Option Purpose
– To display the software licenses.
Sound Settings
The following settings are not available during USB
Video playback.
EQ7 / Subwoofer Level Adjust
Unit status: During reception/playback
Option Purpose
OFF (), R&B,
Pop, Rock, HipHop, Dance,
Electronica
(non-India
model),
Bollywood*
(Indian model),
Custom
Subwoofer:
(–6 - +6)
: 0
Balance / Fader Level Adjust
Unit status: During reception/ playback
Option Purpose
Balance :
(–15 - +15)
: 0
Fader :
(–15 - +15)
: 0
To select the equalizer curve;
customize the equalizer curve.
* For India models, the initial
setting is Bollywood.
To adjust the volume level of the
subwoofer. (Available only when
[Subwoofer] is set to [ON].)
To adjust the sound balance
between left and right speakers.
To adjust the sound balance
between front and rear speakers.
25GB
Page 26

Listening Position
Sets the listening position and subwoofer position.
Unit status: Any status
Option Purpose
Front L () To set to front left.
Front R To set to front right.
Front To set to center front.
All To set to the center of your car.
OFF To not set the listening position.
Subwoofer:
Near, Normal
(), Far
Custom To precisely calibrate the
To select the subwoofer position.
(Available only when
[Subwoofer] is set to [ON], and
the listening position is set to
[Front L], [Front R], [Fro nt], or
[All].)
listening position. Before
starting, measure the distance
between your listening position
and each speaker.
():
Front left
():
Front right
():
Center front
():
In the center of
your car
RBE (Rear Bass Enhancer)
Unit status: During reception/ playback
Option Purpose
OFF (), RBE1,
RBE2, RBE3
To select the mode to use the
rear speakers as subwoofers.
Crossover Filter
Unit status: During reception/ playback
Option Purpose
LPF: 50 Hz, 60
Hz, 80 Hz, 100
Hz (), 120 Hz
HPF: OFF (),
50 Hz, 60 Hz,
80 Hz, 100 Hz,
120 Hz
Subwoofer
Phase:
Normal (),
Reverse
To select the cut-off frequency of
the subwoofer. (Available only
when [Subwoofer] is set to [ON].)
To select the cut-off frequency of
the front/rear speakers.
To select the subwoofer phase.
(Available only when
[Subwoofer] is set to [ON].)
Subwoofer
Unit status: No source selected
Option Purpose
ON (), OFF To set the subwoofer connection
status.
4.1ch Speaker Level
Unit status: No source selected
Option Purpose
– To adjust the volume level of
each connected speaker.
Visual Settings
Dimmer
Unit status: Any status
Option Purpose
OFF To deactivate the dimmer.
Auto () To dim the display automatically
ON To dim th e d isplay.
Dimmer Level
Unit status: Any status
Option Purpose
(–5 - +5)
: 0
Picture EQ
Adjusts the picture to suit the interior brightness of
the car. This setting is available only when the
parking brake is set.
Unit status: During video playback except USB
Video
Option Purpose
Dynamic (),
Standard,
Theater, Sepia
Custom 1,
Custom 2
when you turn lights on.
(Available only when the
illumination control lead is
connected.)
To select the brightness level
when the dimmer is activated.
To select the picture quality.
To customize the picture quality.
26GB
Page 27

Aspect
The screen aspect ratio of USB Video can only be
changed by the option menu (page 16). This setting
is available only when the parking brake is set.
Unit status: During video playback
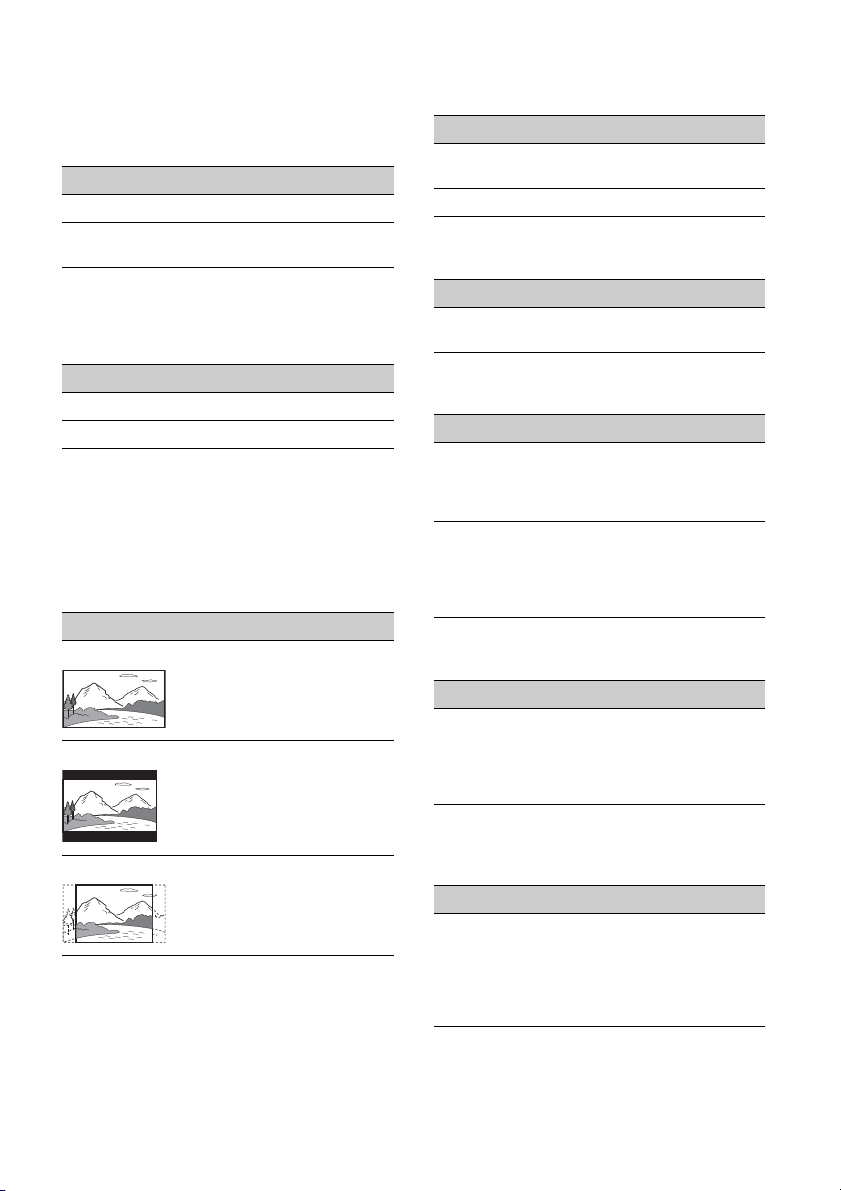
Option Purpose
Normal To display a picture with 4:3
aspect ratio (regular picture).
Wide To display a picture with 4:3
aspect ratio enlarged to the left
and right edges of the screen,
with overflowing parts of the top
and bottom cut off to fill the
screen.
Full () To display a picture with 16:9
aspect ratio.
Zoom To display a picture with 4:3
aspect ratio enlarged to the left
and right edges of the screen.
Source Settings
DVD Direct Search
Sets the search item for DVD direct search play.
Unit status: Any status
Option Purpose
Chapter () To search for a chapter.
Title To s earch for a t it le .
DVD Menu Language
Unit status: No source selected
Option Purpose
English (),
Chinese,
German,
French, Italian,
Spanish,
Portuguese,
Dutch, Danish,
Swedish,
Finnish,
Norwegian,
Russian, Other
To select the default language
for th e disc's menu.
DVD Audio Language
Unit status: No source selected
Option Purpose
English (),
Chinese,
German,
French, Italian,
Spanish,
Portuguese,
Dutch, Danish,
Swedish,
Finnish,
Norwegian,
Russian, Other
To select the default language
for th e soundtrack.
DVD Subtitle Language
Unit status: No source selected
Option Purpose
English (),
Chinese,
German,
French, Italian,
Spanish,
Portuguese,
Dutch, Danish,
Swedish,
Finnish,
Norwegian,
Russian, Other
To select the default subtitle
language for DVD.
27GB
Page 28
Audio DRC
Makes the sound clear when the volume is low.
Only for a DVD* conforming to Audio DRC (Dynamic
Range Control).
* Excluding DVD-R/DVD-R DL/DVD-RW in VR mode.
Unit status: No source selected
Option Purpose
Standard () To select the standard setting.
Wide To obtain the feeling of being at
a live performance.
Multi Channel Output
Switches the method of outputting multi channel
sources.
Unit status: Any status
Option Purpose
Multi () To output in 4.1 channels.
Stereo To do wn mi x to 2 cha nne ls .
Monitor Type
Selects an aspect ratio suitable for the connected
monitor.
(The screen aspect ratio of this unit also changes.)
Depending on the disc, [4:3 Letter Box] may be
selected automatically instead of [4:3 Pan Scan],
and vice versa.
Unit status: No source selected
Option Purpose
16:9 () To display a wide picture.
Suitable when connecting to a
wide-screen monitor or a
monitor with a wide mode
function.
4:3 Letter Box To display a wide picture with
bands on the upper and lower
positions of the screen.
Suitable when connecting to a
4:3 screen monitor.
4:3 Pan Scan To display a wide picture on the
entire screen and automatically
cut off the portions that do not
fit.
DVD Playlist Play
(For DVD-R/DVD-R DL/DVD-RW in VR mode only)
Unit status: No source selected
Option Purpose
Original () To play titles as they were
originally recorded.
Playlist To play an edited playlist.
Video CD PBC
Unit status: No source selected
Option Purpose
ON (), OFF To play a VCD with PBC
functions.
Multi Disc Resume
Unit status: Any status
Option Purpose
ON () To store the resume settings in
memory for up to 5 video* discs.
* DVD VIDEO/VCD/Xvid/MPEG-4
only.
OFF To not store the resume settings
in memory.
Resume playback is available
only for the current disc in the
unit.
Source Skip
Unit status: Any status
Option Purpose
– To reduce the number of presses
required to change sources
(page 6). Check any unused
sources in the Source skip
screen.
Auto Input Change(MHL)
(XAV-712BT/612BT only)
Unit status: Any Status
Option Purpose
ON, OFF () To select HDMI in/MHL in as the
source automatically when the
MHL connection cable is
connected to the unit.
(Depending on the smartphone,
this setting may not work.)
28GB
Page 29

Additional Information
Auxiliary Audio/Video
Equipment
You can connect up to 2 optional devices, such as a
portable media player, game console, etc., to the
AUX1 IN and AUX2 IN terminals on the unit.
Selecting an auxiliary device
1 Press HOME, then touch [AUX].
The AUX playback display appears.
2 Touch [AUX1] or [AUX2] to select the
device.
Operate via the portable device itself.
Adjusting the volume level
Be sure to adjust the volume for each connected
device before playback.
The volume level is common to [AUX1] and [AUX2].
1 Reduce the volume on the unit.
2 Press HOME, then touch [AUX].
The AUX playback display appears.
3 Touch to open the menu, then touch
[Adjust Input Level].
4 Set your usual listening volume on the
unit.
5 Touch –/+ repeatedly to adjust the level.
The level is adjustable in single steps, between
–8 and +18.
Setting the type of device
By setting the type (video or audio) of each
connected device, the background screen can be
switched accordingly.
1 Press HOME, then touch [AUX].
2 Touch to open the menu, then touch
[AUX1 Input] or [AUX2 Input].
3 Touch [Audio], [Video] or [Auto
switching].
The default setting is [Auto switching].
To return to the previous display, touch .
Rear View Camera
By connecting the optional rear view camera to the
CAMERA terminal, you can display the picture from
the rear view camera.
The picture from the rear view camera appears
when:
the back lamp lights up (or the shift lever is set to
the R (reverse) position).
you press HOME then touch [Rear Camera].
you press DSPL repeatedly.
For details on the settings of the rear view camera,
see page 24.
Updating the Firmware
You can update the firmware of this unit from the
following support site:
Customers in Pan Asia:
http://www.sony-asia.com/section/support
http://www.sony-asia.com/caraudio/
Customers in Latin America:
http://esupport.sony.com/ES/LA/
To update the firmware, visit the support site, then
follow the online instructions.
Precautions
Cool off the unit beforehand if your car has been
parked in direct sunlight.
Power antenna (aerial) extends automatically.
Do not leave the front panel or audio devices
brought in inside the car, or it may cause damage
or malfunction due to high temperature in direct
sunlight (XAV-612BT/602BT only).
Moisture condensation
Should moisture condensation occur inside the
unit, remove the disc and wait for about an hour for
it to dry out; otherwise the unit will not operate
properly.
To maintain high sound quality
Do not splash liquid onto the unit or discs.
Notes on safety
Comply with your local traffic rules, laws and
regulations.
While driving
Do not watch or operate the unit, as it may lead
to distraction and cause an accident. Park your
car in a safe place to watch or operate the unit.
Do not use the setup feature or any other
function which could divert your attention from
the road.
29GB
Page 30

When backing up your car, be sure to look
back and watch the surroundings carefully
for your safety, even if the rear view camera
is connected. Do not depend on the rear view
camera exclusively.
While operating
Do not insert your hands, fingers or foreign
object into the unit, as it may cause injury or
damage to the unit.
Keep small articles out of the reach of children.
Be sure to fasten seatbelts to avoid injury in the
event of a sudden movement of the car.
Preventing an accident
Pictures appear only after you park the car and
set the parking brake.
If the car starts moving during video playback,
the picture is automatically switched to the
background screen after displaying the caution
below.
[Video blocked for your safety.]
The monitor connected to the REAR OUT is active
while the car is in motion.
The picture on the display is switched to the
background screen, but audio source can be
heard.
Do not operate the unit or watch the monitor
while driving.
Notes on installation
We recommend this unit should be installed by a
qualified technician or service personnel.
If you try to install this unit by yourself, refer to
the supplied “Installation/Connections” guide
and install the unit properly.
Improper installation may cause battery drain
or a short circuit.
If the unit does not work properly, check the
connections first, referring to the supplied
“Installation/Connections” guide. If everything is
in order, check the fuse.
Protect the unit surface from damage.
Do not expose the unit surface to chemicals,
such as insecticide, hair spray, insect repellent,
etc.
Do not leave rubber or plastic materials in
contact with the unit for a long time. Otherwise,
the finish of the unit may be impaired, or
deformation may occur.
When installing, be sure to fix securely.
When installing, be sure to turn the ignition off.
Installing the unit with the ignition on may cause
battery drain or a short circuit.
When installing, be sure not to damage any car
parts such as pipes, tubes, fuel tank or wiring by
using a drill, as it may cause a fire or an accident.
Notice on license
This product contains software that Sony uses
under a licensing agreement with the owner of its
copyright. We are obligated to announce the
contents of the agreement to customers under
requirement by the owner of copyright for the
software.
For details on software licenses, see page 25.
Notice on GNU GPL/LGPL applied
software
This product contains software that is subject to the
following GNU General Public License (hereinafter
referred to as “GPL”) or GNU Lesser General Public
License (hereinafter referred to as “LGPL”). These
establish that customers have the right to acquire,
modify, and redistribute the source code of said
software in acco rdance with the terms o f the GPL or
LGPL displayed on this unit.
The source code for the above-listed software is
available on the Web.
To download, please access the following URL then
select the model name “XAV-742/712BT/612BT/
602BT.”
URL: http://www.sony.net/Products/Linux/
Please note that Sony cannot answer or respond to
any inquiries regarding the content of the source
code.
Notes on LCD panel
Do not wet the LCD panel or expose it to
liquids. This may cause a malfunction.
Do not press on the LCD panel as doing so can
distort the picture or cause a malfunction (i.e., the
picture may become unclear, or the LCD panel
may be damaged).
Do not touch other than with the finger, as it may
damage or break the LCD panel.
Clean the LCD panel with a dry soft cloth. Do not
use solvents such as benzine, thinner,
commercially available cleaners, or antistatic
spray.
Do not use this unit outside the temperature
range 5 – 45 ºC (41 – 113 ºF).
If your car was parked in a cold or hot place, the
picture may not be clear. However, the monitor is
not damaged, and the picture will become clear
after the temperature in your car becomes
normal.
30GB
Page 31

Some stationary blue, red or green dots may
appear on the monitor. These are called “bright
spots,” and can happen with any LCD. The LCD
panel is precision-manufactured with more than
99.99% of its segments functional. However, it is
possible that a small percentage (typically 0.01%)
of the segments may not light up properly. This
will not, however, interfere with your viewing.
Playable discs and file types
Discs
DVD* DVD VIDEO
VCD Video CD (Ver. 1.0/1.1/2.0)
CD Audio CD
* “DVD” may be used in these Operating Instructions as
a general term for DVD VIDEOs, DVD-Rs/DVD-RWs,
and DVD+Rs/DVD+RWs.
DVD-R/DVD-R DL/DVD-RW
(Video mode/VR mode)
DVD+R/DVD+R DL/DVD+RW
CD-ROM/CD-R/CD-RW
File types
For details on compression formats, see page 32.
Audio MP3 file, WMA file, AAC file,
Video Xvid file, WMV file, MPEG-4 file,
WAVE file
AVC (H.264 baseline) file
Notes on discs
Do not expose discs to direct sunlight or heat
sources such as hot air ducts, nor leave it in a car
parked in direct sunlight.
Before playing, wipe the discs
with a cleaning cloth from the
center out. Do not use
solvents such as benzine,
thinner, commercially
available cleaners.
This unit is designed to play discs that conform to
the Compact Disc (CD) standard. DualDiscs and
some of the music discs encoded with copyright
protection technologies do not conform to the
Compact Disc (CD) standard, therefore, these
discs may not be playable by this unit.
Discs that this unit CANNOT play
Discs with labels, stickers, or sticky tape or
paper attached. Doing so may cause a
malfunction, or may ruin the disc.
Discs with non-standard shapes (e.g., heart,
square, star). Attempting to do so may damage
the unit.
8 cm (3
1
/4 in) discs.
Note o n playb ack operati ons of DVDs and
VCDs
Some playback operations of DVDs and VCDs may
be intentionally set by software producers. Since
this unit plays DVDs and VCDs according to the disc
contents the software producers designed, some
playback features may not be available. Also, refer
to the instructions supplied with the DVDs or VCDs.
Notes on DATA CDs and DATA DVDs
Some DATA CDs/DATA DVDs (depending on the
equipment used for its recording, or the disc
condition) may not play on this unit.
Finalization is required for some discs (page 31).
The unit is compatible with the following
standards.
For DATA CDs
ISO 9660 level 1/level 2 format, Joliet/Romeo in
the expansion format
Multi Session
For DATA DVDs
UDF Bridge format (combined UDF and ISO
9660)
Multi Border
The maximum number of:
folders (albums): 256 (including root and empty
folders).
files (tracks/videos) and folders contained in a
disc: 2,000 (if a folder/file names contain many
characters, this number may become less than
2,000).
displayable characters for a folder/file name:
64 (Joliet/Romeo).
Notes on finalizing discs
The following discs are required to be finalized to
play on this unit.
DVD-R/DVD-R DL (in video mode/VR mode)
DVD-RW in video mode
DVD+R/DVD+R DL
CD-R
CD-RW
The following discs can be played without
finalization.
31GB
Page 32

DVD+RW – automatically finalized.
MP3/WMA/AAC/
Xvid/MPEG-4
Folder (album)
MP3/WMA/AAC/
Xvid/MPEG-4 file
(track/video)
DVD-RW in VR mode – finalization not required.
For details, refer to the manual supplied with the
disc.
Notes on Multi Session CDs/Multi Border
DVDs
This unit can play Multi Session CDs/Multi Border
DVDs under the following conditions. Note that the
session must be closed and the disc must be
finalized.
When CD-DA (Compact Disc Digital Audio) is
recorded in the first session:
The unit recognizes the disc as CD-DA and only
CD-DA of the first session is played, even if
another format (e.g., MP3) is recorded in other
sessions.
When CD-DA is recorded other than in the first
session:
The unit recognizes the disc as a DATA CD or DATA
DVD, and all CD-DA sessions are skipped.
When an MP3/WMA/AAC/Xvid/MPEG-4 is
recorded:
Only the sessions containing the selected file type
(audio/video)* are played (if CD-DA or other data
exists in other sessions, they are skipped).
* For details on how to select t he file type, see page 14.
Notes on USB playback
Compatible codecs are MP3 (.mp3), WMA (.wma),
AAC/HE-AAC (.m4a), JPEG (.jpg), Xvid (.avi/.xvid), and
MPEG-4 (.mp4).
A folder/file name of up to 254 bytes can be
recognized.
The maximum number of displayable music files
(tracks) is 10,000.
DRM (Digital Rights Management) files may not be
played.
Playback order of MP3/WMA/AAC/
Xvid/MPEG-4 files
About WMA files
WMA*1 files meeting the following requirements
can be played. Playback is not be guaranteed for all
WMA files meeting the requirements.
Codec for Disc
Media File format: ASF file format
File extension: .wma
Bit rate: 64 to 192 kbps (Supports variable bit rate
(VBR))
Sampling frequency*
Codec for MSC
Media File format: ASF file format
File extension: .wma
Bit rate: 64 to 192 kbps (Supports variable bit rate
4
(VBR))*
Sampling frequency*2: 44.1 kHz
2
: 44.1 kHz
About MP3 files
MP3 files meeting the following requirements can
be played. Playback is not be guaranteed for all
MP3 files meeting the requirements.
Codec for Disc
Media File format: MP3 (MPEG-1 Layer3) file
format
File extension: .mp3
Bit rate: 48 to 192 kbps (Supports variable bit rate
(VBR))
Sampling frequency*
Codec for MSC
Media File format: MP3 (MPEG-1 Layer3) file
format
File extension: .mp3
Bit rate: 32 to 320 kbps (Supports variable bit rate
4
(VBR))*
Sampling frequency*2: 32, 44.1, 48 kHz
2
: 32, 44.1, 48 kHz
About AAC files
AAC*3 files meeting the following requirements can
be played. Playback is not be guaranteed for all
AAC files meeting the requirements.
Codec for Disc
Media File format: MP4 file format
File extension: .mp4, .m4a
Bit rate: 40 to 320 kbps (Supports variable bit rate
(VBR))
Sampling frequency*
Codec for MSC
Media File format: MP4 file format
File extension: .mp4, .m4a, .3gp
Bit rate: 48 to 288 kbps (Supports variable bit rate
4
(VBR))*
Sampling frequency*2: 8, 11.025, 12, 16, 22.05, 24,
32, 44.1, 48 kHz
2
: 44.1, 48 kHz
32GB
Page 33

About Linear PCM files
Linear PCM files meeting the following
requirements can be played. Playback is not be
guaranteed for all Linear PCM files meeting the
requirements.
Codec for MSC
Media File format: Wave-Riff file format
File extension: .wav
Bit rate: 1,411 kbps
Sampling frequency*
2
: 44.1 kHz
About HE-AAC files
HE-AAC files meeting the following requirements
can be played. Playback is not be guaranteed for all
HE-AAC files meeting the requirements.
Codec for MSC
Media File format: MP4 file format
File extension: .mp4, .m4a, .3gp
Bit rate: 32 to 144 kbps*
Sampling frequency*2: 8, 11.025, 12, 16, 22.05, 24,
32, 44.1, 48 kHz
4
About AVC (H.264/AVC) files
AVC (H.264/AVC) files meeting the following
requirements can be played. Playback is not be
guaranteed for all AVC (H.264/AVC) files meeting
the requirements.
Codec for MSC
Media File format: MP4 file format
File extension: .mp4, .m4v
Profile: Baseline Profile/Main Profile
Level: 3.1
Bit rate: Max. 14 Mbps
Frame rate: Max. 30 fps (30p/60i)
Resolution: Max. 1,280 × 720*
5
About MPEG-4 files
MPEG-4 files meeting the following requirements
can be played. Playback is not be guaranteed for all
MPEG-4 files meeting the requirements.
Codec for Disc
Media File format: MP4 file format
File extension: .mp4
Profile: Simple Profile
Bit rate: Max. 10 Mbps on DVD, 7 Mbps on CD
Frame rate: Max. 30 fps (30p/60i)
Resolution: Max. 720 × 576 pixel
Codec for MSC
Media File format: MP4 file format
File extension: .mp4, .m4v
Profile: Simple Profile
Bit rate: Max. 12 Mbps
Frame rate: Max. 30 fps (30p/60i)
Resolution: Max. 1,280 × 720*
Media File format: MP4 file format
File extension: .mp4, .m4v
5
Profile: Advanced Simple Profile
Bit rate: Max. 8 Mbps
Frame rate: Max. 30 fps (30p/60i)
Resolution: Max. 720 × 576*
5
About Xvid files
Xvid files meeting the following requirements can
be played. Playback is not be guaranteed for all
Xvid files meeting the requirements.
Codec for Disc
Media File format: Xvid file format
File extension: .avi, .xvid
Profile: Advanced Simple Profile
Bit rate: Max. 10 Mbps on DVD, 7 Mbps on CD
Frame rate: Max. 30 fps (30p/60i)
Resolution: Max. 720 × 576*
Codec for MSC
Media File format: Xvid file format
File extension: .avi, .xvid
Profile: Advanced Simple Profile
Bit rate: Max. 8 Mbps
Frame rate: Max. 30 fps (30p/60i)
Resolution: Max. 720 × 576*
5
5
About Windows Media files
Windows Media files meeting the following
requirements can be played. Playback is not be
guaranteed for all Windows Media files meeting the
requirements.
Codec for MSC
1*6
Video 9*
Media File format: ASF file format
File extension: .wmv
Bit rate: Max. 20 Mbps
Frame rate: Max. 30 fps (30p/60i)
Resolution: Max. 1,280 × 720*
5
About JPEG files
JPEG*7 files meeting the following requirements can
be played. Playback is not be guaranteed for all
JPEG files meeting the requirements.
Codec for MSC
Media File format: Compatible with DCF 2.0/Exif
2.21 file format
File extension: .jpg, .jpeg
Profile: Baseline Profile
Number of pixels: Max. 6,048 × 4,032 pixels
(24,000,000 pixels)
*1 Copyright protected WMA/WMV files cannot be
played back.
*2 Sampling frequency may not correspond to all
encoders.
*3 Copyright protected AAC-LC files cannot be played
back.
*4 Non-standard bit rates or non-guaranteed bit rates
are included depending on the sampling frequency.
33GB
Page 34

*5 These numbers indicate the maximum resolution of
playable video, and do not indicate the player’s
display resolution. The display resolution is 800 ×
480.
*6 Some WMV files can be played back only by
transferring using Windows Media Player.
*7 Some photo files cannot be played back, depending
on their file formats.
About iPod
You can connect to the following iPod models.
Update your iPod devices to the latest software
before use.
Compatible iPhone/iPod models.
Compatible Model USB
iPhone 5
iPhone 4S
iPhone 4
iPhone 3GS
iPhone 3G
iPod touch (5th generation)
iPod touch (4th generation)
iPod touch (3rd generation)
iPod touch (2nd generation)
iPod classic
iPod nano (7th generation)
iPod nano (6th generation)
iPod nano (5th generation)
iPod nano (4th generation)
iPod nano (3rd generation)
iPod nano (2nd generation)
iPod nano (1st generation)*
* Passenger App Control is not available for iPod nano
(1st generation).
“Made for iPod” and “Made for iPhone” mean that
an electronic accessory has been designed to
connect specifically to iPod or iPhone,
respectively, and has been certified by the
developer to meet Apple performance standards.
Apple is not responsible for the operation of this
device or its compliance with safety and
regulatory standards. Please note that the use of
this accessory with iPod or iPhone may affect
wireless performance.
About BLUETOOTH function (XAV-712BT/
612BT/602BT only)
What is BLUETOOTH technology?
BLUETOOTH wireless technology is a short-range
wireless technology that enables wireless data
communication between digital devices, such as
a cellular phone and a headset. BLUETOOTH
wireless technology operates within a range of
about 10 m (about 33 feet). Connecting two
devices is common, but some devices can be
connected to multiple devices at the same time.
You do not need to use a cable for connection
since BLUETOOTH technology is a wireless
technology, neither is it necessary for the devices
to face one another, such is the case with infrared
technology. For example, you can use such a
device in a bag or pocket.
BLUETOOTH technology is an international
standard supported by millions of companies all
over the world, and employed by various
companies worldwide.
On BLUETOOTH communication
BLUETOOTH wireless technology operates within
a range of about 10 m.
Maximum communication range may vary
depending on obstacles (person, metal, wa ll, etc.)
or electromagnetic environment.
The following conditions may affect the sensitivity
of BLUETOOTH communication.
There is an obstacle such as a person, metal, or
wall between this unit and BLUETOOTH device.
A device using 2.4 GHz frequency, such as a
wireless LAN device, cordless telephone, or
microwave oven, is in use near this unit.
Because BLUETOOTH devices and wireless LAN
(IEEE802.11b/g/n/ac) use the same frequency,
microwave interference may occur and result in
communication speed deterioration, noise, or
invalid connection if this unit is used near a
wireless LAN device. In such as case, perform the
following.
Use this unit at least 10 m away from the
wireless LAN device.
If this unit is used within 10 m of a wireless LAN
device, turn off the wireless LAN device.
Install this unit and BLUETOOTH device as near
to each other as possible.
Microwaves emitting from a BLUETOOTH device
may affect the operation of electronic medical
devices. Turn off this unit and other BLUETOOTH
devices in the following locations, as it may cause
an accident.
where inflammable gas is present, in a hospital,
train, airplane, or petrol station
near automatic doors or a fire alarm
34GB
Page 35

This unit supports security capabilities that
+ side up
comply with the BLUETOOTH standard to provide
a secure connection when the BLUETOOTH
wireless technology is used, but security may not
be enough depending on the setting. Be careful
when communicating using BLUETOOTH wireless
technology.
We do not take any responsibility for the leakage
of information during BLUETOOTH
communication.
Connection with all BLUETOOTH devices cannot
be guaranteed.
A device featuring BLUETOOTH function is
required to conform to the BLUETOOTH
standard specified by BLUETOOTH SIG, and be
authenticated.
Even if the connected device conforms to the
above mentioned BLUETOOTH standard, some
devices may not be connected or work
correctly, depending on the features or
specifications of the device.
While talking on the phone handsfree, noise
may occur, depending on the device or
communication environment.
Depending on the device to be connected, it may
require some time to start communication.
Others
Using the BLUETOOTH device may not function on
cellular phones, depending on radio wave
conditions and location where the equipment is
being used.
If you experience discomfort after using the
BLUETOOTH device, stop using the BLUETOOTH
device immediately. Should any problem persist,
consult your nearest Sony dealer.
If you have any questions or problems concerning
your unit that are not covered in these Operating
Instructions, consult your nearest Sony dealer.
Notes on the lithium battery
Keep the lithium battery out of the reach of children.
Should the battery be swallowed, immediately
consult a doctor.
Wipe the battery with a dry cloth to assure a good
contact.
Be s ure to observ e the correct polarity wh en inst alling
the battery.
Do not hold the battery with metallic tweezers,
otherwise a short-circuit may occur.
Cleaning the connectors (XAV-612BT/
602BT only)
The unit may not function properly if the
connectors between the unit and the front panel
are not clean. In order to prevent this, detach the
front panel (page 9) and clean the connectors with
a cotton swab. Do not apply too much force.
Otherwise, the connectors may be damaged.
Notes
For safety, turn off the ignition before cleaning the
connectors, and remove the key from the ignition
switch.
Never touch the connectors directly with your fingers
or with any metal device.
Maintenance
Replacing the lithium battery of the
remote commander
Under normal conditions, the battery will last
approximately 1 year. (The service life may be
shorter, depending on the conditions of use.)
When the battery becomes weak, the range of the
remote commander becomes shorter. Replace the
battery with a new CR2025 lithium battery. Use of
any other battery may present a risk of fire or
explosion.
Specifications
Monitor section
Display type: Wide LCD color monitor
Dimensions:
XAV-742/712BT: 7.0 in
XAV-612BT/602BT: 6.1 in
System: TFT active matrix
Number of pixels:
1,152,000 pixels (800 × 3 (RGB) × 480)
Color system:
PAL/NTSC/SECAM/PAL-M/PAL-N automatic
select
Tuner section
FM
Tuning range: 87.5 – 108.0 MHz
Antenna (aerial) terminal:
External antenna (aerial) connector
35GB
Page 36

Intermediate frequency: 25 kHz
Usable sensitivity: 9 dBf
Selectivity: 75 dB at 400 kHz
Signal-to-noise ratio (stereo): 80 dB (mono)
Separation at 1 kHz: 50 dB
Frequency response: 20 - 15,000 Hz
AM
Tuning range: 531 – 1,602 kHz
Antenna (aerial) terminal:
External antenna (aerial) connector
Intermediate frequency:
9,124.5 kHz or 9,115.5 kHz/4.5 kHz
Sensitivity: 26 µV
DVD/CD Player section
Signal-to-noise ratio: 120 dB
Frequency response: 10 – 20,000 Hz
Wow and flutter: Below measurable limit
Harmonic distortion: 0.01%
Region code: Labeled on the bottom of the unit
USB Player section
Interface: USB (High-speed)
Maximum current: 1 A
1.5 A (HIGH CHARGE mode)
HDMI in / MHL in section*
Interface: HDMI in / MHL in
Incorporates MHL 2 (only MHL)
Maximum current (only MHL): 0.9 A
* Applies to XAV-712BT/612BT only.
Wireless Communication*
Communication System:
BLUETOOTH Standard version 2.1 + EDR
Output:
BLUETOOTH Standard Power Class 2 (Max. +4
dBm)
Maximum communication range:
Line of sight approx. 10 m (33 ft)*
Frequency band:
2.4 GHz band (2.4000 – 2.4835 GHz)
Modulation method: FHSS
Compatible BLUETOOTH Profiles*
A2DP (Advanced Audio Distribution Profile) 1.2
AVRCP (Audio Video Remote Control Profile) 1.3
HFP (Handsfree Profile) 1.5
PBAP (Phone Book Access Profile)
OPP (Object Push Profile)
SPP (Serial Port Profile)
Maximum number of storable phonebook
contacts: 1,000
*1 Applies to XAV-712BT/612BT/602BT only.
*2 The actual range will vary depending on factors such
as obstacles between devices, magnetic fields
around a microwave oven, static electricity,
reception sensitivity, antenna’s performance,
operating system, software application, etc.
2
3
:
*3 BLUETOOTH standard profiles indicate the purpose
of BLUETOOTH communication between devices.
Power amplifier section
Outputs: Speaker outputs
Speaker impedance: 4 – 8 ohms
Maximum power output: 52 W × 4 (at 4 ohms)
General
Outputs:
Video output terminal (rear)
Audio output terminals (front/rear)
Audio output terminal (Z×Z)
Subwoofer output terminal
Power antenna (aerial)/Power amplifier control
terminal (REM OUT)
Inputs:
Illumination control terminal
Remote controller input terminal
Antenna (aerial) input terminal
Parking brake control terminal
Microphone input terminal (XAV-712BT/612BT/
602BT only)
Reverse input terminal
Camera input terminal
AUX audio input terminals
AUX video input terminals
USB ports
HDMI in / MHL in port (XAV-712BT/612BT only)
Power requirements: 12 V DC car battery
(negative ground (earth))
Dimensions:
XAV-742/712BT:
Approx. 178 mm × 100 mm × 185 mm
1
(7
/8 × 4 × 7 3/8 in) (w/h/d)
XAV-612BT/602BT:
Approx. 178 mm × 100 mm × 173 mm
1
(7
/8 × 4 × 6 7/8 in) (w/h/d)
Mounting dimensions:
Approx. 182 mm × 111 mm × 160 mm
1
(7
/4 × 4 3/8 × 6 3/8 in) (w/h/d)
Mass:
XAV-742/712BT:
Approx. 2.4 kg (5 lb 5 oz)
XAV-612BT/602BT:
Approx. 2.0 kg (4 lb 7 oz)
Package contents:
Main unit (1)
Parts for installation and connections (1 set)
Microphone (1) (XAV-712BT/612BT/602BT only)
Remote Commander (1): RM-X271
HDMI connection cable (1): RC-400VH
(XAV-712BT/612BT only)
MHL connection cable (1): RC-500VM
(XAV-712BT/612BT only)
Panel Case (1) (XAV-612BT/602BT only)
Optional accessories/equipment:
Mobile monitor: XVM-B62
36GB
Page 37

GPS module unit: XA-NV300T (Australia models
only)
Your dealer may not handle some of the above
listed accessories. Please ask the dealer for detailed
information.
Design and specifications are subject to change
without notice.
Region code
The region system is used to protect software
copyrights.
The region code is located on the bottom of the
unit, and only DVDs labeled with an identical region
code can be played on this unit.
DVDs labeled can also be played.
If you try to play any other DVD, the message [Disc
playback prohibited by region code.] will appear on
the monitor screen. Depending on the DVD, no
region code may be labeled even though playing
the DVD is prohibited by area restrictions.
Copyrights
US and foreign patents licensed from Dolby
Laboratories.
MPEG Layer-3 audio coding technology and patents
licensed from Fraunhofer IIS and Thomson.
Manufactured under license
from Dolby Laboratories. Dolby
and the double-D symbol are
trademarks of Dolby
Laboratories.
Microsoft, Windows, Windows Vista and Windows
Media and logos are trademarks or registered
trademarks of Microsoft Corporation in the United
States and/or other countries.
This product is protected by certain intellectual
property rights of Microsoft Corporation. Use or
distribution of such technology outside of this
product is prohibited without a license from
Microsoft or an authorized Microsoft subsidiary.
“DVD VIDEO,” “DVD-R,” “DVD-RW,” “DVD+R,” and
“DVD+RW” are trademarks.
The Bluetooth® word mark and logos are owned by
the Bluetooth SIG, Inc. and any use of such marks
by Sony Corporation is under license. Other
trademarks and trade names are those of their
respective owners.
ZAPPIN is a trademark of Sony Corporation.
12 TONE ANALYSIS and its logo
are trademarks of Sony
Corporation.
“WALKMAN” and
“WALKMAN” logo are
registered trademarks of
Sony Corporation.
SensMe and the SensMe logo are
trademarks or registered
trademarks of Sony Mobile
Communications AB.
Music and video recognition technology and
related data are provided by Gracenote®. Gracenote
is the industry standard in music recognition
technology and related content delivery. For more
information, please visit www.gracenote.com.
CD, DVD, Blu-ray Disc, and music and video-related
data from Gracenote, Inc., copyright © 2000 present Gracenote. Gracenote Software, copyright
© 2000 - present Gracenote.
One or more patents owned by Gracenote apply to
this product and service. Gracenote website for a
nonexhaustive list of applicable Gracenote patents.
Gracenote, CDDB, MusicID, MediaVOCS, the
Gracenote logo and logotype, and the “Powered by
Gracenote” logo are either registered trademarks or
trademarks of Gracenote in the United States and/
or other countries.
iPhone, iPod, iPod classic, iPod nano, and iPod
touch are trademarks of Apple Inc., registered in
the U.S. and other countries. App Store is a service
mark of Apple Inc.
The “AAC” logo is a trademark of Dolby
Laboratories.
The terms HDMI and HDMI High-Definition
Multimedia Interface, and the HDMI Logo are
trademarks or registered trademarks of HDMI
Licensing LLC in the United States and other
countries.
MHL, Mobile High-Definition Link and the MHL Logo
are trademarks or registered trademarks of MHL
Licensing, LLC.
© 2013 TomTom N.V., The Netherlands. TomTom®,
the ® logo, among others, are Trademarks
owned by TomTom N.V. or one of its subsidiaries.
Please see www.tomtom.com/legal for the limited
warranty and end user license agreement applying
to this product. Ordnance Survery © Crown
Copyright License number 100026920. Data Source
© 2013 Tele Atlas N.V.©
© 2013 - Loquendo TTS. All rights reserved.
Loquendo is a registered trademark. Nuance® is a
registered trademark of Nuance Communications,
Inc. and used here under license.
37GB
Page 38

MirrorLink™ and the MirrorLink Logo are
certification marks of the Car Connectivity
Consortium LLC. Unauthorized use is strictly
prohibited.
THIS PRODUCT IS LICENSED UNDER THE MPEG-4
VISUAL PATENT PORTFOLIO LICENSE FOR THE
PERSONAL AND NON-COMMERCIAL USE OF A
CONSUMER FOR DECODING MPEG-4 VIDEO THAT
WAS ENCODED BY A CONSUMER ENGAGED IN A
PERSONAL AND NON-COMMERCIAL ACTIVITY AND/
OR WAS OBTAINED FROM A VIDEO PROVIDER
LICENSED BY MPEG LA TO PROVIDE MPEG-4 VIDEO.
NO LICENSE IS GRANTED OR SHALL BE IMPLIED FOR
ANY OTHER USE. ADDITIONAL INFORMATION
INCLUDING THAT RELATING TO PROMOTIONAL,
INTERNAL AND COMMERCIAL USES AND LICENSING
MAY BE OBTAINED FROM MPEG LA, LLC. SEE
HTTP://WWW.MPEGLA.COM
THIS PRODUCT IS LIC ENSED UNDER THE AVC PATENT
PORTFOLIO LICENSE FOR THE PERSONAL AND NONCOMMERCIAL USE OF A CONSUMER TO
(i)ENCODE VIDEO IN COMPLIANCE WITH THE AVC
STANDARD (“AVC VIDEO”)
AND/OR
(ii)DECODE AVC VIDEO THAT WAS ENCODED BY A
CONSUMER ENGAGED IN A PERSONAL AND
NON-COMMERCIAL ACTIVITY AND/OR WAS
OBTAINED FROM A VIDEO PROVIDER LICENSED TO
PROVIDE AVC VIDEO. NO LICENSE IS GRANTED OR
SHALL BE IMPLIED FOR ANY OTHER USE.
ADDITIONAL INFORMATION MAY BE OBTAINED
FROM MPEG LA, L.L.C. SEE
HTTP://WWW.MPEGLA.COM
THIS PRODUCT IS LIC ENSED UNDER THE AVC PATENT
PORTFOLIO LICENSE AND VC-1 PATENT PORTFOLIO
LICENSE FOR THE PERSONAL AND NONCOMMERCIAL USE OF A CONSUMER TO DECODE
VIDEO IN COMPLIANCE WITH THE AVC STANDARD
(“AVC VIDEO”) AND/OR THE VC-1 STANDARD (“VC-1
VIDEO”) THAT WAS ENCODED BY A CONSUMER
ENGAGED IN A PERSONAL AND NONCOMMERCIAL
ACTIVITY AND/OR WAS OBTAINED FROM A VIDEO
PROVIDER LICENSED TO PROVIDE AVC VIDEO AND/
OR VC-1 VIDEO. NO LICENSE IS GRANTED OR SHALL
BE IMPLIED FOR ANY OTHER USE. ADDITIONAL
INFORMATION MAY BE OBTAINED FROM MPEG LA,
L.L.C. SEE HTTP://WWW.MPEGLA.COM
Pandora, the Pandora logo, and the Pandora trade
dress are trademarks or registered trademarks of
Pandora Media, Inc., used with permission.
Android is a trademark of Google Inc. Use of this
trademark is subject to Google Permissions.
BlackBerry® is the property of Research In Motion
Limited and is registered and/or used in the U.S.
and countries around the world. Used under license
from Research In Motion Limited.
All other trademarks are trademarks of their
respective owners.
This product uses NCM driver software which is
licensed to Sony by MCCI corporation.
Troubleshooting
If there are any problems with your unit/mobile
device, make sure your car is parked in a safe place
before examining any issues.
The following checklist will help you remedy
problems you may encounter with your unit.
Before going through the checklist below, check
the connection and operating procedures.
For details on using the fuse and removing the unit
from the dashboard, refer to the installation/
connections manual supplied with this unit.
If the problem is not solved, visit the support site on
the back cover.
General
No power is being supplied to the unit.
Check the fuse.
The connection is not correct.
Connect the yellow and red power supply
leads.
There is no beep sound.
An optional power amplifier is connected and
you are not using the built-in amplifier.
The contents of the memory have been erased.
The power supply lead or battery has been
disconnected or it is not connected properly.
Stored stations and correct time are erased.
The fuse has blown.
The unit makes a noise when the position of the
ignition is switched.
The leads are not matched correctly with the car’s
accessory power connector.
The display disappears from/does not appear on
the monitor.
The dimmer is set to [ON] (page 26).
The display disappears if you press and hold OFF.
Press OFF on the unit until the display appears.
The monitor off function is activated (page 6).
Touch anywhere on the display to turn the
display back on.
The display does not respond to your touch
correctly.
Touch one part of the display at a time. If two or
more parts are touched simultaneously, the
display will not operate correctly.
Calibrate the touch panel of the display
(page 24).
Touch the pressure sensitive panel firmly.
38GB
Page 39

The Auto OFF function does not operate.
The Auto OFF function activates when no source
is selected.
Exit the source.
Menu items cannot be selected.
Unavailable menu items are displayed in gray.
USB Music, USB Video, AUX, BT Audio and
Pandora (Australia and New Zealand models
only) cannot be selected as the source.
Remove the check mark from the source item you
cannot select (page 28).
(XAV-742/712BT only)
The monitor angle cannot be adjusted.
The monitor was opened while the unit was
being reset.
Be sure to close the front panel before you
reset the unit.
The notification panel does not appear.
The notification panel is not available when the
unit is;
at the initial settings.
displaying the source in a popup.
under the voice command function (XAV-
712BT/612BT/602BT only).
playing back USB Video.
The playback controls does not appear in the
notification panel.
The playback controls are not available when the
unit is playing back content from the following
sources;
AUX
USB Video
HDMI in/MHL in (XAV-712BT/612BT only)
application on a smartphone via the App
Remote function
RDS
PTY displays [PTY not found.].
The current station is not an RDS station.
RDS data has not been received.
The station does not specify the program type.
Picture
There is no picture/picture noise occurs.
A connection has not been made correctly.
Check the connection between this unit and
other equipment, and set the input selector of
the equipment to the source corresponding to
this unit.
The disc is defective or dirty.
Installation is not correct.
Install the unit at an angle of less than 45° in a
sturdy part of the car.
The parking cord (light green) is not connected to
the parking brake switch cord, or the parking
brake is not applied.
Activate the video output of the iPod.
The picture does not fit in the screen.
The aspect ratio is fixed on the DVD.
There is no picture/picture noise occurs in the
rear monitor.
A source/mode which is not connected is
selected. If there is no input, no picture appears
in the rear monitor.
The color system setting is incorrect.
Set the color system to [PAL] or [NTSC]
according to the connected monitor (page 24).
The picture of the rear view camera is displayed
on this unit.
No picture appears in the rear monitor if the
picture of the rear view camera is displayed on
this unit.
Radio reception
The stations cannot be received.
The sound is hampered by noises.
The connection is not correct.
Connect the REM OUT lead (blue/white striped)
or accessory power supply lead (red) to the
power supply lead of a car’s antenna (aerial)
booster (only when your car has built-in radio
antenna (aerial) in the rear/side glass).
Check the connection of the car antenna
(aerial).
If the auto antenna (aerial) will not extend,
check the connection of the power antenna
(aerial) control lead.
Preset tuning is not possible.
The broadcast signal is too weak.
Sound
There is no sound/sound skips/sound cracks.
A connection has not been made correctly.
Check the connection between this unit and the
connected equipment, and set the input selector
of the equipment to the source corresponding to
this unit.
The disc is defective or dirty.
Installation is not correct.
Install the unit at an angle of less than 45° in a
sturdy part of the car.
The MP3 file sampling rate is not 32, 44.1, or 48
kHz.
The WMA file sampling rate is not 32, 44.1, or 48
kHz.
The AAC file sampling rate is not 44.1 or 48 kHz.
The MP3 file bit rate is not 48 to 192 kbps.
The WMA file bit rate is not 64 to 192 kbps.
The AAC file bit rate is not 40 to 320 kbps.
39GB
Page 40

The unit is in pause/reverse/fast-forward mode.
The settings for the outputs are not made
correctly.
The DVD output level is too low (page 16).
The volume is too low.
The ATT function is activated.
The format is not supported (such as DTS).
Check if the format is supported by this unit
(page 31).
Sound is noisy.
Keep cords and cables away from each other.
Disc operation
The disc does not play.
The disc is defective or dirty.
The disc is not playable.
The DVD is not playable due to the region code.
The disc is not finalized (page 31).
The disc format and file version are incompatible
with this unit (page 31).
Press to remove the disc.
MP3/WMA/AAC/Xvid/MPEG-4 files do not play.
Recording was not performed according to the
ISO 9660 level 1 or level 2 format or the Joliet or
Romeo expansion format (DATA CD), or the UDF
Bridge format (DATA DVD) (page 31).
The file extension is incorrect (page 32).
Files are not stored in MP3/WMA/AAC/Xvid/
MPEG-4 format.
If the disc contains multiple file types, only the
selected file type (audio/video) can be played.
Select the appropriate file type using the list
(page 14).
MP3/WMA/AAC/Xvid/MPEG-4 files take longer
to play than others.
The following discs take a longer time to start
playback.
a disc recorded with a complicated tree
structure.
a disc recorded in Multi Session/Multi Border.
a disc to which data can be added.
The disc does not start playing from the
beginning.
Resume playback or multi-disc resume playback
(page 28) has taken effect.
Certain functions cannot be performed.
Depending on the disc, you may not be able to
perform operations such as stop, search, or
repeat/shuffle play. For details, refer to the
manual supplied with the disc.
The soundtrack/subtitle language or angle
cannot be changed.
Use the DVD menu instead of the direct selection
button on the remote commander (page 12).
Multilingual tracks, multilingual subtitles, or
multi-angles are not recorded on the DVD.
The DVD prohibits changing.
The operation buttons do not function.
The disc will not eject.
Press the reset button (page 6).
USB playback
Items cannot be played via a USB hub.
Connect iPod/USB devices to this unit without
USB hub.
Items cannot be played.
Reconnect the USB device.
The USB device takes longer to play.
The USB device contains large-sized files or files
with a complicated tree structure.
The sound is intermittent.
The sound may be intermittent at a high bit rate
of more than 320 kbps.
This is not a malfunction. This phenomenon
occurs during USB Video playback, when;
the HOME button is pressed.
the system setting is launched.
USB photo/navigation function is ongoing.
BLUETOOTH function
(XAV-712BT/612BT/602BT only)
The other BLUETOOTH device cannot detect this
unit.
Set [Signal] to [ON] (page 24).
While connecting to a BLUETOOTH device, this
unit cannot be detected by another device.
Terminate the current connection and search for
this unit from the other device. The disconnected
device can be reconnected by selecting from the
list of registered devices.
Connection is not possible.
Check the pairing and connection procedures in
the manual of the other device, etc., and perform
the operation again.
The name of the detected device does not
appear.
Depending on the status of the other device, it
may not be possible to obtain the name.
There is no ringtone.
Raise the volume while receiving a call.
Depending on the connecting device, the
ringtone may not be sent properly.
Set [Ringtone] to [Internal] (page 20).
The talker’s voice volume is low.
Raise the volume during a call.
40GB
Page 41

The other party says that the volume is too low
or high.
Adjust the [MIC Gain] level (page 19).
Echo or noise occurs during call conversations.
Reduce the volume.
[Speech Quality] is set to [Mode 1].
Set [Speech Quality] to [Mode 2] (page 19).
If ambient noise other than the phone call sound
is loud, try reducing this noise.
Shut the window if road noise is loud.
Lower the air conditioner if the air conditioner
is loud.
The phone sound quality is poor.
Phone sound quality depends on reception
conditions of the cellular phone.
Move your car to a place where you can
enhance the cellular phone’s signal if the
reception is poor.
The volume of the connected BLUETOOTH device
is low or high.
Volume level will differ depending on the
BLUETOOTH device.
Reduce the volume level differences between
this unit and the BLUETOOTH device (page 14).
The sound skips during audio streaming.
Reduce the distance between the unit and the
BLUETOOTH device.
If the BLUETOOTH device is stored in a case which
interrupts the signal, remove the case while
using the device.
Several BLUETOOTH devices or other devices
which emit radio waves are used nearby.
Turn off the other devices.
Increase the distance between the unit and
other devices.
Playback sound stops momentarily when this
unit is connecting to a cellular phone. This is not
a malfunction.
You cannot control the connected BLUETOOTH
device during audio streaming.
Check that the connected BLUETOOTH device
supports AVRCP.
Some functions do not work.
Check that the connecting device supports the
functions in question.
The name of the other party does not appear
when a call is received.
The other party is not stored in the phonebook.
Add the other party to the phonebook
(page 19).
A call is answered unintentionally.
The connecting phone is set to start a call
automatically.
[Auto Answer] of this unit is set to [3 sec] or [10
sec] (page 20).
Pairing failed due to time out.
Depending on the connecting device, the time
limit for pairing may be short. Try completing the
pairing within the time by setting a single digit
passkey.
The BLUETOOTH function cannot be operated.
Exit the source by pressing and holding SOURCE
for 1 second, then turn on the unit.
No sound is output from the car speakers during
a handsfree call.
If the sound is output from the cellular phone, set
the cellular phone to output the sound from the
car speakers.
MirrorLink™ function
Playback of an audio source is interrupted under
the MirrorLink™ function by a click sound each
time you tap on the smartphone.
Disable the click sound of your smartphone.
App Remote function
The smartphone’s display does not appear on
the unit.
The application in the smartphone cannot operat
by the unit.
The App Remote function does not show the
display of your smartphone on the unit’s display.
You cannot control applications installed to your
smartphone by the unit.
Control the application by your smartphone.
HDMI/MHL connection
(XAV-712BT/612BT only)
There is no picture and/or sound.
Make sure that the connected device is
compatible with the HDMI/MHL connection.
Restart the connected device.
Playback does not start automatically when the
HDMI/MHL connection cable is connected to the
device even though [Auto Input Change(MHL)] is
set to [ON].
Change the source by pressing the SOURCE
button.
The remote commander does not work on the
connected device.
The remote commander works only for an MHL
device. The available operation depends on the
connected device.
41GB
Page 42

Error displays/messages
An error occurred. You will be returned to the
playback screen.
Visualizer is not operating due to an internal
error.
Change to another source, then select [USB
Music].
Bluetooth Connection Error
An error has occurred between this unit and the
BLUETOOTH phone.
Check the BLUETOOTH signal is set to on for
this unit or the BLUETOOTH phone.
Try pairing again.
Reconnect the BLUETOOTH phone.
Bluetooth device is not found.
The unit cannot detect a connectable
BLUETOOTH device.
Check the BLUETOOTH setting of the
connecting device.
No device is in the list of registered BLUETOOTH
devices.
Perform pairing with a BLUETOOTH device
(page 8).
Busy now… Please try again.
The unit is busy.
Wait for a moment and try again.
Call Data Error
An error has occurred while accessing
phonebook data via PBAP or call history from the
BLUETOOTH phone.
Reconnect the BLUETOOTH phone.
Cannot display folders beyond this level. Place
songs no more than eight folders deep.
While browsing contents, a level beyond eight
was selected.
This unit can display folders a maximum of
eight folders deep. Transfer contents beyond
this level.
Cannot read.
The unit cannot read the data due to some
problem.
The data is damaged or corrupted.
The disc is corrupted.
The disc is incompatible with this unit.
The disc is not finalized.
Database error encountered.
A database error was encountered due to a
problem.
Change to another source, then select [USB
Music].
Database update couldn’t be completed.
Database update was canceled due to a problem.
Try to update the database again.
Data Listing Error
An error has occurred while displaying
phonebook data via PBAP or call history from the
BLUETOOTH phone.
Reconnect the BLUETOOTH phone.
Delete failed.
Video contents cannot be deleted due to a
problem.
Try to delete it again. Otherwise, delete it using
a PC, etc.
Disc Error
The disc is dirty or inserted upside down.
Clean or insert the disc correctly.
A blank disc has been inserted.
The disc cannot play due to a problem.
Insert another disc.
The disc is not compatible with this unit.
Insert a compatible disc.
Press to remove the disc.
Disc playback prohibited by region code.
The DVD’s region code differs from the unit’s
region code.
Error - Please select ‘Bluetooth Reset’ from the
General Settings menu.
A memory error has occurred.
Initialize the BLUETOOTH setting (page 25).
Handsfree device is not available.
A cellular phone is not connected.
Connect a cellular phone (page 8).
High Temperature Error
An error has occurred due to high temperature.
Lower the temperature.
iPod video cable reconnected. Reconnect the USB
cable.
Connect the USB cable to the unit properly.
New firmware not found.
There is no firmware update available in the USB
memory.
Try to update to the latest version of firmware.
The firmware file is damaged or corrupted.
Rewrite the file in the USB memory.
No Device
iPod is selected as the source without an iPod
connected. A USB cable with iPod connected has
been removed during playback.
Be sure to connect the USB cable and an iPod
securely.
No Playable Data
The disc does not contain playable data.
The iPod has no playable data.
Load music or video data/files into the iPod.
42GB
Page 43

No Navigation Signal
A navigation system is not connected to this unit.
Check the connection between this unit and
the navigation system.
The navigation system is not operating correctly.
Check the navigation system is operating
correctly.
Internal Malfunction
There may be an internal malfunction.
Check the connection. If the error indication
remains on the display, consult your nearest
Sony dealer.
Check Audio Output Wiring
(Displays until any button is pressed.)
The connection of speakers/amplifiers is
incorrect.
See the supplied “Installation/Connections”
guide to check the connection.
Overcurrent caution on USB.
The USB device is overloaded.
Disconnect the USB device, then change the
source by pressing the SOURCE button.
Indicates that the USB device is out of order, or
an unsupported device is connected.
Playback has stopped because an error
occurred.
Playback of video contents stopped due to a
problem.
Select another source, then select [USB Video].
Remove failed.
Photo contents cannot be deleted due to a
problem.
Try to delete it again. Otherwise delete it by
using PC, etc.
Set wallpaper failed.
The file is damaged or corrupted.
Select another photo.
The file size is too large.
Minimize the size of the picture, then try again.
The application will quit because an error
occurred.
An internal error has occurred.
Change to another source, then select [USB
Music].
The playback list is empty.
The playlist contains unplayable files.
Check if any contents in the USB application are
playable.
The sound in DTS format is not audible.
Discs in DTS format are not supported. Sound is
not output if the DTS format is selected.
DTS formatted discs are not playable on this
unit. Use a compatible disc format (page 31).
USB device not supported
For details on the compatibility of your USB
device, visit the support site on the back cover.
USB hub not supported
USB hubs are not supported on this unit.
The character cannot be displayed with the unit.
For MirrorLink™ operation
No audio, confirm smartphone compatibility.
The sound adjustment of the smartphone is
incorrect.
Check the smartphone’s sound adjustment.
The smartphone is not compatible with
MirrorLink™.
Check the smartphone’s compatibility with
MirrorLink™ at the support site on the back
cover.
Reestablish connection with MirrorLink
compatible device.
The smartphone is not connected with this unit.
Check the connection between this unit and
the smartphone.
The smartphone is turned off.
Check the power supply of the smartphone.
The smartphone is not compatible with
MirrorLink™.
Check the smartphone’s compatibility with
MirrorLink™ at the support site on the back
cover.
Screen content blocked while vehicle in motion.
MirrorLink™ is being operated while driving.
Some MirrorLink™ functions are restricted
while driving.
For HDMI/MHL connection (XAV-712BT/
612BT only):
Connect HDMI or MHL device to the unit.
No device is connected.
Connect a device to the HDMI/MHL connection
cable securely.
No Signal
No signal is being output from the connected
device.
Make sure the device is connected to the
HDMI/MHL connection cable securely.
Check the connected device's output signal.
43GB
Page 44

Not Supported Format
The unit receives unsupported input signal.
There may be a malfunction of connection cable.
Replace the cable.
Overcurrent Caution on MHL.
The connected device is overloaded.
Disconnect the device, then change the source
by pressing the SOURCE button.
Indicates that the device is out of order, or an
unsupported device is connected.
For Pandora® operation (Australia and
New Zealand models only):
Allow connection? Check number on mobile
device.
Check the number on your mobile device. If the
number is correct, touch [OK] to allow the
connection.
API Version Error
The API versions differ.
Select a source other than [Pandora], then
select the Pandora® source again.
Application error on mobile device. Do not check
the mobile device while driving.
Check other operations on your mobile device,
then launch the Pandora® application again.
Select a source other than [Pandora], then select
the Pandora® source again.
Bookmark Error
Bookmarking a track or artist failed.
Try bookmarking again.
Cannot connect Pandora due to poor reception.
The mobile network signal is poor.
Move to an area with better reception.
Cannot skip.
Skip (next) is prohibited for the current content.
Wait until the commercial ends.
Pandora® limits the number of skips allowed.
Wait until the next track begins, or select
another station on the list.
Invalid Login
The mobile device has not logged in to Pandora®.
Try logging in again.
No Station
There is no station on your Pandora® account.
Create a station on your mobile device.
Select a source other than [Pandora], then
select the Pandora® source again.
Pandora Erro r
An error occurred while using Pandora®.
Disconnect, then reconnect the mobile device
with this unit.
(For a USB device, unplug and plug the device
in again. For a BLUETOOTH device, disconnect
and connect the device again.)
Launch the Pandora® application again from
the mobile device.
Pandora original licensing restricted.
Use of the service is being attempted outside the
US.
Pandora® service license has been granted in
the US only.
Please disconnect and reconnect to sync device.
An error has occurred between this unit and the
mobile device.
Disconnect then reconnect the mobile device
with this unit.
(For a USB device, unplug and plug the device
in again. For a BLUETOOTH device, disconnect
and connect the device again.)
Please launch Pandora application on mobile
device.
The Pandora® application has not been
launched.
Launch Pandora® on your mobile device, then
touch [Reconnect].
Server Error
The Pandora® server may have a problem.
Select a source other than [Pandora], then
select the Pandora® source again.
Station does not exist.
The condition of the mobile device has changed
between compiling the station list and selecting
from the list.
Wait until the station list refreshes.
Thumbs Up/Down Error
Thumbs Up/Down feedback failed.
Try Thumbs Up/Down again.
If these solutions do not help improve the situation,
consult your nearest Sony dealer.
If you take the unit to be repaired because of disc
playback trouble, bring the disc that was used at
the time the problem began.
44GB
Page 45

Language Code List
Code Language
1027 Afar
1028 Abkhazian
1032 Afrikaans
1039 Amharic
1044 Arabic
1045 Assamese
1051 Aymara
1052 Azerbaijani
1053 Bashkir
1057 Byelorussian
1059 Bulgarian
1060 Bihari
1061 Bislama
1066 Bengali;
Bangla
1067 Tibetan
1070 Breton
1079 Catalan
1093 Corsican
1097 Czech
1103 Welsh
1105 Danish
1109 German
1130 Bhutani
1142 Greek
1144 English
1145 Esperanto
1149 Spanish
1150 Estonian
1151 Basque
1157 Persian
1165 Finnish
1166 Fiji
1171 Faroese
1174 French
1181 Frisian
1183 Irish
1186 Scots Gaelic
1194 Galician
1196 Guarani
1203 Gujarati
1209 Hausa
1217 Hindi
1226 Croatian
1229 Hungarian
1233 Armenian
1235 Interlingua
1239 Interlingue
1245 Inupiak
1248 Indonesian
1253 Icelandic
1254 Italian
1257 Hebrew
1261 Japanese
1269 Yiddish
1283 Javanese
1287 Georgian
1297 Kazakh
1298 Greenlandic
1299 Cambodian
1300 Kannada
1301 Korean
1305 Kashmiri
1307 Kurdish
1311 Kirghiz
1313 Latin
1326 Lingala
1327 Laothian
1332 Lithuanian
1334 Latvian;
Lettish
1345 Malagasy
Code Language
1347 Maori
1349 Macedonian
1350 Malayalam
1352 Mongolian
1353 Moldavian
1356 Marathi
1357 Malay
1358 Maltese
1363 Burmese
1365 Nauru
1369 Nepali
1376 Dutch
1379 Norwegian
1393 Occitan
1403 (Afan)Oromo
1408 Oriya
1417 Punjabi
1428 Polish
1435 Pashto;
Pushto
1436 Portuguese
1463 Quechua
1481 Rhaeto-
Romance
1482 Kirundi
1483 Romanian
1489 Russian
1491 Kinyarwanda
1495 Sanskrit
1498 Sindhi
1501 Sangho
1502 Serbo-
Croatian
1503 Singhalese
1505 Slovak
1506 Slovenian
Code Language
1507 Samoan
1508 Shona
1509 Somali
1511 Albanian
1512 Serbian
1513 Siswati
1514 Sesotho
1515 Sundanese
1516 Swedish
1517 Swahili
1521 Tamil
1525 Telugu
1527 Tajik
1528 Thai
1529 Tigrinya
1531 Turkmen
1532 Tagalog
1534 Setswana
1535 Tonga
1538 Turkish
1539 Tsonga
1540 Tatar
1543 Twi
1557 Ukrainian
1564 Urdu
1572 Uzbek
1581 Vietnamese
1587 Volapük
1613 Wolof
1632 Xhosa
1665 Yoruba
1684 Chinese
1697 Zulu
1703 Not specified
Code Language
Language code list
The language spellings conform to the ISO 639: 1988 (E/F) standard.
45GB
Page 46
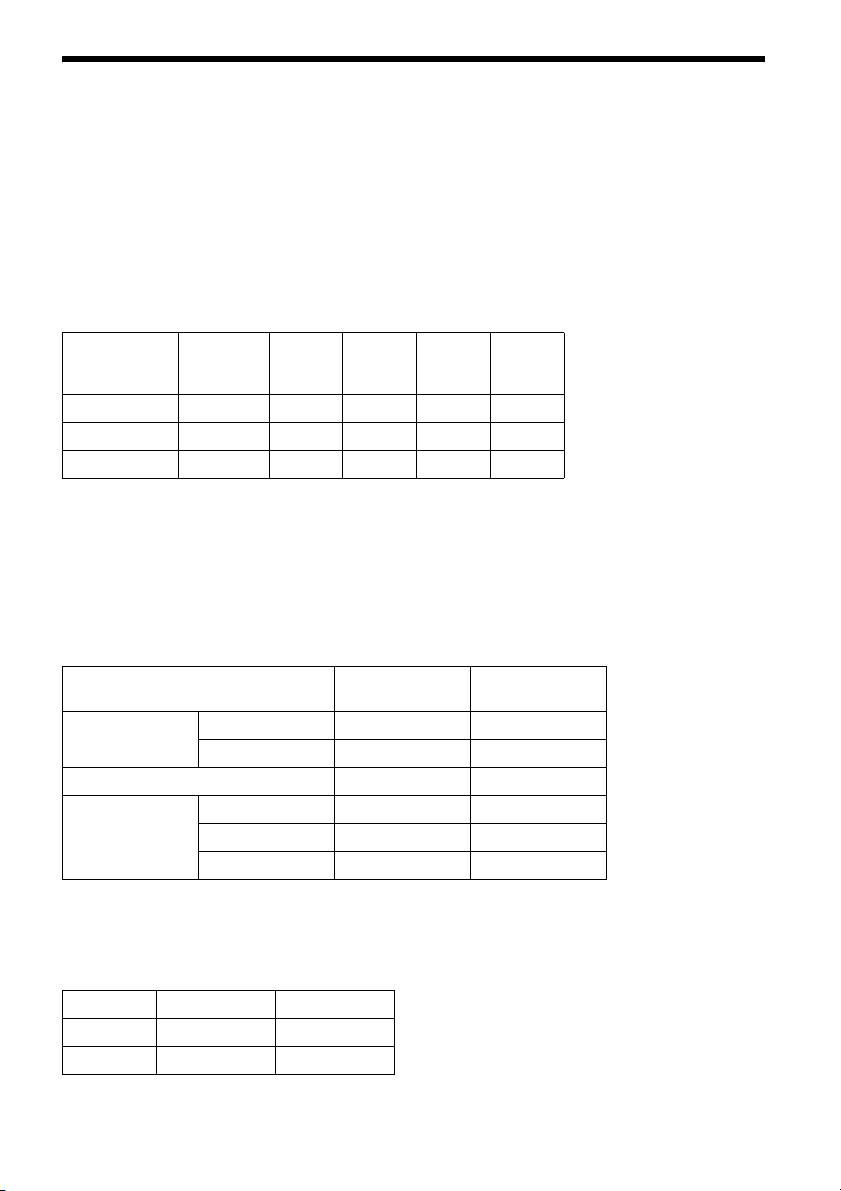
Summary of Useful Functions for Smartphone
Notes on using the MirrorLink™ function
Your smartphone needs to support the MirrorLink™ function. For details on compatible models, refer to the
compatibility list on the support site:
Customers in Pan Asia:
http://www.sony-asia.com/section/support
Customers in Latin America:
http://esupport.sony.com/ES/LA/
Depending on the smartphone, you may need to download an application to use the MirrorLink™ function.
Available operations differ depending on the smartphone. Refer to the manual supplied with the
smartphone, or consult the manufacturer of the smartphone for details.
Smartphone application connectivity
iPhone
(except
iPhone 5
iPhone 5)
App Remote*
1
*
MirrorLink™ - - - *
Pandora *1*
*1 For details on supported OS and/or devices, see the help of its application.
*2 Australia and New Zealand models only.
*3 XAV-712BT/612BT/602BT only
*4 For details on compatible models, refer to the compatibility list on the support site:
2
Customers in Pan Asia:
http://www.sony-asia.com/section/support
Customers in Latin America:
http://esupport.sony.com/ES/LA/
*
Required items
iPod
touch
Android Others
3
-
4
*
4
4
Smartphone App*1
(download needed)
Cable to connect
App Remote iPhone/iPod touch USB
Android
*
(BLUETOOTH)
2
MirrorLink™ USB
3
Pando ra*
iPhone/iPod touch USB
Android (BLUETOOTH)
BlackBerry (BLUETOOTH)
*1 For details on supported OS and/or devices, see the help of its application.
*2 XAV-712BT/612BT/602BT only
*3 Australia and New Zealand models only.
Smartphone connectivity for digital input (XAV-712BT/612BT only)
iPhone/iPod Android
*
1
3
MHL - *
HDMI *
*1 MHL-compatible models only.
2
Page 47

*2 Apple Digital AV Adapter or Lightning Digital AV Adapter is required. For details on compatible models of each
adapter, visit the Apple support homepage.
*3 HDMI-compatible models only.
Battery charge capability
USB
1*2*3
*
*1 The USB rear cable labeled “HIGH CHARGE” is recommended to use for recharging the battery of a connected
device.
*2 If the device connected to the USB rear cable labeled “HIGH CHARGE” is not recharged, set [USB Battery Charge
Mode] to [Standard] (page 25).
*3 Depending on the connected device and/or the selected USB port on the unit, the unit may not be able to
provide enough power to recharge the battery.
*4 An iPod is charged when it is connected to the unit via the appropriate adaptor. In this case, USB connection is
also required.
(XAV-712BT/612BT only)
MHL
-*
HDMI
(XAV-712BT/612BT only)
4
Page 48
Customers in Pan Asia
http://www.sony-asia.com/section/support
http://www.sony-asia.com/caraudio/
Customers in Latin America
http://esupport.sony.com/ES/LA/
http://www.sony.net/
©2013 Sony Corporation Printed in Thailand
 Loading...