How it Works
Log In / Sign Up
Buy Points
How it Works
FAQ
Contact Us
Questions and Suggestions
Users
Sony
Loading...
W
WRR805A
2
WRR855S30/32
WRR855S42/44
WRR-862A
WRR-862A,WRR-862B
Wrr-862B
WRT-800A
2
WRT800A64
WRT800A66
WRT805A
2
WRT805A64
WRT805A66
WRT805A68
WRT805B
WRT-807A
2
WRT807A64
WRT807A66
WRT807A68
WRT-807B
2
WRT807B1
WRT-808A
3
WRT808A64
WRT808A66
WRT808A68
WRT-810A
WRT-820A
3
WRT-822
WRT822A
4
WRT-822B
3
WRT822B1
WRT-847A
WRT-847B
3
WRT-860A
WRT-867A
WRT-8B
3
WRT8B1
WRT8P
WRT8P1
WRT8P2
WRU-806 A
WRU-806B
WRU-8N
WS001
WS-32SE1B
3
WS-40SE1B
WS-46SE1B
3
WS615
WS72
WS74
WS75
WS888
WS-BE1AT
WS-CT550B46
4
WS-DAV1
WS-DAVLFM
4
WS-DAVLFS
3
WS-F100
2
WS-F1000
5
WS-F150
WS-FL7
2
WS-FT7
6
WS-FV10
WSFV-100
WS-FV10A
4
WS-FV10C
3
WS-FV10D
WS-FV10DSC
WS-FV11
5
WS-FV20
4
WS-FV500
4
WS-FVX1
2
WS-IS10F
4
WS-IT1000F
2
WS-IZ1000
WS-IZ1000F
3
WS-L100
WS-MC1
WS-SD3
WSSW-1
WS-TV10A
WS-TV10C
3
WS-TV150
2
WS-WV10
WS-WV10A
3
WS-WV10C
3
WS-WV10D
3
WS-X10FB
4
WS-X10W
2
WT19
31
WU600 TS
WV-D700
WX 350
2
WX-4500X
8
WX-5000MDX
WX-7700MDX
4
WX-800UI
24
WX-800UI-Q
WX-810UI
WX-850BT
2
WX-900BT
26
Loading...
Loading...
Nothing found
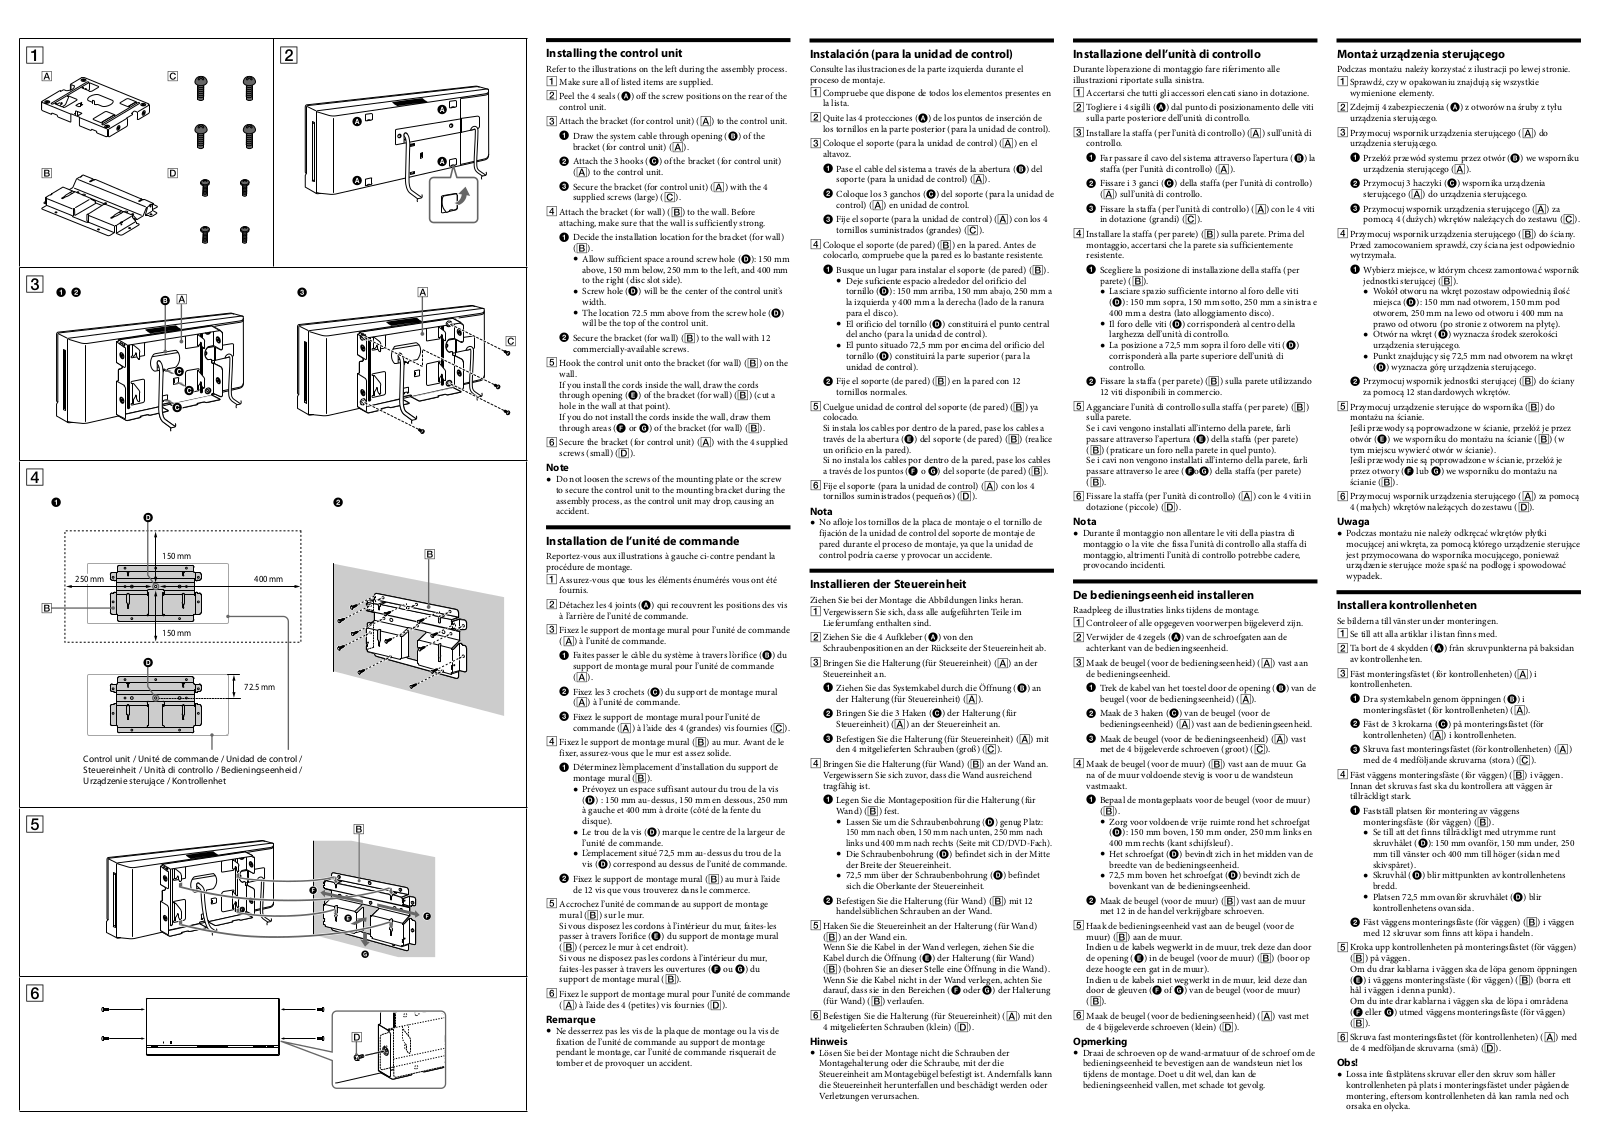
WS-F100
Operating Manual
2 pgs
194.07 Kb
0
Operating Manual
2 pgs
1.72 Mb
0
Table of contents
Loading...
Sony WS-F100 Operating Manual
...
Sony Operating Manual
Download
Specifications and Main Features
Frequently Asked Questions
User Manual
Download
Loading...
+
hidden pages
Unhide
You need points to download manuals.
1 point = 1 manual.
You can buy points or you can get point for every manual you upload.
Buy points
Upload your manuals
 Loading...