

Page 1

About the software on
your Sony notebook
PCG-VX71P
N
Page 2

Read this first
nN
1
Read this first
Notice
This product contains software owned by Sony and licensed by third parties. Use of such software is subject to the terms and conditions
of license agreements enclosed with this product. Software specifications are subject to change without notice and may not necessarily
be identical to current retail versions. Updates and additions to software may require an additional charge. Subscriptions to online
service providers may require a fee and credit card information. Financial services may require prior arrangements with participating
financial institutions.
© 2002 Sony Corporation. All rights reserved.
Reproduction in whole or in part without permission is prohibited.
End user software license agreement
About the software on your Sony notebook
This End User Software License Agreement (the EULA) is a legal agreement between you and Sony Corporation (hereinafter referred
to as Sony), a corporation organized under Japanese Law, the manufacturer of your Sony computer system (the SONY HARDWARE).
Please read this EULA carefully before installing or using the software distributed together with this EULA (the SONY SOFTWARE). By
installing or using the SONY SOFTWARE, you agree to be bound by the terms of this EULA. You may use the SONY SOFTWARE only in
connection with the use of the SONY HARDWARE. SONY SOFTWARE is licensed; not sold.
Notwithstanding the foregoing, software distributed together with separate End User Software License Agreement (the Third Party
EULA), including but not limited to Windows
EULA.
If you do not agree to the terms of this EULA, please return the SONY SOFTWARE together with the SONY HARDWARE to the place
where you obtained it.
1. License. This SONY SOFTWARE and the related documentation are licensed to you by Sony. This EULA allows you to use the SONY
SOFTWARE for your personal use for a single SONY HARDWARE outside a network and only to make one copy of the SONY SOFTWARE
in machine-readable form for back-up purposes only.
®
operating system provided by Microsoft Corporation, shall be covered by the Third Party
Page 3

Read this first
About the software on your Sony notebook
nN
2
2. Restrictions. The SONY SOFTWARE contains copyrighted material and other proprietary material. In order to protect them, and
except as permitted by applicable law, you may not decompile, reverse engineer or disassemble the SONY SOFTWARE in whole or in
part. Except for the transfer of the SONY SOFTWARE together with the SONY HARDWARE and prior agreement of the recipient to be
bound by the terms and conditions of this EULA, you may not sell or rent the SONY SOFTWARE and its copy to any third party.
3. Limited Warranty. Sony warrants the media on which the SONY SOFTWARE is recorded to be free from physical defects for a period
of ninety (90) days from the date of purchase as evidenced by a copy of the receipt. During the applicable warranty period, Sony will
replace free of charge such media proved to be defective, provided they are returned properly packaged to the place where you
obtained it, together with your name, address, and proof of date of purchase. Sony will have no responsibility to replace media
damaged by accident, abuse, or misapplication. The above limited warranty replaces all other representations, conditions and
warranties, whether express or implied, by statute or otherwise and Sony expressly disclaims all other warranties and all conditions
including, but not limited to, the implied warranties and/or conditions of satisfactory quality and fitness for a particular purpose. The
terms of this limited warranty do not affect or prejudice your statutory rights as an ultimate consumer, neither do they limit or exclude
any liability for death or personal injury caused by the negligence of Sony.
4. Termination. This EULA is effective until terminated. You may terminate this EULA at any time by destroying the SONY SOFTWARE,
related documentation, and all copies thereof. This EULA will terminate immediately without notice from Sony, if you fail to comply
with any provision of this EULA. Upon termination you must destroy the SONY SOFTWARE, related documentation, and all copies
thereof.
5. Governing Law. This EULA shall be governed by and construed in accordance with the laws of Japan.
Should you have any questions concerning this EULA or this limited warranty, please refer to the Customer Service Guide on how to
contact VAIO-Link.
Page 4

Read this first
nN
3
About the software on your Sony notebook
ENERGY STAR
As an ENERGY STAR® Partner, Sony has determined that this product meets the ENERGY STAR® guidelines for energy efficiency. The
International E
of computers and their office equipment. The program backs the development and dissemination of products with functions that
effectively reduce energy consumption. It is an open system in which business proprietors can participate voluntarily. The targeted
products are office equipment such as computers, displays, printers, facsimiles and copiers. Their standards and logos are uniform
among participating nations.
E
NERGY STAR is a U.S. registered mark.
®
NERGY STAR
®
Office Equipment Program is an international program that promotes energy saving through the use
Page 5

Read this first
About the software on your Sony notebook
nN
4
Trademarks
Sony, DigitalPrint, DVgate, i.LINK, Jog Dial, MovieShaker, Smart Capture, SonicStage and the SonicStage logo, Sony Notebook Setup, UI
Design Selector, VAIO Edit Components, Memory Stick and the Memory Stick logo, VAIO and the VAIO logo are trademarks of Sony
Corporation.
Microsoft, Windows and the Windows logo are trademarks or registered trademarks of U.S. Microsoft Corporation in the U.S. and other
countries.
i.LINK is a trademark of Sony used to designate that a product contains an IEEE1394-connection.
Adobe, Adobe Acrobat Reader and Adobe Photoshop Elements are trademarks of Adobe Systems Incorporated.
QuickTime and the QuickTime logo are trademarks used under license. QuickTime is registered in the U.S. and other countries.
RealPlayer is a trademark or registered trademark of RealNetworks, Inc. in the U.S. and other countries.
PowerPanel is a trademark of Phoenix Technologies Ltd.
Symantec Norton AntiVirus is a trademark of Symantec Corporation.
All other names of systems, products and services are trademarks of their respective owners. In the manual, the ™ or
specified.
Specifications are subject to change without notice.
®
marks are not
Page 6

Registering your VAIO
Registering your VAIO
It only takes a few moments to register your Sony VAIO computer.
By registering your computer, you can take advantage of Sony’s commitment to quality customer support
and receive the following benefits:
❑ Club VAIO – Online support, tutorials, tips and tricks, news, news forums, competitions, free downloads
and software updates.
❑ VAIO-Link – If you are experiencing any problems with your computer, you can check the VAIO-Link
website for a possible solution: http://www.vaio-link.com
❑ Guarantee – Protect your investment. See the Guarantee sheet for the terms and conditions and refer
to your Customer Guide for more information.
To register your Sony VAIO computer, proceed as follows:
1 Connect your phone line and set up a modem connection (see Configuring your modem (page 66)).
About the software on your Sony notebook
2 Double-click the VAIO Online Registration icon on the desktop.
3 Select your language and click Next.
4 Select the Register Now option button and click Next.
You get to the website https://registration.sonystyle-europe.com/vaio/registration.asp
5 Fill in your first and last name, the serial number of your computer and the place where you live.
6 Click Submit.
Your VAIO is registered.
✍ You can only register if you have administrator rights on your computer.
nN
5
.
.
Page 7

About the software on your computer
About the software on your computer
Your Sony computer is ready to help you work, play, learn, and communicate as soon as you turn it on. This
section gives you an overview of what you can do with the software installed on your computer.
Sony software
DigitalPrint
Sony Electronics
DigitalPrint is an easy-to-use software application designed to help you get the most enjoyment out of your
photographs taken with a digital camera or taken from a CD, floppy disk or Memory Stick™. With
DigitalPrint, you can easily load photos into your computer, create photo albums, labels and make prints.
nN
6
About the software on your Sony notebook
DVgate
Sony Electronics
DVgate is a kit of 3 complementary applications: DVgate Motion, DVgate Still, and DVgate Assemble. This
collection makes it easy to select and edit digital video clips, then bring them together into a professionallooking home video. Use i.LINK™ to connect your digital video camera, and the computer operates as an
editing desk that can capture, preview, cut and assemble your selection and save the sequences in AVI,
MPEG1 and MPEG2 formats. DVgate Still displays digital video images sent from a digital videocassette
recorder or a digital video camera recorder (only possible if you have DV In/Out on your camera), and saves
them as graphic files on your hard drive.
Page 8
About the software on your computer
Jog Dial™ Utility
Sony Electronics
The Jog Dial™ utility allows you to configure the Jog Dial™ on your computer. In this application, you can
select the Sony applications, or others, that you want the Jog Dial™ to pilot; you can also configure the Jog
Dial™ to start any application, establish a dial-up connection, or read an e-mail, simply by turning and
pressing the Jog Dial™.
MovieShaker
Sony Electronics
®
creates personal movies - complete with transitions, special effects, background music, and
About the software on your Sony notebook
MovieShaker
text. All you do is import your clips, pick the tune you want and MovieShaker
choose to take control and produce your very own movie. You choose the exact clips order, special effects,
and transitions. You can also import your own music and MovieShaker
of the song to the length of your movie.
PowerPanel
Sony Electronics
The PowerPanel utility controls the power management of your computer and provides key information
about system activity and battery life. Automatic power management selects the most appropriate profile,
depending on the application you are working with and the conditions of use.
nN
7
®
does the rest. You can also
®
will automatically match the length
Page 9
About the software on your computer
Smart Capture
Sony Electronics
Connect a digital camera to your computer to shoot still images and video clips, which you can view or send
by e-mail. The Smart Capture Finder displays images from the camera and allows you to adjust the settings
or create effects. Smart Capture enables you to capture images via i.LINK™ compatible devices or create a
panorama picture using the panorama assist function.
SonicStage
Sony Electronics
SonicStage uses the OpenMG technology, a copyright protection technology developed by Sony Corporation
and designed to allow recording and playback of digital music data on a personal computer. Once the data
is encrypted and recorded onto the hard disk, SonicStage technology allows it to be played back on the PC
About the software on your Sony notebook
but prevents unauthorized distribution. The purpose of SonicStage technology is to create an environment
in which larger quantities of high-quality music can be distributed without subsequent unauthorized
distribution of the music files.
The SonicStage software encrypts and manages music files either downloaded to a personal computer by
using the EMD services or adopted (or created) from your own CD or the Internet.
To use the CD-R functions, you will need to install the CD-R module from the supplied application CD-ROM.
nN
8
Sony Notebook Setup
Sony Electronics
Use Sony Notebook Setup to consult system information, specify preferences for system behaviour, and set
up a power-on password for your Sony computer.
Page 10

About the software on your computer
UI Design Selector
Sony Electronics
You can change the window design of the Sony software compatible with UI Design Selector.
VAIO Action Setup
Sony Electronics
VAIO Action Setup helps you manage application settings that control hardware events on your computer.
This software enables you, for example, to change the settings for the Jog Dial™.
VAIO Edit Components (available on the application CD-ROM)
Designed as a plug-in for Adobe® Premiere®, VAIO Edit Components includes special features to support
your i.LINK™-DV devices, so you can produce superior quality home movies even after editing. Now you can
About the software on your Sony notebook
control the DV device from your computer, import and edit the movie, and then export it back to the DV
device. To be able to use the Sony software VAIO Edit Components, you must first install Adobe
version 6.0* on your computer.
* available for purchase.
Product Recovery CD-ROMs
nN
9
®
Premiere®
Sony Corporation
The Product Recovery CD-ROMs allow you to reinstall the system, the software shipped with your computer
and the bundled device drivers if they are corrupted or accidentally erased. Reinstalling an individual device
driver may correct a problem you are experiencing with your computer, without you having to recover the
entire system.
!
You can only use the Recovery CD-ROMs on the Sony computer you purchased, and not on any other Sony PC or other manufacturer's PC.
Page 11

About the software on your computer
Operating system and other pre-installed software
Windows® XP Professional
Microsoft Corporation
Built on the proven Windows
foundation you can count on to keep your computer up and running when you need it most. Not only is the
operating system more reliable, it also offers features that make it much faster and easier to recover from
system problems.
From its fresh, new look to its more intuitive, task-based design, Windows
computing experience easier than it’s ever been. With support for the latest security standards and
enhanced Firewall protection, Windows
privacy.
For questions and technical assistance, go online to:
About the software on your Sony notebook
http://support.microsoft.com/directory
Internet Explorer 6.0
Microsoft Corporation
Internet Explorer is the Microsoft Internet browser allowing you to surf the World Wide Web. The Setup
Wizard configures your computer to connect automatically to your service provider. A full e-mail package
enables you to send and receive mail - including attached files - across the Internet. NetMeeting, Outlook
Express and Microsoft Chat are just some of the components bundled with Internet Explorer 6.0. Internet
Explorer 6.0 also includes 128-bit encryption, the highest possible level of protection for all your Internet
communications, including credit card use and financial transactions. A complete online tutorial helps new
users become comfortable using the Internet.
For questions and technical assistance, go online to:
http://support.microsoft.com/directory
®
2000 operating system, Windows® XP Professional delivers a reliable
®
XP Professional will make your
®
XP Professional also keeps your data secure and maintains your
nN
10
Page 12

About the software on your computer
Adobe® Acrobat® Reader 5.0
Adobe Systems Incorporated
Acrobat
®
Reader software allows you to view, navigate, and print electronic documents in Adobe Portable
Document Format (PDF), an open file format that is intended to preserve the conformity of documents
created on all major computer platforms. With Acrobat
from within your Web browser by clicking a PDF file embedded in an HTML file. You quickly see the first
page while the rest of the document is being downloaded.
For questions and technical assistance, go online to:
http://www.adobe.com
Adobe® Photoshop® Elements LE
Adobe Systems Incorporated
About the software on your Sony notebook
Adobe
new features that offer something for every user. Delivering the broadest and most productive toolset
available, Photoshop
the highest quality results across all image media.
For questions and technical assistance, go online to:
http://www.adobe.com
®
Photoshop® Elements LE software introduces the next generation of image editing with powerful
nN
11
®
Reader, you can open and view PDF files
®
Elements LE helps you explore your creativity, work at peak efficiency, and achieve
QuickTime 5.0
Apple
QuickTime is the Apple technology that makes video, sound, music, 3D and virtual reality come alive for your
Internet browser and Windows.
For further information, see the website at:
http://www.apple.com/quicktime
Page 13

About the software on your computer
RealPlayer
RealNetworks
RealPlayer is the RealNetworks video and audio player, which lets you access 2,500 radio stations featuring
music, news and sports.
For further information, see the website at:
http://www.real.com
Symantec Norton AntiVirus (as setup on the hard drive)
Symantec
With Norton AntiVirus, you can scan files, folders, or entire drives for viruses, and quarantine infected files
for submission to the Symantec AntiVirus Research Center (SARC). Files submitted to SARC are analyzed and
the results are reported automatically within seven days. When you configure Norton AntiVirus adequately,
About the software on your Sony notebook
your computer is safe. Norton AntiVirus can automatically check boot records for viruses at system startup,
check programs for viruses at the time you use them, scan all local hard drives for viruses once per week, and
monitor your computer for any activity that might indicate the work of a virus in action. It can also scan files
you download from the Internet and check floppy disks for boot viruses when you use them.
You must launch the Norton AntiVirus installation, and you will then be prompted to update the virus
definitions. This is normal as new viruses will have come out since your VAIO left the factory.
For more information, see the online help files and the website at:
http://www.symantec.com/techsupp
nN
12
Page 14

About the software on your computer
WinDVD
InterVideo, Inc.
InterVideo Inc.'s WinDVD is a simple-to-use DVD player. WinDVD combines all the features you would expect
to find on a standard consumer DVD player, in addition to some very advanced functionalities, full precision
video decoding, a choice of user interfaces, and video display options. You can play DVD movies, interactive
DVD titles, MPEG video content, video and audio CDs. WinDVD automatically determines the type of disc in
the DVD drive and uses the correct playback method.
For questions and technical assistance, go online to:
http://www.intervideo.com
About the software on your Sony notebook
nN
13
Page 15

Using Video software
Using Video software
The following video software applications are installed on your VAIO:
❑ DVgate (page 14)
❑ MovieShaker (page 29)
❑ Smart Capture (page 35)
Using DVgate
DVgate is a software application that enables you to capture and then edit images taken with digital video
devices (DV devices), such as digital video camera recorders, on your personal computer. It also gives you the
ability to output the edited material for recording on a DV device.
With DVgate, you can easily perform image editing with your computer and a DV device.
About the software on your Sony notebook
DVgate consists of 3 applications:
❑ DVgate Motion;
❑ DVgate Still;
❑ DVgate Assemble.
✍ Depending on the computer settings, frames may be lost during video capture and frame duplication when recording edited video. Please make sure
you configure your computer according to the recommended settings to prevent this from happening. To configure your computer to use DVgate, refer
to the Online help of DVgate.
nN
14
Page 16

Using Video software
Using DVgate Motion
With DVgate Motion you can capture video and record edited videos on a DV device.
❑ Capturing video:
You c an automatically or manually capture any scene or portion of the images recorded on a DV
device, such as a digital video camera recorder. What is more, you can specify the exact scenes that you
want to capture while watching the tape playback on the monitor. You can then choose to save the
selected scenes as separate files or as one file.
❑ Recording edited video on a DV device
You can record the edited video on tape using a DV device, such as a digital video camera recorder*,
connected to the computer. With DVgate, you are not limited to recording single clips, but you can
record a series of clips on the DV device at one time.
To launch DVgate Motion, proceed as follows:
1 Connect the camera to the computer with the i.LINK™ cable and turn on the camera.
About the software on your Sony notebook
2 Click Start, All Programs, DVgate, DVgate Motion.
DVgate Motion and the Monitor windows appear.
* The digital video camera recorder must have a DV-IN connector.
Capturing videos
nN
15
You can automatically or manually import videos onto your computer.
To automatically import videos onto your computer, proceed as follows:
1 Launch DVgate Motion.
2 Select Import-Auto from the Mode drop-down list.
Use the DVgate camera controls buttons to play, rewind or fast forward the tape to the selected time
code to begin capturing.
Page 17

Using Video software
3 Press Play to start the video.
The video begins to play in the Monitor window.
4 Click Mark to mark the beginning of the first segment.
The first frame of the segment to be captured, is displayed in the In/
Out list window.
Click Mark again to mark the end of the segment to capture.
The last frame of the segment to be captured, is displayed in the In/
Out list window.
Continue to mark as many segments as you want.
5 Click Capture to import the selected video segment or click Capture
All to import them all at once.
The Save as a file window appears.
6 Select the location to save the file.
About the software on your Sony notebook
7 Click the Save button.
DVgate captures the segments.
The Capturing complete message appears.
8 Click OK in the DVgate Motion window to finish.
Information about the capturing process is displayed in the Report window.
9 Click OK.
10 Exit DVgate Motion.
The Dvmotion2 window appears on the screen.
You can then save the In/Out list, which allows you to capture the same video sequences later on, or
change the In/Out settings.
✍ Make sure that the camera is in Video Tape Recorder mode (VTR) when capturing or playing back video from or to a tape.
If you want to manually import video onto your computer, refer to the DVgate online help file.
nN
16
Page 18

Using Video software
Recording edited videos on a DV device
To record edited videos on a DV device, proceed as follows:
1 Adjust the recording correction values.
2 Add files to the Record List.
3 Remotely or manually record the video on the DV device.
Adjusting the recording correction values
To ensure accuracy in the recording, you can specify recording correction values. Adjustment of the
recording correction values is especially important when performing splice recording. You can choose to
specify the values yourself or to have them automatically adjusted by using the automatic calibration
feature. The values generated by the automatic calibration feature are usually correct.
To automatically adjust the recording correction values, proceed as follows:
About the software on your Sony notebook
1 Launch DVgate Motion.
2 Select Export - Auto from the Mode drop-down list.
3 Select Adjust on Recording… from the Settings menu.
The Adjust on Recording dialog box appears.
4 Click the AutoAdjust button.
DVgate Motion activates the connected DV device and automatically finds the adjustment values.
5 Click OK.
✍ To manually adjust the recording correction values, refer to the DVgate online help file.
nN
17
Page 19

Using Video software
Adding files to the Record List
To add files to the Record List, proceed as follows:
1 Launch DVgate Motion.
2 Click Add in the DVgate Motion – AVI file list.
The Add dialog box appears.
3 Select a file and click Open.
The specified file is added and the serial number, first and last images, time code, file length and file
name are displayed.
★
DVgate Motion adds all serial numbered files with the same name if you select Add all divided files saved with the same name. Serial numbered
files are created when you specify to save files as multiple files in DVgate Motion and DVgate Assemble.
✍ All newly added files are appended to the end of the list.
You can drag multiple files at one time; however, the order in which they are added is unpredictable.
About the software on your Sony notebook
You can record AVI files with different sound modes on a DV device, but about one second of no sound (depending on the DV device) may occur at
the point where the sound modes change.
You can only add AVI files using DV Codec as video compression; MPEG files are not supported.
When recording a video sequence, make sure that all images are saved in the same mode. Recording in different modes might cause sound or image
distortions during playback. After adding the files you want to the Record List, you can still change the order of the files, add or delete files.
nN
18
Page 20

Using Video software
After adding the files to the Record List, you can still change the order of the files, add or delete files.
To change the order of the files in the Record List, proceed as follows:
1 Click the file you want to move while holding down the mouse button.
2 Drag the file to the appropriate position and then release the mouse button.
To remove a file from the Record List, proceed as follows:
1 Click the file you want to remove.
2 Click Delete.
The removed file is filled by the subsequent file and the files are renumbered.
Click Delete All when to remove all files.
✍ You can select multiple AVI or still picture files from the Record List by clicking them while holding down the <Shift> or <Ctrl> key.
When you move multiple files, they are all moved together.
You can undo changes by choosing Undo from the Edit menu immediately after inserting, moving or deleting (a) file(s).
About the software on your Sony notebook
You c a n save a Record List for future use. Record List files can only be used in DVgate Motion.
To preview a clip, proceed as follows:
1 Select the file you want to preview in the DVgate Motion – AVI file list window.
2 Click Preview.
The Monitor window and the Preview window appear.
The Monitor window shows the first frame of the file.
Click on the Previous File button or on the Next File button to select the file you want to preview.
Click Preview All to preview all the files shown in the list.
✍ Previous File and Next File are buttons for moving the preview from one selected file to another. They are not for designed for navigation purposes
within the list. Consequently, you cannot click on them when only one file is selected. When you select only one file, Previous File and Next File
do not function.
nN
19
Page 21

Using Video software
Recording on the DV device
You can automatically or manually export videos from your computer to a DV device.
To automatically export videos from your computer to a DV device, proceed as follows:
1 Connect the camera to the computer with the i.LINK™ cable and turn on the camera.
2 Launch DVgate Motion.
3 Click the down arrow and select Export-Auto from the Mode drop-down list.
4 Click the Add button in the DVgate Motion - AVI file list window and select the video file you want
to export.
5 Click Record or Record All.
The Output dialog box appears.
6 Select the Add blank image option button.
❑ You can add blank frame(s) during recording if you select the Append option button in the Output
About the software on your Sony notebook
❑ You can specify the length of a blank image by entering the number of frames in the Length box in
7 Click OK.
The Output dialog box closes and recording starts.
Video sequences are recorded on the DV device in the order in which they are arranged in the Record
List.
★
Clicking Record All will send all the video files shown in the Record List to the connected device. Clicking Record will send only the video files
selected from the Record List to the connected device.
nN
20
dialog box.
Blank frame(s) can be placed in the following locations:
Head: A blank image is placed before the start of the video sequence during recording.
Tai l : A blank image is placed after the end of the video sequence during recording.
Both: Blank images are placed before the start and after the end of the video sequence during
recording.
the Output dialog box.
Page 22

Using Video software
✍ Even if you specify not to add blank frames, several blank frames are always placed at the end of the recorded segment regardless of the settings.
This is to prevent image noise from being recorded when recording stops.
Do not quit or log off from Windows
Disable the screen saver in Windows
Do not start other applications or move any active window while recording.
Recording from the very beginning of the tape may not be successful if you record by controlling the video device through DVgate Motion.
Do not turn the power switch on the digital video camera recorder to Camera or turn it off while DVgate Motion is recording. Never switch the input
sources when recording on a digital videocassette recorder as this might prevent recording.
If you want to export manually videos from your computer to a DV device, refer to the DVgate online help file.
Using DVgate Still
DVgate Still is an application that displays digital video images sent from DV devices such as a digital
videocassette recorder or a digital video camera recorder and that captures them as still pictures.
About the software on your Sony notebook
The following functions are featured:
❑ Control the connected DV device and display a video image on the screen of your VAIO.
❑ Capture 30 frames of still pictures in total with respectively 15 frames in the forward and backward
directions.
❑ Capture only one frame of a still picture.
❑ Save a captured still picture in BMP, JPEG, GIF or DVF format.
❑ Save a captured still picture by copying it to another application via the clipboard.
✍ The sound recorded with the image, is not played.
®
while recording. Otherwise, recording will fail.
®
.
nN
21
Page 23

Using Video software
Capturing pictures
There are two capture modes in DVgate Still: the Continuous Capture mode and the Single Frame
Capture mode.
❑ Continuous Capture mode:
If you capture pictures during Play mode, you can capture 30 frames of still pictures in total with
respectively 15 frames in the forward and backward directions. All still pictures already captured, are
lost. If you capture during Pause mode, you can capture only one frame of a still picture.
✍ Immediately after you capture during Play mode in Continuous Capture mode, the DV device pauses.
❑ Single Frame Capture mode:
You can capture one frame of a still picture. The captured result is the same even if you capture during
Play or Pause mode.
✍ Capturing 30 frames in Continuous Capture mode replaces all 30 frames. Capturing only one frame overwrites the first frame of the still picture,
capturing the next frame overwrites the second frame, and so on.
About the software on your Sony notebook
To toggle between Continuous Capture mode and Single Frame Capture mode, proceed as follows:
1 Click Settings in the DVgate Still window.
2 Choose Capture…
The Capture Settings window appears.
3 Select the Capture frames continuously option button to capture in Continuous Capture mode.
Clear the Capture frames continuously option button to capture in Single Frame Capture mode.
To capture pictures, proceed as follows:
1 Connect the DV device to your computer.
2 Launch DVgate Still (Start/All Programs/DVgate/DVgate Still).
The DVgate Still window appears.
nN
22
Page 24

Using Video software
3 Set the DV device to the Play or Pause mode.
The video image appears in the Monitor window.
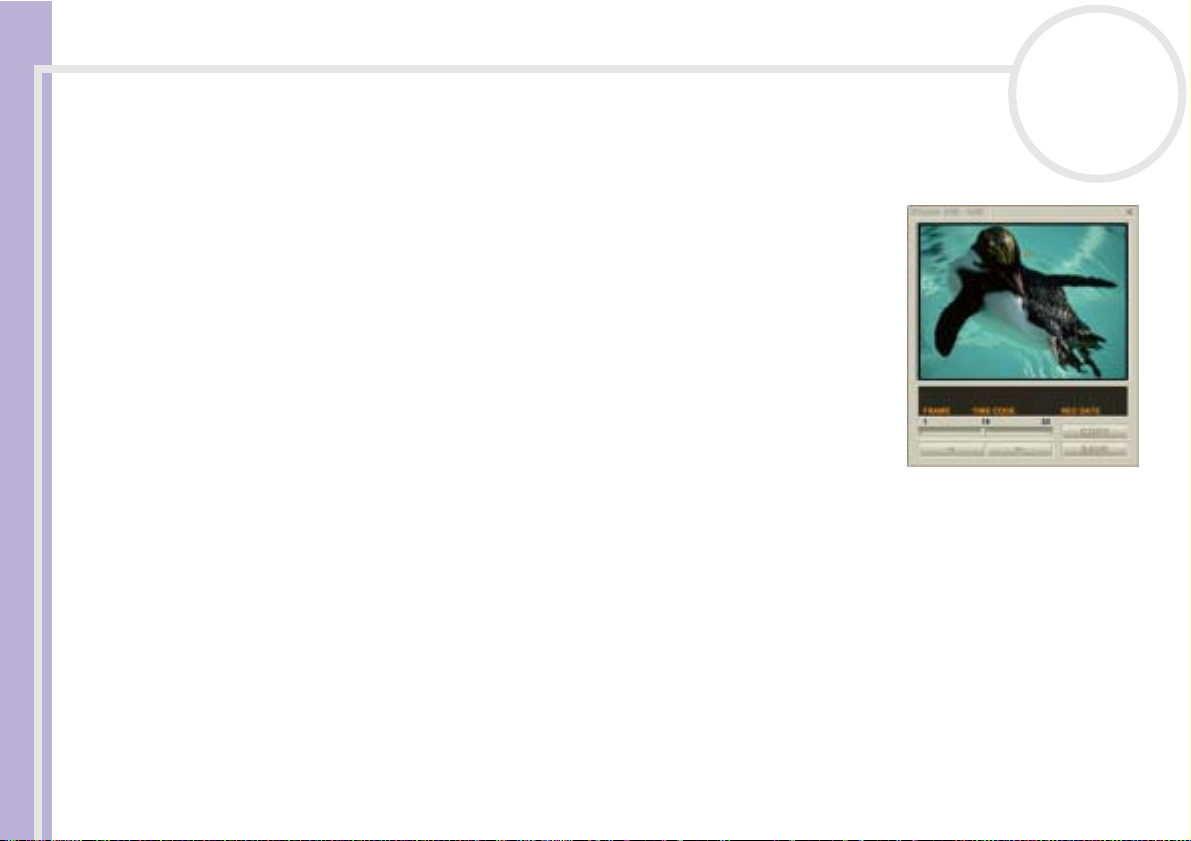
4 Click the Capture button.
The video image in the Monitor window is being captured.
✍ Dragging the slider in the Capture window to the left or right lets you display the still
picture before or after the current one.
! If you exit DVgate Still without saving the captured still picture, it is cleared.
! Even if you attempt to capture continuous pictures, you may not be able to capture some
frames. In this case, exit all applications other than DVgate Still and then retry to capture
them.
About the software on your Sony notebook
nN
23
Page 25
Using Video software
Saving the captured pictures
You can save the still pictures displayed in the DVgate Still - Still window in either one of the following
formats: BMP, JPG, GIF or DVF.
To save the captured pictures, proceed as follows:
1 Launch DVgate Still and capture images.
2 In the DVgate Still - Still window, select a still picture you want to save.
3 Click the Save button.
The Save As dialog box appears.
Use the Location to Save drop-down list to select a folder.
Select a file format from the File Format drop-down list.
4 Click Save.
The captured picture is saved.
nN
24
About the software on your Sony notebook
Using DVgate Assemble
DVgate Assemble enables you to edit video files and still image files captured with DVgate Motion and
DVgate Still. Afterwards you can splice them together to form one single file. You can save the resulting
spliced video sequences as AVI, MPEG1, or MPEG2 format files.
To launch DVgate Assemble, proceed as follows:
1 Click Start.
2 Point to All Programs, DVgate and then to DVgate Assemble.
The DVgate Assemble main window appears.
Page 26

Using Video software
Creating an Assemble List
You can create an Assemble List with files you want to splice together. Afterwards you can always edit the
Assemble List by changing the order of the files and adding or deleting files.
To add files to an Assemble List, proceed as follows:
1 Launch DVgate Assemble.
2 Click the Add button.
The Add dialog box appears.
3 Choose AVI file in the Files of type drop-down box.
If you select Add all divided files saved with the same name,
DVgate Assemble will add all serial numbered files with the same name
to the list. Serial numbered files are files that are created when DVgate
Motion saves files that are split and applies consecutive numbers to
them. The numbers of the split files have 4 digits and increase one unit
About the software on your Sony notebook
at a time starting with 0001.
4 Select a file and click Open.
✍ Imported files are added to the end of the Assemble List.
You can only add video files of the AVI (DV CODEC) format, and still image files of the BMP, JPEG, and GIF formats.
When you add a still image file (BMP, JPEG, or GIF), the number of frames, converted size, and size conversion mode are shown.
You can save an Assemble List for future use. Assemble List files can only be used in DVgate Assemble.
nN
25
Page 27

Using Video software
Editing AVI files
You can edit the AVI files in the Assemble List for the exact scenes you want to use. For example, there is no
need to recapture files even if you only want to use one particular scene from a longer video sequence
originally captured with DVgate Motion. Note that the process of removing the exact scene is only enabled
when one AVI file is selected from the Assemble List. However, this command is disabled when more than
one file are selected.
To edit the AVI files in the Assemble List for the exact scenes you want to use, proceed as follows:
1 Launch DVgate Assemble.
2 Select the AVI file you want to edit in the Assemble List.
3 Choose Edit a clip... from the Edit menu.
The DVgate Assemble - Clip dialog box appears.
4 Click the Preview button.
The video sequence of the selected file is played back.
About the software on your Sony notebook
You can move the playback position to the Begin point or the End point by clicking the Begin or End
point of the image.
Click the Begin button when you see the scene to be used as the Begin point.
The Begin point image and the time code appear in the lower part of the dialog box.
Click the End button when you see the scene to be used as the End point.
The End point image and the time code appear in the lower part of the dialog box.
5 Click OK.
The AVI file is edited.
nN
26
Page 28

Using Video software
Combining still images with video images
To combine still images with video images, proceed as follows:
1 Launch DVgate Assemble.
2 Select the still image you want to insert from the Assemble List.
3 Choose Edit a clip... from the Edit menu in the main window.
The DVgate Assemble - Clip dialog box appears.
4 Enter the insertion time in seconds or frames.
5 Turn the Wide TV mode on or off.
6 Select the screen size.
7 Adjust the height and width of still images when they are output:
❑ Full size: Enlarges the screen size to the full monitor size. The aspect ratio may change with this
About the software on your Sony notebook
❑ Original Size: Retains the original size of the image, without reduction or enlargement.
❑ Full size using aspect ratio as saved: Enlarges the screen size to the maximum without changing
8 Click OK.
The still and video images are combined.
nN
27
selection.
the aspect ratio.
Page 29

Using Video software
Saving the edited video
To save an edited video sequence, proceed as follows:
1 Click the Output or the Output All button.
The Save As dialog box appears.
Information on the output file and the amount of free disk space is shown in the lower part of the Save
As dialog box.
2 Select the location where you want to save the file and type the name of the file in the File name text
box.
3 Click Save.
4 The Outputting as an AVI file dialog box appears and splicing begins.
5 The DVassemble window appears and displays the Exporting/Save to an AVI file complete message.
The set time and the size that the file is split into are displayed when outputting an AVI file.
About the software on your Sony notebook
6 Click OK.
The edited video is saved.
✍ When you click the Output button, only the files on the Assemble List that have been selected, are connected and output as a file. Clicking Output
All means that all the files on the Assemble List are connected and output.
The file name is the name that was entered in the Save As dialog box. A 4-digit serial number is attached to the file name, e.g., test001-0001.avi,
then test001-0002.avi, test001-0003.avi.
nN
28
Page 30

Using Video software
Using MovieShaker
MovieShaker can be used to create fun and innovative movies without any knowledge of film editing. In a
few steps, motion pictures can be combined with special effects, still images (pictures), and music files and
then saved in a format most computers can play.
To open MovieShaker, proceed as follows:
1 Click the Start button on the Windows
2 Point to All Programs and then MovieShaker.
3 Click MovieShaker.
About the software on your Sony notebook
®
taskbar.
nN
29
Page 31

Using Video software
1. Menu bar Shows MovieShaker menus.
2. Monitor panel Contains the Shake, Capture, and Edit tray. Select a tray by clicking the Shake, Capture, or Edit tab.
3. Tool panel In the Tool panel, you will find the Effect, Text, Transition, Narration and Index tray. Select a tray
About the software on your Sony notebook
4. Clip tray The Clip tray is provided for placing clips to be processed with MovieShaker.
5. Product tray The Product tray is where you arrange clips to make a movie. In the Product tray, you will find the
nN
30
The Shake tray is for creating a scene of approximately 30 seconds long including background music,
using clips on the Clip tray at random.
The Capture tray is provided for capturing images directly from the DV device or MICROMV device
connected to your computer, and importing them into the Clip tray. The monitor displays the images
recorded on the videotapes of the DV device or MICROMV device.
The Edit tray is for processing scenes. Click a scene on the Product tray, then it is displayed on the
Edit tray. You can add an effect to the scene by dragging the effect from the Effect tray and/or the
Text tray and dropping it on the Edit tray.
by clicking the Effect, Text , Transit ion , or Narration button. Only when a MICROMV device has been
connected to your computer and MICROMV Device has been selected from the Device menu, the
Index tray appears while the Capture tray is displayed on the monitor panel.
The Effect tray contains various effects to be applied to a scene.
The Text tray provides a tool for creating a text effect to be applied to a scene.
The Tra nsi tio n tray contains various transition effects to be inserted between scenes.
The Narration tray provides a tool for recording narration to be inserted into a movie.
The Index tray provides a tool for capturing images from a MICROMV device and imports them into
the Clip tray.
It can contain a movie file, still image and/or sound files.
Storyboard Display and the Timeline Display.
On the Storyboard, you can easily arrange scenes and transitions.
On the Timeline, you can arrange scenes, transitions, background music, and narration, and make fine
adjustments to the starting/ending points and duration of scenes, transitions, background music, and
narration.
Page 32

Using Video software
Importing images and sound clips
Before you can create a movie, you need to import the images and sound clips you want to use in your
movie.
To import images and sound clips, proceed as follows:
1 Click the File import button .
The Import dialog box appears.
2 Select the file you want to add.
3 Click Open.
The file is added to the Clip tray.
✍ Importing files over 75 seconds in length may cause MovieShaker to stop responding.
To remove a clip from the Clip tray, drag it from the Clip tray and drop it on the trash icon . This only removes the clip from the tray, the original
file is not deleted.
nN
31
About the software on your Sony notebook
Creating a movie
After adding clip(s) to the Clip tray, you can create a short movie using the Shaker feature. Shaker
randomly selects clips from the Clip tray to create a 30-second scene.
To create a movie, proceed as follows:
1 Click the Shake tab .
2 Select a mood by clicking a face in the Shaker tray .
3 Click the Shake button .
A thirty-second scene is automatically generated and saved to the Product tray.
To preview the created movie, proceed as follows:
1 Double-click the scene in the Product tray .
2 Press Play .
Page 33

Using Video software
✍ Scenes created with Shaker begin with a black frame. After processing, they are placed in the first available slot on the Product tray.
Limit the number of scenes in the Product tray to 5 or less.
MovieShaker may stop responding if there are too many scenes in the Product tray.
About the software on your Sony notebook
nN
32
Page 34

Using Video software
Editing clips and scenes
You can edit your movie by adding effects and text, adjusting the colour and contrast, and modifying the
length of the clip.
About the software on your Sony notebook
nN
33
1. Shake tab
2. Capture tab
3. Edit tab
4. Speed control slider
5. Volume control slider
6. Effect palette
7. Fade-in, fade-out
8. Trash
9. Full-screen preview button
10. Play trimming range
11. Repeat-play
12. Play control buttons
13. Trimming range
14. Save as still image button
15. Time adjustment
16. Monitor
Page 35

Using Video software
To edit clips and scenes, proceed as follows:
1 Double-click the clip in the Clip tray to move it to the Monitor Panel.
2 Select the Effect tab from the Tool Panel.
3 Drag and drop the effect you want to add from the Effect tray to the Edit tray monitor.
✍ To preview an effect, click the effect in the Effect tray in the Working Panel monitor.
For instructions on adjusting effect duration and replaying clips or scenes, consult the online Help-files.
Saving a movie
You can save or export your final movie products. You can preview and check them before saving them.
Your final movie products can be saved as files, exported to a DV device/MICROMV device, or uploaded to
ImageStation.
To save your movie, proceed as follows:
About the software on your Sony notebook
1 Click the Export button .
The Export dialog box appears.
2 Select the format in which you want the document to be saved.
3 Click Next.
4 Select the folder in which you want to save the file.
5 Name the file.
6 Click Save.
Your movie is saved.
✍ Exporting movies may take a long time to complete. Saving movies with DV (Digital Video) will provide better quality than Quick-Save, but will take
longer.
MovieShaker can play AVI files up to 65 MB in size.
For DV playback and smooth video playback, the following resolution/refresh rates are recommended: 1024x768/75 Hz or lower.
nN
34
Page 36

Using Video software
Using Smart Capture
You can use Smart Capture to shoot still images and record video clips from a digital camera connected to
your computer.
Capturing still images
You can capture still images from i.LINK™ compatible devices.
To capture still images, proceed as follows:
1 Connect an i.LINK™ compatible device to your computer.
2 Launch Smart Capture from the Start menu, in All Programs / Smart
Capture / Smart Capture.
The Finder window appears, displaying the image of the subject.
3 Adjust the focus on the subject.
About the software on your Sony notebook
4 Click the Capture button in the Smart Capture window.
The Still Viewer window appears.
The image you have captured, is displayed in the Still Image Display area.
5 To end Smart Capture click the button in the top right corner of the
window.
✍ Make sure a camera is plugged to the i.LINK™ connector.
nN
35
Page 37

Using Video software
Displaying captured images in Still Viewer
To display captured images in Still Viewer, proceed as follows:
From the Start menu, select All Programs / Smart Capture and click Still Viewer. You can display, save
or delete your images or send them by e-mail.
To end Still Viewer, click the button.
✍ You can capture still images in the following sizes: 640 x 480, 320 x 240, 160 x 120 and 80 x 60 pixels.
When capturing a small resolution image (i.e., 80 x 60 pixels), the displayed image on the Finder window may appear blurred.
A gap may appear when a rapid-moving object is displayed. This is not a malfunction.
If you start Smart Capture while no camera is plugged, the Smart Capture Finder screen will appear blue.
You can capture still images and video clips from a digital video camera using Smart Capture.
Sending still images via e-mail
About the software on your Sony notebook
To send still images via e-mail, proceed as follows:
1 Launch Still Viewer.
2 Select the still image you want to send via e-mail, using or .
3 Click Mail.
Your e-mail window appears with the selected file attached to your message.
4 Send the e-mail.
✍ You need to set up MAPI (Messaging Application Program Interface) when using the e-mail software. MAPI is a Microsoft
interface that enables you to send e-mails from within a Windows application and to attach the document you are working on to the e-mail note.
nN
36
®
Windows program
Page 38

Using Video software
Shooting video clips
With a video camera connected to your computer you can use Smart Capture to capture video clips, as well
as play them or send them via e-mail.
To capture video clips, proceed as follows:
1 Launch Smart Capture.
2 Select Net Movie using the Switch Capture Mode button.
The image appears in the Finder.
3 Turn the camera towards the subject.
4 Adjust the image.
5 Click the Capture button to shoot a video clip (you can shoot up to 120 seconds, according to the settings
you chose in the Recording options section).
6 Click the Capture button when finished.
About the software on your Sony notebook
The Movie Player window appears, it contains the captured video clip.
7 Click to playback the images. Click to pause, to stop playback.
8 To end Smart Capture, click .
✍ Make sure a camera is plugged to the i.LINK™ connector and turned on.
You can shoot video clips in the following formats:
Non-compressed:
- Video 160 x 120, 24 bits, max. 10 frames/sec.
- Audio PCM, 11.025 kHz, 16 bits, monophonic
Compressed:
- Video MPEG1 160 x 112, maximum of 30 frames/sec.).
- Audio MPEG1, 44.1 kHz (effective maximum equivalent to 11.025 kHz), monophonic.
A gap may appear when a rapid-moving object is displayed. However, this is not a malfunction.
nN
37
Page 39

Using Video software
Sending video clips via e-mail
If you shoot a video clip in a low resolution format, its size will be small allowing you to send the video clip
by e-mail.
To send video clips via e-mail, proceed as follows:
1 Launch Smart Capture.
2 Click Movie Player.
3 Click Mail.
The Compression Settings window appears.
4 Choose the compression rate by moving the slider.
5 Click Start Compression.
When compression is completed, you will be asked to attach the file to your e-mail.
6 Accept and send the e-mail.
About the software on your Sony notebook
nN
38
Page 40

Managing audio files with SonicStage
Managing audio files with SonicStage
SonicStage lets you play and record audio CDs and import digital audio files while maintaining the copyright
information of the contents. When you record an audio CD with SonicStage, it is encoded in ATRAC3 format
onto you computer’s hard drive. The imported data can be played on your computer or transferred to
external devices or media. SonicStage converts your existing MP3, WMA and WAV format audio files into
ATRAC3 format.
To open SonicStage, proceed as follows:
1 Click the Start button on the Windows
2 Point to All Programs, SonicStage and then click SonicStage.
3 The Please confirm setup dialog box appears.
You can set SonicStage as the default application for playing audio CDs by selecting the appropriate
check box.
About the software on your Sony notebook
4 Click Yes.
The SonicStage main window appears.
®
taskbar.
nN
39
Page 41

Managing audio files with SonicStage
About the software on your Sony notebook
1 Feature tabs Changes the screen view according to the selected feature.
2 Player control buttons Controls playback functions, such as play, pause, stop, fast-forward and reverse.
3 Playlist drop-down list Displays available playlists and audio files of the current feature tab.
4 File tree view Displays the folders available on your computer.
5 Internet address drop-
down list
6 File list view Displays the contents of the folder selected in the file tree view.
7 Tutorial tab Opens and closes the Tutorial feature.
✍ The CDDB
®
(Compact Disc Database) Music Recognition Service registration wizard enables you to register with CDDB. You need Internet access on
your computer to register and use this service. For more information regarding CDDB registration, click the Help button.
nN
40
Displays Internet addresses, if available. You can click the Go to URL link
button to immediately connect to web sites.
Page 42

Managing audio files with SonicStage
Recording a CD
You can record songs from audio CDs and import them to playlists in SonicStage.
To record a CD, proceed as follows:
1 Insert an audio CD into your system’s optical disc drive.
2 Click the CD tab.
3 Use the drop-down lists to select the file format.
4 You can select specific tracks on your CD by deselecting the check boxes from the tracks you do not want
to record. You can clear all selected tracks by selecting the empty Select All check box, and then
selecting the tracks you want to record.
5 Click the Rec to Jukebox button to begin recording. When the recording is finished, the new
playlist appears in the File tree view of the Playlist window. You can move to this feature view by
clicking the Playlist tab.
About the software on your Sony notebook
✍ When you record from an audio CD on your optical disc drive for the first time, the CD Drive Optimization dialog box appears.
Click Start to verify your optical disc drive. Once the verification is performed, recording begins.
You can display the name of the CD and its songs by clicking the CD Info button. You can also register with CDDB here.
nN
41
Page 43

Managing audio files with SonicStage
Transferring songs (check in/out)
You can transfer songs between the playlists on your SonicStage software and external devices or media
(for example, Memory Stick™ Walkman, Network Walkman, CD-RW). For more information on using your
external devices or media, see the documentation that came with the product.
These instructions are for using the check in/out 1-step method. For information on using the 2-step method,
read the SonicStage online Help-files.
Checking out songs
Checking out songs means transferring audio files from a computer to an external device (for example, a
portable player).
To check out songs, proceed as follows:
1 Connect the external device or insert the media (for example, a MagicGate Memory Stick™) into your
computer.
About the software on your Sony notebook
2 Click the Transfer tab to display the Transfer window.
Your computer automatically recognizes the connected external device or media and lists the content
information in a new panel on the right side of the Transfer window.
3 Select the playlist containing the song to check out.
The songs in the playlist are shown in the Playlist view panel located in the center of the Transfer
window.
4 From the Playlist view panel, select the song to be checked out. To check out more than one song at a
time, hold down the <Ctrl> key and select additional songs.
5 Click Check Out or drag the song to the appropriate position in the song list of the external device or
media.
The checking out begins.
✍ SonicStage does not work with the blue Memory Sticks™. For more information, read the OpenMG manual.
To cancel Check Out, click Stop, or click Cancel in the processing dialog box that is displayed during the Check Out process.
nN
42
Page 44

Managing audio files with SonicStage
Checking in songs
After checking out audio files, you can transfer those files back to an external device or to the hard drive.
This is what we call checking in.
The songs that you transfer like this can only be checked in to the hard drive of the same computer from
which the songs were checked out.
To check in songs, proceed as follows:
1 Connect the external device or insert the MagicGate Memory Stick™ into your computer.
2 Click the Transfer tab to display the Transfer window.
Your computer automatically recognizes the connected external device or media and lists the content
information in a new panel on the right side of the Transfer window.
3 Select the song to be checked in from the song list of the external device or media. To check in more than
one song at a time, hold down the <Ctrl> key and click the additional songs.
About the software on your Sony notebook
4 Click Check In, or drag the song(s) to the Playlist view panel. If you want to check in all the songs in
the external device or media, click In All.
Check In begins.
✍ To cancel Check In, click Stop, or click Cancel in the Processing dialog box that is displayed during the Check In process.
nN
43
Page 45

Managing audio files with SonicStage
Additional features
❑ SonicStage Tutorial – The features of SonicStage are described in the Tutorial. The user-friendly
interface guides you directly through the SonicStage features.
❑ SonicStage Backup Tool – You can back up and restore all the music, graphics and information data
managed by SonicStage. You must be connected to the Internet to use the SonicStage Backup Tool.
❑ Import audio files in various formats – You can import audio files with various formats, such as MP3
or WAV standards. You can also import audio files that comply with the Microsoft
Technologies (WMT) standard, identified by ASF or WMA extensions. Manage your audio files through
the Playlist feature of SonicStage.
❑ Manage imported songs on the Playlist – Additional features are available when you register your
imported songs through the Playlist feature of SonicStage. You can manage your music by creating
your own list of songs categorized by genre or artist, displaying your song list in the Playlist feature,
and arranging your songs in a customized order using the Playlist folders. Edit your music by combining
About the software on your Sony notebook
multiples songs into a single one, or divide one song into two, by using the Combine and Divide
features.
❑ Simple mode – The main SonicStage window in Simple mode is a smaller, compact version of the
Full mode view. This can be useful when you want to listen to songs with SonicStage while using other
software, or whenever you feel that Full mode view is intrusive. The design of the main SonicStage
window in simple mode can be changed by selecting a new “skin”, which enhances the appearance of
the window. The Simple mode feature enables you to perform playback operations only.
nN
44
®
Windows Media™
Page 46

Using DigitalPrint
Using DigitalPrint
DigitalPrint is designed to help you get the most enjoyment out of your photographs taken with a digital
camera.
With DigitalPrint, you can easily load photos onto your computer, create photo albums, decorate your
photos, print them and even make labels for your favourite storage media.
DigitalPrint includes the following five tools. All these tools can be launched from the DigitalPrint Launcher.
❑ PhotoCapture: Load photos from a digital camera or a Memory Stick™ onto your computer.
❑ PhotoCollection: View and print photos that you have loaded onto your computer.
❑ PhotoDecor: Draw on and add pictures and stamps to photos that you have loaded into your computer.
❑ PhotoAlbum: Create photo albums using the photos that you have loaded into your computer.
❑ LabelMaker: Create labels for CDs, MDs, videotapes, etc.
About the software on your Sony notebook
nN
45
Page 47

Using DigitalPrint
To launch DigitalPrint, proceed as follows:
1 In the Start menu, select All Programs, DigitalPrint, and then DigitalPrint.
About the software on your Sony notebook
2 Click Import to launch PhotoCapture
nN
46
DigitalPrint Launcher appears.
or click Photo to launch PhotoCollection
or click Edit to launch PhotoDecor
or click Album to launch PhotoAlbum
or click Label to launch LabelMaker.
Page 48

Using DigitalPrint
Importing photos
Use PhotoCapture to load images that are stored on a digital camera or a Memory Stick™ onto your
computer.
PhotoCapture can automatically recognize the digital camera or Memory Stick™ that is connected to the
computer.
Once photos are loaded into your computer, they can be used to create original works (photo albums and
labels) with PhotoAlbum and LabelMaker. You can also print photos with PhotoCollection.
PhotoCapture can load photos from the following digital cameras and storage devices:
❑ USB storage class-compatible digital cameras
❑ TWAIN-compatible digital cameras
❑ Memory Stick™.
About the software on your Sony notebook
nN
47
Page 49

Using DigitalPrint
To import photos, proceed as follows:
1 Connect a digital camera or a Memory Stick™ that contains the images you want to transfer to your
2 Open DigitalPrint Launcher and simply click the Import icon.
3 Depending on the device connected to
4 In either case, click the icon to load all the
About the software on your Sony notebook
nN
48
computer.
You can also launch PhotoCapture from the Start menu by clicking All Programs, DigitalPrint, Tool ,
PhotoCapture.
The PhotoCapture window appears.
your computer, you can click a Photo
folder icon or a camera icon.
photos of the devices.
Enter a name for your photo folder in the
Enter Photo Name dialog box and click
OK.
The images are loaded into your
computer and appear in the Imported
Photos window. You can now use the
pictures for editing, printing, creating CD
labels, etc.
Page 50

Using DigitalPrint
Printing photos
With PhotoCollection, printing photos at home is just as easy as asking your local photo shop to develop your
photos or make reprints.
Photos stored in a folder can be printed as a group. Since you can also specify the number of prints to be
made of each photo, you only need to run one printing job (instead of printing each photo separately, one
at a time), even if you want to give copies to a lot of people.
To print photos, proceed as follows:
1 Click the Photo icon in the DigitalPrint Launcher.
2 Click Register Folder to register a photo
About the software on your Sony notebook
3 To print photos from the folder, simply click
✍ For more information about the functionalities of
nN
49
PhotoCollection can also be launched directly from the Start menu by selecting All Programs,
DigitalPrint, Tool, PhotoCollection.
The PhotoCollection window appears.
folder (load the photos into the computer)
and follow the onscreen instructions or
select a folder in which photos are stored
and click the OK button.
the PhotoPrint button.
You can specify the number of prints and
select the paper.
PhotoCollection, refer to the online help files.
Page 51

Using DigitalPrint
Decorating photos
PhotoDecor allows you to decorate digital photos by adding lines, graphics, text, and stamps to digital
photos.
You can use stamps and a variety of pen patterns to decorate digital photos and create colourful and original
works of art through simple operations.
To decorate photos, proceed as follows:
1 Open PhotoDecor from the DigitalPrint Launcher by clicking the Edit icon.
2 Select a photo folder that contains the
About the software on your Sony notebook
3 Use the Pen, Auto Shape, Text , Clip
4 Print or save your edited picture by
✍ For more information on the use of PhotoDecor, refer to
nN
50
You can also launch PhotoDecor directly from the Start menu by selecting All Programs, DigitalPrint,
Too l, PhotoDecor.
The PhotoDecor window appears.
images you wish to decorate and
select one photo.
Art or Stamp Tool Palette to edit
your image.
clicking the Print or Save icon.
the online help.
Page 52

Using DigitalPrint
Creating a photo album
With PhotoAlbum, you can create and print albums of photos taken with a digital camera or photos you
have loaded on your computer.
PhotoAlbum is very simple to use. It includes many useful design templates. Use these templates to easily
create an attractive album even if you have little design experience.
You can also print your album to create wonderful photo collections, adding a whole new dimension of
enjoyment to digital camera photography.
To create an album, proceed as follows:
1 Open PhotoAlbum from the DigitalPrint
About the software on your Sony notebook
2 Click the Create New Album button and
3 To select your images, click the List button in
4 Select a design from the Select Design window by clicking it.
nN
51
Launcher by clicking the Album icon.
You can also launch PhotoAlbum directly
from the Start menu by selecting All
Programs, DigitalPrint, Too l, and
PhotoAlbum.
The PhotoAlbum Initial window appears.
register a photo folder or select an existing
one.
You can select all or only some of the photos
in the album.
the photo folder and select the images in the
Photo List dialog box. Then click the Create
the album with the selected photo(s) button.
The Select Design window appears.
The Select Layout window appears.
Page 53

Using DigitalPrint
5 Select a photo layout by clicking it.
6 Use the album menu to decorate the existing albums or to print them.
✍ For more information on the use of PhotoAlbum, refer to the online help.
About the software on your Sony notebook
nN
52
The album is created and the album menu appears.
You can either preview the album or change the layout, or design.
Page 54

Using DigitalPrint
Creating labels
LabelMaker is an easy-to-use label-making software.
Use the design templates to make beautifully designed labels.
To create labels, proceed as follows:
1 Open LabelMaker from the DigitalPrint
2 In the list on the side of the screen, click the
About the software on your Sony notebook
3 Click the paper you want to use.
4 Click the design you wish to use.
5 In the Edit window, edit the label by using the Pen, Auto Shape, Tex t, Clip Art or Image Tool Palette.
6 Save or print your label by clicking the Save or Print button.
✍ For more information on the use of LabelMaker, refer to the online help.
nN
53
Launcher by clicking the Label icon.
It is also possible to launch LabelMaker
directly from the Start menu by selecting All
Programs, DigitalPrint, Too l, LabelMaker.
The LabelMaker window appears.
medium for which you want to create a label
or edit an existing label (CDs, MDs, VHS
cassettes, etc.).
The Select Paper window appears.
The Select Design window appears.
The Song List (if you selected a music medium like CD or MD) or the Edit window appears.
Edit the album and track names in the Song List window.
Create a track name list when you are creating a label for a music medium, such as a CD. Then click the
Input to the label button.
LabelMaker can be launched and used in conjunction with other Sony applications such as SonicStage.
Page 55

Customizing your computer
Customizing your computer
The following sections briefly describe how to change the main settings of your computer. Among other
things, you will learn how to prepare your modem for use, how to use and customize the look of your Sony
software and utilities, etc.
❑ Setting up your language (page 54)
❑ Setting up your notebook with Sony Notebook Setup (page 56)
❑ Managing power with PowerPanel (page 57)
❑ Starting your favourite software with Jog Dial™ (page 63)
❑ Selecting display modes (page 65)
❑ Configuring your modem (page 66)
❑ Changing your windows design with the UI Design Selector program (page 68)
❑ Setting a Sony wallpaper (page 69)
About the software on your Sony notebook
Setting up your language
It is important that you select the correct keyboard settings during the Windows Setup.
To select the correct keyboard settings during Windows Setup, proceed as follows:
1 At first boot, click Next then Next again in the Windows XP Setup Wizard window.
The Select Your System Settings dialog box appears.
2 Fill in the answers to these three questions:
❑ I live the closest to this region.
❑ I type mostly in this language.
❑ I use this type of keyboard.
3 In the End User License Agreement, accept the License Agreement and click Next.
4 Continue your Windows
®
setup until it is finished.
nN
54
Page 56

Customizing your computer
You can also change the country and language settings into your language as soon as Windows
restarted.
To change the country and language settings for your user account, proceed as follows:
1 Click Start and then Control Panel.
2 In the Control Panel window, click Date, Time, Language, and Regional Options.
3 Click the Regional and Language Options icon.
The Regional and Language Options window appears.
4 In the Regional Options tab, select your language from the Standards and formats drop-down
menu.
5 To change the language of the menus and dialog boxes, select the Languages tab of the Regional and
Language Options window and select your language from the drop-down list.
6 Click Apply to apply the changes.
You are prompted to log off and log on again. Only then will the changes take effect.
About the software on your Sony notebook
7 Click Start, and select Log Off.
8 Click Log Off in the Log Off Windows window.
If necessary, enter your password to log on again.
All the menus, help files and icons are then displayed in your selected language. However, some parts
may remain in English.
9 Repeat this procedure for the other user accounts, if required.
nN
55
®
has been
Page 57

Customizing your computer
Setting up your notebook with Sony Notebook Setup
The Sony Notebook Setup utility allows you to consult system information, specify preferences for system
behaviour, and set up password protection for your VAIO notebook.
To use Sony Notebook Setup, proceed as follows:
1 Click the Start button on the Windows
2 In All Programs, select Sony Notebook Setup and then click Sony Notebook Setup.
The Sony Notebook Setup dialog box appears.
About the software on your Sony notebook
nN
®
taskbar.
Tab De scriptio n
About This
Computer
Initial
Setting
Touchpad When you connect an optional mouse to your computer,
Power On
Password
Bass Boost Activate/Deactivate the Bass Boost setting for the
Displays system information, including memory capacity,
serial number, and BIOS version.
Select the drive and device order you want to use for
loading the operating system. You can specify the hard
drive as well as other drives inserted into your computer.
You can change the volume of the sounds while the
operating system is loading.
you can disable your touchpad. You can also customize
your mouse settings by means of the mouse utility in this
tab.
Set the password to secure your computer.
If you use this option, remember the password at all times.
If you forget the password, you cannot change this setting
anymore, and you will not be able to start your computer.
headphones port.
56
Page 58

Customizing your computer
3 Select the tab for the item you want to change.
4 Once finished, click OK.
The item has been changed.
✍ For more information about each option, click Help in the Sony Notebook Setup screen to display the help file.
Managing power with PowerPanel
The PowerPanel utility controls the power management of your notebook and provides key information
about system activity and battery life. The automatic power management selects the most advantageous
profiles, or lets you customize the profiles you choose, according to your own needs, with the goal of
extended battery life.
PowerPanel has the following features:
❑ Automatic Profile Selection (APS) based on the currently active application;
❑ Ability to select specific Power Profiles manually from the menu;
About the software on your Sony notebook
❑ Ability to edit and create new profiles;
❑ Ability to display detailed battery information;
❑ CPU performance monitoring tool;
❑ It works in harmony with your Windows settings.
Activating PowerPanel
nN
57
When you start the computer, the PowerPanel icon appears in the system tray by default.
If the computer is running on AC power, you see PowerPanel’s Performance icon: .
If the computer is running on battery power, the Battery Life icon is displayed: .
To see the CPU state and the current power profile, simply point to the icon. The CPU state and current
power profile will be displayed in a tooltip.
Page 59

Customizing your computer
To change profiles, proceed as follows:
1 Right-click the PowerPanel icon in the taskbar and select Profiles.
2 In the Profiles menu, select a profile.
The appropriate power settings are activated.
✍ When you use the battery pack as power source, your system selects the Maximum Battery Life power management profile by default. If you select
a different power management profile while using battery power, the same profile will automatically be selected the next time you use the battery
pack to power your computer.
Activating power management profiles
PowerPanel provides several predefined power management profiles. Each profile consists of a group of
power management settings that are designed to meet specific power management goals, ranging from
maximum power management to no power management.
Main preset profiles
About the software on your Sony notebook
Icon Description Icon Description
Maximum Battery Life – Provides power
saving features to give you maximum battery life
and good performance. It reduces the brightness
of the display and puts the system into Standby
mode after a specified time period.
Ultimate Battery Life – Provides power saving
features to give you maximum battery life and
good performance.
Maximum Performance – Provides the best
system performance while still conserving power.
AC Power – The power management state when
AC power is in use. PowerPanel automatically
loads the AC profile unless you disable this
feature.
Power Management Off – Turns off all power
management features such as Standby and
Hibernate modes.
nN
58
Page 60

Customizing your computer
Other preset profiles
Icon Description
Word Processing – Optimizes power management with longer timeouts on
the hard disk and display screen. You can also establish settings for LCD
(Video) Standby, Hard Disk Standby, and Standby to optimize power
management for your system.
Spreadsheet – Reduces the LCD brightness to 'medium', as your software
does not require higher performance.
Presentation – Keeps the display on at all times while it conserves power.
This option is ideal for slideshow presentations. You can establish settings for
LCD (Video) Standby, Hard Disk Standby, and Standby to optimize
power management for your system.
Communications – Extends battery life by initiating a quick display time-
About the software on your Sony notebook
out. You can also establish settings for LCD (Video) Standby, Hard Disk
Standby, and Standby to optimize power management for your system.
Games – Disables the display and the Hard Disk timer.
DVD – Optimizes performance and power requirements for DVD usage.
nN
59
Camera – Optimizes performance and power requirements for camera
usage.
Automatic Profile Selection - Analyses the performance of each
application you choose and matches the profiles to its needs.
Page 61

Customizing your computer
Selecting automatic profiles
A power profile is a set of timer values for a variety of system devices. PowerPanel automatically selects the
profile associated with the application you are using and changes profiles as you switch between
applications.
Power management lets your system enter energy saving modes by levelling some energy-consuming
parameters, such as LCD brightness, or hard disk activity.
To select automatic profiles, proceed as follows:
1 Right-click the PowerPanel icon in the taskbar.
2 Select Profiles.
3 Select Automatic Profile Selection.
Displaying detailed battery information
You can display detailed information of your computer's battery.
About the software on your Sony notebook
To display battery information, proceed as follows:
1 Double-click the PowerPanel icon in the taskbar.
The Battery Information dialog box appears.
2 Select the Battery tab.
This tab contains information such as the estimated time to empty and time to full charge.
nN
60
Battery icon Battery status Battery icon Battery status
discharging: the icon is
blue
fully charged: the icon is
completely blue with an AC
power plug
charging: the icon is blue
with a red clip attached to
the terminal
no battery: the icon is blue
with a yellow cross over it
Page 62

Customizing your computer
Displaying CPU information
You can also view the level of performance of your notebook with the CPU Controls.
To do so, you just have to move your cursor over the CPU icon in your taskbar.
Icon Description
Performance:
Battery Life:
nN
61
This control helps to maximize the CPU clock speed.
The computer can then be used at its maximum
performance. This will be the default icon when the
computer is connected to the mains supply.
This control helps to reduce the notebook’s power
consumption by decreasing the CPU clock speed and
the power voltage. This will be the default icon when
the computer is disconnected from the mains supply,
using the battery.
About the software on your Sony notebook
✍ For more detailed information on what you can do with PowerPanel, refer to the Help files of PowerPanel.
Editing a power profile
To edit the power management settings of a power profile, proceed as follows:
1 Right-click the CPU icon in the taskbar and select Edit/Create Profiles from the menu.
The Profile Editor window appears.
2 Click the profile you want to edit on the left of the screen.
3 Double-click the power profile property (CPU Control, Standby or Hibernate timer ...) you want to modify
on the right of the screen.
An option list or a dialog box will appear. Select an option.
4 Click the File menu and then click Save.
Page 63

Customizing your computer
Creating a power profile
To create a power profile, proceed as follows:
1 Right-click the CPU icon in the taskbar and select Edit/Create Profiles from the menu.
The Profile Editor window appears.
2 Select New from the File menu.
3 A New Power Management Profile appears.
To rename the profile, click right on New Power Management Profile and select Rename in the
context menu.
4 Select the new power management setting you would like for the device.
5 Click the File menu and then click Save.
About the software on your Sony notebook
nN
62
Page 64

Customizing your computer
Starting your favourite software with Jog Dial™
The VAIO Action Setup software enables you to start your favourite software with the Jog Dial™.
This section briefly describes how to use VAIO Action Setup. You can also refer to the VAIO Action Setup
Help for more detailed information.
About the software on your Sony notebook
nN
63
Page 65

Customizing your computer
Defining Jog Dial™ settings
You can select the rotation direction, allocate functions to software that does not support the Jog Dial™,
or select the sound effects while using the Jog Dial™, etc.
1 Right-click the Jog Dial™ icon in the taskbar.
2 Select Jog Dial Setup (VAIO Action Setup) from the menu.
The VAIO Action Setup window appears.
3 In the Advanced Setting 1 tab, set the Jog Dial™ scroll direction and the turning direction of the Jog
Dial™ window by selecting the Upward or Downward option buttons.
4 In the Advanced Setting 2 tab, define whether the window should only be shown while using the Jog
Dial™. Select the Show Jog Dial only when in use option button, if the window should be shown only
while using the Jog Dial™ and enter the display time in the box underneath. Do not select the check box
to see the window at all times.
About the software on your Sony notebook
5 In the Sound Setting tab, define the sound effect associated with the Jog Dial™ functionality. Select
the Use sound when turning check box to hear a sound when turning the Jog Dial™ and enter the
path and file name of the sound in the text box underneath. Select the Use sound when pressing
check box to hear a sound when pressing the Jog Dial™ and enter the path and file name of the sound
in the text box underneath.
6 In the Application List tab, allocate functions to software that does not support the Jog Dial™. Click
the Create Folder button to define a new software folder. Click the Add, Replace, Delete buttons to
add, replace or delete a function in one of the software folders.
nN
64
Modifying the Jog Dial™ application list
Click Jog Dial(J) in the left part of the dialog box, and then select a folder or application you want to modify
in the Application List. For more information on how to add, modify or delete elements in the Jog Dial
List, read the VAIO Action Setup online help.
Page 66

Customizing your computer
Selecting display modes
This computer uses the Intel® video controller. You can select which display is used when the computer is
connected to an external display. When you connect an external display, you can switch the display between
your computer's LCD and the external monitor.
Before you can select a display, you need to shut down your computer, connect the external display to your
computer, and restart.
To select a display, proceed as follows:
1 Click the Start button and then point to Control Panel.
The Control Panel appears.
2 Click Appearance and Themes, then click Display.
The Display Properties dialog box appears.
3 Go to the Settings tab and click Advanced.
The Intel
About the software on your Sony notebook
4 On the Intel® Graphics Technology tab, click Graphics Properties....
5 Select the Devices tab.
6 Select the type of display you want (monitor/notebook/ Dual View Twin – monitor and notebook at the
same time).
7 Click Apply.
✍ You may not be able to display the computer LCD screen and an external display or a projector at the same time, depending on the types of computer
displays and projectors you are using.
Turn on the computer after you turned off the peripheral devices.
®
82815 Graphics Controller Properties dialog box appears.
nN
65
Page 67

Customizing your computer
Configuring your modem
Before you can start using your internal modem, or each time you use your modem while travelling, make
sure that the country of the active location defined in the Phone and Modem Options dialog box matches
the country you are dialing from.
You may notice a Country Selector tab under your current modem driver options. As the Country
Selector tab is not a constant feature, do not use this tab to change the country settings. Only the following
procedure is reliable.
To change your modem country settings, proceed as follows:
1 Click Start and then Control Panel.
2 Click Printers and Other Hardware, then Phone and Modem Options.
The Phone and Modem Options dialog box appears.
3 Select your location on the Dialing Rules tab.
4 Click the Edit button to change the current configuration.
About the software on your Sony notebook
The Edit Location dialog box appears.
Or
Click the New button to configure your modem.
The New Location dialog box appears.
5 Check the country/region settings, and make sure they match the place you are dialing from.
6 If you modified your location settings, click Apply, and then OK.
The Phone and Modem Options dialog box appears again.
7 Check that your modem is listed in the Modems tab.
If your modem is not listed, click Add and follow the wizard.
8 Click Apply/OK.
Your modem is configured.
✍ Before applying new country settings, please make sure your phone line is disconnected from your VAIO computer.
nN
66
Page 68

Customizing your computer
Updating the modem driver
If you need to update the modem driver for any reason, proceed as follows:
1 Click the Start button and open Control Panel.
The Control Panel window appears.
2 Click the Printers and Other Hardware icon.
The Printers and Other Hardware window appears.
3 Click the Phone and Modem Options icon.
The Phone and Modem Options dialog box appears.
4 Click the Modems tab and then click Properties to view the properties of your modem.
The Modem Properties dialog box appears.
5 On the Driver tab, click Update driver.
The Hardware Update Wizard window appears.
About the software on your Sony notebook
Follow the instructions that appear on your screen. You can perform a Windows
or point to the driver's location yourself.
nN
67
®
search for the driver,
Page 69

Customizing your computer
Changing your windows design with the UI Design Selector program
You can change the window design of Sony software compatible with the UI Design Selector program.
To change the window design using UI Design Selector, proceed as follows:
1 Click Start, and then Control Panel.
If you do not see UI Design Selector, click Switch to Classic View on the left side.
OR click Other Control Panel Options on the left side.
2 Double-click UI Design Selector.
The UI Design Selector dialog box appears.
3 Click << or >> and select the design you like.
4 Click Apply.
The UI Design Selector window design changes, to give you a preview of the design you chose for the
About the software on your Sony notebook
Sony software.
5 To try another design, click << or >>.
6 Click OK once you are satisfied with your choice.
The UI Design Selector dialog box disappears and changes the window design of Sony software as you
selected.
nN
68
Page 70

Customizing your computer
Setting a Sony wallpaper
Your Sony VAIO computer offers you, among many other features, a choice of wallpapers.
You can change the wallpaper, the background of your desktop, as many times as you like. There are several
VAIO-specific wallpapers to choose from.
To set another VAIO wallpaper, proceed as follows:
1 Go to Control Panel, click Appearance and Themes, then the Display icon.
The Display Properties dialog box appears.
2 Click the Desktop tab.
A list of Windows and VAIO wallpapers is displayed.
3 Select a wallpaper in the Background list.
You can see a preview of this wallpaper in the monitor above the Background list.
4 Adjust the position of the wallpaper with the Position drop-down list.
About the software on your Sony notebook
5 Click Apply when you have found the appropriate wallpaper.
6 Click OK to close the Display Properties dialog box.
The wallpaper is applied to your computer.
✍ A higher screen resolution reduces the size of items on your screen and increases the relative space on your desktop.
You may not be able to increase the screen resolution above a certain level. Your monitor and video adapters, for example, determine to which extend
you can change the resolution.
nN
69
Page 71

Installing and updating applications
Installing and updating applications
This section explains how to install, run or uninstall a software application.
Furthermore, you will learn how to download the latest updates from our website.
❑ Installing software (page 71)
❑ Changing or removing software (page 72)
❑ Uninstalling software (page 72)
❑ Downloading software (page 74)
About the software on your Sony notebook
nN
70
Page 72

Installing and updating applications
Installing software
Before installing the applications:
❑ Install and connect a hardware device, if necessary (see the Managing drivers (page 75) section);
❑ Quit all Windows
To install an application, proceed as follows:
1 Click Start and then Control Panel.
2 Open Add or Remove Programs in Control Panel.
The Add or Remove Programs dialog box appears.
3 Click Add New Programs, and then click CD or Floppy.
The Install Program From Floppy Disk or CD-ROM window appears.
4 Insert the first installation floppy disk or CD-ROM and click Next.
The Run Installation Program appears.
5 Click Browse… to find the installation program.
About the software on your Sony notebook
The Browse window appears.
6 Select the installation program and click Open.
The path of the installation program appears in Open: text box.
7 Click Finish.
A License Agreement dialog box might appear.
8 Read the agreement and click Yes to accept.
You are asked to define the location where you want to install the software.
9 Click Browse to select the folder and click Next.
If necessary, select the type of installation you wish and click Next.
The software installation begins.
Make sure to select Yes, I want to restart my computer now if you are asked to.
10 Click Finish.
Installation is complete and your computer restarts.
✍ When using Add or Remove Programs, you can only install programs that were written for Windows
®
programs.
®
operating systems.
nN
71
Page 73

Installing and updating applications
Changing or removing software
You can at all times remove or change a software application.
To change or remove a software, proceed as follows:
1 Click Start, click Control Panel, and then click Add or Remove Programs.
2 Select the software you want to change or remove.
❑ To change a program, click Change/Remove or Change.
❑ To remove a program, click Change/Remove or Remove.
!
When you click Change or Remove, some programs may be removed without any further warning.
✍ You can sort programs by selecting different options in Sort by.
Add or Remove Programs will only remove programs that were written for Windows
documentation to see if other files (such as .ini files) should be removed.
nN
®
operating systems. For other programs, check the
72
About the software on your Sony notebook
Uninstalling software
Before proceeding, close the application you want to uninstall.
To uninstall software, proceed as follows:
1 From the Start menu, click Control Panel.
The Control Panel window appears.
2 Double-click the Add/Remove Programs icon.
The Add/Remove Programs dialog box appears.
3 Select the software you wish to uninstall from the list of currently installed programs, then click Change/
Remove.
4 Select Remove, and then click Next.
The Confirm File Deletion dialog box appears.
Page 74

Installing and updating applications
5 Click OK.
If the Locked file detected dialog box appears, click Reboot. The computer restarts once uninstallation
is completed and all previously used files are deleted.
If the Shared file detected dialog box appears, it is recommended that you click No to keep shared
files.
6 Click Close.
The software is uninstalled.
Caution
Windows® File protection
Installing a program might overwrite shared system files such as dynamic-link libraries (DLL files)* and
executable files (EXE files). When system files are overwritten, system performance becomes unpredictable,
programs behave erratically, and the operating system can fail.
About the software on your Sony notebook
Never delete files with the following extensions: SYS, DLL, OCX, TTF, or FON.
In Windows
DLL, OCX, TTF, FON, and EXE files. Windows File Protection runs in the background and protects all files
installed by the Windows Setup program.
Windows File Protection detects attempts by other programs to replace or move a protected system file.
It also checks the file's digital signature.
* This is an operating system feature that allows executable routines (generally serving a specific function or set of functions) to be
stored separately as files with DLL extensions. These routines are loaded only when needed by the program that calls them.
®
XP, Windows File Protection prevents the replacement of protected system files such as SYS,
nN
73
File Signature verification
When you install a new application on your computer, you might overwrite system files and device driver
files with unsigned or incompatible versions, which provokes system instability.
Page 75

Installing and updating applications
The system files and device driver files provided with Windows
indicates that the files are original, unaltered system files or that they have been approved by Microsoft
for use with Windows
Downloading software
Please note it is possible to download the latest upgrades of software for your computer on our website.
Just click the following link to access it: www.vaio-link.com
To download the latest upgrades, proceed as follows:
1 Go to www.vaio-link.com
2 Fill in the two codes and click Enter Site.
3 Select Downloads and follow the procedure.
A list of available downloads appears.
About the software on your Sony notebook
4 Choose the appropriate upgrade and follow the online instructions to download it.
✍ To install your application, see the Installing software (page 71) section.
nN
74
®
XP have a Microsoft digital signature, which
®
.
and choose your language.
®
Page 76

Managing drivers
About the software on your Sony notebook
nN
75
Managing drivers
A driver is a software enabling you to use hardware devices. For example, in order for you to be able to use
a printer, you must first install its driver. Many drivers, such as the mouse driver, come with the operating
system.
This section explains how to install, check, update or uninstall a driver.
The Windows
Finally, you will learn how to download the latest drivers from our site.
❑ Installing a driver (page 76)
❑ Checking the driver's installation (page 77)
❑ Updating a driver (page 78)
❑ Uninstalling a driver (page 79)
❑ Restoring drivers (page 80)
❑ Downloading drivers (page 82)
®
XP Rollback feature is also explained.
Page 77

Managing drivers
About the software on your Sony notebook
nN
76
Installing a driver
To install a driver, proceed as follows:
1 Insert the application CD-ROM into the CD-ROM drive (or the disk or the CD-ROM accompanying the
device you want to configure).
2 Connect the device that needs a driver, to your computer.
The Found New Hardware Wizard screen appears.
3 Select Specify a location, then click Next.
4 When installing a driver from the provided CD-ROM (or disk) by using a CD-ROM (or disk) drive
connected to the computer, select the Drivers folder on the CD-ROM (or disk) drive.
5 When installing a driver after having copied the contents of the provided CD-ROM (or disk) to your hard
disk, browse to the appropriate subdirectory containing the driver. The subdirectory should be found in
the folder you copied from the CD-ROM (or disk).
6 Click OK to begin the search procedure.
7 Click Next to install the driver.
A new window appears when the driver has been installed.
8 Click Finish.
You may be asked to restart your machine.
9 Click Yes.
The driver is installed.
✍ To install your device driver, you must be logged on to your computer with an administrator account.
Page 78

Managing drivers
About the software on your Sony notebook
nN
77
Checking the driver's installation
When the computer restarts, verify that the device is working properly.
To verify the driver’s installation, proceed as follows:
1 From the Start menu, click Control Panel.
The Control Panel window appears.
2 Double-click the System icon.
The System dialog box appears.
If you do not see the System icon, click Switch to Classic View on the left side.
3 Click the Hardware tab, then click Device Manager.
4 Double-click the option corresponding to the device you installed, then double-click your device.
The Properties dialog box appears.
5 Make sure that the This device is working properly message is displayed under Device status.
6 Click OK.
Close all the opened windows, your device is ready for use.
The device is not working properly in the following cases:
❑ Your device is shown in Device Manager with a yellow question or exclamation mark.
Right-click your device and click Uninstall. Then repeat from step 2 in Installing a driver (page 76).
❑ Double-clicking the category of your device in the device manager list does not display your device.
You have to remove your device. Please refer to Uninstalling a driver (page 79) to remove it. Then
repeat from step 2 in Installing a driver (page 76).
❑ Double-clicking Other devices displays your device.
You have to right-click your device, then click Uninstall. Repeat from step 2 in Installing a driver
(page 76).
❑ If the This device is working properly message is not displayed, the device is not working properly.
Click OK to close the Properties dialog box, then reinstall the driver as follows:
Page 79

Managing drivers
About the software on your Sony notebook
nN
78
❑ Right-click Uninstall.
❑ When the Confirm Device Removal dialog box appears, click OK.
❑ Click Yes and restart the computer.
❑ When the computer restarts, repeat from step 2 in Installing a driver (page 76).
❑ If your device is not displayed in the Properties dialog box, the device is not working properly.
Repeat steps 1 through 4 in the previous sections to verify the driver’s installation. Click your device, then
click Uninstall to remove the driver. Click Yes to restart the computer. When the computer restarts,
repeat from step 2 in Installing a driver (page 76).
Updating a driver
To update the driver, proceed as follows:
1 Click Start on the taskbar.
2 Click Control Panel.
3 Click the Printers and Other Hardware icon.
And then click the device you want to revert.
4 On the Hardware tab, click Properties.
5 On the Driver tab, click Update driver.
6 Follow the instructions that appear on your screen. You can have Windows search for the driver, or point
to the driver's location yourself.
Or:
1 Click Start on the taskbar.
2 Click My computer from the menu.
3 Click View system information on the left of the window.
4 Click the Hardware tab, then click Device Manager.
Page 80

Managing drivers
About the software on your Sony notebook
nN
79
5 Double-click the option corresponding to the device you installed, then double-click your device.
The Properties dialog box appears.
6 Click the Driver tab.
7 Click Update driver.
The driver is updated.
✍ To update your device driver, you must be logged on to your computer with an administrator account.
Uninstalling a driver
Leave the device connected to your computer while uninstalling the driver.
To uninstall the driver, proceed as follows:
1 Click Start on the taskbar.
2 Click Control Panel.
3 Click the Printers and Other Hardware icon.
And then click the device you want to revert.
4 On the Hardware tab, click Properties.
5 On the Driver tab, click Uninstall.
6 If you are prompted to restart your computer, click Yes .
The Uninstall button is unavailable if removing the driver would make your device unusable.
Or:
1 Click Start on the taskbar.
2 Click My computer from the menu.
3 Click View system information on the left of the window.
4 Click the Hardware tab, then click Device Manager.
Page 81

Managing drivers
About the software on your Sony notebook
nN
80
5 Double-click the option corresponding to the device you installed, then double-click your device.
The Properties dialog box appears.
6 Click the Driver tab.
7 Click Uninstall.
The driver is uninstalled.
✍ To uninstall your device driver, you must be logged on to your computer with an owner account.
Restoring drivers
System Restore is a feature of Microsoft® Windows® XP that restores your computer to a previous state, if a
problem occurs, without losing your personal data files.
System Restore monitors changes to the system, and it automatically creates easily identified restore points.
These restore points allow you to revert the system to a previous time. They are created daily and at the time
of significant system events (such as when an application or driver is installed).
To revert to your previous driver, proceed as follows:
1 Open the device that is not working correctly in Control Panel.
To open the device:
❑ Click Start on the taskbar.
❑ Click Control Panel.
The Control Panel window appears
❑ Click the Printers and Other Hardware icon.
❑ And then click the device you want to revert.
2 On the Hardware tab, click Properties.
3 Click the Driver tab.
4 On the Driver tab, click Roll Back Driver.
Page 82

Managing drivers
About the software on your Sony notebook
nN
Or:
1 Click Start on the taskbar.
2 Click My computer from the menu.
3 Click View system information on the left of the window.
4 Click the Hardware tab, then click Device Manager.
5 Double-click the option corresponding to the device you installed, then double-click your device.
The Properties dialog box appears.
6 Click the Driver tab.
7 On the Driver tab, click Roll Back Driver.
You have your previous driver back.
✍ You must be logged on to your computer with an owner account in order to complete this procedure.
Restoring your computer does not affect or change your personal data files.
®
For more information about System Restore, see Windows
Help.
81
Page 83

Managing drivers
About the software on your Sony notebook
nN
82
Downloading drivers
Please note it is possible to download the latest versions of drivers for your computer on our website.
Just click the following link to access it: www.vaio-link.com
To download the latest drivers, proceed as follows:
1 Go to www.vaio-link.com
When you access the VAIO-Link for the first time, the Web Disclaimer appears.
2 Fill in the two codes and click Enter Site.
3 Select Downloads and follow the procedure.
A list of available downloads appears.
4 Choose the appropriate driver and follow the online instructions to download it.
To install your driver, see Installing a driver (page 76).
and choose your language.
Page 84

Using the product recovery CD-ROMs
Using the product recovery CD-ROMs
You are recommended to print out these pages for future reference.
The Product Recovery CD-ROMs supplied with your computer allow you to perform a full system recovery,
and help you reinstall individual applications and device drivers manually.
❑ Perform an Application Recovery to:
❑ Reinstall an individual driver if a device is not functioning properly.
❑ Reinstall an individual application if you have problems running it.
❑ Perform a System Recovery in the following cases:
❑ In the event of a serious system crash.
❑ If you want to modify the size of the hard drive partitions.
You can only use these product recovery CD-ROMs on the Sony computer they came with and not on any other Sony PC or other manufacturer's PC.
!
nN
83
About the software on your Sony notebook
❑ Performing an application recovery (page 84)
❑ Performing a system recovery (page 85)
❑ Aborting the system recovery process (page 90)
Page 85

Using the product recovery CD-ROMs
Performing an application recovery
The final CD in the set of product recovery CD-ROMs contains most of the applications that were preinstalled
on your computer. Reinstalling a program from this application CD can fix the problems encountered if it
does not run correctly anymore, or if Windows
To perform an application recovery, proceed as follows:
1 Turn on your computer (using AC power only) and wait until Windows
2 Insert the final product recovery CD-ROM into the disc drive.
3 Open the drive through My Computer and open the Apps folder.
4 Open the folder of the application you want to reinstall.
5 Double-click the Setup file.
6 Follow the instructions in the Installer.
About the software on your Sony notebook
✍ You must run the final product recovery CD-ROM from Windows
The application recovery does not run from DOS.
When performing an application recovery, you do not lose any data on your hard disk.
In most cases, you are advised to uninstall an application before reinstalling it.
Reinstalling a device driver from the application CD
®
is having a problem running a device.
®
has booted up.
®
.
nN
84
Some applications or peripherals require specific drivers which are not found on the Windows® operating
system.
The final CD in the set of product recovery CD-ROMs contains the drivers you need for the preinstalled
hardware devices. Reinstalling a driver from this CD can fix the problems encountered if Windows
®
is having
a problem running a device. For more details on managing drivers, please see Managing drivers
(page 75).
Page 86

Using the product recovery CD-ROMs
To reinstall/update a device driver, proceed as follows:
1 Turn on your computer (using AC power only) and wait until Windows
2 Insert the final product recovery CD-ROM into the disc drive.
3 Open the drive through My Computer and open the Drivers folder.
4 Check that the driver you require appears in the folder.
5 Click Start on the taskbar.
6 Click Control Panel, Performance and Maintenance, then System.
7 On the Hardware tab, select Device Manager and double-click the device you want to update.
8 On the Driver tab click Update Driver.
❑ Follow the instructions that appear on your screen. You can have Windows
point to the driver's location yourself.
®
has booted up.
®
search for the driver, or
nN
85
About the software on your Sony notebook
Performing a system recovery
The system recovery process allows you to:
1 Reinstall an image of the hard disk as it was before you started using your computer.
In the event that your system is seriously damaged, for example, if Windows
or your PC behaves abnormally, the system recovery will completely reinstall the originally configured
system on your C: drive.
2 Change the sizes of the two available hard drive partitions, or delete the partitions altogether.
If you decide to modify the size of your partitions, the existing data on both C: drive and D: drive will be
deleted (see Using partitioned drives (page 86)).
®
does not work as it should,
Page 87

Using the product recovery CD-ROMs
Notes on performing a system recovery
❑ The recovery process can last up to sixty minutes, and in this time you will be prompted to change CDs.
❑ You can recover only the software bundled to your computer. It does not work for the software you have
installed subsequently or the data you have created.
❑ This procedure recovers the entire system, which means you cannot choose to only recover Windows
❑ Make sure that your computer is connected to the AC power supply (not to the battery) before you
attempt a system recovery.
❑ When the recovery is performed, you are recommended to remove the recovery CD-ROM from the drive
before restarting the computer.
Using partitioned drives
In My Computer you may have noticed the availability of two drive partitions (C: and D:). Your hard disk
About the software on your Sony notebook
drive comes from the factory with 2 logical partitions. This does not mean that your computer contains two
physical hard disks.
When you start using your computer, your C: partition (also referred to as C: drive) contains all the files
required by Windows
storage space for all your documents and files, especially larger ones like digital motion pictures captured
by DVgate.
✍ Although you can perform a system recovery and change the partition settings in order to have one C: drive only, this option is not recommended for
using video editing applications like DVgate.
To optimise data storage, use the C: drive to install new applications, and save all your documents and files to the D: drive. Moreover, doing so will
prevent the loss of your data in case you need to perform a system recovery.
Do not try to add, delete, or resize partitions unless you really need to. Changing partition settings might delete all your files on the hard disk.
nN
86
®
and other pre-installed software, while the D: drive is empty. The D: drive is the ideal
®
.
Page 88

Using the product recovery CD-ROMs
If you need to perform a system recovery, but do not want to lose all the data stored on your hard disk, copy all the files you want to keep on the D:
drive. During the system recovery process, choose to keep the current partition information. Doing so will keep your D: drive unchanged after the
recovery process.
If you do need to change the size of your partitions, you can do so by choosing Option Recovery in the system recovery set-up process. In this case,
it is important to be aware that all data on your hard disk will be deleted. If you need to keep existing files, make sure you back them up before
performing the system recovery.
Starting the system recovery procedure
To start the system recovery, proceed as follows:
1 Turn on your computer (using AC power only) and insert the first system recovery CD-ROM into the disc
drive.
2 If you are still able to access Windows
off)*.
About the software on your Sony notebook
3 Wait 10 seconds then turn the computer back on.
4 The system starts to read the CD automatically and you are asked to wait.
5 Click Next in the window that appears.
6 Read the introduction and click Next.
You can now choose the nature of the recovery.
nN
87
®
, shut down your computer (Start/Tur n Off Computer/Tu r n
* If your system is severely damaged and you can no longer access Windows®, you will have to turn off the computer by pressing the
power button for longer than four seconds. Wait for ten seconds before pressing the button again to turn the power on.
Recovering the system without changing partition sizes
To completely restore the original software, drivers and settings on your computer without changing the
partition sizes, choose the first option and apply a Default System Drive Recovery. Performing this recovery
means that you will lose all the data stored on your C: drive, but data on your D: drive will remain.
Page 89

Using the product recovery CD-ROMs
You should allow one hour for the recovery process.
To perform the Default System Drive Recovery, proceed as follows:
1 Select the button next to Default System Drive Recovery (Recommended).
2 Click Next.
You are asked if you are sure you want to recover the system.
3 To start the procedure, click Next.
4 Click Yes to confirm.
The recovery process starts.
5 When asked to do so, remove the CD and insert the next one.
6 When the process is finished, click OK.
7 Click Next in the window that appears.
8 Remove the CD from the drive and click Finish.
About the software on your Sony notebook
Your system is restored to its initial settings and reboots automatically.
Recovering the system with modified partition sizes
To have the option of changing the partition sizes before completely restoring the original software, drivers
and settings on your computer, choose Option Recovery.
Changing the partition sizes of the two hard drives means that you will lose all the data stored on both your
C: drive and your D: drive.
You should allow one hour for the recovery process.
To perform a recovery with options, proceed as follows:
1 Select the button next to Option Recovery.
2 Click Next.
You now have three options:
nN
88
Page 90

Using the product recovery CD-ROMs
❑ Default System Drive Recovery, (see Recovering the system without changing partition sizes
(page 87)).
❑ Change Partition Size and Recover.
❑ Recovery To Originally Shipped State.
Manually changing partition sizes
Choosing Change Partition Size and Recover allows you to manually select the size of your C: drive,
leaving the remaining gigabytes to the D: drive. Meanwhile, all current partition sizes are deleted, the hard
disk is reformatted, and all the original software is restored as with a standard system recovery.
You should allow one hour for this process.
To manually change the partition sizes and perform a system recovery, proceed as follows:
1 Select the button next to Change Partition Size and Recover.
About the software on your Sony notebook
2 Click Next.
3 In the following screen, set the size of your C: drive in gigabytes, or choose to restore the default size by
pressing Default.
4 Click Next.
5 Read the summary of the recovery process about to be performed and click Next to start the process.
6 Click Yes to confirm.
7 When asked to do so, remove the CD and insert the next one.
8 When the process is finished, click OK.
9 Click Next in the window that appears.
10 Remove the CD from the drive and click Finish.
Your system's settings are changed and your computer reboots automatically.
nN
89
Page 91

Using the product recovery CD-ROMs
Resetting the default partition sizes
If you changed the partition sizes since you bought your Sony computer, choosing Recovery To Originally
Shipped State allows you to reset the hard drive to its original size. Meanwhile, the current partitions are
deleted, the hard disk is reformatted, and all the original software is restored as with a standard system
recovery.
You should allow one hour for the recovery process.
To restore the default size of the hard drive, proceed as follows:
1 Select the button next to Recovery To Originally Shipped State.
2 Click Next.
3 Read the summary of the recovery process about to be performed and click Next to start the process.
4 Click Yes to confirm.
5 When asked to do so, remove the CD and insert the next one.
6 When the process is finished, click OK.
About the software on your Sony notebook
7 Click Next in the window that appears.
8 Remove the CD from the drive and click Finish.
Your system is restored to its initial settings and reboots automatically.
Aborting the system recovery process
nN
90
Before the actual recovery process begins, the VAIO System Recovery Utility makes it easy to cancel any
settings you may have made. Most screens remind you about the loss of data that will incur and you can
either to go back to the previous screen (press Back), or abort the recovery setup altogether. To abort,
remove the recovery CD, press Cancel, and click Yes to confirm.
However, once the recovery process has started, canceling the job will delete all the current data on your C:
drive. If you have made changes to the partition settings, you will lose all data on both hard drive partitions.
✍ If you do not remove the CD before pressing Cancel, the system recovery will start again.
 Loading...