

Page 1
p Connections p
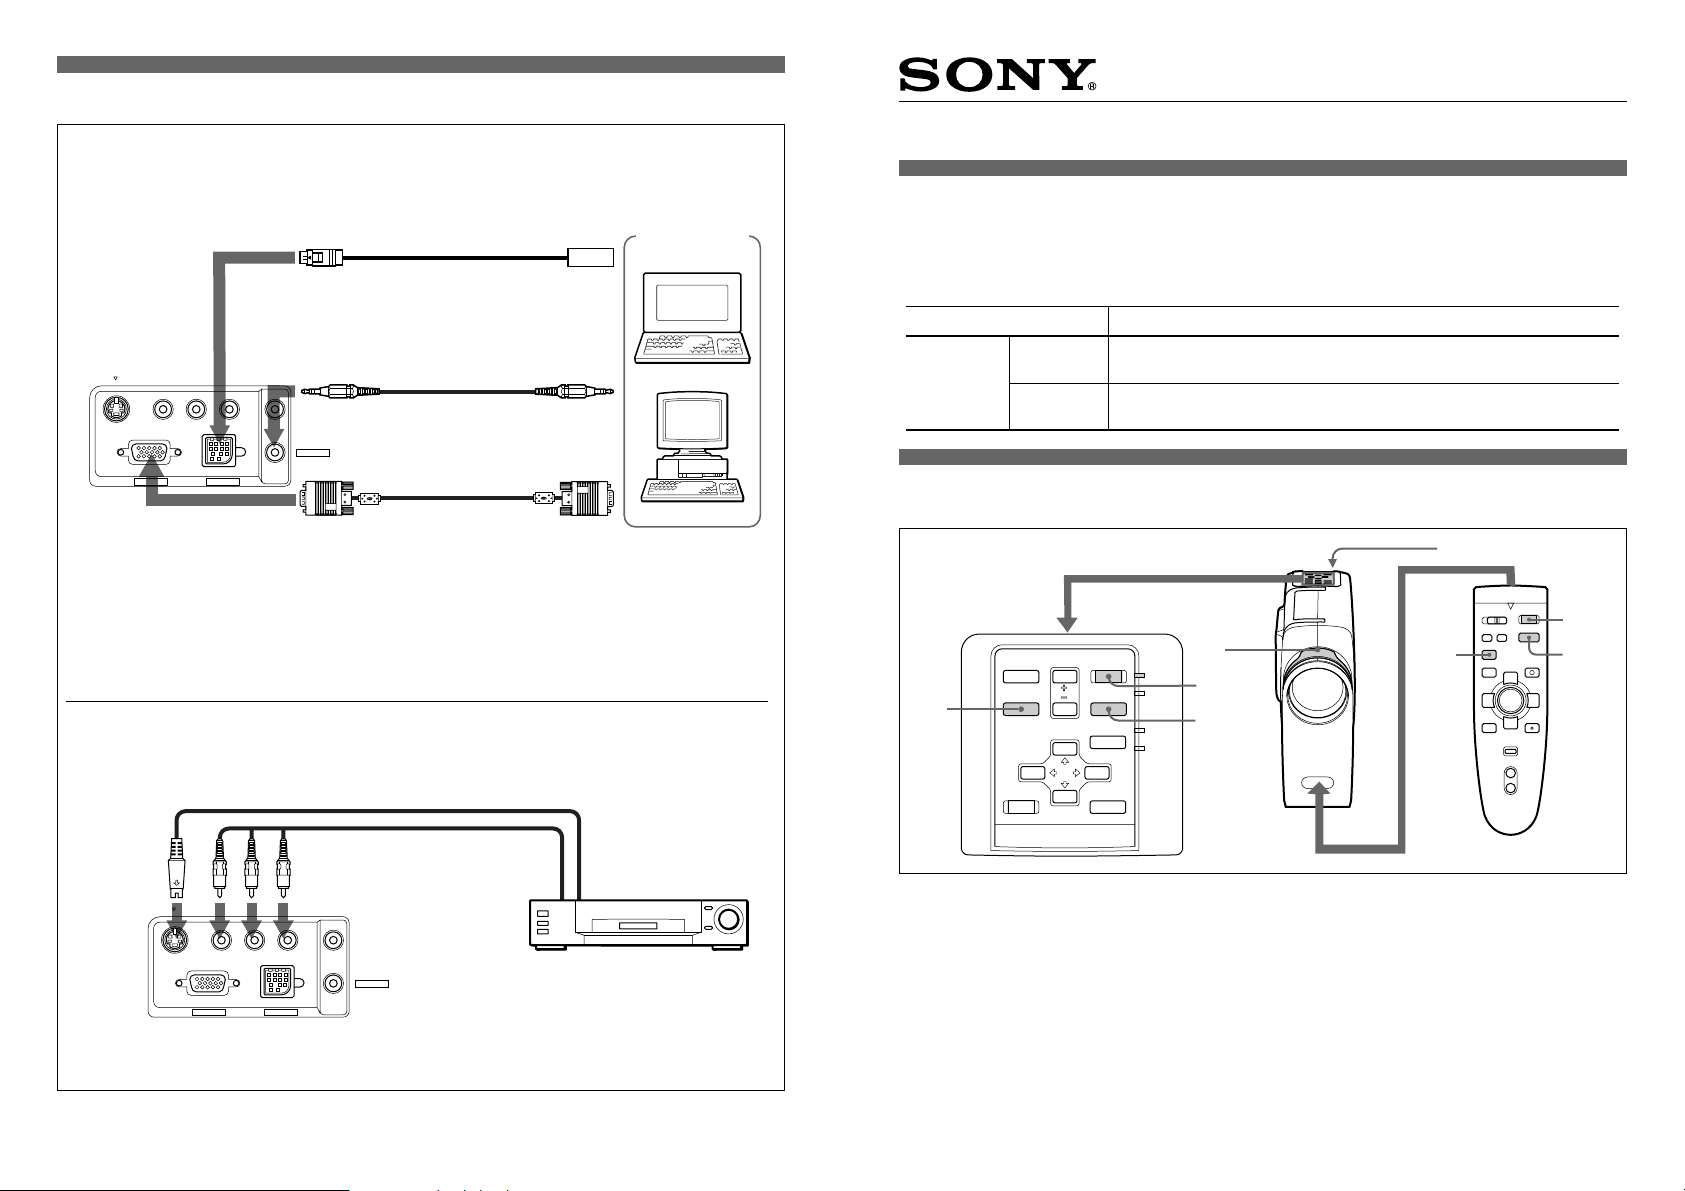
Connecting with a computer
Right side
S VIDEO VIDEO
Connecting with a VCR
L-AUDIO-R
AUDIO OUT
AUDIO IN
INPUT A MOUSE
to mouse/serial port
SIC-S20/S22 Mouse cable
(supplied) or SIC-S21 (not supplied)
Use an appropriate mouse
cable according to your
computer.
Stereo audio connecting cable
(not supplied)
to monitor out
SMF-401
HD D-sub 15-pin cable (supplied)
Use the supplied adapter
when connecting with a
Macintosh1) computer.
S-Video cable (not supplied)
Audio/video cable (supplied)
to audio out
to S video
output
Computer
VPL-XC50U/E/M
Quick Reference Card
p Projection Distances p
The distance between the lens and the screen varies depending on the size of the screen. Use the
following table as a guide.
Screen size (inches) 40 60 80 100 120 150
Distance
(m (feet))
Minimum
Maximum
1.5 2.4 3.2 4.0 4.8 6.0
(5.1) (7.7) (10.4) (13.0) (15.7) (19.7)
1.8 2.8 3.7 4.7 5.6 7.0
(6.0) (9.1) (12.2) (15.3) (18.4) (23.0)
p Basic Operation p
1
COMMAND
I / u
ONOFF
MUTING
INPUT
2
LASER
3
V
bB
R CLICK
v
+
–
APA
key
LIGHT
APA
VOLUME I/
INPUT
MENU
ENTERRESET
PICTUREAUDIO
APA
MENU
ENTER
RESET
VOLUME
ON
/STANDBY
POWER
SAVING
TEMP
/FAN
LAMP
/COVER
4
2
3
u
APA
key
to audio/video
Right side
S VIDEO VIDEO
L-AUDIO-R
INPUT A MOUSE
outputs
AUDIO OUT
AUDIO IN
1) Macintosh is a registered trademark of Apple Computer, Inc.
VCR
1 After all equipment is connected completely, plug the AC power cord into the wall outlet.
2 Press the I /
u
key to turn on the projector.
3 Turn on equipment connected to the projector. Press the INPUT key to select the input source.
4 Turn the focus ring to adjust the focus, and turn the zoom ring to adjust the size of the picture.
To get the clearest picture
You can get the suitable picture when a signal from the computer is input. Press the APA (Auto
Pixel Alignment) key to adjust the picture to be projected clearest.
Sony Corporation 1998 Printed in Japan 4-068-675-11 (1)
Page 2
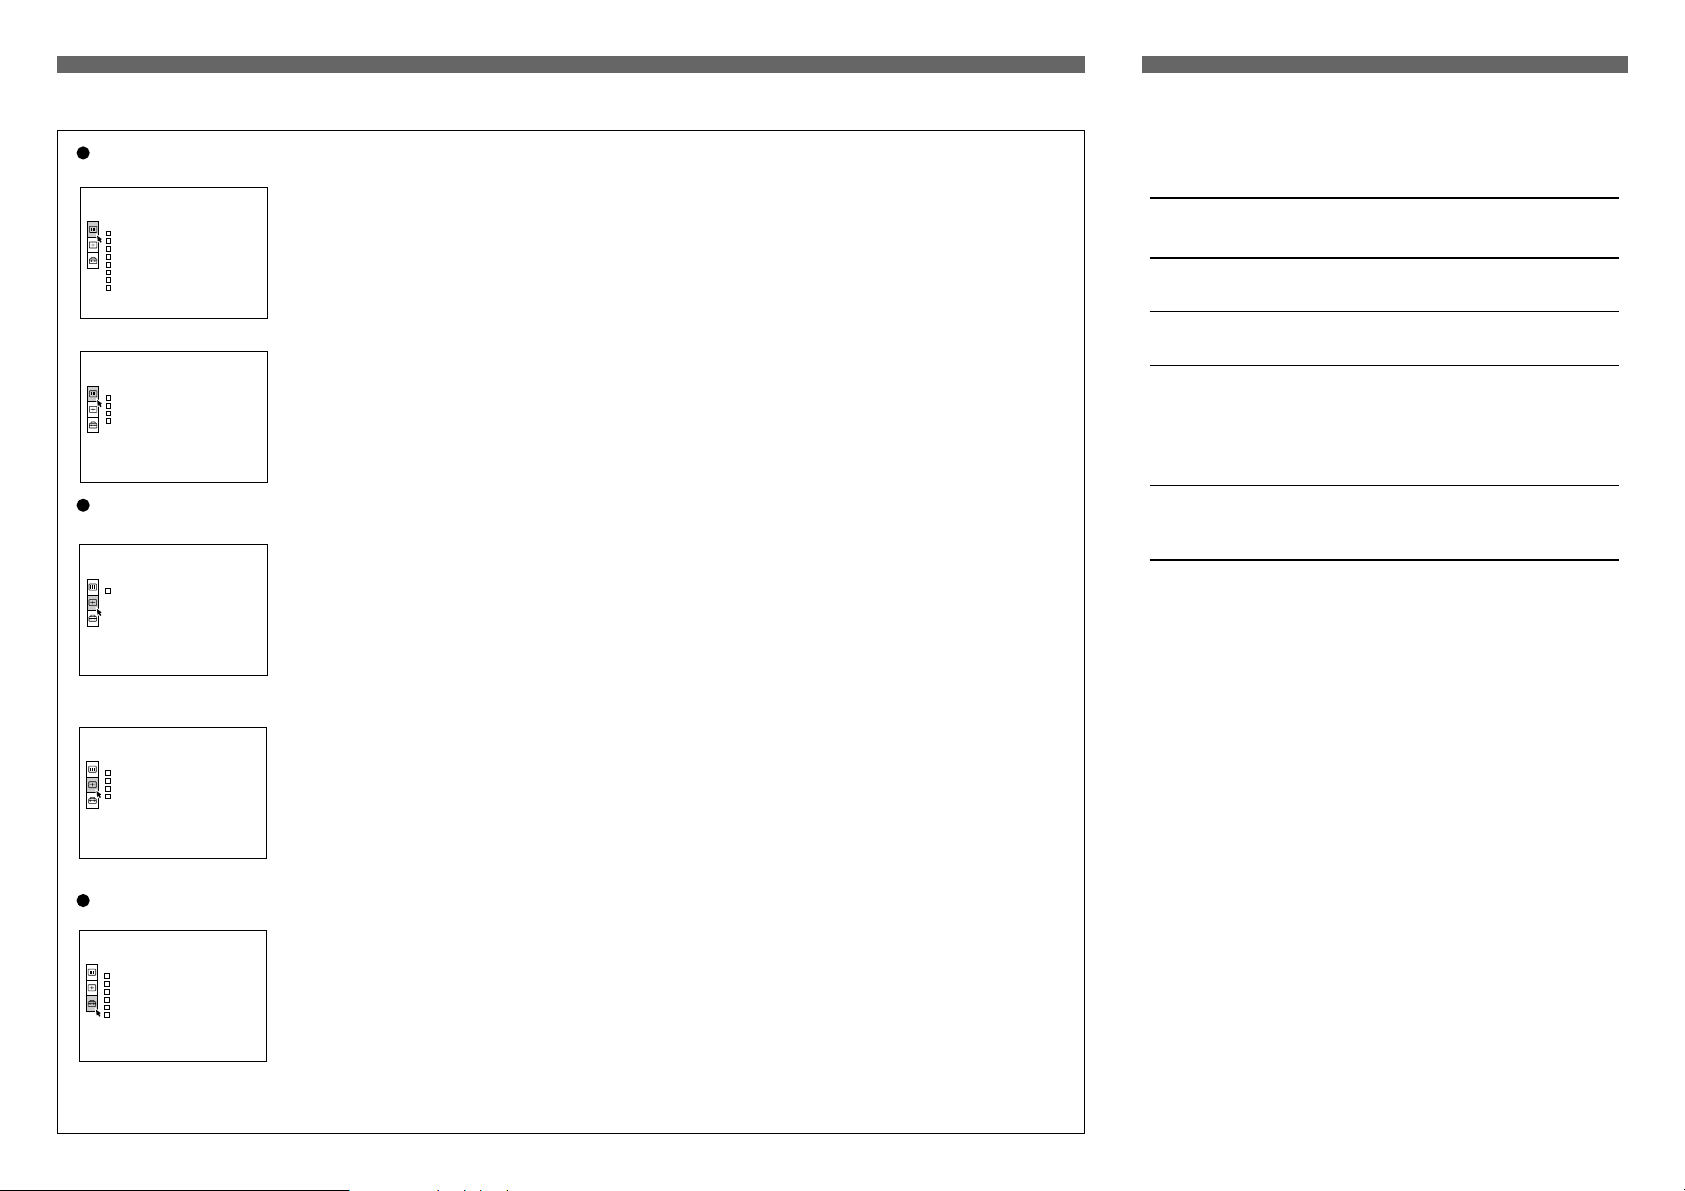
p Menu Functions p
p Basic Menu Operation p
PICTURE CTRL menu: Adjusts picture settings.
When a video signal is input
CONTRAST: Adjusts picture contrast.
PICTURE CTRL
CONTR AST : 8 0
BRIGHT : 50
COLOR : 5 0
HUE : 5 0
SHARP : 50
D.PICTURE:OFF
COLOR TEMP : L OW
COLOR SYS: AUTO
VIDEO
BRIGHT: Adjusts picture brightness.
COLOR: Adjusts color intensity.
HUE: Adjusts skin tones.
SHARP: Adjusts picture sharpness.
D. PICTURE: Emphasizes the black color.
When an RGB signal is input
PICTURE CTRL
CONTR AST : 8 0
BRIGHT : 50
GAMMA MODE: GRAPH ICS
COLOR TEMP : H I GH
INPUT–A
GAMMA MODE: Selects a gamma correction curve.
COLOR TEMP: Adjusts the color temperature.
COLOR SYS: Selects color system of the input signal.
INPUT SETTING menu: Adjusts the input signal settings.
When a video signal is input
DOT PHASE: Adjusts the dot phase of the LCD panel and the signal
INPUT SETT I NG
ASPECT: 4 : 3
VIDEO
No . 01
VIDEO/60
SIZE: Adjusts the horizontal size of pictures input from the INPUT A connectors.
SHIFT: Adjusts the position of the picture input from the INPUT A connectors.
ASPECT: Sets the aspect ratio of the picture.
SCAN CONV: Converts the signal to display the picture according to the screen size or
When an RGB signal is input
To display the menu, press the MENU key.
To Control panel or Remote
Commander key
Select a menu Use the V/v keys to select a menu,
then press the ENTER or b key.
Select an item Use the V/v keys to select an item,
then press the ENTER or b key.
Change an Use the V/b keys to increase the
adjustment level number.
Use the v/B keys to decrease the
number.
Then, press the ENTER key.
Change a setting Use the V/v keys to select the
setting.
Then, press the ENTER or B key.
input from the INPUT A connectors.
according to actual pixel resolution.
INPUT SETT I NG
DOT PHASE: 5
SIZE H:1056
SHIFT H:219 V: 17
SCAN CONV : ON
INPUT–A
No.17
800X600
SET SETTING menu: Changes the projector settings.
SET SETT ING
STATUS:ON
INPUT–A:RGB
LANGUAGE : ENGL I SH
SPEAKER: ON
POWER SAVI NG:OFF
S IRCS RECEI VER : FRONT&REAR
INPUT–A
STATUS: Selects the on-screen information to be displayed.
INPUT-A: Selects the signal input from the INPUT A connector.
LANGUAGE: Selects the language used in the menu and on-screen displays.
SPEAKER: Cuts off the sound of internal speakers.
POWER SAVING: Switches projector to power saving mode.
SIRCS RECEIVER: Selects the remote control detectors on the front and rear of the projector.
 Loading...