

Sony vgn-sz Service Manual

1.MS-1-D.1
Chapter 1. Disassembly & Assembly Guide
1-3. Disassembly & Assembly
- Main Section -
MS-1 Main Section Disassembly
Confidential
SZ Series

1.MS-1-D.2
Battery Pack, Dummy Card (EXP), Dummy Card (PC)
Confidential
1)
3)
Lock Lever
Slide the Lock Lever to the UNLOCK side.
2)
Battery Pack
Release Lever
While Release Lever is slid in the left, remove the Battery Pack.
4)
Eject Lever
Dummy Card (EXP)
Hook the finger on the Dummy Card (EXP) and remove it.
Dummy Card (PC)
Push the Eject Lever once, and the Eject Lever pops up. Push
the Eject Lever once again, and remove the Dummy Card (PC).
SZ Series

1.MS-1-D.2(a)
4
[MA]
Confidential
WAN Antenna (Element Unit)
1)
WAN Antenna (Element Unit)
Remove the WAN Antenna (Element Unit).
WAN Model
SZ Series

1.MS-1-D.3
Heatsink
Confidential
1)
3)
Screw:B2
Screw:B2
Remove the four screws.
2)
Cover (CPU)
While disengaging the detent (three places), remove the Cover (CPU).
4)
Heatsink
A
Remove the two screws.
1
2
Raise the Heatsink in the direction of the arrow1, and remove the Heatsink
while removing the A portion diagonally upward (arrow2).
SZ Series
1.MS-1-D.4
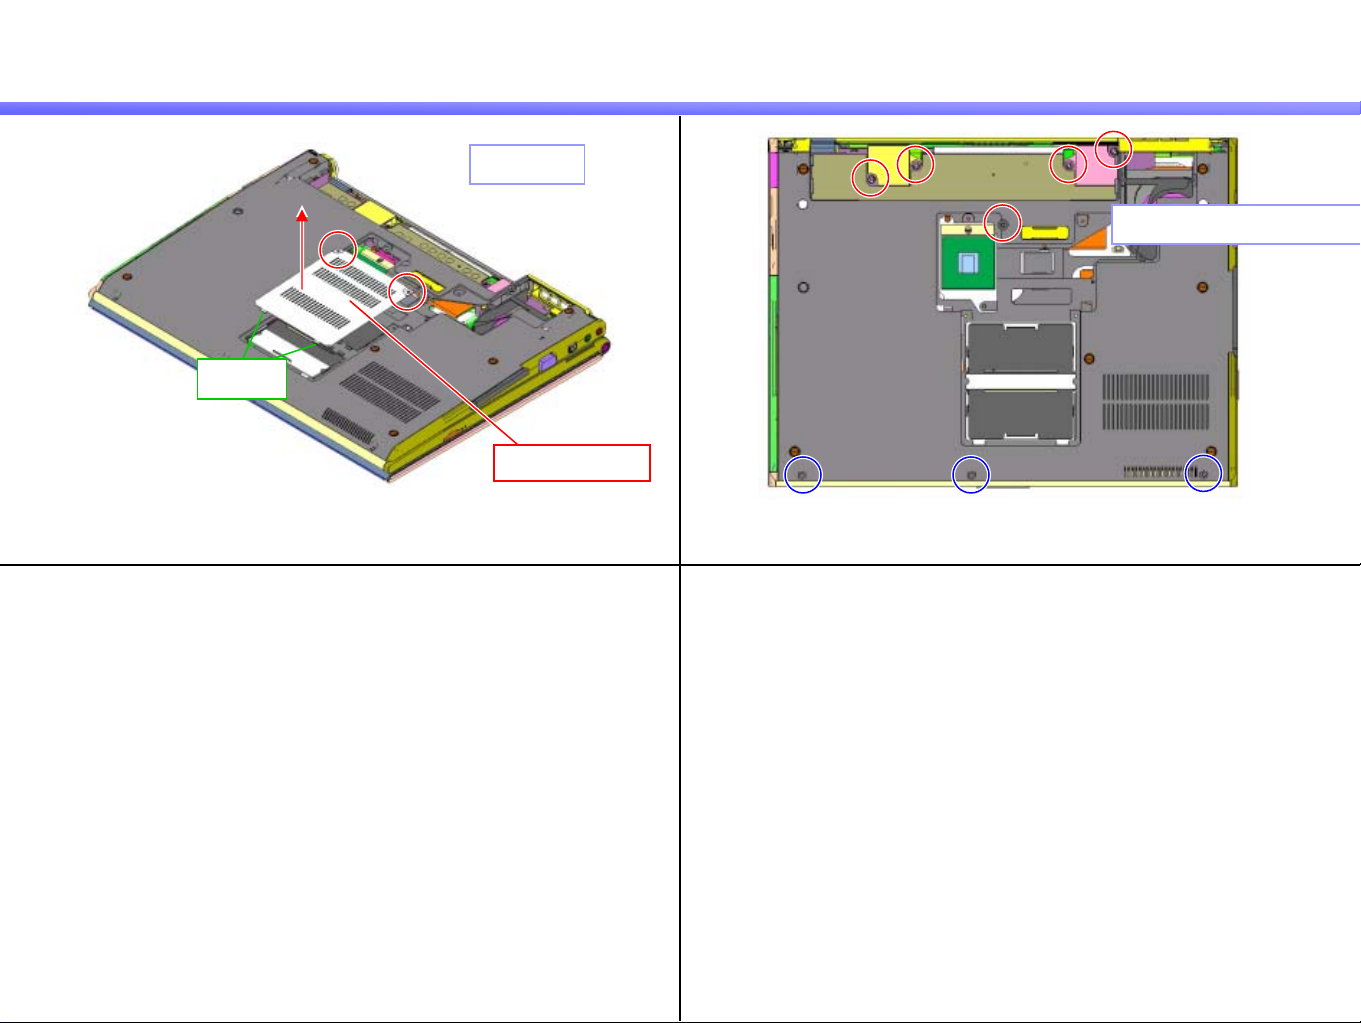
Cover (Memory)
Confidential
1)
Screw:B2
Detent
Cover (Memory)
Remove the two screws, and remove the Cover (Memory)
while disengaging the detent (two places).
2)
Screw: Red-B8 / Blue-B2
Remove the eight screws.
SZ Series

1.MS-1-D.5
Keyboard
1) 2)
Keyboard
Confidential
1
2
Keyboard
Disengage the detent (two places), and release the Keyboard.
* Disengage the detent by pushing it by using a bamboo spatula.
3)
Sheet (MG KB5)
Peel off the Sheet (MG KB5).
FPC
Slide the Keyboard in the direction of the arrow 1 to release the detent
(five places), and turn it toward you and put it on the Plamrest.
4)
FPC
Slide the lock lever in the direction of the arrow to release the lock,
disconnect the FPC, and then remove the Keyboard.
Keyboard
SZ Series
1.MS-1-D.6
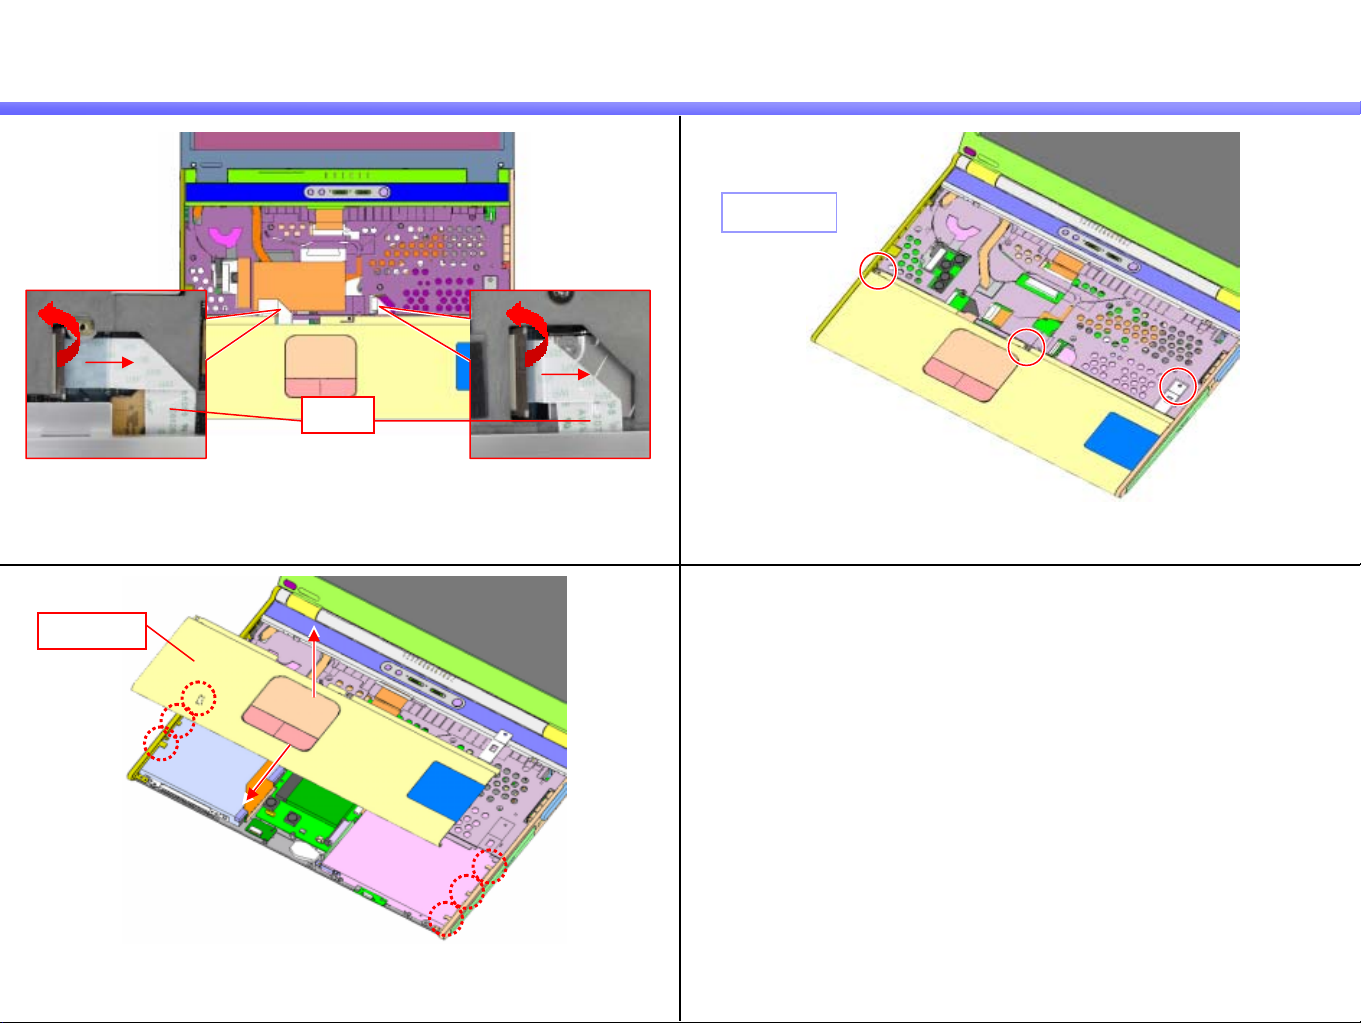
Palmrest
1) 2)
Screw:B1
FFC
Raise the lock lever to release the lock, and disconnect the FFC (two places). Remove the three screws.
3)
Confidential
Palmrest
2
1
Disengage the detent (six places) by sliding the Palmrest in the
direction of the arrow1, and remove the Palmrest vertically upward.
SZ Series

1.MS-1-D.7
HDD
1) 2)
Confidential
3)
Tape (Common)
[MA]
Filament Tape
4
WAN Model
HDD
Peel off the Tape (Common) and Filament Tape.
Connector
[ADD]
3
1
Screw:B2
HDD
Remove the three screws.
D
D
H
FPC
Convex
Disconnect the FPC, and remove the HDD while taking out it from
under the convex portion (one place).
* When disconnecting the FPC, be sure to remove it from the
direction of the arrow 1.
SZ Series

1.MS-1-D.8
Parts of the HDD
Confidential
1)
Screw:B10
HDD
Bracket
Remove the four screws, and then the Bracket (two places). Peel off the Sheet from backside of the HDD.
2)
3) 4)
Filament Tape
Sheet
D
D
H
H
D
D
Peel off the Filament Tape.
HDD
FPC
Disconnect the FPC.
SZ Series
1.MS-1-D.9
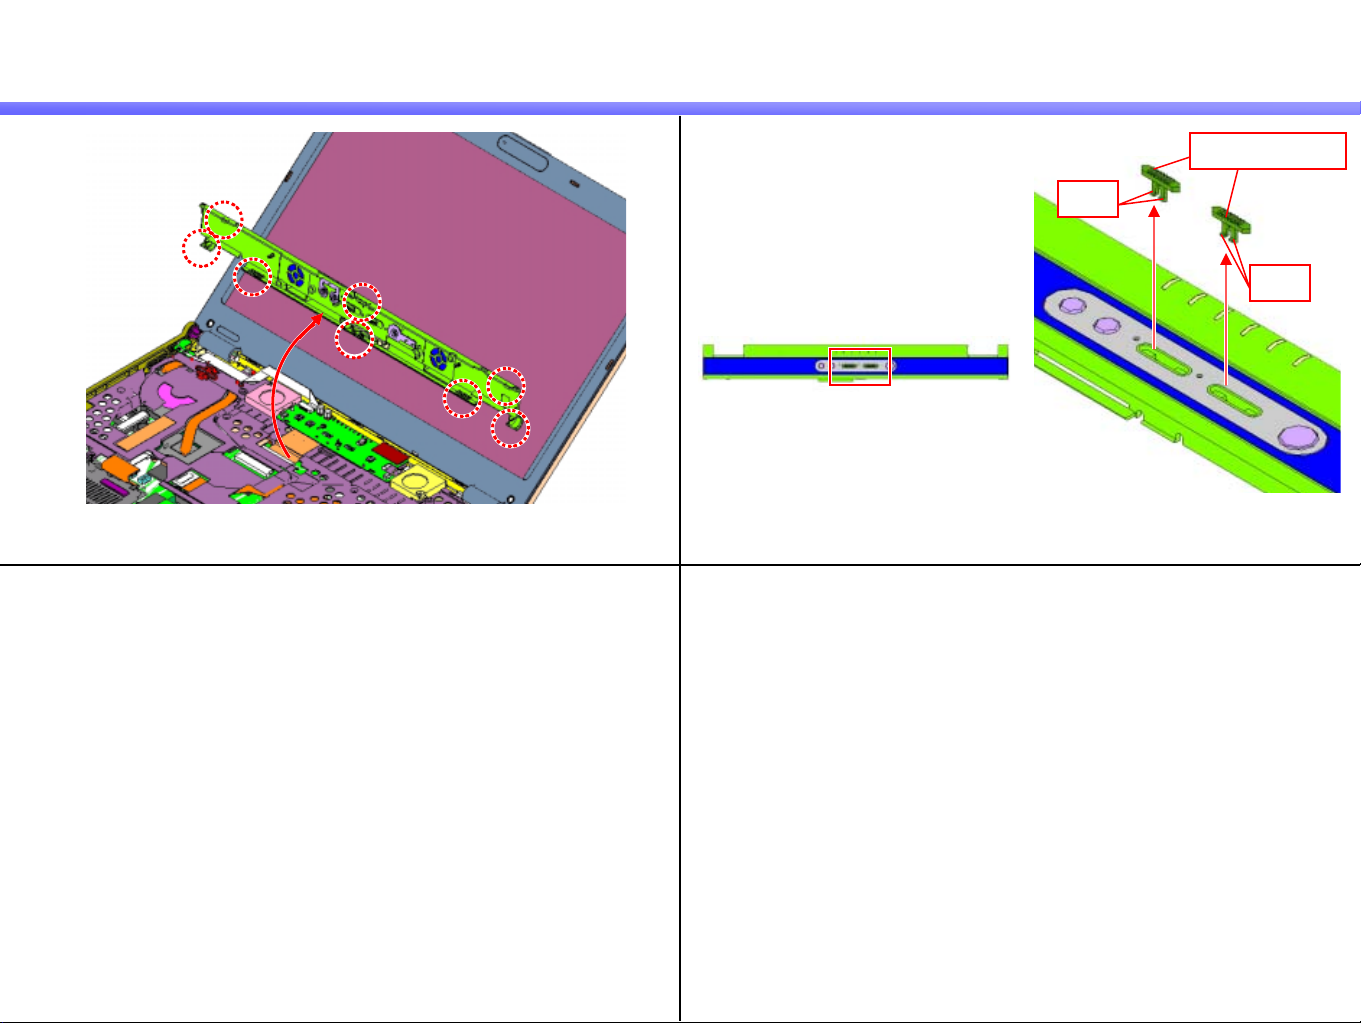
Hood (Keyboard)
Confidential
1)
Turn up the Hood (Keyboard) from the front and disengage the
detent (eight places).
2)
Detent
While disengaging the detent (two places) respectively, remove the
Button (WLAN) (two places).
Button (WLAN)
Detent
SZ Series

1.MS-1-D.10
SWX-214 Board
1) 2)
Tape (Harness) Harness
Peel off the Tape (Harness). Disconnect the Harness.
Confidential
3)
Screw:B5
Remove the one screw, and then the SWX Board.
SWX Board
4)
SWX Board
Harness
Disconnect the Harness.
SZ Series

1.MS-1-D.11
Confidential
IFX-437 Board
Screw:B5
Remove the one screw, and then the IFX Board.
3)
TPM Model
2)1)
IFX Board
FFC
Pull out the FFC vertically and disconnect it.
FFC
Pull out the FFC in the direction of the arrow.
IFX Board
SZ Series
1.MS-1-D.12
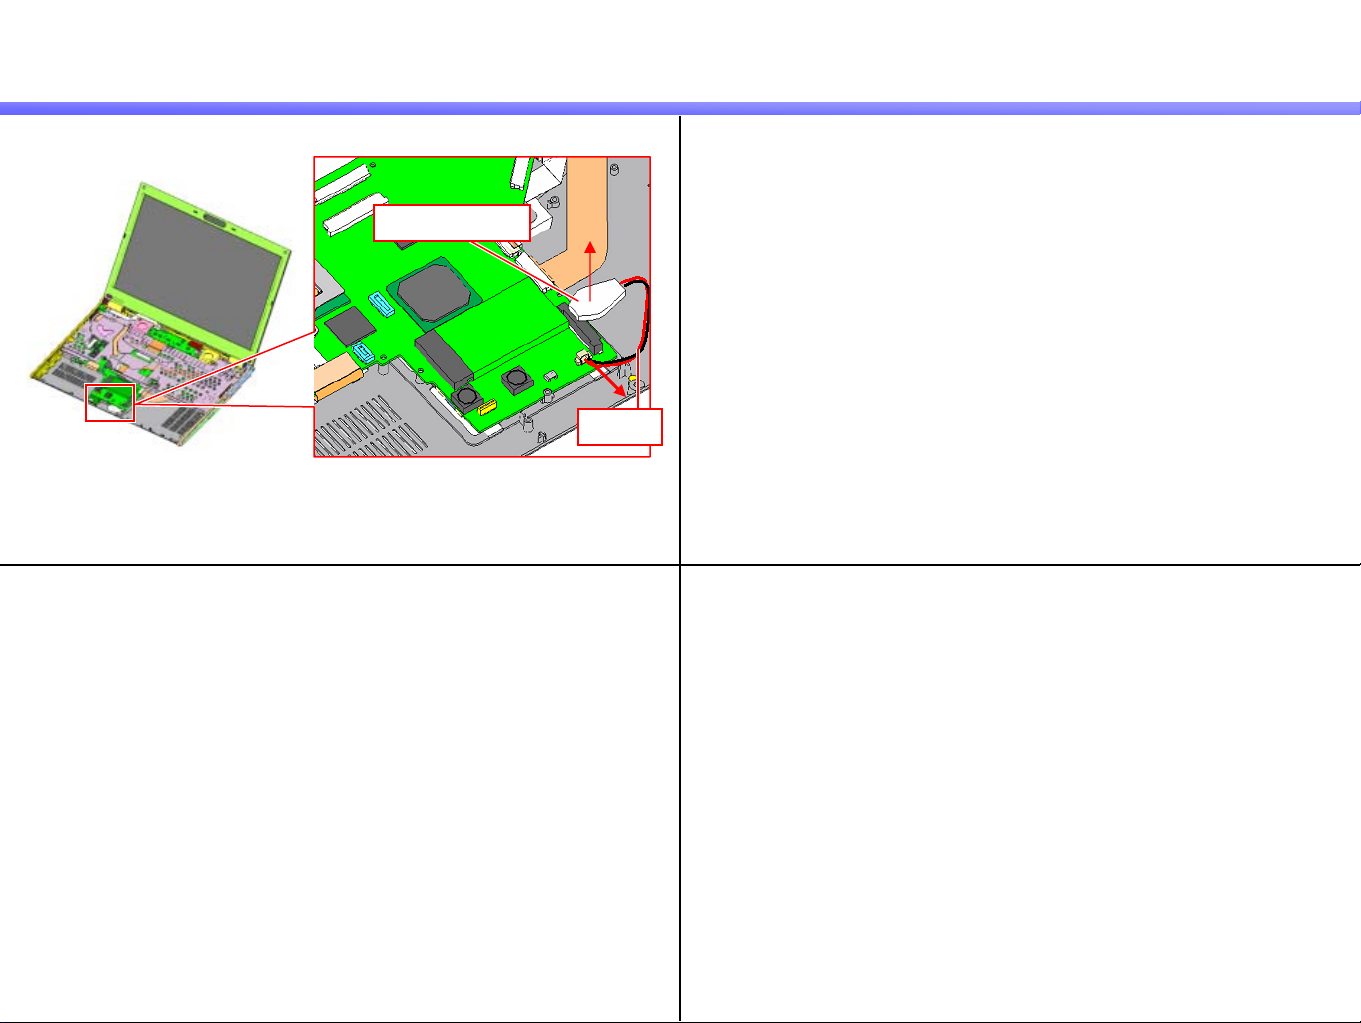
Reserve Battery
1)
Disconnect the Harness, and remove the Reserve Battery.
* The adhesive tape is attached on the bottom of it.
Confidential
Reserve Battery
Harness
SZ Series
1.MS-1-D.13
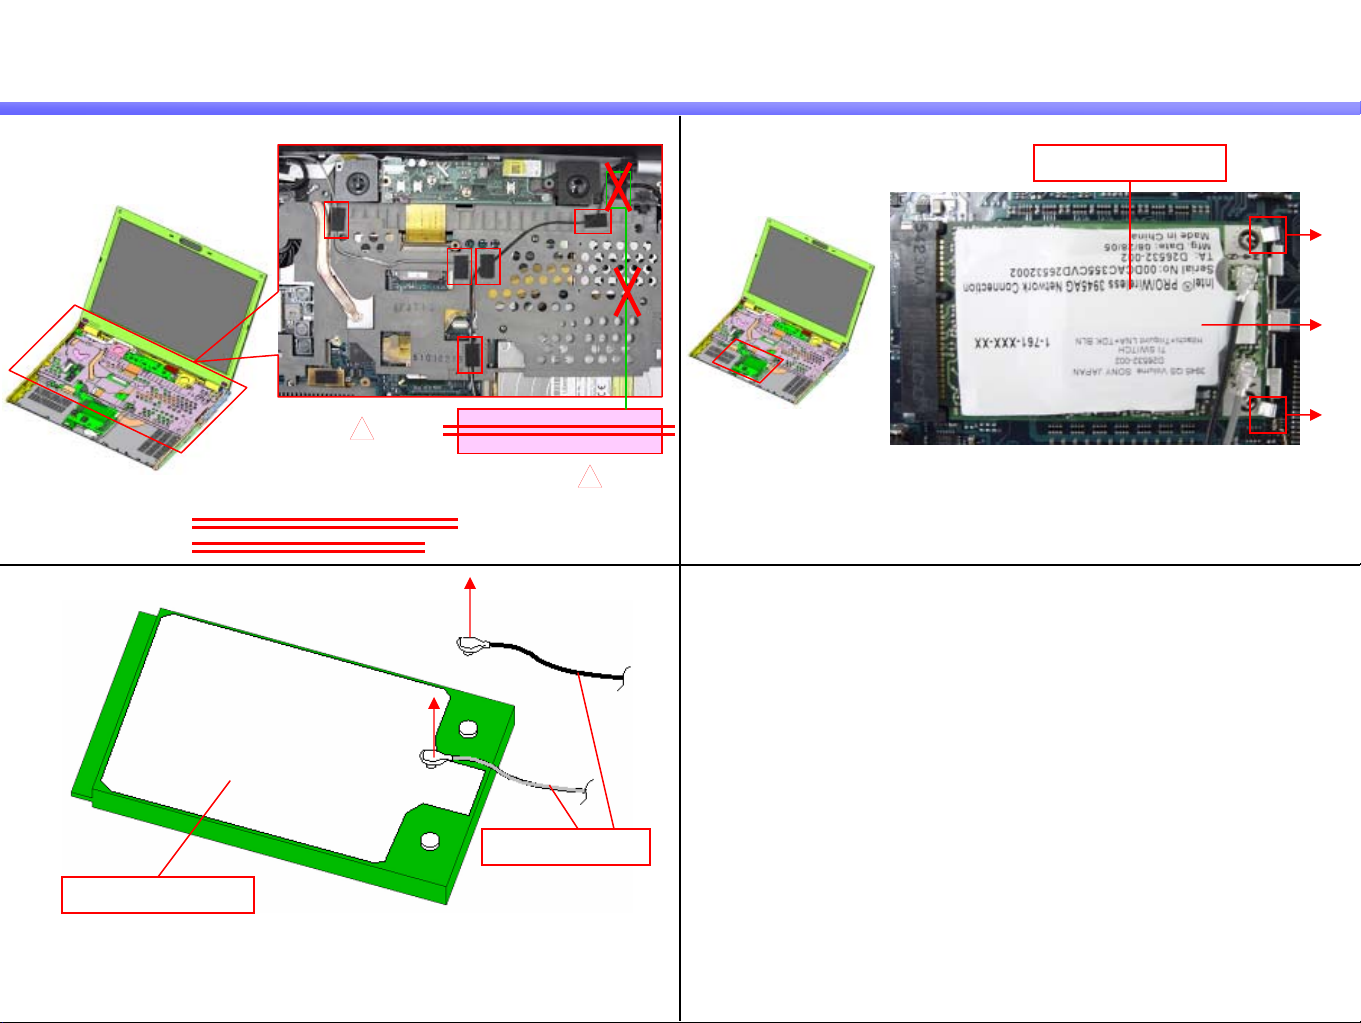
Wireless LAN Card
1) 2)
[COR]
1
Peel off the Sheet (Paste Cable) (five places).
*Camera Model --- Six places
Other --- Five places
3)
Camera Model
[CHG]
1
Confidential
Wireless LAN Card
1
2
1
Move the tab (two places) in the direction of the arrow 1 to release the
lock, and pull out the Wireless LAN Card diagonally upward (arrow2).
Wireless LAN Card
Disconnect the coaxial cable (two places).
* Pull out it vertically.
Coaxial Cable
SZ Series
 Loading...